Netgear orporated WG111 NETGEAR WG111 802.11g Wireless USB2.0 Adapter User Manual HR314 Qcard
Netgear Incorporated NETGEAR WG111 802.11g Wireless USB2.0 Adapter HR314 Qcard
User Manual
Start Here
Follow these instructions to set up your wireless adapter.
These basic setup instructions assume that you will connect to an access point, and you
are not using WEP security. Please refer to the online help and the Reference Manual on
the 54 Mbps Wireless USB 2.0 Adapter Resource CD for instructions on configuring WEP,
Ad-Hoc mode, or advanced options.
Estimated Completion Time: 5-15 minutes.
For Windows XP computers
1
1First, install the WG111 Software
a. Power on your PC, let the operating system boot up completely, and log in
as needed.
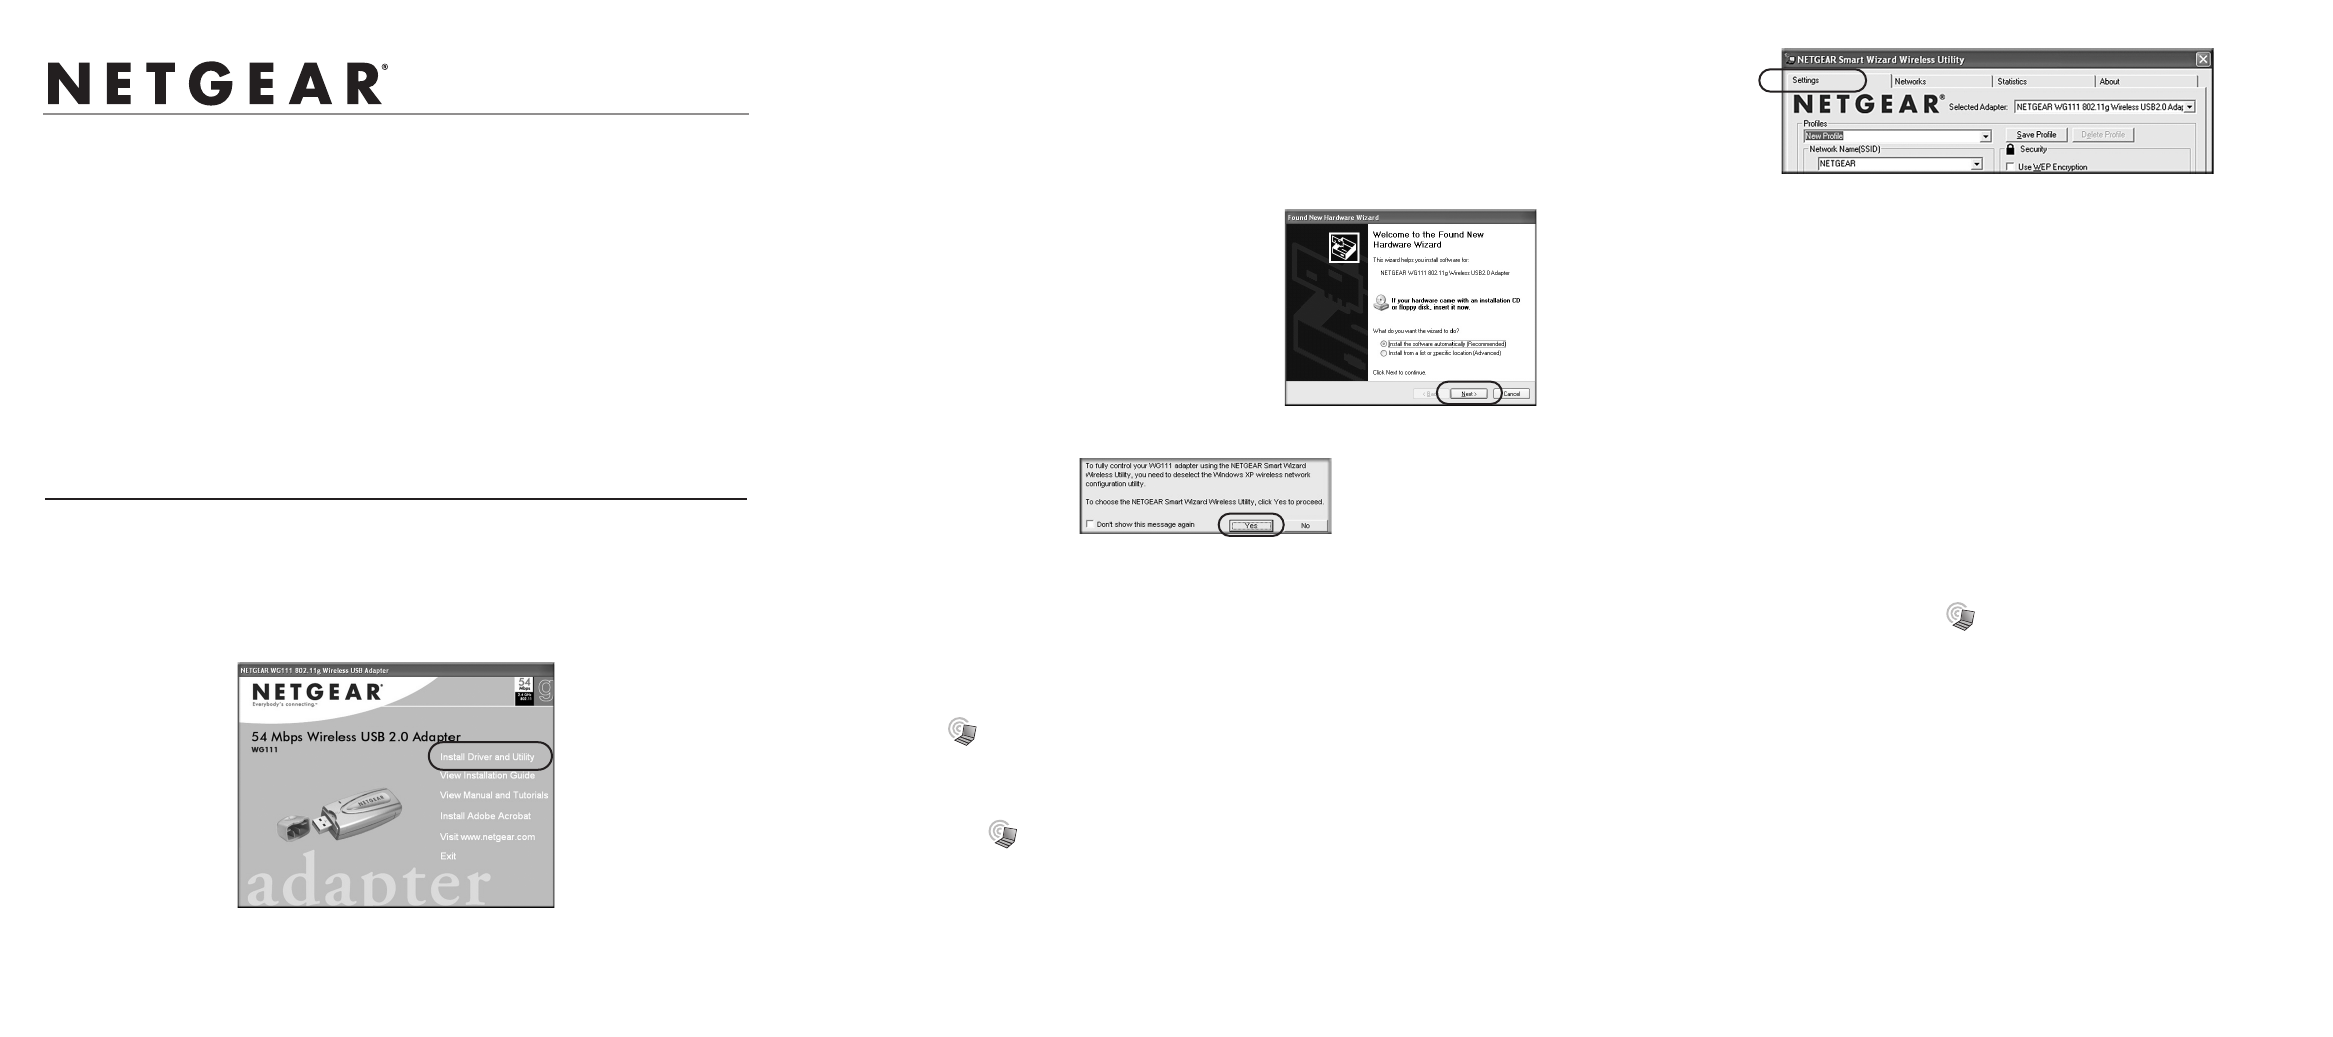
b. Insert the 54 Mbps Wireless USB 2.0 Adapter Resource CD into your CD-ROM
drive. The CD main page shown below will load.
c. Click the Install Driver & Utility link.
d. Follow the InstallShield Wizard steps. Click Finish when done, and if prompted
restart your computer.
2
2Next, Install the WG111 Wireless Adapter
Note: You should have a USB 2.0 port on your computer. Older USB 1.1 ports will
work but cannot support the higher throughput speeds of the WG111.
a. Insert the WG111 into a USB slot. After a short delay, the Found New
Hardware Wizard displays. Click Next to proceed.
Note: If a Windows XP logo testing
warning appears, click Continue
Anyway to proceed.
b. Next, you will also be prompted to choose the country where you are located.
Click Yes to accept this option.
If you choose No, you must read the Windows XP documentation for an
explanation of how to use the Windows XP wireless configuration utility.
You will also be prompted to choose the country you are located in. Select your
location from the list.
c. Click Finish to complete the installation. You will see the WG111 system tray
icon on the lower right portion of the Windows task bar.
3
3Now, Configure Your WG111 and Save the Profile
a. Click the icon in the Windows system tray to open the WG111 Smart
Wireless Settings Utility.
b. The utility opens to the Settings tab page. Click Help for instructions on using
the Smart Wizard Wireless Utility.
c. Change the Network Name SSID to match your network.
Tip: To view the available wireless networks, use the drop-down list or the
Networks tab and choose the one you want.
d. Click Apply to activate the connection.
Tip: Create work and home profiles. Then, activate whichever one you need for
your current location.
Note: The status bar at the bottom of the utility reports the speed of your connection.
USB 1.1 ports limit the speed of the WG111 to 14 Mbps.
4
4Finally, Verify Wireless Network Connectivity
a. Verify that the status monitor information at the bottom of the utility matches
your wireless network.
b. Check the color of the WG111 icon in the Windows system tray: green or
yellow indicates a working connection; red indicates no connection.
c. Check the WG111 LED: blinking means attempting to connect; solid indicates
a good connection; off means the WG111 is not plugged in.
d. Verify connectivity to the Internet or network resources.
Note: If you are unable to connect, see troubleshooting tips in the Basic Installation
section of the Reference Manual on the 54 Mbps Wireless USB 2.0 Adapter Resource CD.
54 Mbps Wireless USB 2.0 Adapter WG111
Installation Guide
NETGEAR, Inc. declare that WG111(NETGEAR WG111 802.11g Wireless USB2.0
Adapter ) is limited in CH1~CH11 by specified firmware controlled in U.S.A.
For Windows 2000, Me, or 98SE computers
1
1First, Install the WG111 Software
a. Power on your PC, let the operating system boot up completely, and log in
as needed.
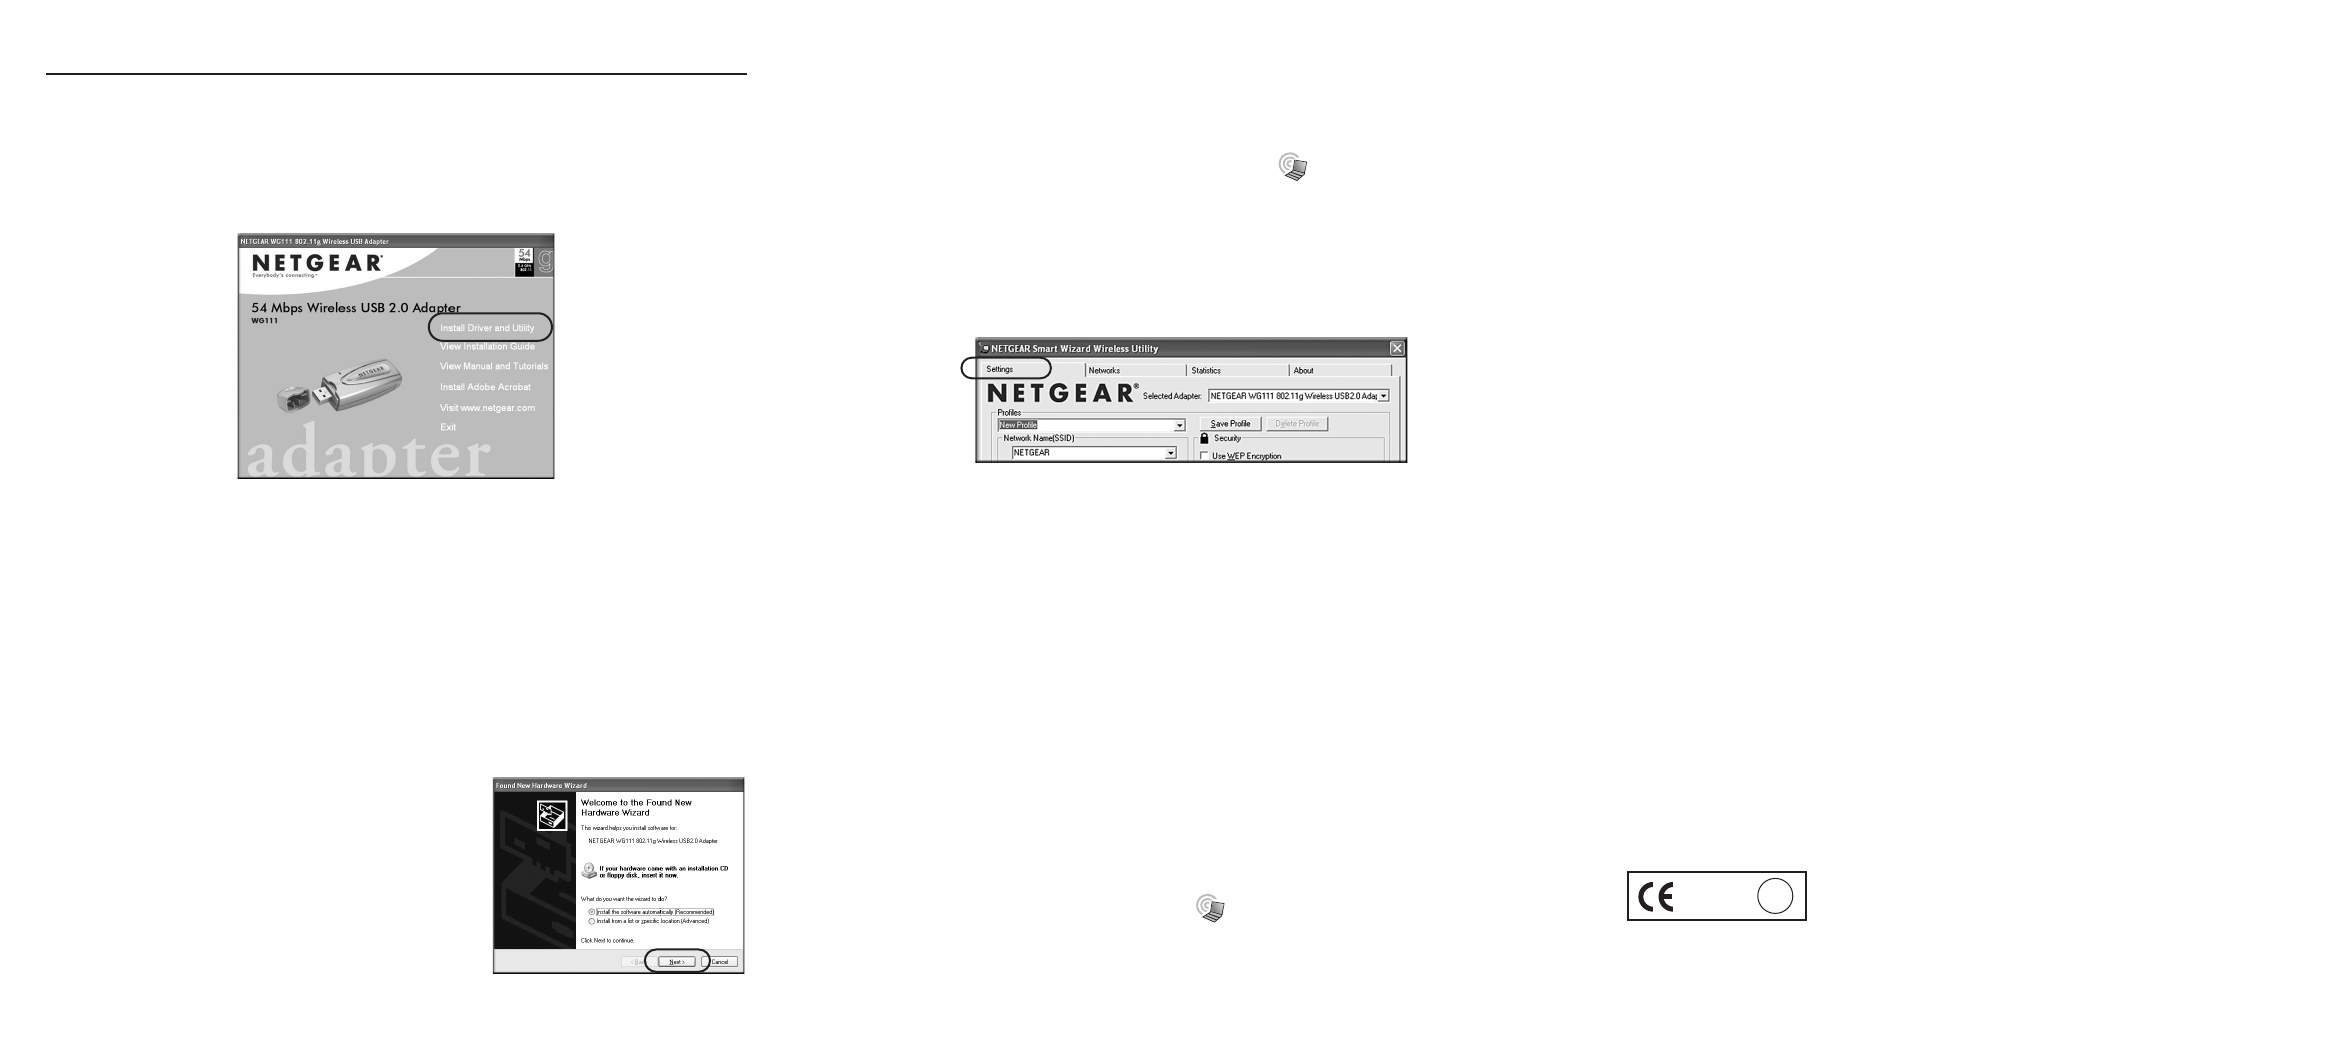
b. Insert the 54 Mbps Wireless USB 2.0 Adapter Resource CD into your CD-ROM
drive. The CD main page shown below will load.
c. Click the Install Driver & Utility link.
d. Follow the InstallShield Wizard steps, click Finish when done, and if prompted,
restart your computer.
2
2Next, Install the WG111 Wireless Adapter
Note: You should have a USB 2.0 port on your computer. Older USB 1.1 ports will
work but cannot support the higher throughput speeds of the WG111.
a. Insert the WG111 into a USB slot. After a short delay, the Found New
Hardware Wizard displays. Click Next to proceed.
Note: If Windows 2000 displays a
Digital Signature Not Found warning,
click Yes to continue the installation.
*201-10106-01*
201-10106-01 February 2004
©2004 NETGEAR, Inc. NETGEAR, the Netgear logo and Everybody's connecting are trademarks or registered
trademarks of Netgear, Inc. in the United States and/or other countries. Microsoft and Windows are registered
trademarks of Microsoft Corporation in the United States and/or other countries. Other brand and product
names are trademarks or registered trademarks of their respective holders. Information is subject to change
without notice. All rights reserved.
b. Follow the Found New Hardware Wizard steps, click Finish when done, and if
prompted, restart your computer.
c. Next, you will be prompted to choose the country where you are located. Select
your location from the list.
d. You will now see the WG111 system tray icon in the lower right area of the
Windows task bar.
3
3Now, Configure Your WG111 and Save the Profile
a. Open the WG111 Smart Wireless Settings Utility by clicking on the icon in the
Windows system tray.
b. The utility opens to the Settings tab page. Click Help for instructions on using
the Smart Wizard Wireless Utility.
c. Change the Network Name SSID to match your network.
Tip: To view the available wireless networks, use the drop-down list or the
Networks tab and choose the one you want.
d. Click Apply to activate the connection.
Tip: Create work and home profiles. Then, activate whichever one you need for
your current location.
Note: The status bar at the bottom of the utility reports the speed of your
connection. USB 1.1 ports limit the speed of the WG111 to 14 Mbps.
4
4Finally, Verify Wireless Network Connectivity
a. Verify that the status monitor information at the bottom of the utility matches
your wireless network.
b. Check the color of the WG111 icon in the Windows system tray: green or
yellow indicates a working connection; red indicates no connection.
c. Check the WG111 LED: blinking means attempting to connect; solid indicates
a good connection; off means the WG111 is not plugged in.
d. Verify connectivity to the Internet or network resources.
Note: If you are unable to connect, see troubleshooting tips in the Basic Installation
section of the Reference Manual on the 54 Mbps Wireless USB 2.0 Adapter Resource CD.
Technical Support
PLEASE REFER TO THE SUPPORT INFORMATION CARD THAT SHIPPED
WITH YOUR PRODUCT.
By registering your product at www.NETGEAR.com/register, we can provide you with
faster expert technical support and timely notices of product and software upgrades.
Attention: This device may be used throughout the European
community. Some restrictions may apply in France and Italy.
!
0560
Federal Communication Commission Interference Statement
This equipment has been tested and found to comply with the limits for a Class B digital device,
pursuant to Part 15 of the FCC Rules. These limits are designed to provide reasonable protection
against harmful interference in a residential installation. This equipment generates, uses and can
radiate radio frequency energy and, if not installed and used in accordance with the instructions, may
cause harmful interference to radio communications. However, there is no guarantee that
interference will not occur in a particular installation. If this equipment does cause harmful
interference to radio or television reception, which can be determined by turning the equipment off
and on, the user is encouraged to try to correct the interference by one of the following measures:
(1)Reorient or relocate the receiving antenna.(2)Increase the separation between the equipment and
receiver.(3)Connect the equipment into an outlet on a circuit different from that
to which the receiver is connected.(4)Consult the dealer or an experienced radio/TV technician for
help.
This device complies with Part 15 of the FCC Rules. Operation is subject to the following two
conditions: (1) This device may not cause harmful interference, and (2) this device must accept any
interference received, including interference that may cause undesired operation.
FCC Caution: Any changes or modifications not expressly approved by the party responsible for
compliance could void the user's authority to operate this equipment.
IMPORTANT NOTE:
FCC Radiation Exposure Statement:
This equipment complies with FCC radiation exposure limits set forth for an uncontrolled
environment. End users must follow the specific operating instructions for satisfying RF exposure
compliance.
This transmitter must not be co-located or operating in conjunction with any other antenna or
transmitter.
PLEASE REFER TO THE SUPPORT INFORMATION CARD THAT SHIPPED
WITH YOUR PRODUCT.
By registering your product at www.NETGEAR.com/register, we can provide you with faster
expert technical support and timely notices of product and software upgrades.
Technical Support