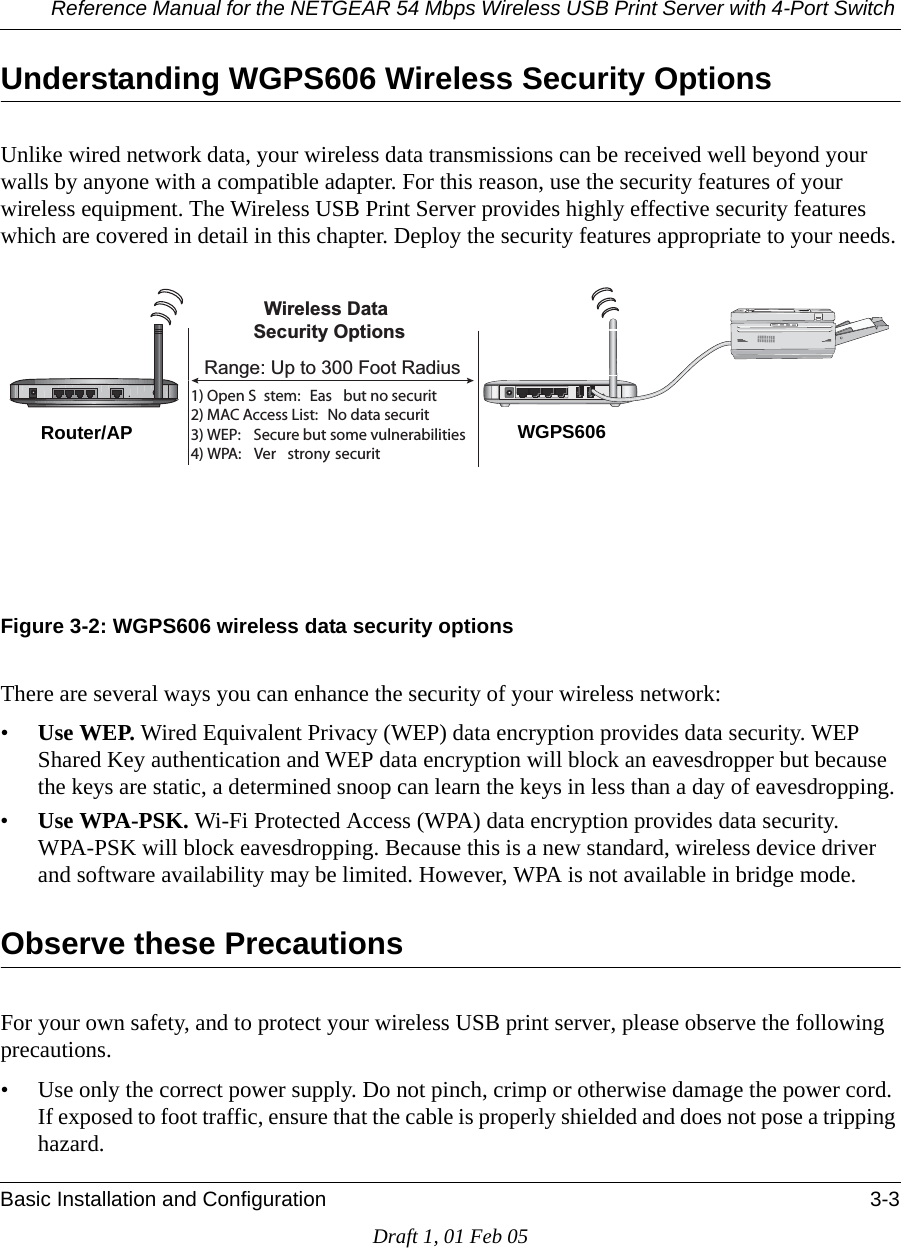
Netgear orporated WGPS606 Wireless Print Server User Manual FullManual
Netgear Incorporated Wireless Print Server FullManual
UserManual.wiki
>
Netgear orporated
>
WGPS606 User Manual
Users Manual Revised
Navigation menu
Upload a User Manual
Namespaces
Wiki Guide
HTML
PDF
Info
Views
User Manual
Discussion / Help
Navigation

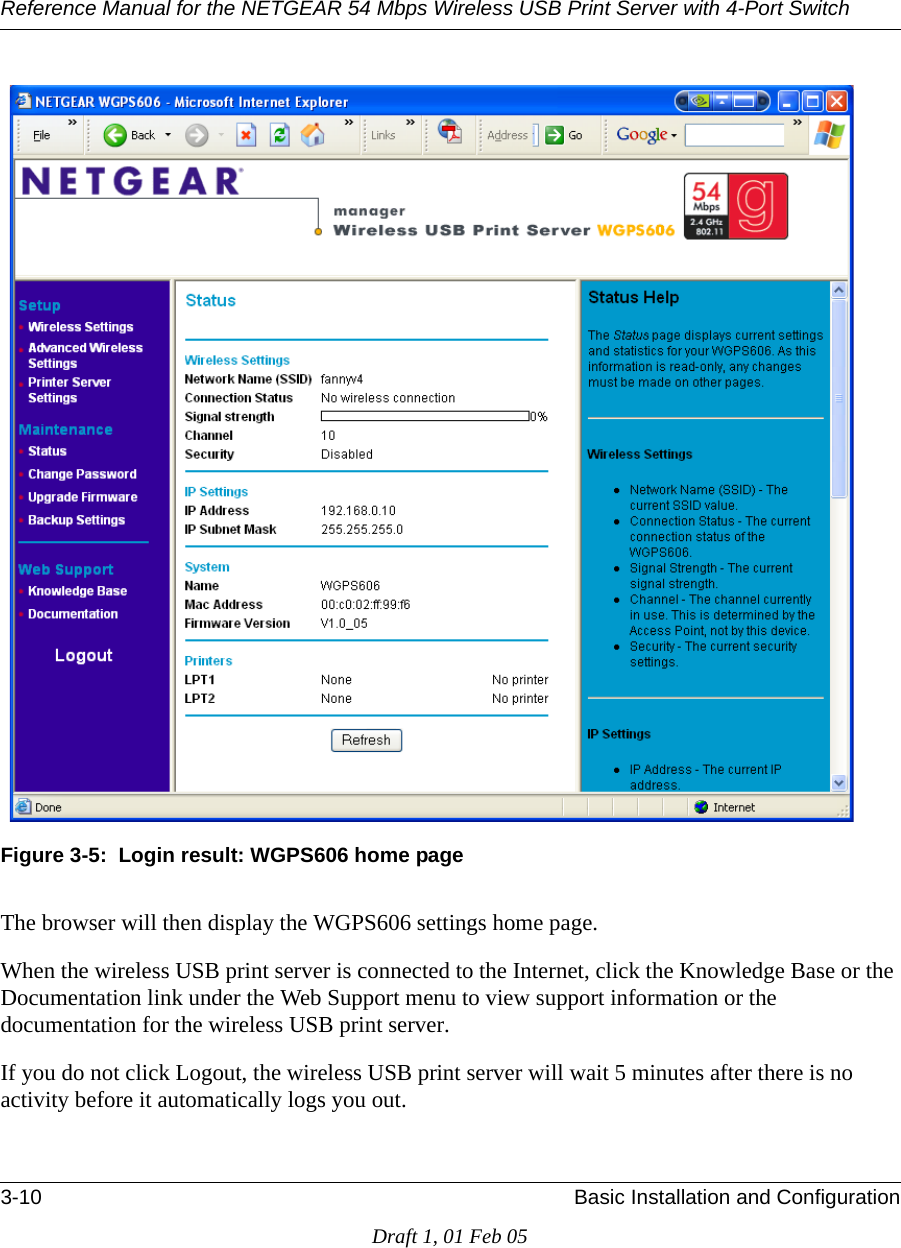
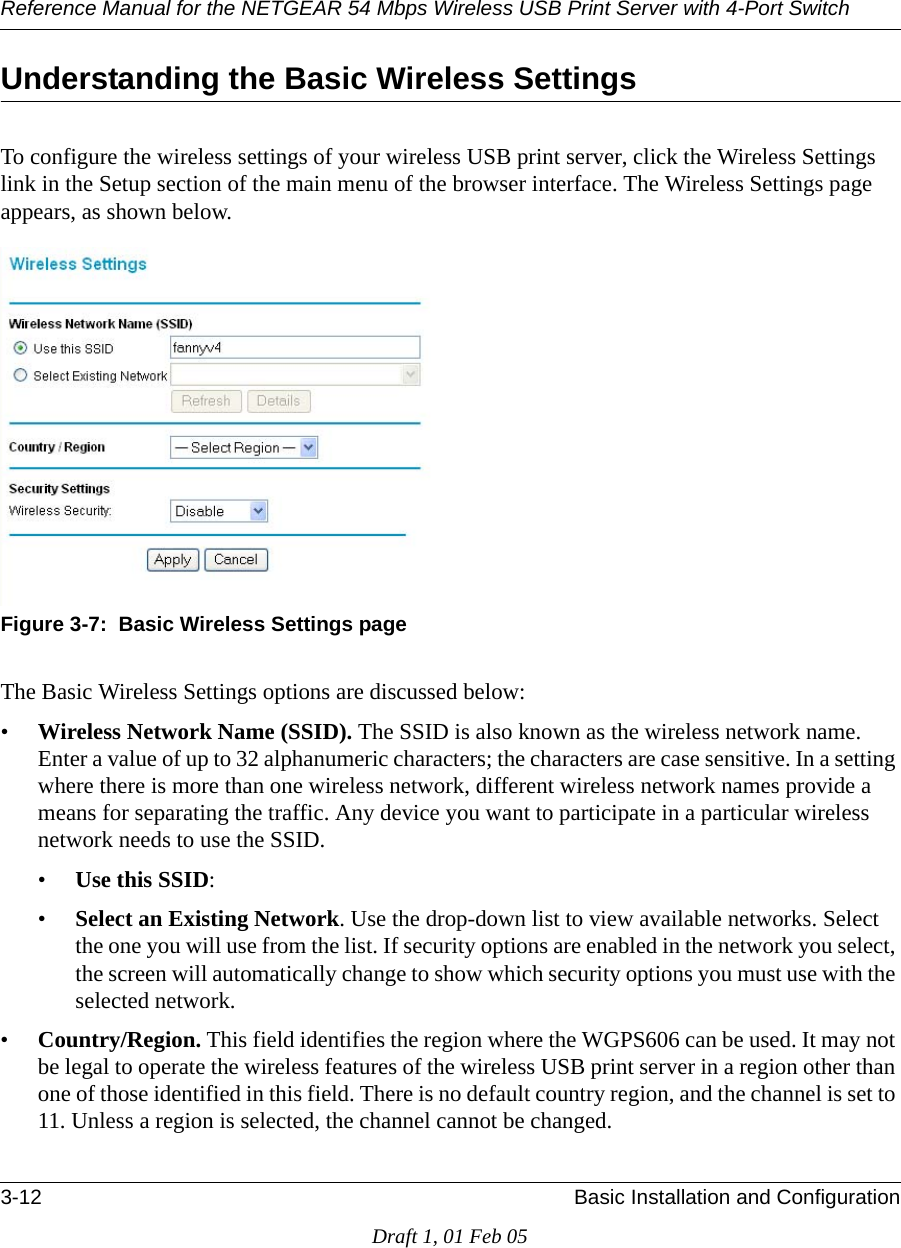
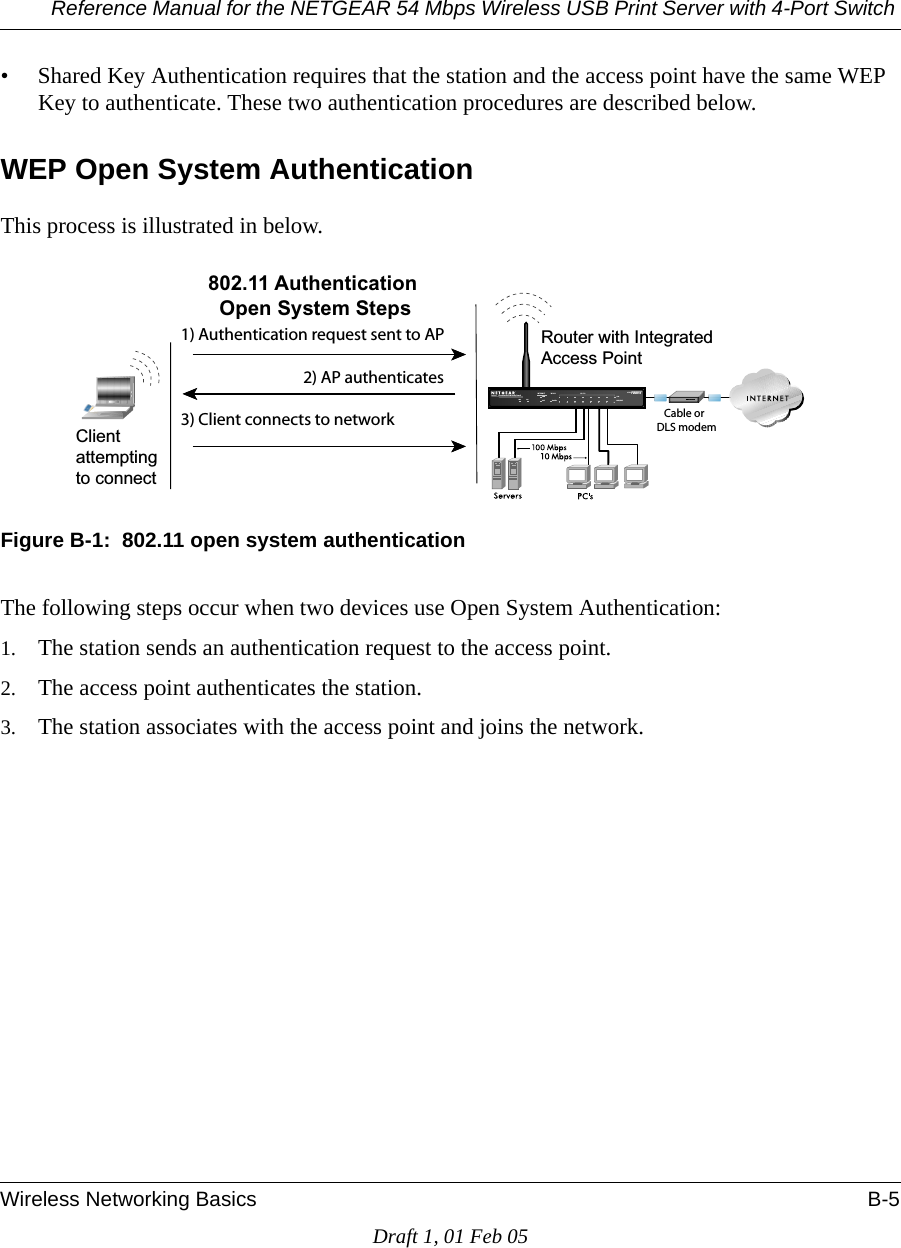
![Reference Manual for the NETGEAR 54 Mbps Wireless USB Print Server with 4-Port Switch 2-4 IntroductionDraft 1, 01 Feb 05– Soft copy of the WGPS606 54 Mbps Wireless USB Print Server Installation Guide• Support Information card• Warranty and Registration cardContact your reseller or customer support in your area if there are any wrong, missing, or damaged parts. You can refer to the Support Information Card for the telephone number of customer support in your area. You should keep the Support Information card, along with the original packing materials, and use the packing materials to repack the WGPS606 if you need to return it for repair. To qualify for product updates and product warranty registrations, we encourage you to register on the NETGEAR Web site at: http://www.netgear.com.Bottom Label DescriptionThe NETGEAR WGPS606 54 Mbps Wireless USB Print Server with 4-Port Switch WGPS606 front and rear hardware functions are described on the bottom label illustrated below.Figure 2-1: WGPS606 bottom label ?ajËË?jÄ~jaËMßË!0-ËË?wÁ?1Ë]Ë+:Ï8+.ÉåÉÔÈÔ¤åÔååå¤ .-ÖÄjÁË?j]ËË?a¬?ÄÄÝÁa]Ëˬ?ÄÄÝÁa20Ë..+ÝjÁ +0¤+0Ô8ÁjjÄÄ!ËsË070: !]Ë-!Ës¤ååË M¬ÄËÊË:#8Ës¤åË M¬Ä¤Ô7^ˤ±å-jÄÍÁj?WÍÁßË.jÍÍ~Ä+0¤+0Ô!¤!Ô!Ï!|y| M¬ÄË8ÁjjÄÄË+ÁÍË.jÁÜjÁËÝÍË|¬ÁÍË.ÝÍWË8+.ÉåÉ](https://usermanual.wiki/Netgear-orporated/WGPS606/User-Guide-532308-Page-16.png)