Netop Q-BOOM54069 QUALATEX Q-BOOM TRANSMITTER User Manual
NETOP INDUSTRIAL CO., LTD. QUALATEX Q-BOOM TRANSMITTER
Netop >
User manual
Instructions & Tips
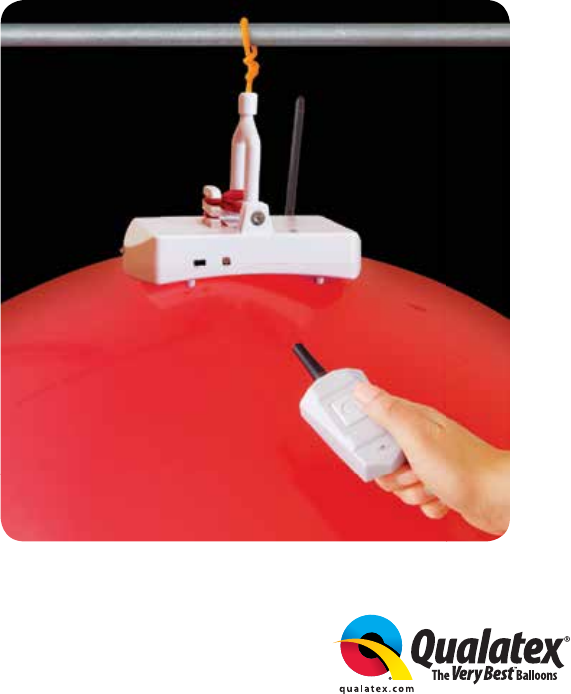
Congratulations on your purchase of Q-Boom, the remote-controlled
balloon popper from Pioneer® Balloon Company!
Please read this booklet to achieve the best results
when using this device.
USA ©2018 PBC SB-PBC 1612035
Q-BOOM™
!
Model : # 54077
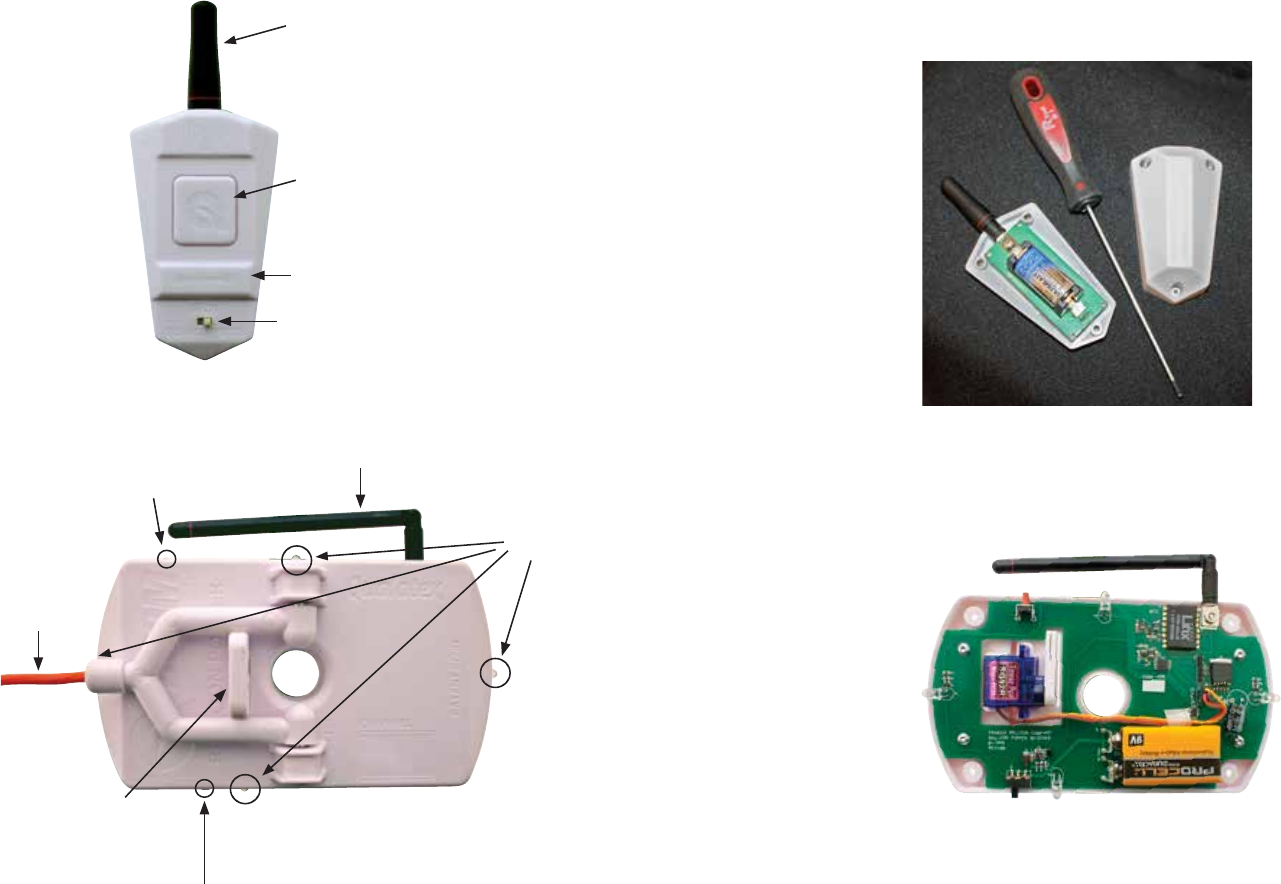
Q-Boom™ consists of two basic components: Q-Boom Battery Replacement*
The ONE BUTTON REMOTE requires an alkaline CR2 battery.
Use the Allen wrench to remove the three ONE BUTTON REMOTE screws,
then remove the cover. Insert the CR2 battery into the battery holder and
reattach cover.
The RECEIVER requires a 9V alkaline battery. Use the Allen wrench to
remove the four retainer screws from the bottom of the unit and expose
the circuit board by removing the back cover. DO NOT TOUCH CIRCUIT
BOARD. Gently push the battery into the terminals and refasten cover.
*NOTE: Remove the batteries from the RECEIVER and ONE BUTTON
REMOTE after using Q-Boom to maximize battery life. Keep new
batteries on hand when using Q-Boom.
*NOTE: Remember to turn the Q-Boom RECEIVER OFF after each use.
1. ONE BUTTON REMOTE
Action Button
Display
Mode Switch
Antenna
2. RECEIVER
2 3
Antenna
Lights
Hanger
Red Button
Z-Notch
On/Off
Switch
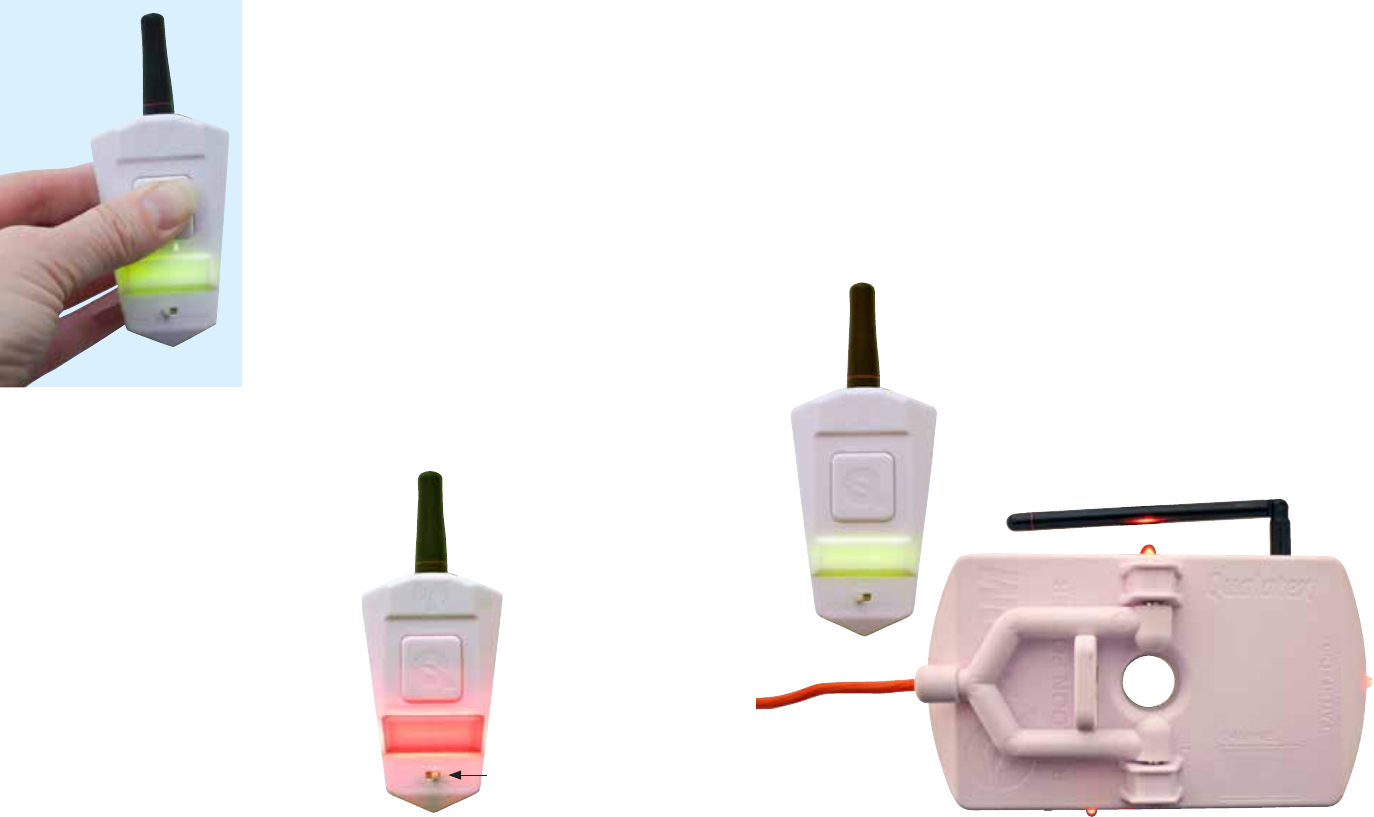
To test the Q-Boom signal without activating
the unit, press and hold the ACTION BUTTON
for a few seconds. The display area will ash
green. This indicates that the device is on
and safe to send test signals. Each time the
ACTION BUTTON is pressed, a signal will be
sent from the ONE BUTTON REMOTE to the
RECEIVER. The RECEIVER’s lights will ash
red to indicate that it has received the signal.
If the ACTION BUTTON isn’t pressed again
within 15 to 20 seconds, the remote will turn
off. To reactivate, simply press and briey
hold the ACTION BUTTON until display turns
green again.
*NOTE: The MODE SWITCH has no “start” position; it can be positioned
to the left or the right when the remote is turned on. The ONE BUTTON
REMOTE always turns on in TEST MODE. As long as the green light is on,
the user can continue to test that the Q-Boom unit is receiving a good
signal without popping the balloon.
Testing Tips
Test mode is a great way to work out where you will place the Q-Boom
device before hanging. Without attaching a balloon, turn on Q-Boom
and place it in the area in which you will use it. Walk around the room,
periodically pushing the ACTION BUTTON on the ONE BUTTON REMOTE.
Each time you press the button, the RECEIVER’s lights should ash. If not,
refer to the checklist at the end of this document.
NOTE: Remember, more than one RECEIVER can be used simultaneously
with the ONE BUTTON REMOTE. A range survey ahead of time ensures
all RECEIVERS are receiving signal.
4 5
TEST
MODE
Mode Switch
ACTIVE
MODE
When ready to pop the balloon, slide the
MODE SWITCH to the opposite position.*
The display area will ash red, which
means the Q-Boom is ready to pop the
balloon. The ONE BUTTON REMOTE is now
ready to send the signal to the RECEIVER.
The balloon will pop immediately upon
pressing the ACTION BUTTON. If you
decide to not pop the balloon, simply slide
the MODE SWITCH to the opposite position
and the display area will turn green. If the
ACTION BUTTON is not depressed within
15 to 20 seconds when the ONE BUTTON
REMOTE display is red or green, the ONE
BUTTON REMOTE will turn off.
Testing Q-Boom™
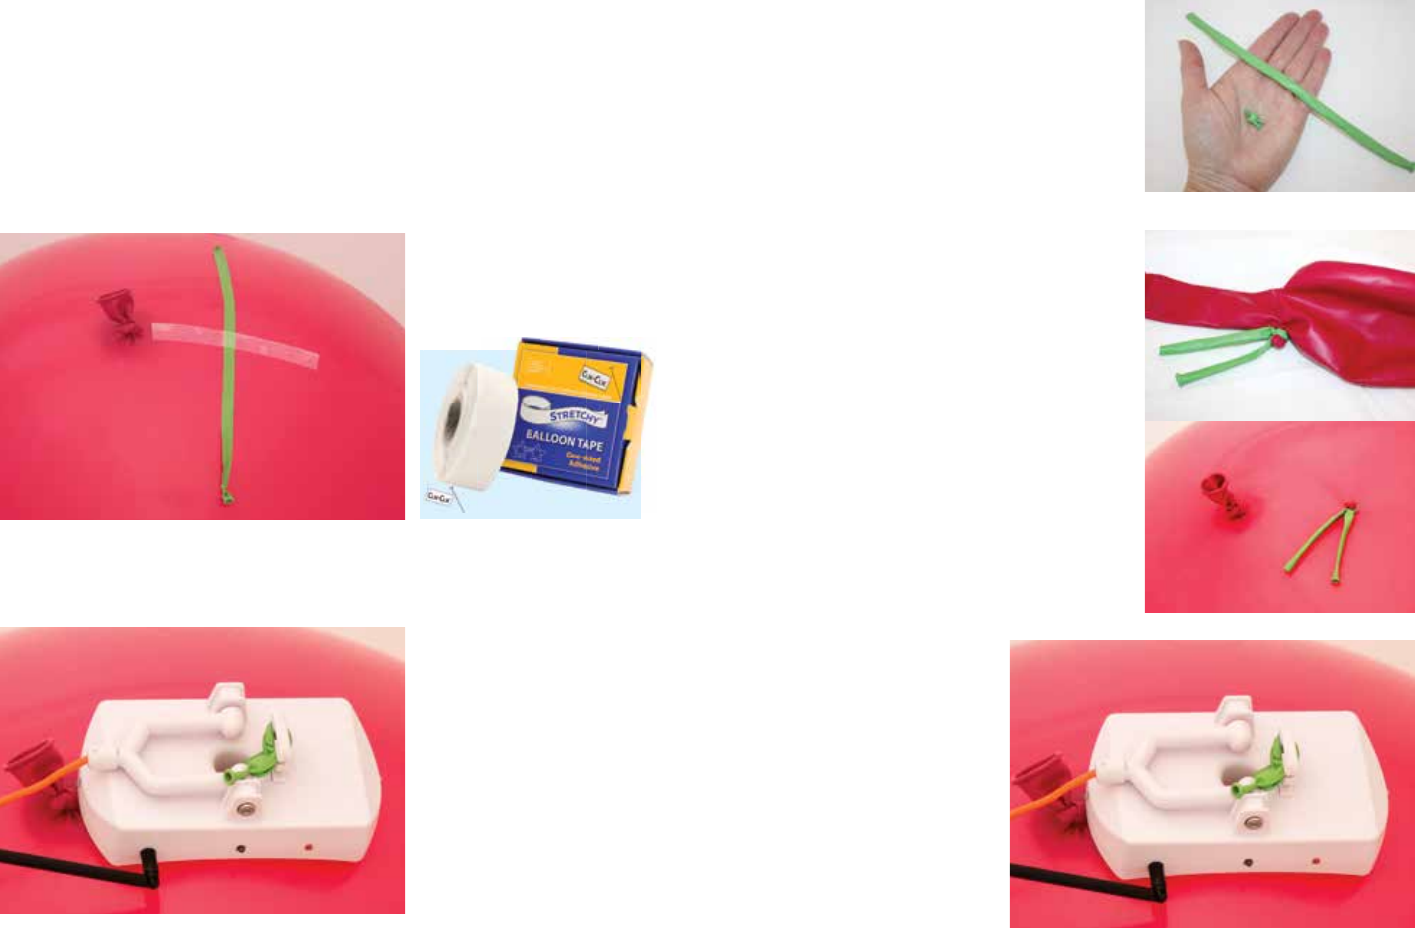
Photo B
Method 2:
Create a Raisin Twist by tying a knot several
times on top of one another in a 260Q. Trim
the balloon on each side of the knot. See
Photo A.
Insert the knot inside the 3' balloon and
grasp the knot through the skin of the
outside balloon at the base of the neck just
past the spot where the balloon starts to
curve, and twist it several times. Secure
the twist by wrapping it several times with
an unin ated 260Q and tie. In ate the 3'
balloon to at least 28" and tie. See Photo B.
Photo A
Photo B
6 7
Photo A
Attaching Q-Boom™ to a Balloon
We recommend two methods of attaching a balloon to the Q-Boom RECEIVER.
Pull the both ends of the 260Q through the hole in the RECEIVER and wrap
it through the Z-Notch several times to secure. See Photo B.
Method 1:
In ate a 3' balloon to at least 28" and tie. Pull the air out of a 260Q and
tie a knot, so the 260Q is at. Use a piece of stretchy tape (available from
Clik-Clik.com) that is a minimum of 5" long and attach the 260Q
approximately 4" from the knot of the balloon. See Photo A.
NOTE: Be sure to position the stretchy tape under the two “legs” of the
RECEIVER. This holds the balloon rmly in position and ensures the blade
punctures the balloon instead of the stretchy tape.
Use the 260Q from the
Raisin Twist and pull it
through the hole in the
RECEIVER. Wrap it through
the Z-Notch several times
to secure. See Photo C.
Perform recommended
Q-Boom test (see page 4).
Balloon is now ready
to hang.
Photo C
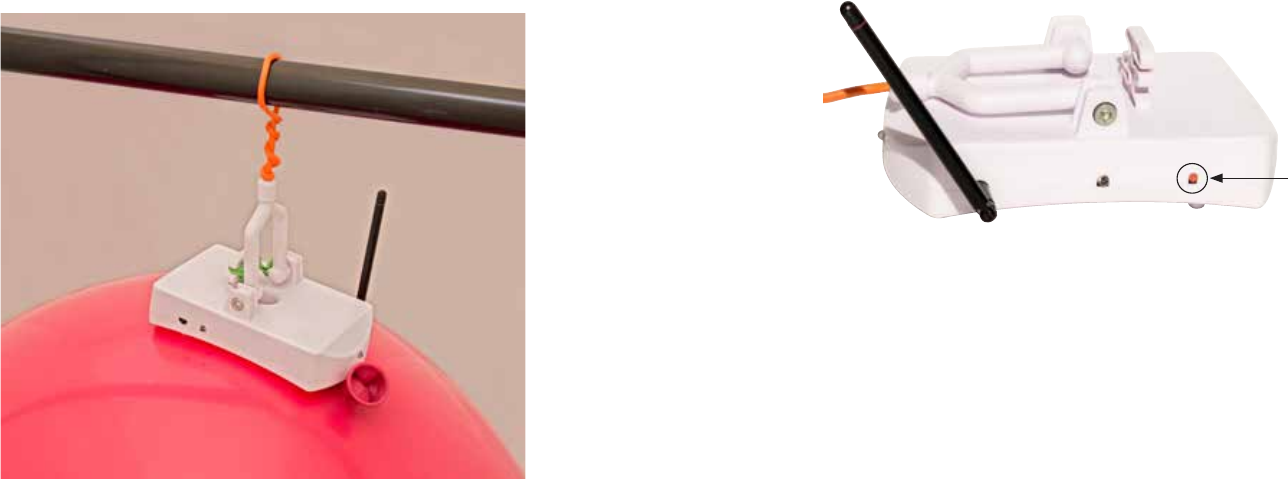
Hanging Q-Boom™
To hang the completed Q-Boom balloon assembly, nd a secure object
such as a pipe, drop ceiling, cross-brace, etc. Wrap the exible wire
around the object, tying the wire back on itself to create a closed loop.
It is important to ensure that the Q-Boom RECEIVER does not become
unattached while hanging for safety of guests.
Pairing RECEIVERS to the ONE BUTTON REMOTE:
1. Install fresh batteries in both the ONE BUTTON REMOTE and the
RECEIVER while it is turned OFF.
2. While holding the RED BUTTON on the side of the RECEIVER, switch the
power ON. This puts the unit into PAIRING MODE. Release the RED BUTTON.
8 9
Red Button
3. Press the ACTION BUTTON on the ONE BUTTON REMOTE and hold until
the RED LEDs on the RECEIVER ash to indicate pairing was successful.
This only needs to be done once. The ONE BUTTON REMOTE and RECEIVER
will remained paired, even after the batteries are removed.
NOTE: A ONE BUTTON REMOTE can be paired with multiple RECEIVERS,
just repeat the process for each RECEIVER.
Troubleshooting
If the Q-Boom RECEIVER’s red lights don’t ash when testing, ask the
following questions:
1. Is the Q-Boom turned ON?
2. Is the battery new? If not, use a fresh battery.
3. Is the “line of sight” to the unit obstructed by anything? Check
that there are no major obstructions between the ONE BUTTON REMOTE
and RECEIVER.
4. Is there something else operating on the same frequency as the
Q-Boom? If this is the case, chances are Q-Boom cannot be used in
this environment.
FCC Statement
This equipment has been tested and found to comply with the limits for a Class B digital device, pursuant to part 15 of the FCC Rules. These
limits are designed to provide reasonable protection against harmful interference in a residential installation. This equipment generates uses and
can radiate radio frequency energy and, if not installed and used in accordance with the instructions, may cause harmful interference to radio
communications. However, there is no guarantee that interference will not occur in a particular installation. If this equipment does cause
harmful interference to radio or television reception, which can be determined by turning the equipment off and on, the user is encouraged to
try to correct the interference by one or more of the following measures: —Reorient or relocate the receiving antenna.
—Increase the separation between the equipment and receiver.
—Connect the equipment into an outlet on a circuit different from that to which the receiver is connected.
—Consult the dealer or an experienced radio/TV technician for help.
FCC Statement
This device complies with Part 15 of the FCC Rules. Operation is subject to the following two conditions: (1) this device may not cause
harmful interference, and (2) this device must accept any interference received, including interference that may cause undesired operation.
Caution!
Any changes or modifications not expressly approved by the party responsible for compliance could void the user's authority to
operate the equipment.