Newcont Electronic NTP-6451A 2.4GHz Digital Cordless Telephone User Manual 6451A
Newcont Electronic Co., Ltd. 2.4GHz Digital Cordless Telephone 6451A
Contents
- 1. Users Manual Part I
- 2. Users Manual Part II
Users Manual Part I

OWNER'S MANUAL
INSTALLATION AND
OPERATING
INSTRUCTIONS
PLEASE READ THIS
MANUAL CAREFULLY
BEFORE USE.
KEEP FOR
YOUR REFERENCE.
Digital 2.4GHz
Expandable Cordless Telephone System
With Answering Machine
NTP-6451A
NEWCONTNEWCONT

T his telephon
e is registered for use in Canada.
Notice: The Industry Canada label identifies certified equipment. This certification
means that the equipment meets certain telecommunications network,
protective, operational and safety requirements. Industry Canada does mot
guarantee the equipment will operate to the user’s satisfaction.
Before installing this equipment, users should ensure that it is permissible to be
connected to the facilities of the local telecommunications company. The equipment
must also be installed using an acceptable method of connections. The customer
should be aware that compliance with the above conditions may not prevent
degradation of service in situations. Repairs to certified equipment should be made by
an authorized Canada maintenance facility designated by the supplier. Any repairs or
alterations made by the user to this equipment, or equipment malfunctions, may give
the telecommunications company cause to request the user to disconnect the
equipment.
Users should ensure for their own protection that the electrical ground connections of
the power utility, telephone lines and internal metallic water pipe system, if present, are
connected together. This precaution may be particularly important in rural areas.
Caution: Users should not attempt to make such connections themselves, but should
contact appropriate electric inspection authority, or electrician, as
appropriate.
Notice: The REN assigned to this device denotes the number of devices you may
connect to the telephone loop which is used by the device to prevent
overloading. The termination on a loop may consist of any combination of
devices subjected only to the requirement that the sum of the REN does
exceed five (5.0).
This device complies with RSS-210 of Industry Canada. Operation is subject to the
following two conditions: (1) this device may not cause interference, and (2) this device
must accept any interference, including interference that may cause undesired
operation of the device.
I MP OR T AN T INSTRU CT I ON S
FCC R E GU L AT I ONS
This equipment complies with FCC REGULATIONS 15 and 68 of the Federal
Communications commission (FCC) rules for the United States. A label is located
on the underside of the base unit containing the FCC registration number and
Ringer Equivalence Number (REN). You must, upon request, provide this
information to your local telephone company.
This equipment is compatible with inductively coupled hearing aids.
1. This equipment has been tested and found to comply with the limits for a Class B
digital device, pursuant to part 15 of the FCC Rules. These limits are designed to
provide reasonable protection against harmful interference in a residential
installation. This equipment generates, uses and can radiate radio frequency energy
and, if not installed and used in accordance with the instructions, may cause harmful
interference to radio communications. However, there is no guarantee that
interference will not occur in a particular installation. If this equipment does cause
harmful interference to radio or television reception, which can be determined by
turning the equipment off and on, the user is encouraged to try to correct the
interference by one or more of the following measures:
--Reorient or relocate the receiving antenna.
--Increase the separation between the equipment and receiver.
--Connect the equipment into an outlet on a circuit different from that to which the
receiver is connected.
--Consult the dealer or an experienced radio/TV technician for help.
2. Changes or modifications to this unit not expressly approved by the party responsible
for compliance could void the user’s authority to operate the equipment. Any change
to the equipment will void FCC grant.
3. Privacy of communications may not be ensured when using this phone.
4. The FCC requires that you connect you cordless telephone to the nationwide
telephone network through a modular telephone jack (USOCRJ11C or RJ11W).
5. You telephone company may discontinue you service if your equipment causes harm
to the telephone network. They will notify you in advance of disconnection, if
possible. During notification, you will be informed of your right to file a complaint with
the FCC.
6. If it is determined that your telephone equipment is malfunctioning, the FCC requires
that it not be used and that it be unplugged from the modular jack until the problem
has been corrected. Repairs to this telephone equipment can only be made by the
manufacturer or its authorized agents or by others who may be authorized by the
FCC. For repair procedures, follow the instructions outlined under Warranty.
7. The REN is useful in determining the number or devices you may connect to your
telephone line and still enable the devices to ring when you receive a call. The
general rule is that the REN value should not exceed 5.0 total; however, contact your
local telephone company for the specific number in your area.

Contents
Getting Started.........................................................................................1
Connecting your phone....................................................................1
Preparing for use .............................................. ..............................4
Using the Handset Display
Using the soft keys
................................. .... .... .....................5
..........................................................................5
Using the Navigation Keys....................................... .......................5
Setting up your Handset...........................................................................6
Registering a handset......................................................................6
Setting the Ring Tone and Ring Volume .........................................6
Naming a Handset............................................................................6
Entering Text on the Handset..........................................................7
Setting the language........................................................................7
Setting Tone/Pulse Dialing...............................................................7
Setting the Date and Time...............................................................7
Setting the Area Code for caller ID................................ .................8
Setting Answer On/Off ....................................................................8
Using the Intercom
1.Press Intercom.
2.From the list of handsets, press until points to the handset you want to page,
or to Select All to page all handsets.
Note: If there are only 2 handsets registered to the base, pressing the Intercom
button will automatically page the other handset.
3.Press ( ).
4.To answer the page, press TALK ( ).The first handset to respond is connected.
If no one answers the page after 2 minutes, or if the person you are paging presses
( ), No Answer displays on your handset and paging stops.
5.When someone answers the page, talk into the handset.
6.To end the intercom session, press ( ).
Transferring a Call from One Handset to Another
Unannounced Transfer
1.Press ( ).
2.Press Intercom.
3.Scroll to the handset you want to transfer the call to and press ( ).
Note: If there are only 2 handsets registered to the base, pressing the Intercom
button will automatically page the other handset.
3.Press to hang up. The call is transferred to the other handset.
Announced Transfer
1.Follow steps 1 through 3 above.
2.To answer the page on the other handset, press ( ).
3.Tell the person on the other handset that you are transferring a call, then press
( ) button again.The call is transferred to the other handset and all three
individuals are on the call.
4.Press ( )to hang up the second handset.
Volume
OK
C
OK
OK
C
C
C
OK
OK
18
Multihandset Functions
C
Multihandset Functions
You can have up to 4 handsets registered to a base station. Expansion handsets do
not require connection to a phone line. You can place the handset and its
charging base anywhere a standard electrical outlet is available.
With multiple handsets, you can:
Conference call
Handset to handset intercom
Set up handsets to automatically answer intercom calls
Transfer calls from one handset to another
Conference Calling
If one handset is already on a call, the display on other handsets registered to the
same base station shows Line in use
Once a second handset is added to the call, the displays on all handsets shows
On conference. A maximum of 2 handsets can be on a conference call at the same time.
1.To connect a second handset to a call, press or on the second handset.
2.To disconnect from the conference call, press on either or both handsets.
Contents
Using the Handset............................................................ ... .... .................9
Placing calls.................... .........9
Making a call using the speakerphone
........................................................
.............................................9
Switching Between the Handset and speakerphone......................9
Muting a call.....................................................................................9
Redialing a Number............................................................. .............9
Using the handset finder..................................................................9
Storing number in the phonebook..................................................10
Storing a caller ID number in the phonebook................................10
Calling a Numberfrom the phonebook........................... ...............10
Editting a phonebook Entry...........................................................11
Deleting a phonebook Entry..........................................................11
Using Caller ID...............................................................................11
Reviewing the List of Calls............................................................11
Deleting Caller ID Calls..................................................................12
Handset/Answer Machine Remote Control...................................12

Contents
Answering system Operation................................................................13
Setting the Ring count..................................................................13
Setting the Day and Time....................................... ......................13
setting the Announce Mode
Recording an Announcement
.............................. .... .... ...................14
........................................................14
Two-digit Message Counter Display.............................................15
Base Volume Control.....................................................................15
Answering Calls with Answer ON.................................................15
Answer OFF....................................................................................15
Playing Back New Message...................................................................16
Pausing During Playback...............................................................16
Recording a Memo............................................... ....... ..................16
Reviewing Messages......................................................................17
Deleting Messages.........................................................................17
Call Interrupt..................................................................................17
Multihandset Functions............................................................. .............18.
Conference Calling . ...................18
Using the Intercom
...................................................... .
...... .... .... .... .... .................................................18
Transfering a call from one Handset to Another......... .... .... .... .....18
Unanounced Transfer............................................... .... ........18
Announced Transfer............................................ .... .............18
Reviewing Messages
To repeat the currently playing message, press the [REVIEW] key once.
While a message is playing, push the [REVIEW] key twice to play the
previous message.
During message playback, pushing the [Skip] key wil advance playback
to the next message. The new message number will be announced and
the message will begin playing.
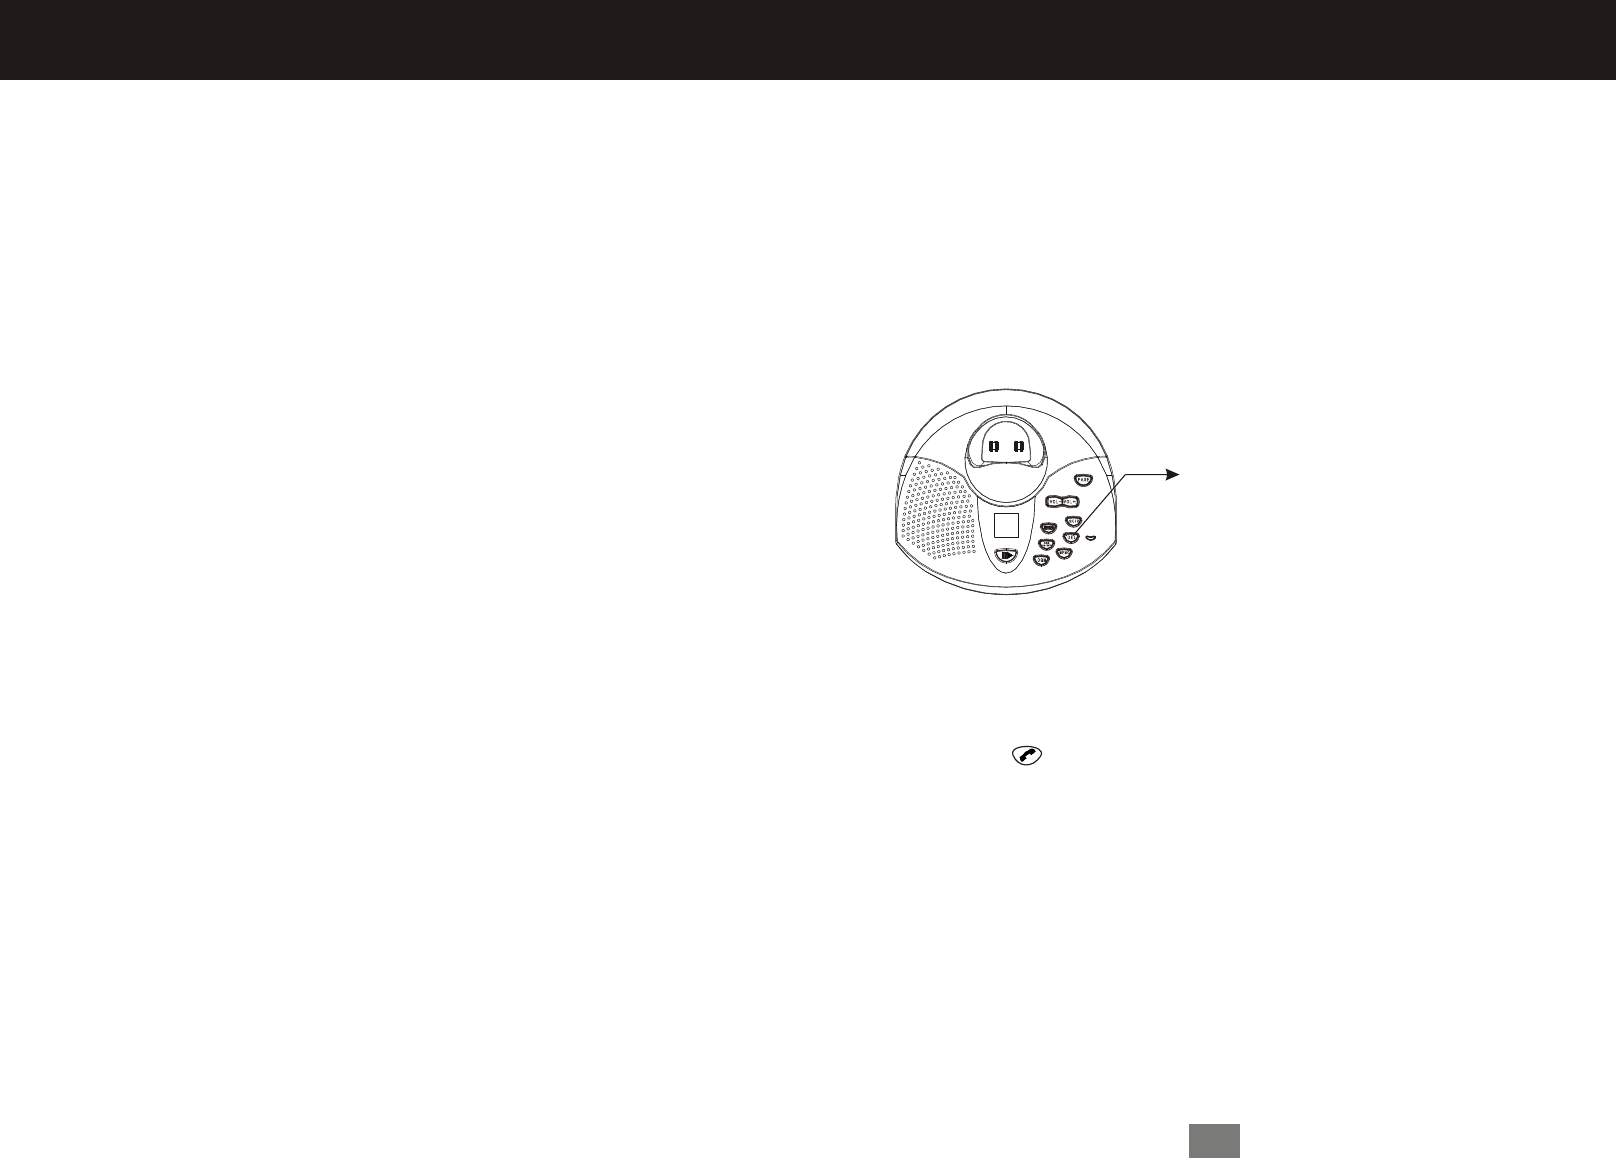
Deleting Messages
Messages will be saved unless you delete them.
To delete a single message:
1. While a message is playing press
[DEL]. The NTP-6451A announces
"Message deleted."
2. The NTP-6451A will announce the
next message number and play the
next message or, if the message
was the last one, announce “End of
messages.”
Call Interrupt
If the NTP-6451A answers the telephone before you do,you can automati
-cally interrupt the answering machine by picking up any extension phone
or by pressing on your handset.
17
Playing Back New Messages
NOTE.......................................................................................... ..............19.

Getting Started
Connecting Your Phone
This section is a reference guide to the basic functions and operations of your
cordless telephone. For more detailed descriptions of the operations and features
of this telephone, refer to the Content on page 1.
1.Carefully remove your cordless telephone from its shipping carton. If there is
any visible damage, do not attempt to operate this equipment. Return it to the
place of purchase.
2.Check to be sure you have all items that come with this cordless telephone
system. You should have a HANDSET, BASE UNIT,AC ADAPTER,TELEP-
HONE LINE CORD, SHORT TELEPHONE LINE CORD,BATTERY PACK,
BELT CLIP and Owner's Manual.
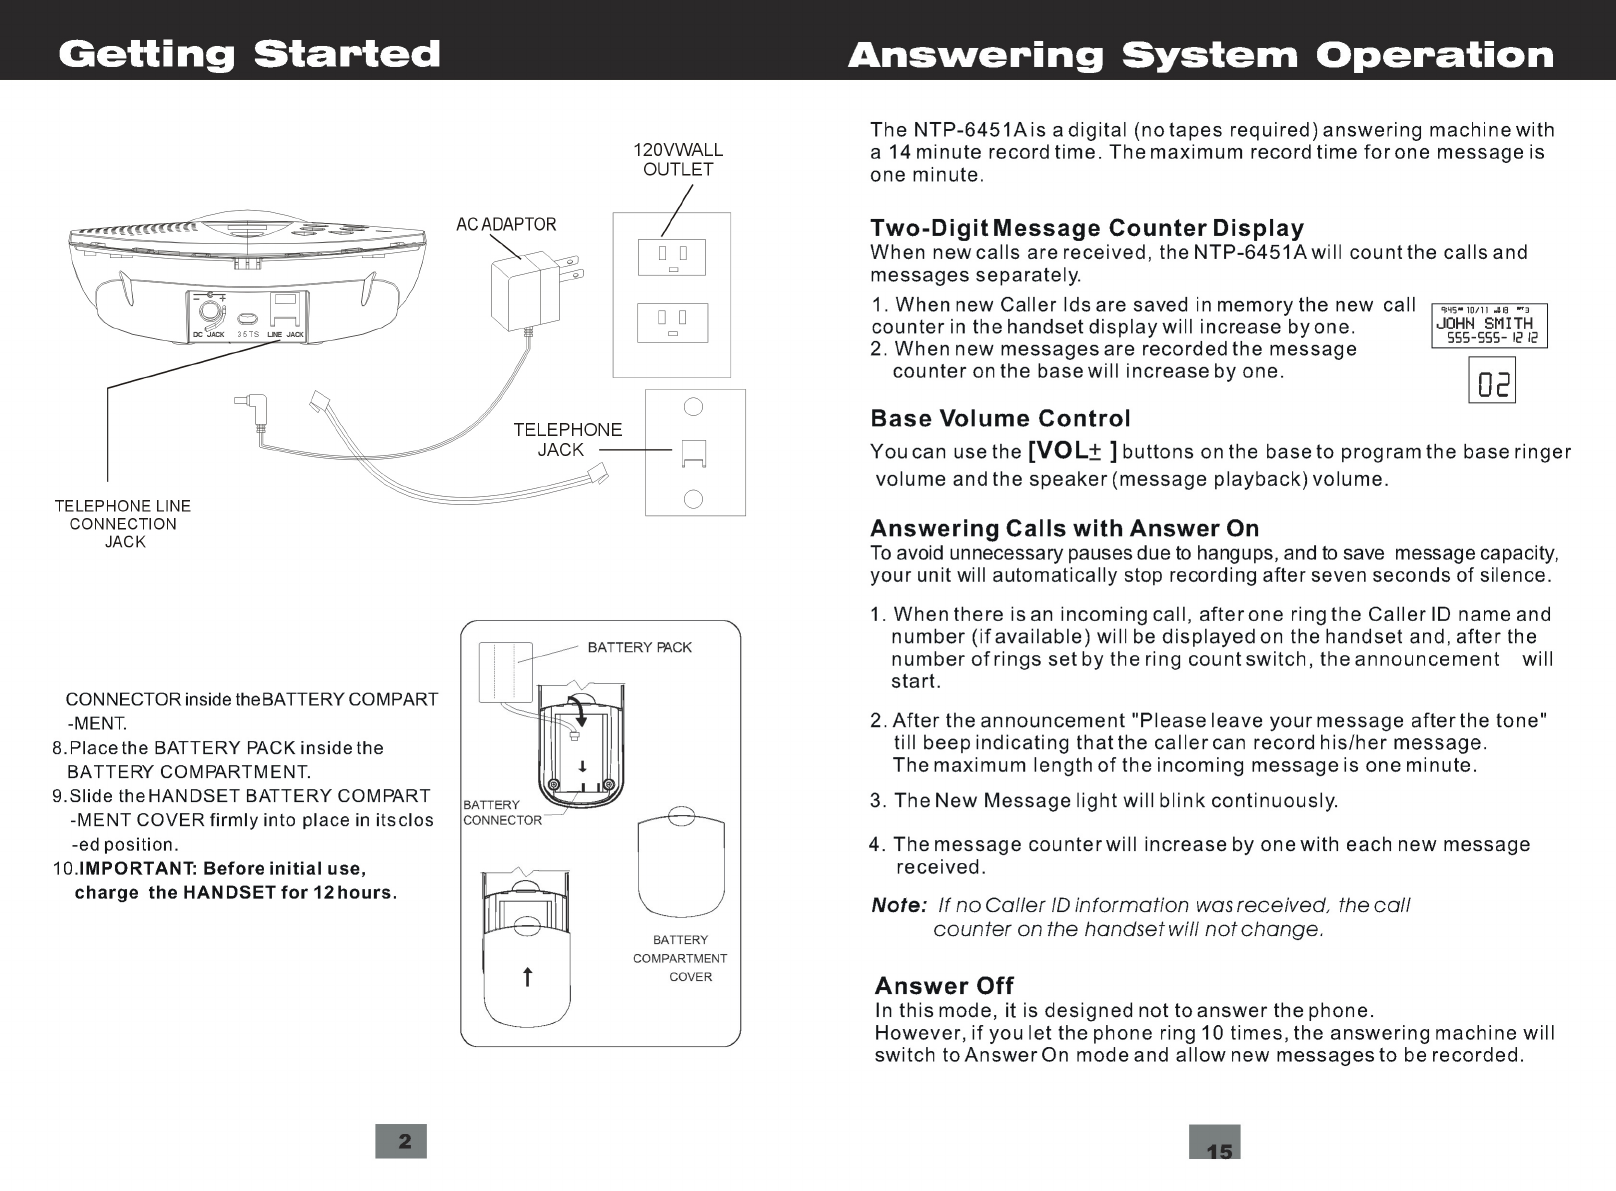
3.Insert the small plug on end of the AC ADAPTER into the POWER IN CONNEC
-TION JACK at the back of the BASE UNIT.
4.Plug the AC ADAPTER into a 120V AC wall outlet.
USE ONLY WITH CLASS 2 POWER SOURCE 9V DC, 700 mA.
5.Insert one plug of the TELEPHONE LINE CORD into the house TELEPHONE
JACK and the other end into the TELEPHONE LINE CONNECTION JACK
on the back of the BASE UNIT.
6.We recommend not placing this unit next to appliances. Doing so may cause
interference.
7.Install the HANDSET BATTERY PACK by plugging it into the BATTERY
1
1. The Caller ID name and number (if available) will display after the
first ring.
2. After 10 rings, the NTP-6451A will turn on and pick up the telephone line.
3. The NTP-6451A is now in Answer On mode.
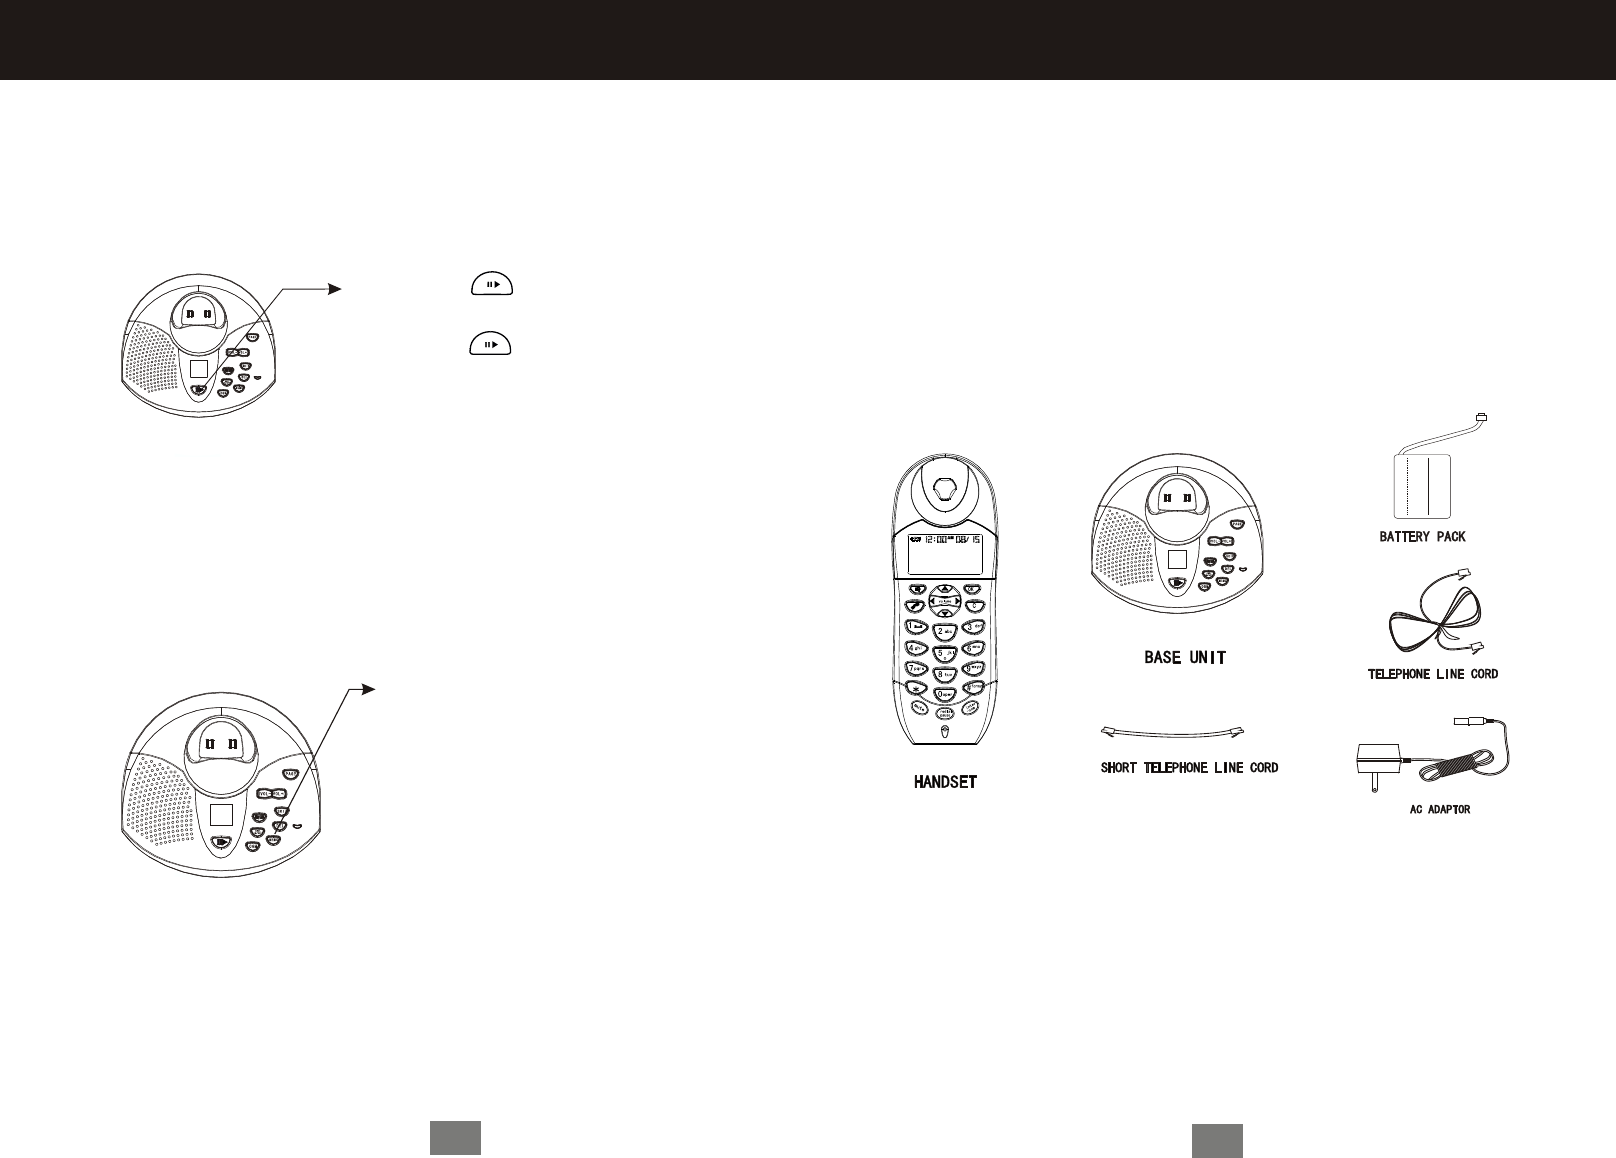
Pausing During Playback
1. Press the key during
playback to suspend activity.
2. Press the key again to
resume activity.
Note: If still in pause mode after 1 minute, the NTP-6451A
automatically returns to standby mode.
Recording a Memo
The NTP-6451A will allow you to record memo messages up to one minute
long. The memo will be considered as a new message.
Note: If the memory is full during recording,
the unit will announce “Memory is full”
and the memo recording is ended.
1. To record a memo,
the [Memo] key
press and hold
till beep.
2. While continuing to hold the
[Memo], say your memo message.
When you finished with your memo,
release the [Memo] key.
3. The memo is stored as a new
message and the new call light
will flash.
16
Playing Back New Messages
