Novatron NTD38 MULTIMEDIA PLAYER User Manual 8C24 NTD38 Manual En for CE
Novatron Co., Ltd MULTIMEDIA PLAYER 8C24 NTD38 Manual En for CE
UserManual.wiki
>
Novatron
>
NTD38 User Manual
>
USERS MANUAL 2
Contents
1.
USERS MANUAL 1
2.
USERS MANUAL 2
USERS MANUAL 2
Navigation menu
Upload a User Manual
Namespaces
Wiki Guide
HTML
PDF
Info
Views
User Manual
Discussion / Help
Navigation
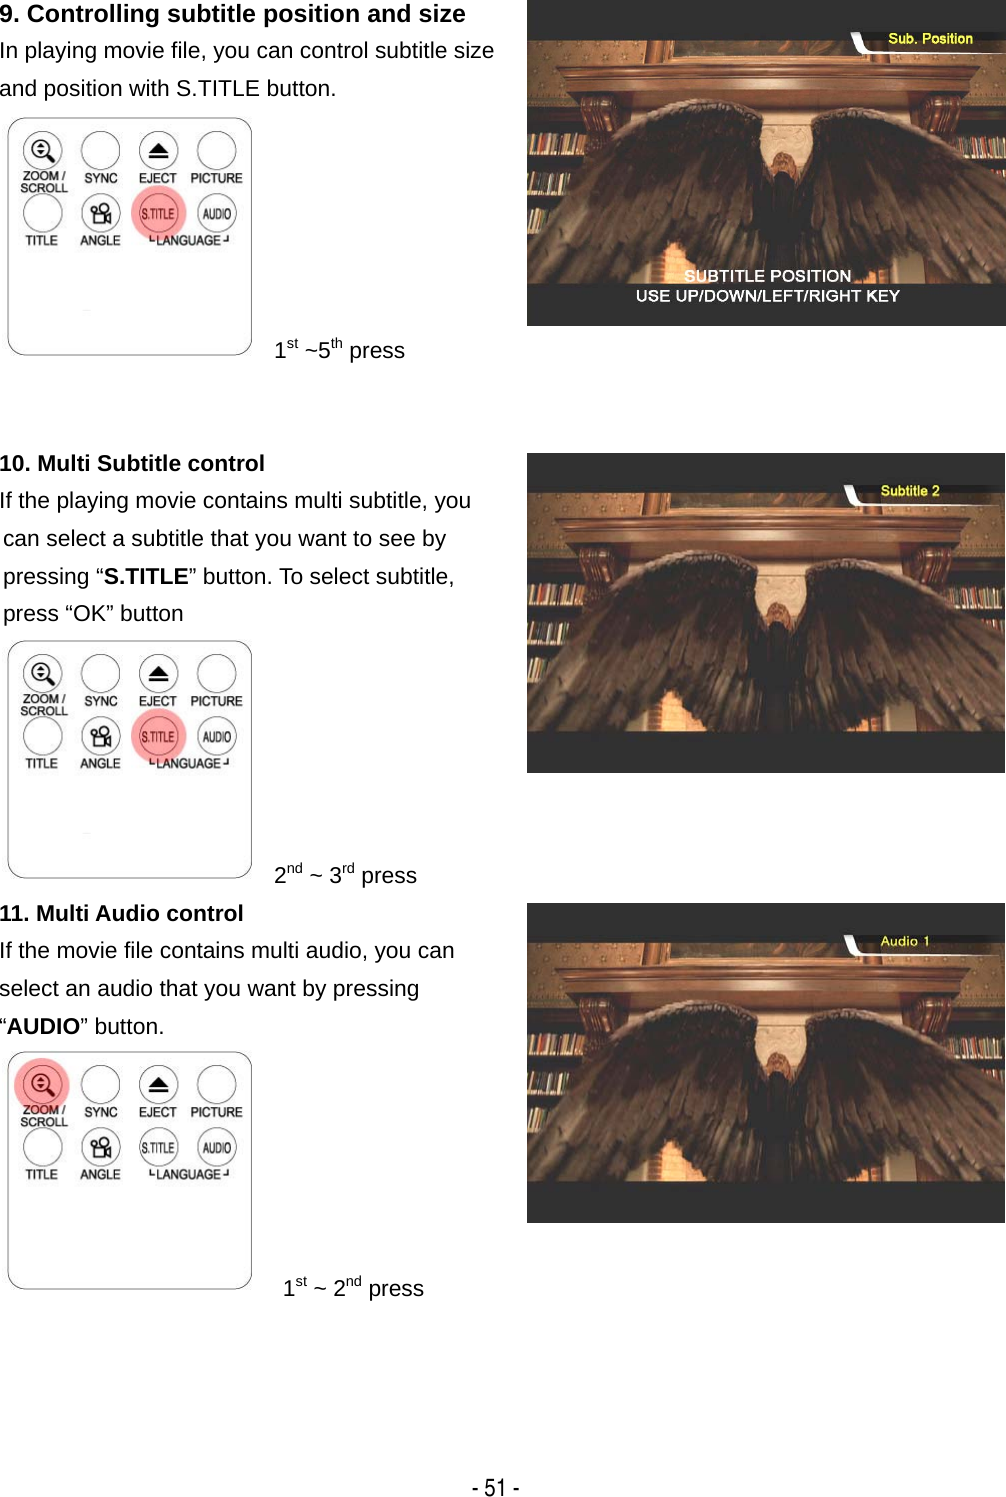
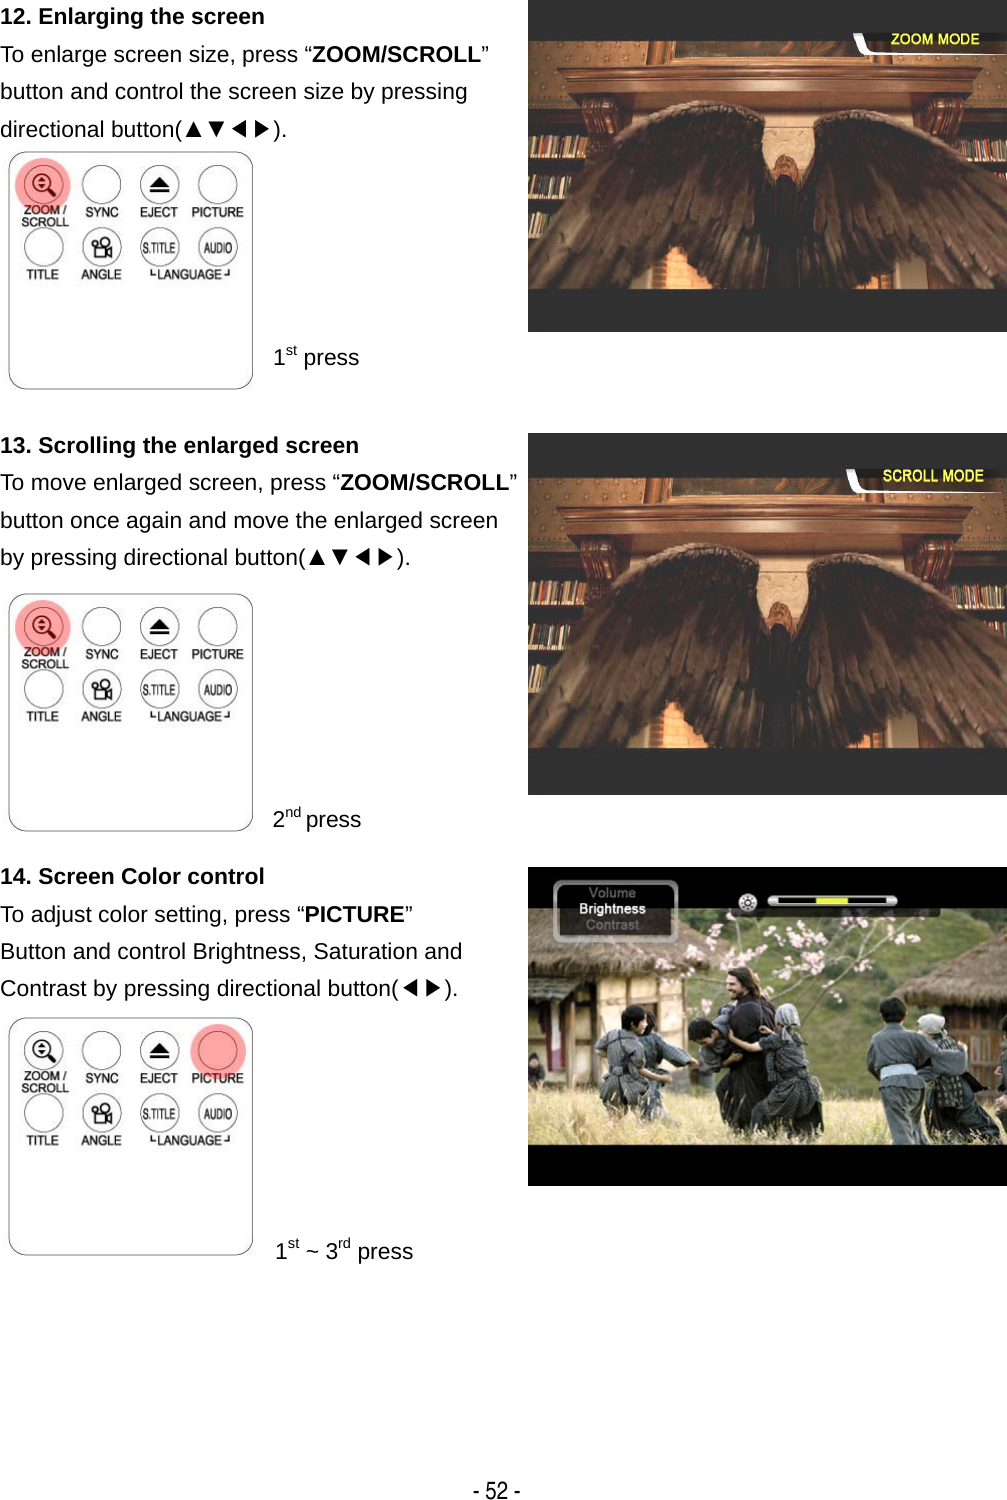
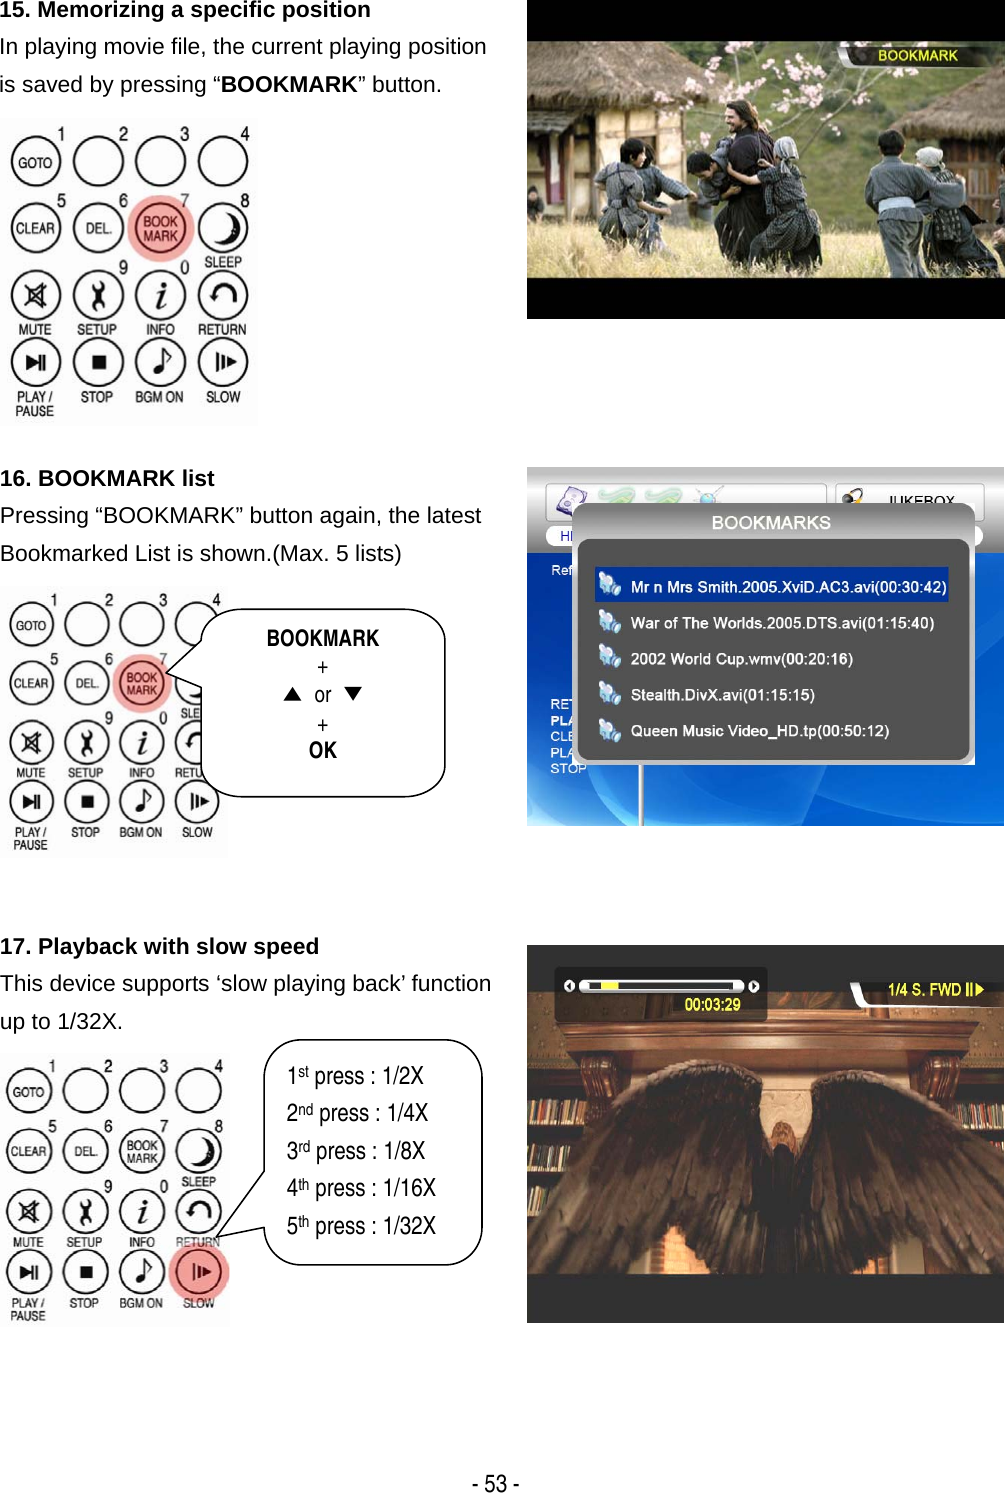
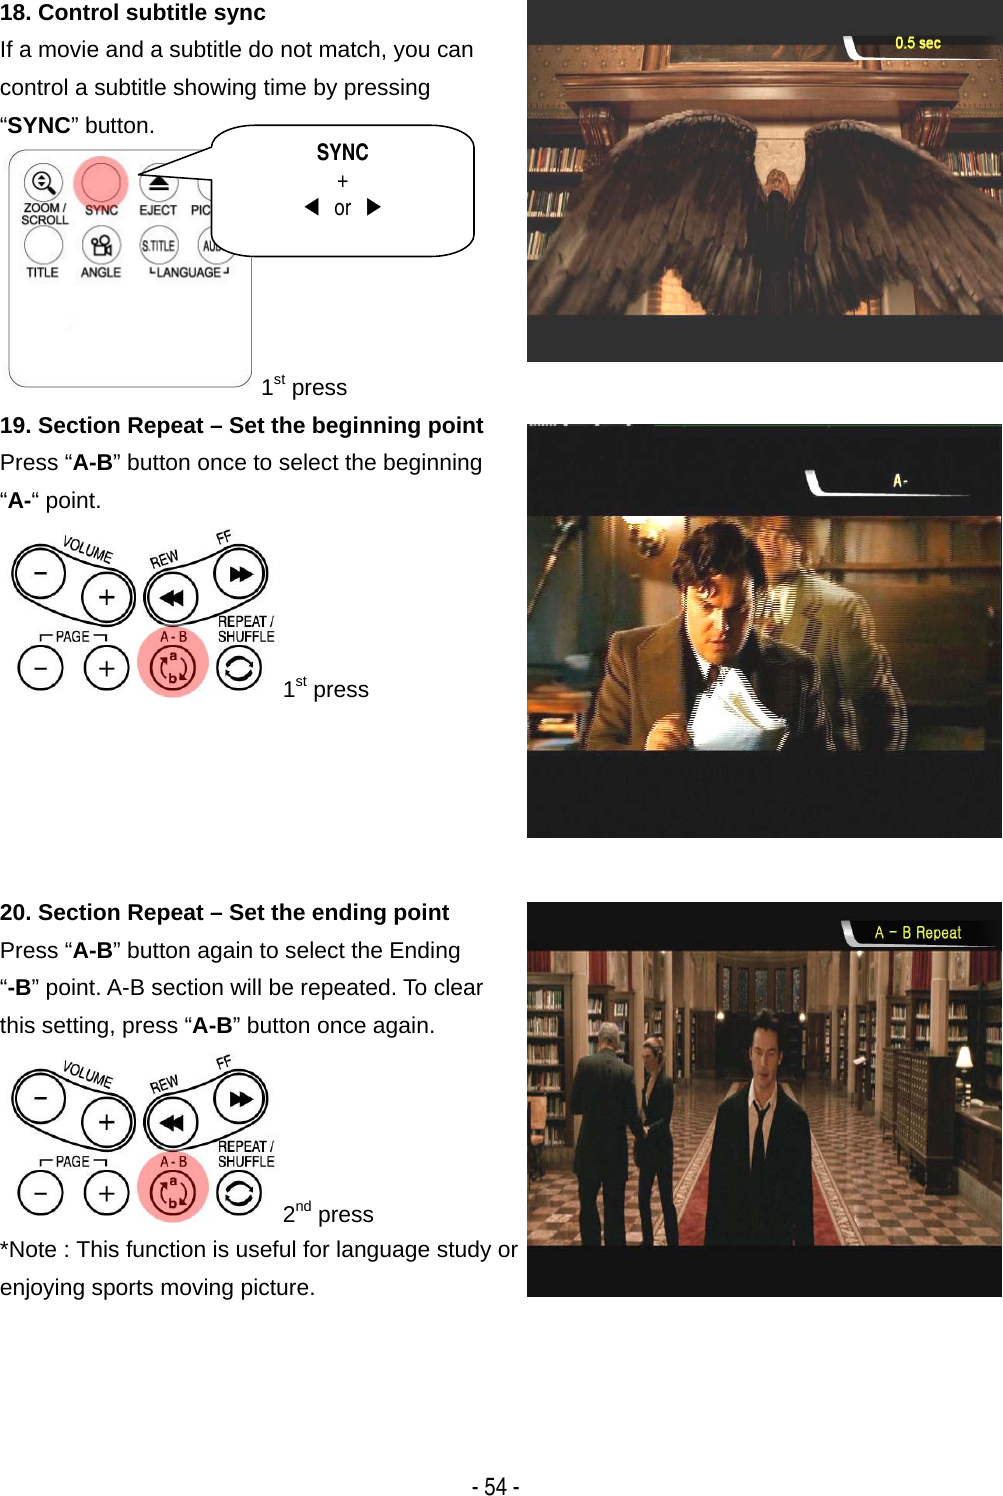
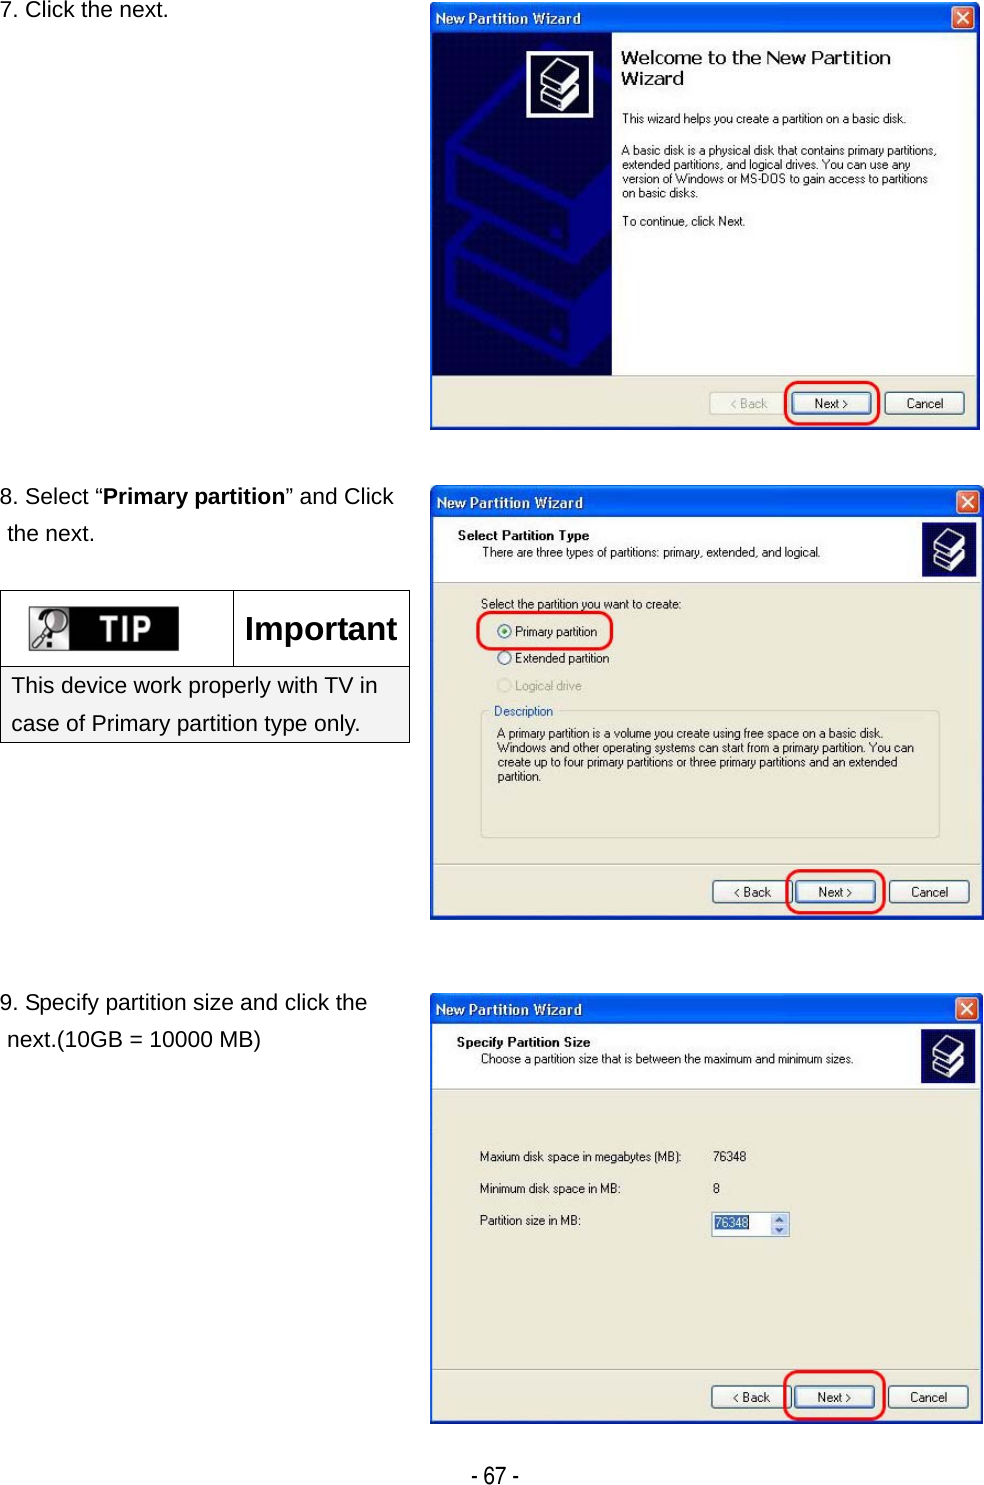
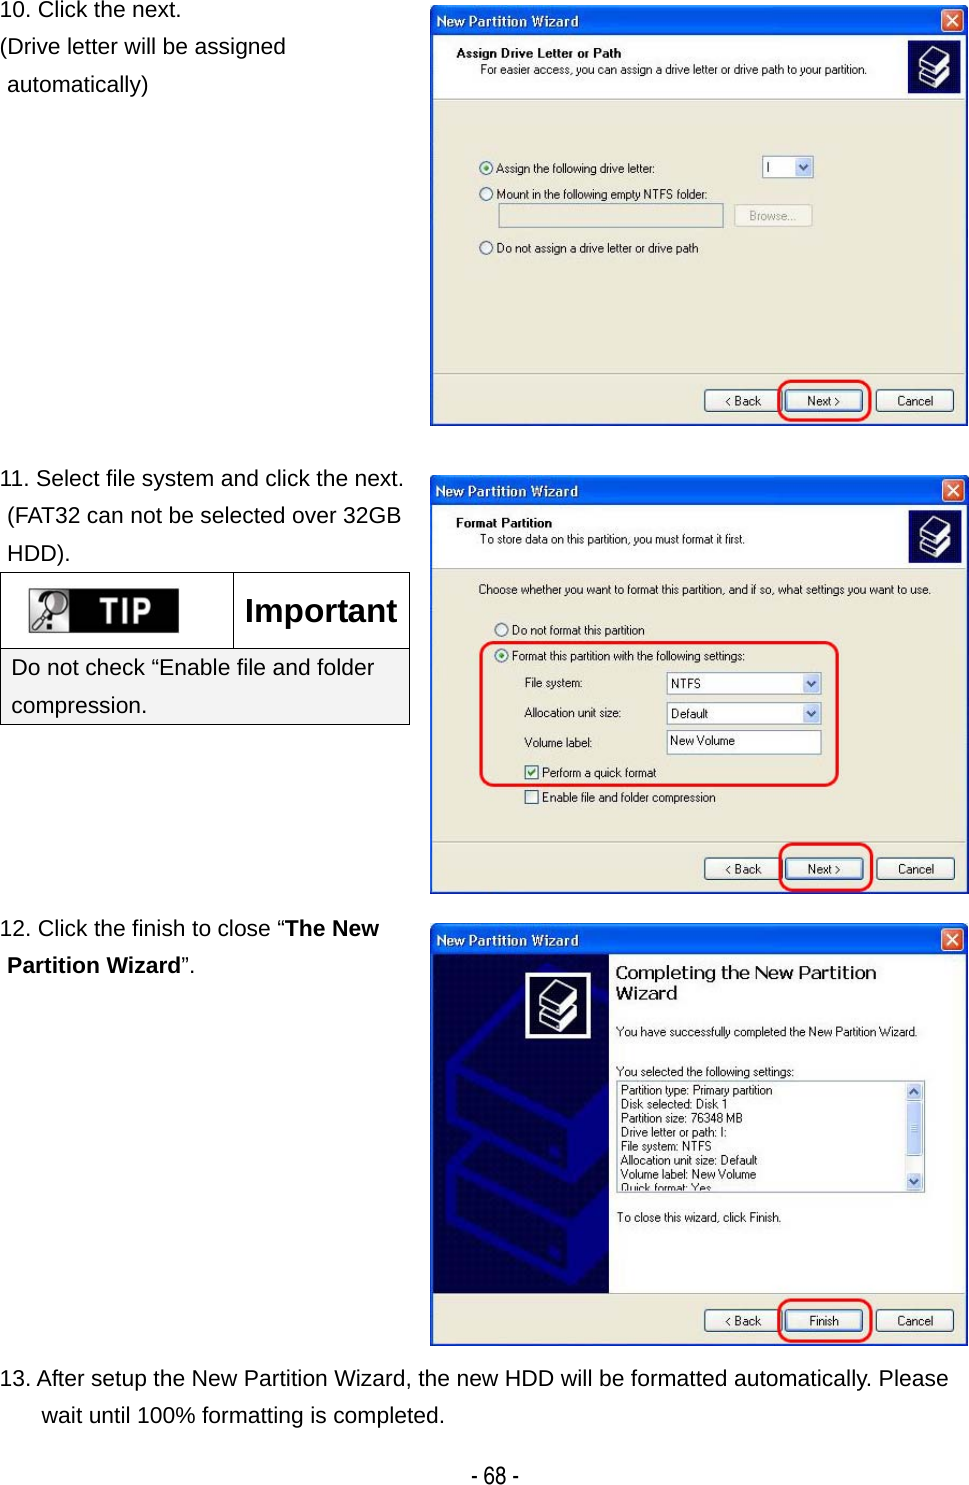
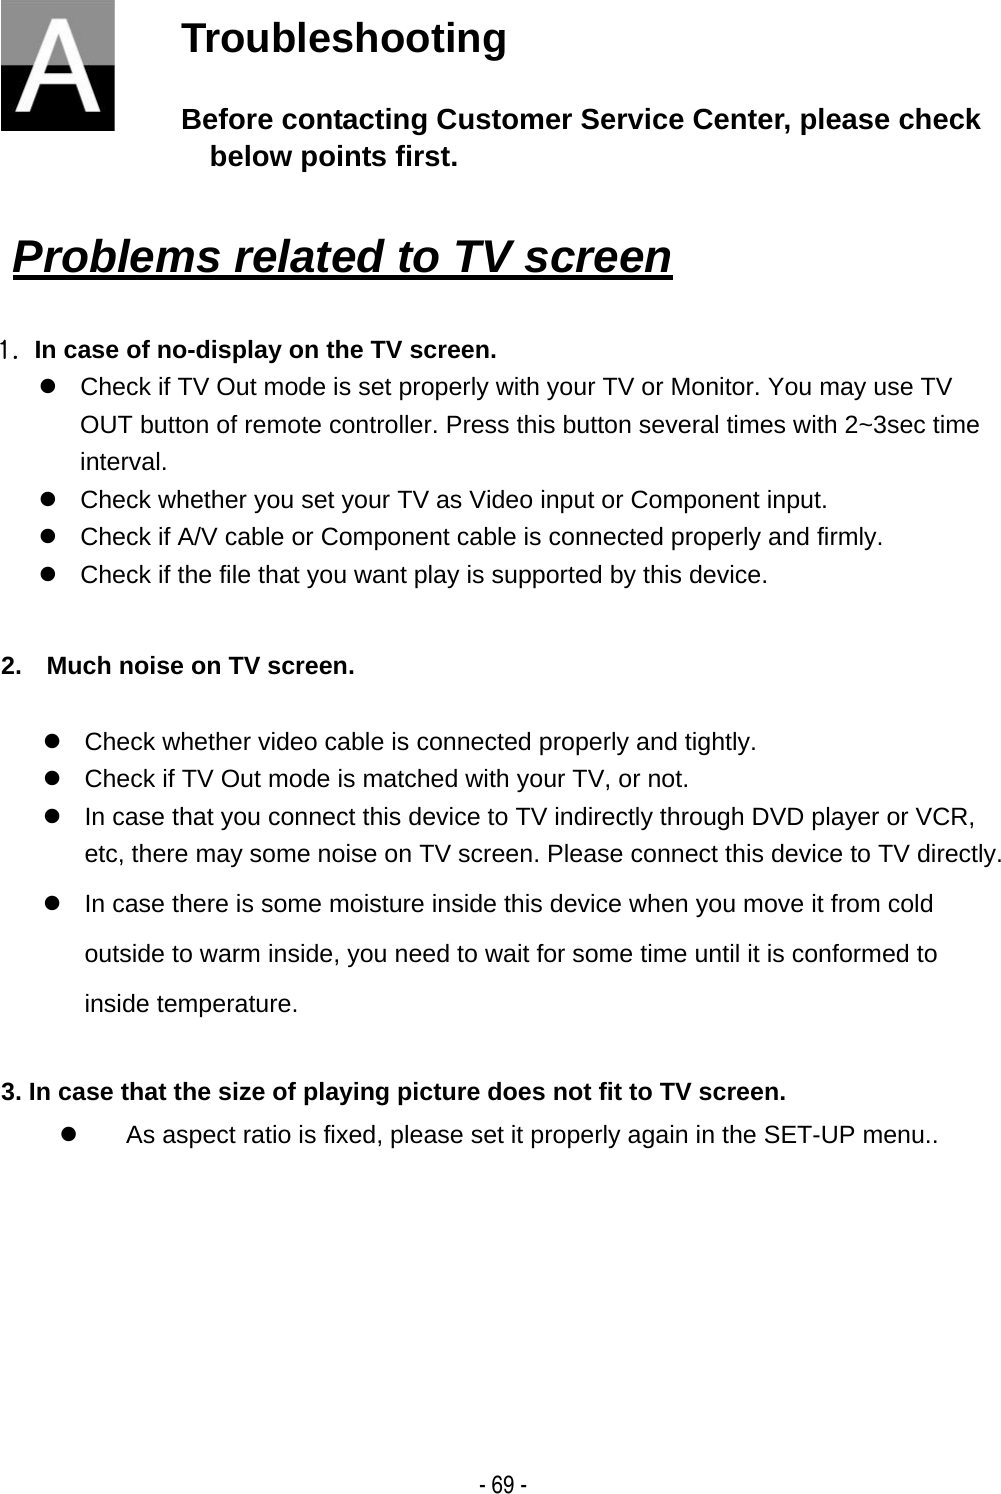
![- 70 -1. In case of no-sound or much noise z Check whether stereo cable (A/V cable) is connected properly and tightly between this device and TV set. z Check if [MUTE] button is pressed and volume level is set properly z Check whether digital audio cable is connected properly and tightly to the audio input connectors of Home Theater System or Audio Amplifier z Try changing the value(Down mix or pass through) of Audio Out on SET-UP menu z Try changing audio cable with new one. z Check the Audio channels(2channel or 5.1 channel) on SETUP MENU 2. In case of no-sound or bad sound quality when connected with digital audio system z Check the Audio channels(2channel or 5.1 channel) on SETUP MENU z Set as ‘pass through’ on SETUP menu. z Check the status of connection and set up for digital audio system(Refer to the manual of digital audio system) z Check whether optical cable or coaxial cable is connected properly and tightly Problems related to Sound](https://usermanual.wiki/Novatron/NTD38.USERS-MANUAL-2/User-Guide-970086-Page-41.png)