OBSERVA Telecom QX610C LTE Cat 4 USB Dongle User Manual
OBSERVA Telecom LTE Cat 4 USB Dongle
user manual
4G CONNECT
User Manual
1
Index
4G Connect Introduction ............................................... 2
Internet service .............................................................. 8
SMS service .................................................................. 10
Contacts ....................................................................... 15
Settings ........................................................................ 19
FAQs ............................................................................. 26

2
4G CONNECT INTRODUCTION
1. To launch the Network Connect, double-click the
shortcut icon on the desktop. It should be noted that:
If the PIN code enabled, enter the correct one, then
click OK. The (U)SIM will be locked after three retries of
incorrect PIN code inputting;
Enter the correct PUK to retrieve the default PIN code.
After ten retries of incorrect PUK code inputting, please
contact with your service provider;
With the wrong PIN and PUK, all the network services
are unavailable.
3
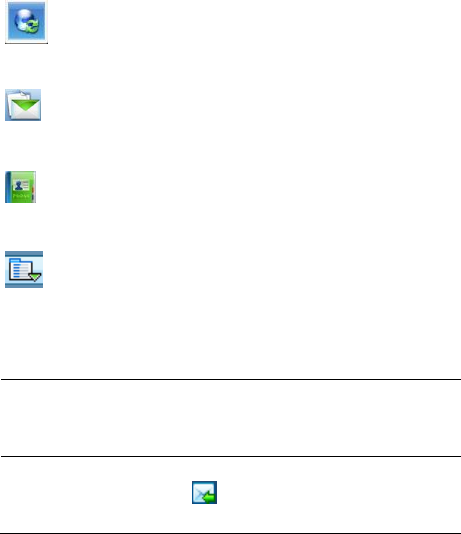
2. Main interface introduction
: Connect /disconnect to the internet
: Access to the SMS service interface
: Access to the Phonebook interface
: Set items
3. Status information
Status
Description
New message
New message(s) arrived.

4
Message full
Indicates the (U)SIM’s storage
of SMS is full.
No device
Indicates that system cannot find
the device.
Initializing
Indicates that the device is in the
process of initializing.
Searching
The device is searching for the
network.
No service
No suitable network.
5
No (U)SIM card
(U)SIM card not inserted or the
device cannot recognized the
(U)SIM.
Invalid (U)SIM
card
The (U)SIM is out of service.
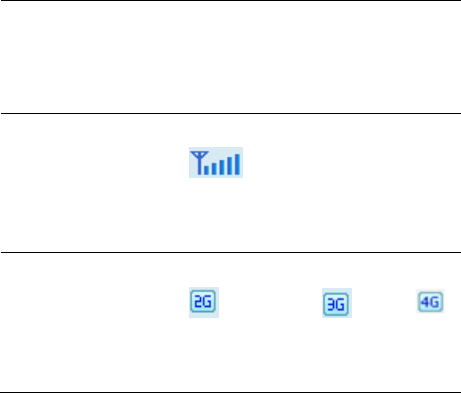
Network signal
Indicate the signal
strength of the network.
Network type
GSM/GPRS, UMTS,
LTE.
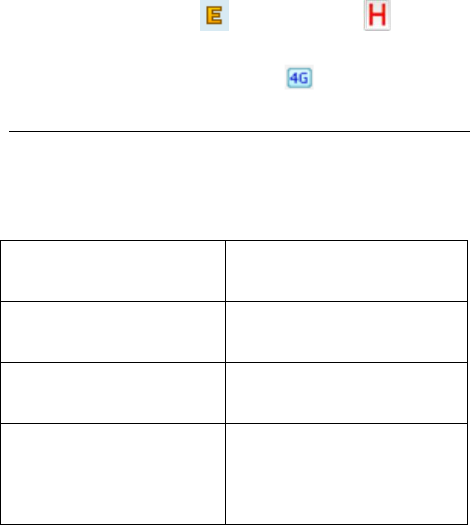
6
Data service
EDGE available, HSPA
available, LTE.
4. Indicator light description
State of indicator light
Description
Twist in multicolour circularly
Device initialization
Twist in red colour slowly
Abnormality of device
Twist in
green/blue/purple/yellow
slowly
Registered
HSPA/UMTS/EDGE/GPRS

7
Luminous continuously
Data transmitting
8
INTERNET SERVICE
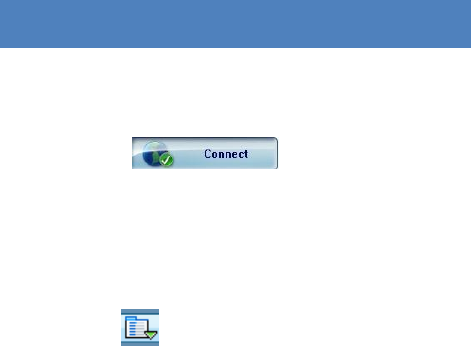
1. Connecting with the default connection profile
Click to set up the
connection;
2. Connect to the internet with the user-defined profile
Click , select Connection Profile;
Click New, fill in all the parameters, then click ok.
Click Import, Select one item from the list and click
OK.
Note: Contact with your service provider to get the
correct parameters.
9
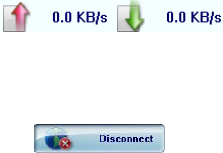
3. Statistics information
The following window will be displayed at lower right
corner of main interface when connecting to the
internet.
4. Disconnect from the internet
Click to disconnect the internet
connection.
10
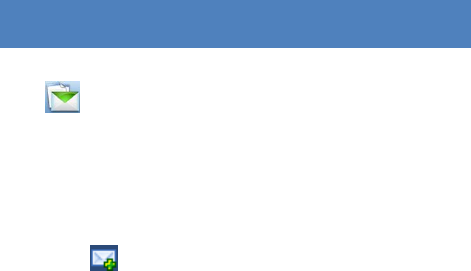
SMS SERVICE
Click to enter SMS (Short Message Service) service
interface.
1. Creating and sending a message.
Click :
Input the recipient number by one of the following
options:
Enter the number directly;
Click Send to, choose the recipient number
from the phonebook and add to the send list ,
then click OK.
Enter the message content;
11
Click Send or Save to Draft. The message will be
saved in the Draft when failed to send.
Note:
You can group send a message at most 100
recipients;
Each number should be separated by “,”;
The message cannot expand 1,530 characters at
most.
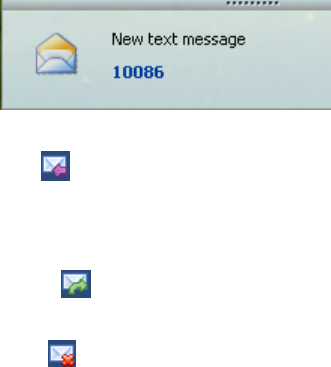
2. Inbox
The following prompt box will be displayed when
received a new message;
12
Reply : Access the edit interface, write the
content, click Send or Save to Draft;
Forward : Forward the selected message;
Delete : Delete the selected message.
Note:
The new message will be saved in PC when 4G
Connect running only, else in (U)SIM instead;
You can use “Shift” or “Ctrl” to selected several
messages;
13
3. Outbox
The message in the Outbox can be deleted or forwarded.
4. Draft
The MSG sent unsuccessfully will be saved in the
Draft .
Click the selected message;
Confirm the recipient and the content, and click
Send or Save to Draft.
5. Recycle
All deleted information will be saved in the Recycle.
6. The selected SMS can be operated as follows:
Save number
14
To save the sender’s information to the (U)SIM
card or PC.
Delete text message
To delete the selected message.
Move to
To move the selected message to Outbox or Draft.
Copy to
To copy the selected message to Outbox or Draft.
SMS Export
Right-click the selected the message;
Click SMS Export ;
Specify the path and the file name, and click
Save.
Note: The exported message will be saved as a *.csv file.
15
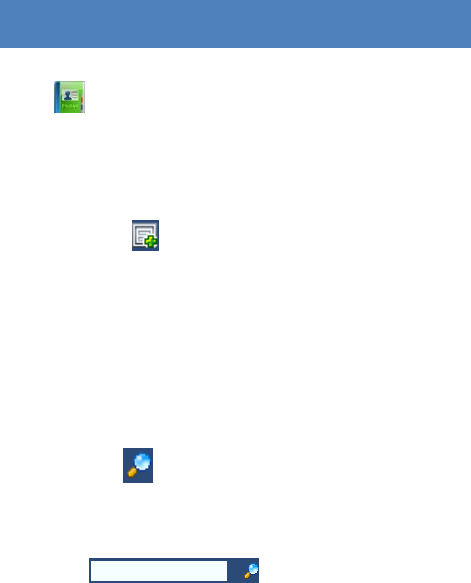
CONTACTS
Click to enter Contacts interface.
1. New
Click ;
Enter the Name and Mobile, and save it in the
(U)SIM card or PC.
2. Search a contact
Click ;
Enter the key characters of you want to find in the
;

16
The result will be displayed in turn.
3. View a contact
Click Local or (U)SIM to display the contacts
interface accordingly;
Select a contact, then you can operate as follows:
Edit : Modify the selected contact;
Delete : Delete the selected contact;
Send SMS : Send a message to the
selected contact;
Copy to: Copy the contact between (U)SIM
card and PC.
17
Note: The deleted contact information cannot be
retrieved.
4. Import
Right-click the mouse;
Click Contacts Import;
Select the *.vcf or *.csv file and click Open;
The import file will be saved in the current
interface.
5. Export
Right-click the selected contact;
Click Contacts Export;
18
You can saved the contact file as *.csv file or *.vcf
file;
Confirm the name and the path the file saved, then
click Save.

19
SETTINGS
Click to list the functions.
1. PIN Management
Enable PIN
Click Enable PIN;
Enter the correct PIN code and click OK.
Note: The PIN code should be a numeric
string of 4-8 digits.
Disable PIN
Click Disable PIN;
20
Enter the correct PIN code and click OK.
Modify PIN
Click Modify PIN;
Enter the old PIN code and new PIN code,
confirm the new PIN code and click OK.
2. Connection Profile
Click the shortcut button, you can enter Profile
Management page to set APN information.
3. Contacts Import
For more details, refer to Internet Contacts-4.
4. Contacts Export
For more details, refer to Internet Contacts-5.
21
5. SMS Export
For more details, refer to Internet Text Message-5.
6. Help &About
Help: To open the User Manual;
About: To get the PC Suite software information.
7. Options
General
You may choose the alert tone when
connected/disconnected to the internet.
Text Message Setting
22
You may active the message alert tone, and
also can set up your favorite tone via
selecting a *.wav file in the PC.
The number showed in the SMS center is
read from the (U)SIM card automatically;
modification is not recommended;
Note: SMS would not work with the wrong SMSC.
Contact with the service provider to get the
correct SMSC.
You may select the period in the drop-box, it
specifies the validity which the message
would save in the network;
Note: The validity setting of SMS should be
supported by the network.
Profile Management
23
For more details, refer to Internet service-2.
Network
Network Type
You can choose Auto or Only UMTS/HSPA or
Only GPRS/EDGE. The device will register
network according to the selected mode.
The default mode is Auto.
Registration Mode
Auto search and register is set as
default value;
Select Manual search and register
before dialing, available networks will
be listed when finished;
24
Select an available network and click
Register, and then the device will try to
register.
Statistics
Daily report
You can view every day’s network statistics
information.
Weekly report
You can view every week’s network statistics
information.
Monthly report
You can view every month’s network
statistics information.
25
Yearly report
You can view every year’s network statistics
information.
Diagnostics
You can view device information, Operator
information, network status and so on
information.
Connection type
You can switch RAS or NDIS type to dial up.
Language selection
You can switch different language.
8. Show Menu Bar
You can display or hide the Menu Bar.

26
FAQS
1. Q: What shall I do if I cannot connect to the internet?
A: Open Settings->Connection Profile, confirm the APN
information right or not. For more details, contact with
your service provider.
2. Q: Why takes so long for installation?
A: According to the different hardware and software
environment, it would take a few minutes for installation.
3. Q: Why can’t I receive the message?
A: Please confirm whether the (U)SIM’s SMS memory is
full or not.
4. Q: Why can’t I register to the internet?
A: Open Settings->Network Selection, check the network
setting.
27
5. Q: Why the software doesn’t run automatically when the
device is plugged in?
A: Click My computer->data card disk->StartModem.exe.
Or run the 4G Connect from Start of the OS if 4G Connect
was installed.
FCC statements:
This device complies with part 15 of the FCC rules. Operation is subject to the
following two conditions: (1) this device may not cause harmful interference, and (2)
this device must accept any interference received, including interference that may
cause undesired operation.
NOTE: The manufacturer is not responsible for any radio or TV interference caused
by unauthorized modifications or changes to this equipment. Such modifications or
changes could void the user’s authority to operate the equipment.
NOTE: This equipment has been tested and found to comply with the limits for a
Class B digital device, pursuant to part 15 of the FCC Rules. These limits are designed
to provide reasonable protection against harmful interference in a residential
installation. This equipment generates uses and can radiate radio frequency energy
and, if not installed and used in accordance with the instructions, may cause harmful
interference to radio communications. However, there is no guarantee that
interference will not occur in a particular installation. If this equipment does cause
harmful interference to radio or television reception, which can be determined by
turning the equipment off and on, the user is encouraged to try to correct the
interference by one or more of the following measures:
‐ Reorient or relocate the receiving antenna.
‐ Increase the separation between the equipment and receiver.
‐Connect the equipment into an outlet on a circuit different from that to which the
receiver is connected.
‐Consult the dealer or an experienced radio/TV technician for help.
The SAR limit of USA (FCC) is 1.6 W/kg averaged over one gram of tissue. Device
types QX610C (FCC ID: 2AFTXQX610C) has also been tested against this SAR limit.
The highest SAR value reported under this standard during product certification for
use when properly worn on the body is 1.146 W/kg.
. This device was tested for typical body‐worn operations with the back of the Dongle
kept 5mm from the body.