ORION ELECTRIC M2G0B VCR/DVD TV Interface Device User Manual Part 1
ORION ELECTRIC CO., LTD. VCR/DVD TV Interface Device Part 1
UserManual.wiki
>
ORION ELECTRIC
>
M2G0B User Manual
>
User Manual Part 1
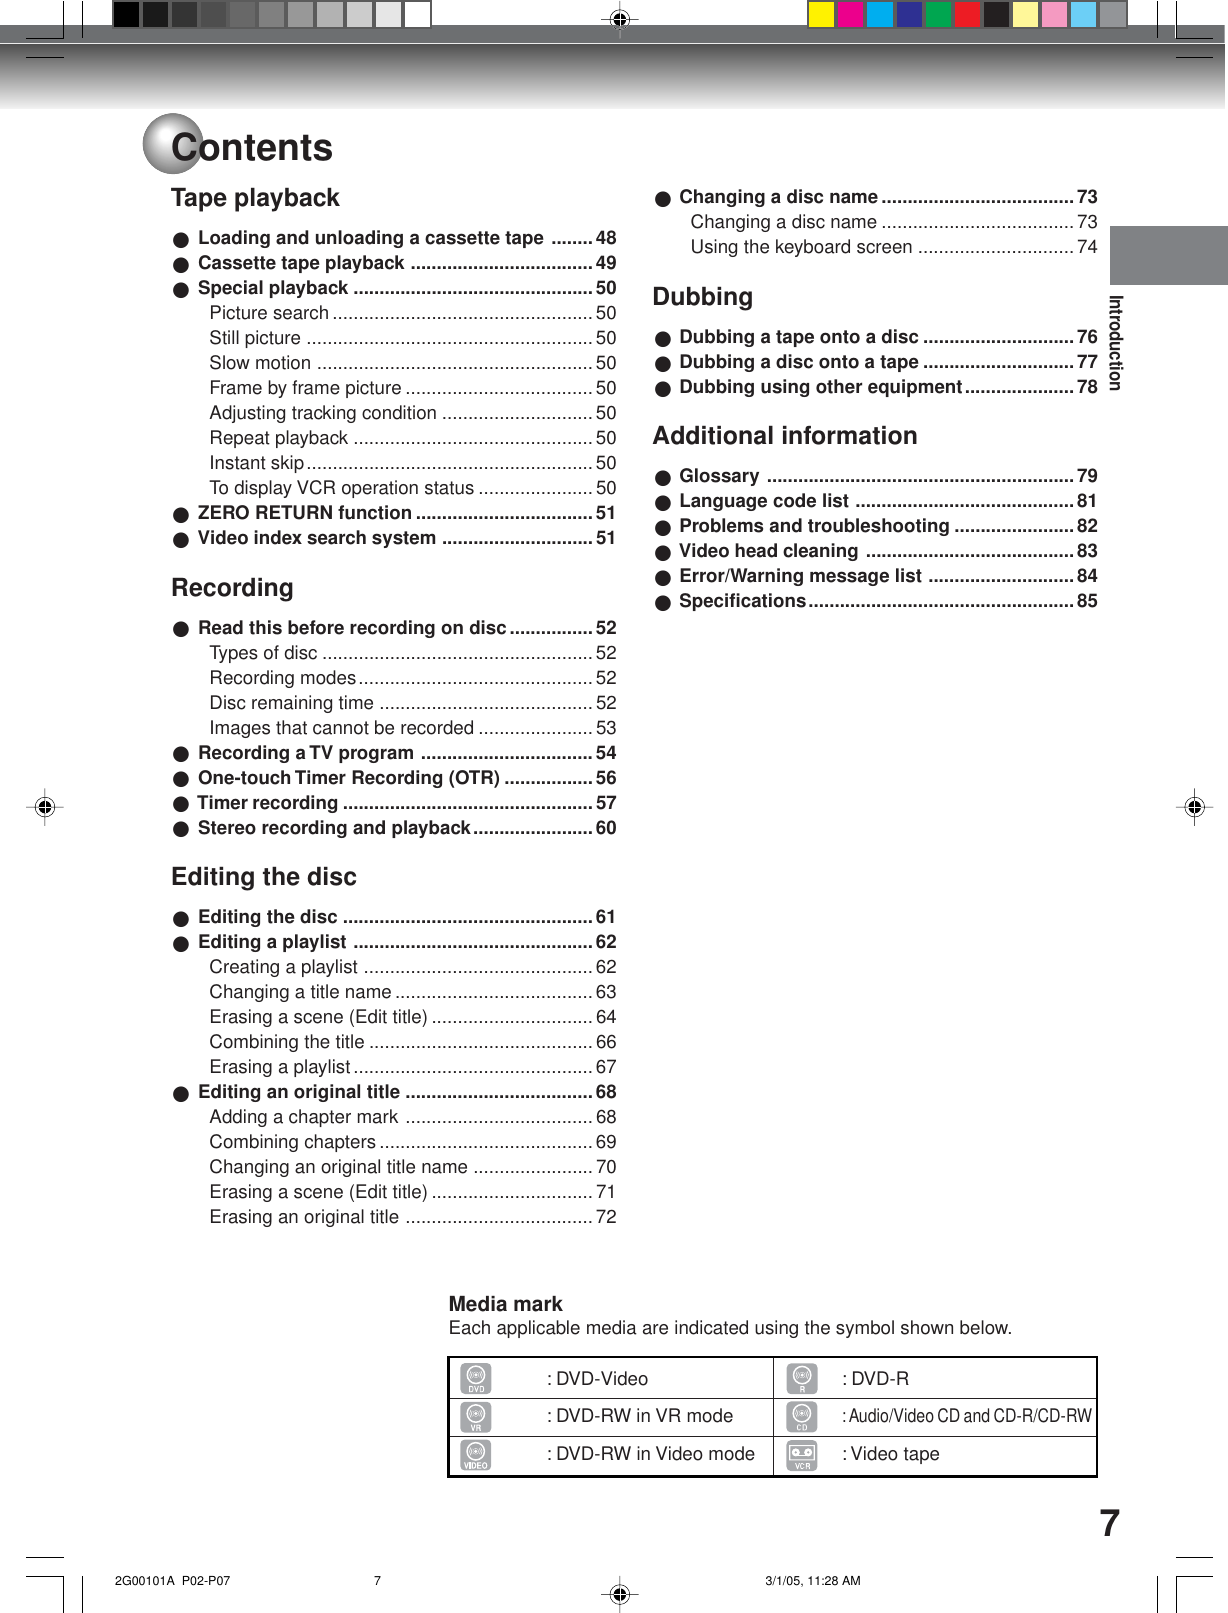
Contents
1.
User Manual Part 1
2.
User Manual Part 2
3.
User Manual Part 3
User Manual Part 1
Navigation menu
Upload a User Manual
Namespaces
Wiki Guide
HTML
PDF
Info
Views
User Manual
Discussion / Help
Navigation


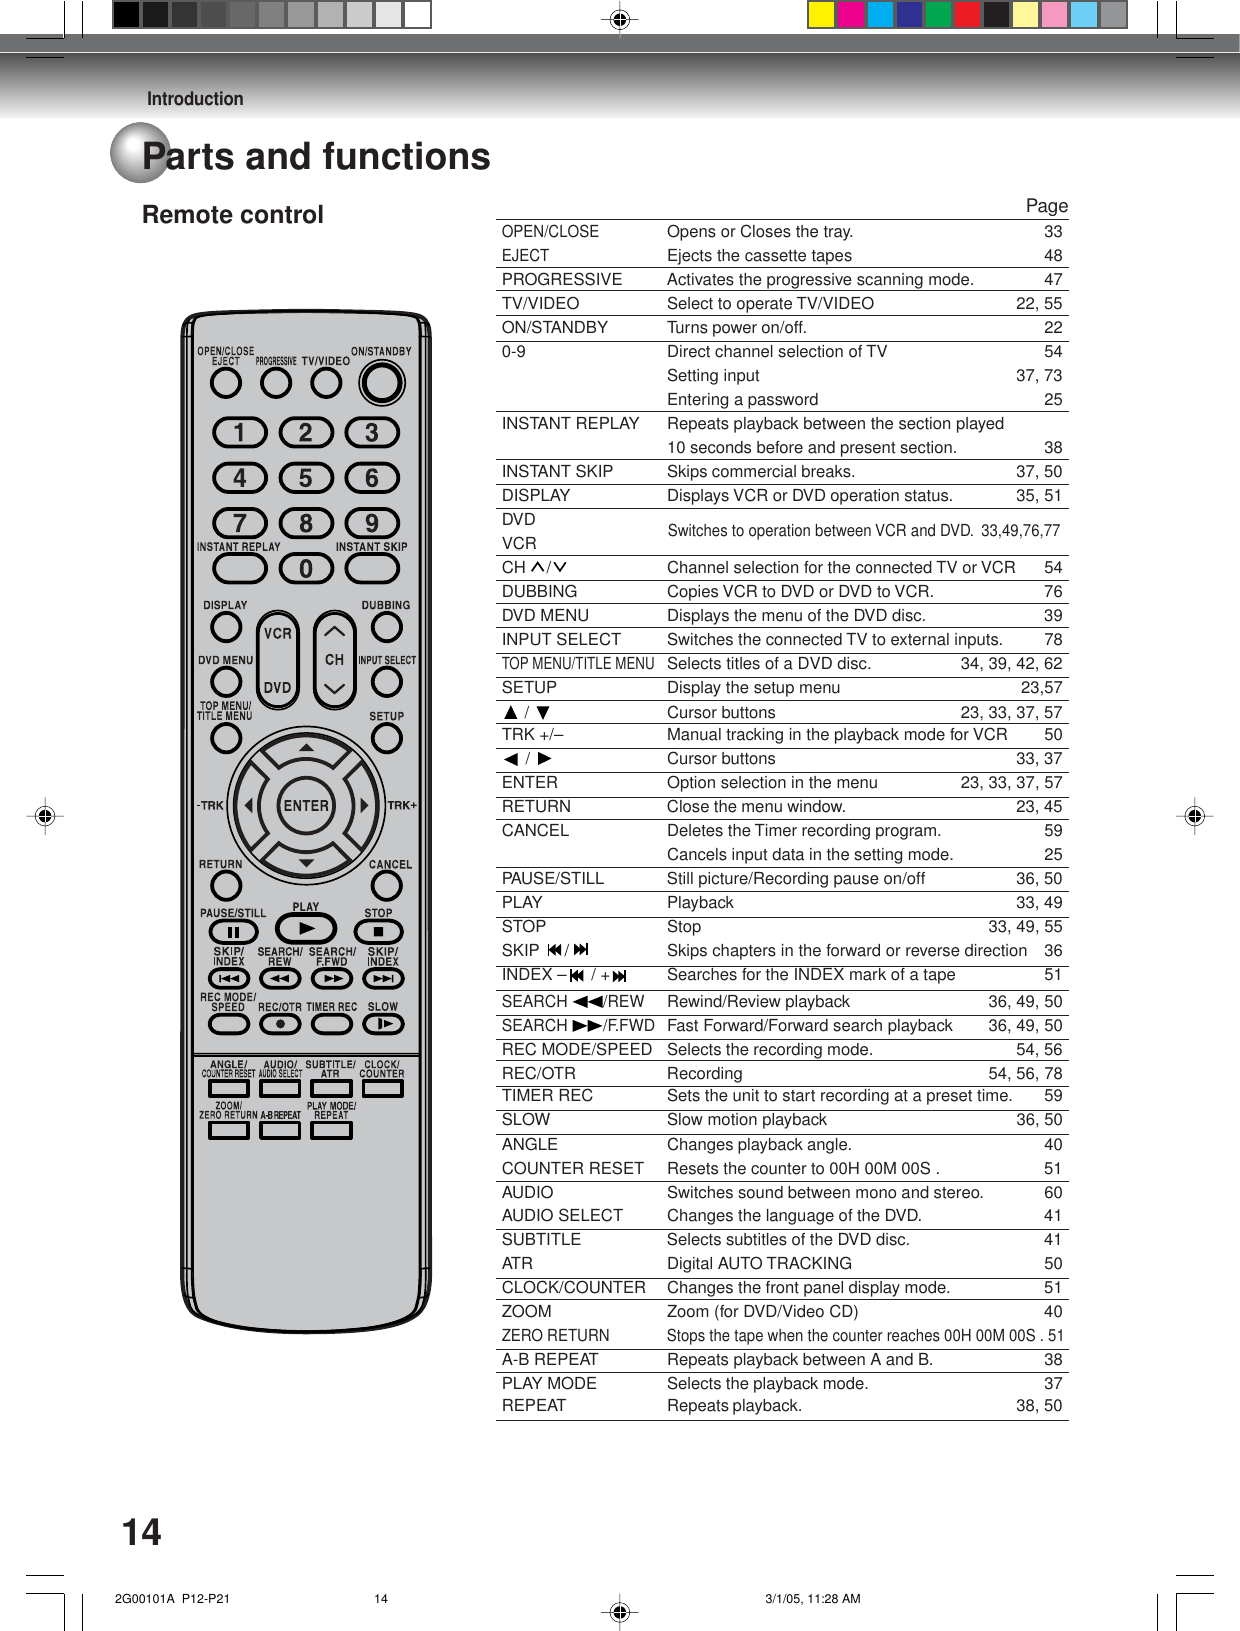
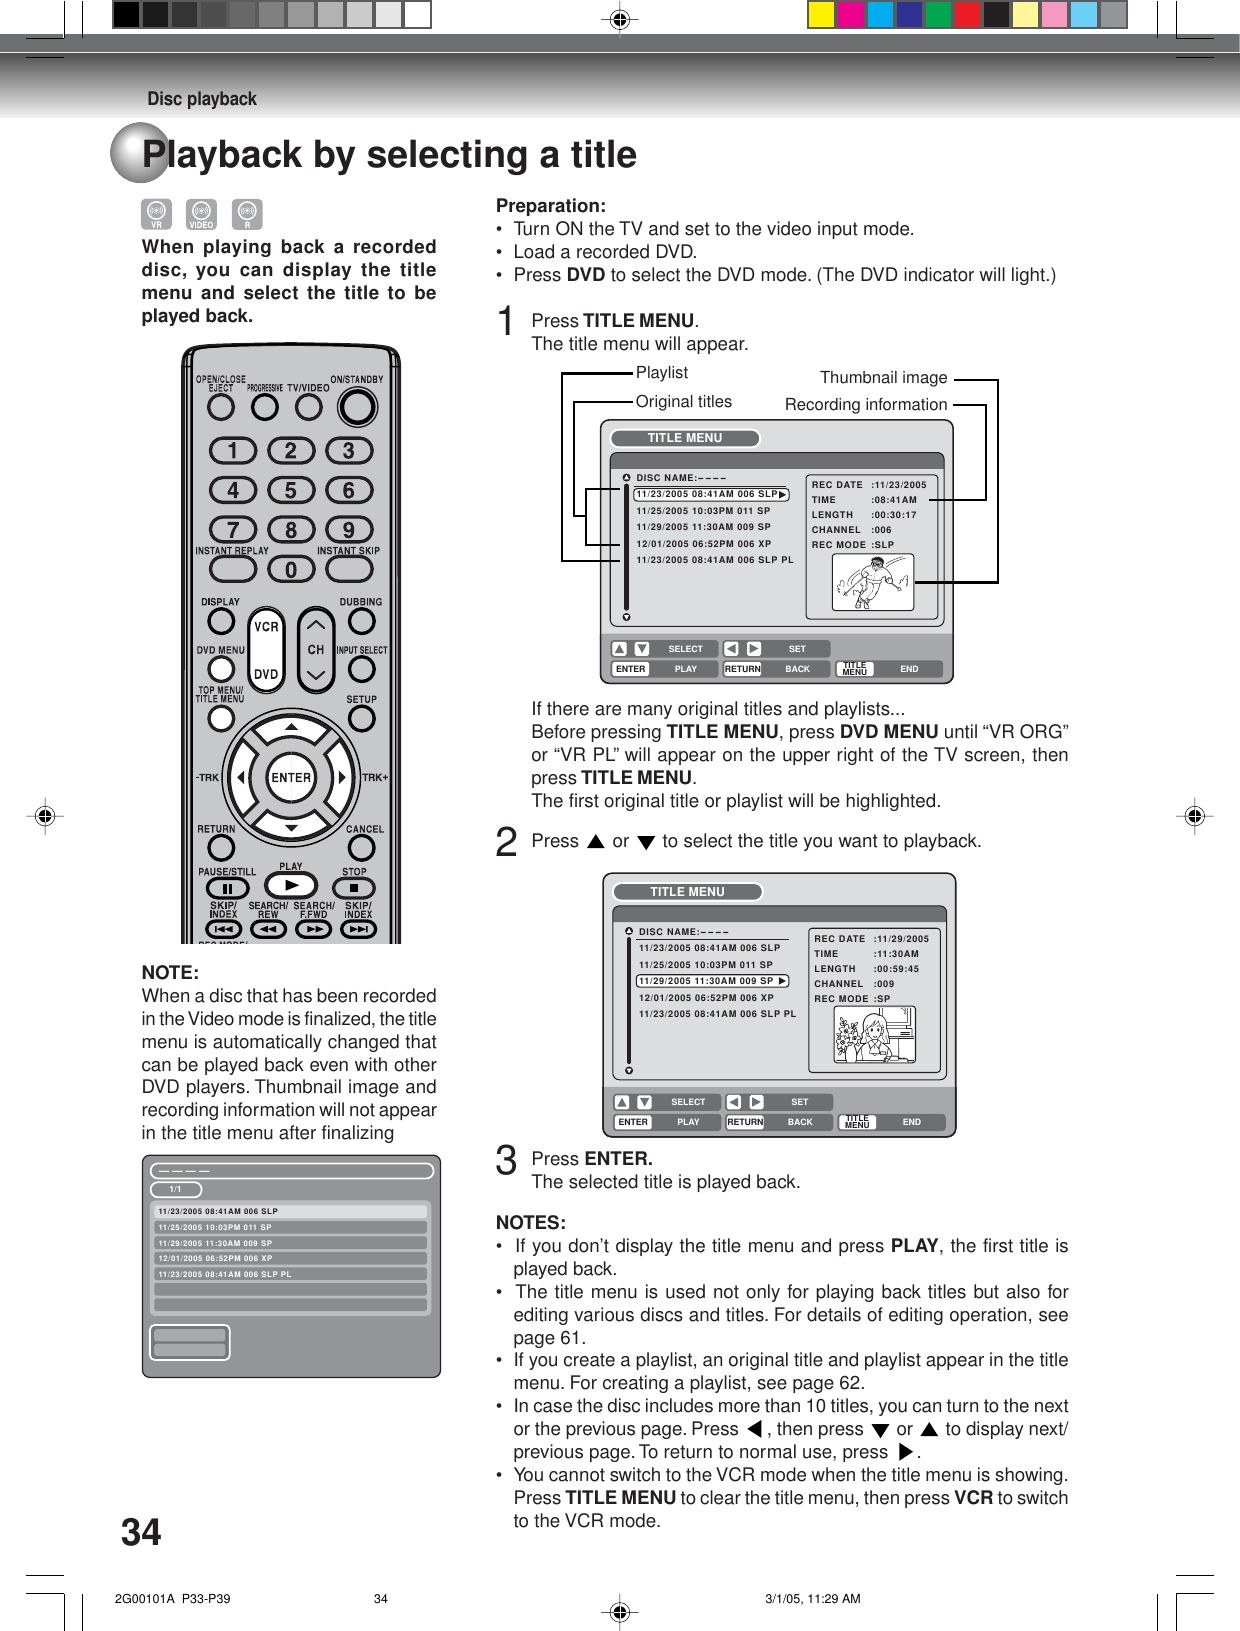
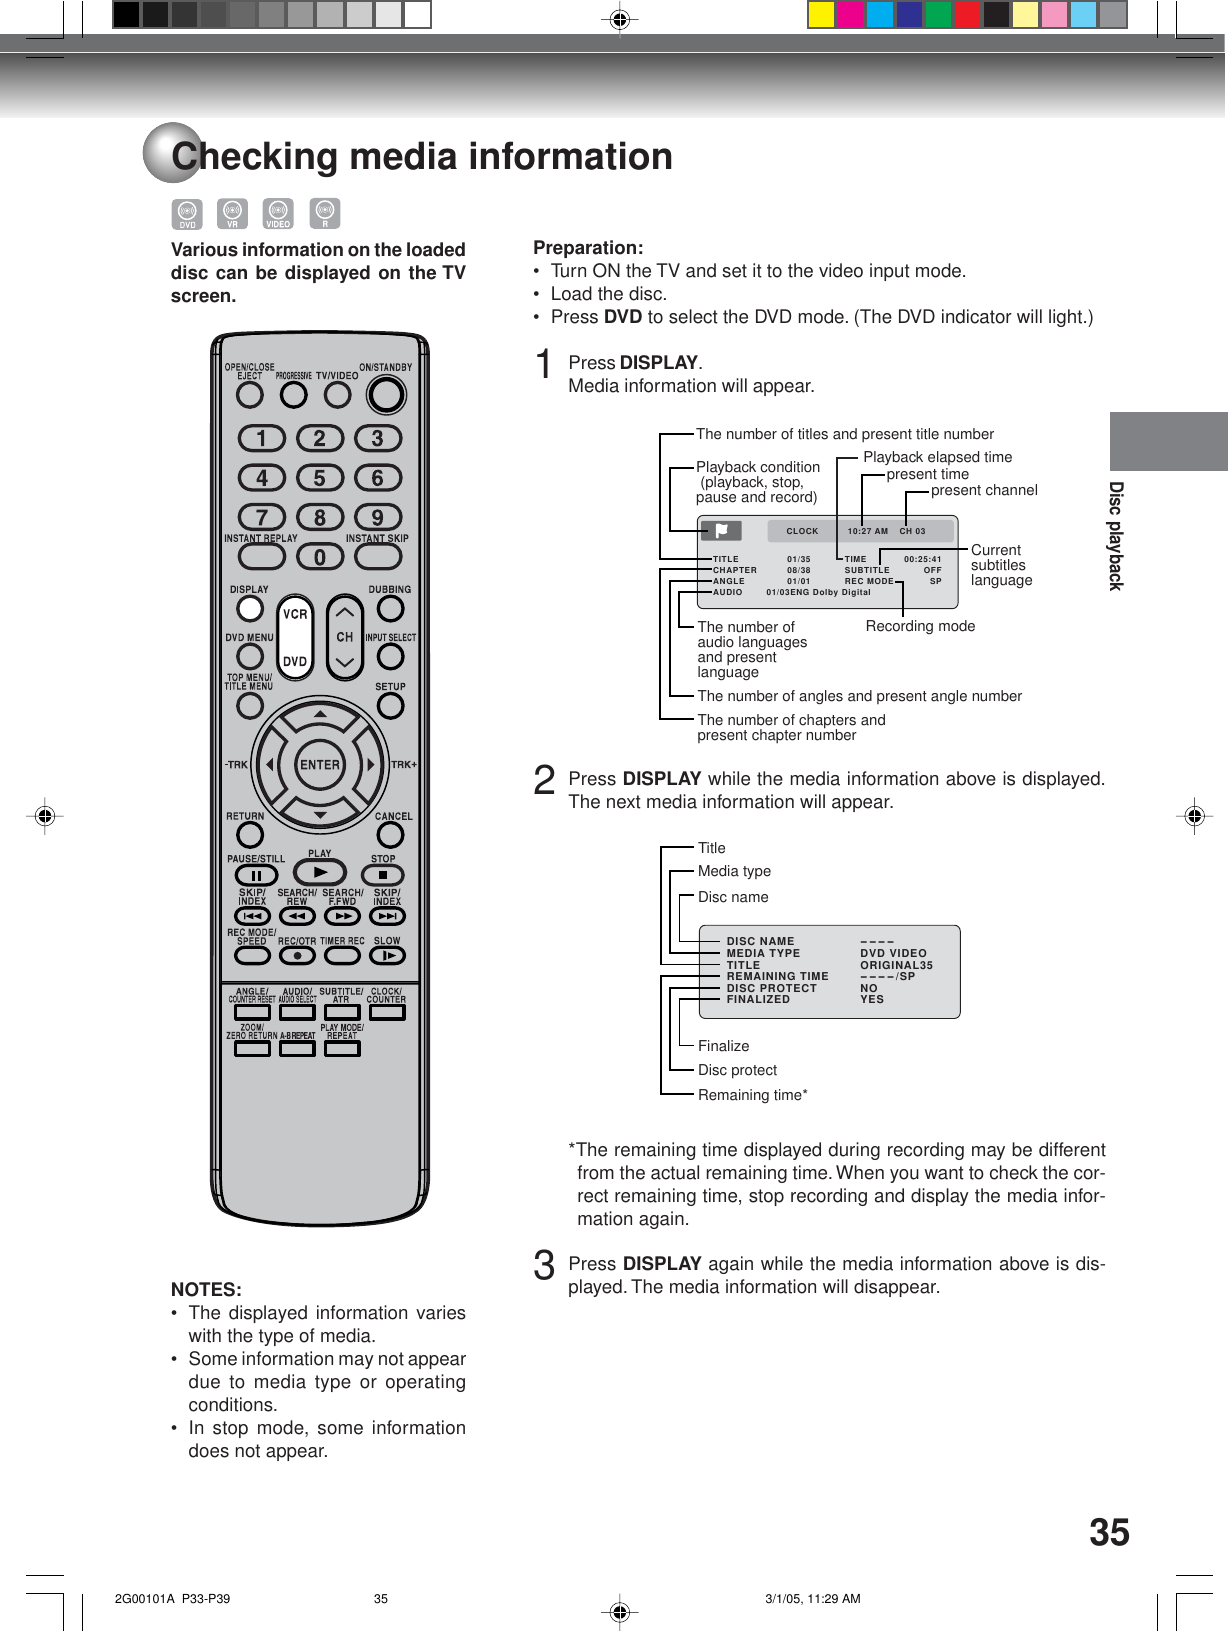
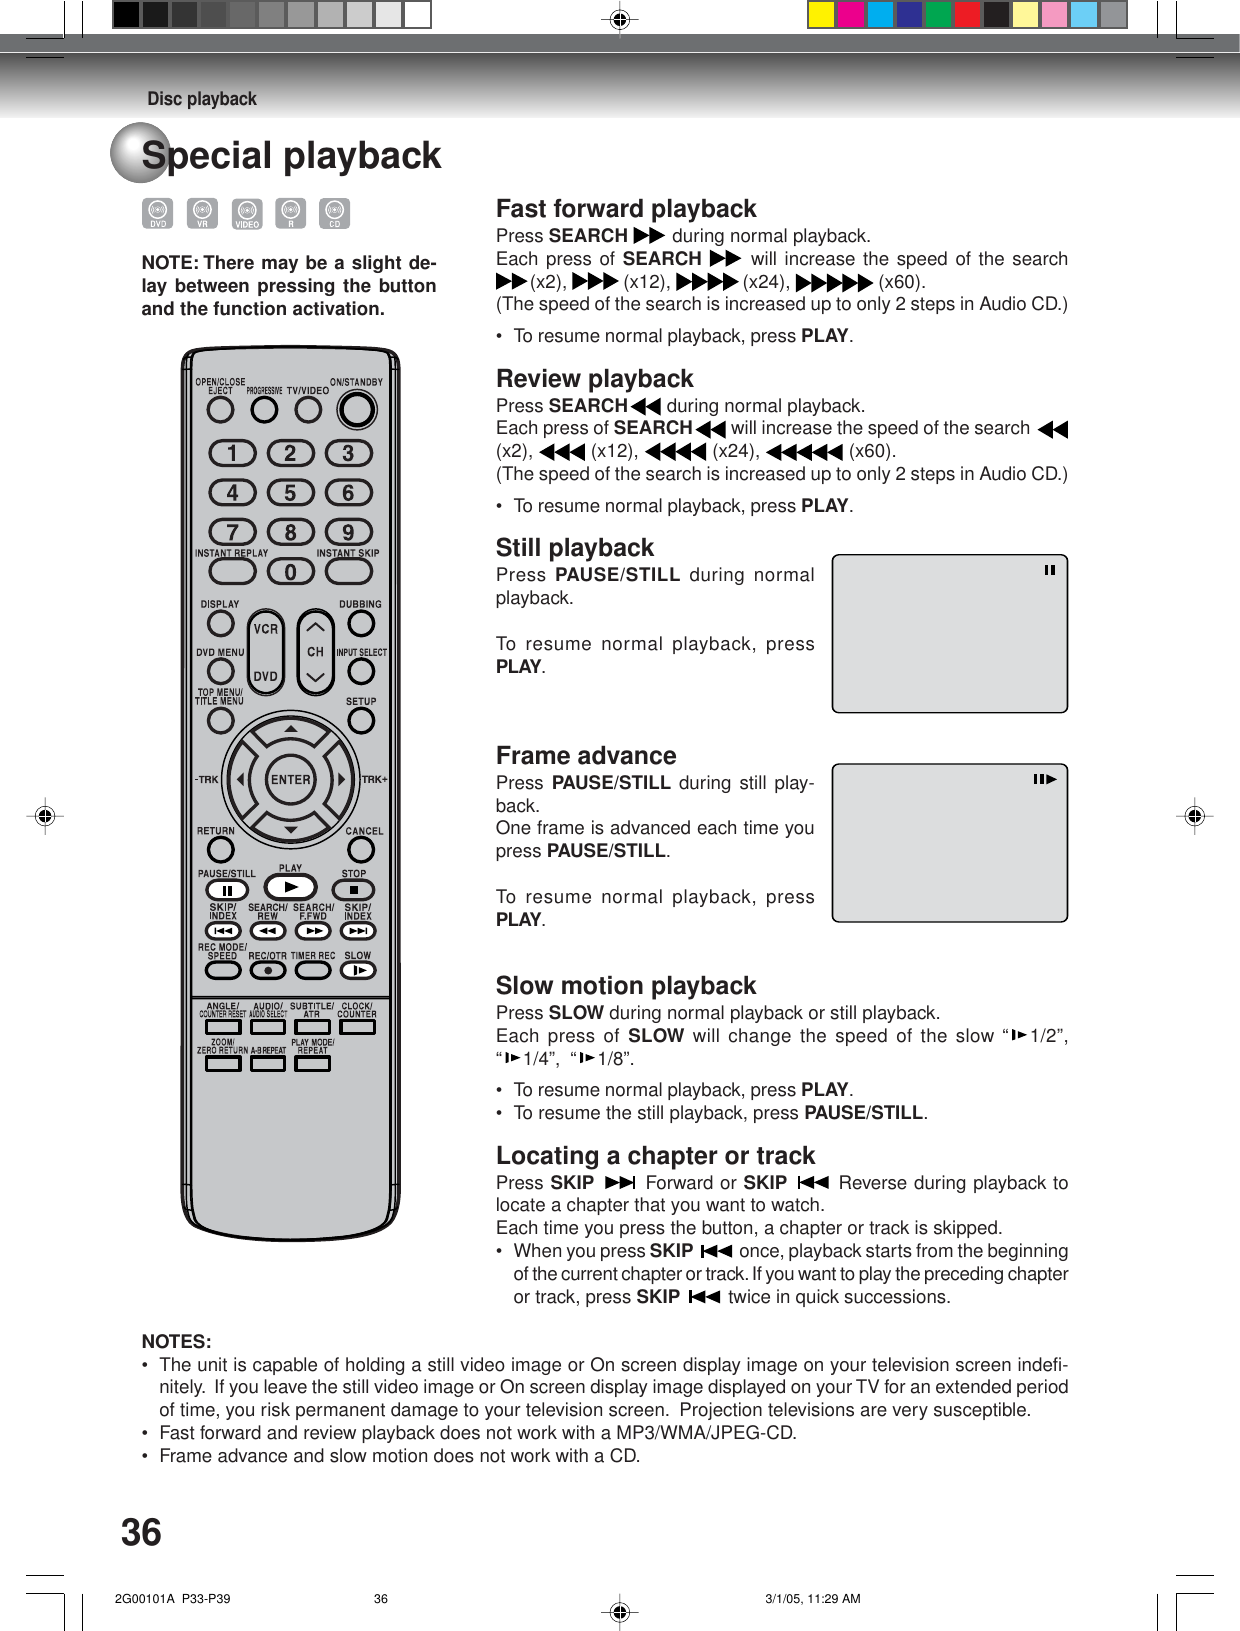
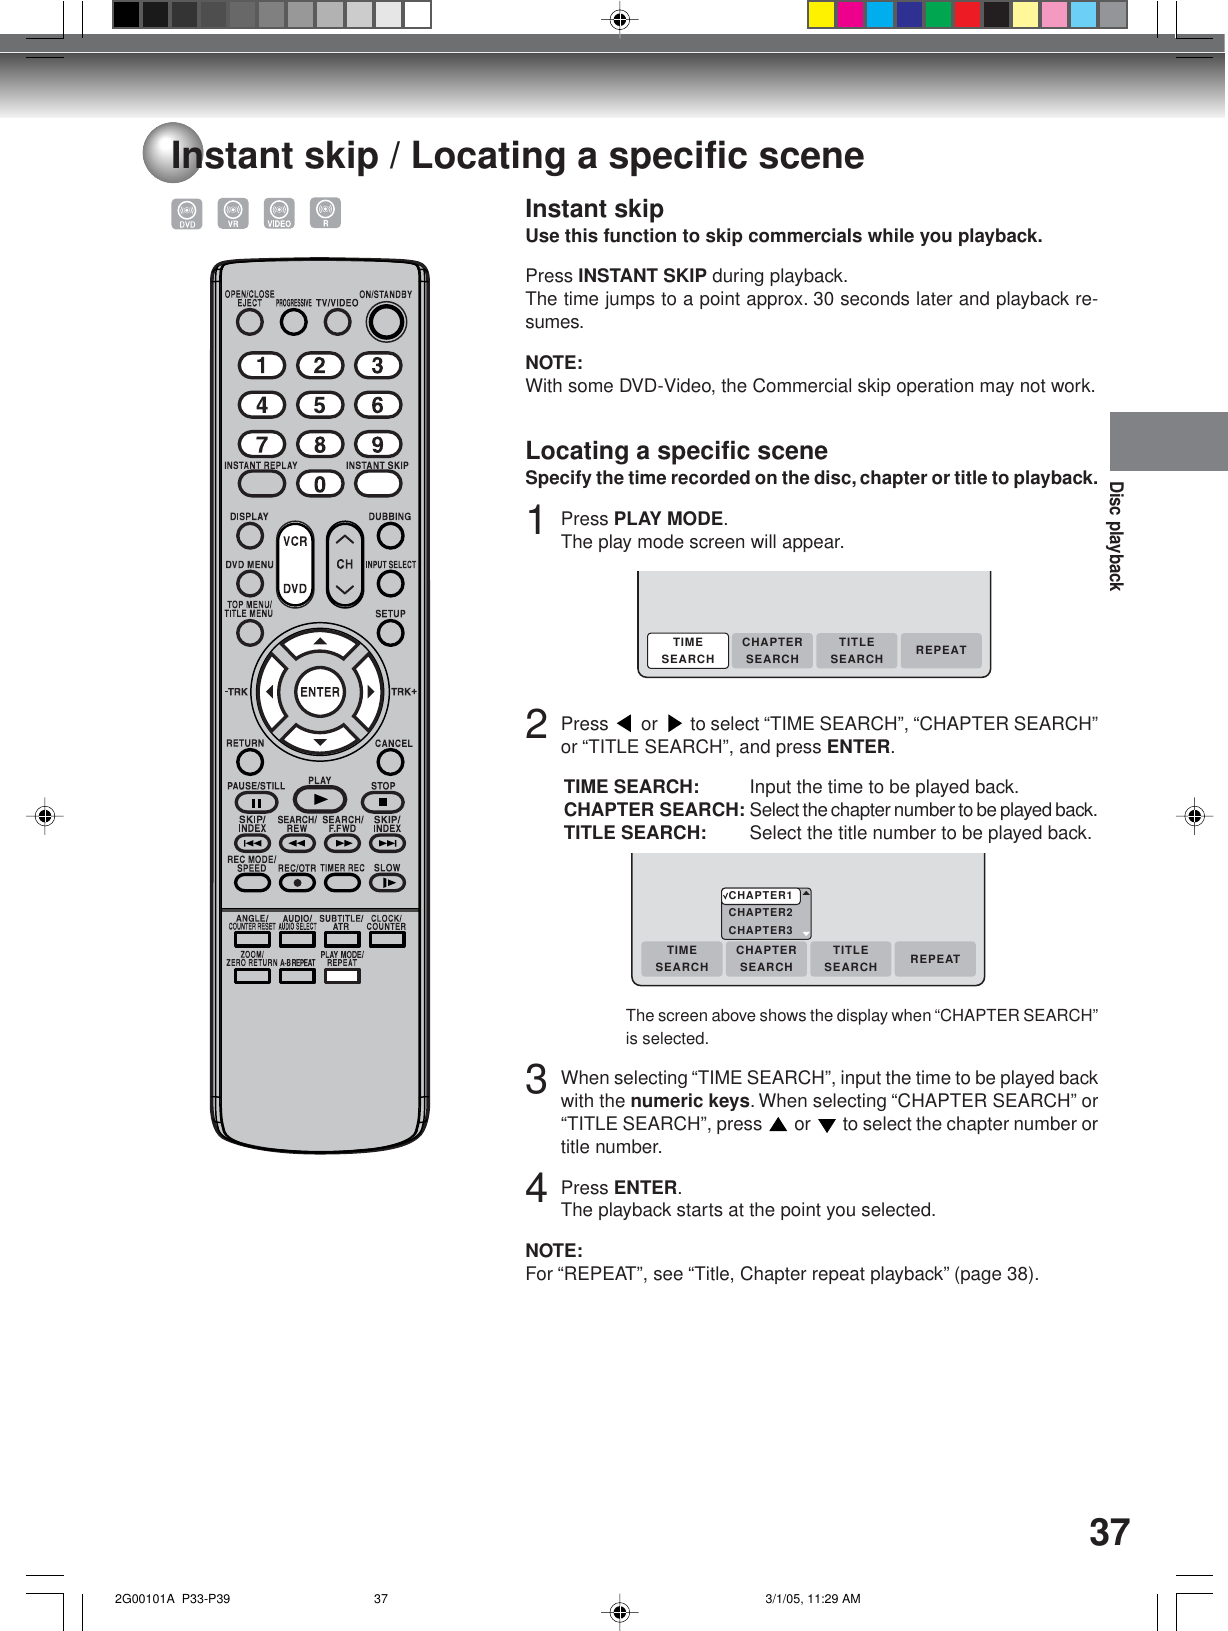
![Introduction13No. Display DescriptionLights during video tape playback.1Parts and functionsNOTE:Some discs may not playback correctly, or chapter number, playback time, etc may not be displayed.Display windowVideo tape is temporarily stopped.Lights during video tape recording.Progressive scanning mode.Timer recording display.PP21 3424Appears when a CD is inserted.Appears when a CD-R is inserted.Appears when a DVD-Video is inserted.Appears when a DVD-R is inserted.Appears when a DVD-RW is inserted.Appears when a DVD-RW in VR mode is inserted. When the disc is set to video mode, VR does not appear.Video tape is in the unit.Clock display (Colon [ : ] flashes).Counter display in hour/minute/second for VCR/DVD, minute/second for CD.Cable TV channel display.TV channel display.Track number display for CD.Display for afternoon (out in the morning).The external input channel (L1 or L2) display.Error display.Lights during playback of DVD and CD. Flashes in auto resume.DVD or CD is temporarily stopped.Lights during DVD recording.CDCD-RDVDDVD-RDVD-RWVR10:0001H00M00SC 36CH2CHTRK 002PML1/L2Err34 DVD recording modes. XP, SP, LP or SLP can be selected in turn by pressing the REC MODE/SPEED repeatedly.2 VCR recording modes. SP or SLP can be selected in turn by pressing the REC MODE/SPEED repeatedly.SP/SLPXP/SP/LP/SLPAppears when a CD-RW is inserted.CD-RWAppears when the tuner built into this unit is not selected. When you press TV/VIDEO disappears.TV 2G00101A P12-P21 3/1/05, 11:28 AM13](https://usermanual.wiki/ORION-ELECTRIC/M2G0B.User-Manual-Part-1/User-Guide-522661-Page-13.png)