ORION ELECTRIC M2H2A VCR/DVD TV Interface Device User Manual 2H20101A E COV
ORION ELECTRIC CO., LTD. VCR/DVD TV Interface Device 2H20101A E COV
UserManual.wiki
>
ORION ELECTRIC
>
M2H2A User Manual
User Manual
Navigation menu
Upload a User Manual
Namespaces
Wiki Guide
HTML
PDF
Info
Views
User Manual
Discussion / Help
Navigation
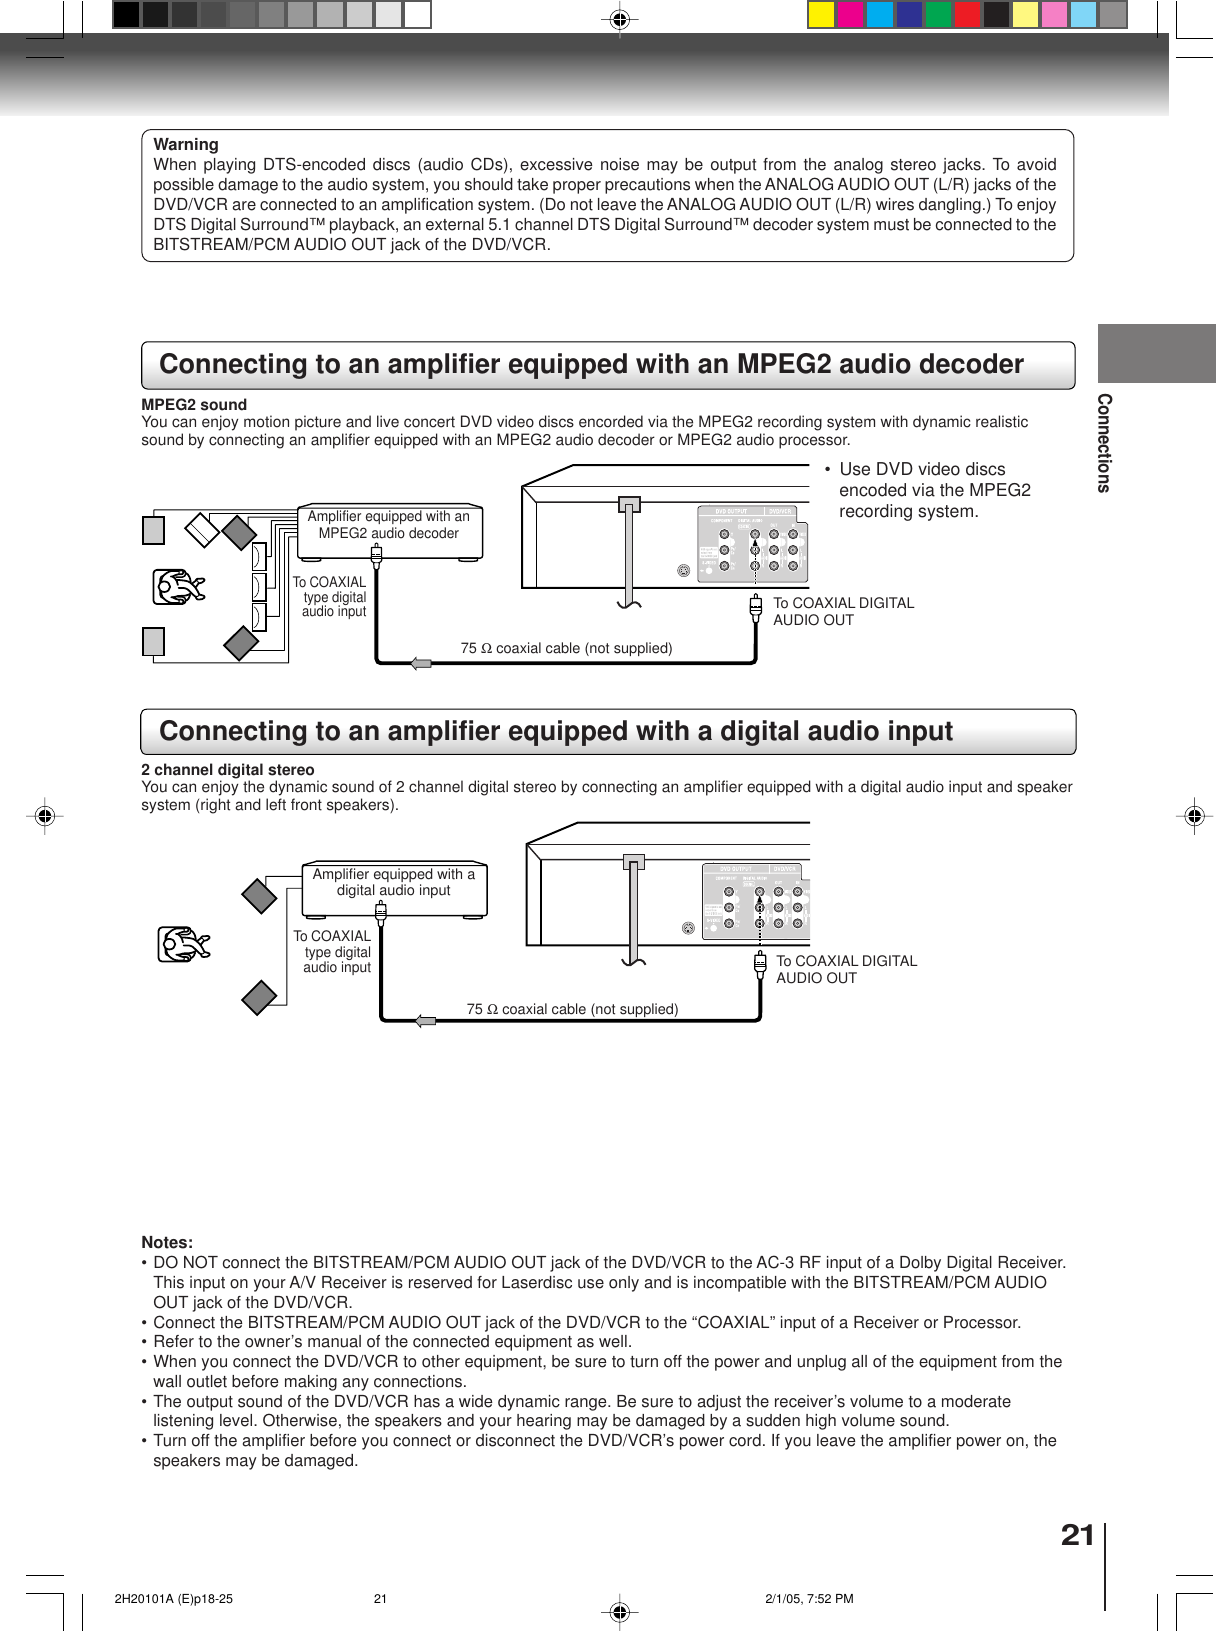
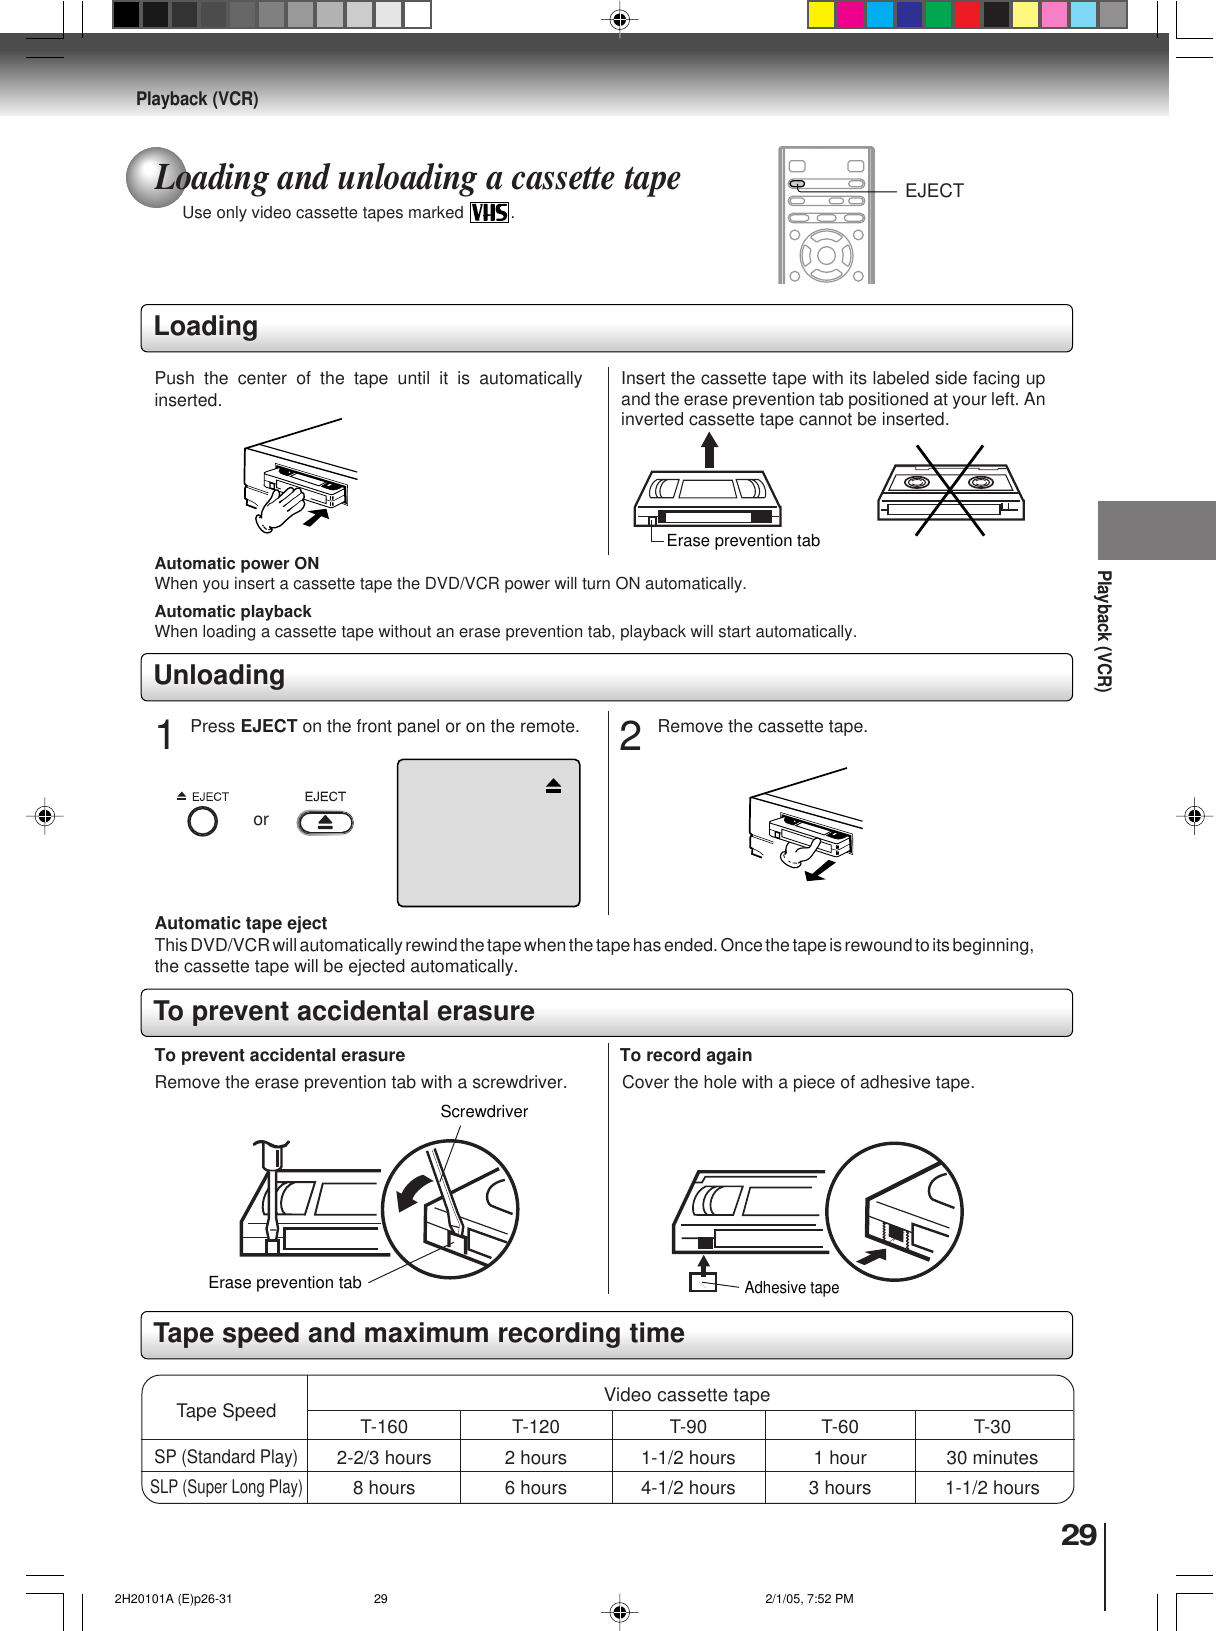
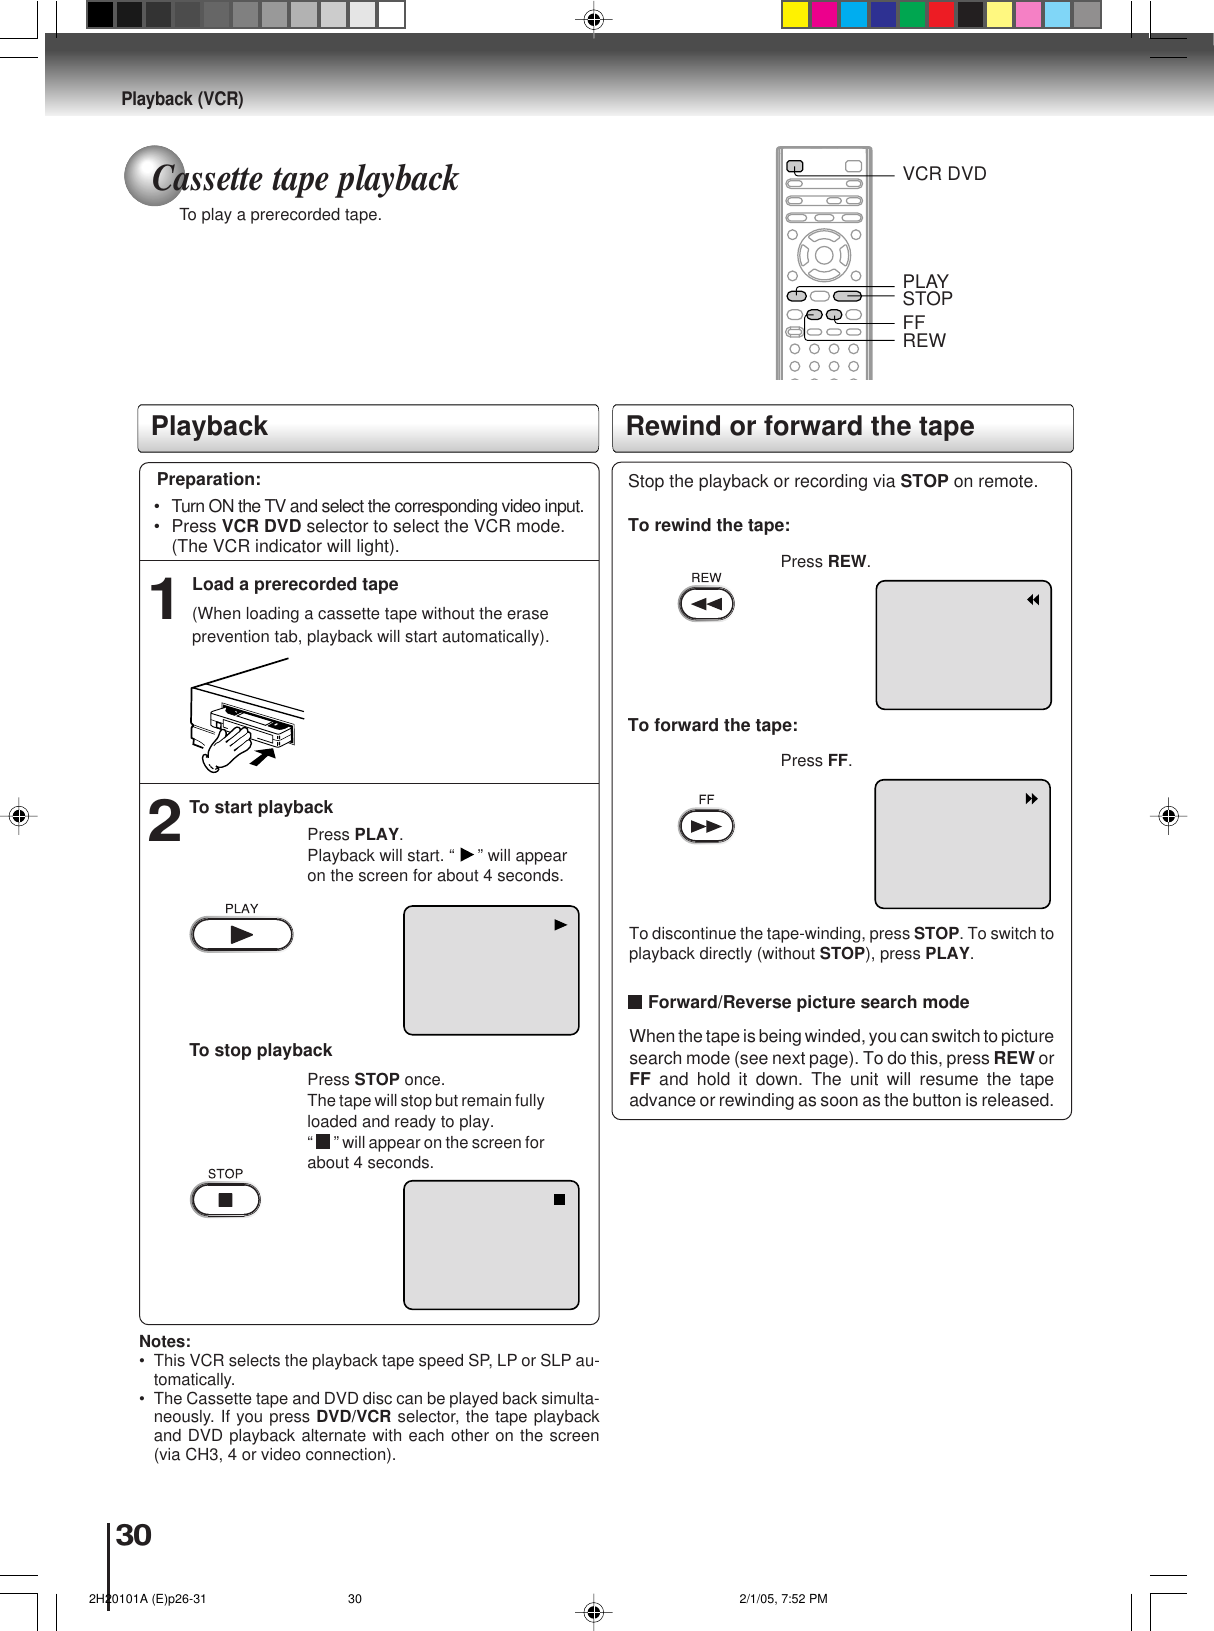
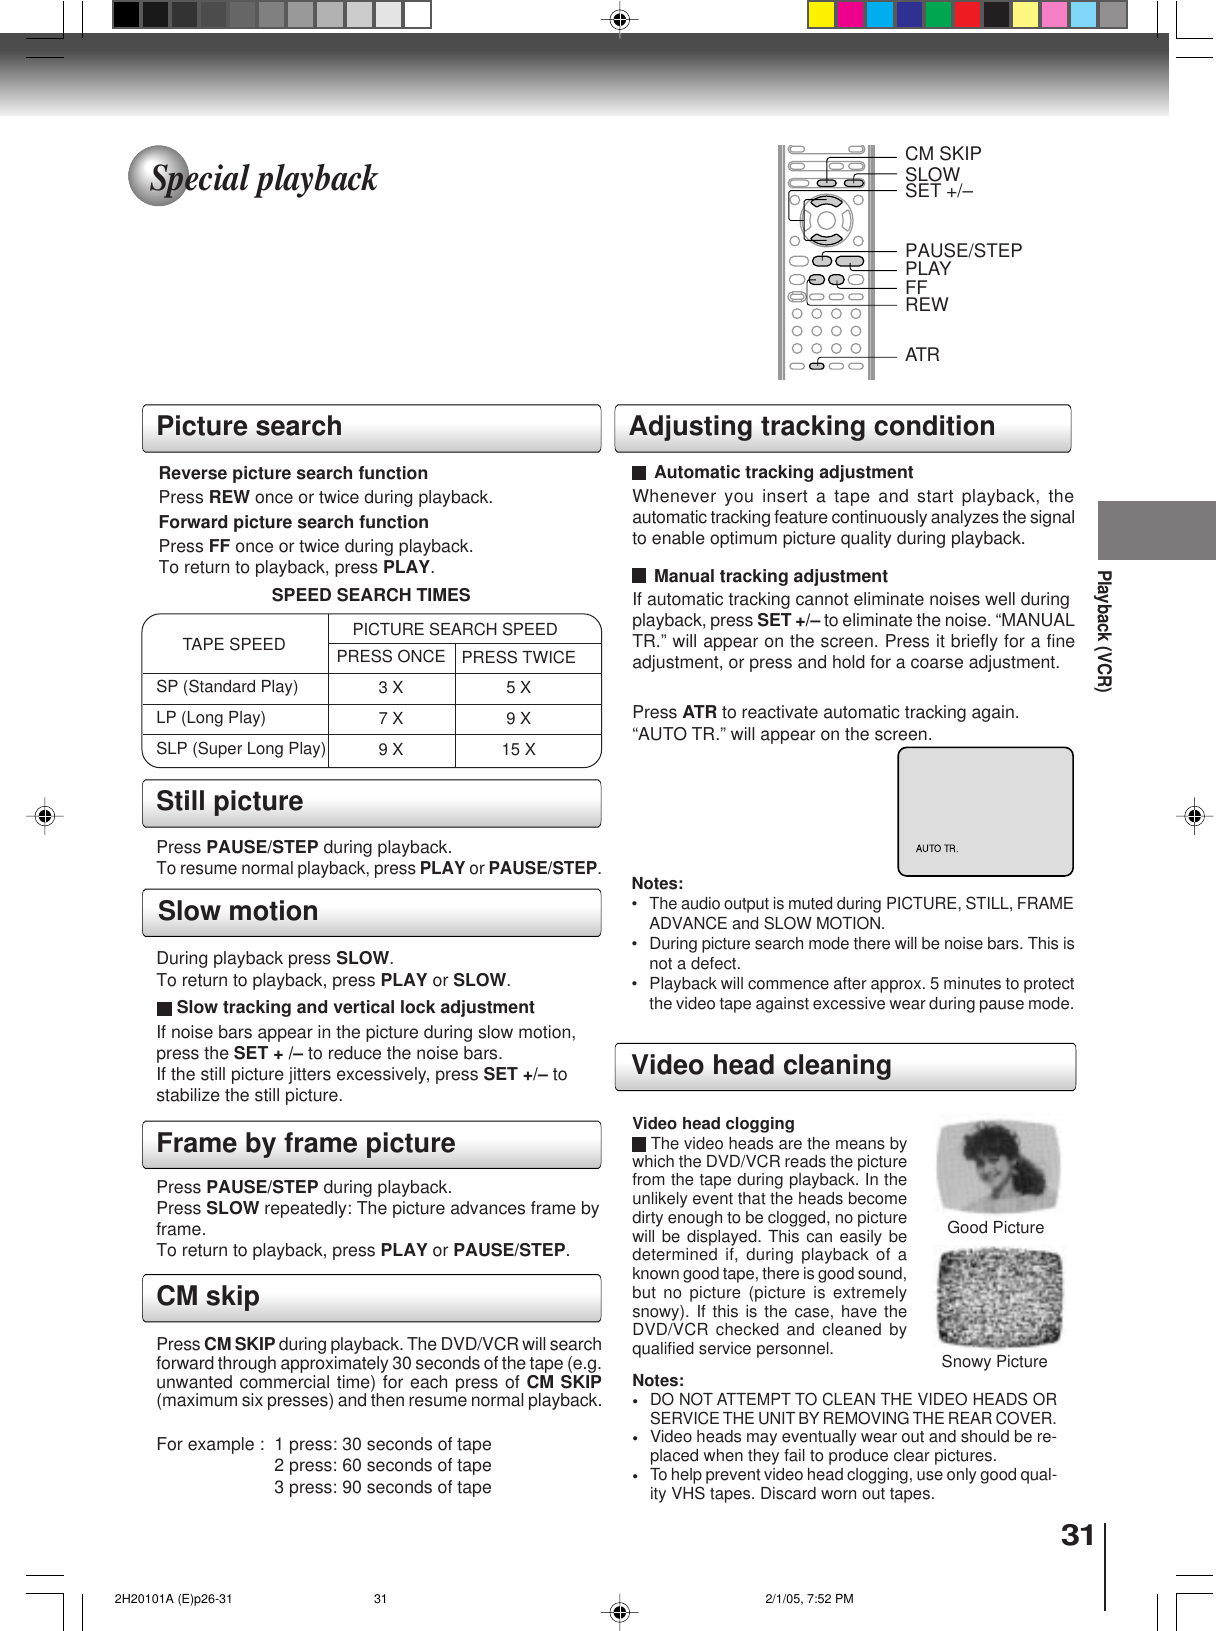
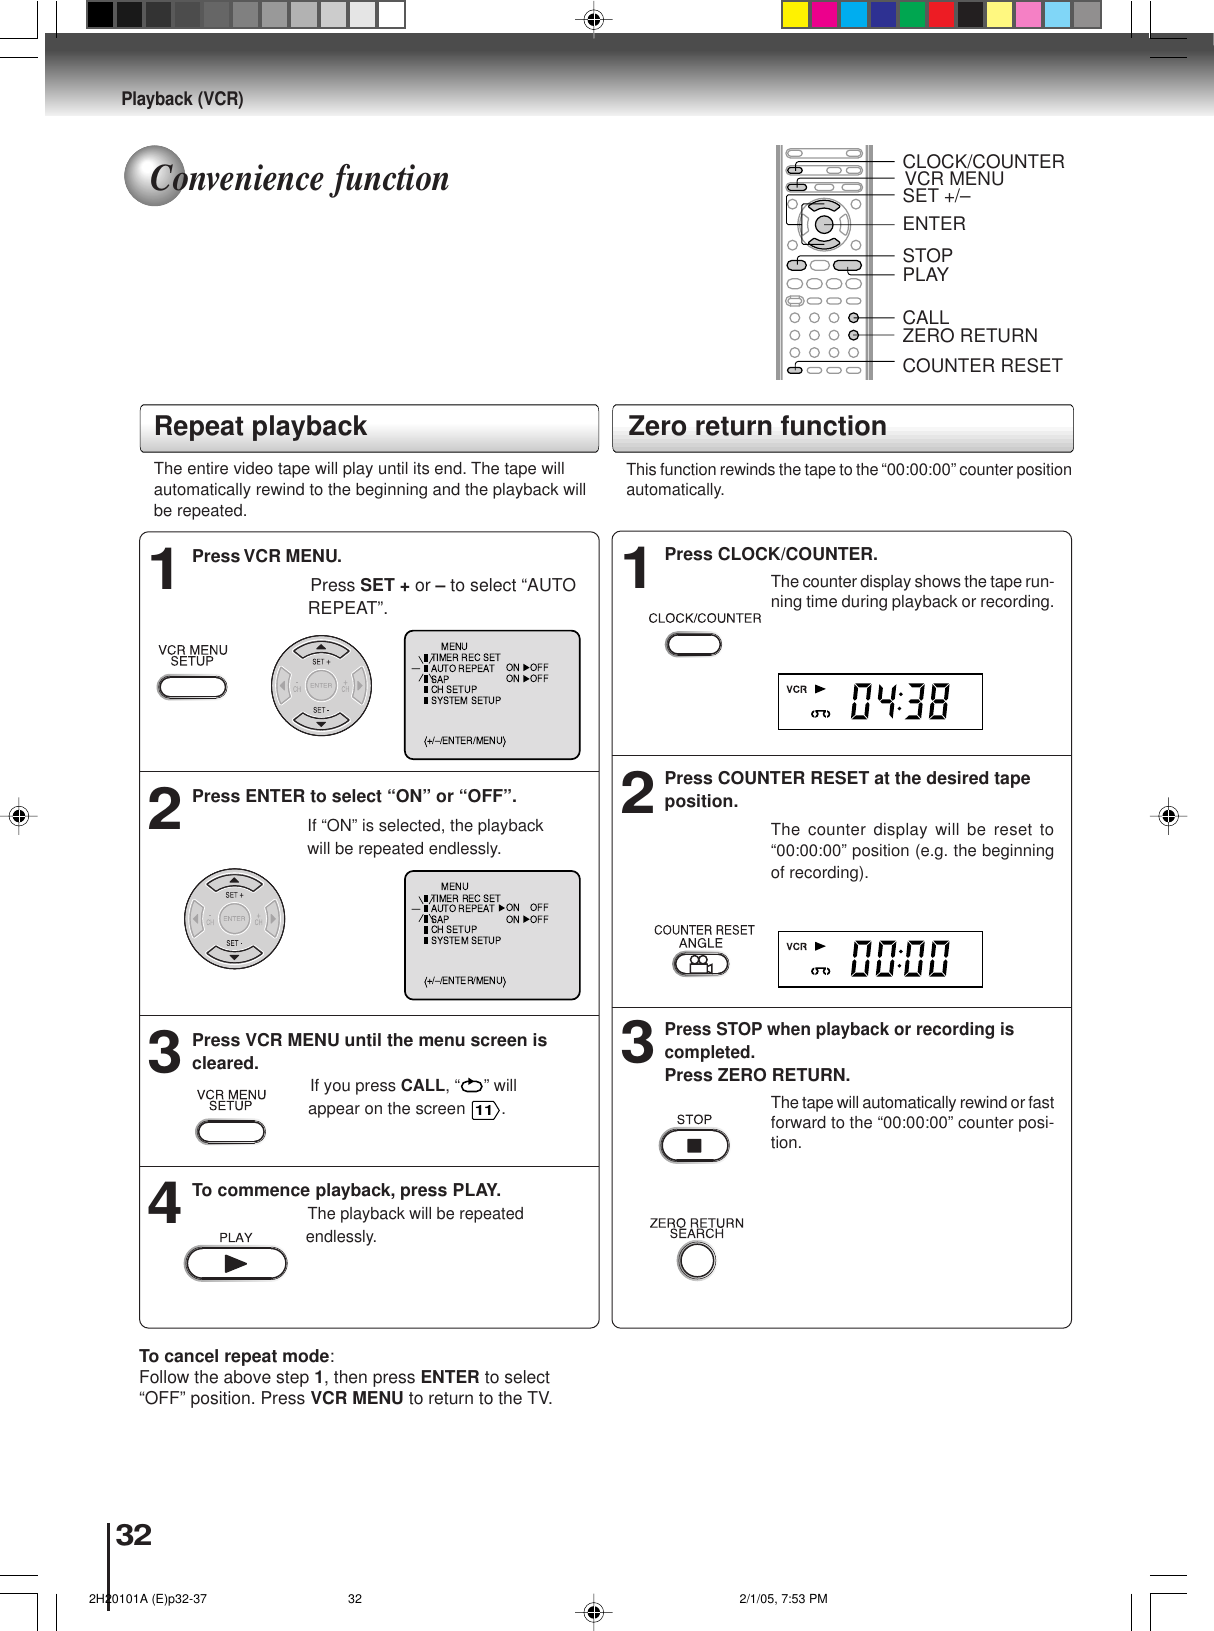
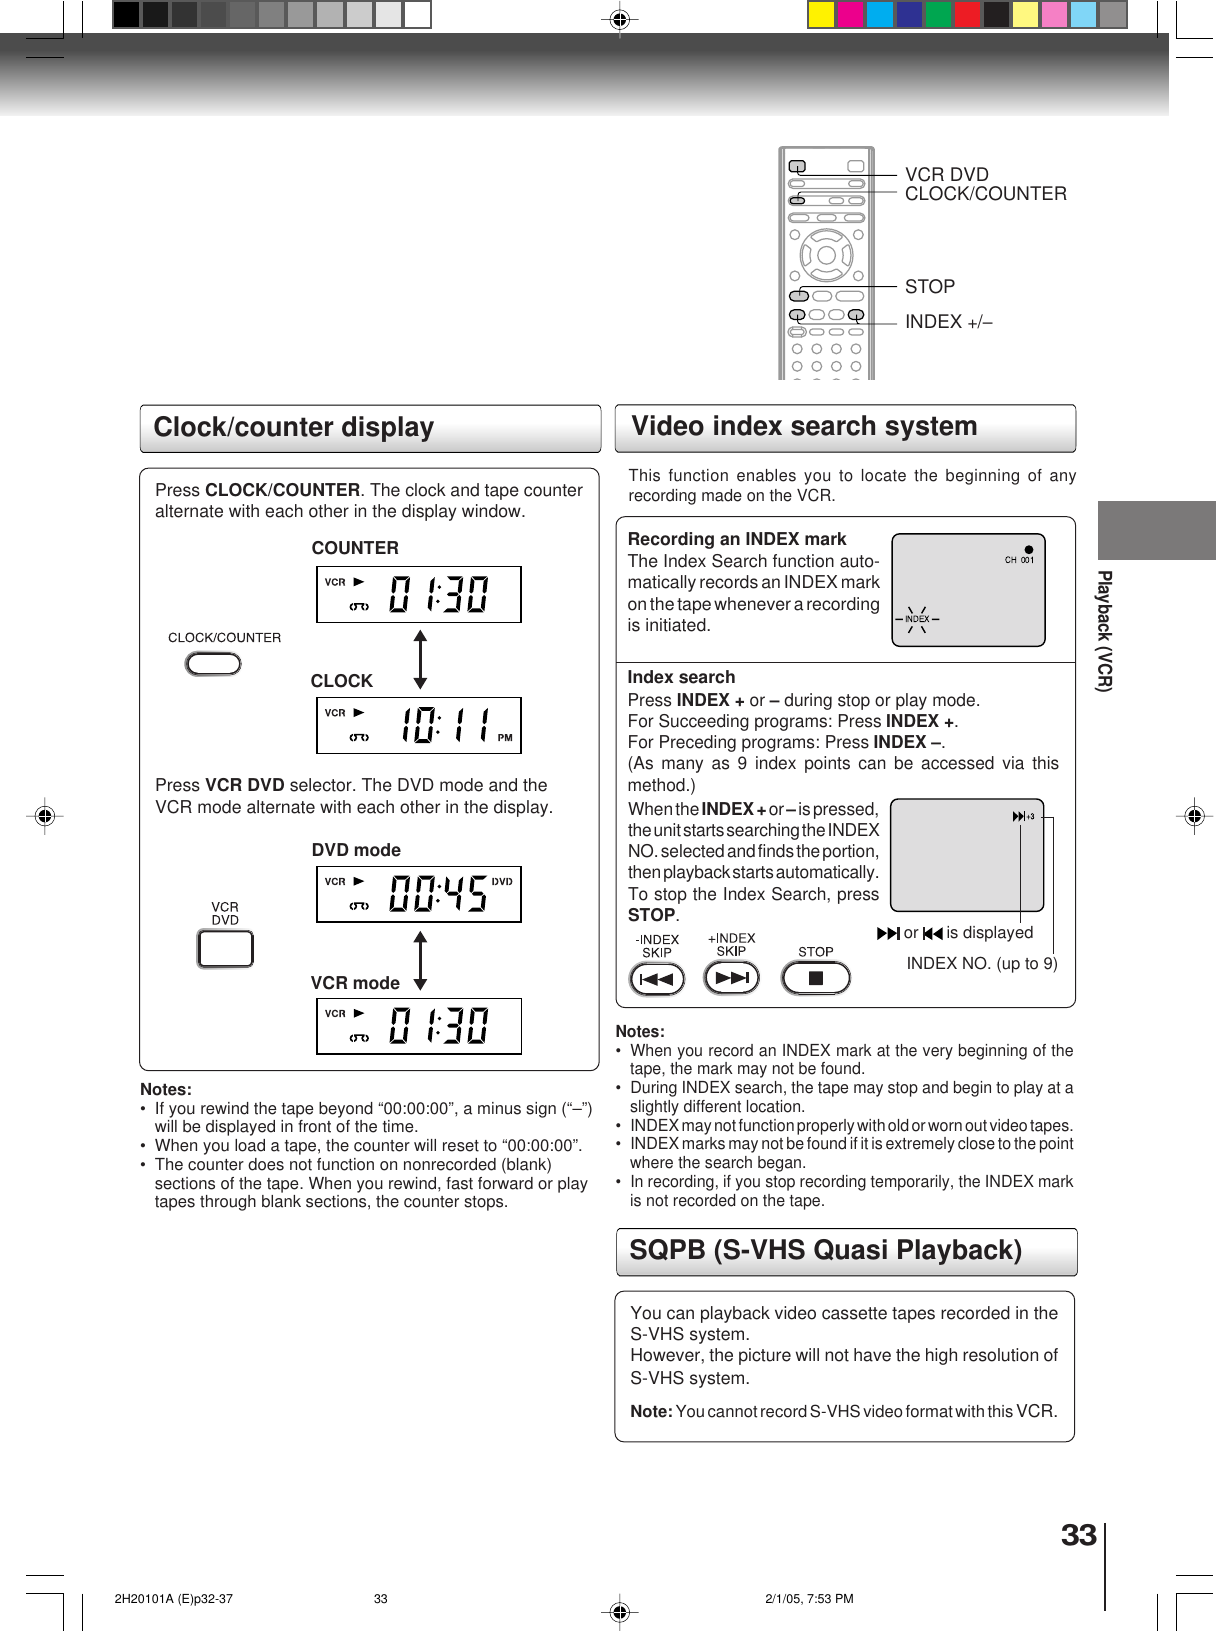
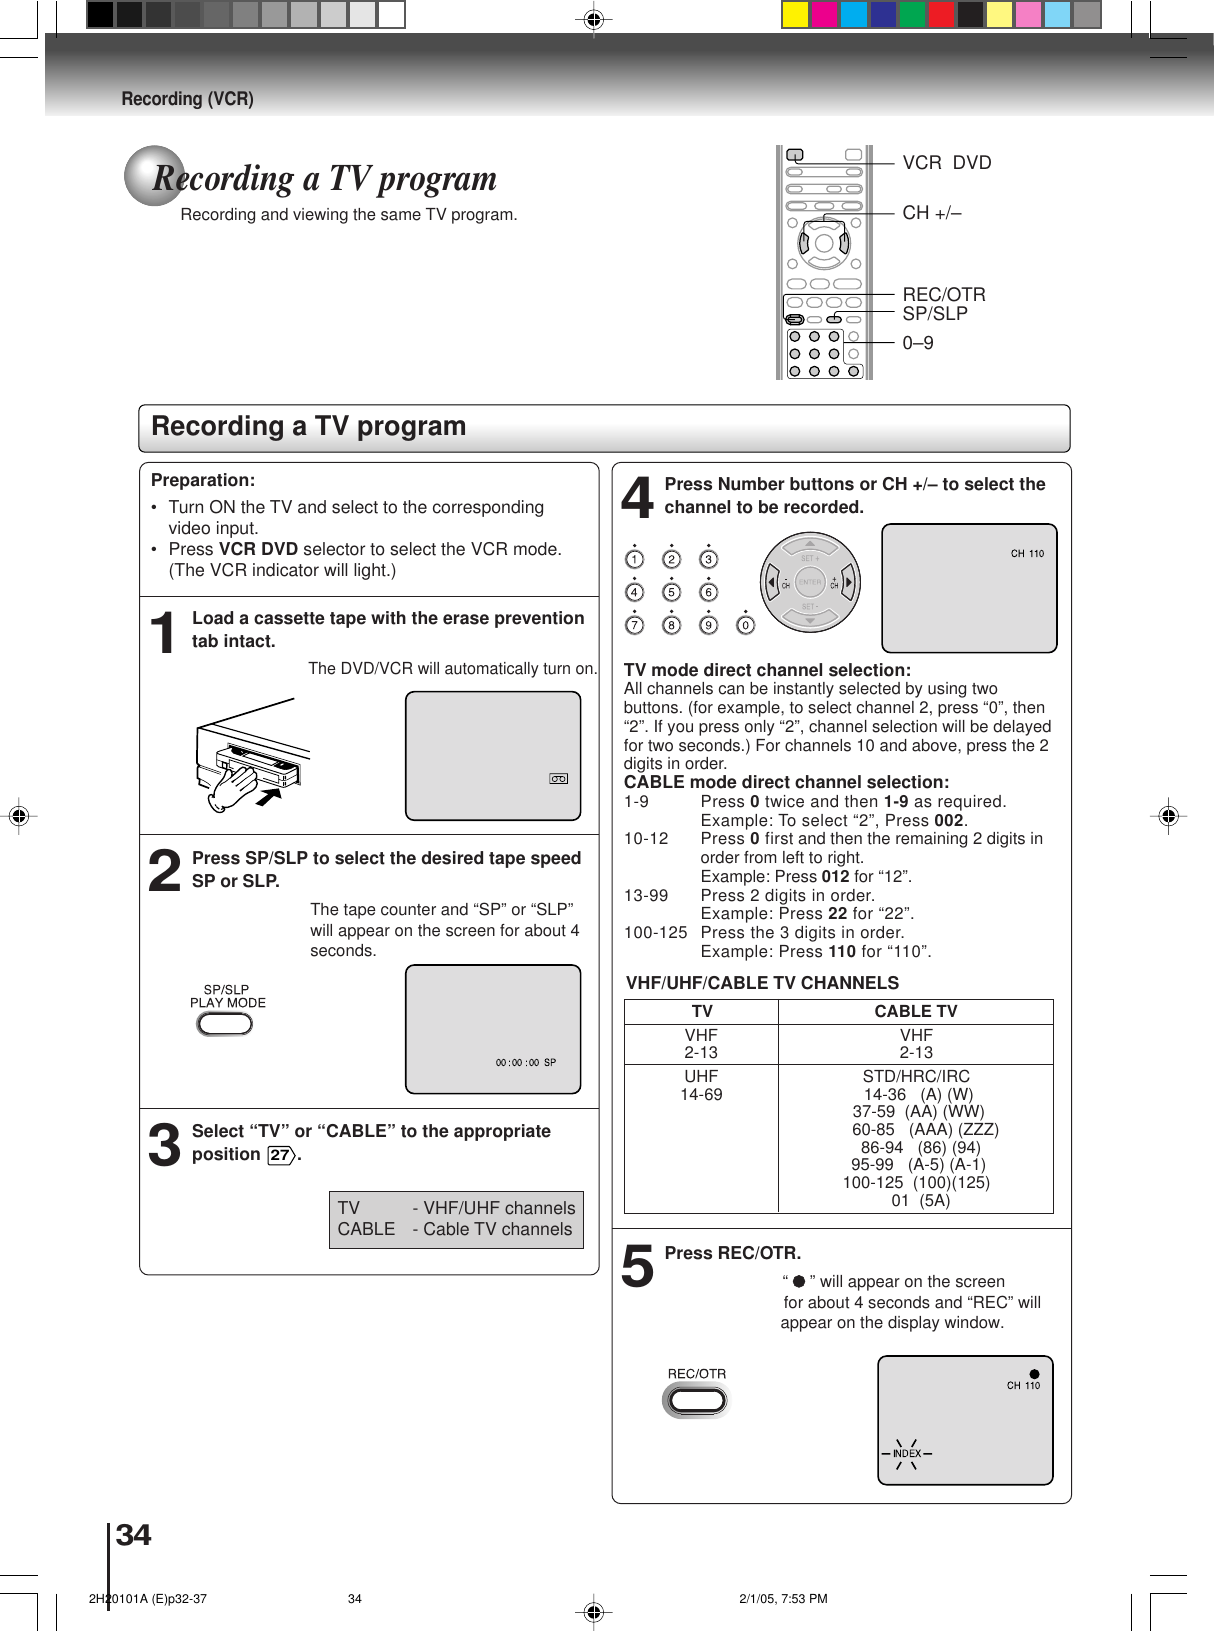
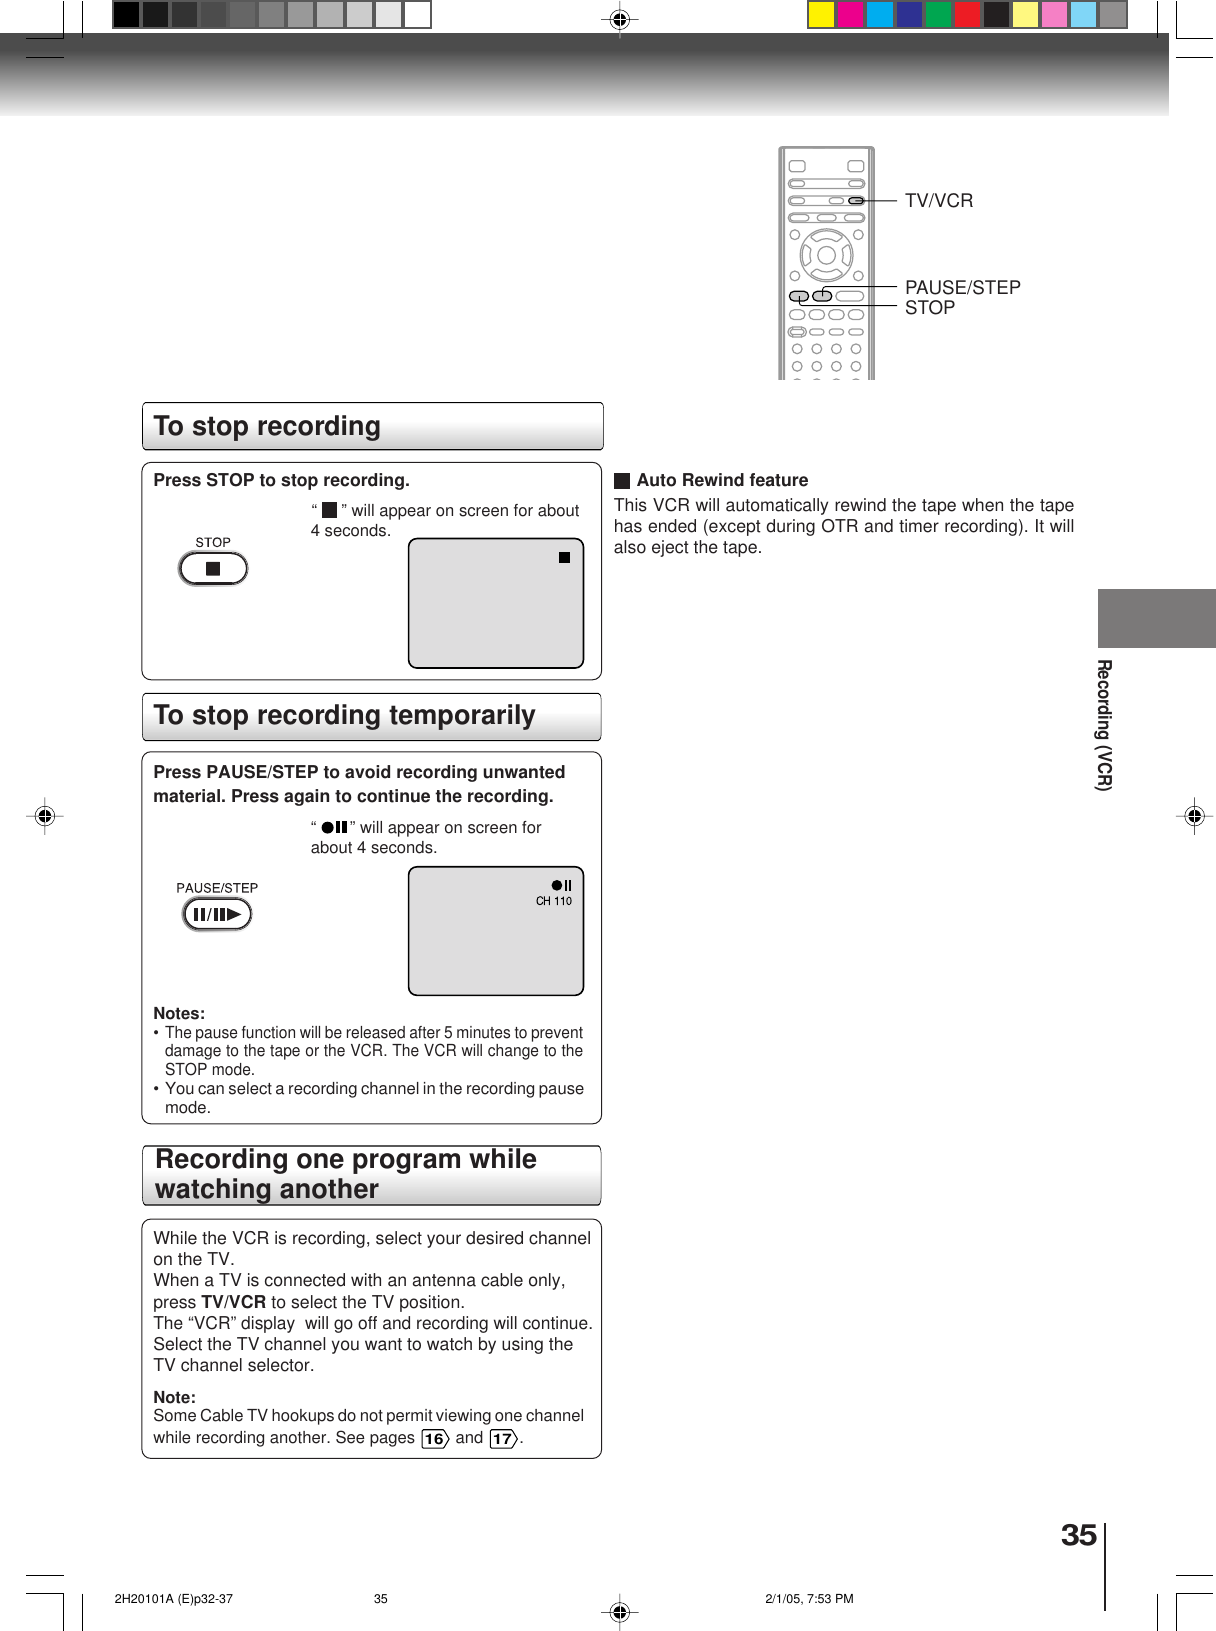
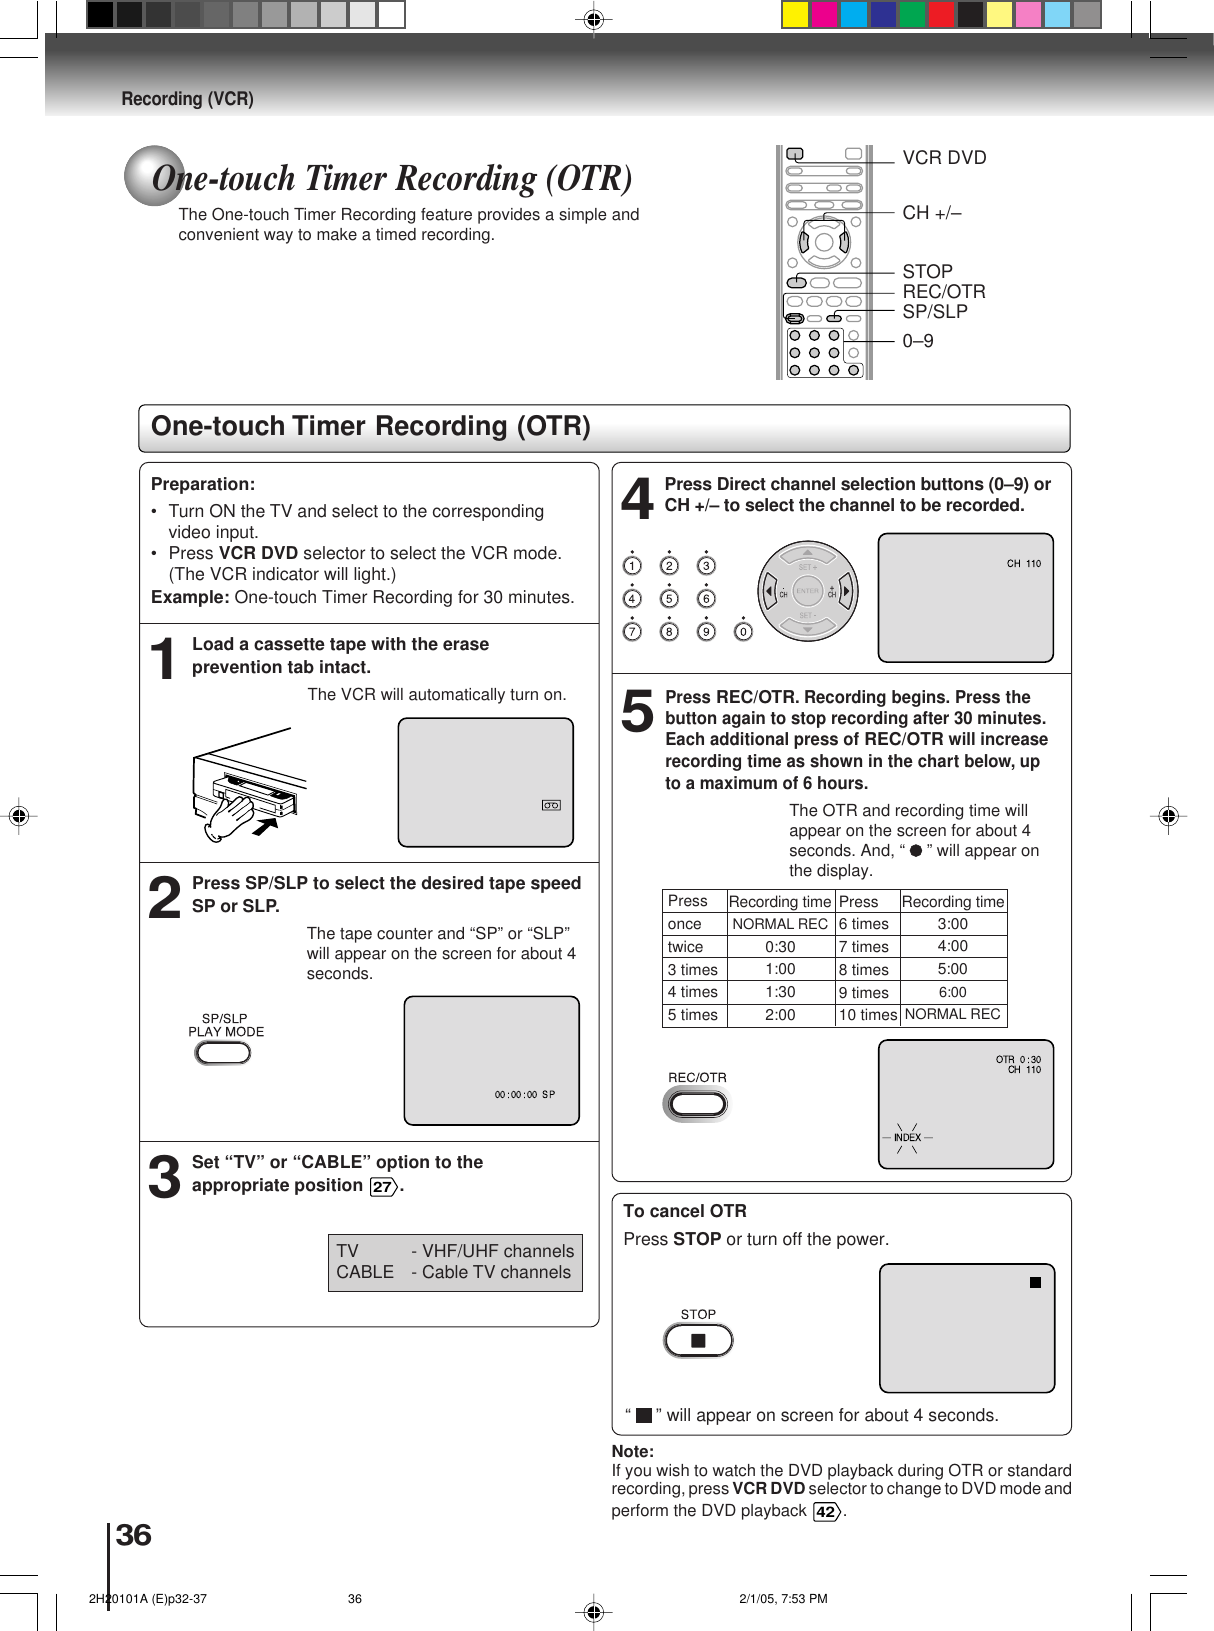
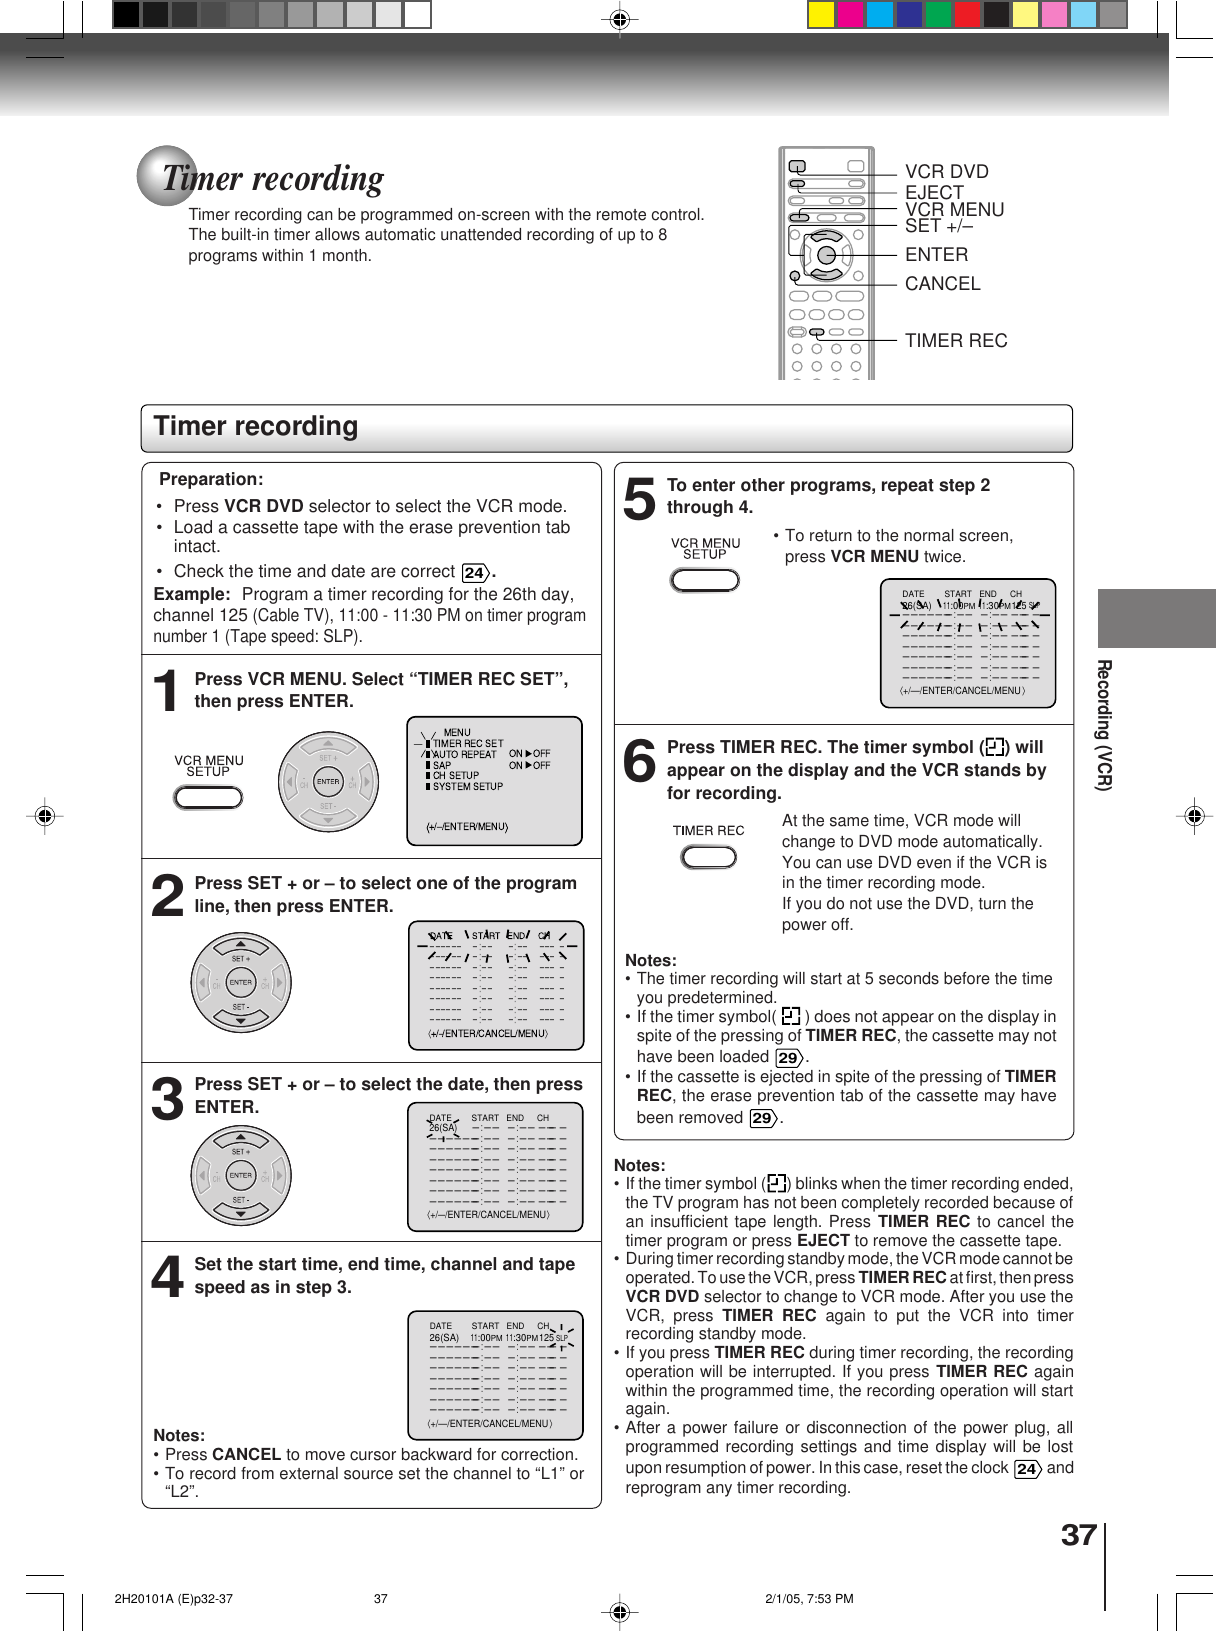
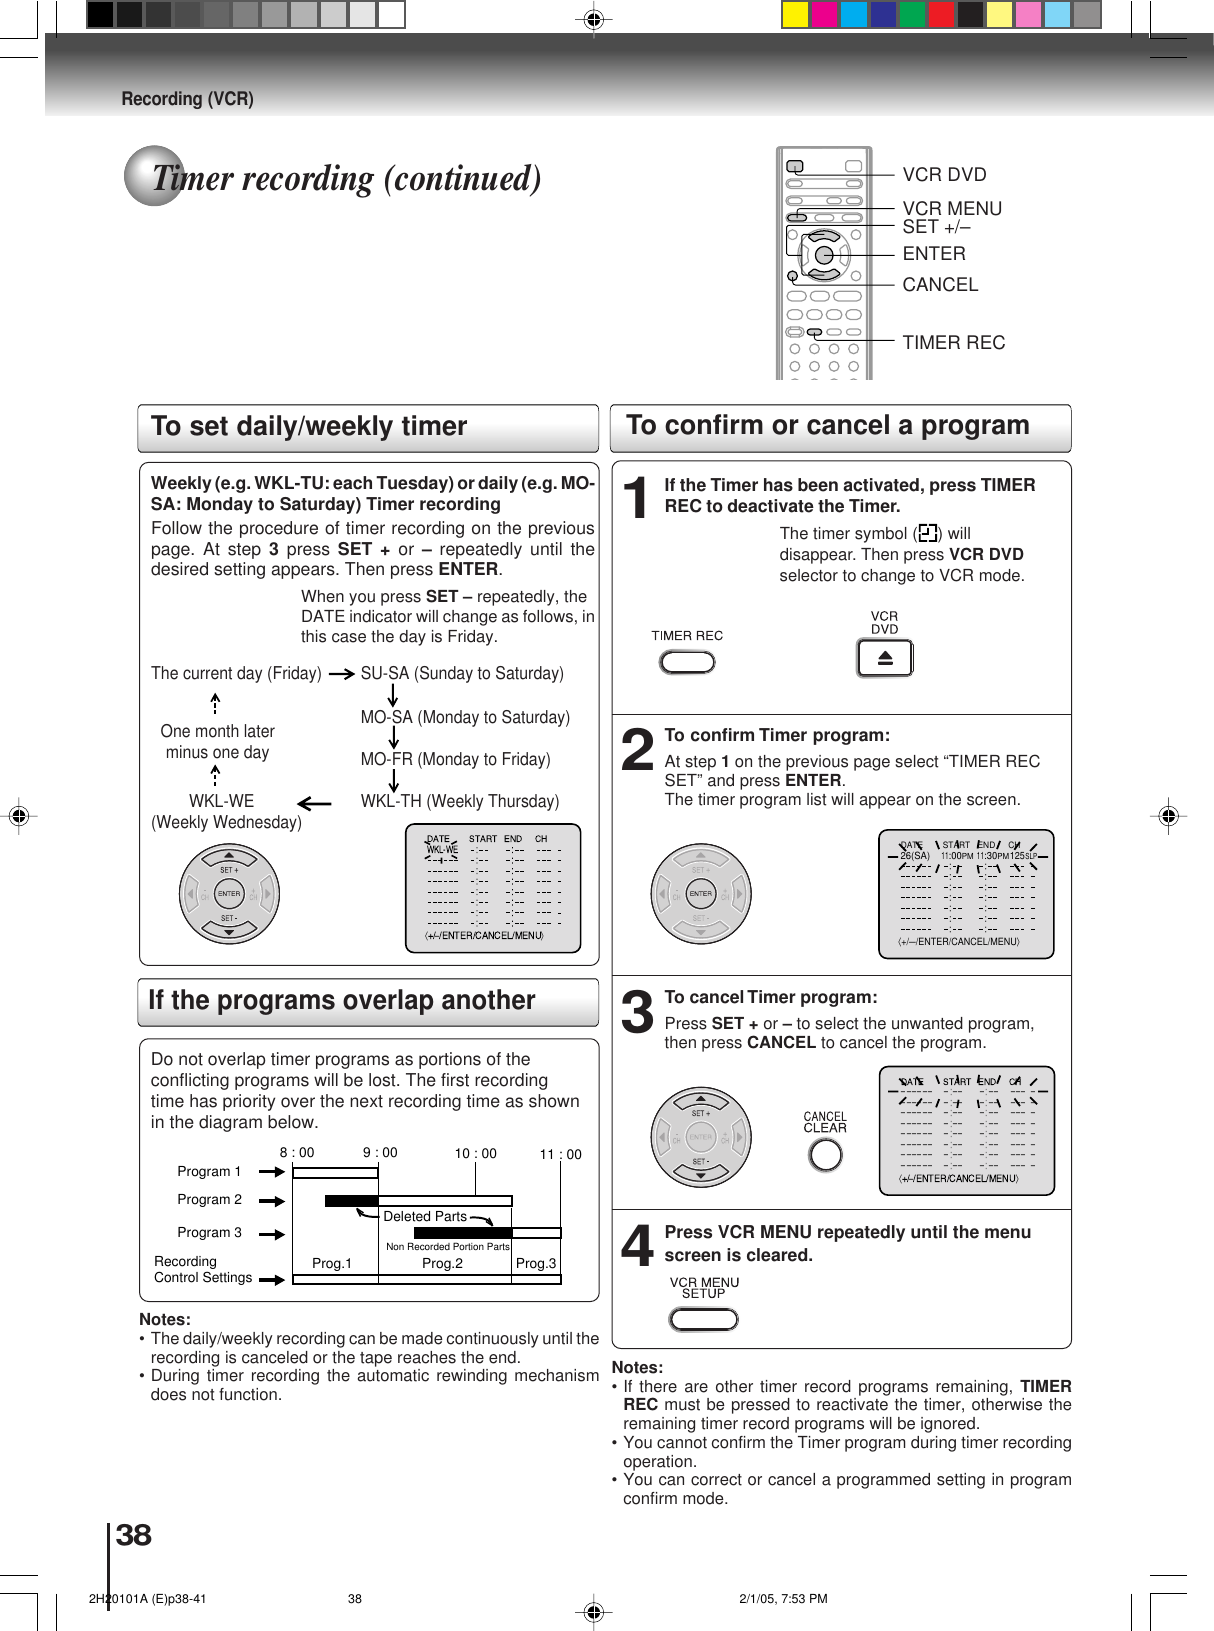
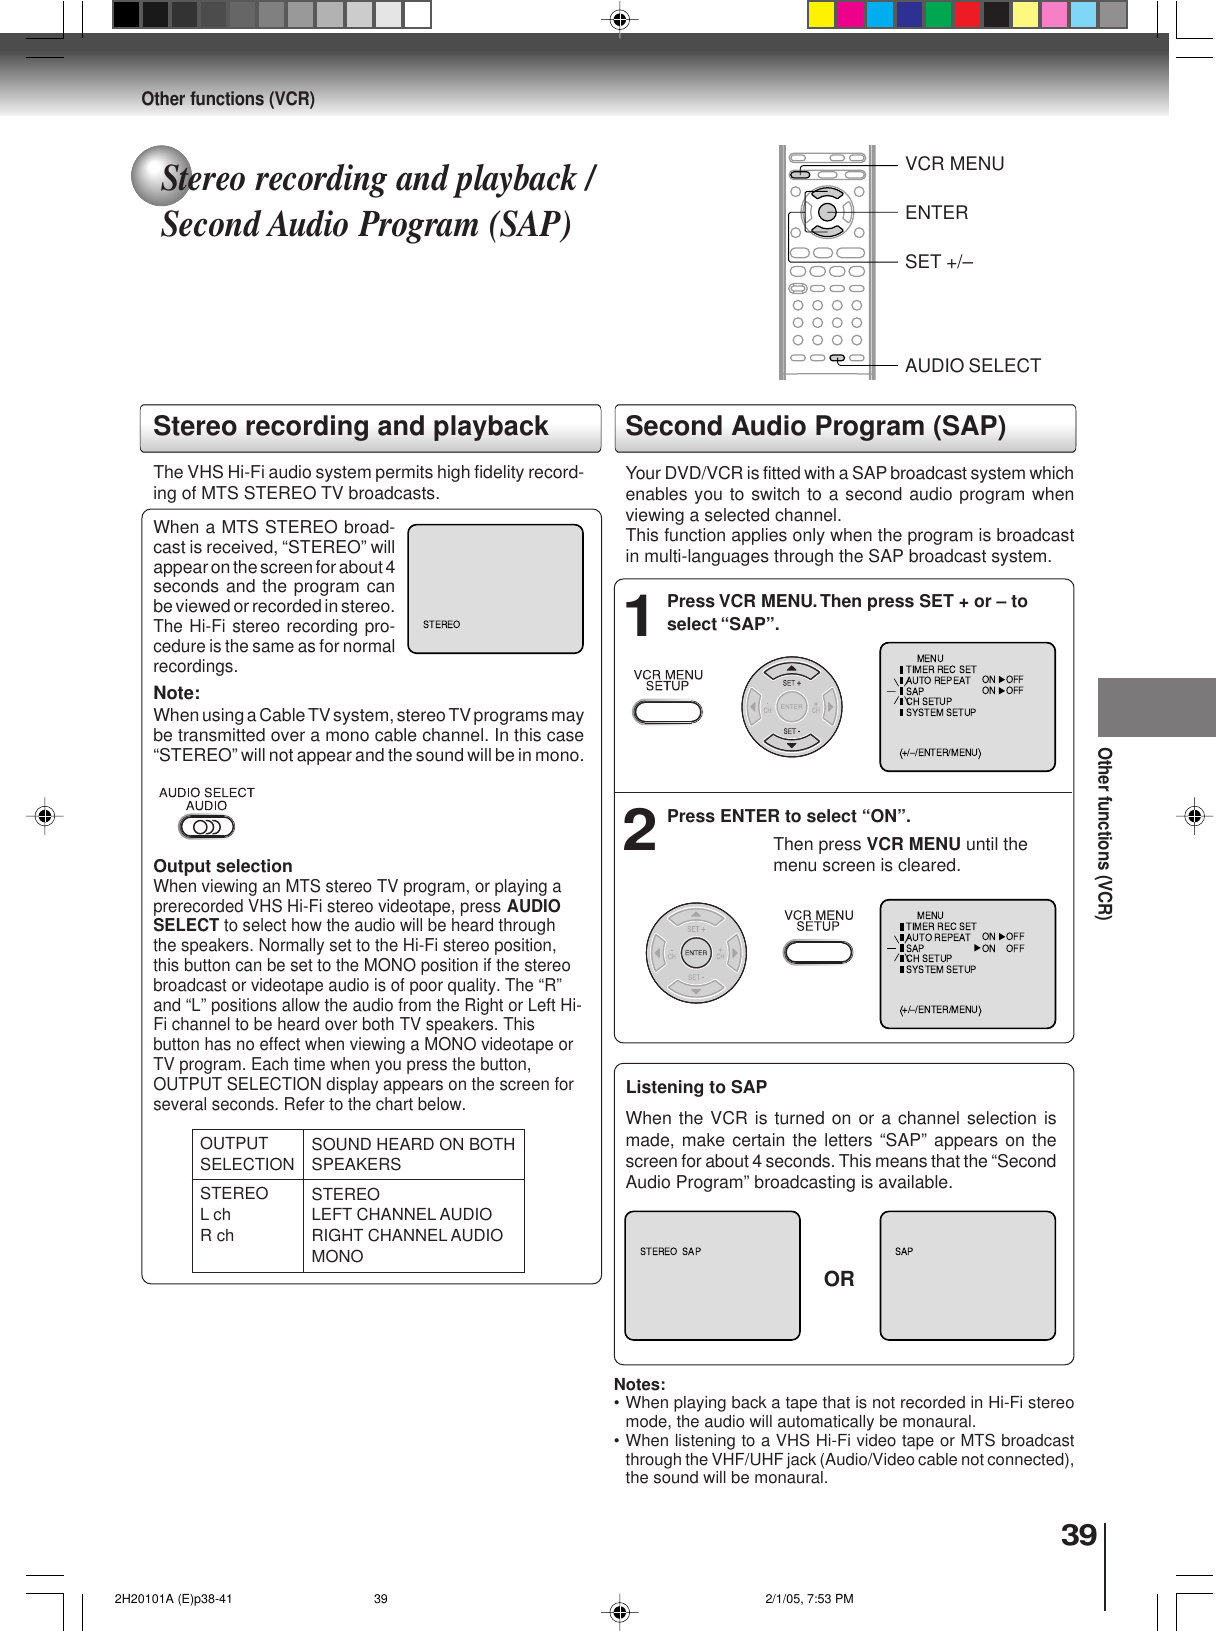
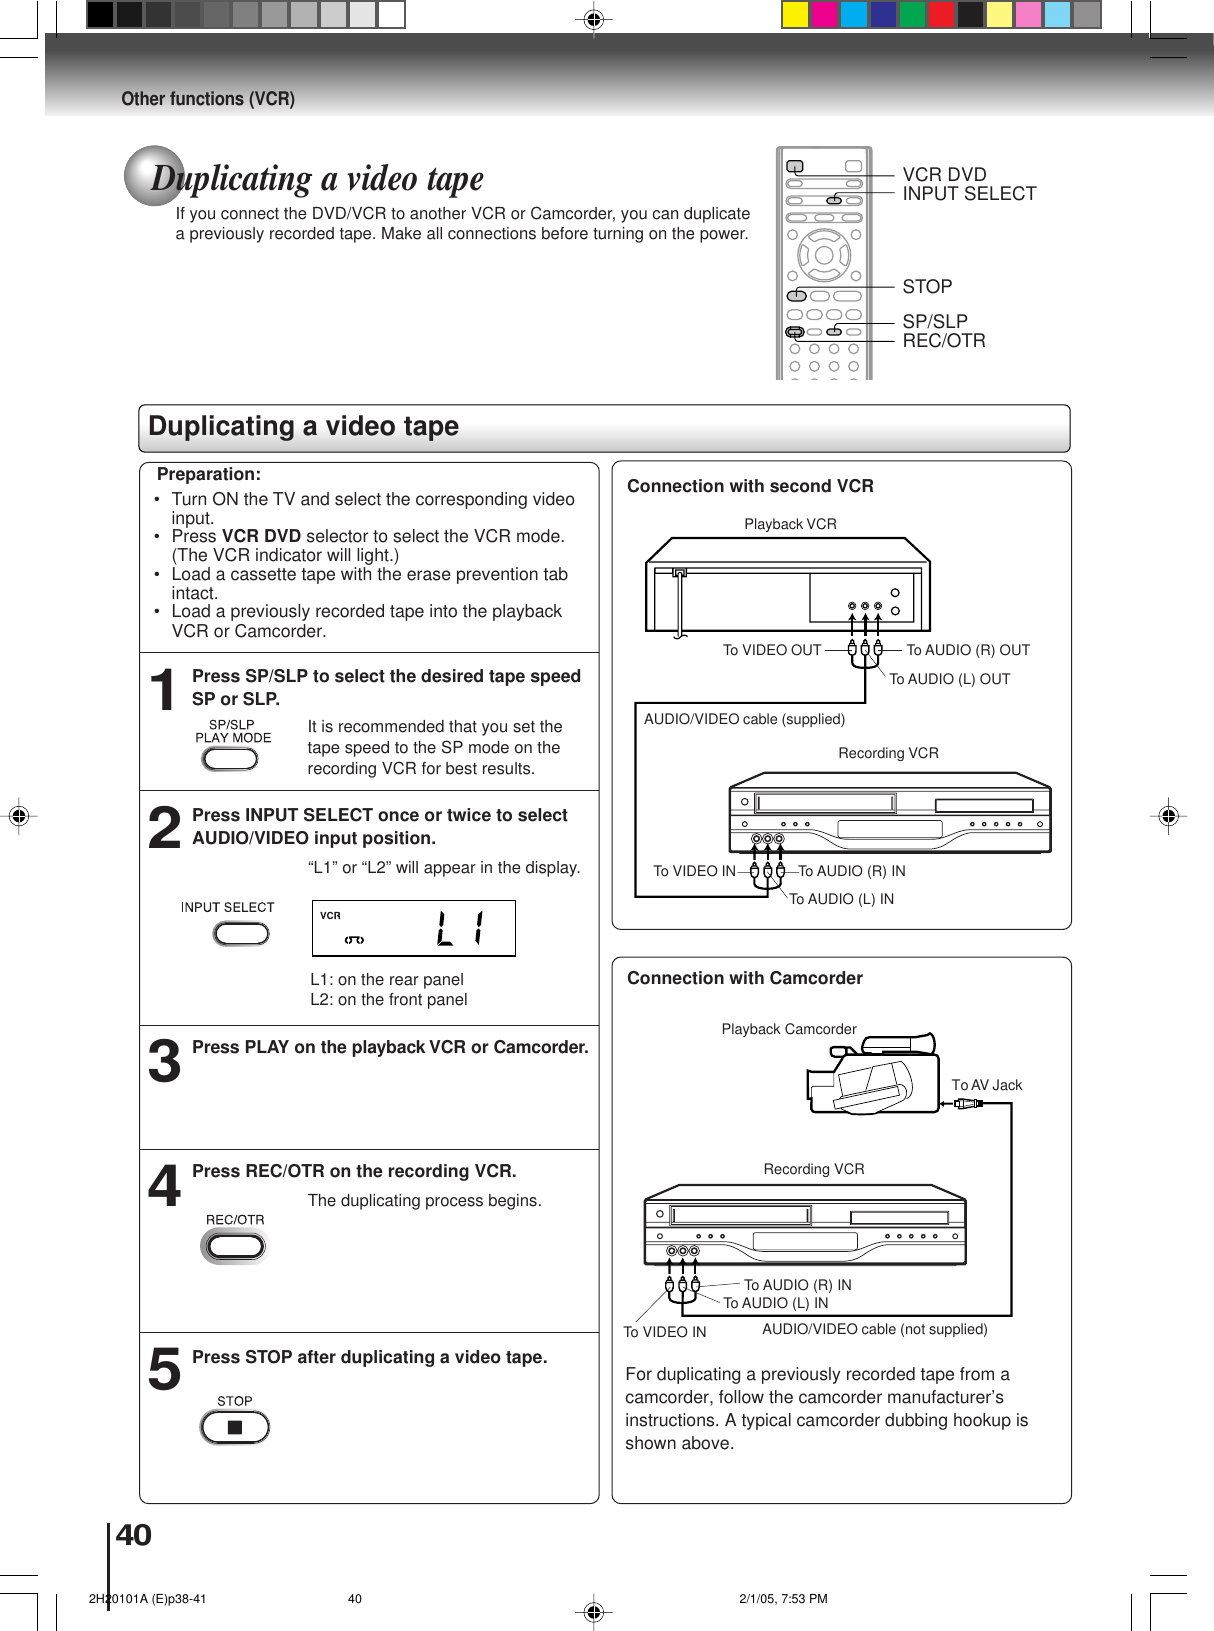

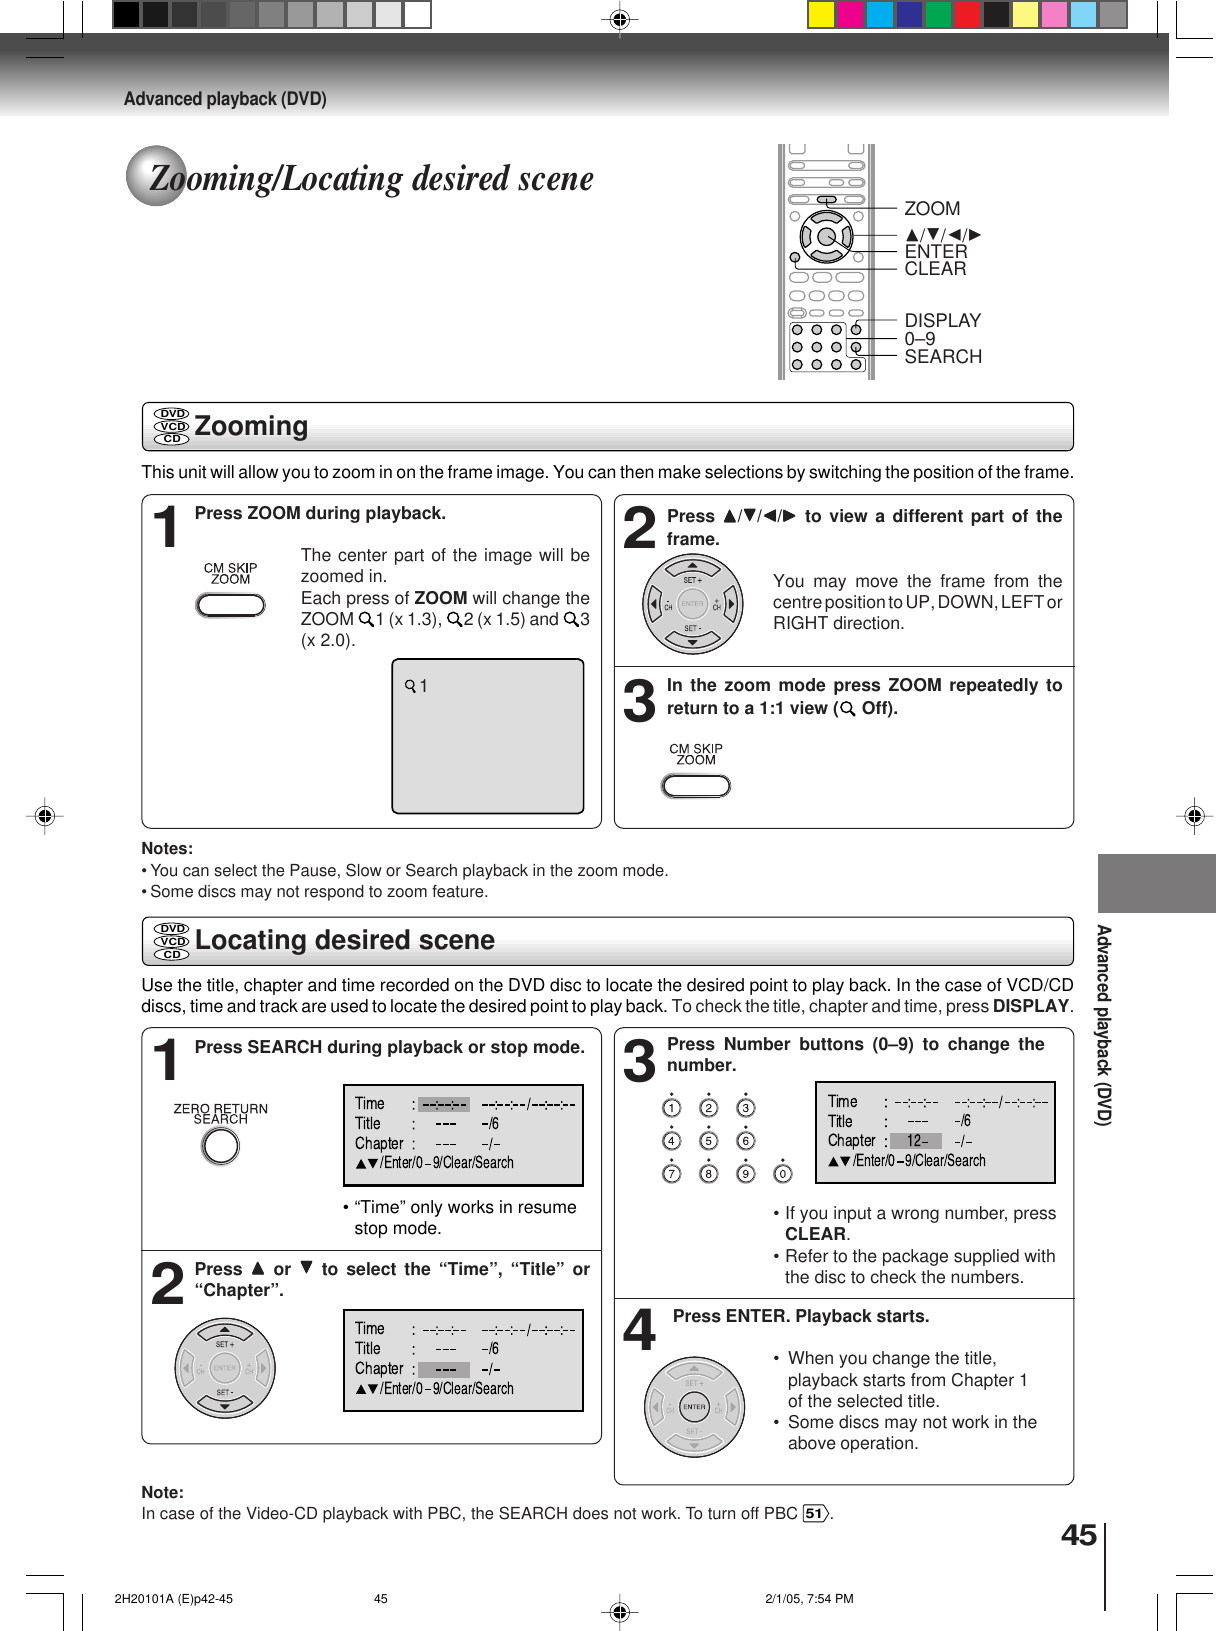

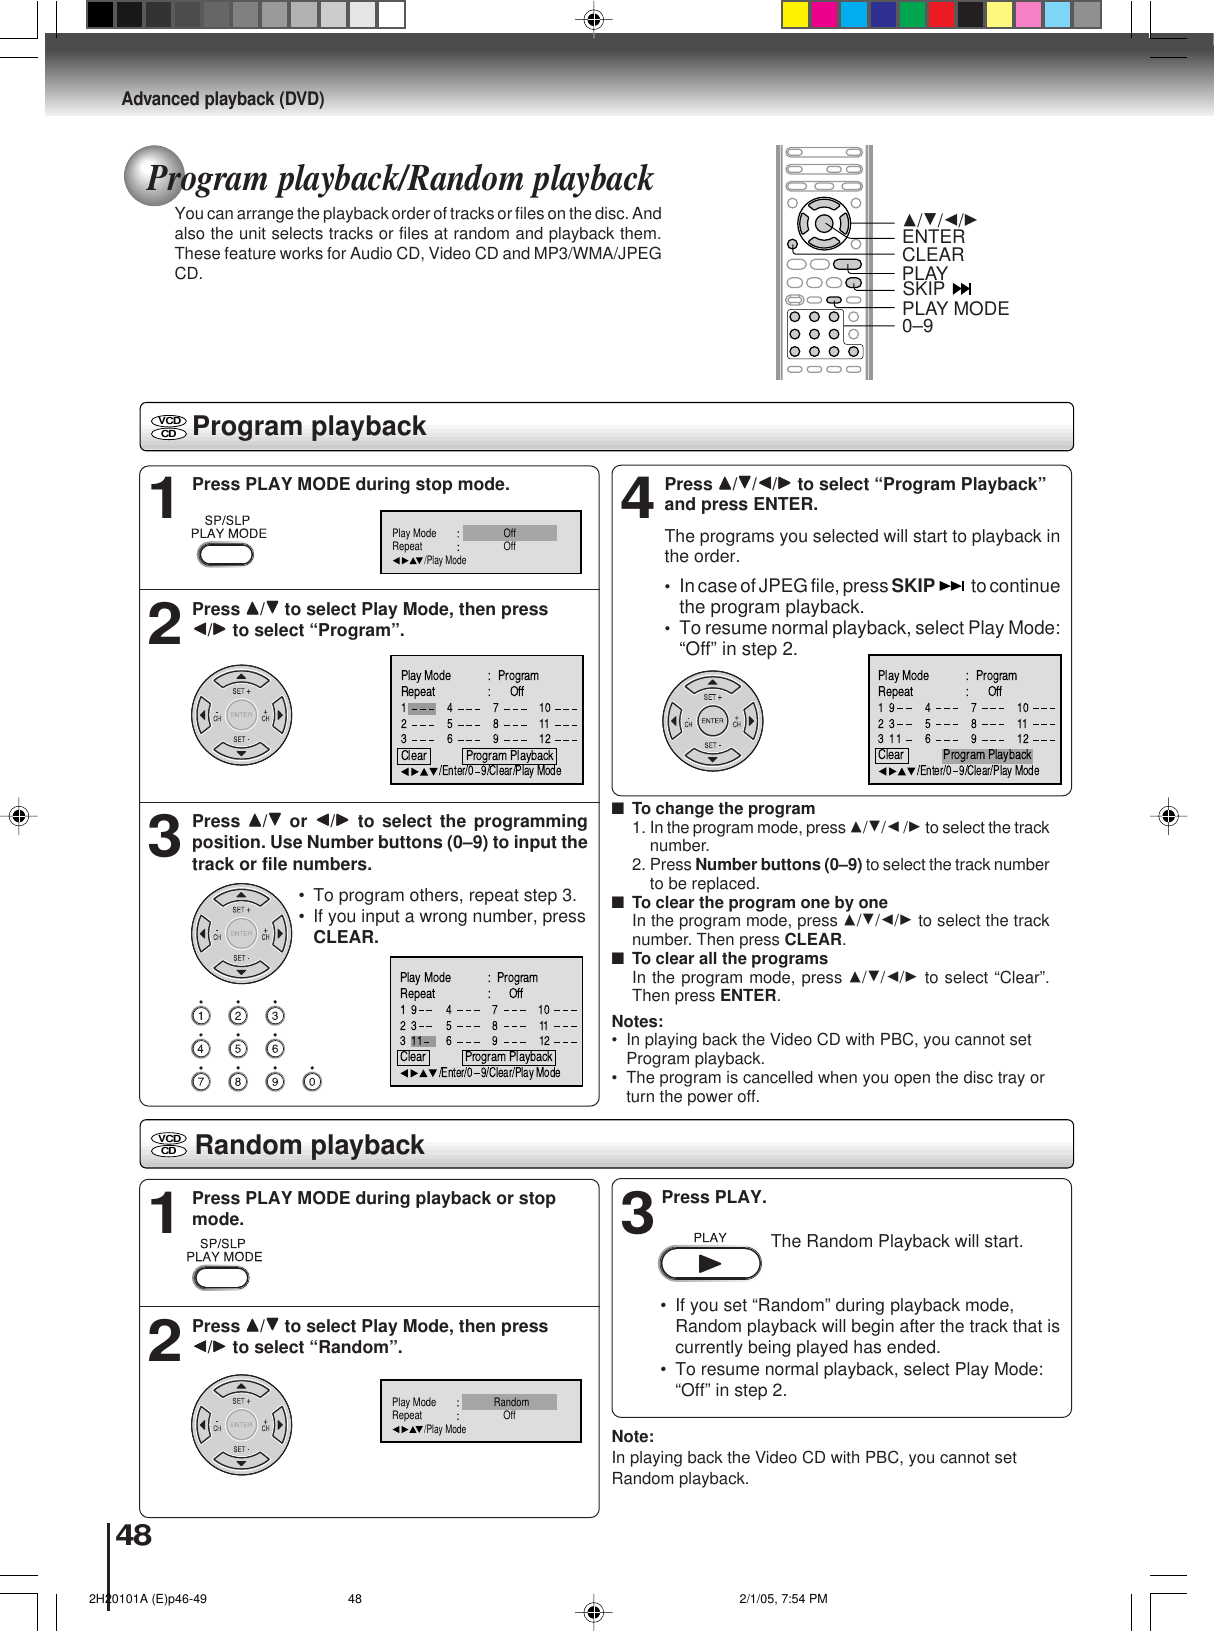
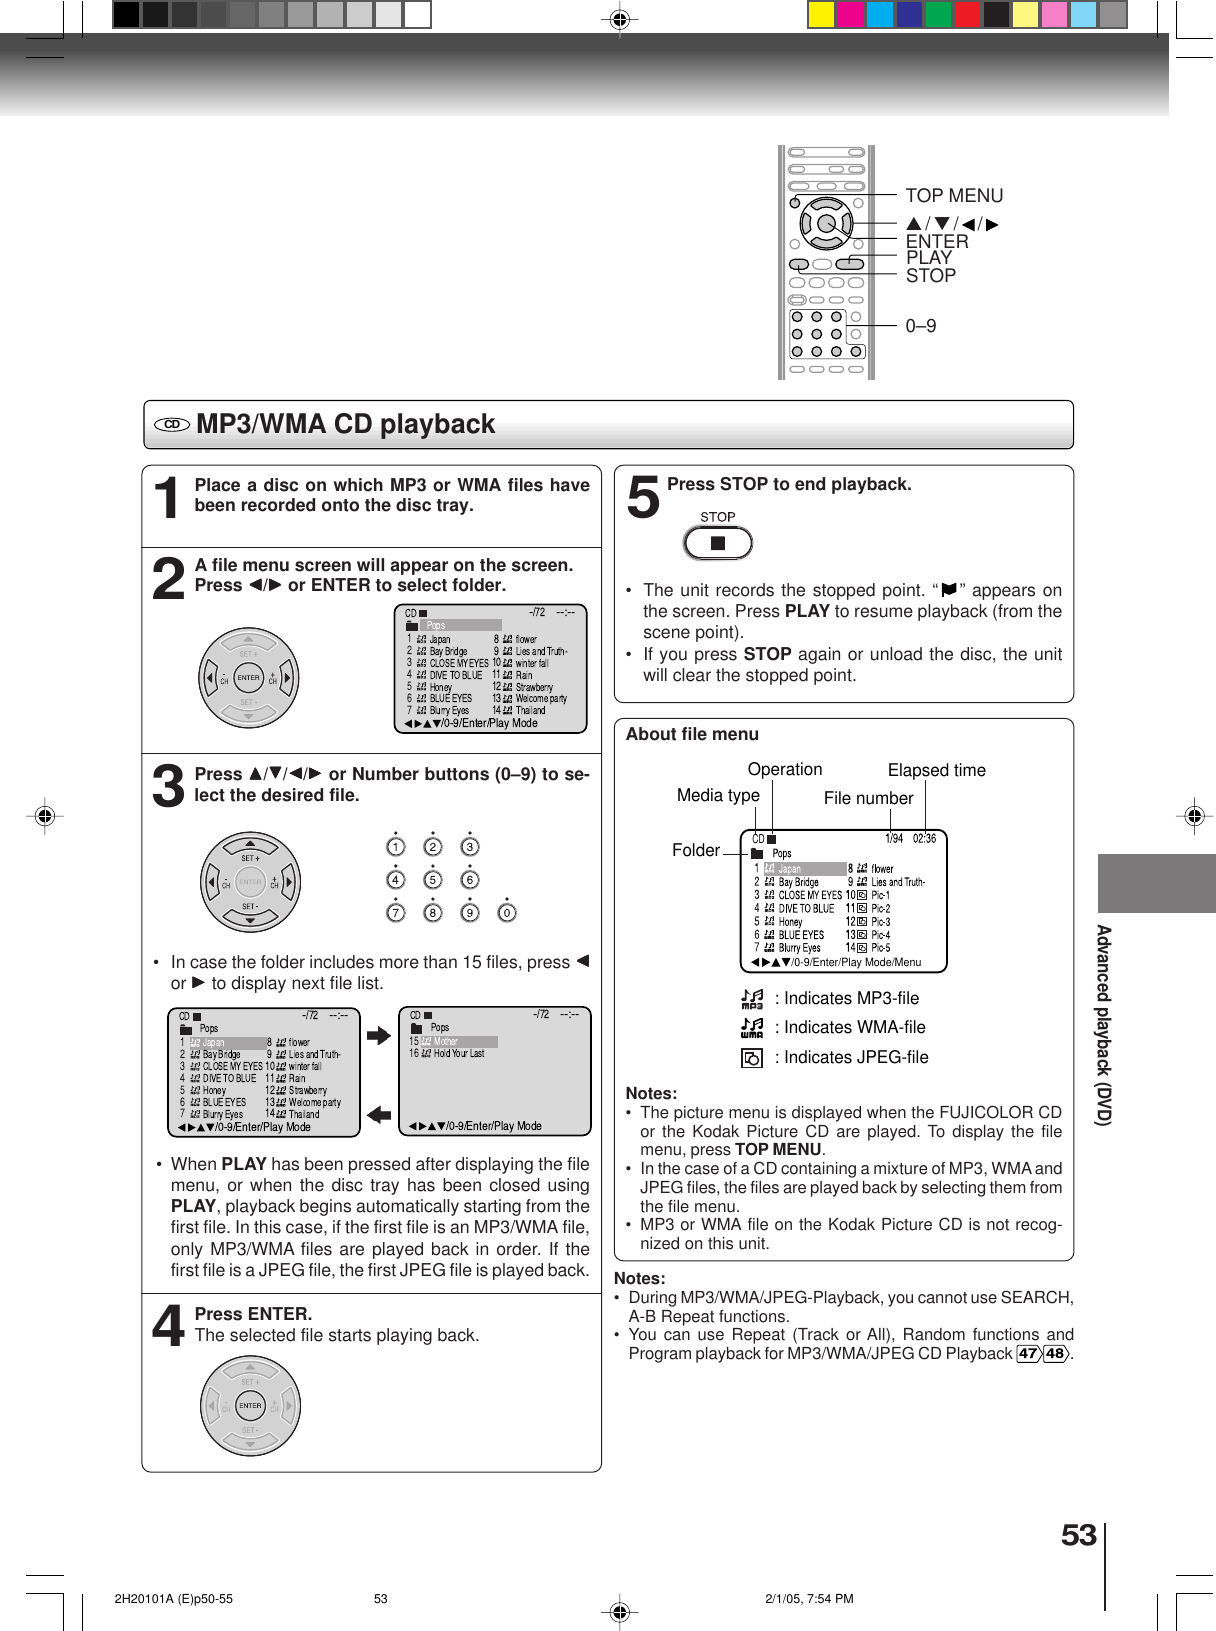
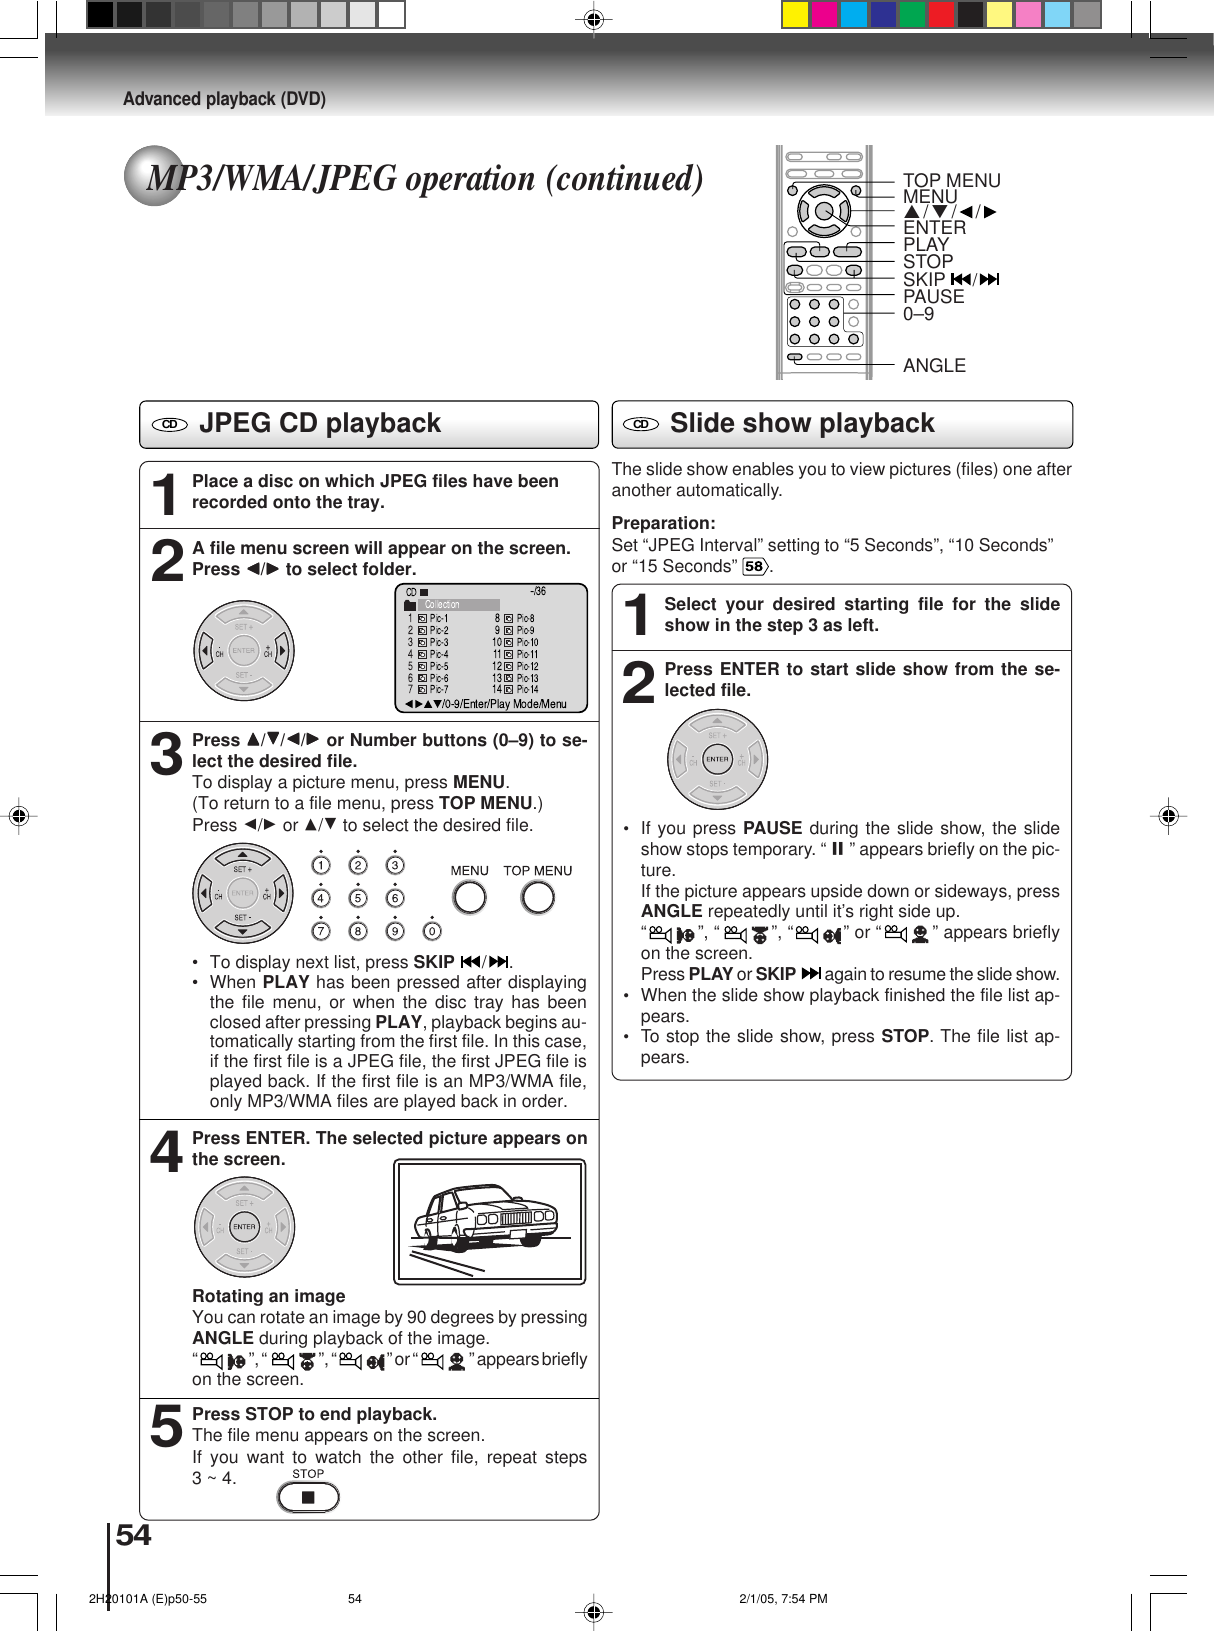
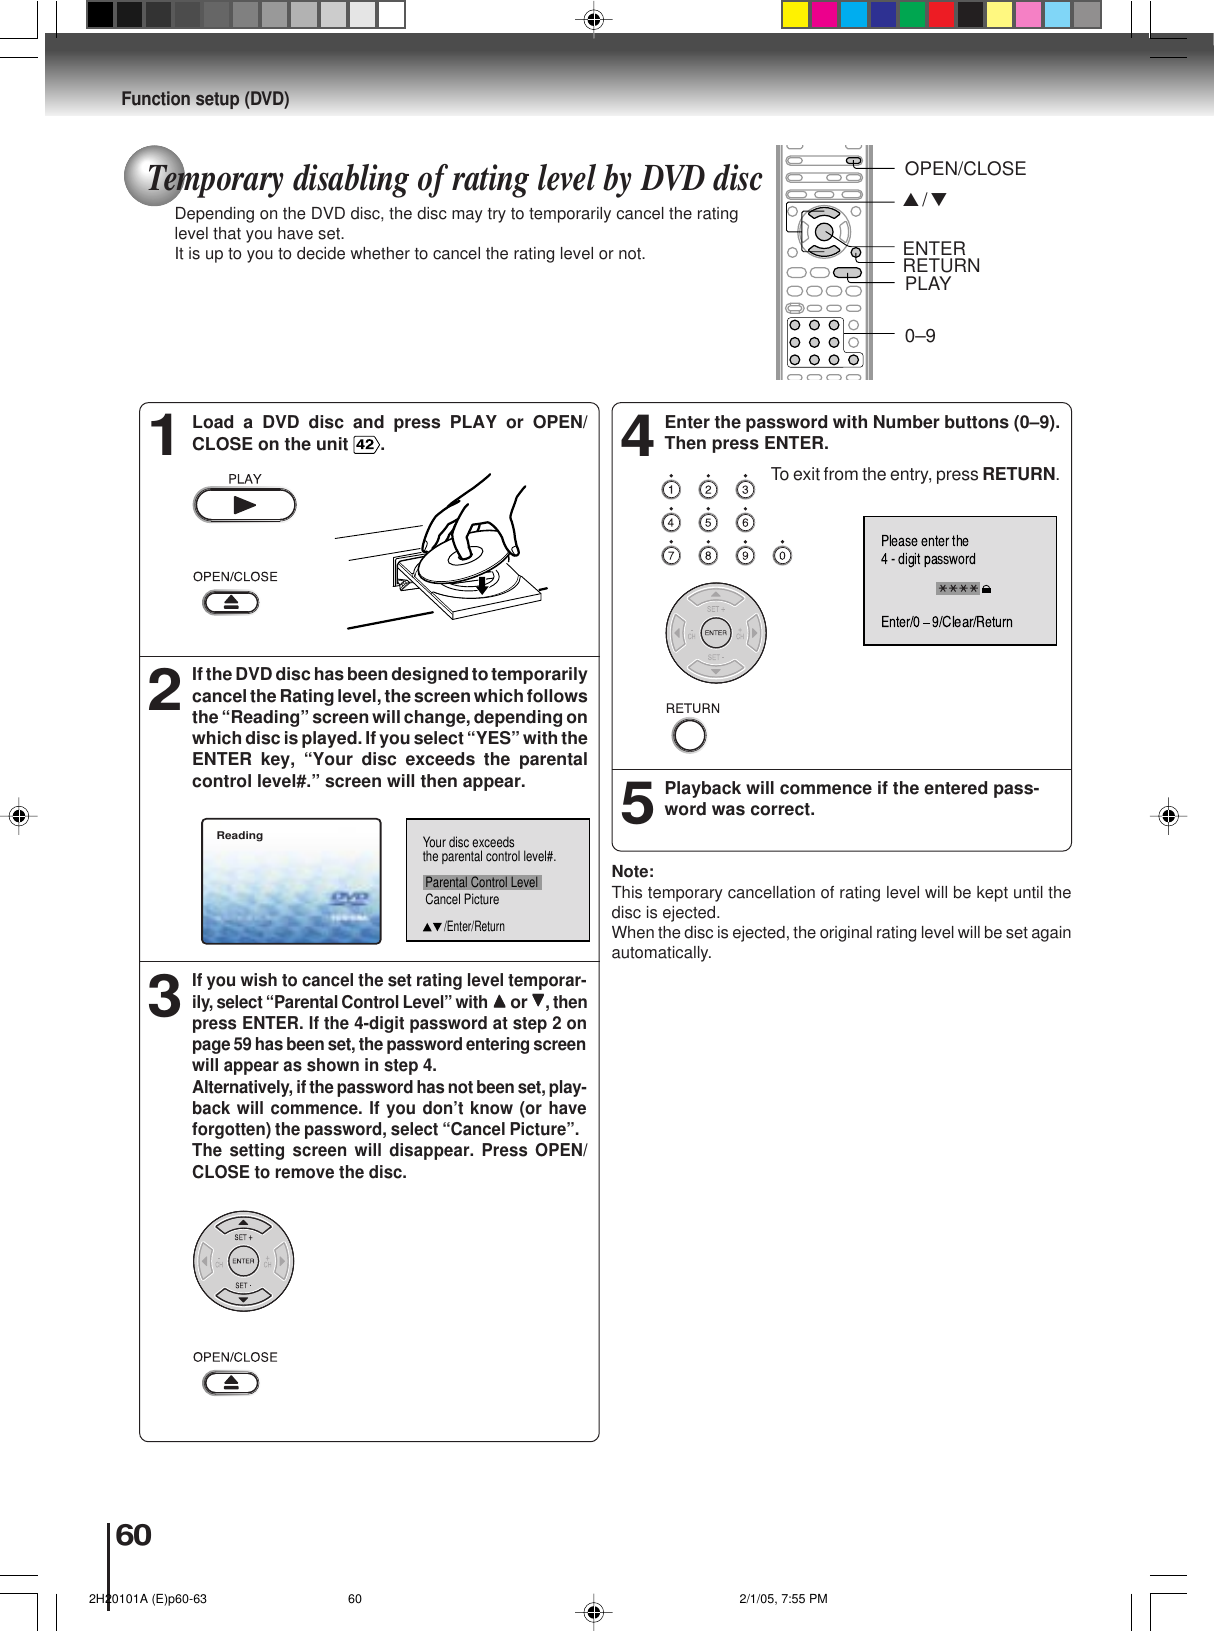
![47Repeat playback1Press PLAY MODE during playback or stop mode.Repeat playback/A-B Repeat playbackPress PLAY MODE again to make the screendisappear.3A-B Repeat playback1Press A-B RPT during playback.The start point is selected.A-B repeat playback allows you to repeat material betweentwo selected points.22DVDVCDCDANotes:• In A-B Repeat mode, subtitles near the A or B locations maynot be displayed.• You cannot set the A-B Repeat for the scenes that includemultiple angles.• A-B Repeat playback does not work when Repeat playback isactivated.• You may not be able to set A-B Repeat, during certain scenesof the DVD.• A-B Repeat does not work with an interactive DVD, MP3/WMA/JPEG CD.• A-B Repeat is prohibited when PBC is on.To resume normal playbackPress A-B RPT again.“Off” appears on the screen.ABDVDVCDCDD/B/APLAY MODEA-B RPTRepeat Off/Play ModeNotes:• Some discs may not work with the repeat operation.• In case of Video CD with PBC, repeat functions are prohib-ited during playback.[DVD]Press BBBBB/AAAAA to select “Chapter” or “Title”.The unit automatically starts repeatplayback after finishing the current ti-tle or chapter.[Audio CD, Video CD, MP3/WMA CD]Press DDDDD to select “Repeat”.Press BBBBB/AAAAA to select “Track” or “All”.The unit automatically starts repeatplayback after finishing the currenttrack.• If you set the repeat mode during stop mode,press PLAY to start Repeat playback.Press A-B RPT again.The end point is selected. Playbackstarts at the point that you selected.Playback stops at the end point, re-turns to Point A automatically, thenstarts again.To resume normal playbackSelect Repeat : “Off” in step 2.PLAYAdvanced playback (DVD)Play Mode OffRepeat Off/Play Mode 2H20101A (E)p46-49 2/1/05, 7:54 PM47](https://usermanual.wiki/ORION-ELECTRIC/M2H2A/User-Guide-516359-Page-47.png)