ORION ELECTRIC M2I3A DVD/VCR TV Interface Device User Manual 2I30101A En cov
ORION ELECTRIC CO., LTD. DVD/VCR TV Interface Device 2I30101A En cov
UserManual.wiki
>
ORION ELECTRIC
>
M2I3A User Manual
>
Users Manual 2
Contents
1.
Users Manual 1
2.
Users Manual 2
Users Manual 2
Navigation menu
Upload a User Manual
Namespaces
Wiki Guide
HTML
PDF
Info
Views
User Manual
Discussion / Help
Navigation


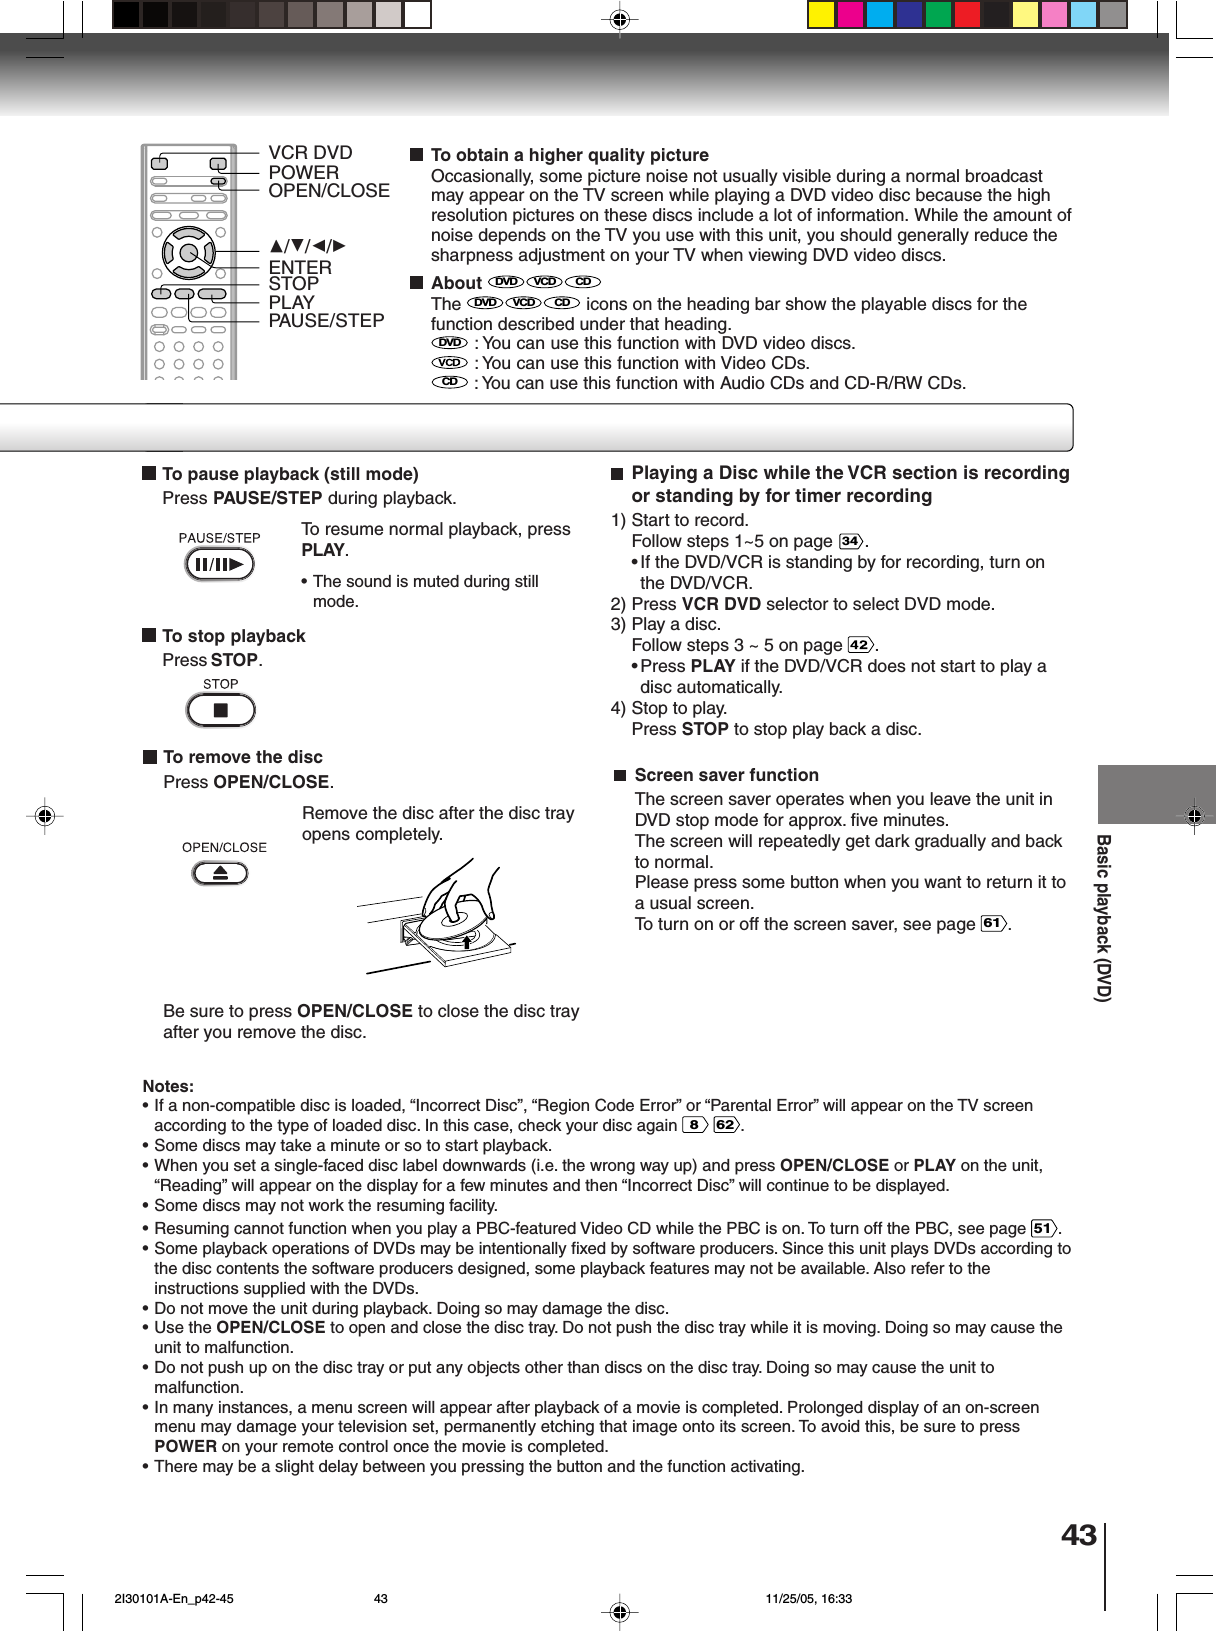

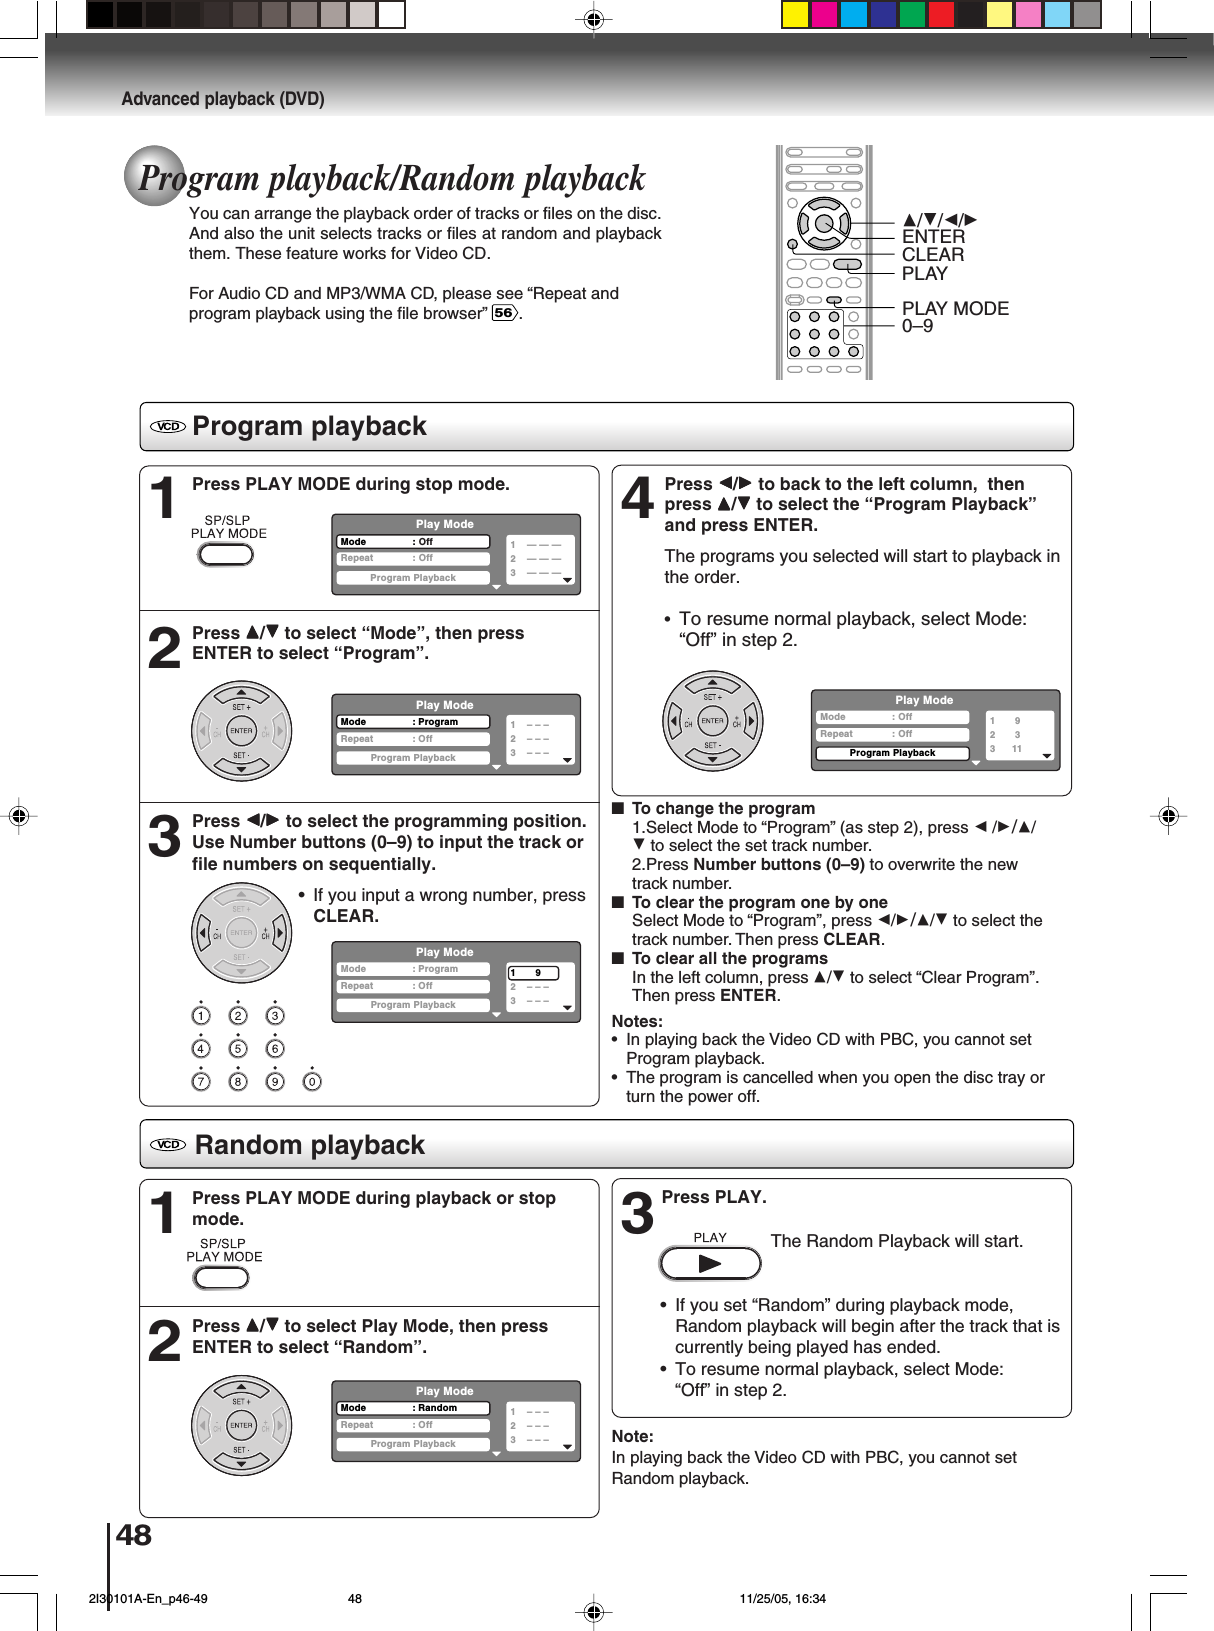
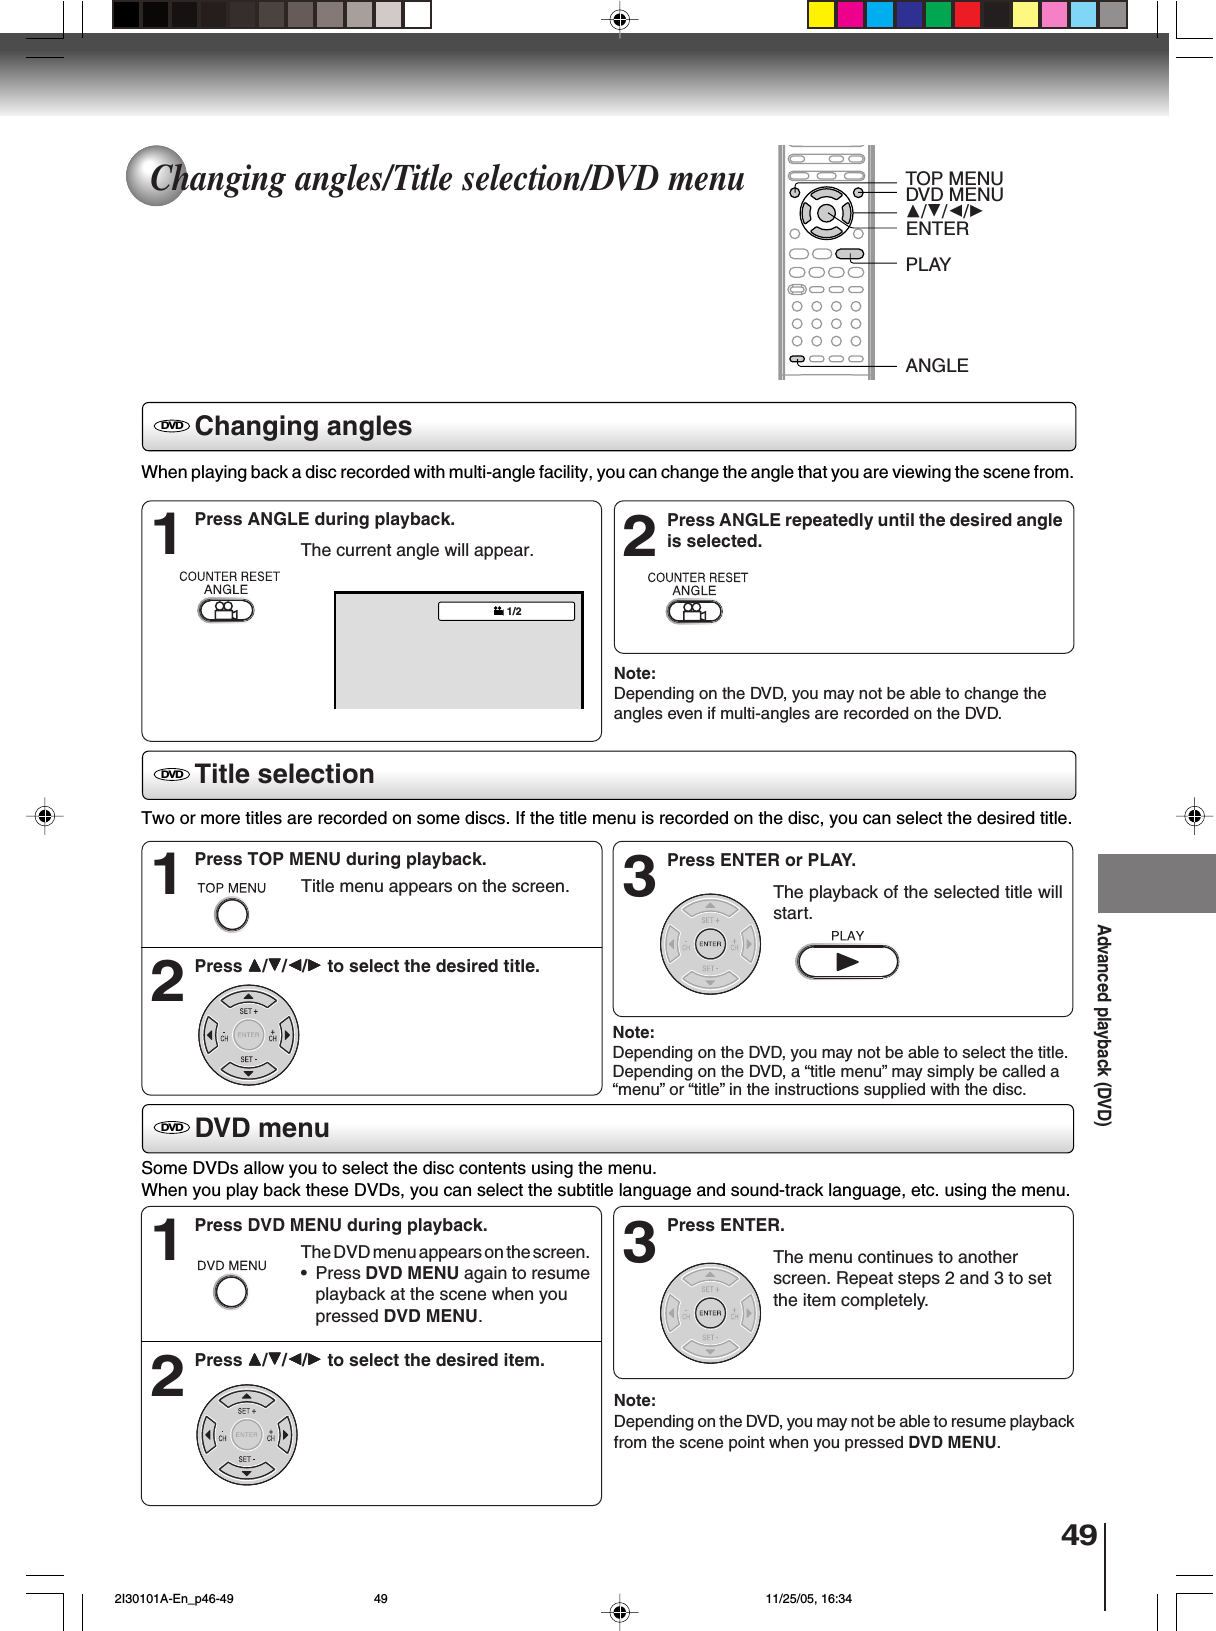
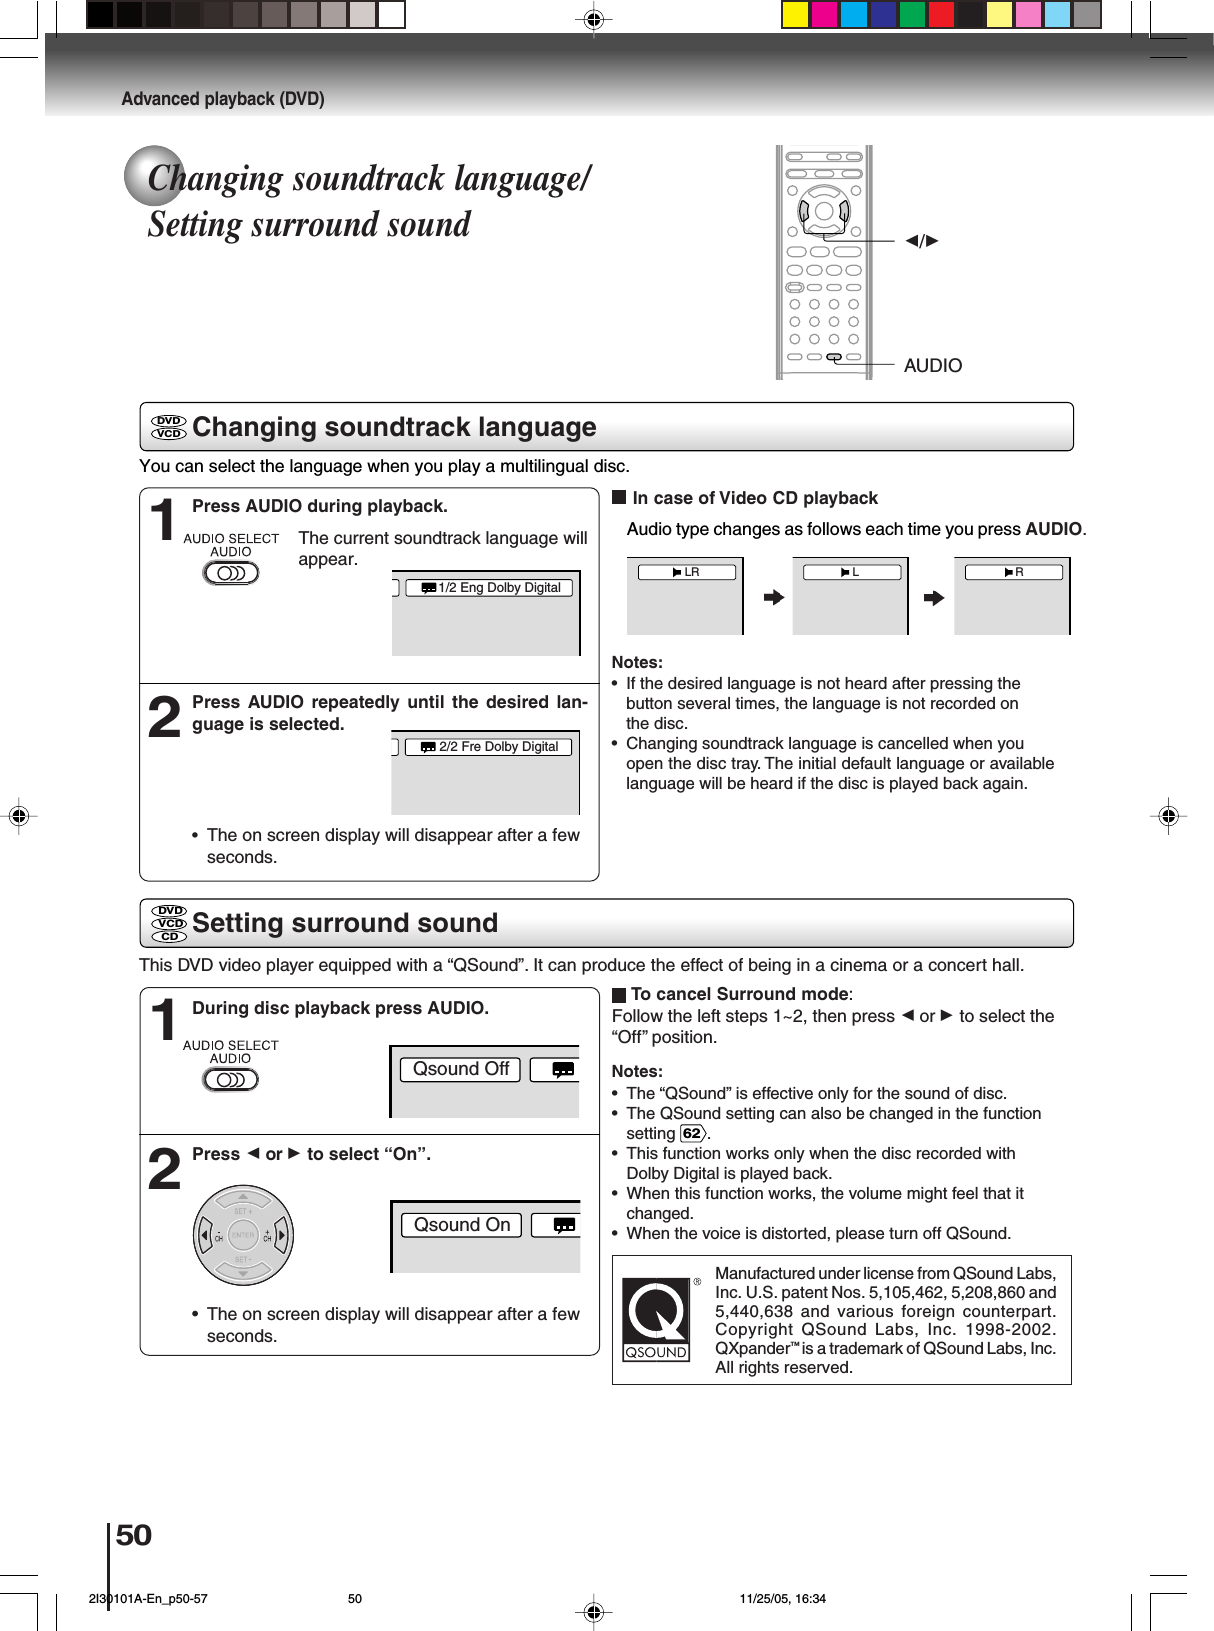
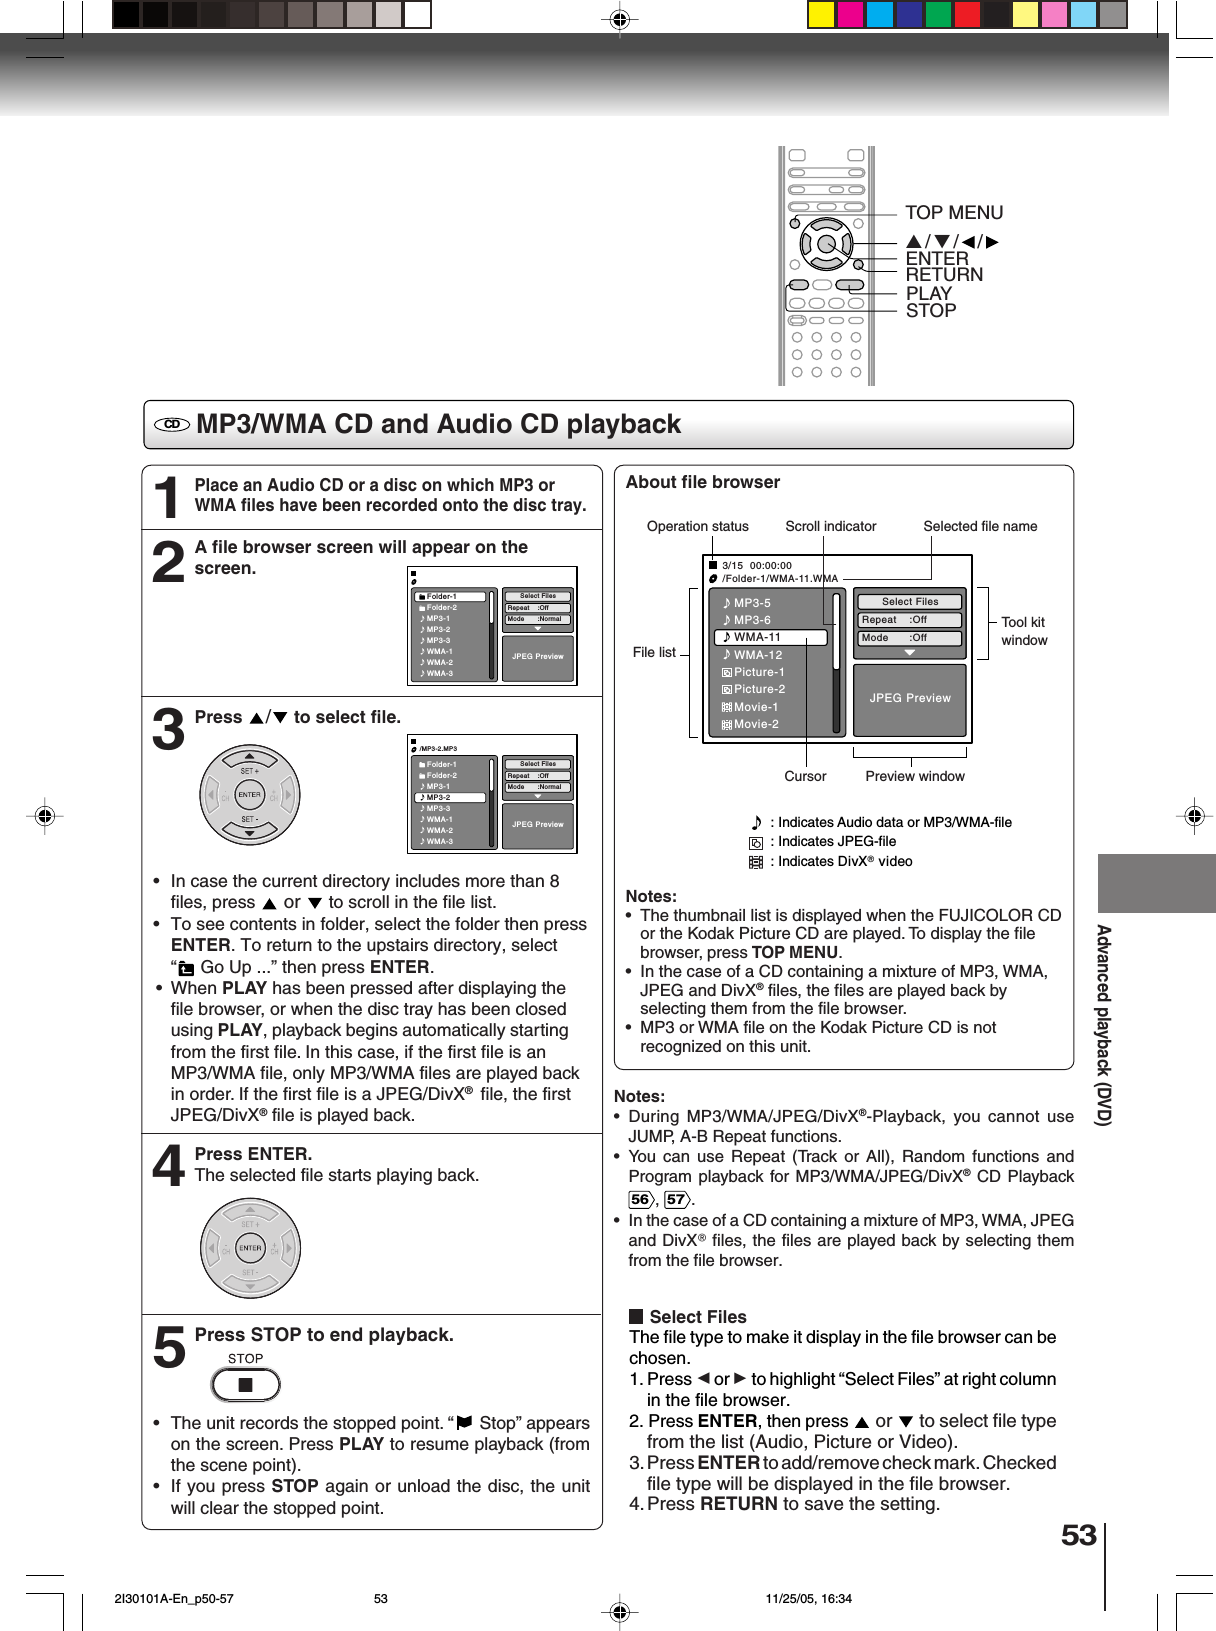
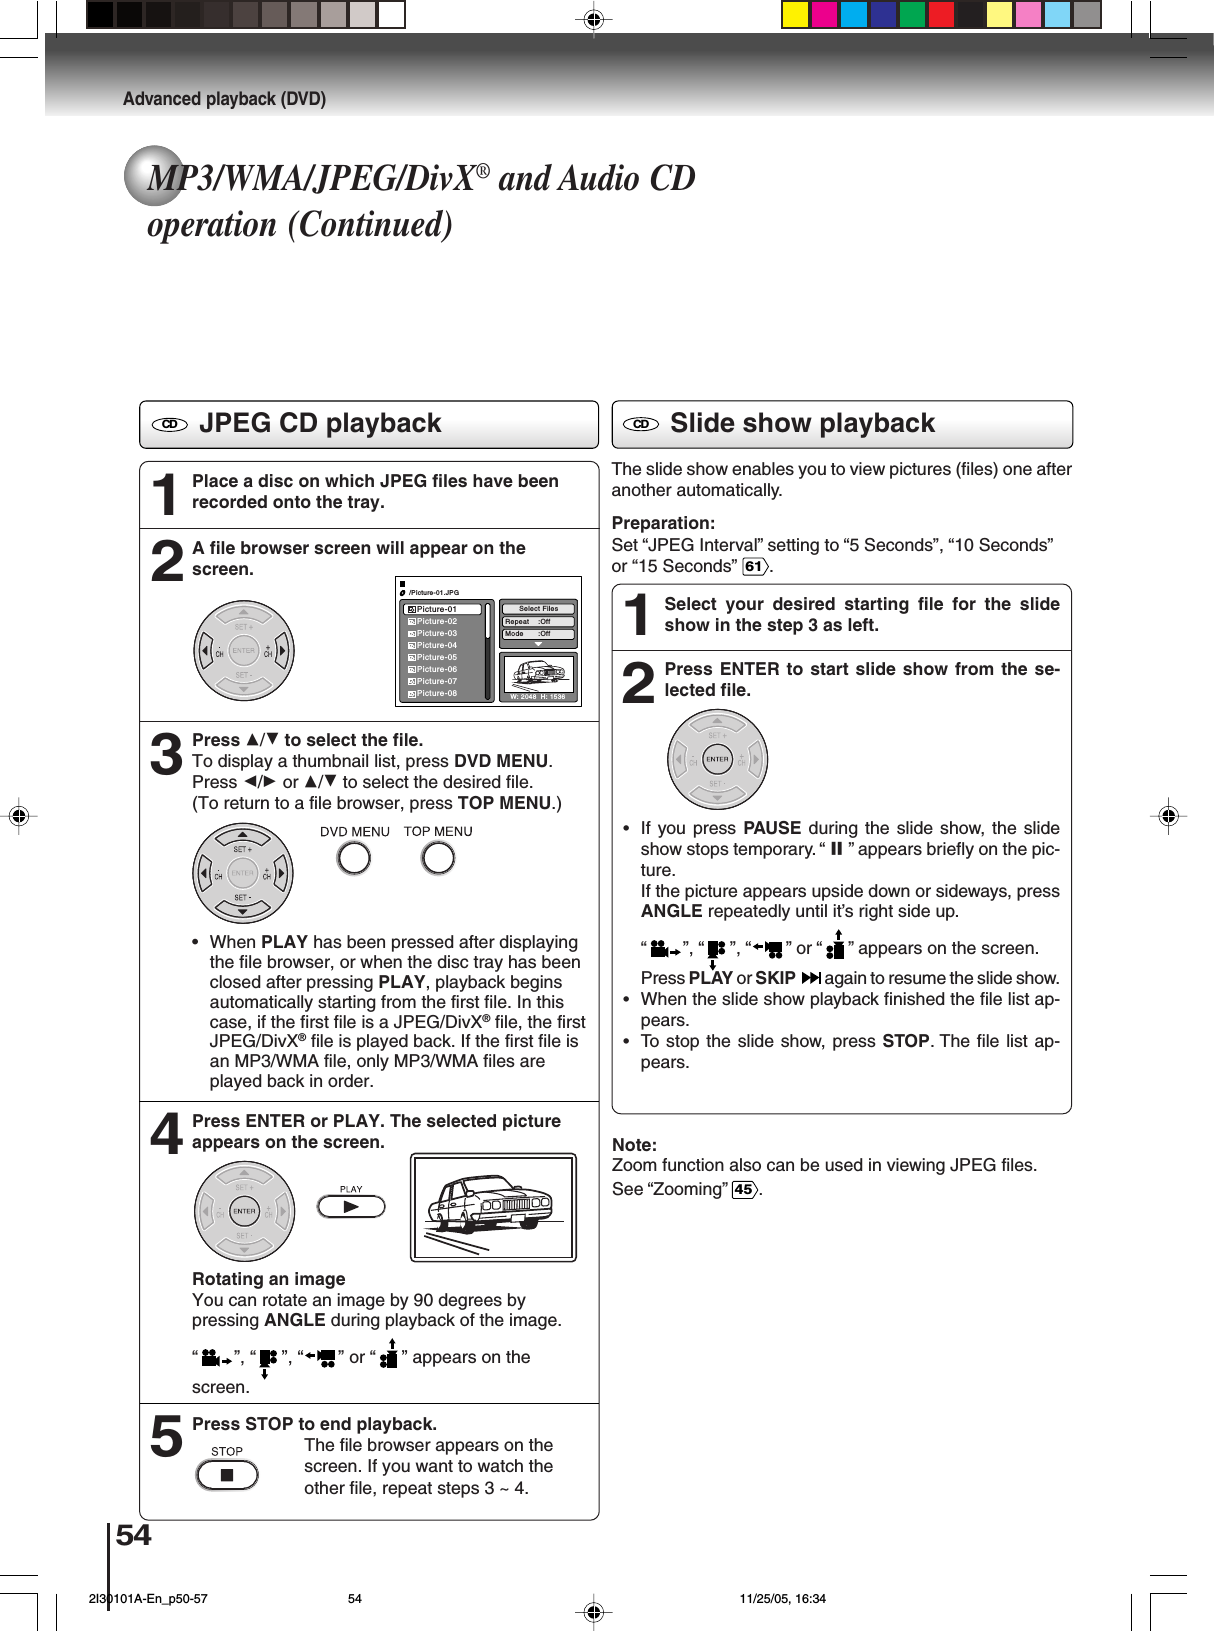
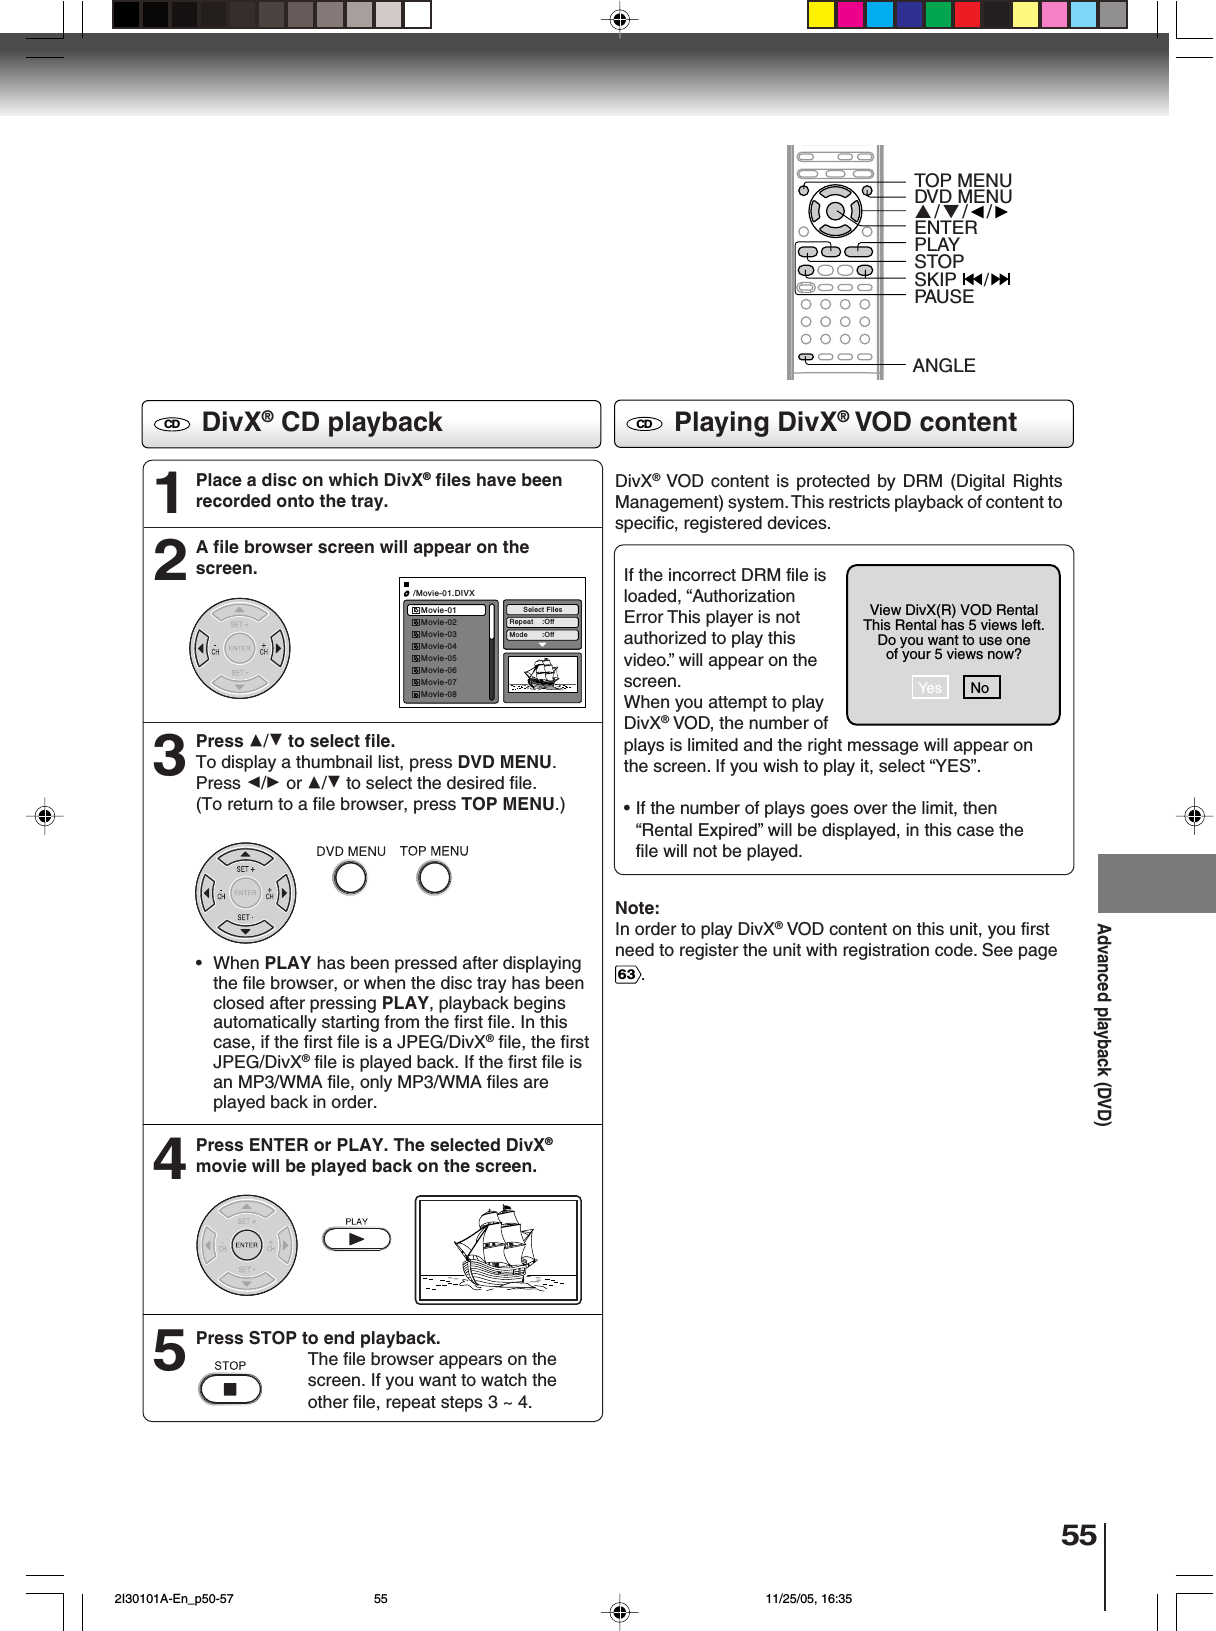
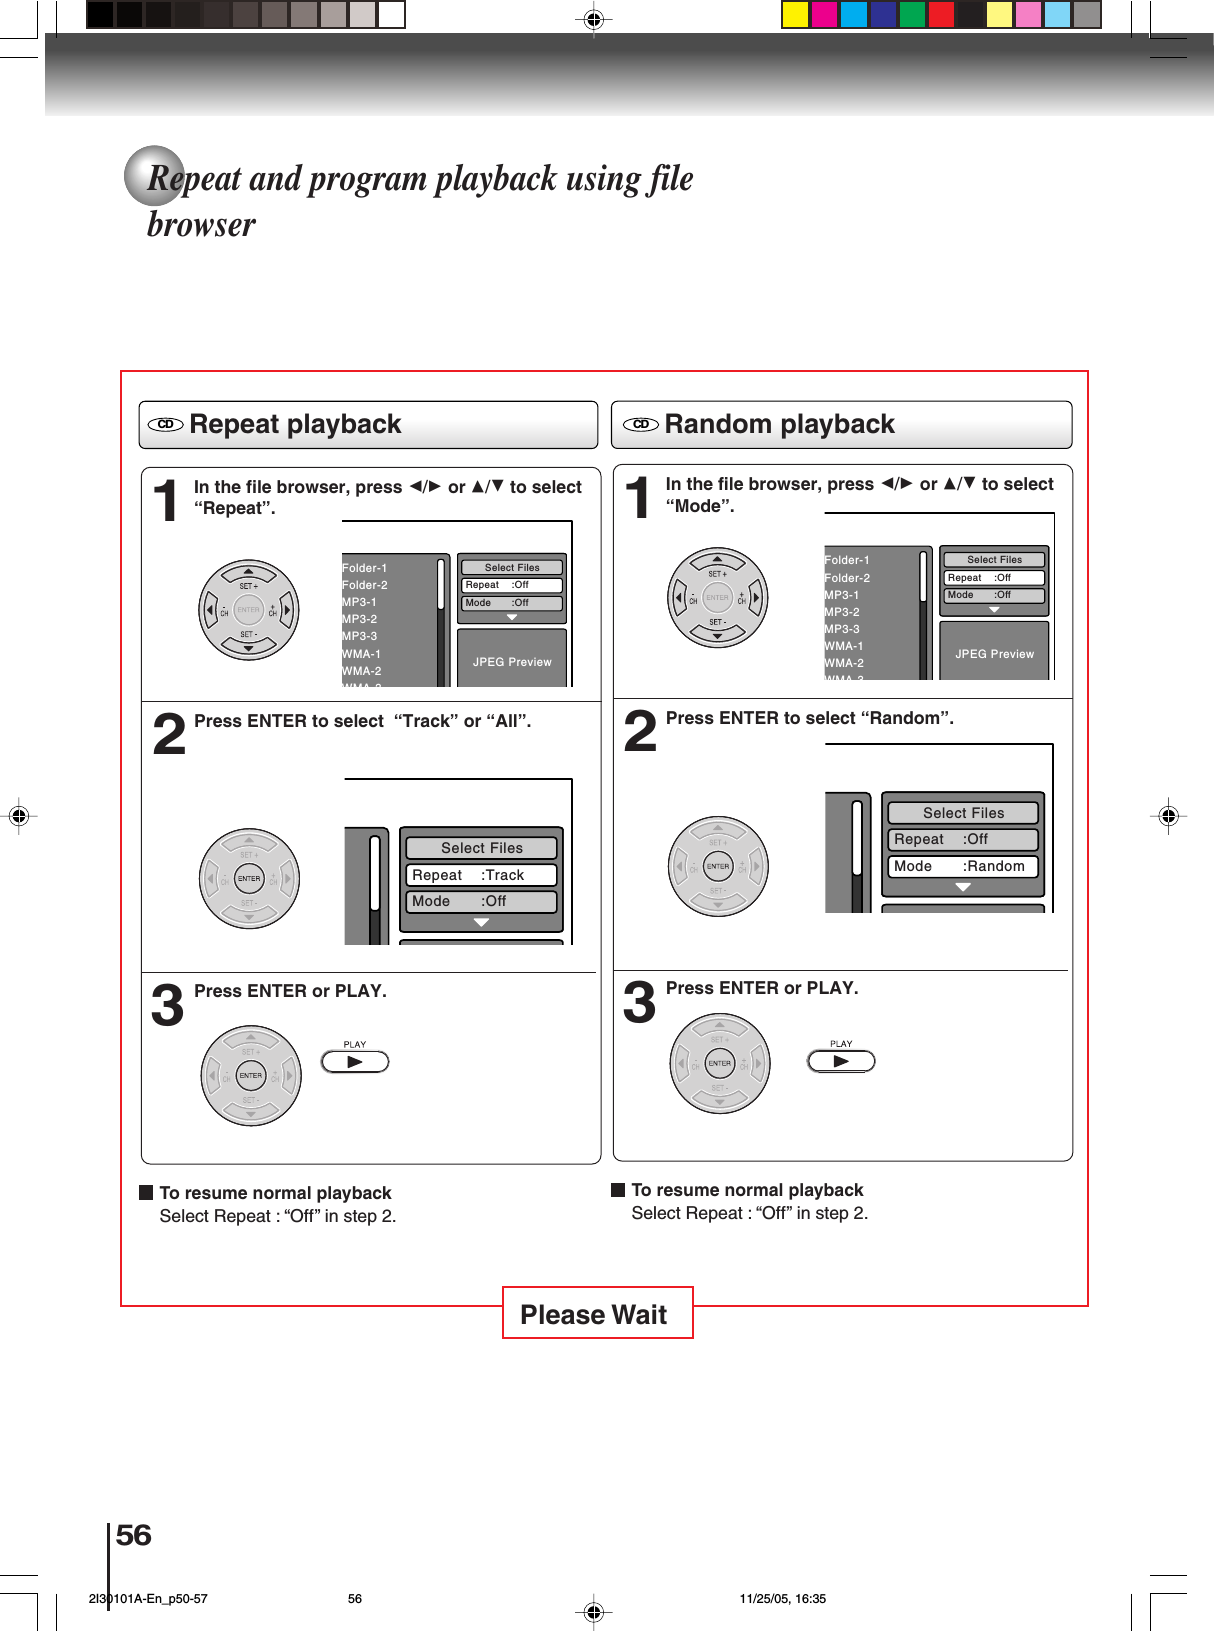
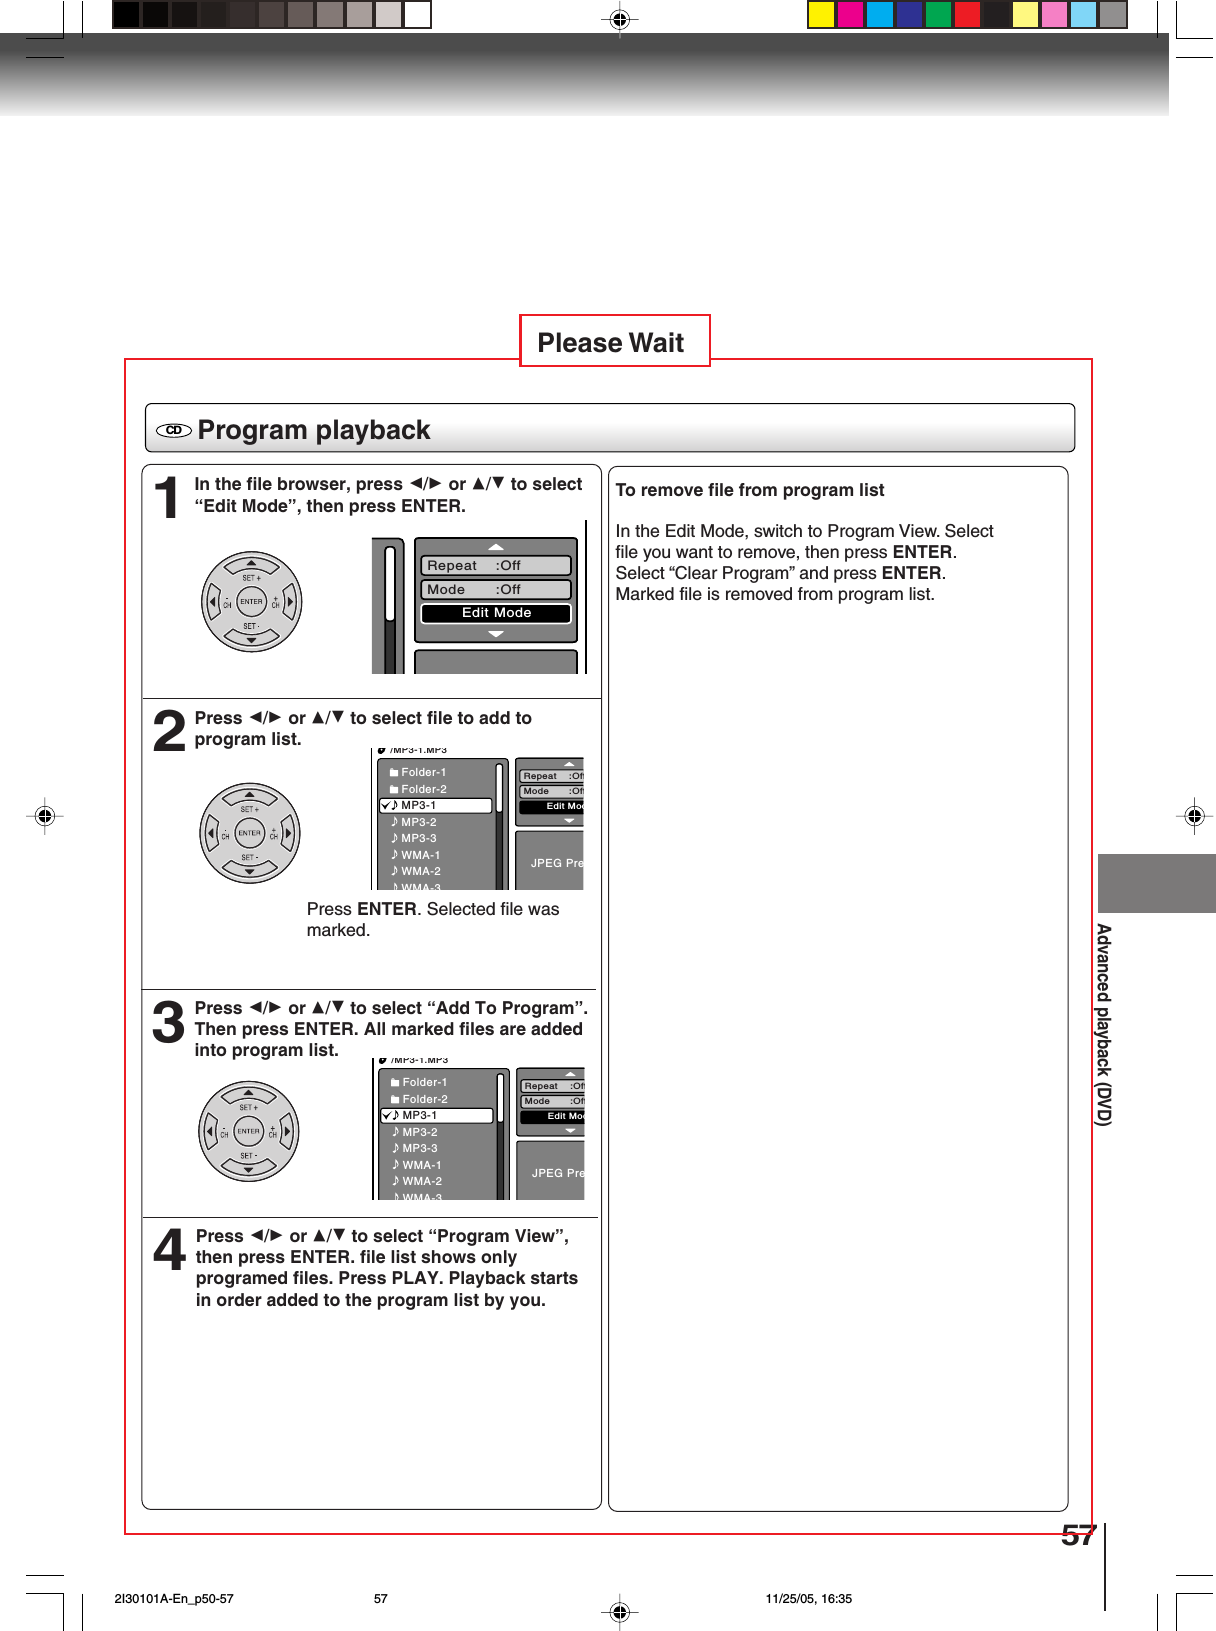
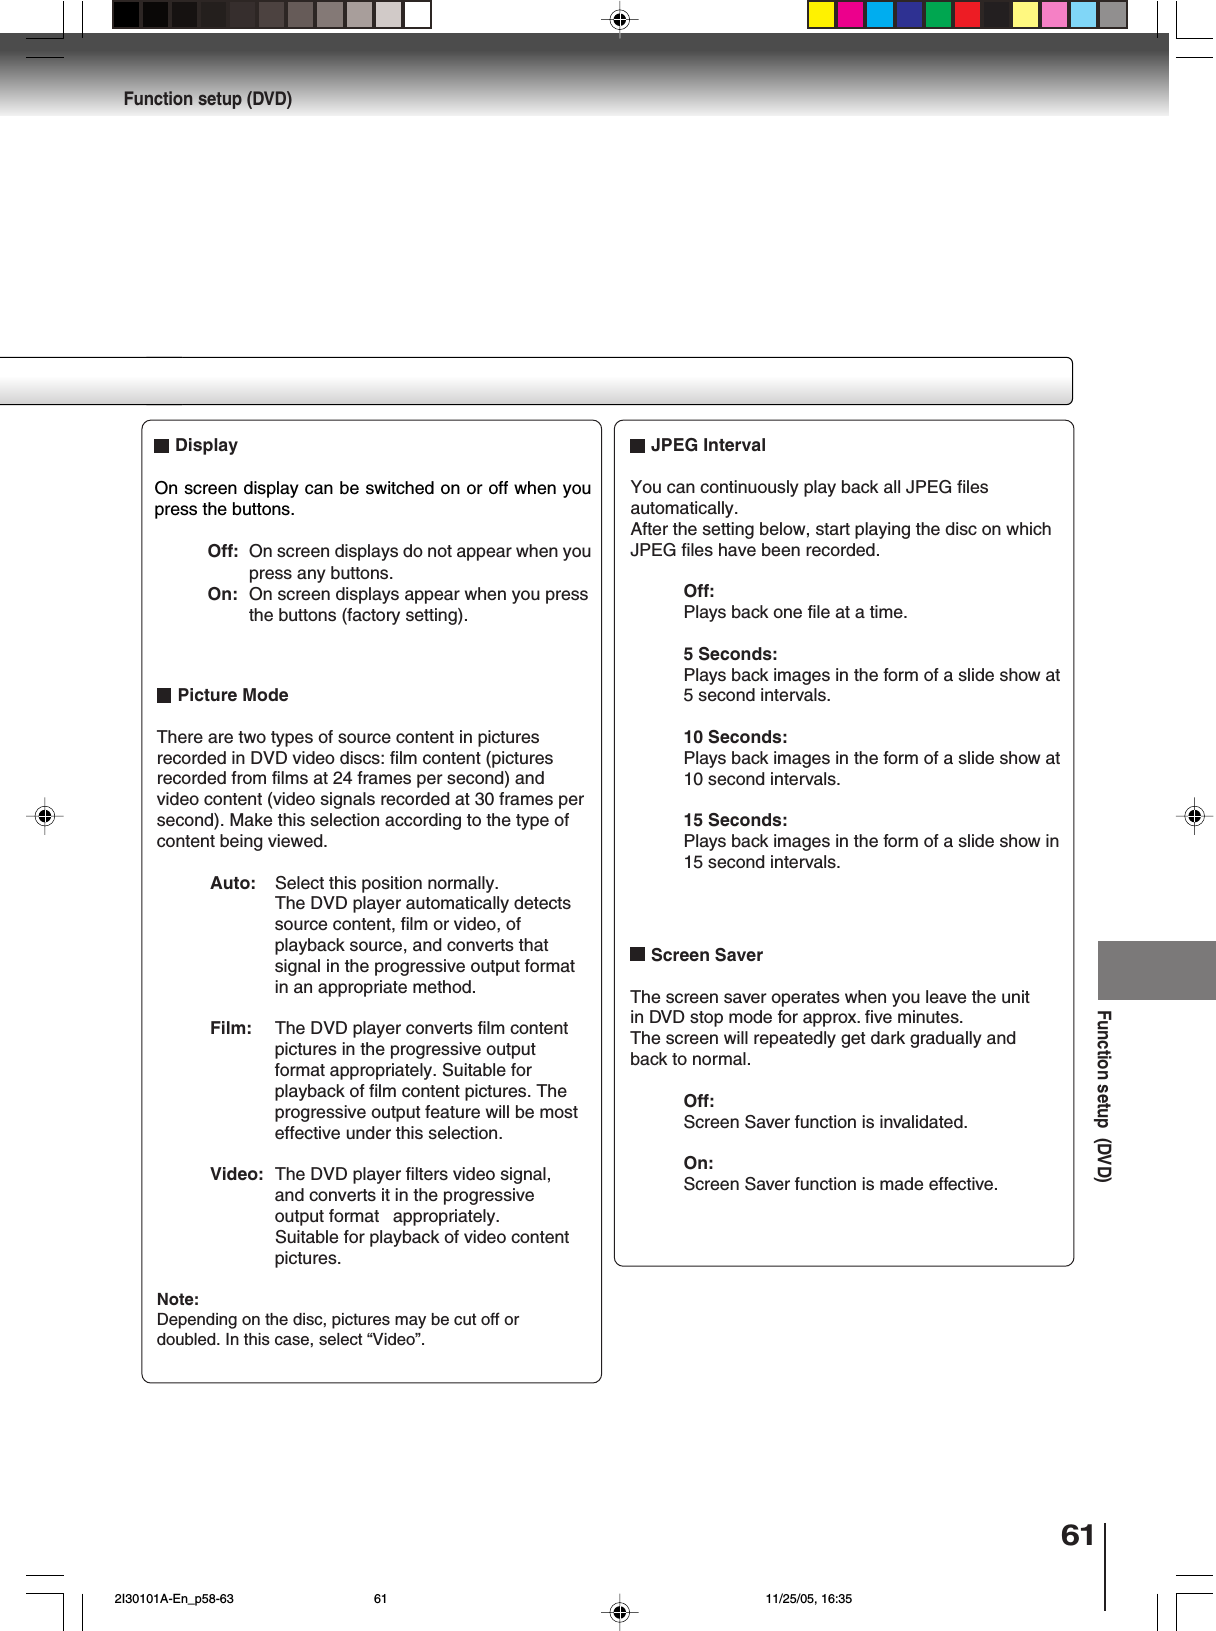
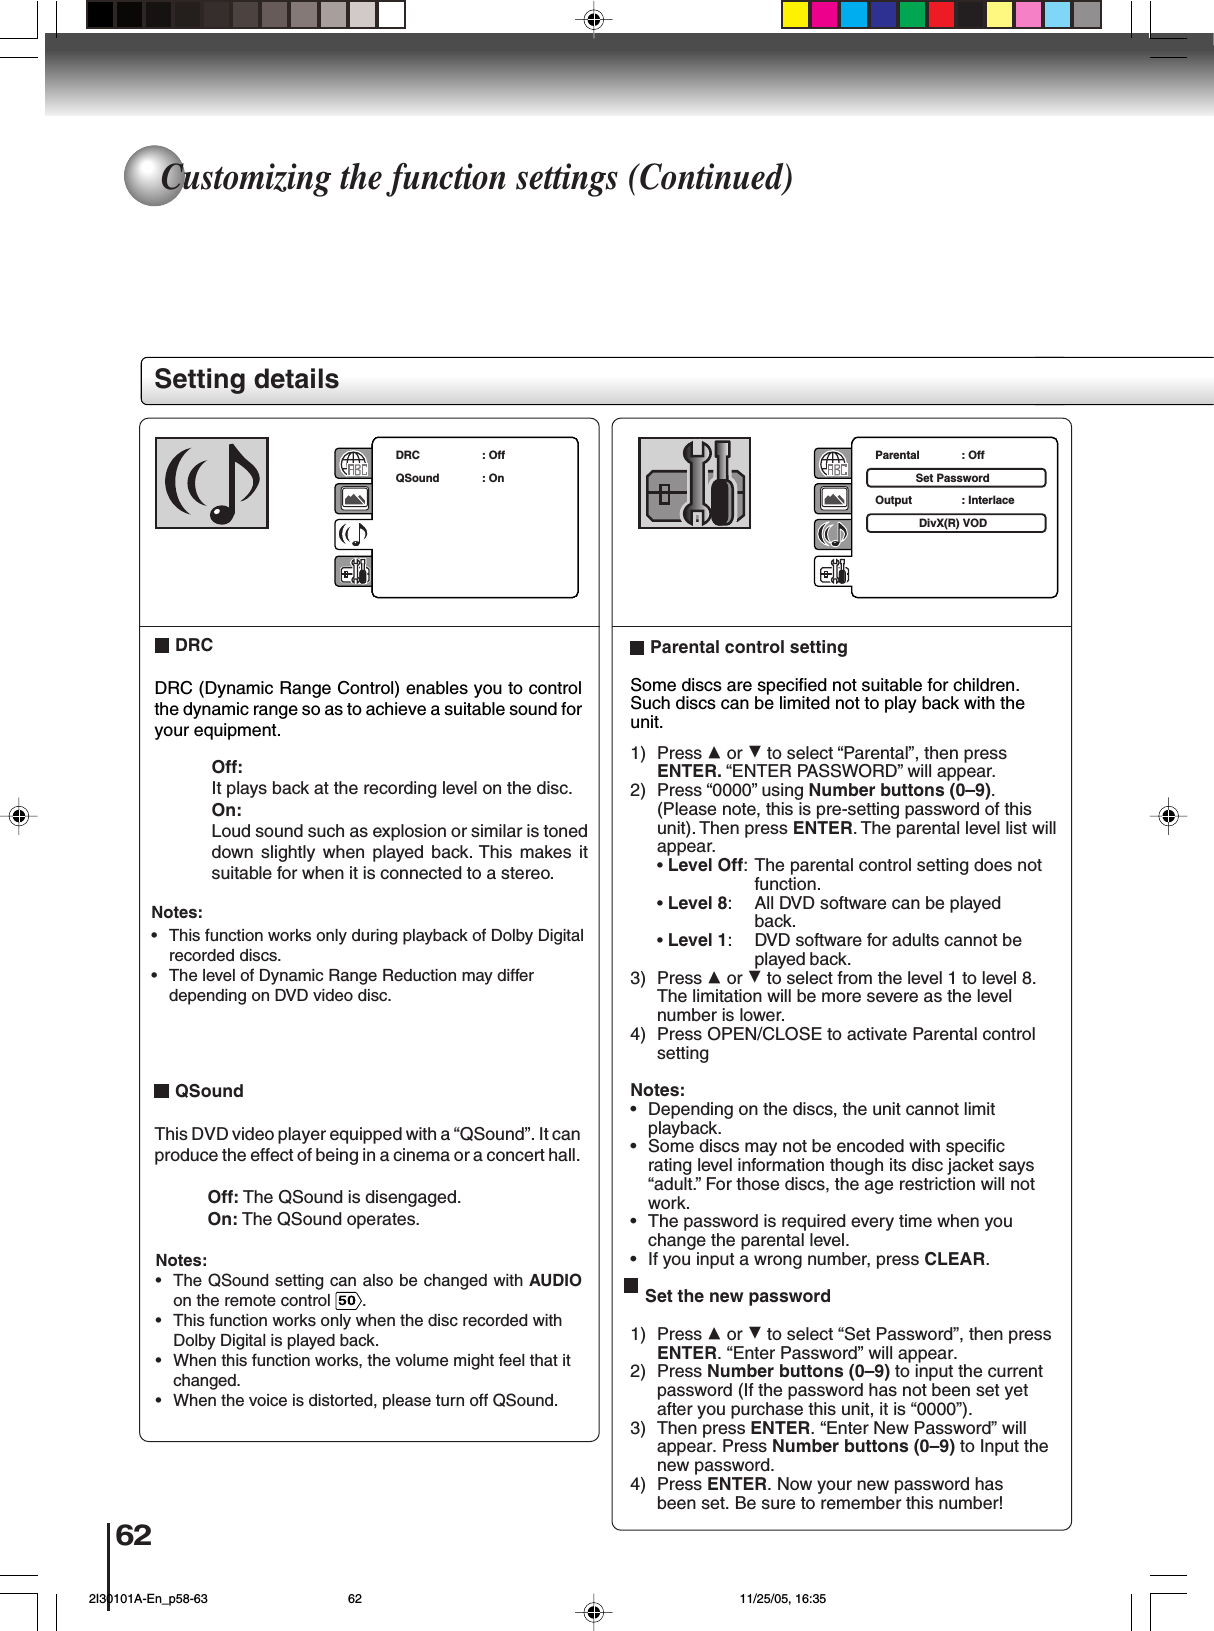
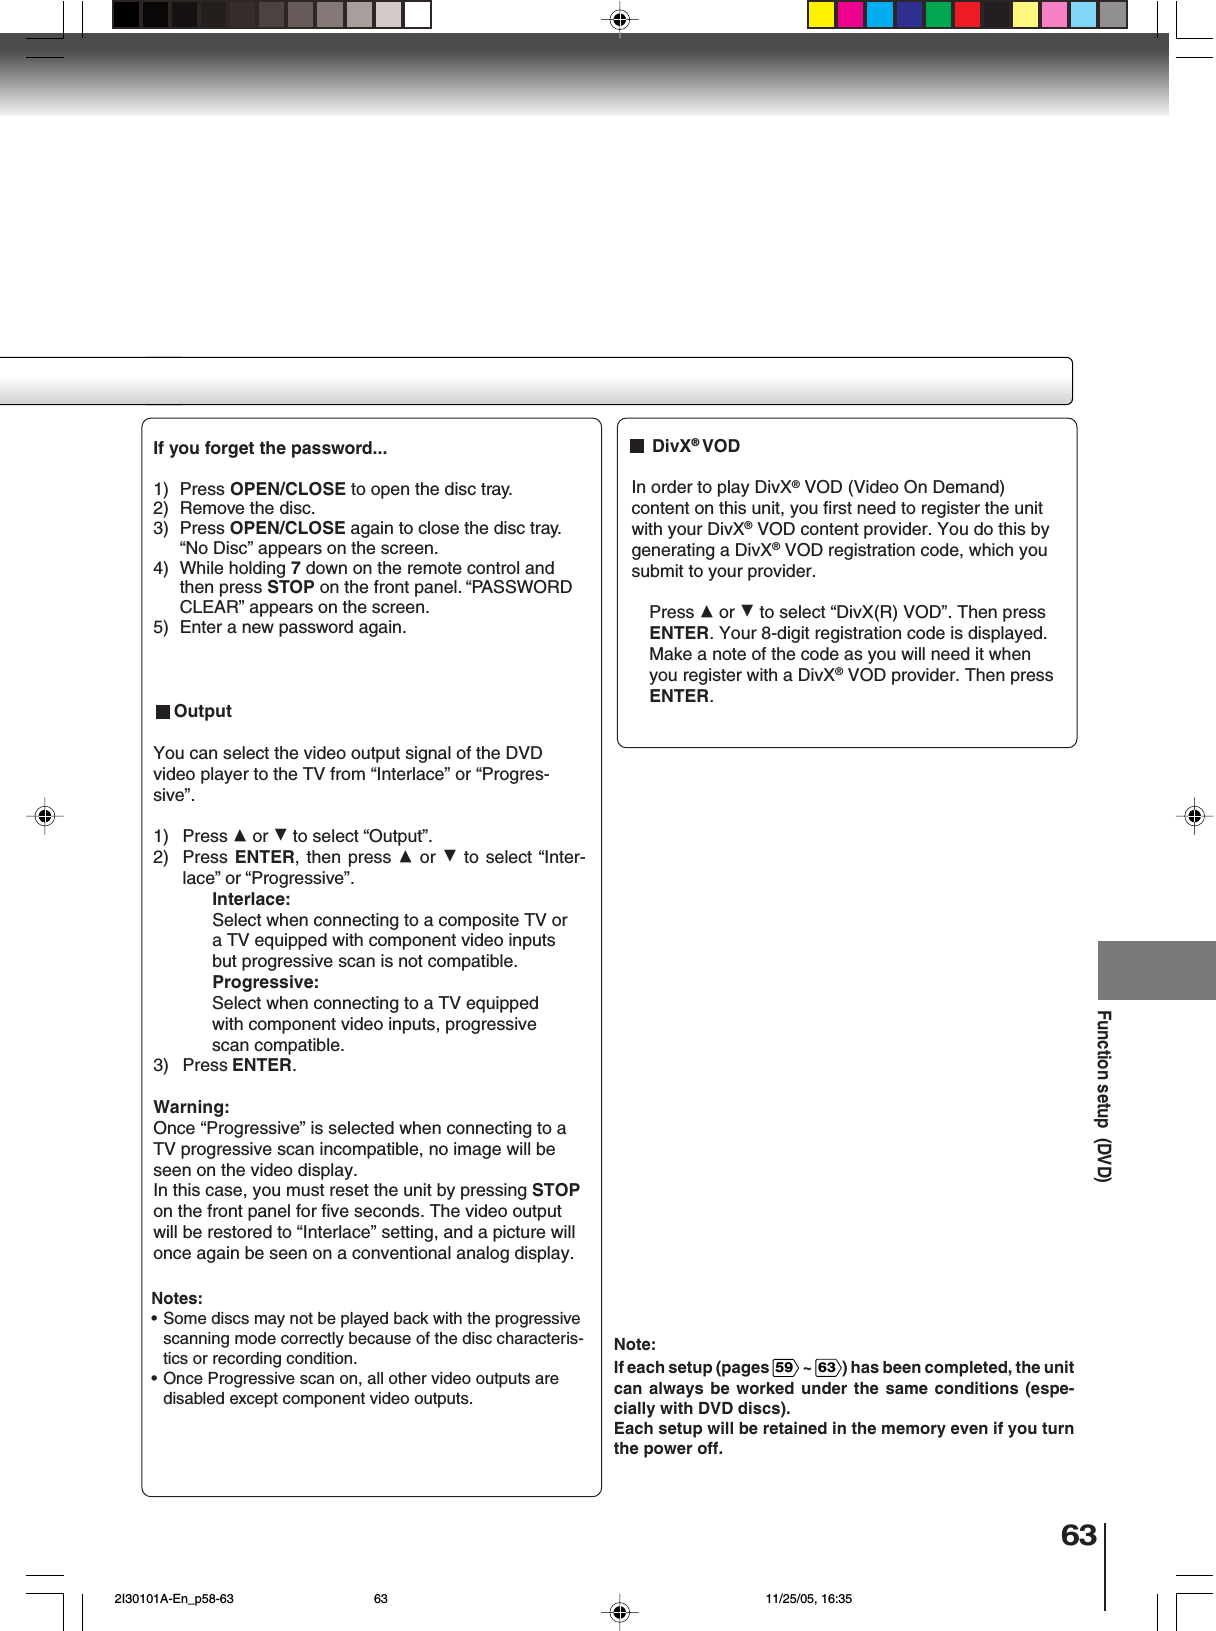
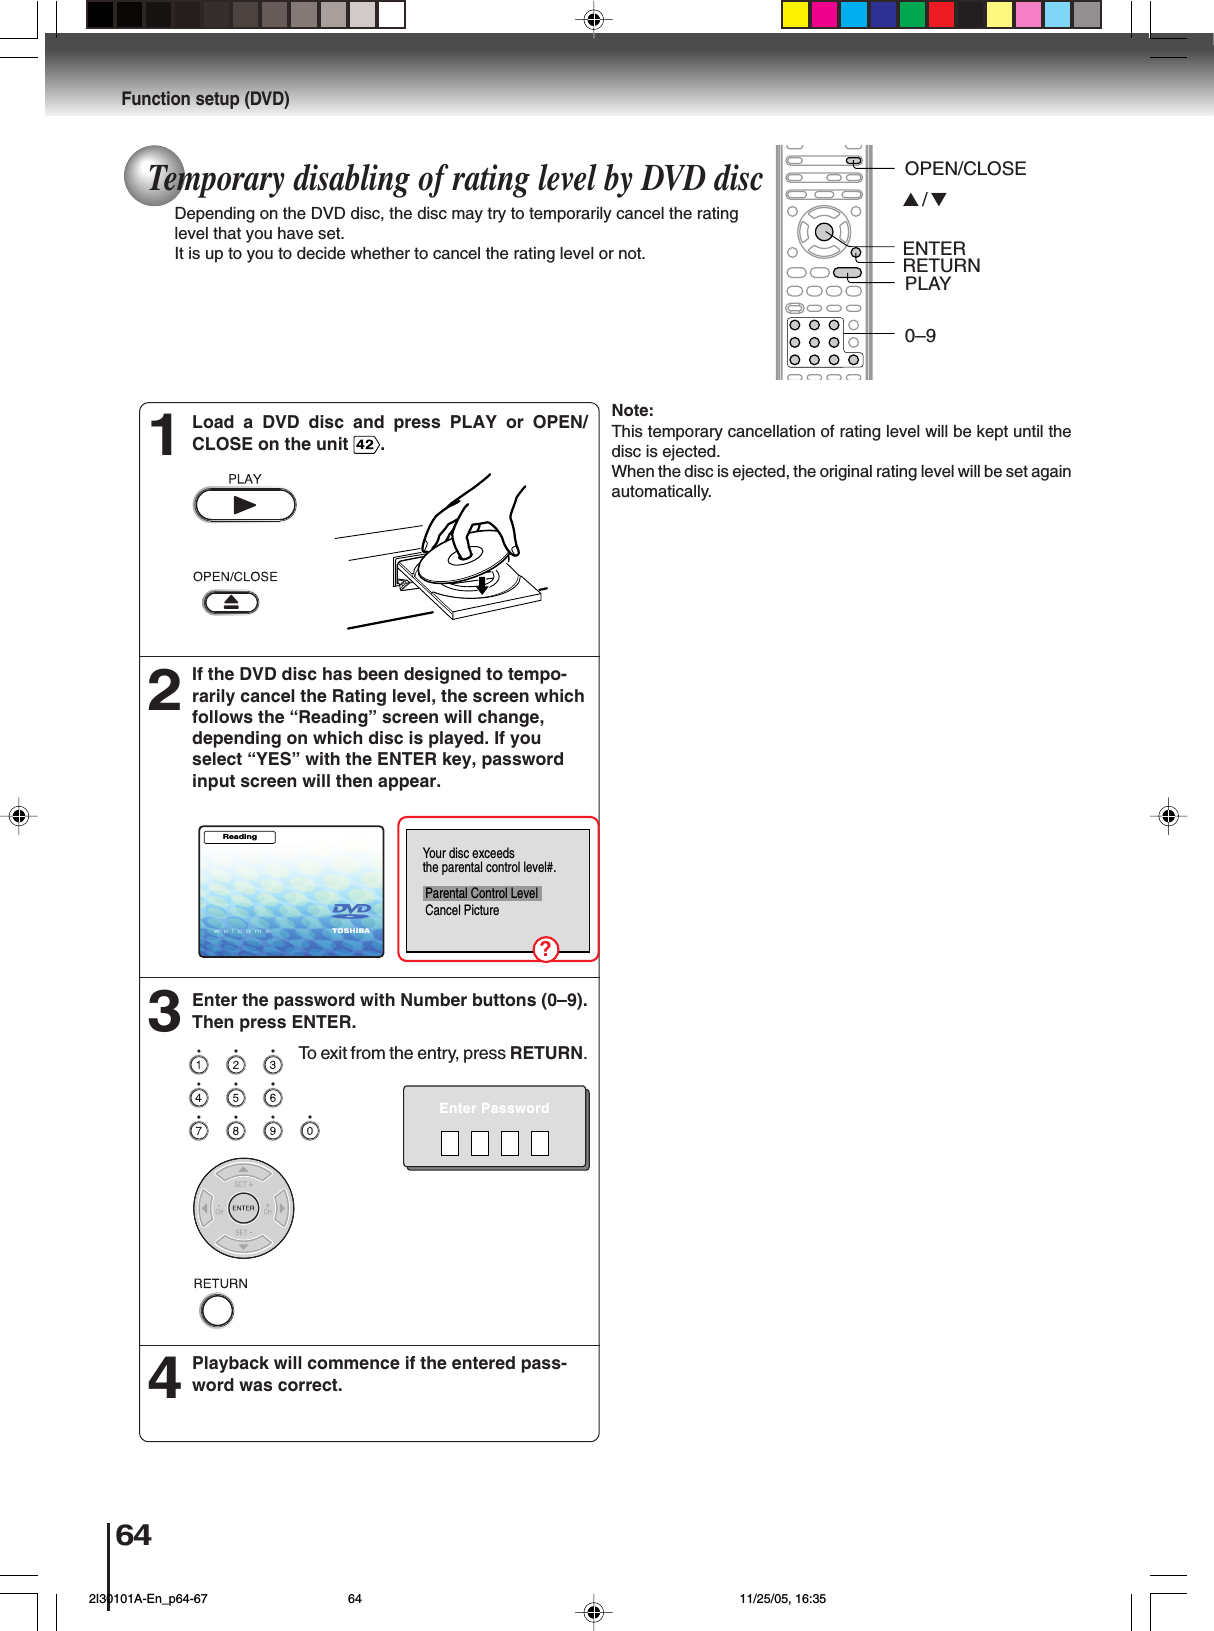
![47Repeat playback1Press PLAY MODE during playback or stop mode.Repeat playback/A-B Repeat playbackPress PLAY MODE again to make the screendisappear.3A-B Repeat playback1Press A-B RPT during playback.The start point is selected.A-B repeat playback allows you to repeat material betweentwo selected points.22ANotes:•In A-B Repeat mode, subtitles near the A or B locations maynot be displayed.•You cannot set the A-B Repeat for the scenes that includemultiple angles.•A-B Repeat playback does not work when Repeat playback isactivated.•You may not be able to set A-B Repeat, during certain scenesof the DVD.•A-B Repeat does not work with an interactive DVD, MP3/WMA/JPEG/DivX® CD.•A-B Repeat is prohibited when PBC is on.To resume normal playbackPress A-B RPT again.“Off” appears on the screen.DVDVCDCDDPLAY MODEA-B RPTPlay ModeRepeat : OffNotes:•Some discs may not work with the repeat operation.•In case of Video CD with PBC, repeat functions are prohib-ited during playback.[DVD]Press ENTER to select “Chapter” or “Title”.The unit automatically starts repeatplayback after finishing the current ti-tle or chapter.[Video CD]Press DDDDD to select “Repeat”.Press ENTER to select “Track” or “All”.The unit automatically starts repeatplayback after finishing the currenttrack.•If you set the repeat mode during stop mode,press PLAY to start Repeat playback.[Audio CD and MP3/WMA CD]Please see “Repeat and program playback usingthe file browser” 56.Press A-B RPT again.The end point is selected. Playbackstarts at the point that you selected.Playback stops at the end point, re-turns to Point A automatically, thenstarts again.To resume normal playbackSelect Repeat : “Off” in step 2.PLAYAdvanced playback (DVD)ABPlay ModeRepeat : OffMode : OffENTERDVDVCD 2I30101A-En_p46-49 11/25/05, 16:3447](https://usermanual.wiki/ORION-ELECTRIC/M2I3A.Users-Manual-2/User-Guide-609678-Page-12.png)