Ocean Digital Technology MS230C0000 Internet Radio User Manual WR 233 IB
Ocean Digital Technology Ltd. Internet Radio WR 233 IB
UserManual.wiki
>
Ocean Digital Technology
>
MS230C0000 User Manual
User Manual
Navigation menu
Upload a User Manual
Namespaces
Wiki Guide
HTML
PDF
Info
Views
User Manual
Discussion / Help
Navigation
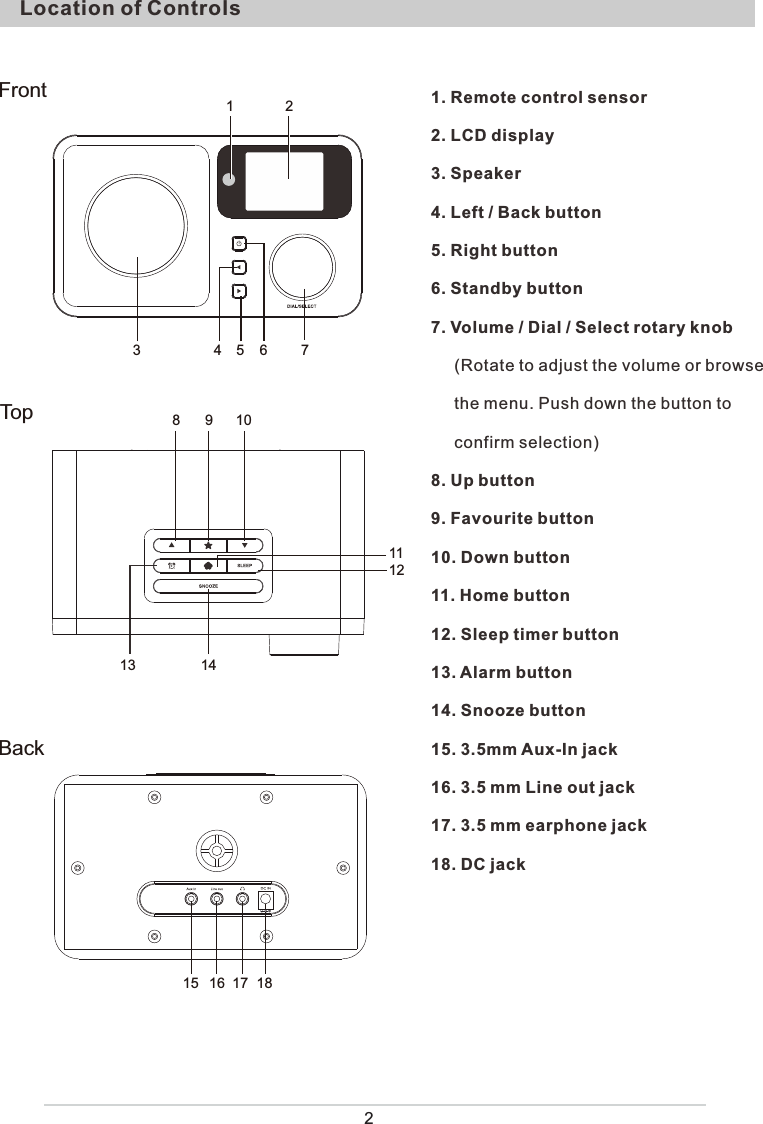
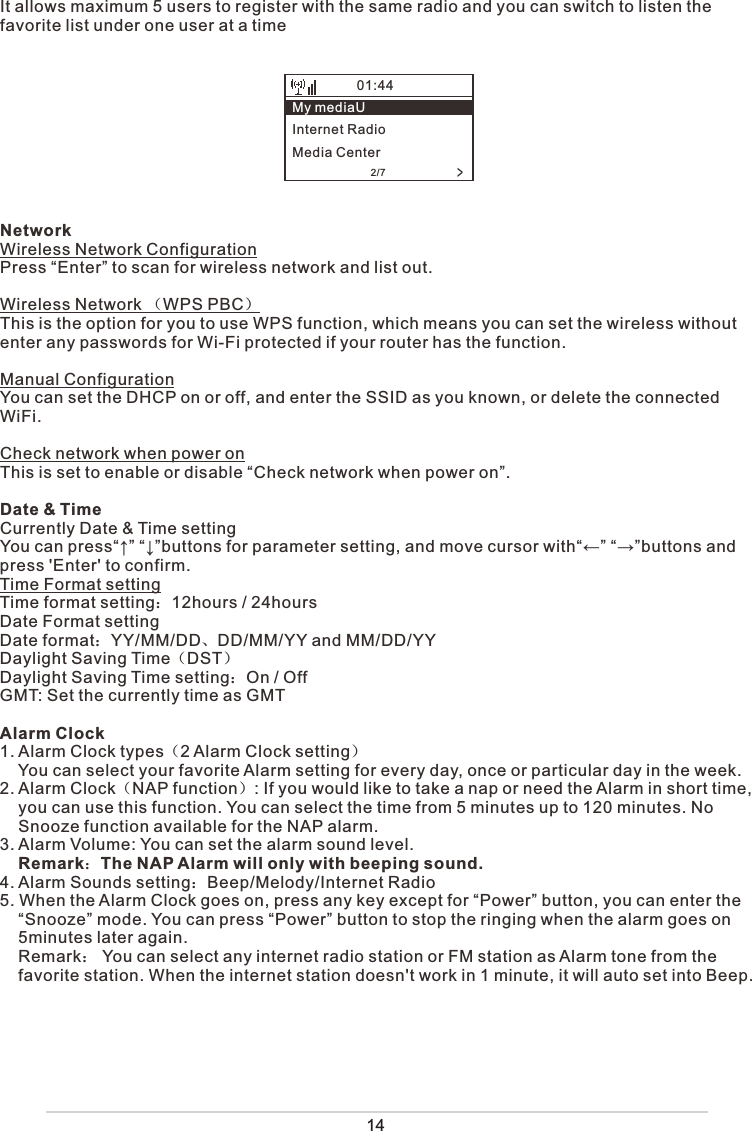
![5 Key“0”―― 0,'DEL' Key“1”―― '1'->'@'->' '(space)->'!'-> “ (double quotes)->'#'->'$'->'%'->'&'-> '(single quotes)->'('->')'->'*'->'+'->','->'-'->'.'->'/'->':'->';'->'<'->'='->'>'->'?'->'['->'\'->']'->'^'->'_'->'`'->'{'->'|'->'}'->'~'Key “2”―― 2,A,B,C,a,b,cKey“3”―― 3,D,E,F,d,e,fKey“4”―― 4,G,H,I,g,h,iKey“5”―― 5,J,K,L,j,k,lKey“6”―― 6,M,N,O,m,n,oKey“7”―― 7,P,Q,R,S,p,q,r,sKey“8”―― 8,T,U,V,t,u,vKey“9”―― 9,W,X,Y,Z,w,x,y,zRemark: press '→' to move to next character and press 'OK' button to confirm. You can also press ↑ ↓ to change the character /number, then press the right key to confirm the entry.After you finish the entry, press the select button to confirm. Switching on the radioPlug the connector pin of the mains adaptor into the DC jack on the unit. Connect the other end of the adaptor to the wall socket. Caution: Use only the main adaptor supplied with the radio. Connecting a power supply with a different rating will cause permanent damage to the radio and may be hazardous.The display on the front of the radio will light up and show:Then you can select your prefer language on the radio.It will ask you if you want to Enable the “Check Network” when Power on”, it is suggested to choose “Yes”. Then the radio will always check the available WiFi network automatically.Remote control character listWelcomeEnglishDeutschFrancais+01:44 2/7](https://usermanual.wiki/Ocean-Digital-Technology/MS230C0000/User-Guide-3214589-Page-6.png)
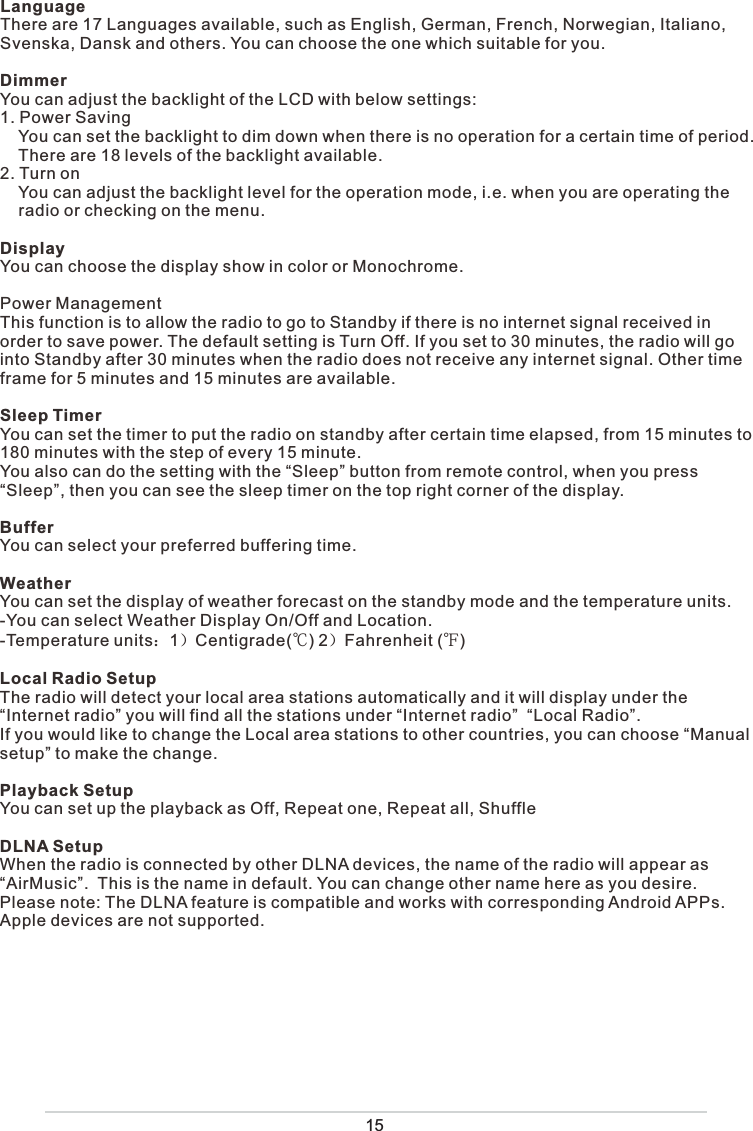
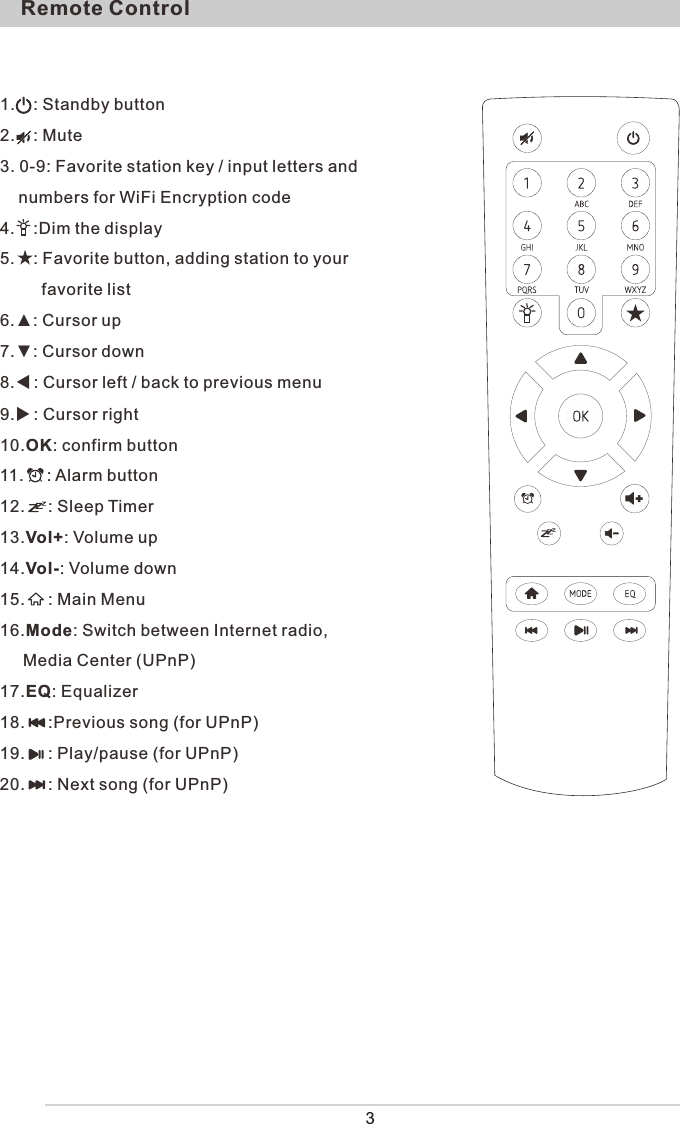
![6Connecting to your WiFi NetworkThe screen below will appear. You can choose Yes to proceed to search for the available WiFi network. If your router has the WPS function, you can select the “Yes[WPS]” to proceed.It will then start scanning the network. After the search is done, it will display a list of the available router.Choose your router from the list, enter the WEP(Wired Equivalent Privacy) or WPA(Wi-Fi Protected Access) code. If your network is not configured to be with the WEP or a WPA code, the unit will connect to the router automatically. Note: The encryption code would have been set up by the person who set up and configured your network.Please refer to the “Remote control character list” for you to enter the passwords. Press the “→” button to go to the next word, press “←” button to delete the wrong word you have entered.If you want to enter the passwords on the radio main unit, you can use the Volume Dial rotary knob. Follow the steps below:- Rotate the knob to select the character- Press the button to go to the next entry- After you finish the entries, push down the Rotary knob to confirm. The radio will start connecting to the network.Enter Password 1/1MOVE INPUT: OK16:2301:44LinksysHomeaudioDemo< 1/6 >01:01 YES Yes(WPS) NOWould you like to configure Network now?](https://usermanual.wiki/Ocean-Digital-Technology/MS230C0000/User-Guide-3214589-Page-7.png)
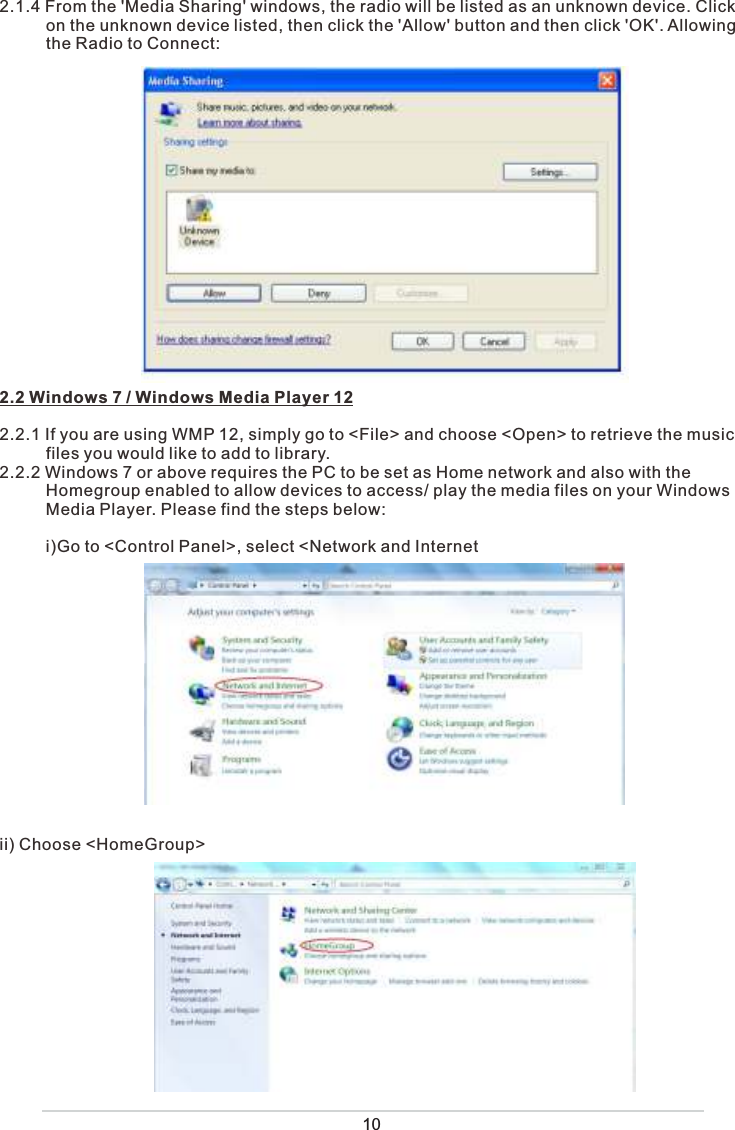
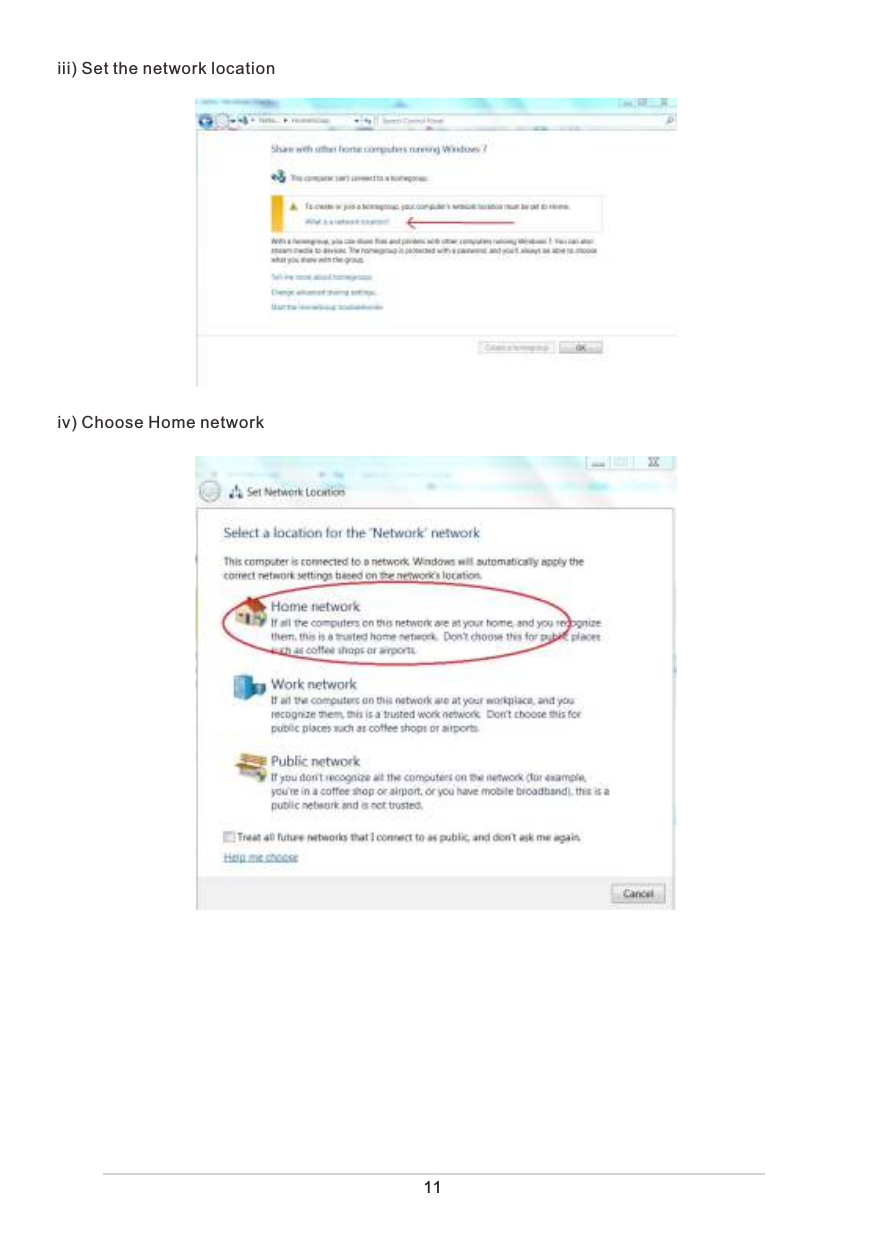
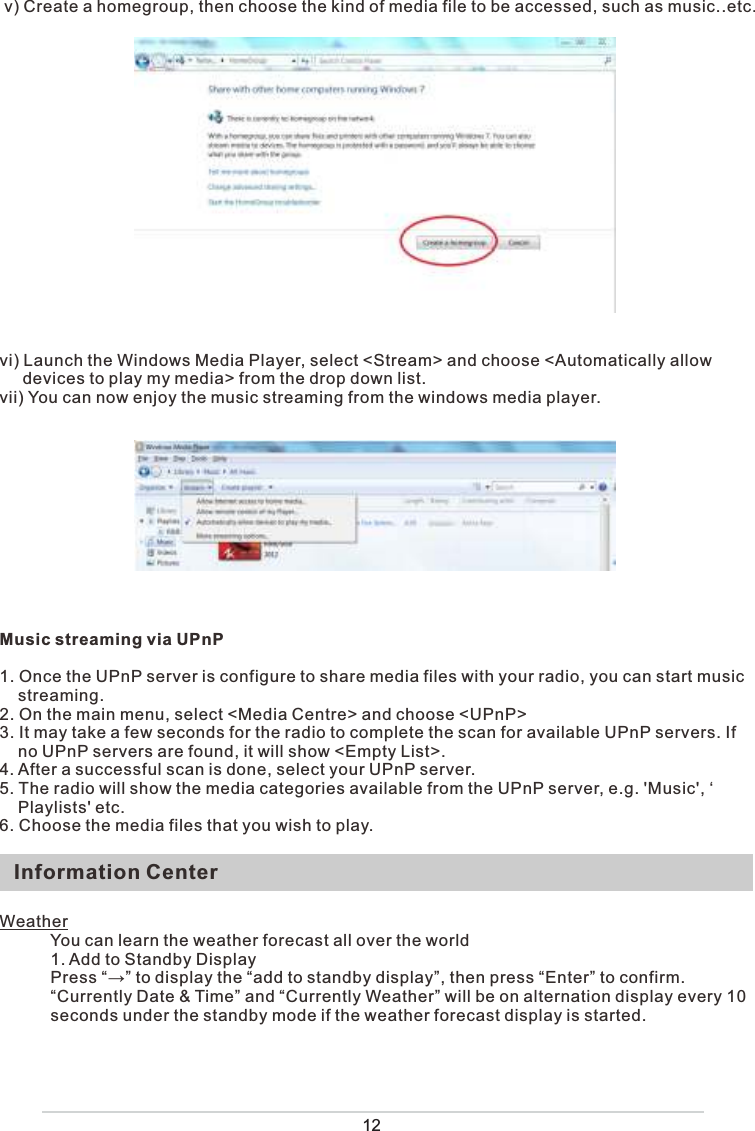
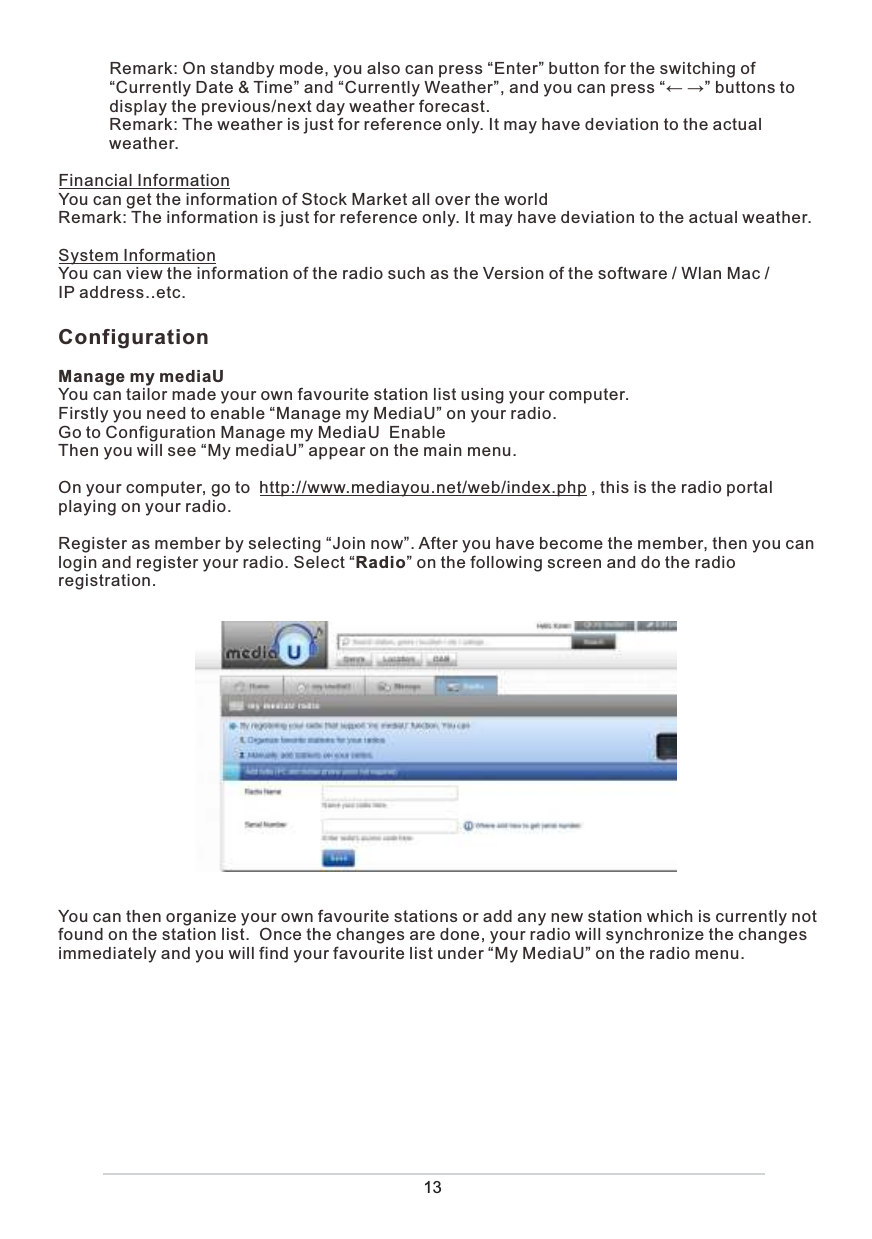
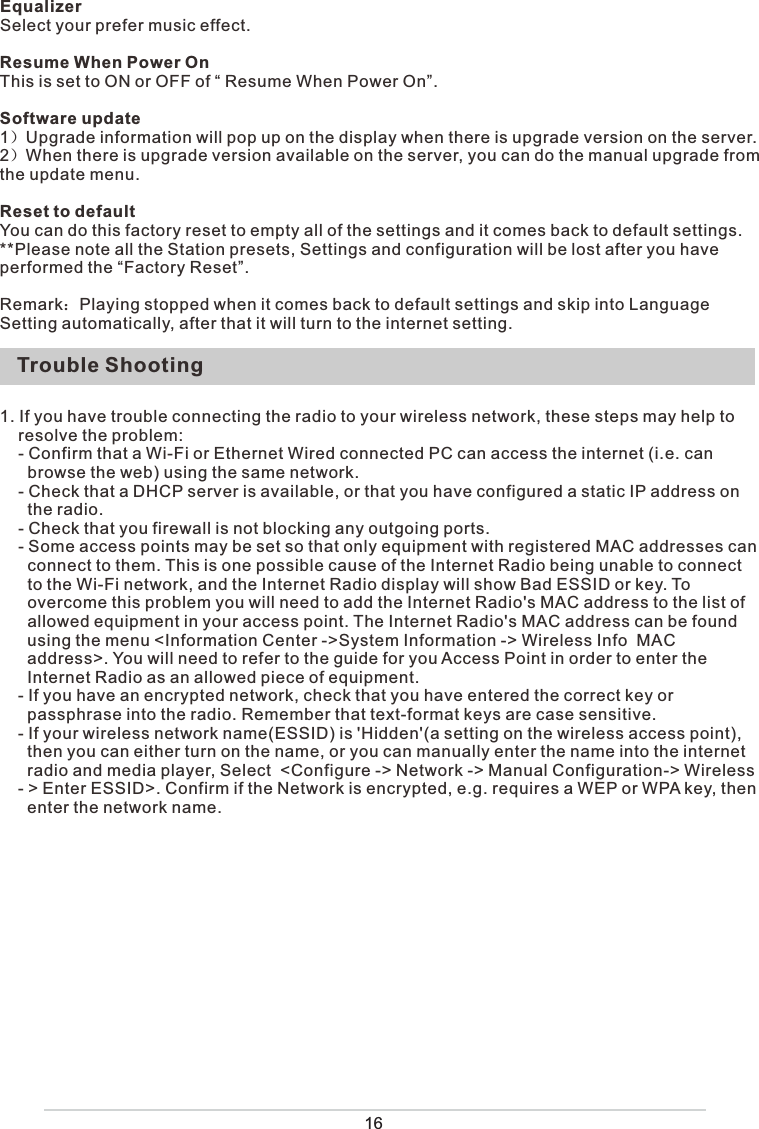
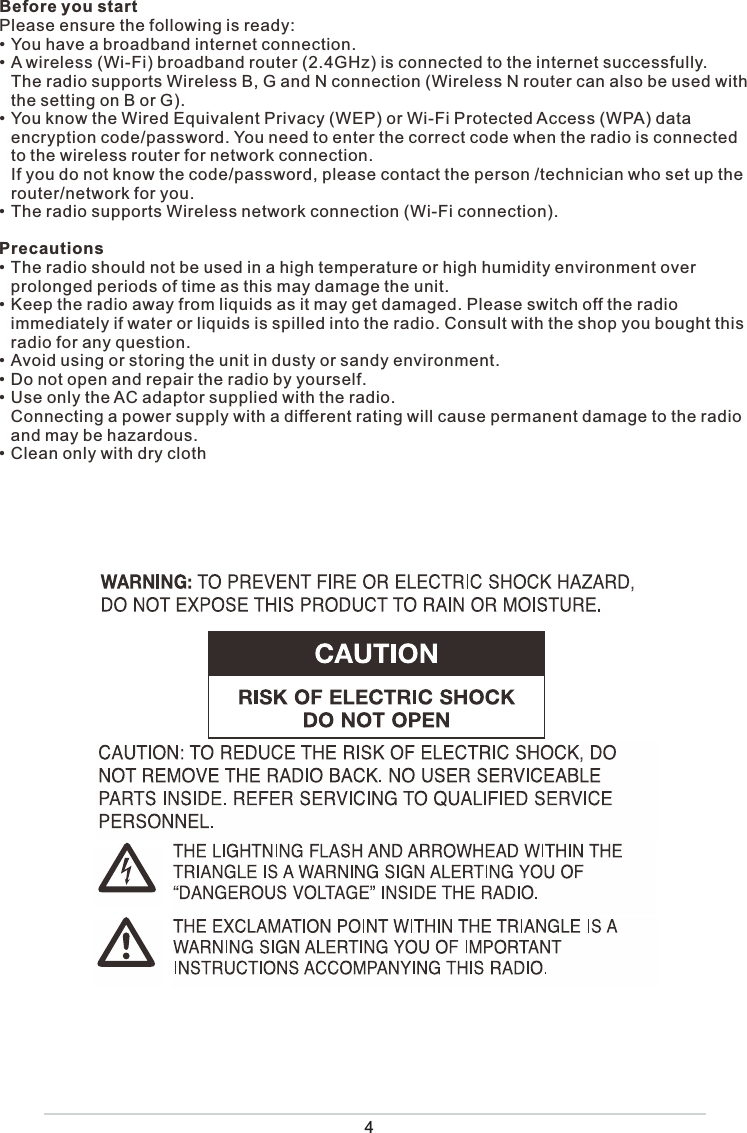
![9 Please make sure your computer laptop is on the same Wi-Fi network as the Radio before you start using this function.1. If your PC is running Microsoft Windows XP, then you can use Windows Media Player 11(WMP11) to act as your UPnP (Universal Plug and Play) media server. (For Windows 7 or above, please download the correspond version of Windows Media Player). The latest Windows Media Player may be downloaded from Microsoft's website and install by following the instructions detailed in its installation wizard.2. Once installed, Windows Media Player will create a library from all the media files available to it on your PC. 2.1 Windows XP / Windows Media 11 2.1.1 To add new media files to the library, select' File > Add to Library…> Advanced Options', Click 'Add' and choose the files you wish to add and click' OK'. 2.1.2 Now you need to connect your Internet radio to Windows Media Player 11 and configure it to allow the radio to access your media library. In order to this, you will need to do the following: a. On the radio, go to the main menu and select <Media Centre> <UPnP>. b. It will scan for all available UPnP servers. Note, this may take a few seconds for the radio to complete its scan and before the scan has completed, the radio will display '[Empty]'. The radio will continue to display '[Empty]' if no UPnP servers and found. c. After a successful scan. Select your UPnP server, by rotating the dial if there is more than one UPnP server, and then press SELECT. 2.1.3 Your PC will now prompt you that a device has attempted to connect to your UPnP server. In order to allow the radio to have access to the media files, you will need to click the 'Library' tab from Windows Media Player 11 and select the <Media Sharing> item to open the 'Media Sharing' window. Selecting 'Media Sharing…' for Windows Media Player11:](https://usermanual.wiki/Ocean-Digital-Technology/MS230C0000/User-Guide-3214589-Page-10.png)