Ocean Digital Technology ZENO000000 Bluetooth Speaker User Manual
Ocean Digital Technology Ltd. Bluetooth Speaker Users Manual
Users Manual
5 Speaker -iQS™ 3D Surround
with Bluetooth wireless
MODEL Zeno
1 - 15

CONTENTS
1.
Contents
............................................................ .....................................
1
2.
Getting Started
................................................ ....................................
2
3.
Safety
I
n
s
t
r
u
c
t
i
on
s
...............................................................................
3-4
4.
Remote-Control-Buttons and functions…...............
.......................
5
5.
Front and Back Panel-
Control
and Function .
...................................
6-7
6.
How and When to Change Batteries ……
..........................................
8
7.
Operating
I
n
s
t
r
u
c
t
i
on
s
......................................................................
9-13
8.
Specifications
................................................ ......................................
14
1
GETTIN G STARTED
Description:
KEY FEATURES
Integrated iQSTM 3D Analog Audio Processor which
faithfully reproduces the soundstage intended in the original
recordings.
fields.
Wireless Bluetooth connectivity
3.1 channel system with independent subwoofer volume control
85 W total music power
Powerful sound generated by four 2” speakers and
one 4” internal subwoofer.
Small, easy to use remote control
Front panel control buttons
Multicolor RGB LED indicators on front panel
Attractive piano-black glossy finish.
Before attempting to connect, operate or adjust this product,
please read these instructions carefully, and keep this manual for
future reference
15
2
The Zeno is a compact table top 3.1 speaker system with wireless
Bluetooth connectivity and SoniQ iQSTM surround processing. The
superior surround technology is accomplished using a proprietary
analog signal processing chip operating with a special algorithm based
on Natural Audio Processing which preserves all the directionality and
clarity of the original audio source while creating an incredible,
immersive 3D sound field environment that envelops the listener
without adding any artificial artifacts or unnatural, over-processed
effects. The surround performance adapts to any audio content,
whether pure stereo or surround encoded recording, and works equally
well for any media, including music, movies, and TV.
Any Bluetooth enabled portable device can easily be connected
wirelessly to the Zeno, which also includes an Auxiliary stereo input
for all other sources, including MP3 players, DVD players, set top
boxes, TV audio outputs, laptops, or anything with line level or
headphone audio output.
3 listening modes: normal stereo, maximum and narrow 3D sound
SPECIFICATIONS
Power Ada
pt
o
r
100-240V
50/60 H
z
Audi
o
P
ower
85 W of music power
30 W Internal Subwoofer
I
nputs Wireless Bluetooth 1x3.5mm AUX
DC Input coax power Jack 15 V
O
utputs USB (Charger only)
TYPE A USB connector
S
oun
d S
tages Max 3D, Narrow 3D, Stereo
F
ront
P
ane
l
Power On / Off
Volume +/-
Bluetooth Pairing
R
emote
C
ontro
l
Power On/Off
Input Select (Bluetooth/AUX)
3D Sound field Select (Music, Movies,
News)
Master Volume (+/-)
Subwoofer Lever (+/-)
Mute
C
onstruct
i
o
n
Plastic and wood with cloth grill
Di
mens
i
ons (WxDxH) 12”x8.5”x7”(30.5x21.6x17.8cm)
W
e
i
g
h
t 8.4 lbs (3.8 Kg)
As
part
of
our policy
of
continuous improvements, we reserve the right
to
make
design
and
specification changes for product improvement without prior notice. The
performance specification figures indicated are nominal values for production units.
There may be some deviations from these values in individual
units.
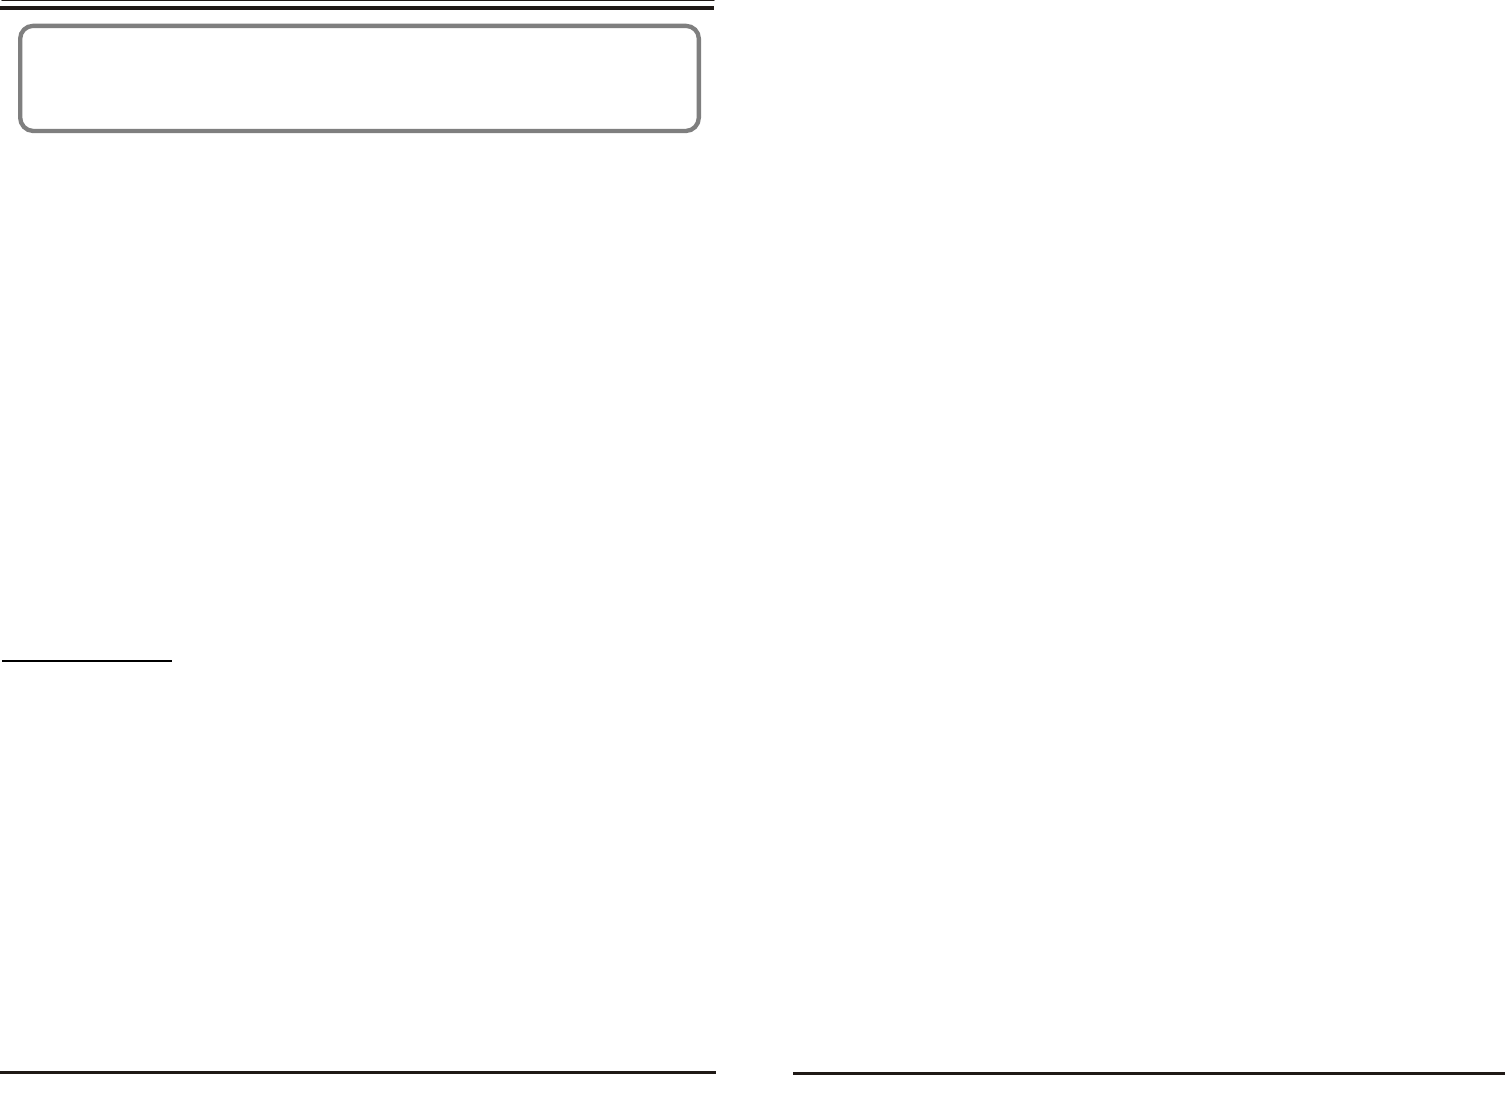
SAFETY INFORMATION
The lightning flash with arrowhead symbol inside
an
equilateral triangle is
intended
to alert the user to the
presence of
uninsulated
“hazardous voltage” within
the
Product’s enclosure, which may be of sufficient
magnitude
to
induce a
risk
of electric shock to
persons.
The exclamation mark inside an equilateral triangle is
intended
to alert the user to the presence of
important
operating
and
maintenance
(servicing) instructions in
the
literature
accompanying
the
product.
WARNING: TO REDUCE THE RISK OF FIRE OR ELECTRIC
SHOCK, DO NOT EXPOSE THIS APPLIANCE TO RAIN OR
MOISTURE
1. Caution: To reduce the risk of
electric shock, do not remove cover (or
back). No user-serviceable parts inside.
Refer servicing to qualified personnel.
2. Do not install the equipment in a place
exposed to direct sunlight.
3
14
SAFETY INFORMATION
OPERATING INSTRUCTIONS
1) Sound Stage Settings
The settings are selected using the remote and is indicated the iQS 3D
LED#2.
a) If the selected setting is MOVIE mode, the LED color is Yellow. This
creates wide sound stage which is ideal for action movies.
b) If the selected setting is MUSIC Mode, the LED color is Green. This
creates a Narrow sound stage which is ideal for listening to Music and
watching TV drama.
c) If the selected setting is NEWS Mode, the LED is Off. This setting is
good for listening to News or Dialog
2) Speaker Placement
Do not place objects on either side of the speaker.
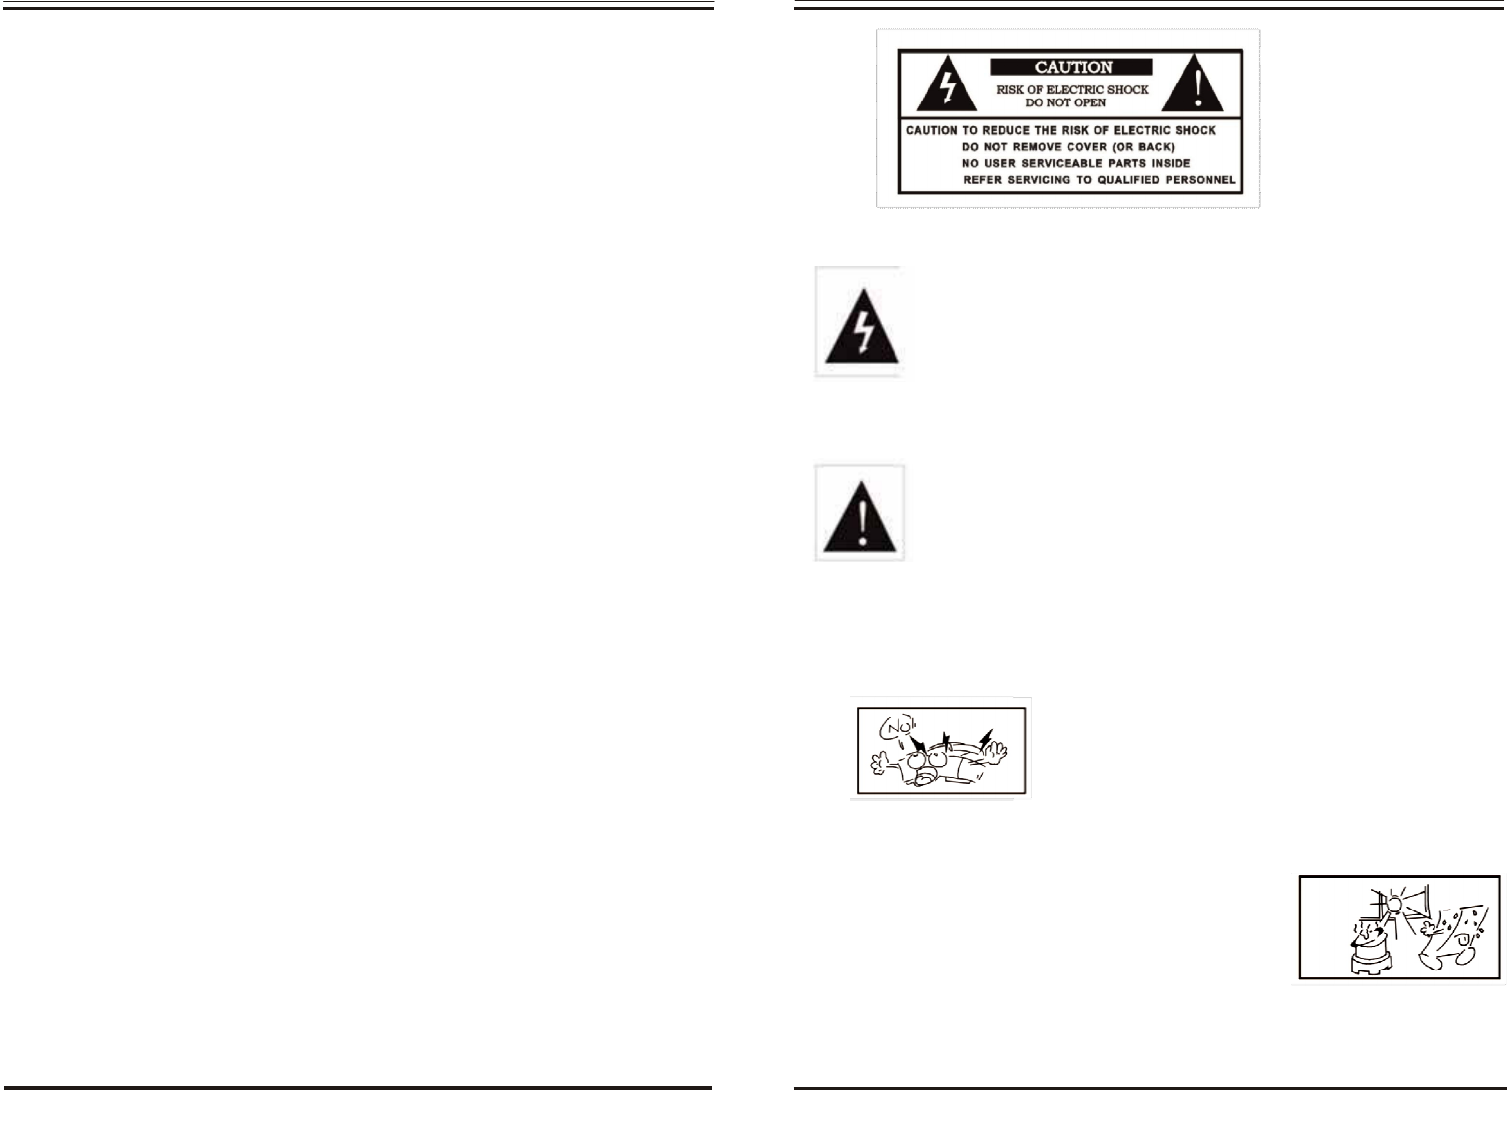
3) System Connections
3. Do not install the equipment in a dusty, damp
or poorly ventilated place.
4.
To prevent damage to the equipment, please
unplug from the power outlet if not in use.
5.
To unplug the equipment, always handle the
power cord using the plug. Do not pull out the
plug by tugging the cord.
6. Place the equipment on the stable surface and
avoid placing other objects on top.
7. Cleaning care: Use a soft, dry cloth for
cleaning. For stubborn dirt, soak the cloth in a
weak detergent solution; wring well and wipe to
remove the dirt. Do not use volatile agents such
as benzene or paint thinner, as they may damage
the surface finish of the equipment.
13
4
OPERATING INSTRUCTIONS
Charging mobile phone
Mobile phone.
It will not play audio from any audio device.
start charging.
Power saving mode
the S550will automatically go into Standby mode to save power.
Cleaning
cloth.
Do not use solvents, chemicals, or sprays
Do not allow liquids to spill or objects to drop into any openings.
Troubleshooting
The Paired Bluetooth device will not connect
1. Turn the Zeno off and back on.
2. Remove the “SoniQ” from the pairing list on your Bluetooth device.
Then pair the device and the Zeno again.
Cannot pair the Zeno with my Bluetooth device
1. Make sure Zeno is discoverable. Press and hold the Pairing button until
the Bluetooth indicator, LED #3, slowly flashes.
2. Make sure the Bluetooth is enabled on your Bluetooth device.
3. Your Bluetooth device may be out of range – make sure the distance is
within 10 meters.
4. If there are many Bluetooth devices on your list of your device, please try
removing some of the devices and pair with Zeno again.
5. Turn the Zeno off and back on
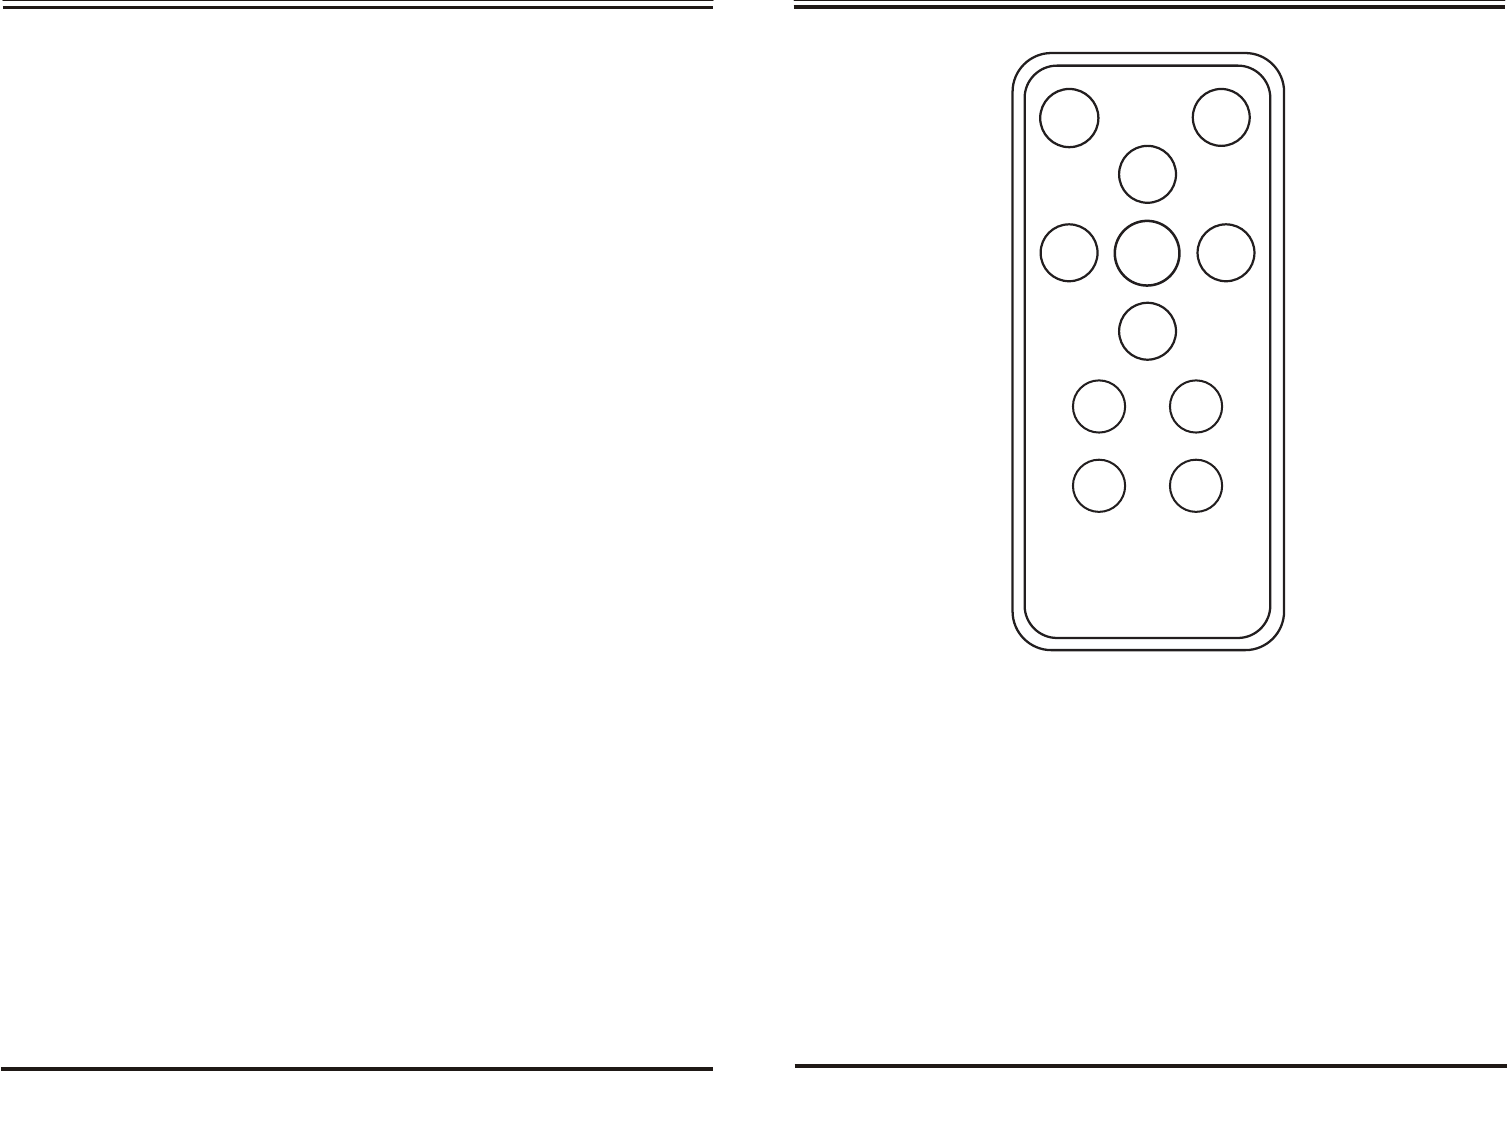
REMOTE CONTROL - CONTROLS AND FUNCTIONS
Location of controls
Power
Mute
BT - Bluetooth mode
iQS 3D – Music,Movie,News.
Aux-in
Bass - / Bass+ -- Adjusting the bass level
Volume - / Volume+ -- Adjusting volume level
5
12
Aux-in
Bass-
V- V+
Bass+
MovieMusic
BT
News
Power Mute
To clean the exterior surface of your product, you can wipe it using a soft, dry
If the music is stopped on S550 and remain for 30 minutes with no music playing,
Plug in the USB cable into the USB connector, and the mobile phone / device will
The USB connector on the rear of the speaker is only for charging battery of

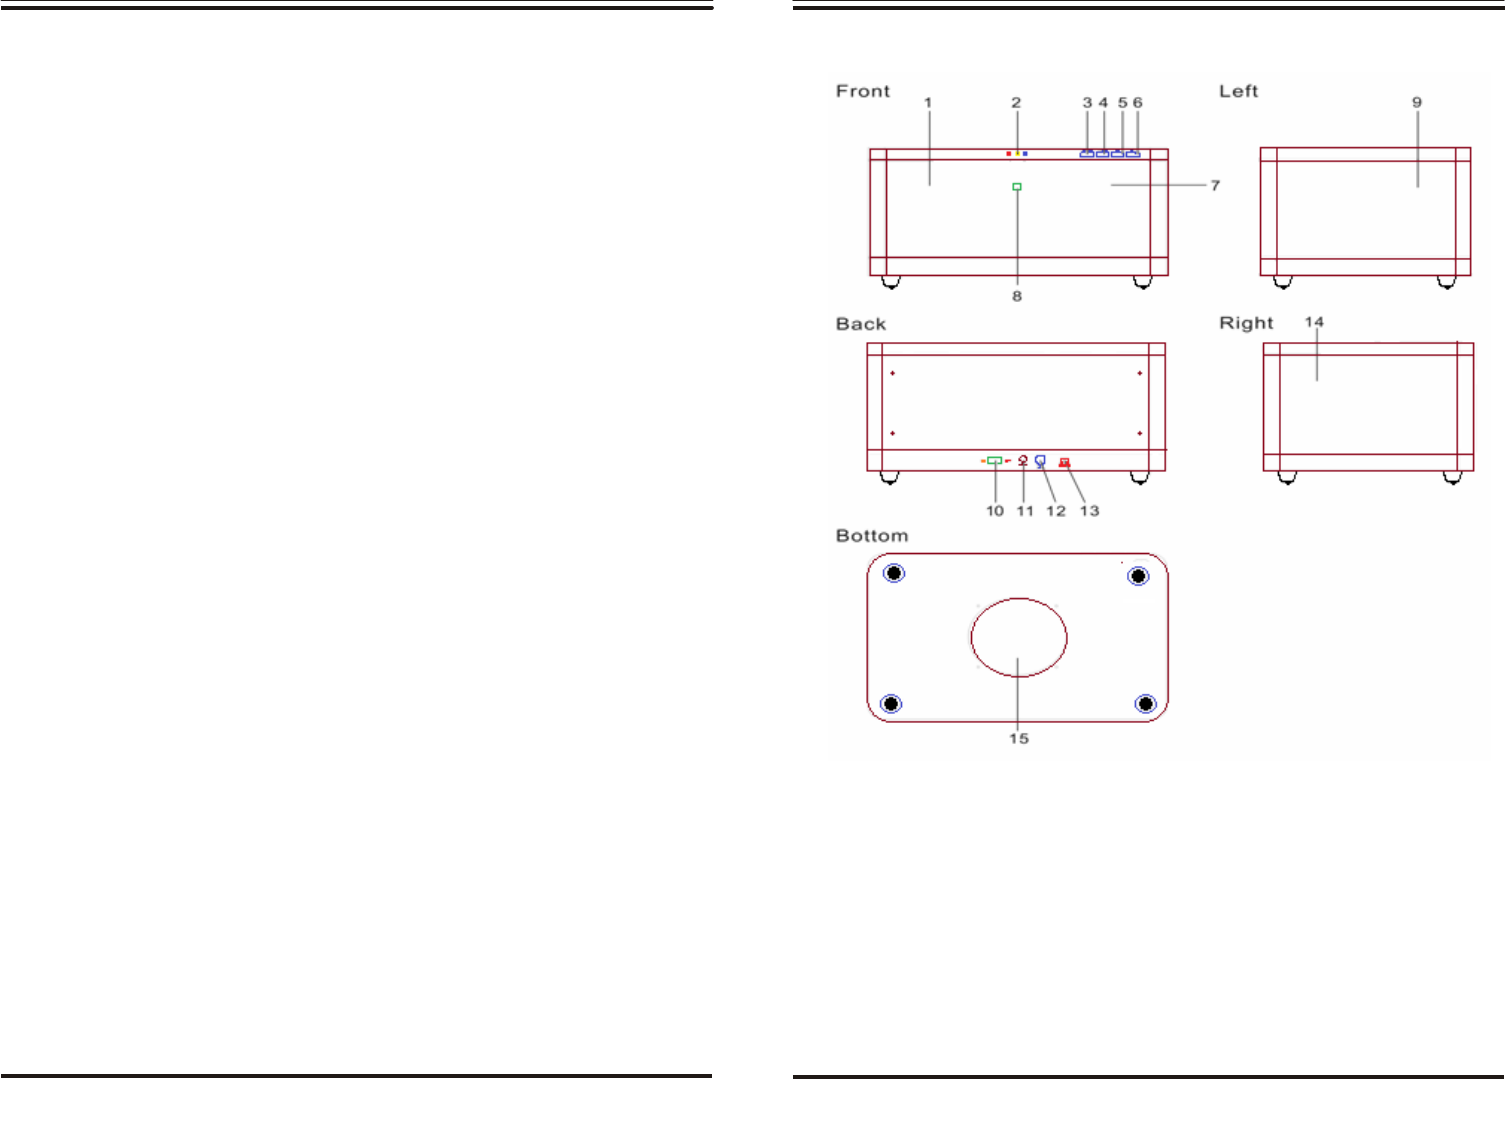
FRONT & BACK PANEL CONTROLS AND FUNCTIONS
1. Speaker 9. Speaker
2. LED indicator 10. Power ON/OFF
3. Standby 11. AUX -IN
4. Pairing 12. DC Socket
5. Volume – 13. USB Socket for charging Mobile
6. Volume + 14. Speaker
7. Speaker 15. Sub Woofer
8. Remote sensor
OPERATING INSTRUCTIONS
To pair additional devices
Adding another source – AUX IN
To add a source
Volume Level
Bass Level
11
6
With the Bluetooth device and the Zeno speaker both turned On, press the
PAIR button once to disconnect your paired Bluetooth device. The blue LED #3
will turn off, then press the Pairing button until LED #3 flashes Blue, and SoniQ
is ready to be discoverable again. Follow the steps above "To Begin pairing
with a Bluetooth device".
You can connect the Zeno with your other audio device, such as a portable
digital music player. This requires an audio cable with a 3.5mm plug to connect
with the AUX input on the Zeno. For audio devices with dual stereo RCA
connectors, use an adapter that converts from RCA to 3.5mm.
Plug in the 3.5 mm Line In cable to the audio device and the other end to the
AUX connector at the back of Zeno.
Press the AUX-IN button on the remote control, and LED #1 on the unit will
change to Purple color. The AUX IN mode is now ready. You can play the
music from the external audio device.
Adjust the master volume level by pressing the Volume Up (V+) or the
Volume Down (V-) button on the unit or remote control.
Similarly adjust the bass level by pressing the Bass+ - or Bass - button on the
remote control.
Note: Holding the Level buttons will continuously adjust the level, until
the minimum or maximum range is reached.
OPERATING INSTRUCTIONS
To Begin pairing with a Bluetooth device
1. Switch on the Power button, LED #1 indicator will be in Red, then
change to Blue.
2.
starts flashing in Blue. You will hear a beeping tone. It is now
ready for Bluetooth connection.
3. Make sure your Bluetooth device has the Bluetooth enabled. After
scanning starts, select the name SoniQ on the list of discoverable
devices.
4. When the Bluetooth is connected, it will show “Connected” next to
the name of SoniQ on the list and you will hear a beep. The LED
#3 on Zeno will light up in Blue and remain steady On.
5. If your Bluetooth device asks for a passkey, enter digits 0000 (four
zeros) or 1234 and press OK. Some devices may ask you to accept
the connection.
6. Your Bluetooth device indicates when pairing is complete, and you
will hear a tone from the Zeno speaker. The LED #3 turns to Blue
and remain steady On while connected.
To connect a previously paired device
Normally, a previously paired device will automatically connect
when Zeno Power is turned On. Otherwise, simply select "SoniQ"
on the list of the Bluetooth devices to connect. When the Zeno
speaker is connected with the Bluetooth device, the LED #3 will
be illuminated in steady Blue.
Note: The Zeno can only connect with ONE Bluetooth device at
one time. Please always disconnect with the existing Bluetooth
device before connecting to another one.
FRONTAND BACK PANEL - CONTROLS AND FUNCTIONS
10 7
press the STBY button to power On the Zeno. The LED will
Hold and press the “PAIR” button on the unit until the LED #3
HOW AND WHEN TO CHANGE BATTERIES
1. Insert Batteries:
2. When to change the batteries:
OPERATING INSTRUCTIONS
A. Connecting to AC power
To use the Zeno, connect the external AC power adopter.
1. Connect the AC adaptor coax power plug to the DC jack on the rare
panel. Plug the AC power cord into the wall socket.
2. Switch the Power to ON using the ON/OFF switch on the rare panel.
LED #1 will illuminates in Red and the Zeno will be in Standby
mode.
3. Press the Standby button on the front panel or the Power button on
the remote control. LED #1 will change from Red to Blue and
LED #2 will be Yellow, and LED #3 will be off.
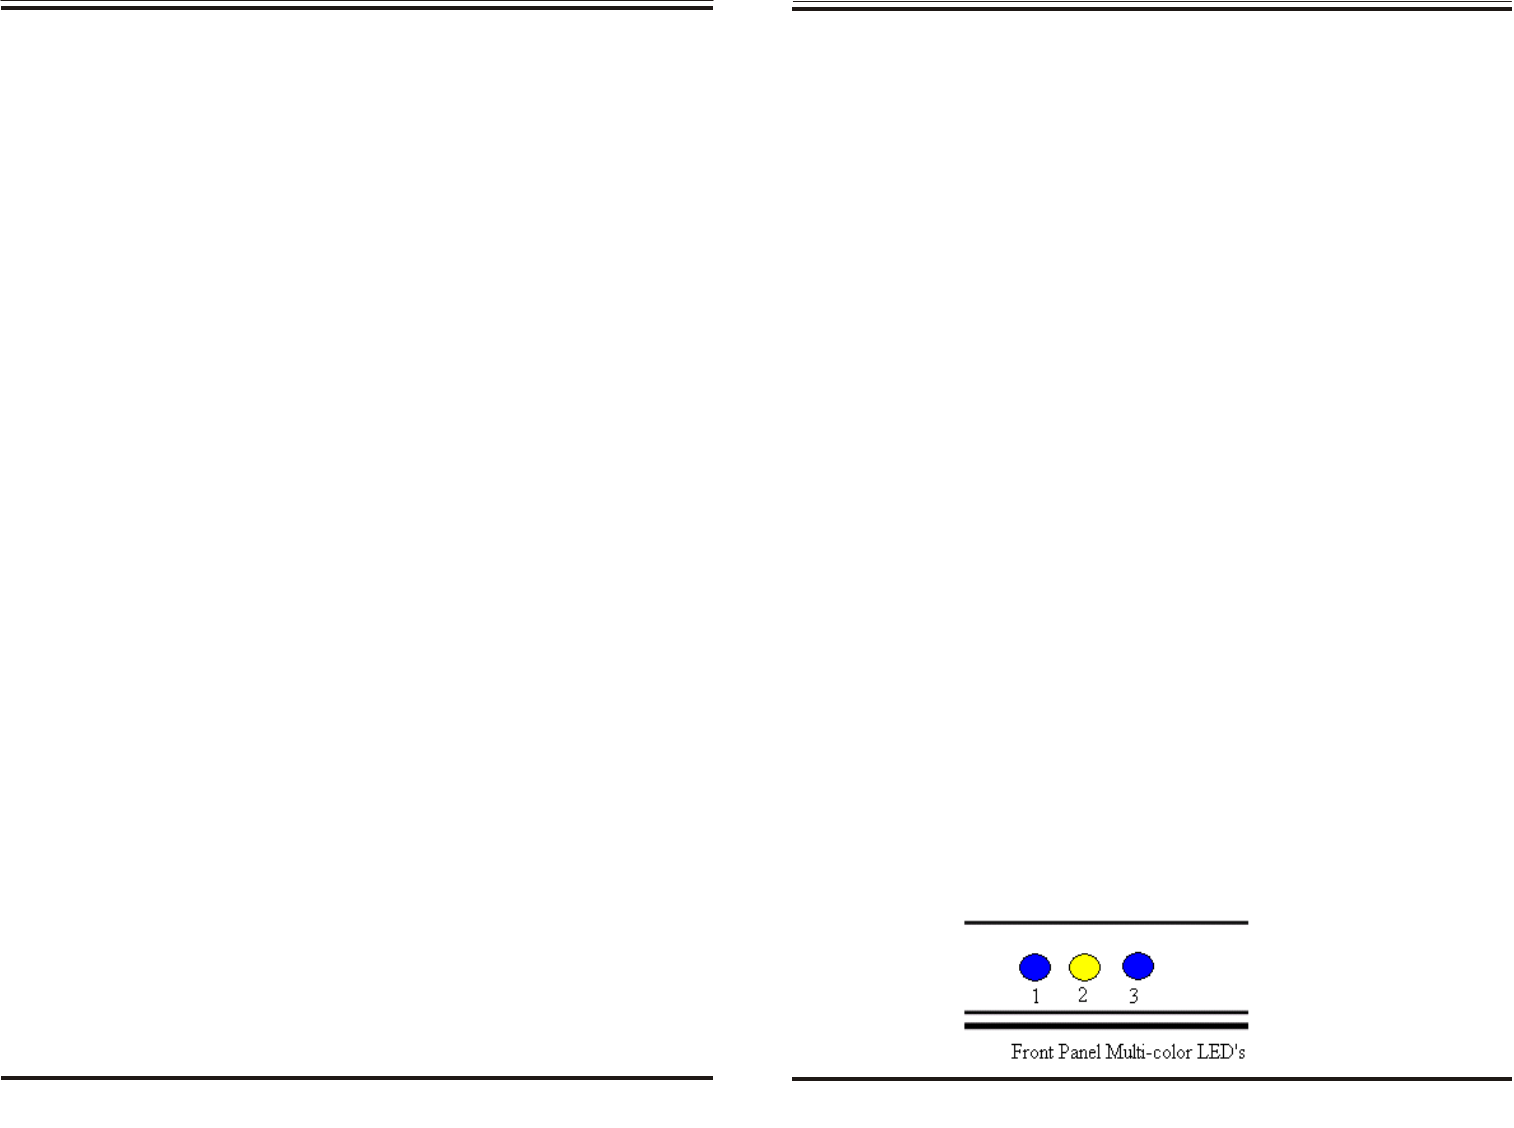
B. LED STATUS INDICATOR
indicate when a source is activated.
1. LED #1 (left) shows the operating mode
RED : Standby
Blue : Bluetooth selected
Purple : AUX IN selected
2. LED #2 (center) shows the iQS 3D mode
Yellow : Movie Mode (maximum 3D width)
Green : Music Mode (reduced 3D width)
Off : News Mode(normal stereo, 3D off)
3. LED #3 (right) indicates Bluetooth function
Steady Blue : Bluetooth Connected
Flashing Blue : Bluetooth pairing
Off : Disconnected
8 9
Insert one CR2025 Lithium button cell battery into the battery compartment.
Make sure the battery is inserted with the “+” side facing down.
Notice: Do not throw the remote control down on the ground or tread on it.
Remove the battery from the remote control when it’s not in use for an
extended period or during Shipment.
The remote control has an
operating
range of up to 7 meters and
effective
left or right
operating
angle of 30 degrees away from the system.
If
the
remote
does not work within these specifications, make sure that nothing
is
blocking
the line of sight
between
the remote and the remote sensor.
If
the line of
sight
is clear yet the remote does not function properly, change
the
battery.
The LED indicators, located at the centre of SoniQ will illuminate to
Zeno
FCC WARNING
This device complies with Part 15 of the FCC Rules. Operation is subject to the following two
conditions:
(1) This device may not cause harmful interference, and
(2) this device must accept any interference received, including interference that may cause
undesired operation.
NOTE 1: Any changes or modifications to this unit not expressly approved by the party
responsible for compliance could void the user's authority to operate the equipment.