Ocean Star Electronics 20009BT Wireless Speaker System User Manual XW BTS1 indb
Ocean Star Electronics Ltd. Wireless Speaker System XW BTS1 indb
UserManual.wiki
>
Ocean Star Electronics
>
20009BT User Manual
User Manual
Navigation menu
Upload a User Manual
Namespaces
Wiki Guide
HTML
PDF
Info
Views
User Manual
Discussion / Help
Navigation

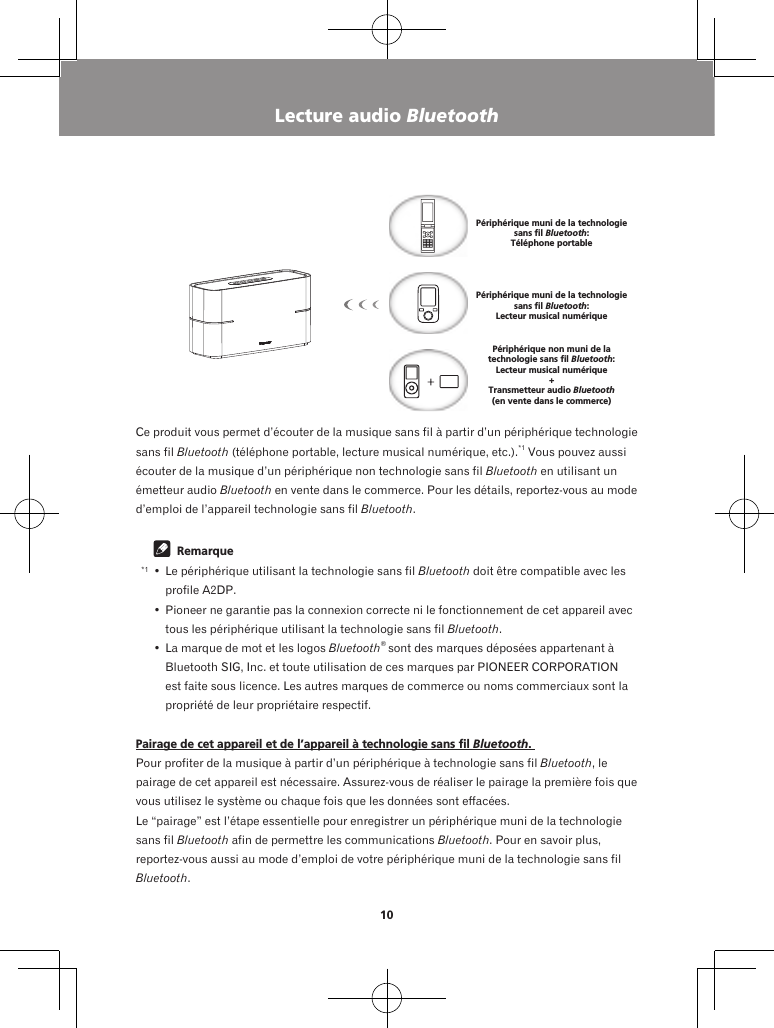
![3EnglishPOWER-CORD CAUTIONHandle the power cord by the plug. Do not pull out the plug by tugging the cord and never touch the power cord when your hands are wet as this could cause a short circuit or electric shock. Do not place the unit, a piece of furniture, etc., on the power cord, or pinch the cord. Never make a knot in the cord or tie it with other cords. The power cords should be routed such that they are not likely to be stepped on. A damaged power cord can cause a fire or give you an electrical shock. Check the power cord once in a while. When you find it damaged, ask your nearest PIONEER authorized service center or your dealer for a replacement.S002*_A1_EnAC adapter CAUTION• Make sure to grasp the body of the AC adapter when removing it from the power outlet. If you pull the power cord, it may become damaged which could lead to fire and/or electrocution.• Do not attempt to plug in or remove the AC adapter with wet hands. This may result in electrocution.• Do not insert the power cord of AC adapter into a power outlet where the connection remains loose despite inserting the prongs all the way into the outlet. Heat may be generated which could lead to fire. Consult with the retailer or an electrician regarding replacement of the power outlet.Store the AC adapter out of the reach of children and infants.The AC adapter cord may accidentally wind around the neck and it may cause suffocation.Radio wave cautionThis unit uses a 2.4 GHz radio wave frequency, which is a band used by other wireless systems (Microwave ovens and Cordless phones, etc.). In this event noise appears in your television image, there is the possibility this unit (including products supported by this unit) is causing signal interference with the antenna input connector of your television, video, satellite tuner, etc. In this event, increase the distance between the antenna input connector and this unit (including products supported by this unit).• Pioneer is not responsible for any malfunction of the compatible Pioneer product due to communication error/malfunctions associated with your network connection and/or your connected equipment. Please contact your Internet service provider or network device manufacturer.• A separate contract with/payment to an Internet service provider is required to use the Internet.If you want to dispose this product, do not mix it with general household waste. There is a separate collection system for used electronic products in accordance with legislation that requires proper treatment, recovery and recycling.Private households in the member states of the EU, in Switzerland and Norway may return their used electronic products free of charge to designated collection facilities or to a retailer (if you purchase a similar new one).For countries not mentioned above, please contact your local authorities for the correct method of disposal.By doing so you will ensure that your disposed product undergoes the necessary treatment, recovery and recycling and thus prevent potential negative effects on the environment and human health.K058b_A1_En[For European Users][For American Users]This device complies with part 15 of the FCC Rules. Operation is subject to the following two conditions: (1) This device may not cause harmful interference, and (2) this device must accept any interference received, including interference that may cause undesired operation.](https://usermanual.wiki/Ocean-Star-Electronics/20009BT/User-Guide-1877270-Page-3.png)
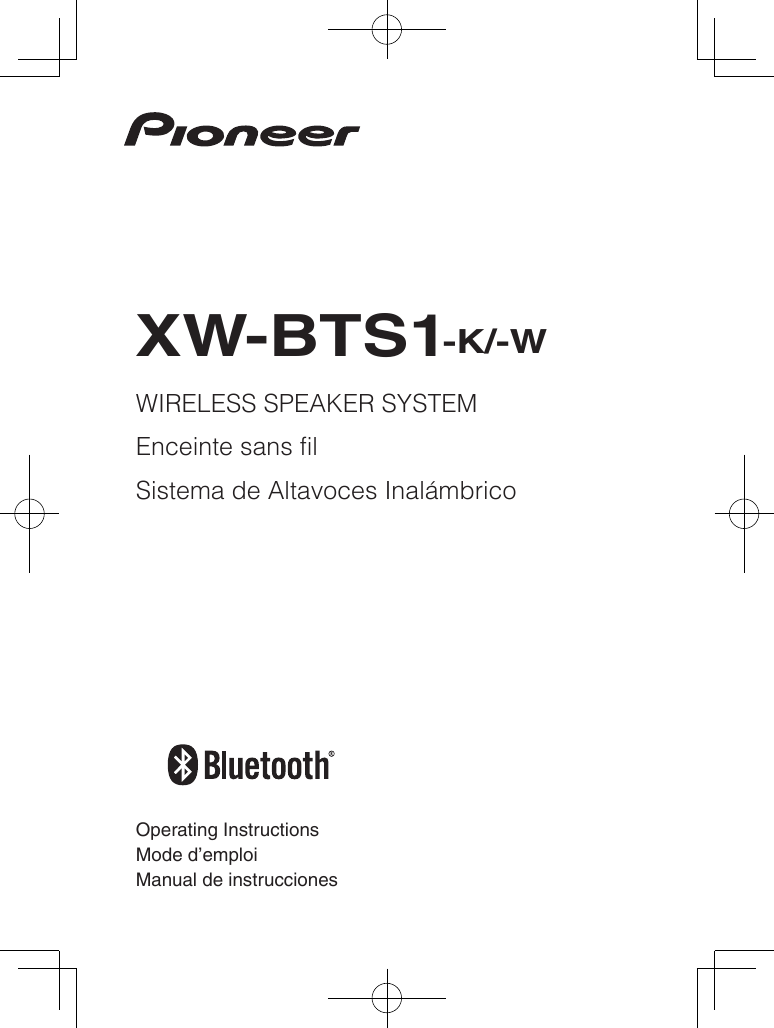
![4[For American Users]Read these instructions.Keep these instructions.Heed all warnings.Follow all instructions.Do not use this apparatus near water.Clean only with dry cloth.Do not block any ventilation openings. Install in accordance with the manufacturer’s instructions.Do not install near any heat sources such as radiators, heat registers, stoves, or other apparatus (including amplifiers) that produce heat.Do not defeat the safety purpose of the polarized or grounding-type plug. A polarized plug has two blades with one wider than the other. A grounding type plug has two blades and a third grounding prong. The wide blade or the third prong are provided for your safety. If the provided plug does not fit into your outlet, consult an electrician for replacement of the obsolete outlet.Protect the power cord from being walked on or pinched particularly at plugs, convenience receptacles, and the point where they exit from the apparatus.1) 2) 3) 4) 5) 6) 7) 8) 9) 10)Only use attachments/accessories specified by the manufacturer.Use only with the cart, stand, tripod, bracket, or table specified by the manufacturer, or sold with the apparatus. When a cart is used, use caution when moving the cart/apparatus combination to avoid injury from tip-over.Unplug this apparatus during lightning storms or when unused for long periods of time.Refer all servicing to qualified service personnel. Servicing is required when the apparatus has been damaged in any way, such as power-supply cord or plug is damaged, liquid has been spilled or objects have fallen into the apparatus, the apparatus has been exposed to rain or moisture, does not operate normally, or has been dropped. D3-7-13-69_En11)12)13)14)NOTE:This equipment has been tested and found to comply with the limits for a Class B digital device, pursuant to Part 15 of the FCC Rules. These limits are designed to provide reasonable protection against harmful interference in a residential installation. This equipment generates, uses, and can radiate radio frequency energy and, if not installed and used in accordance with the instructions, may cause harmful interference to radio communications. However, there is no guarantee that interference will not occur in a particular installation. If this equipment does cause harmful interference to radio or television reception, which can be determined by turning the equipment off and on, the user is encouraged to try to correct the interference by one or more of the following measures:— Reorient or relocate the receiving antenna.— Increase the separation between the equipment and receiver.— Connect the equipment into an outlet on a circuit different from that to which the receiver is connected.— Consult the dealer or an experienced radio/TV technician for help.D8-10-1-2_A1_EnThis equipment complies with FCC radiation exposure limits set forth for an uncontrolled environment and meets the FCC radio frequency (RF) Exposure Guidelines in Supplement C to OET65. This equipment has very low levels of RF energy that it deemed to comply without maximum permissive exposure evaluation (MPE). But it is desirable that it should be installed and operated keeping the radiator at least 20cm or more away from person’s body (excluding extremities: hands, wrists, feet and ankles).CAUTIONAlterations or modifications carried out without appropriate authorization may invalidate the user’s right to operate the equipment.D8-10-2_A1_EnThis transmitter must not be co-located or operated in conjunction with any other antenna or transmitter.WARNING: Handling the cord on this product or cords associated with accessories sold with the product may expose you to chemicals listed on proposition 65 known to the State of California and other governmental entities to cause cancer and birth defect or other reproductive harm.Wash hands after handling.D36-P5_B1_EnIMPORTANT NOTICETHE MODEL NUMBER AND SERIAL NUMBER OF THIS EQUIPMENT ARE ON THE REAR OR BOTTOM.RECORD THESE NUMBERS ON YOUR ENCLOSED WARRANTY CARD AND KEEP IN A SAFE PLACE FOR FUTURE REFERENCE.D36-AP9-1_A1_En](https://usermanual.wiki/Ocean-Star-Electronics/20009BT/User-Guide-1877270-Page-4.png)
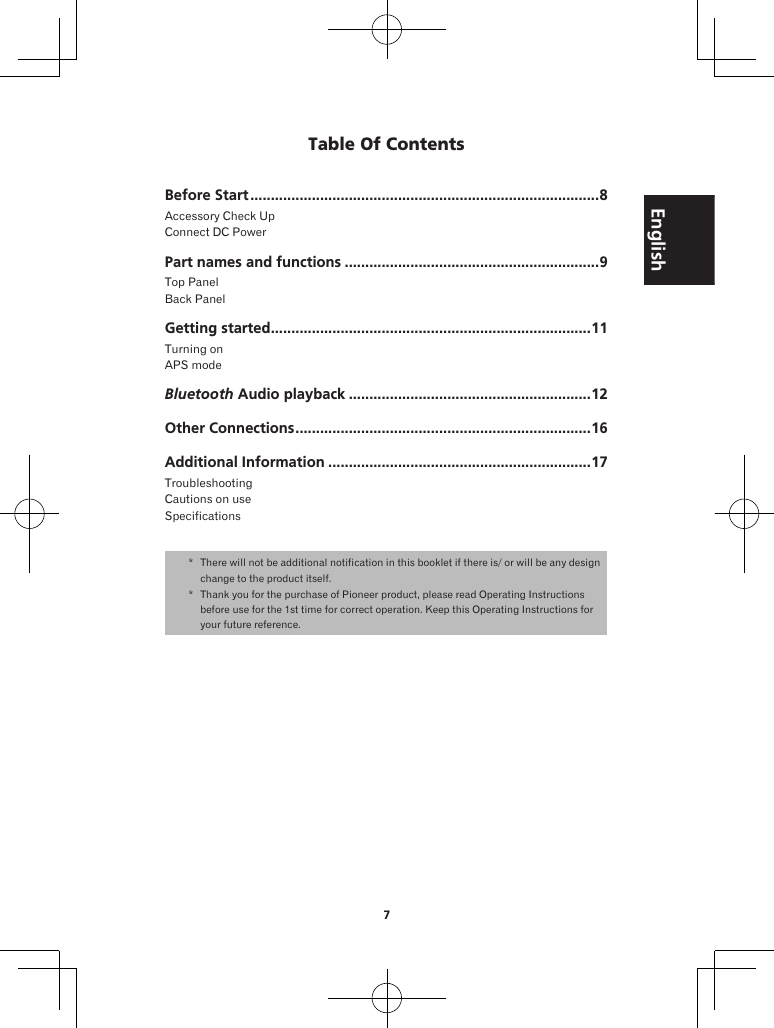
![5English[For Canadian Users]This Class B digital apparatus complies with Canadian ICES-003.D8-10-1-3_A1_EnThis device complies with Industry Canada licence-exempt RSS standard(s). Operation is subject to the following two conditions: (1) this device may not cause interference, and (2) this device must accept any interference, including interference that may cause undesired operation of the device.This equipment complies with IC radiation exposure limits set forth for an uncontrolled environment and meets RSS-102 of the IC radio frequency (RF) Exposure rules. This equipment has very low levels of RF energy that it deemed to comply without maximum permissive exposure evaluation (MPE). But it is desirable that it should be installed and operated keeping the radiator at least 20cm or more away from person’s body (excluding extremities: hands, wrists, feet and ankles).[For American Users and Canadian Users]The Safety of Your Ears is in Your HandsGet the most out of your equipment by playing it at a safe level – a level that lets the sound come through clearly without annoying blaring or distortion and, most importantly, without affecting your sensitive hearing. Sound can be deceiving. Over time, your hearing “comfort level” adapts to higher volumes of sound, so what sounds “normal” can actually be loud and harmful to your hearing. Guard against this by setting your equipment at a safe level BEFORE your hearing adapts.ESTABLISH A SAFE LEVEL:• Set your volume control at a low setting. • Slowly increase the sound until you can hear it comfortably and clearly, without distortion. • Once you have established a comfortable sound level, set the dial and leave it there.BE SURE TO OBSERVE THE FOLLOWING GUIDELINES:• Do not turn up the volume so high that you can’t hear what’s around you.• Use caution or temporarily discontinue use in potentially hazardous situations.• Do not use headphones while operating a motorized vehicle; the use of headphones may create a traffic hazard and is illegal in many areas.S001a_A1_En](https://usermanual.wiki/Ocean-Star-Electronics/20009BT/User-Guide-1877270-Page-5.png)
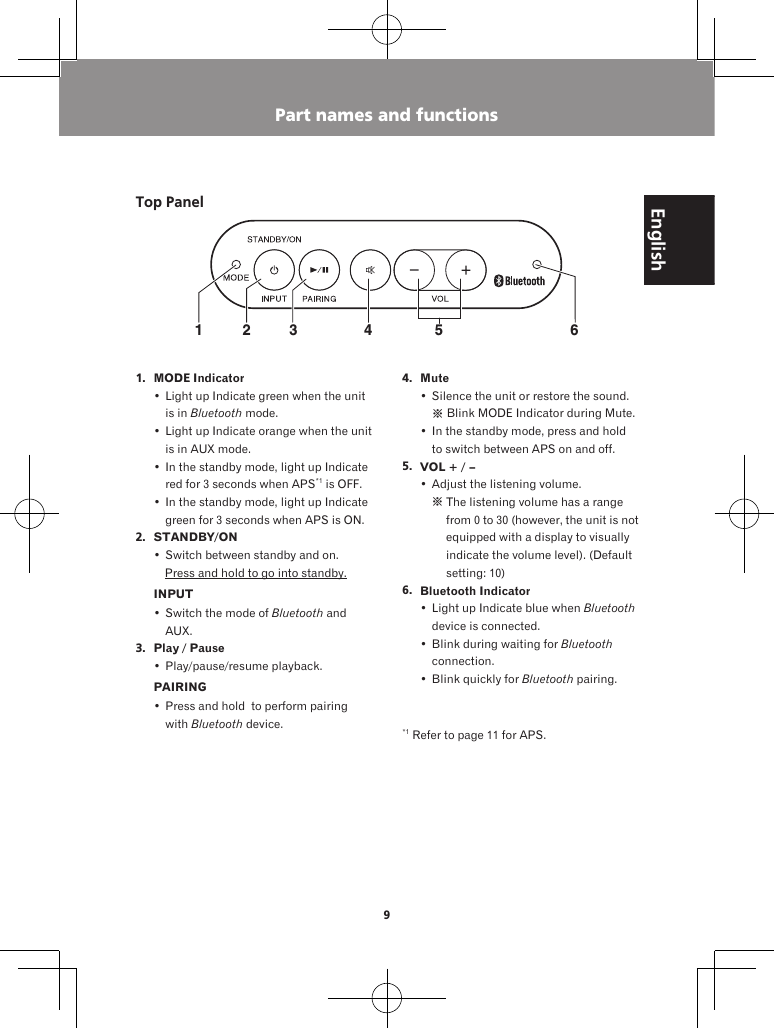
![6Register your product at:http://www.pioneerelectronics.com (US)http://www.pioneerelectronics.ca (Canada)• Protect your new investmentThe details of your purchase will be on file for reference in the event of an insurance claim such as loss or theft.• Receive free tips, updates and service bulletins on your new product• Improve product developmentYour input helps us continue to design products that meet your needs.• Receive a free Pioneer newsletterRegistered customers can opt in to receive a monthly newsletter.Discover the benefits of registering your product online at http://www.pioneer.co.uk (or http://www.pioneer.eu).[For American Users and Canadian Users][For European Users]](https://usermanual.wiki/Ocean-Star-Electronics/20009BT/User-Guide-1877270-Page-6.png)

![11EnglishGetting startedTurning on Press [STANDBY/ON] button. The indicator would light. This unit switches to the last select mode.APS mode • After this unit is kept inactive for 20 minutes, it automatically switches to the standby mode.• When 5 minutes before switching to the standby mode automatically, the indicator starts to blink.How to turn off the APS mode• Press and hold [Mute] button to turn off the APS mode in the standby mode and the indicator lights red for about 3 seconds.• If the APS mode is turned on again, Press and hold [Mute] button in the standby mode and the indicator lights green for about 3 seconds. Note• When you play at low volume, this unit might switch to the standby mode automatically. Please increase the volume, or turn off the APS mode.](https://usermanual.wiki/Ocean-Star-Electronics/20009BT/User-Guide-1877270-Page-11.png)
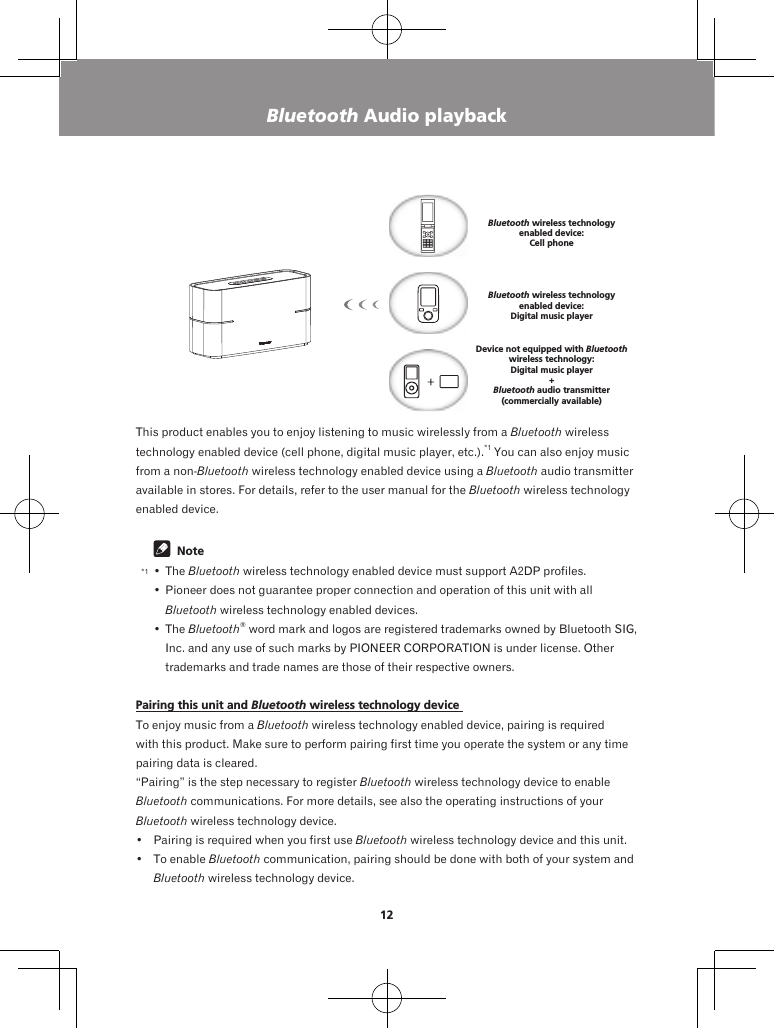
![13EnglishBluetooth Audio playback1. Press [INPUT] button to select Bluetooth mode. (Mode Indicator: green).2. Press and hold [PAIRING] button until you hear 2 consecutive “beep” sounds. Then, the blue indicator on the top panel blinks quickly and the unit will enter the pairing mode.3. Switch on the Bluetooth wireless technology device that you want to perform pairing with, place the device within 1 m (3.2 ft.) of the system, and set it to the pairing mode. Pairing begins.• In case of entering PIN code, use “0000”. ( Only “0000” works for PIN code in this product. )4. When Bluetooth wireless technology device has connected, the blue indicator on the top panel will change from blinking to lit.5. Start playback of music contents stored in Bluetooth wireless technology device.Connect the Latest Paired Bluetooth wireless technology DeviceWhen the unit is switch on again to Bluetooth mode next time, it will be connected automatically with equipment that has the latest connected device already.Connect previous Paired Bluetooth Device1. If you want to connect other paired device instead of the latest paired one, please make sure the Bluetooth connection of the latest device dis-connect. Then, the blue indicator on the top panel blinks slowly and the unit will change the waiting for connection mode.*Alternatively, there is also a way to switch the unit in pairing mode.2. Switch on other paired device, and select this unit from this device Bluetooth list.3. Connection with other devices is successful, the blue indicator will change from blinking to lit.• Operating range of Bluetooth audio is up to 10 m (32 ft.). (Measured in open space. Walls and structures may affect range of device.)](https://usermanual.wiki/Ocean-Star-Electronics/20009BT/User-Guide-1877270-Page-13.png)

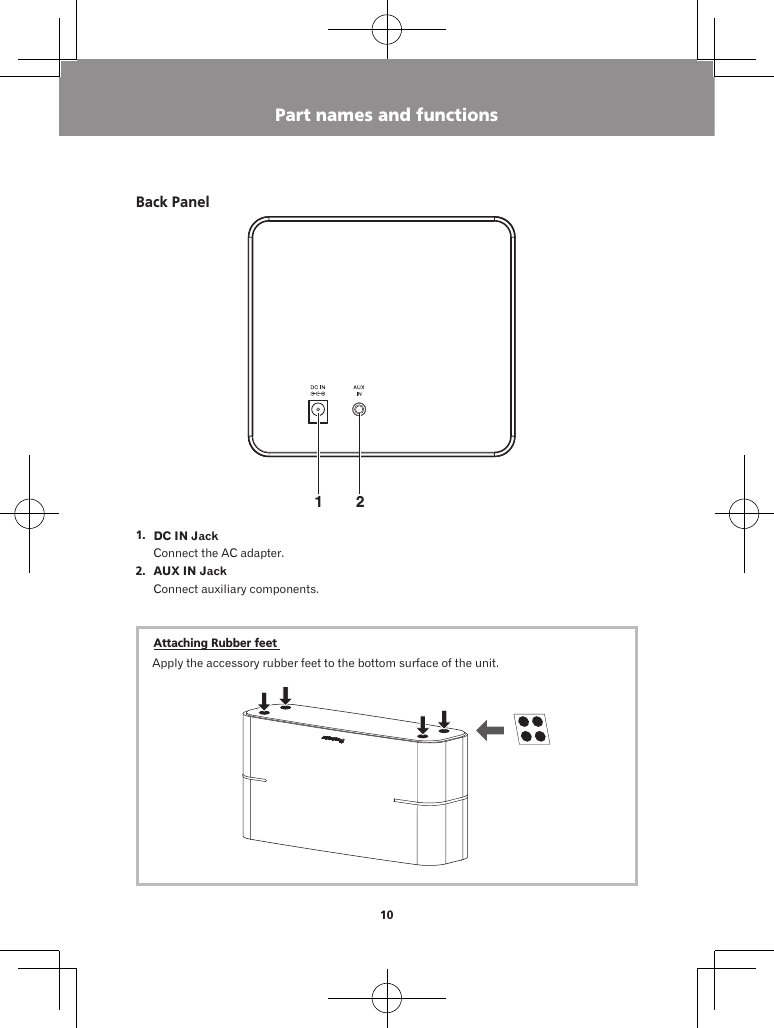
![16Other Connections• Before making or changing the connections, switch off the power and disconnect the power plug from the power outlet.• When playing music through AUX mode, the music volume will vary depending on the volume of the music player. If there is distortion when the volume is set at max, lower the music player’s volume and to avoid distortion.1. Connecting auxiliary components Connect the back panel AUX IN jack to your auxiliary playback component.2. Press [INPUT] button. (Mode indicator : orange)3. Start playback of the auxiliary component.This unit’s back panelStereo mini-plug cable (commercially available)Digital audio player, etc.](https://usermanual.wiki/Ocean-Star-Electronics/20009BT/User-Guide-1877270-Page-16.png)
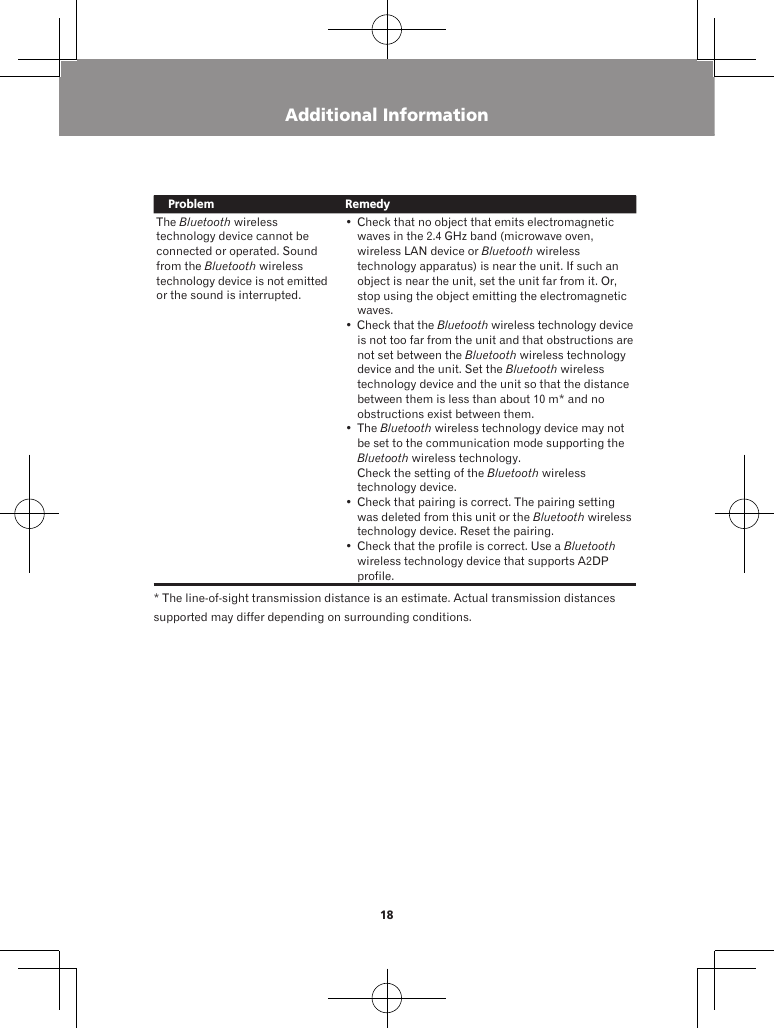
![19EnglishCautions on useWhen moving this unitWhen moving this unit, press [STANDBY/ON] button, and then unplug the power cord.Damage may occur when another device isconnected to the AUX IN jack.Place of installation• Do not place this unit on top of a TV or color monitor.Also, install it away from cassette decks and other devices easily affected by magnetic forces.Avoid the following locations:• Places exposed to direct sunlight• Humid or poorly ventilated places• Extremely hot places• Places exposed to vibrations• Places in which there is much dust or cigarette smoke• Places exposed to soot, steam, or heat (kitchens, etc.)Do not place objects on this unitDo not place any objects on top of this unit.Do not obstruct the ventilation holes.Do not use this unit on shaggy rugs, beds, sofas, etc., or wrapped in cloth, etc. Doing so will prevent the heat from dispersing, leading to damage.Do not expose to heat.Do not place this unit on top of an amplifier or other components that generate heat. When rack mounting it, to avoid the heat given off by the amplifier or other audio components, place it on a shelf below the amplifier.• Turn off the power of this unit when not using it.• Depending on signal conditions, striped patterns may appear on a TV screen and noise may enter the sound of radio broadcasts when the power of this unit is on. If this happens, turn off the power of this unit.Cleaning the this unit• Unplug the power cord from the power outlet when cleaning this unit.• Clean this unit using a soft cloth. For tough dirt, apply some neutral detergent diluted in 5 to 6 parts water to a soft cloth, wring out thoroughly, wipe off the dirt, and then wipe again with a soft, dry cloth.• Alcohol, thinner, benzene, insecticides, etc., could cause the print or paint to peel off. Also, leaving rubber or vinyl products in contact with this unit for long periods of time could mar the cabinet.• When using chemical-impregnated wipes, etc., read the cautions included with the wipes carefully.Additional Information](https://usermanual.wiki/Ocean-Star-Electronics/20009BT/User-Guide-1877270-Page-19.png)
![3FrançaisNOTE IMPORTANTE SUR LE CABLE D’ALIMENTATIONTenir le câble d’alimentation par la fiche. Ne pas débrancher la prise en tirant sur le câble et ne pas toucher le câble avec les mains mouillées. Cela risque de provoquer un court-circuit ou un choc électrique. Ne pas poser l’appareil ou un meuble sur le câble. Ne pas pincer le câble. Ne pas faire de noeud avec le câble ou l’attacher à d’autres câbles. Les câbles d’alimentation doivent être posés de façon à ne pas être écrasés. Un câble abîmé peut provoquer un risque d’incendie ou un choc électrique. Vérifier le câble d’alimentation de temps en temps. Contacter le service après-vente PIONEER le plus proche ou le revendeur pour un remplacement.S002*_A1_FrAvertissement au sujet de l’adaptateur secteur• Pour débrancher l’adaptateur secteur de la prise d’alimentation, veillez à bien saisir l’adaptateur par son boîtier. Si vous tirez sur le cordon d’alimentation, celui-ci peut s’endommager et présenter un risque d’un incendie, de choc électrique, et/ou d’électrocution.• N’essayez pas de brancher ou de débrancher l’adaptateur secteur avec des mains humides. Ceci constitue un risque de choc électrique ou de mort par électrocution.• Ne branchez pas le cordon d’alimentation de l’adapateur secteur dans une prise de courant don’t la connexion ne serait pas ferme bien que les broches de la fiche soient insérées à fond dans la prise. Il pourrait se produire un dégagement de chaleur au niveau de la prise, avec un risque d’incendie. Pour le remplacement d’une prise d’alimentation de votre installation domestique, veuillez contacter votre revendeur ou un technicien qualifié.Rangez l’adaptateur secteur hors de portée des petits enfants.Le cordon de l’adaptateur secteur pourrait s’enrouler par accident autour du cou et causer un étouffement.Précaution concernant les ondes radioCet appareil utilise comme onde radio une fréquence de 2,4 GHz, c’est-à-dire une bande utilisée par d’autres systèmes sans fil (Fours à micro-ondes, téléphones sans fil, etc.).Si des parasites apparaissent sur les images télévisées, il est possible que cet appareil (y compris ceux qu’il prend en charge) provoquent des interférences sur le connecteur d’entrée de votre téléviseur, les images vidéo, le tuner satellite, etc. Dans ce cas, augmentez la distance entre la prise d’entrée d’antenne et cet appareil (y compris les produits pris en charge par cet appareil).• Pioneer n’est pas responsable d’un mauvais fonctionnement du produit Pioneer compatible due à une erreur/défaillance de la connexion réseau et/ou de l’appareil raccordé. Veuillez contacter votre fournisseur de service Internet ou le fabricant du périphérique du réseau.• Un abonnement payant auprès d’un fournisseur d’accès Internet est nécessaire pour utiliser Internet.Si vous souhaitez vous débarrasser de cet appareil, ne le mettez pas à la poubelle avec vos ordures ménagères. Il existe un système de collecte séparé pour les appareils électroniques usagés, qui doivent être récupérés, traités et recyclés conformément à la législation.Les habitants des états membres de l’UE, de Suisse et de Norvège peuvent retourner gratuitement leurs appareils électroniques usagés aux centres de collecte agréés ou à un détaillant (si vous rachetez un appareil similaire neuf).Dans les pays qui ne sont pas mentionnés ci-dessus, veuillez contacter les autorités locales pour savoir comment vous pouvez vous débarrasser de vos appareils.Vous garantirez ainsi que les appareils dont vous vous débarrassez sont correctement récupérés, traités et recyclés et préviendrez de cette façon les impacts néfastes possibles sur l’environnement et la santé humaine.K058b_A1_Fr[Pour les utilisateurs européens]](https://usermanual.wiki/Ocean-Star-Electronics/20009BT/User-Guide-1877270-Page-23.png)
![4[Pour les utilisateurs canadiens]Cet appareil numérique de la Classe B est conforme à la norme NMB-003 du Canada.D8-10-1-3_A1_FrLe présent appareil est conforme aux CNR d’Industrie Canada applicables aux appareils radio exempts de licence. L’exploitation est autorisée aux deux conditions suivantes : (1) l’appareil ne doit pas produire de brouillage, et (2) l’utilisateur de l’appareil doit accepter tout brouillage radioélectrique subi, même si le brouillage est susceptible d’en compromettre le fonctionnement.Cet appareil est compatible avec les limites d’exposition aux radiations CI définies pour un environnement non contrôlé et satisfait la règlementation RSS-102 sur la fréquence radio (RF) CI. Cet appareil présente des niveaux très faibles d’énergie RF et reconnu conforme sans évaluation de l’exposition maximale permissive (MPE). Mais il est préférable qu’il soit être installé et utilisé avec le radiateur à au moins 20 cm ou plus du corps de la personne (à l’exclusion des extrémités: les mains, les poignets, les pieds et les chevilles).[Pour les utilisateurs américains et canadiens]La protection de votre ouïe est entre vos mainsPour assurer le rendement optimal de votre matériel et – plus important encore – la protection de votre ouïe, réglez le volume à un niveau raisonnable. Pour ne pas altérer votre sens de la perception, le son doit être clair mais ne produire aucun vacarme et être exempt de toute distorsion. Votre ouïe peut vous jouer des tours. Avec le temps, votre système auditif peut en effet s’adapter à des volumes supérieurs, et ce qui vous semble un « niveau de confort normal » pourrait au contraire être excessif et contribuer à endommager votre ouïe de façon permanente. Le réglage de votre matériel à un volume sécuritaire AVANT que votre ouïe s’adapte vous permettra de mieux vous protéger.CHOISISSEZ UN VOLUME SÉCURITAIRE:• Réglez d’abord le volume à un niveau inférieur. • Montez progressivement le volume jusqu’à un niveau d’écoute confortable ; le son doit être clair et exempt de distorsions. • Une fois que le son est à un niveau confortable, ne touchez plus au bouton du volume.N’OUBLIEZ PAS DE RESPECTER LES DIRECTIVES SUIVANTES:• Lorsque vous montez le volume, assurez-vous de pouvoir quand même entendre ce qui se passe autour de vous.• Faites très attention ou cessez temporairement l’utilisation dans les situations pouvant s’avérer dangereuses.• N’utilisez pas des écouteurs ou un casque d’écoute lorsque vous opérez un véhicule motorisé ; une telle utilisation peut créer des dangers sur la route et est illégale à de nombreux endroits.S001a_A1_FrDécouvrez les nombreux avantages offerts en enregistrant votre produit en ligne maintenant sur http://www.pioneer.fr (ou http://www.pioneer.eu).[Pour les utilisateurs européens]Enregistrez votre produit sur:http://www.pioneerelectronics.com (États-Unis)http://www.pioneerelectronics.ca (Canada)• Protégez votre nouveau matérielLes renseignements relatifs à votre matériel seront conservés pour référence en cas de sinistre, tel que la perte ou le vol.• Recevez des conseils, des informations d’entretien et de mise à jour sur votre nouveau matériel• Contribuez au développement de nos produitsVotre participation nous aide à concevoir des produits qui répondent à vos besoins.• Recevez gratuitement le bulletin d’informations de PioneerLes clients enregistrés peuvent, s’ils le désirent, recevoir un bulletin d’informations mensuel.[Pour les utilisateurs américains et canadiens]](https://usermanual.wiki/Ocean-Star-Electronics/20009BT/User-Guide-1877270-Page-24.png)
![9FrançaisPour commencerMise sous tensionAppuyez sur la touche [STANDBY/ON]. L’indicateur s’allume.L’appareil commute sur le dernier mode sélectionné.Mode APS• Si l’appareil est laissé inactif pendant 20 minutes, il commute automatiquement en mode de veille.• L’indicateur comment à clignoter 5 minutes avant la mise automatique en mode de veille.Comment mettre hors service le mode APS• Maintenez enfoncée la touche [Sourdine] pour mettre hors service le mode APS en mode de veille de façon que l’indicateur s’allume en rouge pendant 3 secondes.• Si le mode APS est mis de nouveau en service, maintenez enfoncée la touche [Sourdine] en mode de veille de façon que l’indicateur s’allume en vert pendant 3 secondes. Remarque• Lors d’une lecture à faible niveau de volume, l’appareil peut commuter automatiquement sur le mode veille. Veuillez augmenter le volume ou mettre hors service le mode APS.](https://usermanual.wiki/Ocean-Star-Electronics/20009BT/User-Guide-1877270-Page-29.png)