One World Technologies MLT0180 Music, Misting and Light Tower User Manual
One World Technologies, Inc. Music, Misting and Light Tower
UserManual.wiki
>
One World Technologies
>
MLT0180 User Manual
User Manual
Navigation menu
Upload a User Manual
Namespaces
Wiki Guide
HTML
PDF
Info
Views
User Manual
Discussion / Help
Navigation

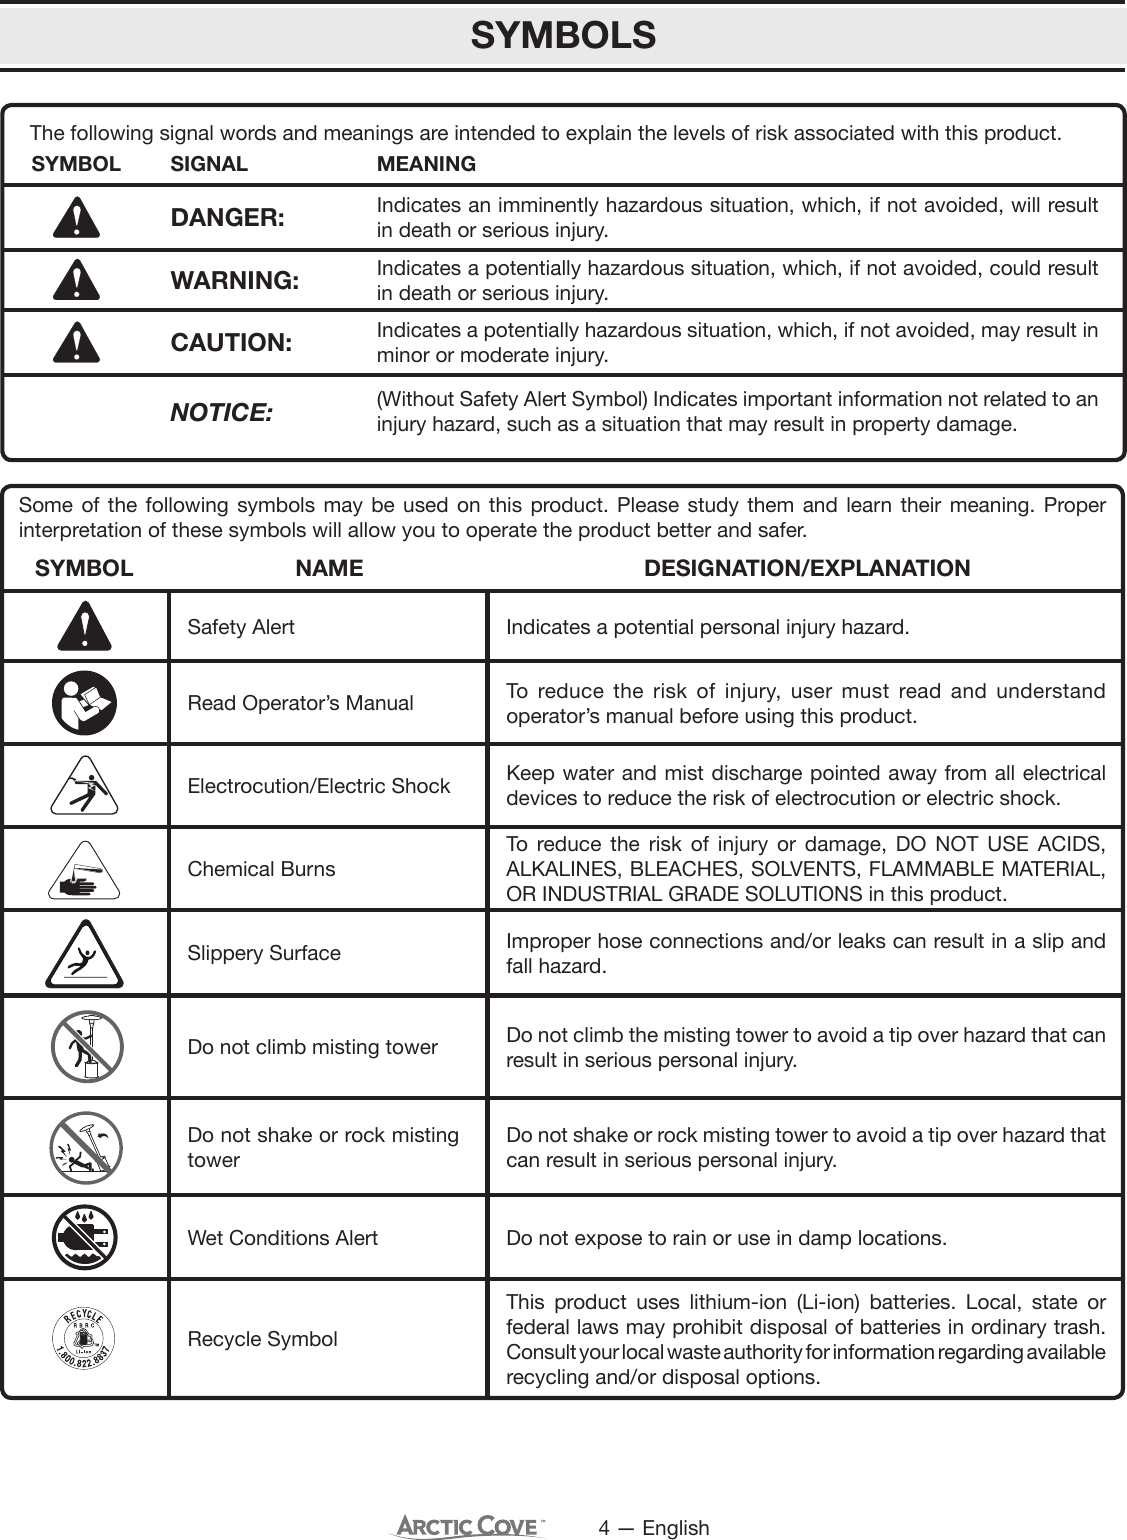
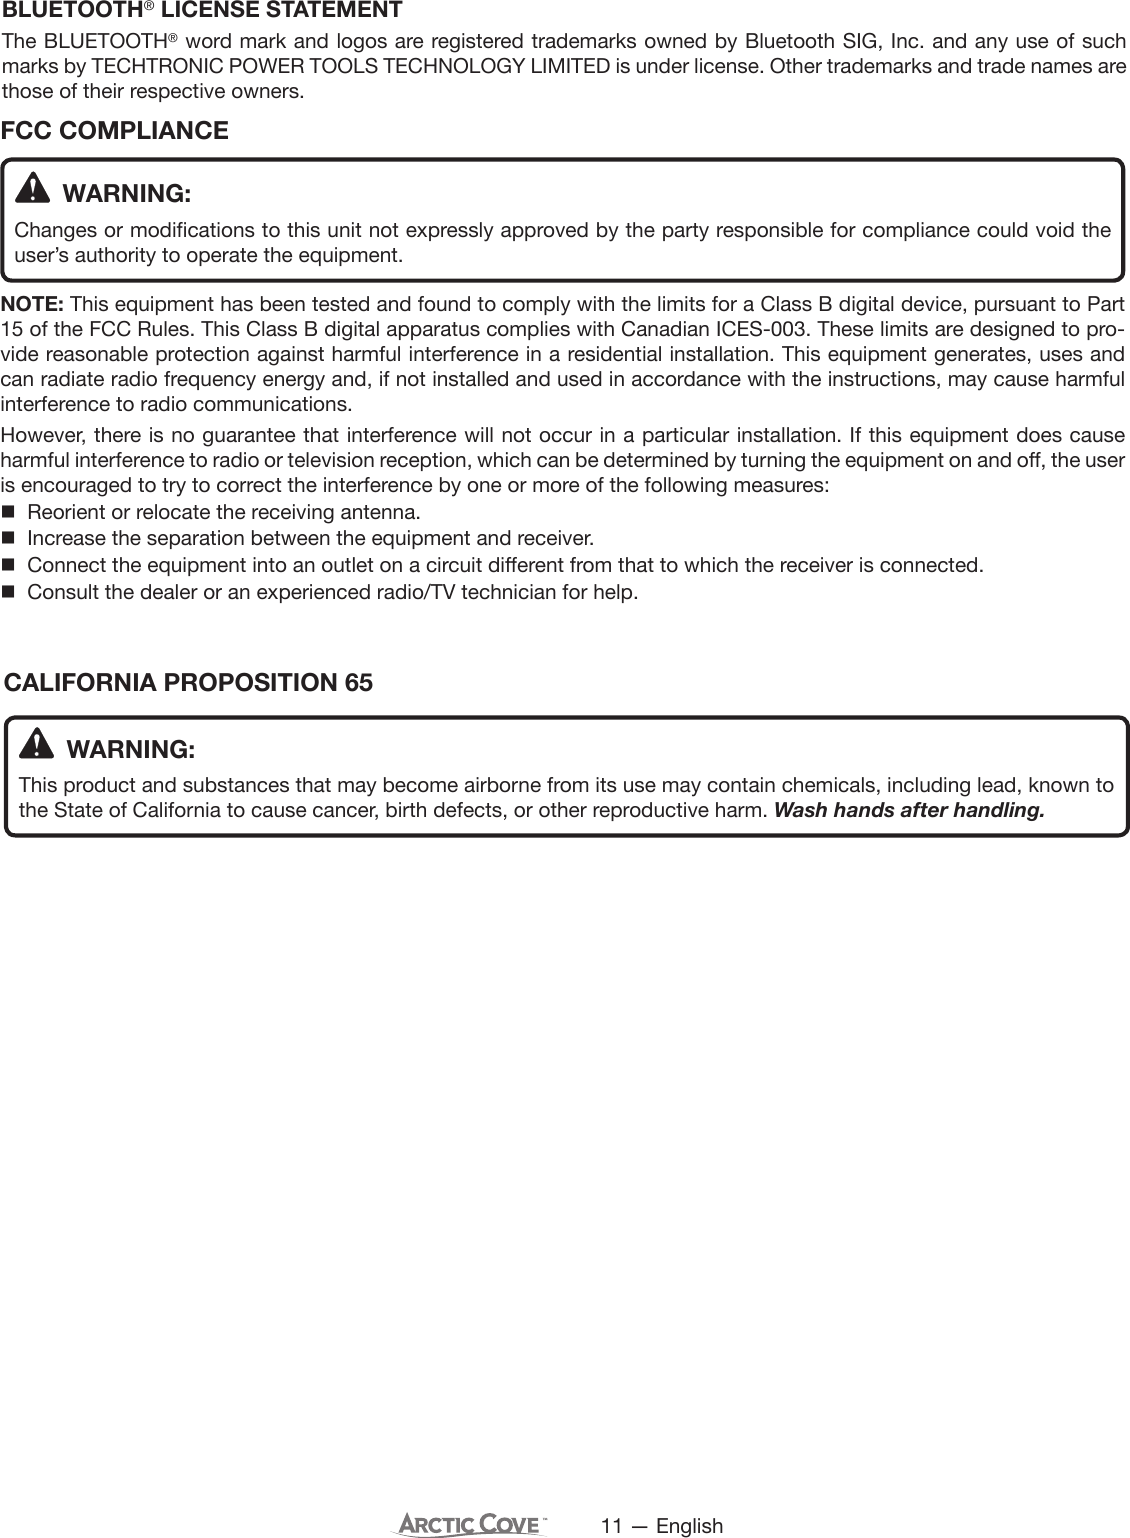
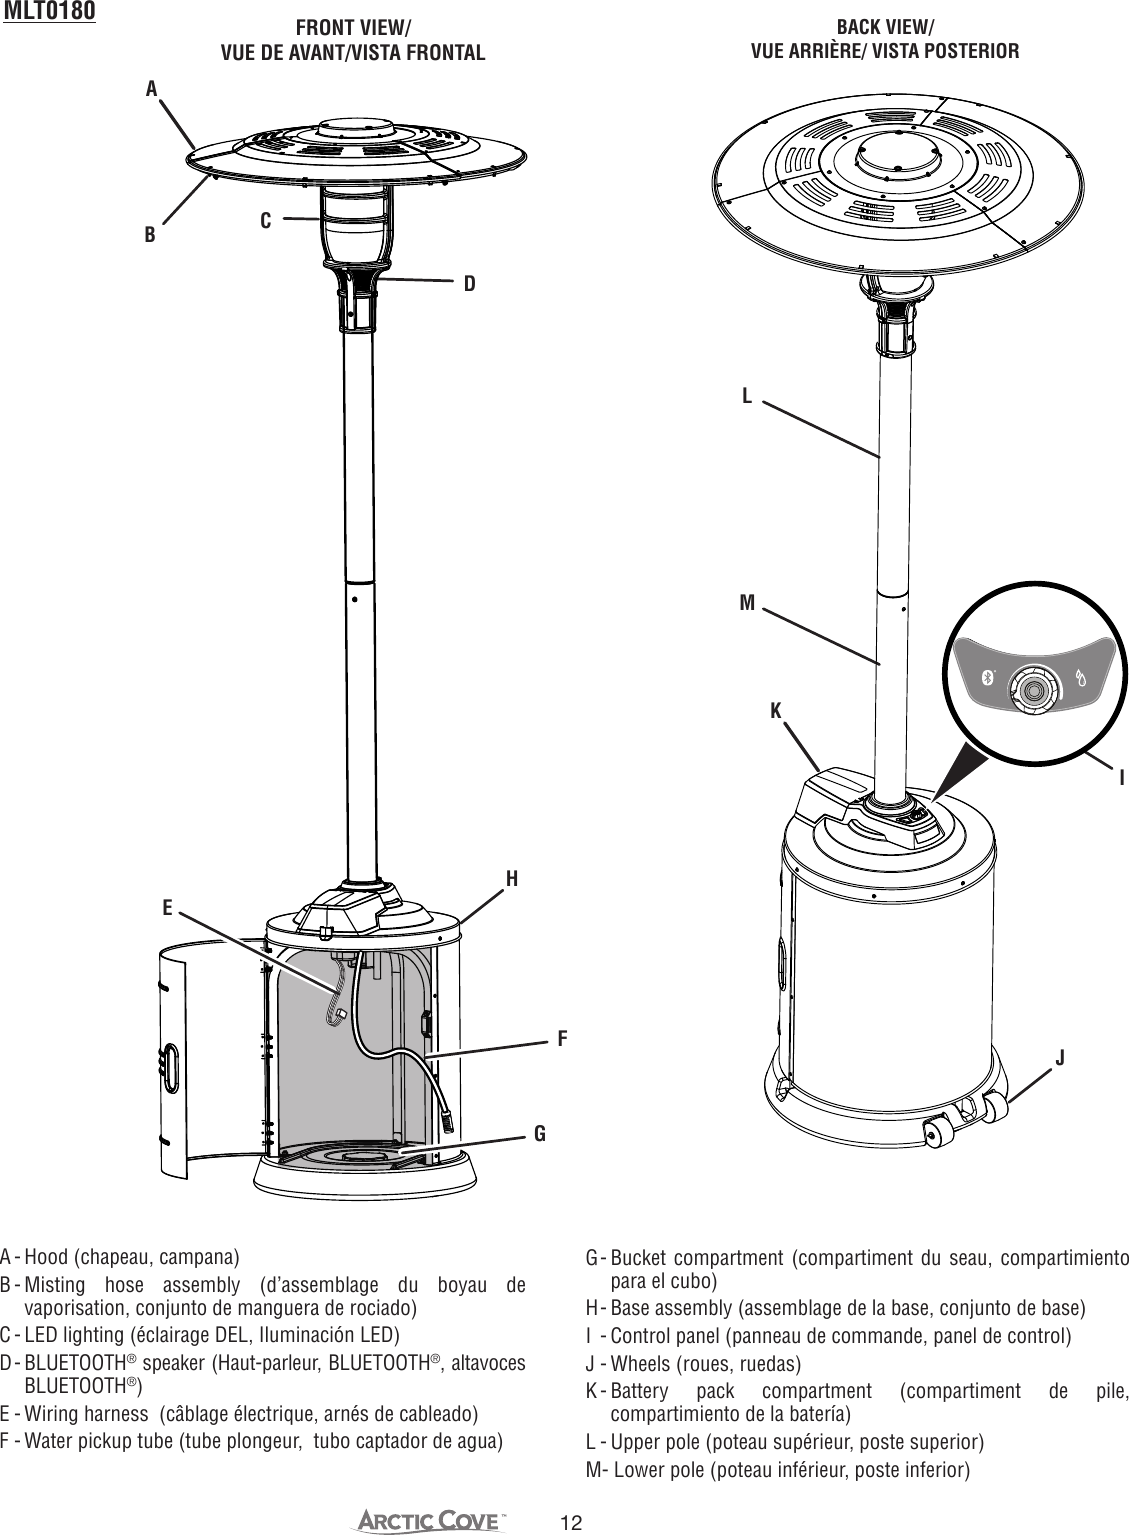

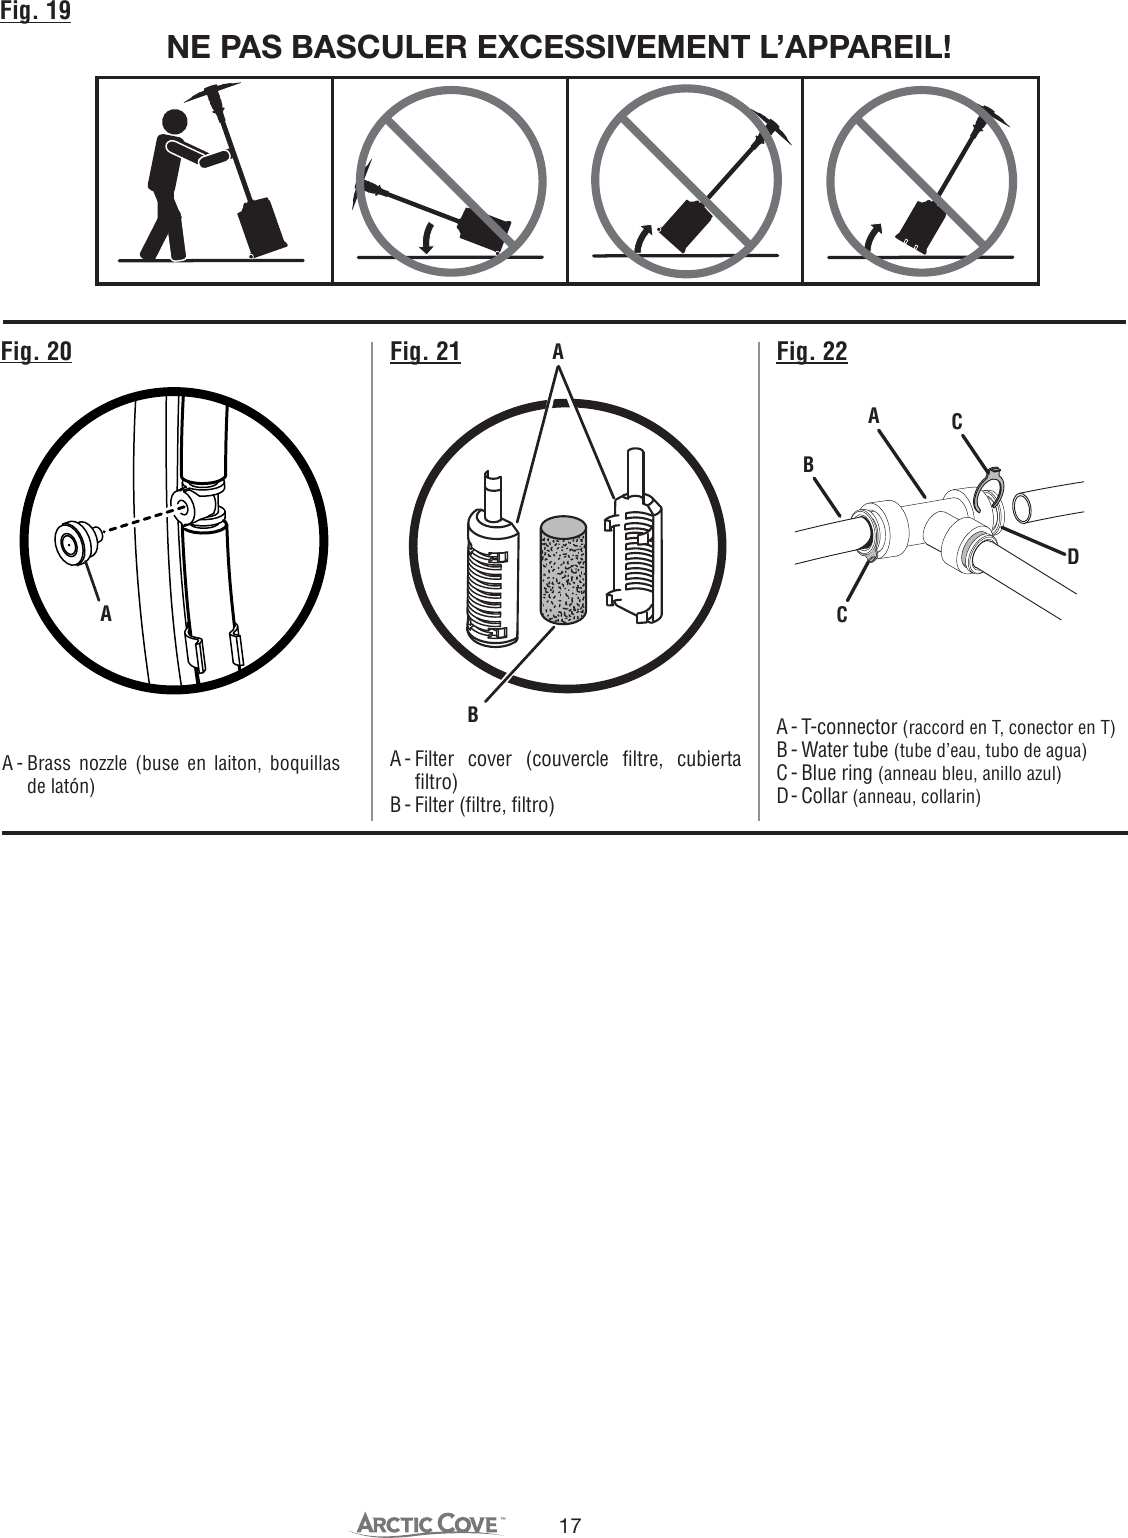
![16Fig. 17Fig. 18Fig. 15Fig. 16A - Battery compartment (compartiment de pile, compartimiento de la batería)B - Battery pack (bloc-pile, paquete de batería)C - Battery compartment cover (couvercle du compartiment de pile, cubierta del compartimiento de la bateríaD - Data label location (emplacement de l’étiquette de données, ubicación de la etiqueta de datos)A - BLUETOOTH® speaker ON/OFF [interrupteur de ON/OFF (MARCHE/ARRÊT) du haut-parleur BLUETOOTH®, altavoz BLUETOOTH® ON/OFF (ENCENDIDO/APAGADO)]B - Misting ON/OFF [vaporisation ON/OFF (MARCHE/ARRÊT), rociado ON/OFF (ENCENDIDO/APAGADO)]C - LED lighting ON/OFF and brightness adjustment [témoin DEL d’allumage ON/OFF (MARCHE/ARRÊT) et d’intensité d’éclairage, iluminación LED ON/OFF (ENCENDIDO/APAGADO) y ajuste de brillo]BCAABDBAABFig. 13 Fig. 14A - Wiring harness (câblage électrique, arnés de cableado)B - Wiring harness connector (raccord du câblage électrique, conector del arnés de cableado)A - Coupler (raccord, acoplador)B - Water tube (tube d’eau, tubo de agua)A - Water pick up tube (tube plongeur, tubo captadorB - Garden hose (boyau d’arrosage, manguera de jardín)A - Upper pole (poteau supérieur, poste superior)B - Lower pole (poteau inférieur, poste inferior)C - Wiring harness and water pickup tube (câblage électrique et le tube plongeur, arnés de cableado y el tubo captador de agua)D - Screw holes (trous de vis, tornillos de cada)E - Machine screws (DD) (vis à métaux, tornillo para metales)ABCDDDDEECBA](https://usermanual.wiki/One-World-Technologies/MLT0180/User-Guide-2534144-Page-17.png)