Onkyo Home Entertainment UTX1 Digital Wireless Audio Transmitter User Manual
Onkyo Corporation Digital Wireless Audio Transmitter
UserManual.wiki
>
Onkyo Home Entertainment
>
UTX1 User Manual
User Manual
Navigation menu
Upload a User Manual
Namespaces
Wiki Guide
HTML
PDF
Info
Views
User Manual
Discussion / Help
Navigation
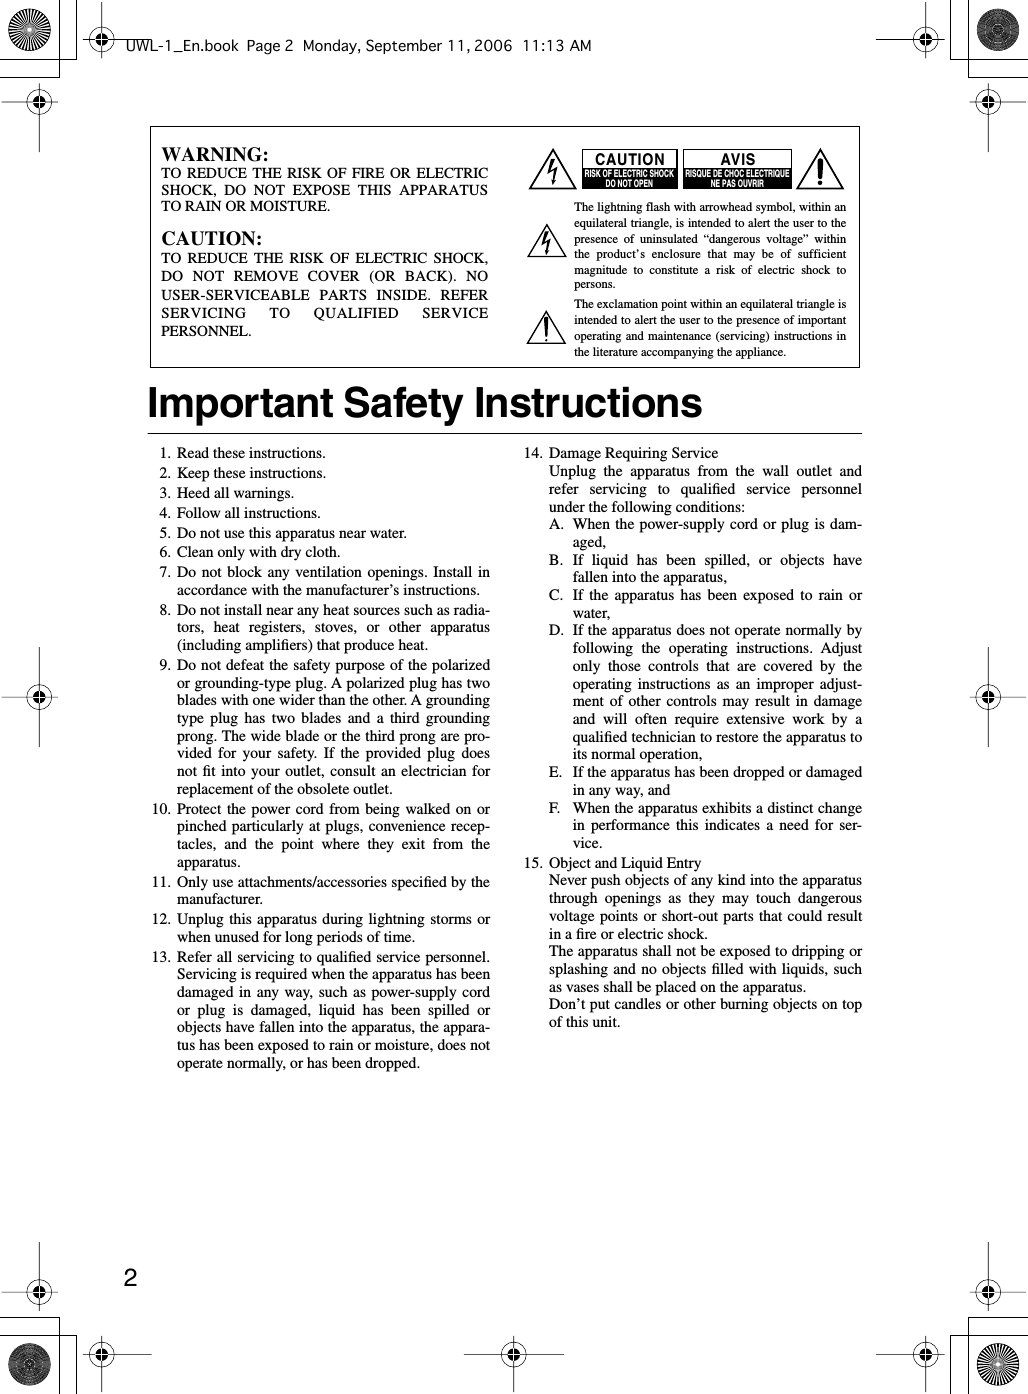
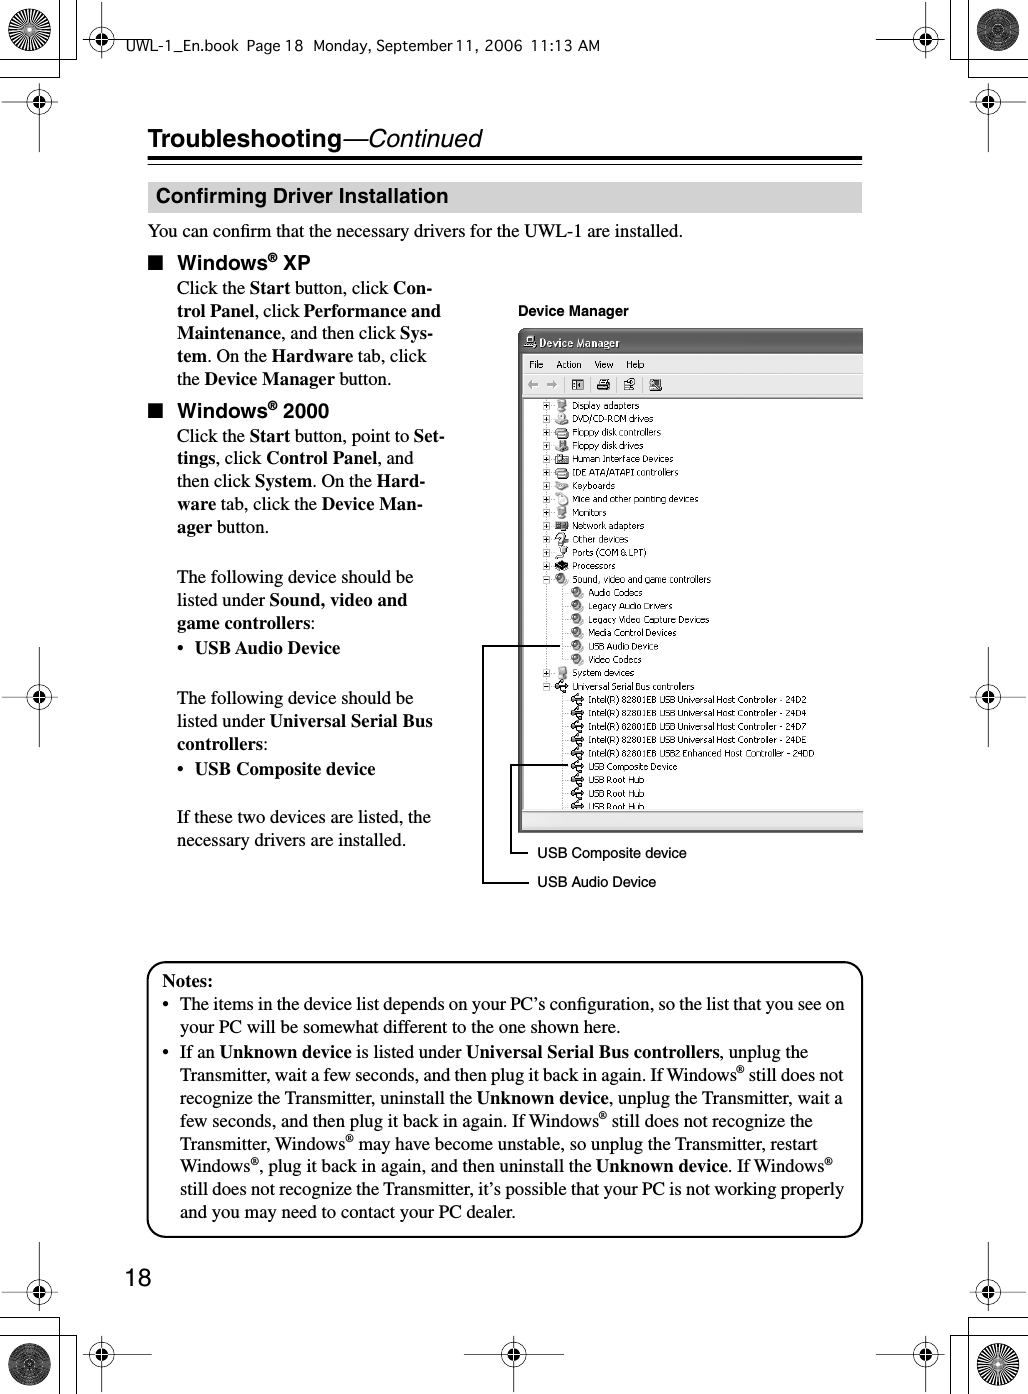
![3 Precautions 1. Recording Copyright —Unless it’s for per-sonal use only, recording copyrighted material is illegal without the permission of the copy-right holder. 2. Care —Occasionally you should dust the unit all over with a soft cloth. For stubborn stains, use a soft cloth dampened with a weak solution of mild detergent and water. Dry the unit immediately afterwards with a clean cloth. Don’t use abrasive cloths, thinners, alcohol, or other chemical solvents, because they may damage the finish or remove the panel letter-ing. 3. Power Pressing the [STANDBY/ON] button to select Standby mode does not fully shutdown the unit. If you do not intend to use the unit for an extended period, remove the power cord from the AC outlet. 4. Never Touch this Unit with Wet Hands —Never handle this unit or its power cord while your hands are wet or damp. If water or any other liquid gets inside this unit, have it checked by your Onkyo dealer. 5. Handling Notes • If you need to transport this unit, use the original packaging to pack it how it was when you originally bought it.• Do not leave rubber or plastic items on this unit for a long time, because they may leave marks on the case.• This unit’s top and rear panels may get warm after prolonged use. This is normal.•If you do not use this unit for a long time, it may not work properly the next time you turn it on, so be sure to use it occasionally. For U.S. models FCC Information for UserFCC WARNING Changes or modifications not expressly approved by the party responsible for compliance could void the user’s authority to operate the equipment. NOTICE: This equipment has been tested and found to com-ply with the limits for a Class B digital device, pur-suant to part 15 of the FCC Rules. These limits are designed to provide reasonable protection against harmful interference in a residential installation.This equipment generates, uses and can radiate radio frequency energy and, if not installed and used in accordance with the instructions, may cause harmful interference to radio communica-tions. However, there is no guarantee that interfer-ence will not occur in a particular installation. If this equipment does cause harmful interference to radio or television reception, which can be deter-mined by turning the equipment off and on, the user is encouraged to try to correct the interference by one or more of the following measures:• Reorient or relocate the receiving antenna• Increase the separation between the equipment and receiver.•Connect the equipment into an outlet on a circuit different from that to which the receiver is con-nected.• Consult the dealer or an experienced radio/TV technician for help.FCC ID: ATMUTX1MODEL: UTX-1IC No.: 6547A-UTX1This device complies with Part 15 of the FCC Rules. Operation is subject to the following two conditions: (1) this device may not cause harmful interference, and (2) this device must accept any interference received, including interference that may cause undesired operation.This transmitter must not be co-located or operated in conjunction with any other antenna or transmit-ter.UWL-1_En.book Page 3 Monday, September 11, 2006 11:13 AM](https://usermanual.wiki/Onkyo-Home-Entertainment/UTX1/User-Guide-713453-Page-3.png)

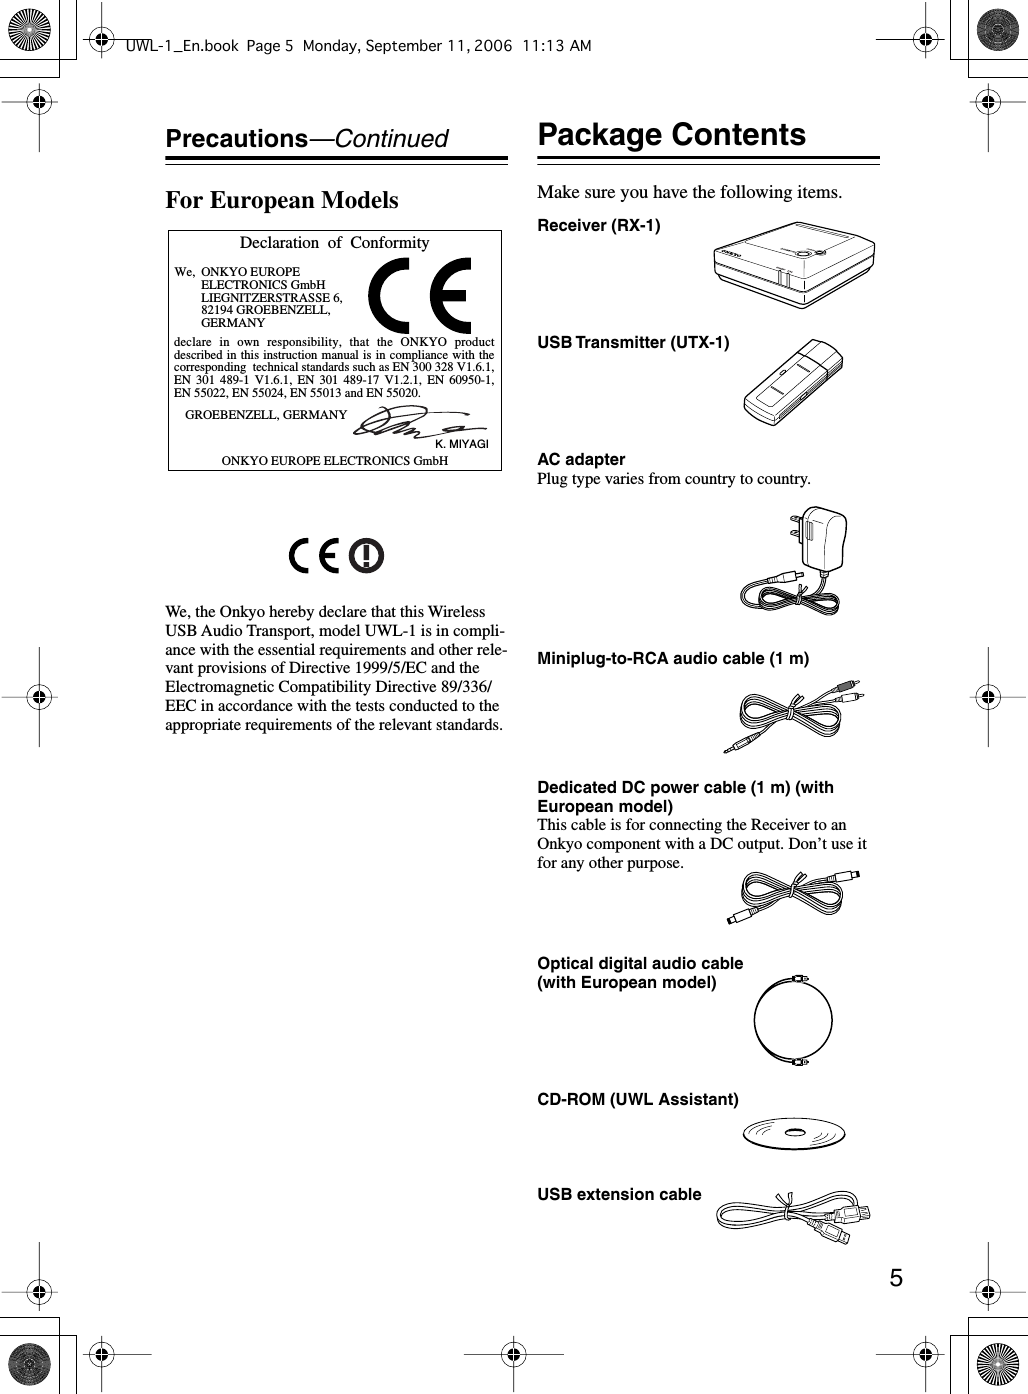

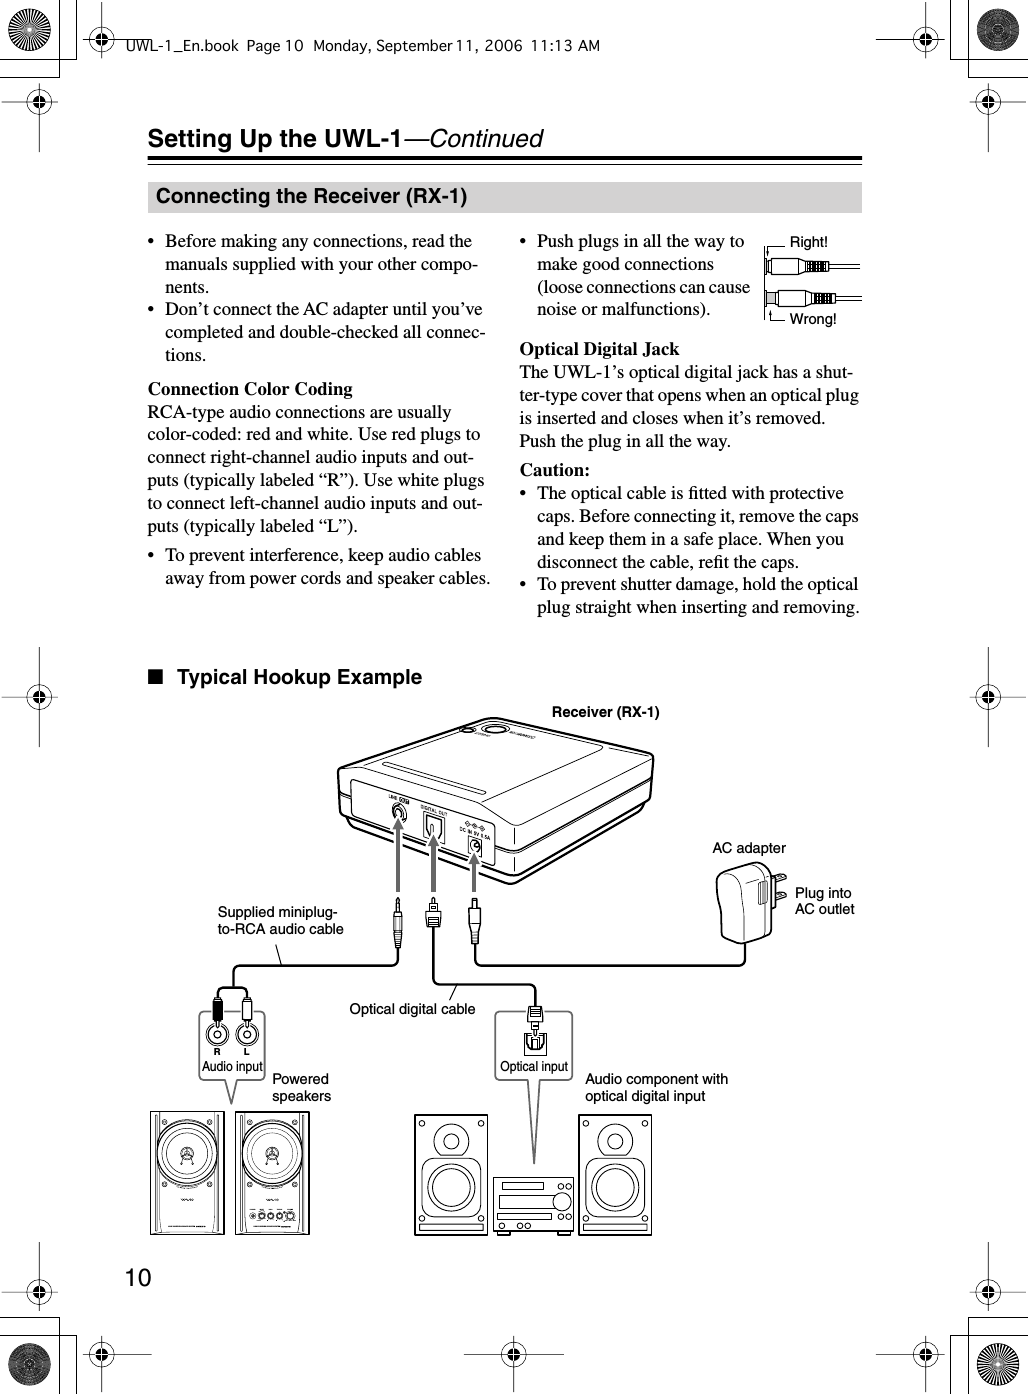
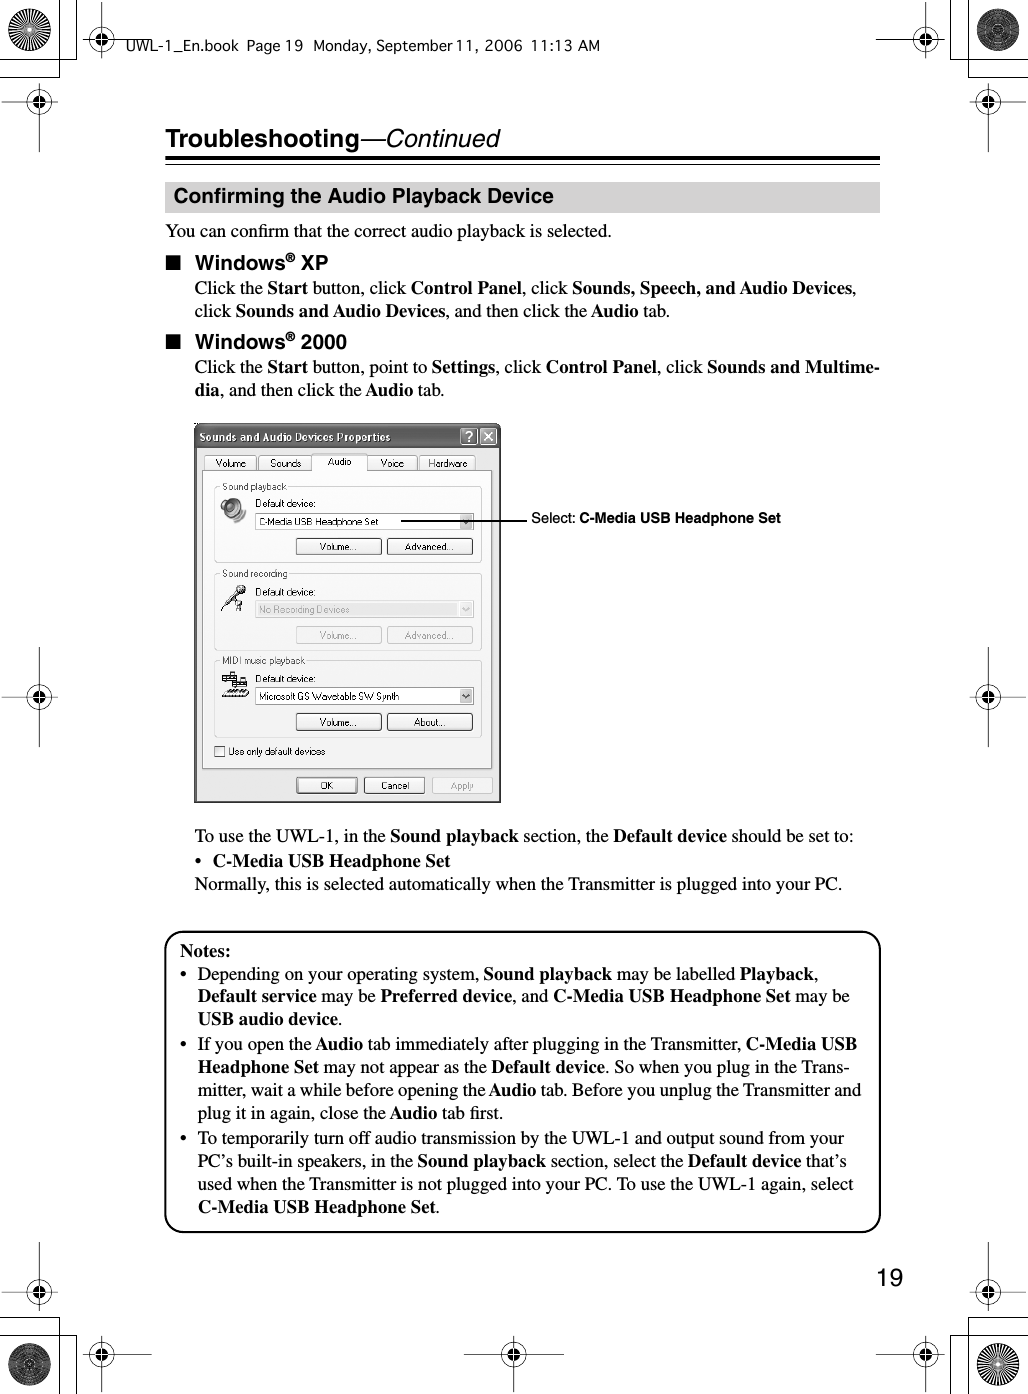
![11 Setting Up the UWL-1 —Continued ■ Connecting an Onkyo Component with a DC Output (European Model) The Receiver is set to the same ID as the Transmitter before it leaves the factory, so normally you don’t need to change it. However, if you have several Receivers and want them all to receive audio from the same Transmitter, you’ll need to set them all to the same ID. 1 With your PC on, plug the Transmitter into a USB port, and then connect the AC adapter to the Receiver. 2 Put the Receiver close to the Transmitter (30–100 cm apart). 3 Press and hold down the Receiver’s [CH SELECT] button for at least 3 sec-onds, and then press and hold down the Transmitter’s [CH SELECT] button for at least 6 seconds. The Transmitter’s Transmit indicator and the Receiver’s STANDBY indicator both flash, and the Receiver detects the Transmitter’s ID. Once the Receiver has recognized the Trans-mitter’s ID successfully, the Receiver’s SYNC indicator lights up. Changing the Receiver’s IDDIGITALOPTICALIN DC5V2W/0.4A MAX.DC OUTLRLINE 1INOptical digital audio cableDedicated DC power cable** Use the included dedicated DC power cable only with Onkyo components that have a DC output. Don’t use it for any other purpose.Onkyo component with DC outputReceiver (RX-1)Note: When you use the dedicated DC power cable, use the included optical digital audio cable for the audio connection, as the audio quality may suffer with an analog audio connection. If you do use an analog connection, use the included AC adapter instead of the dedicated DC power cable.Miniplug-to-RCA audio cableConnect one or the other.Receiver (RX-1)CH SELECT buttonSTANDBY indicator SYNC indicatorTransmitter (UTX-1)Transmit indicatorCH SELECT button30–100 cm apartUWL-1_En.book Page 11 Monday, September 11, 2006 11:13 AM](https://usermanual.wiki/Onkyo-Home-Entertainment/UTX1/User-Guide-713453-Page-11.png)
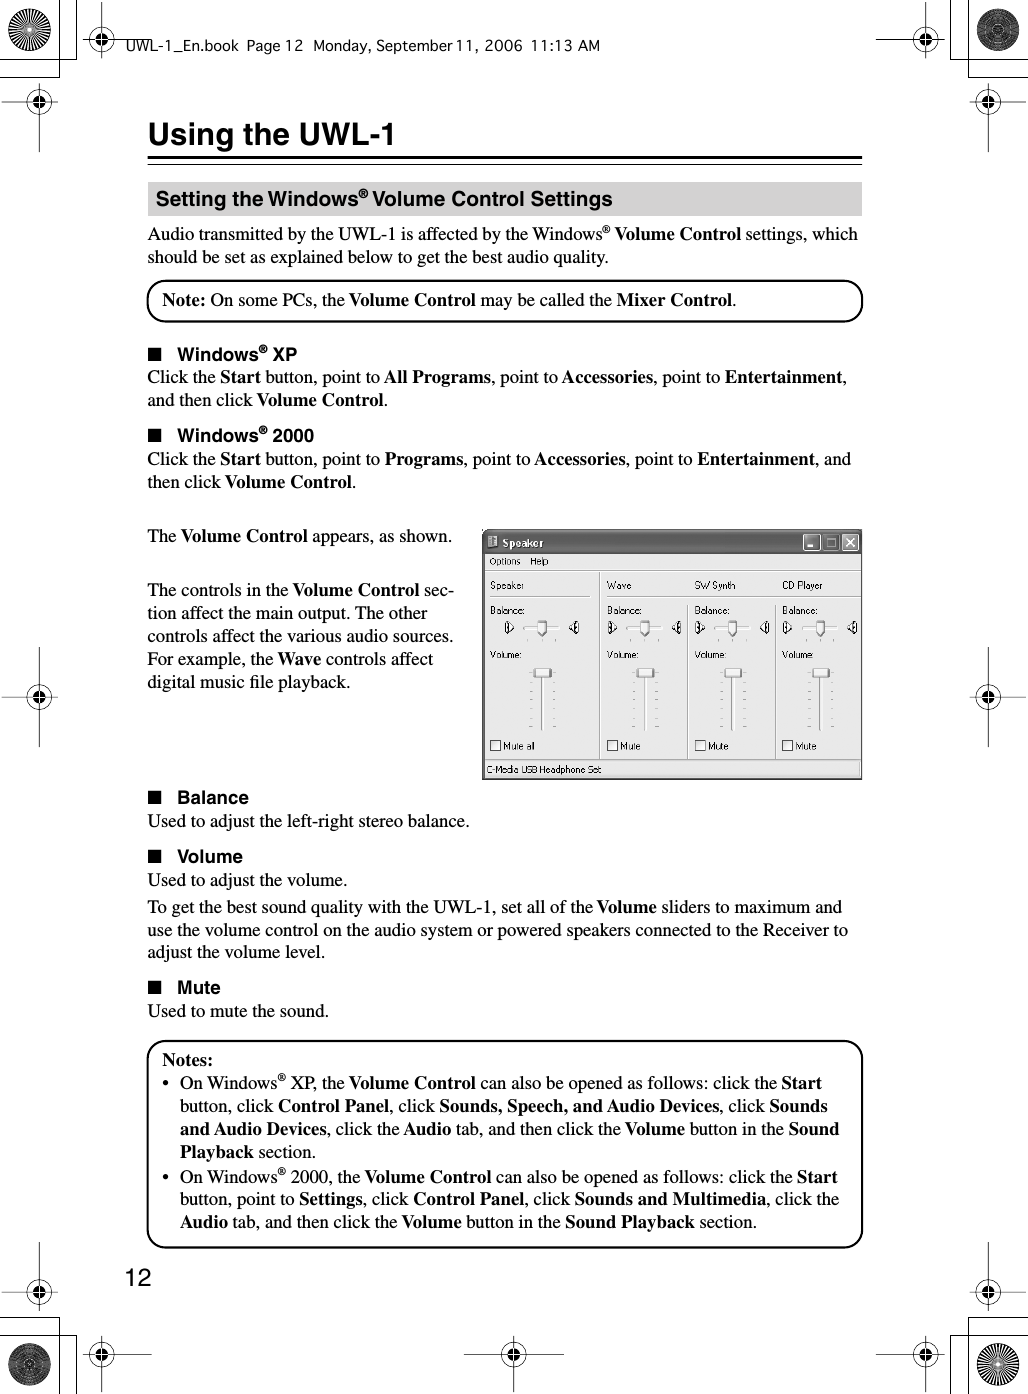
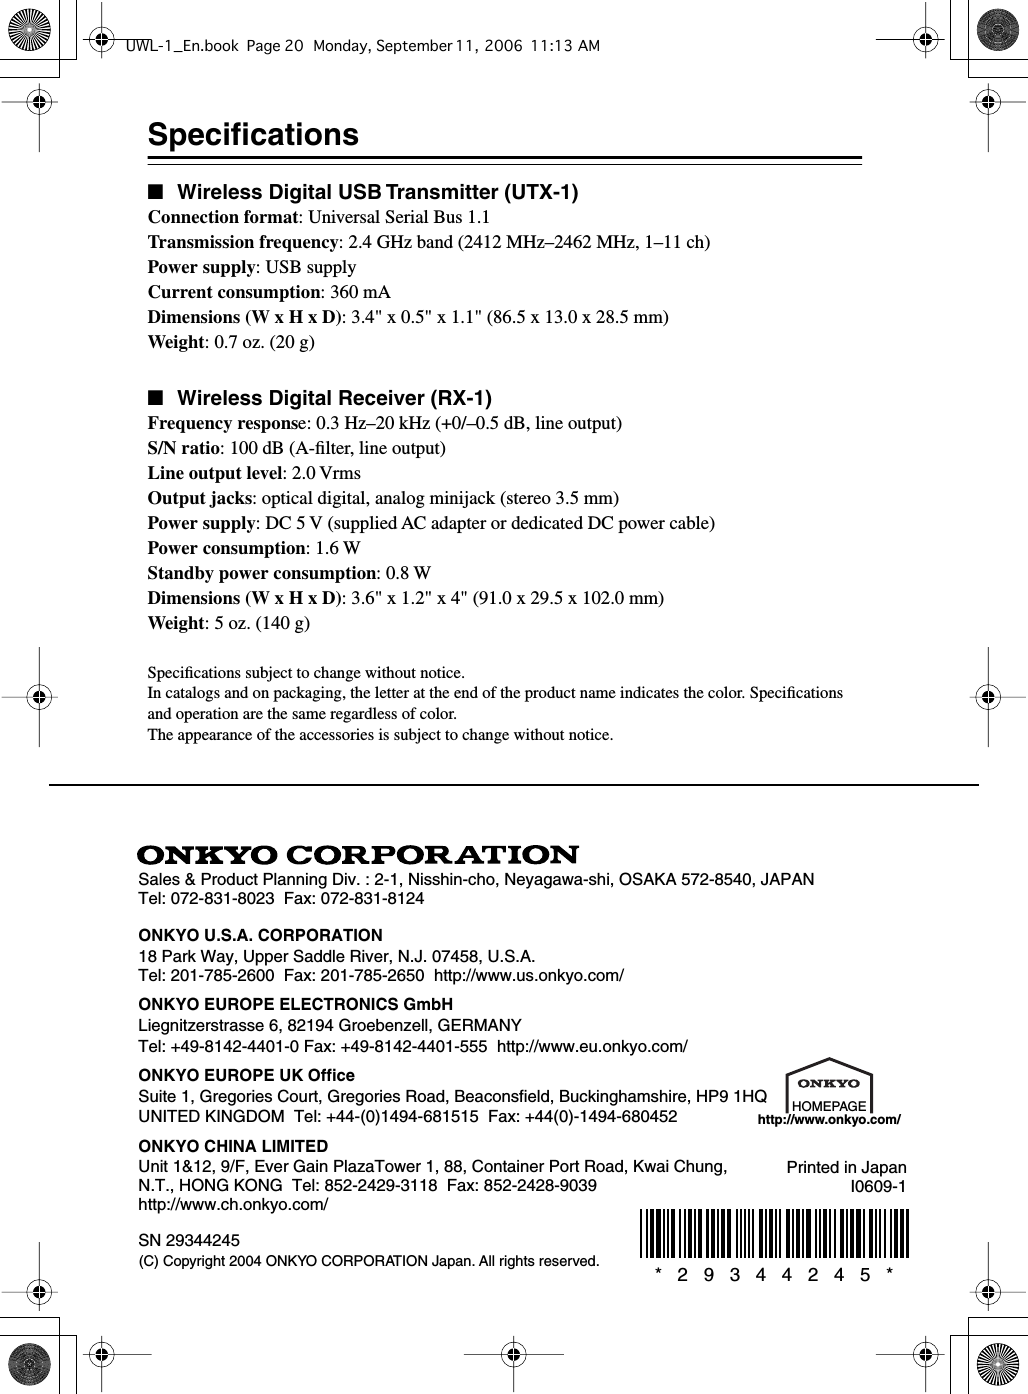
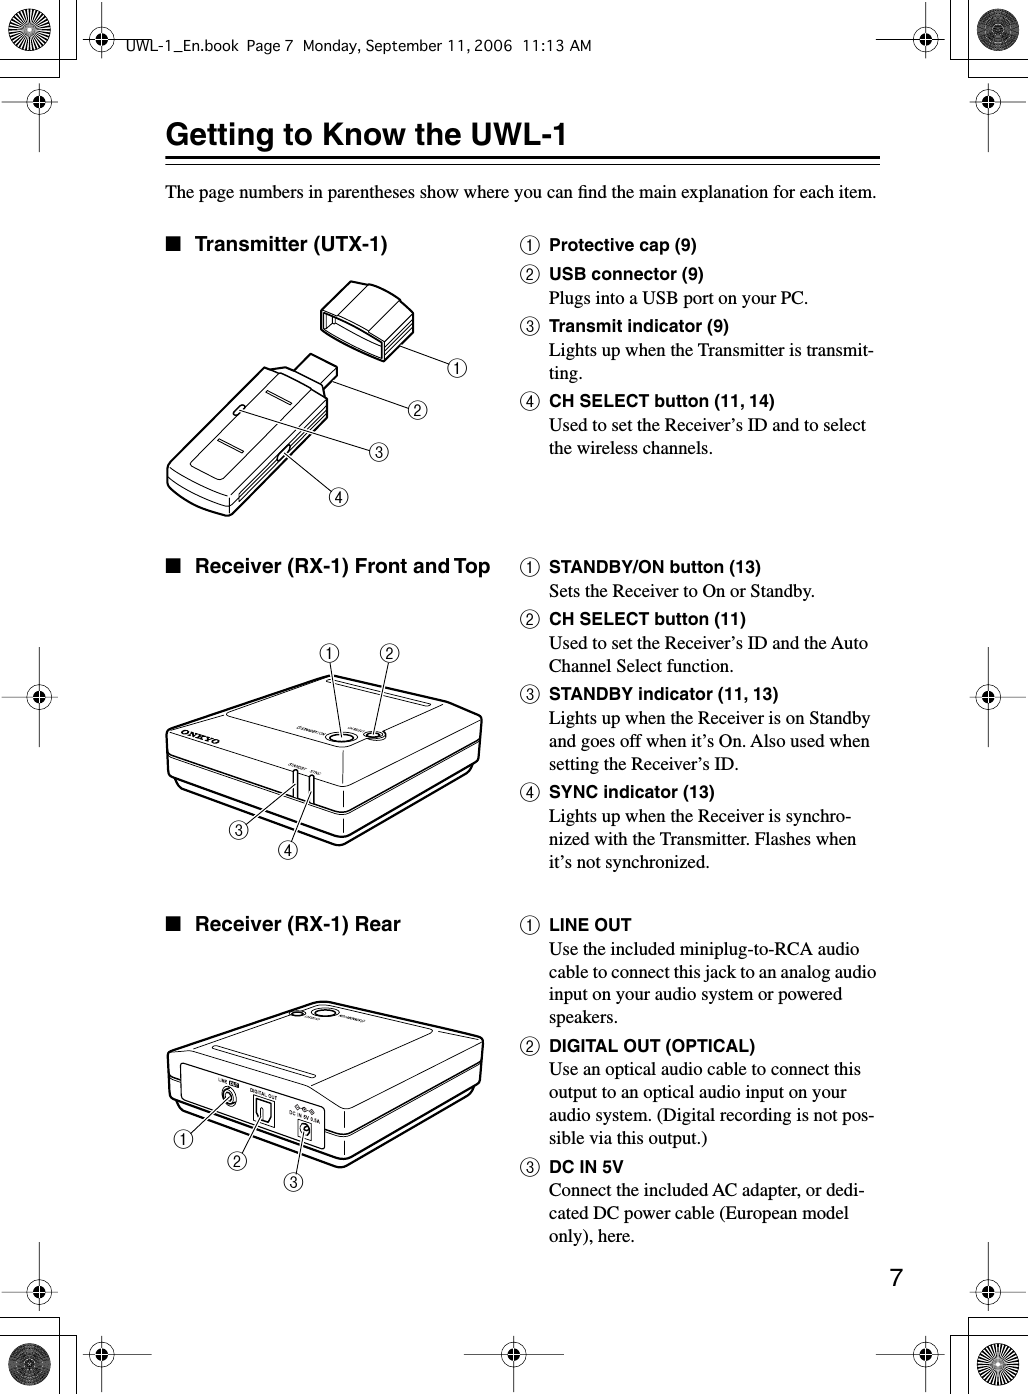
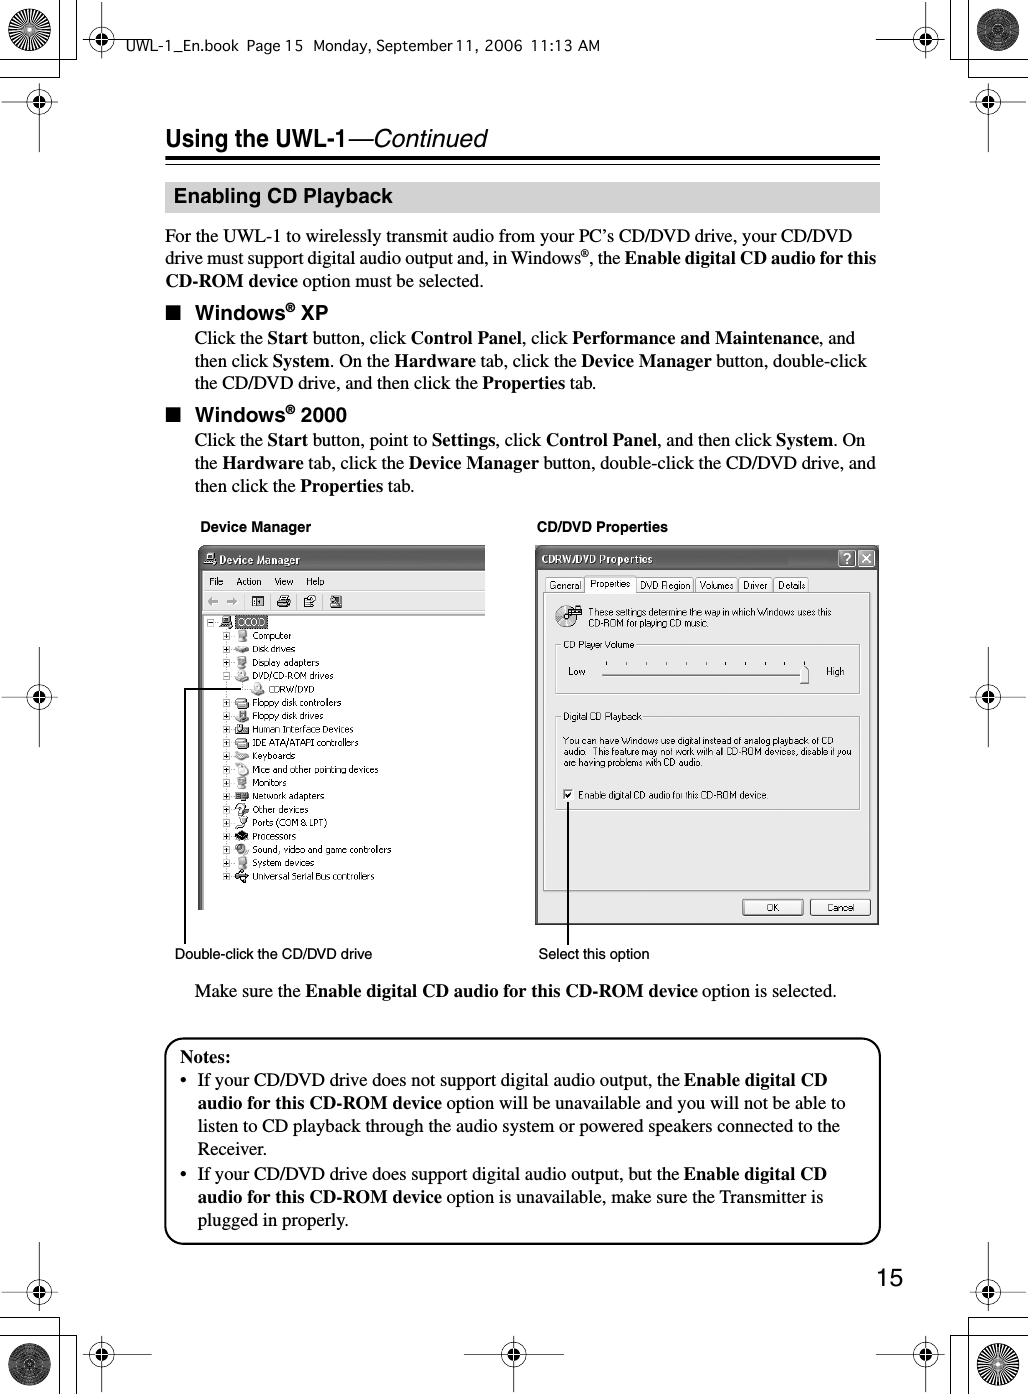
![13 Using the UWL-1 —Continued With the UWL-1, you can play the digital music stored on your PC through an audio system or powered speakers located in any room in your house. You can also stream Internet radio, CDs, or DVDs. 1 Make sure the Transmitter is plugged into your PC properly (see page 9). 2 If the Receiver’s STANDBY indicator is on, press the [STANDBY/ON] button to turn on the Receiver. The Receiver’s SYNC indicator will light up when it’s synchro-nized with the Transmitter and ready for use. 3 Turn on the audio system or powered speakers that you’ve connected to the Receiver (see page 10), select the input source, and turn up the volume. 4 Use Windows ® Media Player or another audio playback program to play a dig-ital music file, or load a CD and play that. The audio will be transmitted wirelessly by the Transmitter to the Receiver and output via the audio system or powered speakers that you’ve connected to the Receiver. If you don’t hear anything, see “Troubleshooting” on page 16. 5 When you’ve finished using the UWL-1, press the Receiver’s [STANDBY/ON] button to set it to Standby. The Receiver’s STANDBY indicator lights up. 6 Stop audio playback on your PC, and then unplug the Transmitter. If it’s not practical to unplug the Transmitter every time you finish using it, you can leave it plugged in, but to output sound from your PC’s built-in speakers, you’ll need to change the Default device setting on the Audio tab of the Sounds and Audio Devices Properties con-trol panel (see page 19). Listening to MusicNote: To listen to a CD in your PC’s CD/DVD drive, digital CD playback must be enabled (see page 15).Note: If no audio is output by your PC for a while, the Transmitter will stop transmitting and the Transmit indicator will go off. The next time audio is output, the Transmitter will start transmitting again and the Transmit indicator will light up. However, it takes the Trans-mitter a few seconds to synchronize with the Receiver, during which no audio will be heard, so you may not hear the first few seconds of the first song you play. To prevent this, output some audio to light up the Transmit indicator beforehand.STANDBY / ONSTANDBY indicatorSYNC indicatorUWL-1_En.book Page 13 Monday, September 11, 2006 11:13 AM](https://usermanual.wiki/Onkyo-Home-Entertainment/UTX1/User-Guide-713453-Page-13.png)
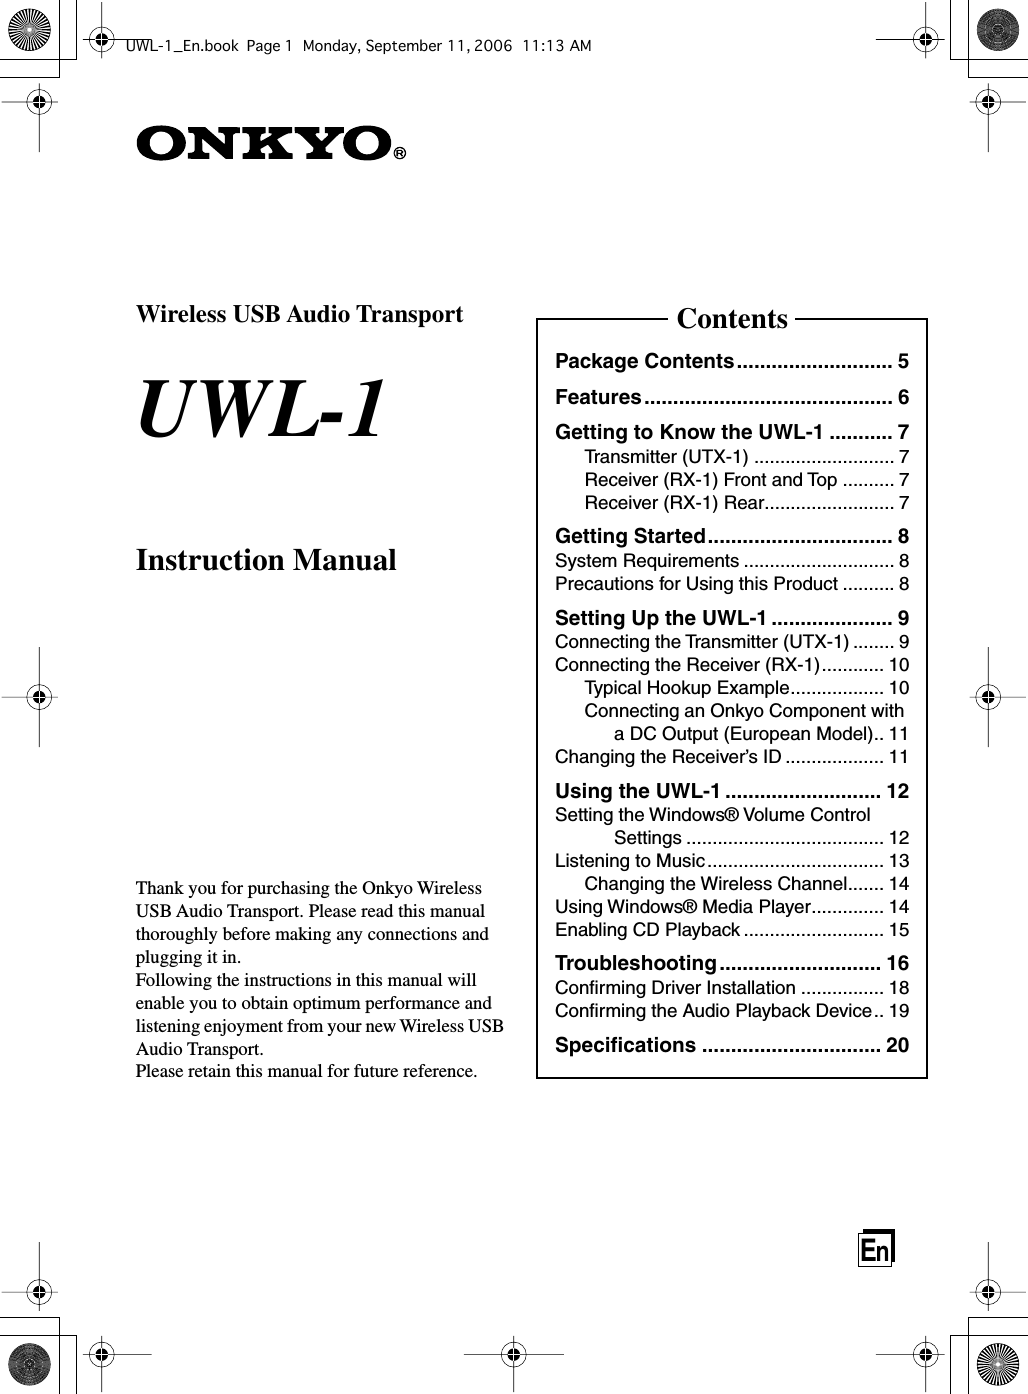
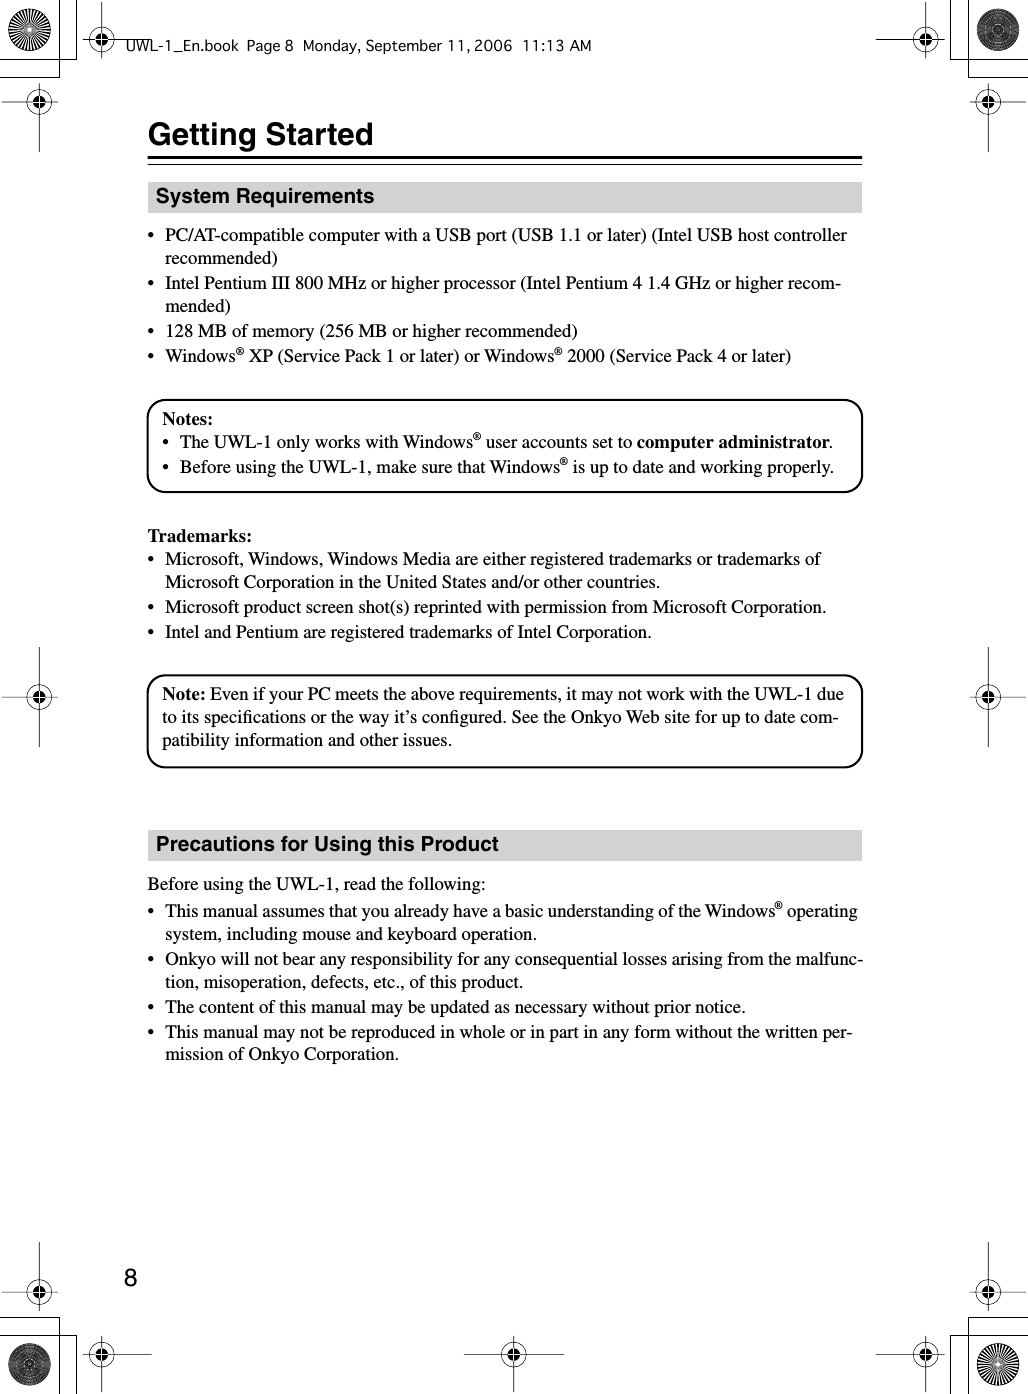
![14 Using the UWL-1 —Continued ■ Changing the Wireless Channel If you hear noise, or audio playback is interrupted, try pressing the Transmitter’s [CH SELECT] button to select another wireless channel. The Transmitter can transmit on any one of 11 channels (2412 MHz to 2462 MHz), and changing the channel may resolve the issue. If you press and hold down the Transmitter’s [CH SELECT] button for 3–5 seconds, the Auto Channel Select function will auto-matically select the channel with the least noise. If that doesn’t work, unplug the Transmitter, wait a few seconds, and then plug it back in again.With Windows ® Media Player, you can play your digital music files (MP3, WMA, WAV, etc), CDs, DVDs, and listen to Internet radio. ■ Windows ® XP Click the Start button, point to All Programs , point to Accessories , point to Entertainment , and then click Windows Media Player . ■ Windows ® 2000 Click the Start button, point to Programs , point to Accessories , point to Entertainment , and then click Windows Media Player .•To play a digital music file that’s in your Media Player library, simply double-click it.•To play a digital music file that’s not in your Media Player library, on the File menu, select Open , locate the file, and then click Open .•To play a CD, load it into your PC’s CD/DVD drive. If playback doesn’t start automatically, click the Now Playing arrow, and then select the CD in the list.• Use the Volume slider to adjust the volume.• See the online help for more information. Using Windows ® Media PlayerNote: While the Transmitter is plugged into your PC, your PC’s built-in speakers will not output any sound. This is because USB audio devices have priority. To output sound from your PC’s built-in speakers, unplug the Transmitter, or change the Default device setting on the Audio tab of the Sounds and Audio Devices Properties control panel (see page 19).CH SELECT buttonVolume sliderUWL-1_En.book Page 14 Monday, September 11, 2006 11:13 AM](https://usermanual.wiki/Onkyo-Home-Entertainment/UTX1/User-Guide-713453-Page-14.png)
![16 Troubleshooting If you’re having trouble using the UWL-1, look for a solution here. Some issues may be due to a connected component, so refer to the manuals for your other components, too. If you can’t resolve the issue yourself, contact your Onkyo dealer. There’s no sound • On the Receiver, make sure the miniplug or optical digital plug is pushed in all the way (see page 10).• If the Receiver’s STANDBY indicator is on, the Receiver is off. Press the [STANDBY/ON] button to turn on the Receiver (see page 13).• On the Windows ® Volume control , deselect all of the Mute boxes and set all of the Volume sliders to maximum (see page 12).•In Windows ® Sounds and Audio Devices Properties , make sure the correct audio playback device is selected (see page 19).• There may be a problem with the audio system or powered speakers connected to the Receiver. Make sure the audio system is connected to the Receiver properly. Make sure it’s turned on, the volume level is turned up, and the Receiver is selected as the input source. If the audio system appears to be working OK, check the cables (see page 10). See the instruc-tion manual supplied with your audio system or powered speakers for more information.•If the Receiver’s SYNC indicator is flashing, the Receiver is not synchronized with the Trans-mitter and wireless transmission is not possible. Try changing the Receiver’s ID (see page 11).• Also see “Audio playback is noisy or distorted” below. The left and right volume levels are not the same • Check the balance control setting on the connected audio system or powered speakers.• On the Windows ® Volume control , set all of the Balance sliders to midway (see page 12).• Check the balance control settings in your audio playback program. If the program has inde-pendent volume controls for the left and right channels, set them to the same level. The sound quality is poor or there’s noise • The sound quality can be affected by strong magnetic fields, such as those from a TV. Try moving such devices away from the Receiver. Windows ® doesn’t automatically detect the Transmitter • Make sure the Transmitter is properly plugged into a USB port on your PC (see page 9).• The problem may be with your USB hub. We recommend that you plug the Transmitter directly into a USB port on your PC, but if you are using a USB hub, refer to its instruction manual and make sure it’s working properly.•Unplug the Transmitter, wait about 15 seconds, and then plug it in again. If Windows ® seems unstable, restart your PC. Your PC’s built-in speakers output no sound • While the Transmitter is plugged into your PC, your PC’s built-in speakers will not output any sound. This is because USB audio devices have priority. To output sound from your PC’s built-in speakers, unplug the Transmitter, or change the Default device setting on the Audio tab of the Sounds and Audio Devices Properties control panel (see page 19). Audio IssuesUWL-1_En.book Page 16 Monday, September 11, 2006 11:13 AM](https://usermanual.wiki/Onkyo-Home-Entertainment/UTX1/User-Guide-713453-Page-16.png)
![17 Troubleshooting —Continued Audio playback is noisy or distorted •Depending on the location of the Transmitter, audio playback may be interrupted. Try moving the Transmitter to another location. If you can’t relocate your PC, using a commercially avail-able USB extension cable and moving the Transmitter to another location may resolve the issue.• Select another wireless channel by pressing the Transmitter’s [CH SELECT] button (see page 14).• If a radio or satellite dish is located nearby, it may cause interference.• If a wireless computer network, microwave oven, or other device that uses the 2.4 GHz fre-quency band is located nearby, audio playback may be interrupted. In this case, press the Transmitter’s [CH SELECT] button to select another wireless channel (see page 14).• If there’s an obstacle between the Transmitter and Receiver, audio playback may be inter-rupted. There’s no sound when playing a CD in your PC’s CD/DVD drive • If your PC’s CD/DVD drive does not support digital audio output, audio from the CD/DVD drive will not be transmitted by the Transmitter and you will not be able to listen to CD play-back through the audio system or powered speakers connected to the Receiver (see page 15). Can’t hear any music when playing PC games • If the game uses the CD/DVD drive’s audio output to output audio, see the previous item. Audio playback is interrupted • Audio playback may be interrupted if you connect or disconnect another USB device.• During audio playback, don’t perform any demanding tasks that will create additional work for your PC’s processor.•If your PC’s processor does not meet the system requirements stated on page 8, performance may be affected. Even if the processor does meet the requirements, audio playback may be interrupted if the processor is burdened with a heavy workload. In this case, quit all other pro-grams.•Turning off any energy saving settings may also improve performance. Can’t record on the component connected to the Receiver’s optical digital jack •For copyright reasons, it’s not possible to record from the Receiver’s optical digital jack. RecordingNote: The UWL-1 uses microcomputers for signal processing and control functions. In very rare situations, severe interference, noise from an external source, or static electricity may cause it to lockup. In the unlikely event that this should happen, unplug the Transmitter and the Receiver’s AC adapter, wait at least 5 seconds, and then plug them back in again.UWL-1_En.book Page 17 Monday, September 11, 2006 11:13 AM](https://usermanual.wiki/Onkyo-Home-Entertainment/UTX1/User-Guide-713453-Page-17.png)