OpenPeak CSCO4G710 Cisco CIUS 4G User Manual ciusug
OpenPeak Inc. Cisco CIUS 4G ciusug
UserManual.wiki
>
OpenPeak
>
CSCO4G710 User Manual
>
Users Manual 1
Contents
1.
Users Manual 1
2.
Users Manual 2
Users Manual 1
Navigation menu
Upload a User Manual
Namespaces
Wiki Guide
HTML
PDF
Info
Views
User Manual
Discussion / Help
Navigation


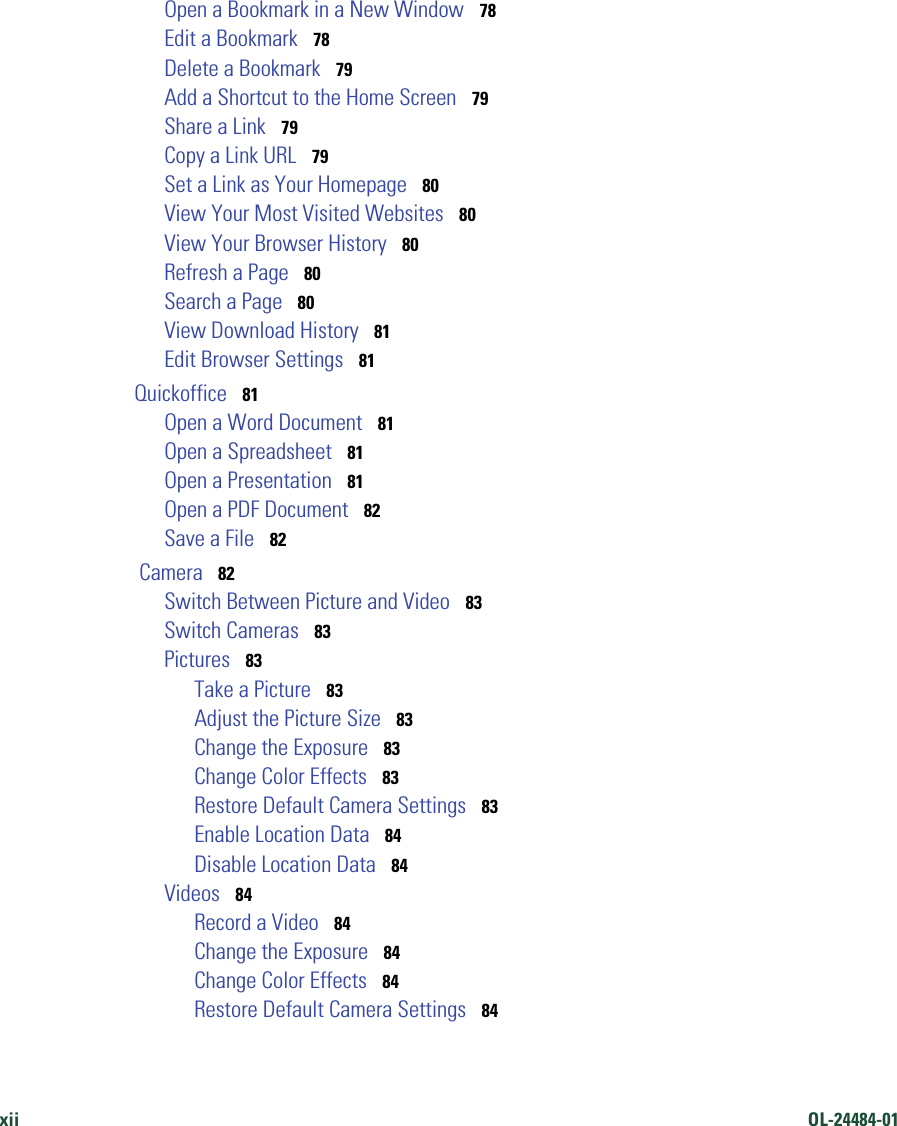

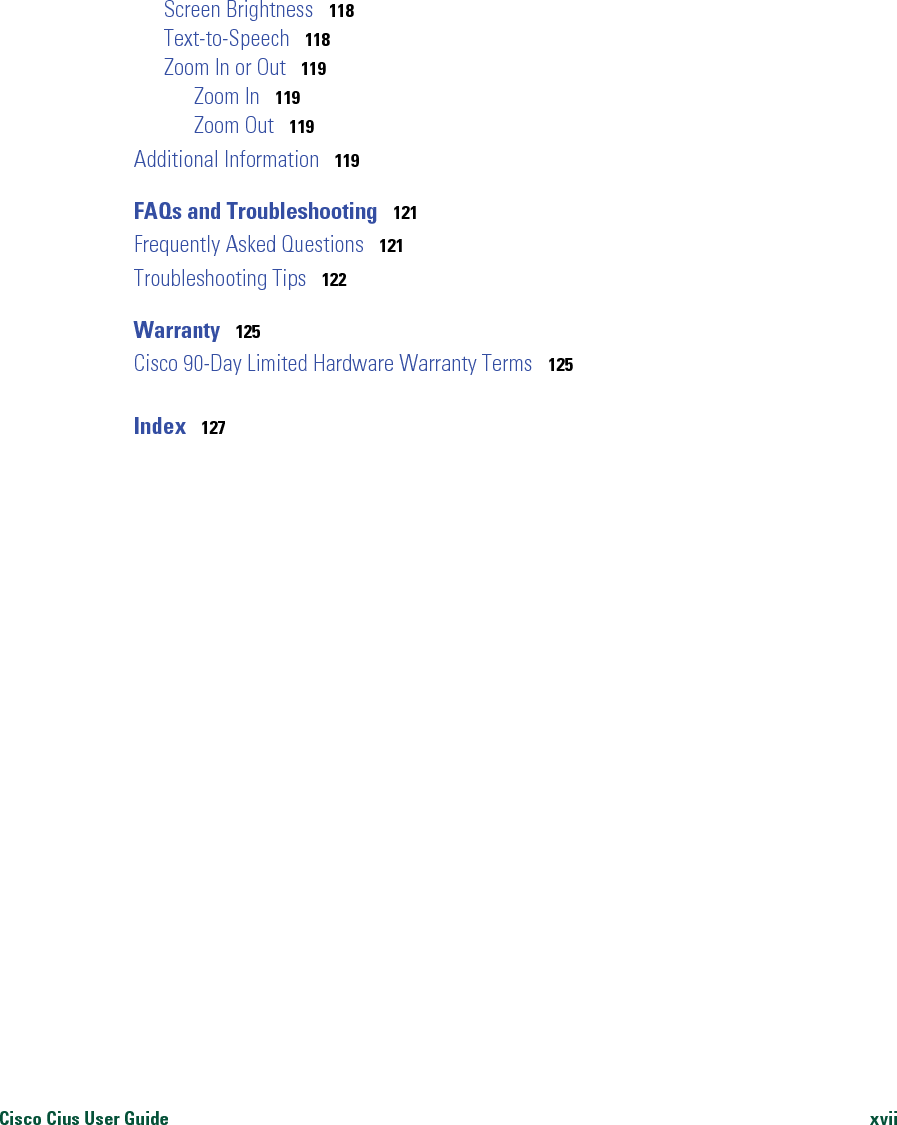
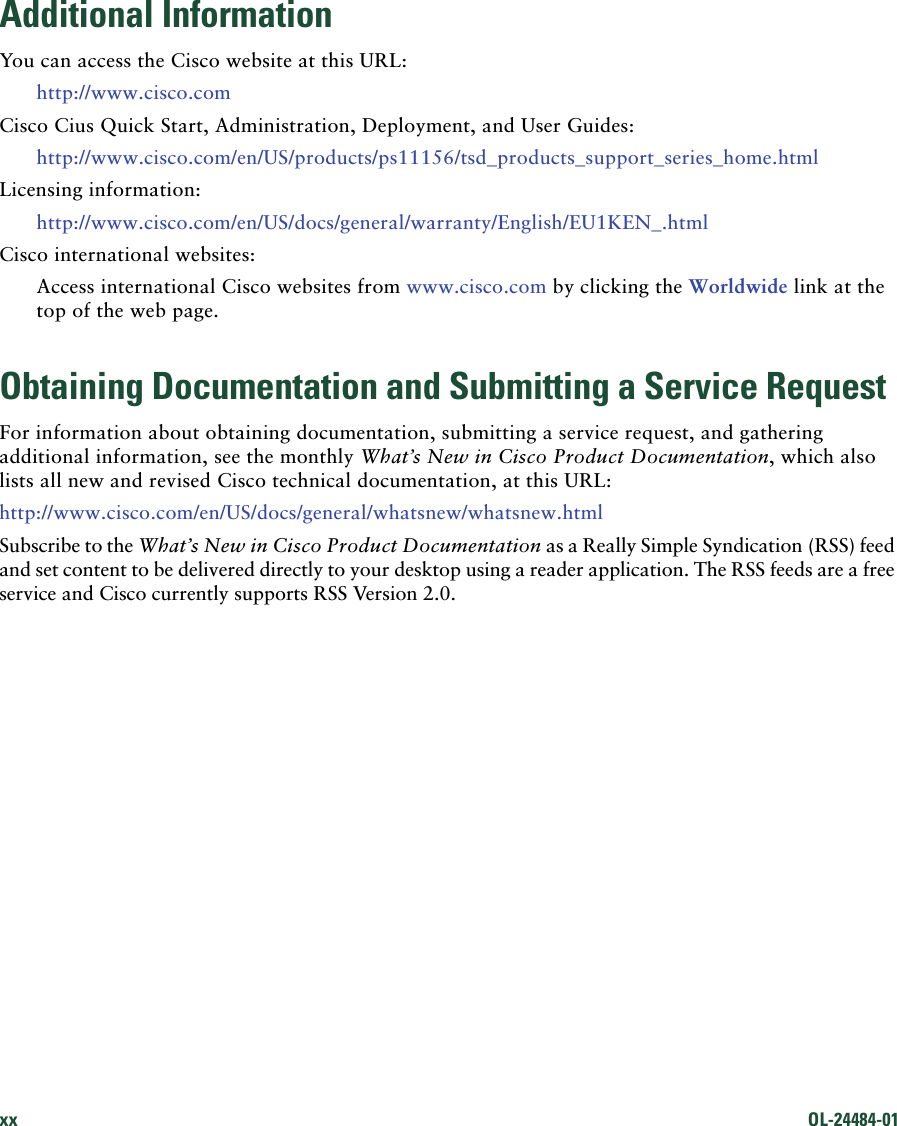

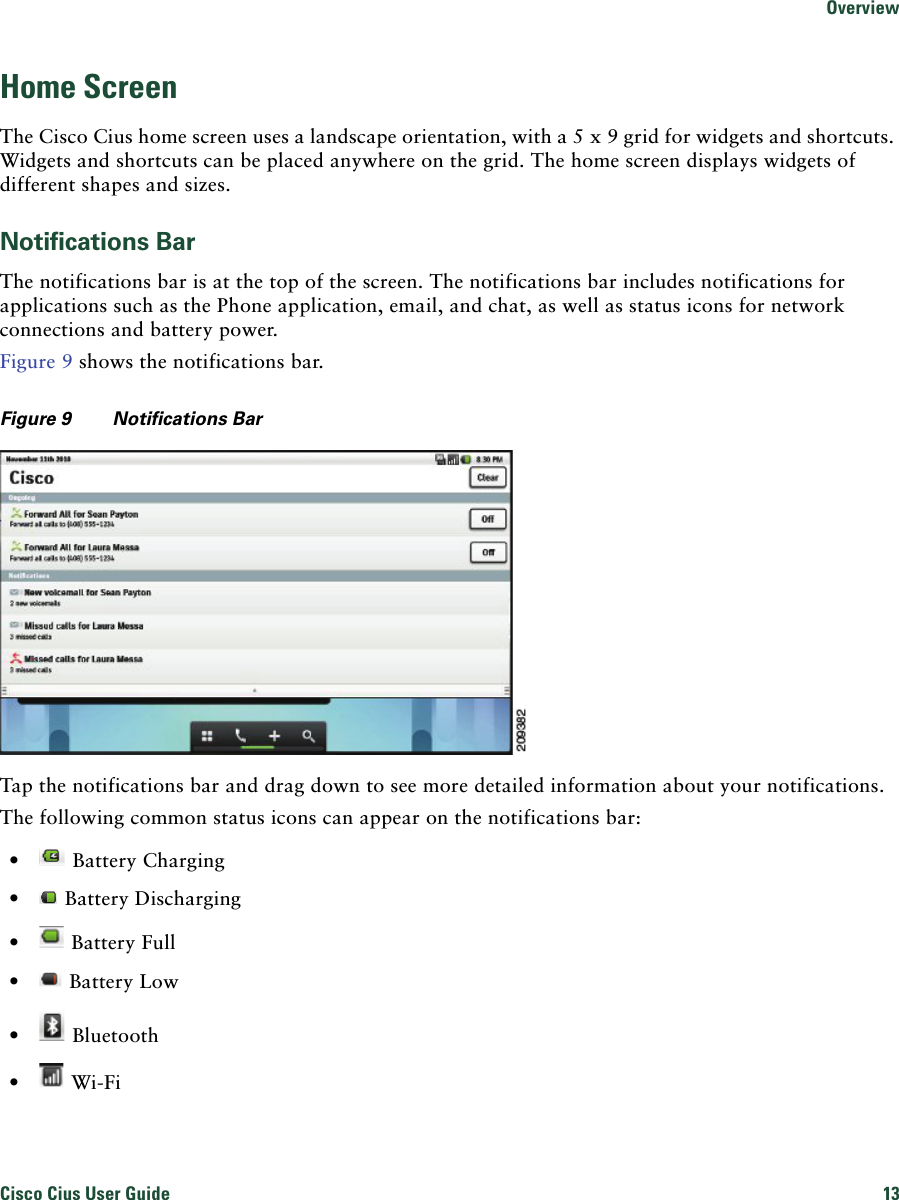
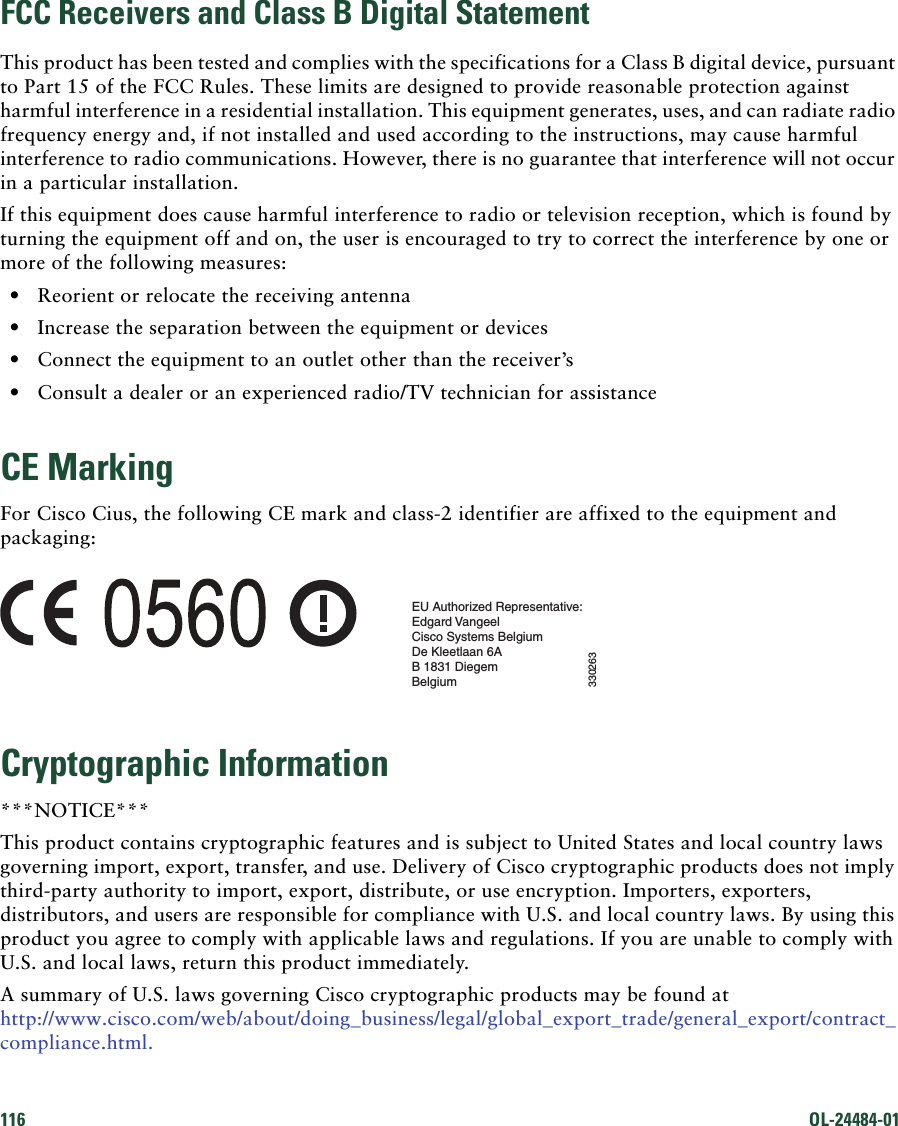
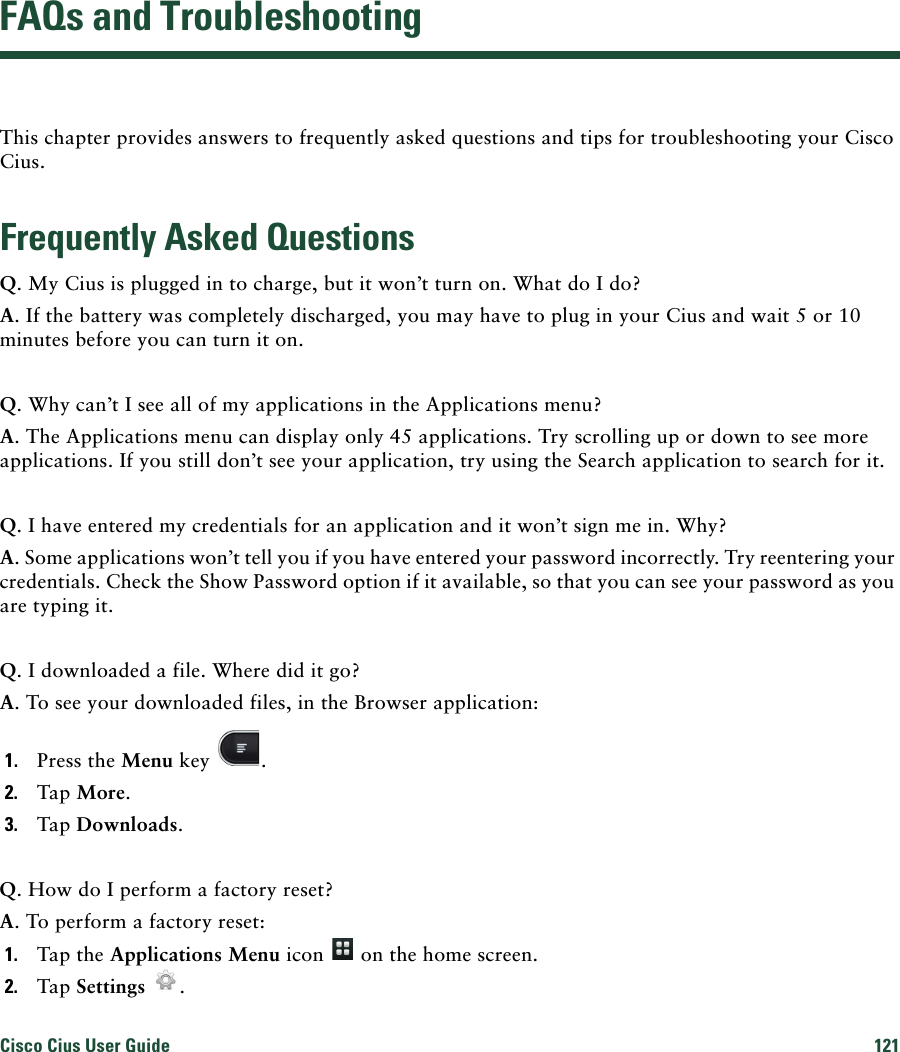
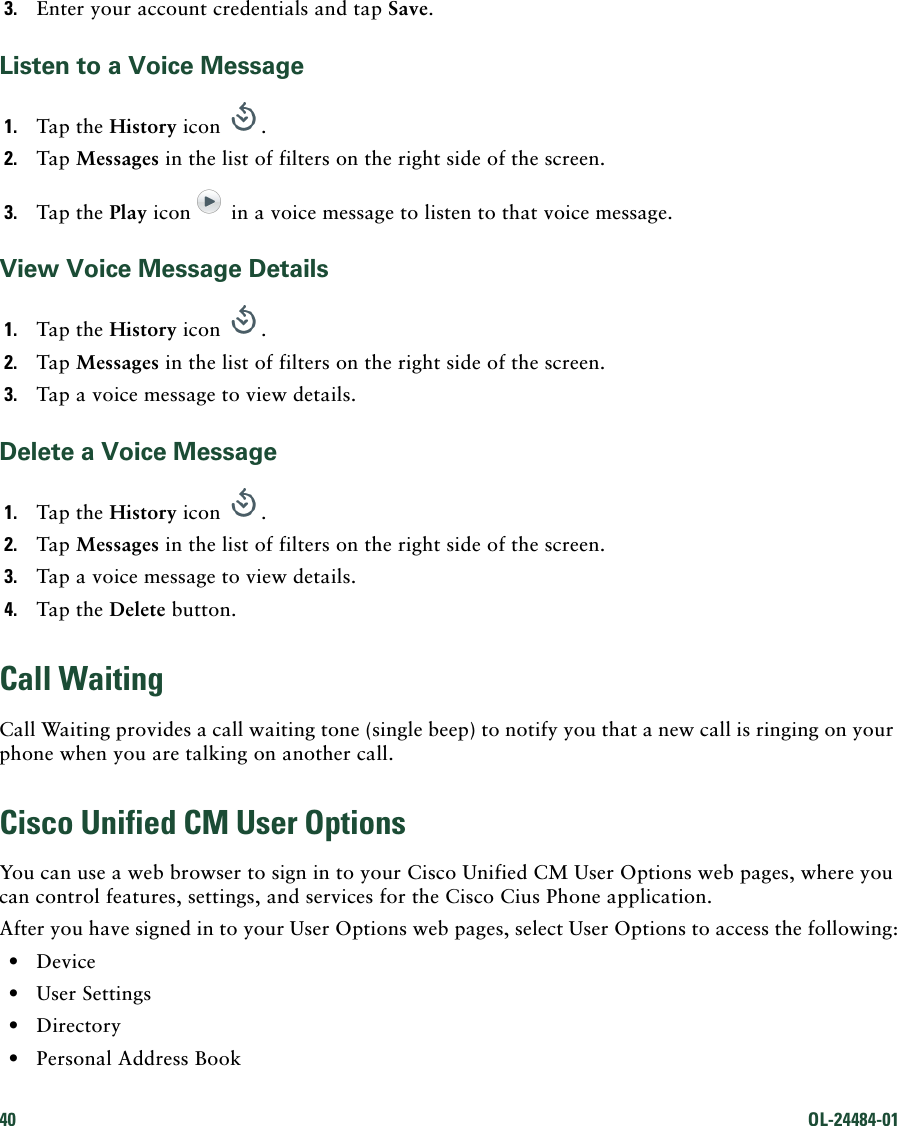
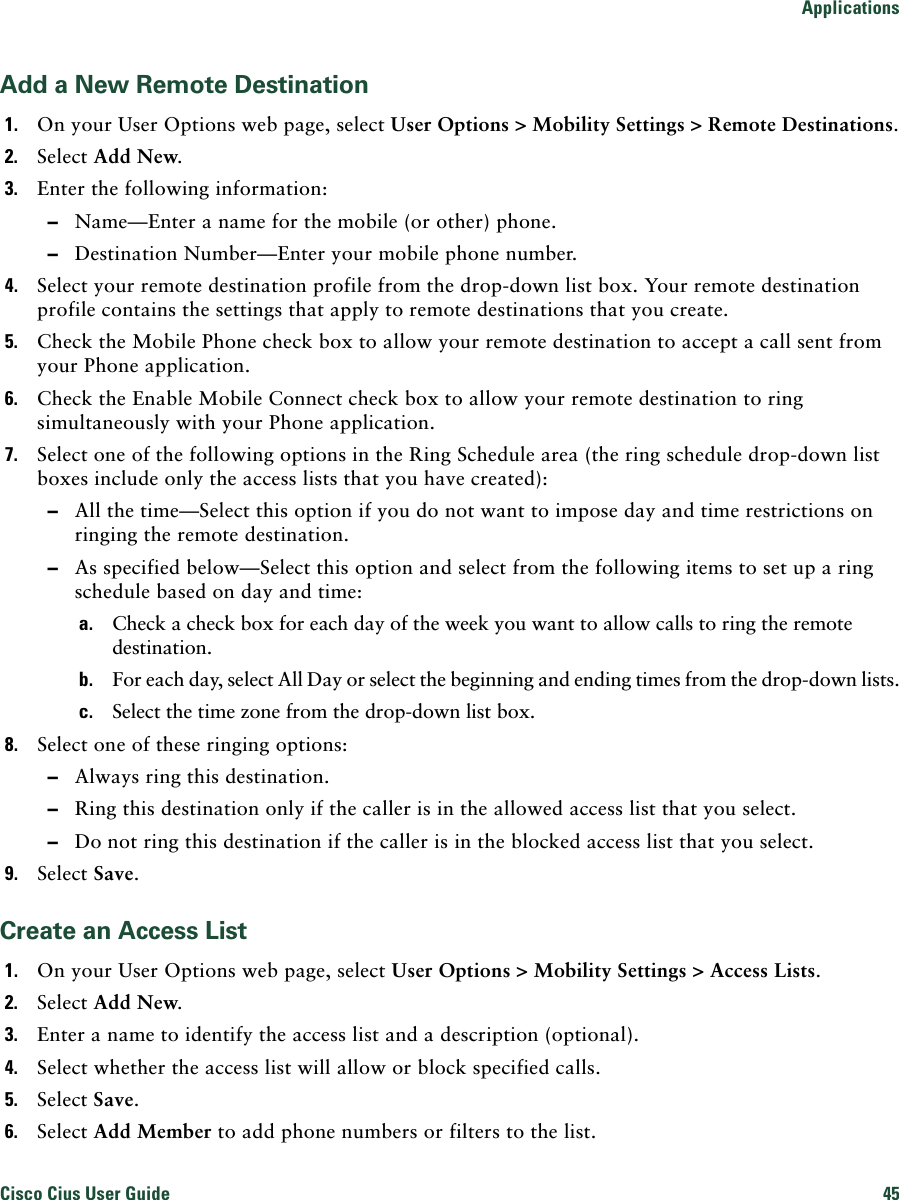
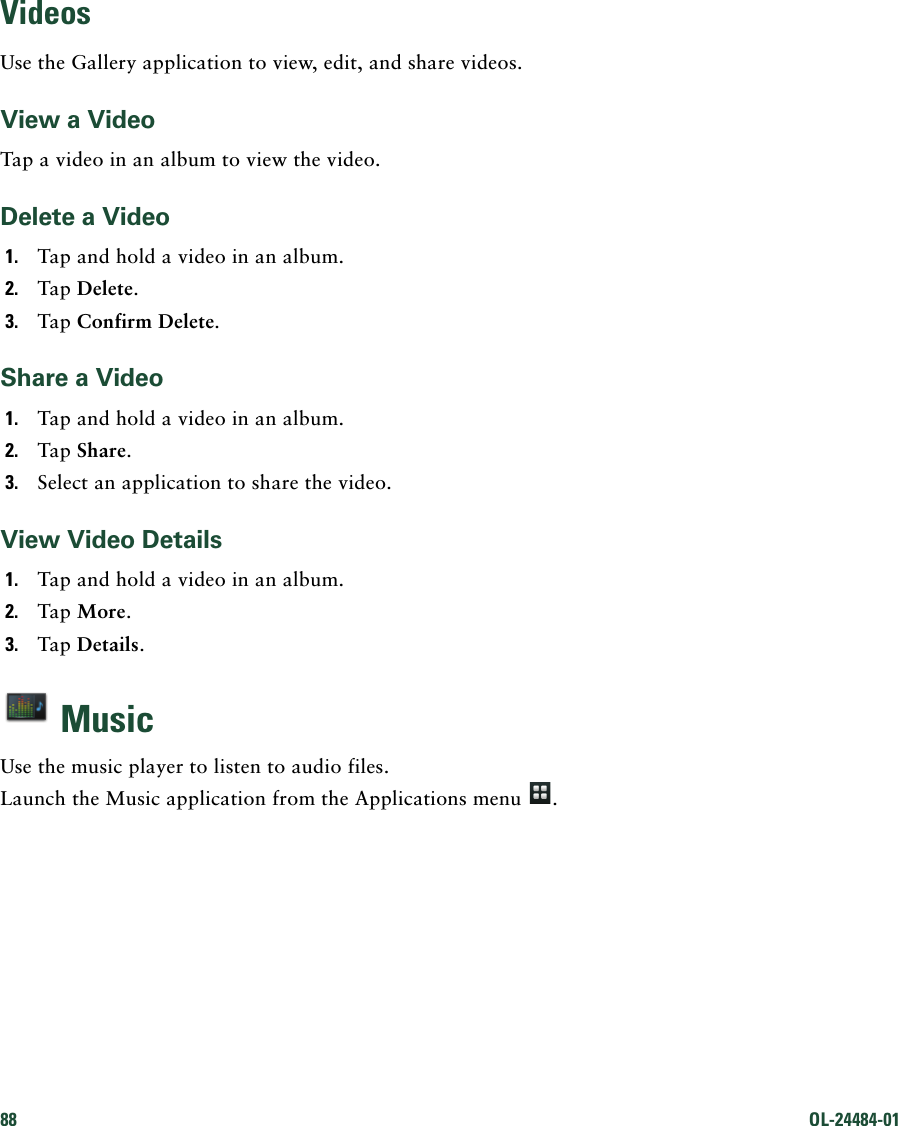
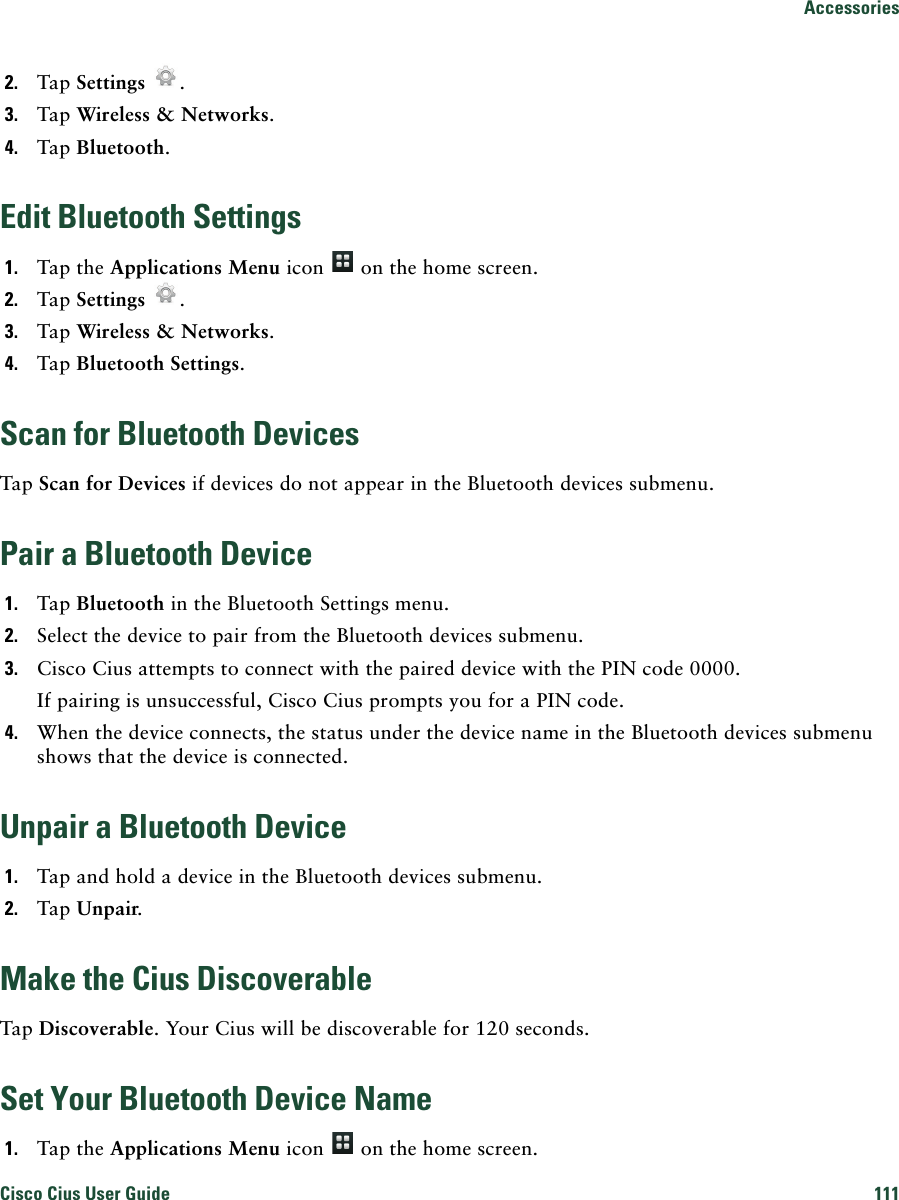
![18 OL-24484-01 Home ScreenCisco Cius home screen has five work spaces that you can customize with widgets and shortcuts. Navigate Between Work Spaces • Tap the bottom left or bottom right corner to navigate between work spaces. • Tap and hold the Applications menu icon to view a menu of all five work spaces. Tap a work space on the menu to go to that work space.Customize the Home Screen • To add widgets, shortcuts to applications, or folders to the home screen, or to change the wallpaper on the home screen, tap the Add to Cius Home Screen icon , or tap and hold an open space on the home screen. • To add an application to the home screen, tap the Applications menu icon , and then tap and hold an application icon. • To remove an icon or widget from the home screen, tap and hold an icon or widget on the home screen, and drag it to the trash can at the bottom of the screen.Quick Contact BadgesTap the contact picture of one of your contacts to display a quick contact badge. From the quick contact badge, you can: • Place a call • View contact details • Send an email message • Start a chat • Start a Cisco WebEx meetingContact PicturesContact pictures appear only for contacts that you have added manually, or that you have synced from your Chat application contact list.To download contact pictures for your email contacts:1. From the Settings application , tap Accounts & Sync.2. Tap Manage Accounts.3. Select your email account.4. Tap Account Settings.5. Check Download Pictures.Direct Dial ShortcutAdd a direct dial shortcut to a home screen to use as a speed dial for that contact.1. Tap the Add to Cius Home Screen icon , or tap and hold an open space on the home screen.2. Tap Shortcuts.3. Tap Direct Dial.4. Select a contact.Enable Auto-RotationYou can enable auto-rotation so that your Cius displays applications properly whether you are holding your Cius horizontally or vertically.1. From the Settings application , select Display.2. Select Auto-Rotate Screen.Keyboard ShortcutsWhen you are using your Cisco Cius with a media station and USB keyboard, you can use these keyboard shortcuts: • Menu: Shift-Ctrl-[ • Home: Shift-Ctrl-] • Back: Shift-Ctrl-\When you are using a USB mouse, right-click to make the Menu, Home and Back keys appear on screen.](https://usermanual.wiki/OpenPeak/CSCO4G710.Users-Manual-1/User-Guide-1589005-Page-38.png)


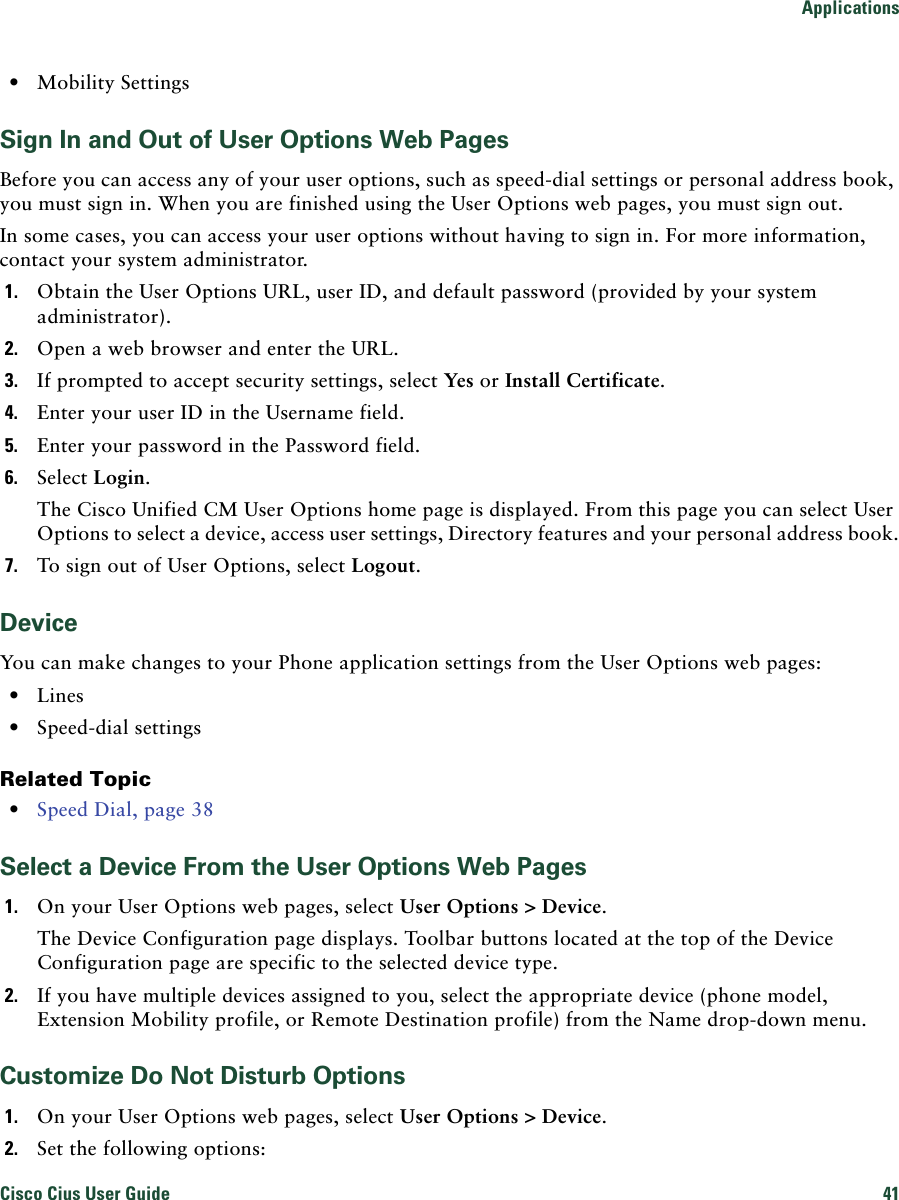
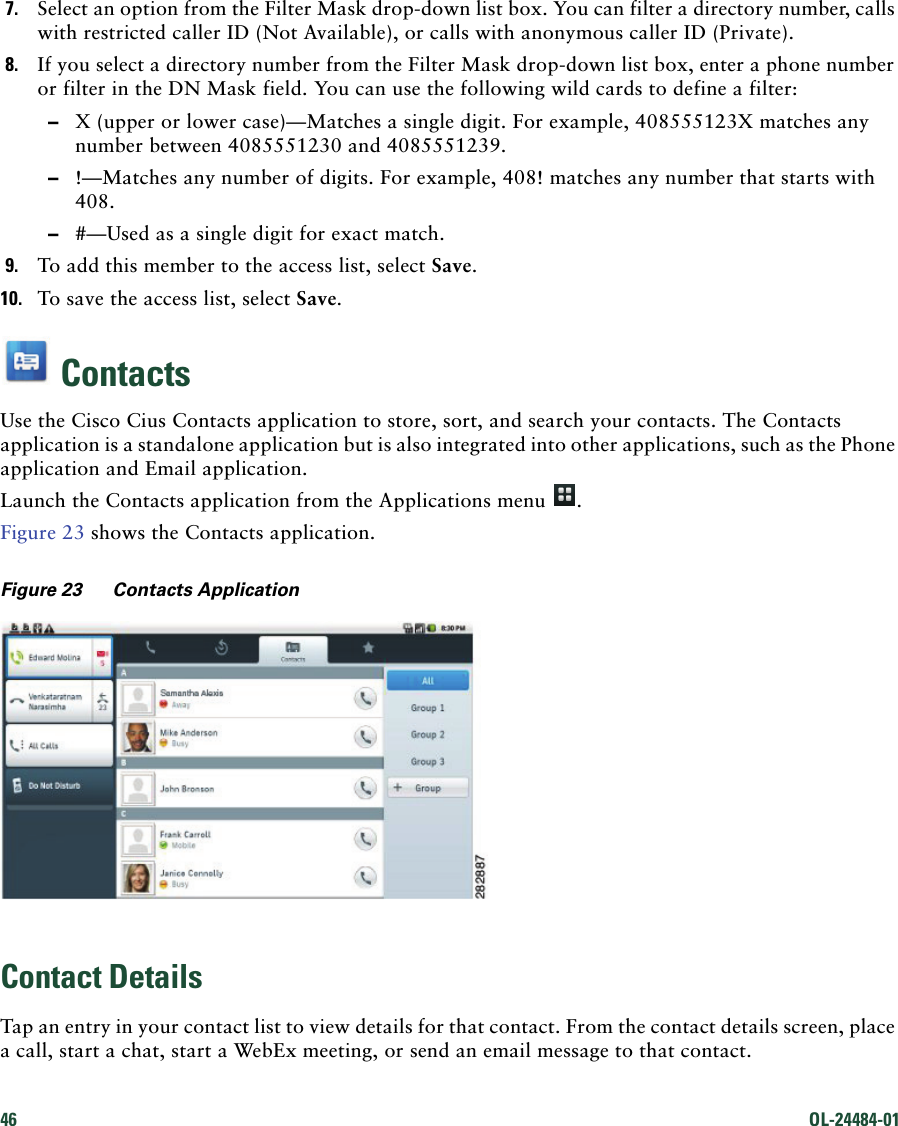


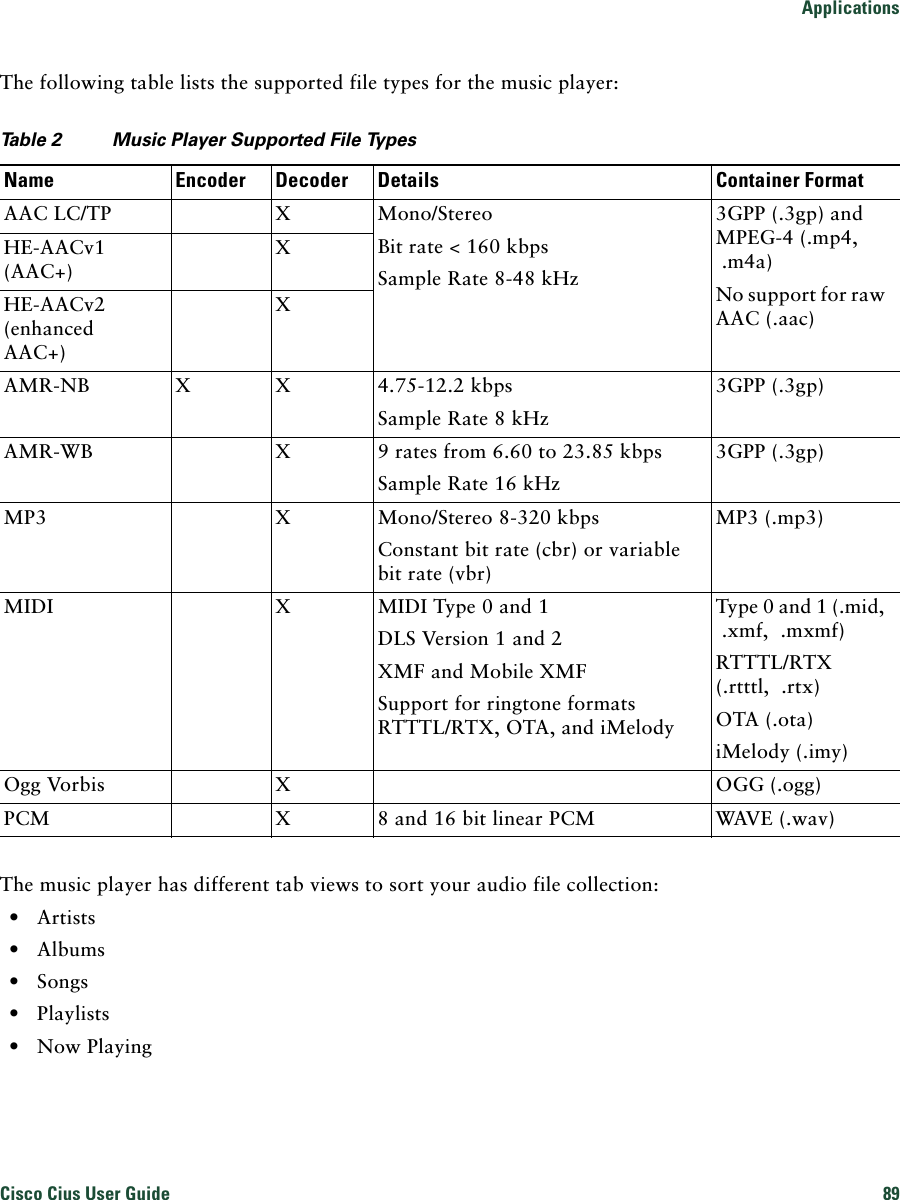

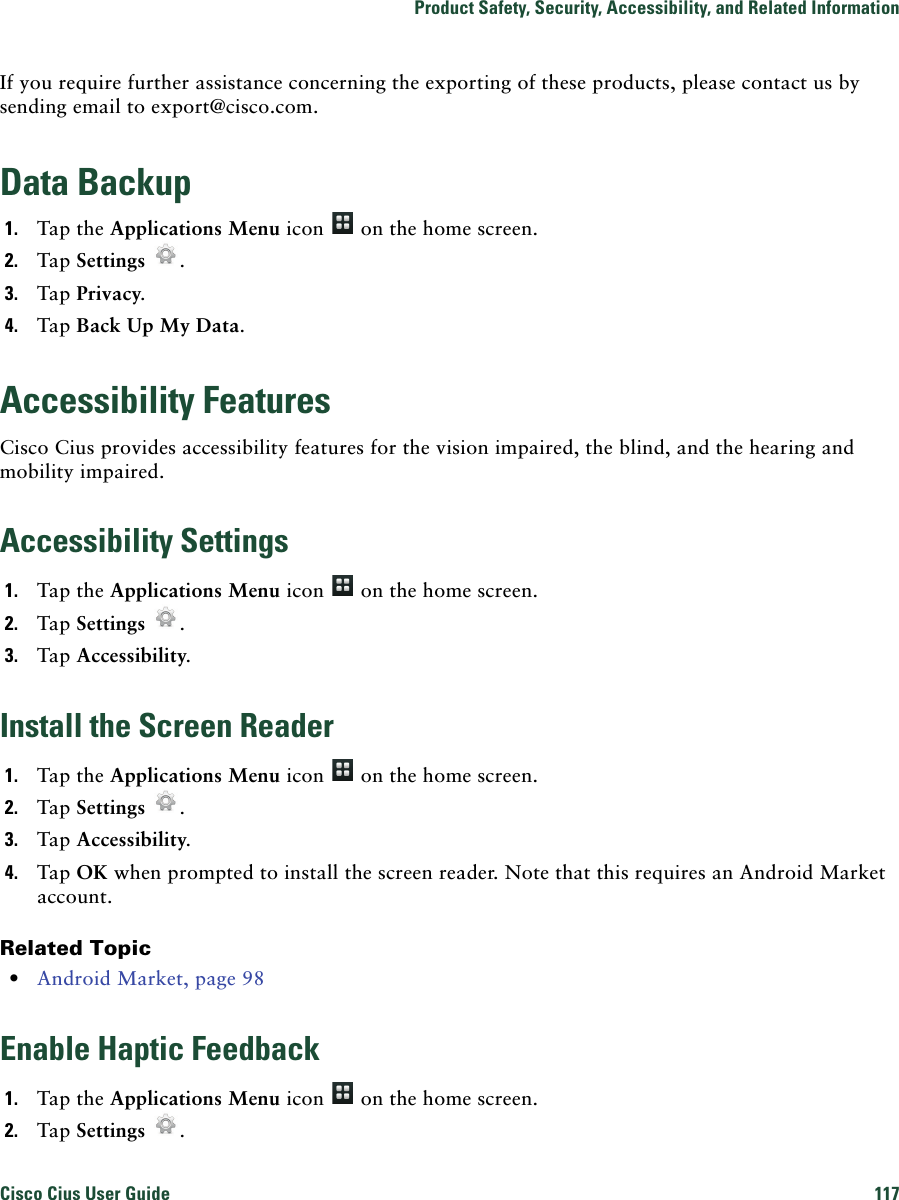
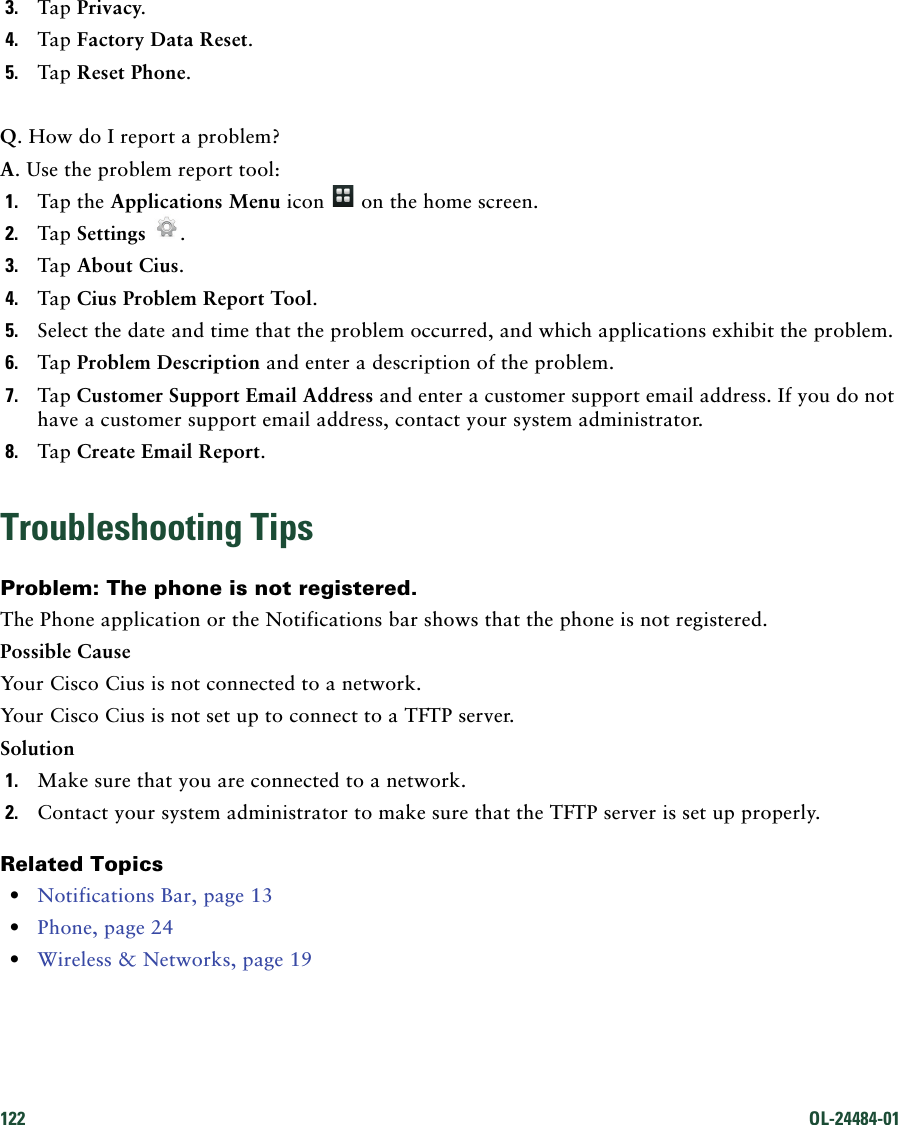
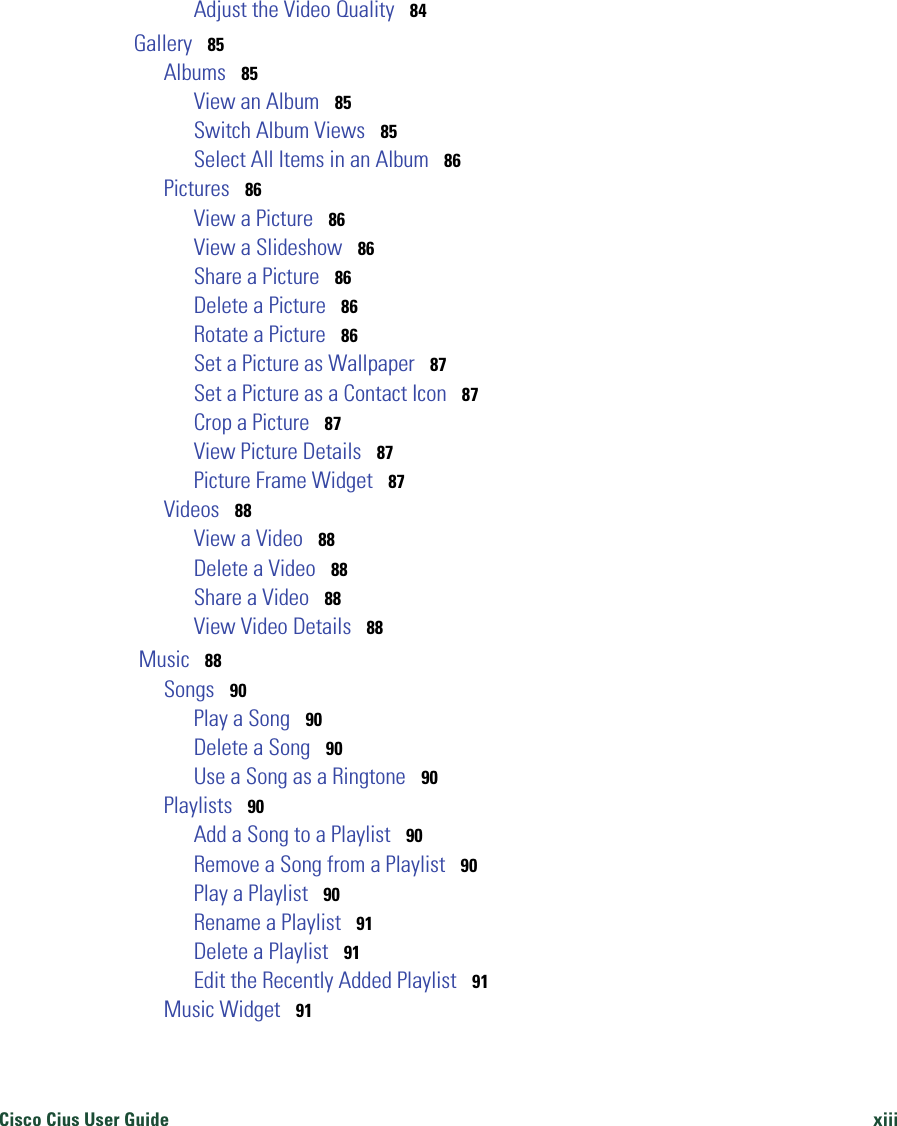
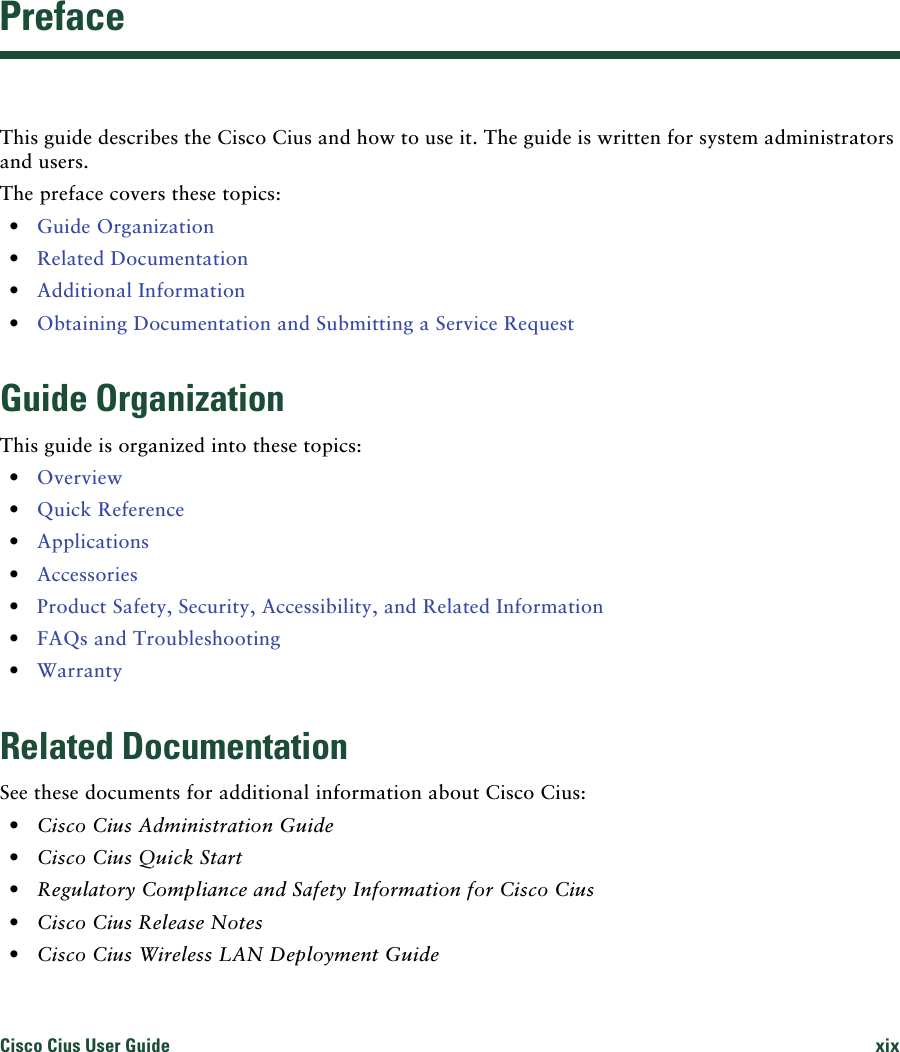
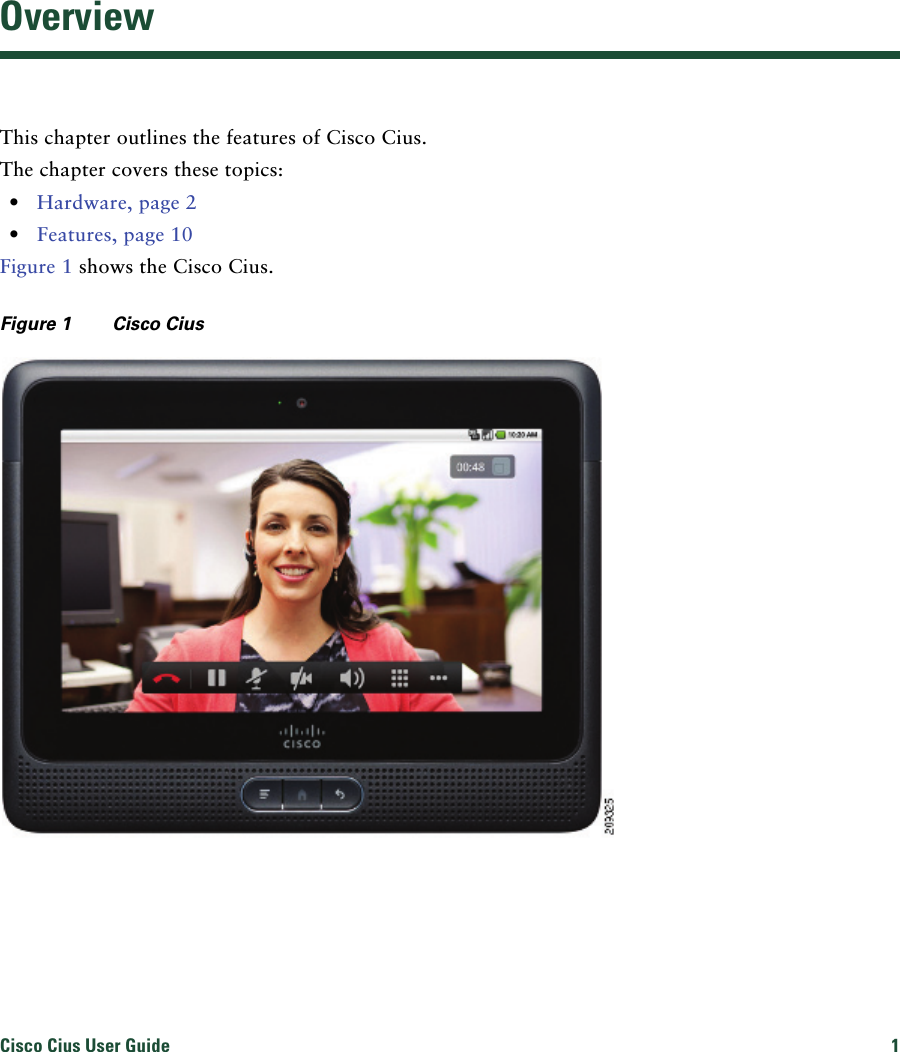
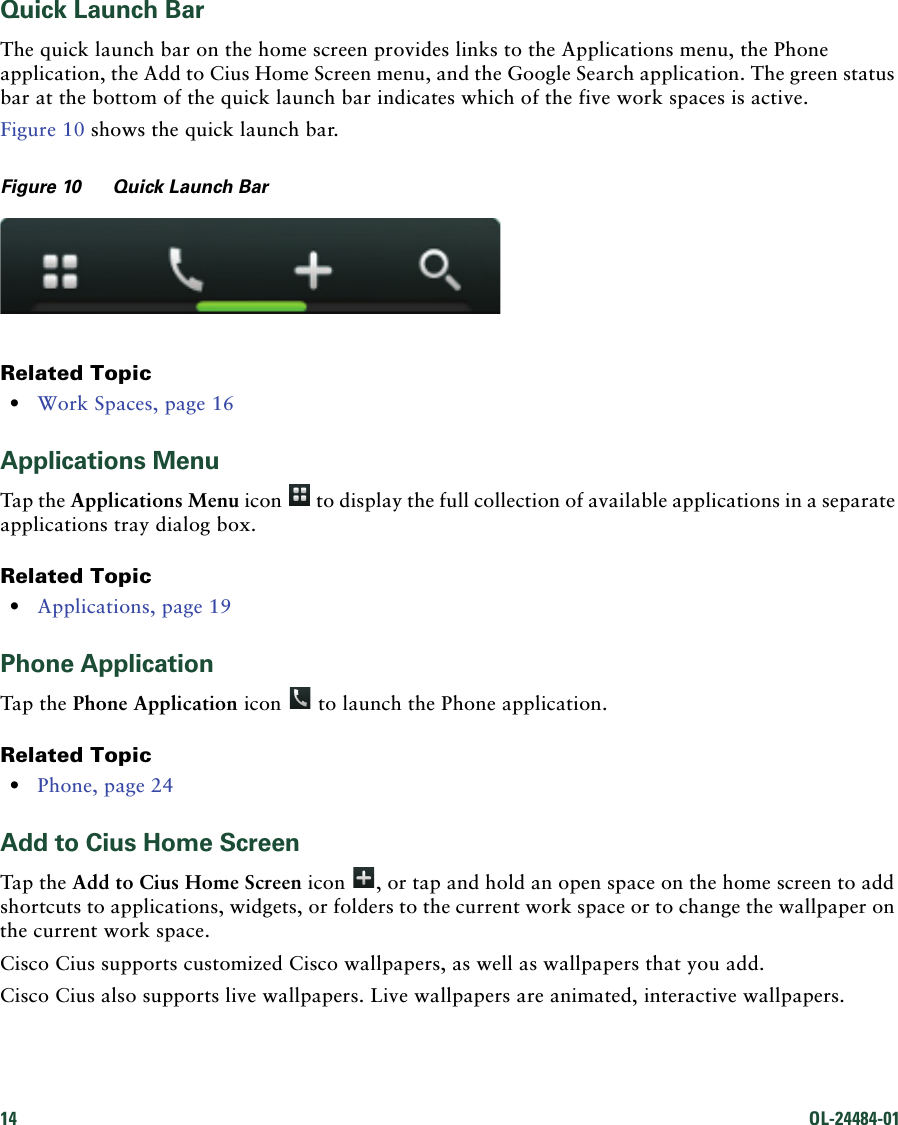
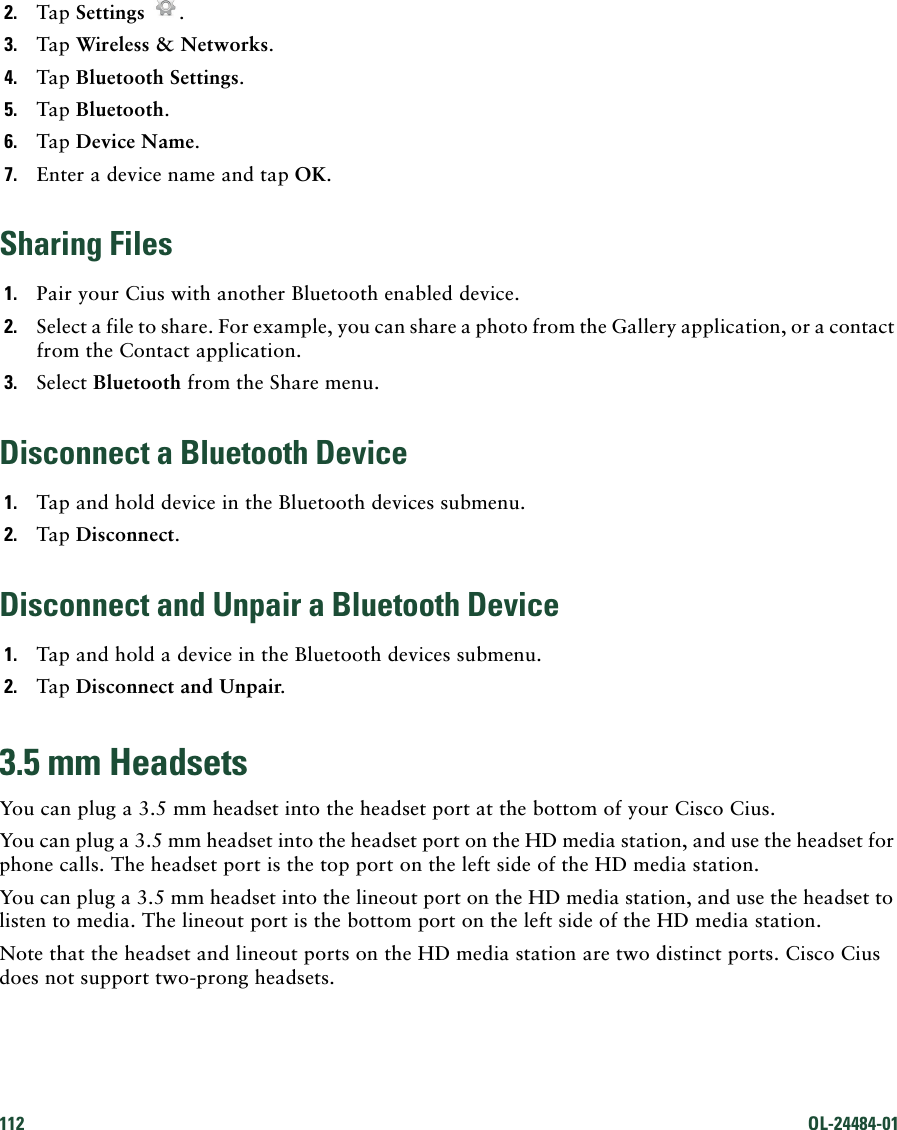
![AccessoriesCisco Cius User Guide 105 End a Speakerphone CallPress the Speaker button during a speakerphone call to end that call.Adjust the Ringer VolumePress the Vol ume button to adjust the phone ringer volume up or down.USB AccessoriesEach available Cisco Cius HD media station features three USB ports: two on the back, and one on the right side. The USB ports allow you to use any of the following accessories: • USB keyboard • USB mouse • USB memory stick • USB-powered hub • USB serial console cableUSB Keyboard and MouseNot every USB keyboard or mouse works with Cisco Cius. However, most USB keyboards that are human interface device (HID) compliant will work correctly. Since all USB hubs need to be powered, keyboards that include one or more hubs are not allowed on Cius, because they contain a non-powered hub.Cisco Cius Key ShortcutsThe following keyboard shortcuts are available for Cius: • Menu: Shift-Ctrl-[ • Home: Shift-Ctrl-] • Press and hold Shift-Ctrl-] to view a list of open and recently used applications. • Back: Shift-Ctrl-\](https://usermanual.wiki/OpenPeak/CSCO4G710.Users-Manual-1/User-Guide-1589005-Page-125.png)

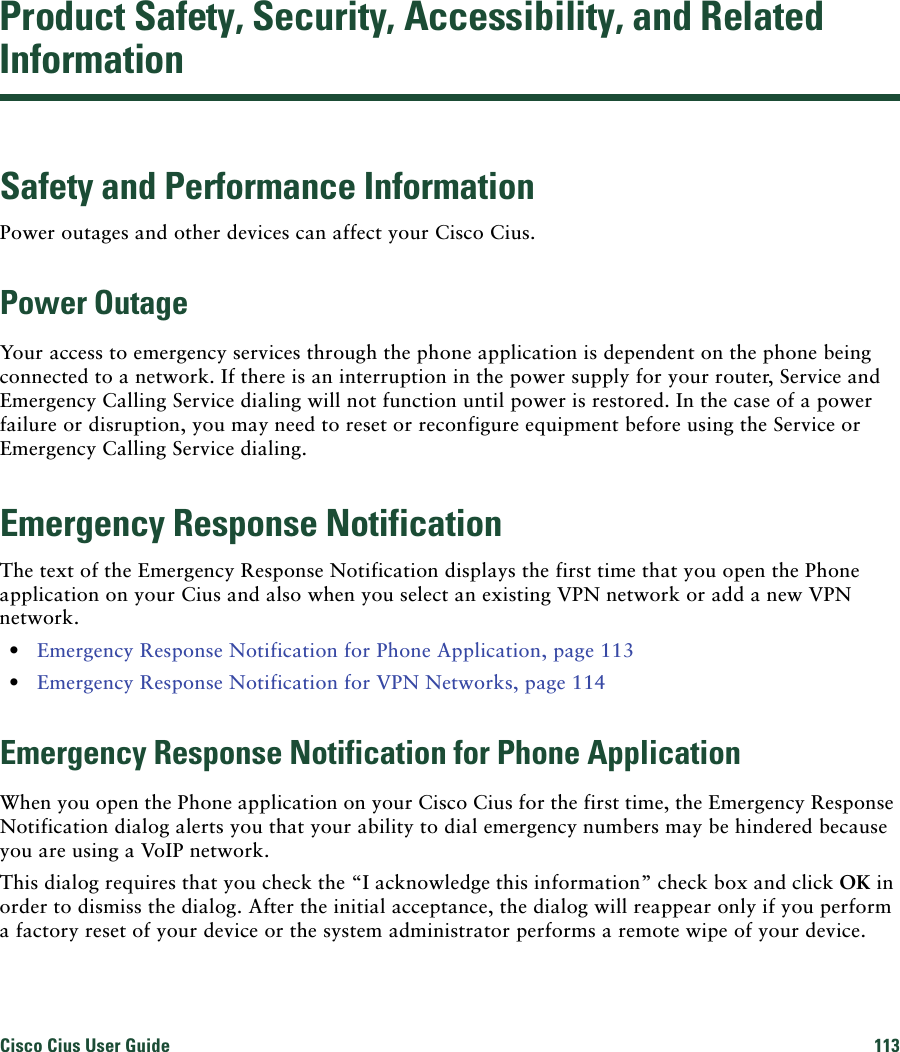
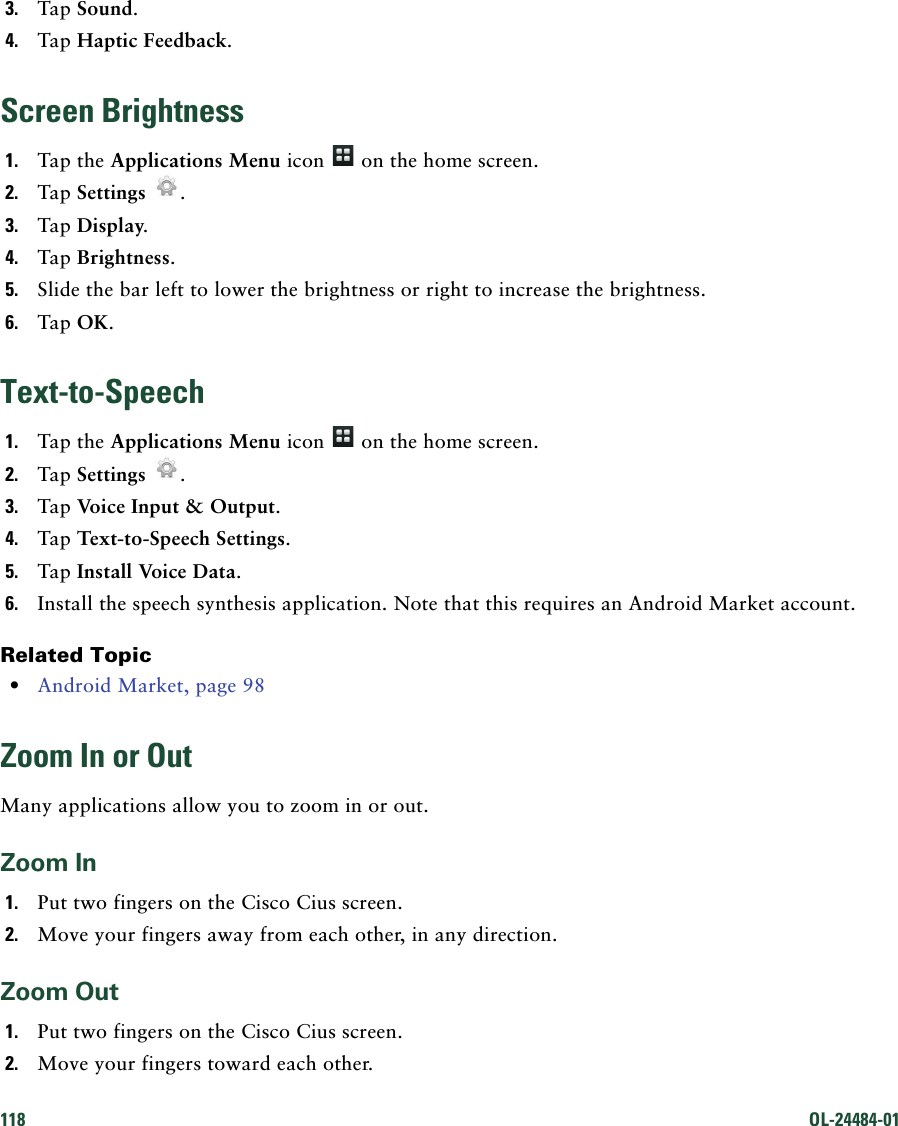
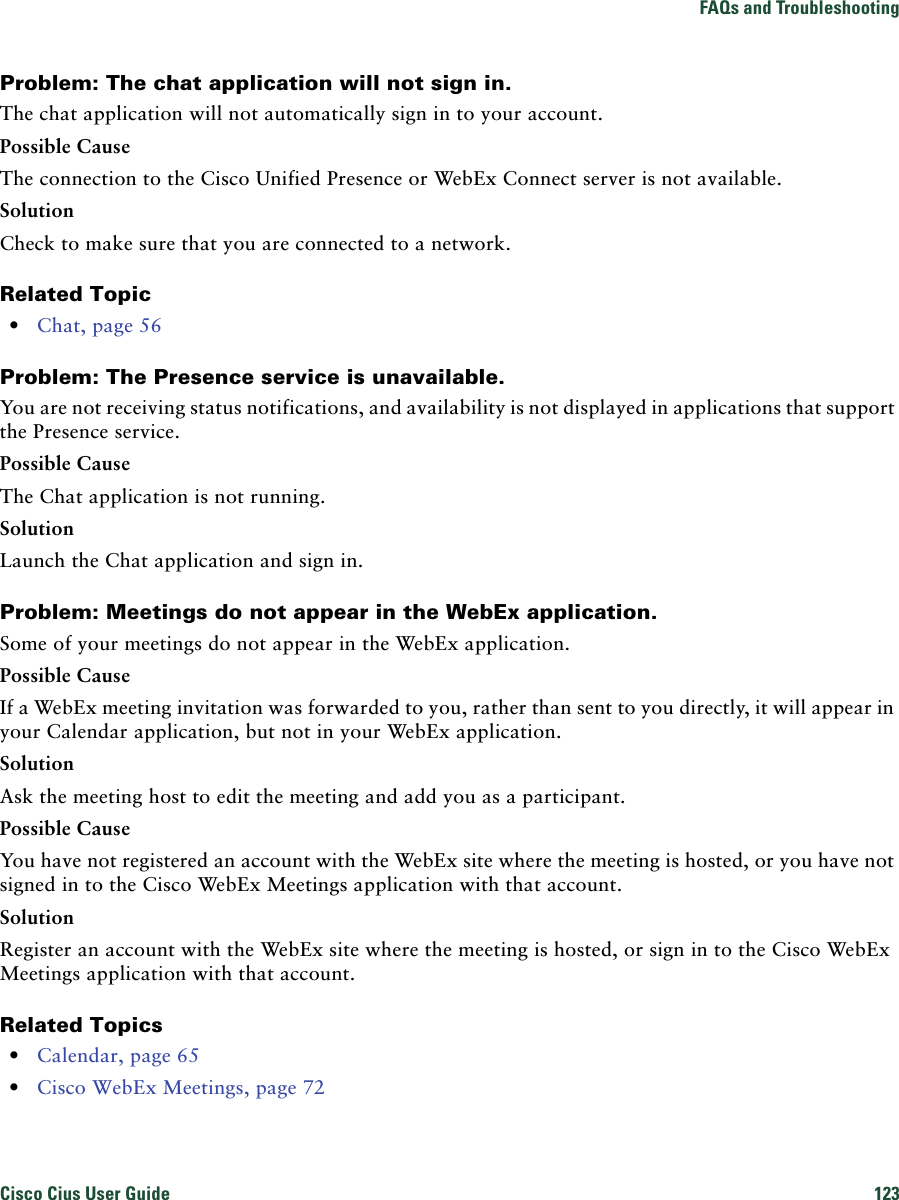
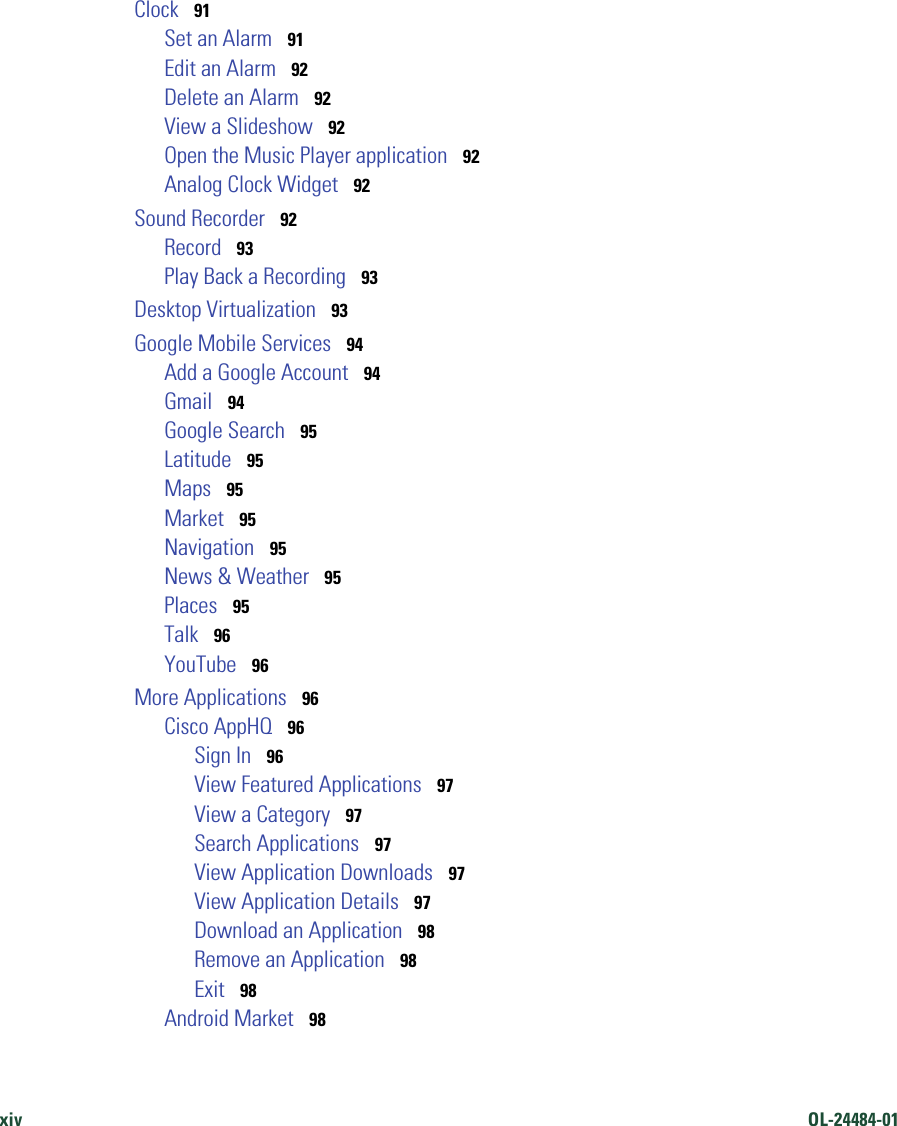
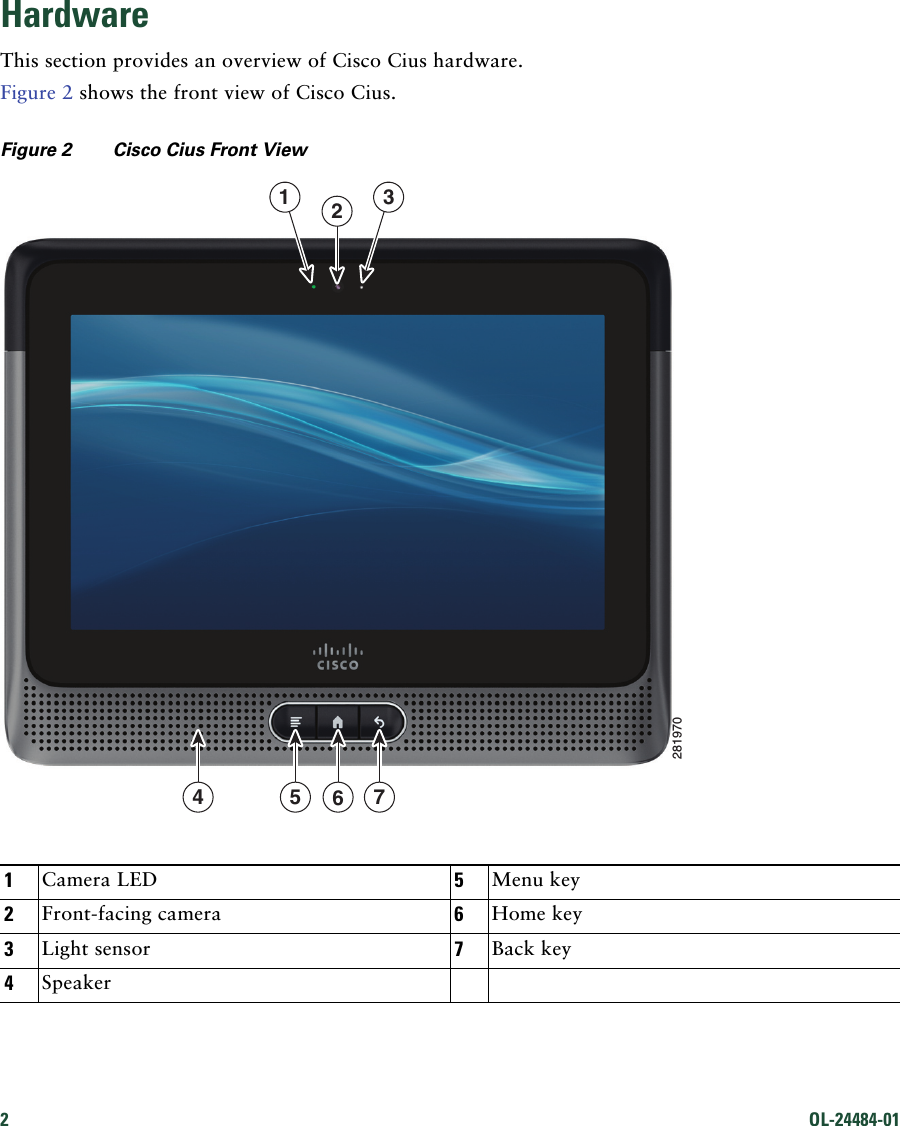
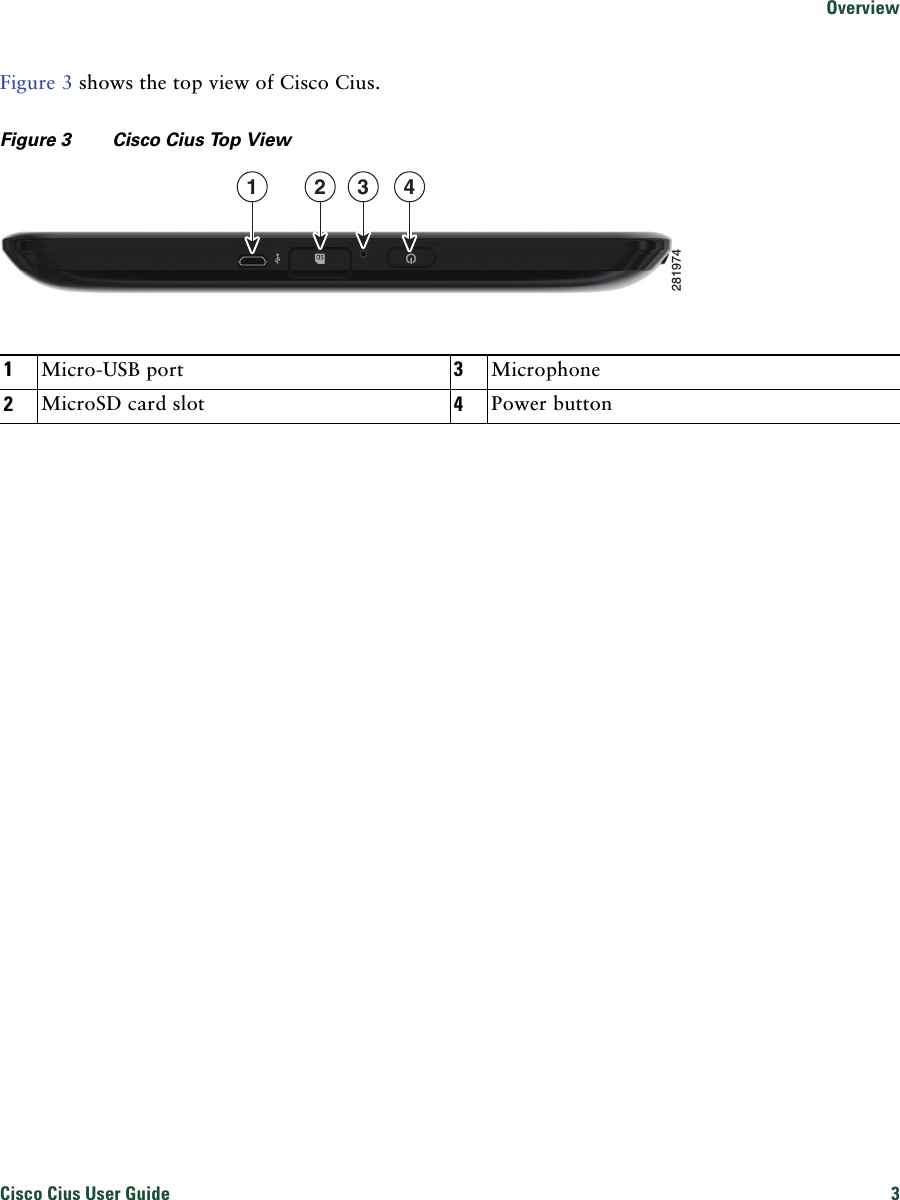
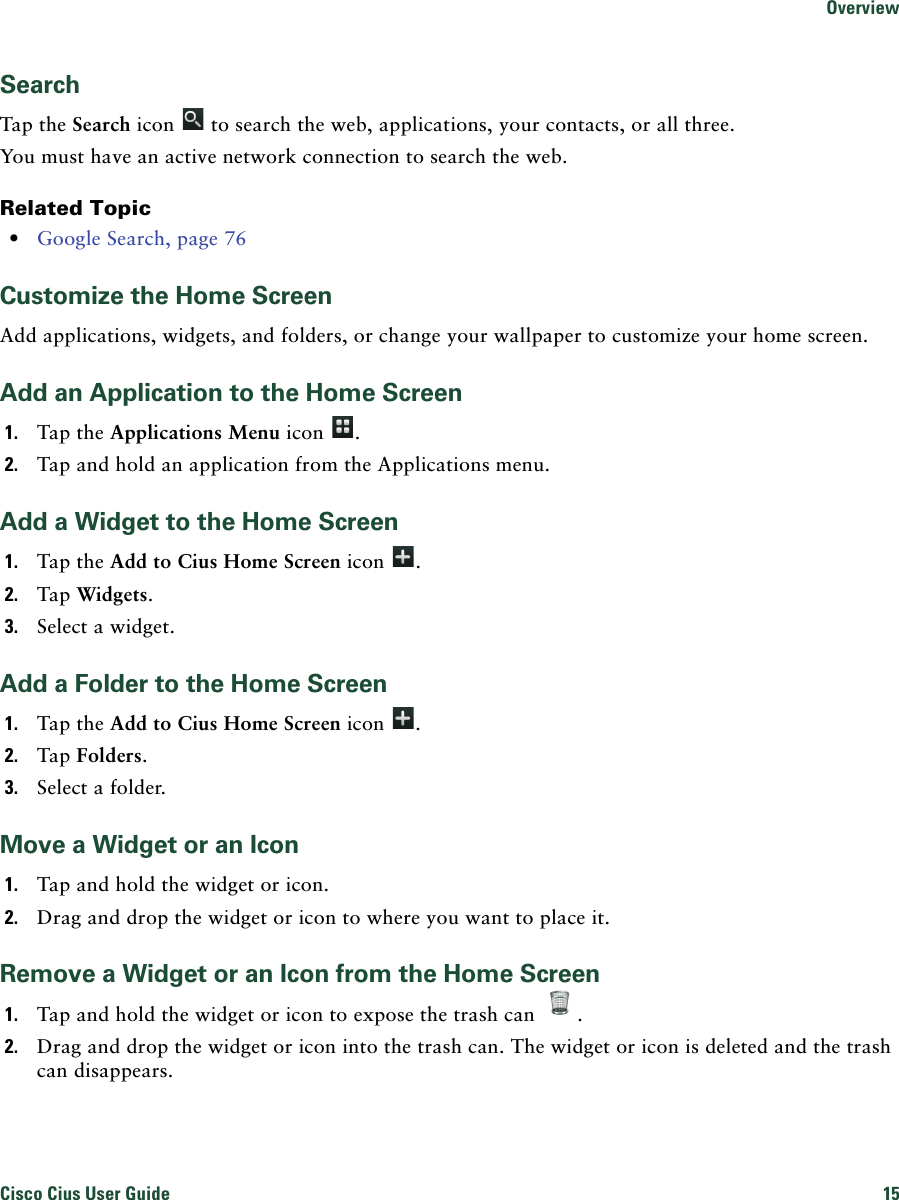
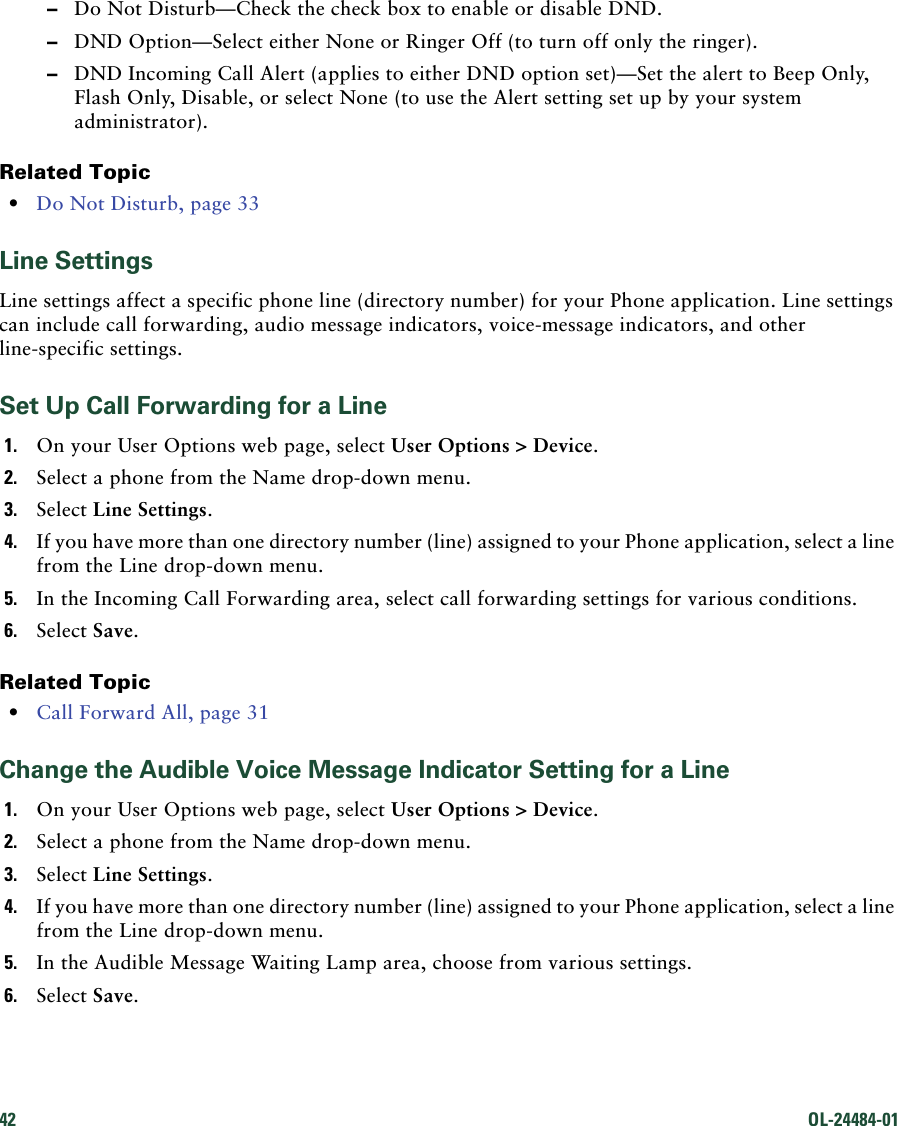
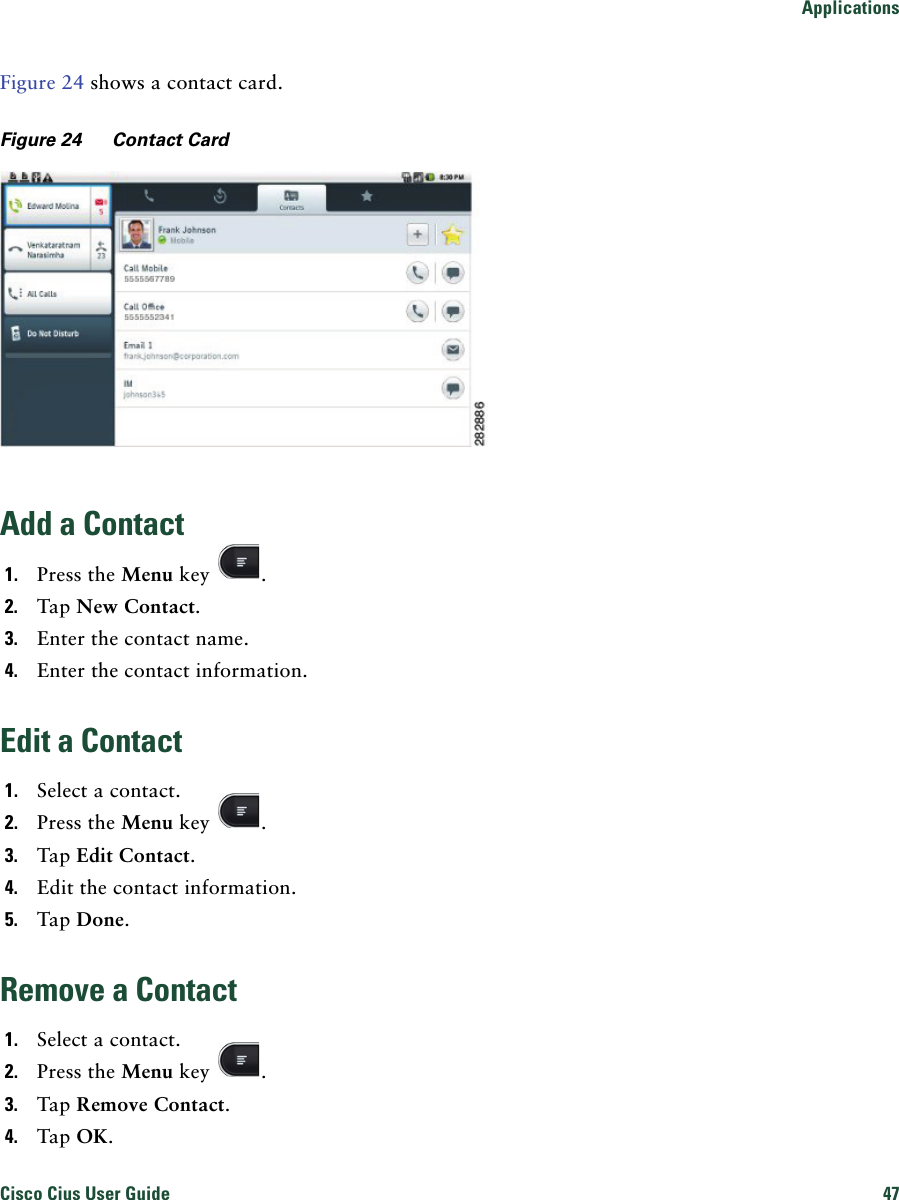
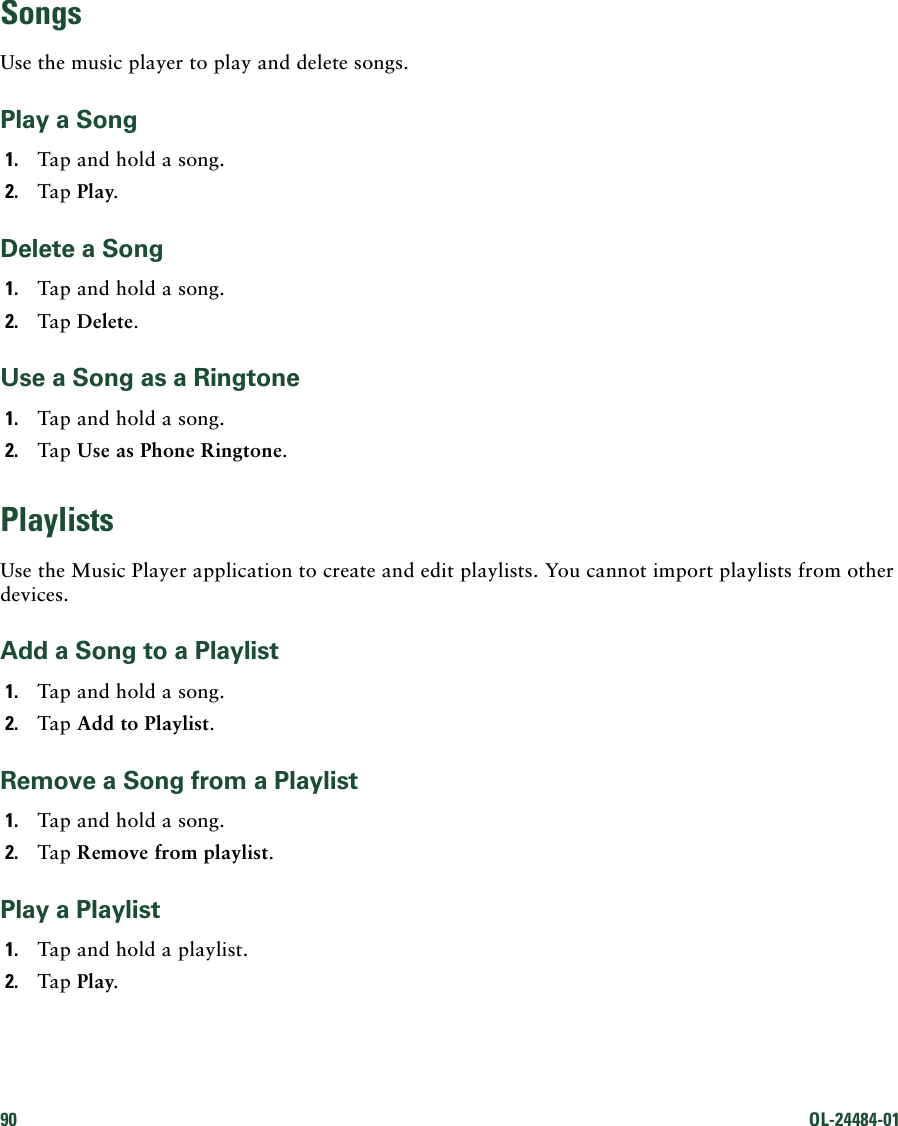
![114 OL-24484-01 The text of the Emergency Response Notification dialog for the Phone application follows here:Dialing emergency numbers (for example, 911 or 112) may not work on an enterprise-class IP telephony network like that used for Cisco Cius. Correct location information may not be passed on to emergency responders. Your network administrator can advise you about the capabilities of your network, including the dialing sequence that you will need to use when on or off the enterprise premises.Emergency Response Notification for VPN NetworksWhenever you choose to connect to an existing VPN network or choose the option to Add a New VPN Connection, a dialog displays to warn about the potential disruption of emergency response numbers. You can proceed to the VPN connection step by pressing OK. You can dismiss the dialog and cancel the connection by pressing the Back button on your device.The text of the Emergency Response Notification dialog for VPN networks follows here:CAUTION — Emergency response numbers (for example, 911 or 112) may not work on software telephony clients. Your exact location and the appropriate emergency response agency may not be easily identified. Some countries restrict use of VoIP software via VPN over the Internet, including: UAE, Saudi Arabia, Pakistan, Lebanon, Jordan, Egypt, Oman, Qatar, Yemen, Algeria, and Kuwait.External DevicesCisco recommends using good-quality external devices (such as headsets) that are shielded against unwanted radio frequency (RF) and audio frequency (AF) signals. Depending on the quality of these devices and their proximity to other devices such as mobile phones or two-way radios, some audio noise may still occur. In these cases, Cisco recommends that you take one or more of these actions: • Move the external device away from the source of the RF or AF signals. • Route the external device cables away from the source of the RF or AF signals. • Use shielded cables for the external device, or use cables with a better shield and connector. • Shorten the length of the external device cable. • Apply ferrites or other such devices on the cables for the external device. Cisco cannot guarantee the performance of the system because Cisco has no control over the quality of external devices, cables, and connectors. The system will perform adequately when suitable devices are attached using good-quality cables and connectors. Caution In European Union countries, use only external speakers, microphones, and headsets that are fully compliant with the EMC Directive [89/336/EC].](https://usermanual.wiki/OpenPeak/CSCO4G710.Users-Manual-1/User-Guide-1589005-Page-134.png)