Opticon Sensors Europe 2366 Handheld RF-ID Tag Reader User Manual Phl27br1
Opticon Sensors Europe BV Handheld RF-ID Tag Reader Phl27br1
UserManual.wiki
>
Opticon Sensors Europe
>
2366 User Manual
>
User manual
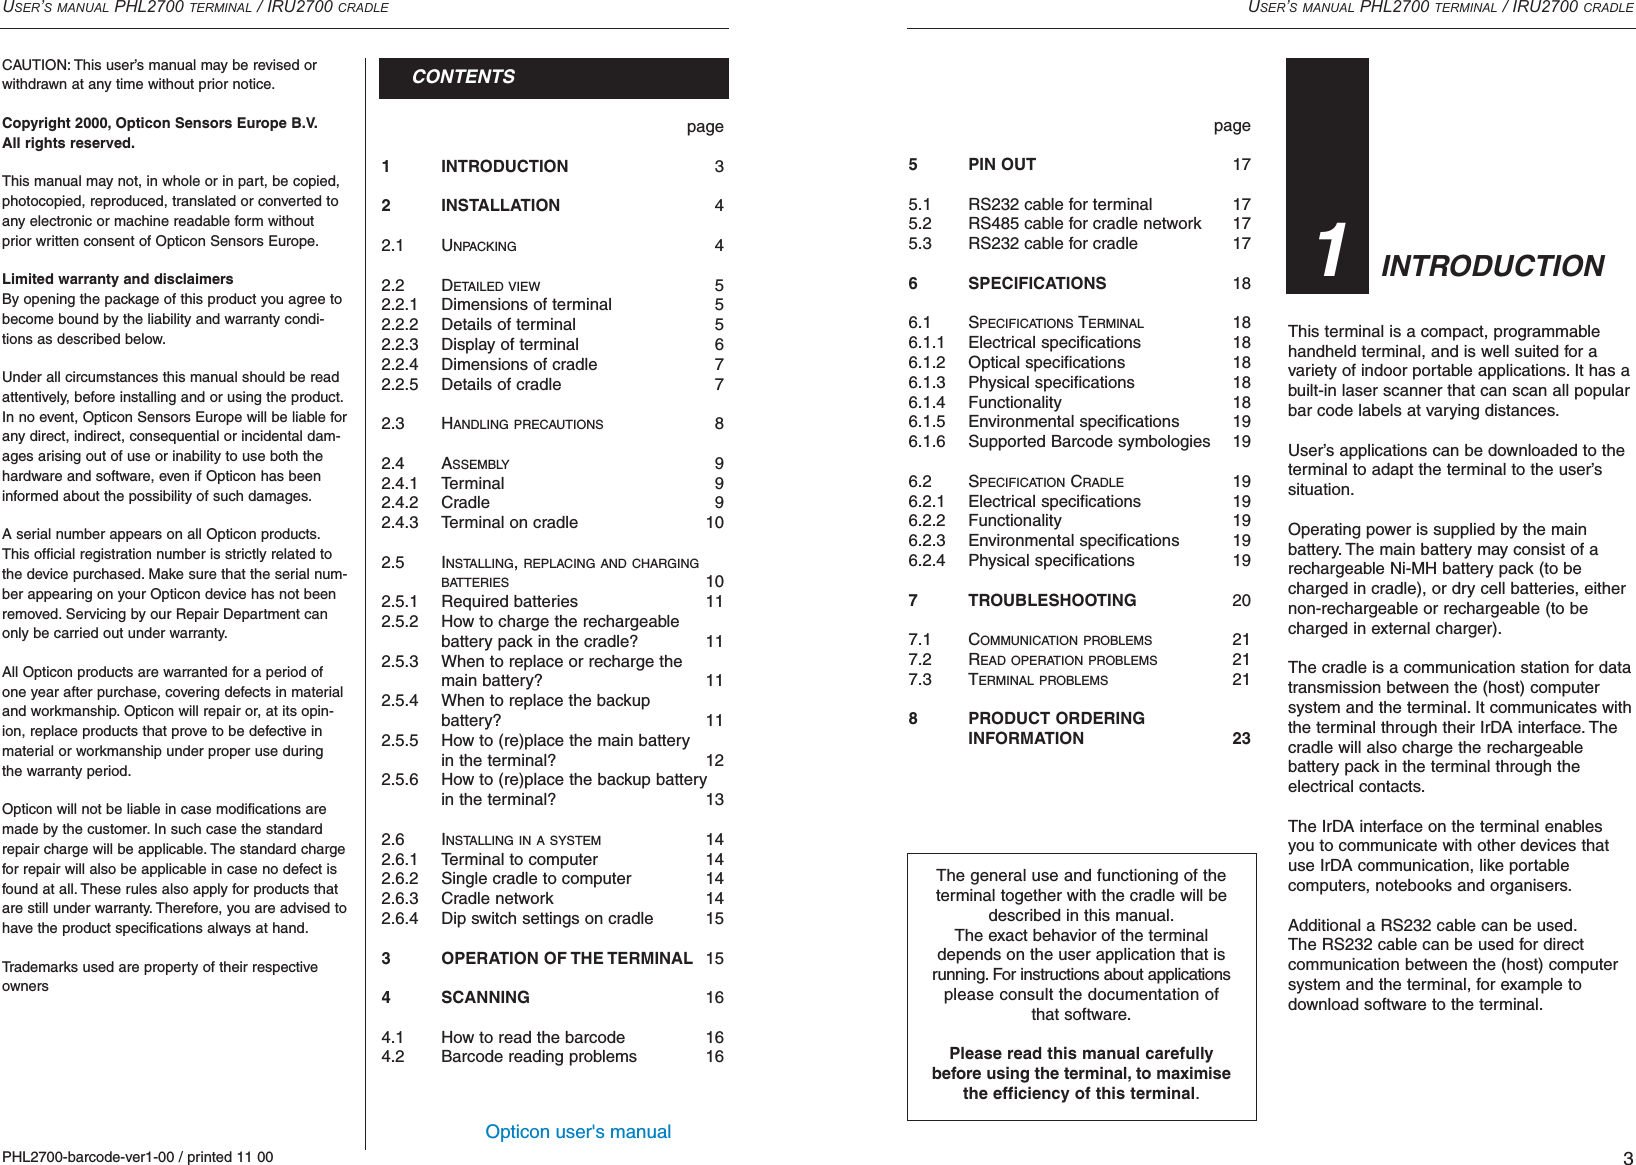
Contents
1.
User manual
2.
User manual supplement
3.
Specification leaflet
User manual
Navigation menu
Upload a User Manual
Namespaces
Wiki Guide
HTML
PDF
Info
Views
User Manual
Discussion / Help
Navigation

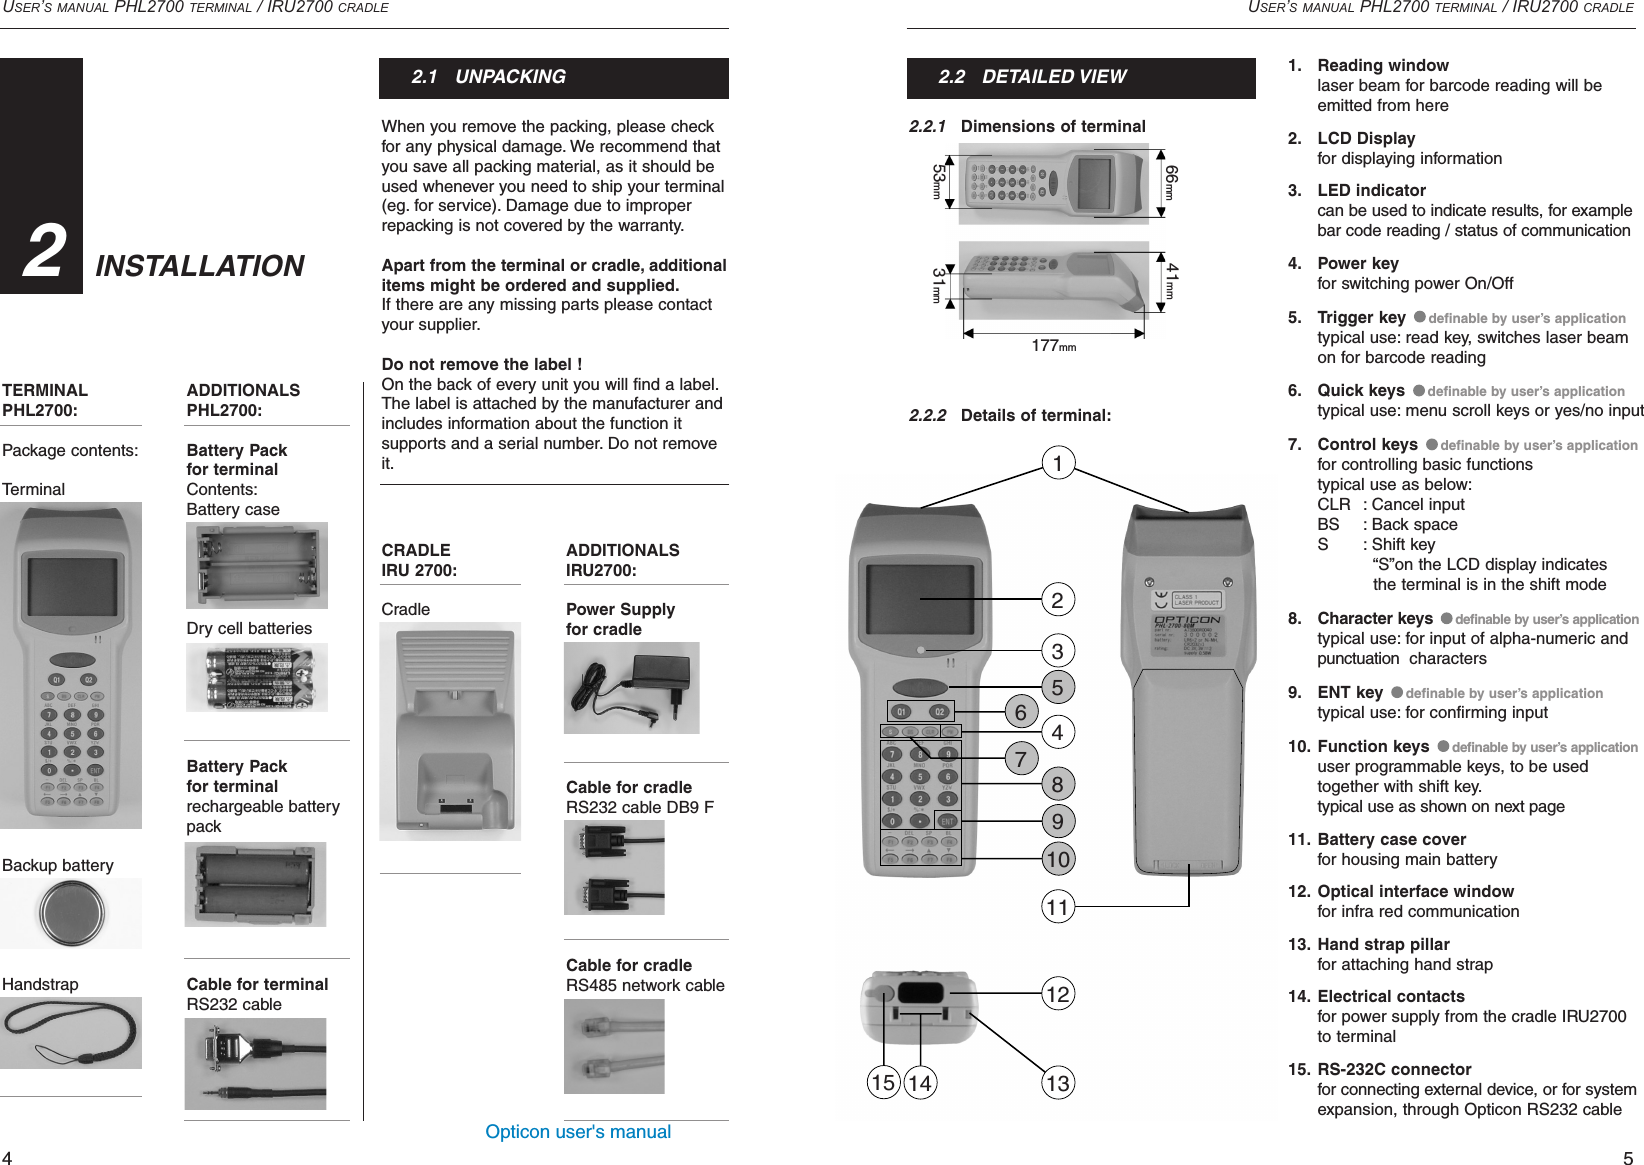
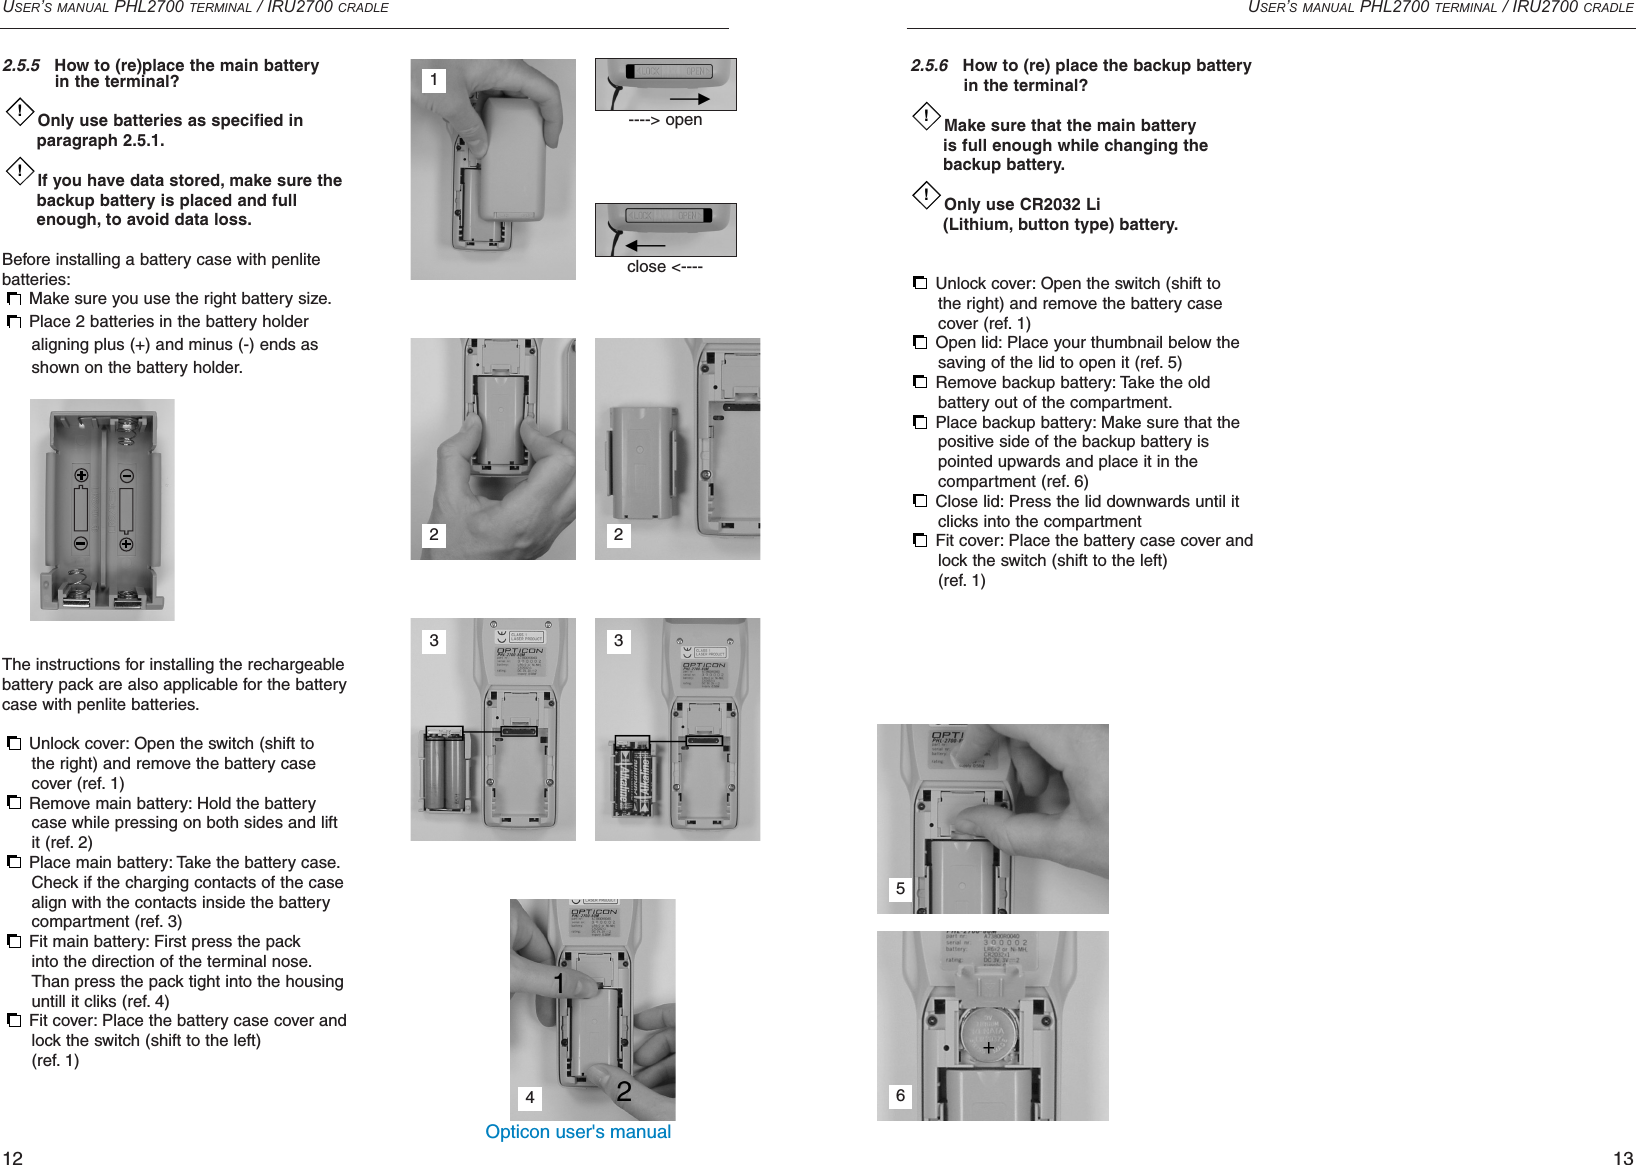
![Opticon user's manualUSER’S MANUAL PHL2700 TERMINAL / IRU2700 CRADLE9Use of the terminalOperate the terminal keys bypressing them lightly with yourfingertips or with something softand round.Pressing the keys with a sharppointed object (for eg. a ball-point) can damage the keys.Avoid temperature changes.Sudden temperature changescan cause condensation toform on the terminal. Using theterminal while condensation ispresent can cause malfunction.Always wait until the condensationclears naturally before attemptingoperation.Do not leave the terminal in anarea where static charge isaccumulated, or near deviceswhere electromagnetic emissionis generated.Do not place any objects on topof the terminal. Do not lay theterminal face down.Doing so can cause accidentaloperation of the [PW] key or[ENTER] key, which can dis-charge your batteries orchange settings you do notwant to be changed.Cleaning of the terminalClean the optical interface window periodically.MaintenanceThere are no user-serviceableparts inside the terminal or thecradle. So do not try to take itapart. The manufacturer will notbe liable for any damagecaused by the customer.In case of malfunction that can not be solvedby the trouble-shooting instruction in theappendix, please consult our service department.Follow the next steps to make your terminalready for installation in a system, that isdescribed further in the manual.2.4.1.TerminalTo avoid drop use the hand strap.Fix the small cord of the strap around the pillar of the terminal (ref. 1)Insert the handle of the strap in the thin loop (ref. 2)The strap is fixed to the terminal (ref. 3)Hold the handstrap around the wrist when carrying the terminal (ref. 4) Do not swing the terminal around.Start with a full batteryTo be sure of proper operation, it is advised to start with a full battery, charge the battery pack according to the instructions in the next chapter.Click the battery pack into the terminal,as instructed in the next chapter.!USER’S MANUAL PHL2700 TERMINAL / IRU2700 CRADLE8To avoid malfunctioning and to ensure yearsof trouble free operation, pay attention to thefollowing:General useDo not use or leave the productin extremely hot areas - likedirect sunlight, near a heater, or in a car - or in areas that arevery cold, humid, moistured ordusty.Do not expose the product torain or water splashDo not subject the the productto very strong impact, do notthrow or drop the terminal fromlarge heights.Do not allow a mechanicalshock to the product.General cleaning instructionsClean the exterior by wiping itwith a soft, dry cloth. Do notuse much water.Do not use thinner, white spiritor other solvents. These candiscolour the case and the keysand has a negative effect onthe lifetime of the keys.Use of the cradleDo not place any other product than the PHL-type terminal in the cradle.Cleaning of the cradleAvoid touching the contacts in the cradle. Thecontacts must stay as clean as possible tomaintain optimal charging capacity.Do not use water when cleaning the cradle.This can cause malfunction in the chargers.2.3 HANDLING PRECAUTIONS!!2.4 ASSEMBLY2.4.2CradlePlace for mountingPlace the cradle in normal office conditions.Avoid a place under strong light.Otherwise IrDA communication may be disturbed.Power ConnectionAttach the DC jack of the AC adapter into the socket of the cradle.Then connect the AC adapter to the mains outletWhen the terminal PHL2700 with the rechargeable battery pack is placed in the cradle, the LED on the cradle turns green.When the terminal PHL2700 with penlite batteries is placed in the cradle, no indication is given by the cradle.2.4.3.Terminal on cradleTake notice that the IRU2700 cradle is designedfor the PHL2700 terminal. No other types ofterminals can be placed into this cradle.Place the terminal in the cradle as shown inthe illustration:1 23 4](https://usermanual.wiki/Opticon-Sensors-Europe/2366.User-manual/User-Guide-318044-Page-5.png)
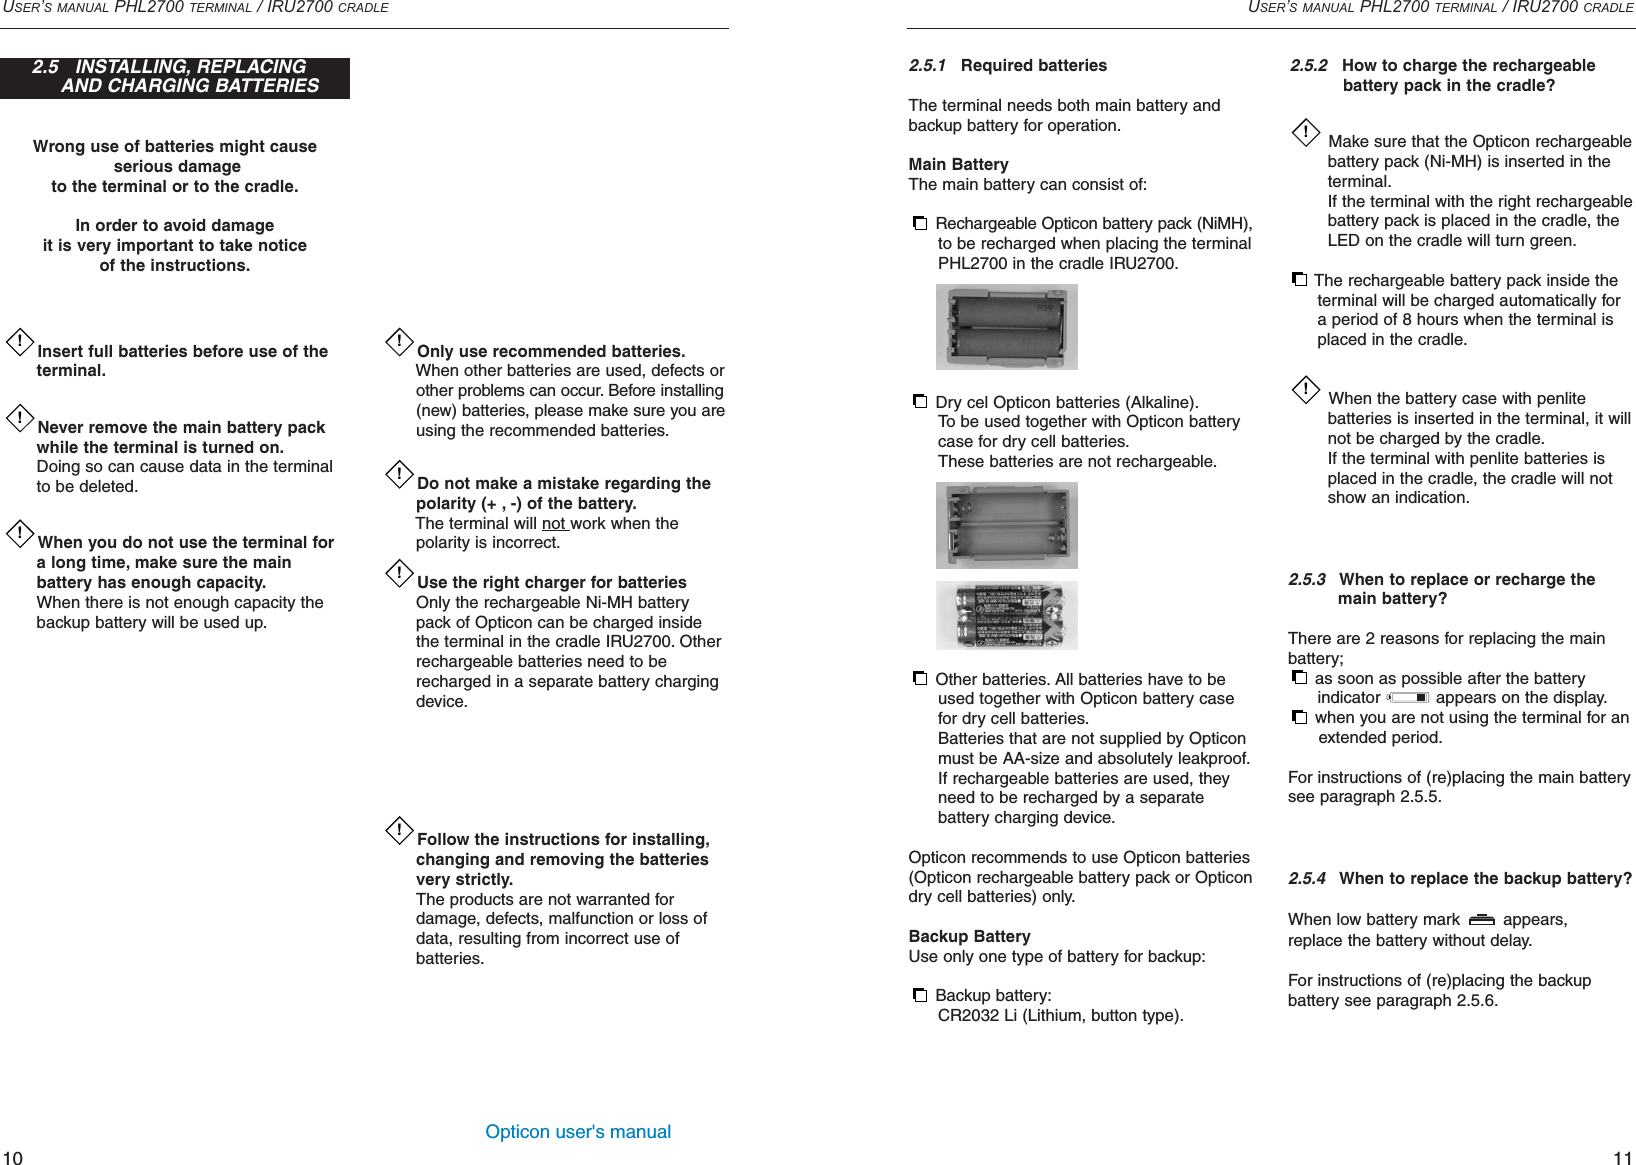
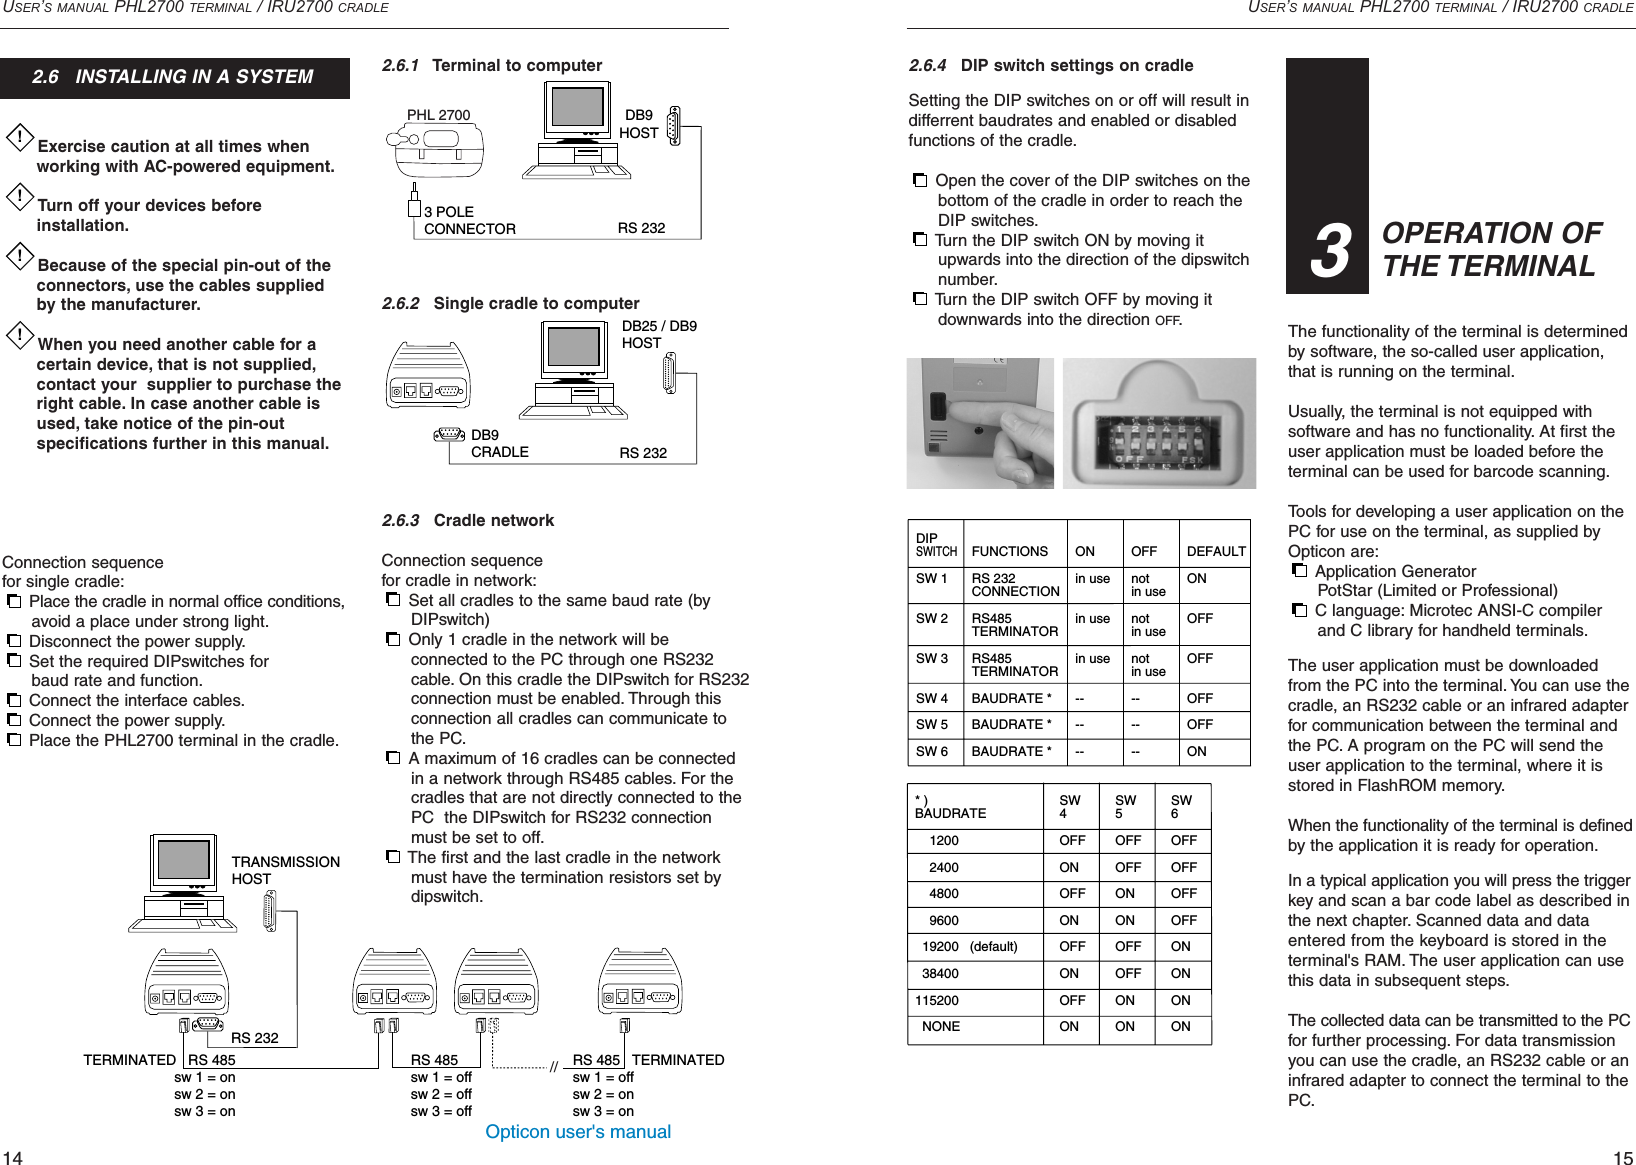
![Opticon user's manualUSER’S MANUAL PHL2700 TERMINAL / IRU2700 CRADLE17USER’S MANUAL PHL2700 TERMINAL / IRU2700 CRADLE16The terminal is a Class I laser product conforming to the strictest laser safety standards. However, we recommend that you avoid looking directly into the laser beam emitter, or pointing the laser beam directly into someone’s eyes.Fit the bar code in the laser beam frommargin to margin and pass the scanner downward over the bar code, as shown in thescan position illustration.When reading a small bar code, decrease thedistance between the terminal and the bar code.For larger bar codes, position the terminal sothat the bar code fits into the laser beam.When reading a very high density bar code,decrease the distance between the terminaland the bar code. For a low density bar code,increase the distance between the terminaland bar code.4.2 Barcode reading problemsWhen the barcode can not be read, try the following:Change the angle between the bar code and the terminal.Change the distance between the bar code and the terminal.If the bar code is larger than the laser beam, try moving the terminal a bit further away from the bar code.!5.1 RS232 cable for terminal PHL17005.2RS485 cable for cradle network IRU27005.3RS232 cable for cradle IRU2700Please take care of the handling precautions.Please make sure that the terminal is installed according to the installation instructions.Never remove the main battery pack while the terminal is turned on.Doing so can cause data in the terminal to be deleted or corrupted.4.1 How to read the barcodeThe scanning sequence is defined by theuser’s application. A typical sequence is:Press the [PW] key to turn power on.Check the display for the message:READ BAR CODEPoint the terminal to the barcode and press the Trigger key.Point the laserbeam to barcode as shown in the scan position illustration.The barcode will be read and the reading results will be indicated.A ‘Good Read’means that the scanner haseffectively recognised and decoded the barcode. In most cases, the application programwill provide an indicator signal or a buzzer signal to indicate a good read to the user.When the read is incorrect you can try again,paying attention to the instructions in thischapter.!!!SCANNING34good readscan positionincorrect readscan positionsPIN-OUT35Jackplug3 pole(terminal)123DB 9connectorFemale(PC)235SignalRxDTxDGNDRS232cable SignalTxDRxDGND1913Modularplug(6P6)123456Modularplug(6P6)-2345-16NetworkcableRS485Signal-RD+RD-SD+SD--16DB 9 male(cradle) 3 2 6 + 1 5 4 8 7DB 9female(PC) 2 3 4 5 6 + 1 7 8SignalRxDTxDDTRGNDDSRRTSCTSRS232cableSignalTxDRxDDSRGNDDTRCTSRTS1919In/Out(cradle)INOUTOUT--OUT-Note--ON (fixed)-not usedON (fixed)not used5.35.25.1](https://usermanual.wiki/Opticon-Sensors-Europe/2366.User-manual/User-Guide-318044-Page-9.png)