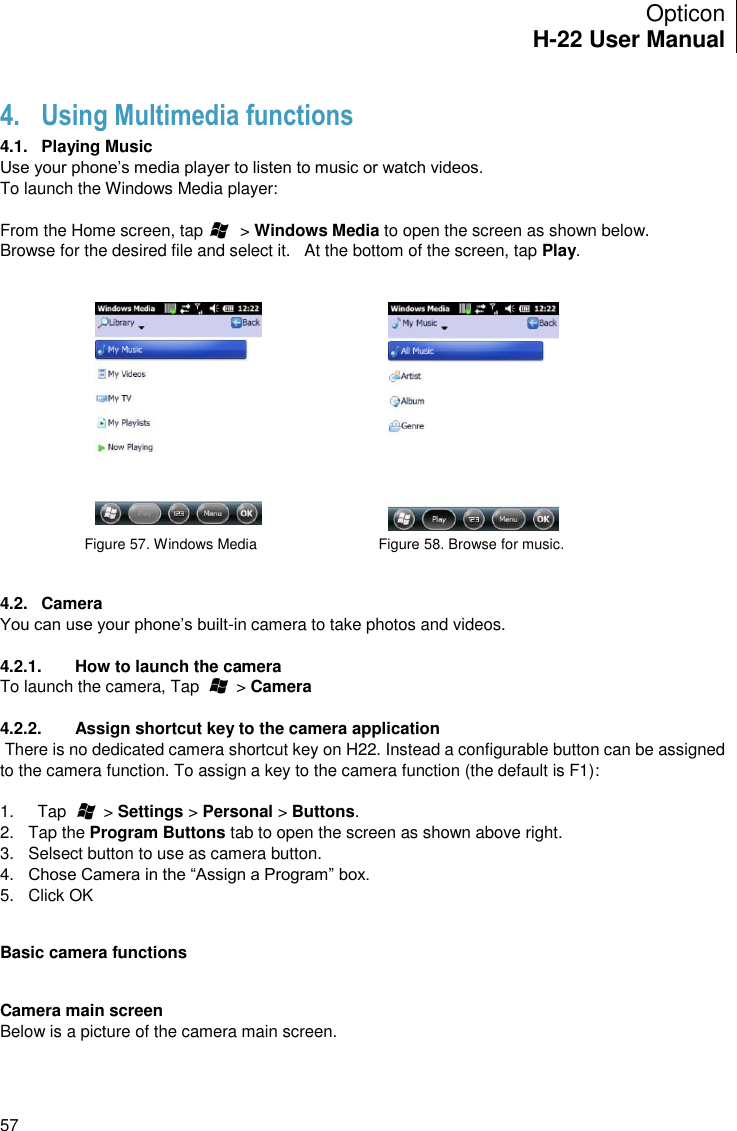
Opticon Sensors Europe H22 PDA Phone H-22 User Manual H 22
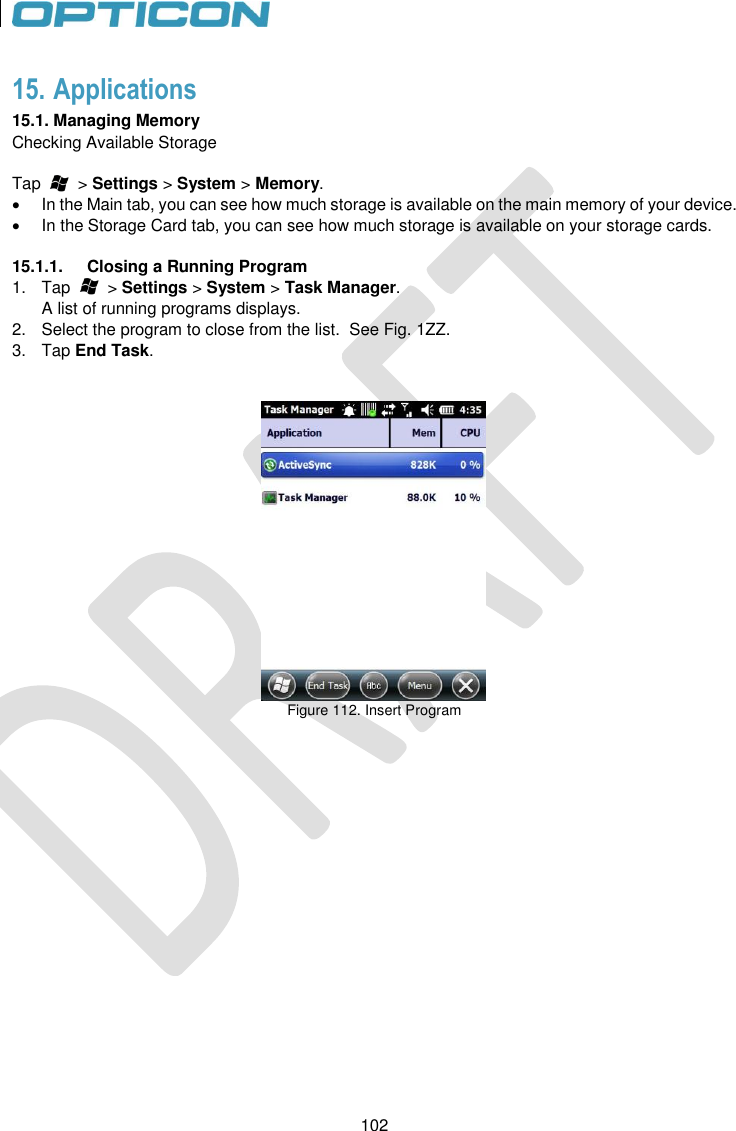
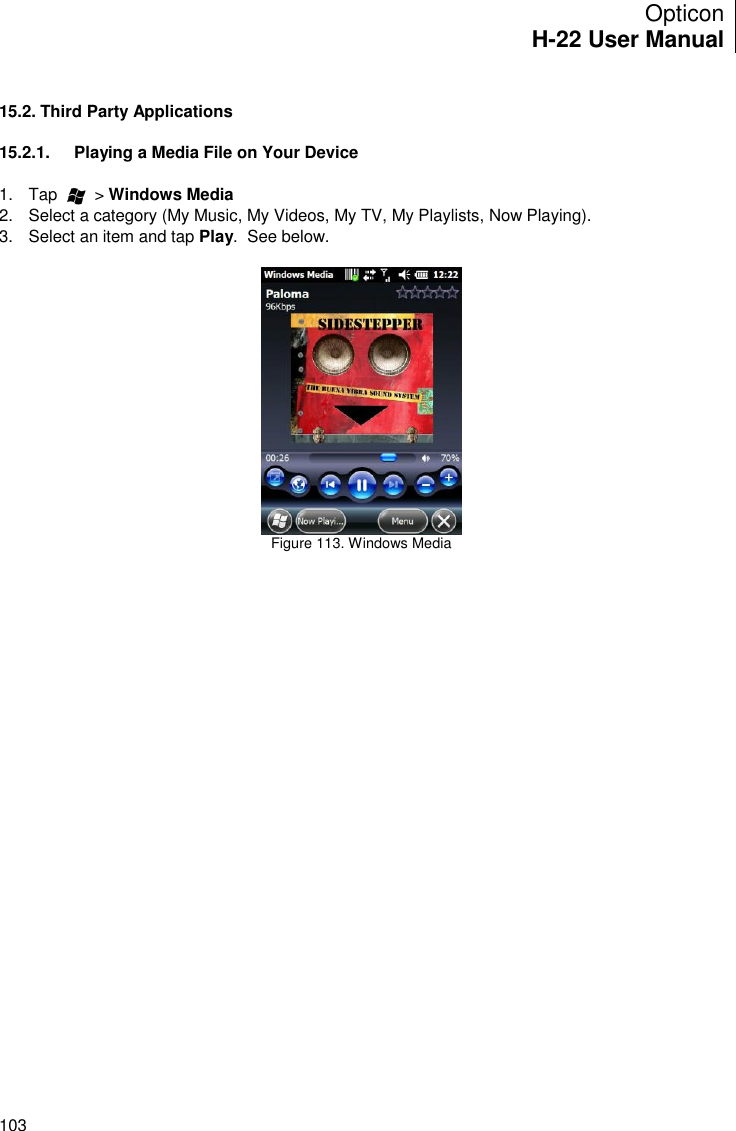
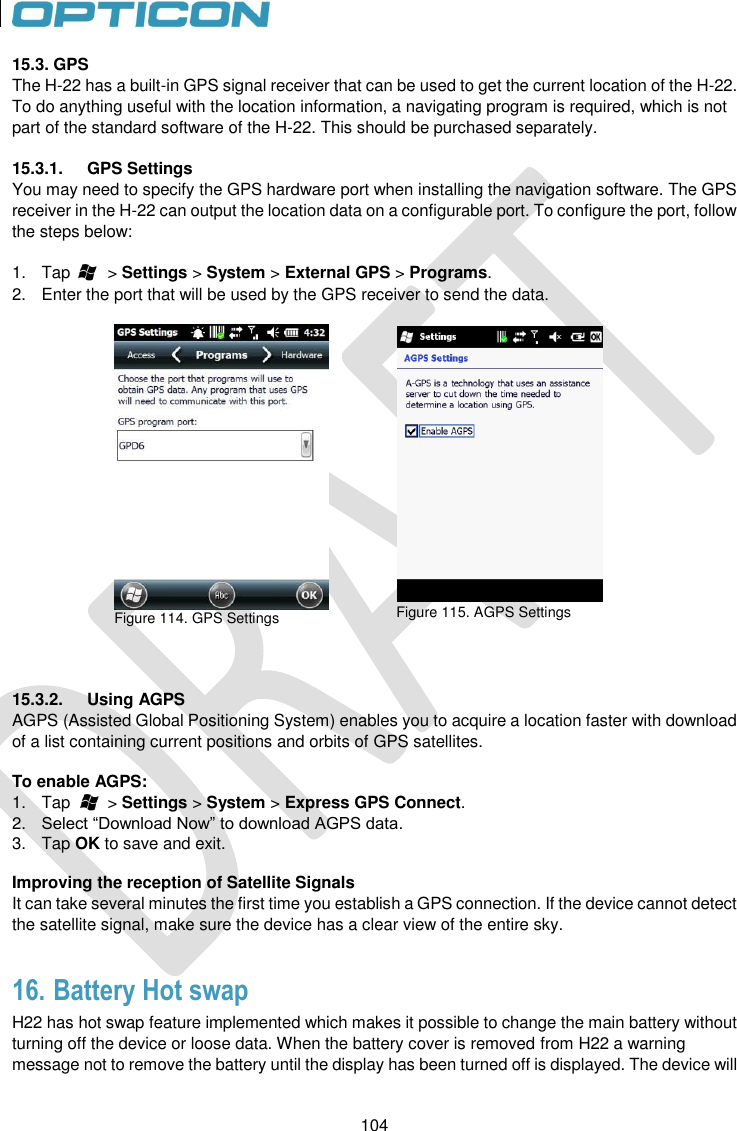
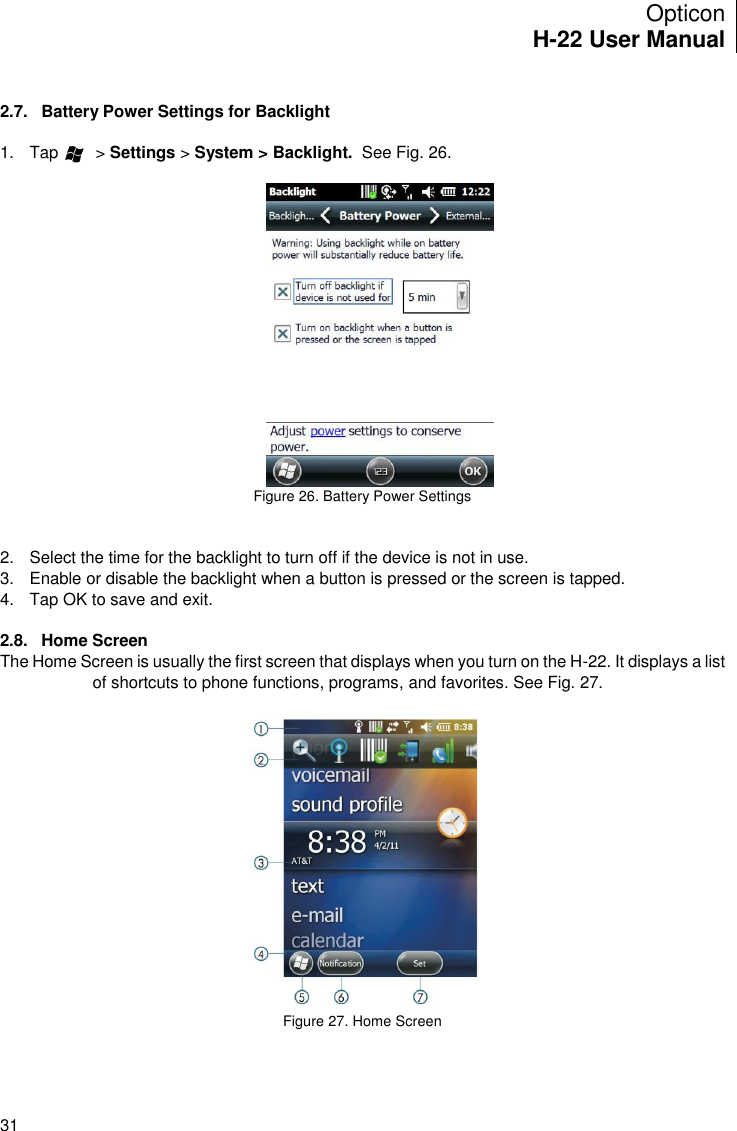
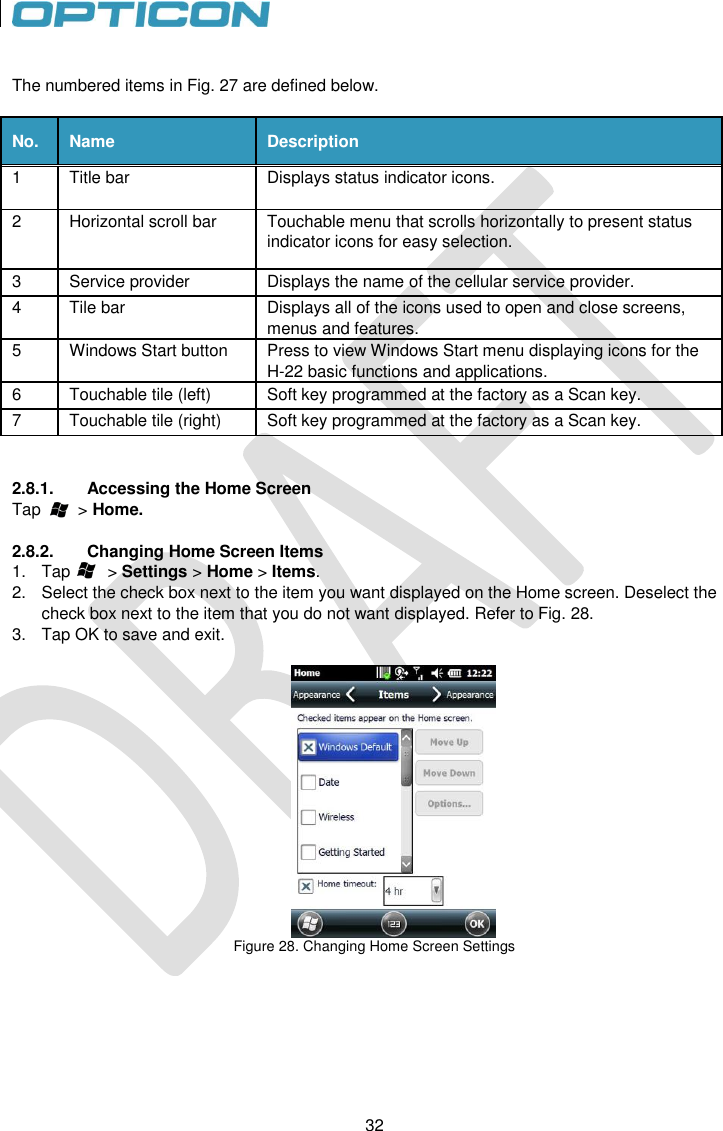
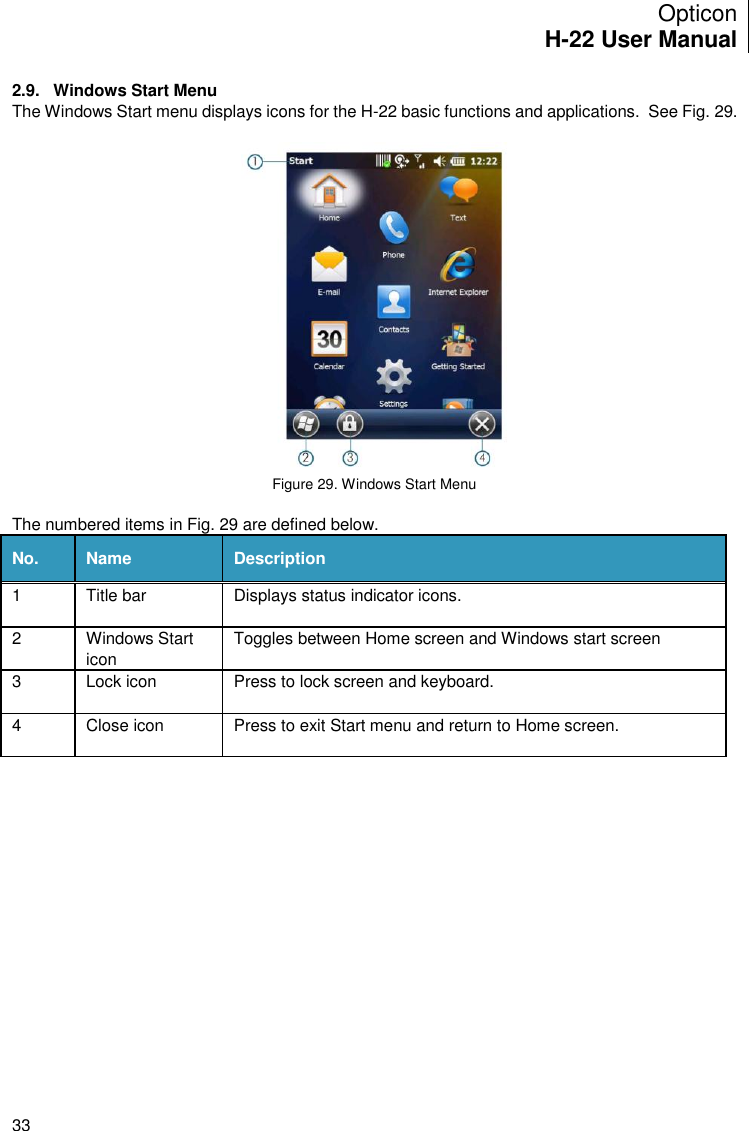
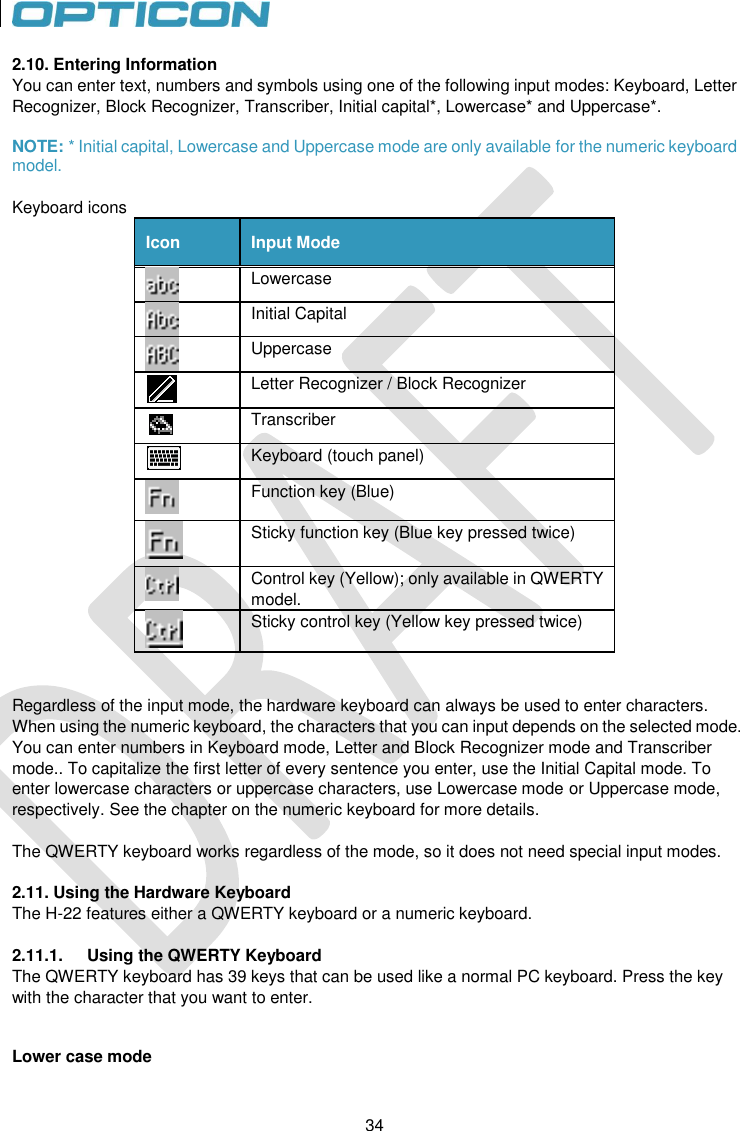
Opticon Sensors Europe BV PDA Phone H-22 H 22
UserManual.wiki
>
Opticon Sensors Europe
>
H22 User Manual
>
H22_User_Manual_Dec_08
Contents
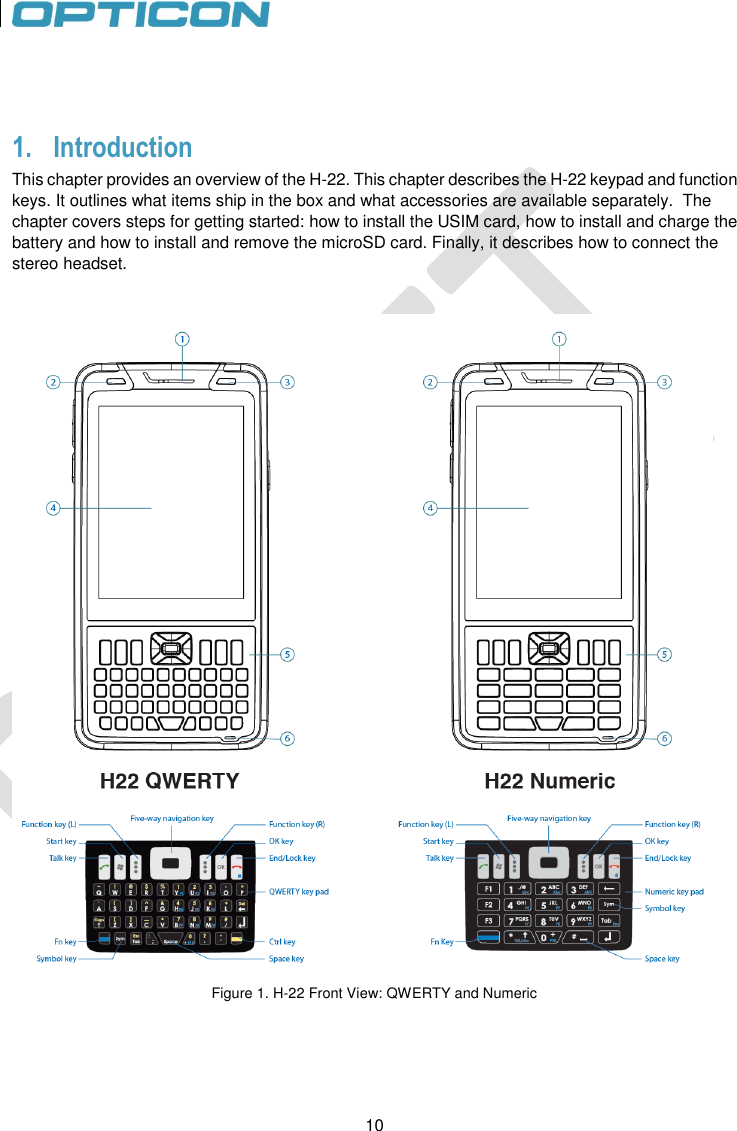
1.
H22_User_Manual_Dec_08
2.
User_Manual_Dec_08
H22_User_Manual_Dec_08
Navigation menu
Upload a User Manual
Namespaces
Wiki Guide
HTML
PDF
Info
Views
User Manual
Discussion / Help
Navigation
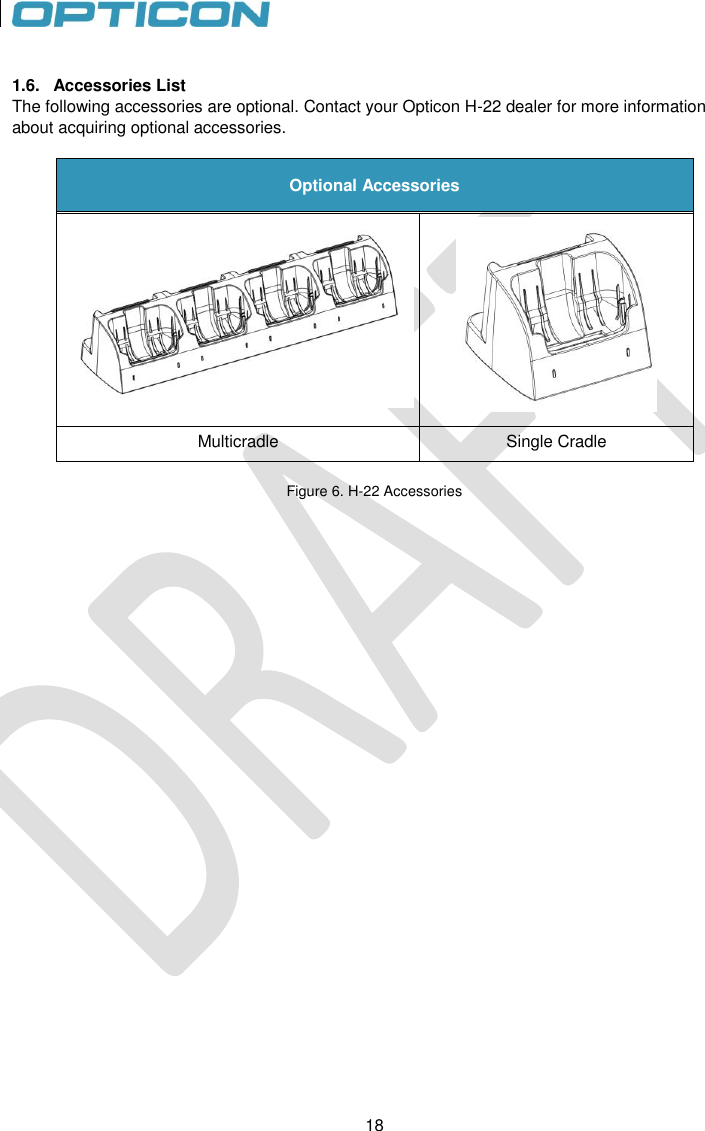

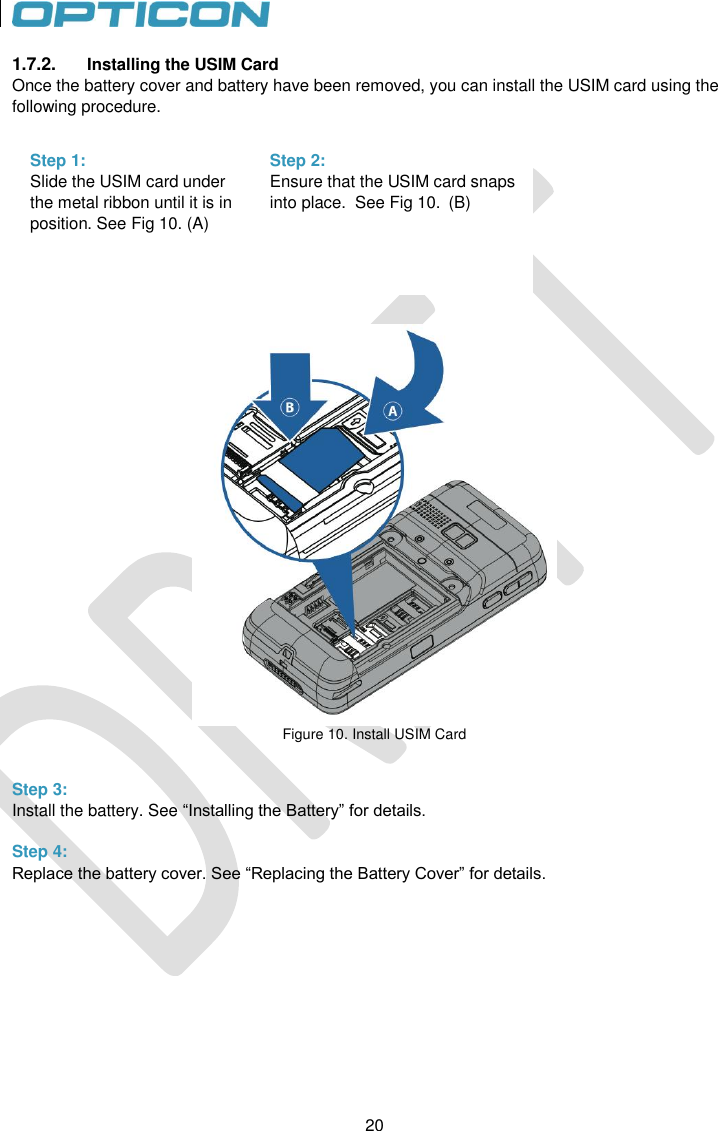
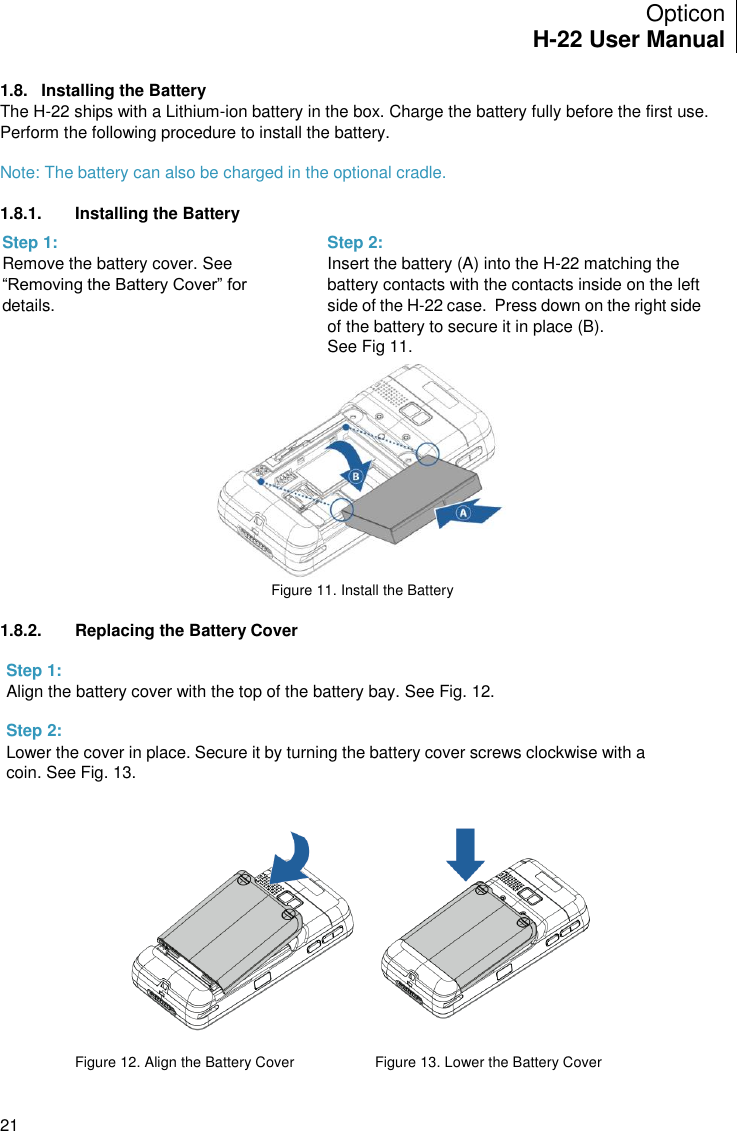
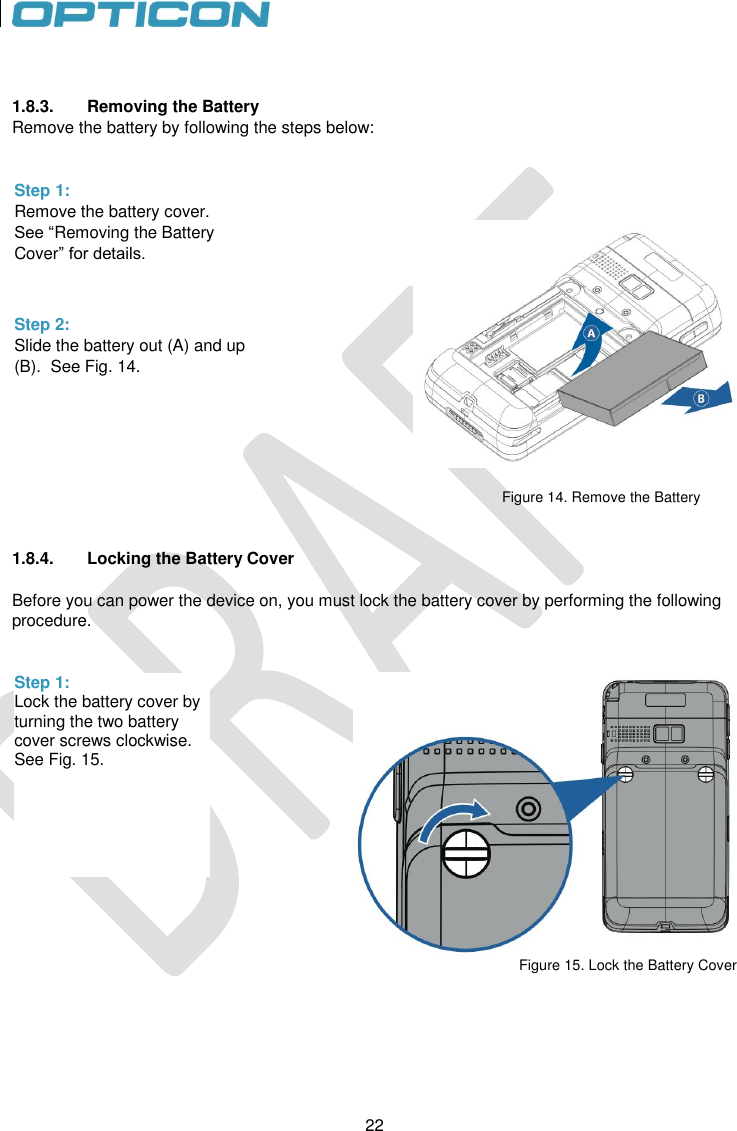
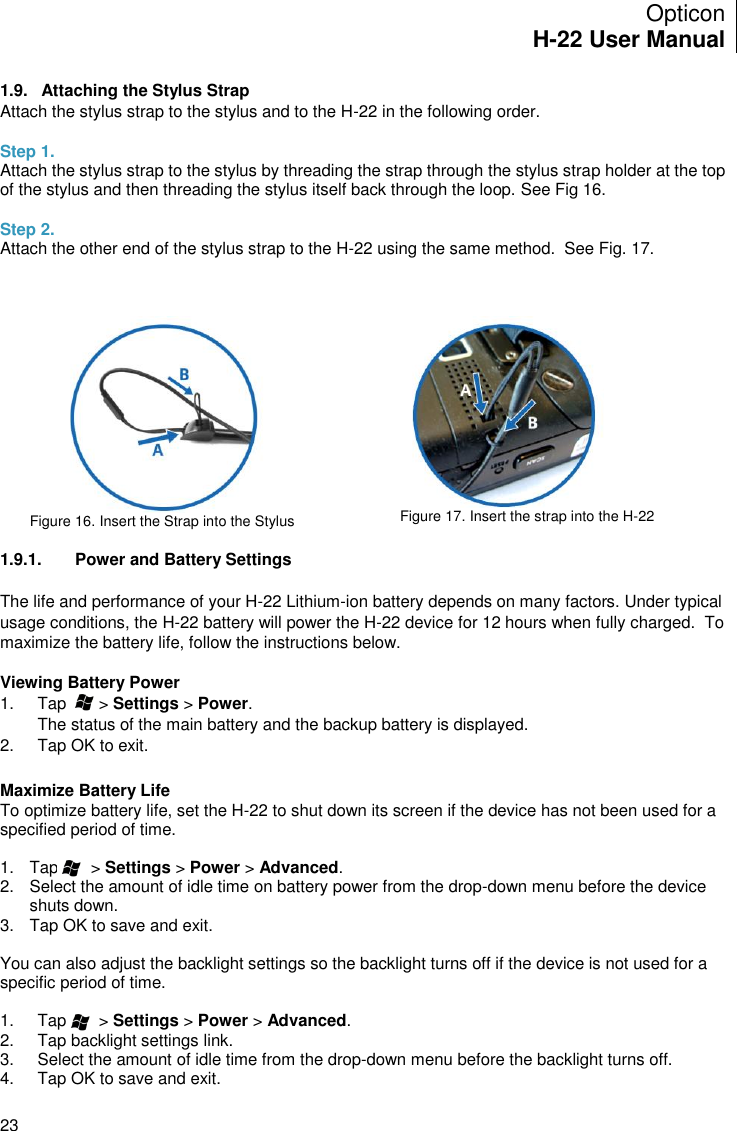
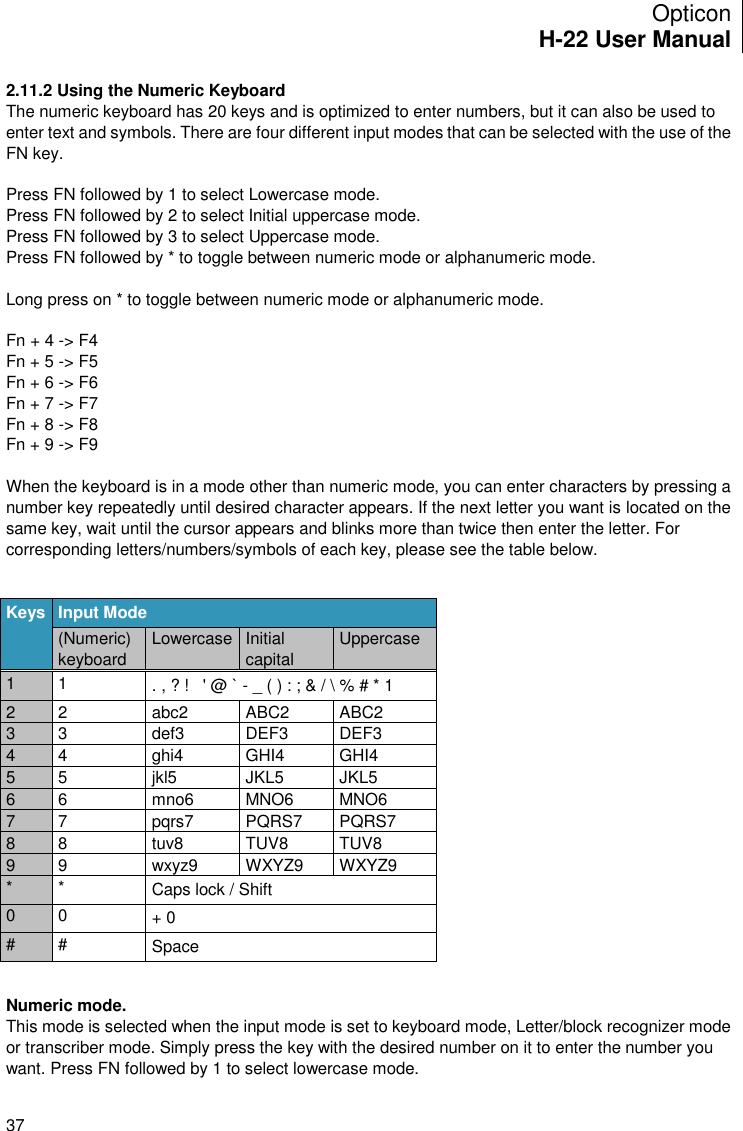
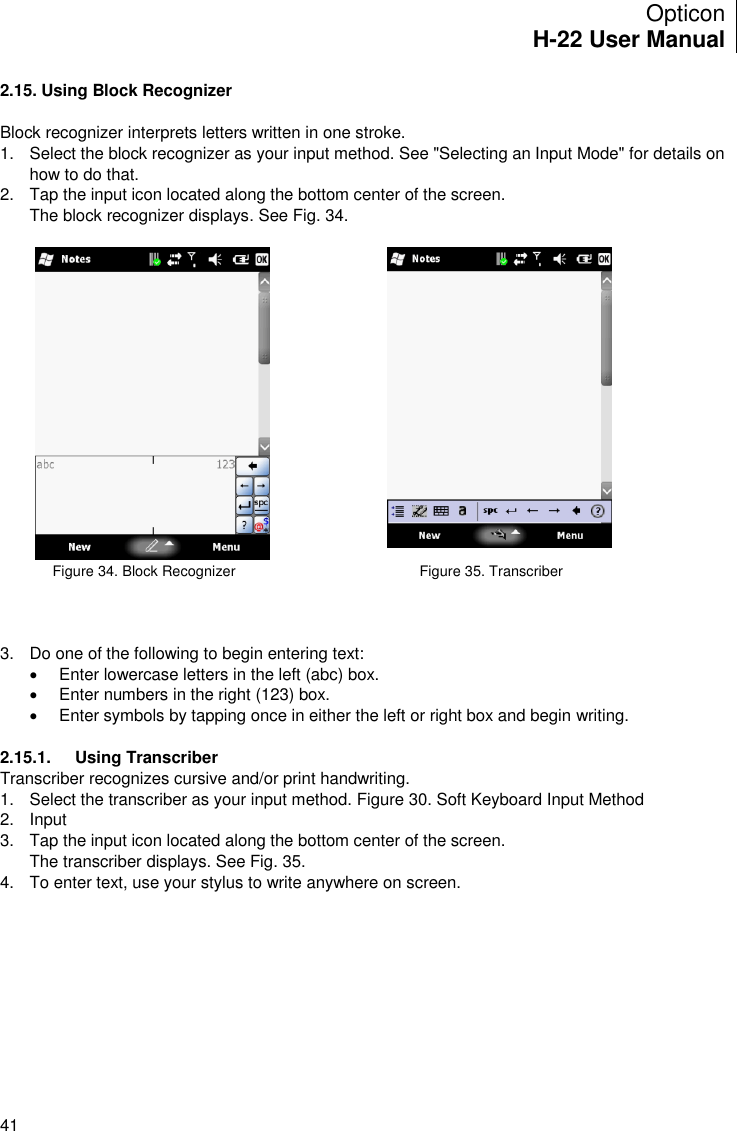
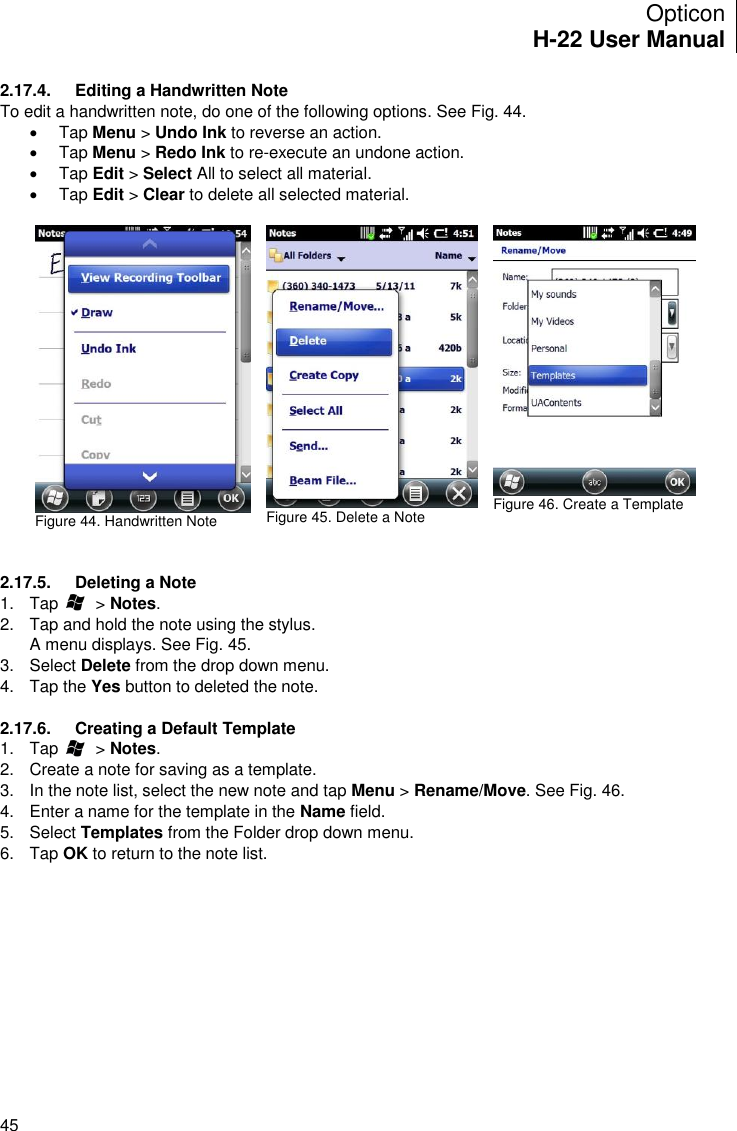
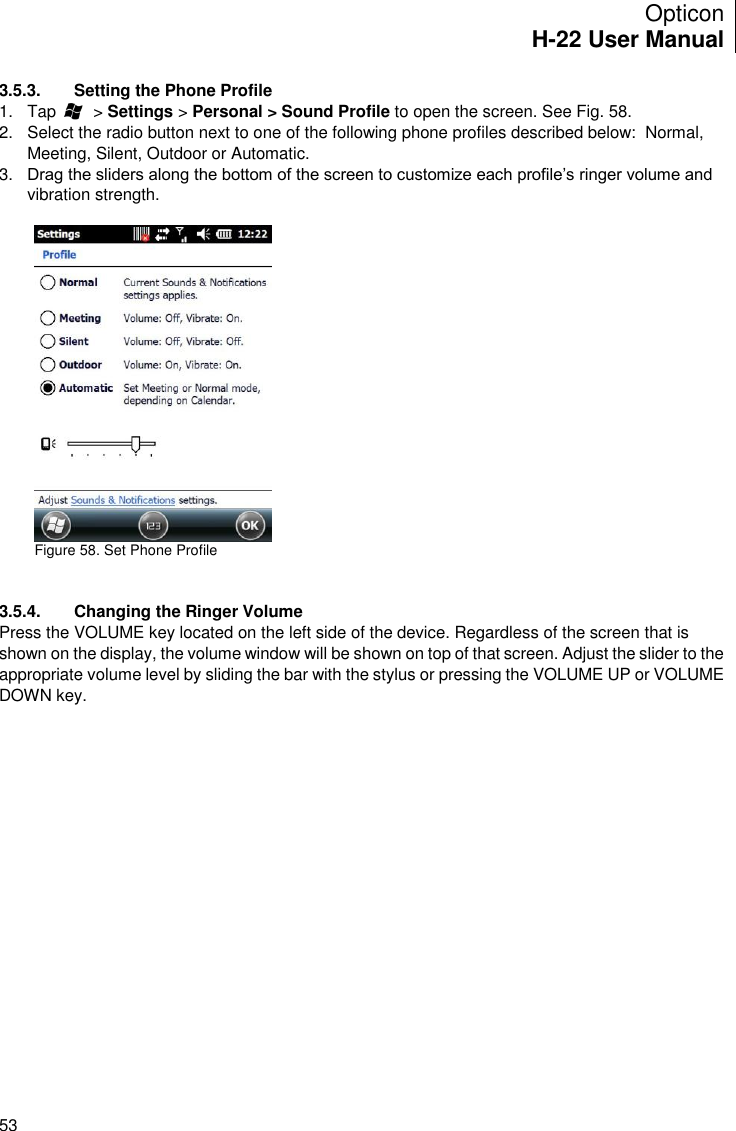
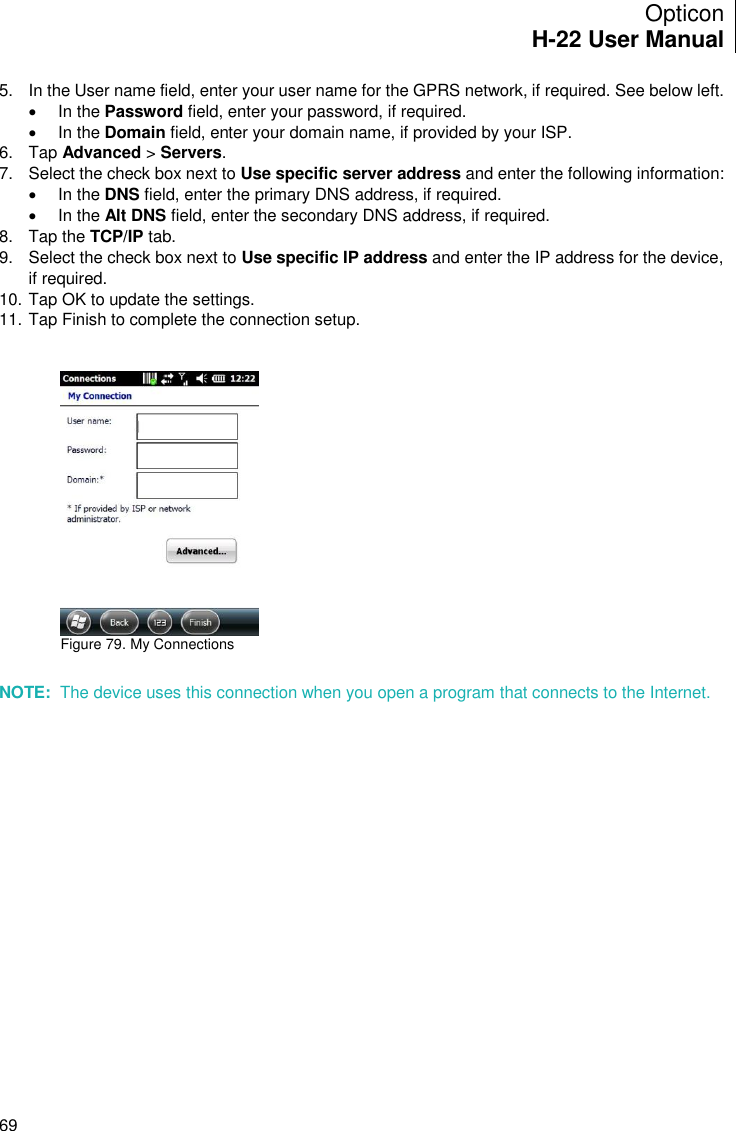
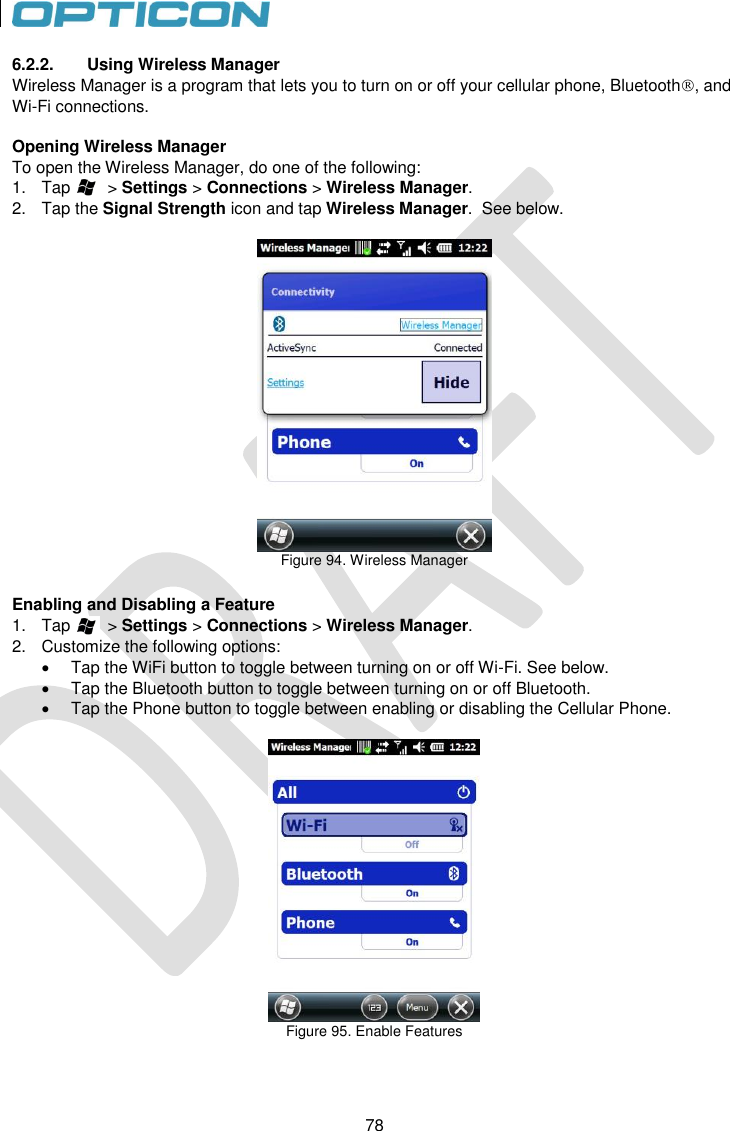
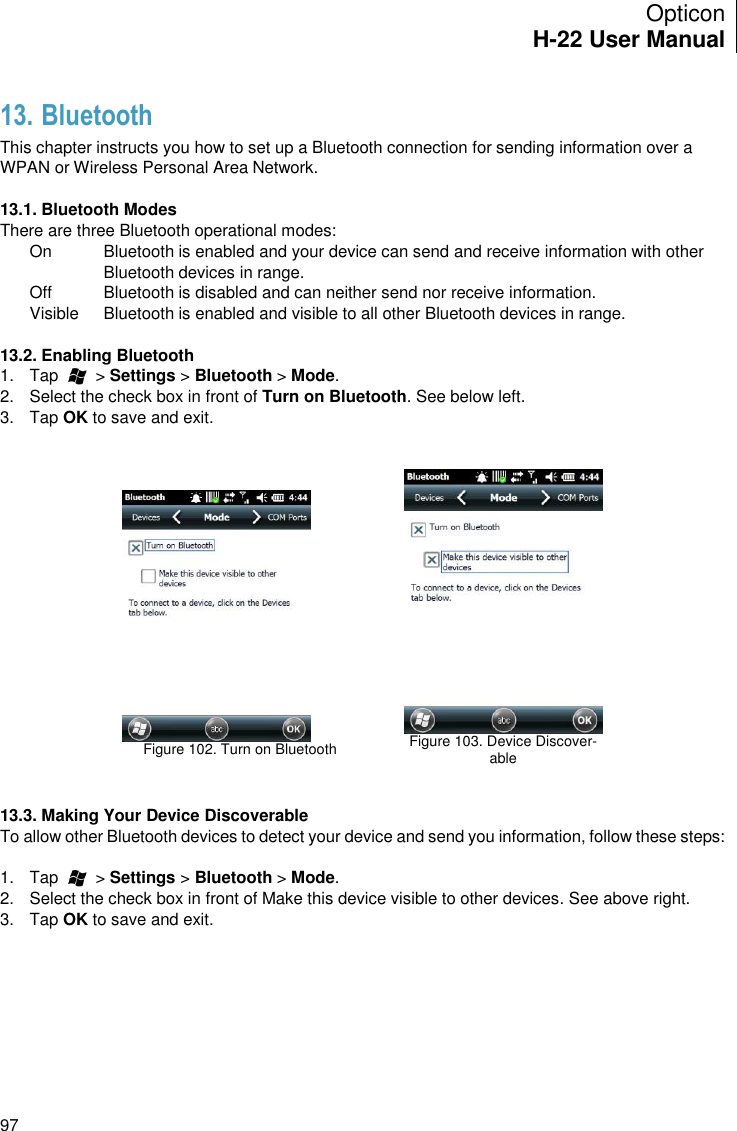
![Opticon H-22 User Manual 35 By default, the QWERTY keyboard is in lower case mode. To enter a single uppercase letter, press ↑ (the shift key, located on the far left, on the lower row) followed by the key marked with the desired character. This character will then be uppercase. The next character will be lowercase again. Upper case mode To switch to uppercase mode, press FN, followed by ↑ (the shift key, located on the far left, on the lower row). All characters will then become uppercase characters. To enter a single lowercase character, press ↑ followed by the key marked with the desired character. This character will then be lowercase. The next character will be uppercase again. Symbols To enter the symbols, printed in blue on the keys, press the FN key, followed by the key with the desired marking. e.g. when you want to enter !, press FN, followed by W. Special characters. To enter special characters, accented letters, punctuation marks, currency signs etc, (e.g. à, Ç, ®) you can use the Sym key (located next to the shift key on the bottom row. You can also use the Fn key (blue) to generate F1 through F10 and the Ctrl key (yellow) to generate characters other than a-z;,.’ and /. To use the Sym key, press the Sym key one or more times until the desired character is shown of the screen. e.g. when you want to enter Ã, while in lowercase mode, press ↑, followed by A, to get the A character. Now press Sym until the à appears on the screen. In this case, the Sym key has to be pressed 7 times. The tables below show what characters can be made with the Sym, Fn and Ctrl keys. Lower case characters plus symbols Key After SYM Fn+ Key Ctrl + Key After SYM a àáâäåąãăæ ` b F7 7 c çćč© _ +±& d ð ) ]}>» e èéêëę @ ~ f ^ % g & -_+± h F4 4 i ìíîï F3 3 j F5 5 k F6 6 l ł + ±-_ m F9 9](https://usermanual.wiki/Opticon-Sensors-Europe/H22.H22-User-Manual-Dec-08/User-Guide-1603242-Page-35.png)
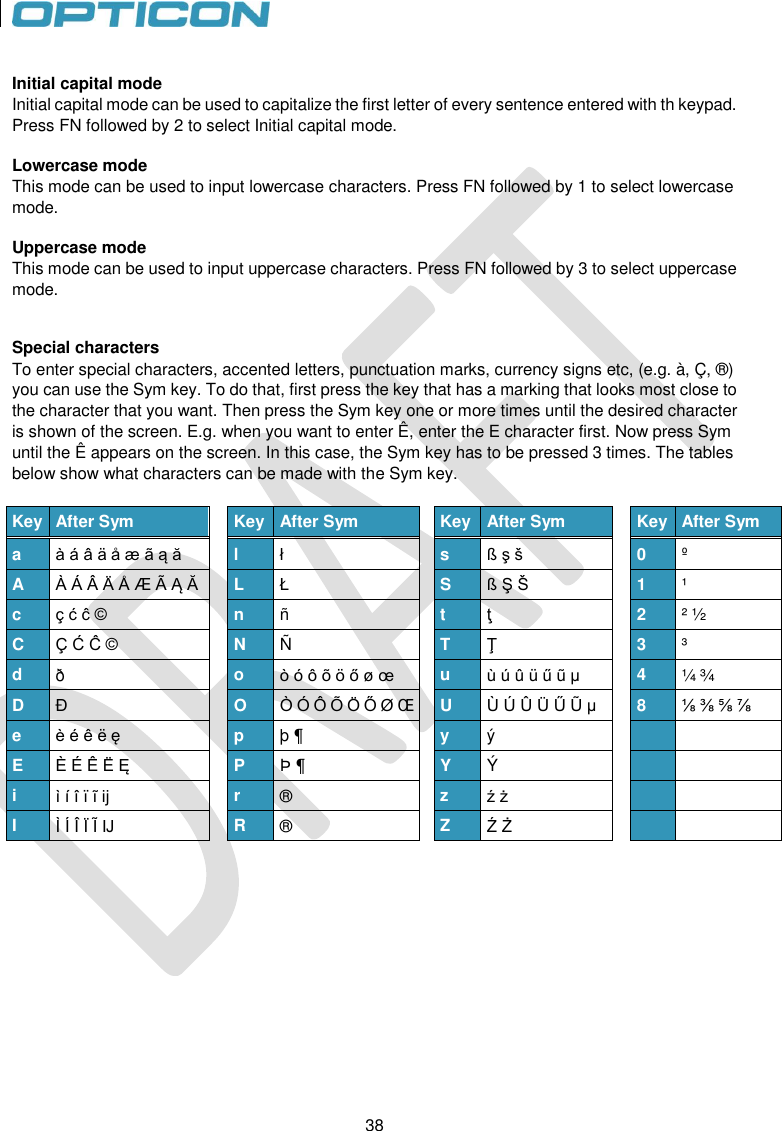
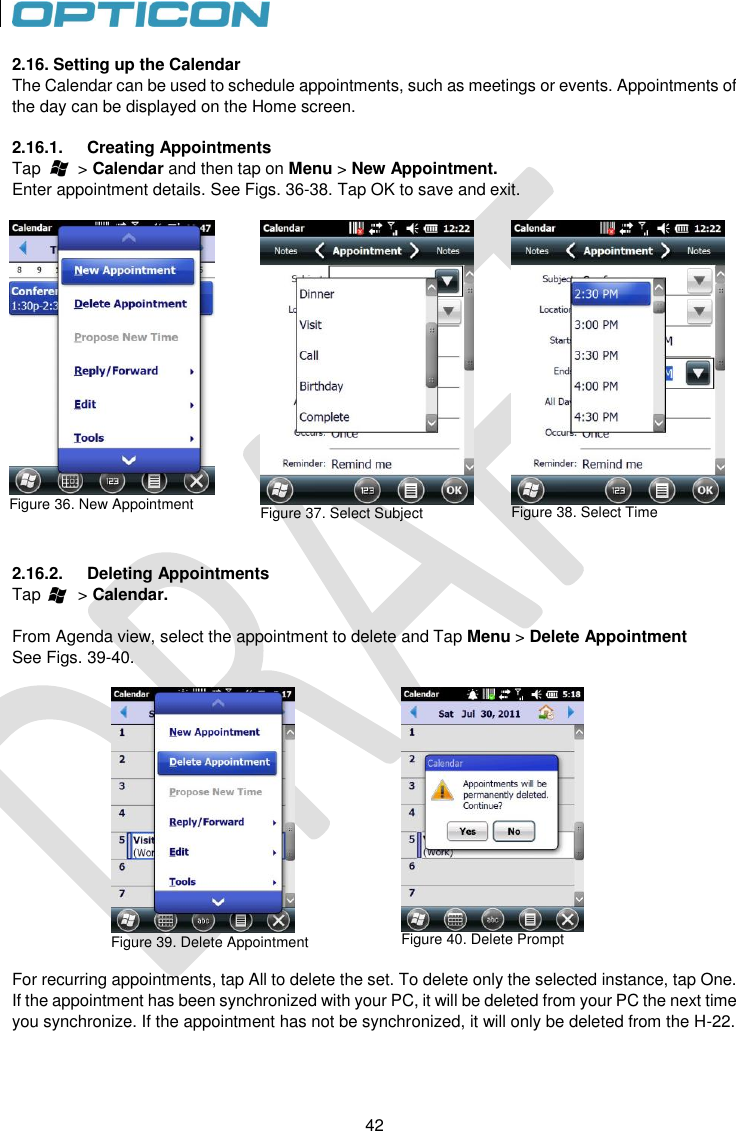
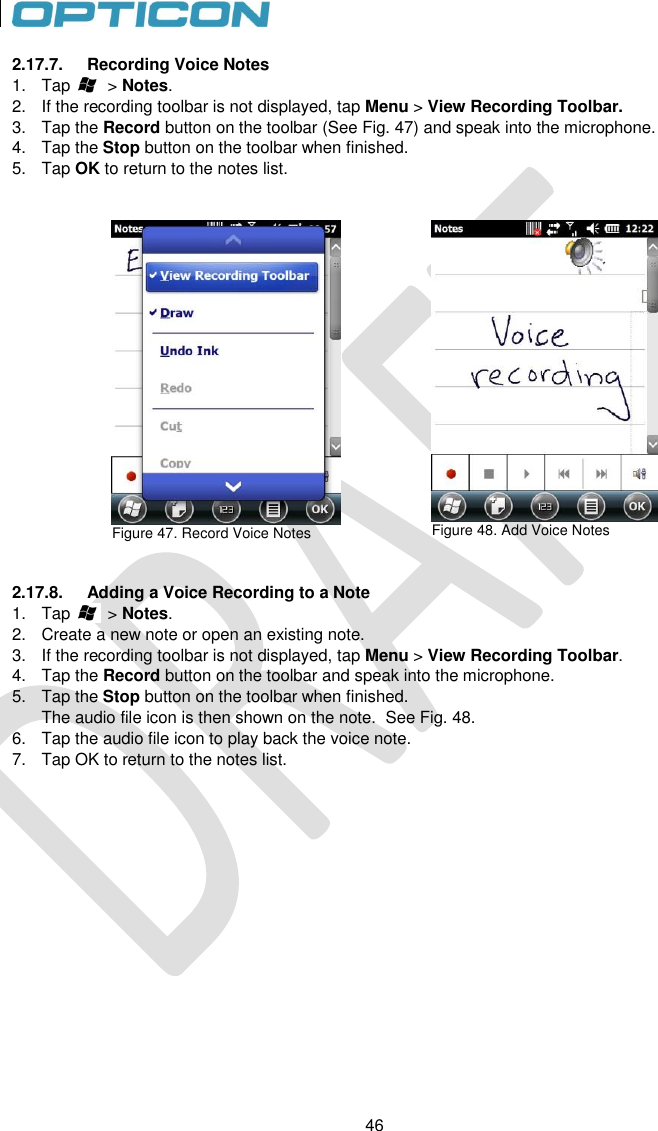
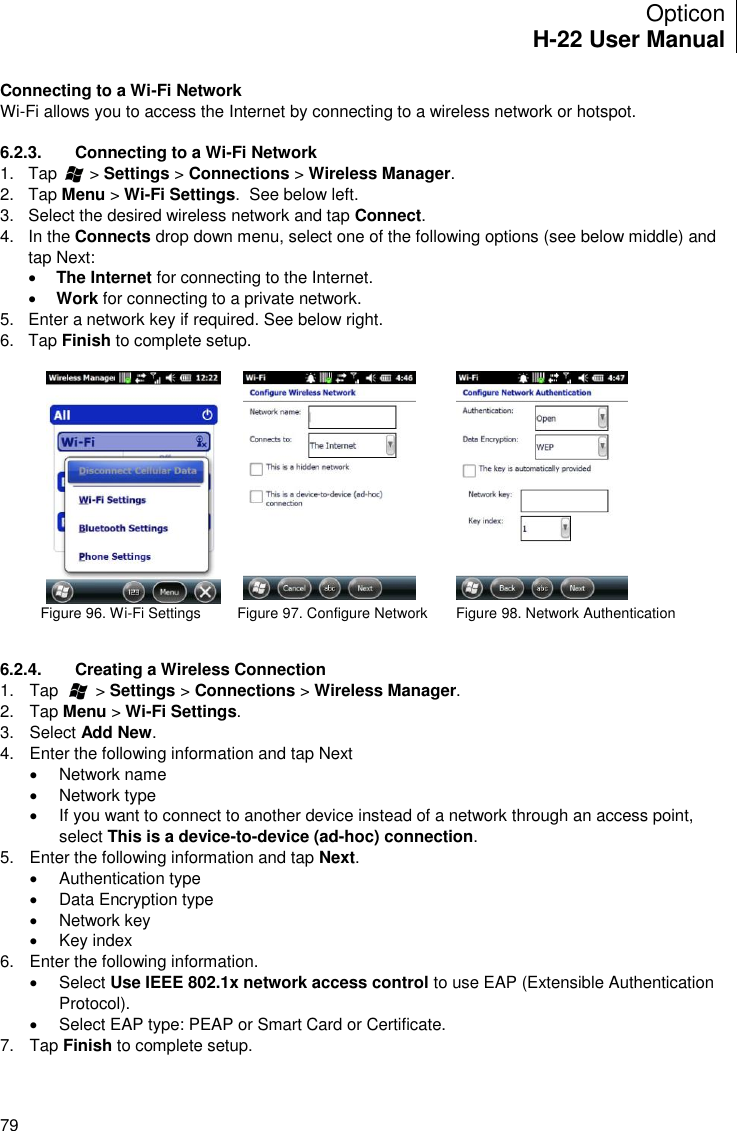
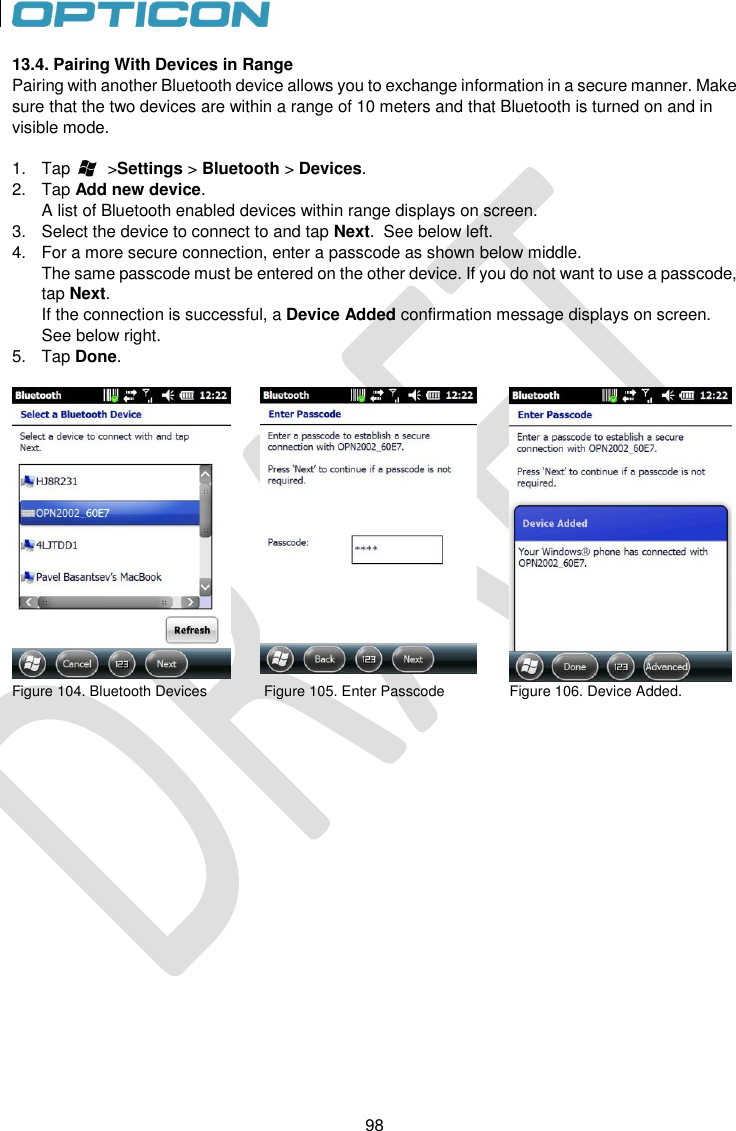
![36 36 Lower case characters plus symbols (continued) Key After SYM Fn+ Key Ctrl + Key After SYM n ñ F8 8 o òóôõöőøœ - _+± p þ¶ = q ~ @ r ® $ €£¥ s şšß ( [{<« t ţ % ^ u ùúûüű F2 2 v * # w ! ¡?¿ x ] }>») y ý F1 1 z źż [ {<«( ; .:, : ,;. , ;.: F10 0 . :,; ? ¿!¡ ' " '«» / \| # * Tab Esc Space Return Backspace Del Shift Caps Lock Upper case characters Key After Sym Key After Sym Key After Sym A À Á Â Ä Å Ą à Ǎ Æ N Ñ U Ù Ú Û Ü Ű C Ç Ć Č © O Ò Ó Ô Õ Ö Ő Ø Œ Y Ý D Ɖ P Þ ¶ Z Ź Ż E È É Ê Ë Ę R ® I Ì Í Î Ï S Ş Š ß L Ł T Ț](https://usermanual.wiki/Opticon-Sensors-Europe/H22.H22-User-Manual-Dec-08/User-Guide-1603242-Page-36.png)