Opticon Sensors Europe PHL7200-BW Portable Data Terminal User Manual 1 rev
Opticon Sensors Europe BV Portable Data Terminal 1 rev
UserManual.wiki
>
Opticon Sensors Europe
>
PHL7200-BW User Manual
>
User manual 1 rev
Contents
1.
User manual 1 rev
2.
User manual 2 rev
3.
User manual 3 rev
4.
User manual 4 rev
5.
User manual 5 rev
6.
User manual 6 rev
7.
User manual 7 rev
8.
User manual 8 rev
9.
User manual 9 rev
User manual 1 rev
Navigation menu
Upload a User Manual
Namespaces
Wiki Guide
HTML
PDF
Info
Views
User Manual
Discussion / Help
Navigation


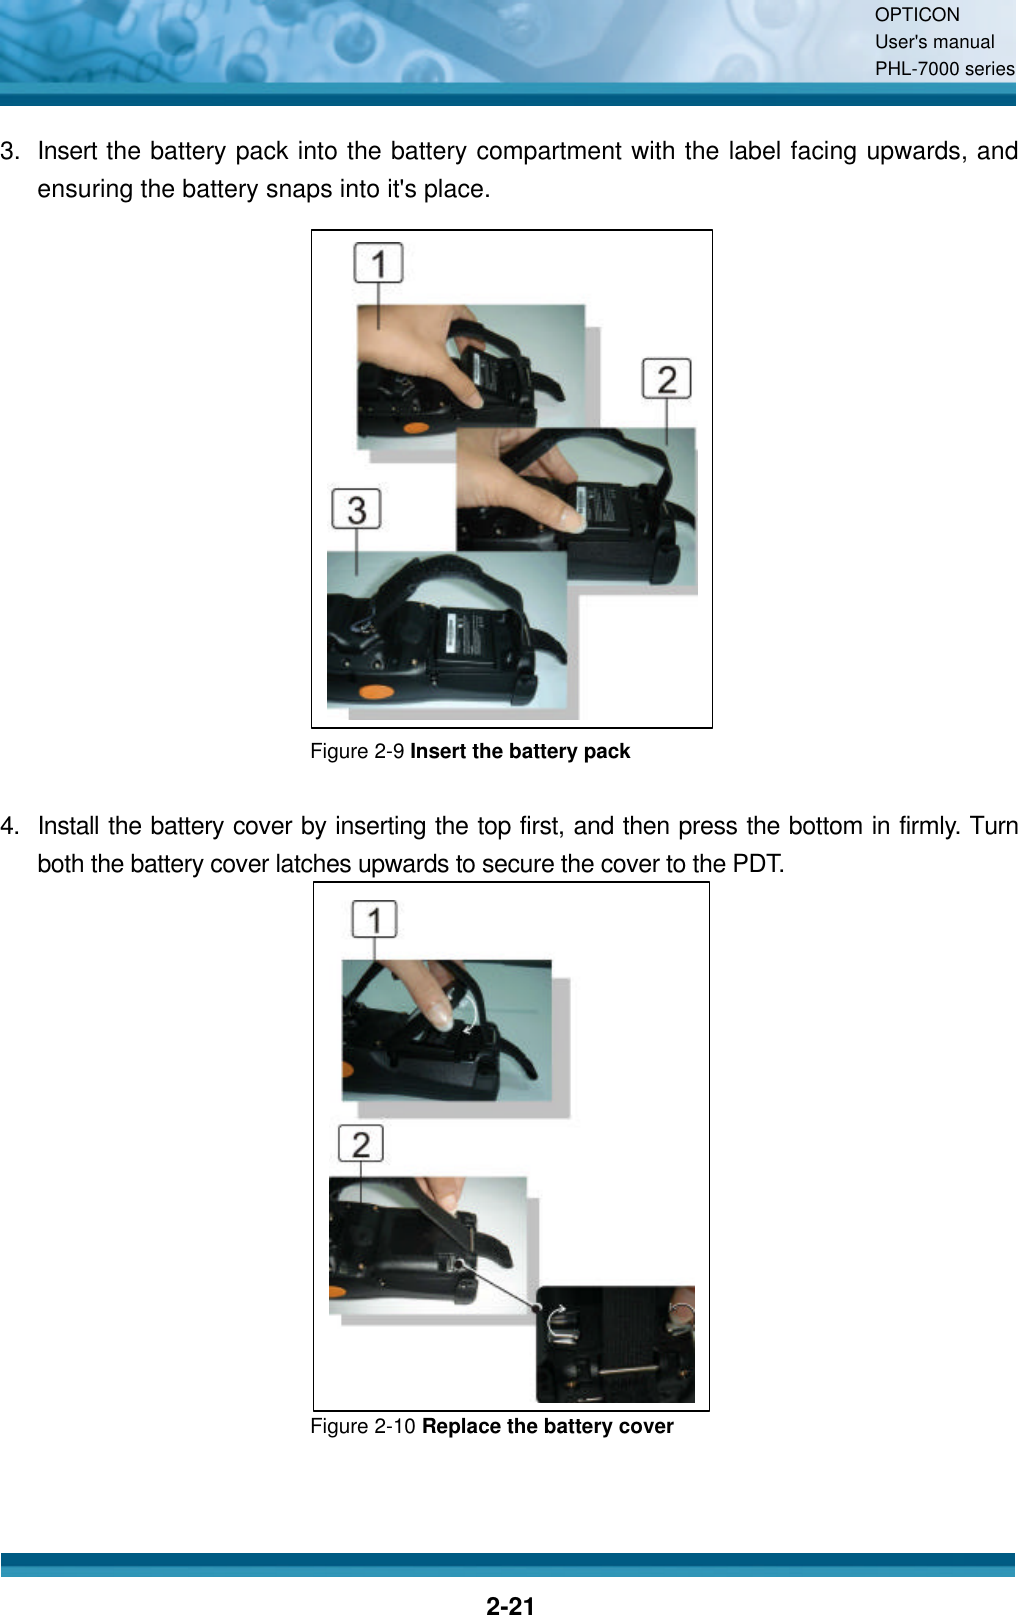
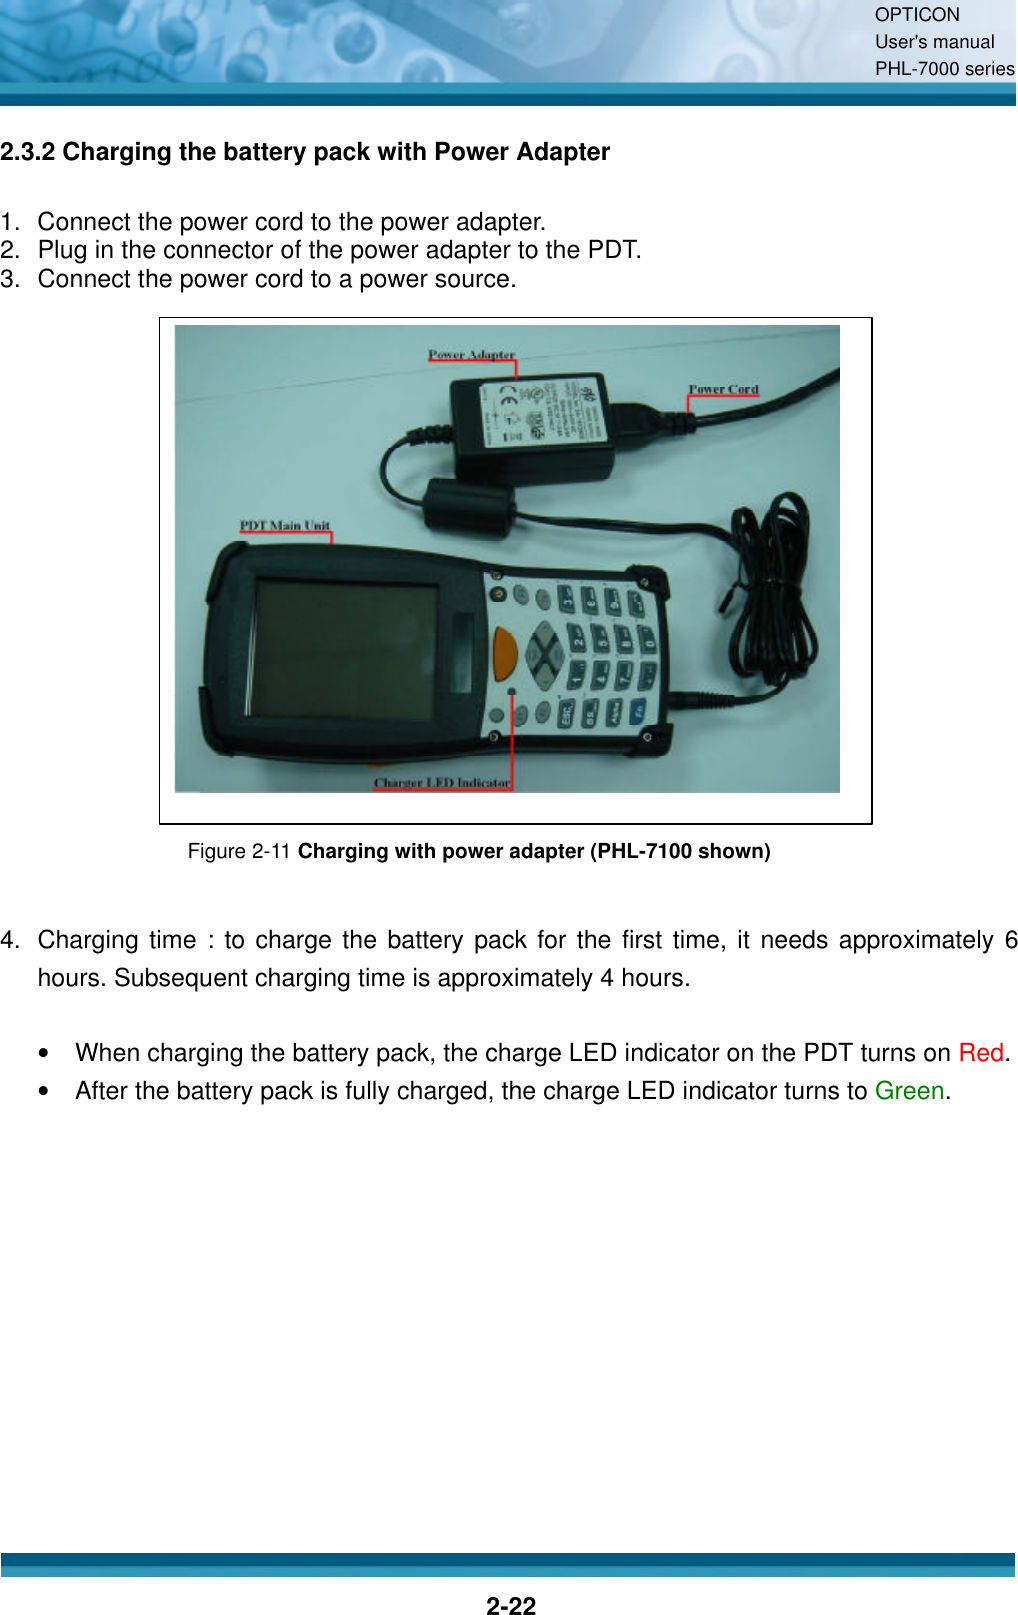
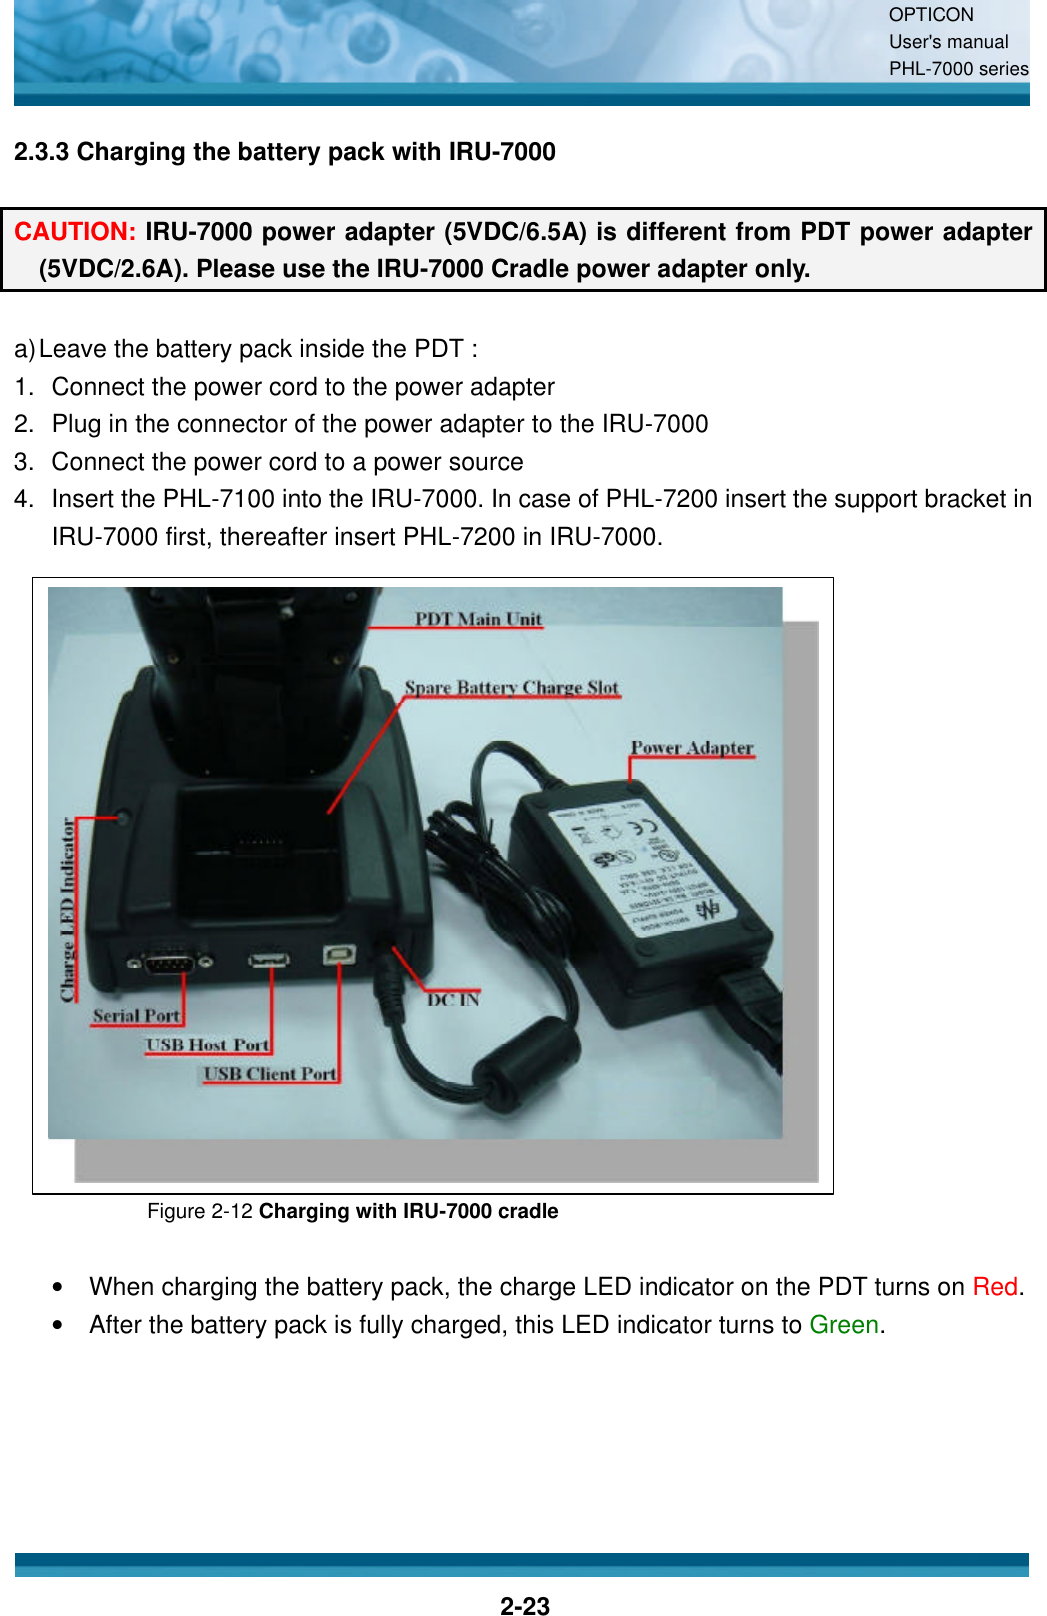
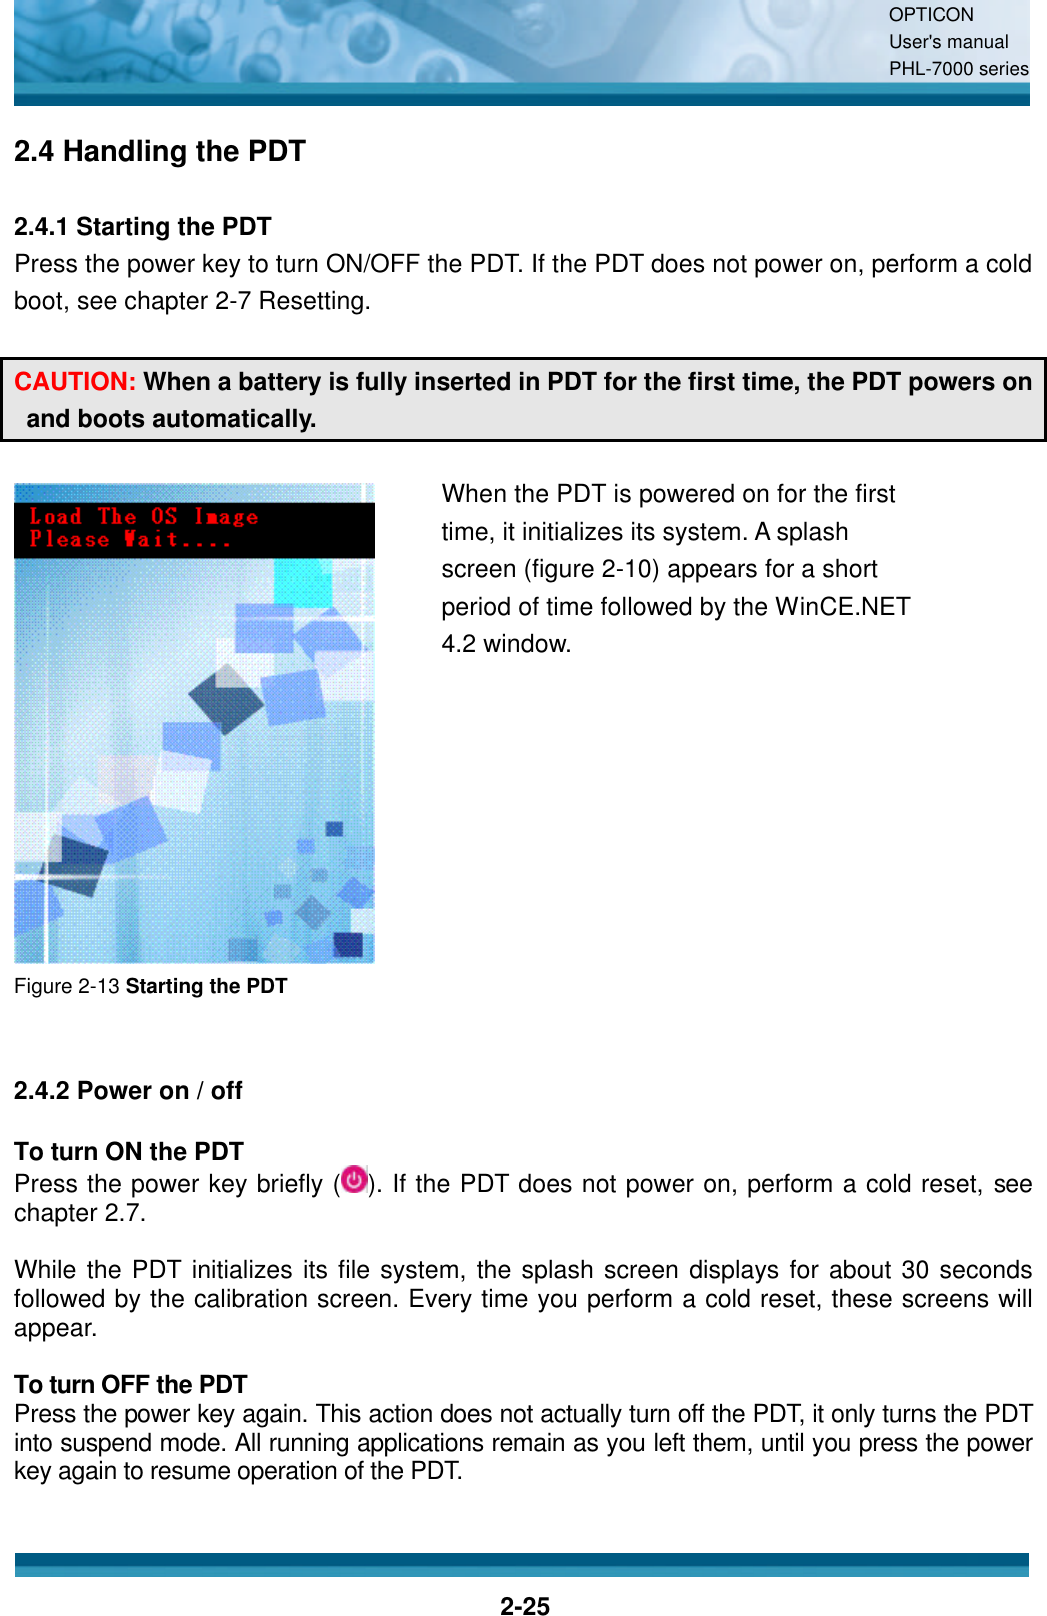


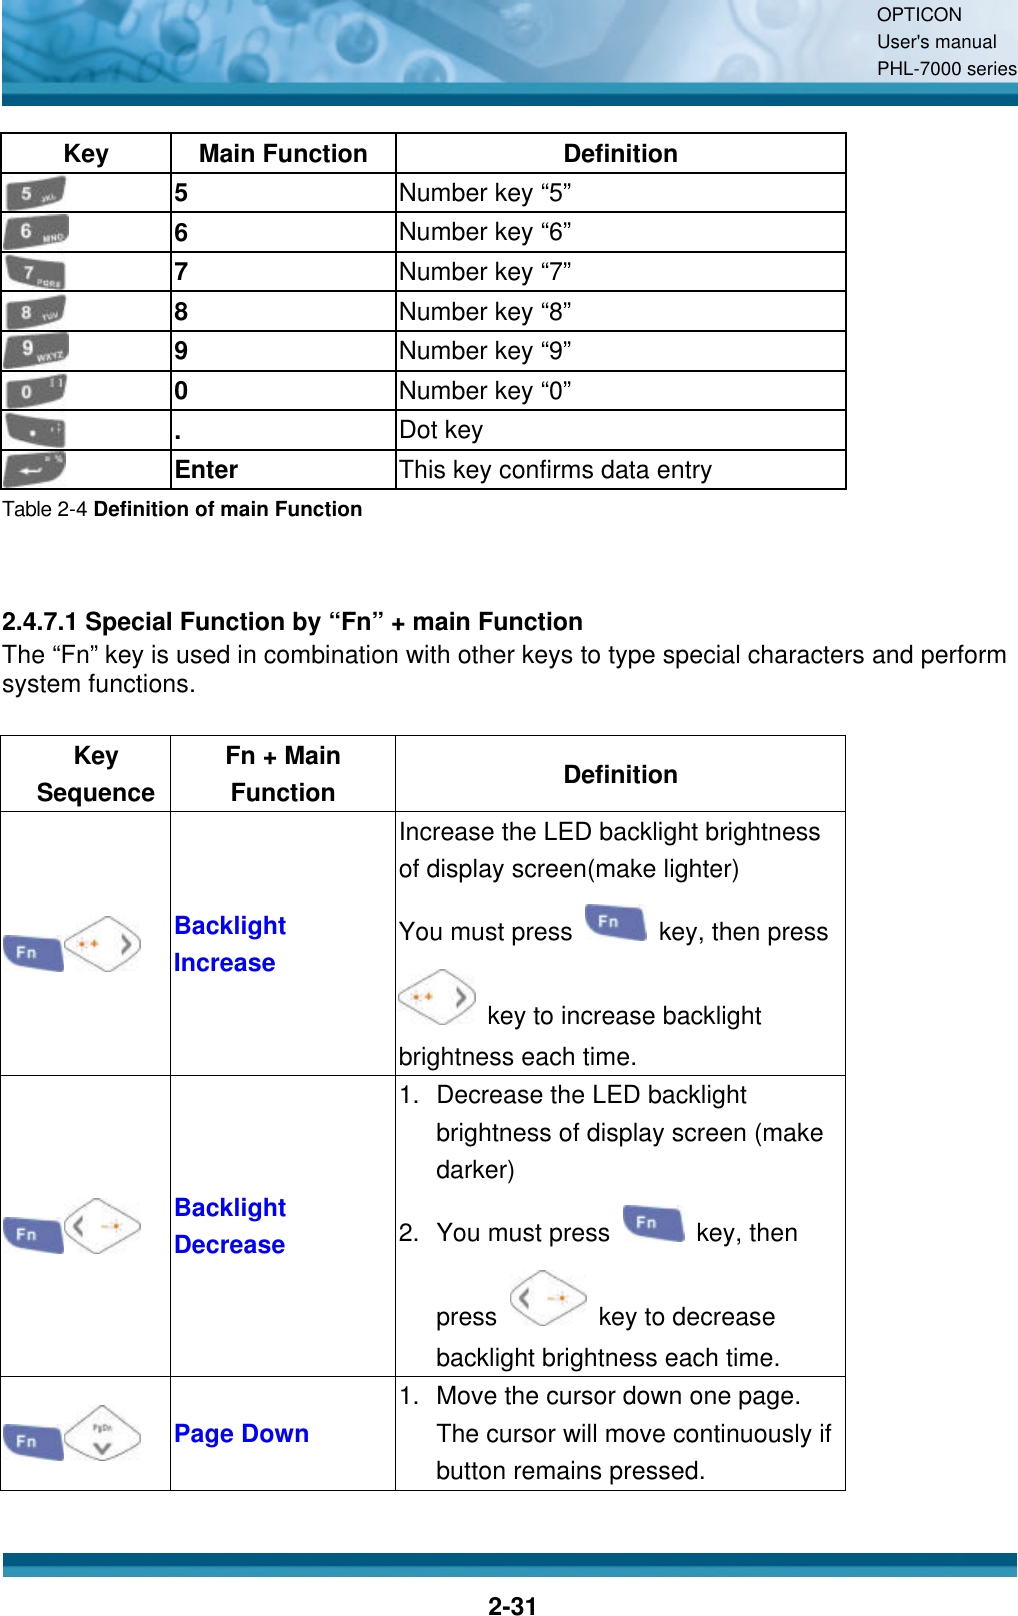
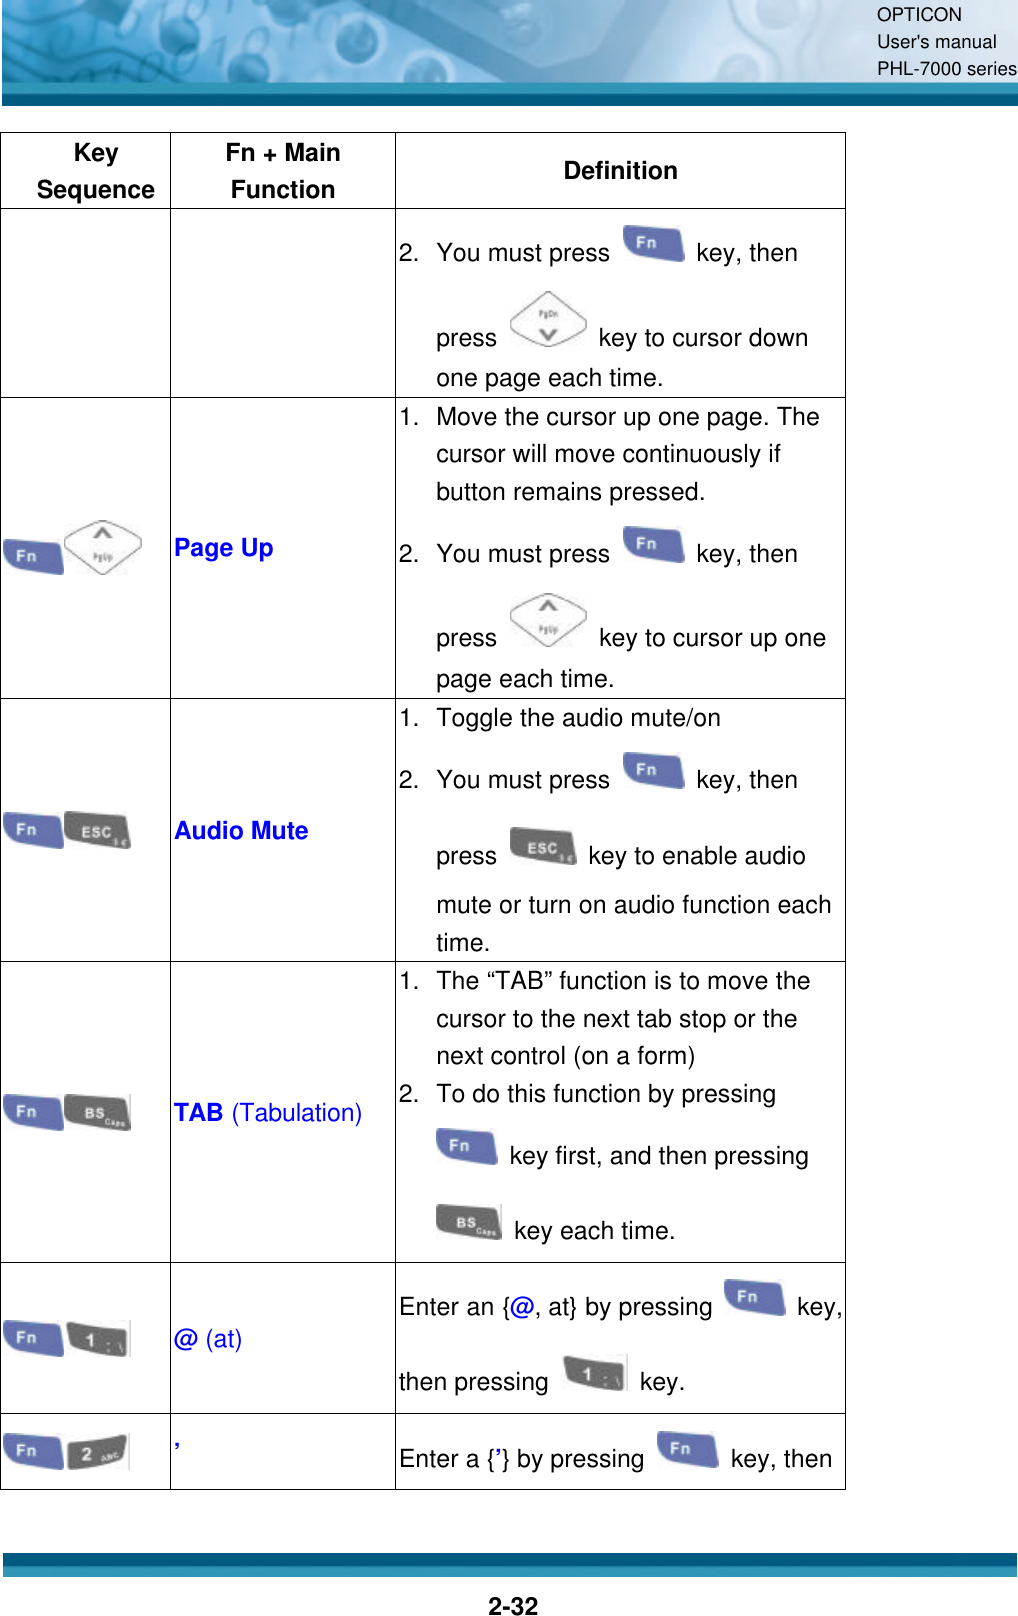
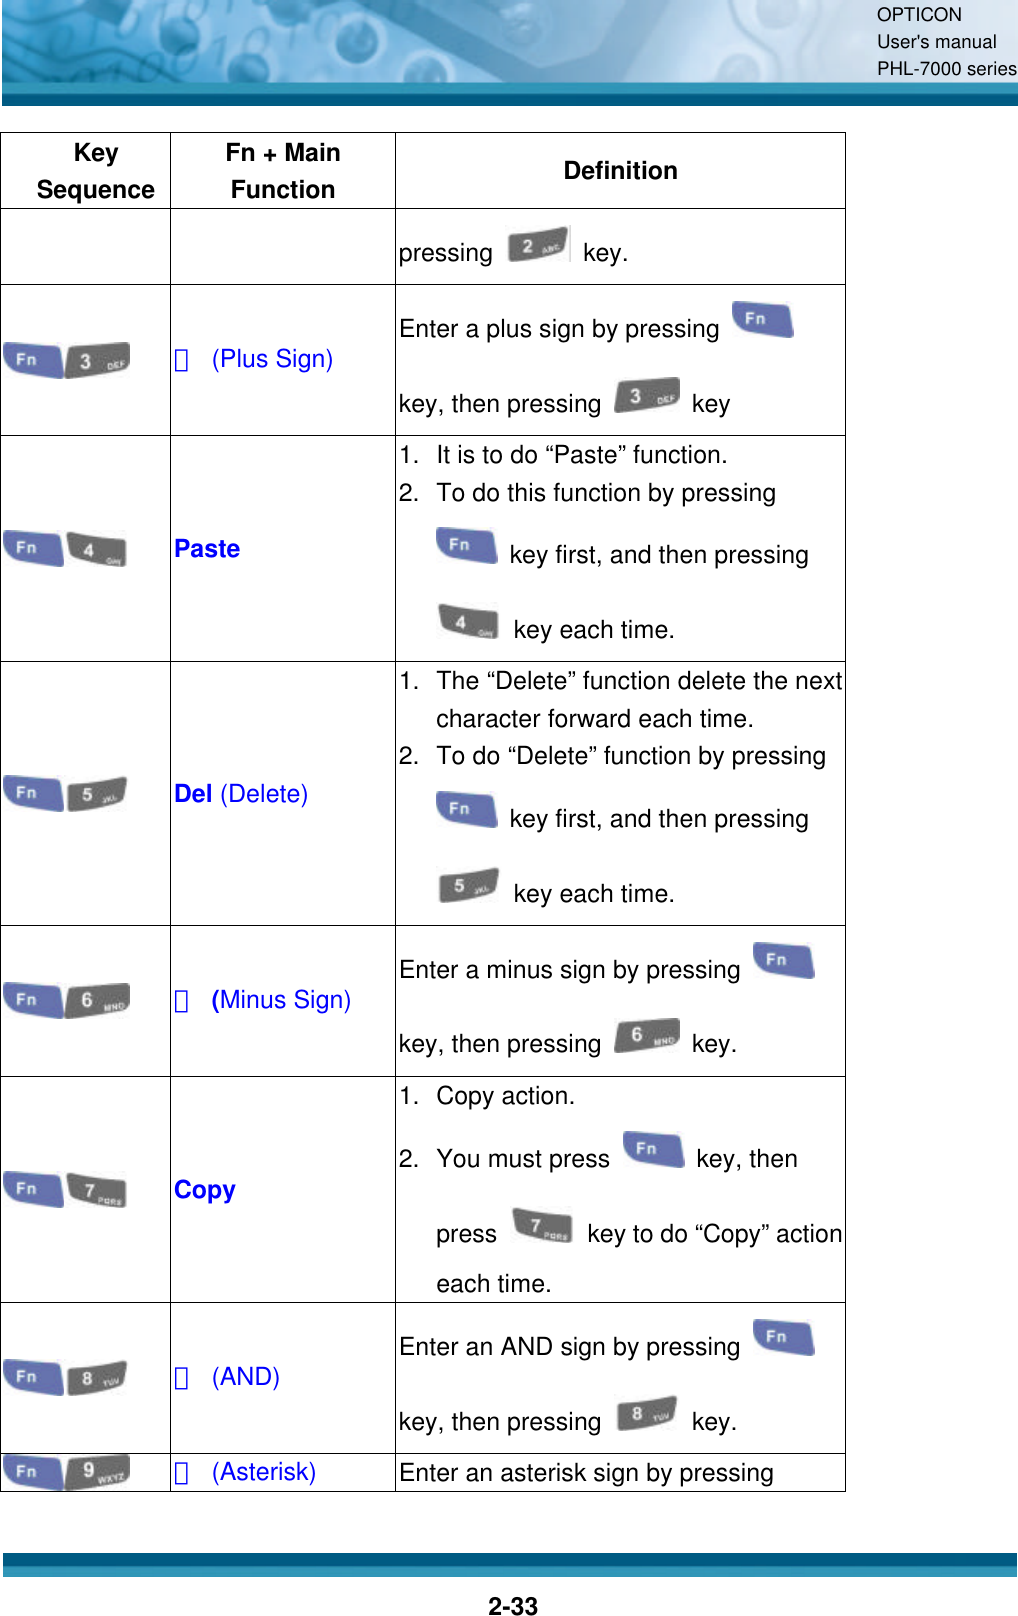

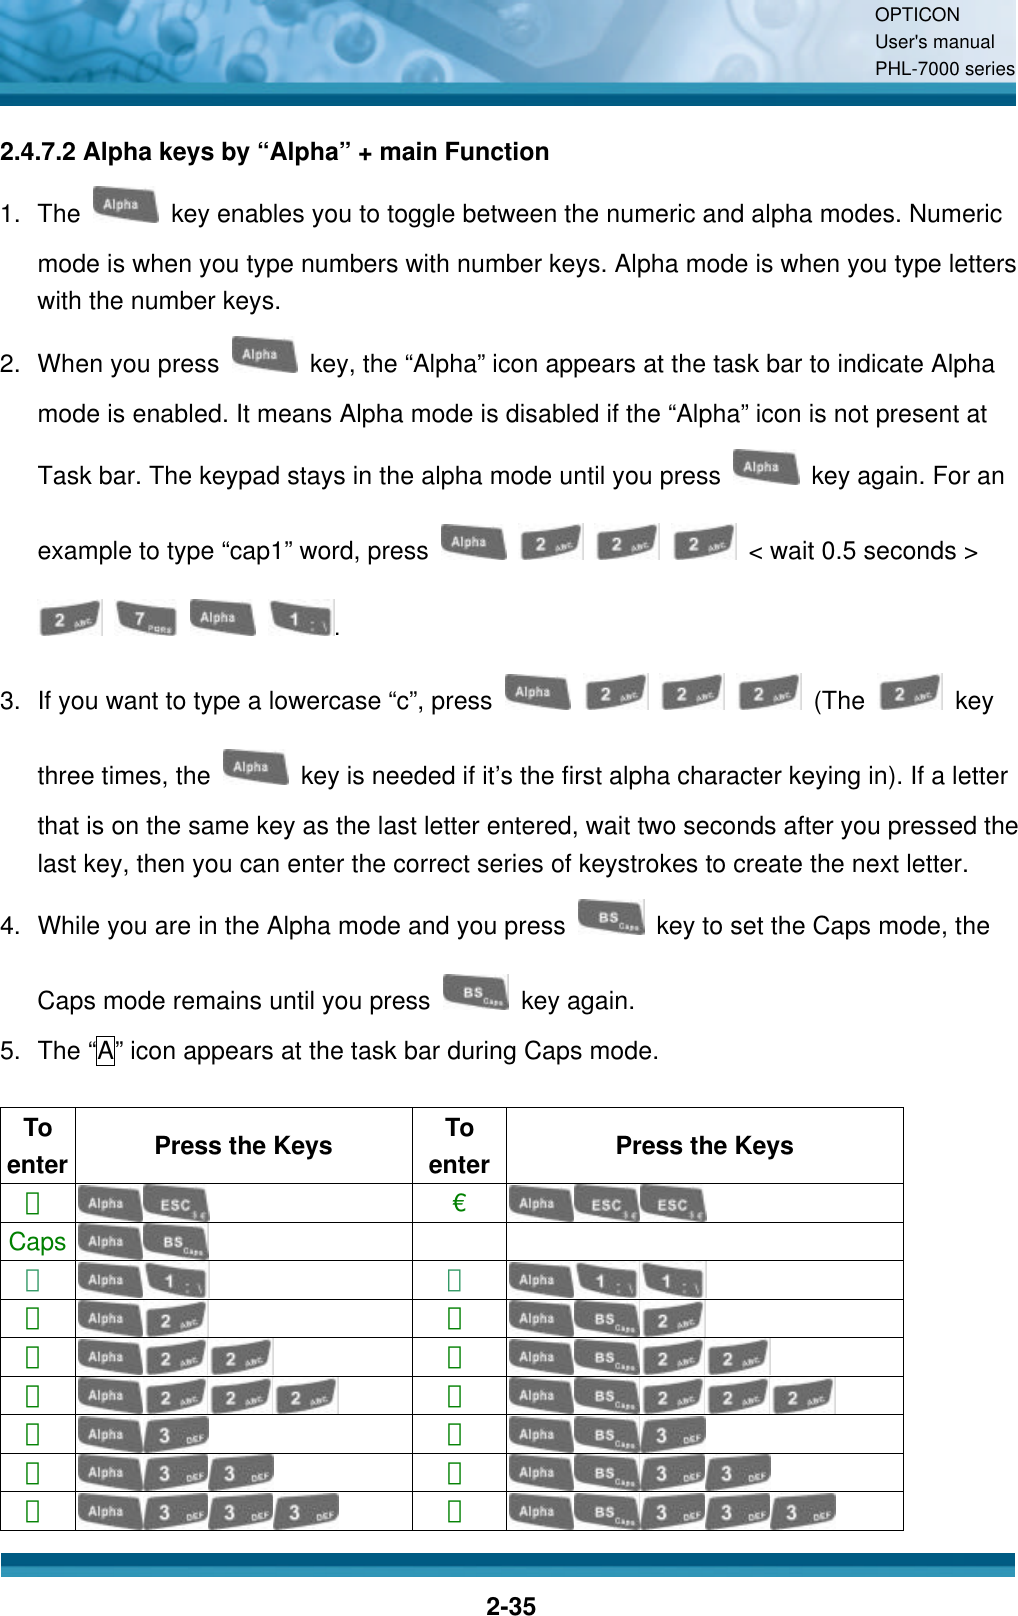
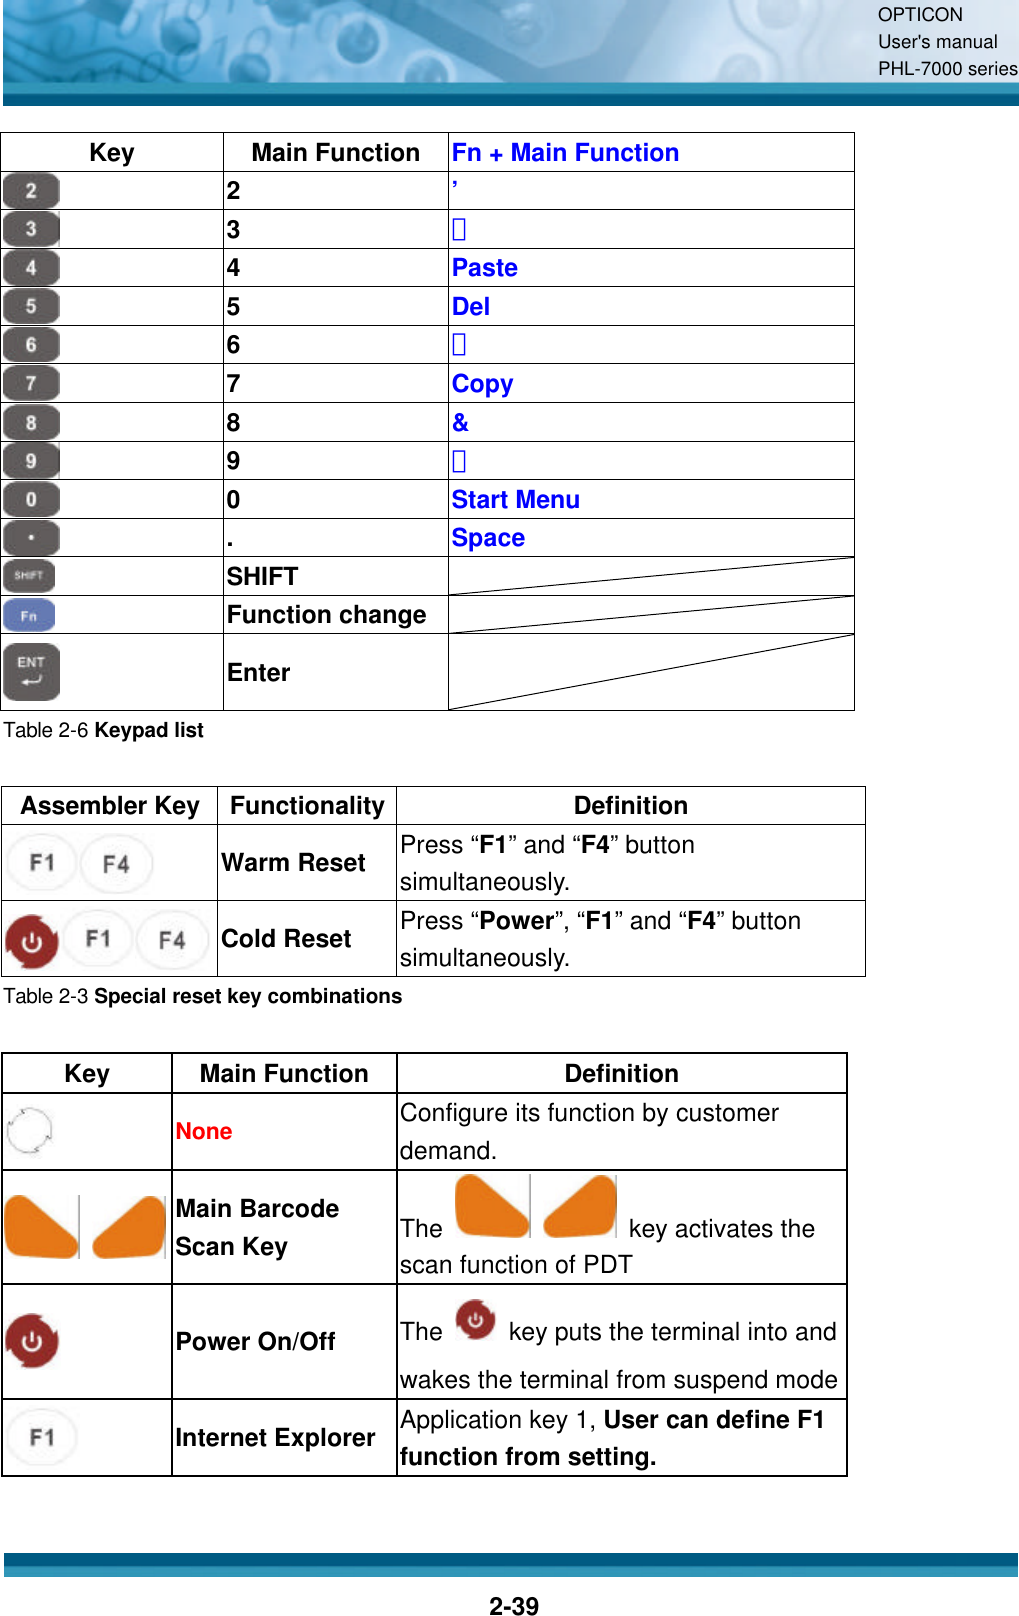
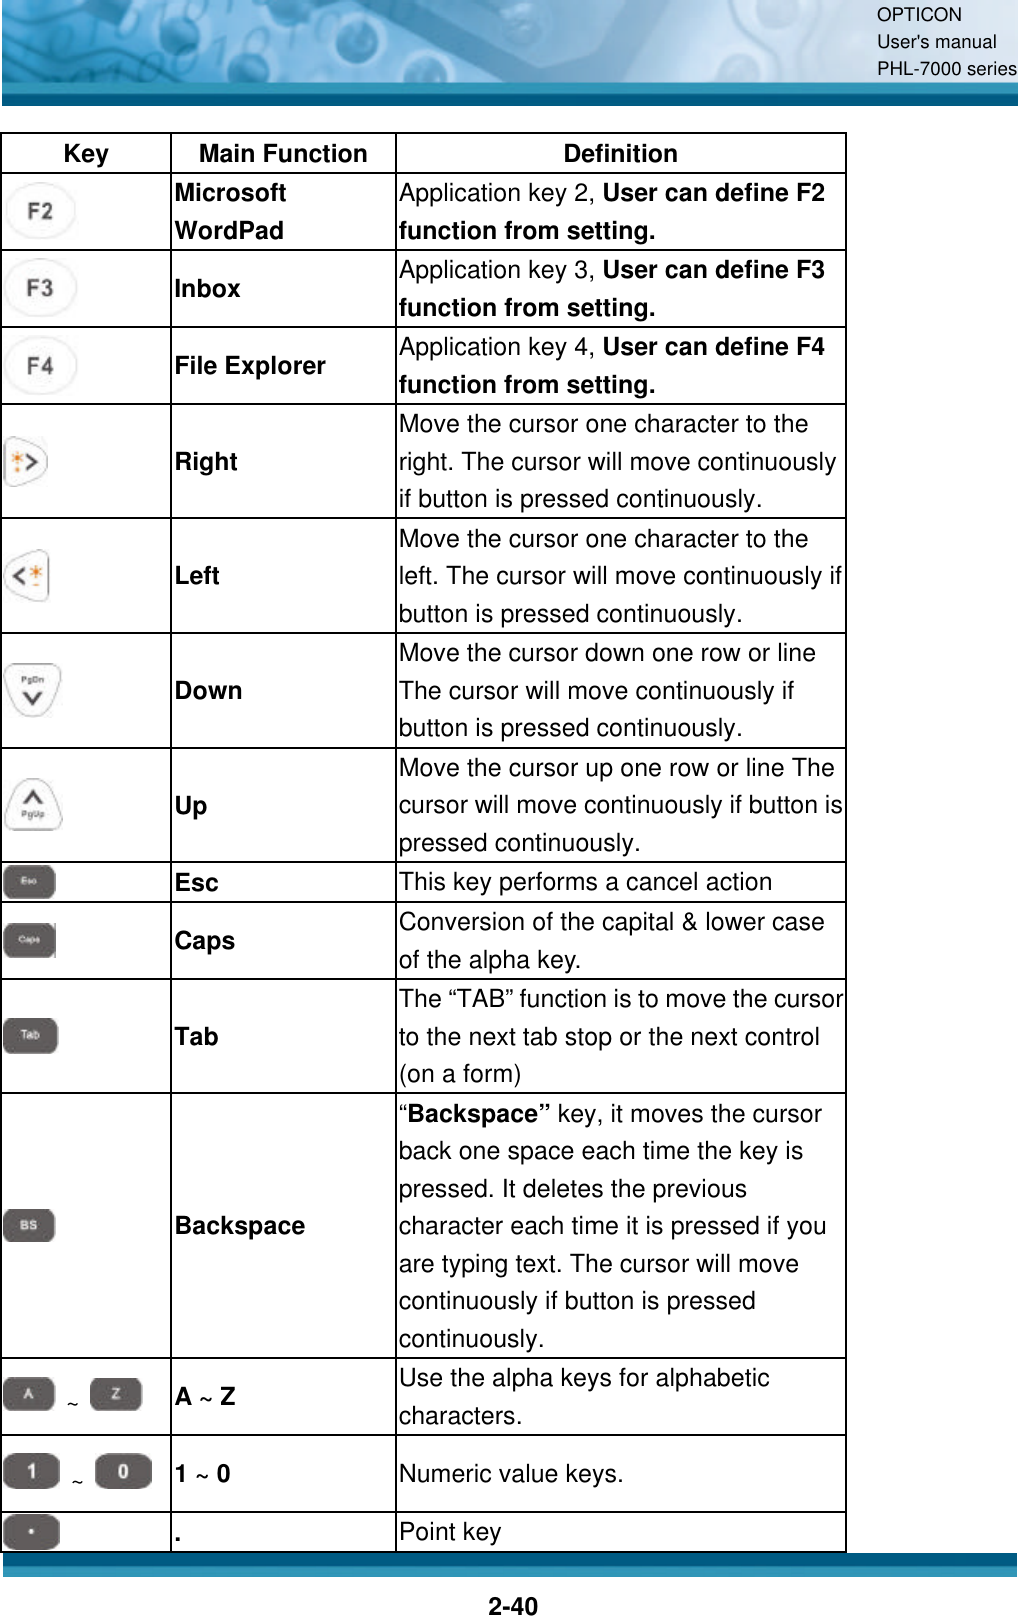
![OPTICON User's manual PHL-7000 series 2-38 Key Main Function Fn + Main Function Down Page Down Up Page Up Esc Caps Tab Backspace A F5 B F6 C F7 D F8 E ( F ) G [ H ] I { J } K € L $ M # N % O ^ P ~ Q , R 、 S ! T ? U \ V = W X Y ; Z / 1 @](https://usermanual.wiki/Opticon-Sensors-Europe/PHL7200-BW.User-manual-1-rev/User-Guide-734245-Page-43.png)