Option OGI0401 HSPA USB Stick User Manual Globetrotter module GTM378
Option NV HSPA USB Stick Globetrotter module GTM378
Option >
Contents
- 1. Leaflet
- 2. Quick Start Guide
Quick Start Guide

Option
Quick Start Guide GI0401
OPTION NV, Gaston Geenslaan 14, B-3001 Leuven
Tel +32 16 317 411 Fax +32 16 207 164 http://www.option.com
Option Confidential

GI0401 Quick Start Guide
Author: J. N
About this document
Overview and Purpose
This document describes how to use the hardware, software and gives some installation
instructions.
Confidentiality
All data and information contained or disclosed by this document is confidential and proprietary
of Option NV, and all rights therein are expressly reserved. By accepting this document, the
recipient agrees that this information is held in confidence and in trust and will not be used,
copied, reproduced in whole or in part, nor its contents revealed in any manner to others without
prior and written permission of Option NV.
Version History
Date Version Author(s) Revision(s) Remarks
May 13, 2008 V01 J. Nys Initial version
Table of contents
1 Driver installation ................................................................................................................................. 2
2 Communicating with the GI0401.......................................................................................................... 4
3 Led functionality................................................................................................................................... 6
y
s Version: V01
–
D1
Creation Date: May 13, 2008 Page: 1 of 6
Option Confidential: This document is Option Confidential - it may not be duplicated, neither distributed externally without prior and written permission of
Option NV.

GI0401 Quick Start Guide
Author: J. N
1 DRIVER INSTALLATION
Following drivers are available for WinXP, Win2K and Win XP x64 edition:
Multifunction Adapter : Globetrotter GI40X
Network : Globetrotter Network Card
Ports : Globetrotter Application Port
Ports : Globetrotter Diagnostics Port
Multi function adaptors : Globetrotter GI40X - Mass storage
Installation procedure:
1. If you have not already done so, install and connect the cradle. The unit shall be connected
correctly only if the "Welcome to the Found New Hardware Wizard" appears.
2. By connecting the unit to the PC, Windows will detect new hardware and will ask to install the
drivers. Insert the CD and install the drivers following the windows driver installation wizard. As
there are multiple drivers the "Found new hardware" wizards needs to run multiple times. Further
installation instructions will be given for Windows XP.
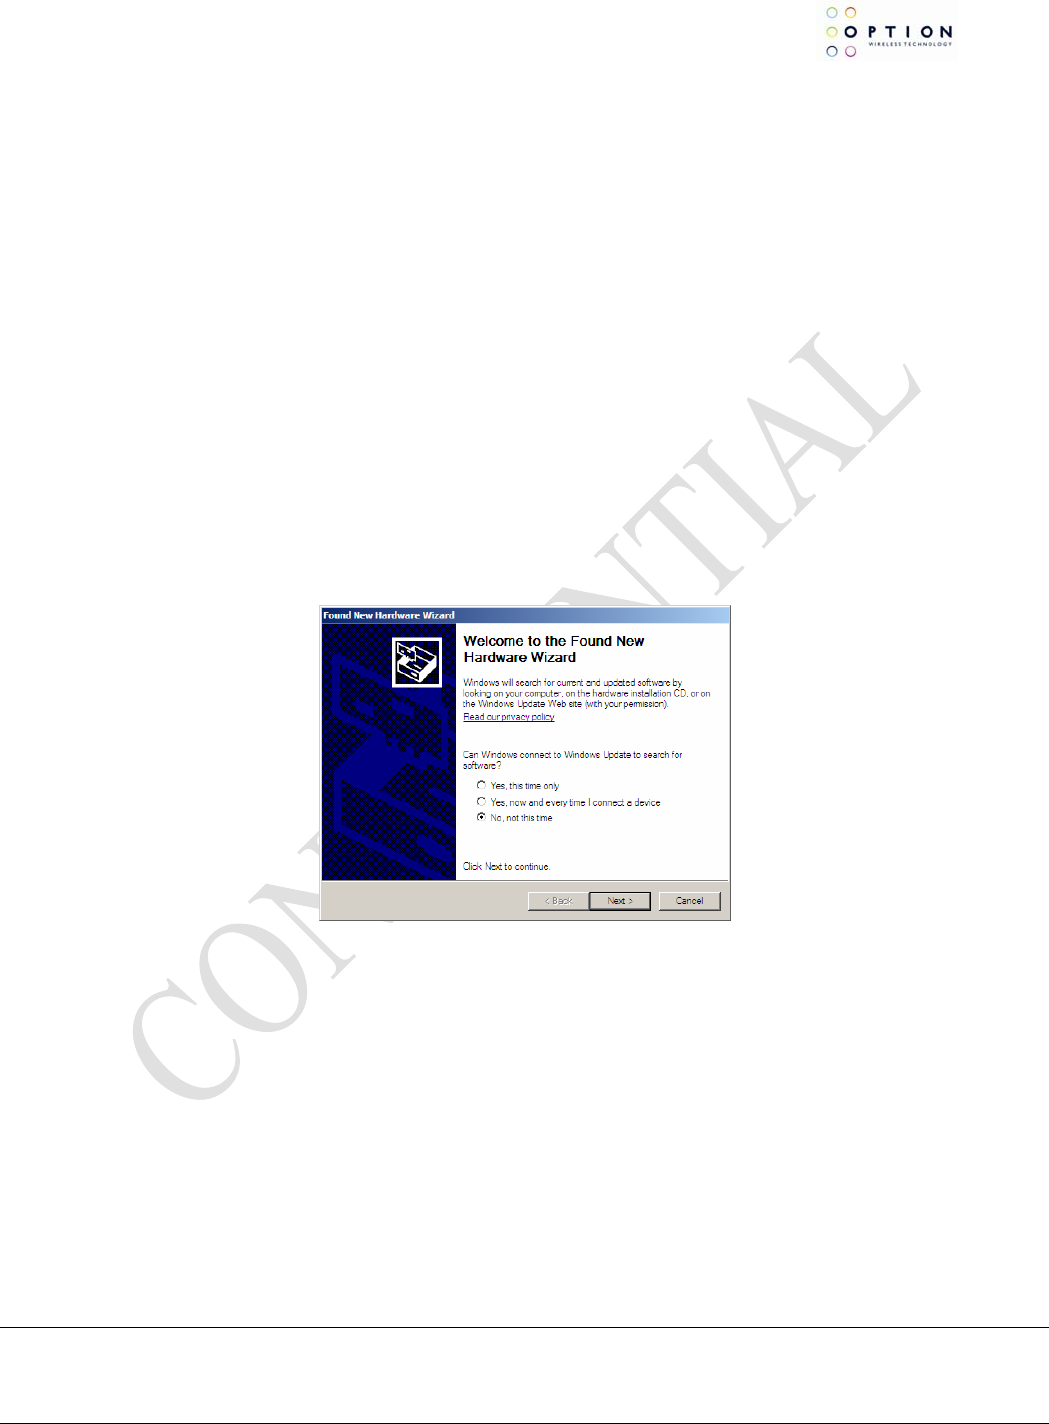
3. For Windows XP: on the first dialog ("connect to Windows Update ?") select No, not this time:
Figure 1: Hardware wizard
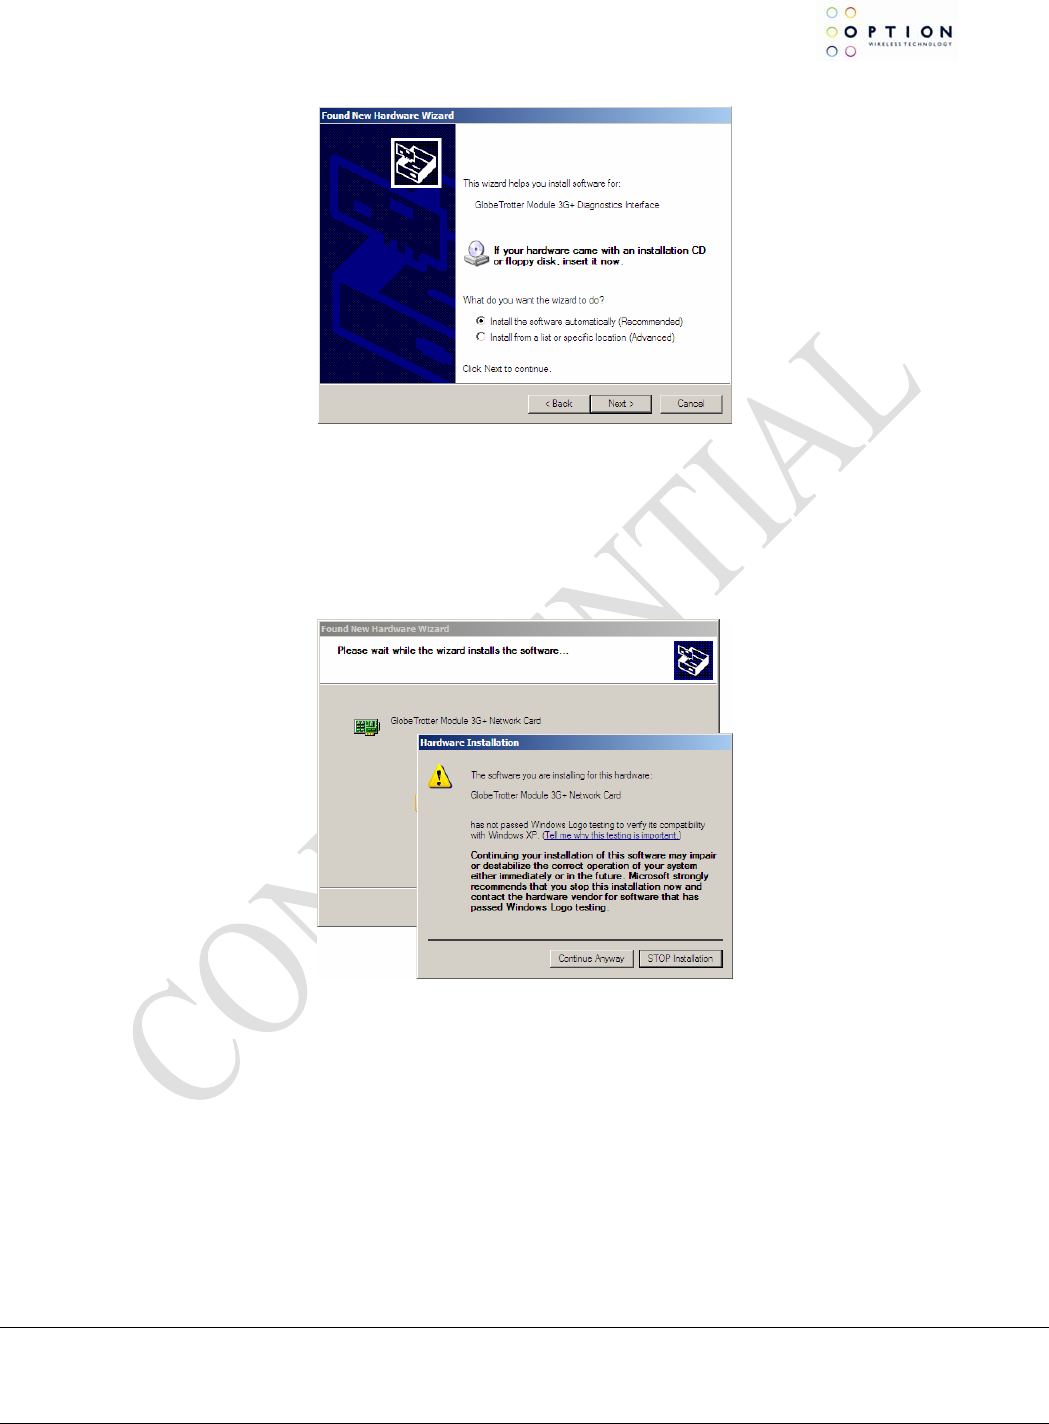
4. On the next dialog, select "Install software automatically":
y
s Version: V01
–
D1
Creation Date: May 13, 2008 Page: 2 of 6
Option Confidential: This document is Option Confidential - it may not be duplicated, neither distributed externally without prior and written permission of
Option NV.

GI0401 Quick Start Guide
Author: J. N
Figure 2: automatic search for driver
If Windows does not automatically find the correct driver, you should select Install from a list or
specific location and browse to the folder "DriverXP_2000" on the CD
5. For the driver signing warning, click "Continue Anyway":
Figure 3: Not signed driver warning
6. In total, five or six devices will be detected:
• Globetrotter Bus
• Globetrotter Mass storage
• Globetrotter Network Card
• Globetrotter Application Interface
• Globetrotter Diagnostics Interface
Repeat steps 3 through 5 for the 3 remaining devices to complete the installation.
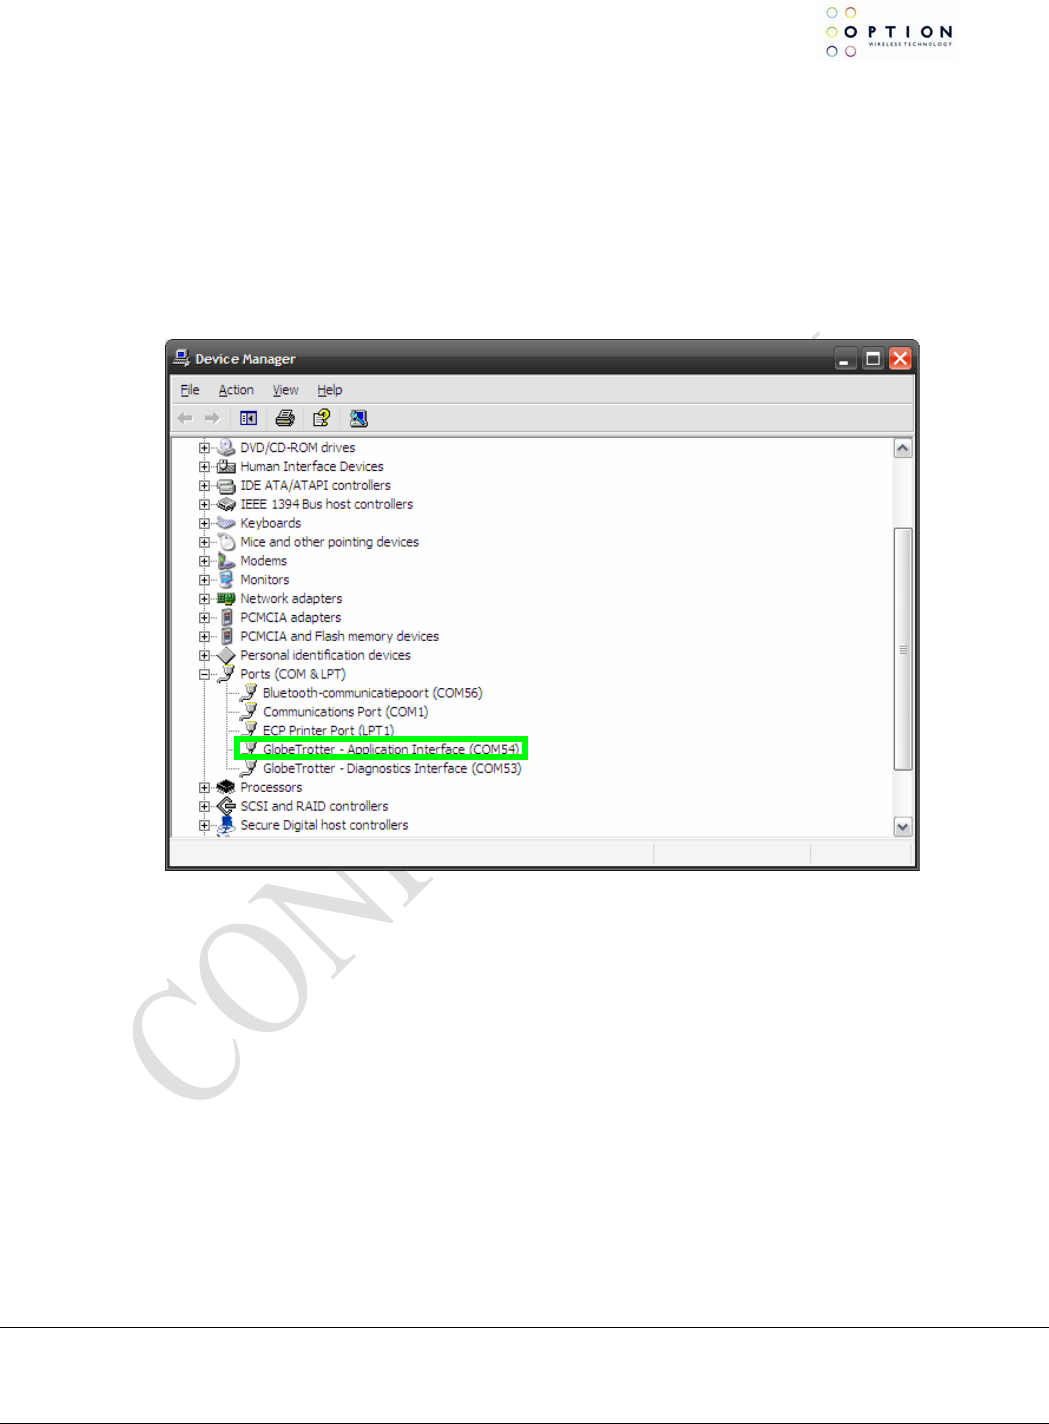
On successful installation of the drivers, all devices should show up in the device manager:
y
s Version: V01
–
D1
Creation Date: May 13, 2008 Page: 3 of 6
Option Confidential: This document is Option Confidential - it may not be duplicated, neither distributed externally without prior and written permission of
Option NV.

GI0401 Quick Start Guide
Author: J. N
2 COMMUNICATING WITH THE GI0401
This section describes briefly how to setup HyperTerminal to enter AT commands.
Note: A SIM card needs to be entered in the device to make a network connection.
1. Go to device manager, and check which port is the Application port.
y
s Version: V01
–
D1
Creation Date: May 13, 2008 Page: 4 of 6
Option Confidential: This document is Option Confidential - it may not be duplicated, neither distributed externally without prior and written permission of
Option NV.
Figure 4: Device manager
2. Open HyperTerminal
Therefore you can follow the following path:
Start → Programs → accessories → Communication → HyperTerminal
3. Enter a name for your HyperTerminal Connection and press OK.
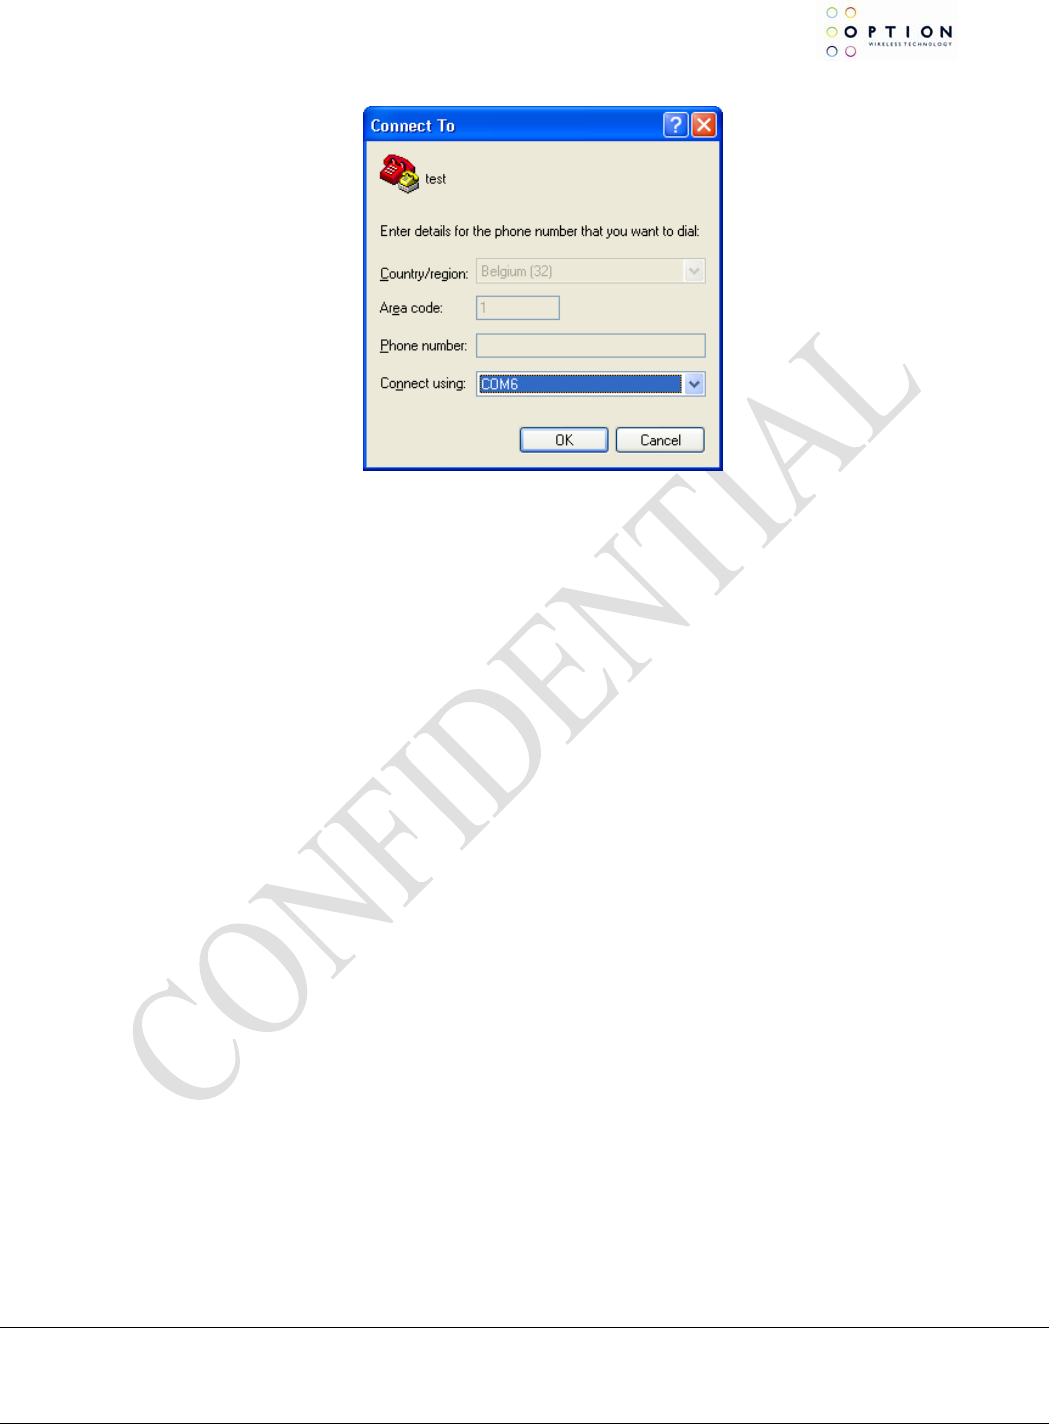
4. In the next window, change the connecting using field to the Application Port. Click on OK.

GI0401 Quick Start Guide
Author: J. N
Figure 5: Connection port
5. Now the next window will appear. Modify the Bit per second field to 115200 and Click the OK
button.
Now HyperTerminal is configured. You are now ready to communicate with the GI0401.
y
s Version: V01
–
D1
Creation Date: May 13, 2008 Page: 5 of 6
Option Confidential: This document is Option Confidential - it may not be duplicated, neither distributed externally without prior and written permission of
Option NV.

GI0401 Quick Start Guide
Author: J. N
3 LED FUNCTIONALITY
The LEDs on the GI0401 provide information on the connection status of the device.
y
s Version: V01
–
D1
Creation Date: May 13, 2008 Page: 6 of 6
Option Confidential: This document is Option Confidential - it may not be duplicated, neither distributed externally without prior and written permission of
Option NV.