Otto Bock HealthCare MUG608AETT406 Serial Cable Replacement User Manual 647G192 KEIB 10 04 indd
Otto Bock Healthcare Products GmbH Serial Cable Replacement 647G192 KEIB 10 04 indd
UserMan
Otto Bock Healthcare Products GmbH ·
647G192
– Version 1.0 – 06.04
Version 1.0
60X3
BionicLink
60X3
BionicLink
60X3
BionicLink
GB
GB
D
0681
0681
0681
I

2
1
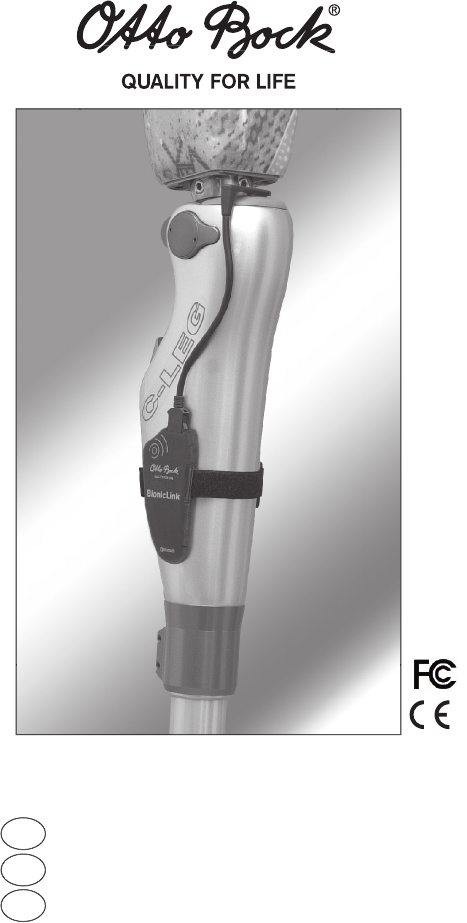
Bildbotschaft:
Den BionicLink am
C-Leg® - Kniegelenk
einrasten
2
3
4
Deutsch
Bitte lesen Sie diese Bedienungsanleitung aufmerksam durch. Beachten
Sie besonders die aufgeführten Sicherheitshinweise!
1 Verwendungszweck
Der 60X3 BionicLink ist
ausschließlich
zur Datenkommunikation für die Einstellung des
C-Leg®-Kniegelenks zu verwenden.
2 Sicherheitshinweise
•
Der BionicLink darf nur vom geschulten Orthopädie-Techniker verwendet werden.
•
Achten Sie darauf, dass weder feste Teilchen noch Flüssigkeit in das Gerät eindringen
können. Das Gerät sollte keinem intensiven Rauch oder Staub und keinen mechani-
schen Vibrationen oder Stößen ausgesetzt werden. Aufenthalte in der Nähe großer
3
magnetischer oder elektrischer Störquellen (z.B. Trafostationen oder Sender) sollten
vermieden werden.
•
Der BionicLink darf nur im orthopädischen Werkstättenbereich oder beim stationären
Aufenthalt in einem Rehabilitationszentrum eingesetzt werden.
•
Nach den Einstellarbeiten muss der BionicLink von der Prothese des Patienten entfernt
werden.
•
Da der BionicLink keine Mängel an Prothesen und Prothesenkomponenten selbständig
erkennen kann, ist eine aufmerksame Beobachtung durch den Orthopädie-Techniker
und das Wissen über die Funktion der Prothesenkomponenten eine notwendige Voraus-
setzung.
•
Der BionicLink bezieht seine Energie aus dem Akkumulator des C-Legs®. Es wird daher
empfohlen, die Einstellarbeiten nur mit voll aufgeladenem C-Leg® Akkumulator durchzu-
führen.
•
Nehmen Sie den BionicLink nicht in Betrieb, wenn das C-Leg® Funkadapter Kabel
oder das Gehäuse sichtbar beschädigt ist. Falls Sie eine Beschädigung entdecken,
schicken Sie das Gerät bitte an eine Otto Bock Servicestelle.
•
Betriebstemperaturen unter 0° C und über 60° C sind zu vermeiden.
•
Das C-Leg® Funkadapter Kabel des BionicLink darf nicht geknickt oder gequetscht
werden.
3 Lieferumfang und Zubehör
3.1 Lieferumfang
1 Stk.
60X3 BionicLink
1 Stk.
C-Leg® Funkadapter-Kabel
1 Stk.
Klettband
1 Stk.
Bedienungsanleitung
3.2 Zubehör
Zum Betrieb des 60X3
BionicLink
wird ein PC mit Bluetooth® Technologie benötigt. Sollte
der PC über keine eingebaute Bluetooth® Funktionalität verfügen, wird der 60X4 BionicLink
PC von Otto Bock empfohlen.
Bei Verwendung von Bluetooth® Komponenten anderer Hersteller informieren Sie sich bitte
bei Ihrer Otto Bock Servicestelle.
4 Beschreibung
Der 60X3 BionicLink dient zur kabellosen Datenkommunikation mittels Bluetooth® Technolo-
gie zwischen dem C-Leg®-Kniegelenk und einem PC mit Bluetooth® Funktionalität.
Patientenspezifische Einstellungen sind somit ohne Kabelverbindung durchführbar und
ermöglichen dem Patienten während der Einstellarbeiten mehr Bewegungsfreiheit. Eine
Befestigung des
BionicLink
während der Einstellarbeiten unter der Schaumkosmetik ist
möglich und vorteilhaft, der Einfluss der Kosmetik auf den Bewegungsablauf kann somit
4
berücksichtigt werden. Nach den Einstellarbeiten muss der BionicLink von der Prothese
des Patienten entfernt werden.
Der BionicLink ist für eine rechts- und linksseitige Versorgung des Patienten geeignet.
Hinweis:
Der BionicLink benötigt keine Batterien, da die Energieversorgung durch den
Akkumulator des C-Leg®s erfolgt.
5 Anlegen des 60X3 BionicLink
(Abb. 1 bis Abb. 4)
1.
Den Stecker des
C-Leg® Funkadapter
Kabels in den BionicLink stecken (der Stecker
braucht nicht wieder entfernt zu werden).
2.
Das Klettband in die Schlitze, an der Rückseite des BionicLink, seitenrichtig einführen
(Abb.1)
3.
Den BionicLink am C-Leg®-Kniegelenk einrasten (Abb. 2)
Hinweis:
Bei einer linksseitigen Versorgung den BionicLink medial, bei einer rechtssei-
tigen Versorgung den BionicLink lateral am C-Leg®-Kniegelenk anlegen.
4.
Das Klettband mit dem freien Ende um das C-Leg®-Kniegelenk schlingen, durch den
Kunstoffring fädeln, straff ziehen und andrücken (Abb. 3).
5.
Den Stecker des
C-Leg® Funkadapter
Kabels in die Buchse des C-Leg®s einführen
(Abb. 4).
6.
Die leuchtende LED zeigt die Betriebsbereitschaft des BionicLink an.
6 Inbetriebnahme
1.
Verbindung zwischen dem BionicLink und dem PC aufbauen. Details über den Ver-
bindungsaufbau und über das Einrichten einer seriellen Kommunikation mit Bluetooth®
entnehmen Sie bitte der Dokumentation Ihrer PC Bluetooth® Hardware.
2.
PIN eingeben.
Die für den Verbindungsaufbau benötigte PIN Nummer lautet: 2534
3.
Starten Sie die C-Leg® Einstellsoftware am PC (Version mindestens C-Soft 1.0).
4.
Die Einstellungen können durchgeführt werden (Bitte beachten Sie, dass der Patient
während der Einstellarbeiten sicher und ruhig steht).
5.
Eine einwandfreie Datenübertragung zum BionicLink ist nur bei Sichtverbindung in
einem Umkreis von 10 Meter zum PC gewährleistet.
Während der Datenübertragung blinkt die Leuchtdiode.
6.
Nach den Einstellarbeiten BionicLink und C-Leg® Funkadapter Kabel entfernen.
Stecker schutzkappe am C-Leg® wieder aufstecken.
Achtung!
Befindet sich das C-Leg® außerhalb der Sendereichweite oder wird der Übertra-
gungspfad abgeschattet (z.B. durch Stahl oder Stahlbeton) kann die Verbindung
unterbrochen werden.
Dies wird durch die Meldung am PC „Verbindung unterbrochen“ angezeigt.
5
7 Technische Daten
Reichweite der Funkverbindung
ca. 10 Meter
Umgebungstemperatur
0 °C - 60 °C
Stromversorgung
durch C-Leg® Akku
Funkübertragung
Bluetooth® Klasse II
Empfohlene Einstellsoftware
ab C-Soft Version 1.0
8 Gewährleistung
Eine Gewährleistung kann nur übernommen werden, wenn der 60X3 BionicLink für das C-
Leg®-Kniegelenk unter den vorgegebenen Bedingungen und zu den vorgesehenen Zwecken
verwendet wird. Otto Bock übernimmt die Gewährleistung für das Produkt nur, wenn es in
von Otto Bock geprüften Bauteil-Kombinationen verwendet wird.
9 Konformitätserklärung
Die CE-Kennzeichnung wurde entsprechend der Richtlinie 93/42/EWG und 1999/5/EG
durchgeführt.
Bluetooth® ist ein eingetragenes Warenzeichen des jeweiligen Inhabers.
English
Please read this Manual carefully. Take special notice of the Safety Infor-
mation!
1 Application
The 60X3 BionicLink is intended
exclusively
for data communication when adjusting the
exclusively for data communication when adjusting the exclusively
C-Leg® Knee Joint.
2 Safety Information
•
The BionicLink may only be used by orthopaedic technicians and CPOs certified for
C-Leg® fittings.
•
Do not allow foreign particles or liquids to enter the device. Do not subject the device
to intensive smoke or dust nor to mechanical vibrations or shocks. Avoid staying near
sources of high magnetic or electric interference (e.g. transmitters, transformers).
•
The BionicLink may only be used within the confines of an orthopaedic workshop or
during a stay in a rehabilitation clinic.
•
After making the adjustments with the BT BionicLink disconnect it from the prosthesis
of the patient.
•
The BionicLink cannot automatically identify defects of prostheses or prosthetic com-
ponents. Therefore it is necessary that the CPO possesses a solid knowledge of its
functions and carefully monitors the prosthesis (components).
•
The BionicLink is powered by the C-Leg® battery. We therefore recommend to make
6
adjustments only with a fully charged C-Leg® battery.
•
Do not take the BionicLink into operation if there is visible damage to the
C-Leg® Radio
Adapter Cable
or to the housing. If you see any damage, please return the device to an
Otto Bock Service Facility.
•
Avoid working temperatures under 0°C and over 60°C.
•
Do not bend or crush the BionicLink cable.
3 Scope of Delivery and Accessories
3.1 Scope of Delivery
1 pce.
60X3 BionicLink
1 pce.
C-Leg® Radio Adapter Cable
1 pce.
Velcro® strap
1 pce.
Operating Manual
3.2 Accessories
To operate the 60X3
BionicLink
you need a PC with Bluetooth® technology. If your PC does
not have a built-in Bluetooth® function then we recommend the 60X4 BionicLink PC from
Otto Bock.
Should you experience problems when using Bluetooth® components from other manufac-
turers, please contact your Otto Bock Service Facility.
4 Description
The 60X3 BionicLink is for the wireless communication between the C-Leg® Knee Joint and
a PC with Bluetooth® functionality.
Patient specific adjustments can be carried out without a cable, thus allowing the patient
more room to move while making adjustments. Fixation of the BionicLink under the foam
cover while making adjustments is possible and recommended since this offers the pos-
sibility to take the influence of the foam cover on the movement cycle into consideration.
After making the adjustments with the BT BionicLink disconnect it from the prosthesis of
the patient.
The BionicLink is suitable for fitting on either the right or left side.
Attention
: The BionicLink does not need batteries since power is supplied by the C-Leg®
battery.
5 Applying the 60X3 BionicLink
(Fig. 1 to Fig. 4)
1.
Plug
C-Leg® Radio Adapter Cable
into BionicLink (you do not have to remove the plug
anymore).
2.
Place Velcro® into slit on backside of BionicLink (velcro facing outwards) (Fig.1)
3.
Snap BionicLink onto C-Leg® Knee Joint (Fig. 2)
Attention
: Positon BionicLink in a left sided fitting medially, in a right sided fitting la-
terally on the C-Leg® Knee Joint.
4.
Loop free end of Velcro® around the C-Leg® Knee Joint, pull it through the plastic ring,
7
pull tight and fasten shut (Fig. 3).
5.
Plug
C-Leg® Radio Adapter Cable
into C-Leg® jack (Fig. 4).
6.
The lit up LED signalizes that the BionicLink is ready for operation.
6 Start-up
1.
Set-up connection between BionicLink and PC. For details regarding set-up of commu-
nication and of a serial communication with Bluetooth®, please refer to your Bluetooth®
documentation.
2.
Enter PIN.
PIN code needed for communication set-up: 2534
3.
Start C-Leg® adjustment software on PC (Version from C-Soft 1.0 upwards).
4.
Make the necessary adjustments (Remind the amputee to stand safe and still during the
adjustments).
5.
Data transmission to BionicLink will function properly with visual contact within a 10
meter perimeter of the PC.
During data transfer the LED will blink.
6.
After making adjustments remove BionicLink and C-Leg® Radio Adapter Cable and
replace the protective plug on the C-Leg®.
Attention!
If the C-Leg® is out of range or if the transmission path is shaded (e.g. by steel or
reinforced concrete) then the connection can be interrupted.
The message “Transmission interrupted” will appear on your screen.
7 Technical Data
Radio Link Range
approx. 10 meter
Ambient Temperature
0 °C - 60 °C
Power Supply
by C-Leg® battery
Radio Transmission
Bluetooth® Class II
Recommended Adjustment Software
from C-Soft Version 1.0 upwards
8 Warranty
Warranty only applies if the 60X3 BionicLink for C-Leg® Knee Joint is used according to the
specified conditions and for the intended purposes.
Otto Bock warranty applies only to tested component combinations.
9 Declaration of Conformity
The CE-marking has been carried out in accordance with the requirements of the 93/42/
EEC and 1999/5/EG guidelines.
Bluetooth® is a registered trademark.

8
I
taliano
Leggere le seguenti istruzioni d‘uso. Prestare particolare attenzione alle
norme di sicurezza!
1 Campo d‘impiego
Il BionicLink 60X3 è indicato
esclusivamente
per la comunicazione di dati per la regist-
razione del ginocchio C-Leg®.
2 Norme per la sicurezza
•
Il BionicLink deve essere impiegato esclusivamente da tecnici ortopedici specializzati.
•
Verificare che non penetrino nell‘apparecchio corpi solidi nè liquidi. Non sottoporre
l‘apparecchio a fumo intenso, polvere vibrazioni meccaniche nè urti. Evitare la vicinanza
a forti campi elettromagnetici (per es. trasmettitori, trasformatori)
•
Utilizzare il BionicLink solo in ambito ortopedico o in caso di soggiorno temporaneo
presso un centro di riabilitazione.
•
Dopo aver effettutato le registrazioni rimuovere il BionicLink dalla protesi del paziente.
•
Poichè il BionicLink non è in grado di individuare malfunzionamenti nella protesi e nei
componenti protesici automaticamente, è necessaria un‘attenta verifica da parte del
tecnico ortopedico insieme ad una perfetta conoscenza della funzione dei componenti
protesici.
•
Il BionicLink è alimentato dalla batteria del C-Leg®. Si consiglia pertanto di effettuare le
regolazioni solo con batteria del C-Leg® completamente carica.
•
Non azionare il BionicLink se sono presenti danneggiamenti nel cavo di collegamento
Bluetooth del C-Leg® oppure nell‘alloggiamento. Se si rilevano danneggiamenti, si pre-
ga di rispedire l‘apparecchio alla Otto Bock.
•
Evitare temperature di regime inferiori a 0° C e al di sopra di 60° C.
•
Non piegare nè deformare il cavo del BionicLink.
3 Contenuto della spedizione e accessori
3.1 Contenuto della spedizione
1 pz.
60X3 BionicLink
1 pz.
cavo di connessione Bluetooth C-Leg®
1 pz.
fascia in velcro
1 pz.
istruzioni d‘uso
3.2 Accessori
Per il funzionamento del 60X3
BionicLink
è necessario un PC con la tecnologia Bluetooth®.
Se il Vostro PC non ha a disposizione la funzionalità Bluetooth®, si consiglia il 60X4 Bionic-
Link PC della Otto Bock.

9
Se si utilizzano componenti Bluetooth® di un altro produttore si prega di informare la Otto
Bock.
4 Descrizione
Il 60X3 BionicLink consente una comunicazione di dati senza fili tramite la tecnologia Blue-
tooth® tra il C-Leg® ed un PC con funzionalità Bluetooth®.
Si possono quindi effettuare registrazioni specifiche su pazienti senza fili consentendo ai
pazienti una maggiore libertà di movimento durante le regolazioni. E‘ possibile fissare il
BionicLink
sotto il cosmetico durante le registrazioni ed è anche consigliabile poichè offre
la possibilità di prendere in considerazione l‘influenza del rivestimento cosmetico sul ciclo
del movimento. Dopo aver effettuato le registrazioni rimuovere il BionicLink dalla protesi del
paziente.
Il BionicLink è indicato per una protesizzazione destra o sinistra.
Attenzione:
il BionicLink non necessita di batterie, poichè viene alimentato
dall‘accumulatore del C-Leg®.
5 Montaggio del 60X3 BionicLink
(fig. 1 fino fig. 4)
1.
Inserire il cavo di connessione Bluetooth
C-Leg® nel
BionicLink (non è più necessario
rimuovere il cavo).
2.
Inserire la fascia in velcro nella fessura sulla parte posteriore del BionicLink, con la
parte in velcro rivolta verso l‘esterno (fig.1)
3.
Fissare il BionicLink al C-Leg® (fig. 2)
Attenzione:
In caso di protesizzazione della gamba sinistra collocare il BionicLink
medialmente, in caso di protesizzazione della gamba destra posizionare il
BionicLink lateralmente sul C-Leg®.
4.
Stringere la fascia in velcro lasciando l‘estremità libera intorno al C-Leg®, infilarla
nell‘anello in plastica, tirarla e allacciarla in modo ben saldo (fig. 3).
5.
Inserire il cavo di connessione Bluetooth
C-Leg® nel jack
del C-Leg® (fig. 4).
6.
Il LED lampeggiante indica che il BionicLink è pronto per l‘uso.
6 Messa in funzione
1. Stabilire il collegamento tra il BionicLink ed il PC. Per maggiori dettagli per stabilire la
connessione e riguardo la comunicazione seriale con il Bluetooth®, fare riferimento alla
documentazione dell‘Hardware del Vostro PC Bluetooth®.
2.
Immettere il PIN.
Per il set-up della comunicazione il codice PIN necessario è il seguente: 2534
3.
Iniziare ad effettuare le regolazioni col software del C-Leg® al PC (versione consigliata dalla C-
Soft 1.0 e maggiori).
4.
Si possono eseguire le registrazioni (si prega di verificare che il paziente durante le

10
registrazioni stia fermo in posizione sicura).
5.
La trasmissione dei dati al BionicLink funziona correttamente con un contatto visuale in
un perimetro di 10 metri dal PC.
Durante il trasferimento dei dati il LED lampeggia.
6. Al termine delle registrazioni rimuovere il BionicLink ed il cavo di connessione Bluetooth
C-Leg®. Rimontare il cavo di protezione sul C-Leg®.
Attenzione!
Se il C-Leg® si trova al di fuori del range di trasmissione oppure se il percorso di
trasmissione è oscurato (per es. da acciaio o cemento armato) la connessione
può essere interrotta.
Sul Vostro schermo del PC comparirà il messaggio „Trasmissione interrotta“.
7 Dati tecnici
Range di trasmissione
ca. 10 metri
Temperatura ambiente
0 °C - 60 °C
Alimentazione energia
con accumulatore C-Leg®
Trasmissione
Bluetooth® classe II
Software consigliato per le registrazioni dalla versione C-Soft 1.0 e maggiori.
8 Garanzia
La garanzia è da considerarsi valida solo qualora il BionicLink 60X3 per il ginocchio
C-Leg® venga utilizzato agli scopi preposti ed alle condizioni indicate. La garanzia viene
concessa solo in presenza di combinazioni di componenti testate dalla Otto Bock.
9 Dichiarazione di conformità
Il marchio CE è stato apposto conformemente agli obblighi della direttiva CEE 93/42 e CE
1999/5.
Bluetooth® è un marchio registrato.
11

Otto Bock Healthcare Products GmbH
Kaiserstraße 39 · 1070 Wien · Austria
Tel. (+43-1) 526 95 48 · Telefax (+43-1) 526 79 85
vertrieb.austria@ottobock.com · www.ottobock.at
Otto Bock ist ein von der DQS zertifiziertes
Unternehmen nach DIN EN ISO 9001,
Reg. Nr. 779 (Managementsystem)
This device complies with part 15 of the FCC Rules. Operation is subject to the following two conditions:
(1) This device may not cause harmful interference, and
(2) this device must accept any interference received, including interference that may cause undesired
operation.
This device and its antenna must not be co-located or operating in conjunction with any other antenna or
transmitter.
Modi cations not expressly approved by Otto Bock could void the user’s authority to operate the equipment.
NOTE: This equipment has been tested and found to comply with the limits for a Class A digital device,
pursuant to part 15 of the FCC Rules. These limits are designed to provide reasonable protection against
harmful interference when the equipment is operated in a commercial environment.
This equipment generates, uses, and can radiate radio frequency energy and, if not installed and used in
accordance with the instruction manual, may cause harmful interference to radio communications.
Operation of this equipment in a residential area is likely to cause harmful interference in which case the user
will be required to correct the interference at his own expense.