user manual
User Manual
Retail Tablet


Thank you for purchasing an i DISPLAY product. We recommend reading this
user guide carefully in order to achieve optimal pleasure and performance and to
maximize the service life of this product.
This guide describes how to setup the Retail Tablet. This guide is intended for retail
personnel, sales people and anyone who wants to set up the Retail Tablet in a
retail environment.
Introducing the Retail Tablet S, page 6, introduces the Retail Tablet its and
components
Getting Started, page 9, describes how to set up and start the Retail Tablet.
Playing Content, page 15, describes the various options for displaying videos,
pictures and applications on the Retail Tablet.
Main Android OS screen (Home screen), page 19, describes the Retail Tablet
Home screen and Application Drawer, which provides access to tablet settings and
other standard Android tools.
Retail Tablet Accessories, page 20, describes the mounting attachments and other
accessories that can be connected to the Retail Tablet.
You may also refer to
http://www.i-display.com/products/retail-tablet-s-technical-specication
to download the latest Retail Tablet specication sheet to download the latest
version of this user guide. For support contact: support@i-display.com.
Important Notice
Copyright © 2012 Outform Ltd. All rights reserved.
All intellectual property rights in this publication are owned by Outform and
protected by applicable copyright laws and international treaty provisions.
Outform retains all rights not expressly granted. No part of this publication may be
reproduced in any form whatsoever or used to make any derivative work without
prior written approval by Outform.
Outform reserves the right to revise this publication, and/or make improvements
or changes in the product(s) and/or the program(s) described in this
documentation at any time without prior notice. The information in this document
is provided in good faith, but without any representation or warranty whatsoever,
whether it is accurate, or complete or otherwise, and on express understanding
that i Outform shall have no liability whatsoever to other parties in any way arising
from or relating to the information or its use.
All other trademarks are the property of their respective owners. Other company
and brand products and service names are trademarks or registered trademarks of
their respective holders.
This device complies with CE/FCC regulations.
About This Guide
•
•
•

4
Index
Safety and Warnings 5
Introducing the Retail Tablet M 6
Getting Started 9
Standby Mode and ON Mode 12
Playing Content 15
Main Android OS Screen (Home Screen) 19
Retail Tablet Accessories 20
5
Safety and Warnings
NOTE
This mark is applied to indicate that the equipment conforms to European safety
and electro-magnetic compatibility standards.
WARNING!
Main Supply: This equipment is designed to operate from a 100-240 Volt, 50/60Hz
AC main supply. The use of other power sources may damage this equipment.
Check that the voltage marked on the rating plate located at the rear of the power
adaptor states 100-240V. The manufacturer will NOT accept responsibility for
damage or injury caused by connecting to the wrong voltage.
WARNING!
Main Adaptor: The supplied power adaptor is compatible with a standard main
socket. NB. If the power adaptor or lead gets damaged, it must be replaced by a
qualied service agent with an approved adaptor of the same type and rating.
WARNING!
Dangerous voltage constituting a risk of electric shock is present inside this
equipment.
WARNINGS!
The main plug shall be the main disconnect device and shall remain operable at all
times.
Do not push objects into holes and ventilation slots.
Do not expose this product to dripping or splashing or place any objects lled
with liquids on or near the product.
Do not place a naked ame source, such as lighted candles, on or near this
product.
Do not attempt to repair this product yourself. Always use a qualied service agent
to perform adjustments or repairs.

6Introducing the Retail Tablet S
Introducing the Retail Tablet S
This chapter introduces the Retail Tablet and its components.
What is the Retail Tablet?
The Retail Tablet is an Android-based (Android OS 2.3), interactive digital display
that is specically designed to be used by the retail market. The Retail Tablet is
a robust, yet slim line unit that features a multi-touch screen, front camera and
embedded Wi-Fi and 3G (optional). Retail Tablet features include content auto-
play, auto-copy and auto-detect features. The Retail Tablet comes in the following
sizes: 7”, 10” 15.6”, 18.5” and 21.5”.
You may refer to the www.i-DISPLAY.com for more information.
Retail Tablet Components
The following components are provided with the Retail Tablet:
Retail Tablet
Power Supply Unit
Anti-glare lm
Four thumb screws
7
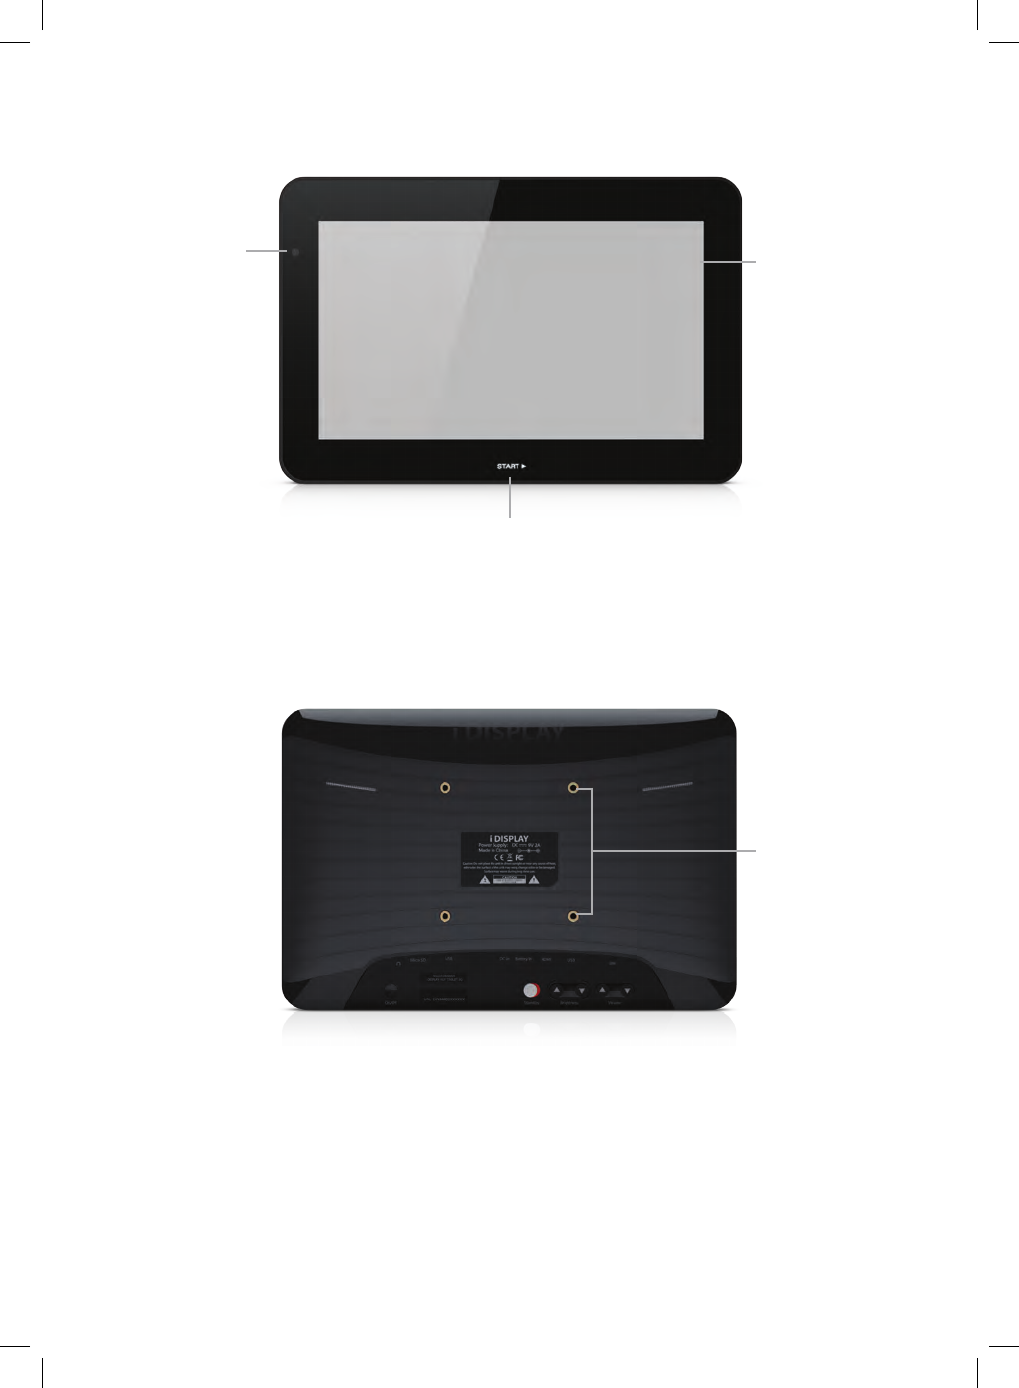
Introducing the Retail Tablet S
1
2
3
4
8Introducing the Retail Tablet S
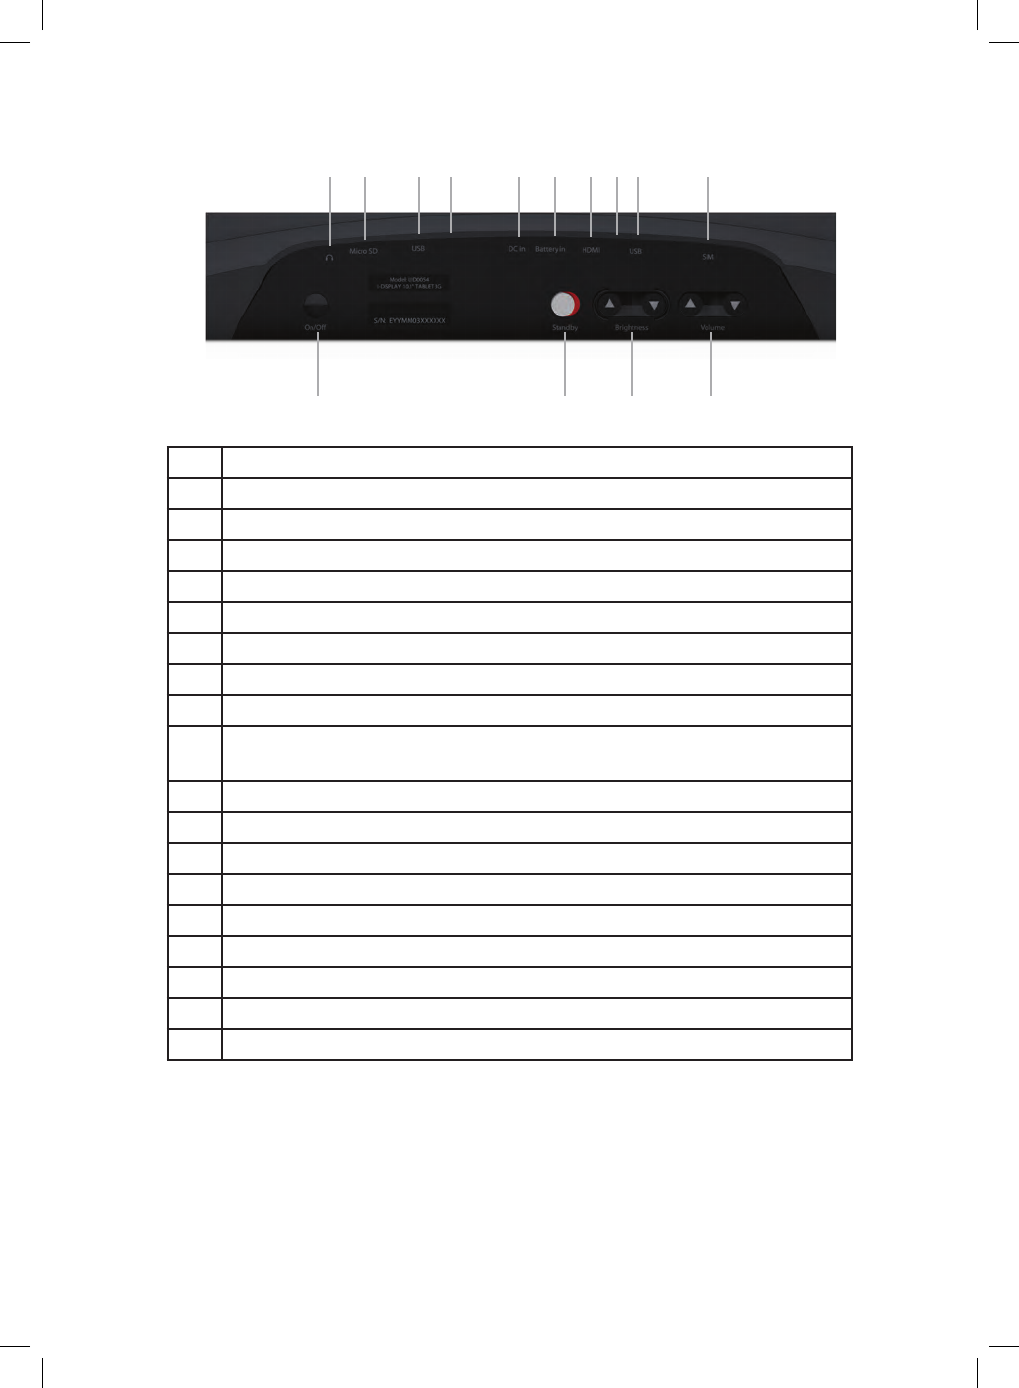
No. Description
1. Front camera
2. START Indicator
3. Multi-Touch Screen with embedded Wi-Fi and 3G
4. Bracket Screws for Attaching Multiple VESA Options
5. On/O Button (also serves as a Back and Home button)
6. Earphone
7. Micro SD port for playing content
8. USB Port
9. PB-Molex connector for Connect Box. A Connect box has up to 12 buttons
(push or touch) and one motion sensor.
10. DC In – Power Input
11. Battery In for Portable Battery Charger
12. Micro HDMI port for connecting the tablet to a larger screen
13. Reset Pin Hole
14. USB Port
15. SIM Card Port
16. Volume Control
17. Brightness Control
18. Standby Mode Button
6 7 8 9 10 11 12 14
5 161718
15
13

Getting Started
Getting Started
This chapter describes how to set up and start the Retail Tablet.
Setting Up the Retail Tablet
To set up the Retail Tablet:
Remove the transparent cover sheet protecting the tablet’s screen.
Use the eece side of the provided cleaning cloth to clean o any dust on the
touch screen.
Peel o the backing of the anti-glare sticker and place it gently and carefully on
the touch screen. You can use the white foam provided in the packaging to press
on the sticker as you apply it in order to ensure there are no air bubbles between
the sticker and the screen.
Mount or position the tablet on the table, counter, shelf or oor according to the
provided accessories. You may refer to the Accessories section (page 20) for a
description of mounting accessories and other devices that can be connected to
the Retail Tablet
Turning On the Retail Tablet
Before using the Retail Tablet when powered by battery (without the power
supply), we recommend charging it for 5 to 6 hours.
The Retail Tablet is precongured to automatically start its Autoplay application
when it is turned on. You may refer to the Logging Out of the Retail Tablet
Autoplay Application section on page 10 for instructions on logging out of the
i DISPLAY Autoplay application in order to access a standard Android OS screen
To turn on the Retail Tablet:
Move the Standby button on the back of the tablet to determine the tablet’s
power saving behavior. You may refer to the Standby Mode and ON Mode section
on page 12 for more information.
Connect one side of the power supply to the tablet’s DC In socket located on its
back lower side.
Plug the power supply into a standard electrical outlet. If this is the rst time the
tablet is turned on, then wait two minutes after plugging in the power supply
before pressing the On/O button to turn on the tablet.
Press the On/O button on the back of the tablet for approximately seven
seconds.
1.
2.
3.
4.
1.
2.
3.
9
4.
10 Getting Started
NOTE
Each time the tablet is powered on (after being o), it may take up to two
minutes to begin to play.
If the tablet is not in Standby mode, it starts playing. If the tablet is in Standby
mode, then tap the ashing START indicator to start playing.
The tablet is provided with a preloaded demonstration application that it
automatically starts to play.
Logging Out of the Retail Tablet Autoplay Application
The Retail Tablet is precongured to automatically start its Autoplay application
when it is turned on. The following describes how to log out of the i DISPLAY
Autoplay application in order to go to a standard Android OS screen.
To access the Android OS screen:
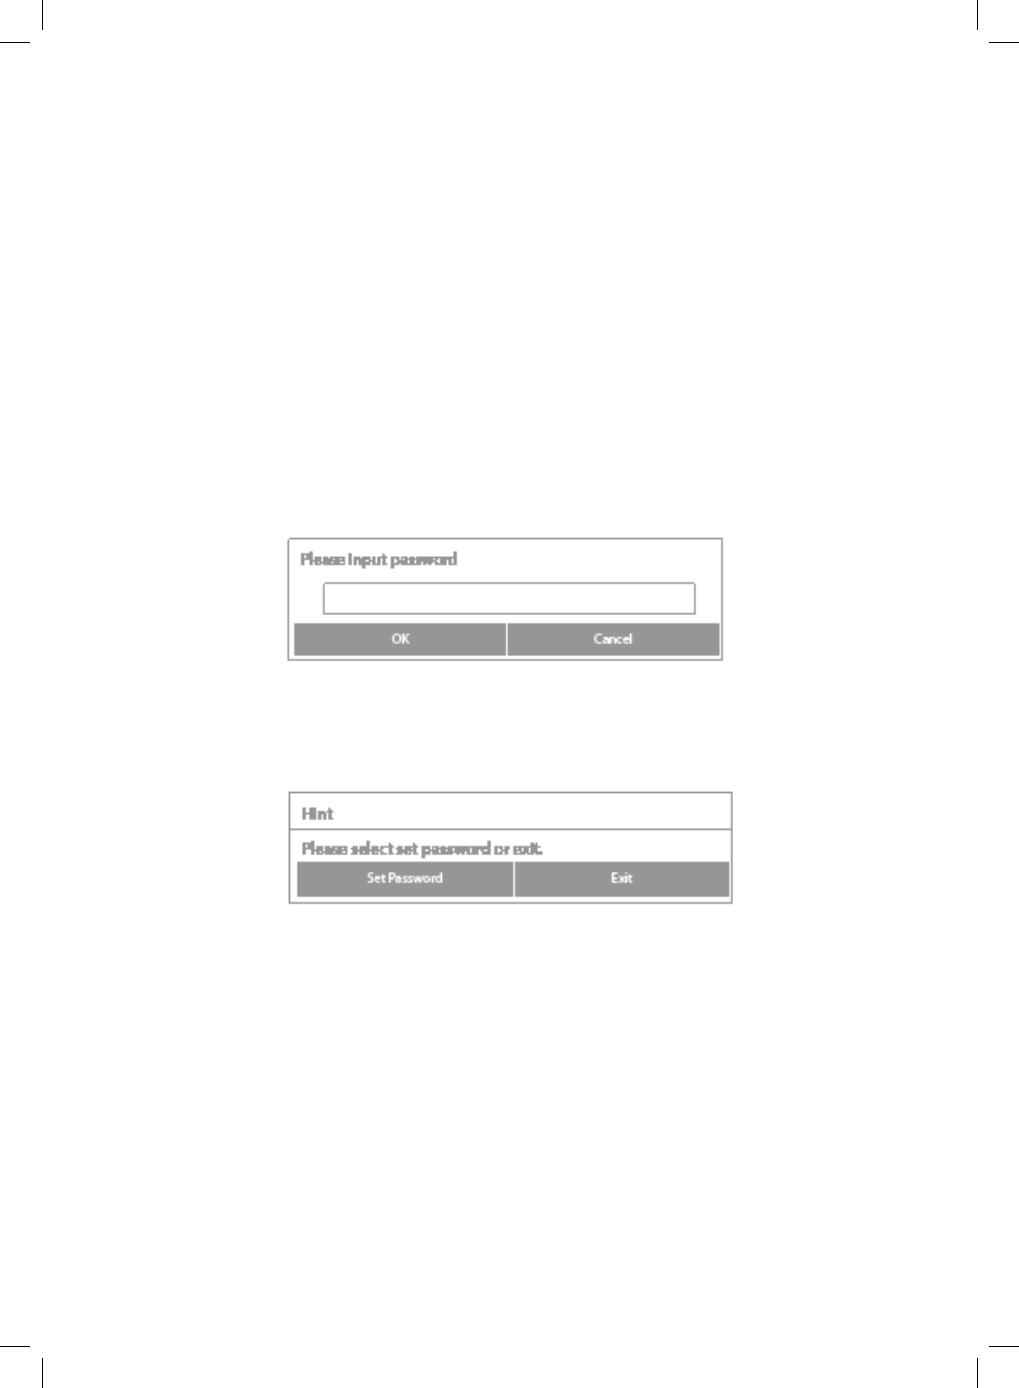
While content is playing, quickly press the On/O (Back) button (for one second).
A password window is displayed, as shown below:
Tap in the white eld to display a virtual keyboard.
Type in the password. If this is the rst time you are using the Retail Tablet, then
the password is: 11223344.
Tap the Done button and then the OK button. The following window is displayed
Tap the Exit button to exit the Autoplay application and to display the Android OS
main screen.
– OR –
Tap the Set password button to enter a new password.
Enter the password twice (once in each eld) and tap the OK button. A success
message is then displayed. Tap the OK button.
The tablet then either:
Starts to play the content of Folder 0 (in ON mode), or
Goes into standby and displays the START indicator which can be tapped to start
playing the content of Folder 0.
5.
1.
2.
3.
4.
5.
6.
Getting Started 11
If you change the password, please make sure to write it down and remember it. If
you forget your password, then you must contact i Display for a new password.
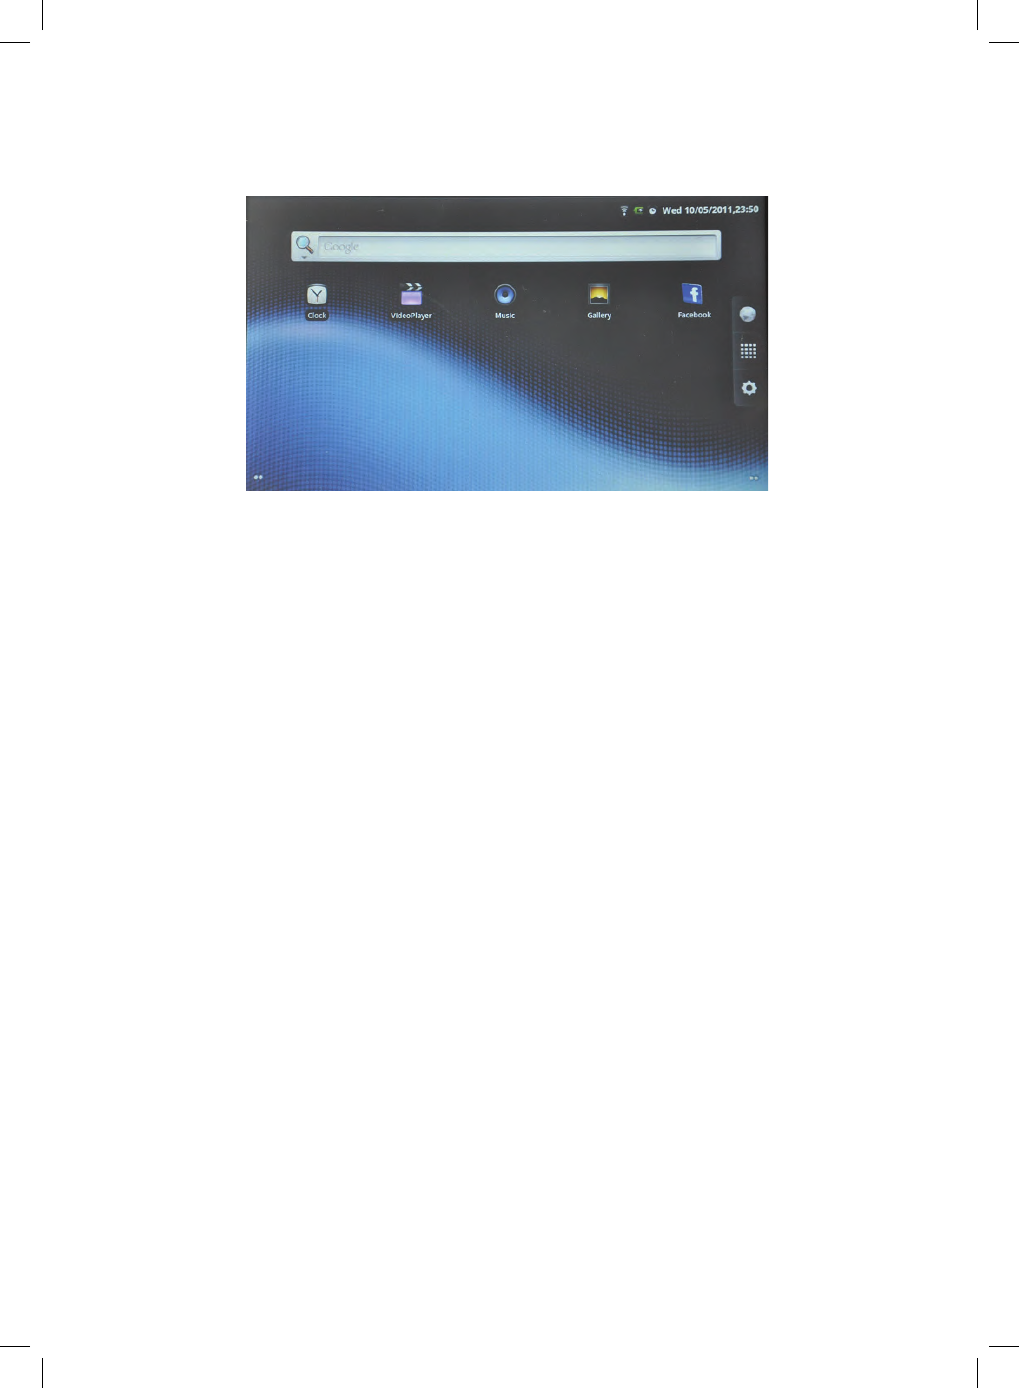
A standard Android Home screen is then displayed, as shown below:
By default, the Retail Tablet is password protected in order to ensure that only
authorized retail personnel can modify and congure it, as described below. You
have the option to disable/enable the requirement to enter a password using the
Enable/Disable Password.
To turn o the Retail Tablet:
While the Retail Tablet is playing, quickly press the On/O button on the back of
the tablet. A password window pops up.
Enter the password and tap the OK button. The tablet opens a standard Android
screen.
Press and hold the On/O button on the back of the tablet. The tablet will then ask
you to conrm that you want to power o.
1.
2.
3.
12 Standby Mode and ON Mode
NOTE
You can lock the position of the START indicator using the Settings option ,
as described on page 20.
ON mode sets the tablet to play content in a continuous loop until you turn it o.
The following describes how the tablet operates in each of these modes.
When Turning on the Tablet
When you power on the Retail Tablet by pressing the On/O button at the back of
the tablet, the tablet behaves as follows according to whether the Standby button
on the back of the tablet it is set to Standby mode or ON mode:
Standby Button Set to Standby Mode
The START indicator is displayed and you can tap it to start autoplaying the
content of Folder 0, as described on page 15.
Standby Mode and ON Mode
Standby mode enables you to extend battery life by setting the tablet to only
display content when it is most ecient. This mode is typically used when the
tablet is running on battery.
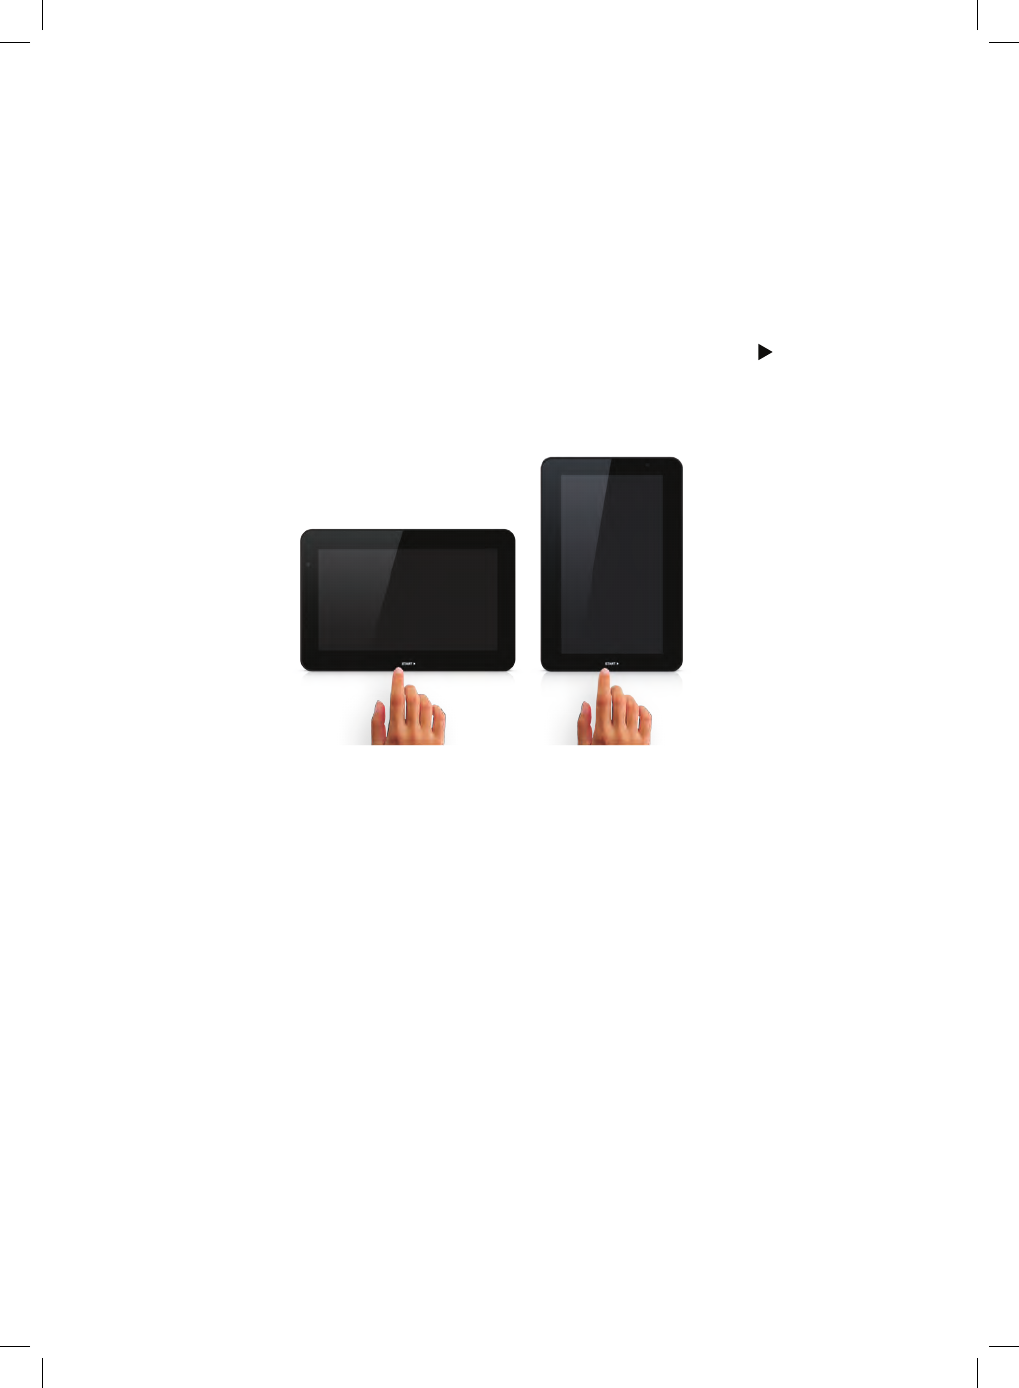
When in standby, the tablet displays a black screen that shows a START ashing
indicator. You can tap the START indicator to start playing the tablet’s content.
The START indicator appears in one of two positions on the tablet according to the
tablet’s orientation (portrait or landscape).
13
Standby Mode and ON Mode
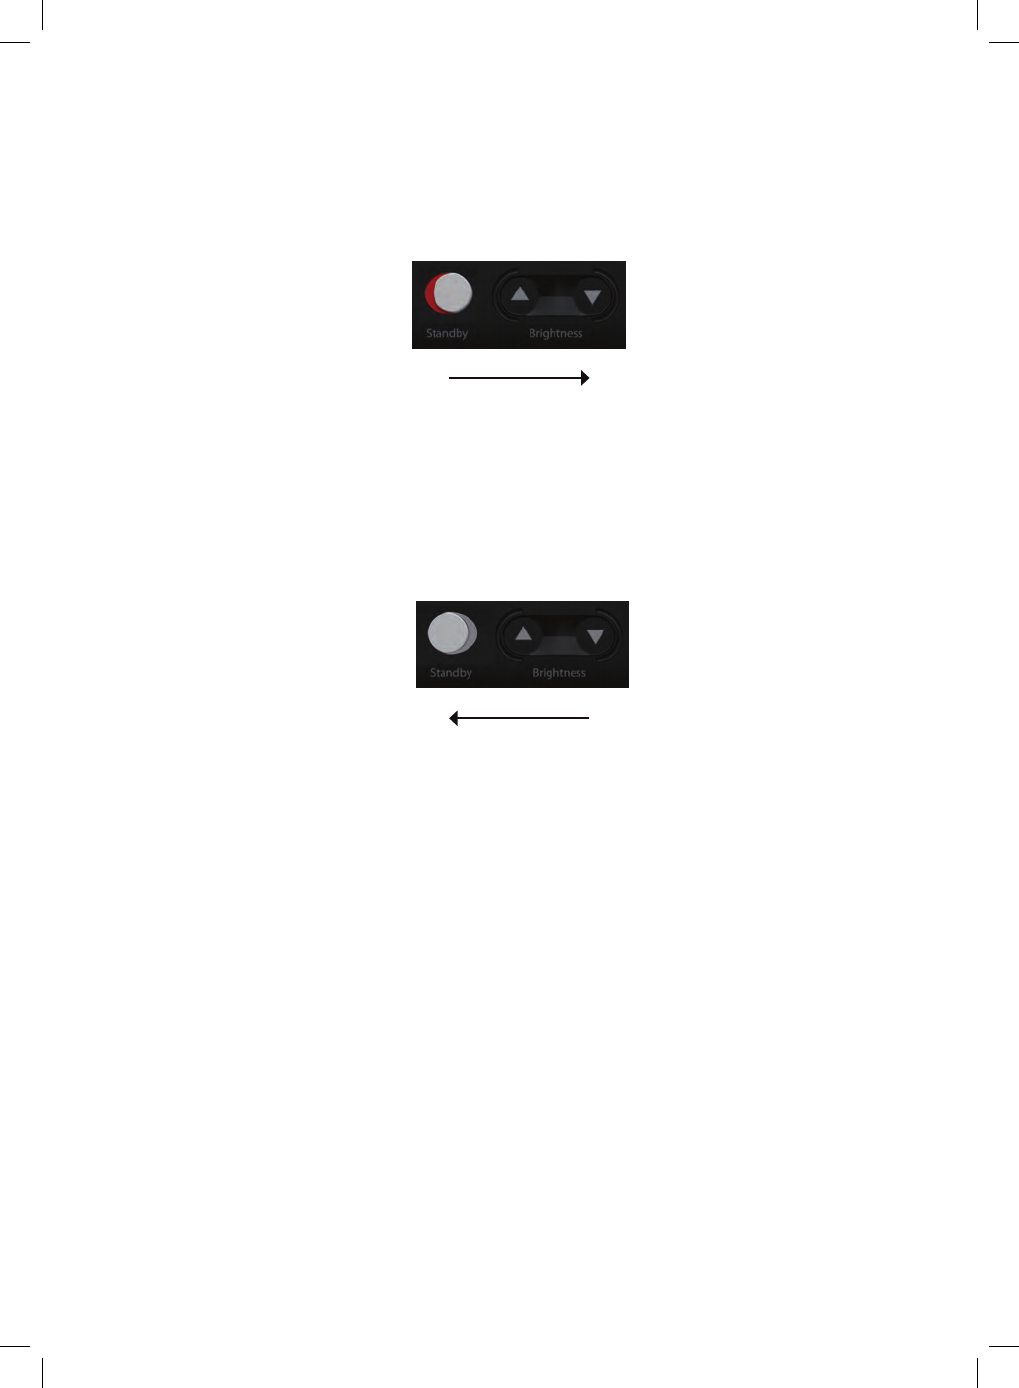
To set the tablet to Standby mode:
Slide the Standby button on the back of the tablet closer to the Brightness button
so that the red color is showing.
Standby Button Set to ON Mode
The tablet starts playing the content of Folder 0 immediately.
To set the tablet to ON mode:
Slide the Standby button on the back of the tablet away from the Brightness
button so that the silver color is showing.
During Play
While the tablet is playing, it behaves as follows according to whether the Standby
button on the back of the tablet it is set to Standby mode or ON mode:
Standby Button Set to Standby Mode:
The tablet plays all the content in Folder 0 once and then goes back to standby,
meaning that it displays a black screen. The START indicator is then displayed and
you can tap it to start autoplaying the content of Folder 0 again.
If an application (apk) is running, then the tablet leaves it running until there has
been no user interaction for over three minutes and then goes back to standby,
meaning that it displays a black screen. The START indicator is then displayed and
you can tap it to start autoplaying the content of Folder 0 again.
Standby Button Set to ON Mode:
The tablet plays all the content in Folder 0 repeatedly in an endless loop.

14

15
Playing Content
Playing Content
This chapter describes the various options for displaying videos, pictures and
applications on the Retail Tablet.
What Does the Tablet Play?
The Retail Tablet runs standard Android applications (apk) using Android OS 2.3.
Video Formats: The Retail Tablet plays the following video formats:
MPEG1 / MPEG2 / MPEG4
Divx4 / Divx5 / Divx6
H.264
AVI
Image Formats: The Retail Tablet displays the following image formats:
JPG
BMP
PNG
GIF
You may refer to the
http://www.i-display.com/products/retail-tablet-m-technical-specication
to download the latest Retail Tablet specication sheet.
How Does the Tablet Play?
The following describes the various options for displaying videos, pictures and
applications (Android apk) on the Retail Tablet.
Default AutoPlay – Folder 0
The Retail Tablet disk drive contains a Root folder that can contain sub-folders. By
default, the tablet plays the content of a folder named 0. This folder is located in
the Root folder.
If Folder 0 contains multiple content les, then each is played one after the other
in the order in which they were added to the Retail Tablet.
Video les are played one after another.
Image les are each displayed for three seconds.
Applications continue running until there has been no user interaction for over
three minutes (and the tablet is in Standby mode) or if you exit the application by
quickly pressing the On/O (Back) button. If you place an application in Folder 0,
then it should be the only le in that folder.
•
•
•
•
•
•
•
•
•
•
•

16 Playing Content
For example, if a folder contains an image le and two video les in the following
order:
car-choice-banner.jpg
car-choice-banner.mpeg
top-of-range.mpeg
then the tablet will rst display the car-choice-banner.jpg image for three seconds,
and then play the discount-car.mpeg video and then play the top-of-range.mpeg
video.
If the tablet is in ON mode, it will then repeatedly play this sequence in a loop. If
the tablet is in Standby mode, it will then go to standby (black screen).
Connect Box – Selecting Folders 1 – 12
The Retail Tablet can also play the content of folders named from 1 to 12 if a
Connect Box is connected to it. This Connect Box has 12 connectors for push
buttons or touch sensors and 1 connector for motion sensor.
The Retail Tablet plays the content of Folder 0 by default. If one of the Connect Box
buttons is pressed, then the Retail Tablet plays the same numbered folder once.
After it nishes:
In Standby mode, the Retail Tablet then goes to standby (black screen) and will
play Folder 0 again after the START indicator is tapped.
– OR –
In ON mode, the content of Folder 0 will then play repeatedly.
For example:
In Standby mode, if button number 6 is pressed on the Connect Box, then the
content of Folder 6 is played once and then the Retail Tablet goes to standby.
In ON mode, if button number 1 is pressed on the Connect Box, then the content
of Folder 1 is played once and then the content of Folder 0 is played repeatedly.
Motion Sensor
The Retail Tablet can also have an additional connector for a motion sensor. The
motion sensor enables the Retail Tablet to play the content of a folder named MS,
as follows:
Standby Mode
This option enables you to set up the Retail Tablet so that it is typically in Standby
mode in order to save power. When the sensor detects motion the Retail Tablet
automatically starts playing the contents of the MS folder.
The content in the MS folder is played repeatedly as long as motion is detected.
When motion is no longer detected, the tablet goes back to standby.
ON Mode
This option enables you to set up the Retail Tablet so that by default it plays
the contents of Folder 0 until the sensor detects motion. Then the Retail Tablet
automatically starts playing the content of the MS folder.
•
•
•
•
•
•
•
17
Playing Content
The content in the MS folder is played repeatedly as long as motion is detected.
When motion is no longer detected, the tablet goes back to playing the content
of Folder 0 repeatedly. If the tablet is playing an application and it is not touched
for more than three minutes, then it returns to playing the content of Folder 0
repeatedly.
You may refer to the
http://www.i-display.com/products/retail-tablet-m-technical-specication
to download the latest Retail Tablet specication sheet to download the latest
Retail Tablet specication sheet.
Barcode Reader – Plays Per Barcode
The Retail Tablet can be used to automatically play the content of a specic le in
the Root directory of the tablet when a barcode reader is connected.
Copy a le onto the Retail Tablet with the same exact name as the barcode. The
tablet will then automatically play the content of that le when a product with
that barcode is read.
How Do I Load Content?
Retail Tablet auto copy feature makes loading content simple!
You can load content les using either a USB drive, a Micro SD, Wi-Fi or a mobile
network (using a SIM card), as follows.
USB – Loading Content
Loading Content into Folder 0
To load from a USB drive into Folder 0:
Create a folder named 0 on a USB disk. Remove all other content from the USB
drive.
If a video or image is playing, then insert the USB drive into one of the two USB
ports on the back of the tablet.
If an application is playing, then insert the USB drive into one of the two USB ports
on the back of the tablet and then after ten seconds, quickly press the On/O
button on the back of the tablet.
After a few seconds a window pops up requesting a password.
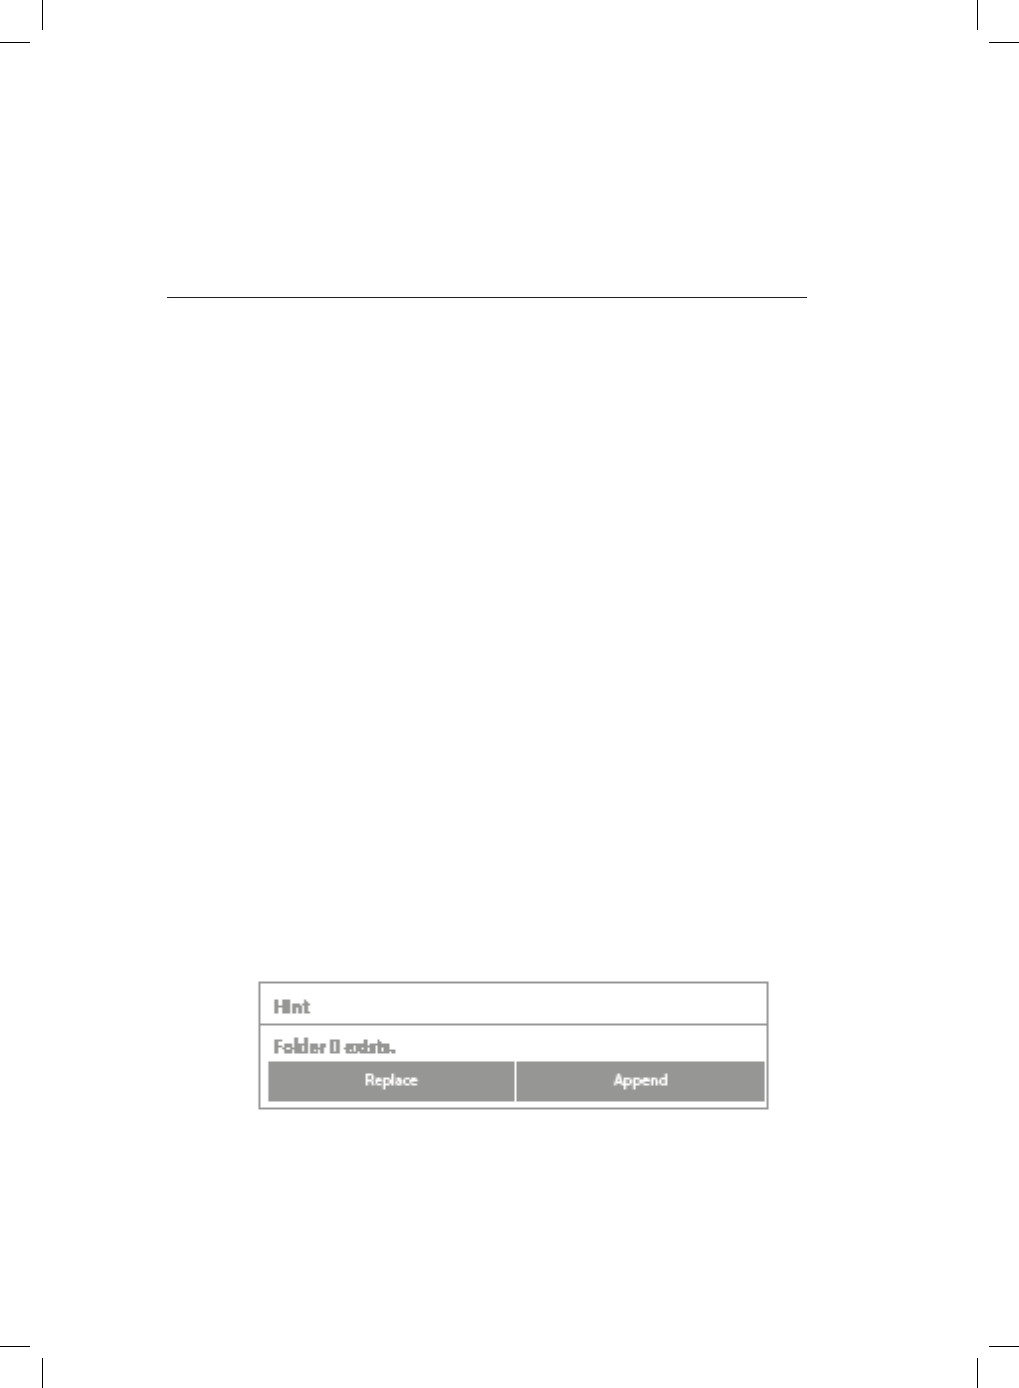
Enter the password and tap the OK button. If this is the rst time you are using the
Retail Tablet, then the password is: 11223344. The following window is displayed:
Tap the Replace button to delete the content of Folder 0 on the tablet and replace
1.
2.
3.
4.

18 Playing Content
it with the content of Folder 0 on the USB drive.
– OR –
Tap the Append button to add the content of Folder 0 on the USB drive to the
content of Folder 0 on the tablet.
A success message is displayed after the content has been copied. The le(s) in
Folder 0 will automatically start playing. If multiple les are in Folder 0, then they
play one after another repeatedly.
If the tablet does not start to play the content, then restart it and the content
should start playing automatically after restart.
NOTE
Do not turn o the Retail Tablet or remove the USB drive while it is copying.
We recommend removing the USB disk after its content has been successfully
copied.
Loading Content into Other Folders
You can use the standard Android Explorer to copy folders/les to the tablet. For
example, into the Folders 1 through 12, the MS folder or a le with the same name
as a barcode.
Loading an Application
If one of the les that was copied to the Retail Tablet is an application (Android
apk) then an installation wizard automatically starts,
Tap the Install button
Tap the Open or Done button to run the application.
Micro SD – Playing Content
A Micro SD card can be used to play content on the tablet. The Retail Tablet will
then automatically start repeatedly playing the content on the Micro SD. This
procedure does not aect the contents already on Folder 0 of the Retail Tablet,
meaning that when you remove the Micro SD card, the tablet will go back to
playing the content in Folder 0.
To play Micro SD content:
Insert the Micro SD card into the Micro SD port on the back of the tablet. A
password window is automatically displayed.
The content of the Micro SD card will automatically play in a loop.
You must leave the Micro SD card inserted in the tablet as long as it is playing.
Browser and Market – Downloading Content
You can download content using Wi–Fi or mobile connection to the Root folder of
the tablet and then move the content to Folder 0 (or Folders 1 through 12) using
Explorer which can be accessed from the Applications Drawer.
1.
2.
5.
19
Main Android OS Screen (Home Screen)
Main Android OS Screen (Home Screen)
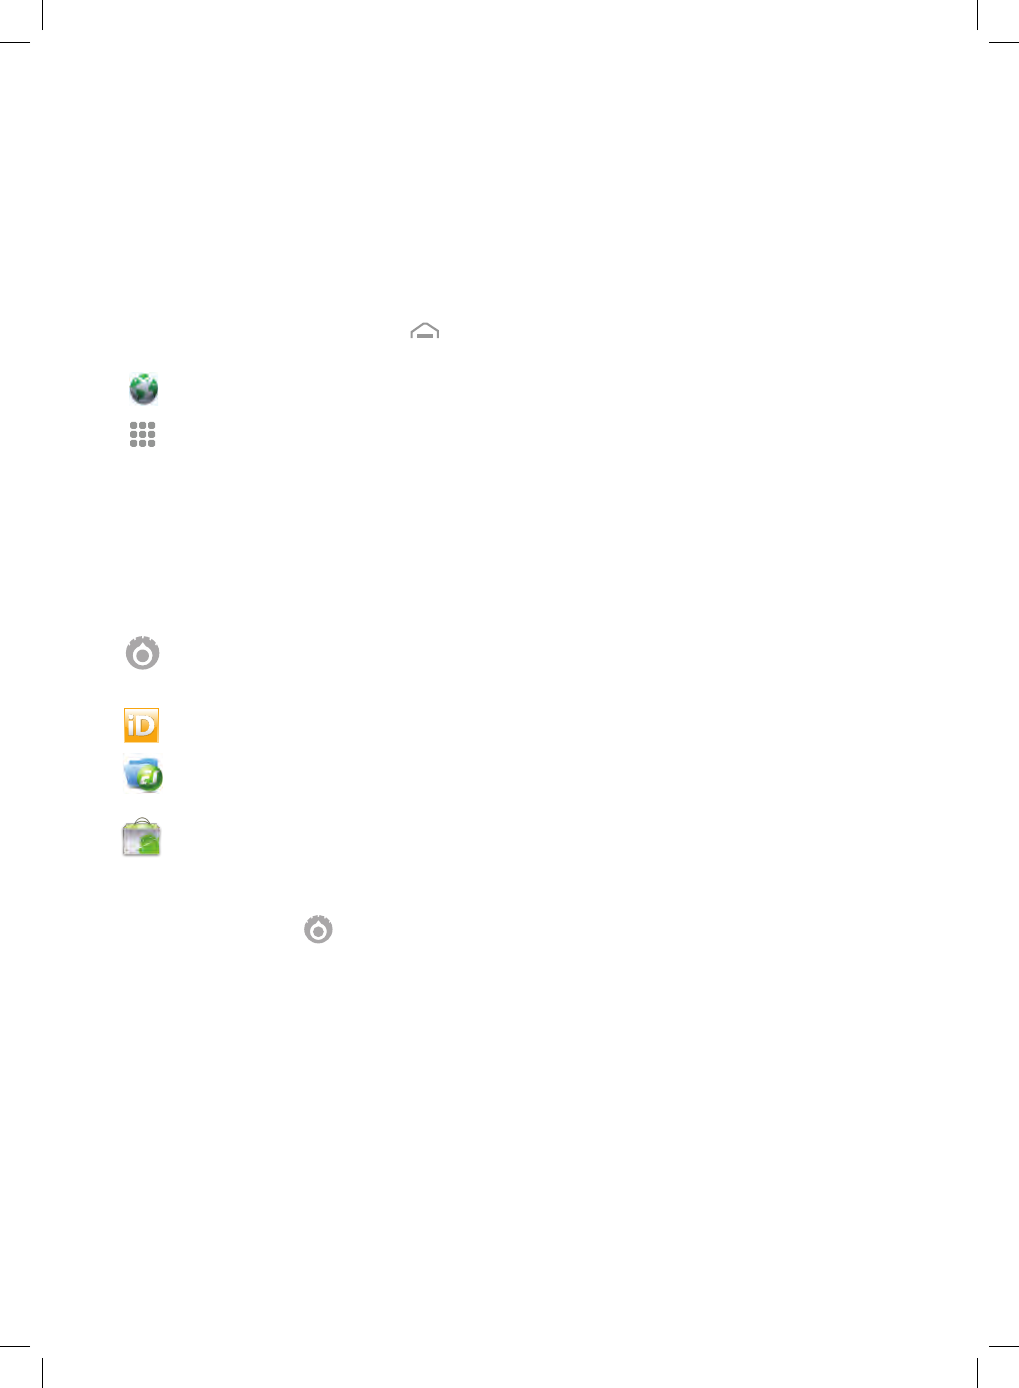
Home Screen
While you navigate in the Android environment, you can return to this Home
screen by tapping the Home button.
The Home screen provides the following options:
Browser: Tap to open a standard web browser in which you can access the Internet
and surf the web.
Applications: Tap to display the Applications Drawer which enables access to
the applications and tools installed on the Retail Tablet. You may refer to the
Applications Drawer section below for more information.
Applications Drawer
The Retail Tablet provides a standard Android Application Drawer which enables
access to the applications and tools installed on the tablet. The following describes
some that are especially relevant to the Retail Tablet.
Settings: Tap to congure Retail Tablet settings, such as Wi-Fi, Mobile and so on.
More information about the relevant settings options is provided in the Setting
section.
i Display: Tap to return to autoplaying the content of Folder 0 in a loop.
Explorer: Tap to open a standard le explorer window which you can use
to transfer les to/from the Retail Tablet. This option is especially useful for
transferring les downloaded from the Internet to Folder 0.
Market: Android Market is an online software store developed by Google for
Android OS devices. You can use it to download applications to the Retail Tablet.
Settings
Tap the Settings button to congure typical Android setting options. Take note
of the following options that are particularly relevant for the Retail Tablet.
Setting Up Wireless Networks
You can tap the Settings Wireless & networks option to congure Wi-Fi and Mobile
networks settings in order to download content to the Retail Tablet.
This menu also enables you to congure Bluetooth settings for working with
Bluetooth accessories, such as Bluetooth earphones.

20 Main Android OS Screen (Home Screen) / Retail Tablet Accessories
Display Brightness
We recommend setting the Retail Tablet screen to its maximum brightness, as
follows.
Either:
Use the Brightness button on the back of the Retail Tablet
– OR –
Use the Settings --> Display --> Brightness option, which can be accessed from the
Android OS screen.
This menu also enables you to lock the Retail Tablet screen in its current
orientation so that the position of the START indicator does not change.
Retail Tablet Accessories
This chapter describes the mounting attachments and other accessories that can
be connected to the Retail Tablet.
Printer
The Retail Tablet supports standard Android OS 2.3 printer drivers. This enables the
connection of a printer that can be used by the applications (apks) that you load,
such as coupon printer.
Barcode Reader
The Retail Tablet can be used to automatically play the content of a specic folder
by connecting a barcode reader. You can copy a folder onto the Retail Tablet that
has the same name as the barcode. The tablet will then automatically play the
content of that folder when a product with that barcode is read.
For example, If the barcode of a product is 12345678, then a le named 12345678
can be placed in the Root folder of the Retail Tablet. The Retail Tablet will then play
the le named 12345678 when the barcode reader scans the product barcode
12345678.
Connect Box
The Retail Tablet can be connected to a Connect Box that has 12 push buttons
or touch sensors. The Retail Tablet will then play the relevant folder according to
21
Retail Tablet Accessories
which button is pressed, as described in the Connect Box – Selecting Folders 1 –
12 section on page 16.
This Connect Box can also have one motion sensor which enables the display of a
folder named MS when motion is detected, as described on page 16.
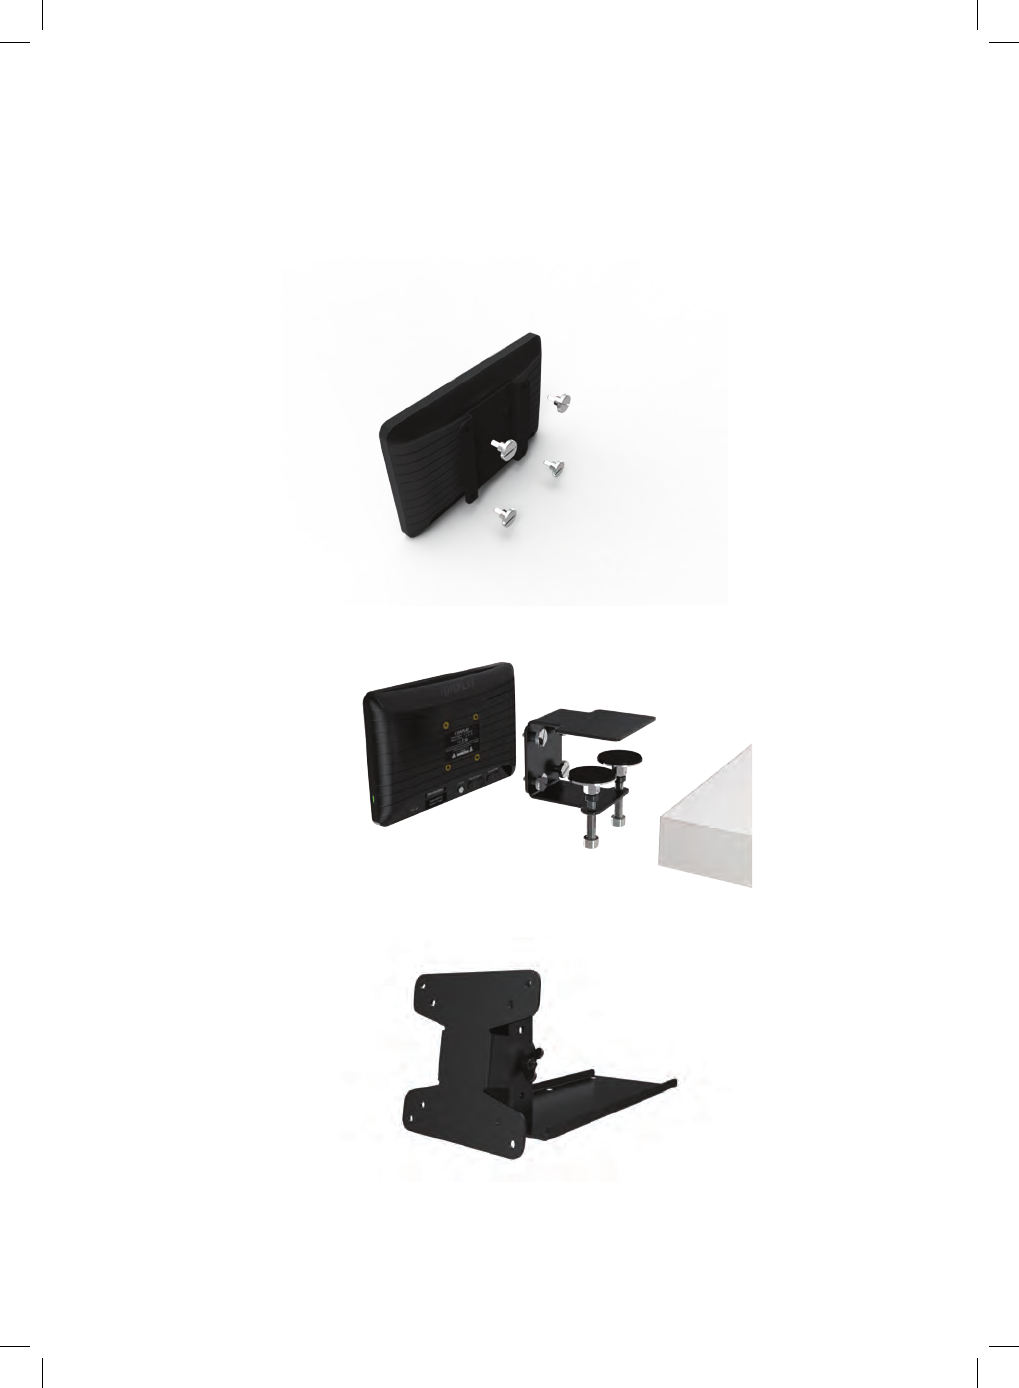
Mounting Options
The following are some of the mounting options available from i-DISPLAY.
VESA Mounting bracket
Fixed Shelf or Table Bracket
Rotating Shelf or Table Bracket
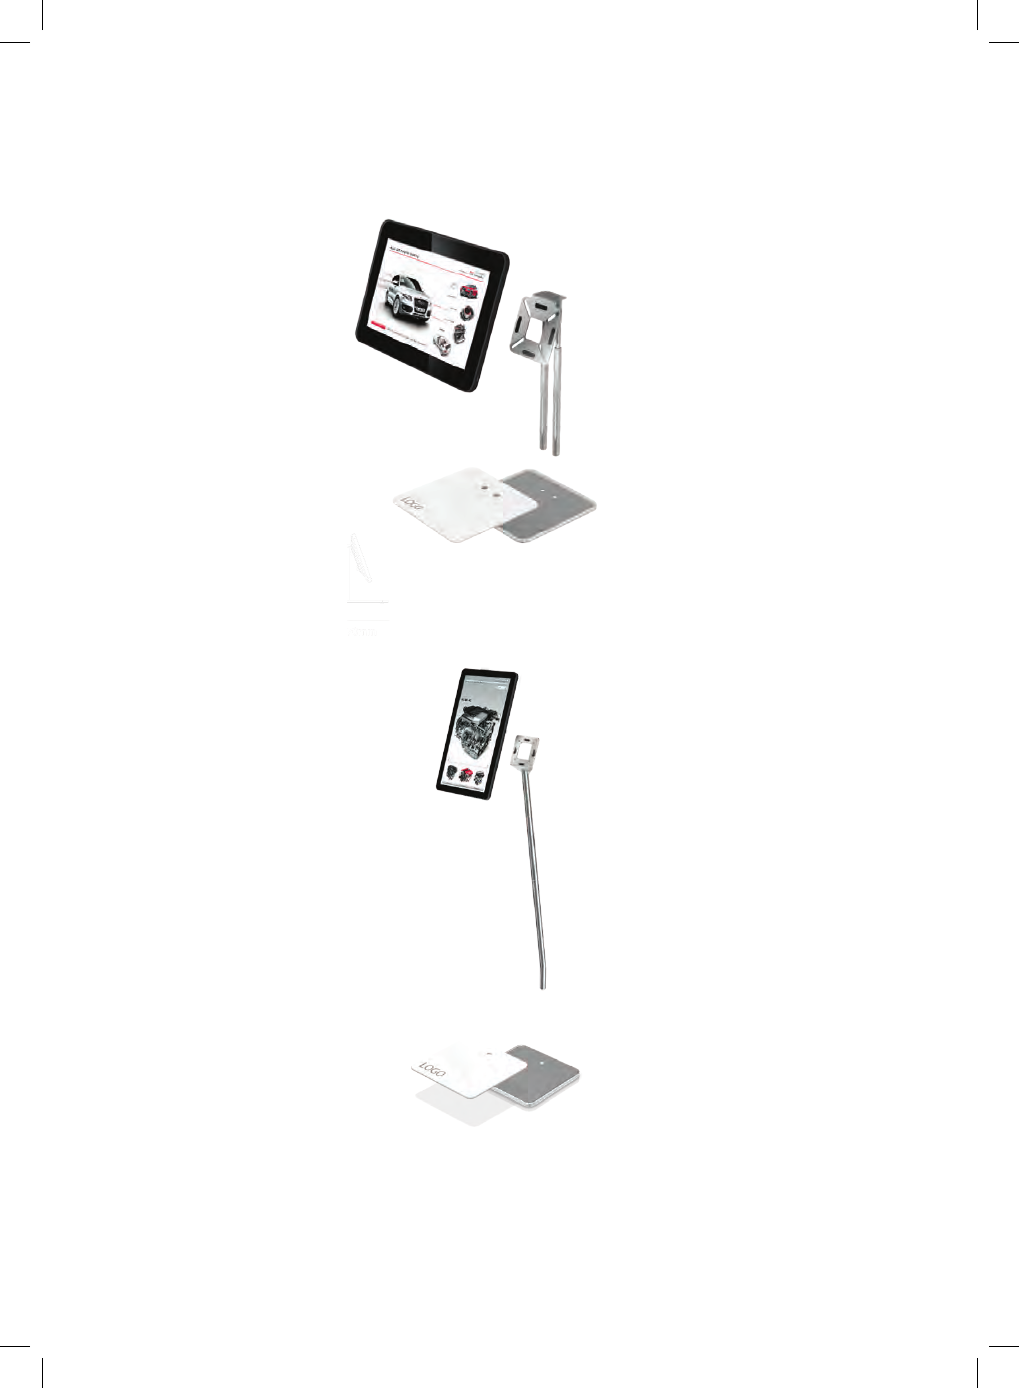
22 Retail Tablet Accessories
Counter Display
Floor Display

For further information or support, please contact: support@i-display.com
FCC Statement
This device complies with part 15 of the FCC rules. Operation is subject to the following two conditions:
(1) this device may not cause harmful interference, and
(2) this device must accept any interference received, including interference that may cause undesired operation.
NOTE: The manufacturer is not responsible for any radio or TV interference caused by unauthorized
modifications to this equipment. Such modifications could void the user’s authority to operate the equipment.
NOTE: This equipment has been tested and found to comply with the limits for a Class B digital device, pursuant
to part 15 of the FCC Rules. These limits are designed to provide reasonable protection against harmful
interference in a residential installation. This equipment generates uses and can radiate radio frequency energy
and, if not installed and used in accordance with the instructions, may cause harmful interference to radio
communications. However, there is no guarantee that interference will not occur in a particular installation.
If this equipment does cause harmful interference to radio or television reception, which can be determined by
turning the equipment off and on, the user is encouraged to try to correct the interference by one or more of the
following measures:
- Reorient or relocate the receiving antenna.
- Increase the separation between the equipment and receiver.
-Connect the equipment into an outlet on a circuit different from that to which the receiver is connected.
-Consult the dealer or an experienced radio/TV technician for help.