Oxford Nanopore Technologies plc MNT-001 MinIT User Manual
Oxford Nanopore Technologies Limited MinIT Users Manual
Users Manual

D-0184-1, Rev 1.
Quick start installation guide

Welcome
The MinIT is made by:
Oxford Nanopore Technologies
Gosling Building, Edmund Halley Road
Oxford Science Park
OX4 4DQ, United Kingdom
The product is protected by the patents and patents
pending https://nanoporetech.com/patents
Pre-installation
Before you install the device the
following should be available:
MinIT
Power Supply
Wireless-Compatible Tablet, Laptop
or SmartPhone
1 x Oxford Nanopore MinION™
MinION USB 3.0 Cable
Optional: USB Memory Stick
(for Data Transfer)
Optional: 1 x 1 GB Ethernet
(for Networking)
Here’s everything you need to install
your device and to check the system
is ready for use.
Just follow the steps on the following
pages in order to:
• Setup the MinIT™ for use
• Power on the device
• RuntheHardwarechecktoconrm
the device has shipped successfully
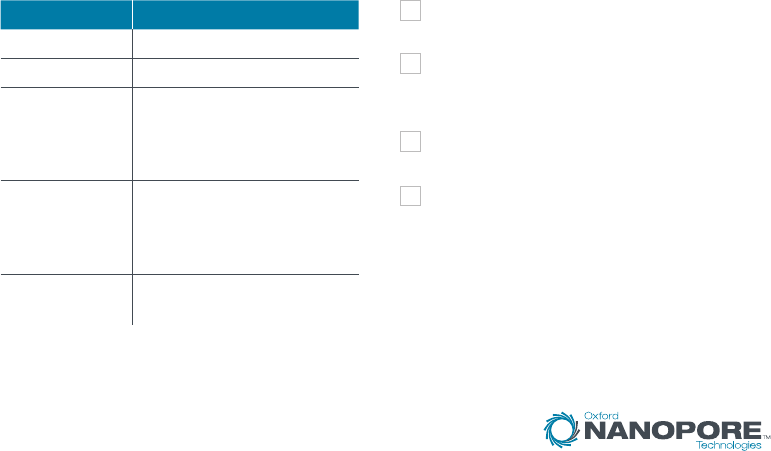
Technical Specification: Recommendations:
Place the MinIT on a stable and clean
laboratory bench.
Ensure the Ethernet and power
connectors are in close proximity to
where the MinIT will be installed.
Sequencing should be carried out at a
room temperature at +18° C to +25° C.
Do not cover the ventilation grills.
About your MinIT Usage advice
Component Specification
Size W 65 x L 120 X D 40 mm
Weight 290 g
Compute
Specication
Processing: GPU
accelerators (ARM
Processor 6 Cores, 256
Core GPU), 8 GB RAM
Connections 1 x USB 3.0
1 x USB 2.0
1 x 1 GB Ethernet
(for Networking)
On-Board
Software
Linux OS and MinIT OS
(including MinKNOW)
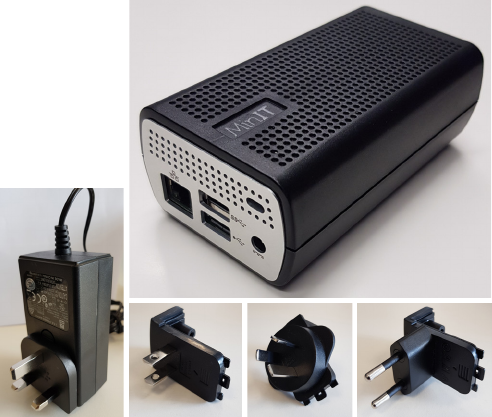
Your MinIT
What’s in the box:
1 x MinIT Device
1 x Power supply
4xCountry-SpecicAdapters
Useful information about MinIT setup:
• GUIisdenedasaGraphicalUser
Interface
• For Windows OS, please refer to A4 to
A6 later in this document
• For Mac OS, please refer to B4 to B6
later in this document
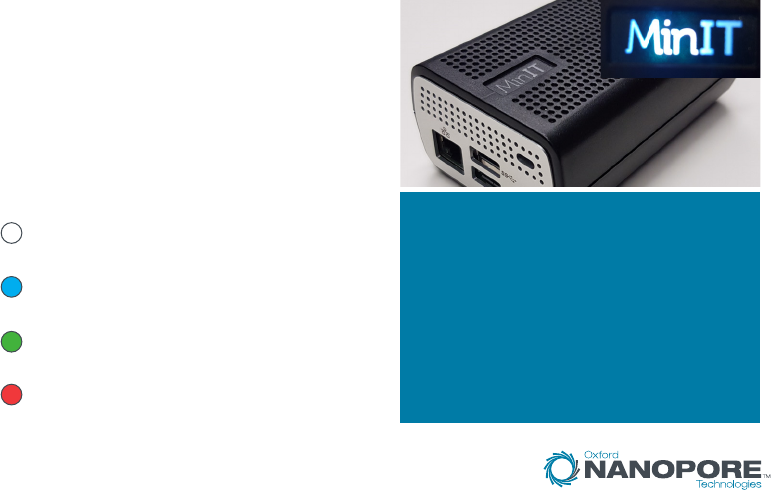
White LED display indicates the device
is powered
BlueLEDdisplay‘ash’indicatesthe
Wi-Fi is being enabled
GreenLEDdisplay‘ash’indicatesthe
Wi-Fi has connected successfully
RedLEDdisplay‘ash’indicatesthe
Wi-Fi connection has not been successful.
MinIT overview
IMPORTANT:
Any further information or functional
changes to the Quick Start Installation
Guide, can be found on the MinIT channel
in the Oxford Nanopore Technologies
Community, here:
https://community.nanoporetech.com/
posts/channels/minit
Setting up your MinIT
1 Unpack the device
Place the MinIT on a clean
surface.
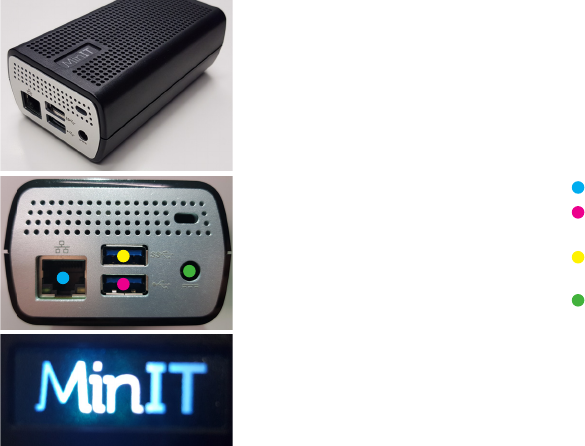
2 Attach the required cables
1 x MinION via USB 2.0 port
(lower of two, power port right)
1 x (Optional) USB SSD Storage
1 x (Optional) Ethernet
3 Power Supply
Connect the power supply to the
AC mains power and the MinIT.
The MinIT logo will illuminate white
when powered.
• Ethernet
• USB 2.0
(for MinION)
• USB 3.0
(for SSD storage)
• Power socket
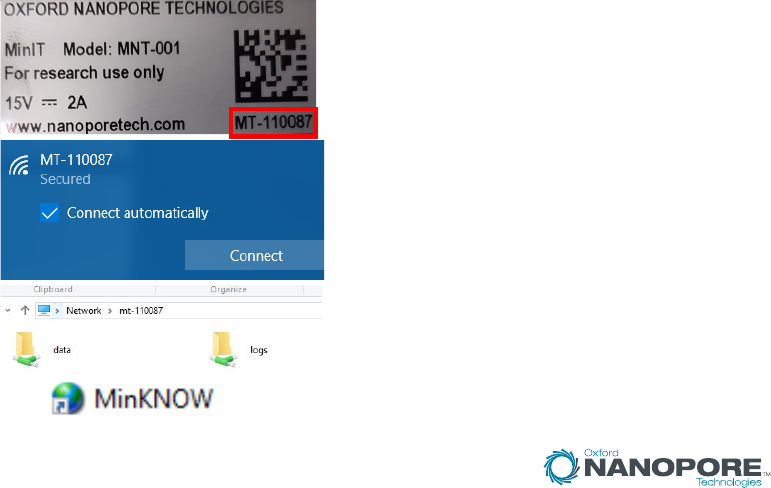
Connecting your MinIT – Windows OS
A4 Identify the MinIT ID
The ID for the MinIT is shown above in
the red box, on the underside label. Note
this number (e.g. MT-110087) is required
for Wi-Fi connection.
A5 Connect to the MinIT (Wi-Fi)
Using a Wi-Fi compatible device, connect
to the Wi-Fi with the ID of your MinIT (A4).
Login with the Security Key:
WarmButterflyWings98
A6 Opening the MinKNOW GUI
Open network sharing and go to \\mt-
1XXXXX(MinITID(A4)).ThisisyourMinIT’s
location on the network. In the Data folder,
open the MinKNOW™ shortcut to open the
MinKNOW GUI.
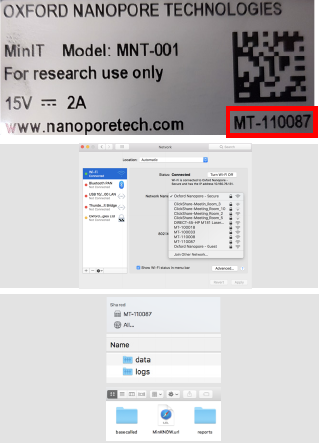
Connecting your MinIT – Mac OS
B4 Identify the MinIT ID
The ID for the MinIT is shown adjacent in
the red box, on the underside label. Note
this number (e.g. MT-110087) is required
for Wi-Fi connection.
B5 Connect to the MinIT (Wi-Fi)
Using a Wi-Fi compatible device, connect
to the Wi-Fi with the ID of your MinIT (B4).
Login with the Password:
WarmButterflyWings98
B6 Opening the MinKNOW GUI
Under Shared, click on MT-1XXXXX
(MinITID(B4)).ThisisyourMinIT’s
location on the network. In the Data
folder, open the MinKNOW shortcut to
open the MinKNOW GUI.
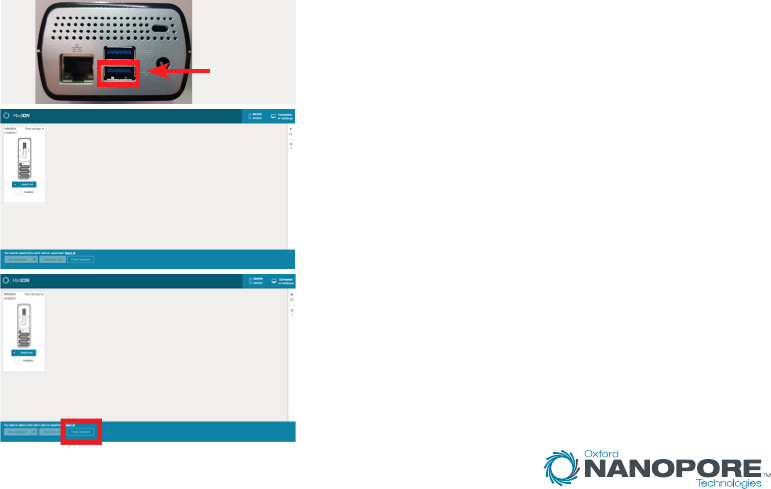
Running the Hardware Check
7 Plug MinION Into MinIT
Plug the MinION into the USB 2.0 port
andinsertyourCTCowcellintothe
MinION.
8 Select CTC
The CTC will appear numerically in the
GUI.Selectthe‘owcell’iconbyticking
the box below it.
9 Click the “Check hardware” button
This can be found at the bottom of the
screen, shown in the red box above.
USB 2.0
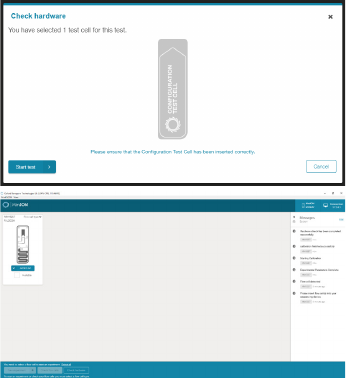
10 Confirm the CTC is loaded correctly
A display will appear asking you to check
the CTC is inserted correctly. Once
conrmedclick“Starttest”.
11 Check the messages
The message tab on the right will show
“Calibrationnishedsuccessfully”,
followedby“Hardwarecheckhas
completedsuccessfully”.
12 Your hardware is working correctly
Oncethecongurationrunhas
completed, the Hardware is ready for a
sequencing experiment. Please refer to
the Nanopore Community for additional
protocols.
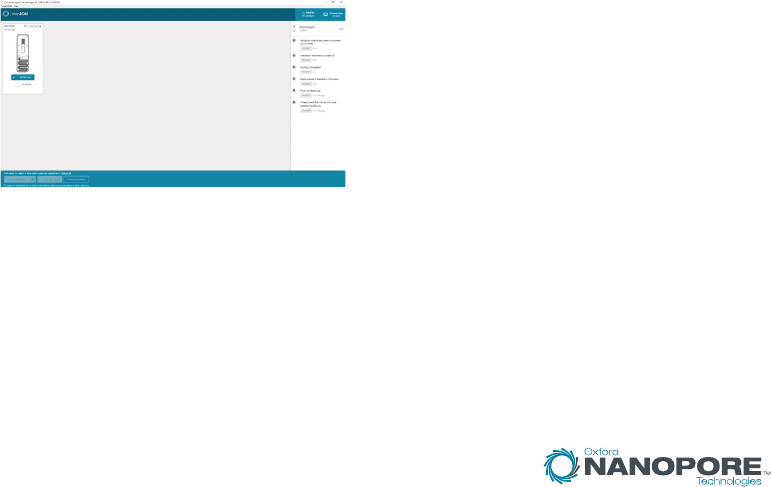
Powering off the device
13 Close the GUI
Ensure the MinION is not running. Close
theGUIthroughthe“x”inthetopright
corner.
14 Power off device
Remove MinION from MinIT and switch
power off at the power source. The power
cable can then be removed from the
MinIT.

Oxford Nanopore Technologies, the Wheel icon, MinION, MinKNOW and MinIT are registered trademarks of
Oxford Nanopore Technologies in various countries. © Copyright 2018 Oxford Nanopore Technologies.
MinIT is currently for research use only.
D-0184-1, Rev 1.
Additional information
Safety Information
The MinIT is for Research Use Only.
Please ensure you have reviewed the MinIT
safety information before you start using the
device.
For more the fully updated Start Guide
technical information, protocols, safety
guides see:
https://community.nanoporetech.com/
posts/channels/minit
Cleaning the MinIT
Should any leaks develop
over the course of loading
aowcell,orduringan
experiment, please absorb
excess liquid using a
laboratory tissue and clean
the area using an IPA wipe.
Please dispose of the
cleaning materials into a
biohazard waste bin.