PAX Technology E500FDD-LTE Integrated Smart Terminal User Manual
PAX Technology Limited Integrated Smart Terminal
User Manual
E500 Integrated Smart Terminal
PAX TECHNOLOGY LIMITED
1. Contents Checklist
Please check the components after unpacking. If any one of them is missing, or if there is a page
missing from the product manual,ect.,please contact the dealer.
Name Qty.
E500
1
AC Power Adapter 1
Product manual
1
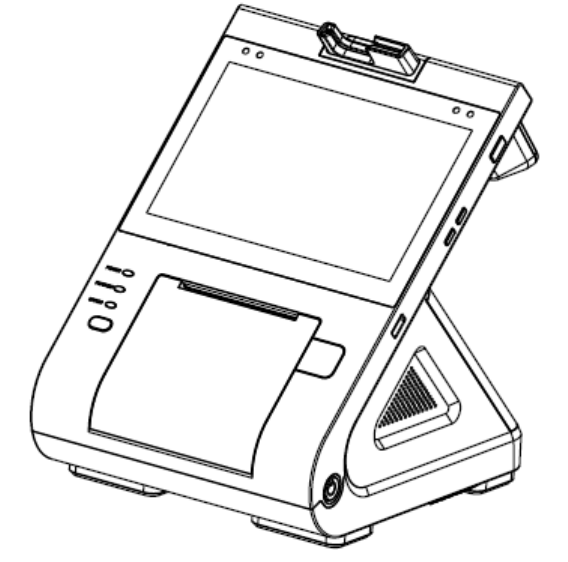
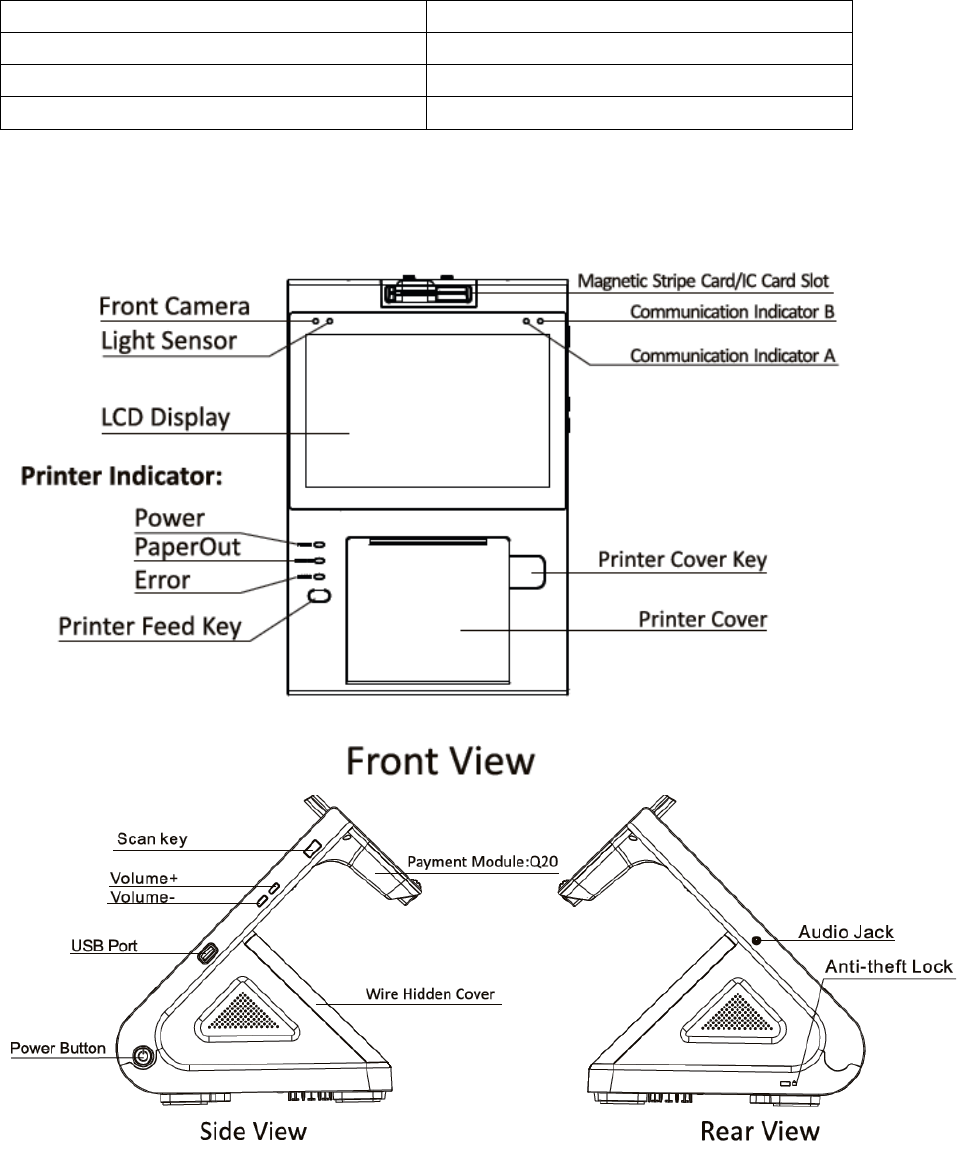
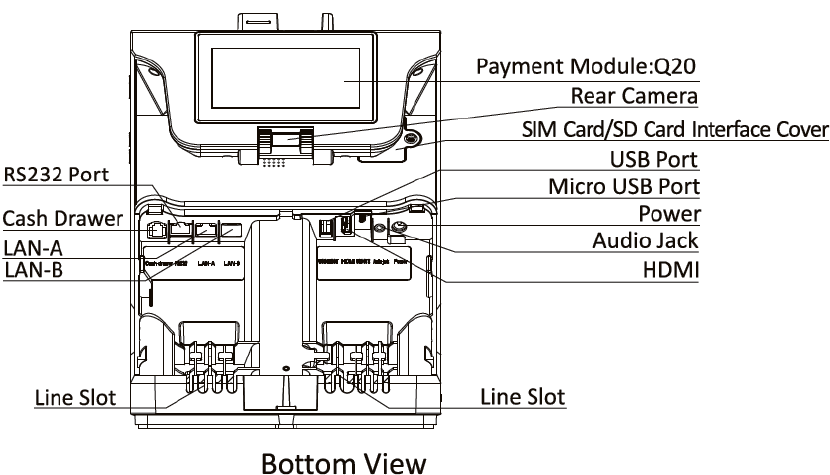
2. Product Description
3.Installation
USB port : Connect USB device or PC
SIM card : Open the SIM card/SD card cover and insert the SIM card into the corresponding
SIM card s lo t .
Mirco SD card:Open the SIM card/SD card cover and insert the Micro SD card into the
corresponding Micro SD card s lo t .
LAN A/B : Open the wire hidden cover which is at the back of the terminal, insert the ca b le
which is connected to the Internet to LAN A or LAN B. It provides bi-directional wired
Internet for the cash register.
Cash Drawer: Open the wire hidden cover which is at the back of the terminal, insert the
RJ11 connector into the Cash Drawer interface to connect the Cash Drawer with the cash
register.
HDMI interface: Open the wire hidden cover which is at the back of the terminal, insert the
HDMI c a b le which connects the HD TV or display (supports 720P or above) into the HDMI
interface of the cash register. Then the HD TV or display can show all the information on the
screen of the cash register.
Audio Jack:Ado p t the international standard interface, support the microphone.
4. Instruction
Power ON/OFF
Power ON: Press and hold the Power button (on the s i de ) for three seconds until the main
screen and the guest screen display normally.
Power off: Press and hold the Power button for three seconds until the shutdown menu
appears, tap Shutdown
> Click Shutdown, and then “shutting...” appears, the terminal is being turned off.
Load the print paper: When the printer indicator lights in yellow, it needs to load the print paper.
Press the printer cover switch to open the printer cover, load the paper roll by following the
direction as shown in the paper warehouse, and close the printer cover. Then the indicator will
light off.
Magnetic stripe card: Place the magnetic stripe face to the main screen (perpendicular to the
main screen), swipe card through the magnetic card slot at a constant speed.
IC card: Place the chip face down, insert the IC card into the card slot, and push it to the end.
Swiping contactless card: Place a contactless card close to the sensor area of swiping which is
at the screen of the payment m odu le .
5. Specification
Operation System: Android 6.0
CPU: ARM Quad-core Cortex™-A53,1.2GHZ processor
Memory: 1GB DDR3 SDRAM, 8GB eMMC
Display: 8inch, 1280*800, multi-touch capacitive touch screen, white LED backlight
Printer: 3 inch High-Speed Thermal Printer with Auto-cutter
Audio: Support speaker and microphone
Camera: 5 mega-pixel auto-focusing camera 1
2 mega-pixel fixed-focusing camera 1
L-Sensor: Support ambient light sensor
Wireless Communication:
Support WIFI, Bluetooth, WCDMA/FDD-LTE
Peripheral Ports: 1 Micro-USB(OTG)
2 USB TypeA
1 HDMI
2 LAN (One in, one out)
1 Cash Drawer
1 RS232
2 Audio Jack
Card Slots: 1 SIM card slot
1 Micro SD card slot
1 magnetic stripe/IC card slot , using two-in-one(supportMAG&ICC)
Magnetic Card Reader: Support 1/2/3.
IC Card reader: Support reading card of 1.8V,3.3V and 5V.
Support storage card and CPU card.
Conform to the standard of EMV2000 L1&L2,PBOC3.0 , IOS7816
RF Card Reader: 13.56Mhz,conform to the standard of ISO14443, Type A/B
6. Cautions of installation and usage
1)Avoid exposing the terminal in hot, humid,dusty or strong electromagnetic environment.
2)Do not violently vibrate, shake or beat the product.
3)Do not plug/unplug any units of the product when it is power on, otherwise it may damage
the internal circuit.
4)Do not maintain the terminal if you are non-professional
5)Before inserting the magnetic stripe/IC/contactless card, please check whether there is any
foreign object insi de or surround the card slot , and if any , report to related personnel.
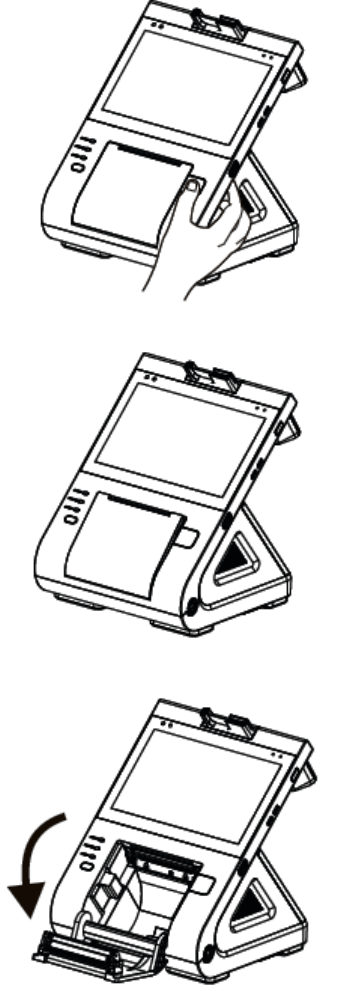
7. Printer for paper instructions
1.When the printer is out of paper,the "Out of Paper" indicator will light in yellow.
Press the Printer Cover key firmly to open the Printer Cover.
2.The Printer Cover will bounce slightly.
3.Open the Printer Cover completely in the direction of the arrow.
4.Load the paper roll as the picture shows, and left a sheet of paper to be exposed.
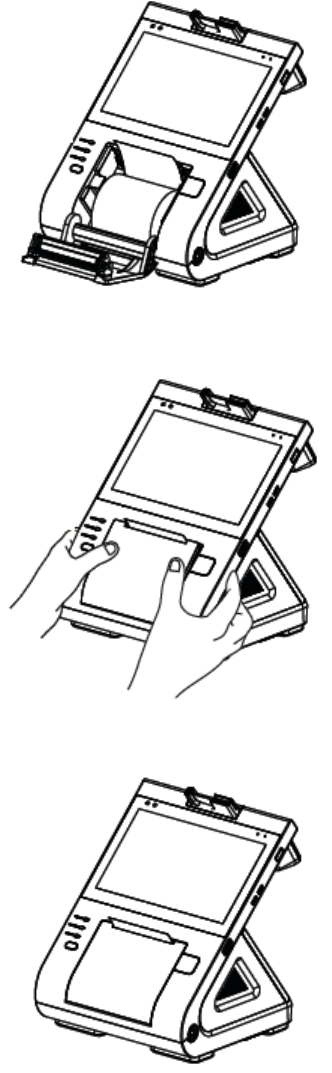
5.Close the Printer Cover as shown in the picture, and press the Printer Cover with both
hands into the paper warehouse.
6. As shown in the picture, the "Out of Paper" indicator will light off.
This device complies with Part 15 of the FCC Rules. Operation is subject to the following two
conditions: (1) This device may not cause harmful interference, and (2) this device must
accept any interference received, including interference that may cause undesired operation.
This equipment has been tested and found to comply with the limits for a Class B digital
device, pursuant to Part 15 of the FCC Rules. These limits are designed to provide reasonable
protection against harmful interference in a residential installation. This equipment generates,
uses and can radiate radio frequency energy and, if not installed and used in accordance with
the instructions, may cause harmful interference to radio communications. However, there
is no guarantee that interference will not occur in a particular installation. If this equipment
does cause harmful interference to radio or television reception, which can be determined by
turning the equipment off and on, the user is encouraged to try to correct the interference by
one of the following measures:
Reorient or relocate the receiving antenna.
Increase the separation between the equipment and receiver.
Connect the equipment into an outlet on a circuit different from that
to which the receiver is connected.
Consult the dealer or an experienced radio/TV technician for help.
FCC Caution:
Any changes or modifications not expressly approved by the party responsible for
compliance could void the user's authority to operate this equipment.
This transmitter must not be co-located or operating in conjunction with any other
antenna or transmitter.
Radiation Exposure Statement:
This equipment complies with FCC radiation exposure limits set forth for an uncontrolled
environment. This equipment should be installed and operated with minimum distance 20cm
between the radiator & your body.