Contents
- 1. User Mannual
- 2. User Manual
User Mannual

UserManual
1
PH5003 User Manual

UserManual
2
TableofContents
1.Keypad Operations .................................................................................................................... 3
2. Using Memory Card as U Disk ............................................................................................. 3
3. Wi-Fi ........................................................................................................................................ 3
4. Bluetooth...................................................................................................................................... 5
5. Email ............................................................................................................................. ... .. .. .5
6. Phone ......................................................................................................................6
7. Messaging .................................................................................................................................... 6
8. Contacts ........................................................................................................................................ 7
9. Brwoser ........................................................................................................................................ 8
10.Sound Recorder ........................................................................................................................ 8
11.Clock ............................................................................................................................................ 8
12.Calculator ................................................................................................................................... 9
13. Camera ....................................................................................................................................... 9
14. Gallery ...................................................................................................................................... 10
15. Music ........................................................................................................... 错误!未定义书签。
16. Calendar .................................................................................................................................... 11
17. FM Radio ................................................................................................................................ 12
18. Settings ..................................................................................................................................... 12
19. Notice for the use of phone ................................................................................................ 14

UserManual
3
1. Keypad Operations
Keys Functions
Home key
Press this button to return to home screen from any application or interface.
Long press it to enter recently opened application window.
Menu key Press it to start the menu,which allows you to perform actions in the current interface or
option menu.
Back key Press it to return to the previous interface,or to close dialog box, option menu,
notification panel or the keypad.
Power key Long press it to open the menus, then you could choose to “Power off” or “Reboot”.
Up key
Press it to increase the volume.
Down key Press it to decrease the volume.
2. Using Memory Card as U Disk
If you want to send music, pictures or other files to the phone’s memory card from the computer,you should set memory card as u disk
first.
Set memory card as u disk
1) Connect the phone to the computer with USB cable. The notification icon will appear in the status box.
2) Open the notification panel and select “USB storage”
3) In the notification panel, touch “USB connected” ,then touch “Turn on USB Storage ”.
Notices:If you connect your phone to the computer then choose open the USB device, the phone can’t read the memory card.
You temporarily cannot use some applications, such as camera.
Uninstall the U Disk from computer
You can operate it in the same way of connecting it as “USB storage”.
3. Wi-Fi
Wi-Fi provides as far as 300feet (100M) range of wireless network access. If you use cell phone to connect Wi-Fi, you should connect
to the wireless access point or 「hot spots」.
Notices:The availability and coverage of Wi-Fi signal depend on the number, infrastructure and other objects
penetrated by the signal.
Open Wi-Fi and to connect to the wireless network
1) Press Menu key from home screen, then touch settings->Wireless & networks
2) Select the “Wi-Fi”,to open Wi-Fi. Phone will automatically scan for available wireless networks.

UserManual
4
3) Touch Wi-Fi settings. Then a list of Wi-Fi network will show the founded network name and security settings. (open network
or WEP、WPA/WPA2 with password).If you enable the notification in Wi-Fi settings. The status box will show an icon when
open available wireless network founded.
4) Touch one of the Wi-Fi choices to connect the network. When you choose open network, phone will connect to
it automatically. If you choose WEP、WPA/WPA2 with password, you should type the password first, then
touch to connect it.
Notices:when the phone is connected to the wireless network,
The status box will show this Wi-Fi icon( ), and the approximate signal strengthen (the number of lit bars).If touch
the connected network,will display the name of Wi-Fi network, status, speed, signal, strength, security, information
and IP address. If you want to delete the wireless settings, please touch “not reserve”. If you want to connect to this
network, you should re-enter these settings.
Notices:
Unless you choose not to reserve the network, otherwise, there is no need to re-enter the corresponding password when next time
connecting to the previously encrypted wireless network. Wi-Fi will search automatically, that is, phone needn’t to perform additional steps
to connect Wi-Fi networks.
Connect to other Wi-Fi networks
1) In the interface of wireless and network, touch Wi-Fi settings. The founded Wi-Fi networks will show on the Wi-Fi network
list.
2) Touch other Wi-Fi networks, and then you can connect to this network.

UserManual
5
4. Bluetooth
Turn on Bluetooth
1) Press Menu key from home screen,then touch Settings->Wireless & networks.
2) Touch “Bluetooth” to open the Bluetooth function. After being turned on, the status box will show this icon ( ). Once the
Bluetooth is turned on, then it will start to scan for all devices within range automatically.
3) All the devices founded will display in a list. If you want to search devices again, Press Menu key, select
“Refresh” to start searching again.
Pairing and connection of Bluetooth headset
1) Press Menu key from home screen, then touch Settings.
2) Touch Wireless & networks->Bluetooth, Set the Bluetooth to “On” and also turn on the Bluetooth headset. It
will search the Bluetooth headset automatically. Once it searches out the headset, it will display the name in the
list. Touch the name of headset, it will start to pair.
Tips:
a. If there is no device in the list after searching, press Menu key->Refresh to search again
b. Make sure that the devices are also with Bluetooth turned on and detectable.
Notice:Generally Bluetooth devices need password to be paired, often use「0000」as the default password.
Cut the connection to the Bluetooth
1) Press Menu key from home screen->Settings->wireless &networks->Bluetooth.
2) In the list of Bluetooth equipment, touch the setting icon: ( ) and select “FORGET”. Then the Bluetooth
connection is not connected any more.
5. Email
Load Email
Select “Email” from app screen. Input the correct Email address and password-> It will match up with the correct
“Port” and “Server” and login in your Email account. If you want to change the settings of Email account, Just select the
Setting icon ( ) and select “Settings”->Select the current account name->Server settings->Incoming settings/Outgoing
settings. You can set the new server, port, security type and so on.
Create and send mails
When creating a new Email, select the icon ( ) from Email interface first and enter the address(recipient)、subject
and contents. You can tap the icon behind “To” to add “Cc” or “Bcc”. Tap the icon ( ) to add attachment, and tap the
icon ( ) to send out the Email.

UserManual
6
6. Phone
When the icon of internet server appears in the screen, you could dial or receive calls. The signal bar on the top, at the
right corner shows the strength of network signal.
Start dialing
Press the” Phone” on standby interface. You could choose SIM1 or SIM2 to do the dialing.
Dialing
At the interface,enter the phone number,and then click the dialing icon ( ) , after that, you should choose
one SIM card to dial out.
Telephone calls in the call history
Every telephone number called and received in “SIM1、SIM2” will be reserved in phone menu of call history. Select
“Phone”->Choose the icon ( ) at the right corner on the top of interface->Select “Call history” to view the call logs.
Long press one call log, it will pop up options: “REDIAL” and “DETAILS”. Choose “REDIAL” to call the number
again and choose “DETAILS” to check the call time and duration. In call history, press Menu key to choose “Delete” to
remove the call logs or you can choose “Clear all history” to remove all the call logs.
Receive /Hang up calls
When a call comes, it will pop up an interface. Tap “Answer” to get in the call while tapping “Dismiss” to hang up the
call. .
Proximity sensor
According to the distance between phone and human body,it will automatically adjust the switch of the backlight.
During the call, put the phone close to the ear, the backlight will turn off automatically, which could save batteries and
prevent inadvertently touching.
Call recording
During the call, tap the icon ( ) on the right->Choose “Start recording”,you could record the call. Then choose
“Stop recording”, it will end up recording with the file saved.
7. Messaging
This module allows you to create SMS/MMS to send to other phone numbers. Make sure an available SIM card is
inserted. Before you send your messages.
Create and send SMS
1) Choose “Messaging” from app menu,touch the icon ( ) to create a new message.
UserManual
7
2) On top of the interface, type the name or number or tap the icon ( ) to add contact number from
phonebook.
3) At the bottom of the interface, type the text message and tap the icon ( ) to send out.
Create an MMS
When you create an MMS, tap the icon ( ) to add pictures, videos, audios, calendar events and so on.
8. Contacts
Open the menu of applications->Select “Contacts”
It displays all the phone contacts and SIM card contacts, the contacts are sorted by the first letter of name in the
alphabet order.
Add a new contact
Tap the icon ( ) to add a new contact. You can choose save to SIM or Phone. Then input the name and phone
number. You can also input other information, like Email, State, City, Street, Company and so on. When you finish
composing the information, just tap “SAVE” to save it.
Search contacts
When you enter “Contacts”, tap the ( ) icon and input the first letter of contact name. It will display the results
in the list.
Delete contacts
Enter “Contacts”, press Menu key->Select “Delete contact”-> Tap the contacts you want to delete, and select OK.
Then the contacts will be removed.
More options about contacts
1) Select “Import/Export”, you can choose any contact to backup to SD card or Phone storage and still you can
restore the contacts from SD or Phone storage.
2) Select “Contacts to display”, you can select which contacts to display. (Only display the contacts saved in
SIM or phone, or display both contacts)
3) Select “Accounts”, you can choose a current account to “Auto-sync”.
4) Select “Share Visible contacts”. All of the contacts can be imported into the SD card, or sharing via Bluetooth,
SMS/MMS, Gmail and so on.

UserManual
8
9. Browser
In browser, you can input the webpage address and surf the internet. Make sure you have connected to an available Wi-Fi
or inserted an available SIM card which has been turned on the cellular data before use.
1) In the interface of Browser,touch address filed and enter the URL.
2) Use keypad to enter URL. The appropriate web sites will appear on the screen. You can touch it directly go to the
page or continue to enter URL.
Homepage
Select “Home”,you could load in the set homepage. If you do not set it, you will use the vendor’s pre-set sites.
Functions of menu
1) < Backward
After browsing multiple pages, pressing this button will return to the previous page
> Forward
After browsing multiple pages, pressing this button will move to a web page after the current page.
2) Windows
You can view all open windows to the current.
3) Bookmarks
Click the bookmark under the bookmarks list, will open the URL.
4) Menu
a. Save to bookmarks: save the current URL as bookmark.
b. Find on page: search what you need in current page.
c. Share page: select the Bluetooth, Messaging, Gmail and so on to share the current page.
d. Bookmarks/History: Show the bookmarks and your browsing history
e. Setting: contains a variety of browser settings.
.
10. Sound Recorder
Sound Recorder can record voice and the recoding files are saved as “amr” format
1) Click the “Sound Recorder” application.
2) Keep the phone’s microphone near the voice source.
3) Click red button ( ) from interface to start recording and tap the icon ( ) to pasuse, tap the icon ( ) to end
recording, then select “SAVE” to finish.
11. Clock
Open the menu of application, select clock
Alarm
When having set an alarm clock,the phone will arrives in the setting time to alert you by ringing or vibrating. Tap the
UserManual
9
icon ( ) to add a new alarm. You could set the alarm according to your needs.
You can also edit the current alarm,you could edit time、ringtones、vibration、repeat and add labels
12. Calculator
This function can turn your phone into calculator to do some simple calculations.
Touch the number keys to make it appear in the blank box. In the interface of calculator, slide the screen to the left to
make the senior panel appear
13. Camera
Select “Camera” from app menu, where you can take photos or record videos.
Take pictures
1) In Camera interface->Aim your object with the screen. You can also touch and hold the screen to enable the
“Object tracking” function
2) Touch the shutter button ( ) on the screen. The photos will be shot and saved to the Galley
3) Tap the icon ( ) from interface to switch into font camera, tap it again to change back to back camera
4)Camera settings
You can touch the setting button ( ) in the interface of camera to enter camera settings. You can select GPS
location info, Exposure, Color effect, Scene mode, White balance, Anti-flicker and so on.
Face beauty mode
Tap the icon ( ) on tap of camera interface to activate the “Face beauty mode”. In this mode, when you take
photos of the face, it will make the face on the photo look more radiant, which the skin looks smoother and has an
even skin tone. Tap the icon “ ” on top of camera interface to go back to normal mode.
Record videos
1)Press the video recording icon ( ) from camera interface and it will record videos instantly.
2)Press the recording icon ( ) again to save the file.
3)video record settings
You can touch the settings button in the interface of camera to select video record settings. It includes Audio mode,
Time lapse interval, Video quality and so on.
UserManual
10
14. Gallery
Open images
On home screen,touch label of applications,then touch Gallery to view all the images saved. Touch one album to
open the images.
View images
1) In the picture interface, touch photo album to view images.
2) Touch the thumbnail to view pictures on full screen.
You can choose to display small or large thumbnails. Hold down the screen towards the left side to view the next
photo or towards right to view the previous one.
In the photo album or list, press and hold down the picture towards left to view the next picture, or towards right to view
the previous one.
Crop images
In the gallery, press the photo you want to crop, choose from Menu->crop,then the instruments of cropping will
appear.
1) To adjust the trimmer size, press and hold the edge of cutting tool. After the trimmer arrow appears, drag your
finger from the center inward or outward, then you can adjust the size.
2) To keep the ratio of the trimmer,please press any one of the four corners.。
3) To move the trimmer to other areas of the picture, hold down the center of cutting device, then drag your
finger to certain position.
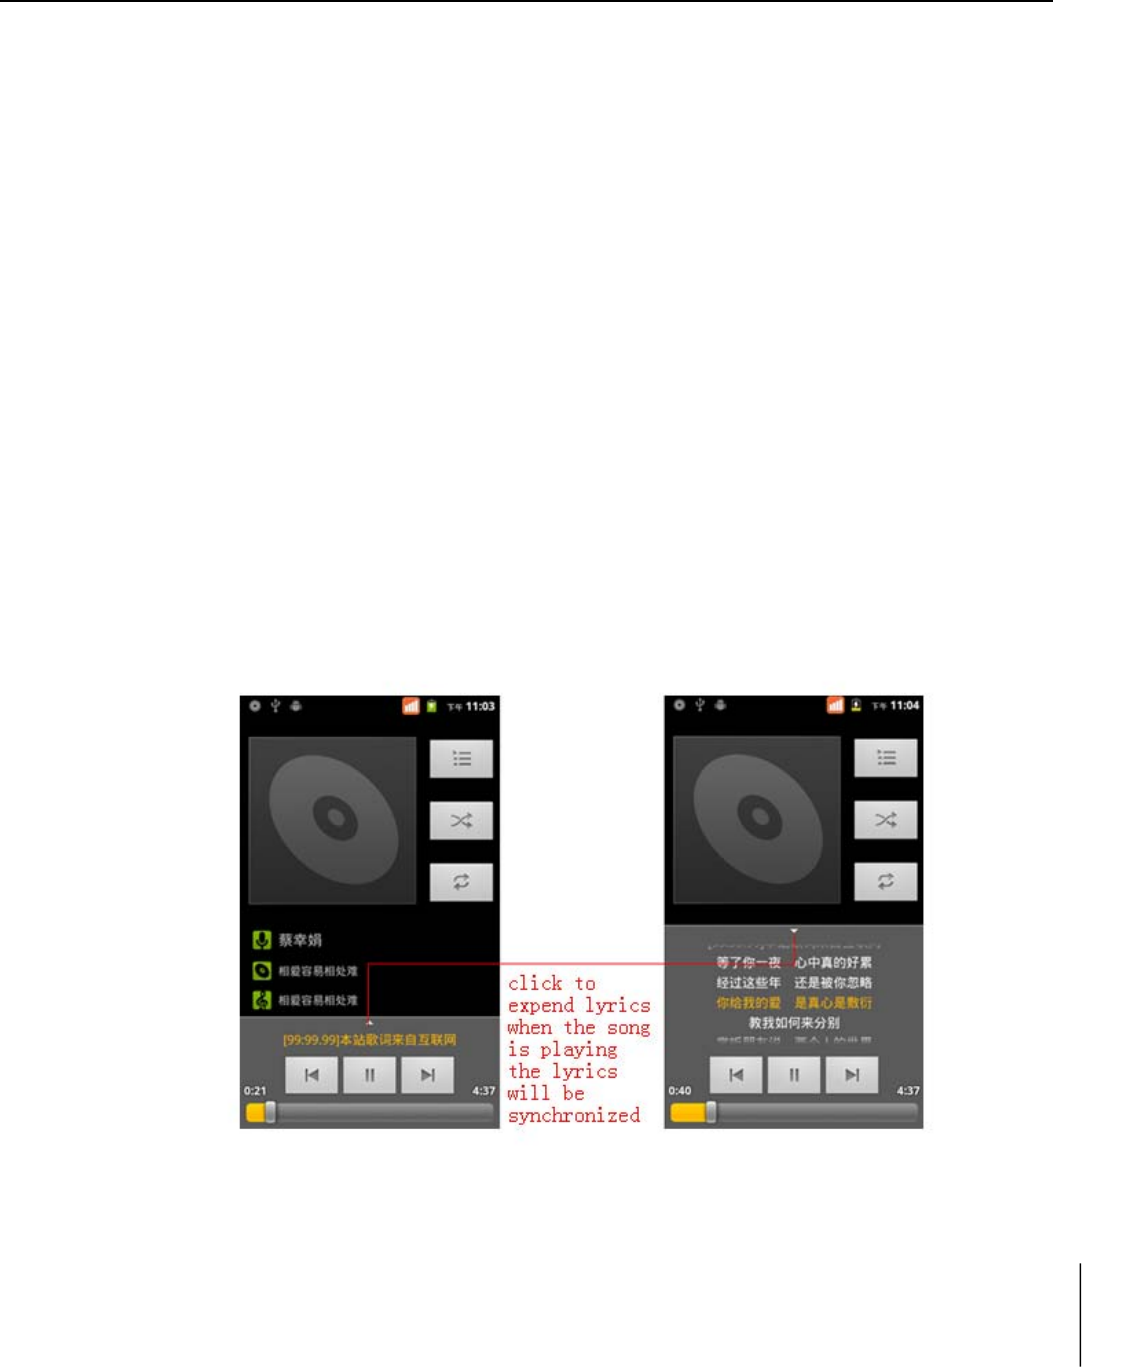
15. Music
Create a playlist
On home screen, touch the label of music. Then the interface of music appears.
Play music media
Your music files are classified according to the following four categories: “Artists”, “Albums”, “Songs” and
“Playlists”. Touch one of these categories and you can view the list inside.
Choose any item to open the list,then all the albums and songs will appear. Select one album, then the songs in it
will be played.
Create a playlist
1) Touch any category of music media on the screen.
2) In the list, you can press and slide up and down the screen to browse the artist, album or song that you want

UserManual
11
to add to the play list.
3) Press the artist, album or song, and then touch the options menu in the playlist.
4) In the interface of adding to the play list window, touch the new playlist.
5) Enter the new name of the playlist, and then touch to save.
Manage the play list
Enter the interface of music then touch the playlist.
1) To play songs of the playlist, touch the name of playlist.
2) To delete a play list, press and hold the playlist, and then touch “Delete”.
3) To rename a play list, press and hold the playlist, then touch Options menu rename. Enter the new play list
name, and then touch “Save”.
4) If you want to set a song as the incoming call ringtone, just touch menu>Use as ringtone. The song will be set
as the default incoming call ringtone.
16. Calendar
Enter the calender application
Load Goggle accounts, enter the application. In the interface of month or week, it will display gray to highlight
the day. It will also display the date on the current month by default.
In the interface, press menu, 4 display modes will appear, the Schedule Intrface shows a certain schedule (Click
on the initial time and view forward, click the final time to view backward s).
1) Day Interface displays a day's schedule (last clicked date). Slide around to turn page accoring day.
3) Week Interface displays a week's schedule (last clicked date). Slide around to turn page accoring week.
5) Month Interface displays a month's schedule (last clicked date). Slide around to turn page accoring
month.
4) Agenda Interface displays today's schedule, In the interface of month or week use gray to highlight the
day.
New event
1) Press Menu key->Select “New event”
2) Enter the name of the event
Notice: Special occasions such as birthday or a day with events, set the all-day option to “Yes”. If the activity is at a
certain time period, select the start time and end time.
3) Enter the event “Location” and input information. Set the Description, such as “REPETITION”, “REMINDERS”, “PRIVACY”
and so on.
4) Click “Done” to return to calendar.
Notice:All-day events appear in the calendar heading. It will not show the period of calendar.
Cancel activities:In the time frame, press for long to delete the activity.

UserManual
12
17. FM Radio
Through this app, you can listen to FM radio on the device, FM radio use the wired headset as an antenna to receive
signals, before opening this program ,you can insert the original equipment-headset to the phone
Open FM radio
Touch this label FM radio to open the application of FM radio. Make sure an earphone inserted before you use FM
radio or else it couldn’t be used.
Play FM radio
Press the red button ( ) from interface to start or pause p FM radio playing. Press the symbol “<” and “>” to
search available FM channels. Select this icon ( ) from the interface, it will search out the FM channel list. You can
choose any FM channel from the list to play.
FM recording
Select the setting symbol ( ) from the interface and choose “Start recording”. Then it will begin to record FM radio
automatically. You can tap “STOP RECORDING” from the bottom to save the file.
18. Settings
Wi-Fi
To allows you to search and connect to available wireless access point.
Bluetooth
Turn it on to search other devices, once get connected, you can transfer files between devices.
SIM cards
1) Touch it to choose or to disable the SIM card, the card is grey when disabled.
2) For the SIM cards, you can choose Cellular data, Calls, SMS messages.
Data usage
You can check your Wi-Fi or SIM cards’ data usage situation here
More
1) Airplane mode: You can slide the button to activate or disable.
2) Tethering & portable hotspot: Share your digital data via USB.
3) VPN: To set Virtual Private Networks Settings here.
4) Mobile networks: It includes: Data roaming, Preferred network type, Access Point Names, Network operators
Display
1) Wallpaper: You can set wallpaper from Gallery or you can select one default picture as your wallpaper. It also
contains the “Live Wallpapers”
2) Brightness level: Drag the icon to adjust the brightness for screen.
3) Screen time Out: Select a time, when time reaches, the screen will fade out.
4) Font size: You can set different size for font, like Small, Normal, Large and Extra large
Sound & notification

UserManual
13
This module gives the profile settings, including:Vibration, volume, ringtones, notification sound and feedback
(Dial pad touch tones, select Sound, screen lock sound, touch sounds and so on)
There are four default profiles: General/ Silent / Meeting / Outdoor. You can select any one of them.
Add audio profiles: It allows you to create the new profiles by inputting the name and select “OK” to save. For
each new profile you have added, just go to the profile settings to adjust the volume, turn on the vibration, select new
incoming call ringtones and so on.
Storage
1) View SD Card and Phone Memory.
2) Unmount or Erase SD Card.
Battery
You can see the using power situation of cell Standby, Phone idle, Display and so on.
Apps
1) Manage applications: Manage and delete the installed applications.
2) Running apps: Show the apps in current use in the list. You can touch any of it and select Stop to end up the
app running
3) Downloaded: Show the Downloaded apps. You can select any one of them, and select Force stop, Uninstall or
Clear data
4) All: Show all the apps installed on the phone.
Location
Use wireless to find locations in the application(Google maps)
Security
1) Set up screen lock
a. None: There will be no screen at all
b. Swipe: when screen timeouts and gets locked up. Swipe upwards to unlock the screen
c. Pattern: First draw an unlock pattern and need to confirm it. When the screen locks, you have to draw the
correct pattern to unlock.
d. PIN: Enter PIN numbers to unlock the screen.
e. Password: Set password to unlock the screen.
2) Set up SIM card lock
Enter(4-8numbers)PIN to set the lock of SIM.
SIM card PIN (Personal Identification Number) is to prevent unauthorized use of SIM cards. PIN code is
provided with SIM. The service provider gives the initial value.
Change a blocked PIN code, you need to open the "SIM Lock ", then go to Change Password screen, the
phone will automatically prompt enter the old PIN code and asked to enter a new PIN code twice, finally the phone will
prompt that change the code successfully. If you enter the PIN with error for three times, SIM card PIN codes will be
automatically locked, PUK codes is usually supplied with SIM card. If no, you should go to the service provider for the
codes. If you enter 10 times wrong PUK code, the SIM card will be permanently locked and invalid.
Accounts
1) Add account: Choose any type of accounts to add. Such as “Google”, “Exchange” and so on.
2) Auto-sync data: Turn on/off Automatic synchronization, applications automatically synchronize data or
asynchronous data
Language & input
1) Select Language: Set the phone language from the list
2) Personal dictionary: Add words to custom dictionary or delete.
3) Keyboards: you can select different Android keyboard according to different languages

UserManual
14
Factory data reset
Go to Settings->Choose “Backup & reset”->Select “RESET THE PHONE”-> “ERASE EVERTHING”, it can
clear all data stored on the phone and go back to the factory settings
Date & Time
1) Automatic date & time: Use date and time provided by Network.
2) Automatic time zone: Use network-provided time zone
3) Set date: Slide the screen to select month and press to select day
4) Set time: Move the clock hand to set the hour and minute
5) Select Time Zone: Slide up and down to select Time Zones
6) Use 24-hour format: Slide the button to turn it on/off
7) Choose date format: Select one of the date formats from the list
Scheduled power on &off
You can set time of boot or shutdown by touching it. You may also select to repeat it or a certain day during a
week.
About phone
You can check status, including battery status, battery level, SIM status, IMEI information and so on. You can also
check the model number, Android version, Baseband version and so on.
19. Notice for the use of phone
Your phone is a product of superior design and craftsmanship and should be treated with care. The following suggestions can help you
comply with the terms of repair kits, to extend the life of mobile phone.
1) Place the mobile phone and their parts and components out of reach of small children.
2) Keep the phone dry, rain, humidity and all types of liquids which contain minerals will corrode electronic circuits.
3) Don’t touch the phone with wet hands when charging, it will cause electric shock or damage the phone.
4) Avoid place the device in high temperature environment. Temperatures will shorten the life of electronic devices, damage batteries, and
warp or melt certain plastics.
5) Avoid place the device in too low temperature environment. When the temperature rises, the phone will produce water vapor that may
damage electronic circuit.
6) Avoid place the phone in dusty, dirty places, otherwise parts may be damaged.
7) To avoid the phone in a lit cigarette, near open flame or any heat source.
8) Do not open the device, non-professional approach will do damage to the phone.
9) Do not throwit from height, knock or shake the phone, rough handling can damage internal circuit boards.
10) Do not paint the phone, because the paint will block headphones, microphones or other removable parts, and lead it not work.
11) Use clean, soft, dry cloth to clean the camera, light sensor lenses. Prohibit the use of harmful chemicals and cleaning agents, cleaning
fluids to clean the phone
12) If mobile phone, battery, charger, or mobile phone accessories are defective, send to the nearest qualified service center for inspection.
13) I f nessary, Service Centre staff will assist you and will arrange for phone repairs.

UserManual
15
FCCStatement
1.ThisdevicecomplieswithPart15oftheFCCRules.Operationissubjecttothefollowingtwoconditions:
(1)Thisdevicemaynotcauseharmfulinterference.
(2)Thisdevicemustacceptanyinterferencereceived,includinginterferencethatmaycauseundesiredoperation.
2.Changesormodificationsnotexpresslyapprovedbythepartyresponsibleforcompliancecouldvoidtheuser'sauthority
tooperatetheequipment.
NOTE:
ThisequipmenthasbeentestedandfoundtocomplywiththelimitsforaClassBdigitaldevice,pursuanttoPart15ofthe
FCCRules.Theselimitsaredesignedtoprovidereasonableprotectionagainstharmfulinterferenceinaresidential
installation.
Thisequipmentgeneratesusesandcanradiateradiofrequencyenergyand,ifnotinstalledandusedinaccordancewith
theinstructions,maycauseharmfulinterferencetoradiocommunications.However,thereisnoguaranteethat
interferencewillnotoccurinaparticularinstallation.Ifthisequipmentdoescauseharmfulinterferencetoradioor
televisionreception,whichcanbedeterminedbyturningtheequipmentoffandon,theuserisencouragedtotryto
correcttheinterferencebyoneormoreofthefollowingmeasures:
Reorientorrelocatethereceivingantenna.
Increasetheseparationbetweentheequipmentandreceiver.
Connecttheequipmentintoanoutletonacircuitdifferentfromthattowhichthereceiverisconnected.
Consultthedealeroranexperiencedradio/TVtechnicianforhelp.
SARInformationStatement
Yourwirelessphoneisaradiotransmitterandreceiver.Itisdesignedandmanufacturednottoexceedtheemissionlimits
forexposuretoradiofrequency(RF)energysetbytheFederalCommunicationsCommissionoftheU.S.Government.These
limitsarepartofcomprehensiveguidelinesandestablishpermittedlevelsofRFenergyforthegeneralpopulation.The
guidelinesarebasedonstandardsthatweredevelopedbyindependentscientificorganizationsthroughperiodicand
thoroughevaluationofscientificstudies.Thestandardsincludeasubstantialsafetymargindesignedtoassurethesafetyof
allpersons,regardlessofageandhealth.Theexposurestandardforwirelessmobilephonesemploysaunitof
measurementknownastheSpecificAbsorptionRate,orSAR.TheSARlimitsetbytheFCCis1.6W/kg.*TestsforSARare
conductedwiththephonetransmittingatitshighestcertifiedpowerlevelinalltestedfrequencybands.AlthoughtheSAR
isdeterminedatthehighestcertifiedpowerlevel,theactualSARlevelofthephonewhileoperatingcanbewellbelowthe
maximumvalue.Thisisbecausethephoneisdesignedtooperateatmultiplepowerlevelssoastouseonlythepower
requiredtoreachthenetwork.Ingeneral,thecloseryouaretoawirelessbasestationantenna,thelowerthepower
output.Beforeaphonemodelisavailableforsaletothepublic,itmustbetestedandcertifiedtotheFCCthatitdoesnot
exceedthelimitestablishedbythegovernmentadoptedrequirementforsafeexposure.Thetestsareperformedin
positionsandlocations(e.g.,attheearandwornonthebody)asrequiredbytheFCCforeachmodel.ThehighestSAR
valueforthismodelphonewhentestedforuseattheearis0.408W/Kgandwhenwornonthebody,asdescribedinthis
userguide,is0.651W/Kg(Body‐wornmeasurementsdifferamongphonemodels,dependinguponavailableaccessories
andFCCrequirements).ThemaximumscaledSARinhotspotmodeis0.651W/Kg.Whiletheremaybedifferencesbetween
theSARlevelsofvariousphonesandatvariouspositions,theyallmeetthegovernmentrequirementforsafeexposure.
TheFCChasgrantedanEquipmentAuthorizationforthismodelphonewithallreportedSARlevelsevaluatedasin
compliancewiththeFCCRFexposureguidelines.SARinformationonthismodelphoneisonfilewiththeFCCandcanbe
foundundertheDisplayGrantsectionofhttp://www.fcc.gov/oet/fccidaftersearchingon
FCCID:2ALJJ‐PH5003AdditionalinformationonSpecificAbsorptionRates(SAR)canbefoundontheCellular
TelecommunicationsIndustryAsso‐ciation(CTIA)web‐siteathttp://www.wow‐com.com.*IntheUnitedStatesand
Canada,theSARlimitformobilephonesusedbythepublicis1.6watts/kg(W/kg)averagedoveronegramoftissue.The
standardincorporatesasub‐stantialmarginofsafetytogiveadditionalprotectionforthepublicandtoaccountforany
variationsinmeasurements.
Body‐wornOperation
Thisdevicewastestedfortypicalbody‐wornoperations.TocomplywithRFexposurerequirements,aminimumseparation
distanceof10mmmustbemaintainedbetweentheuser’sbodyandthehandset,includingtheantenna.Third‐party
belt‐clips,holsters,andsimilaraccessoriesusedbythisdeviceshouldnotcontainanymetalliccomponents.Body‐worn

UserManual
16
accessoriesthatdonotmeettheserequirementsmaynotcomplywithRFexposurerequirementsandshouldbeavoided.
Useonlythesuppliedoranapprovedantenna.