PIONEER POS SOLUTION DASH Tablet PC User Manual
PIONEER POS SOLUTION INC Tablet PC
UserManual.wiki
>
PIONEER POS SOLUTION
>
DASH User Manual
>
User manual
Contents
1.
User manual
2.
User's manual
User manual
Navigation menu
Upload a User Manual
Namespaces
Wiki Guide
HTML
PDF
Info
Views
User Manual
Discussion / Help
Navigation

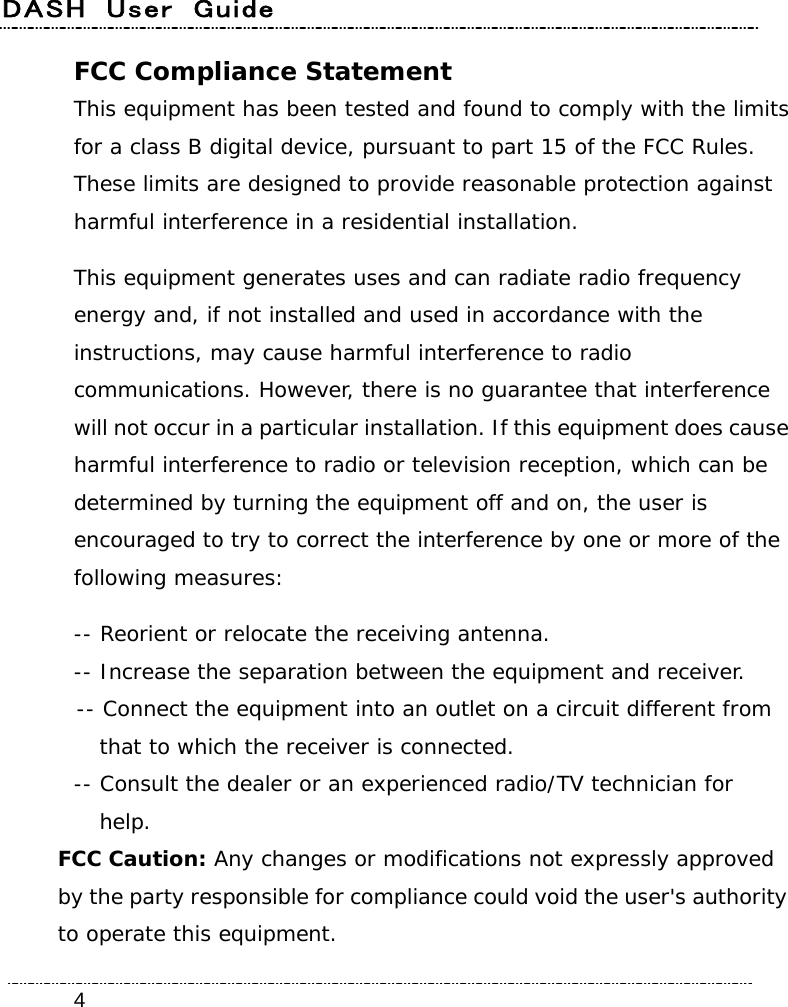


![DASH User Guide 25 If your system does not define User Interface function, this button can be programmable to execute specific application. When you program your application, please write this directory as listed below into your source code, then the system will aware and execute this application. F5_EXE="C:\WINDOWS\system32\taskmgr.exe" F5_PARA="" F5_PATH="" Programmable Function Buttons If your system does not define this button’s function, this button can be programmable to execute specific application. When you program your application, please write this directory as listed below into your source code, then the system will aware and execute this application. [Setup] F1_EXE="c:\windows\explorer.exe" F1_PARA="" F1_PATH="" F2_EXE="C:\Program Files\Windows Media Player\wmplayer.exe" F2_PARA="/prefetch: 1" F2_PATH="" F3_EXE="c:\program files\E-Cam\E-CAM.exe" F3_PARA="" F3_PATH="" F4_EXE="C:\WINDOWS\system32\osk.exe" F4_PARA="" F4_PATH=""](https://usermanual.wiki/PIONEER-POS-SOLUTION/DASH.User-manual/User-Guide-1853688-Page-25.png)


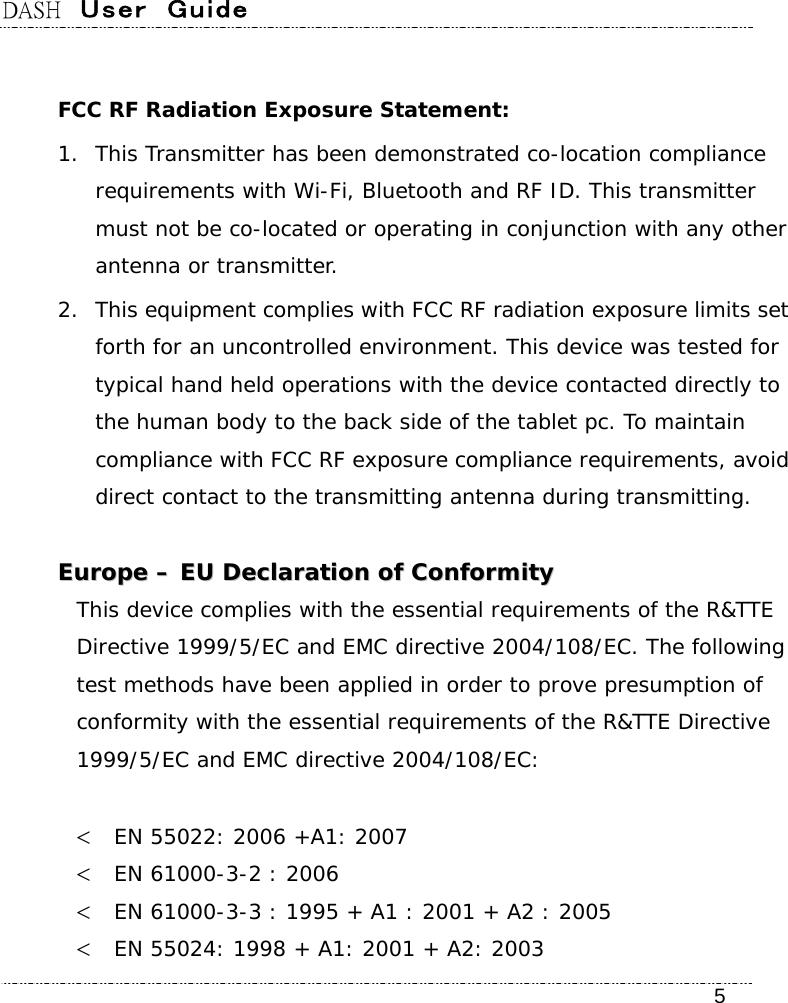
![DASH User Guide 52in the list. To exit from this menu, press <Esc>. 44..55.. EExxiitt CCoonnttrrooll Exit Saving Changes When you select this option, it will pop-out the following message, “Save configuration changes and exit setup?” Select [OK] to save the changes and exit the BIOS SETUP UTILITY. Exit Discarding Changes When you select this option, it will pop-out the following message, “Discard changes and exit setup?”. Select [OK] to exit the BIOS SETUP UTILITY without saving any changes. Load Setup Defaults When you select this option, it will pop-out the following message,](https://usermanual.wiki/PIONEER-POS-SOLUTION/DASH.User-manual/User-Guide-1853688-Page-52.png)
![DASH User Guide 53 “Load optimal defaults?” Select [OK] to load the default values for all the setup configurations. Load Optimized Defaults When you select this option, it will pop-out the following message, “Load optimal defaults?” Select [OK] to load the default values for all the setup configurations. Discard Changes When you select this option, it will pop-out the following message, “Discard changes?” Select [OK] to discard all changes. Save Changes When you select this option, it will pop-out the following message, “Save changes?” Select [OK] to save all changes.](https://usermanual.wiki/PIONEER-POS-SOLUTION/DASH.User-manual/User-Guide-1853688-Page-53.png)