PIPO TECHNOLOGY P9 MID User Manual
PIPO TECHNOLOGY CO., LIMITED MID
UserManual.wiki
>
PIPO TECHNOLOGY
>
P9 User Manual
User Manual
Navigation menu
Upload a User Manual
Namespaces
Wiki Guide
HTML
PDF
Info
Views
User Manual
Discussion / Help
Navigation
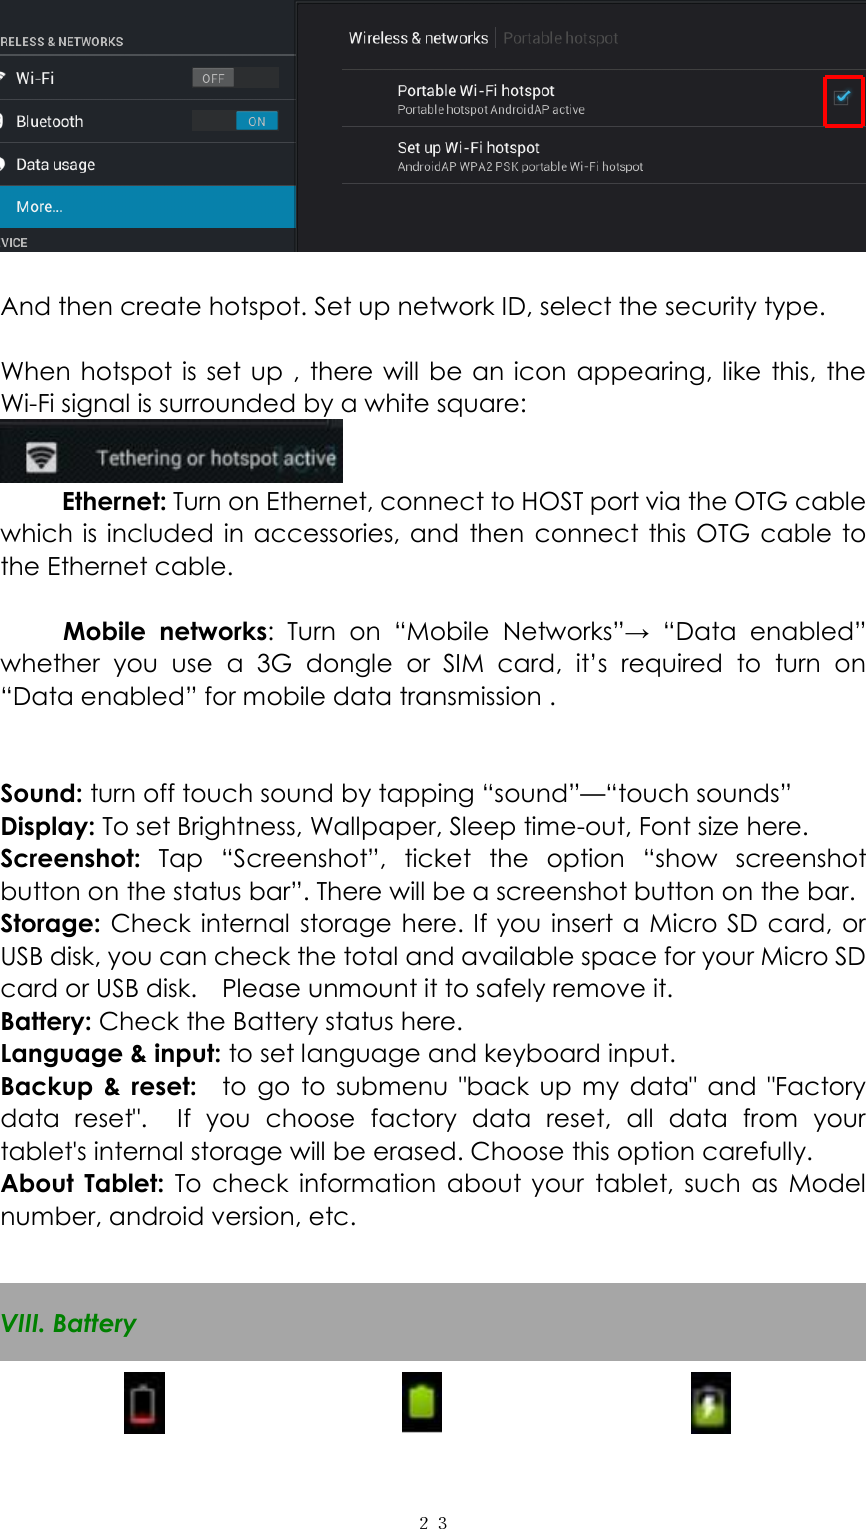
![22 Secondly, after setting the screen lock, you could add A new VPN. Create your VPN name, input the server address, and then click “save” [Input What ever name you want to show on the VPN] And then input your VPN account and password And , finally, VPN settled. Portable hotspot: turn on Wi-Fi and turn on hotspot by ticking the square.](https://usermanual.wiki/PIPO-TECHNOLOGY/P9/User-Guide-3371211-Page-22.png)