Palm 200000 PDA With 802.11b WLAN User Manual
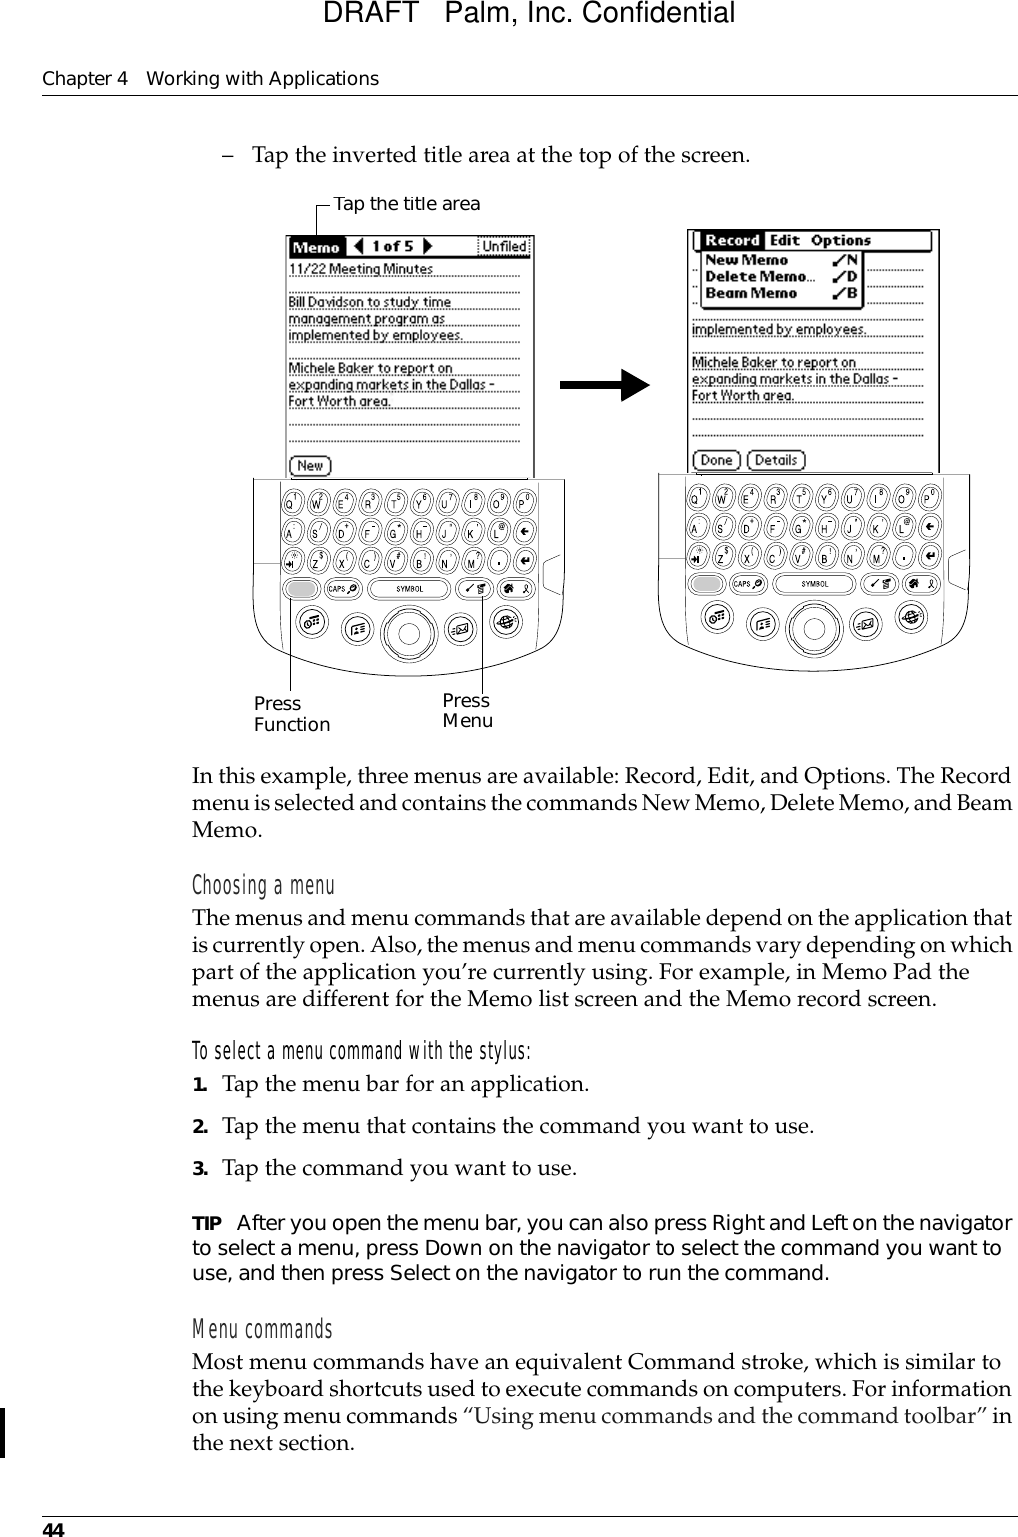
Palm Inc PDA With 802.11b WLAN
UserManual.wiki
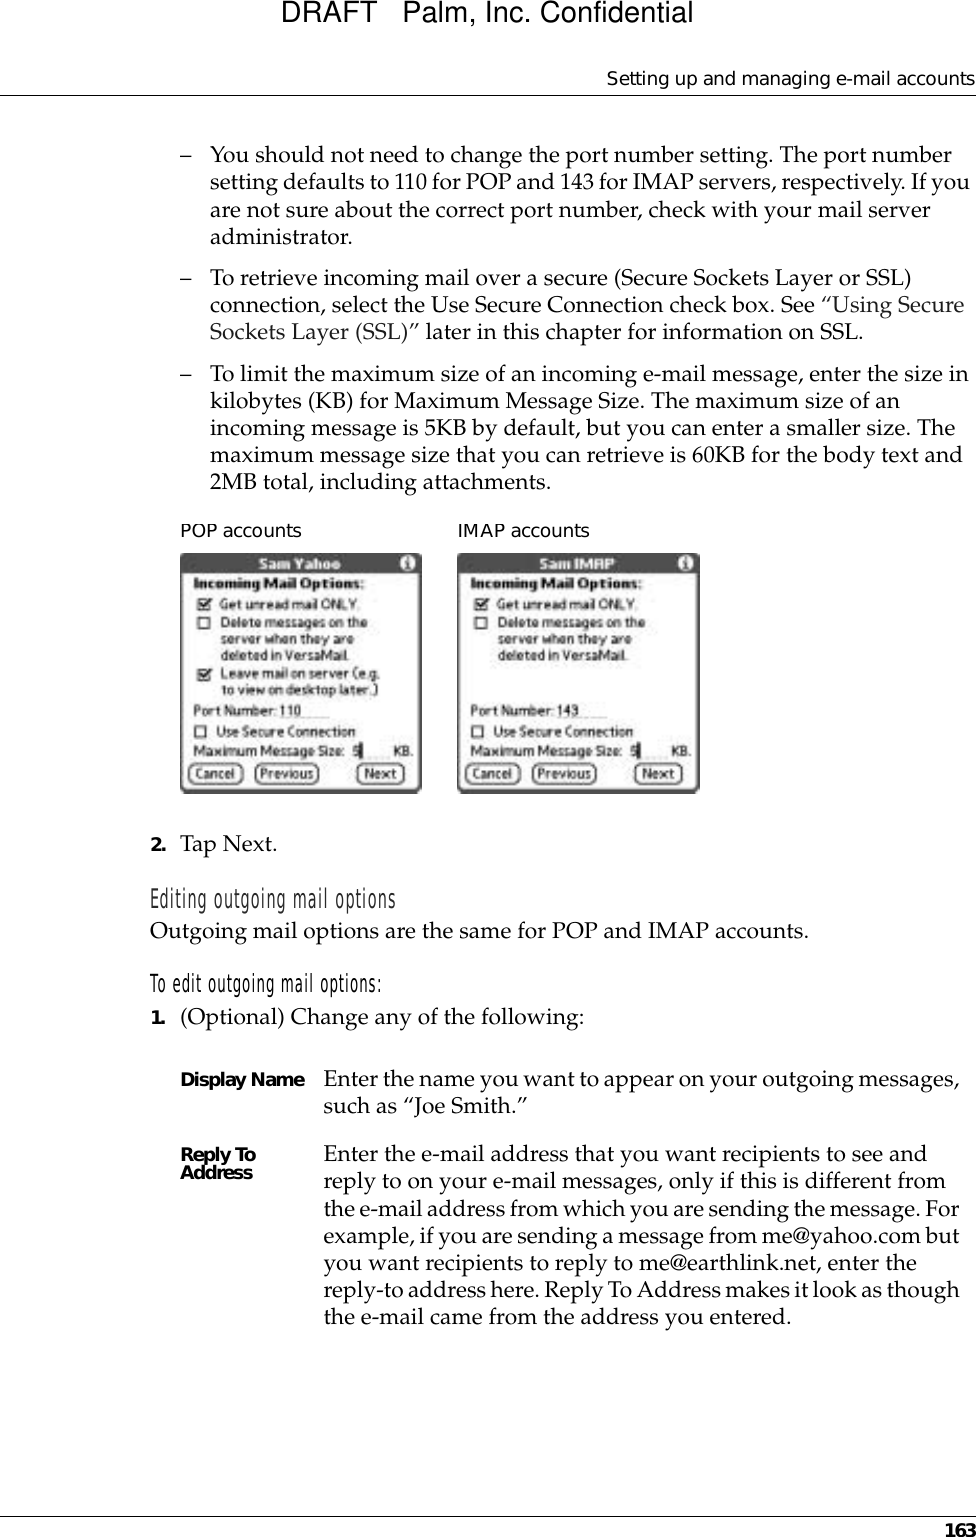
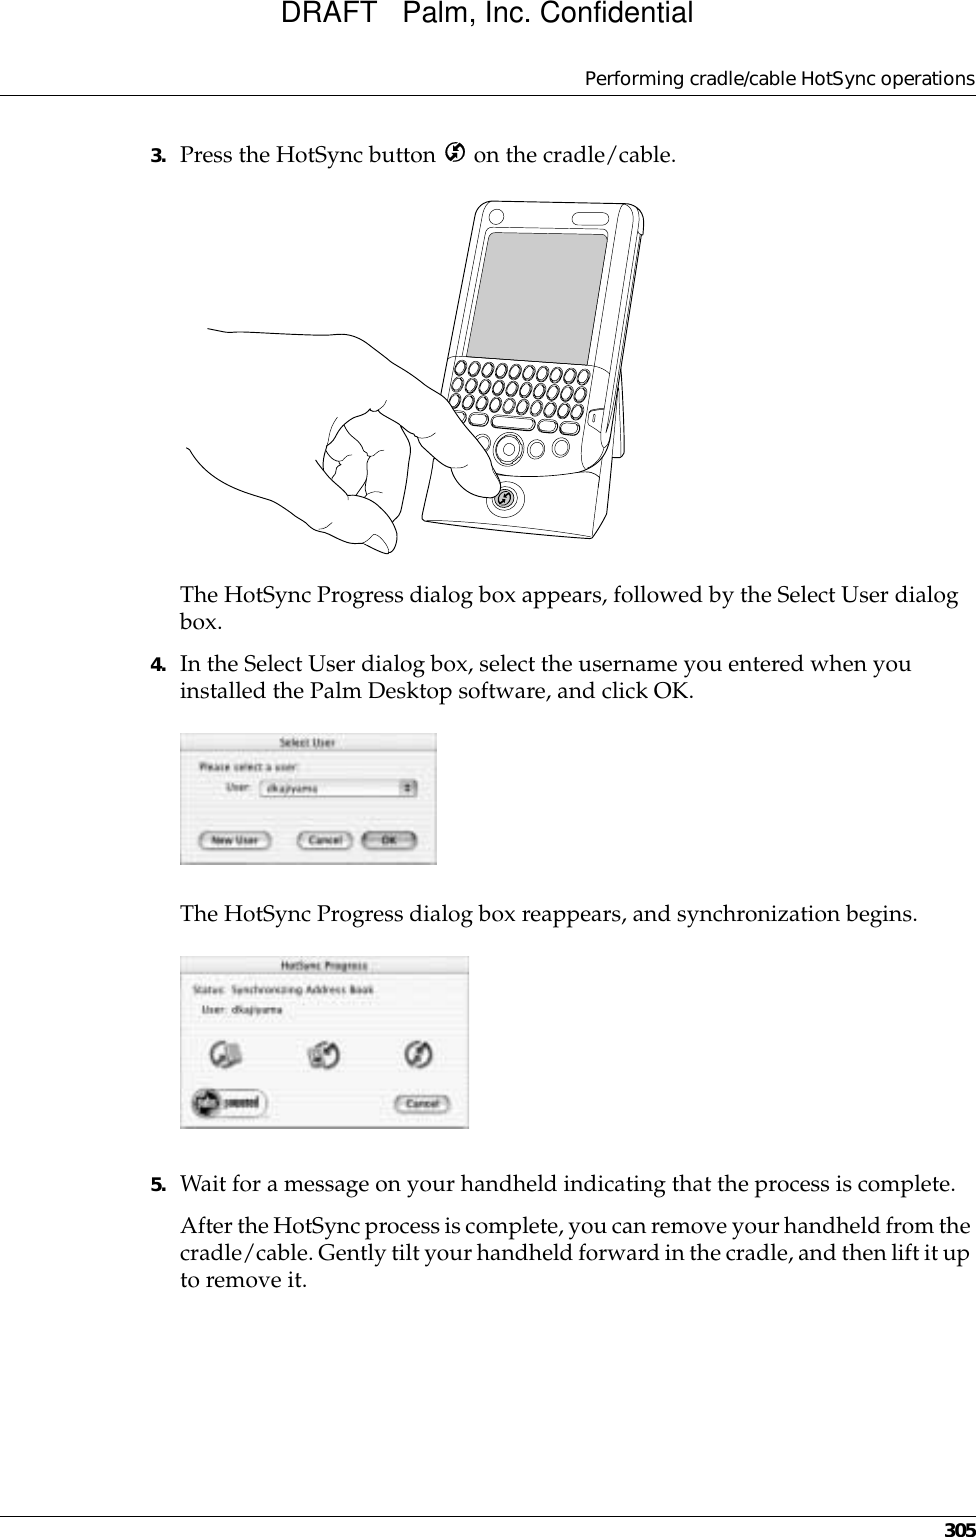
>
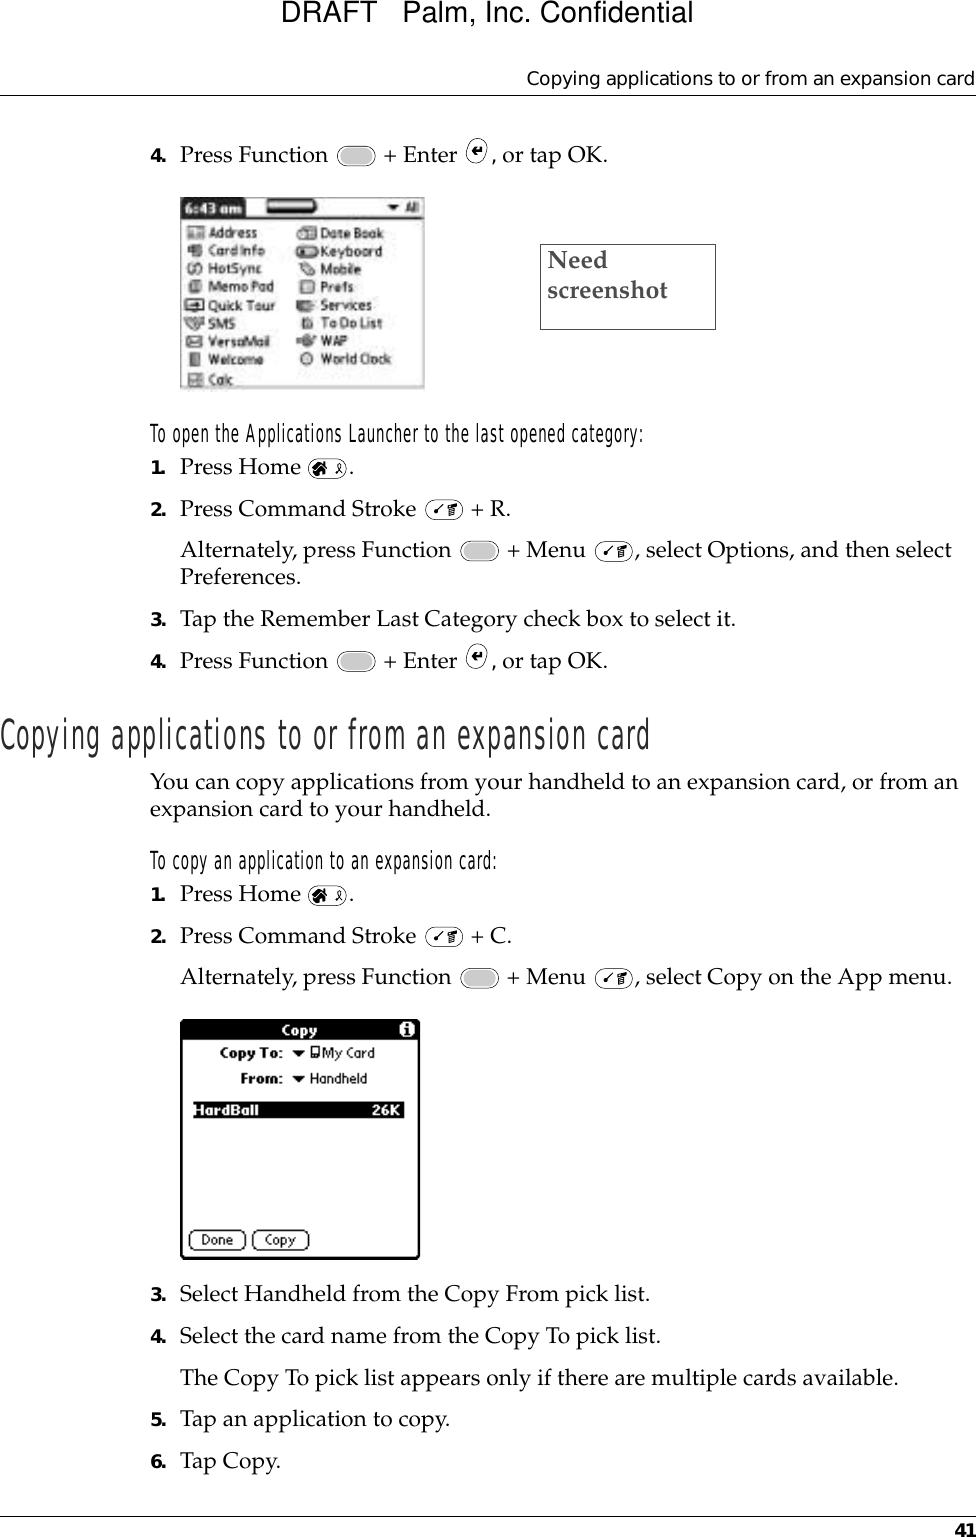
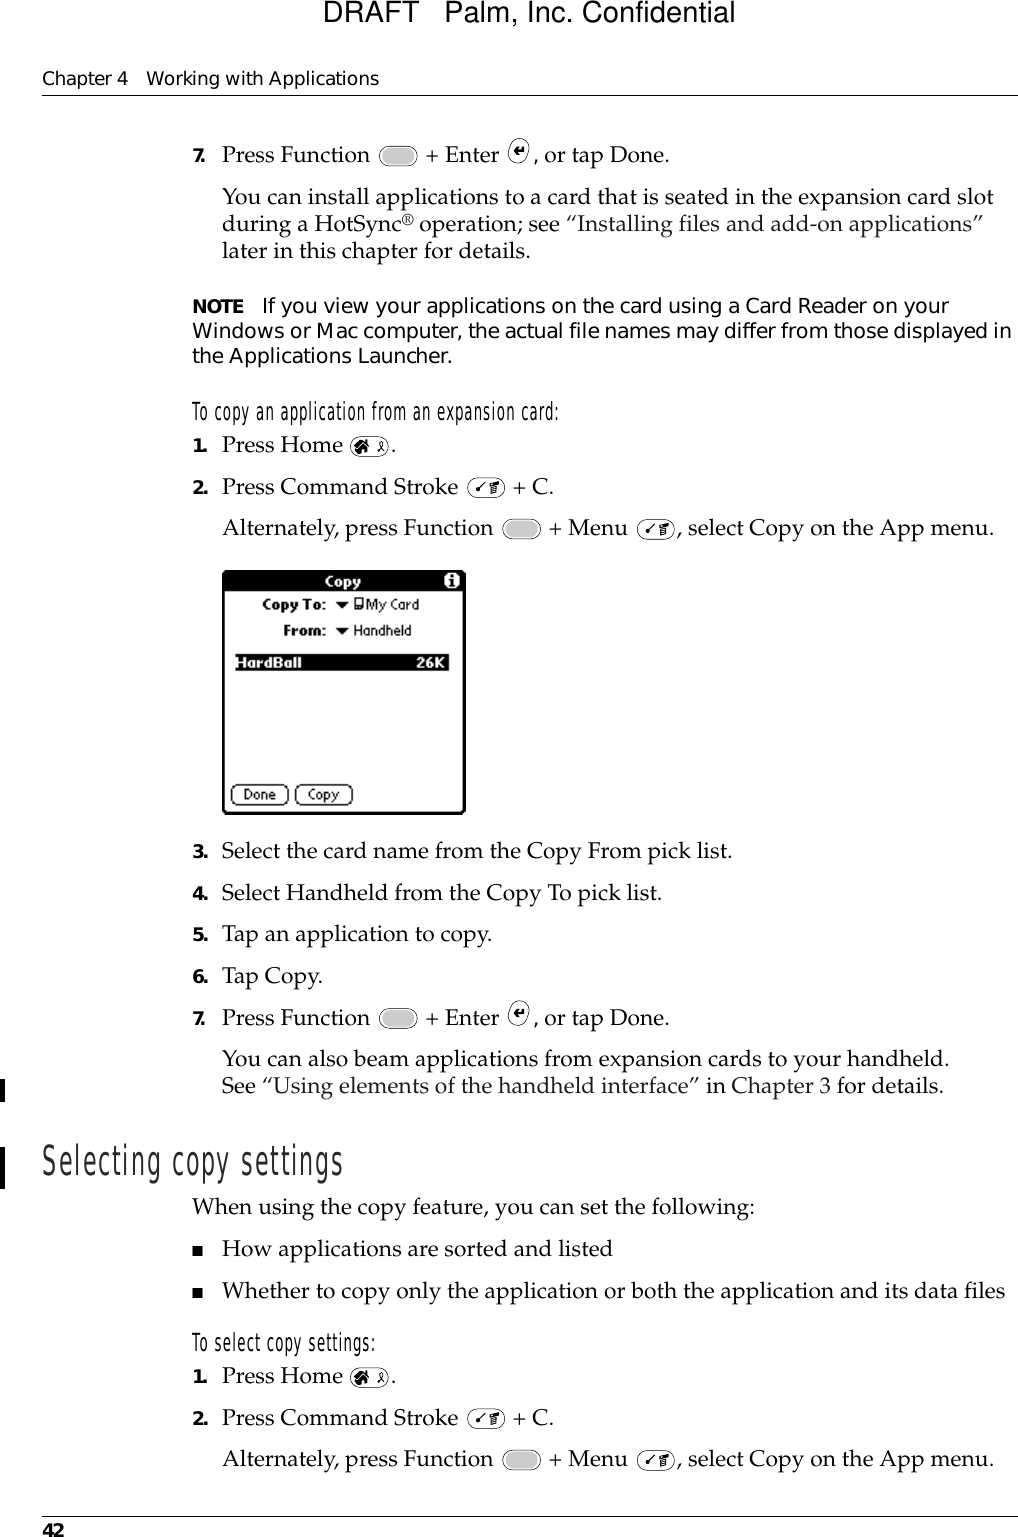
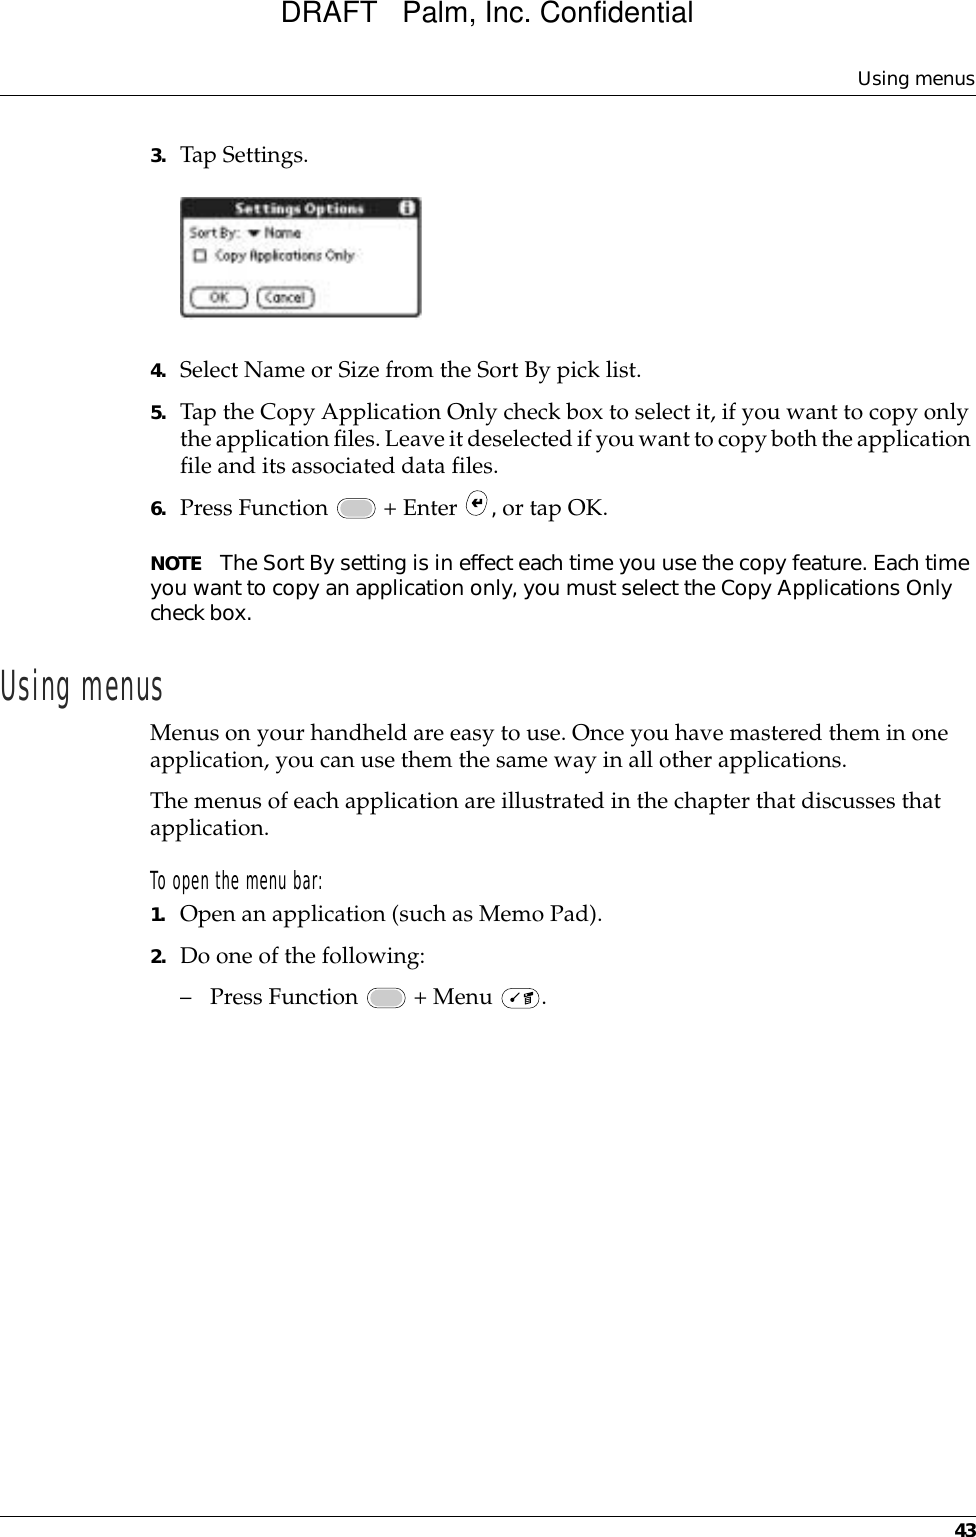
Palm
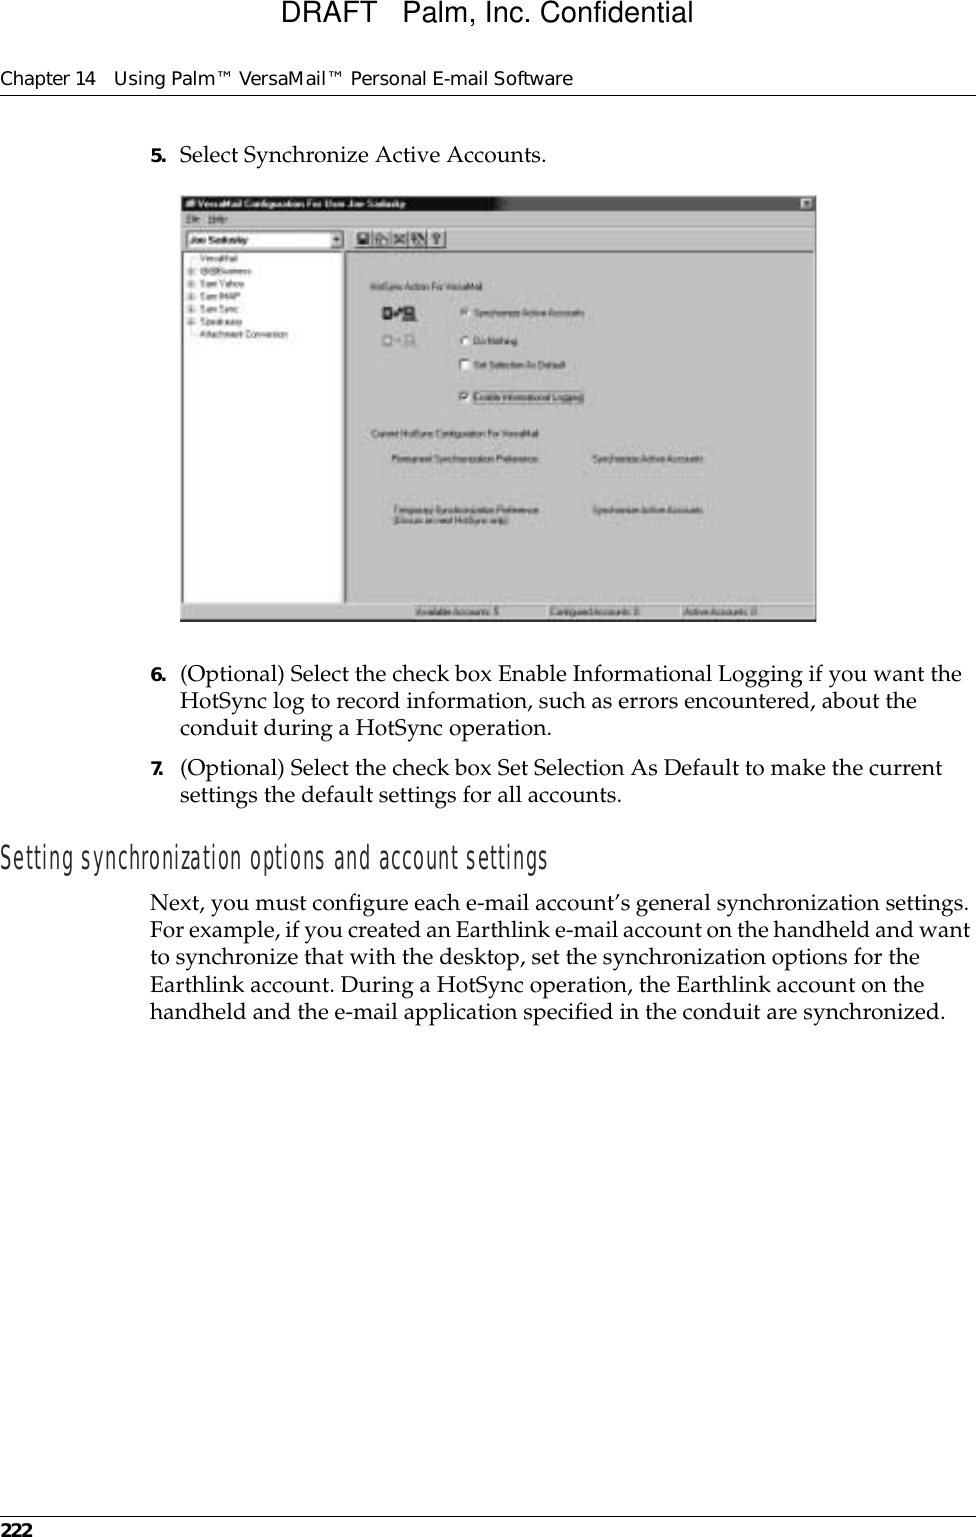
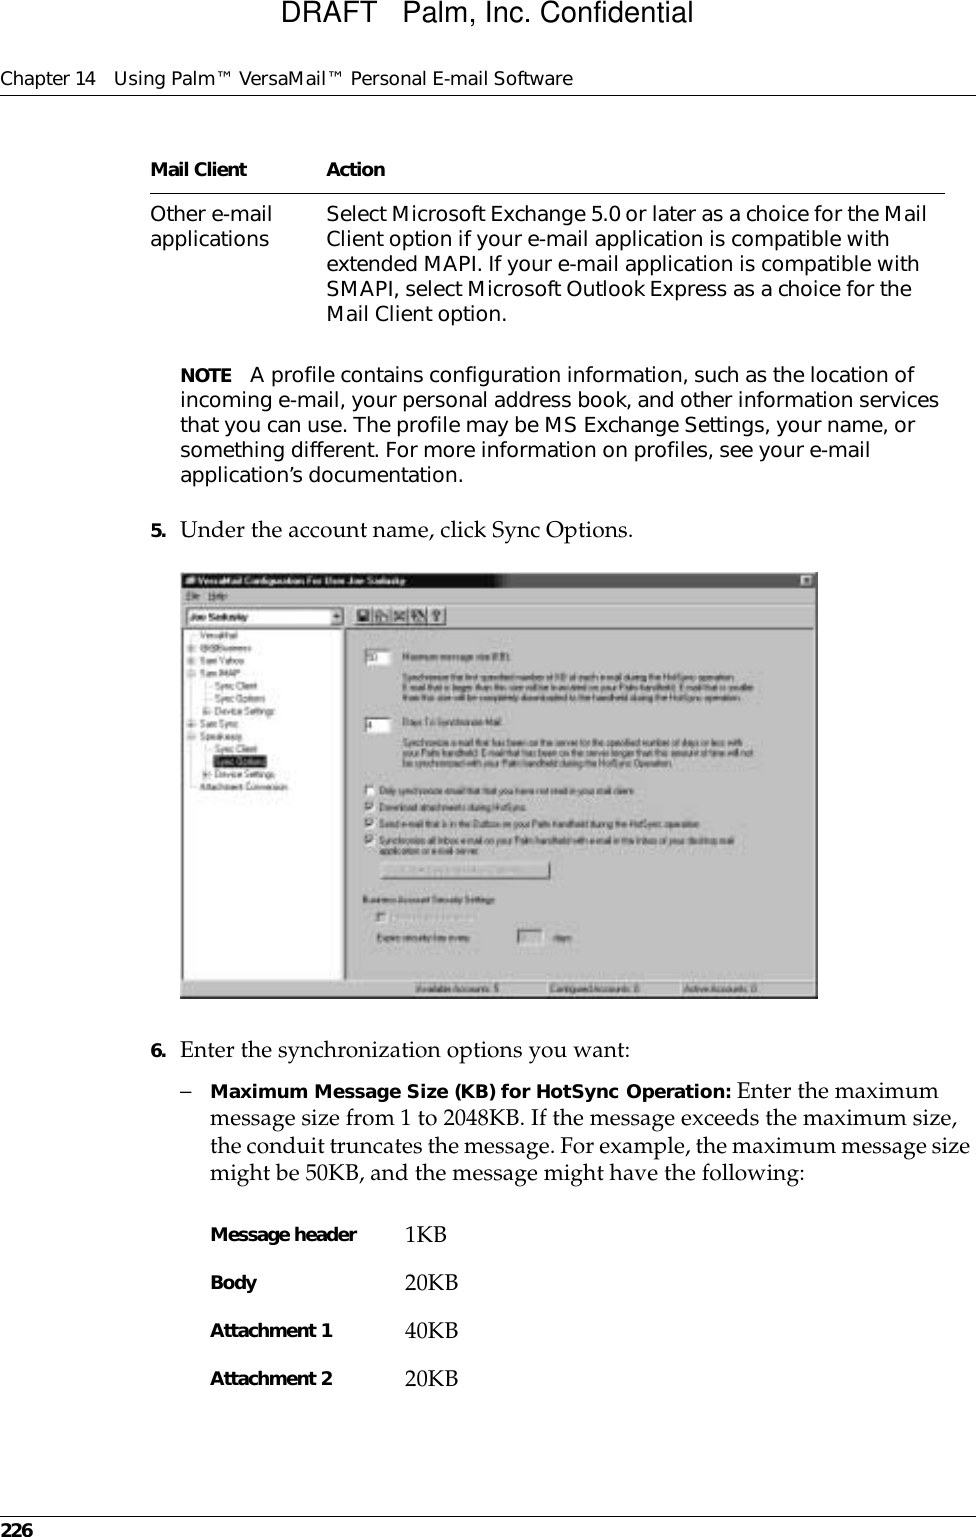
>
200000 User Manual
>
User Manual
Contents
1.
Revised regulatory statement
2.
User Manual
User Manual
Navigation menu
Upload a User Manual
Namespaces
Wiki Guide
HTML
PDF
Info
Views
User Manual
Discussion / Help
Navigation
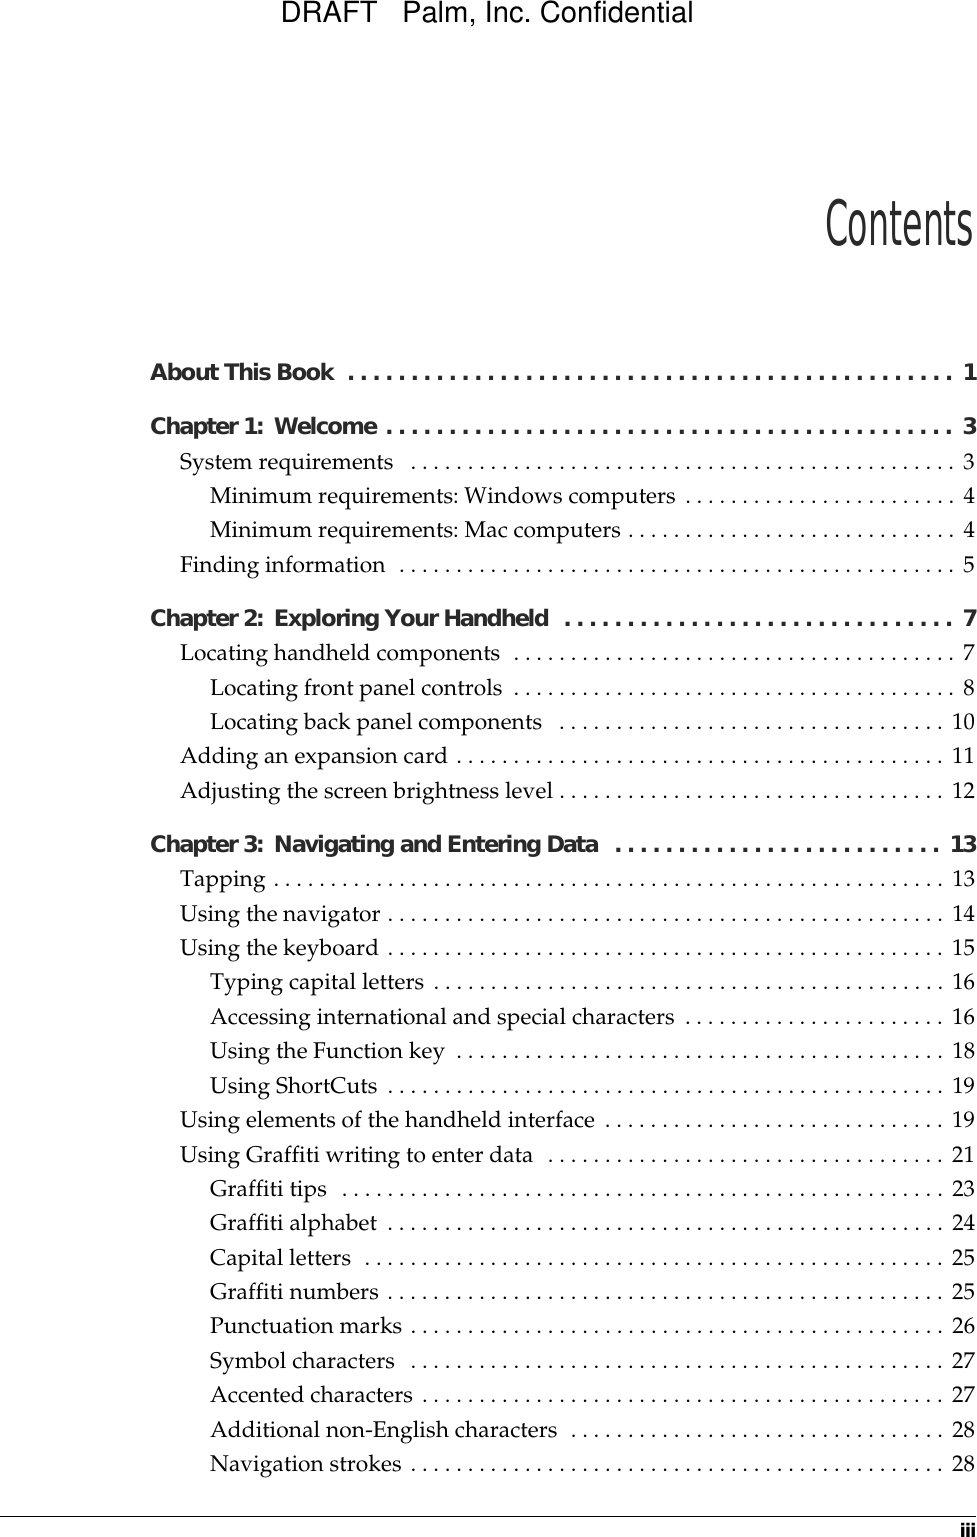

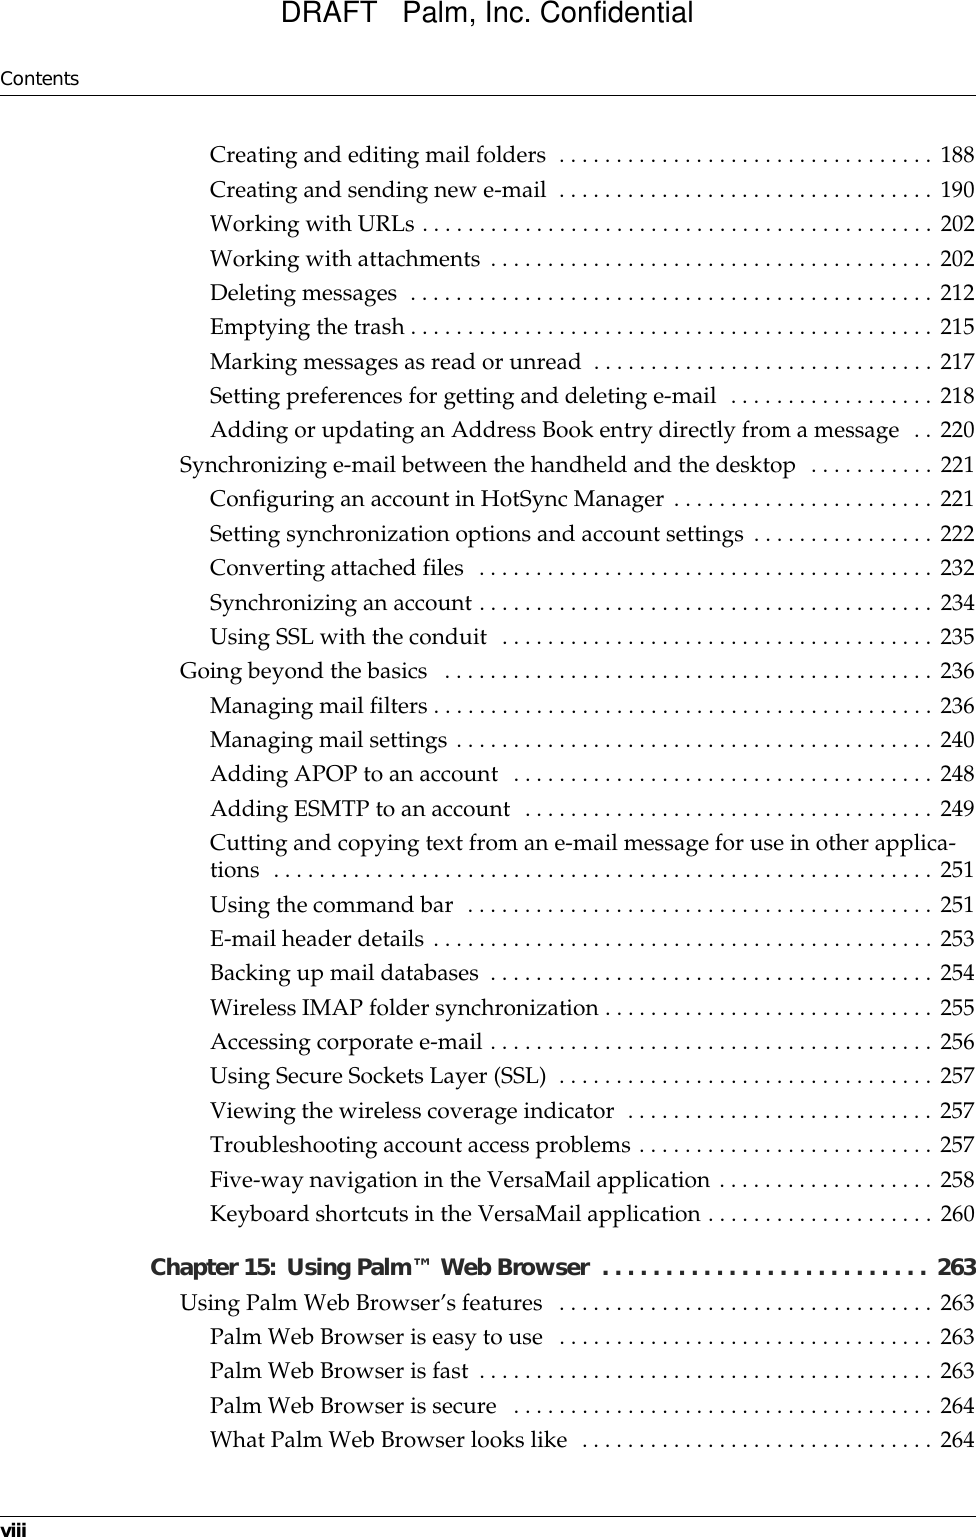

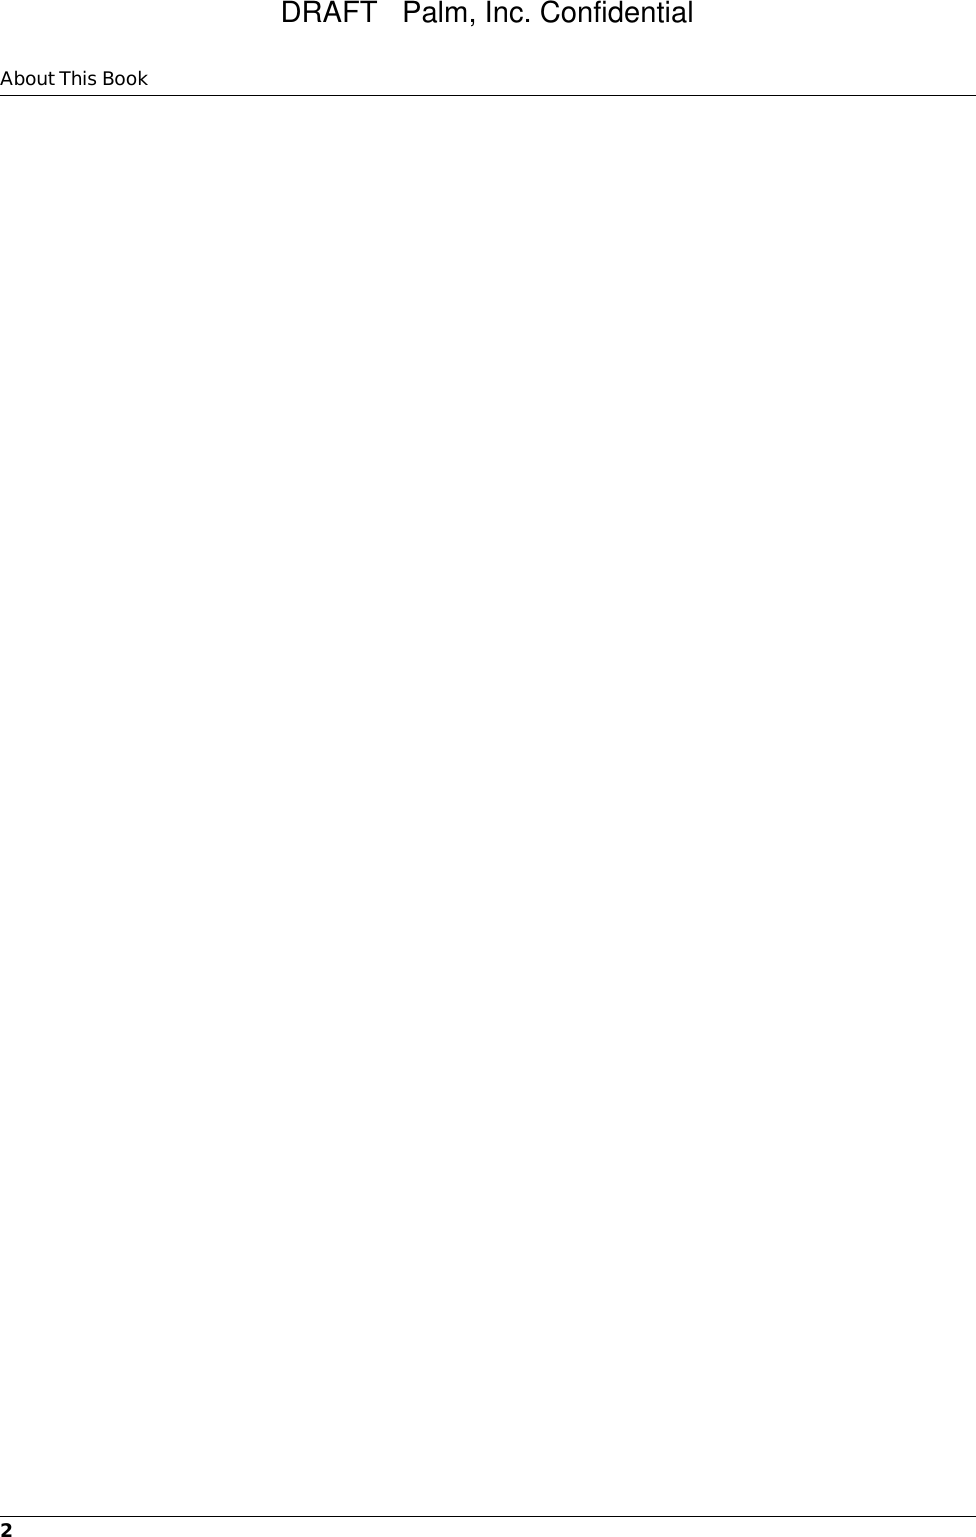
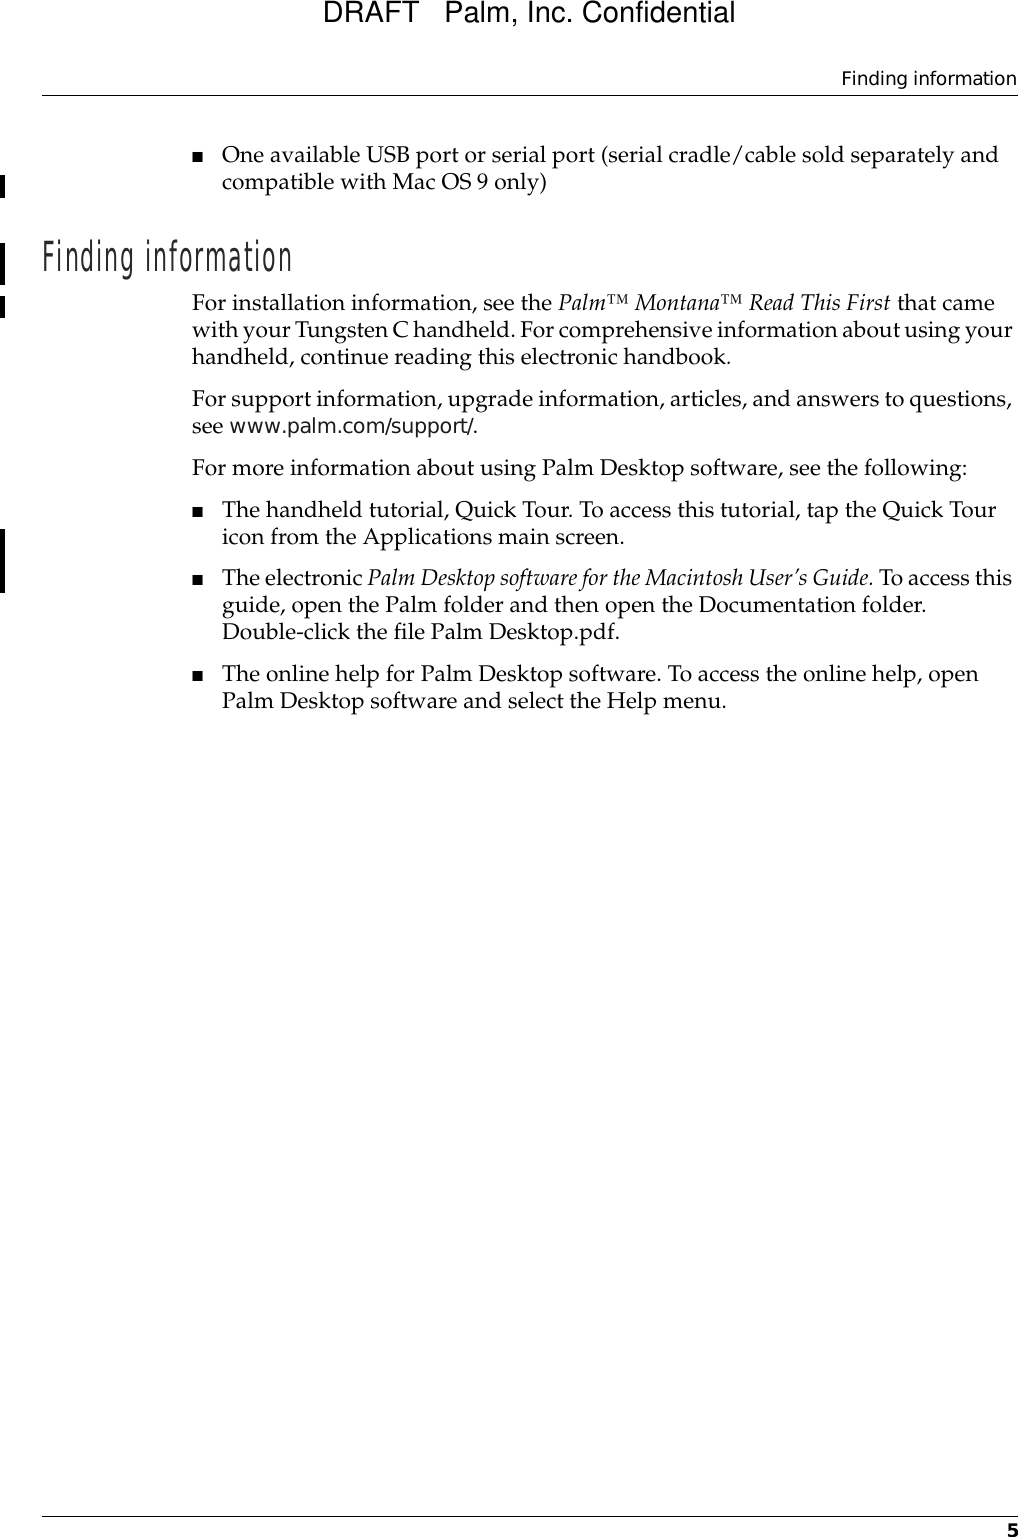

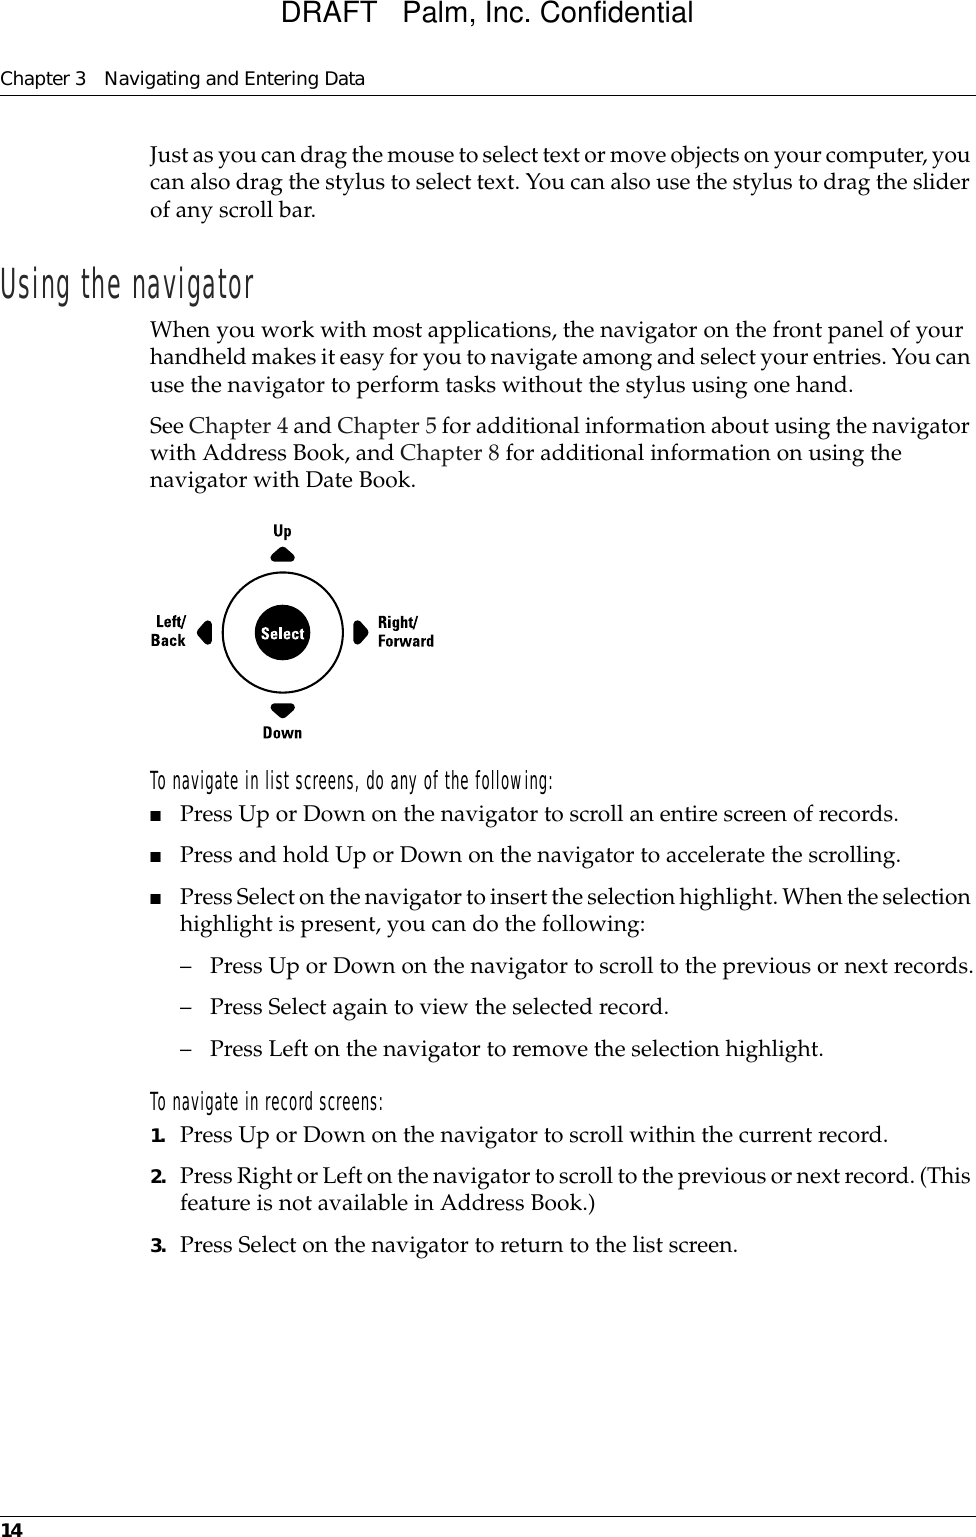
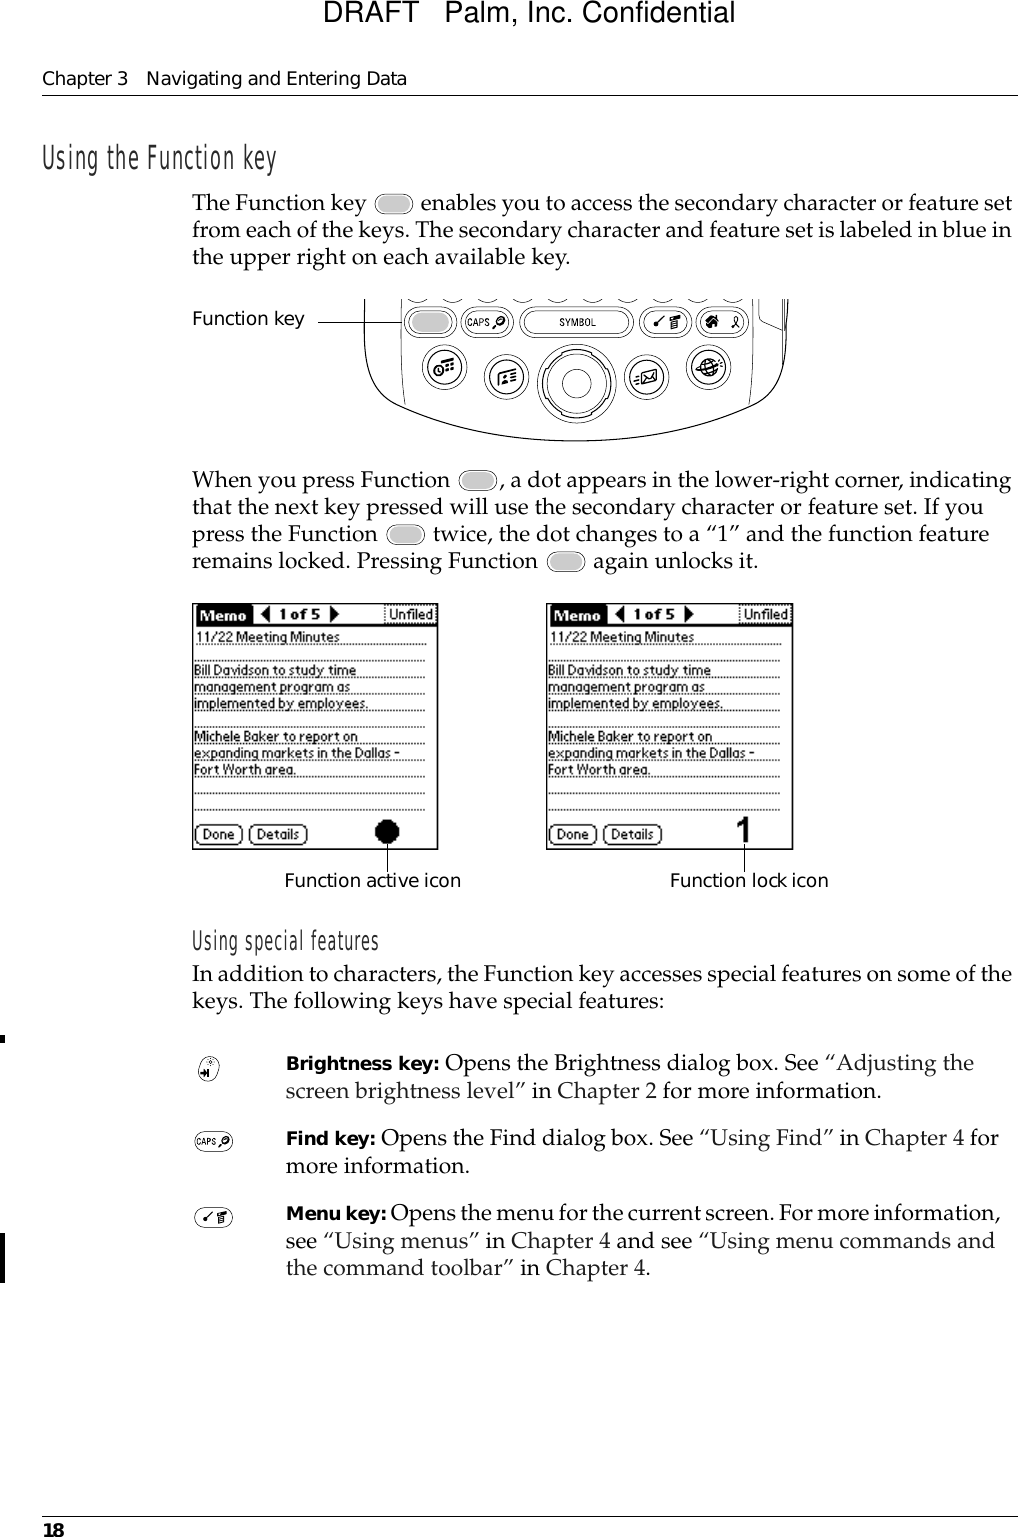

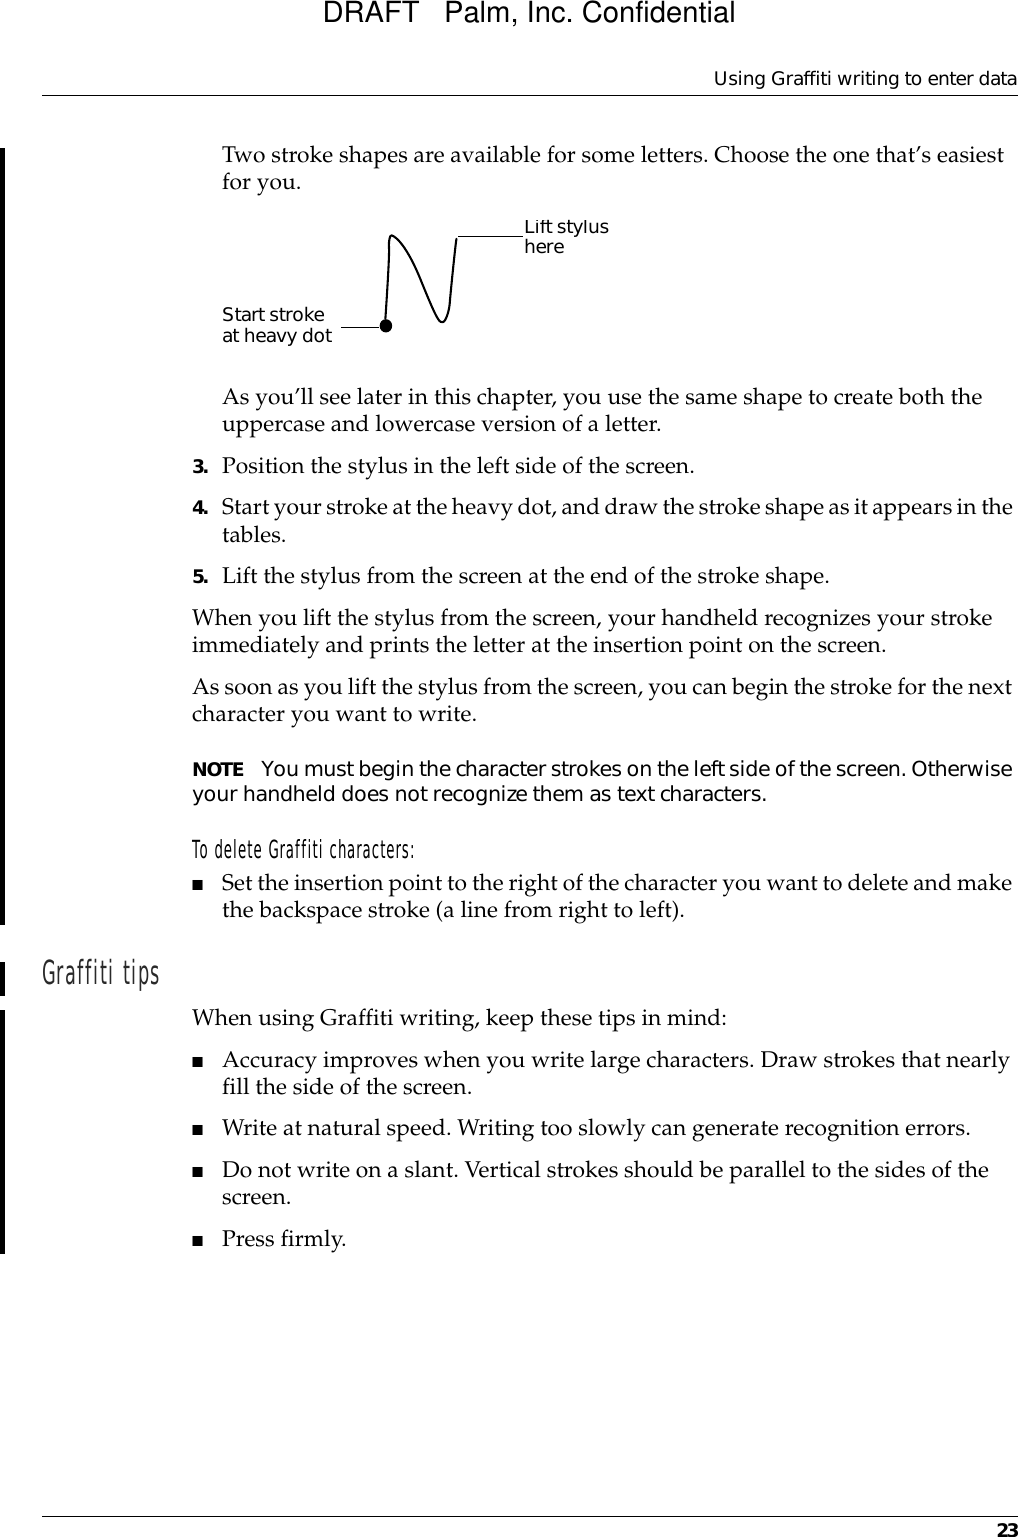
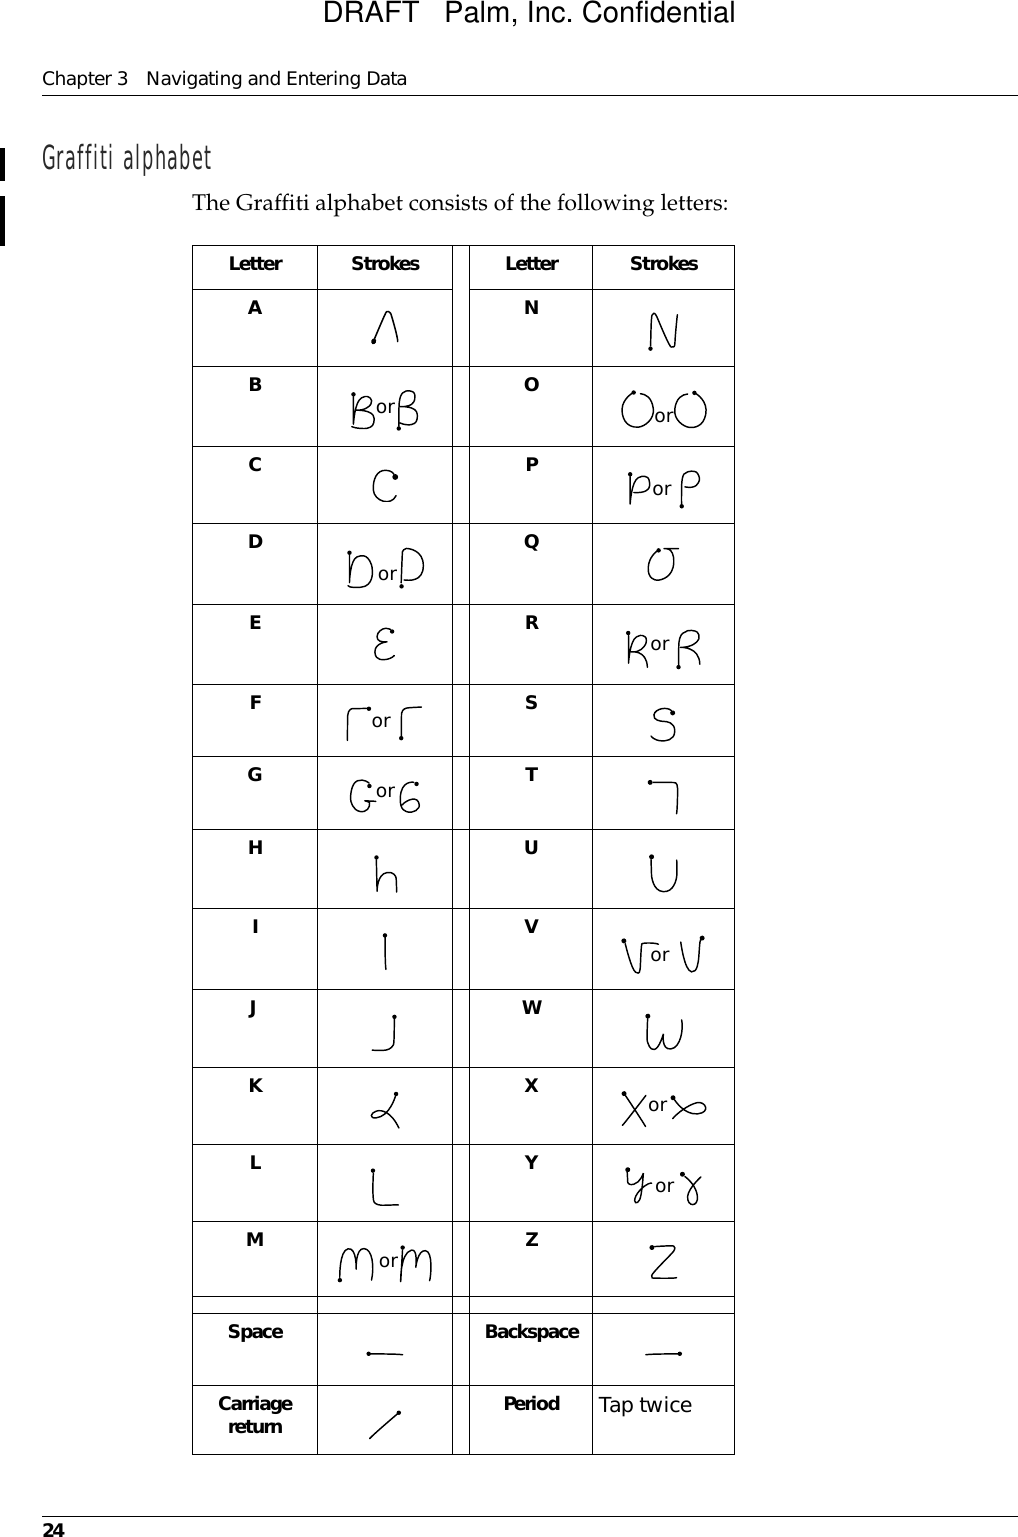
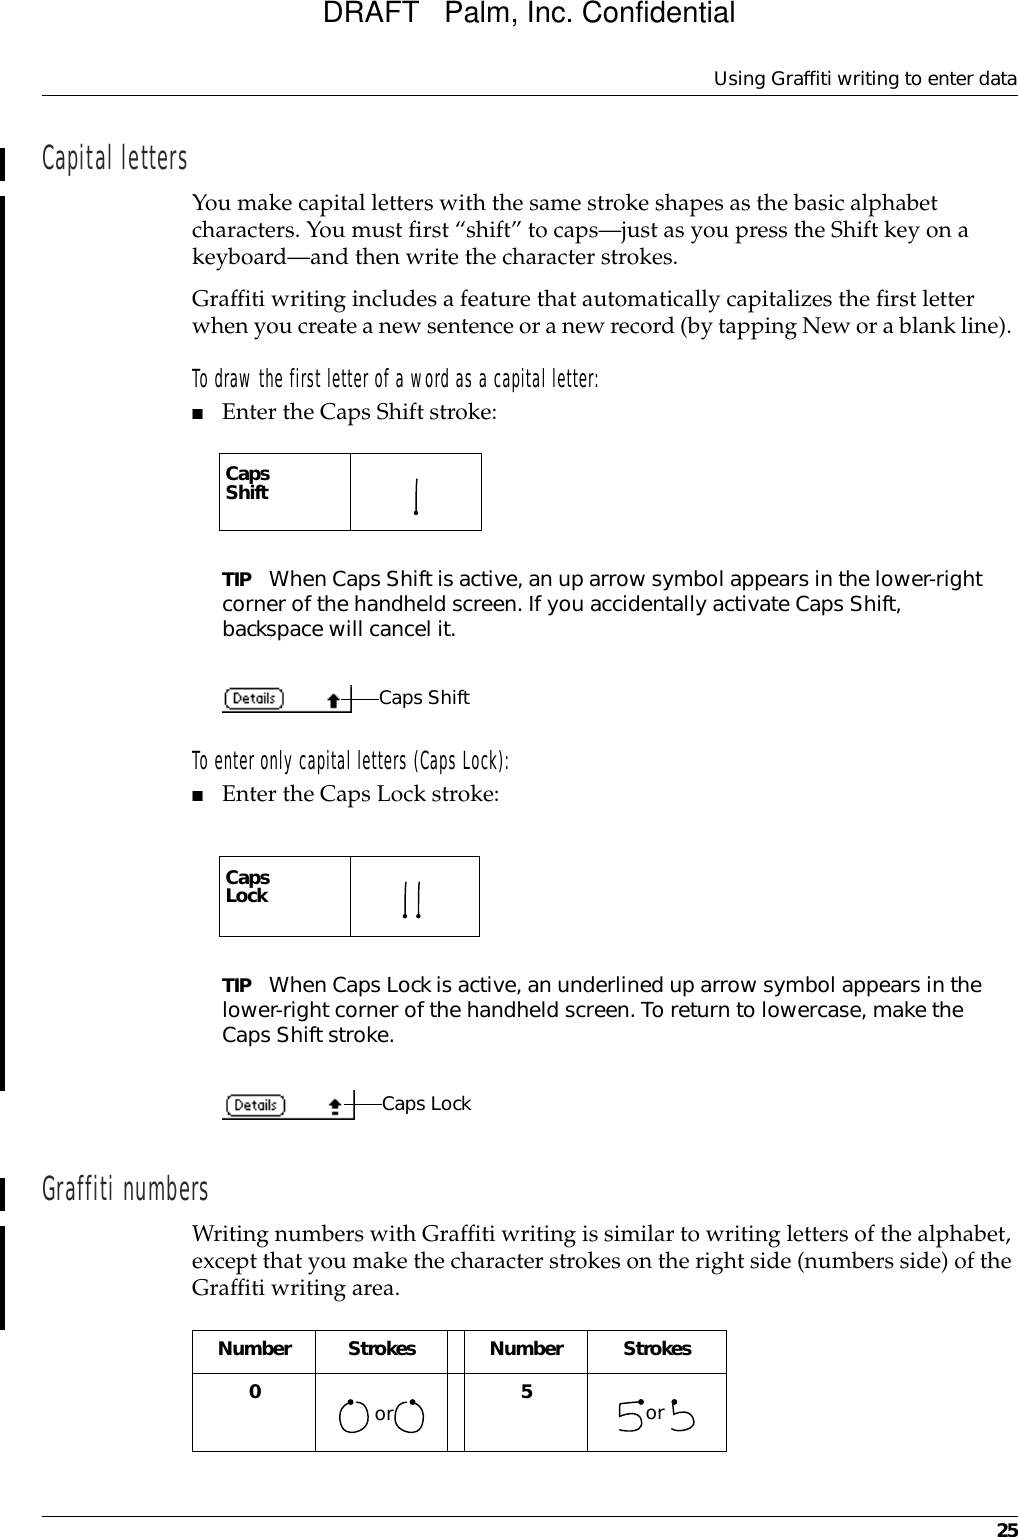
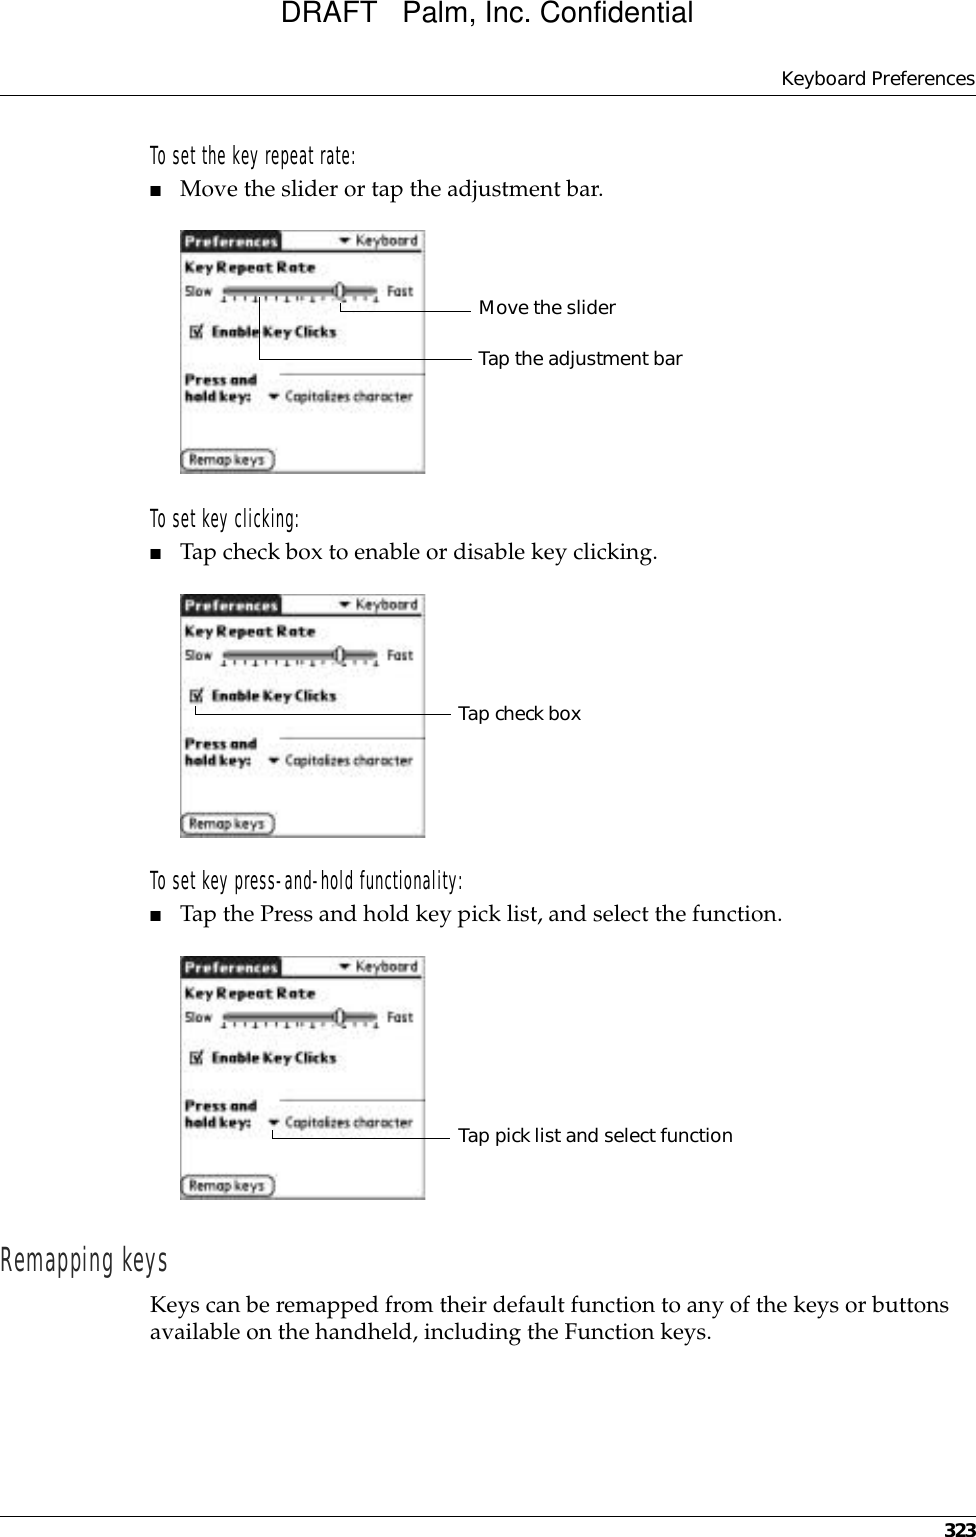
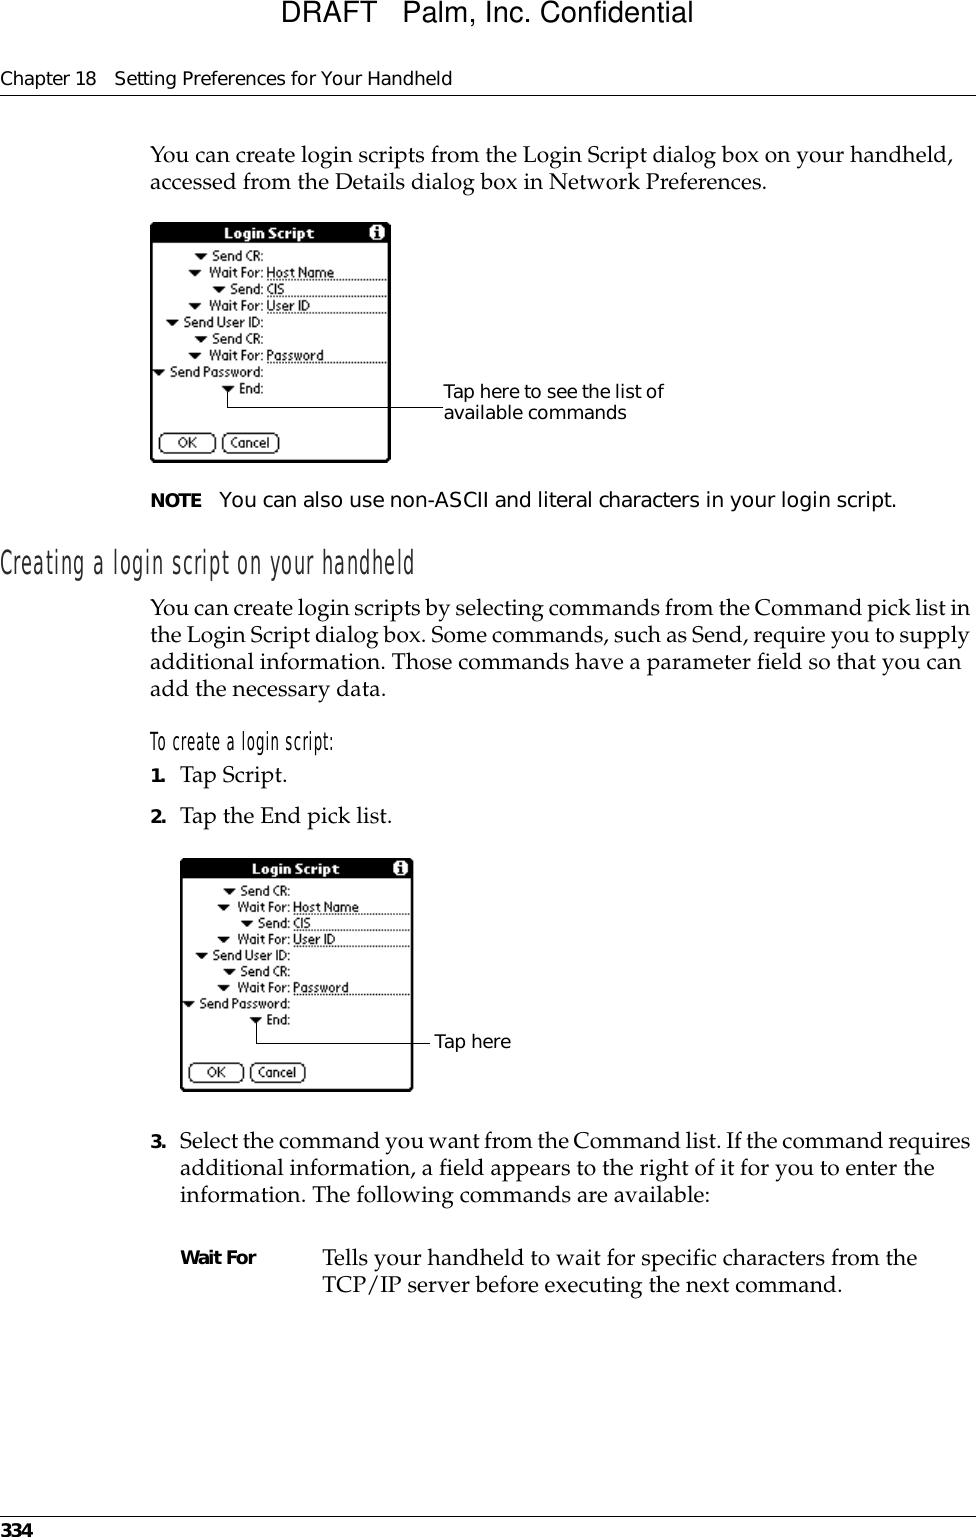
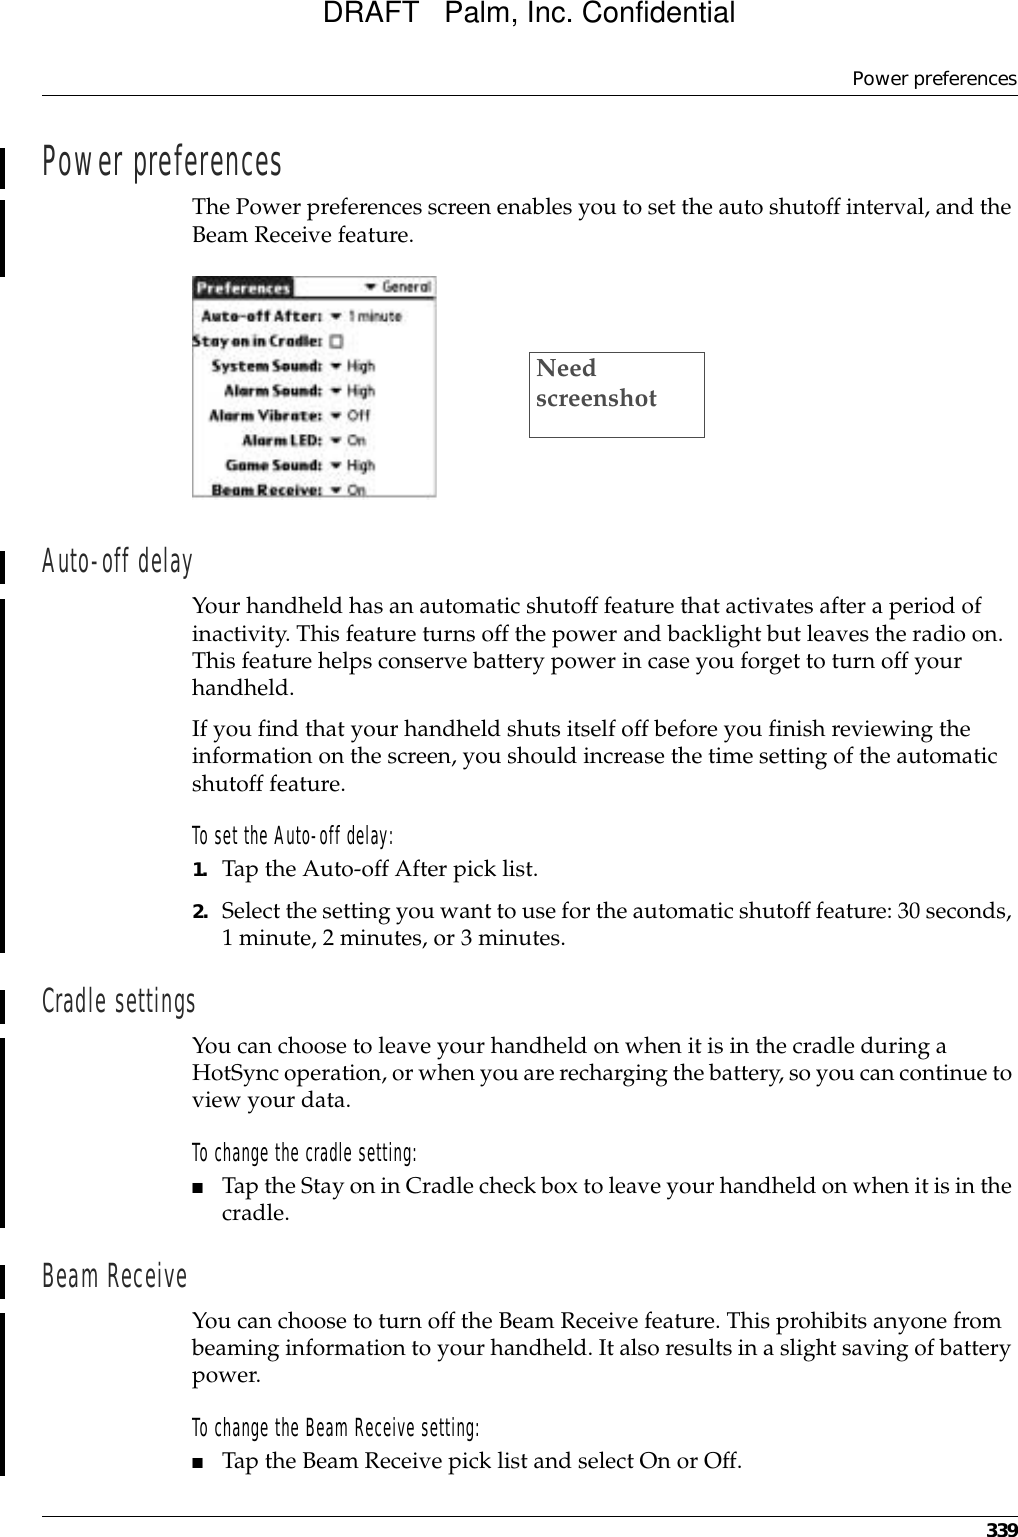
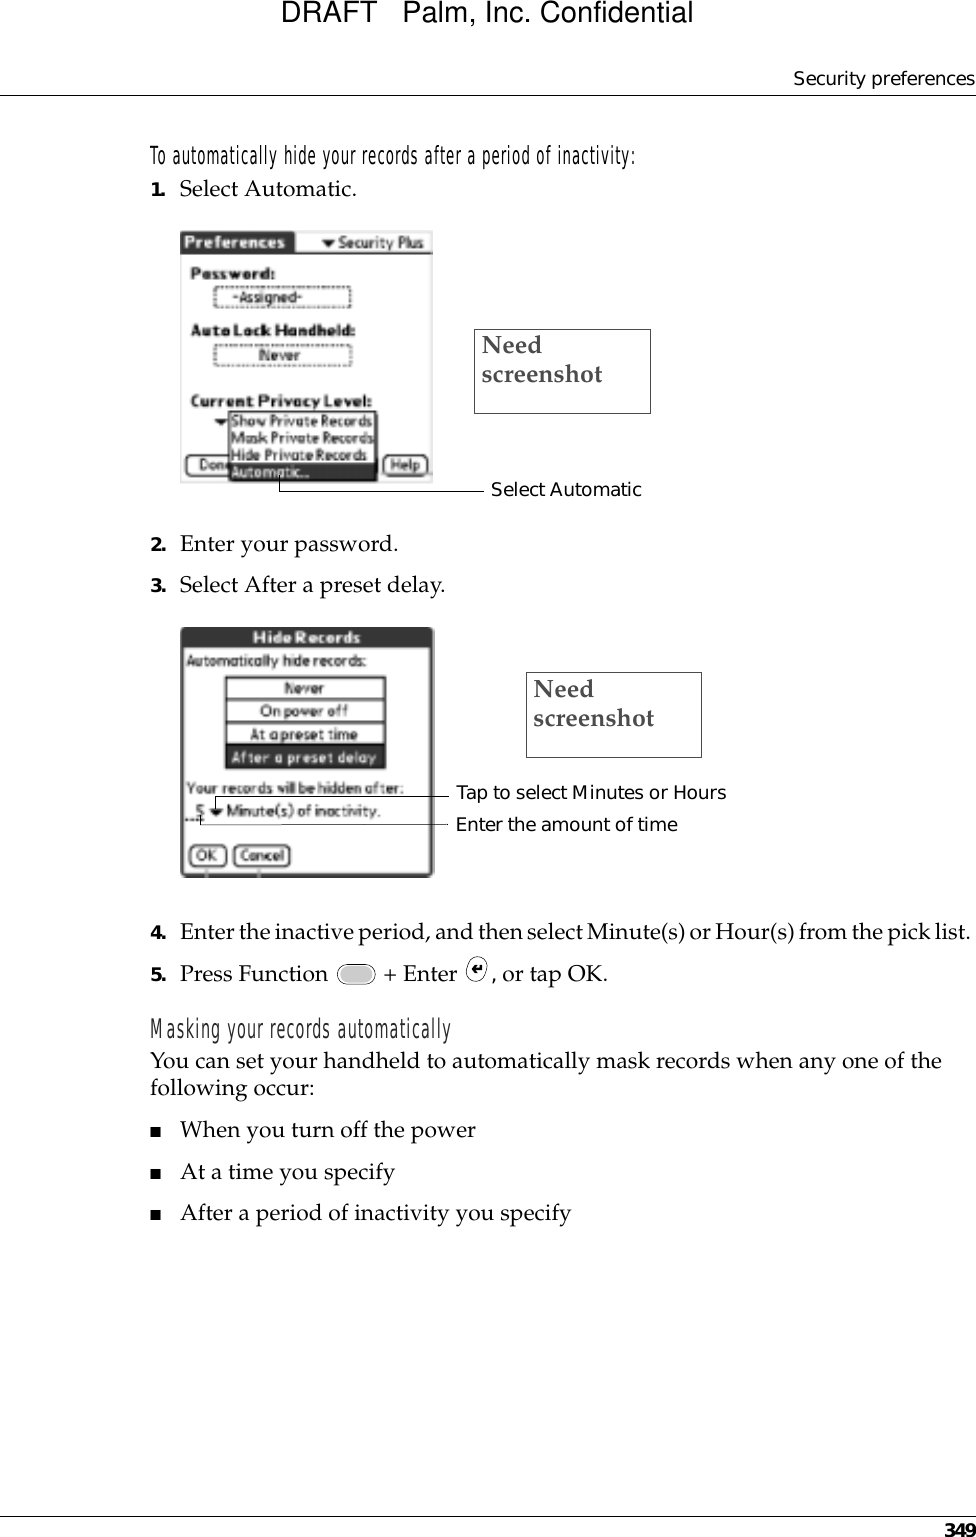
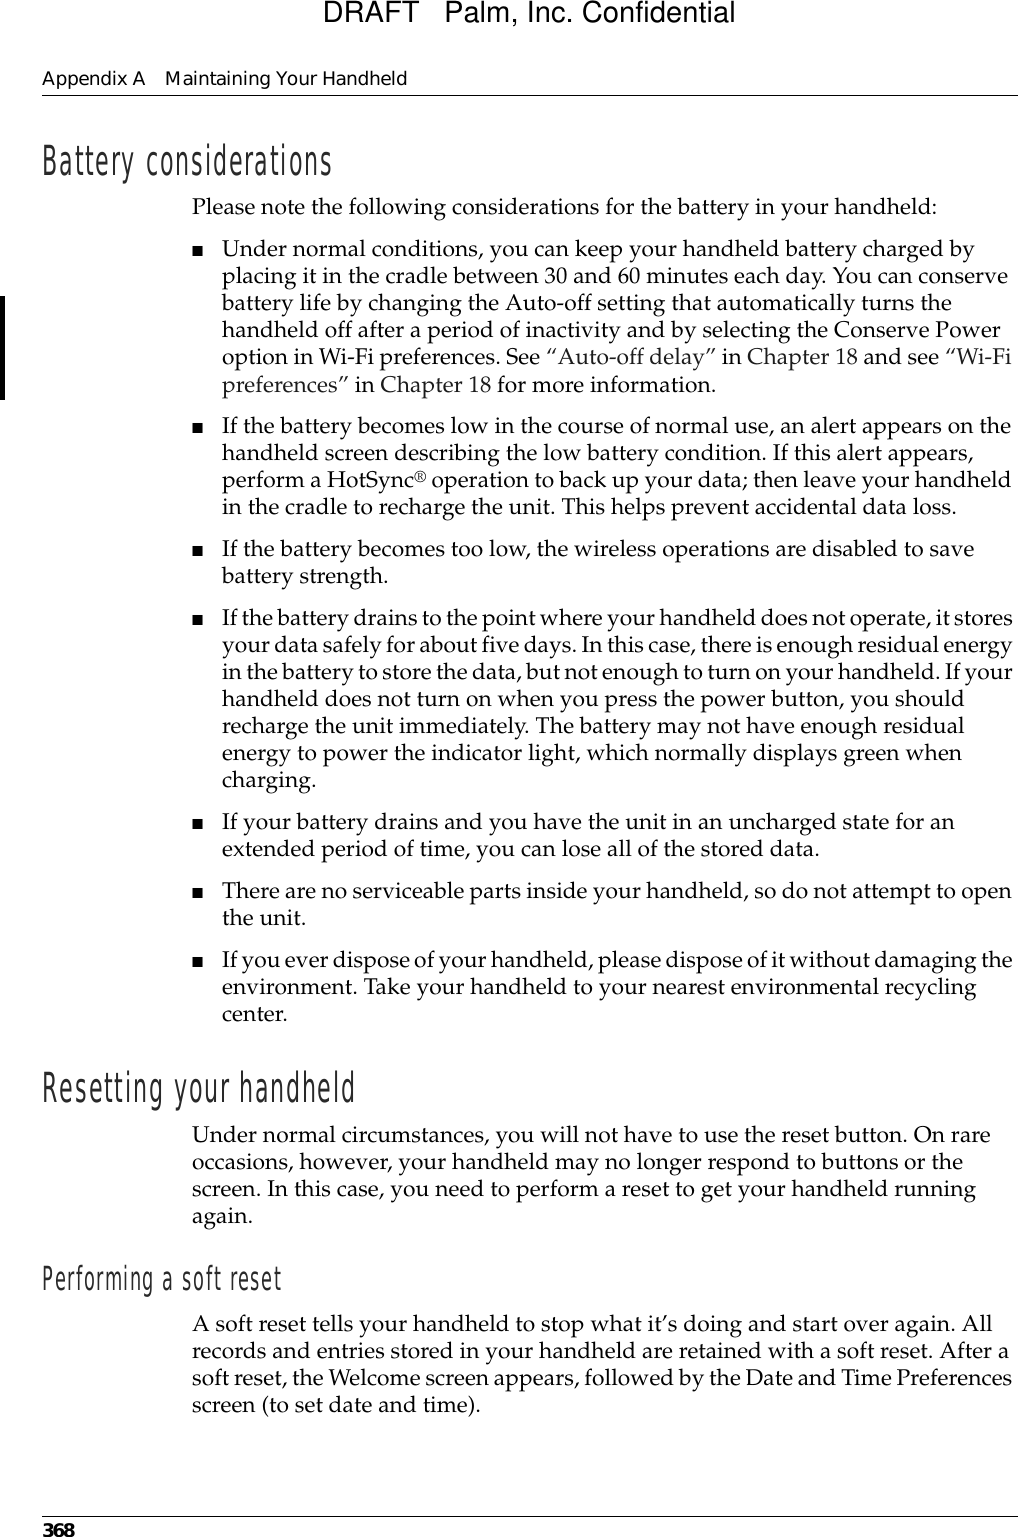
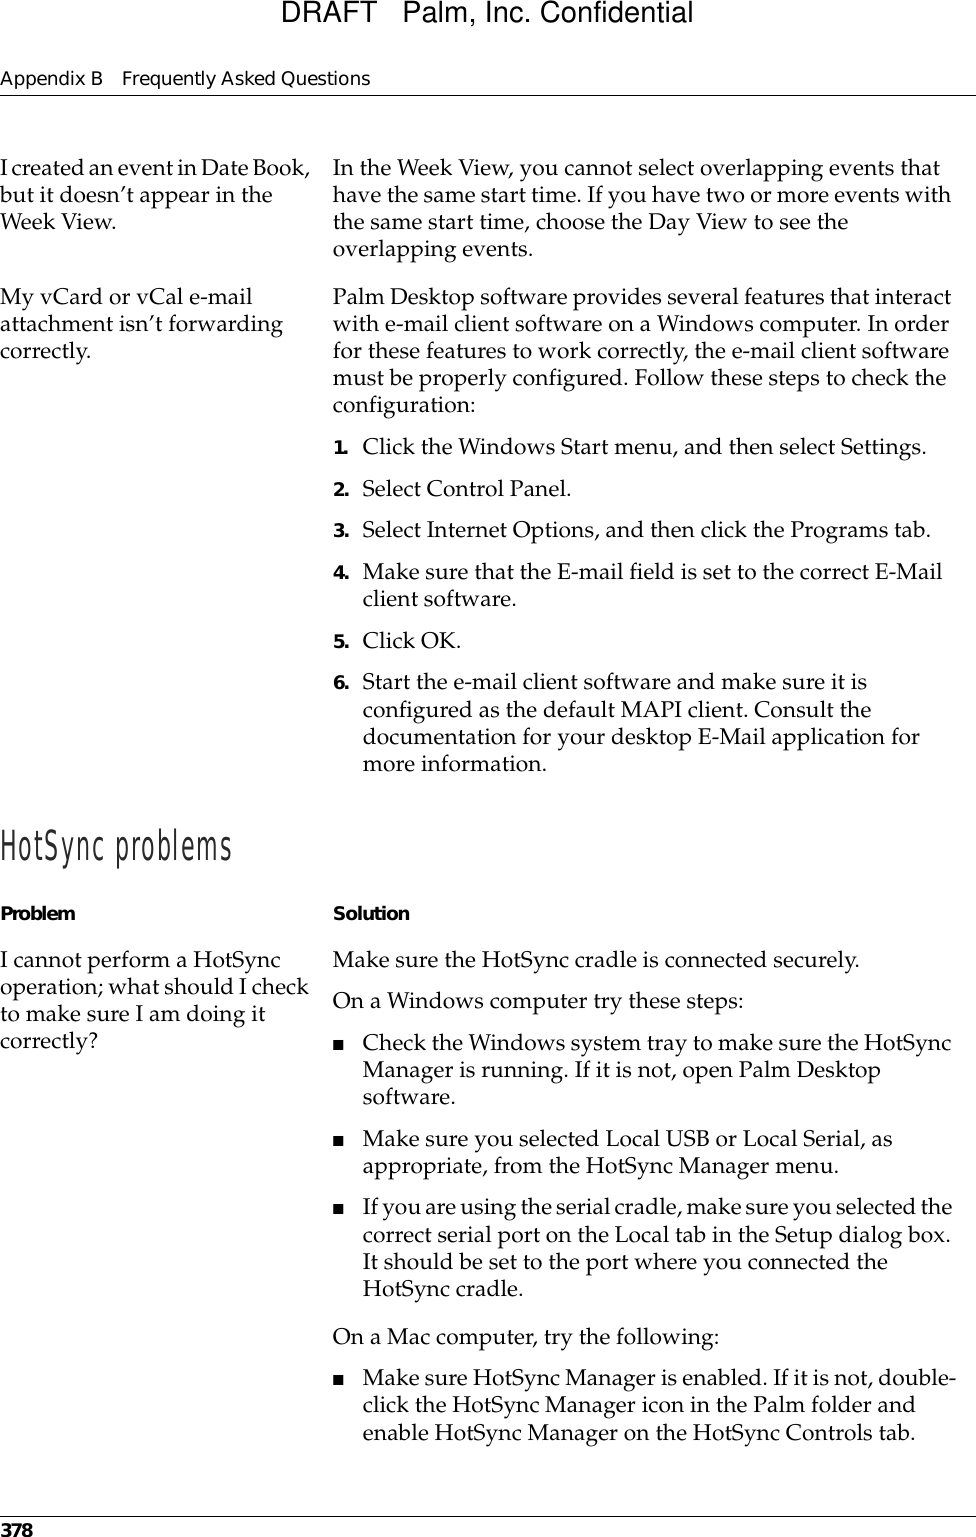
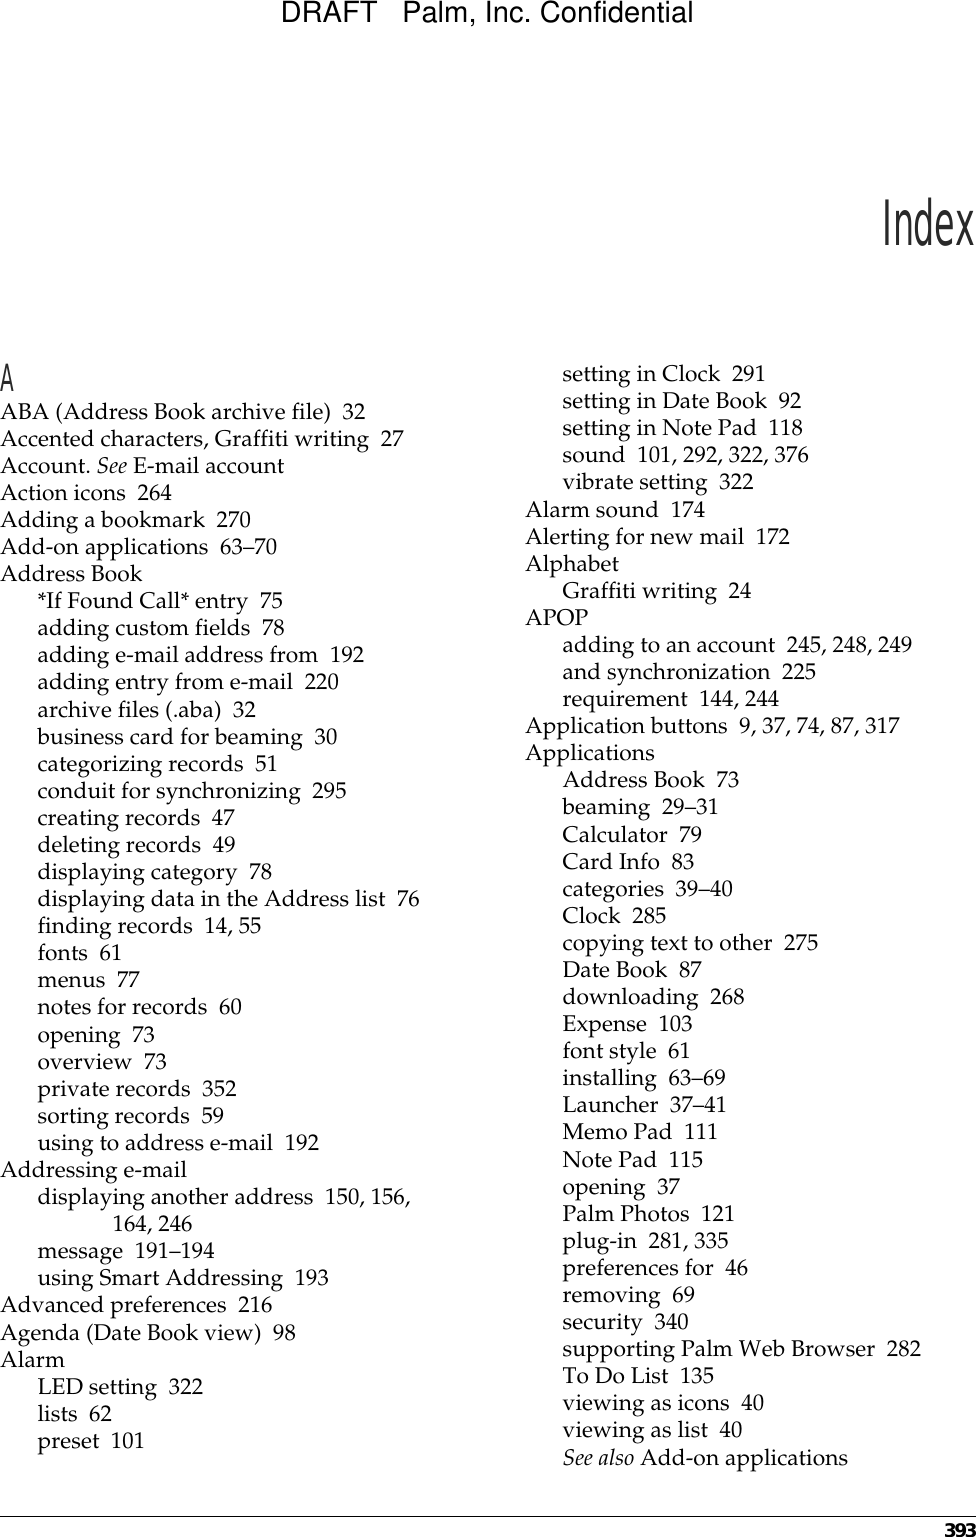
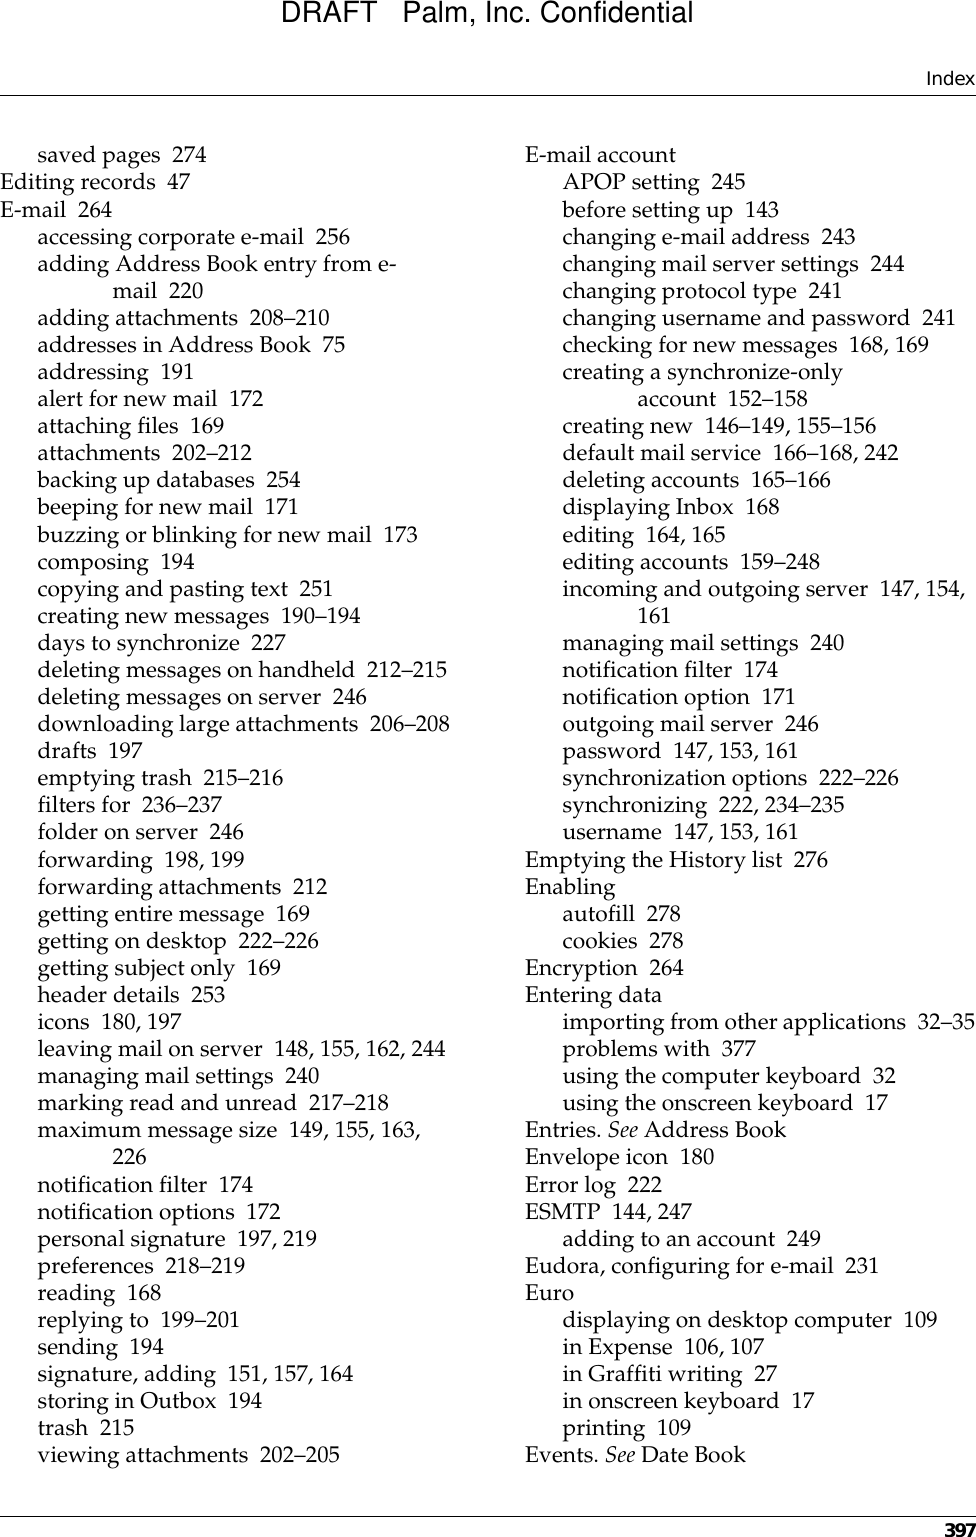
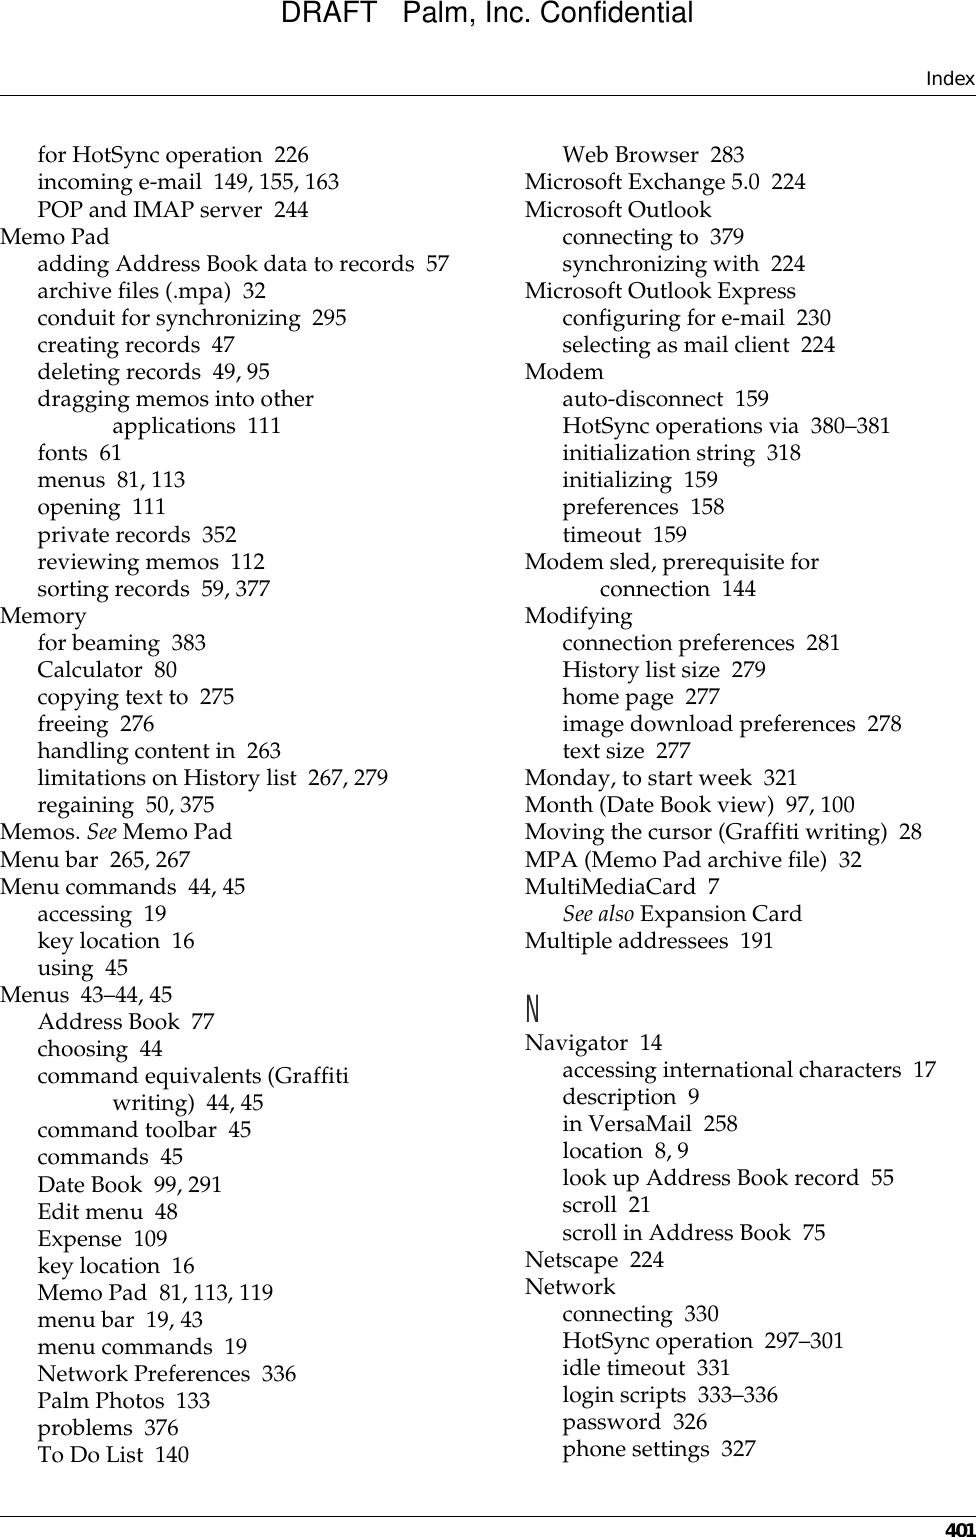
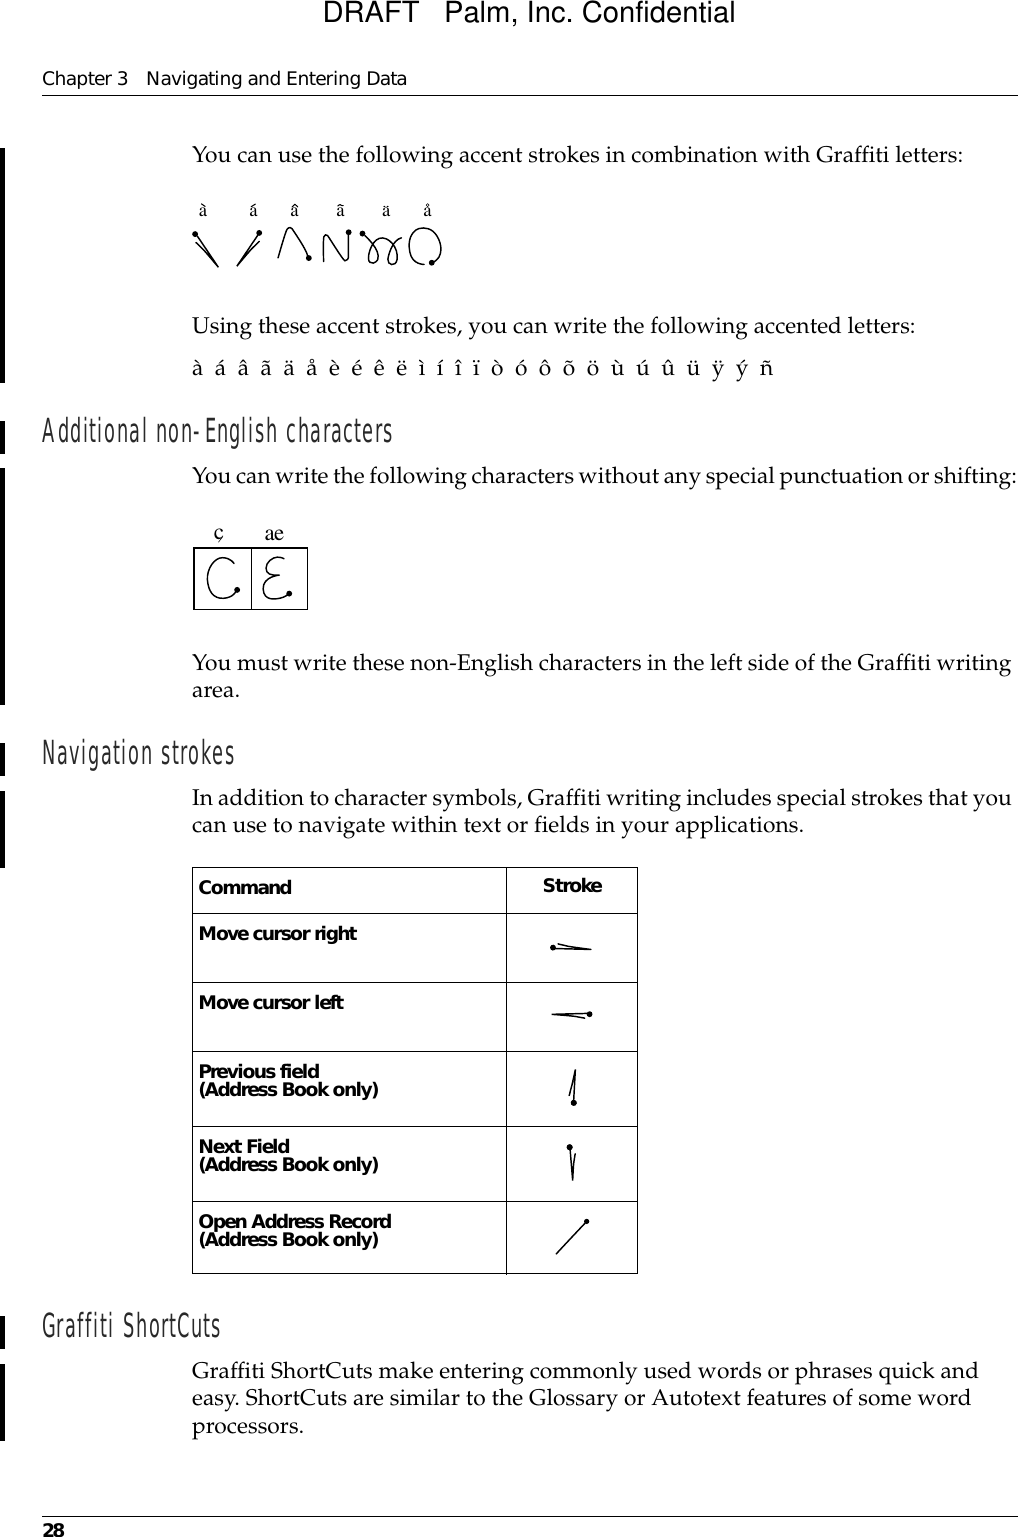
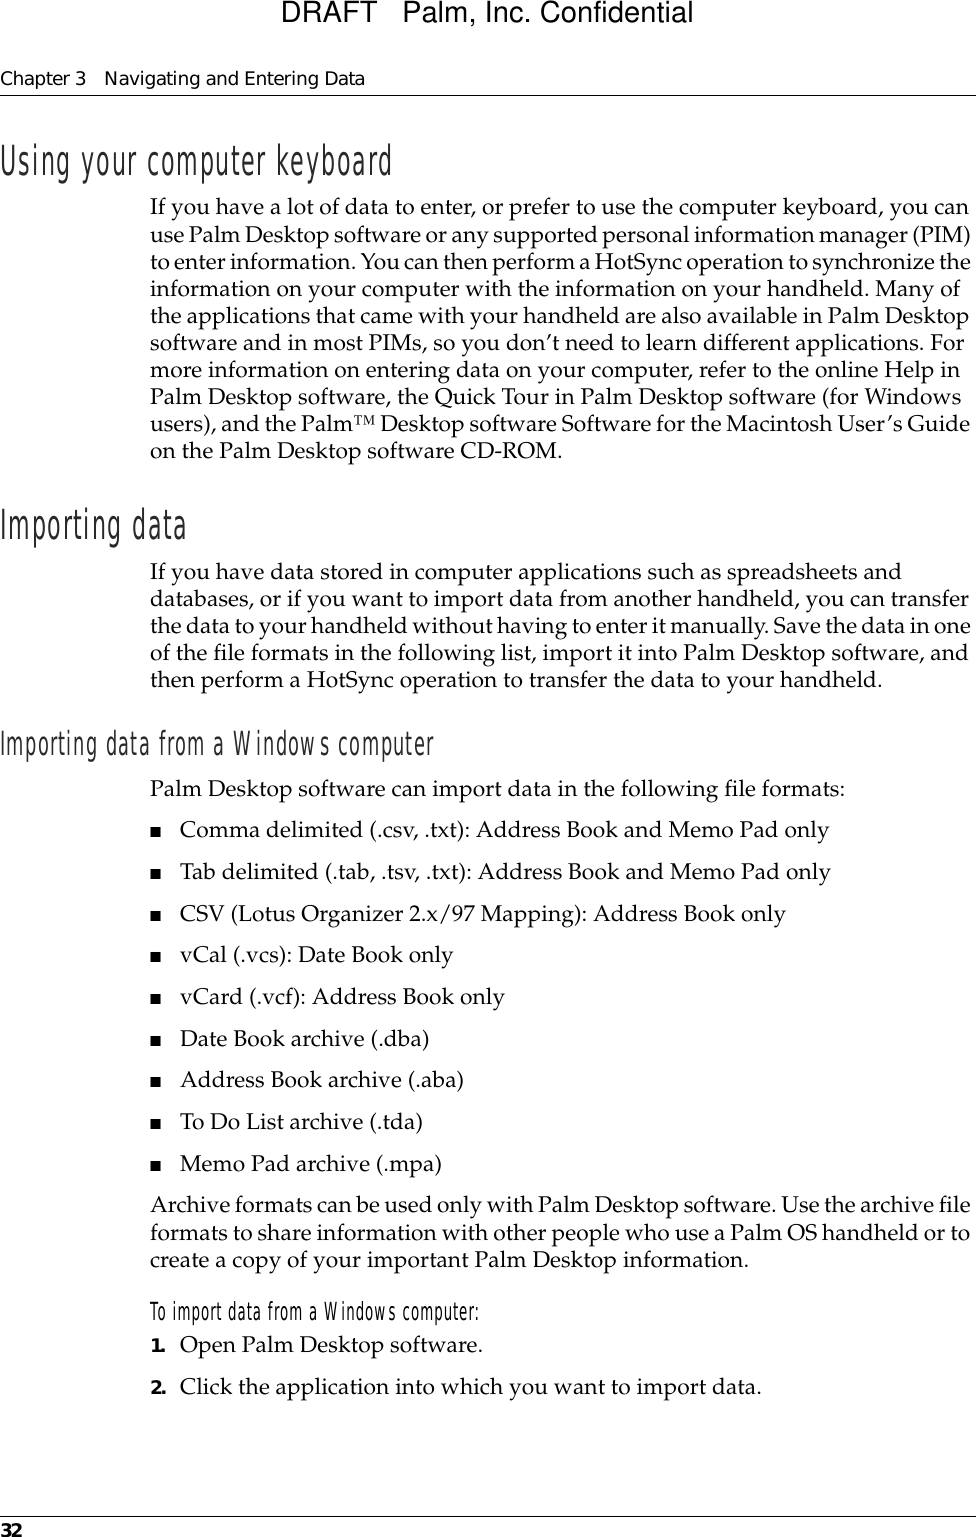
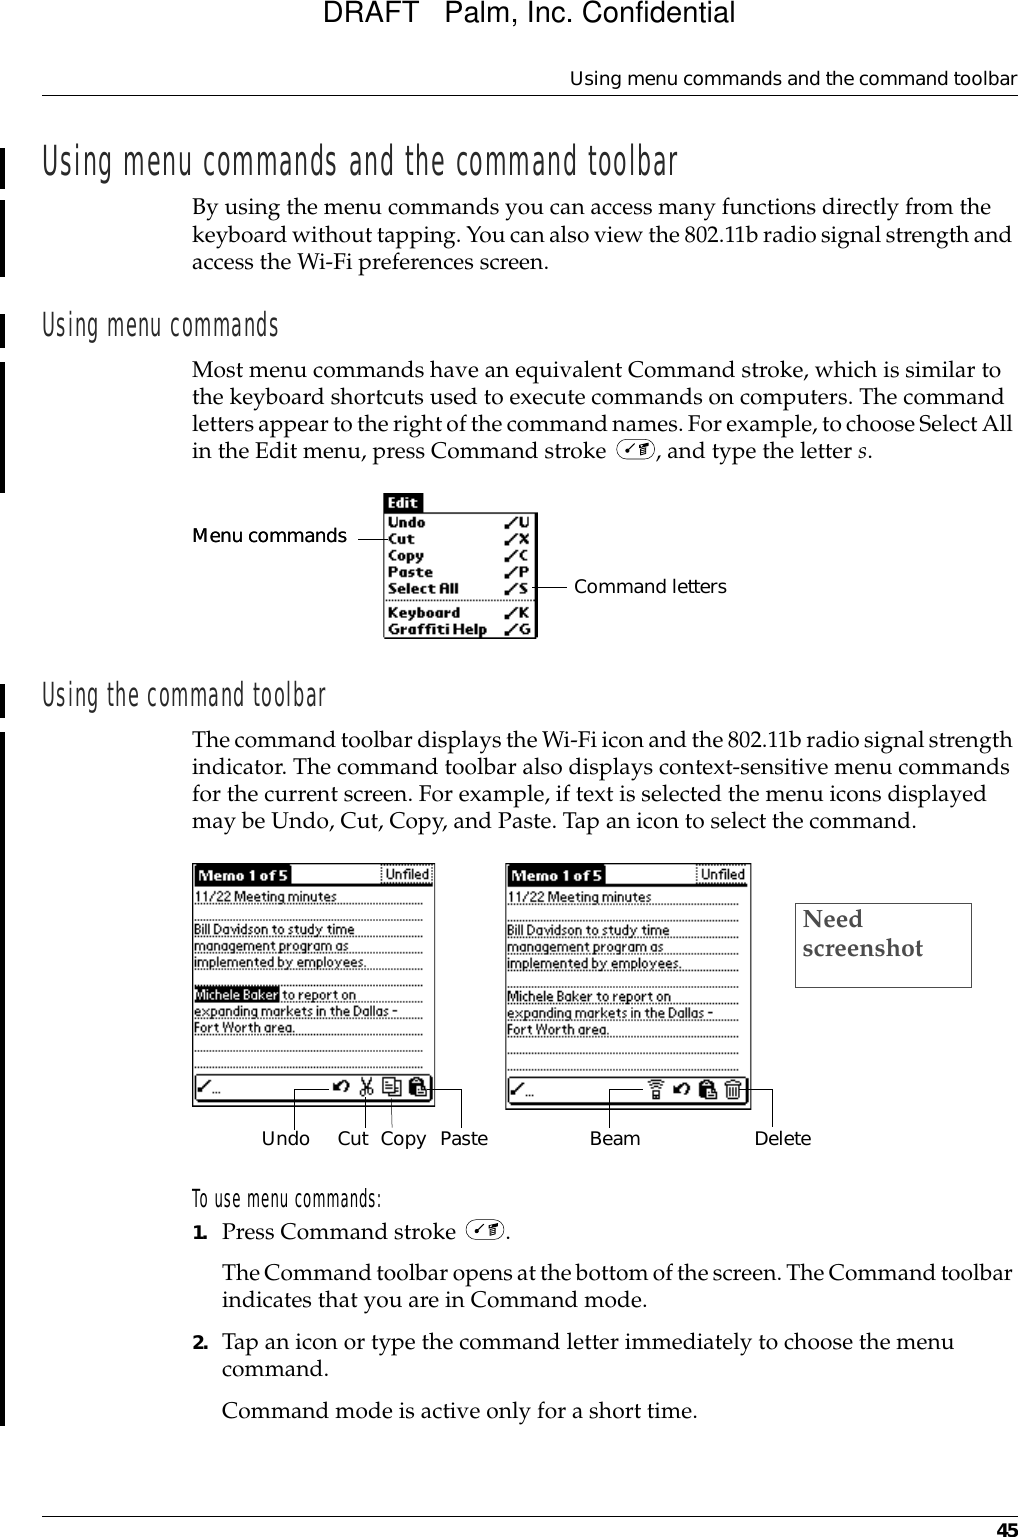
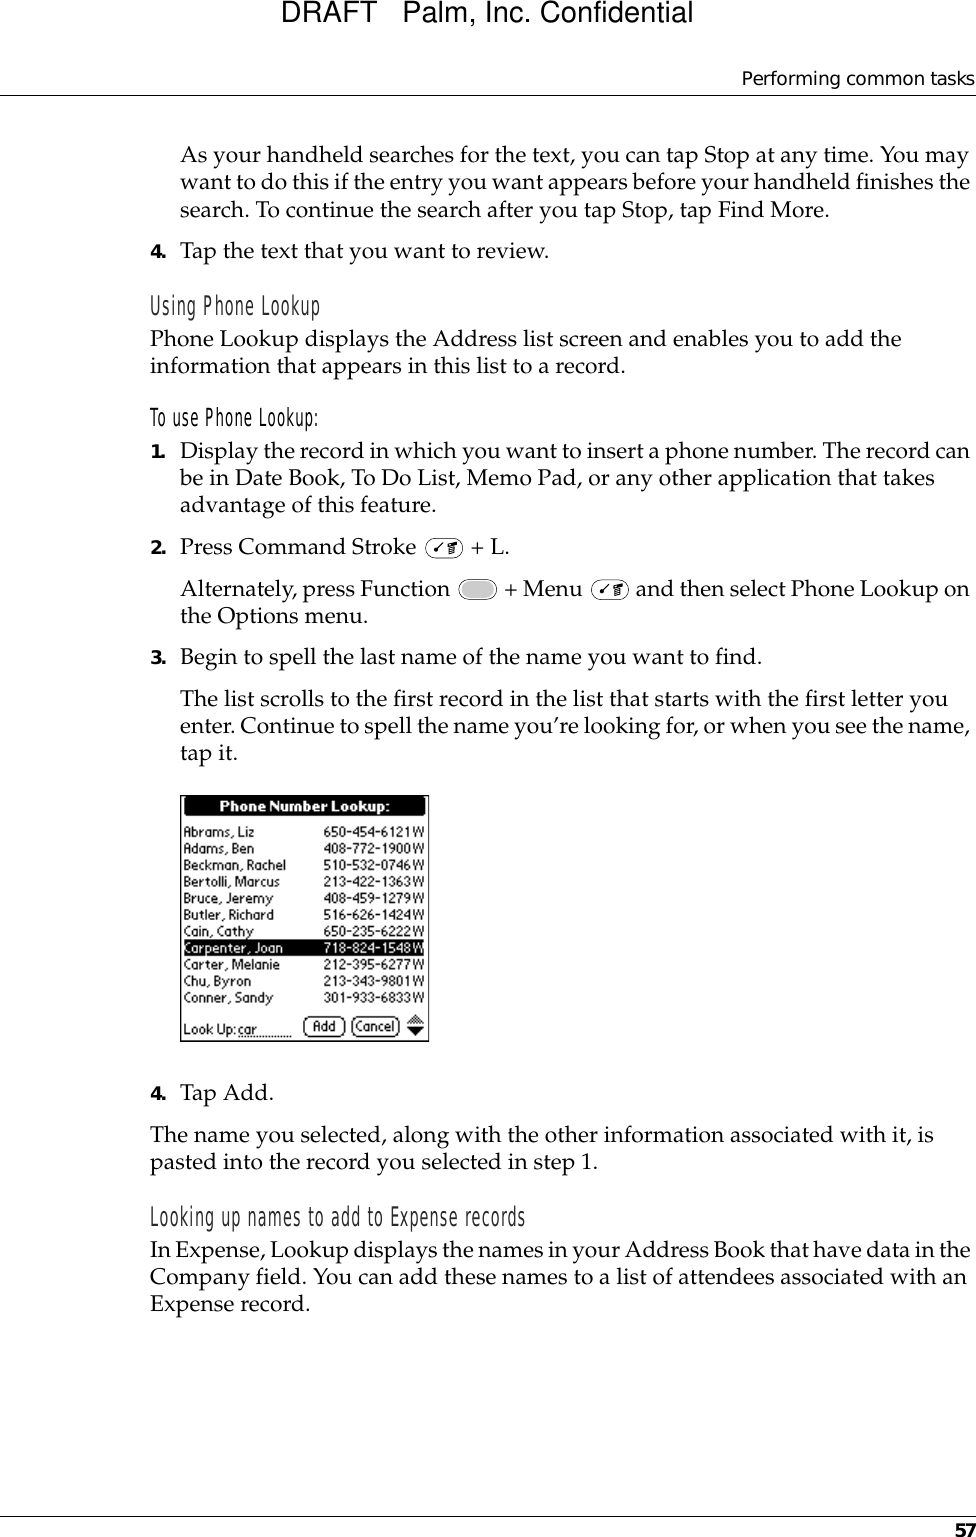
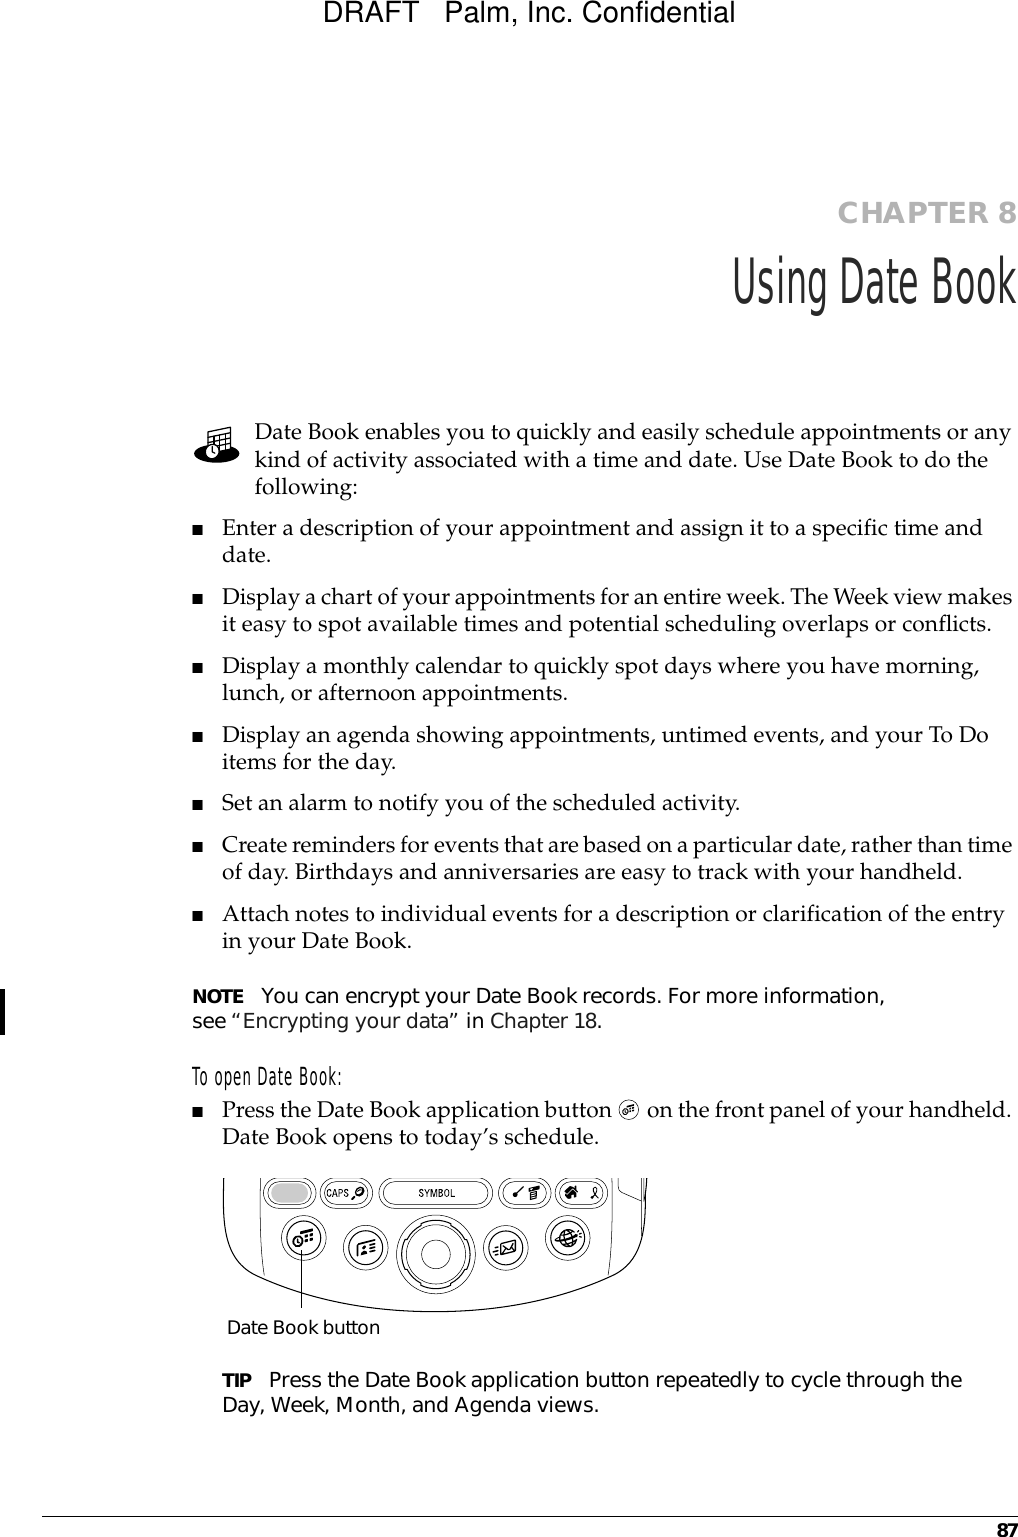
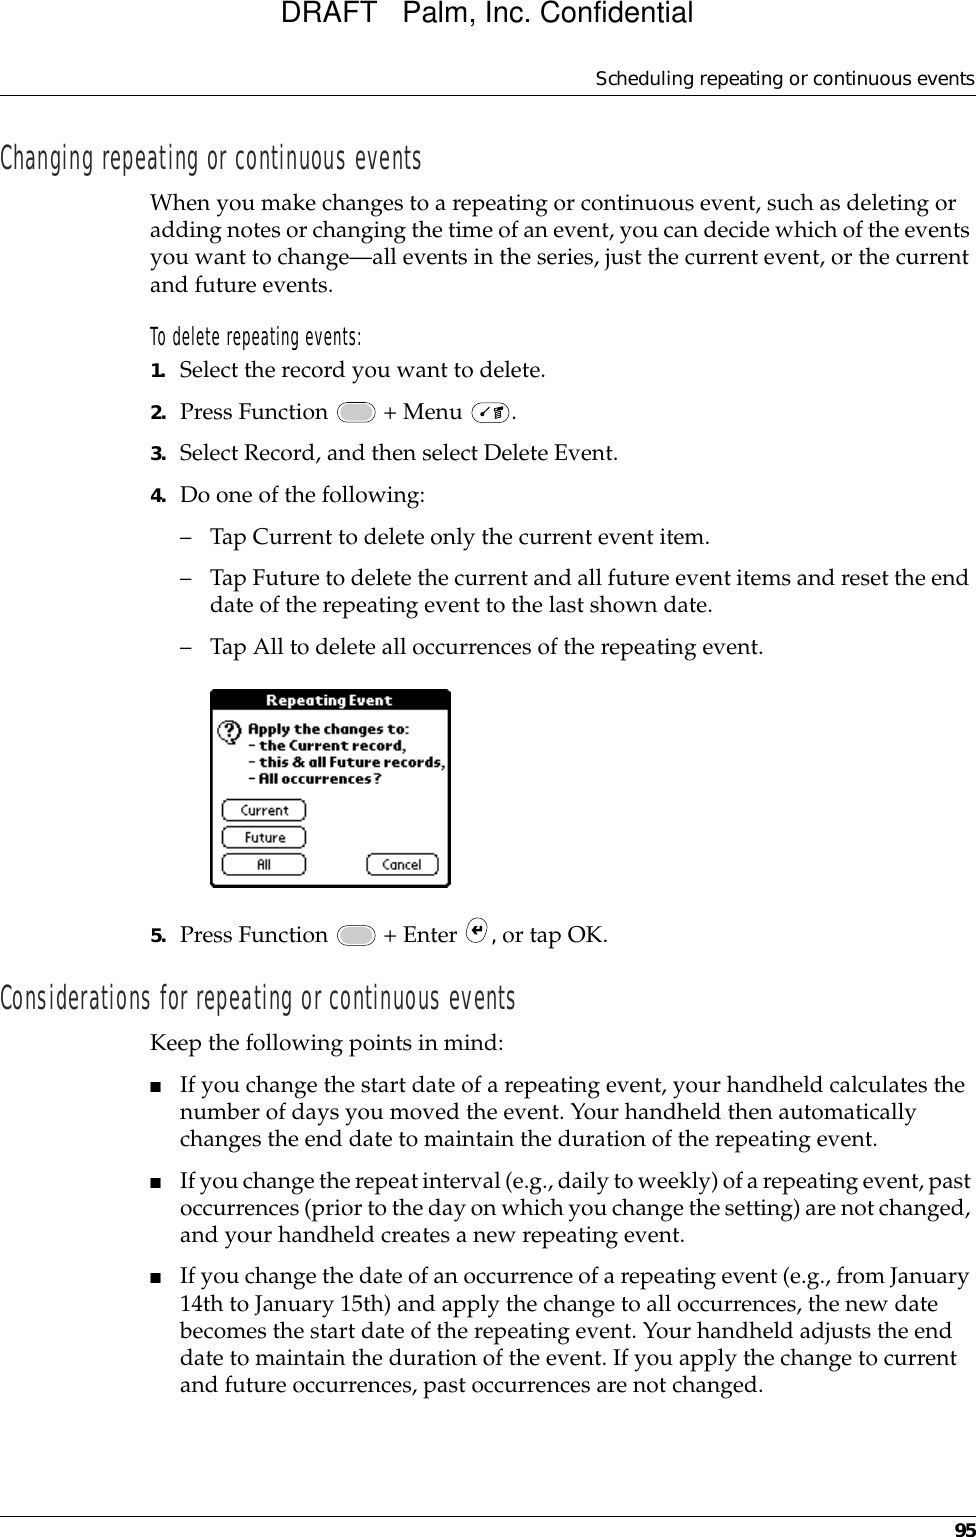
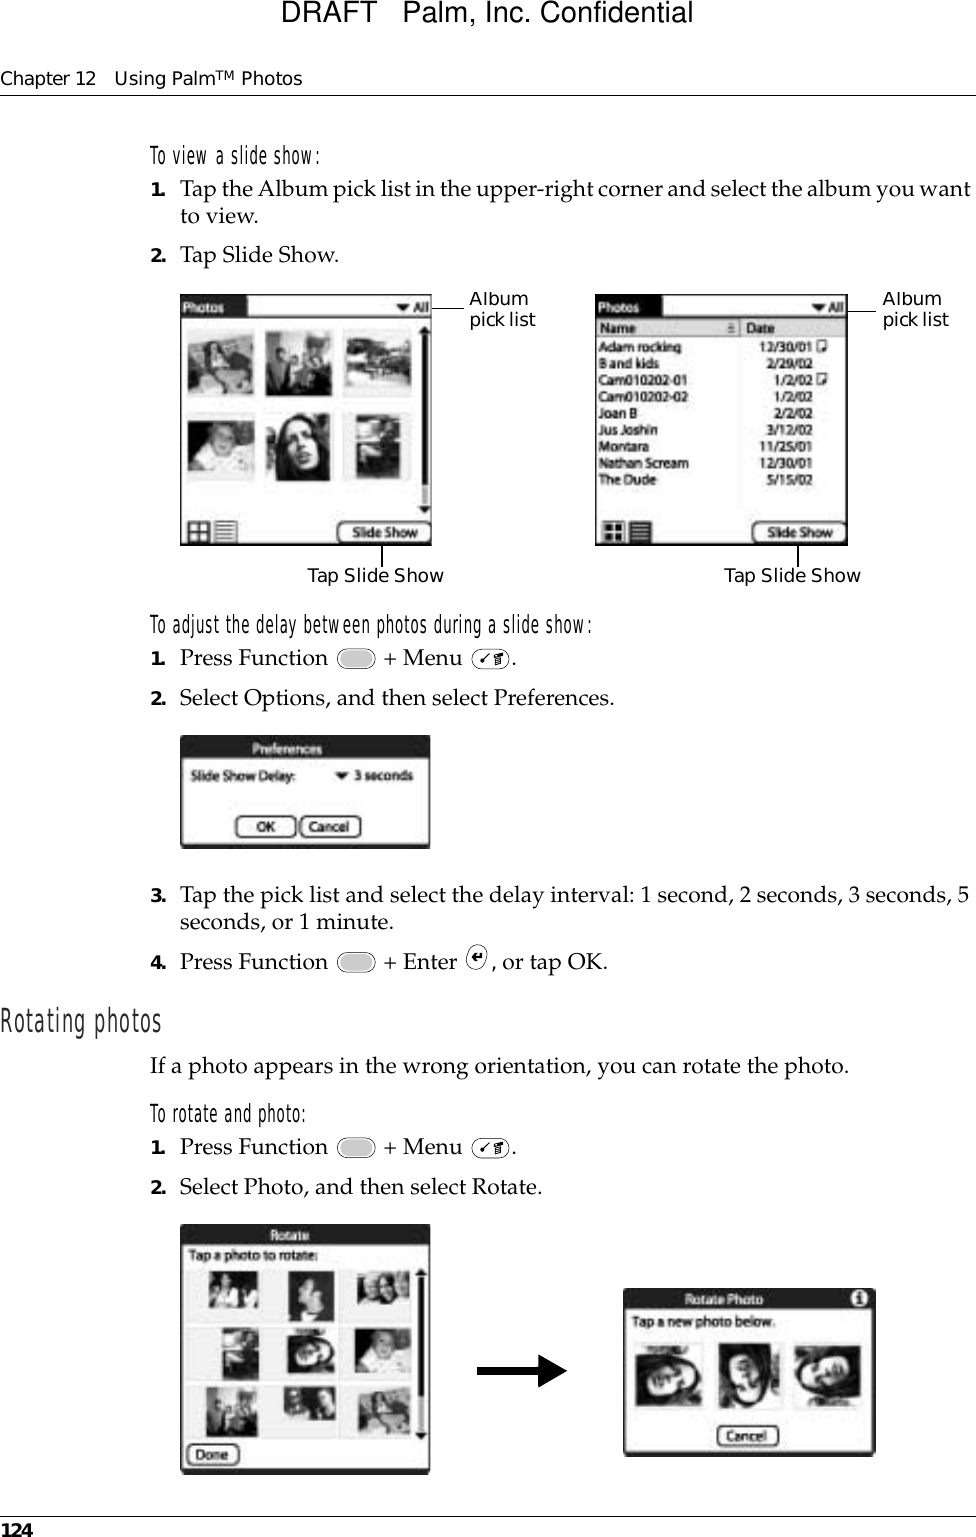
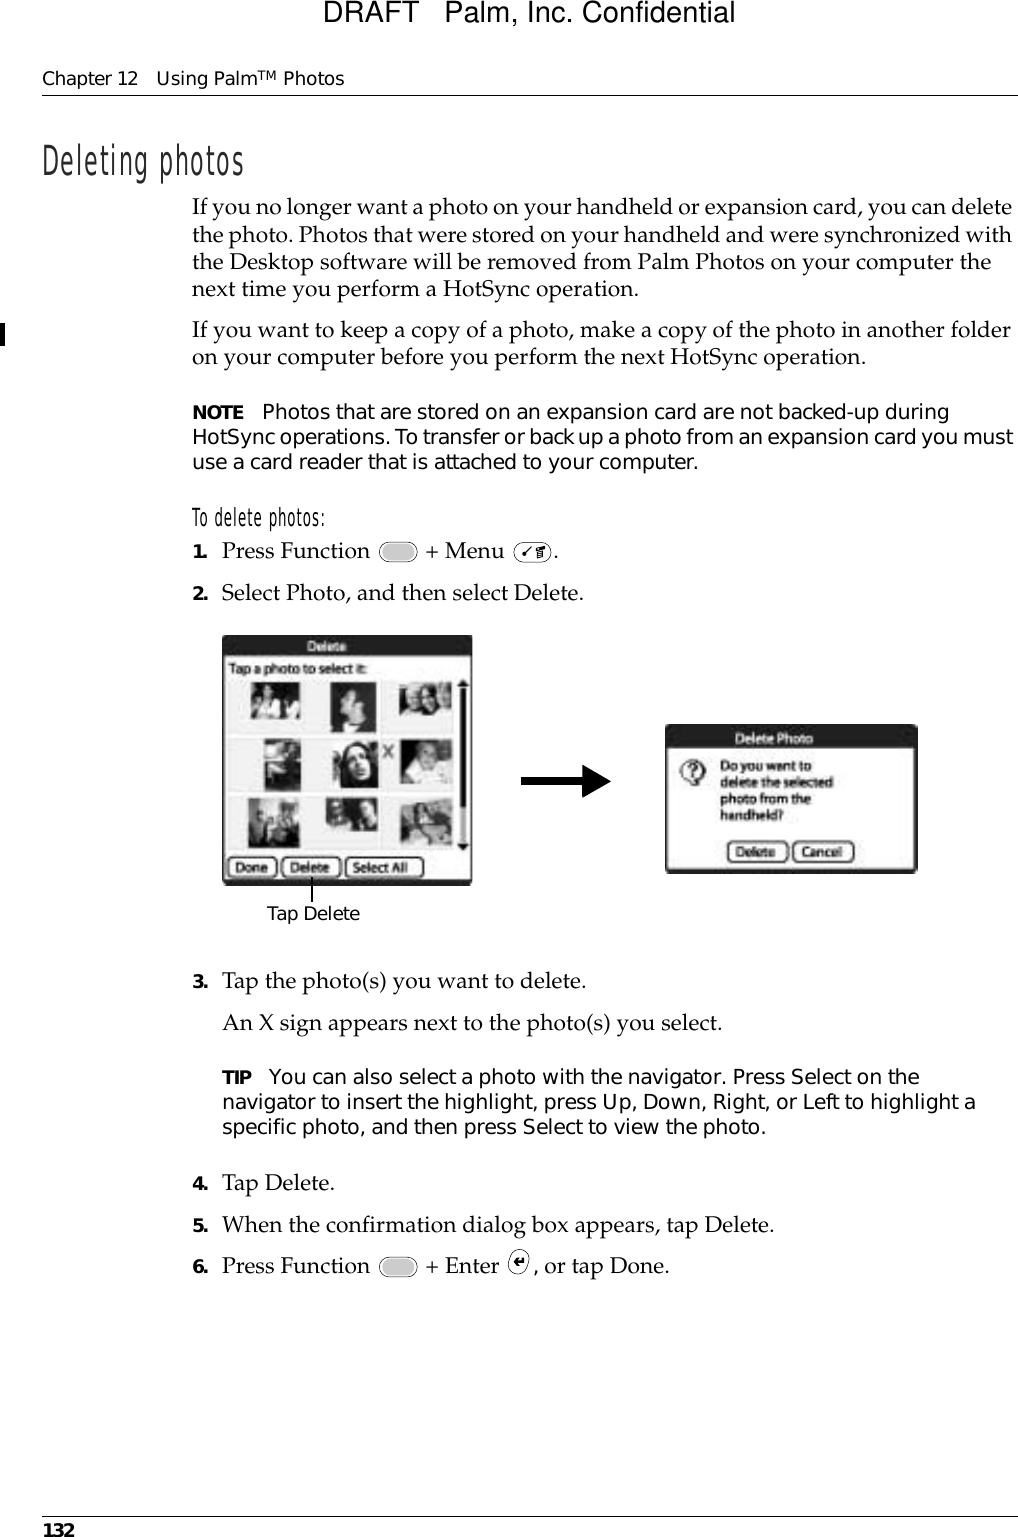
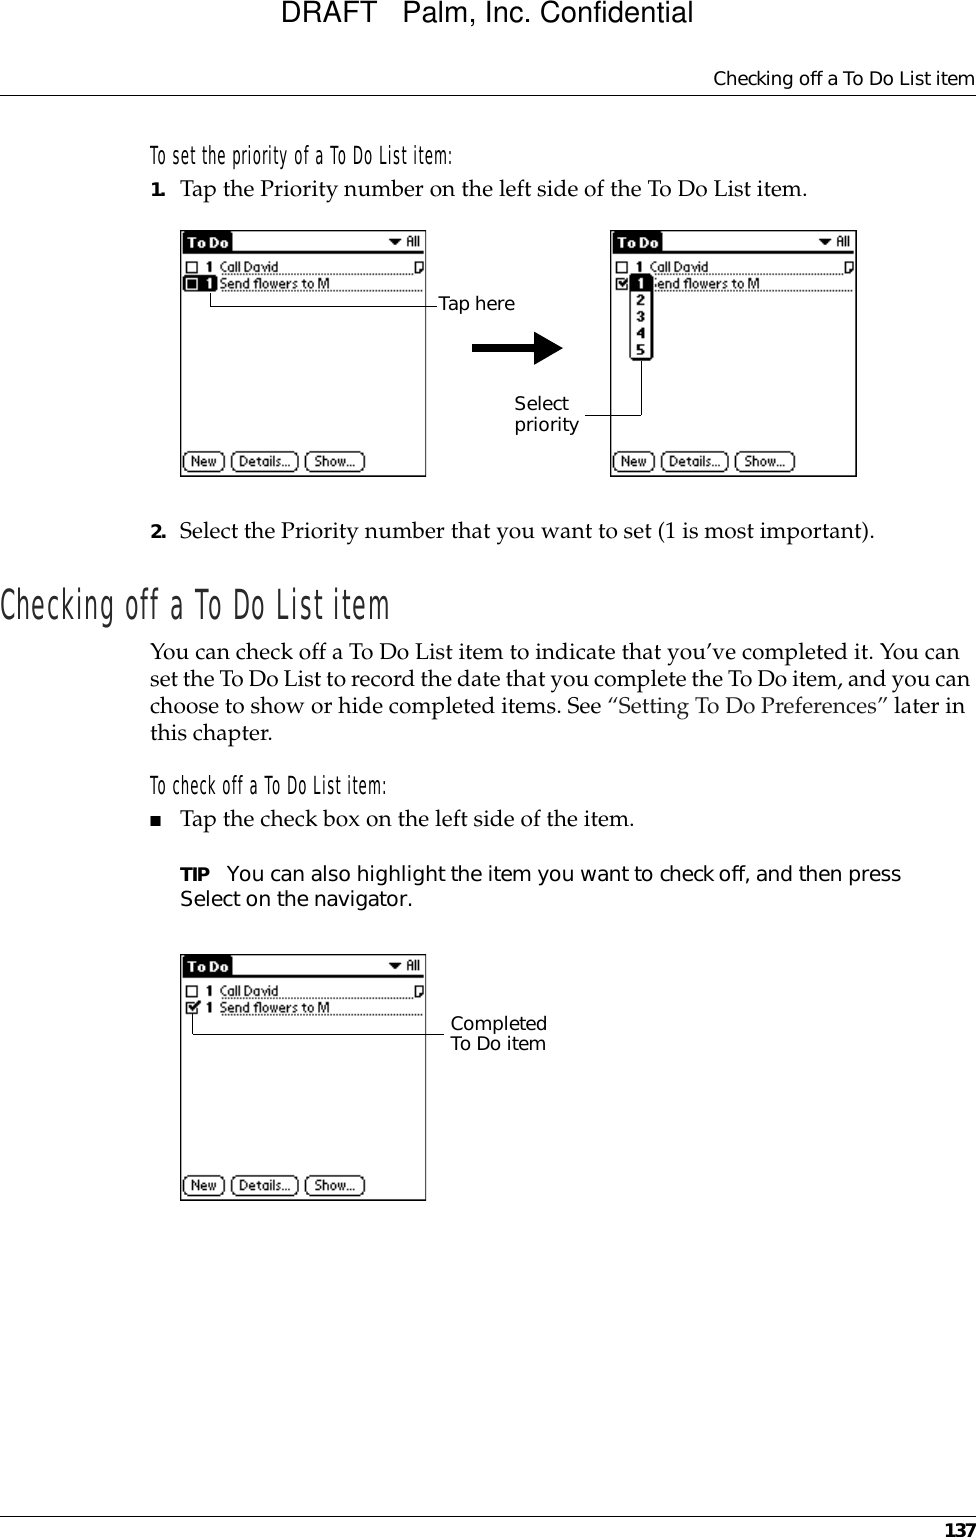
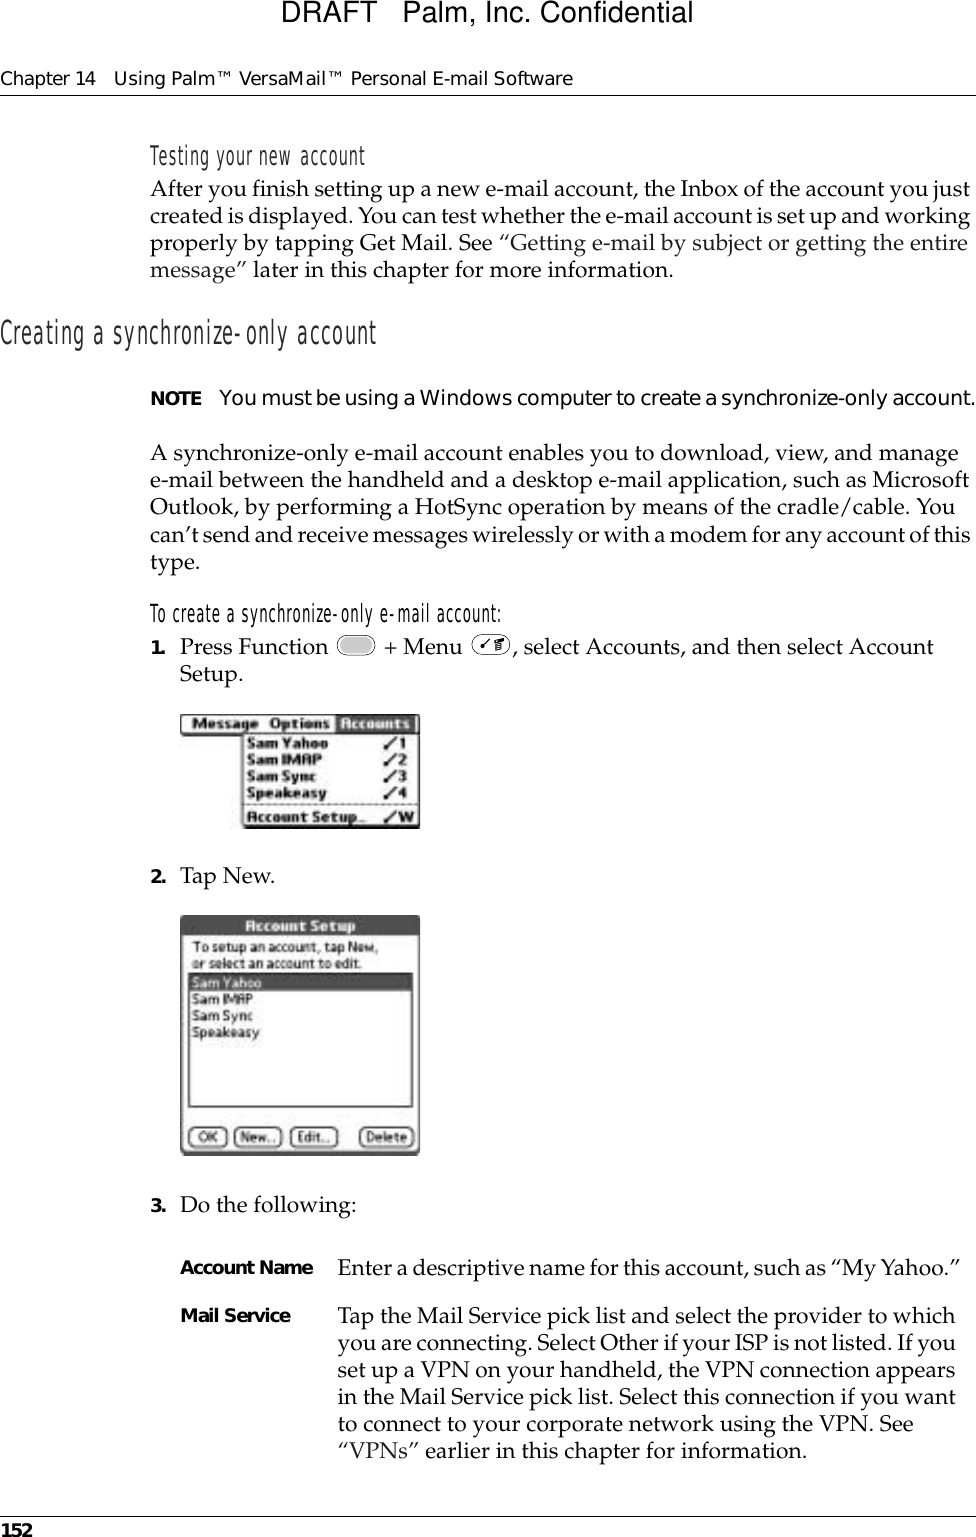
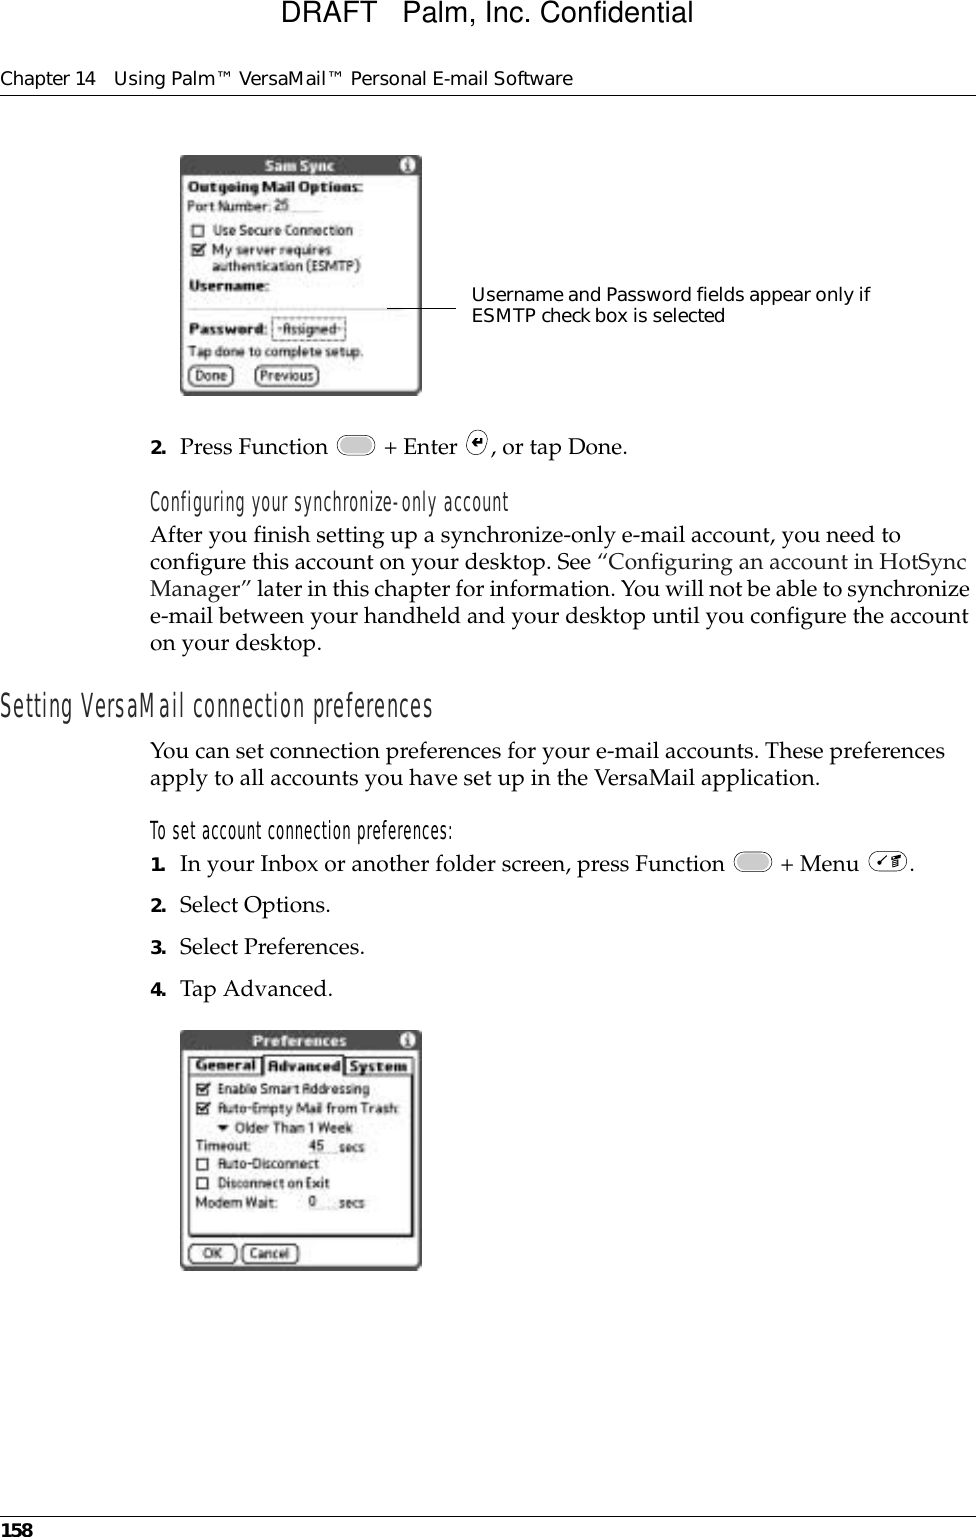
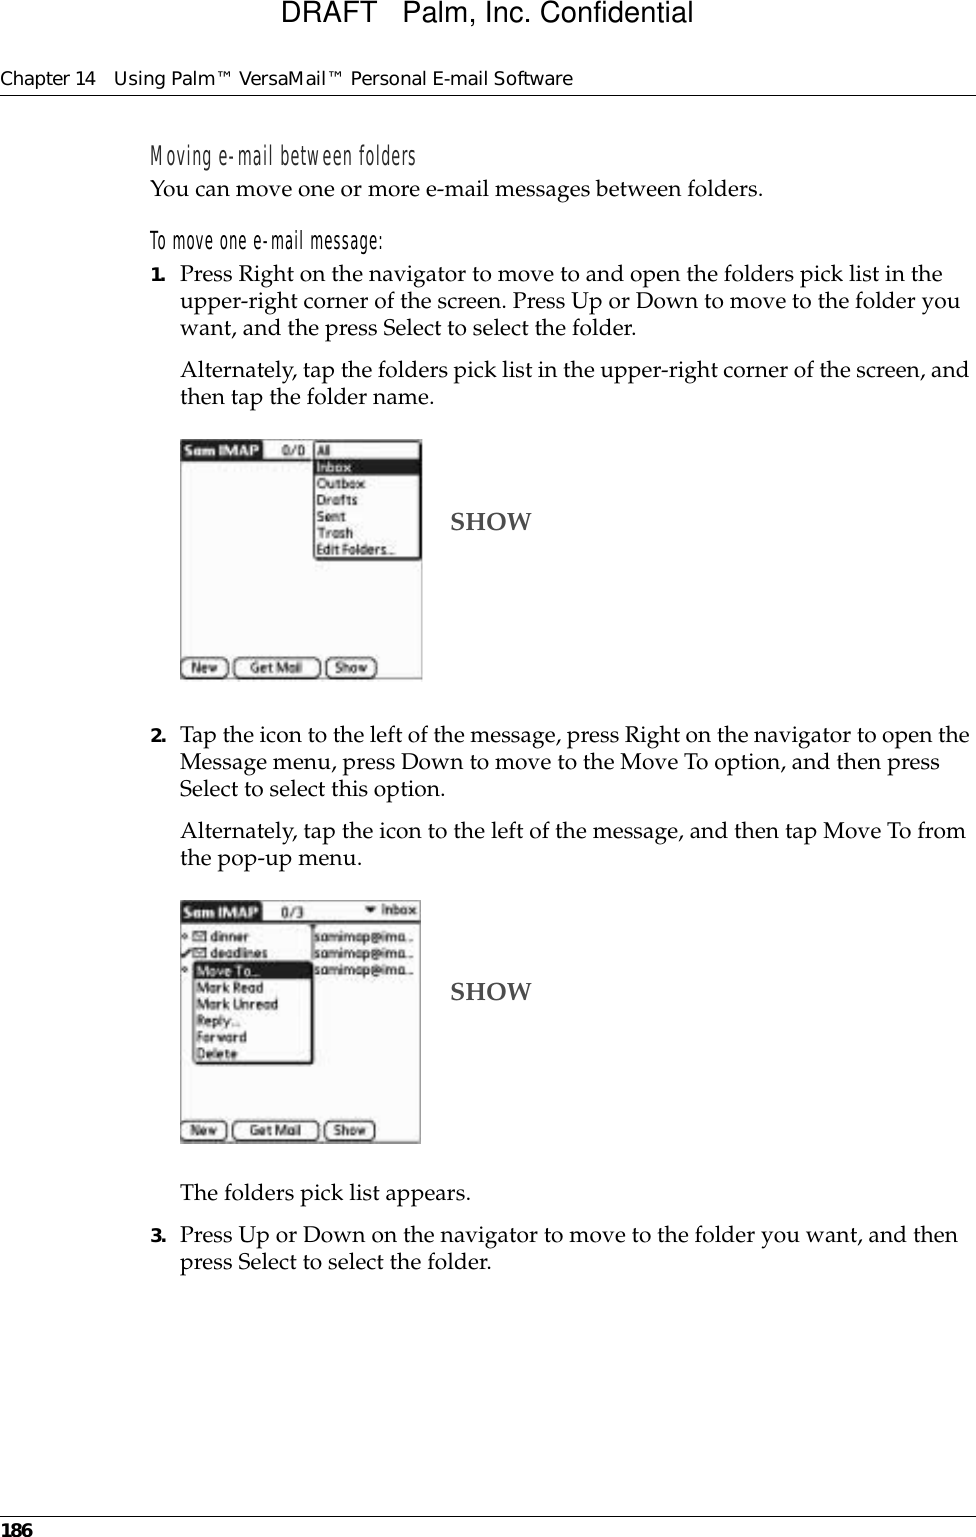
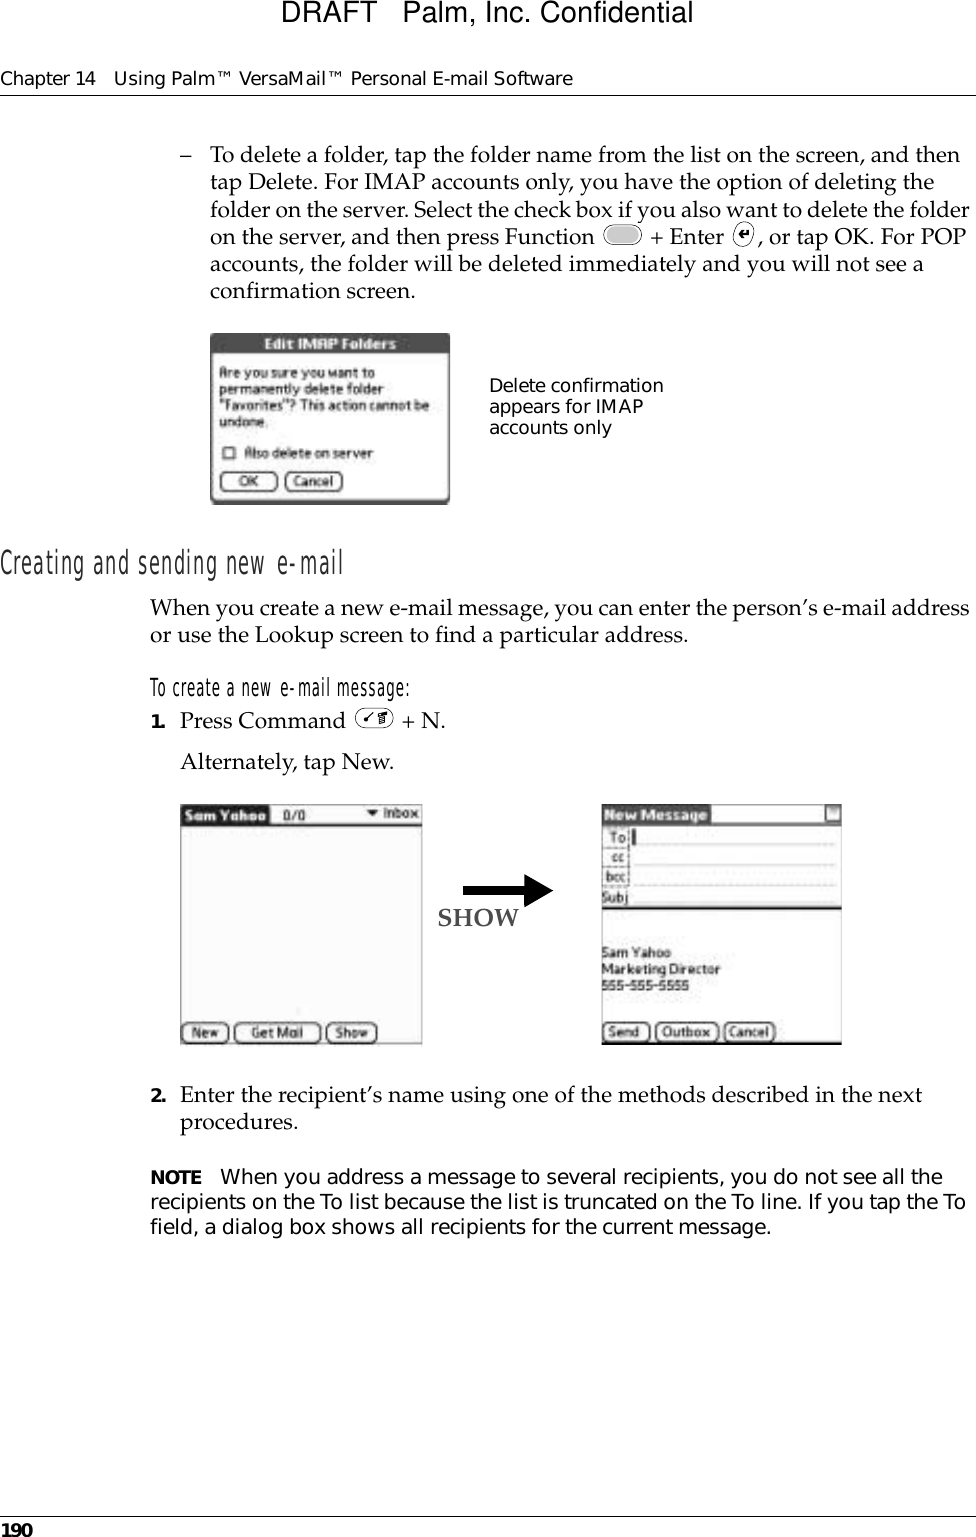
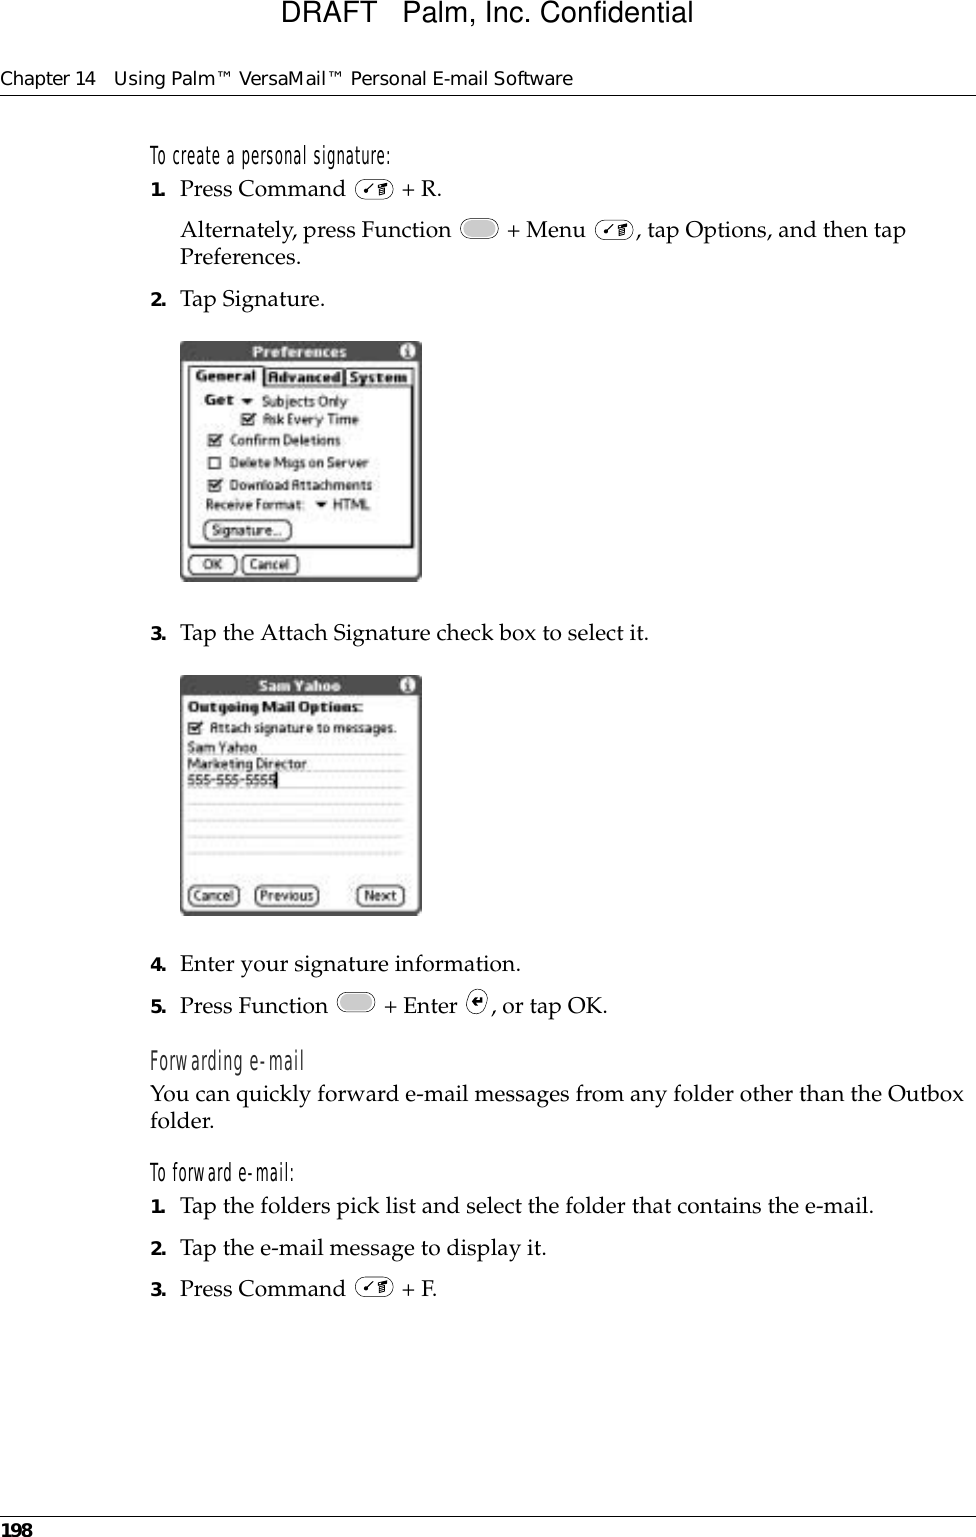
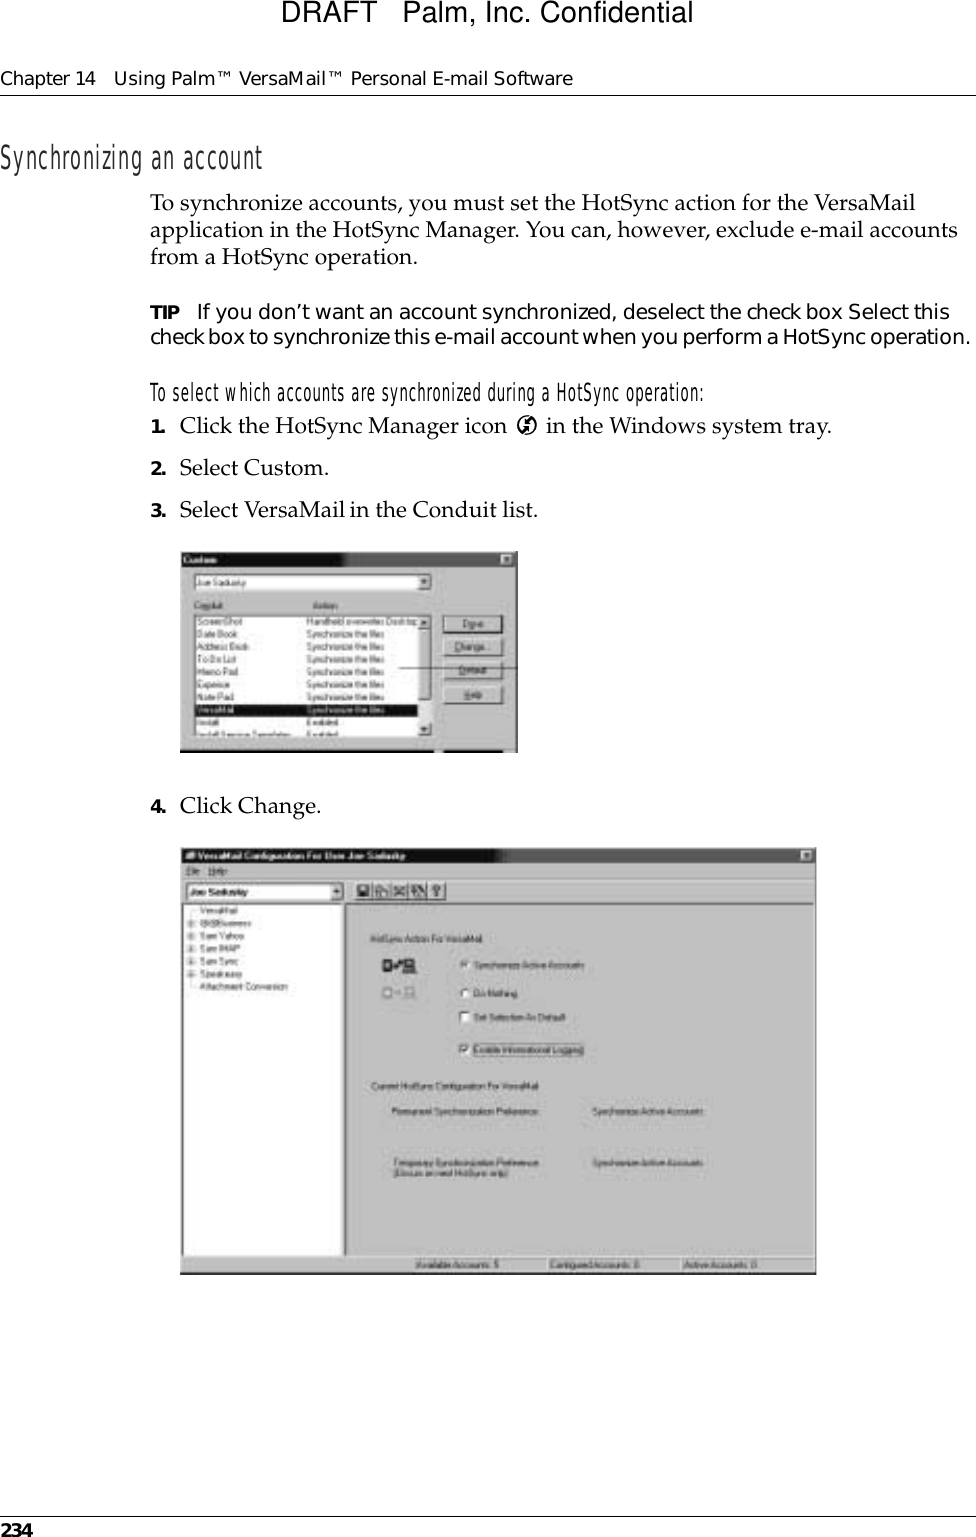
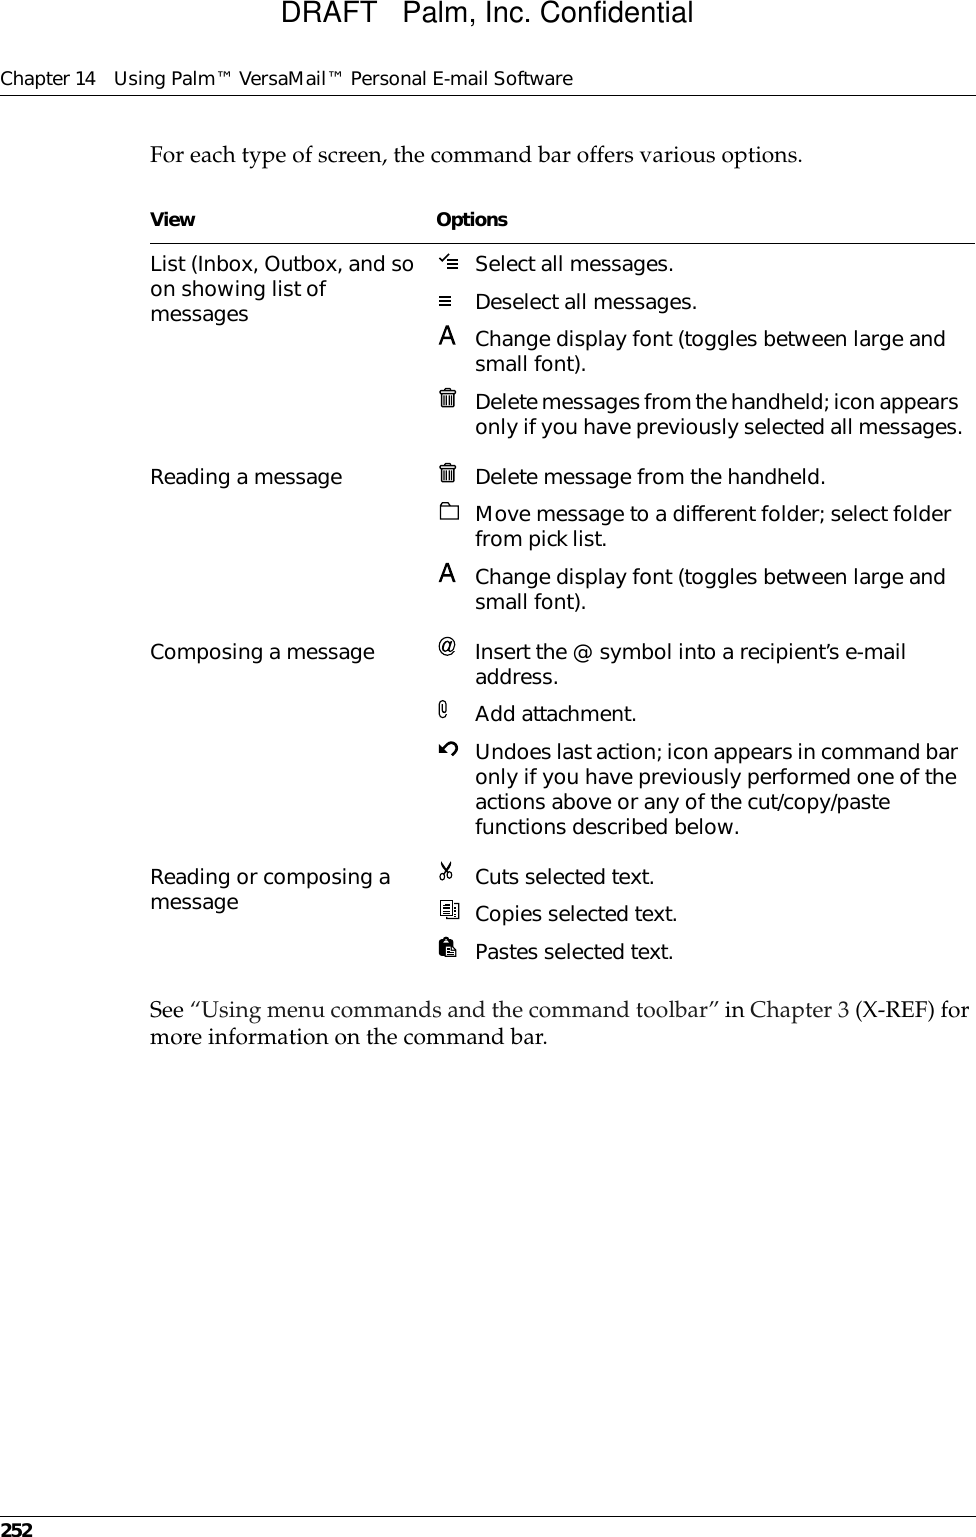
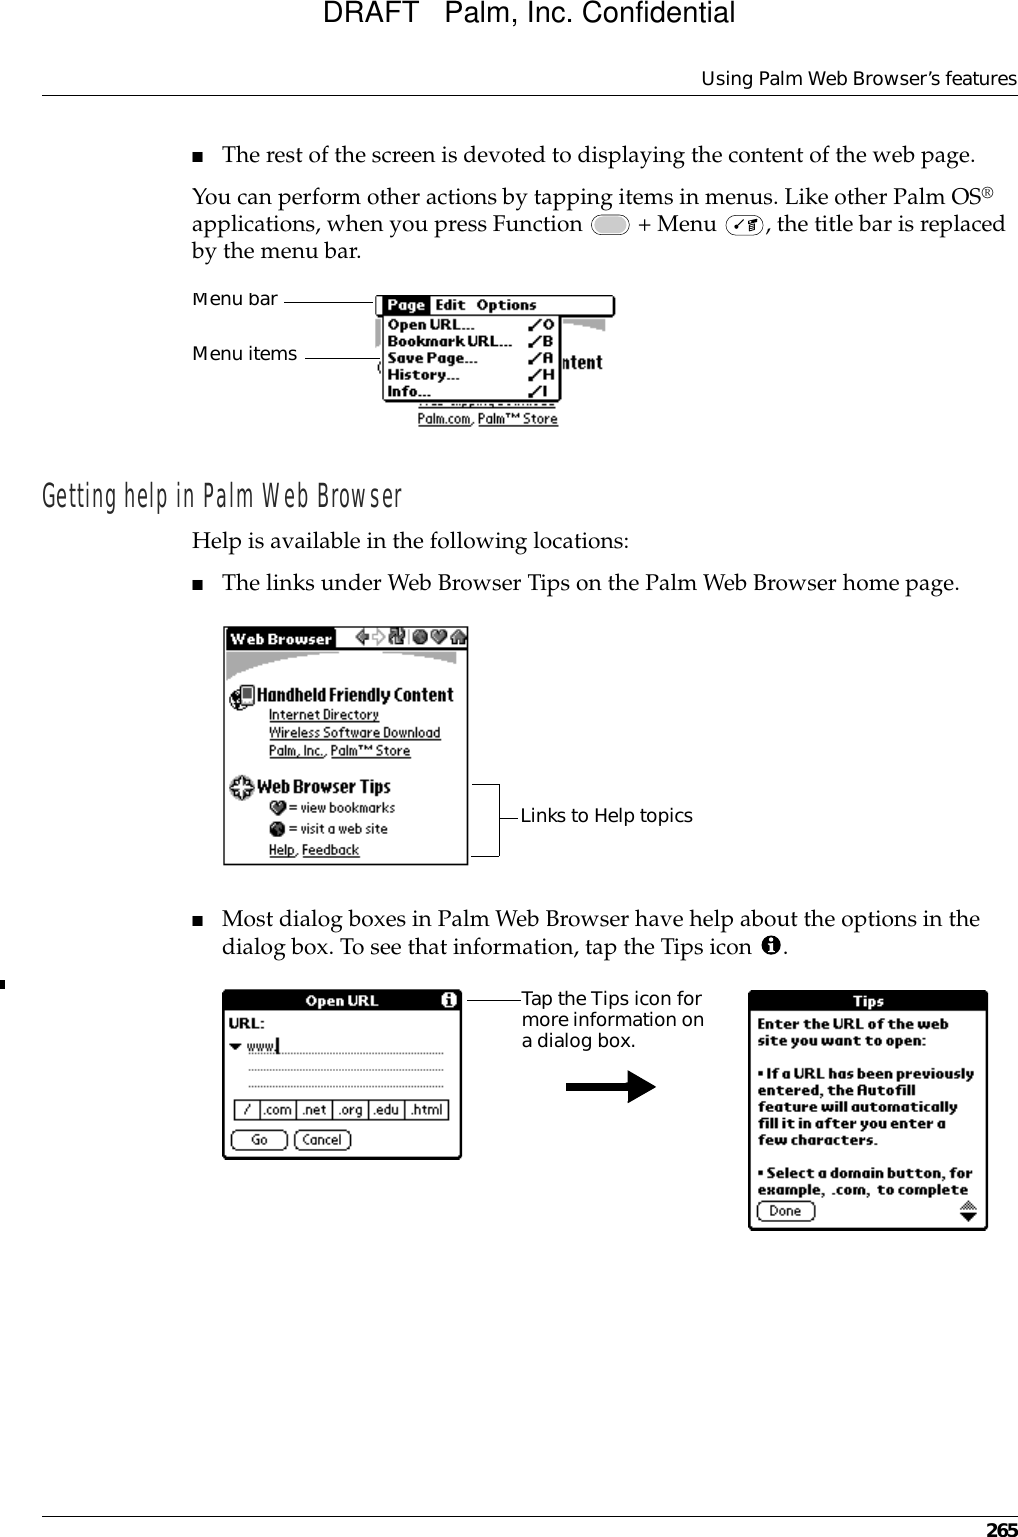
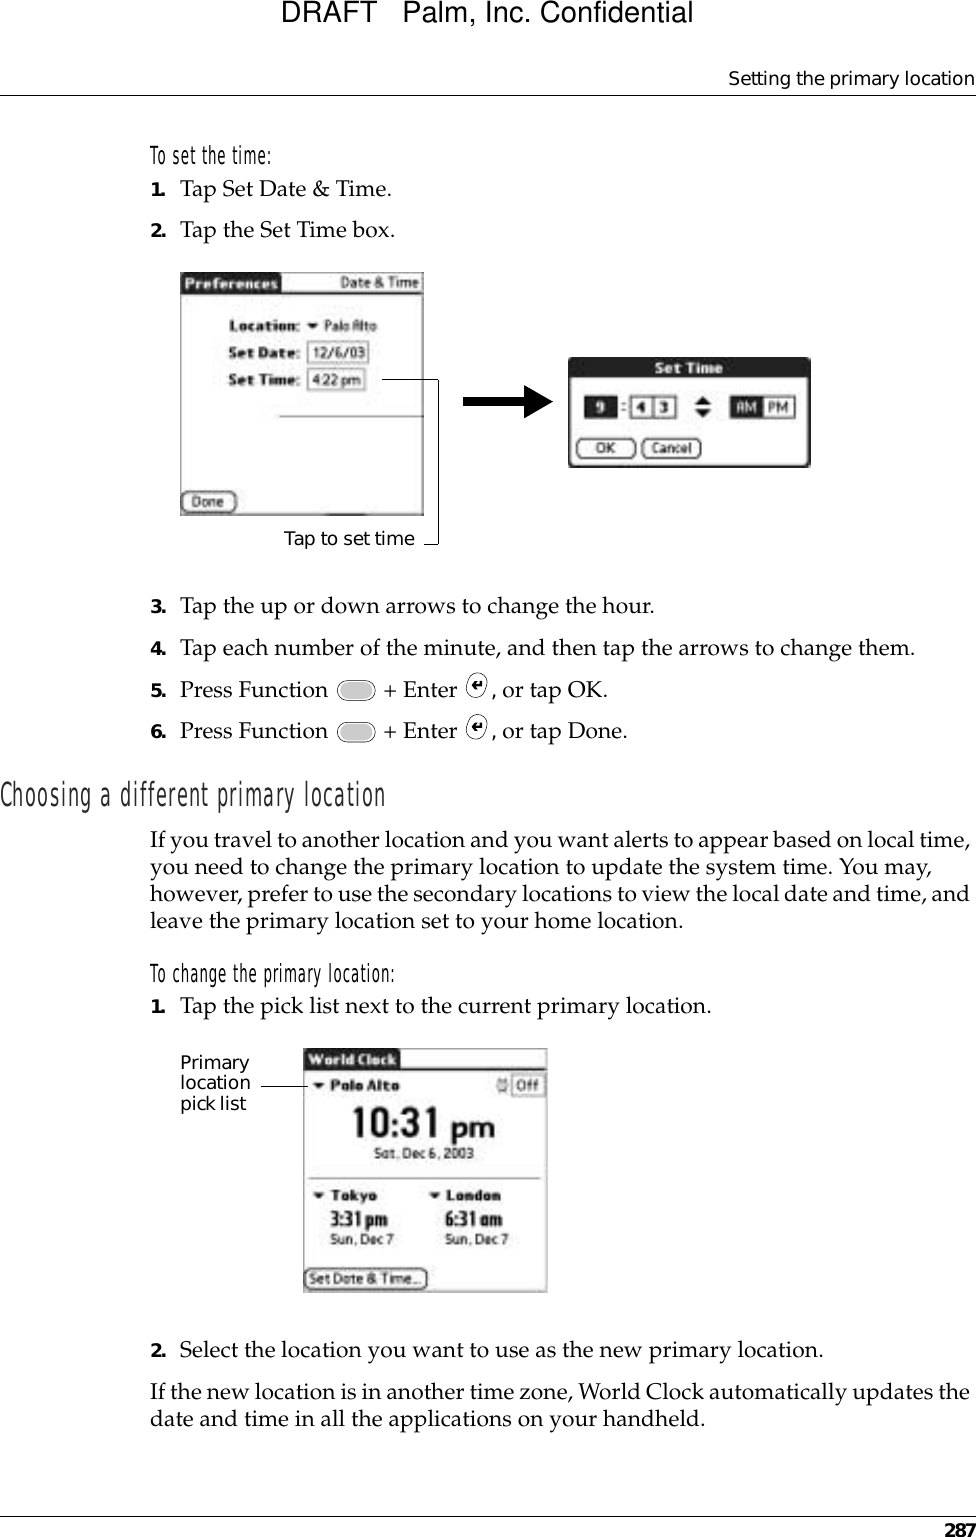
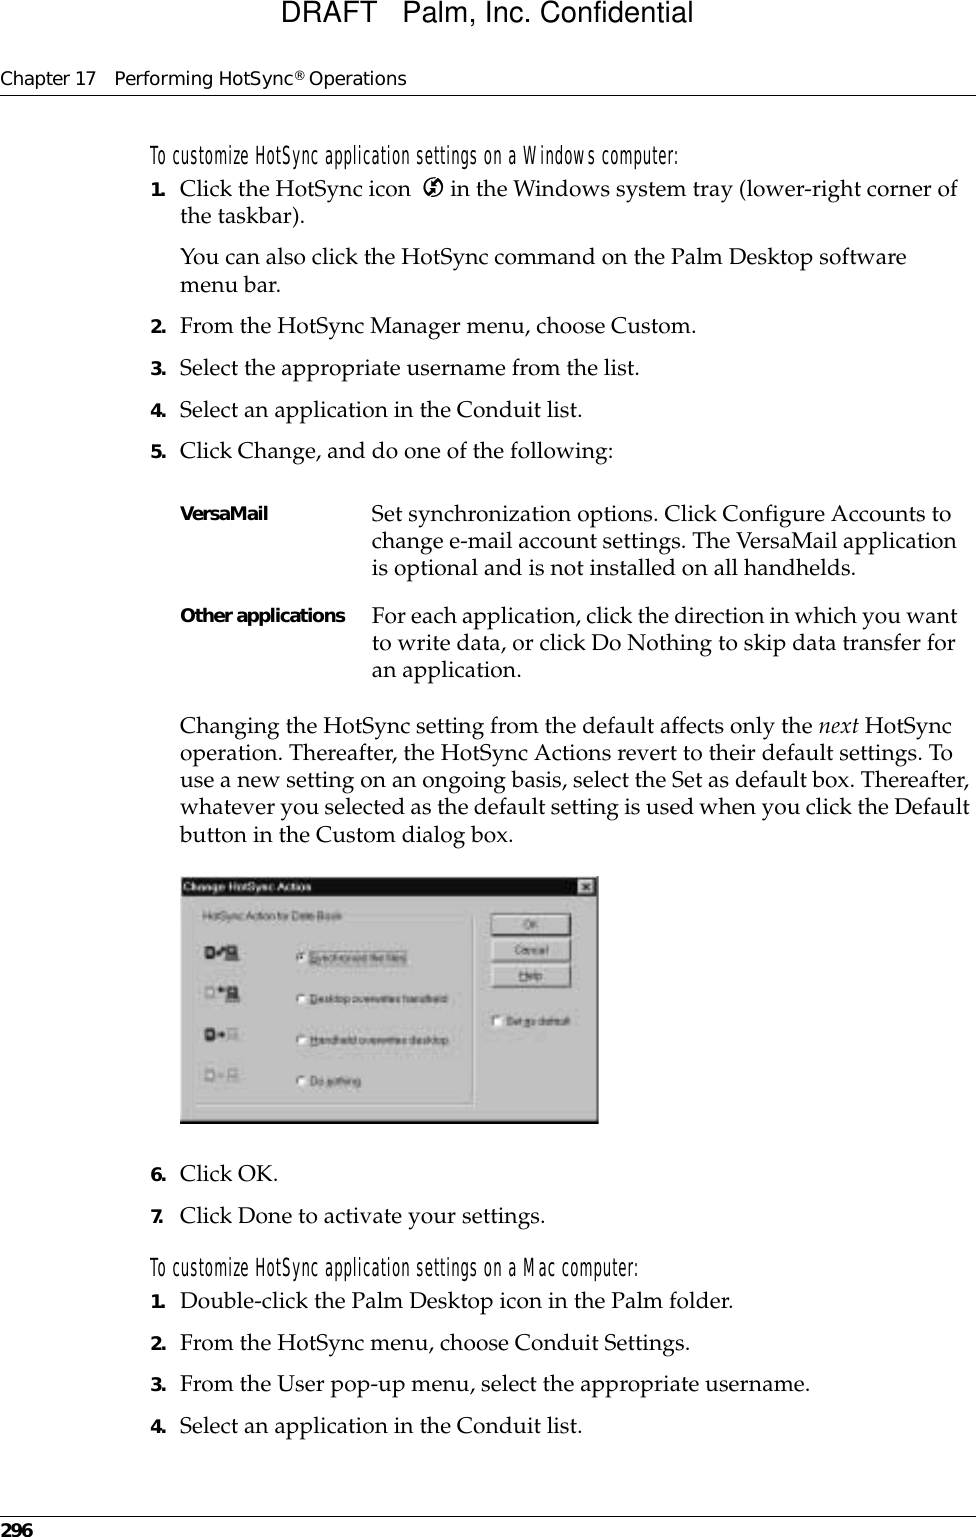
![Using Graffiti writing to enter data27You can also use the following additional Graffiti punctuation marks.Symbol charactersAll symbol characters begin with the symbol shift stroke in the Graffiti writing area of your handheld.When the Symbol Shift is active, a slanted shift symbol appears in the lower-right corner of the screen. The next stroke that you make creates the symbol or extended character.Accented charactersTo create accented characters, draw the stroke that is normally used to create the letter, followed by an accent stroke. Graffiti writing then adds the accent to the letter.For example, the following diagram shows the strokes required to draw an accented e.@ # % ^ & * < > + = | —\ { } [ ] ~ ` ; : " tabSymbolShift Symbol Shift• ,,,,,°,+—X:==cY?!ƒ∅= eDRAFT Palm, Inc. Confidential](https://usermanual.wiki/Palm/200000.User-Manual/User-Guide-321231-Page-39.png)
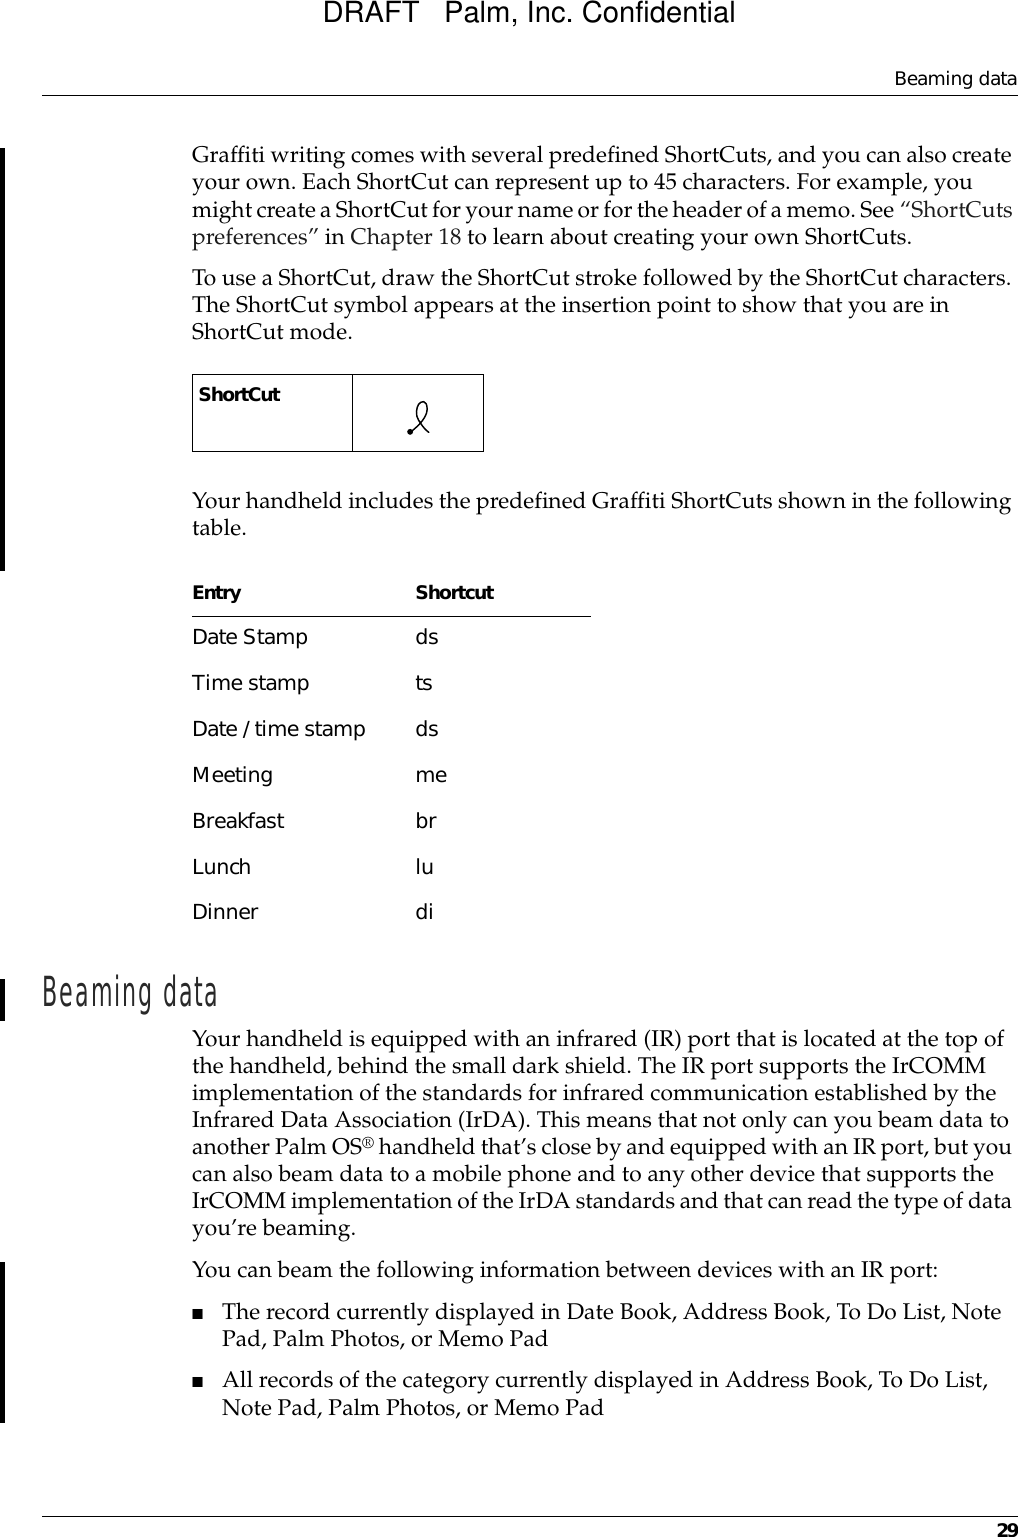
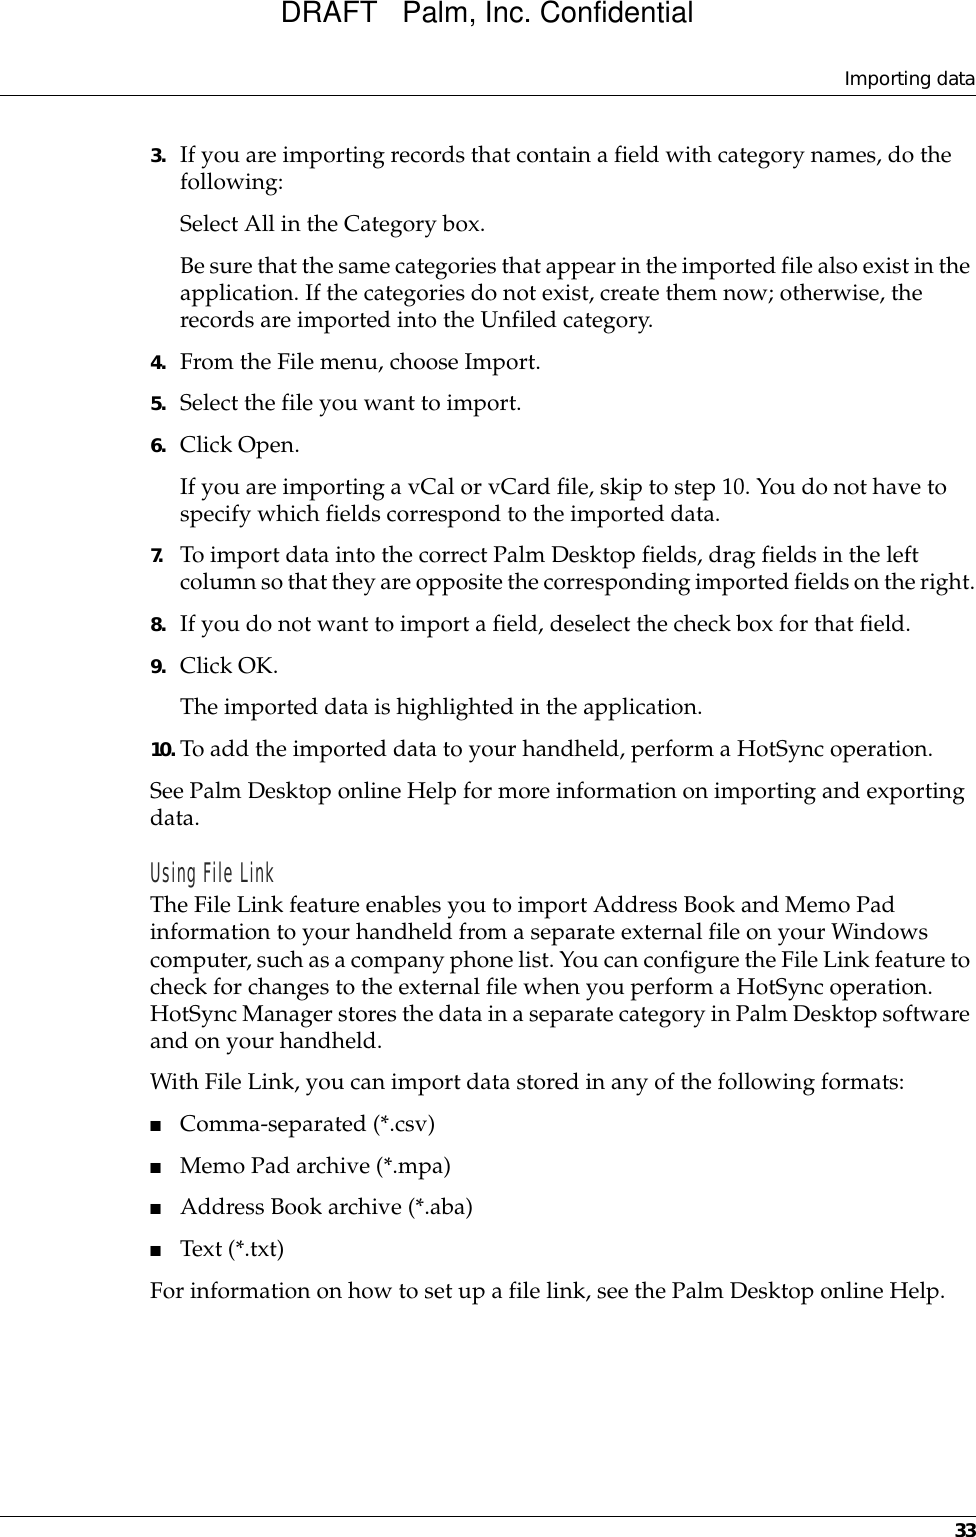

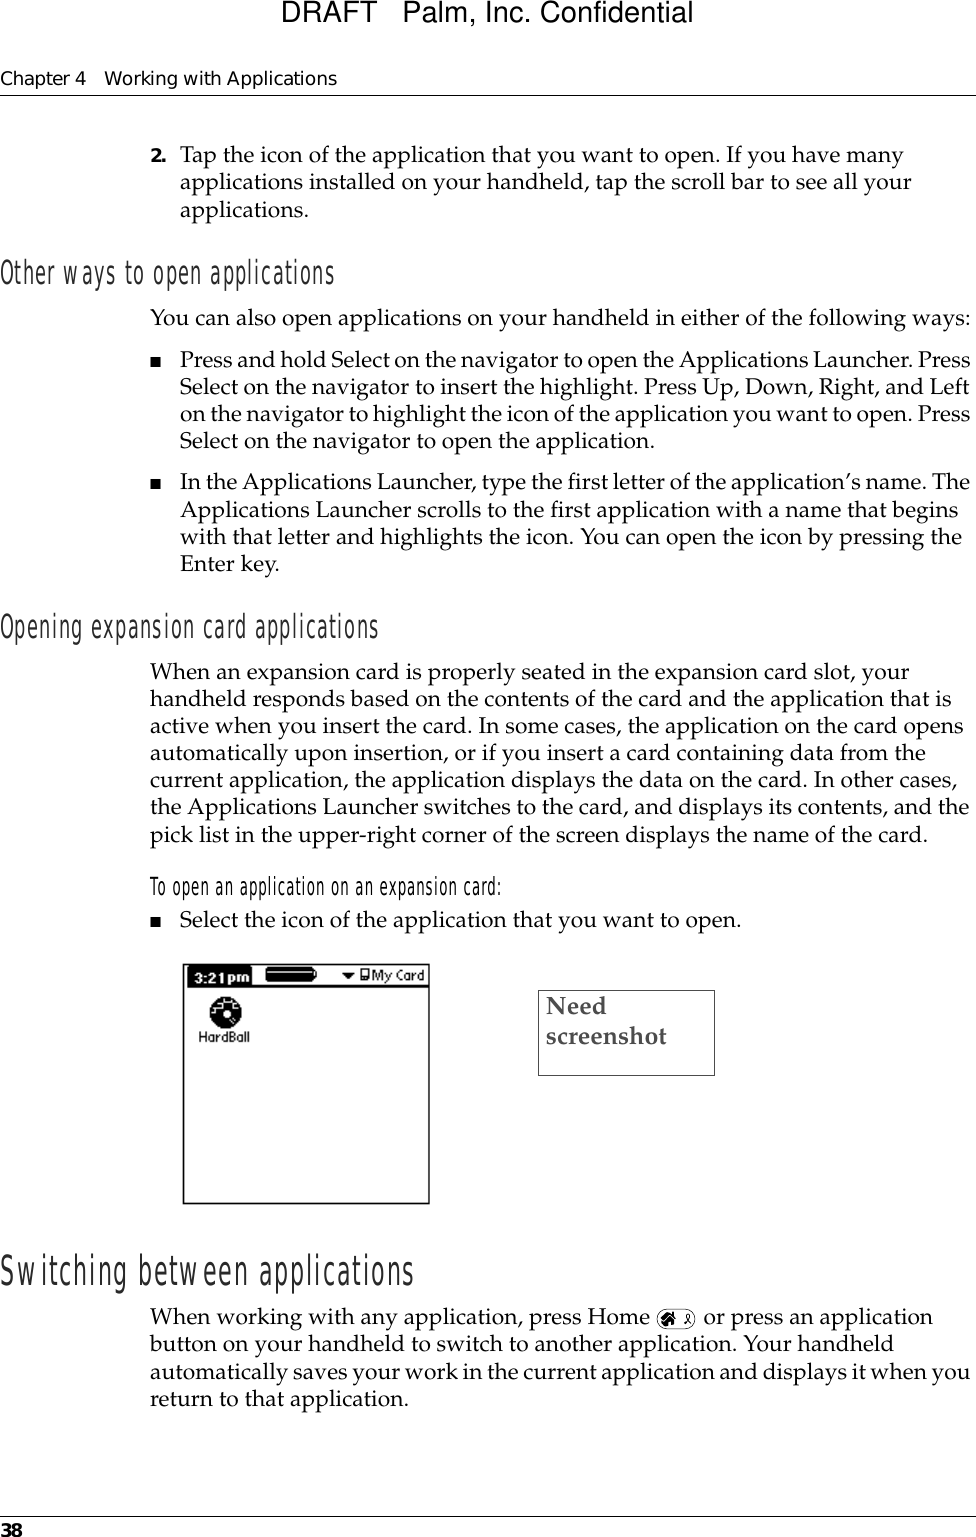
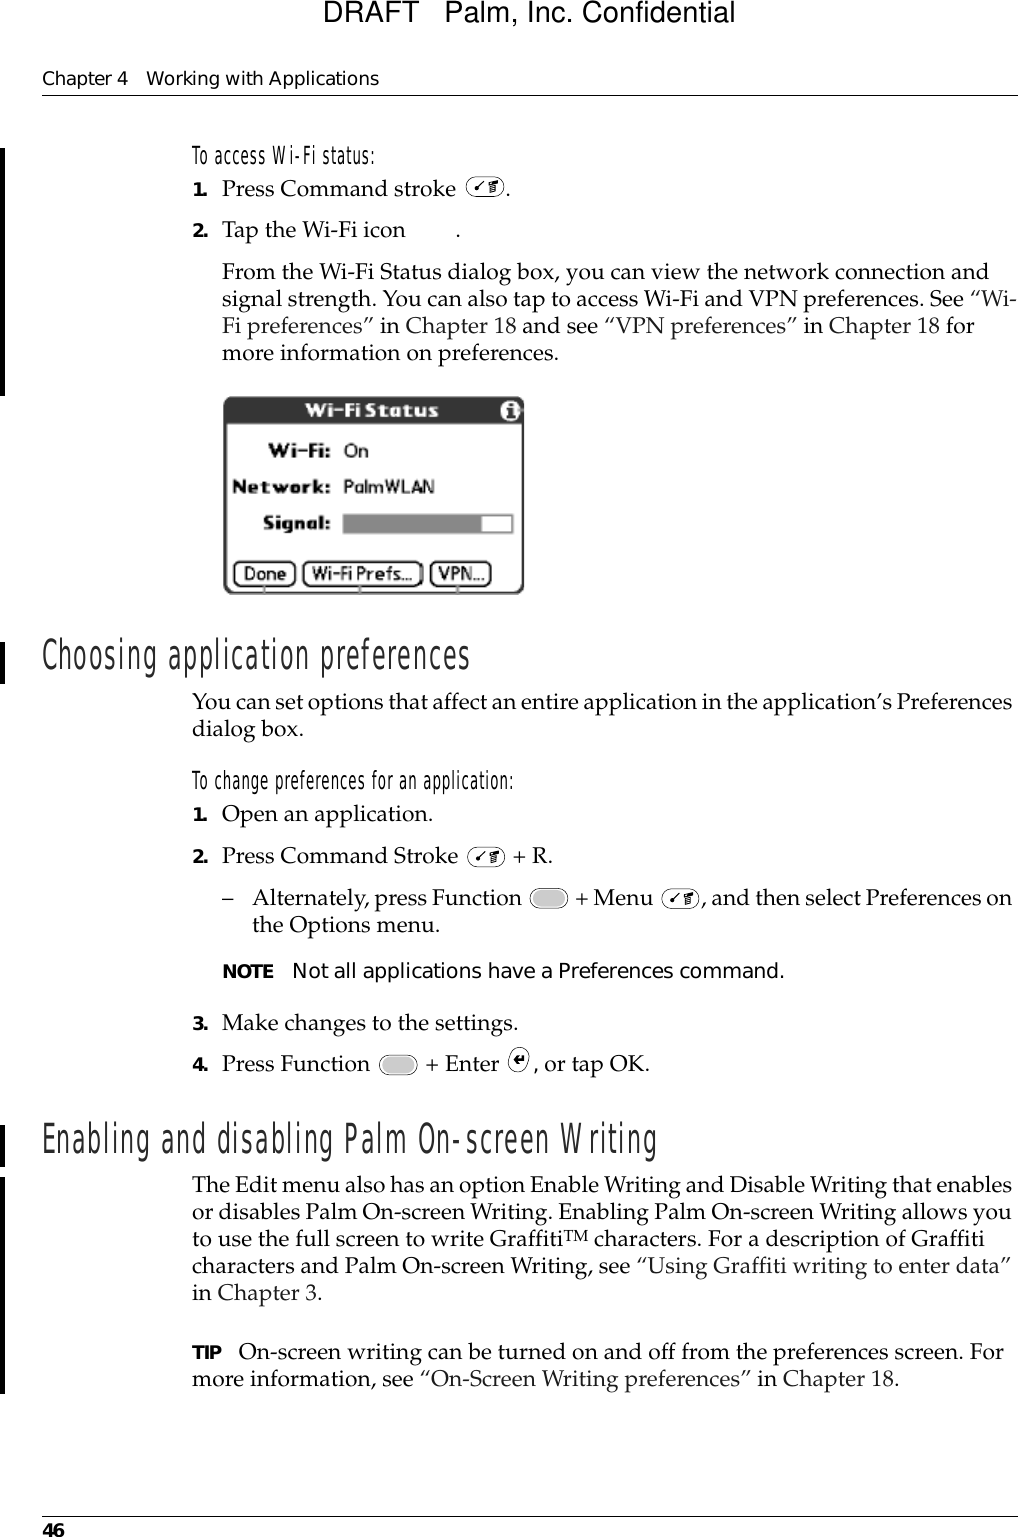
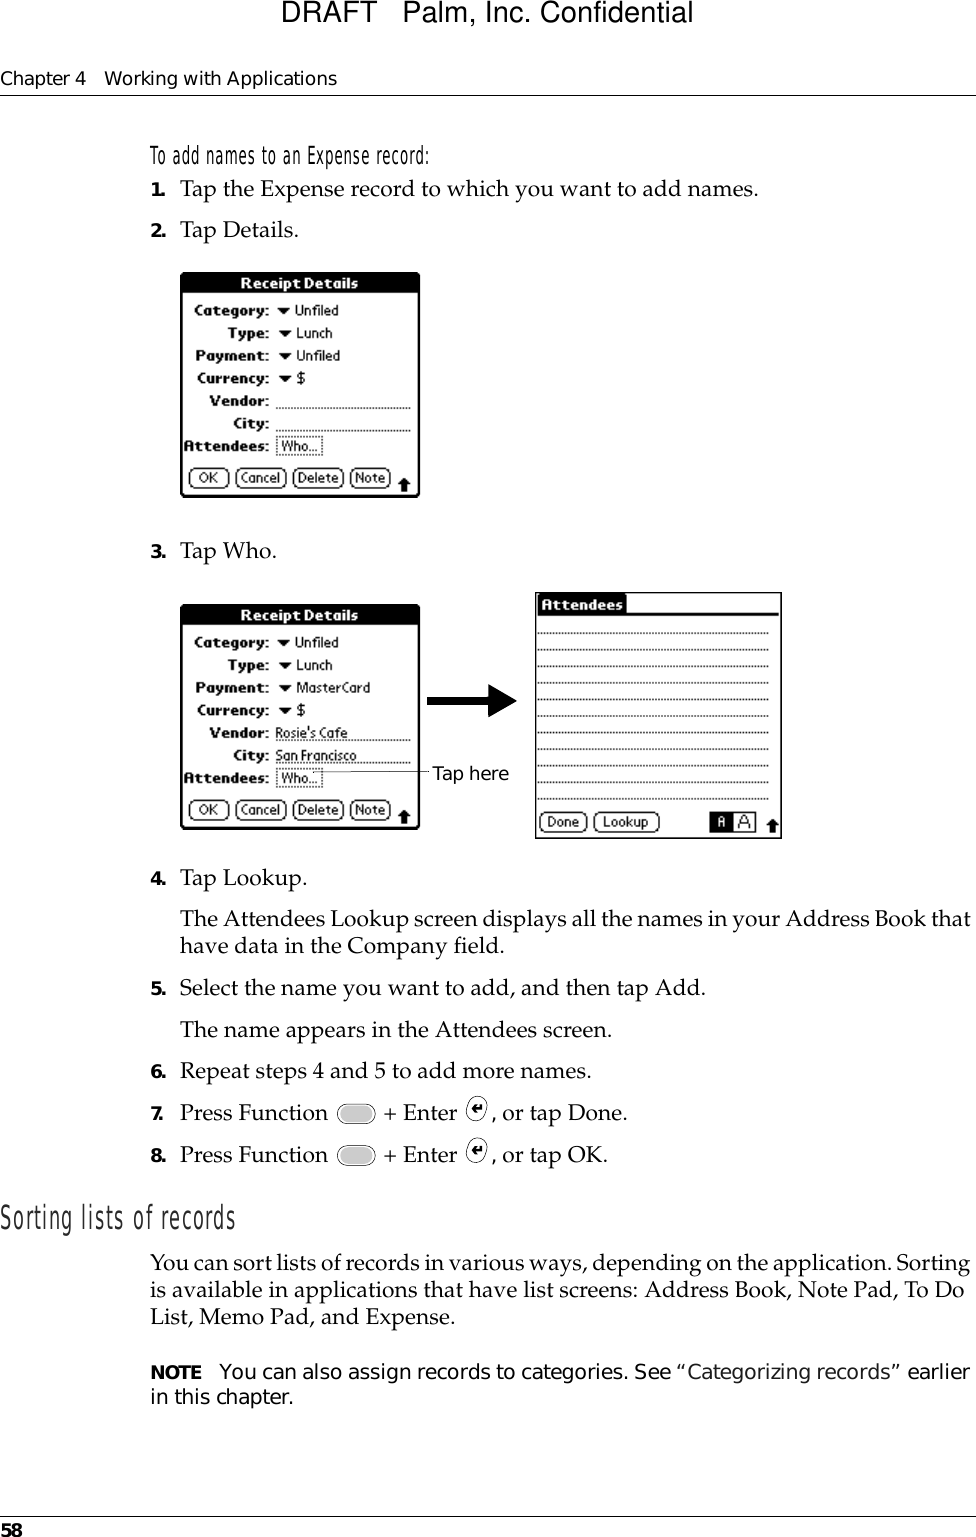


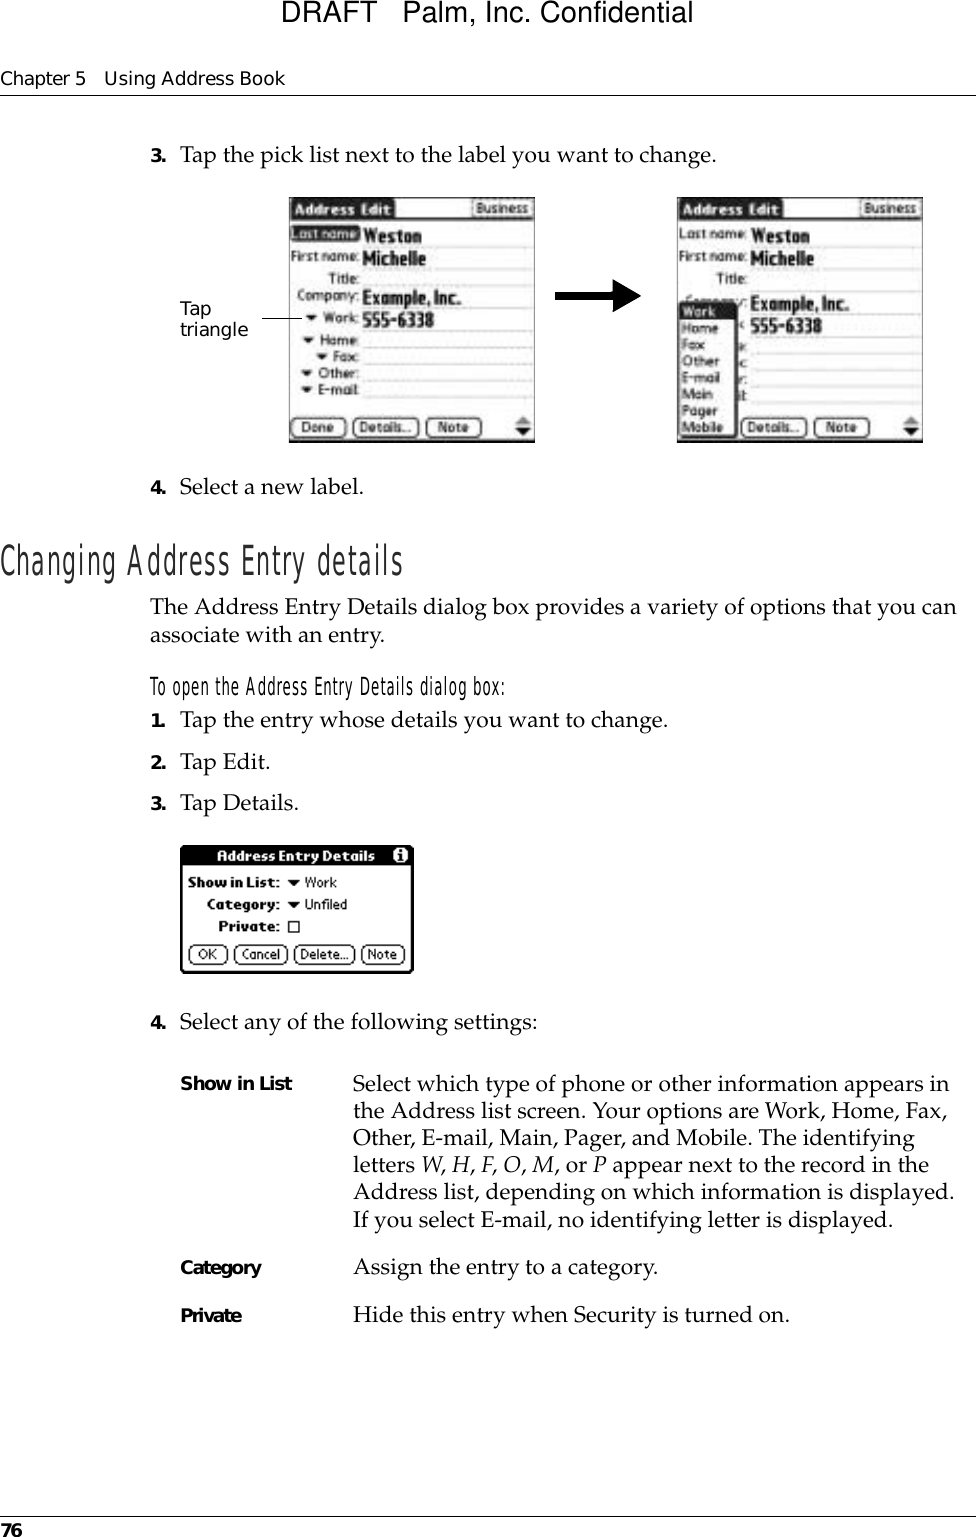


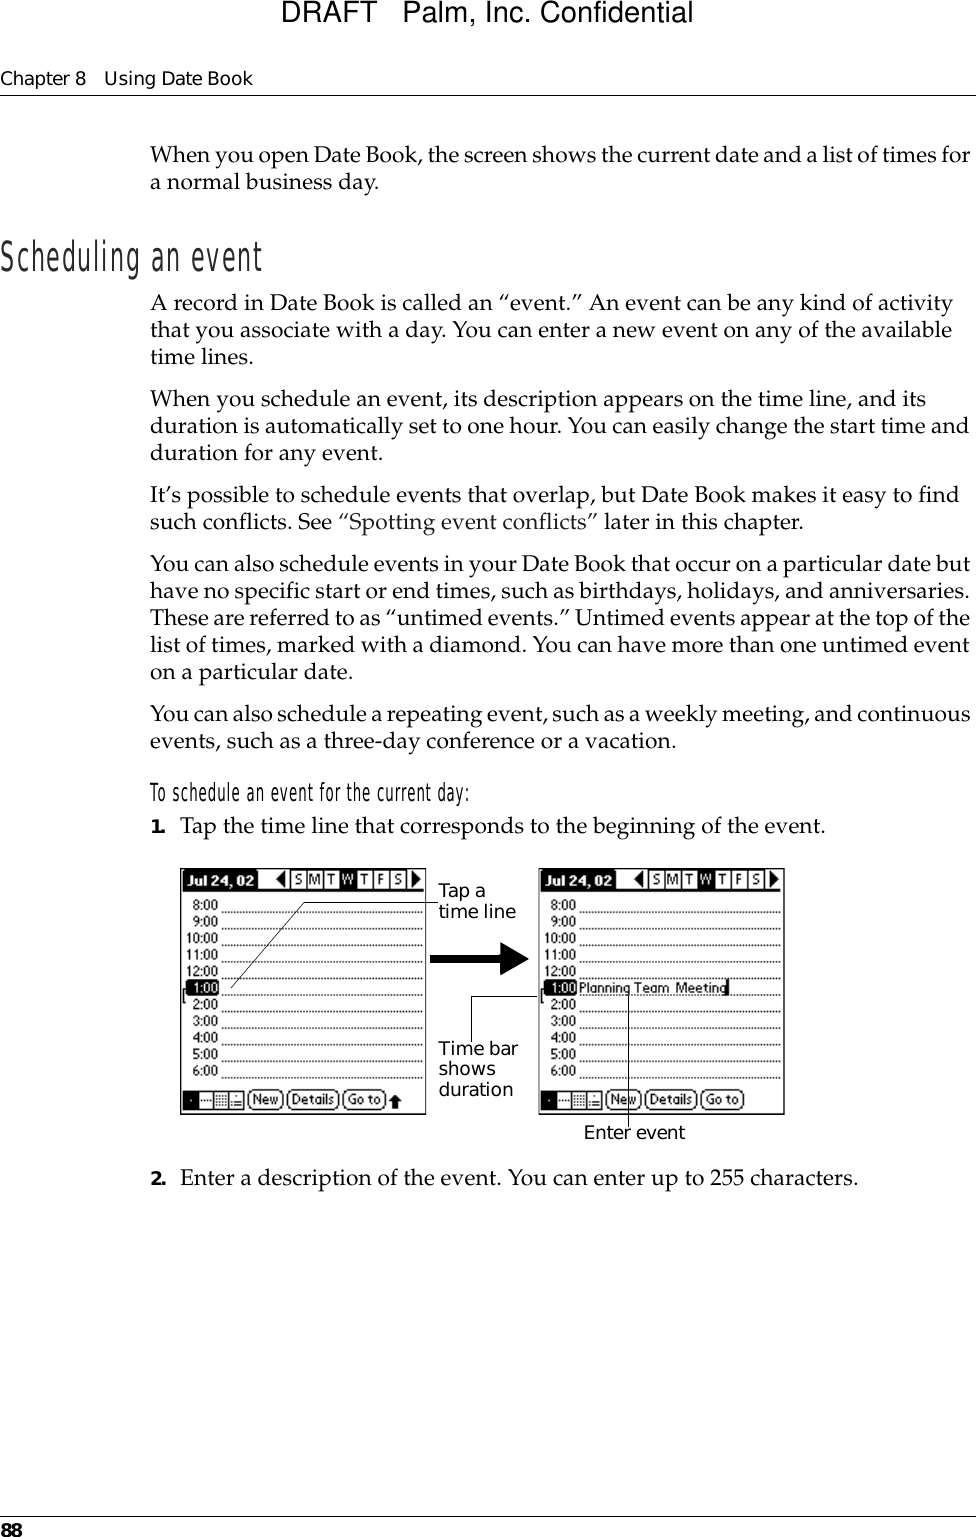

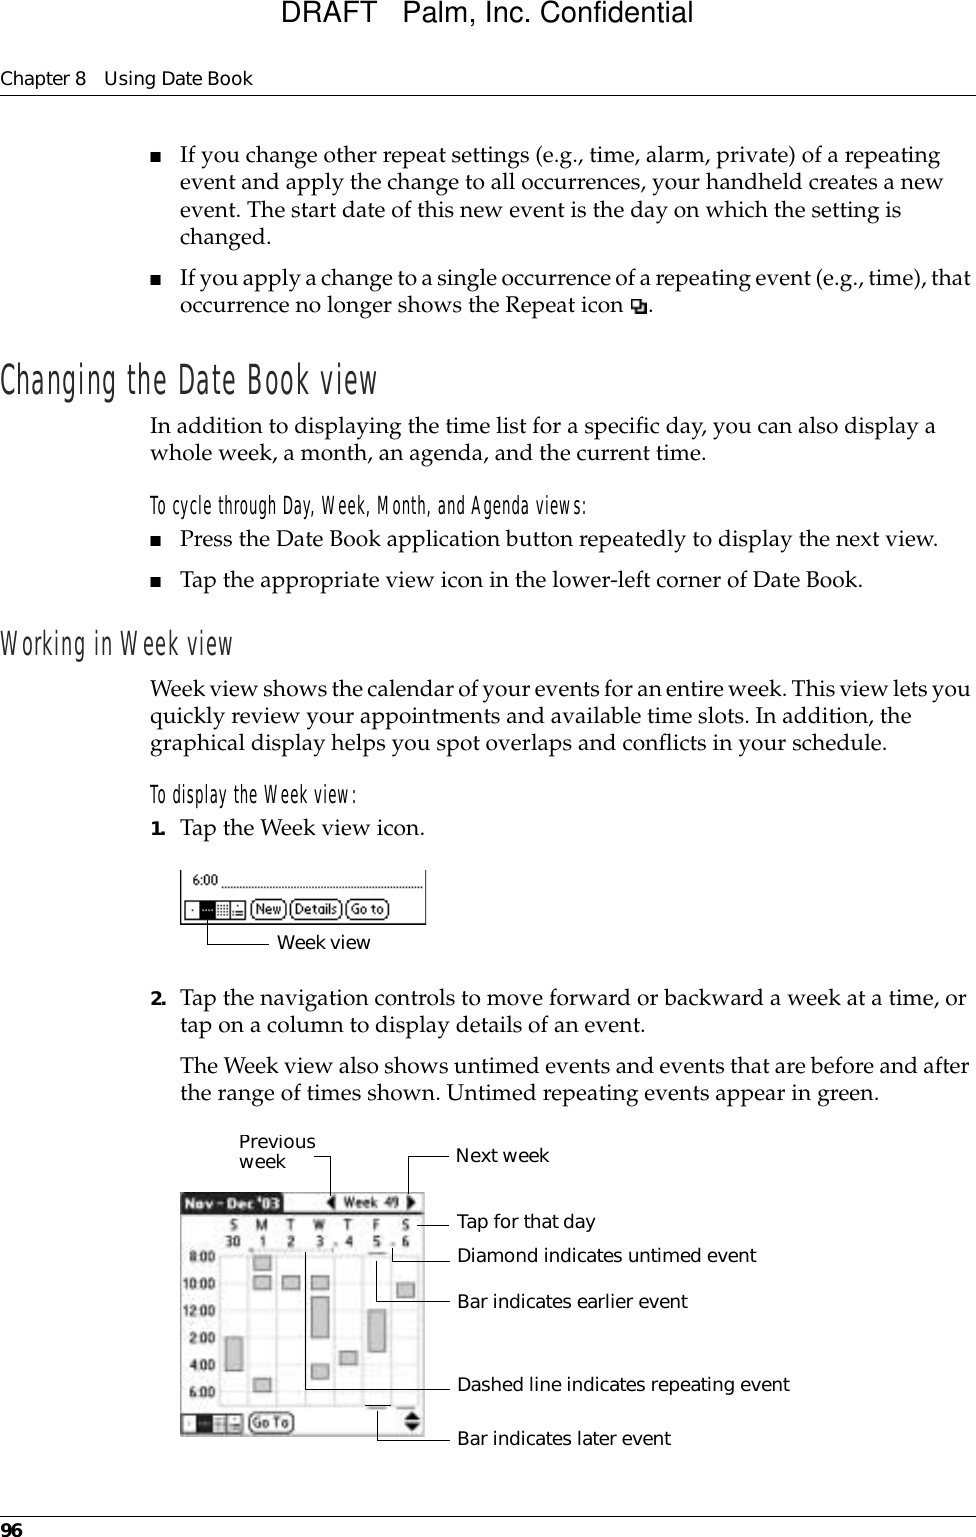
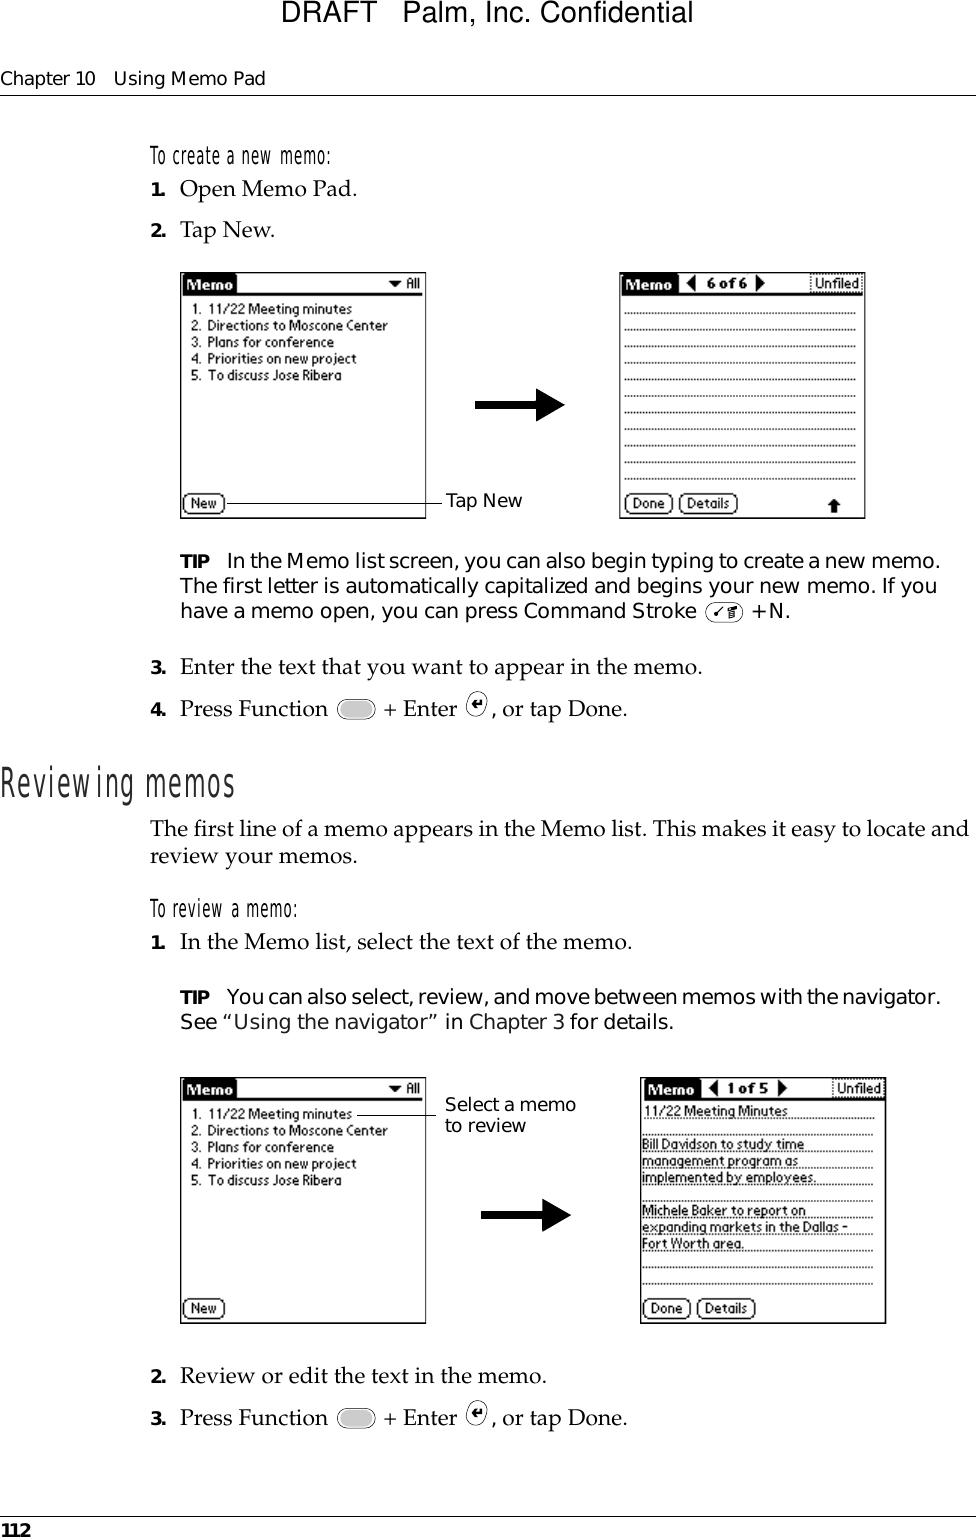

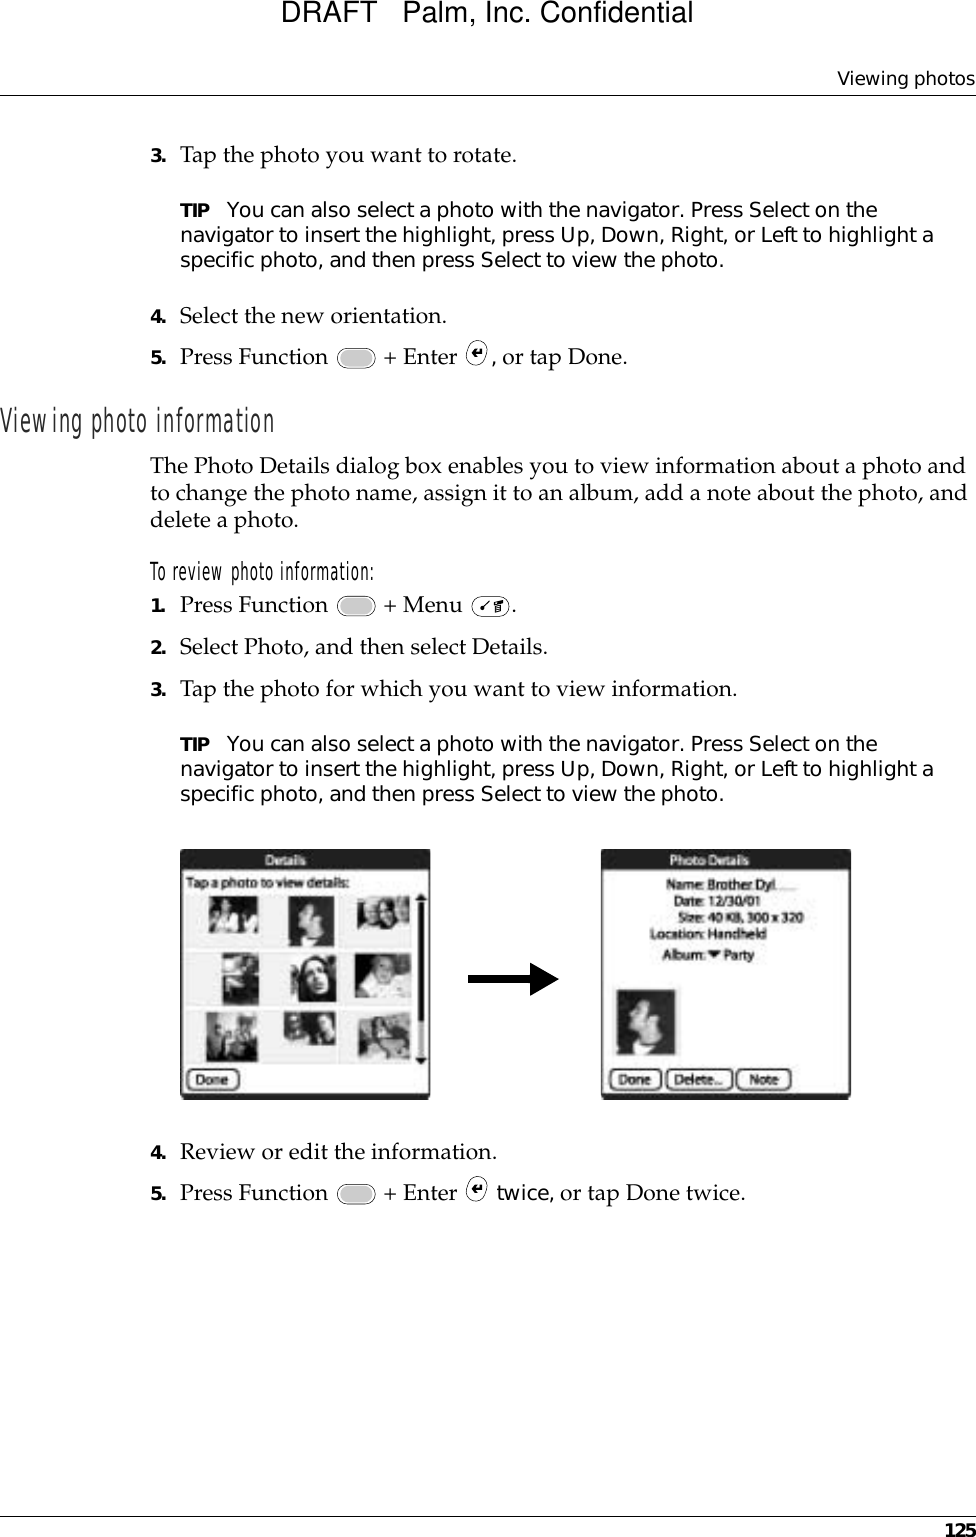
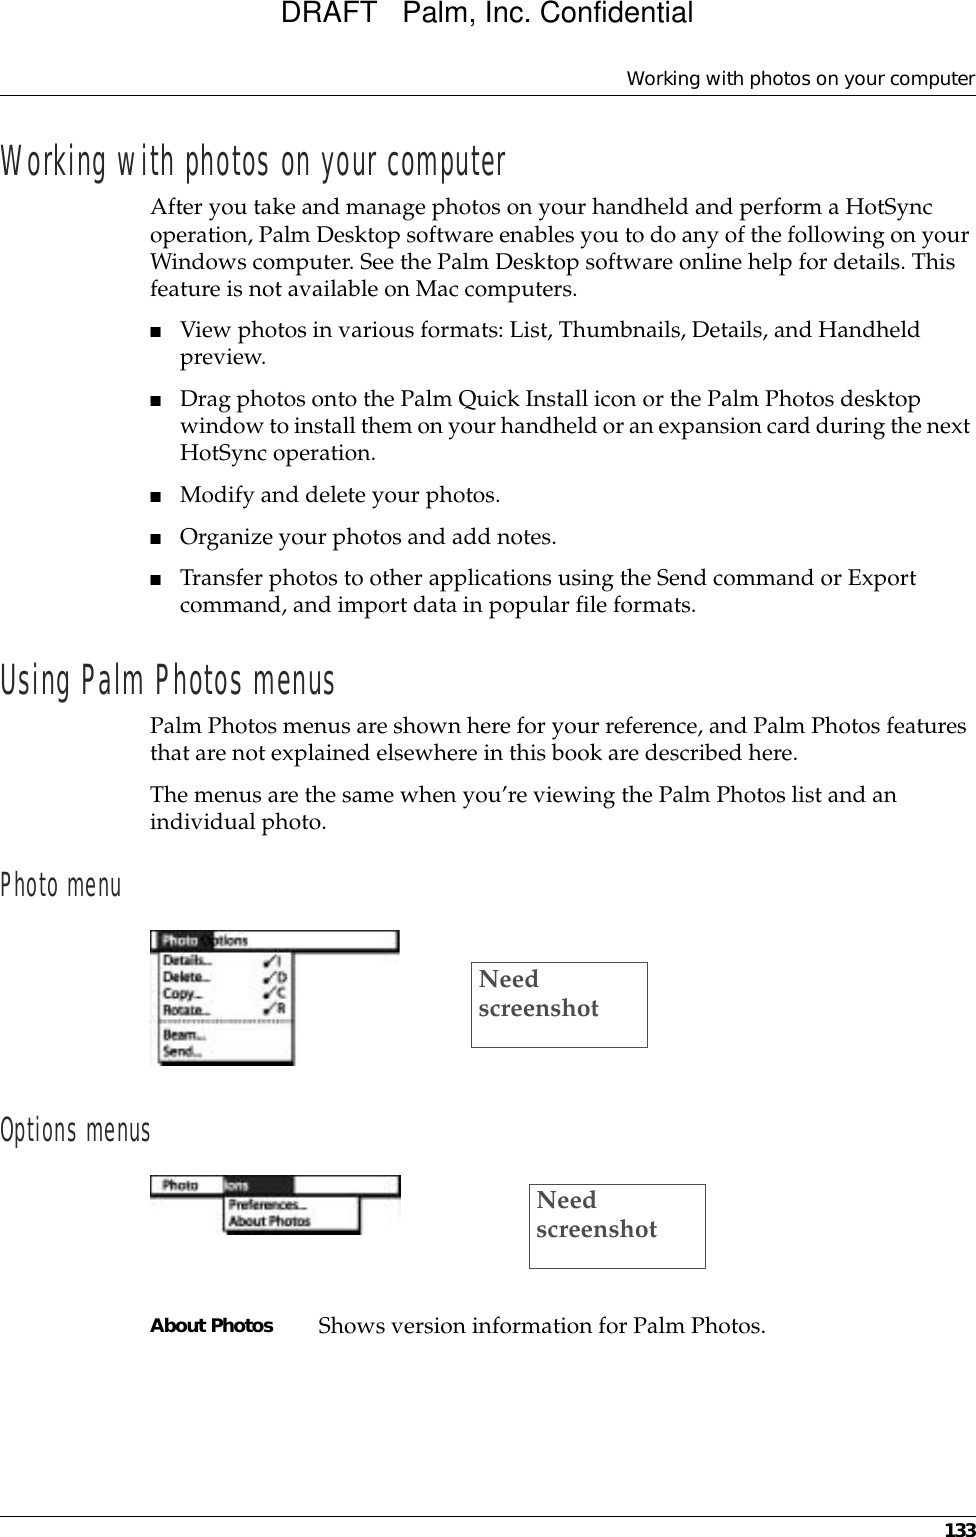

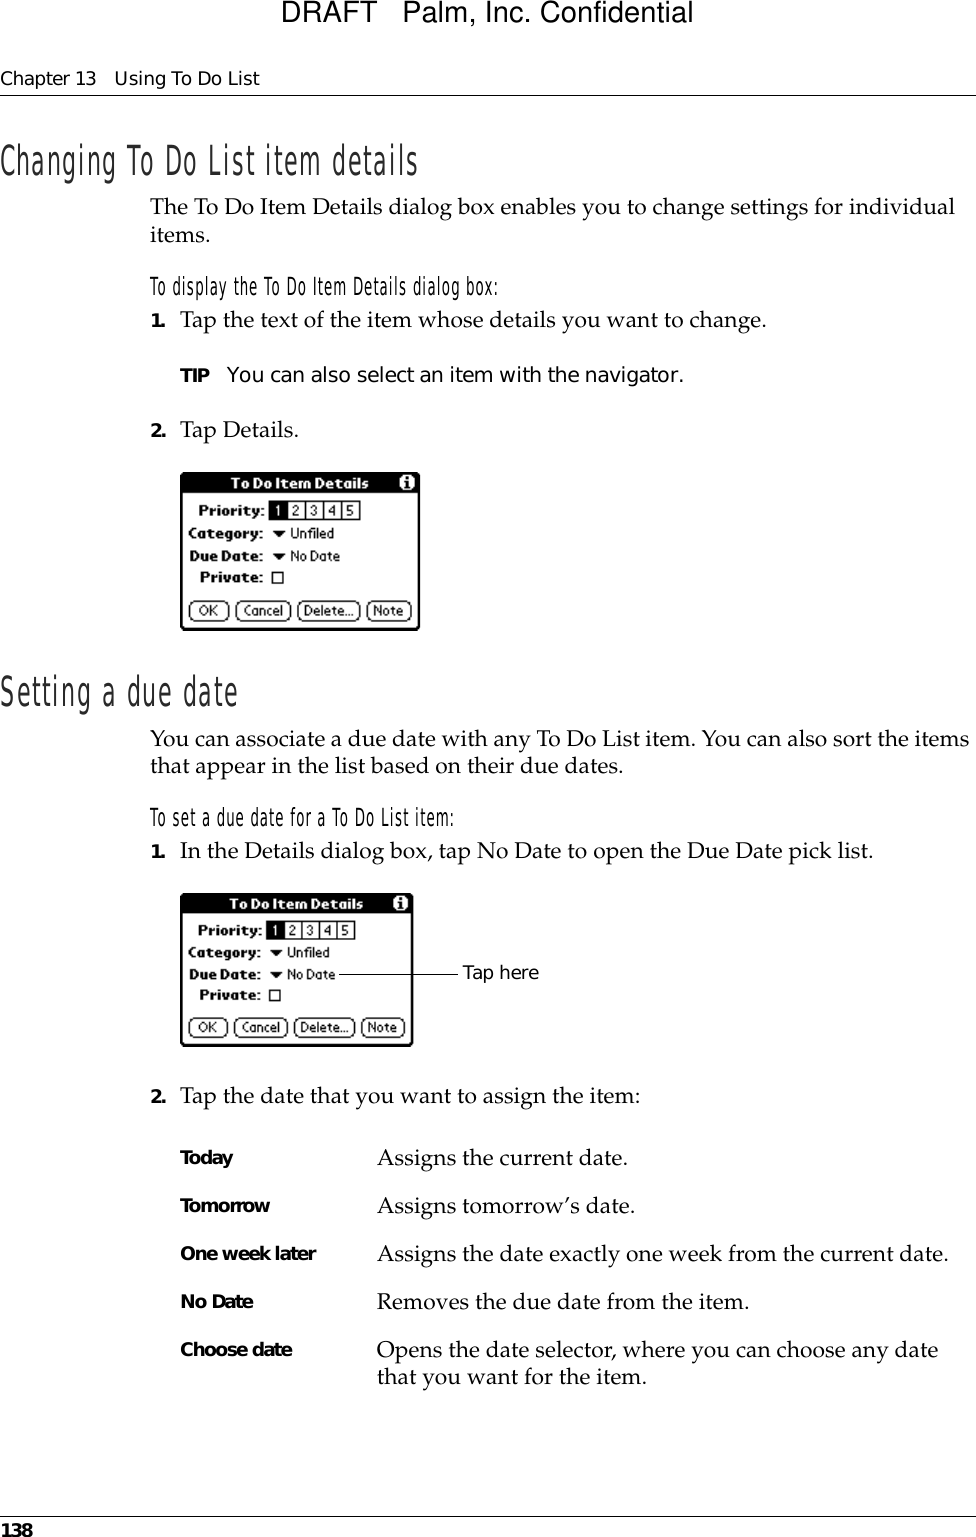

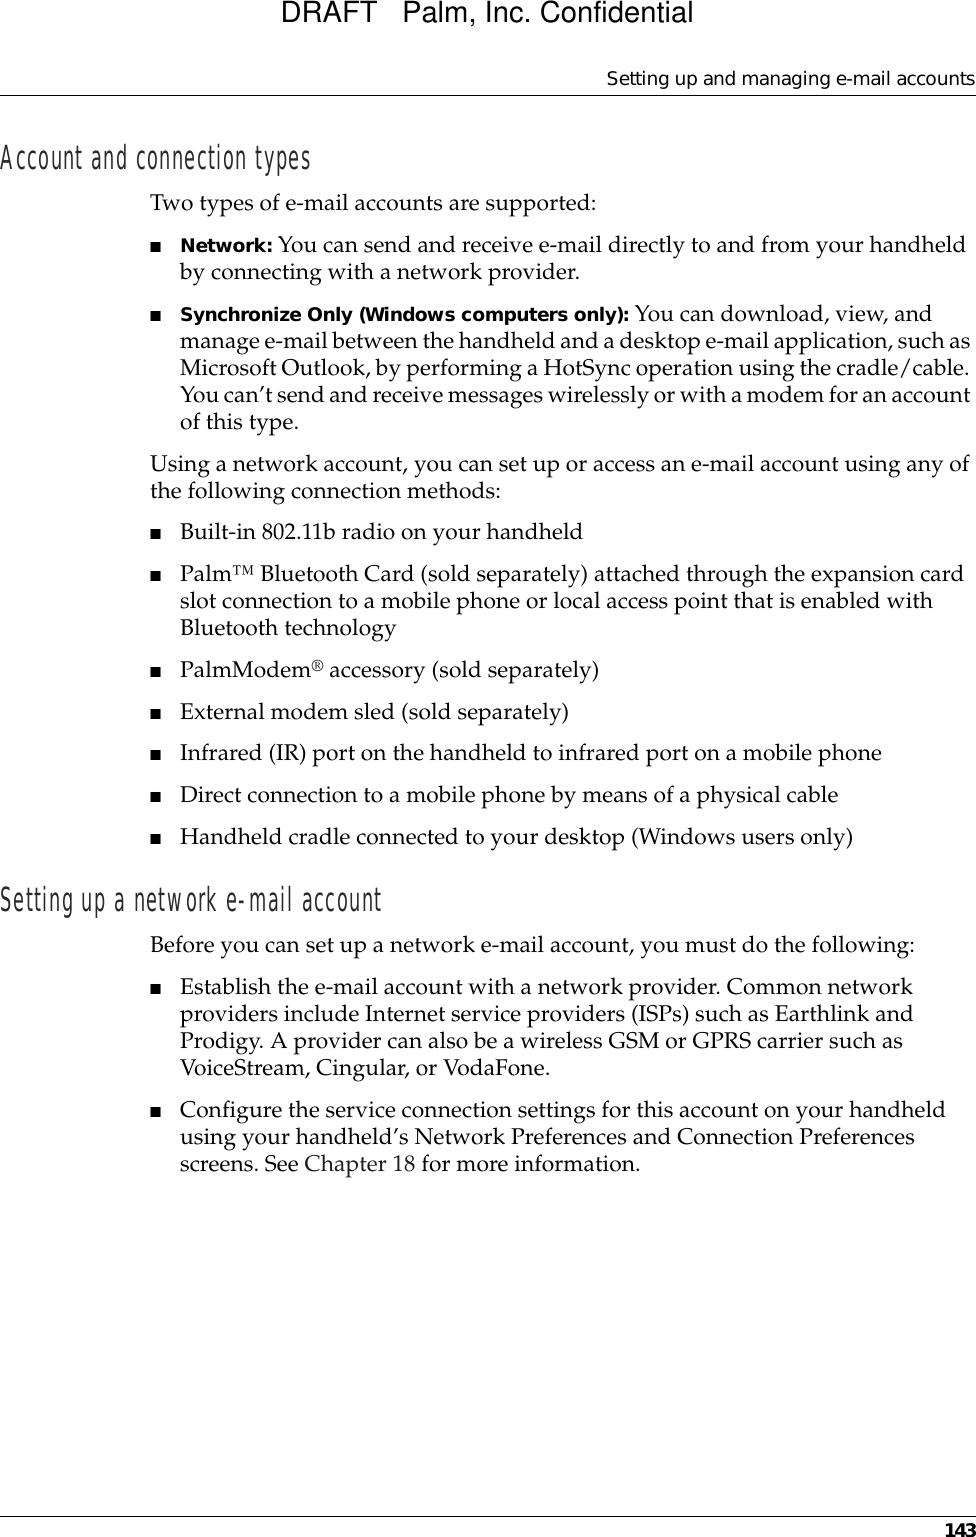


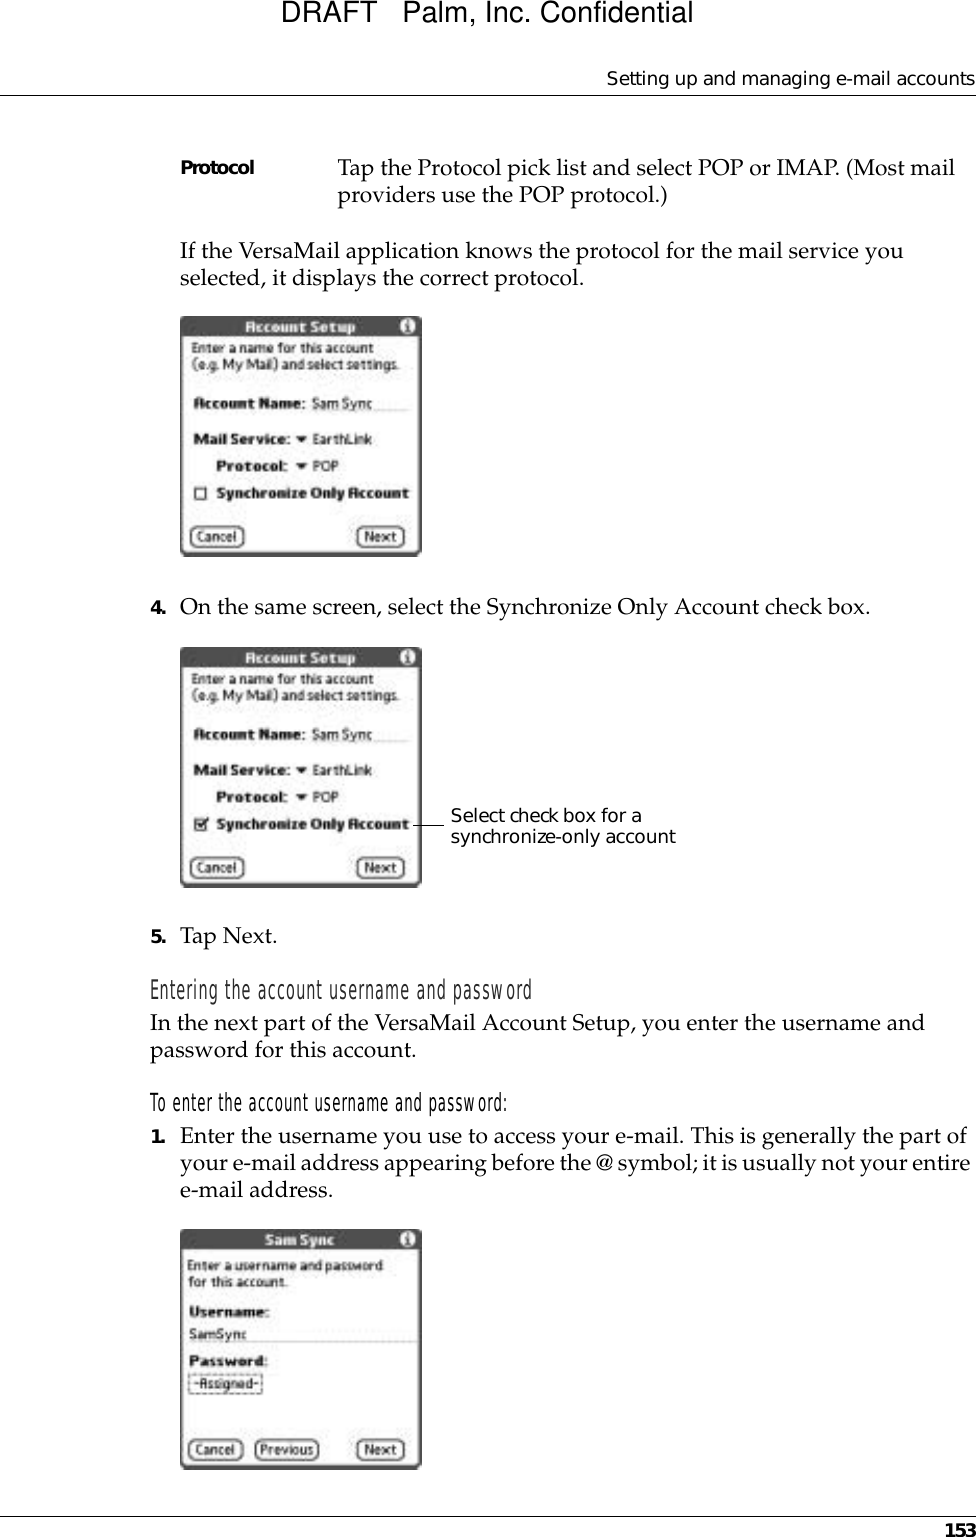


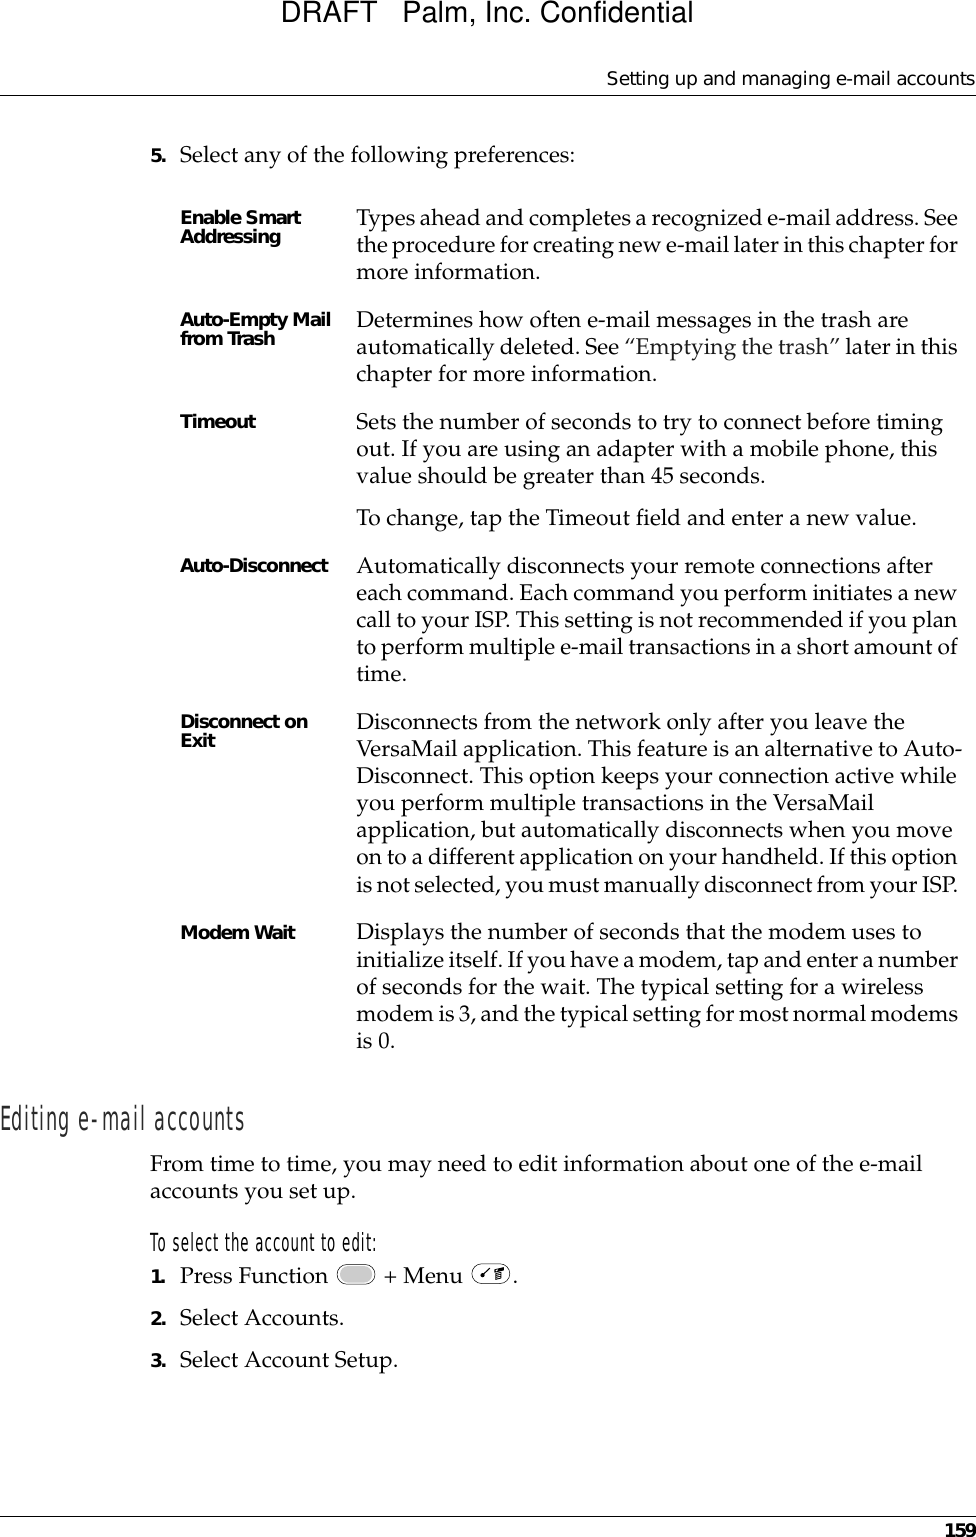
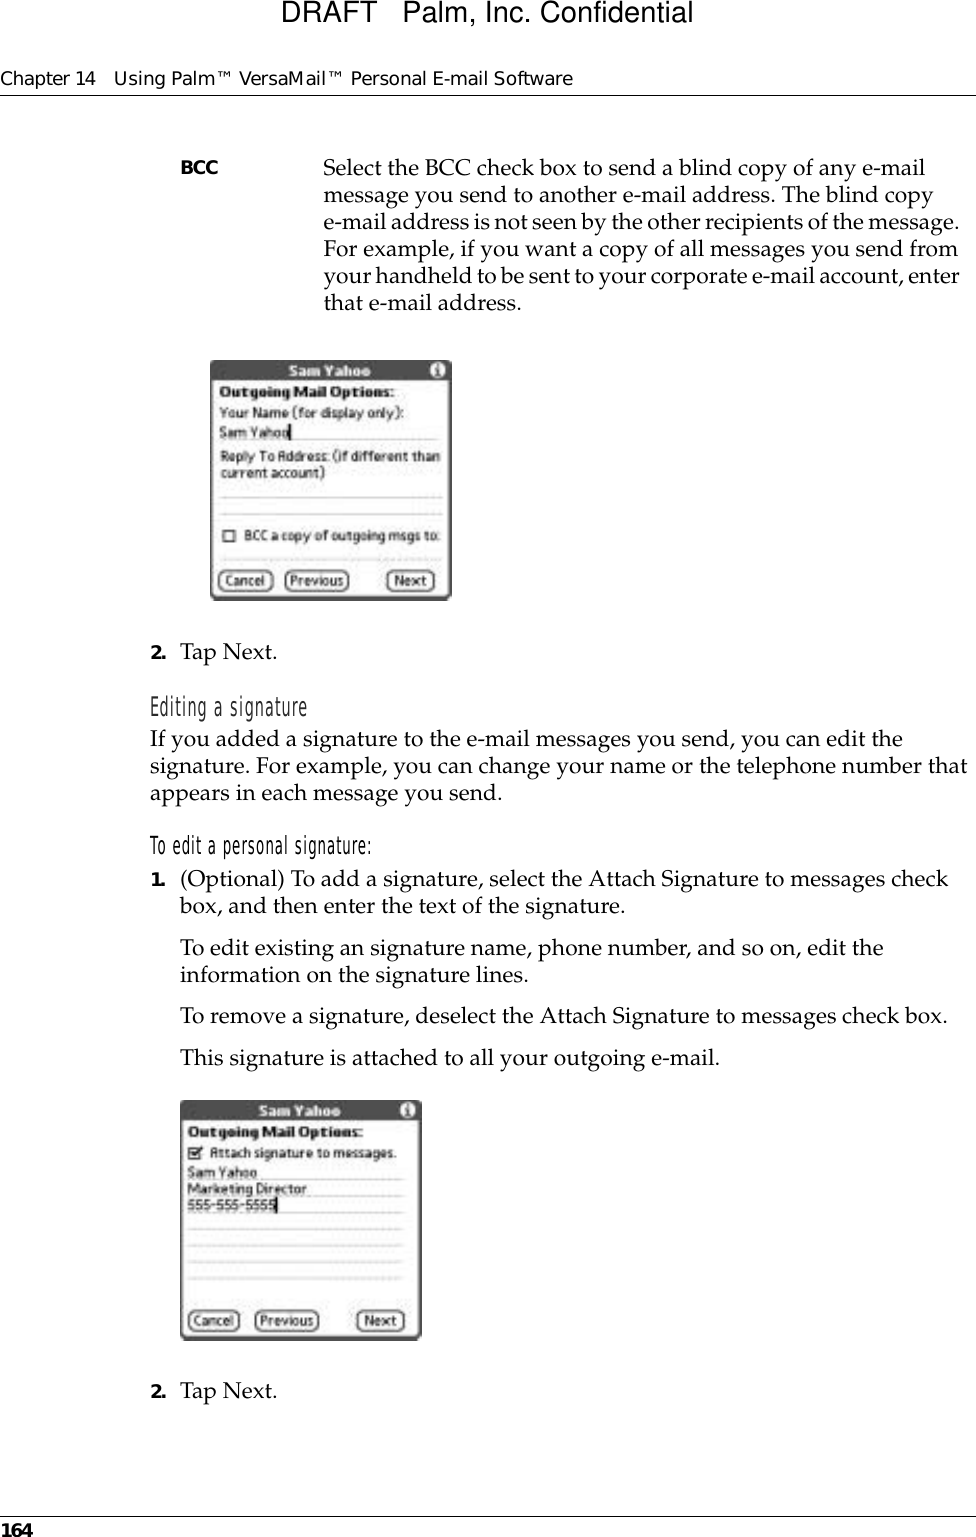

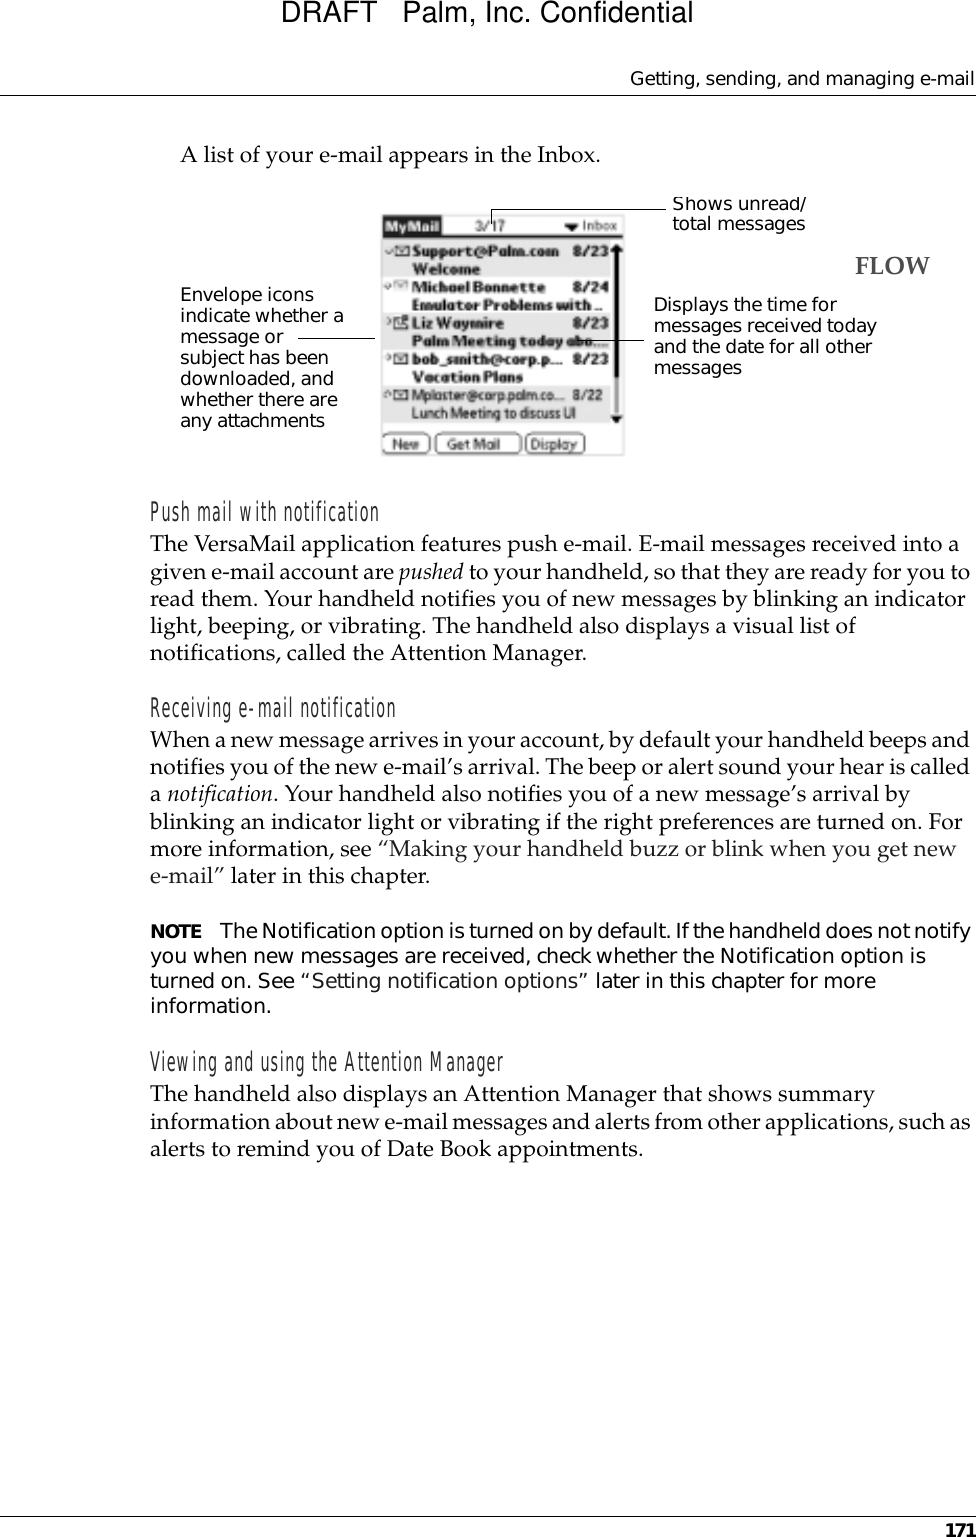

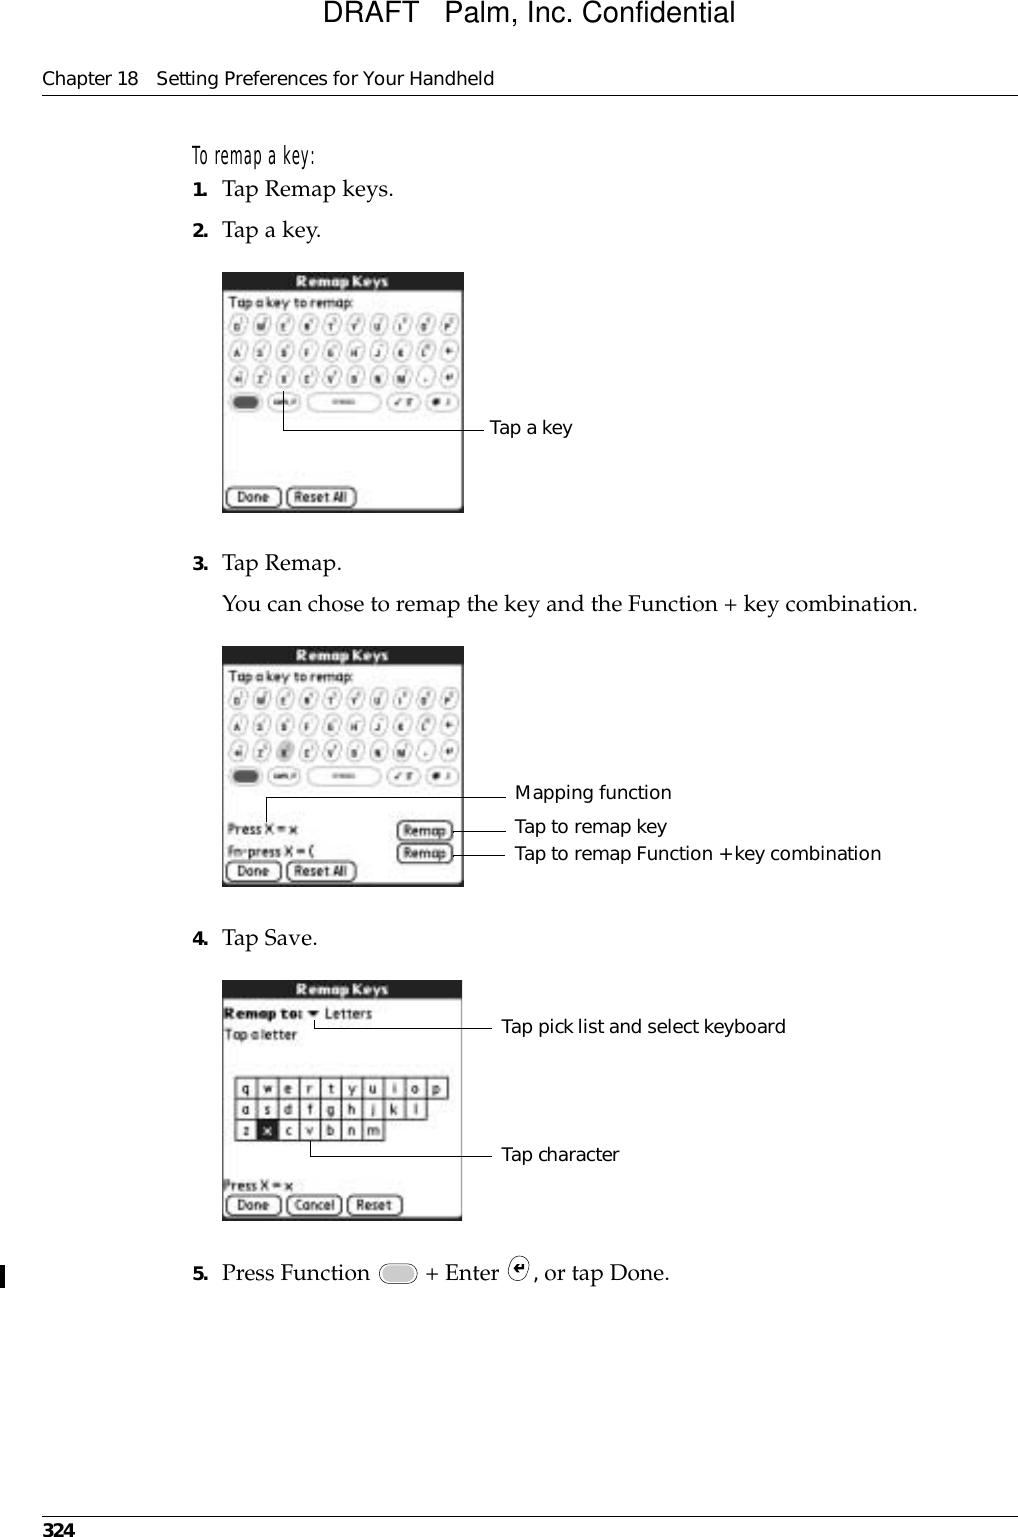
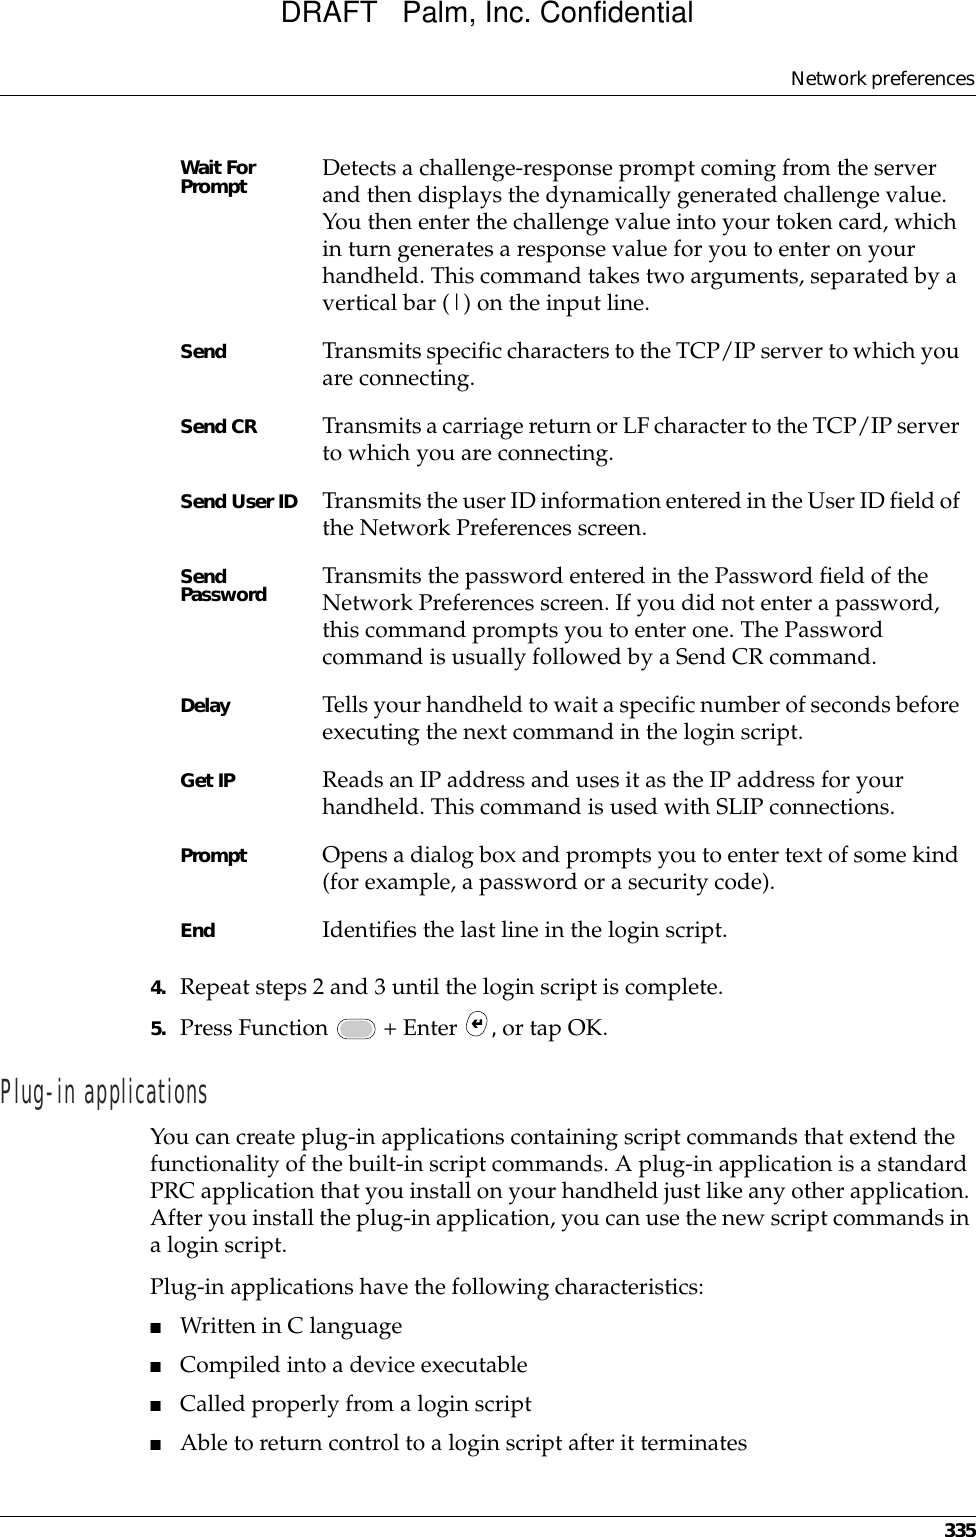
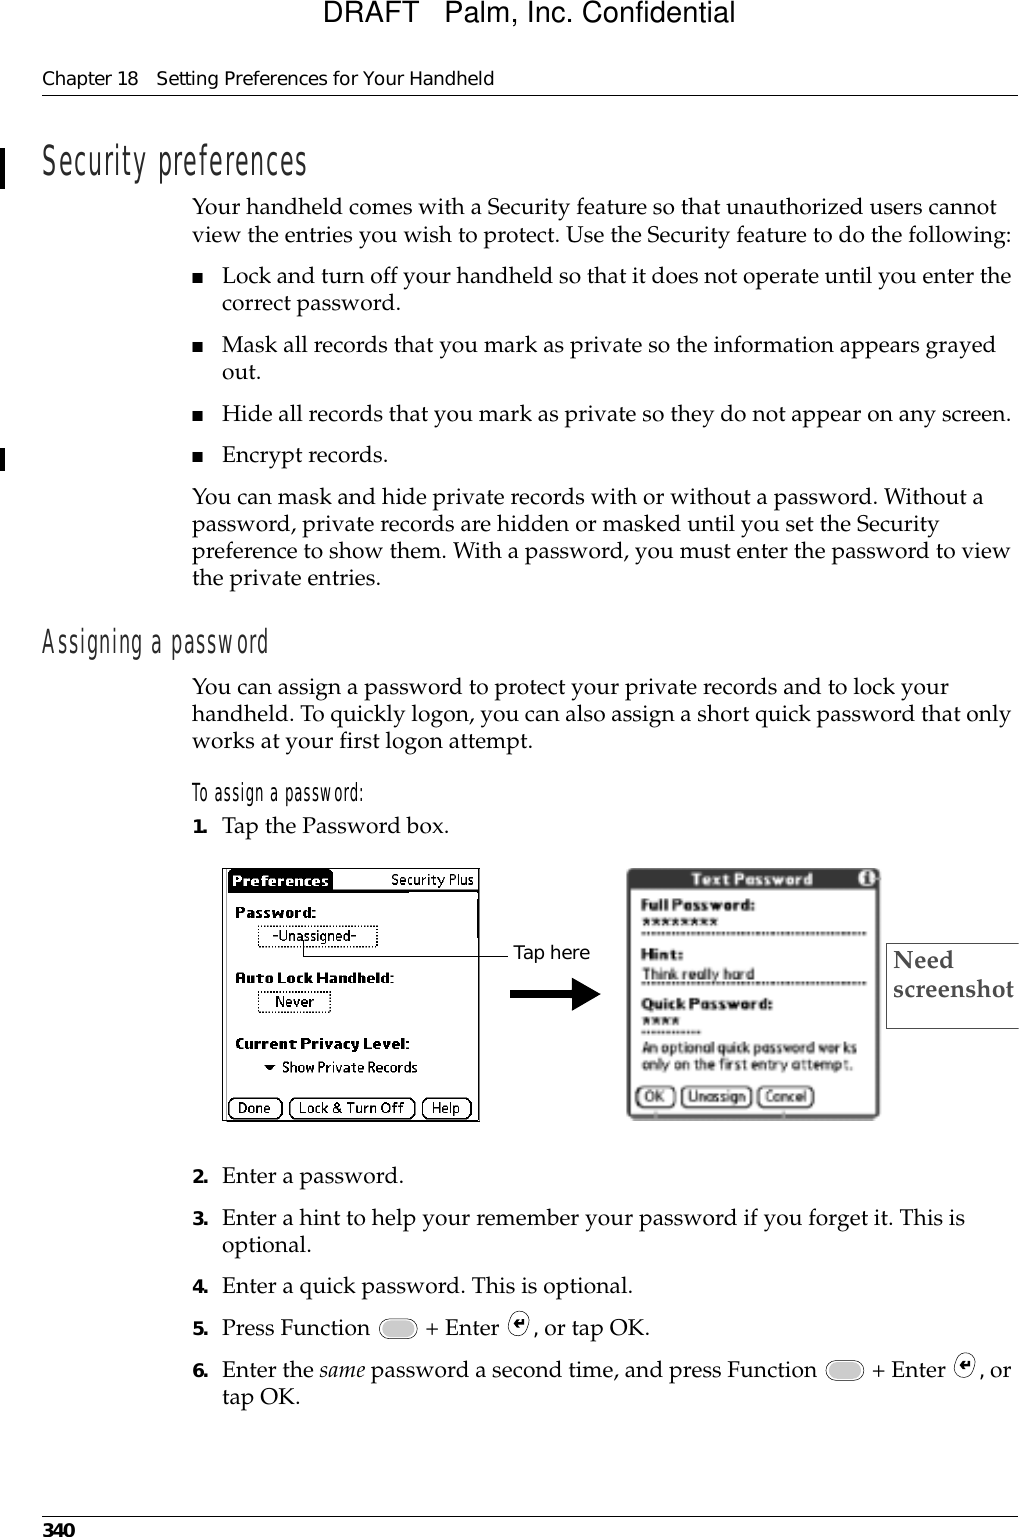
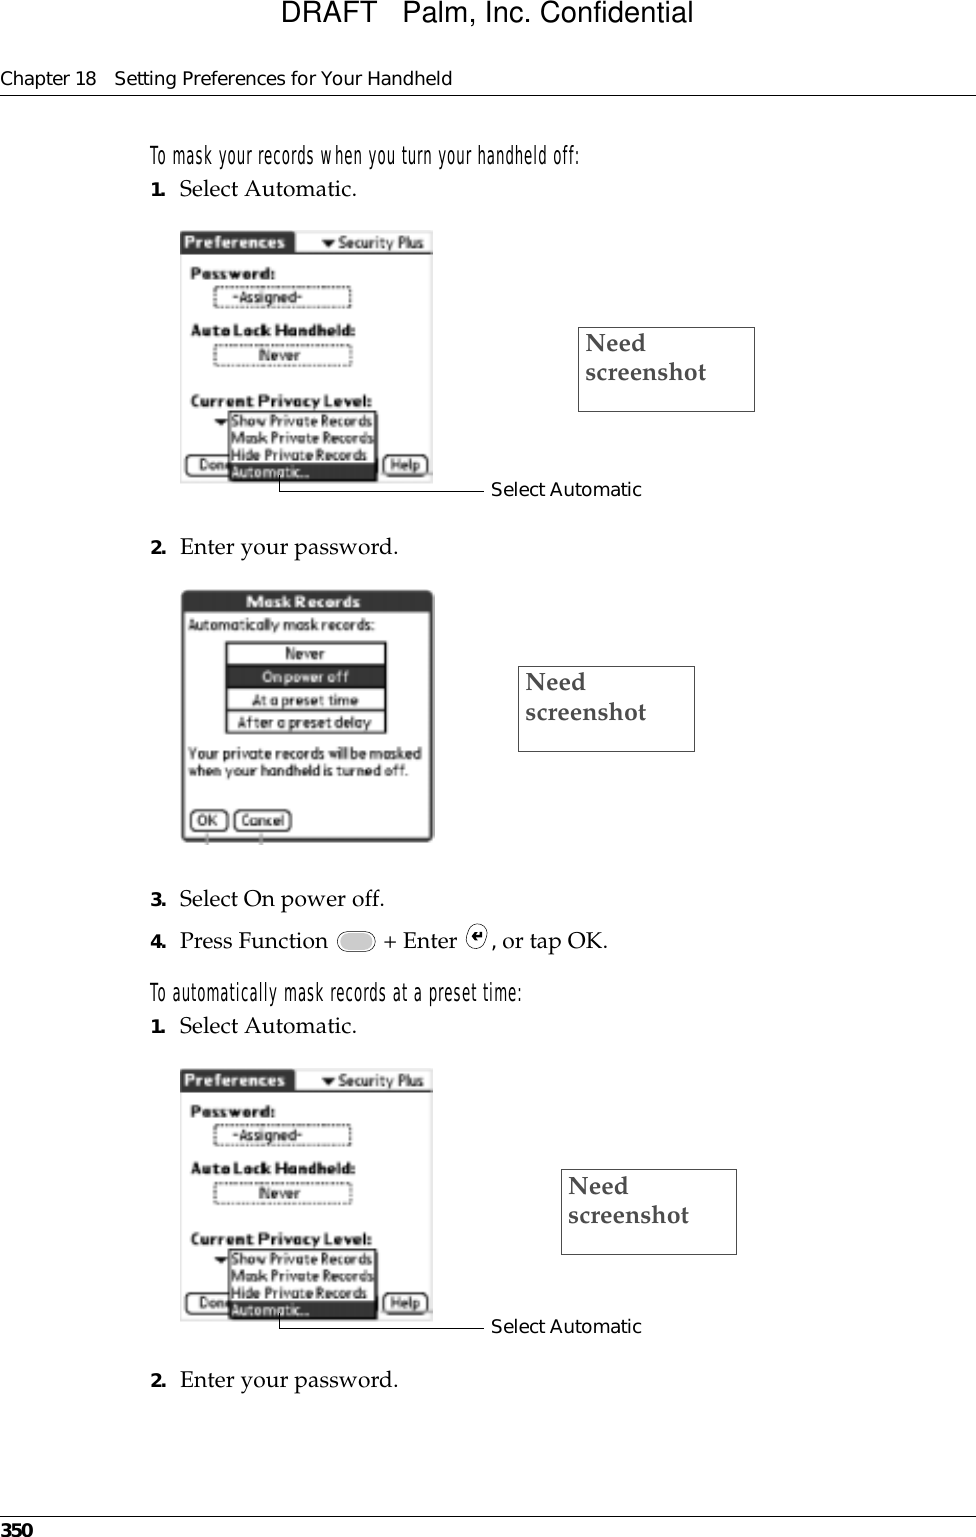
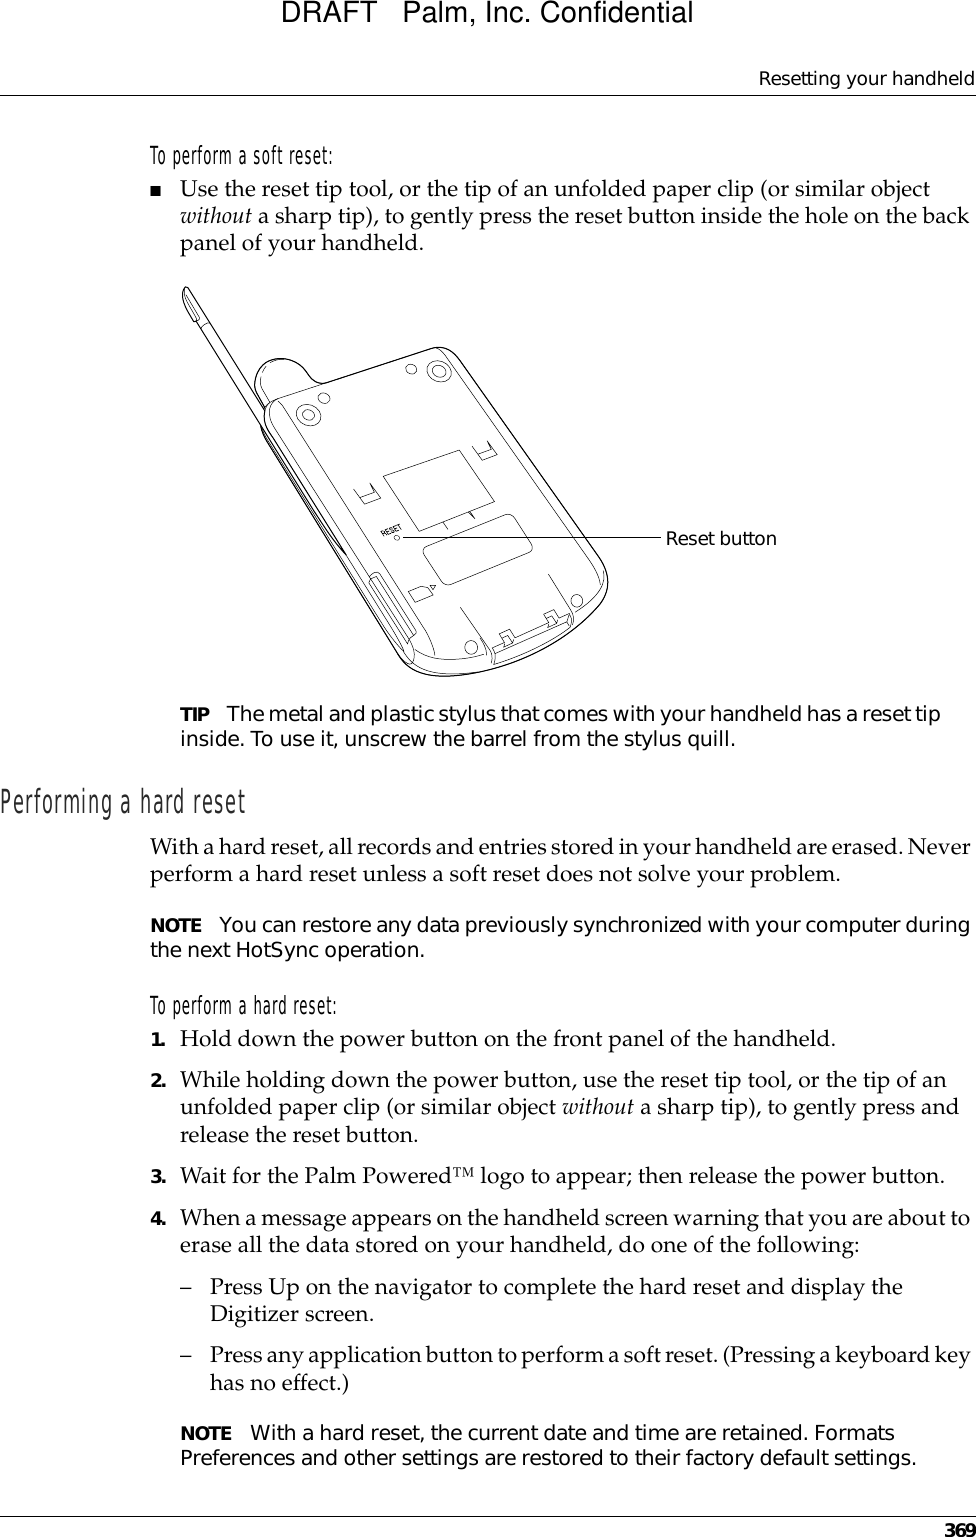
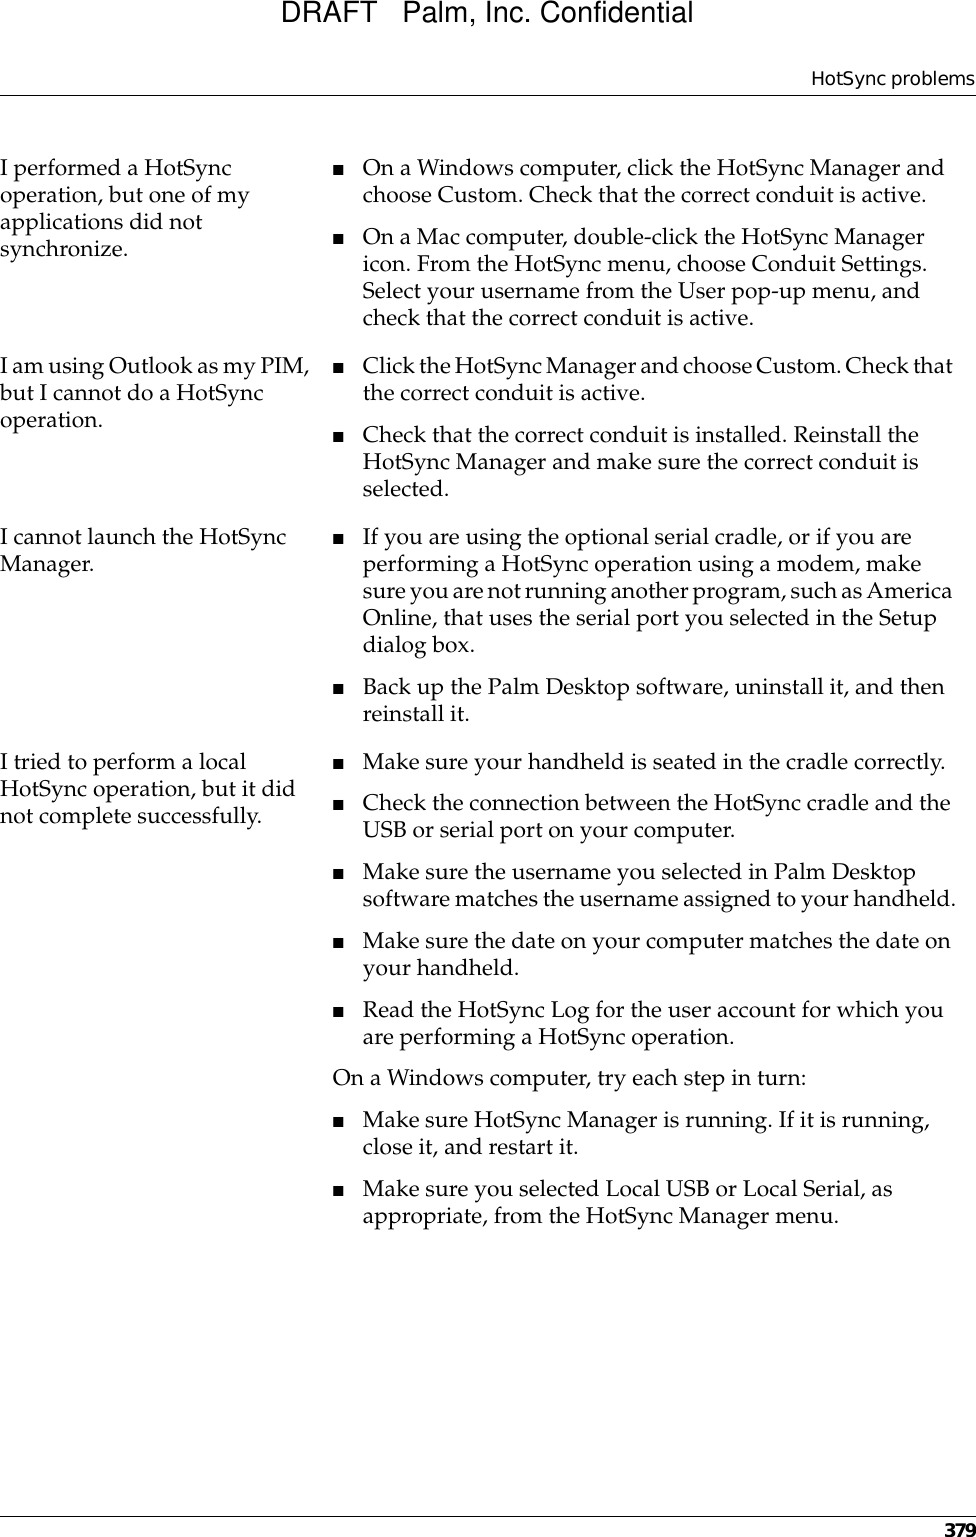
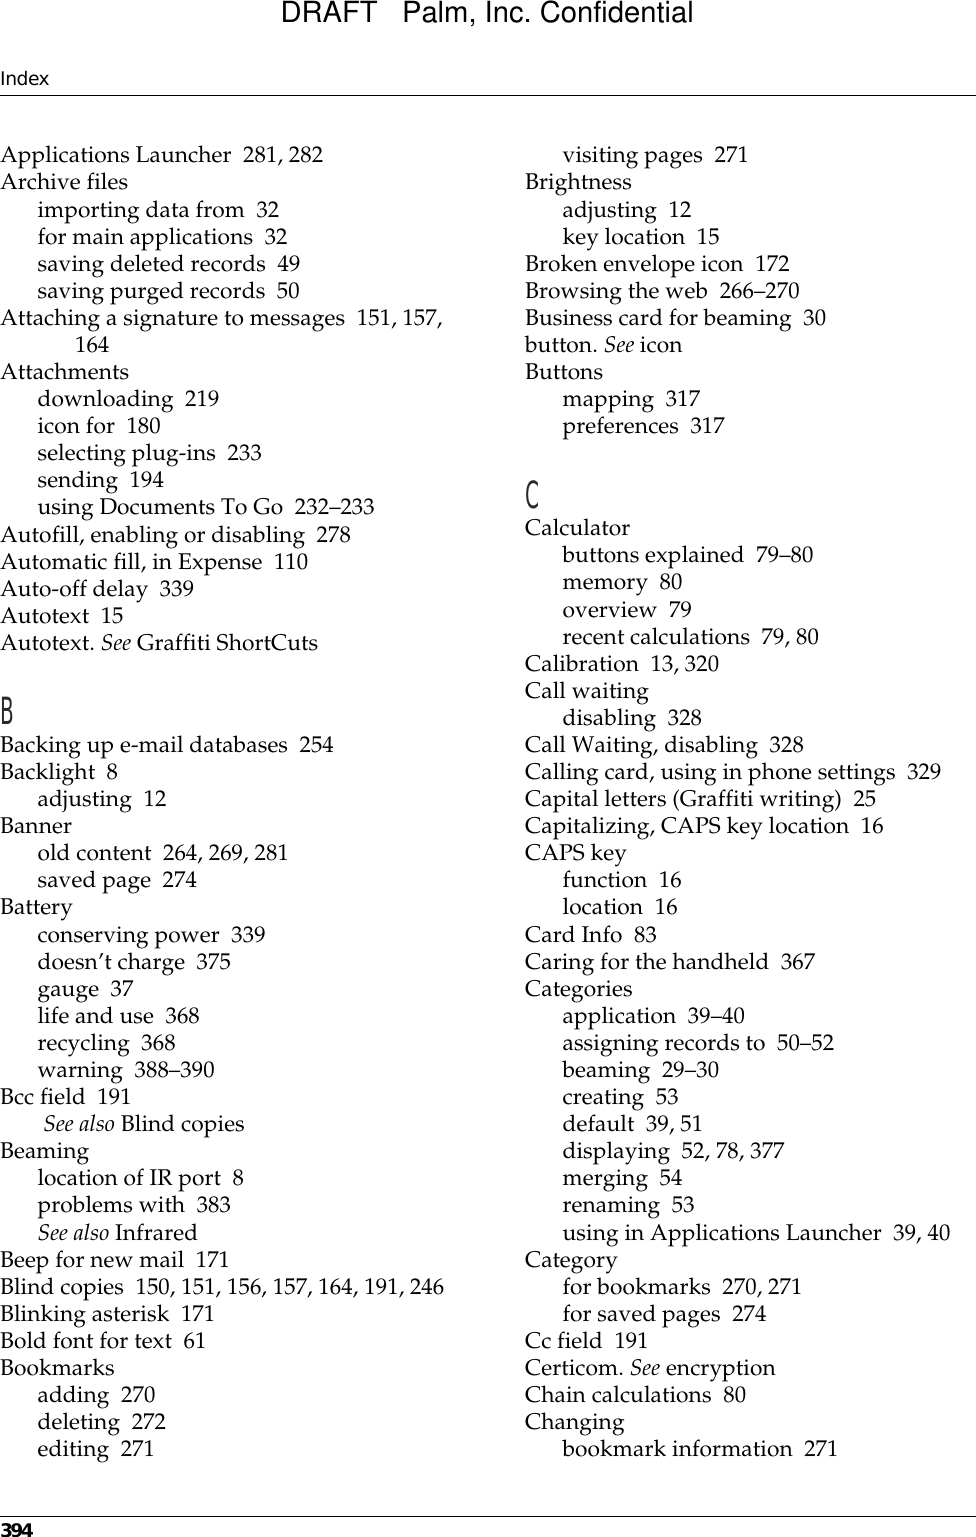
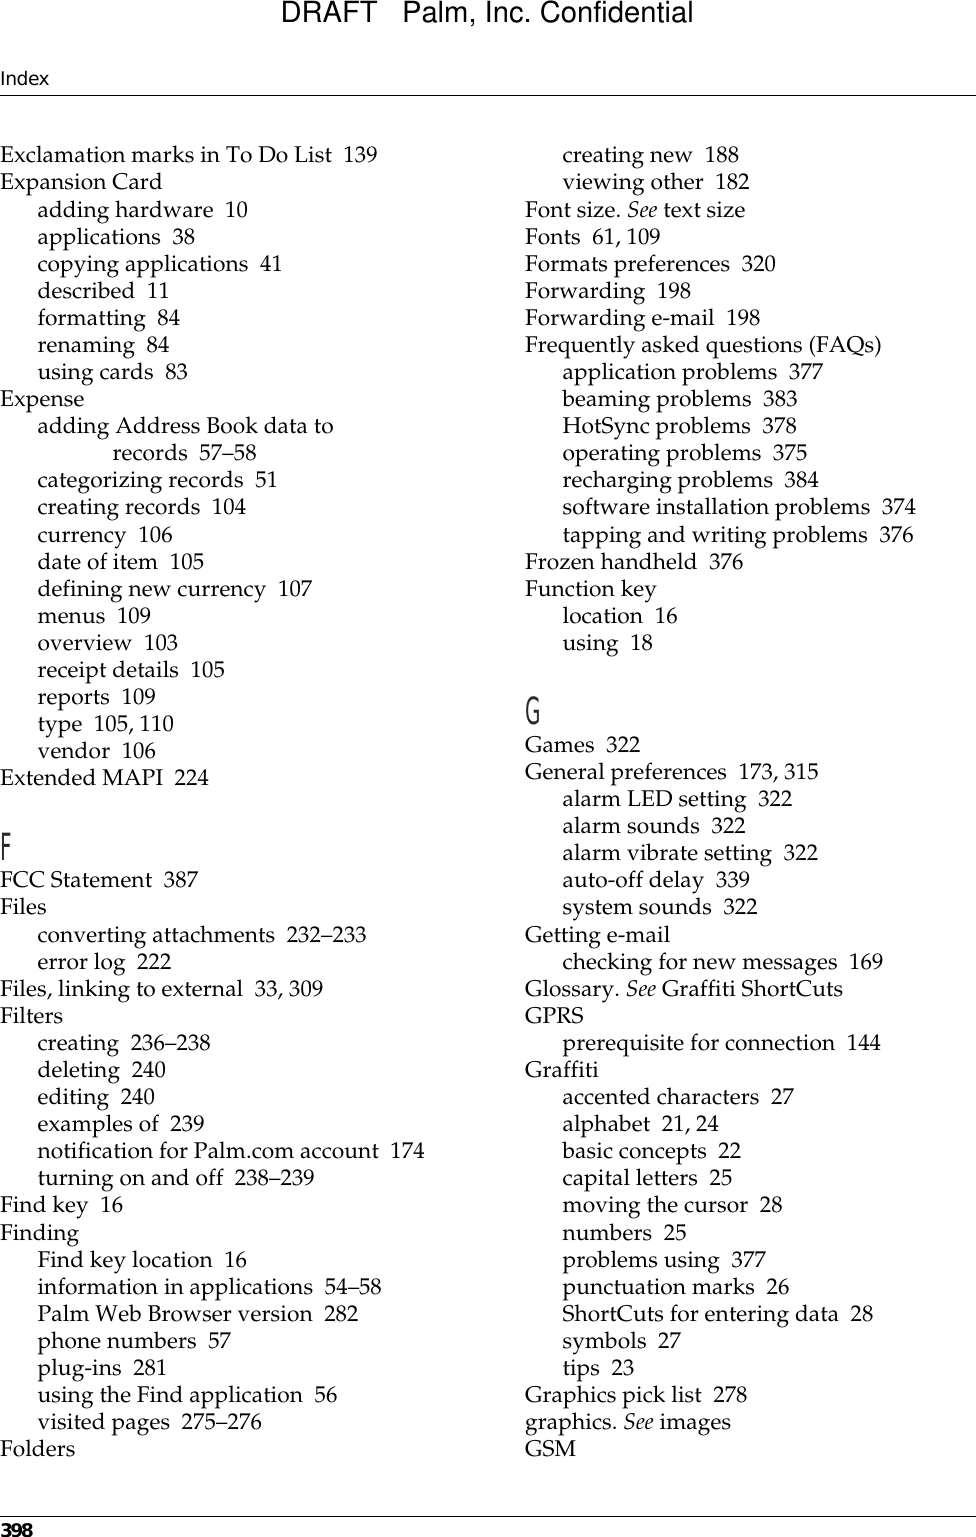
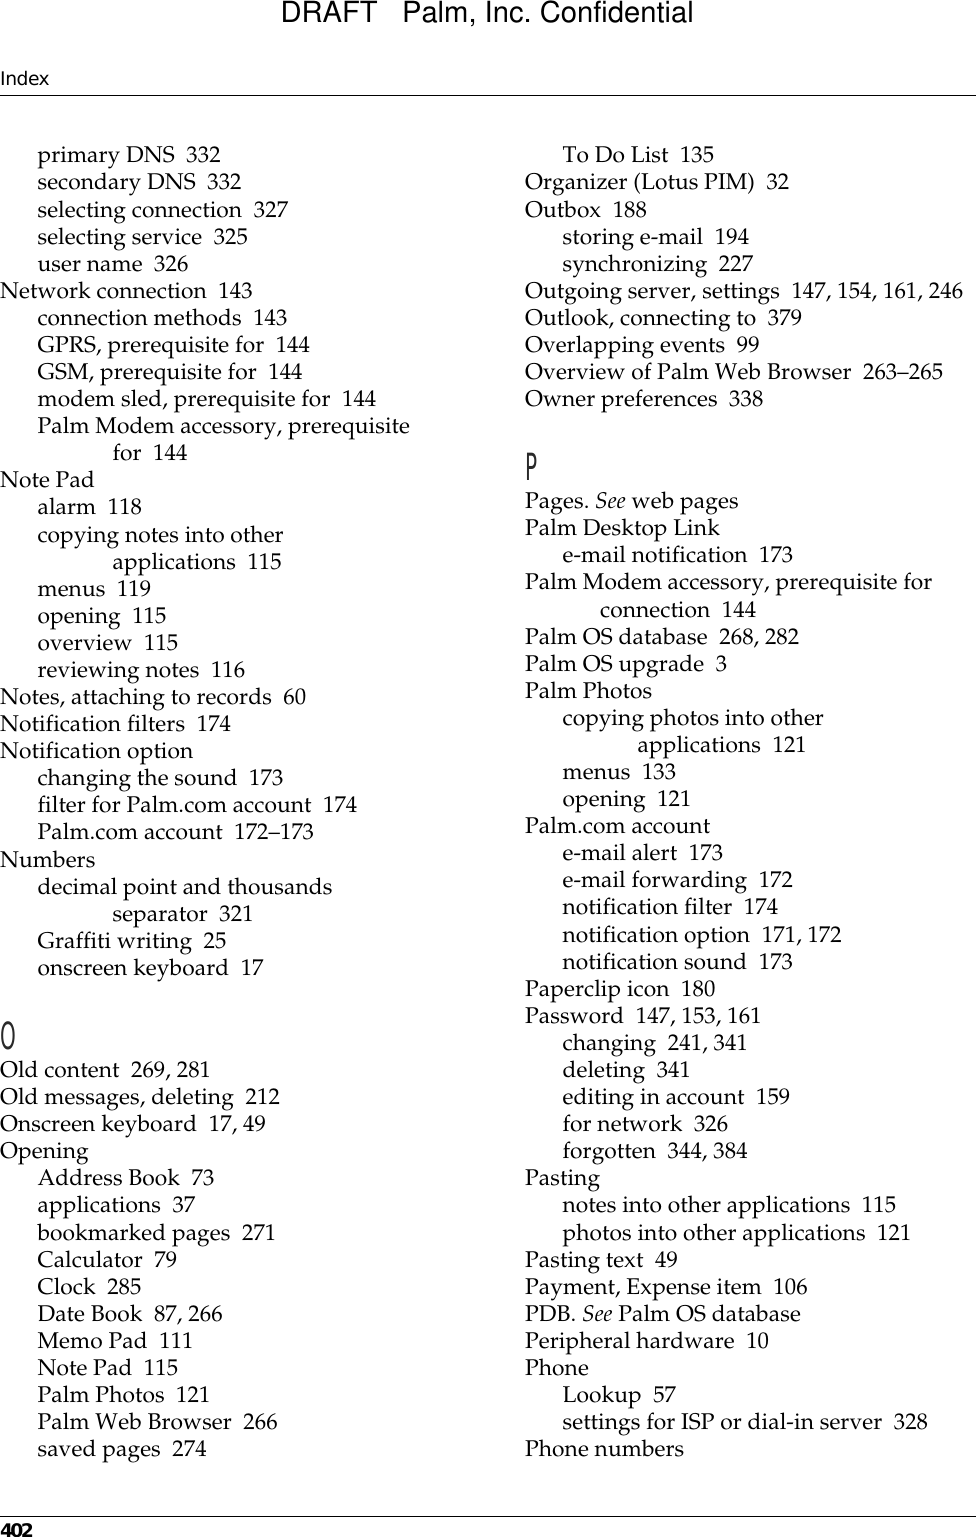
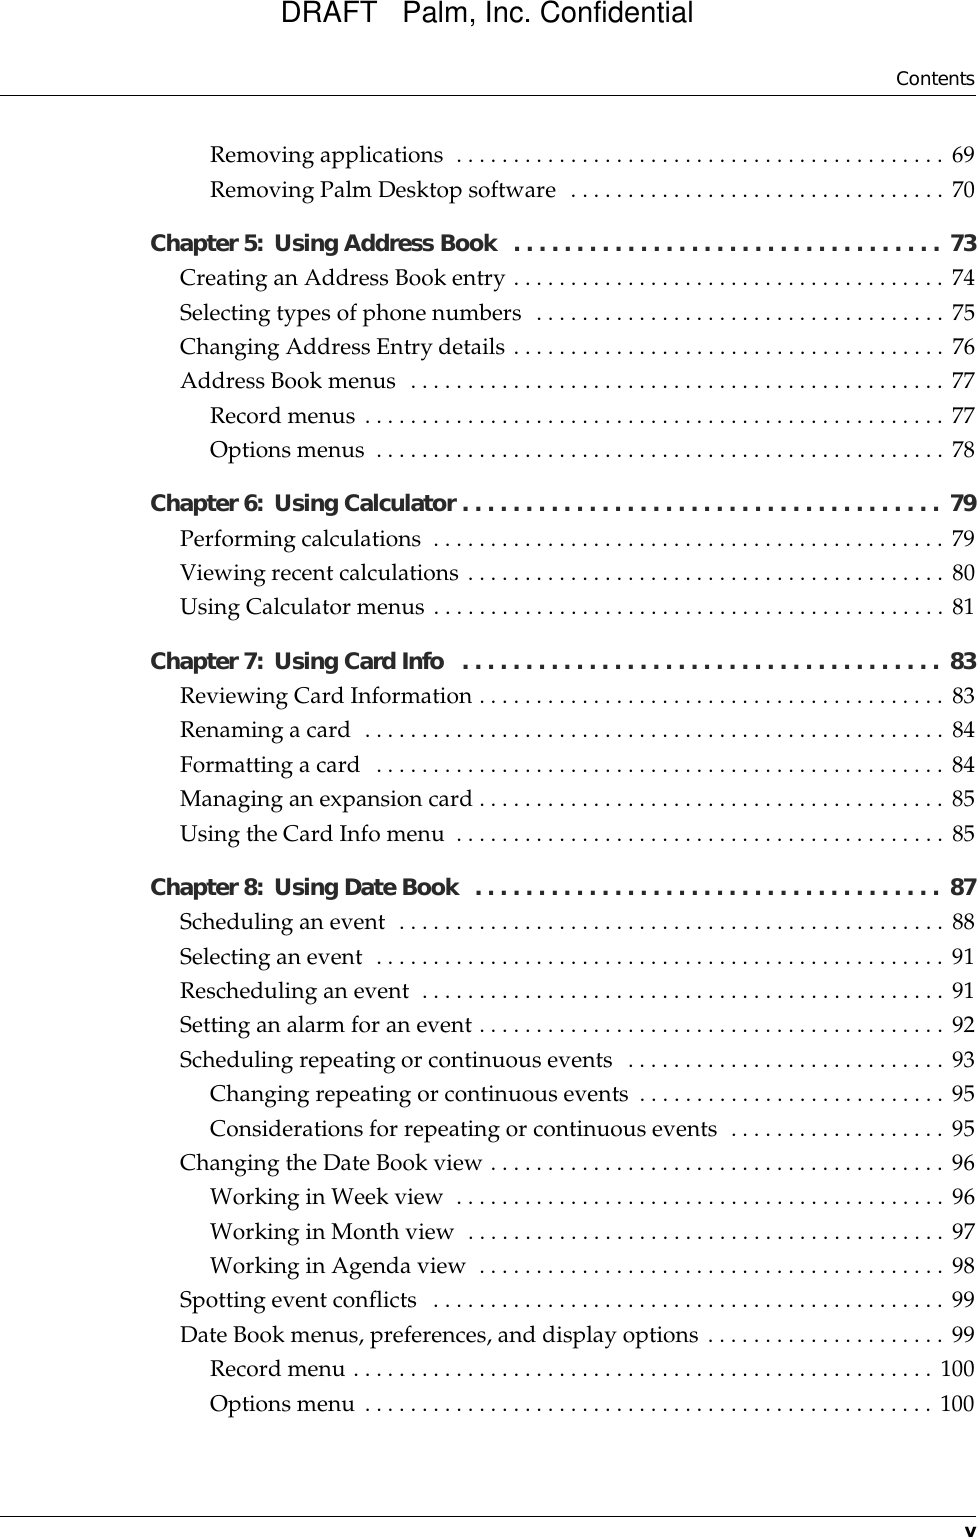
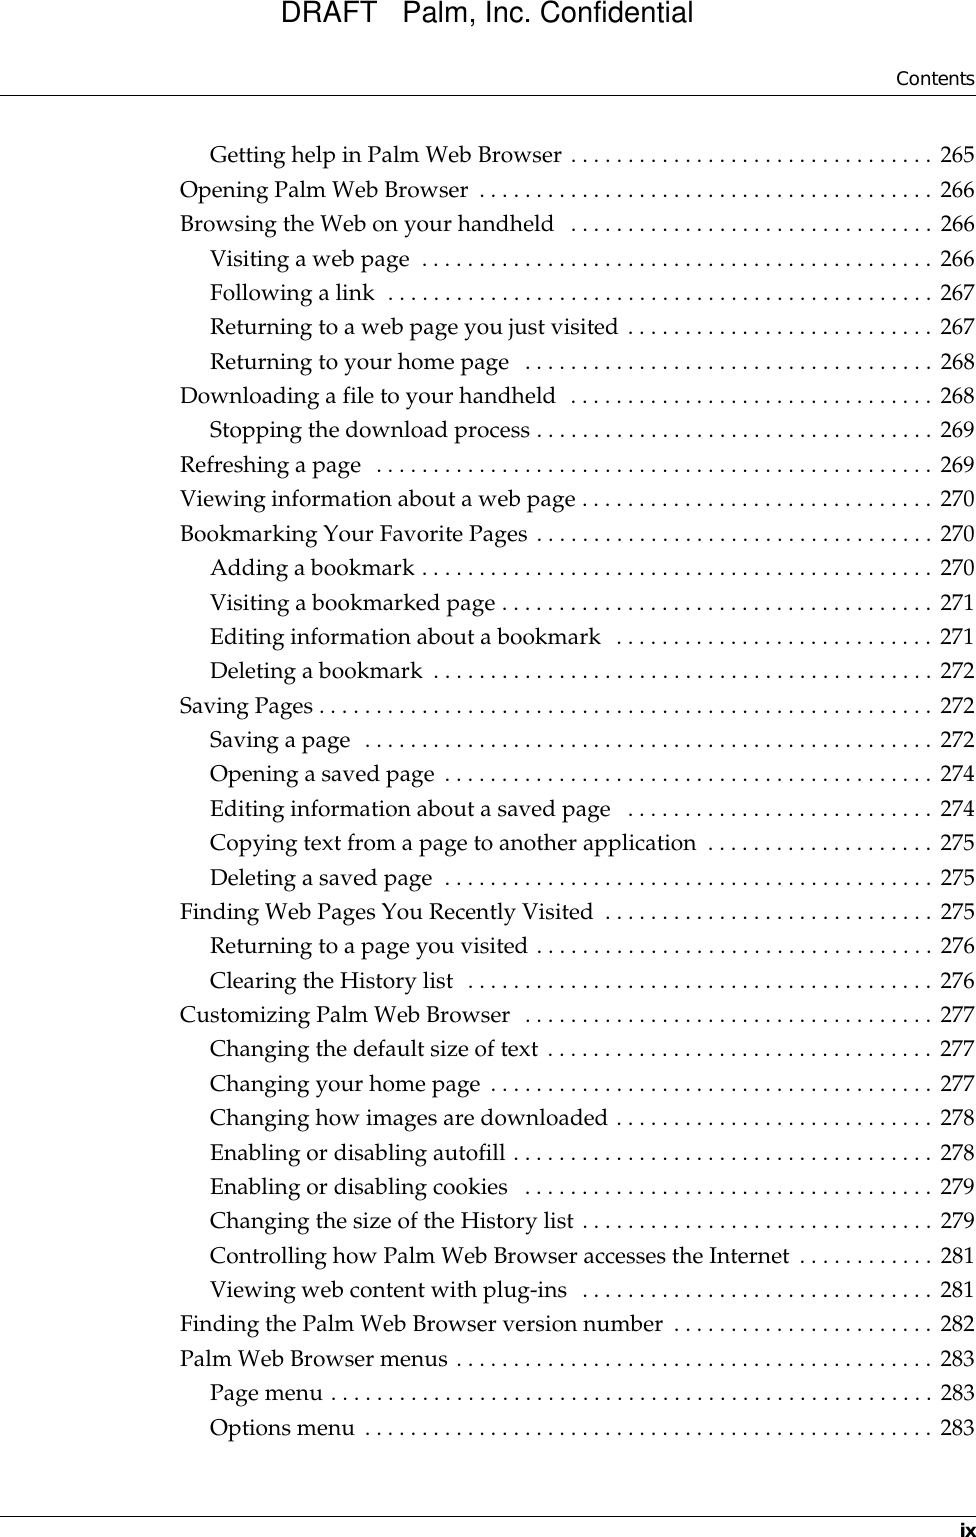
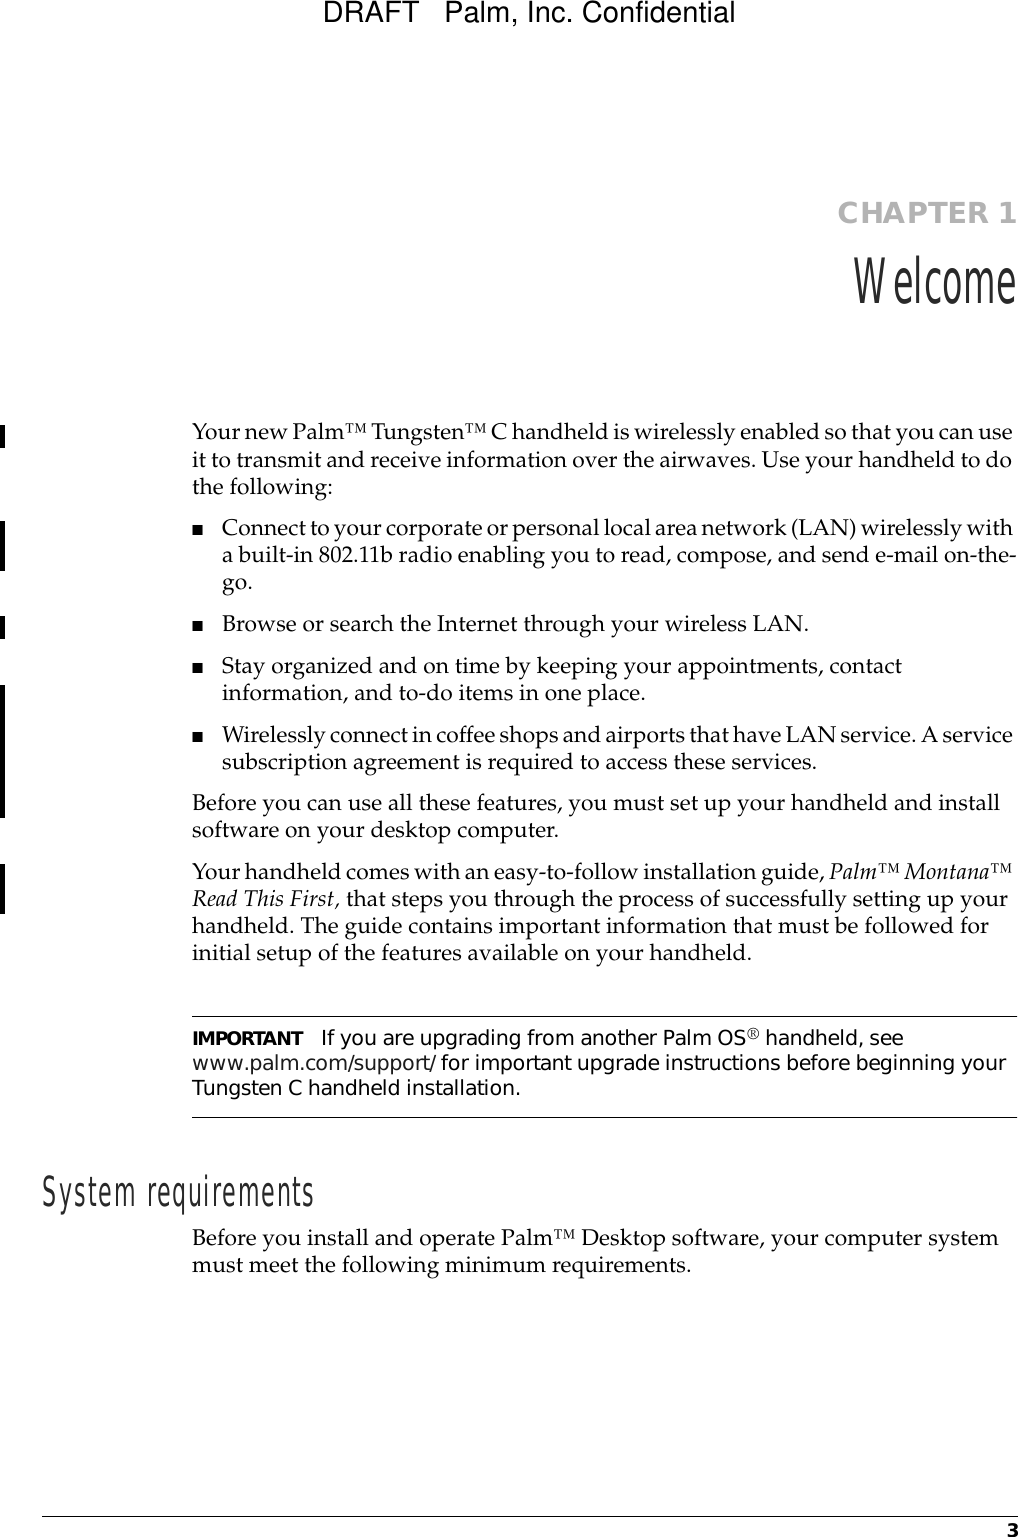
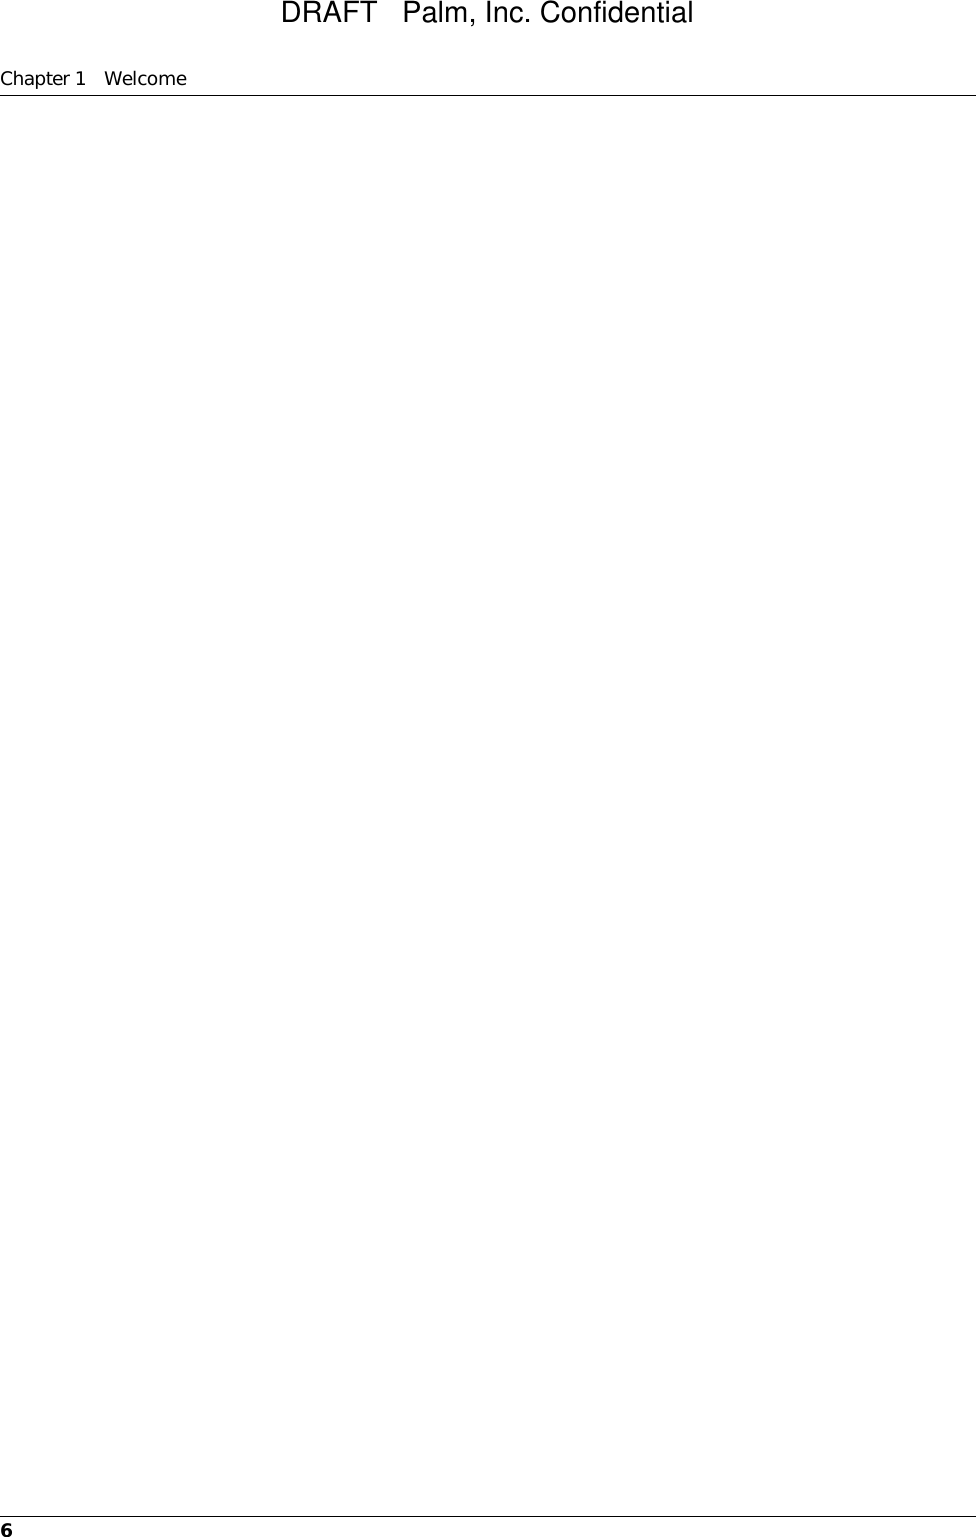
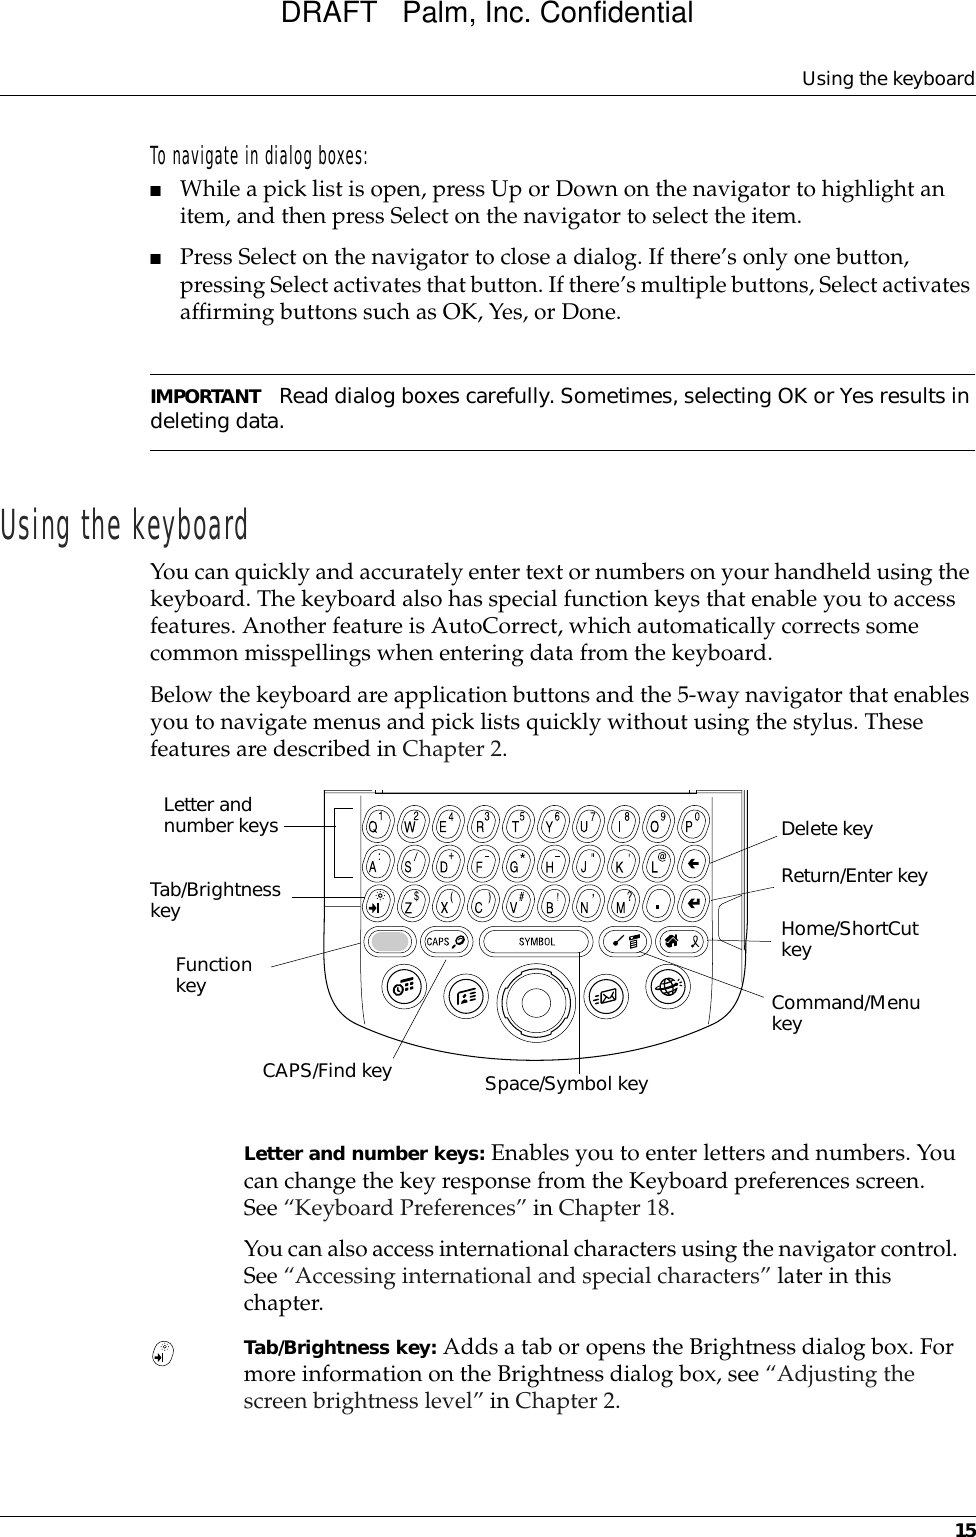
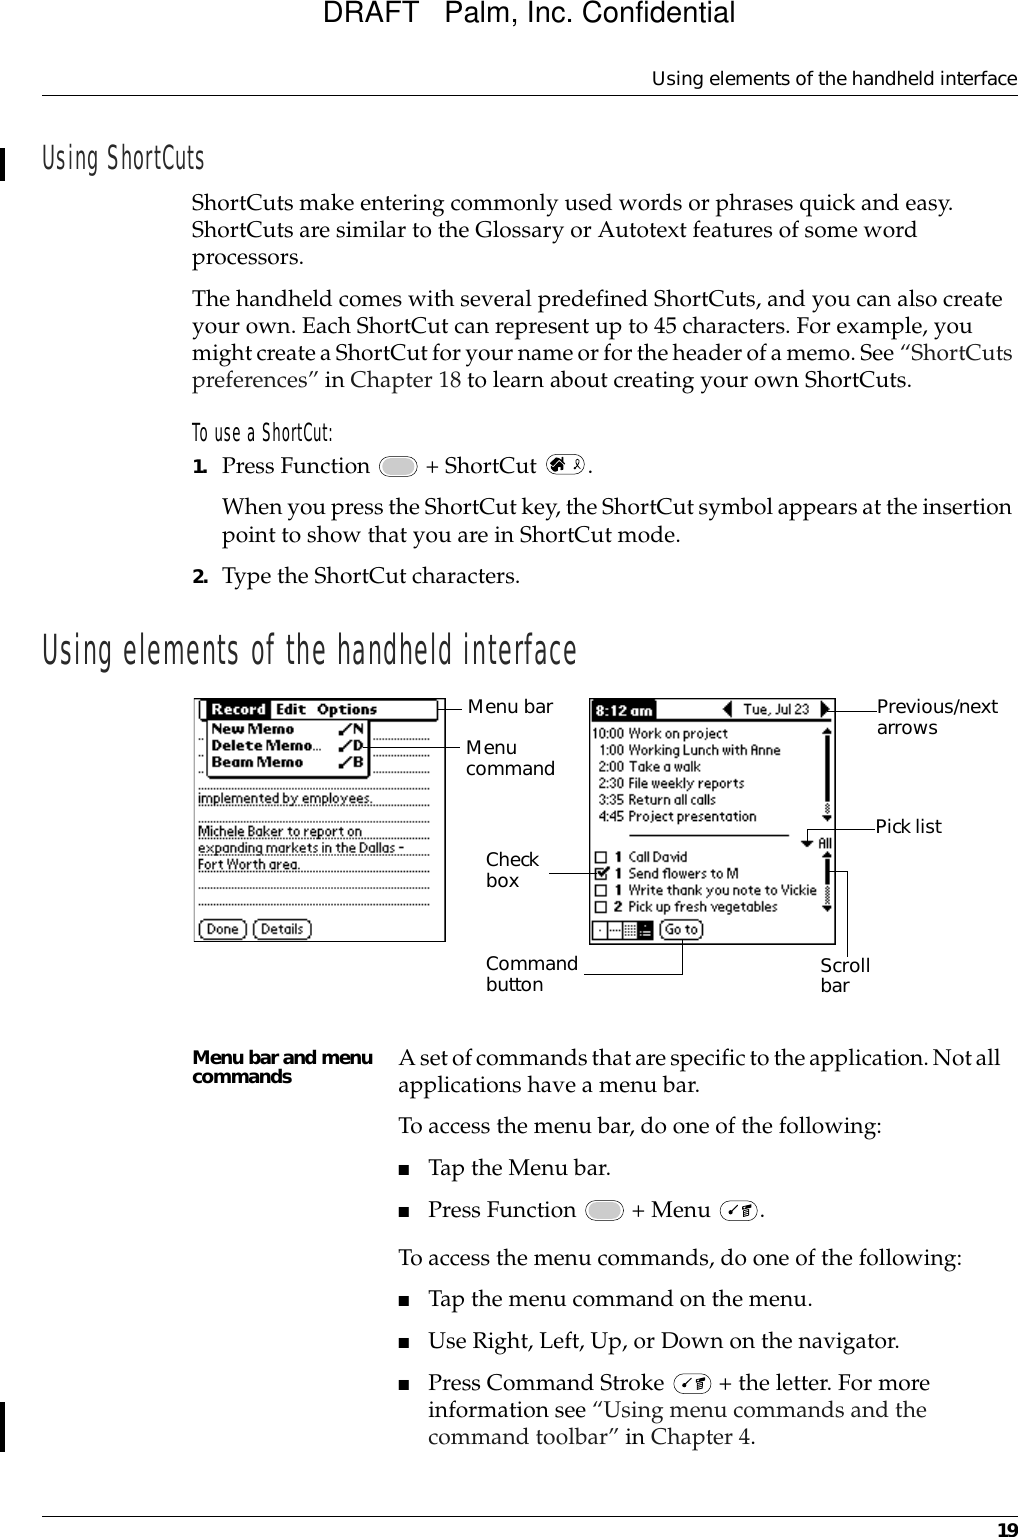
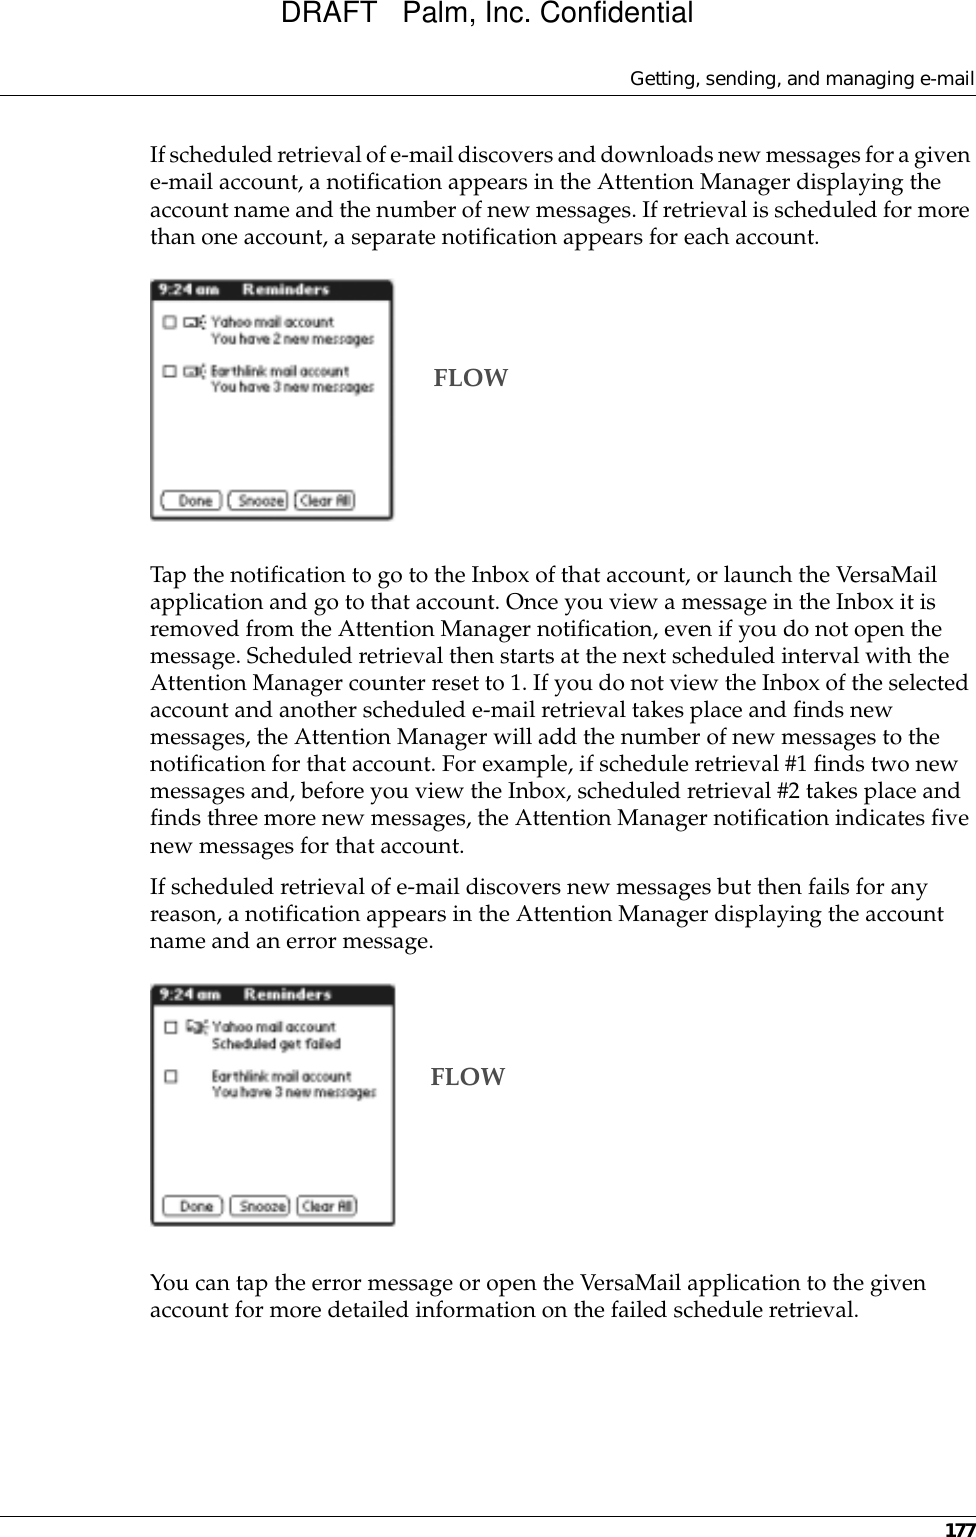
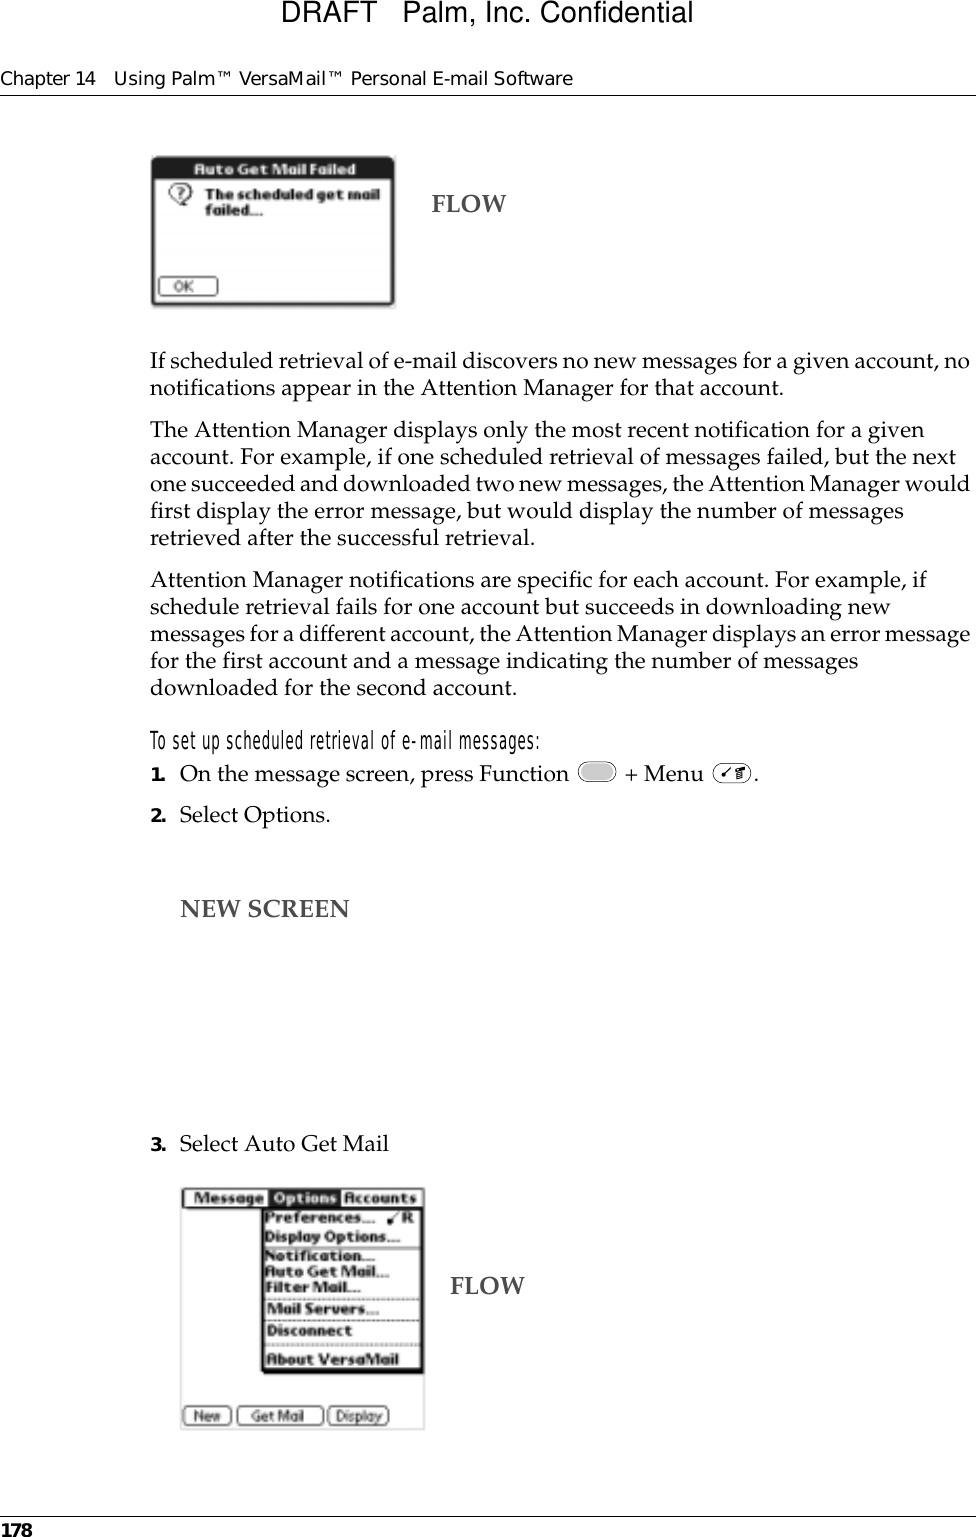
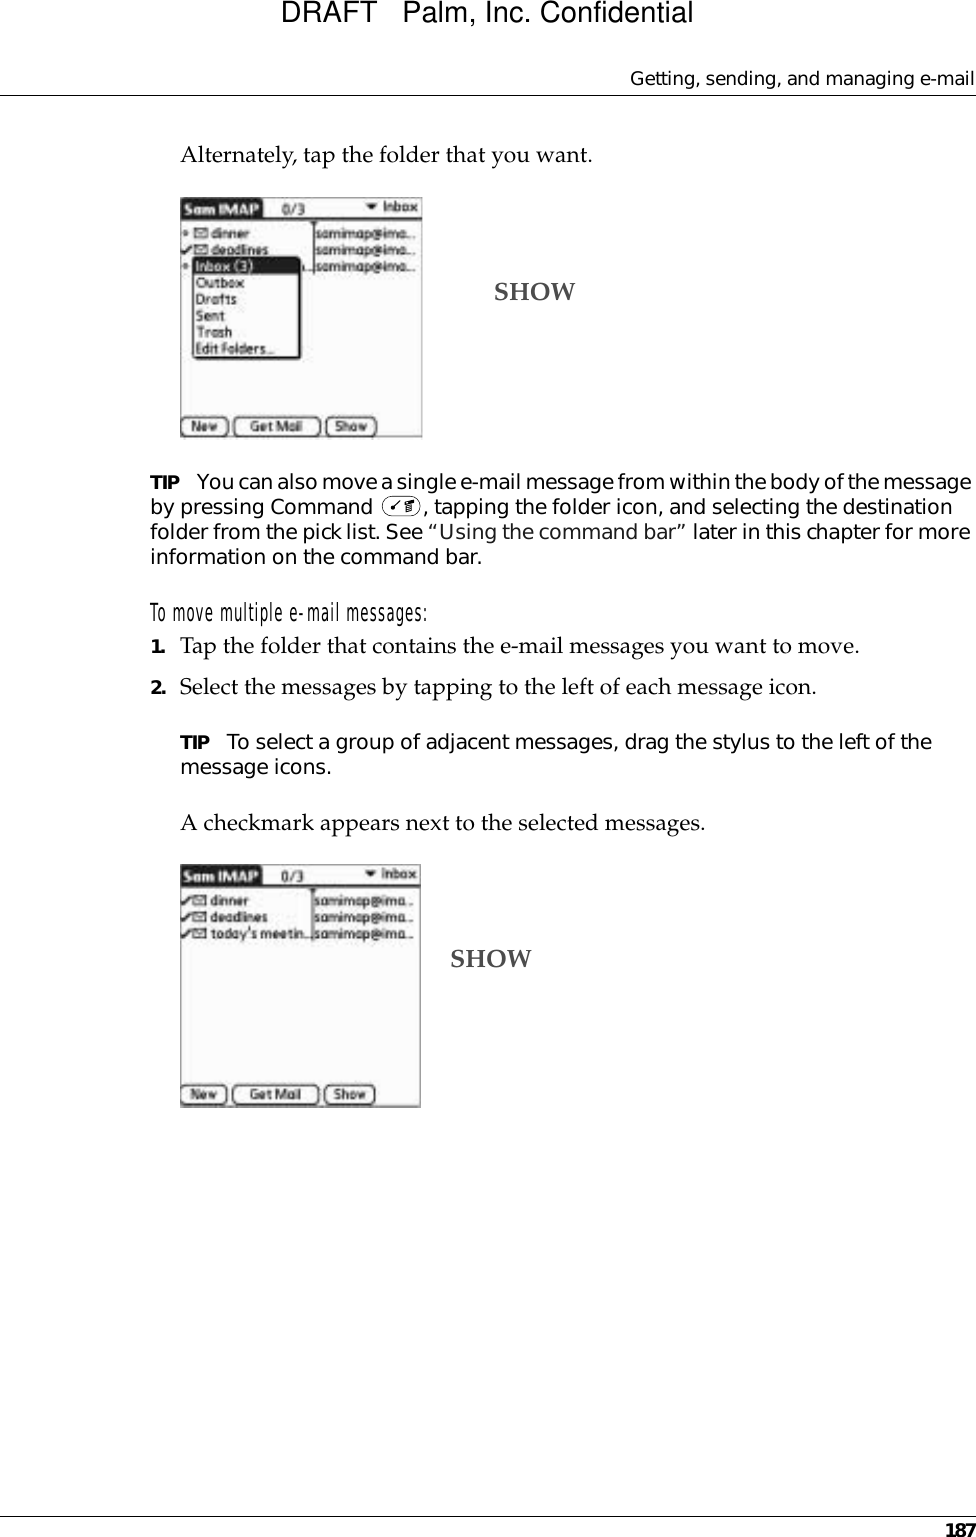
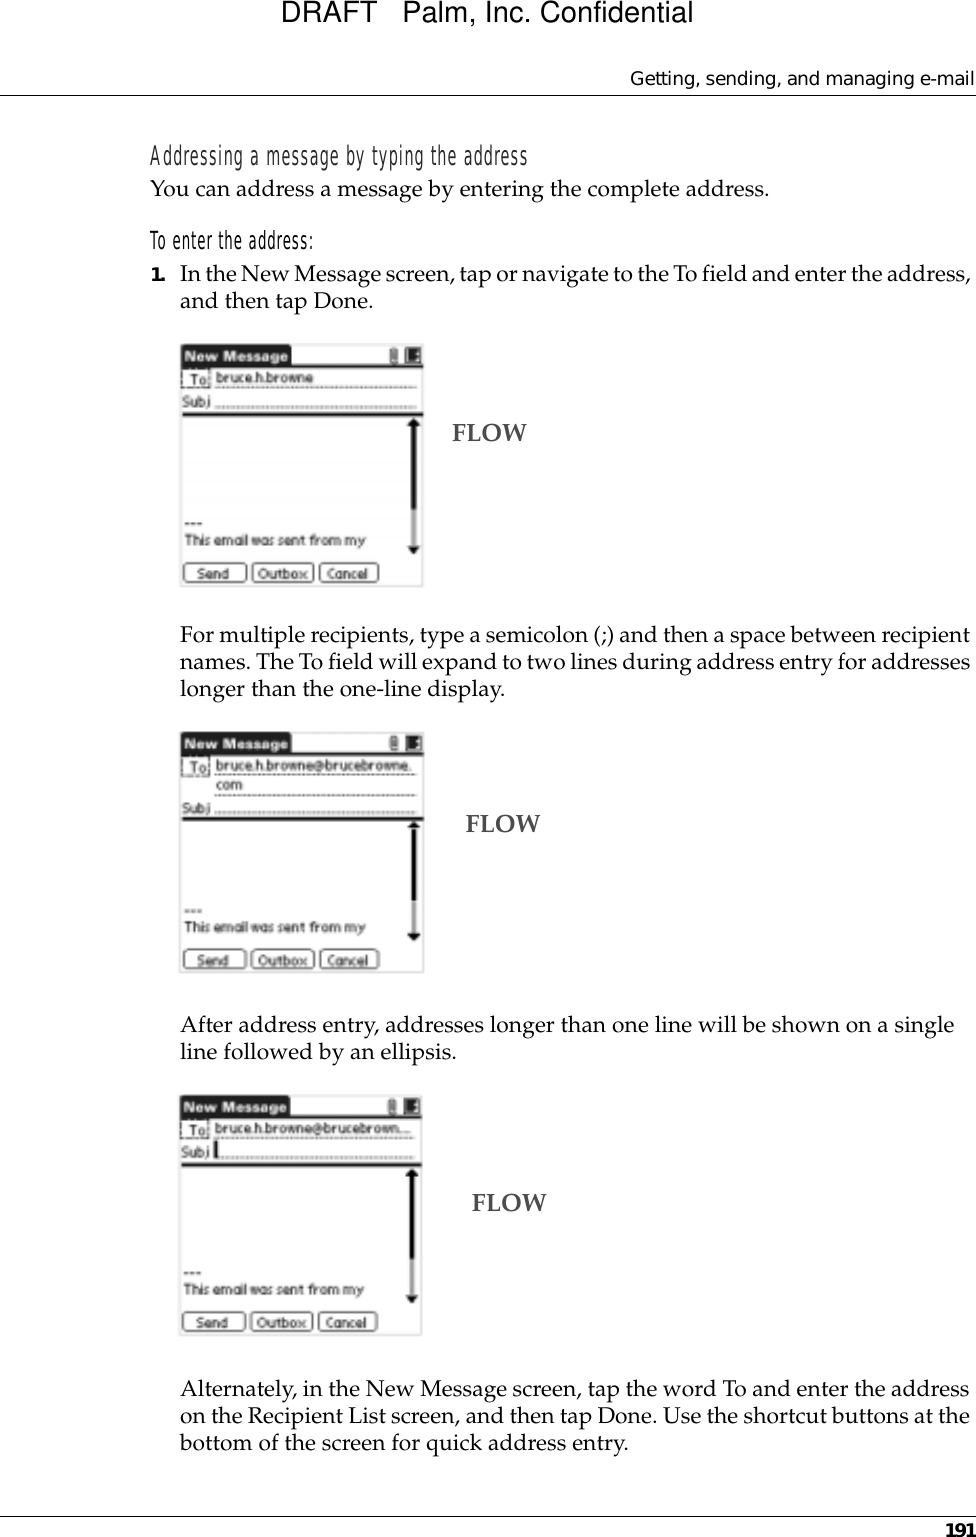
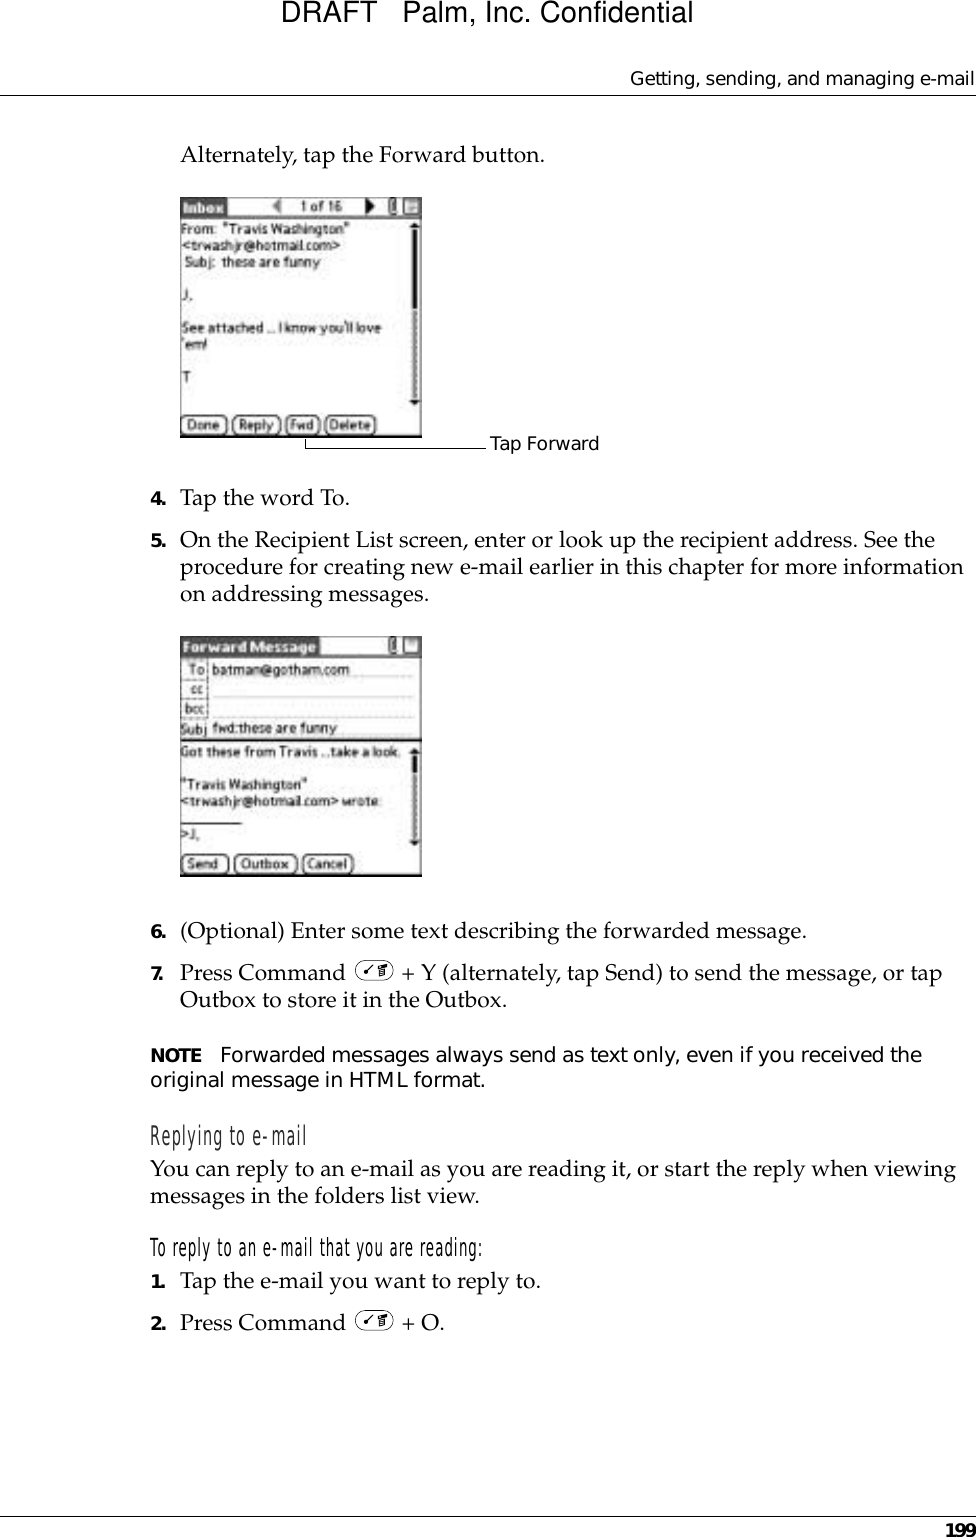
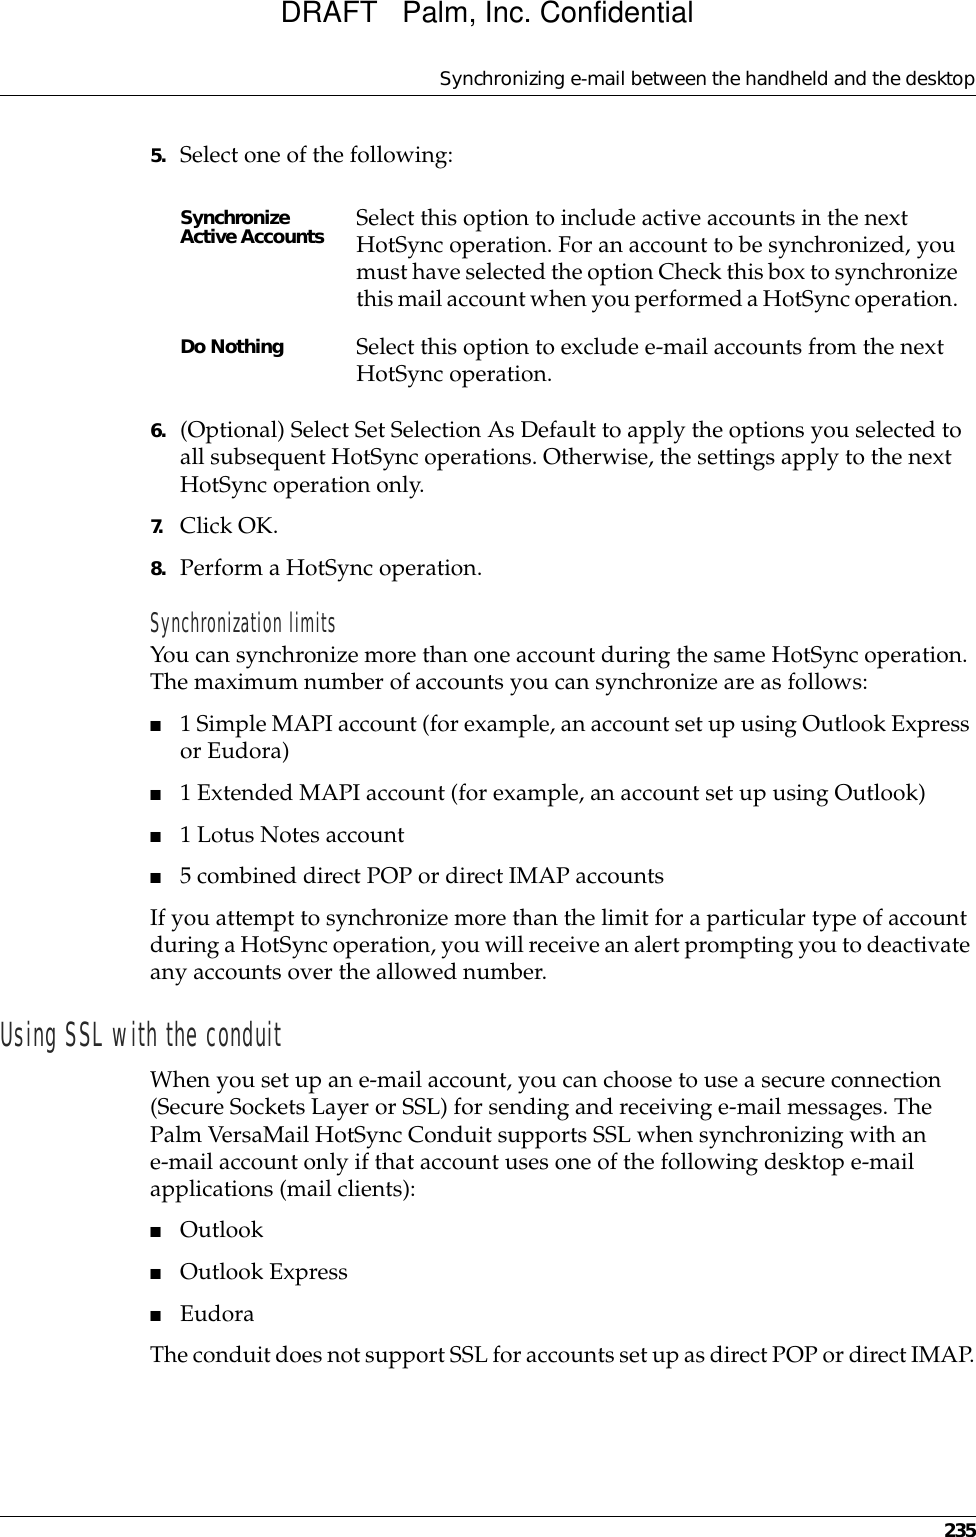
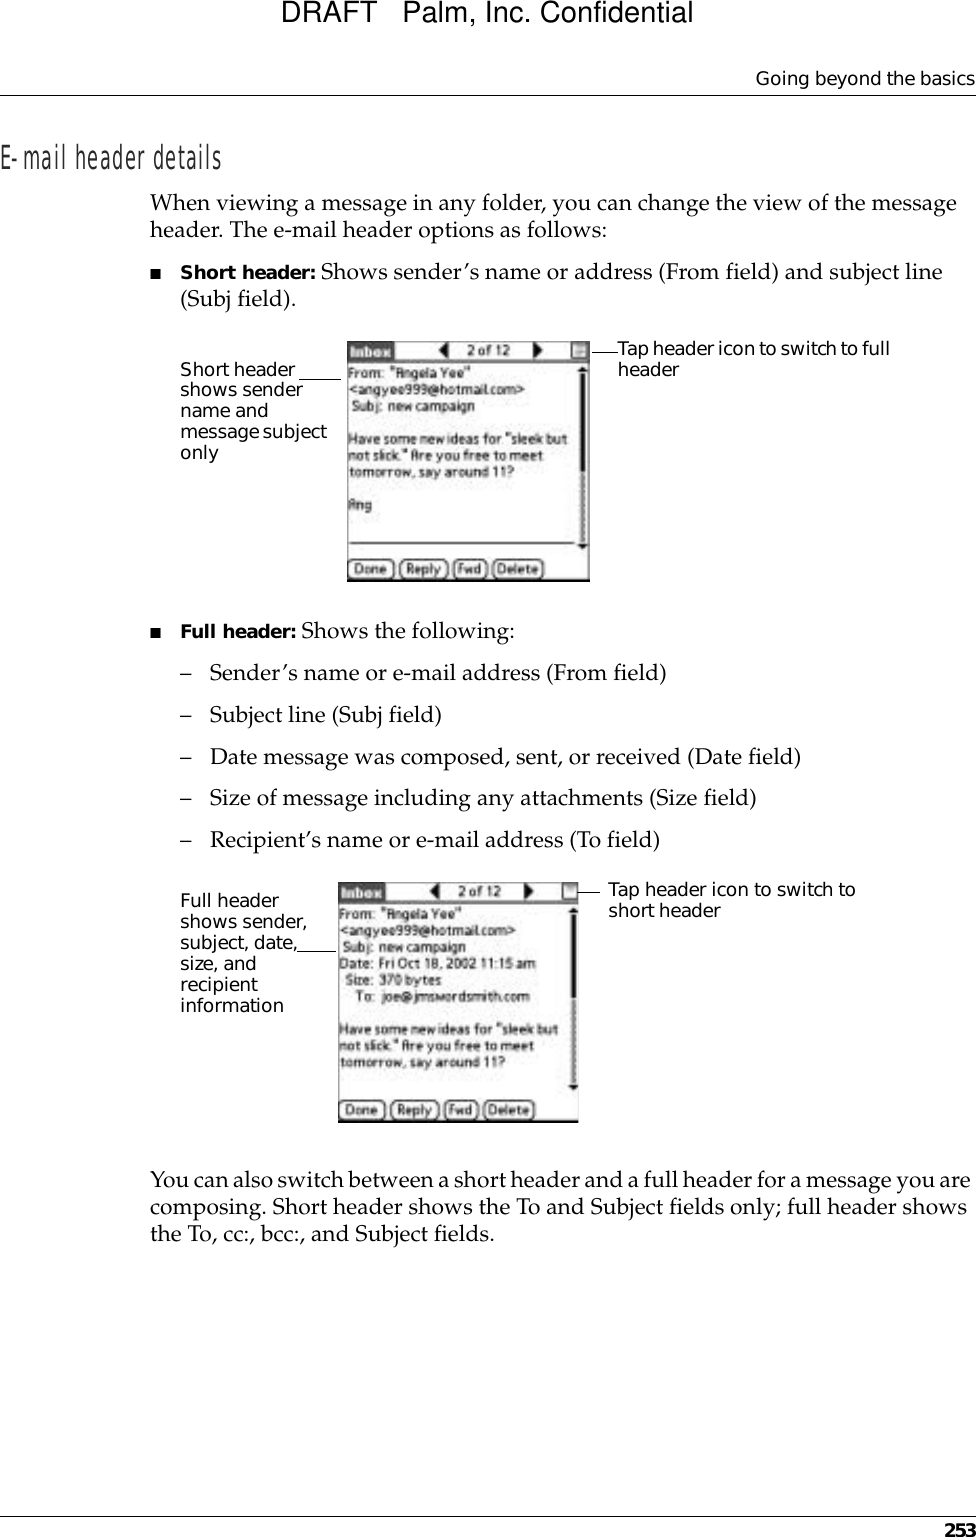
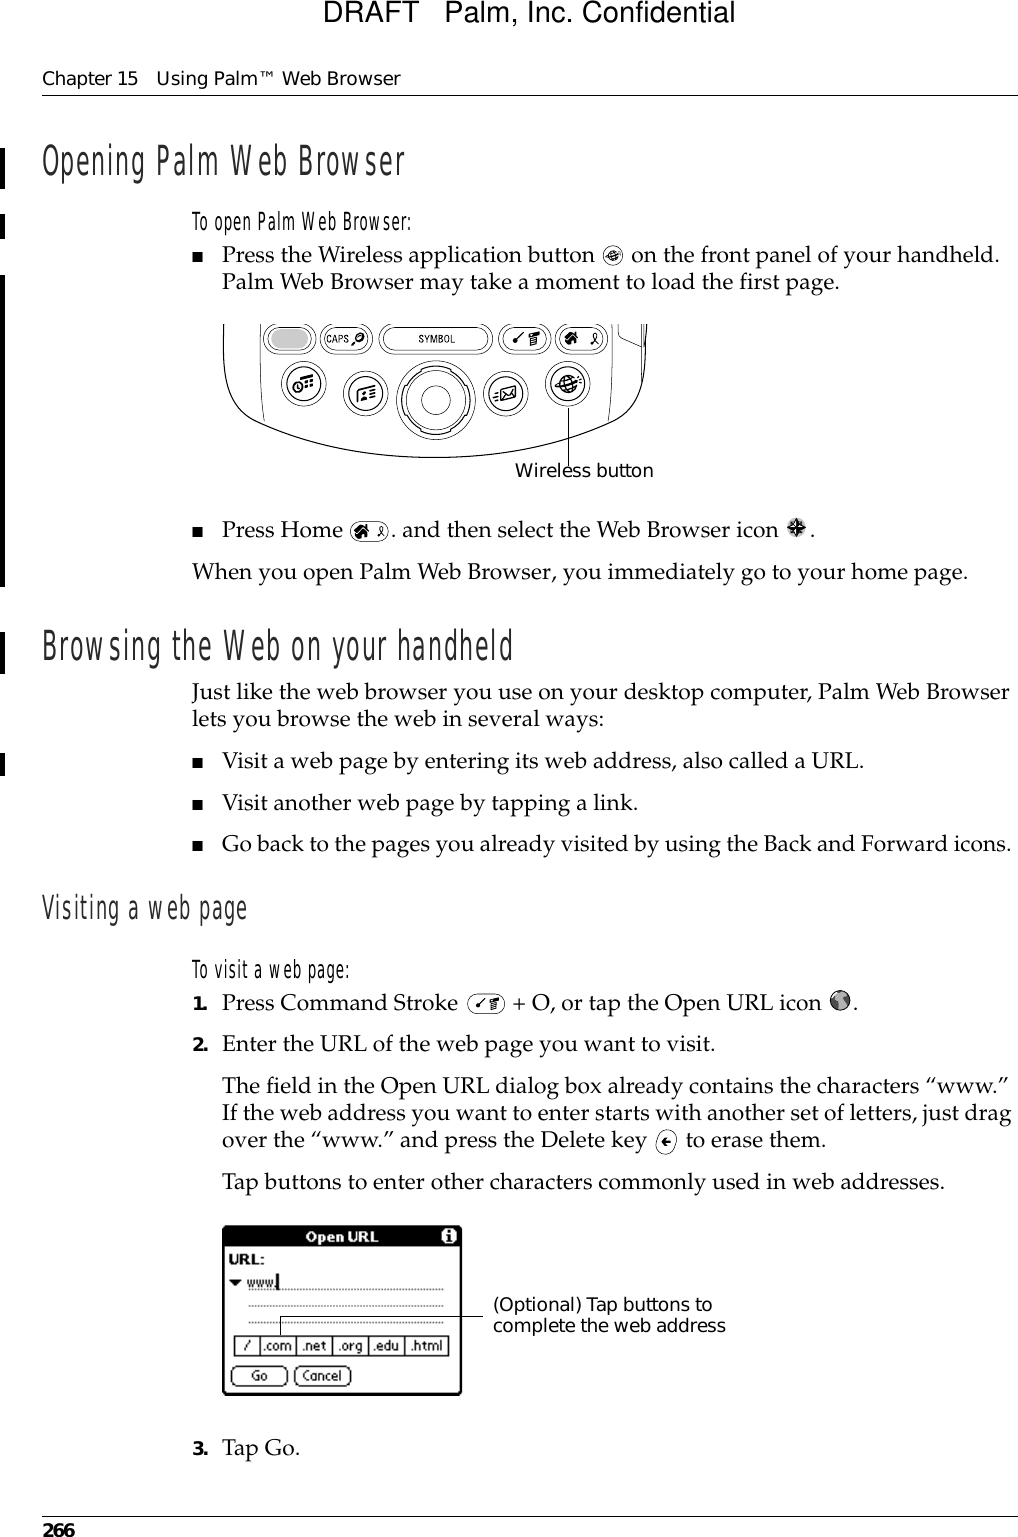
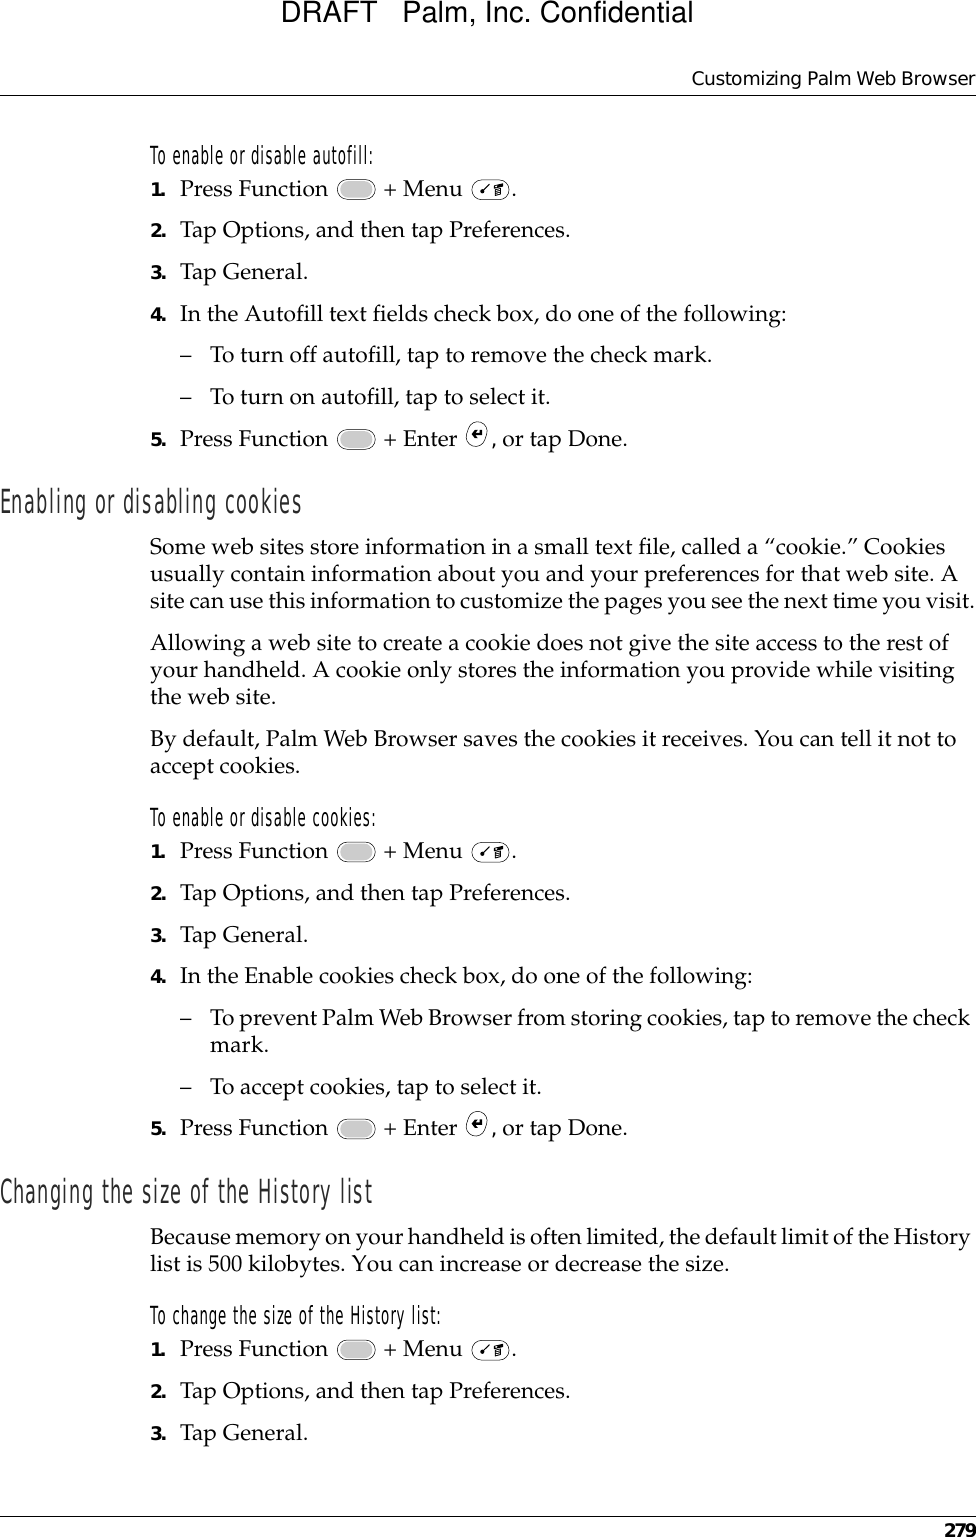
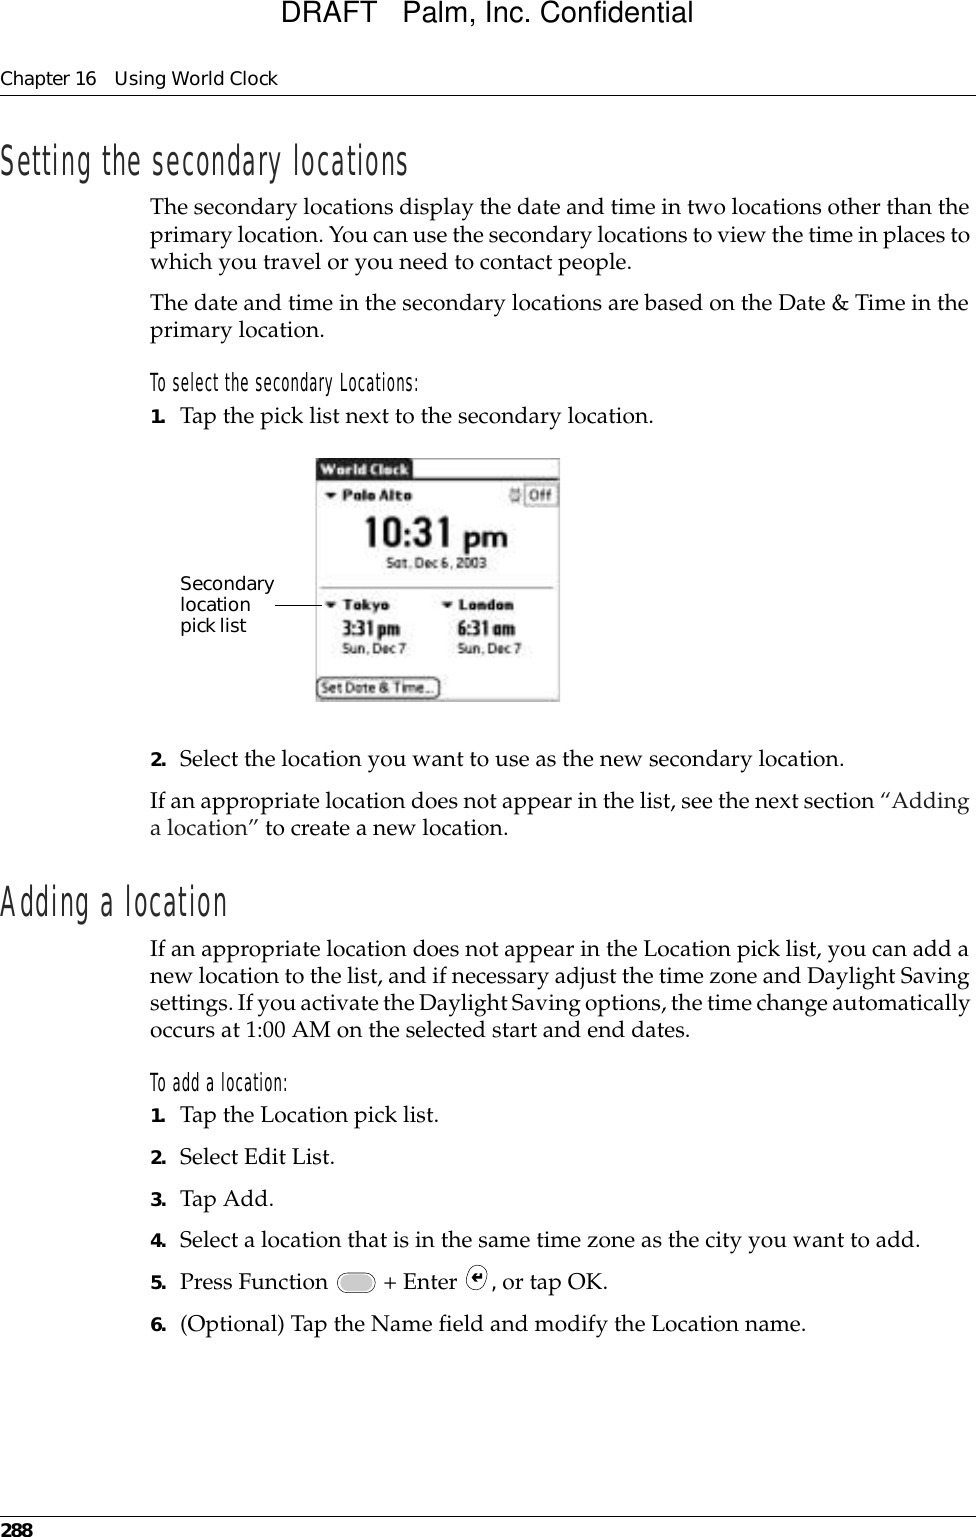
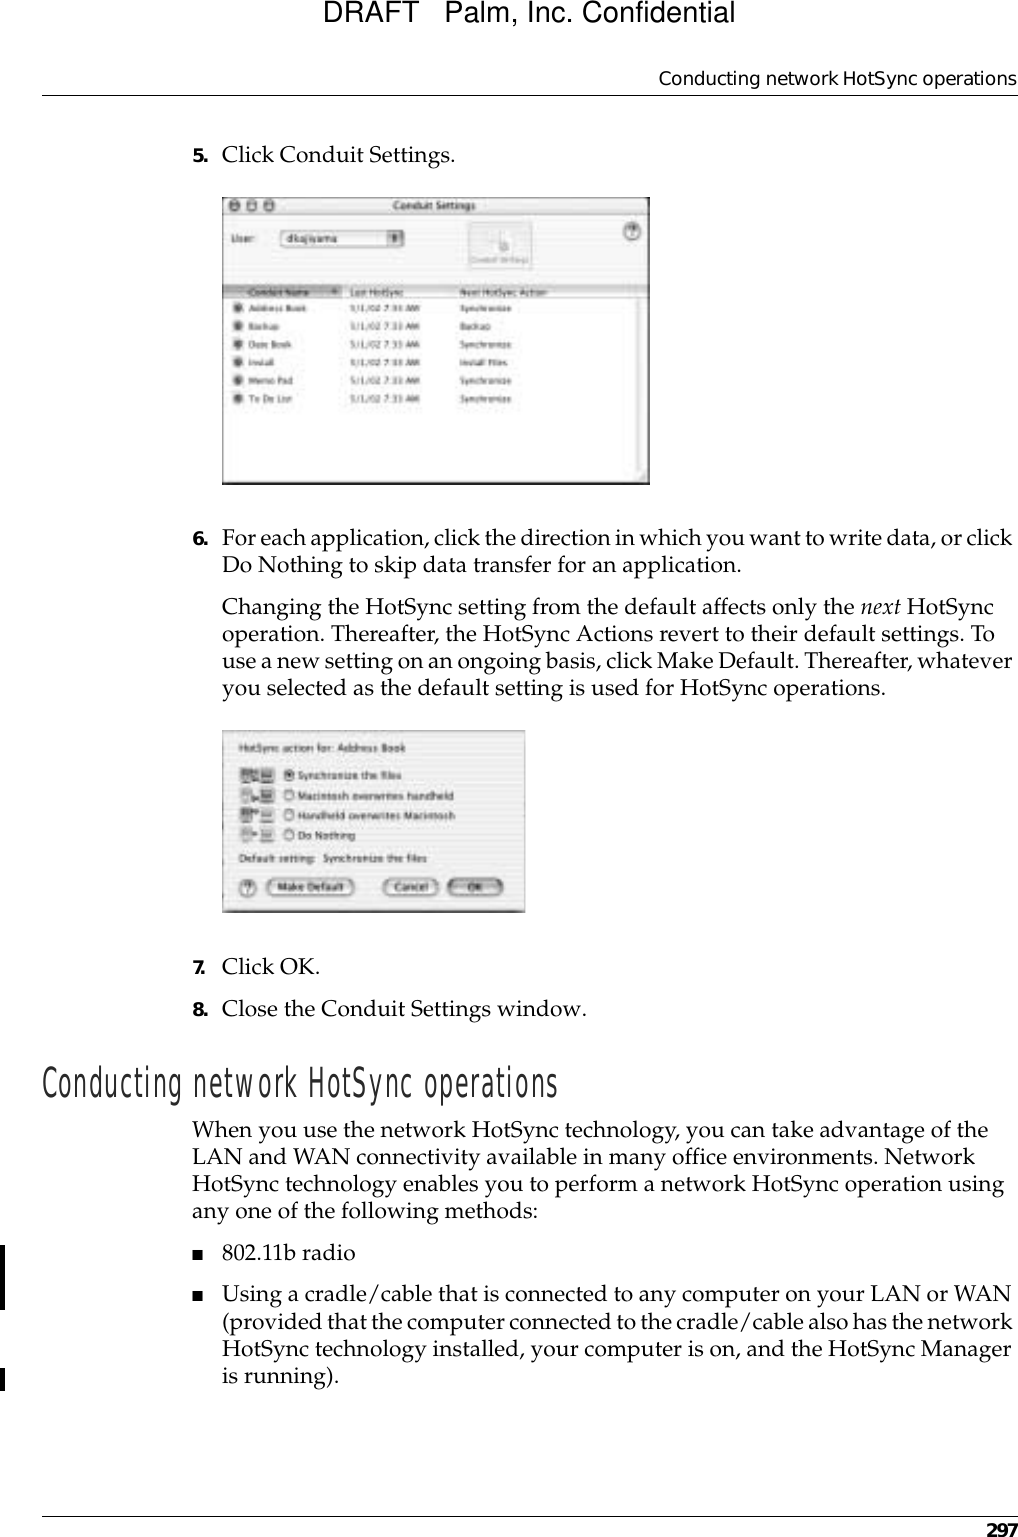
![Getting, sending, and managing e-mail1756. Use the pick lists to create criteria for the notification filter.The two pick lists and the edit line combine to create a statement that identifies the type of e-mail that triggers notification. For example, a filter might read, “If the [From] [Contains] mweston@example.com, Then Notify Me.” You can also use the And button to create a more complex statement, such as “If the [From] [Contains] mweston@example.com, And if the [Subject] [Starts with] Apollo Project, Then Notify Me.”When you use this notification filter, only e-mail matching these conditions prompts a notification alert on your handheld.7. Tap OK. Scheduled retrieval of e-mailYou can set up the VersaMail application to automatically search for new mail on a regular schedule for a given e-mail account. When setting up a schedule, you select the interval for retrieving mail, the start and end time for retrieving mail, and the days on which scheduled e-mail retrieval should take place.You can set up different schedules for each of your e-mail accounts, but you can only set up one schedule for a given account. For example, if you set up a schedule for mail retrieval on weekdays for your Yahoo account, you cannot set up a separate schedule for weekends on the same account.To Select the header field with the information contained in the edit line: To, From, Subject.Contains Select a filter action: Contains, Starts with, Does not contain.Edit line Enter the text that must be found in the header field. For example, if you want to be notified only of e-mail where the Subject is the Apollo Project, enter “Apollo Project.”Add Use to further refine the notification criteria by linking two conditions together. Tap Add, and then select criteria from the To and Contains pick lists. Enter the text that must be found in the header field in the Edit line. Tap to remove the current notification filterSet the filter criteriaDRAFT Palm, Inc. Confidential](https://usermanual.wiki/Palm/200000.User-Manual/User-Guide-321231-Page-187.png)
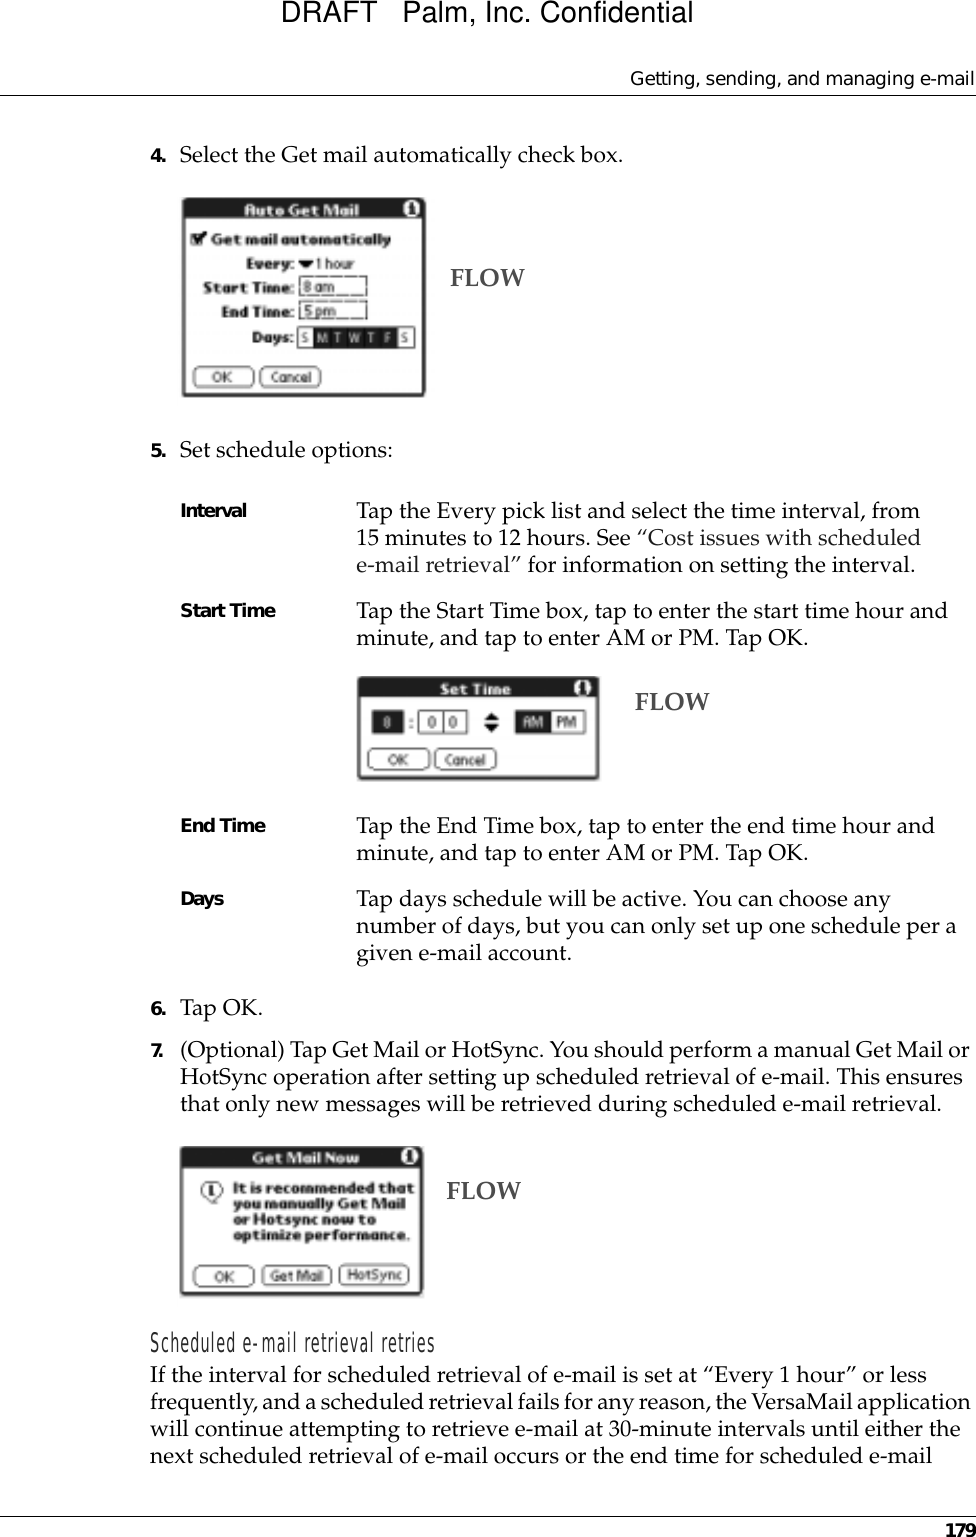

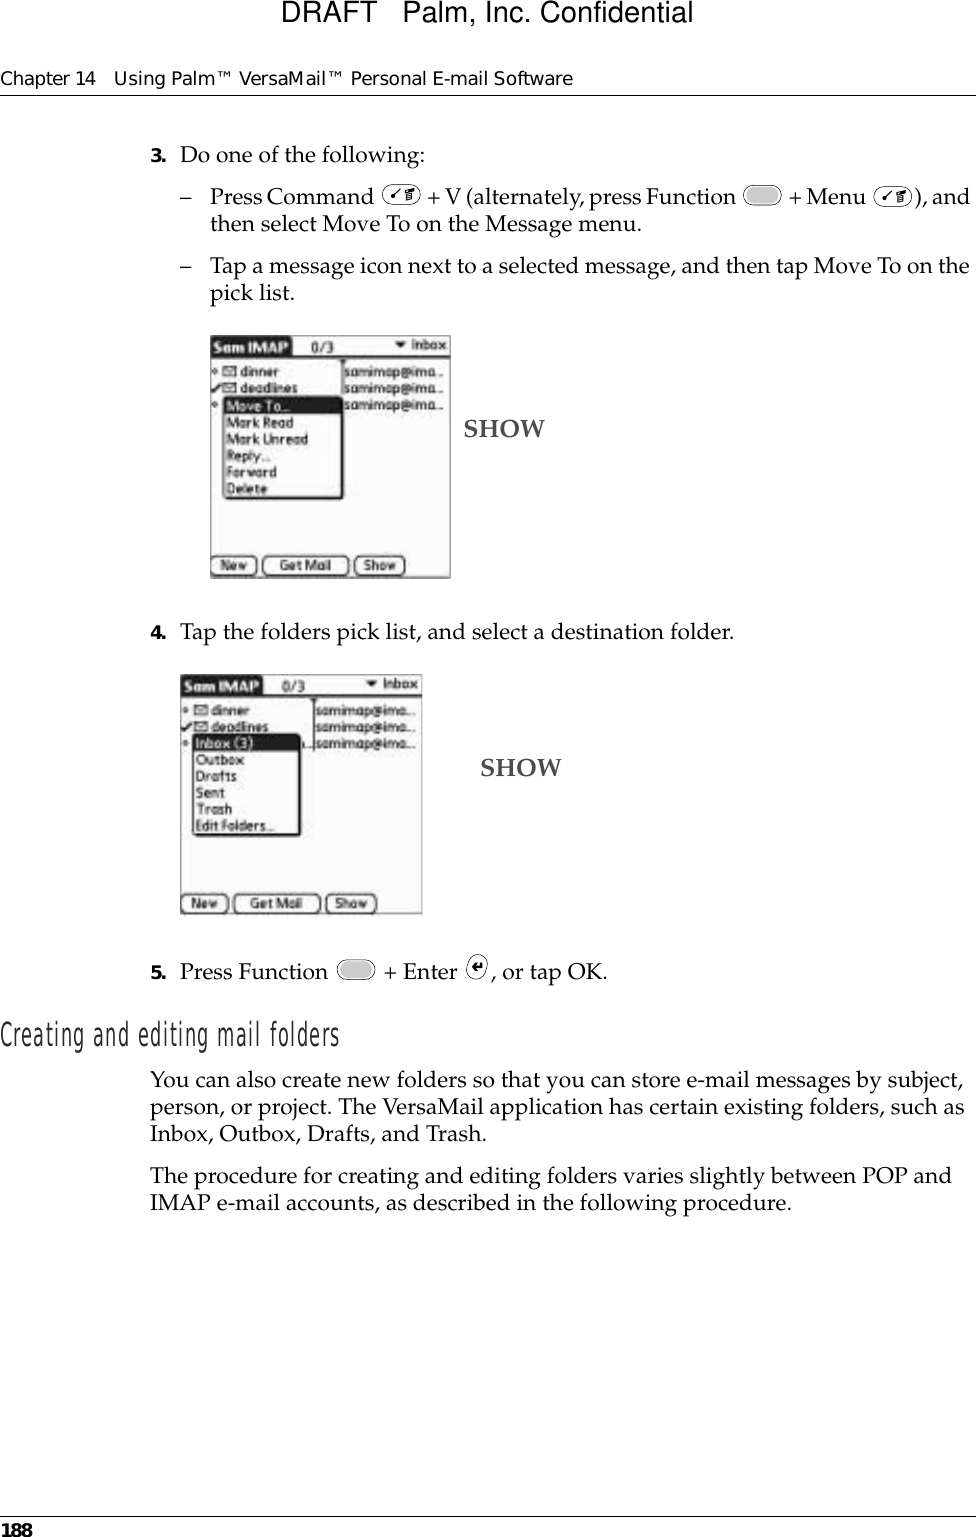
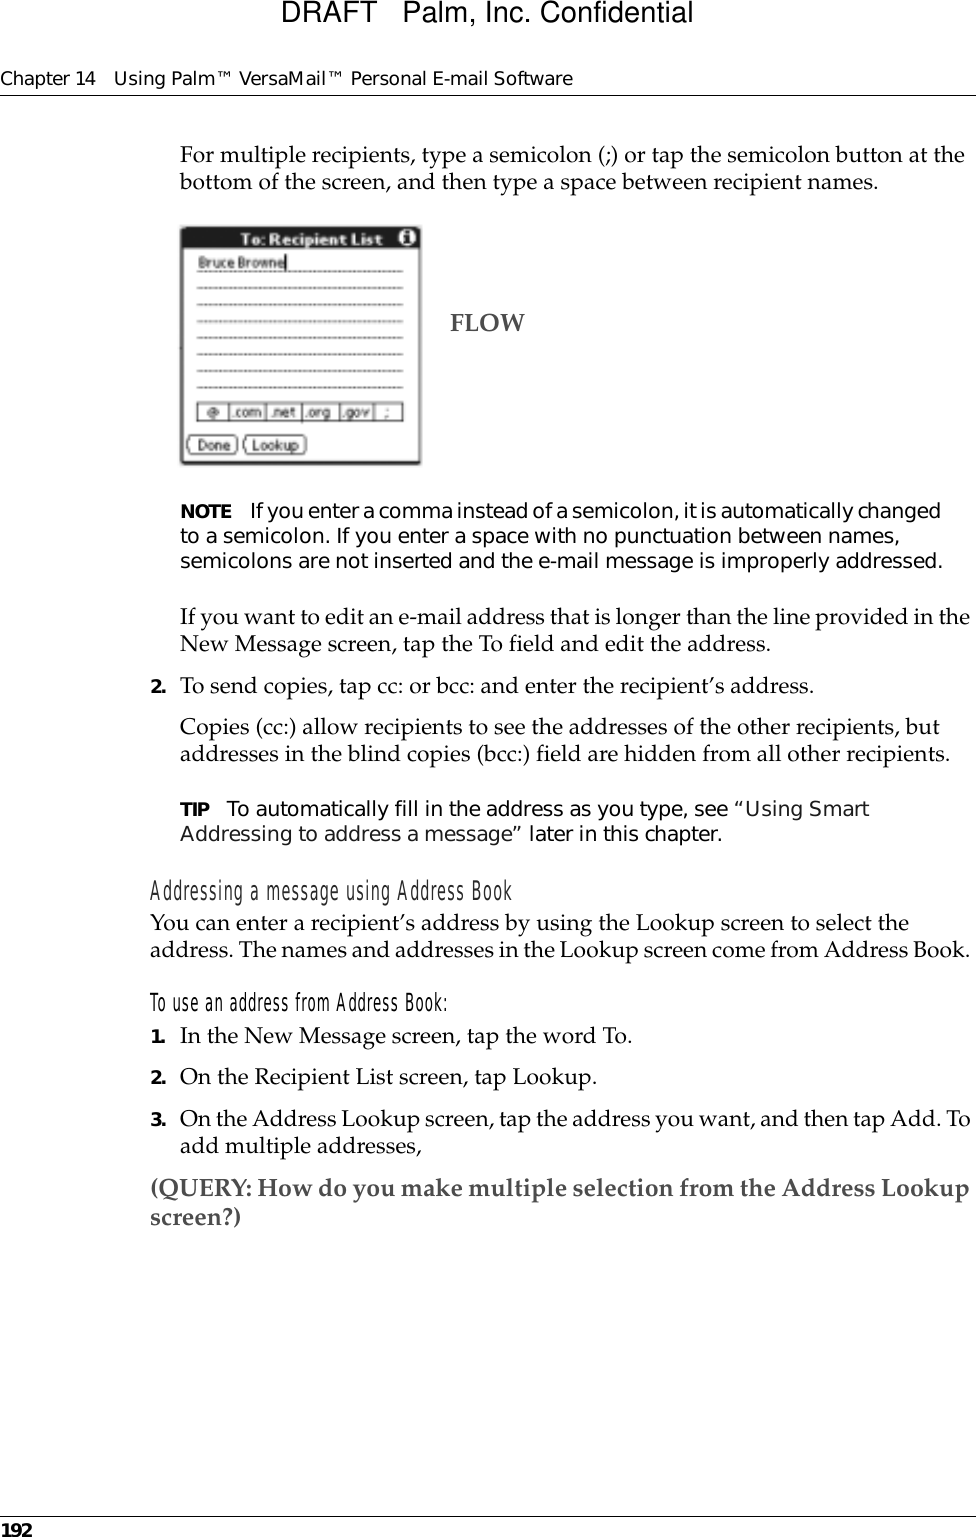
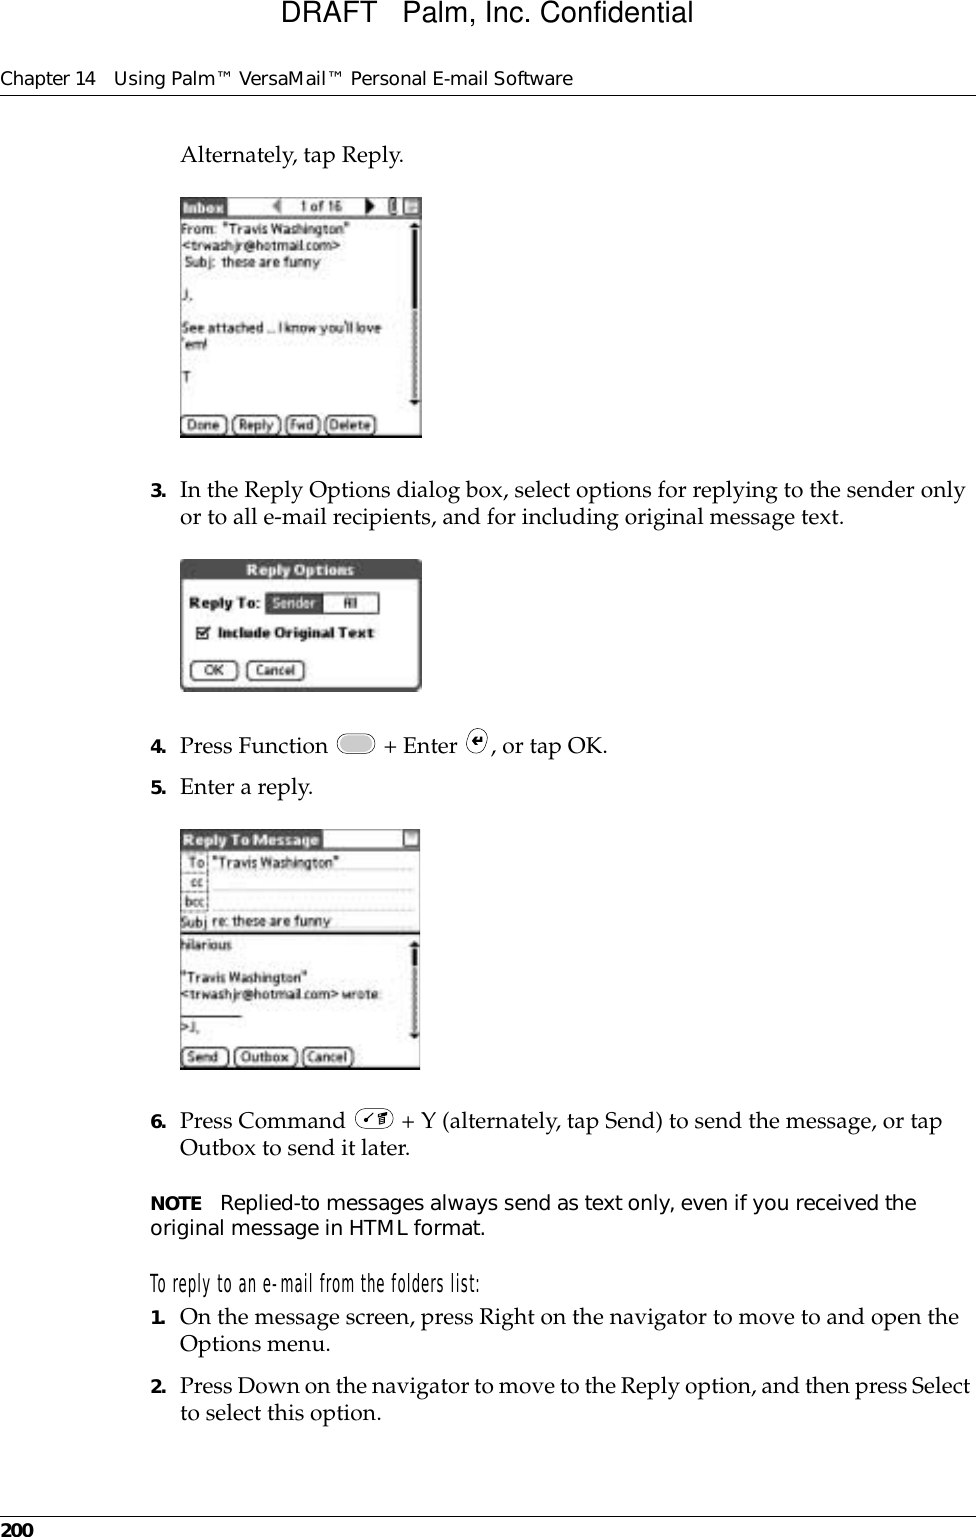
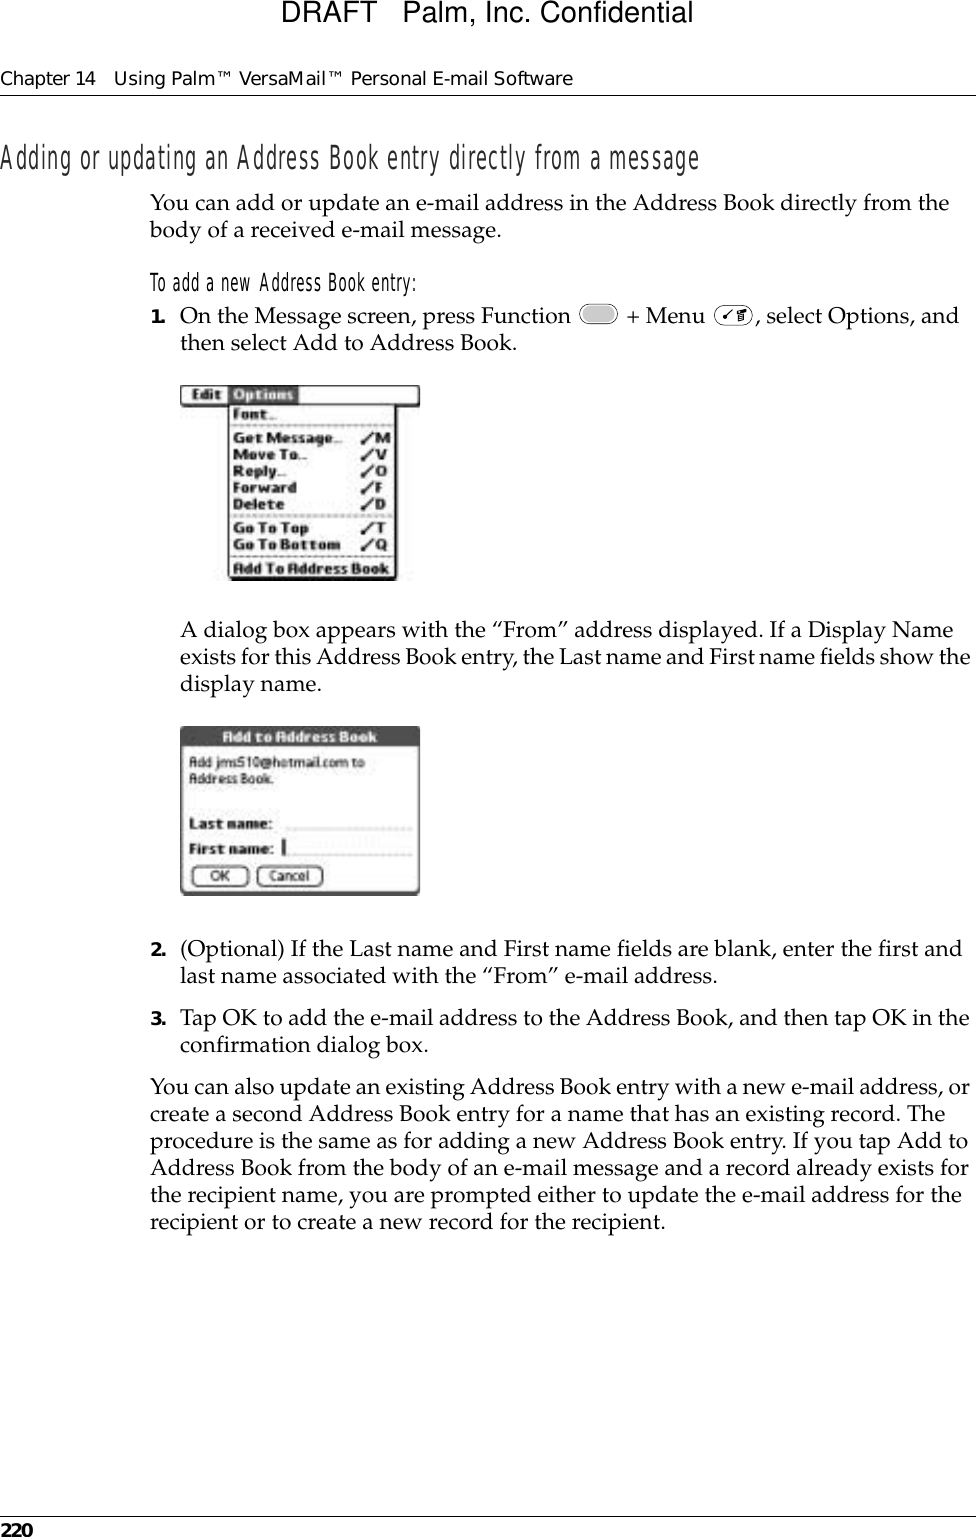
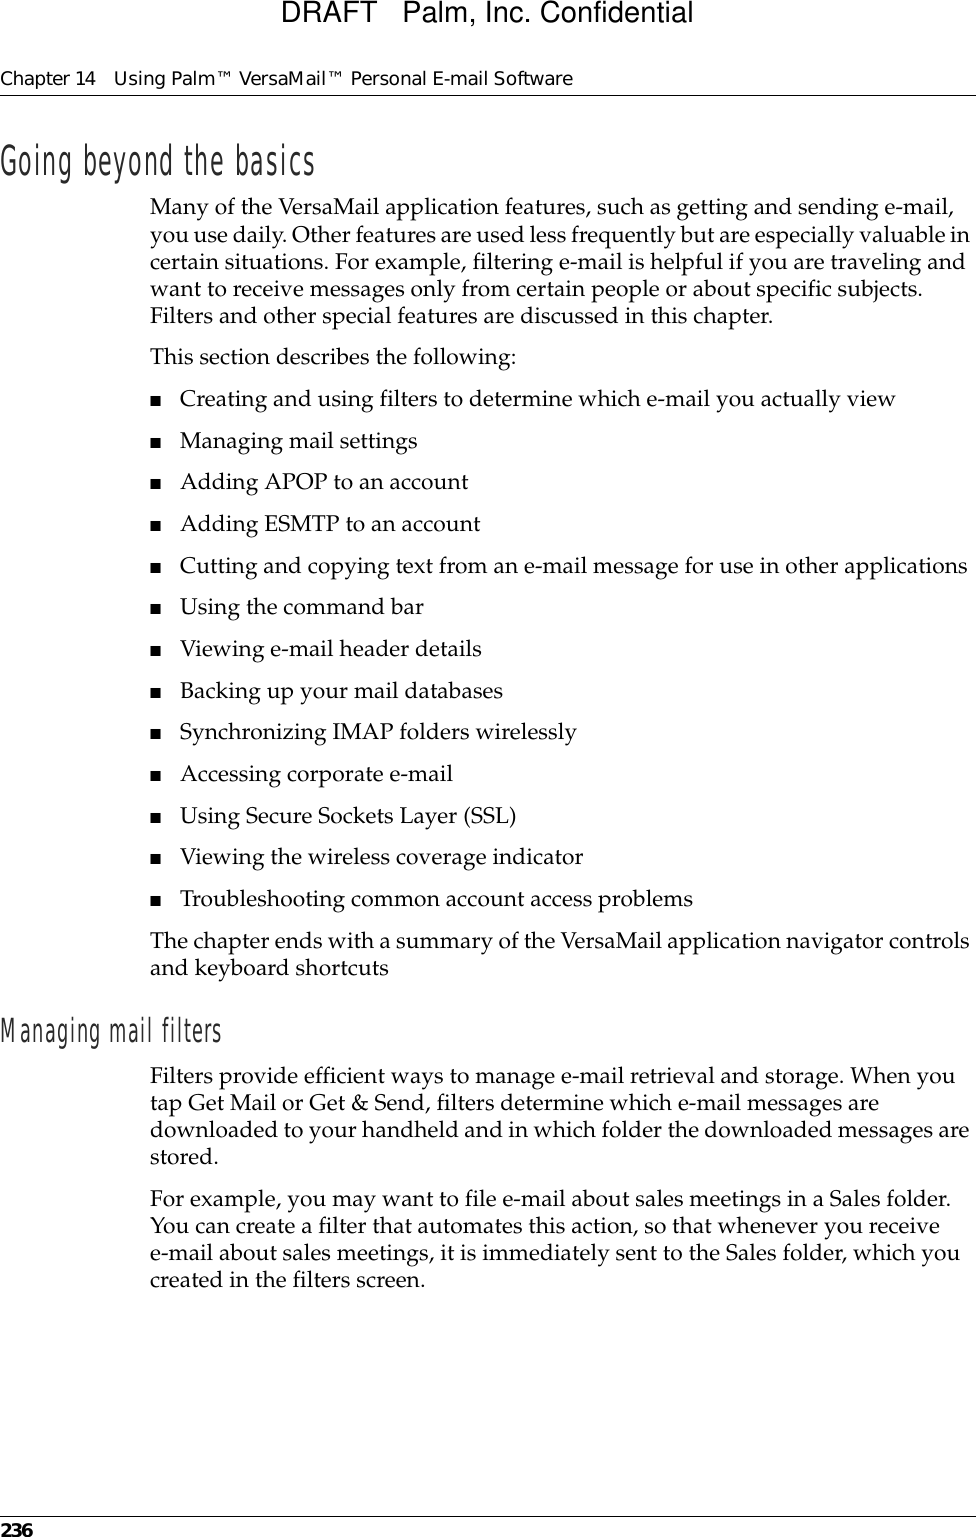
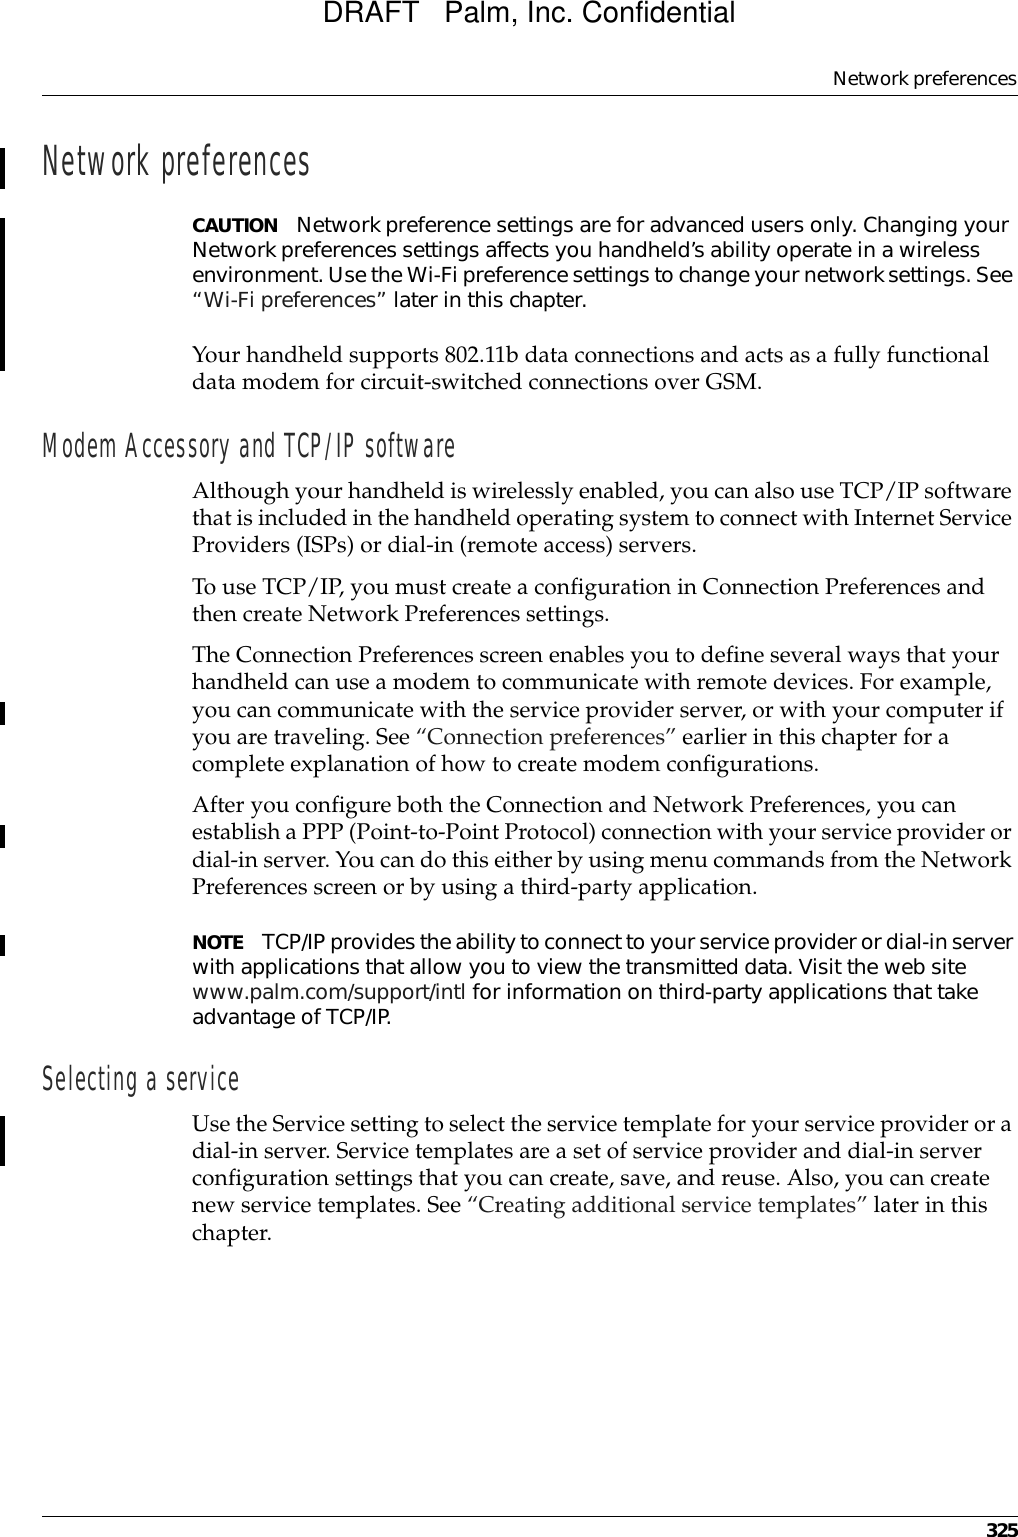
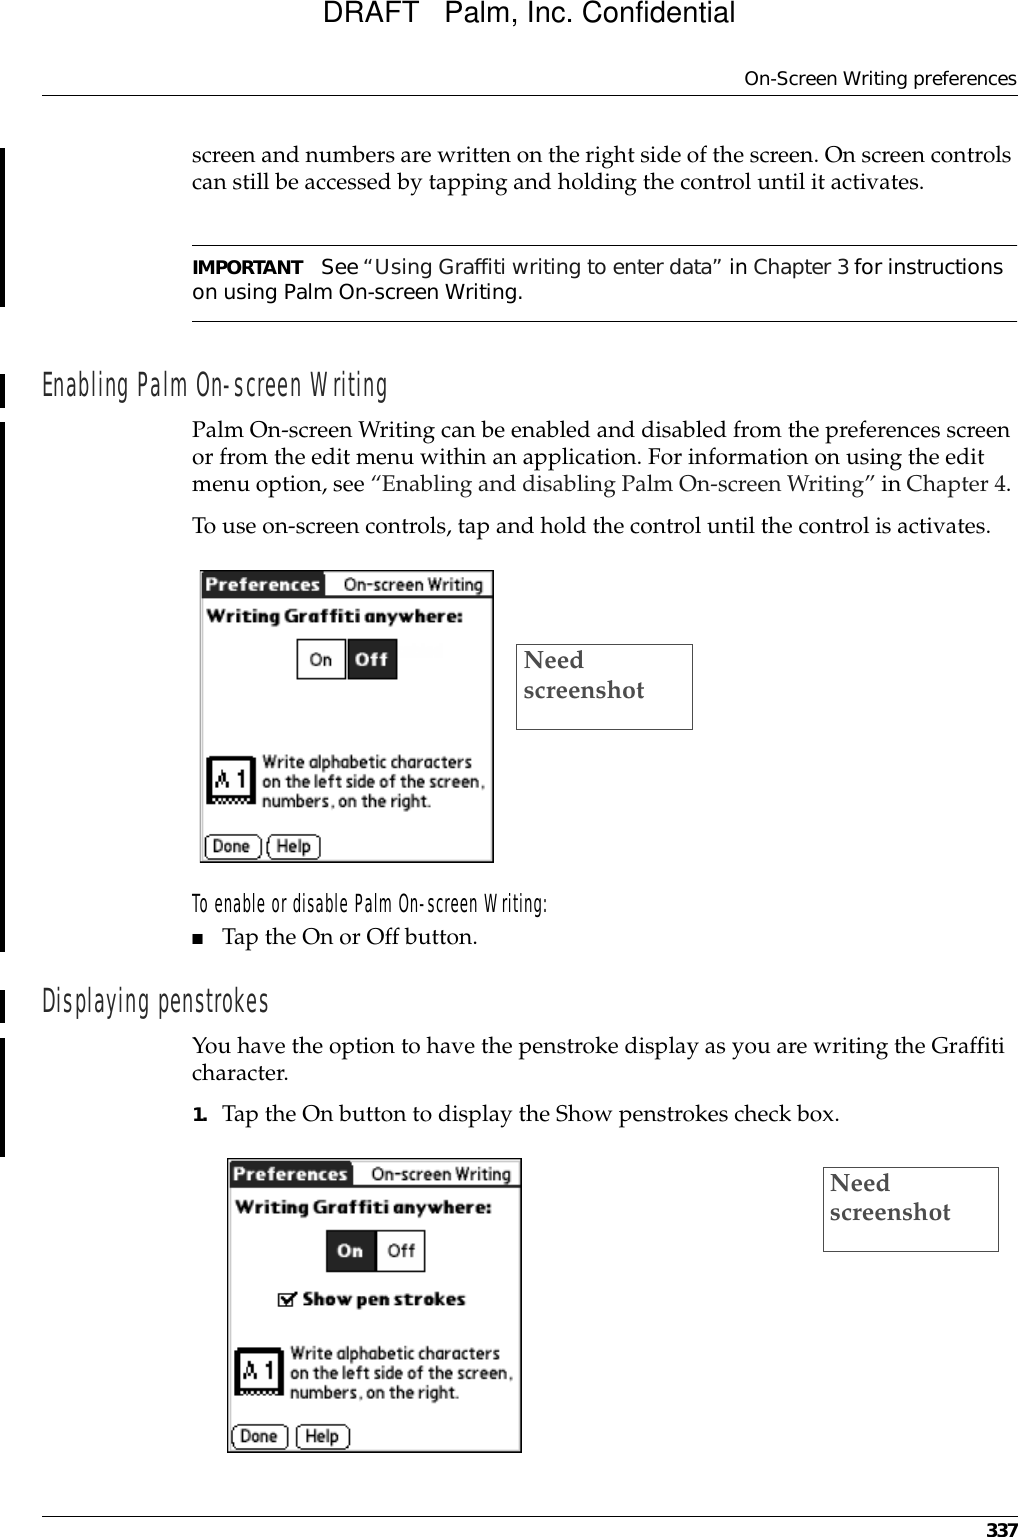
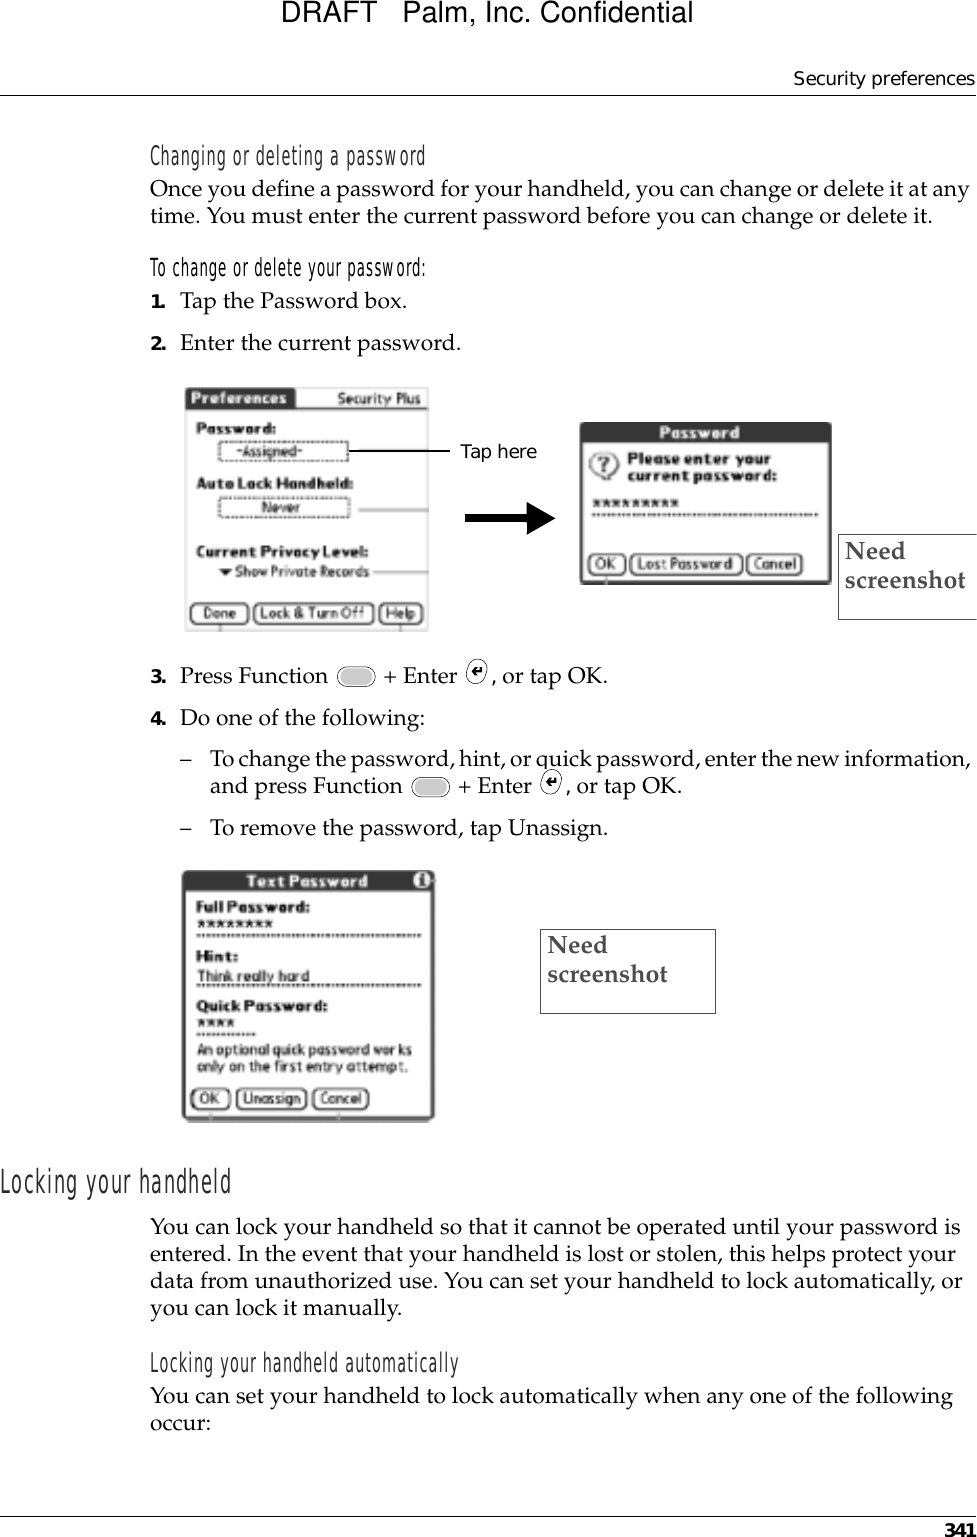
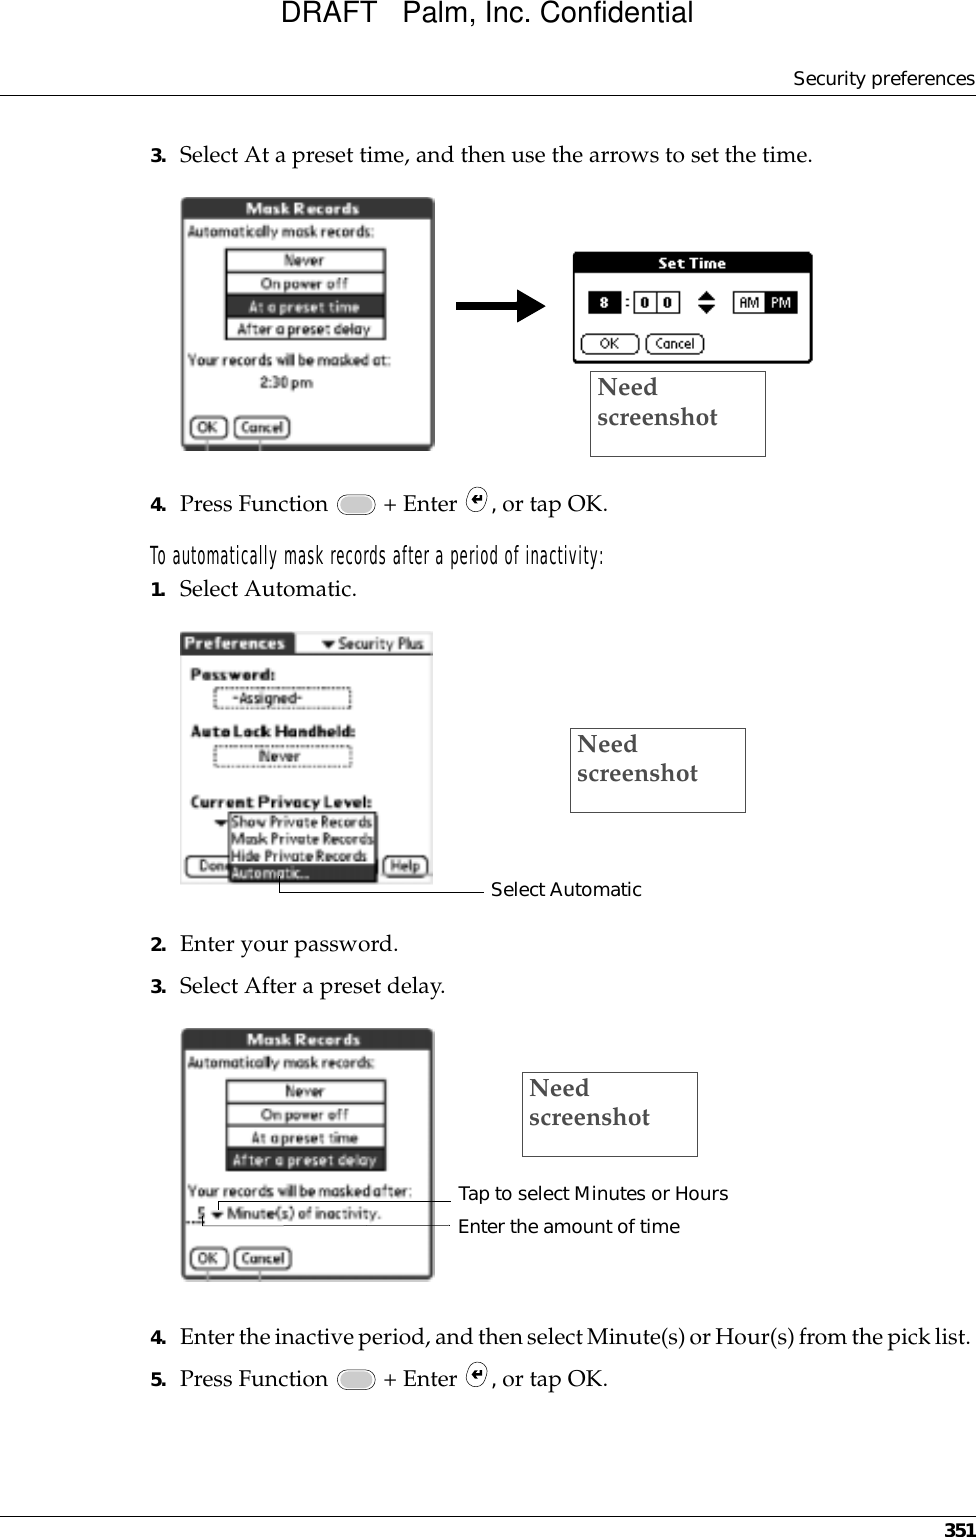
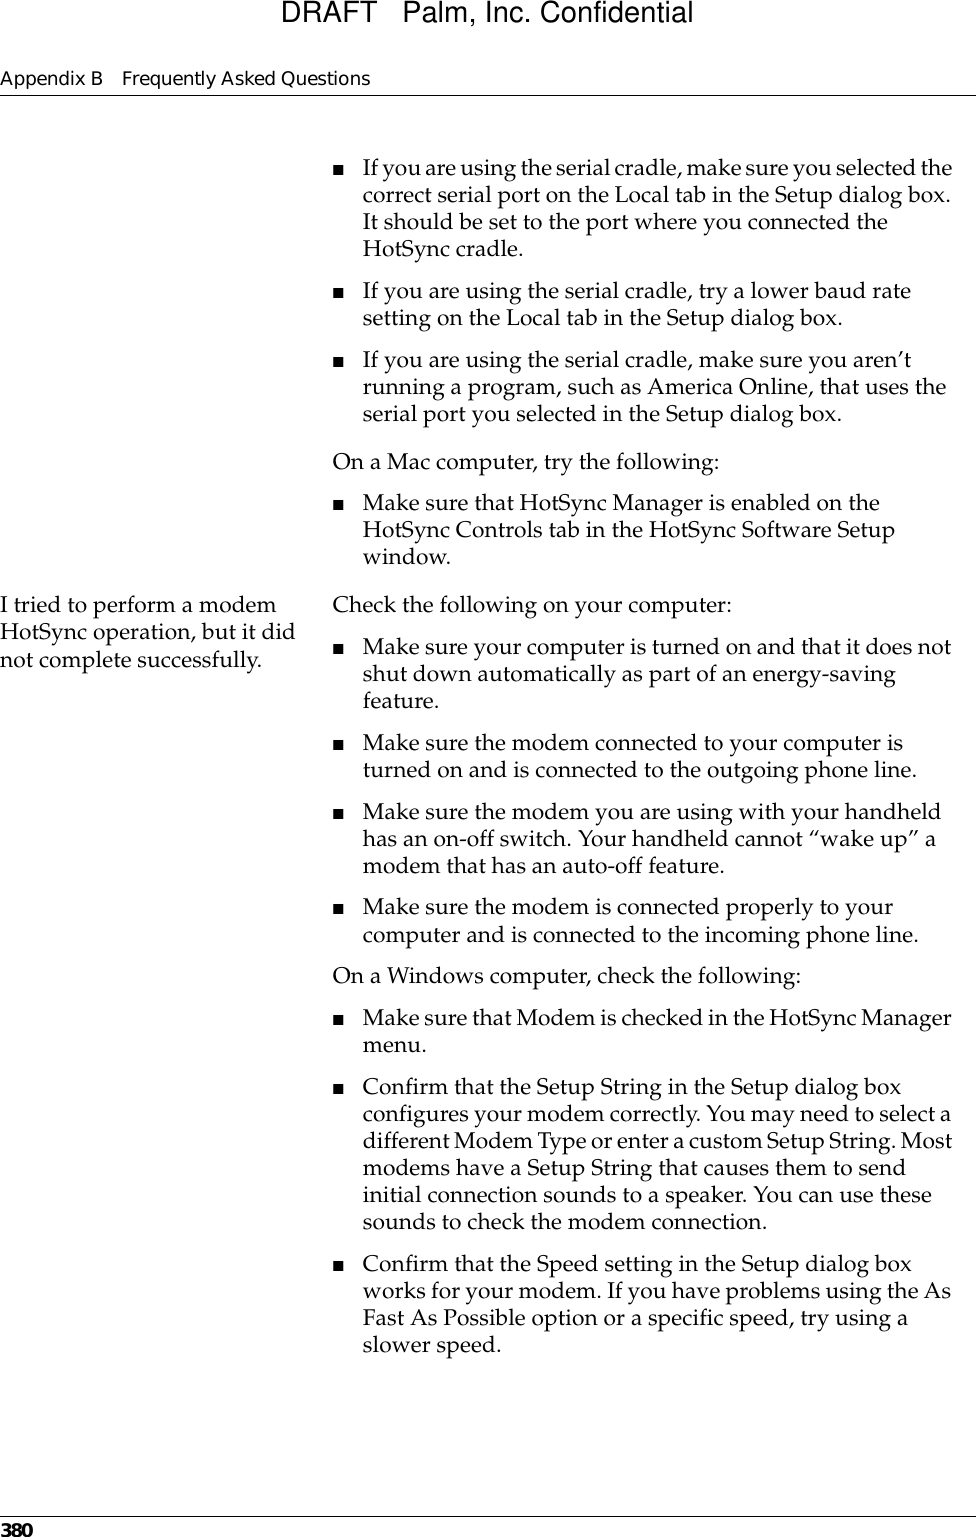
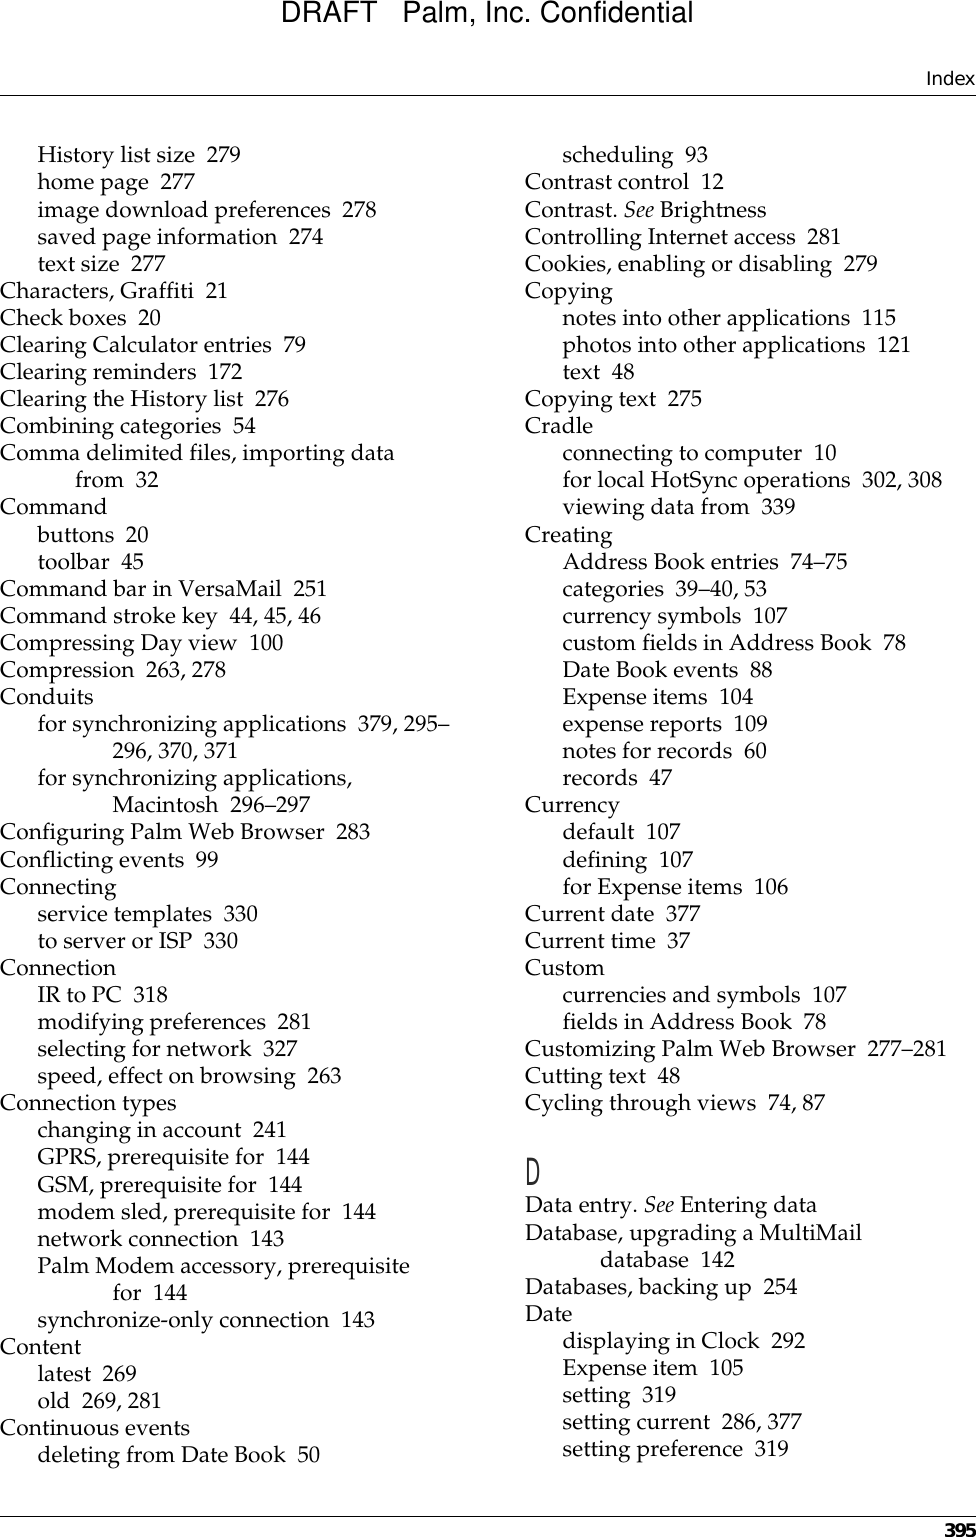
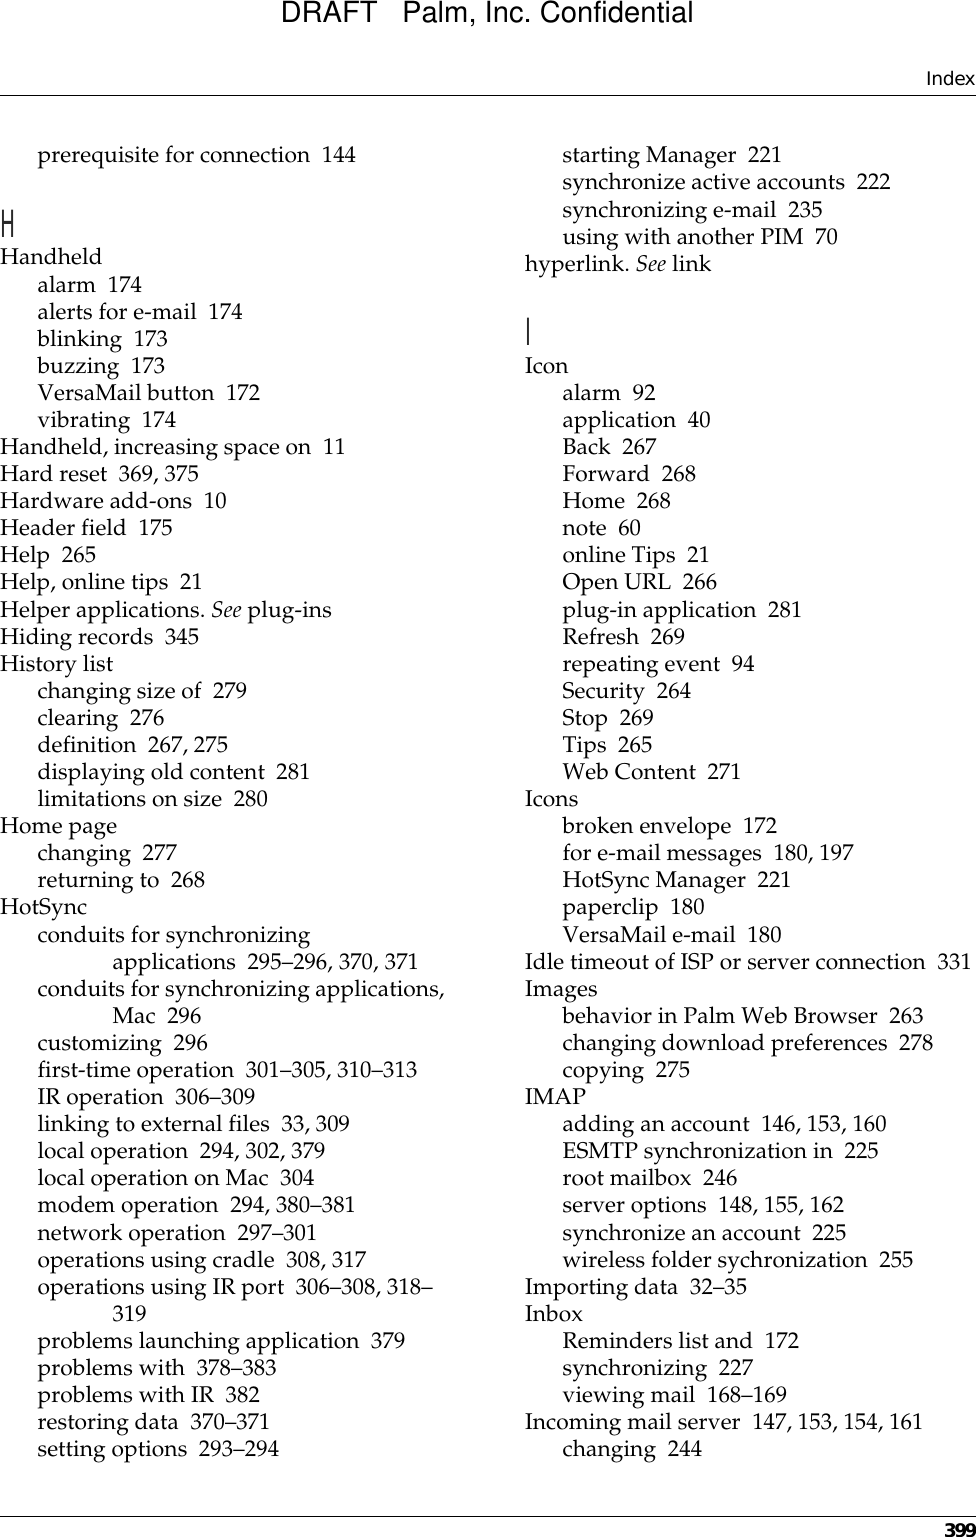
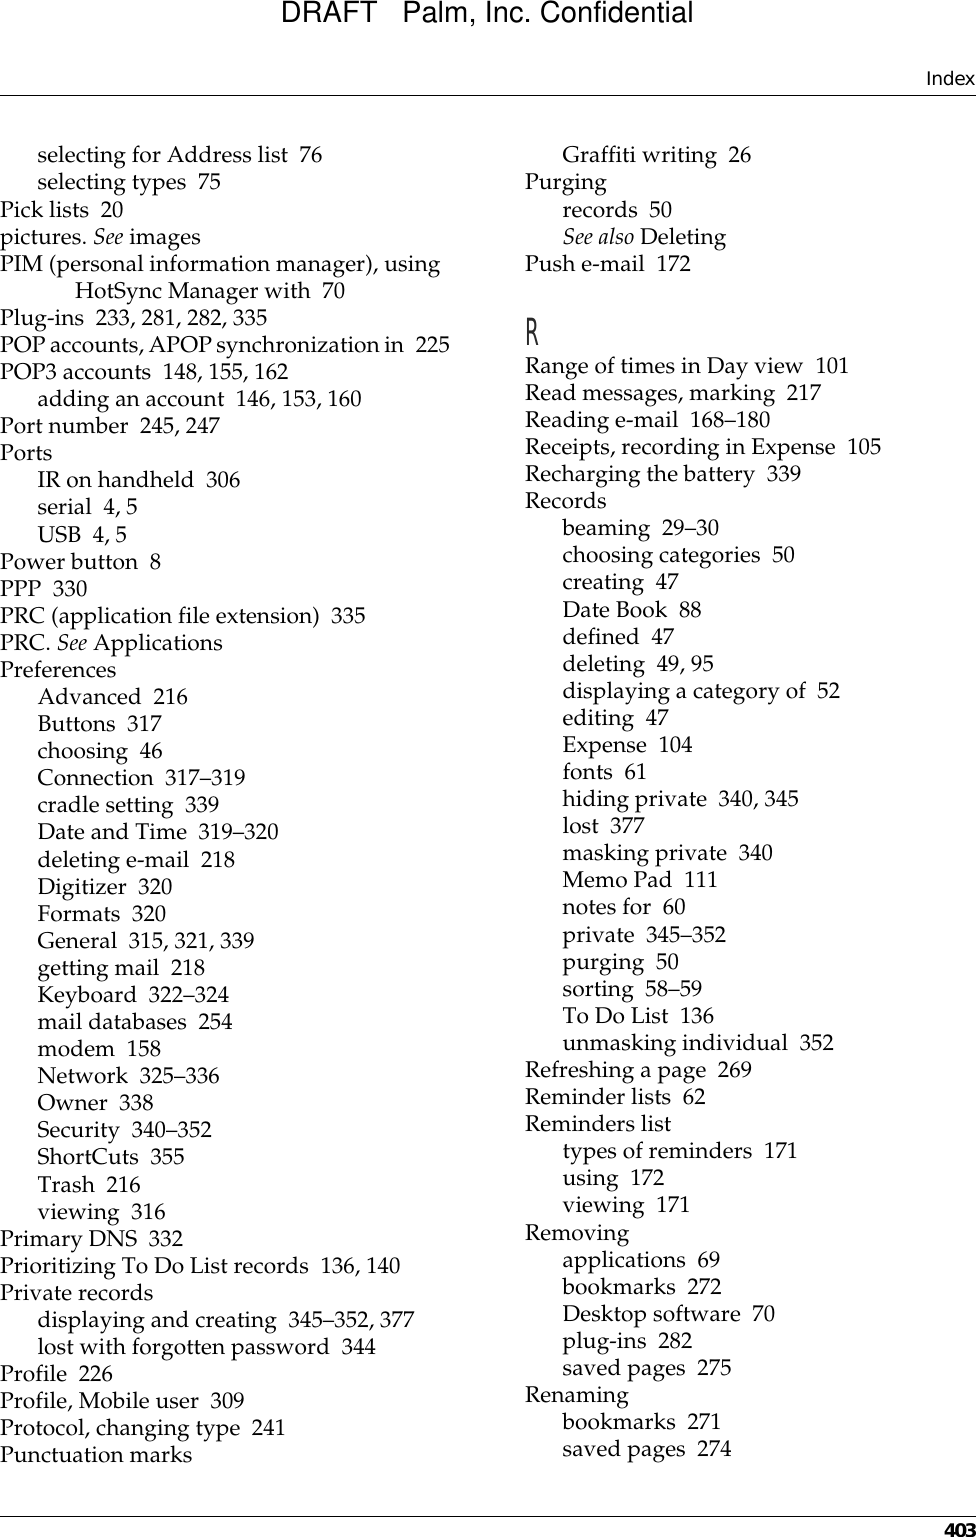
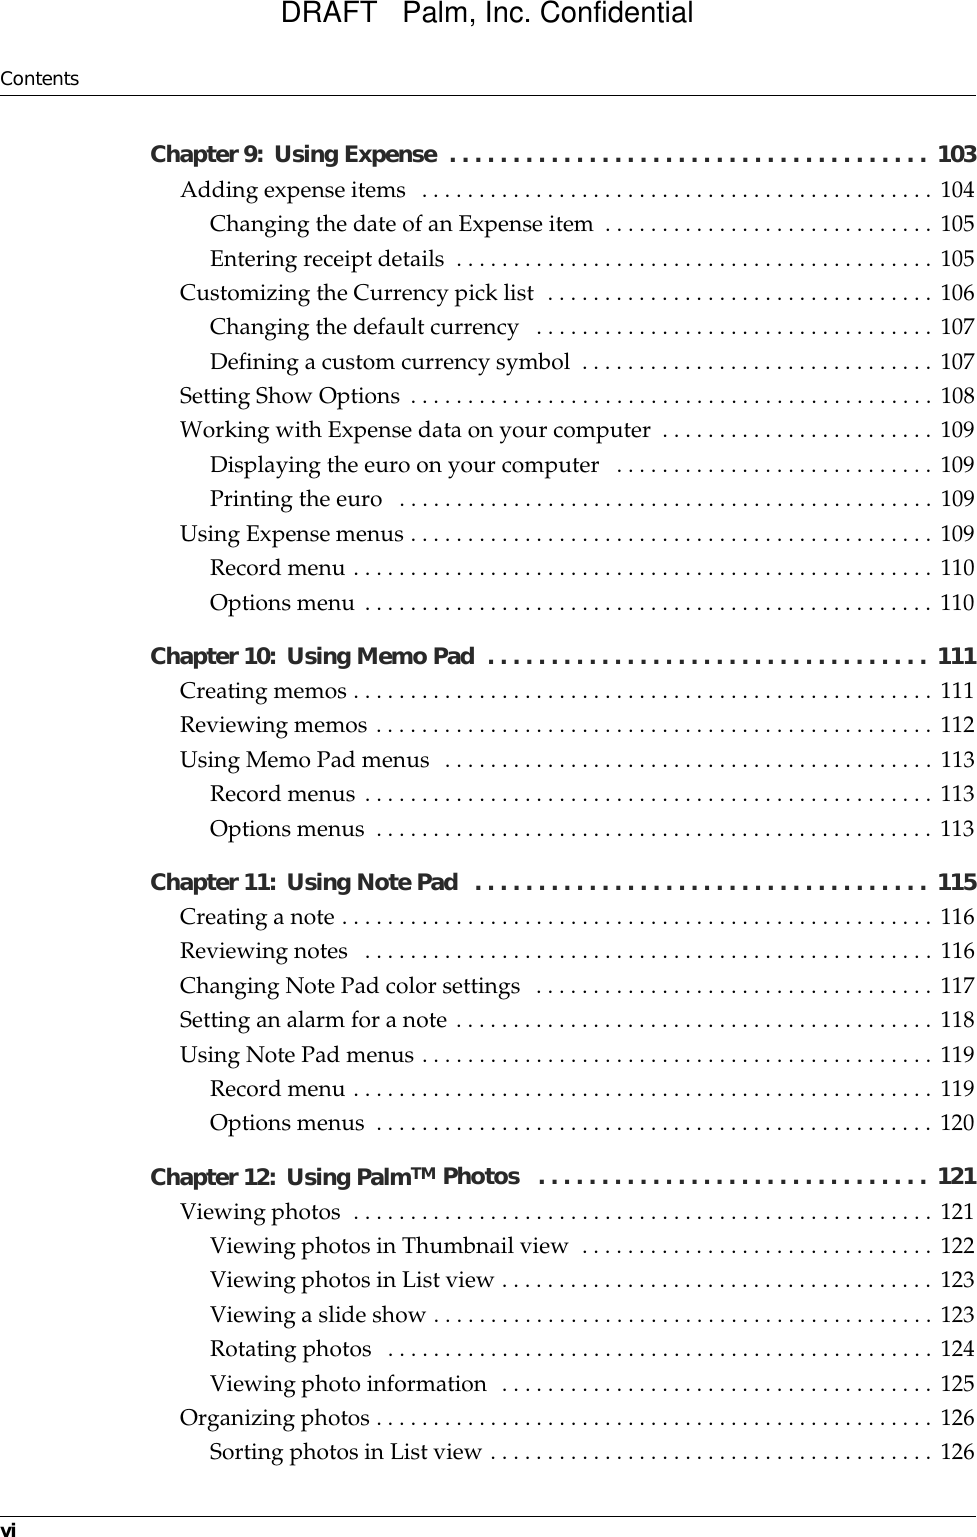
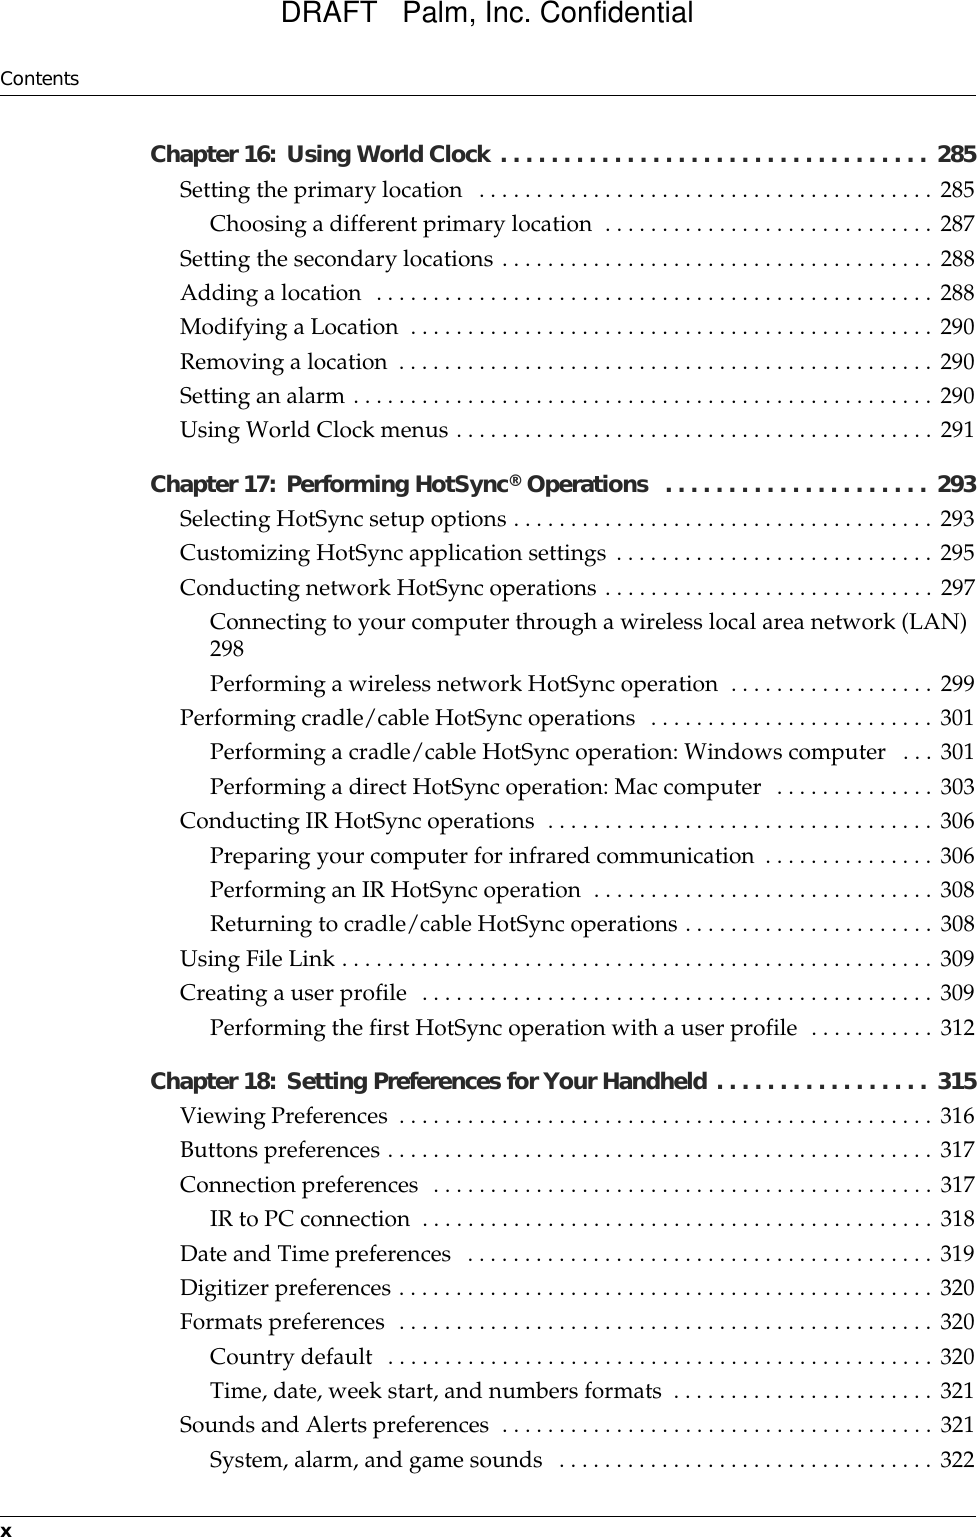
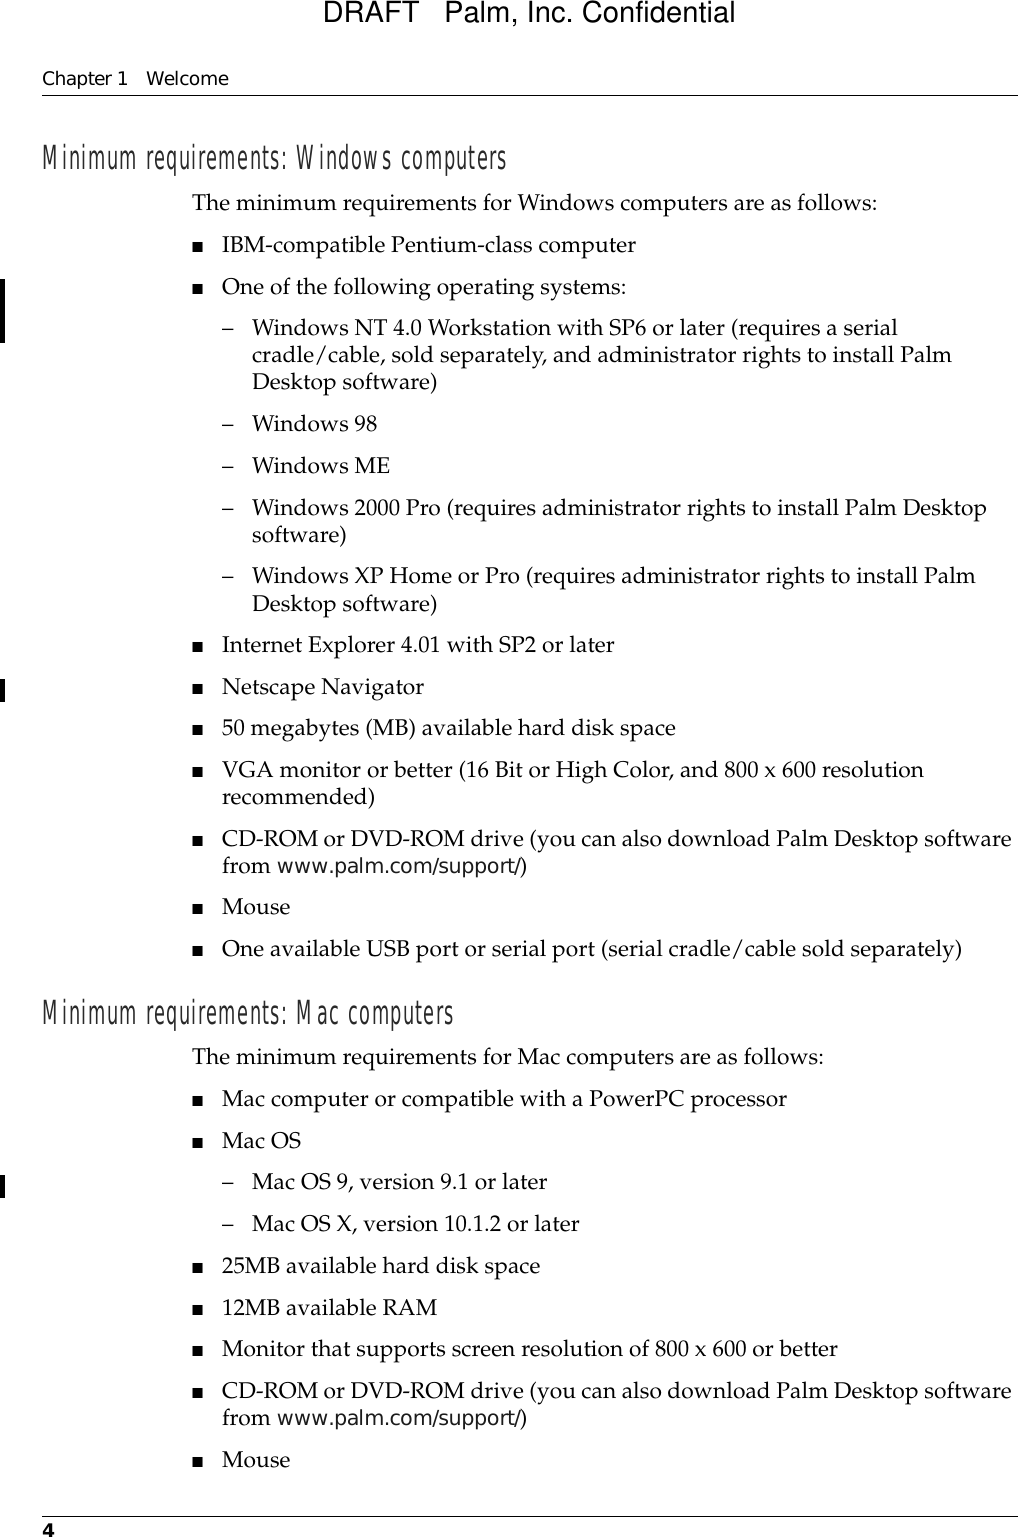
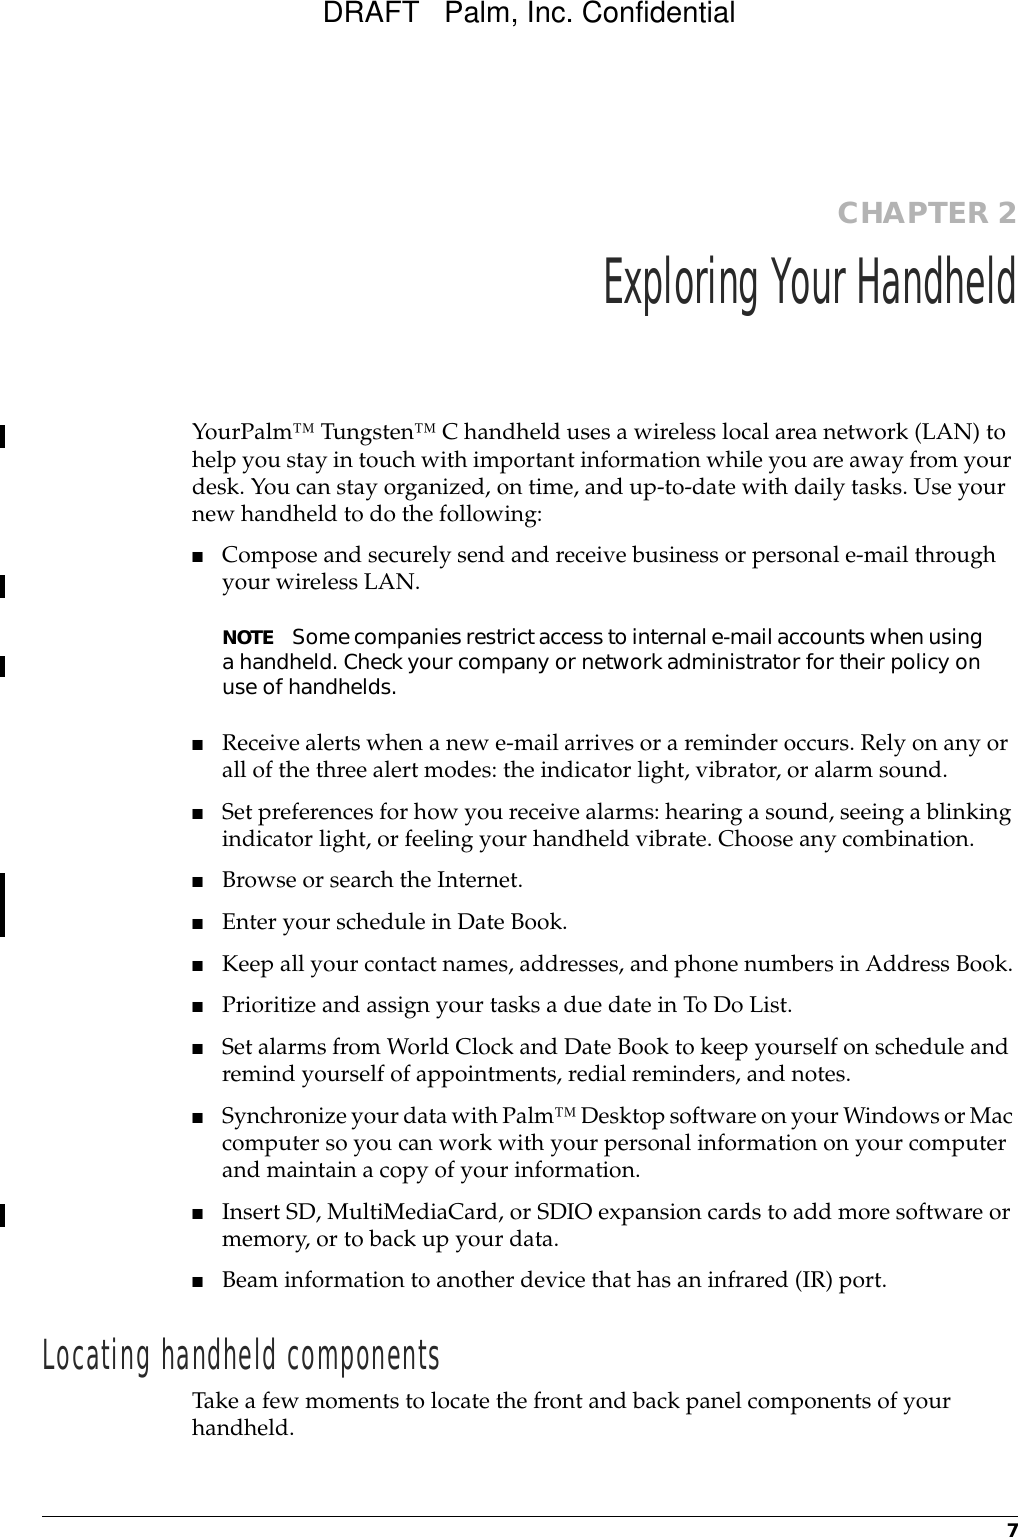
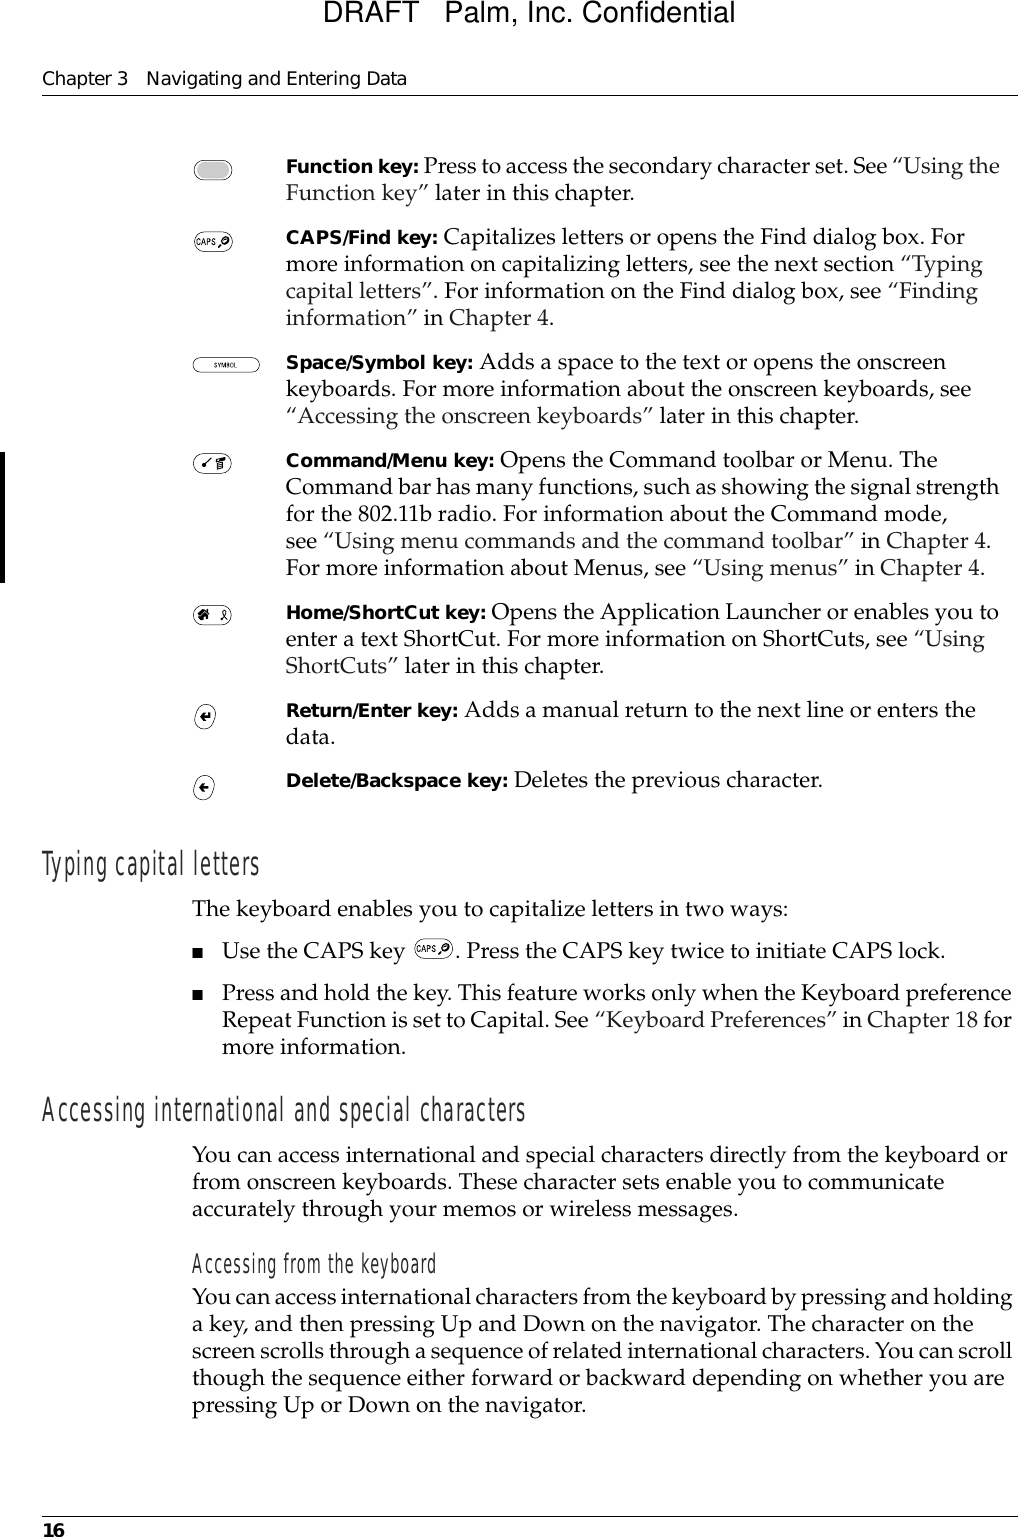
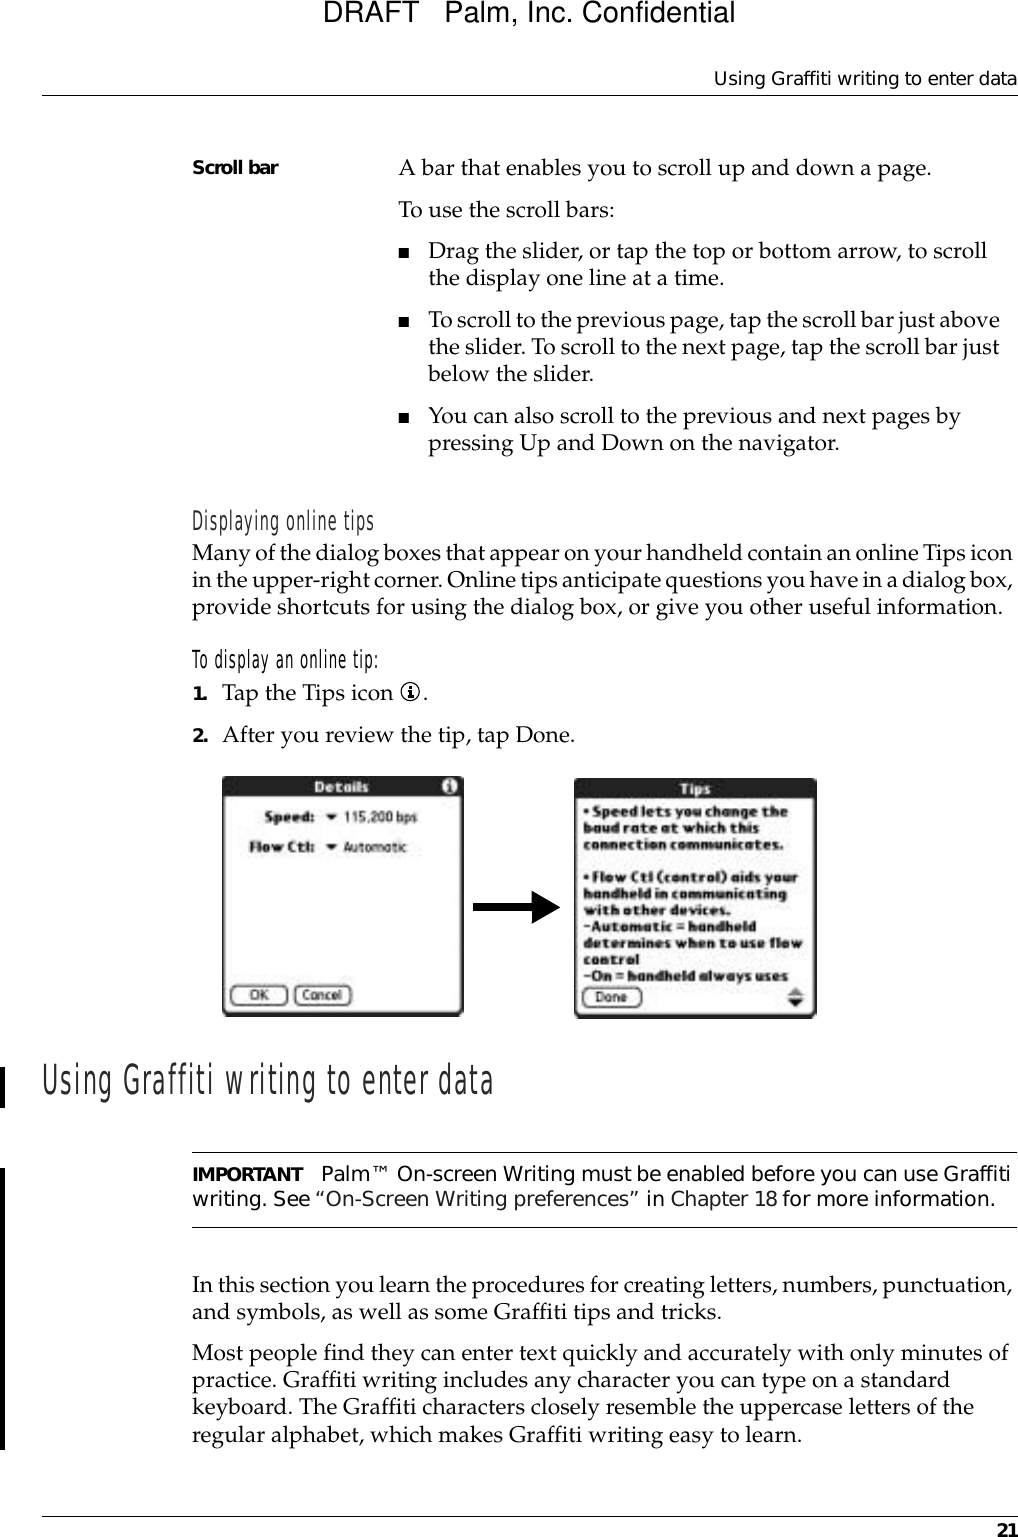
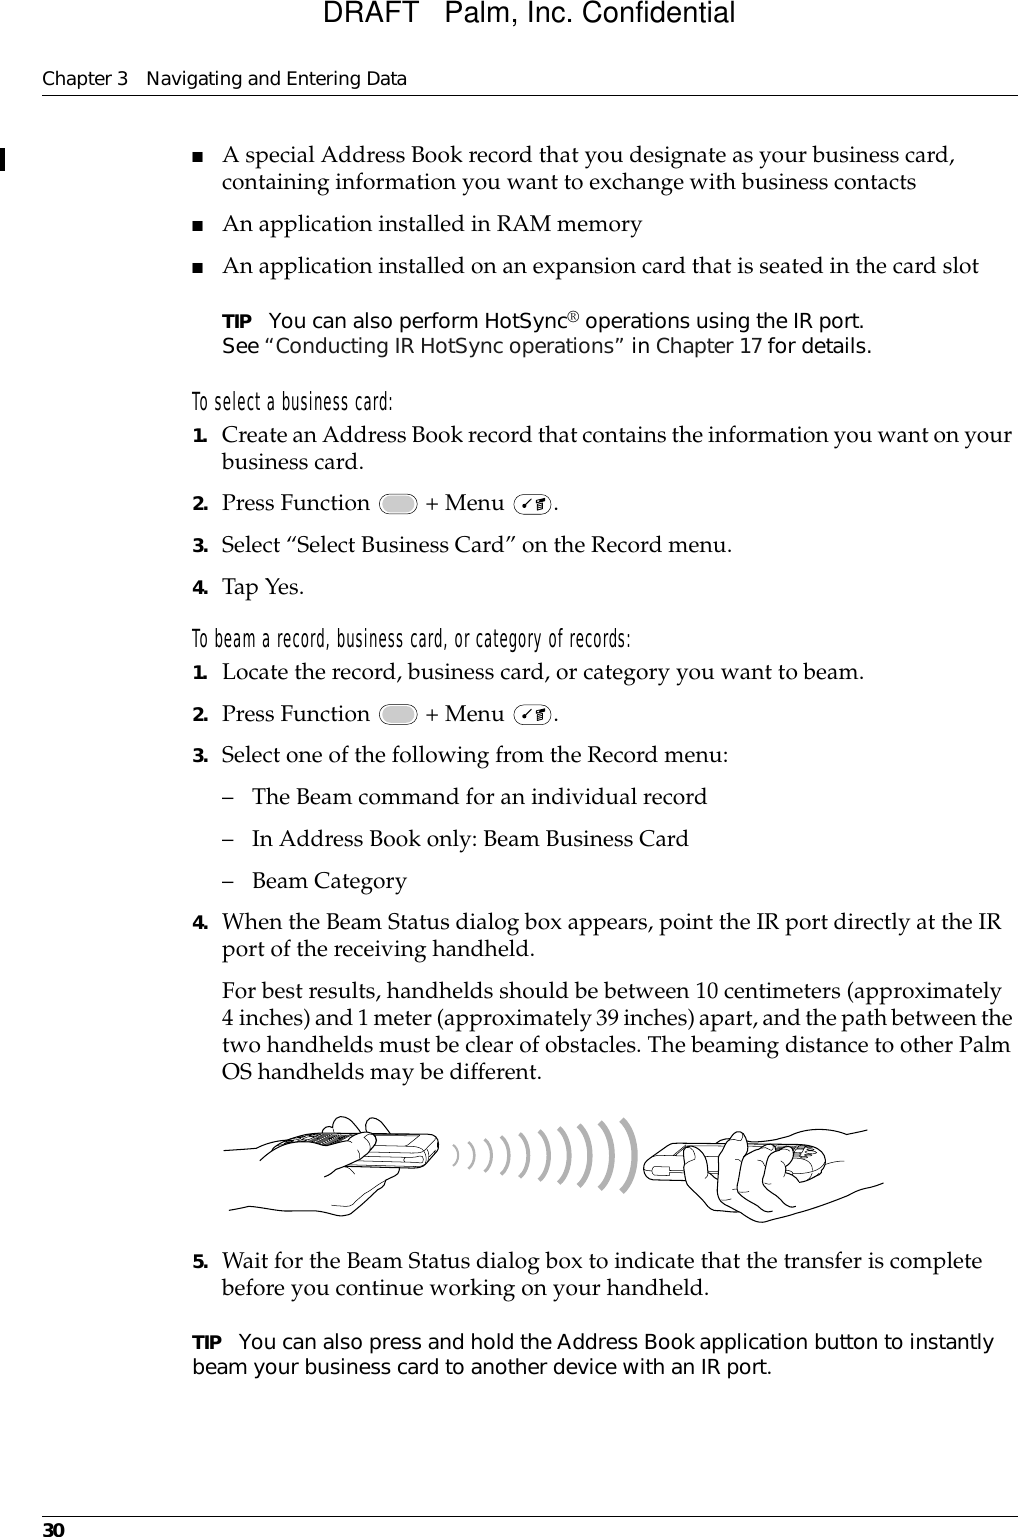
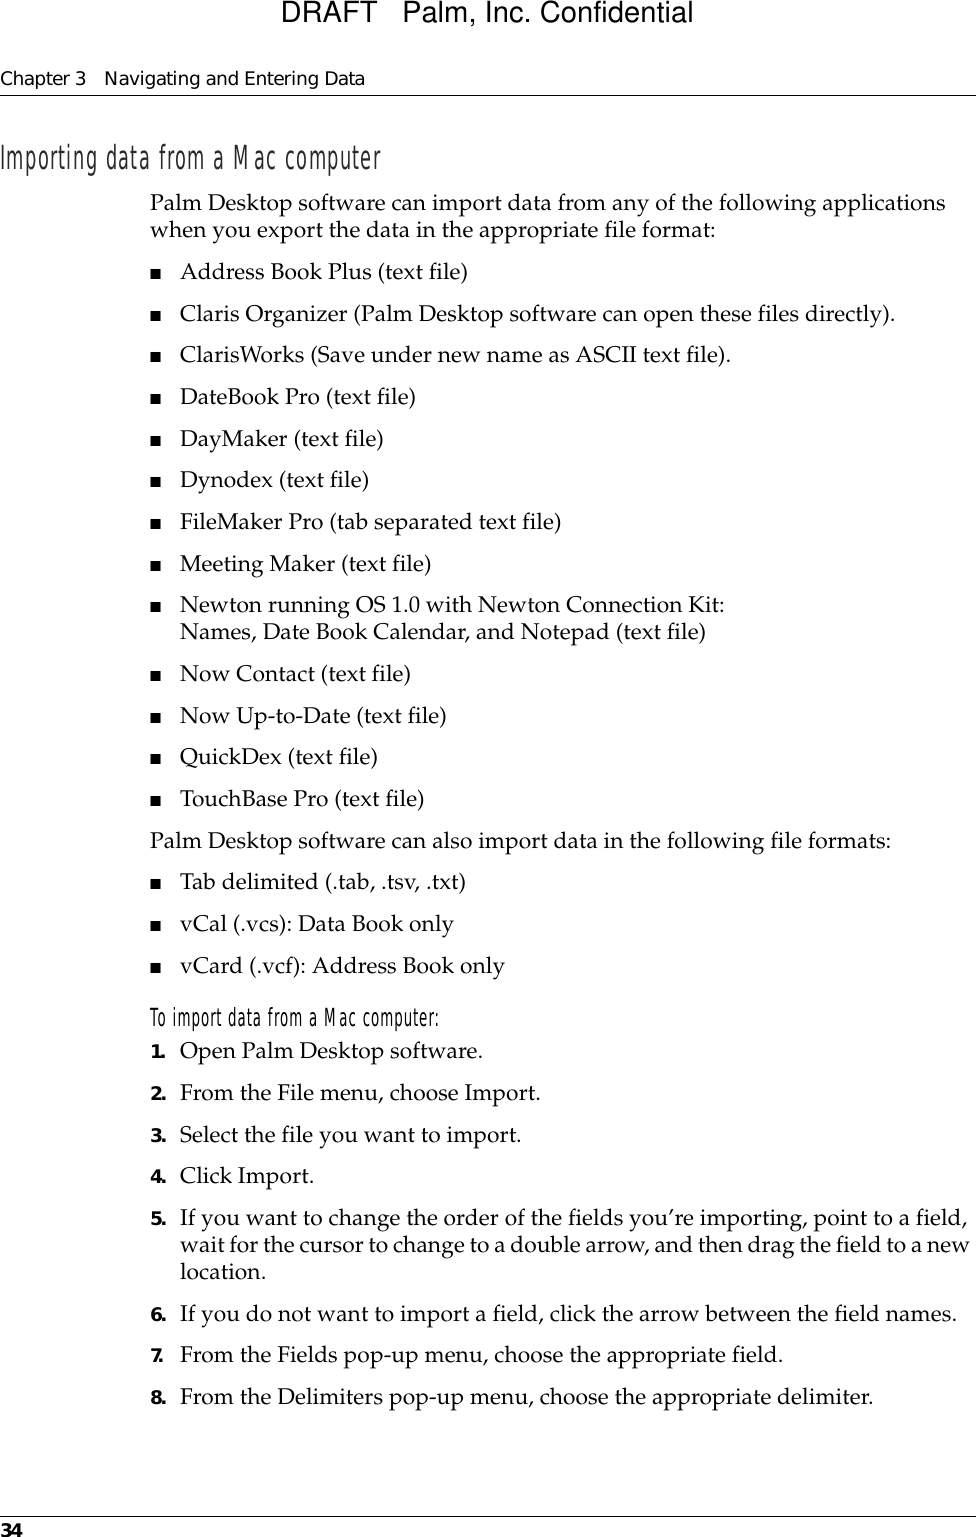
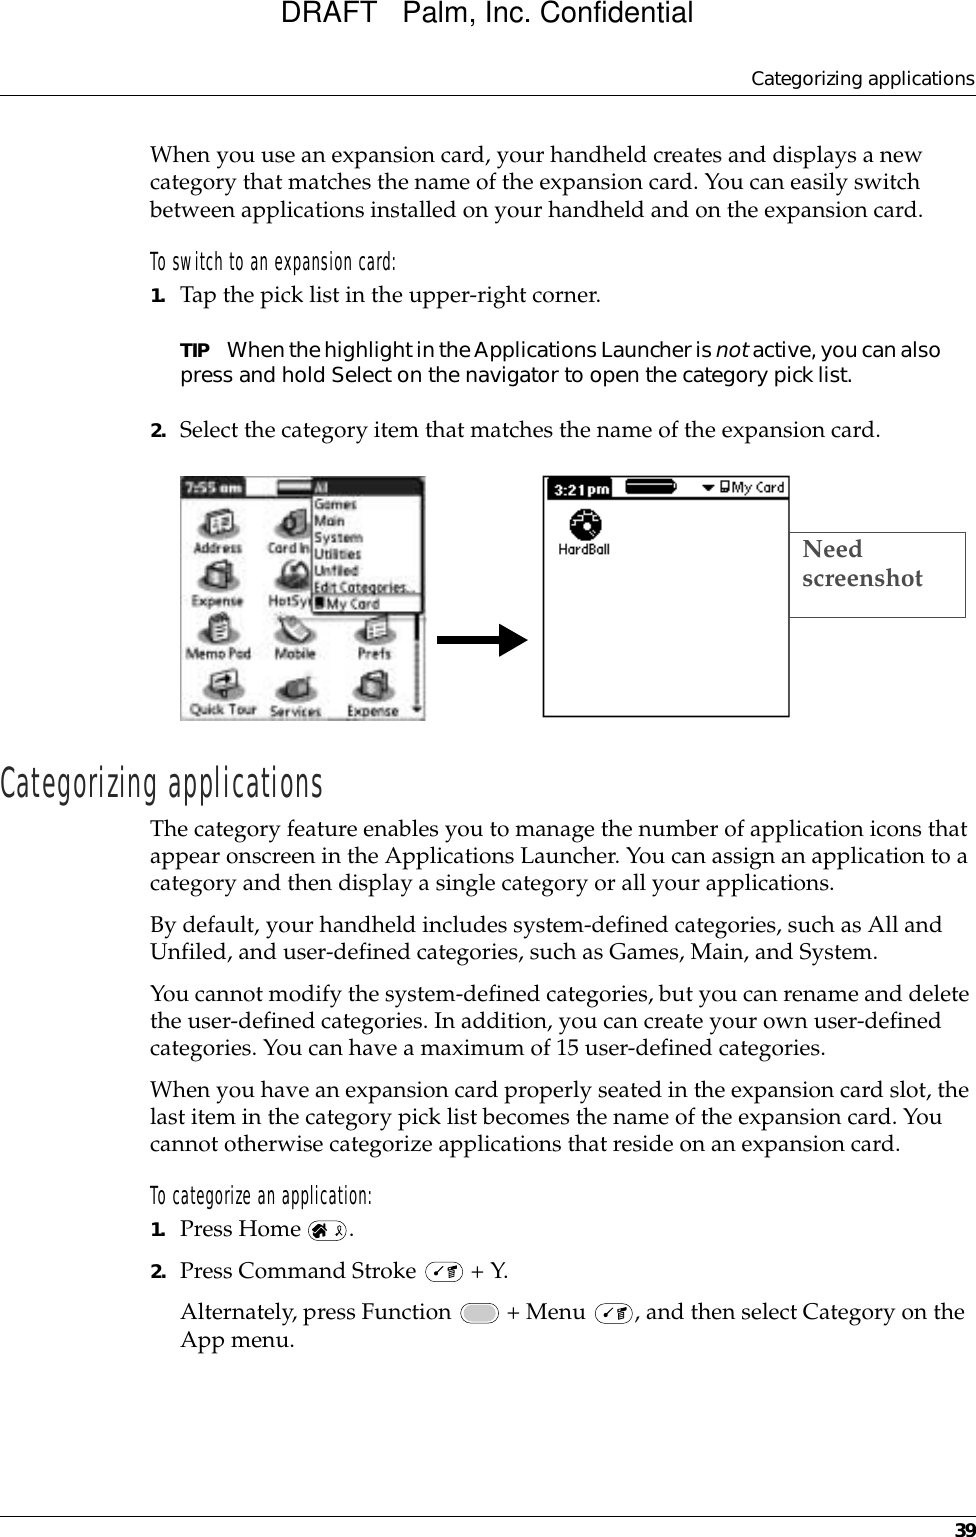
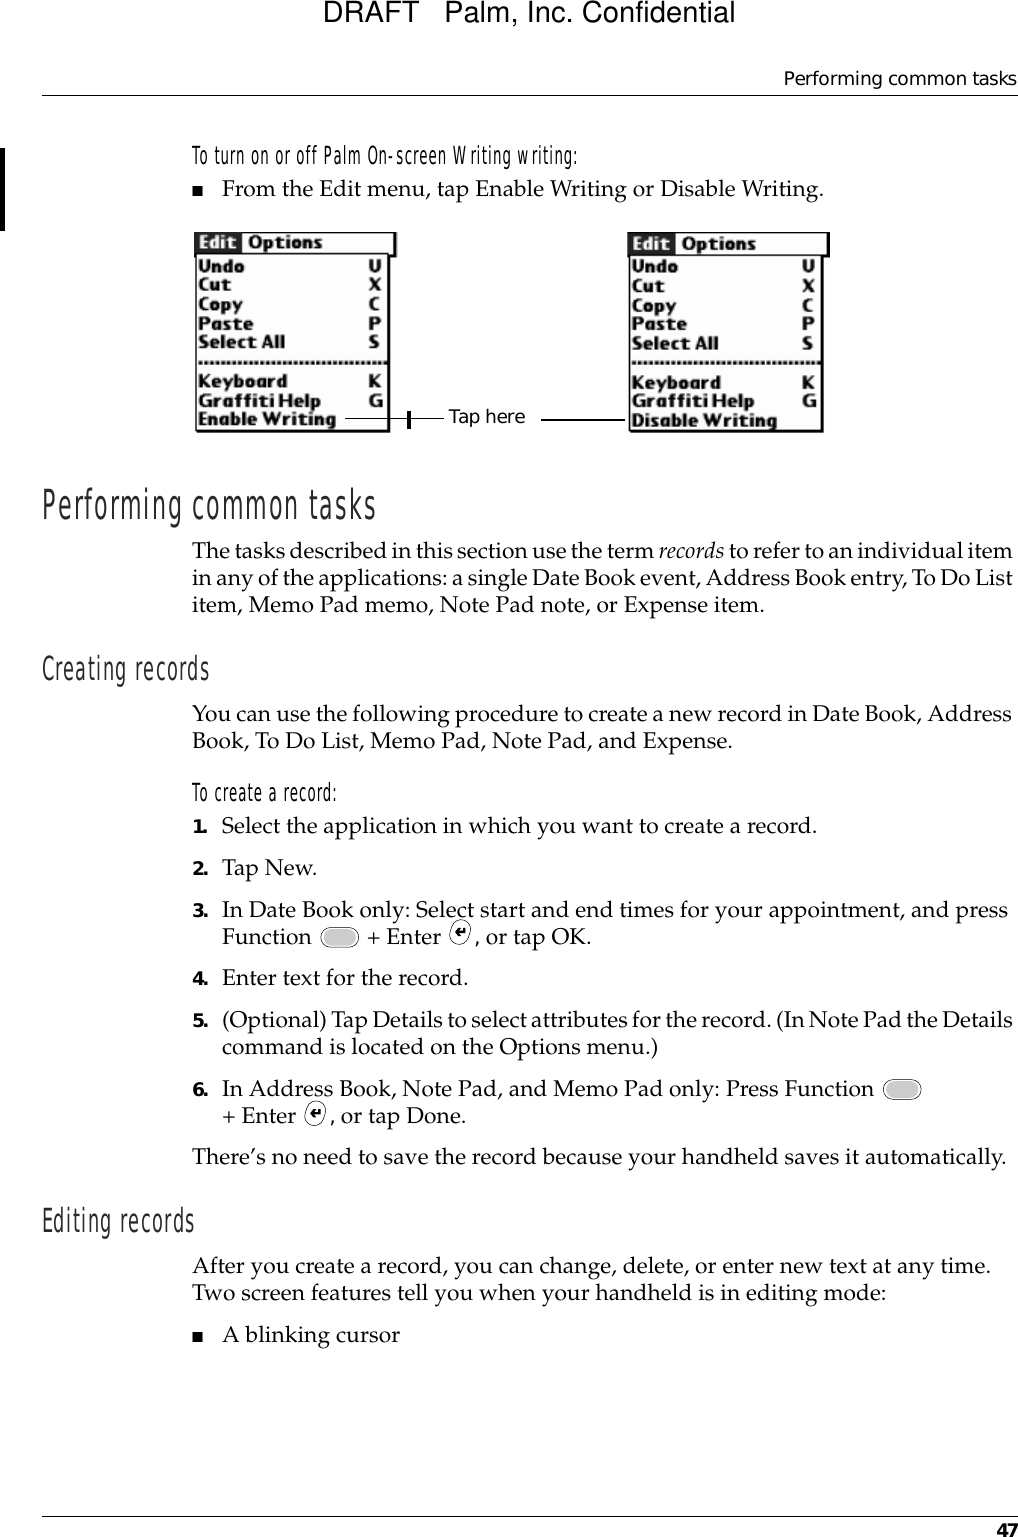
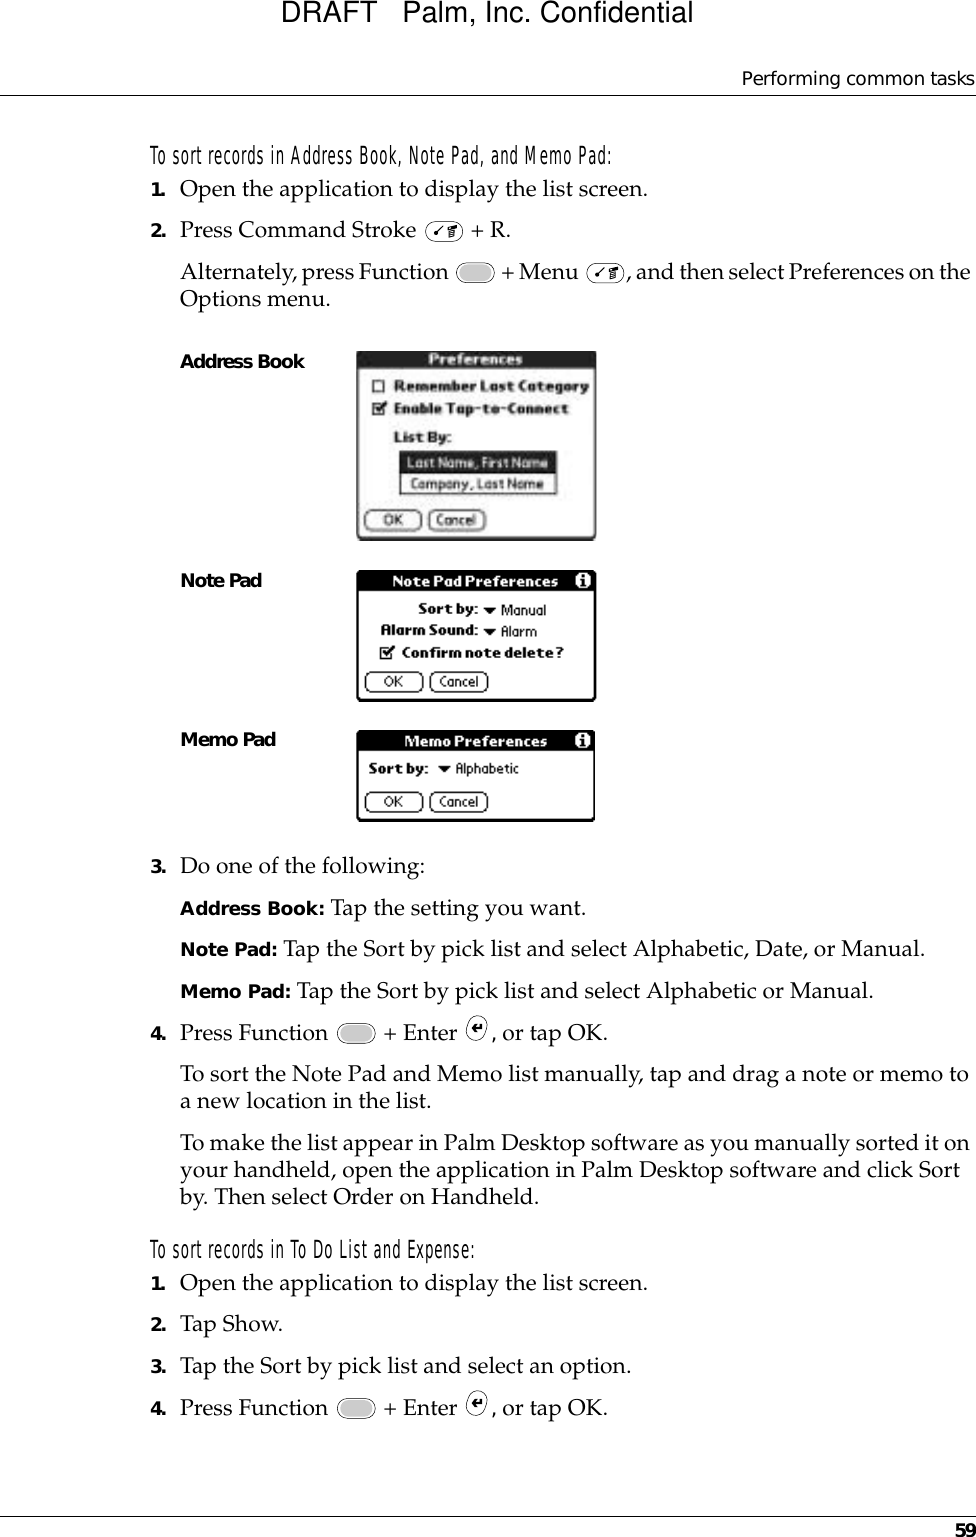
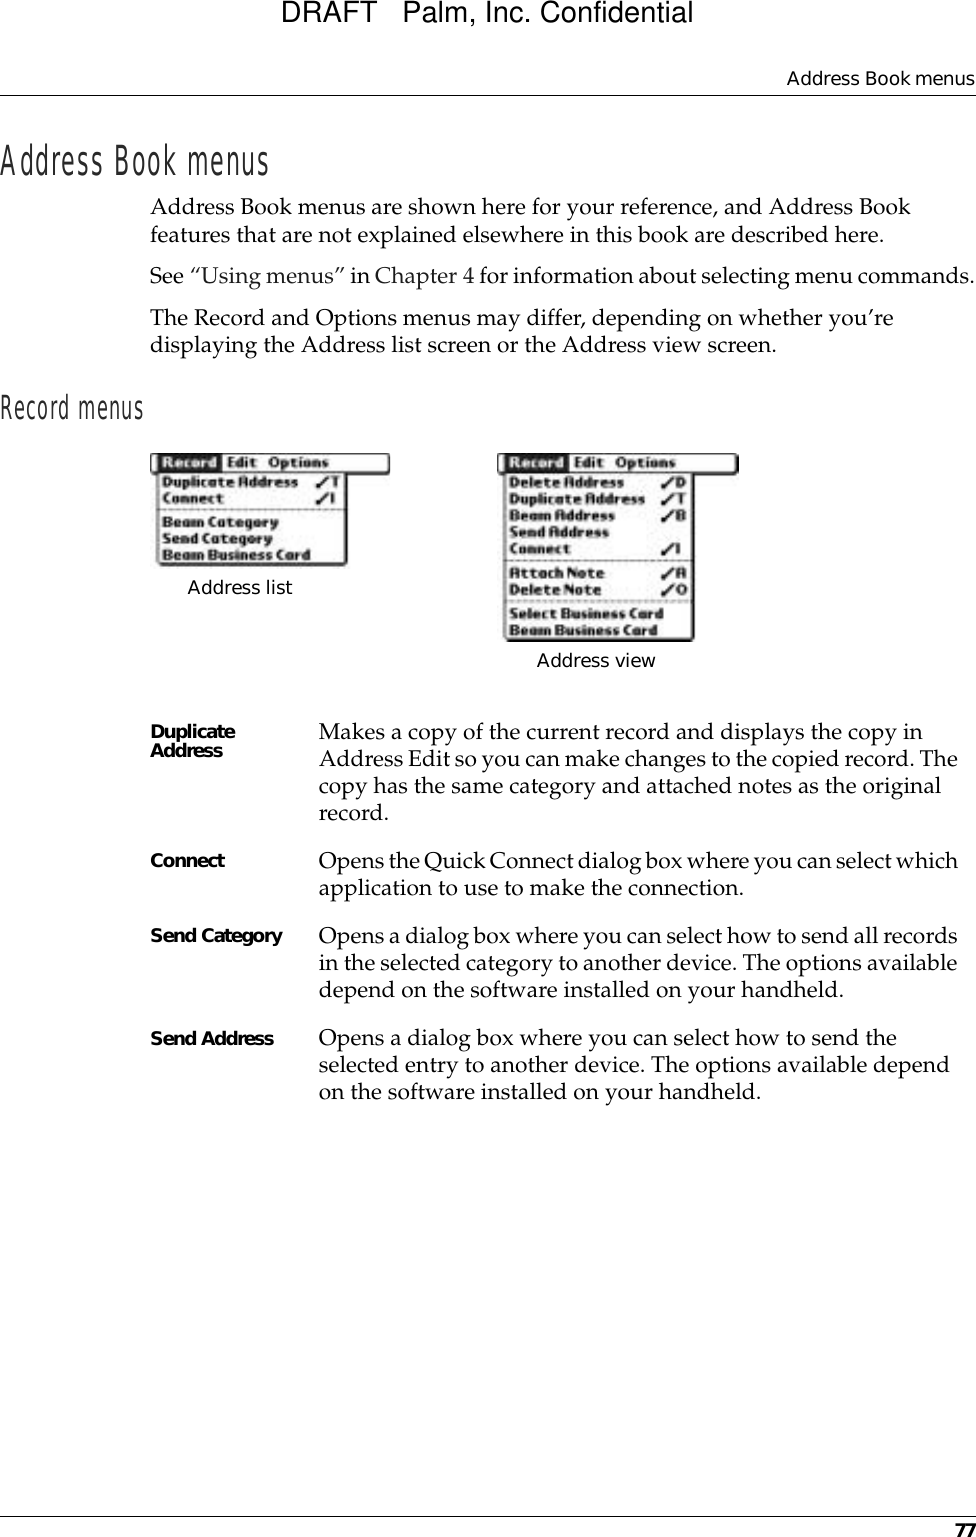
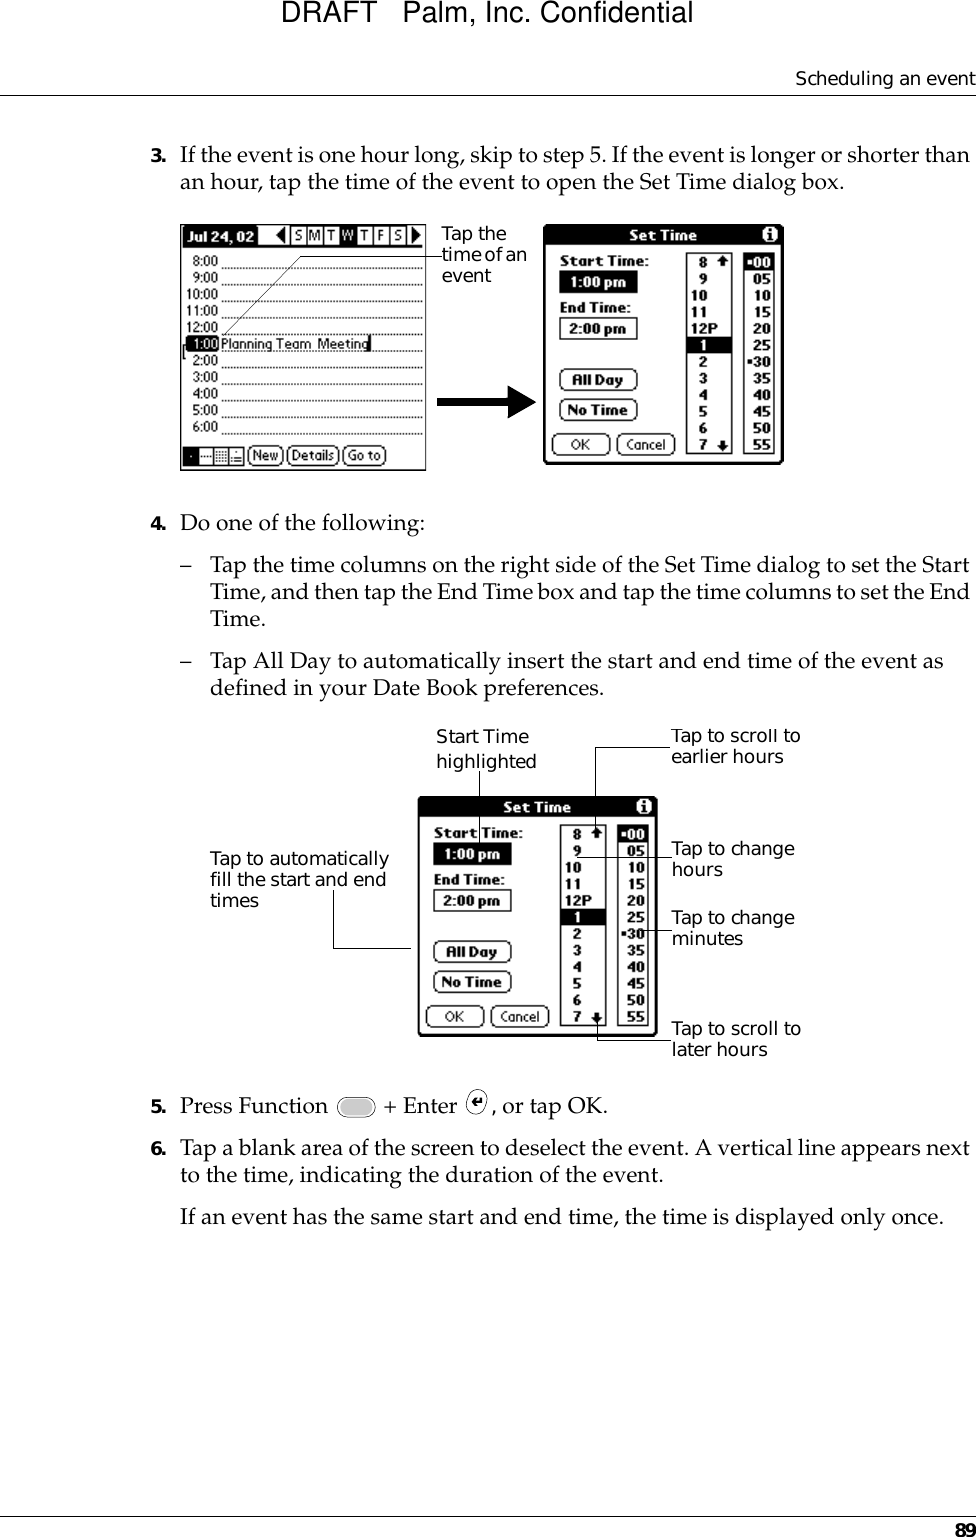
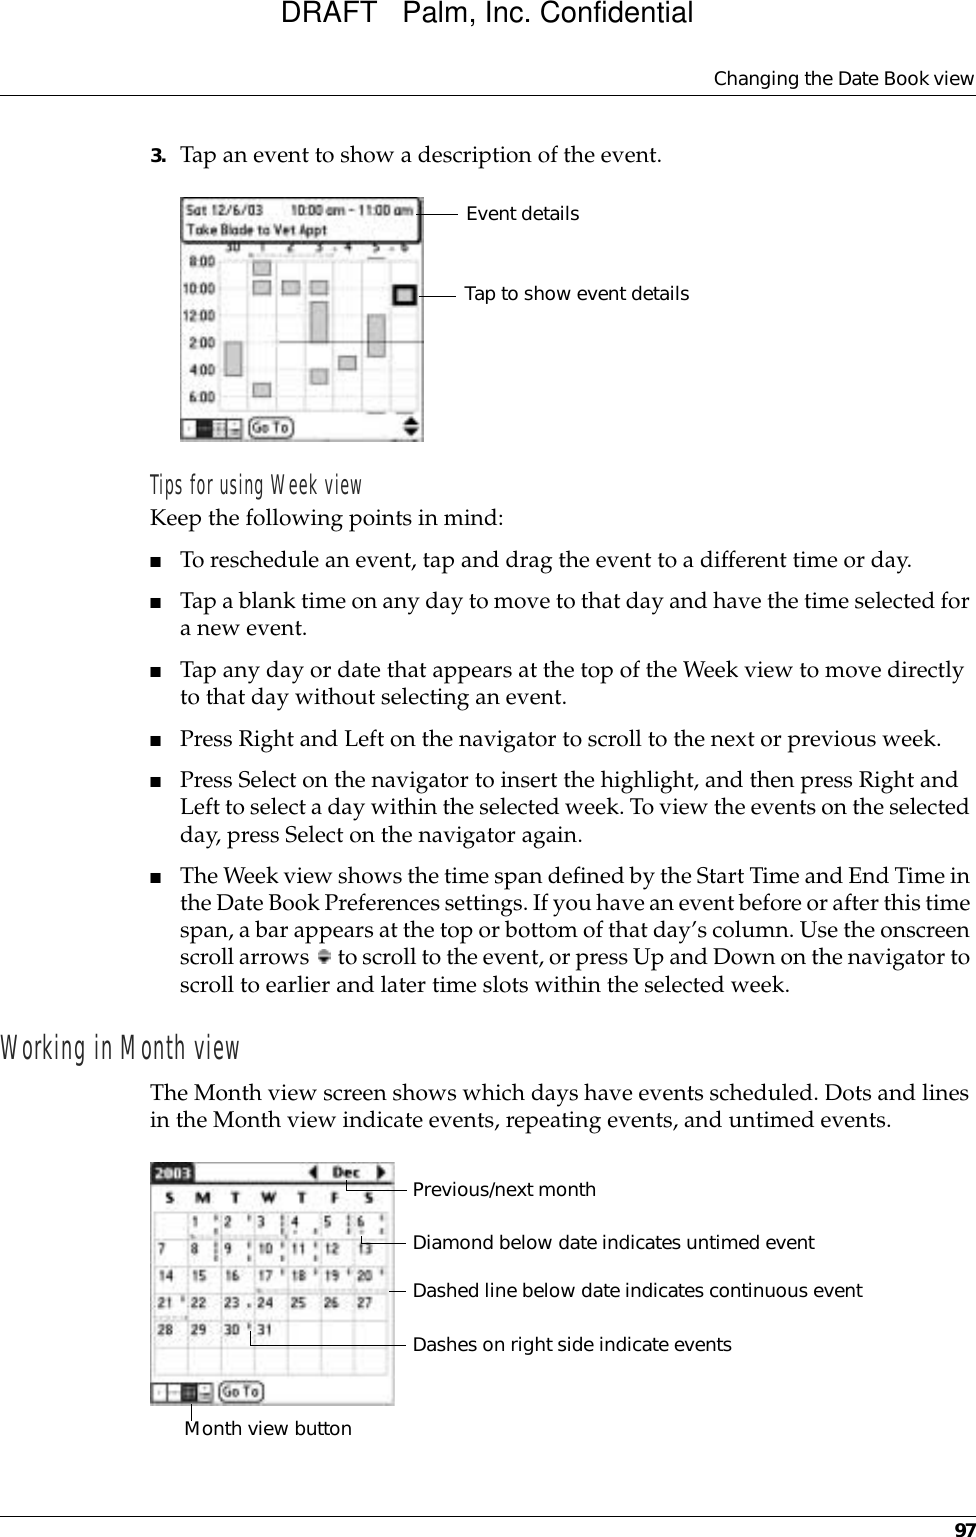
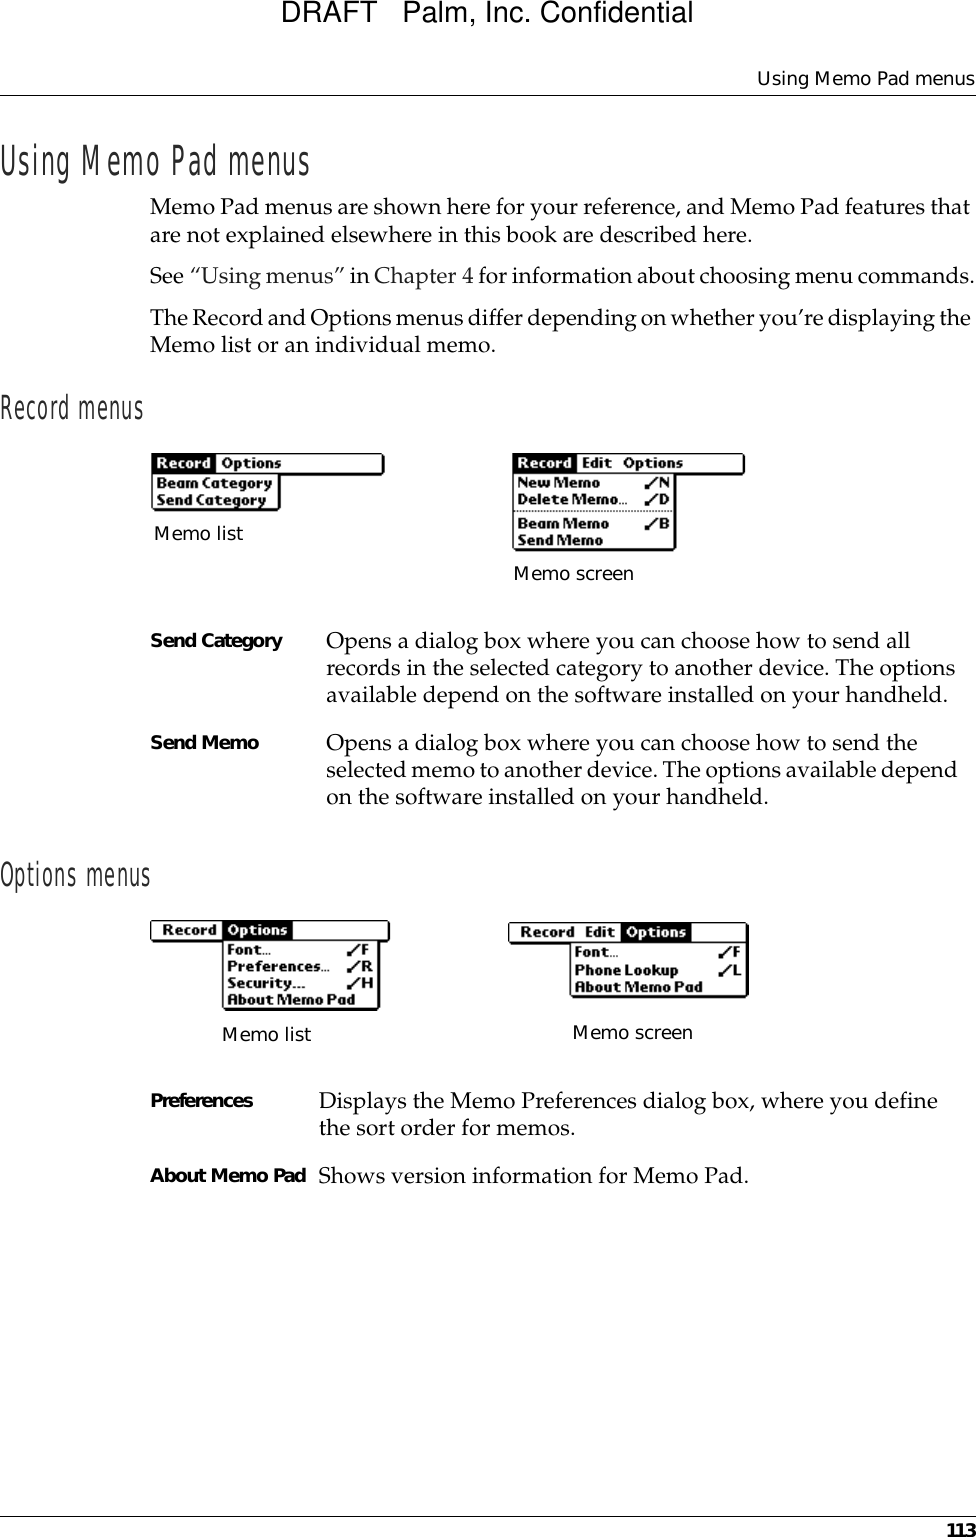
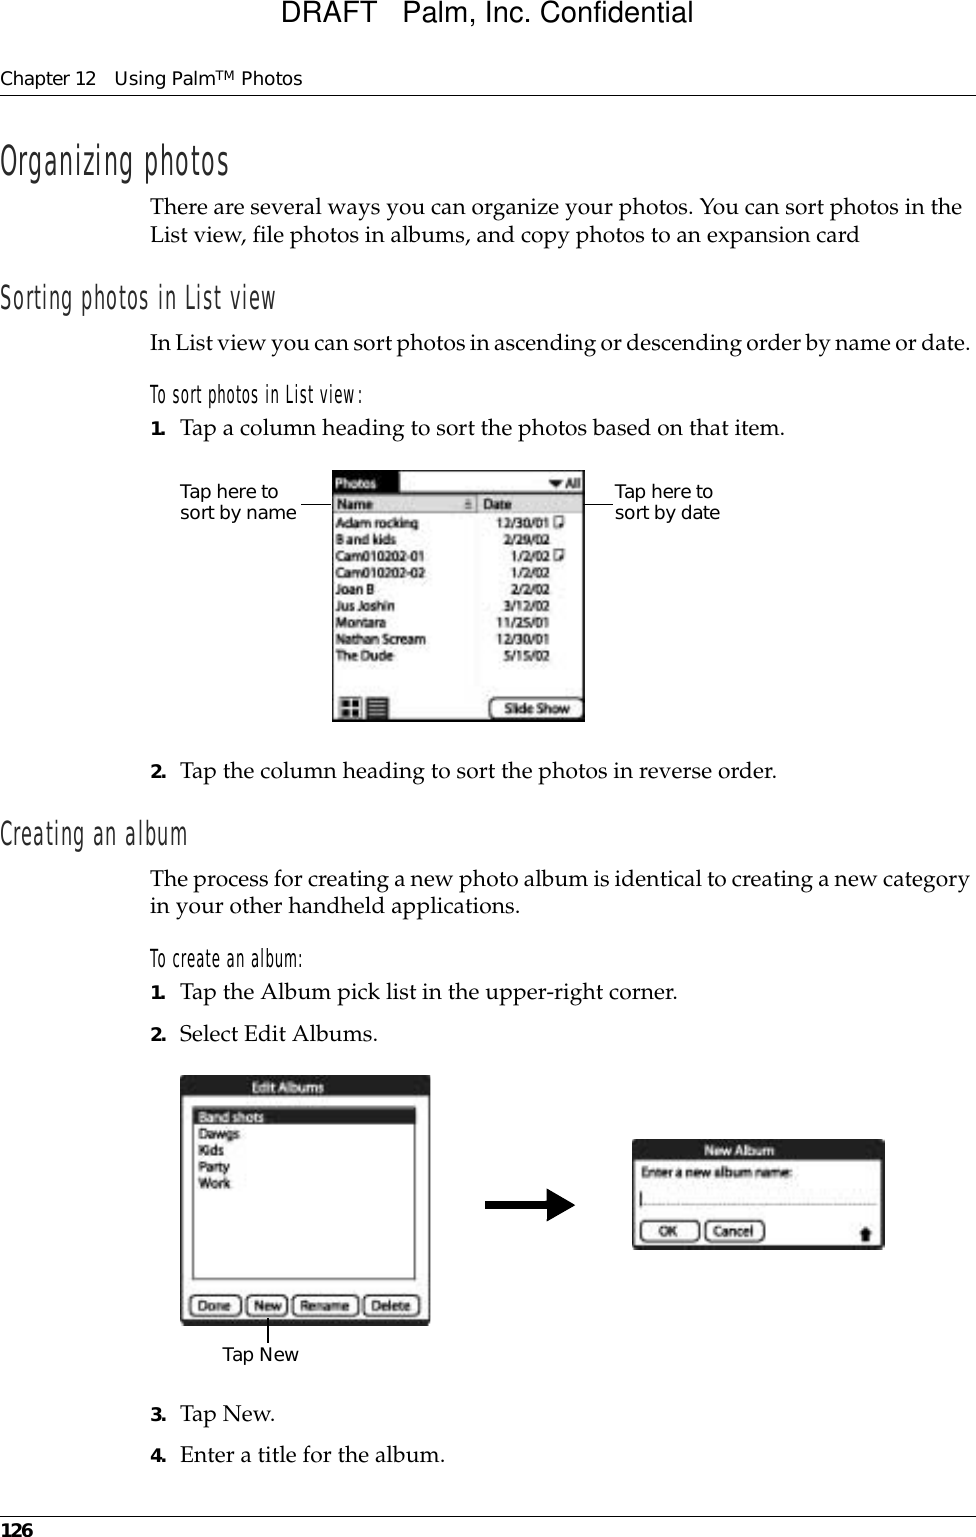
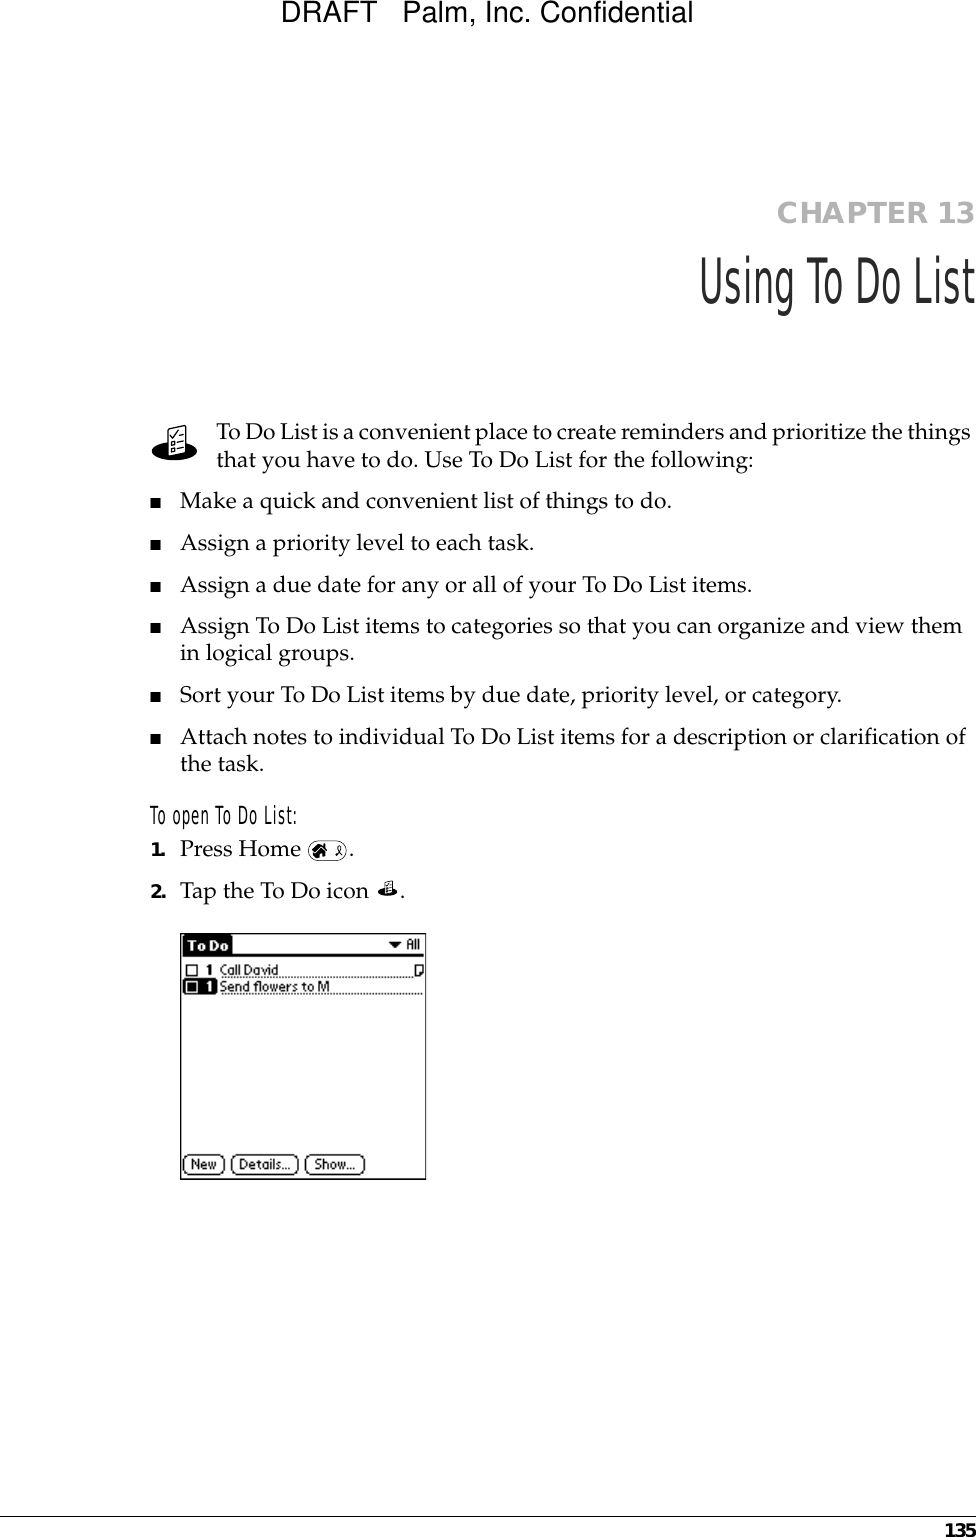
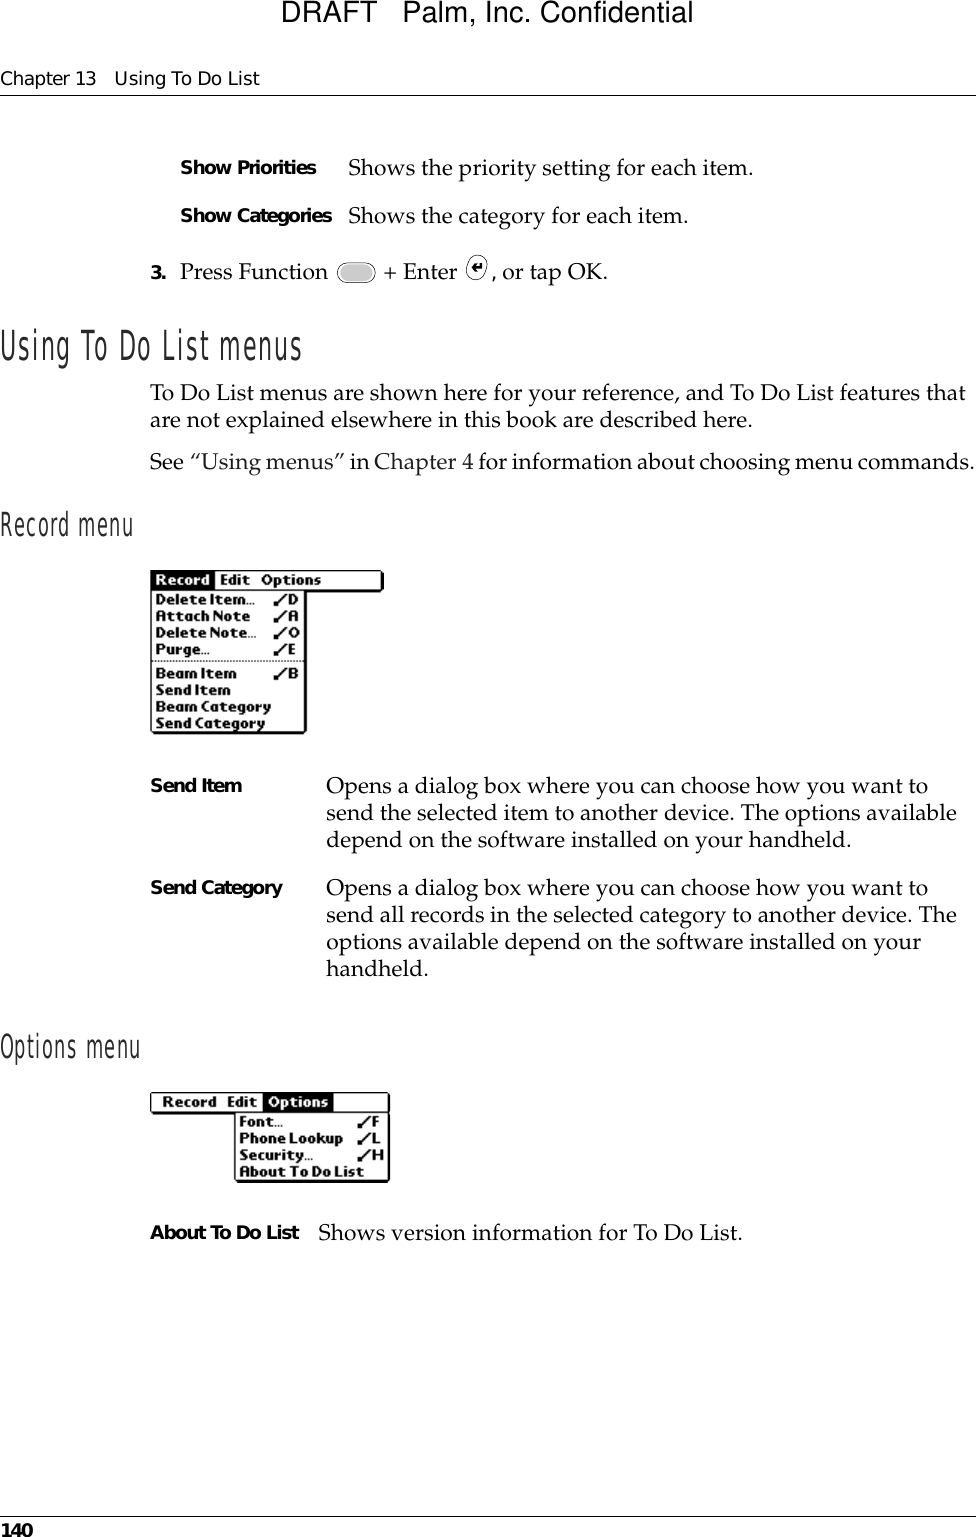
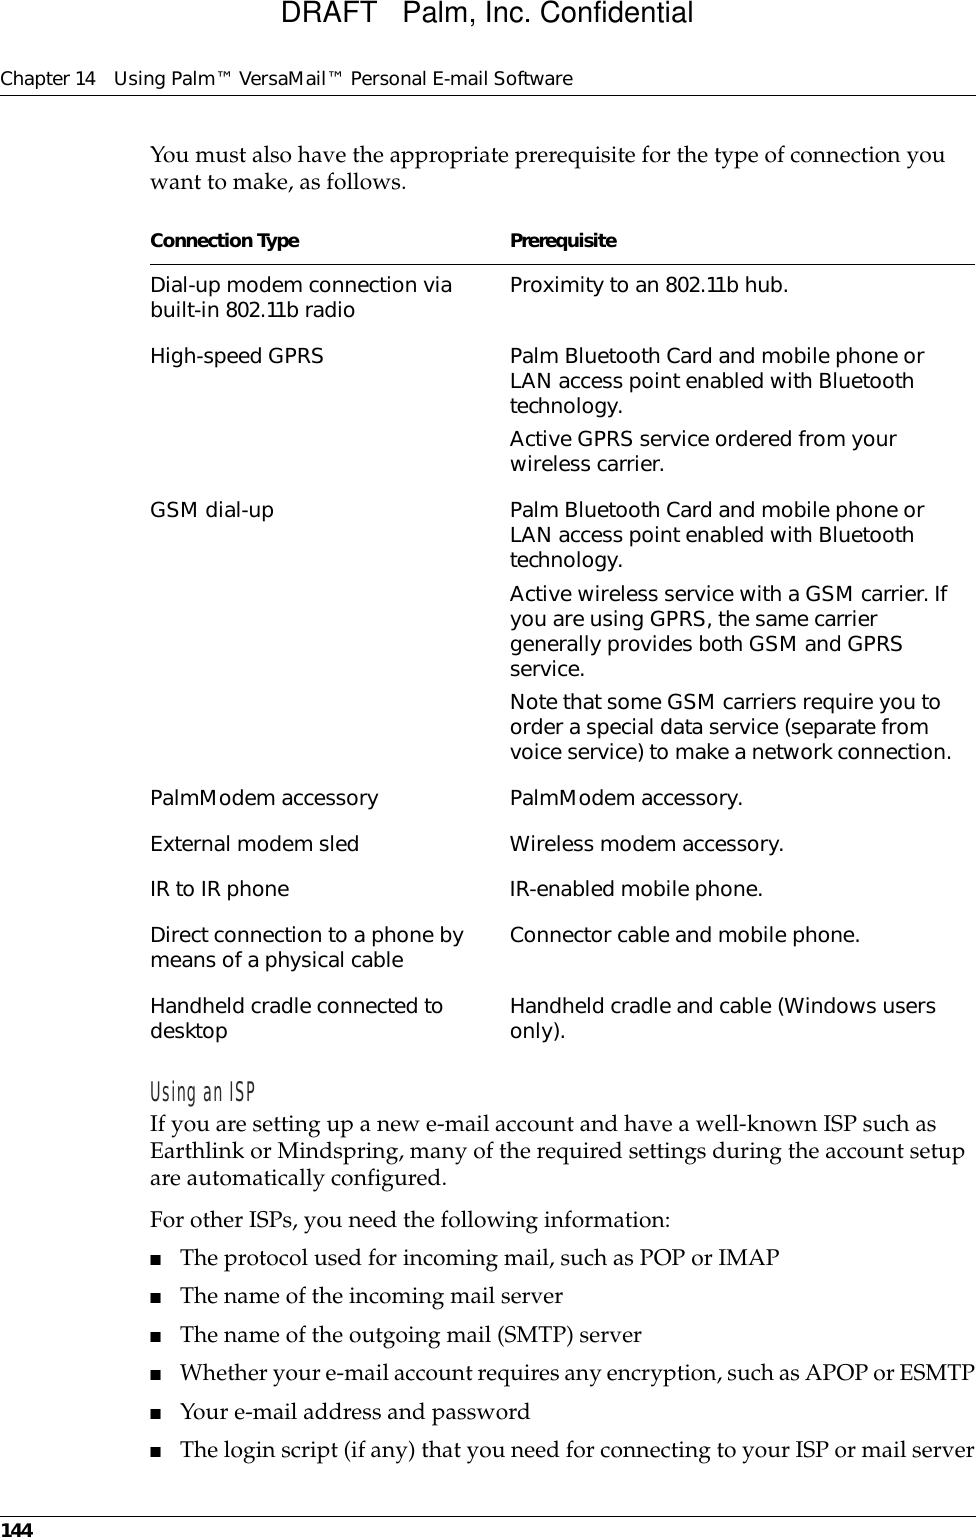
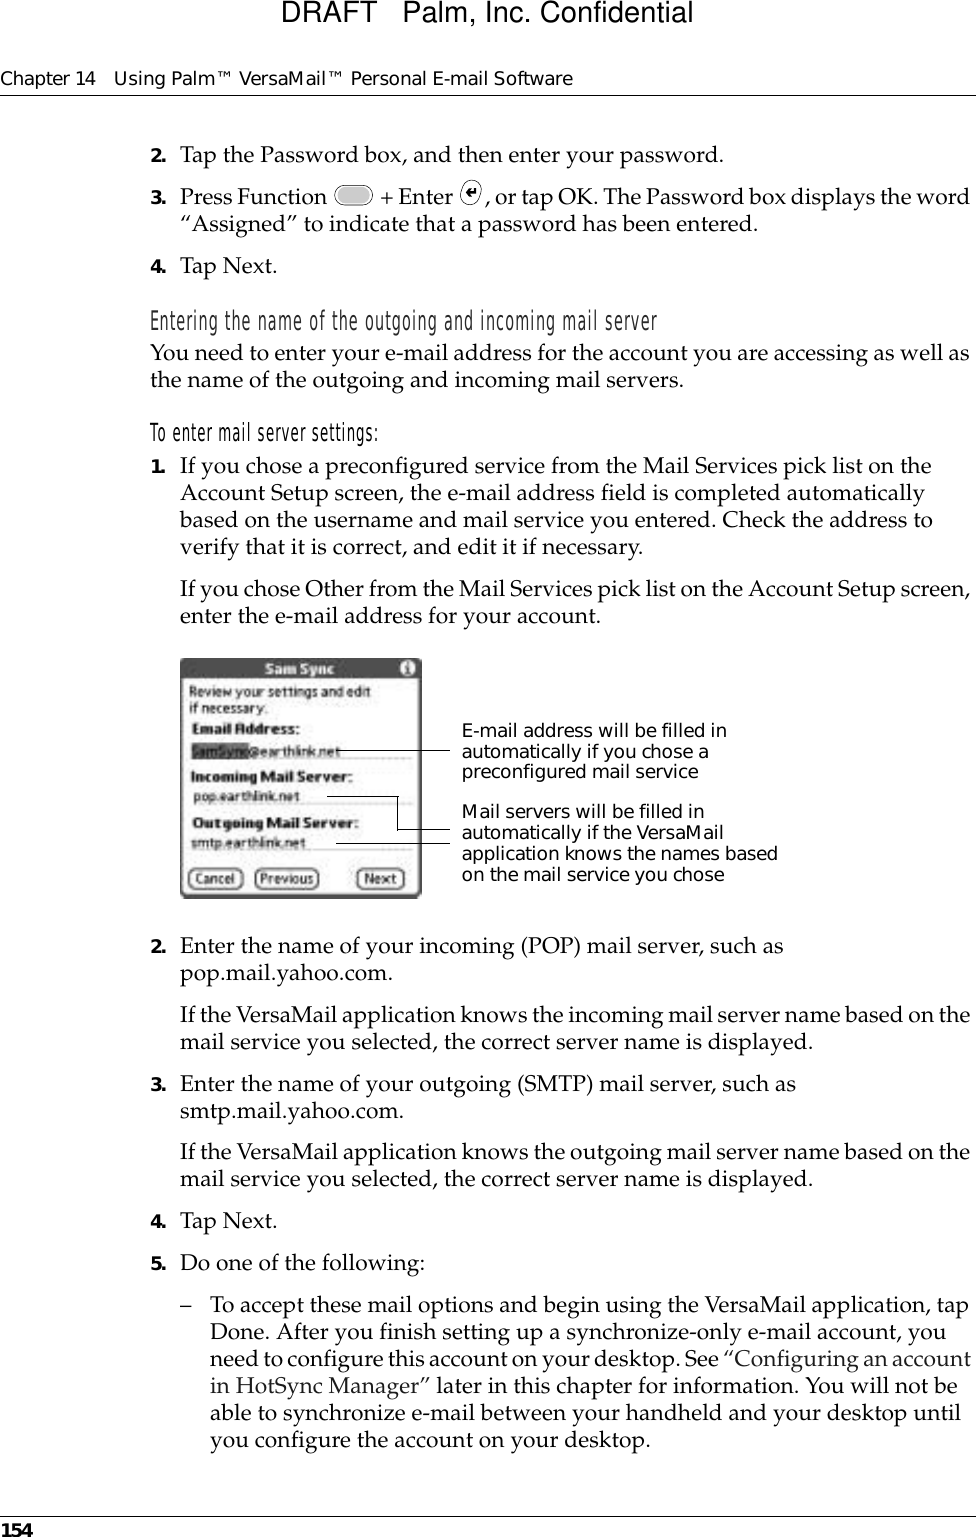
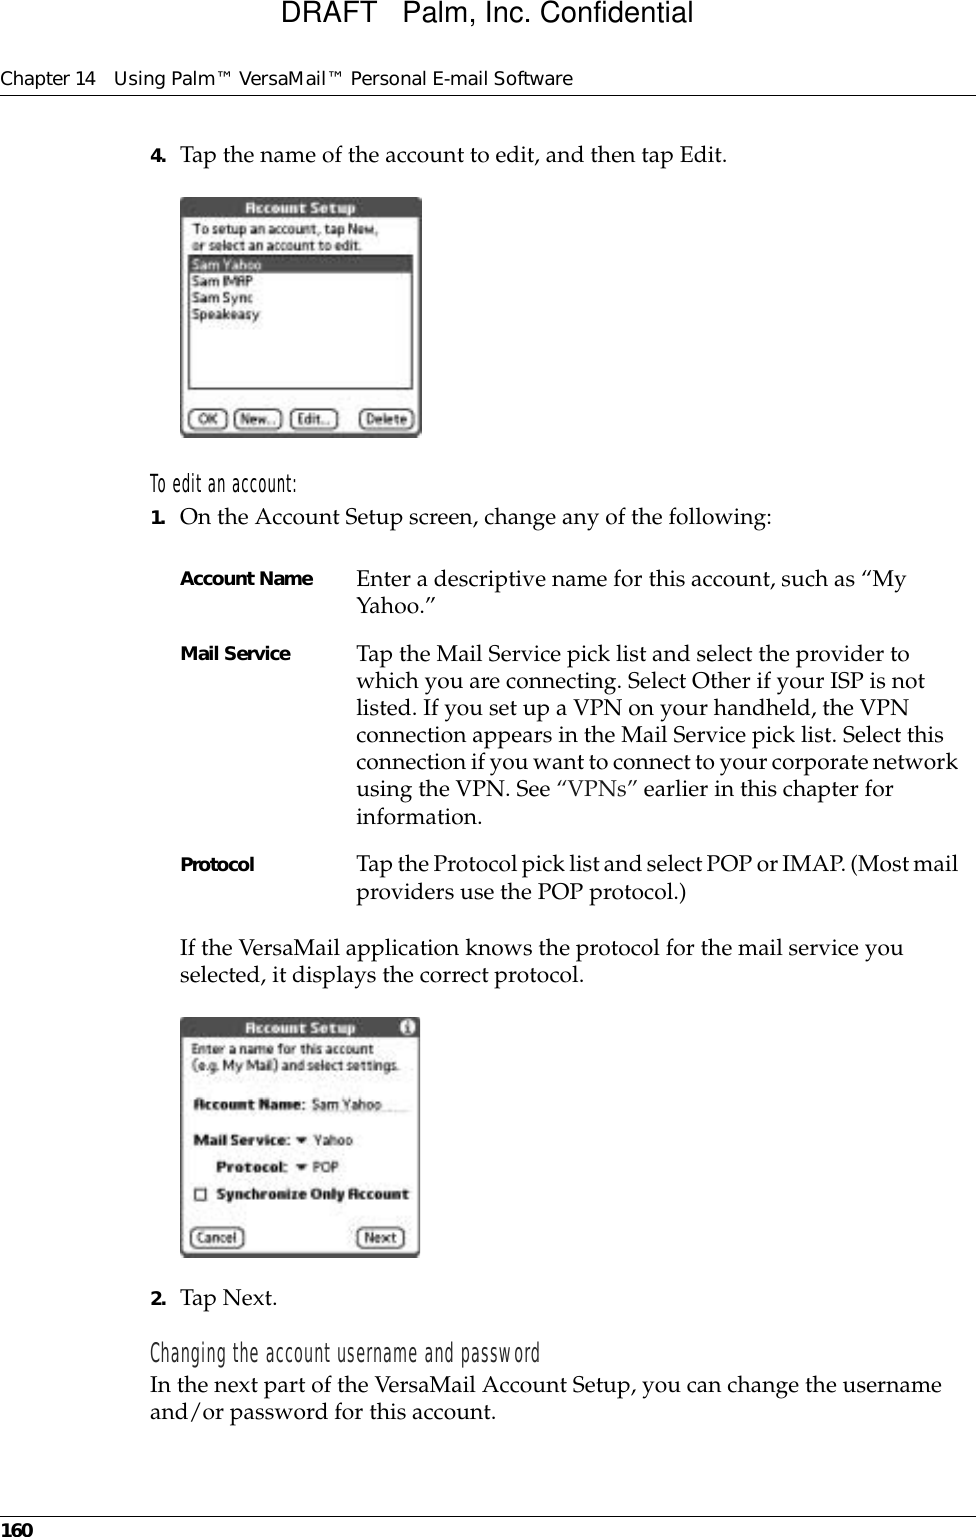
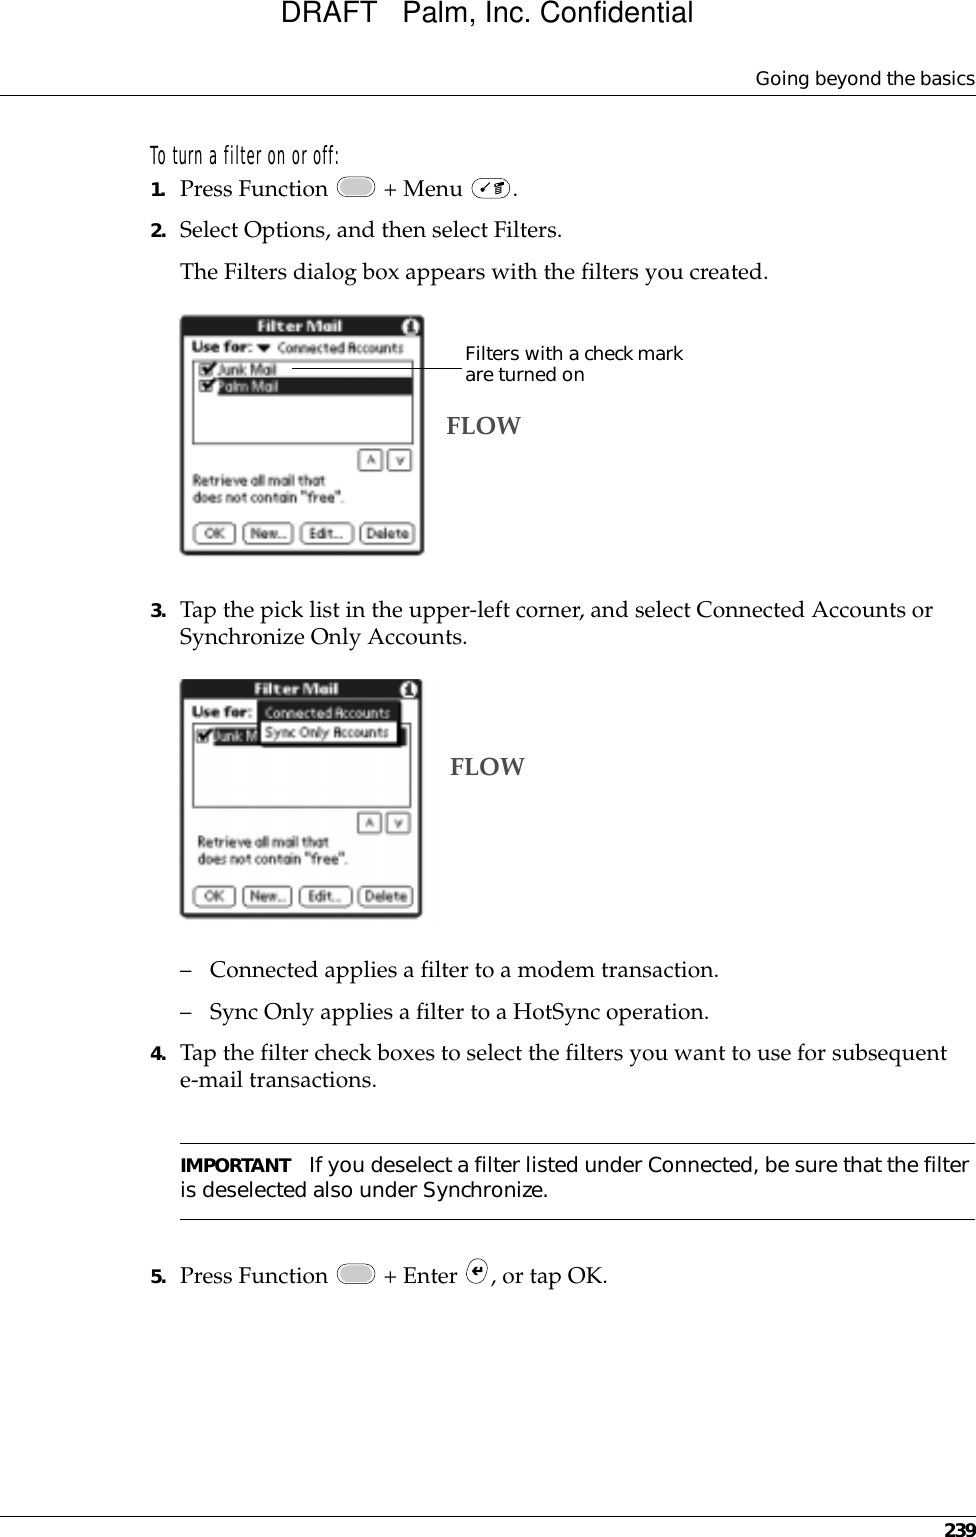
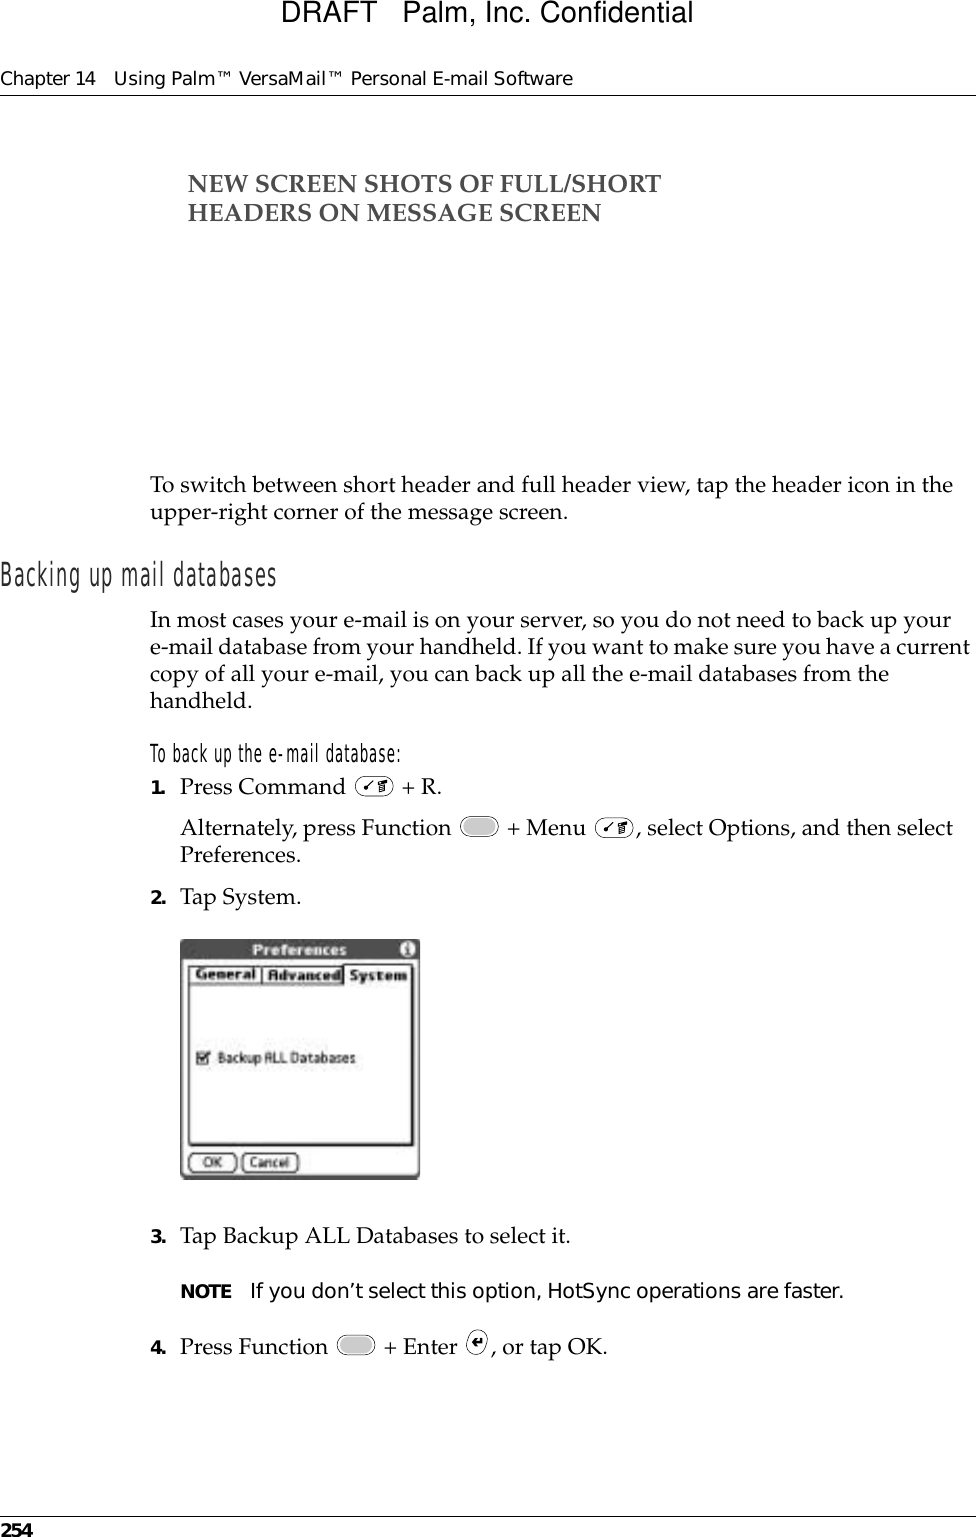
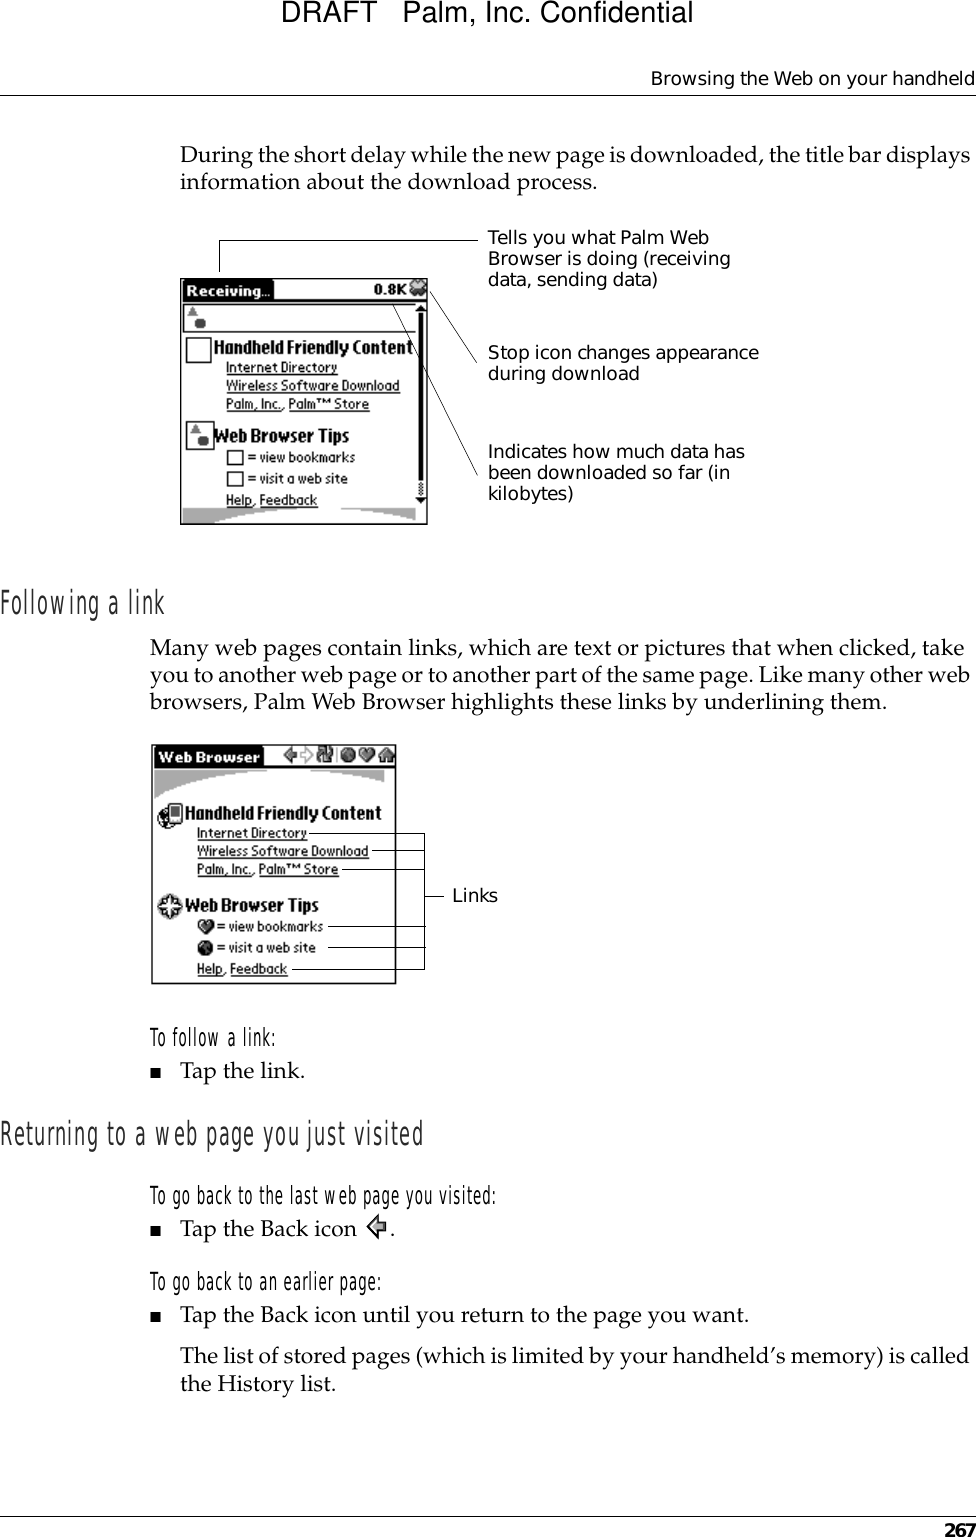
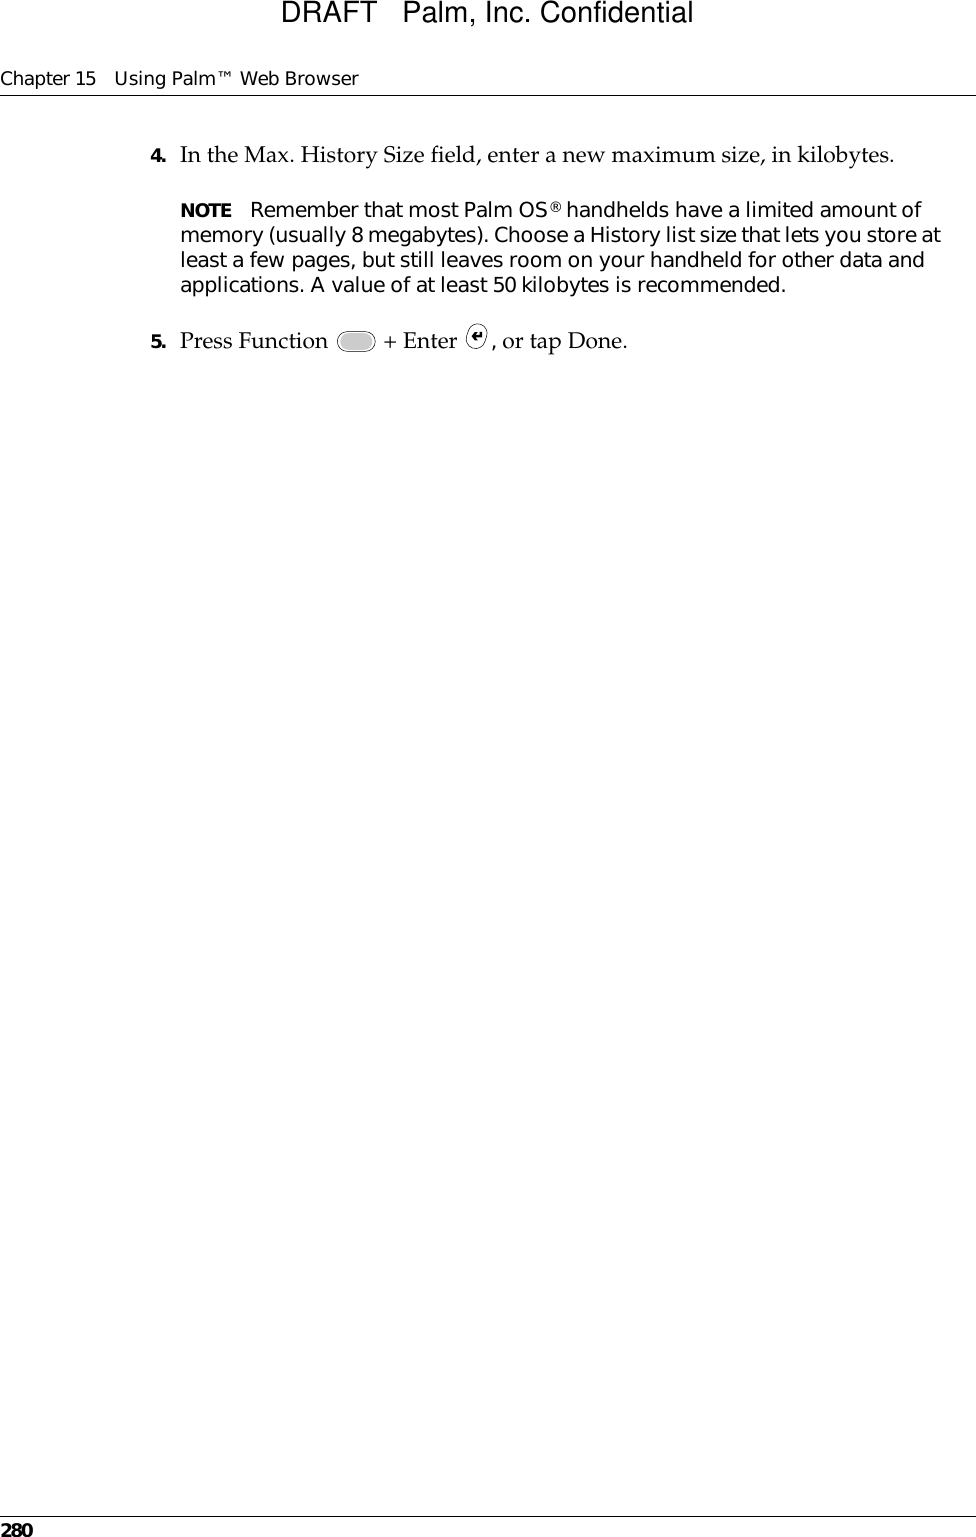
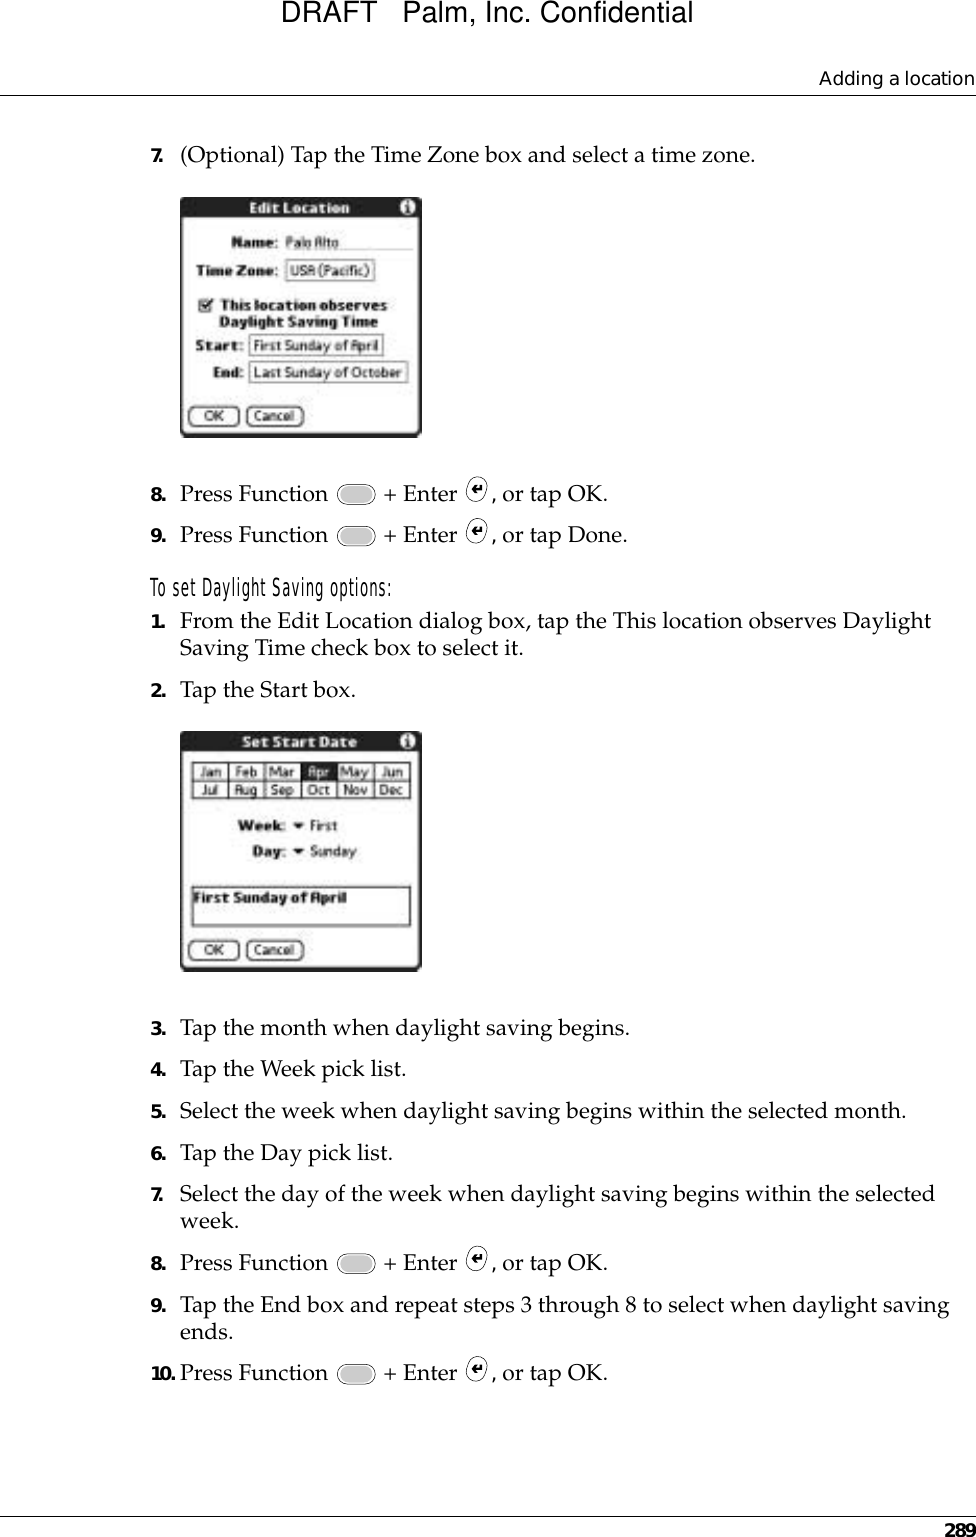
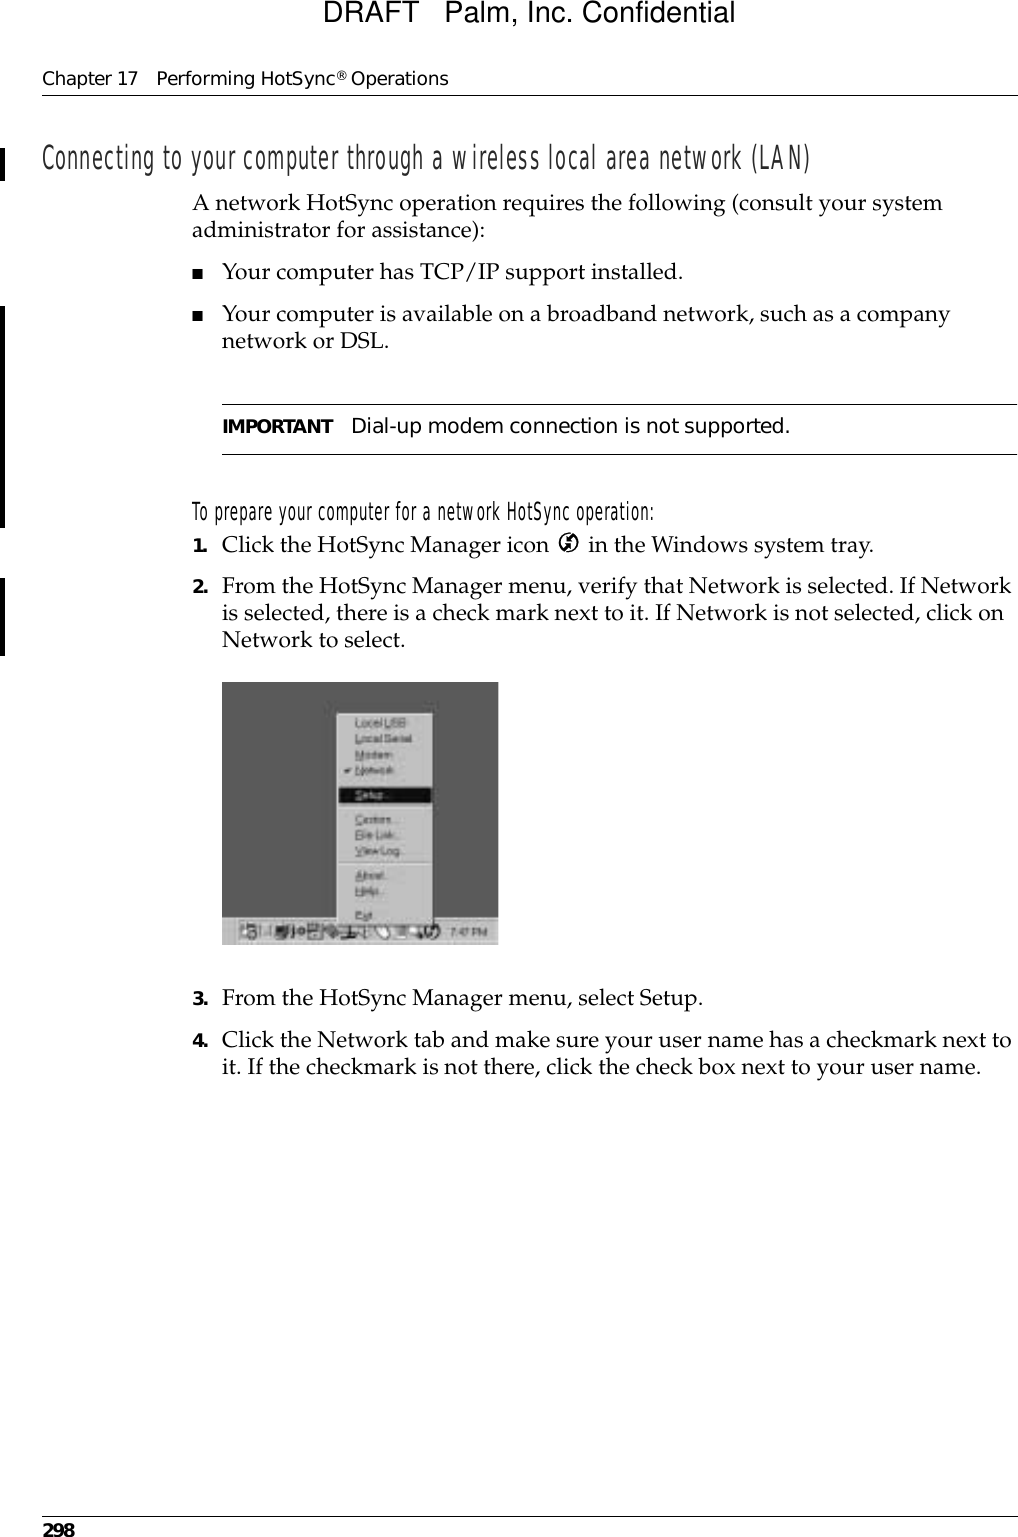
![Chapter 14 Using Palm™ VersaMail™ Personal E-mail Software238The three pick lists and the edit line combine to create a statement that identifies the type of e-mail and where you want the e-mail stored. For example, a filter might read, “If the [Subject] [Contains] sales meeting, Then get mail and move to [Sales].” When you use this filter to sort incoming e-mail, any e-mail containing sales meetings in the subject line is filed in the Sales folder.6. Press Function + Enter , or tap OK.The filter appears in the Filters list.Selected filters execute in the order in which they appear on the list. Move filters up and down the list to ensure that they execute in the correct order.NOTE Filters created on the handheld also apply to e-mail synchronization. See “Synchronizing an account” earlier in this chapter for more information. Turning filters on and offBy default, a filter that is turned on or selected affects all subsequent downloads of e-mail until you deselect it. More than one filter can be in effect at once. Before you download e-mail, be sure to turn on the filters you want and turn off those you don’t want.To pick list Select the message header field with the information contained in the edit line: To, From, Subject, cc, Date, Size. For example, you might select Date to download only messages that are less than a certain number of days old. Contains pick list Select a filter action: Contains, Starts with, Does NOT Contain. Edit line Enter the text that must be found in the header field. For example, if you want to sort e-mail with the subject Sales, enter “Sales.” If you enter more than one criteria, separate each with a comma, for example—Sales, New York.Then get mail and move to pick list Select the folder or mailbox into which you want your filtered e-mail to go. You can also create a new folder for storing the incoming e-mail. Tap Edit Folders, and then create a new folder or delete or rename existing ones. FLOWDRAFT Palm, Inc. Confidential](https://usermanual.wiki/Palm/200000.User-Manual/User-Guide-321231-Page-250.png)

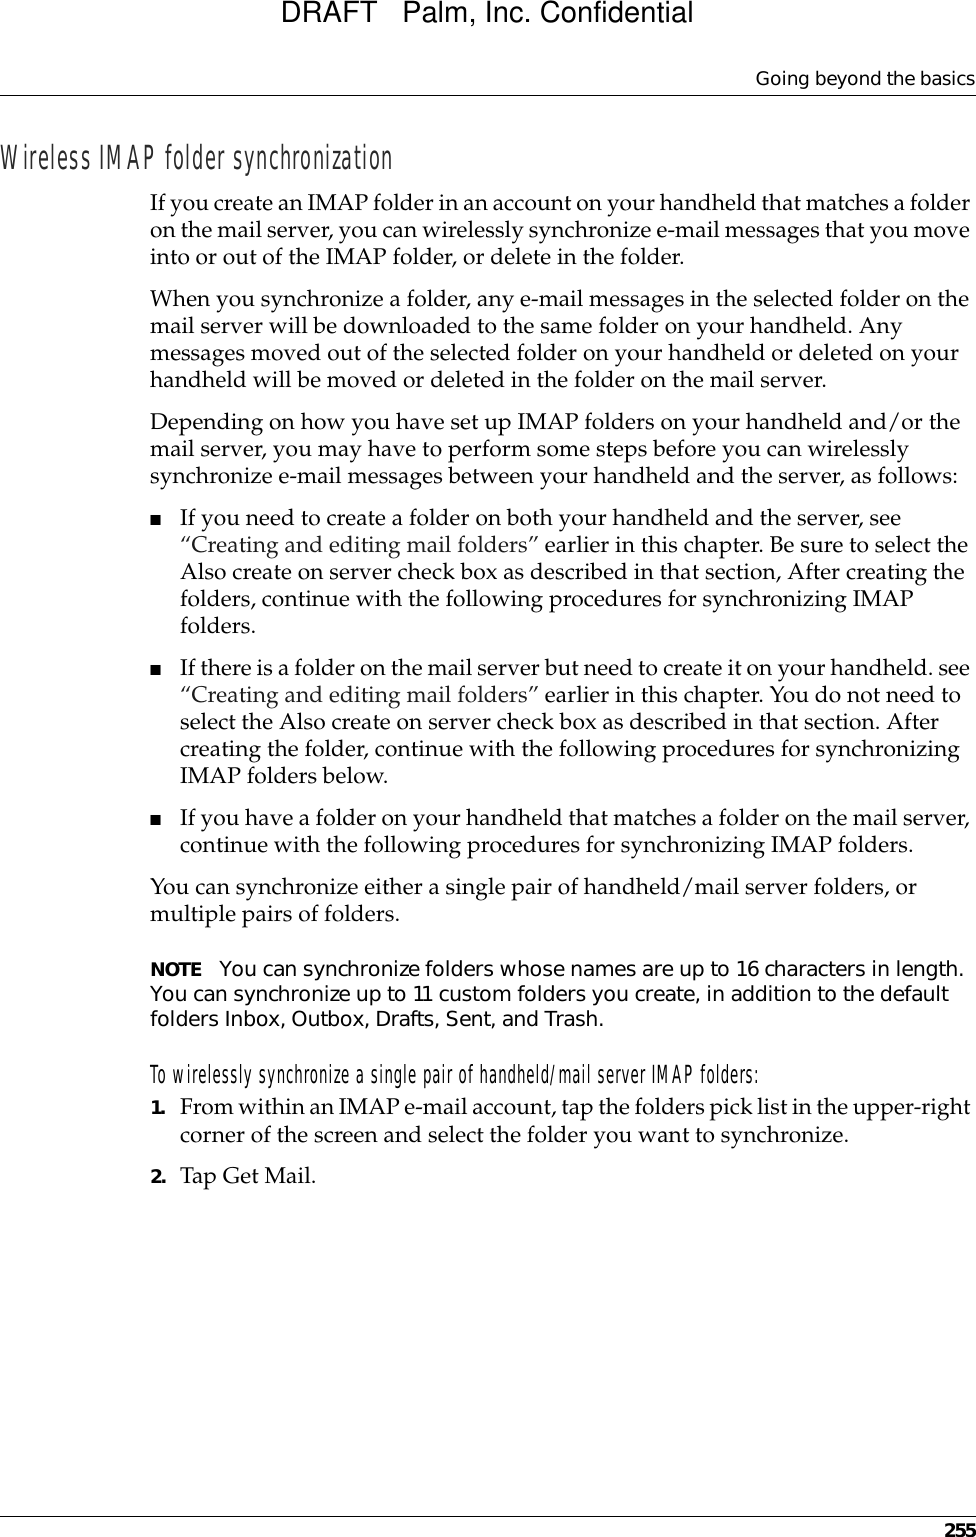

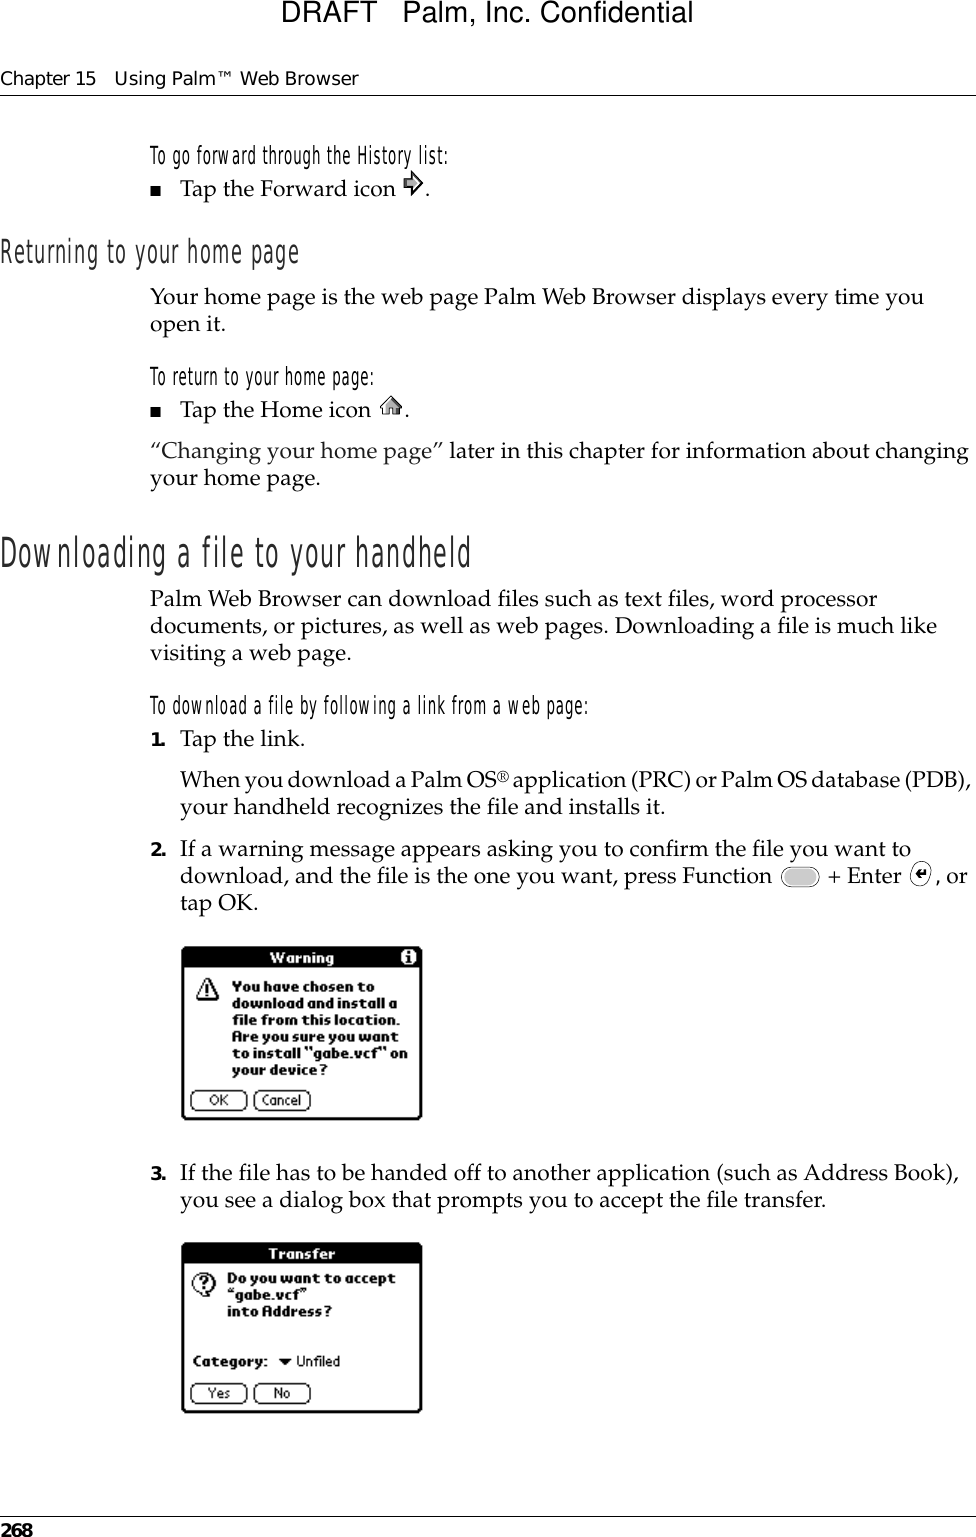

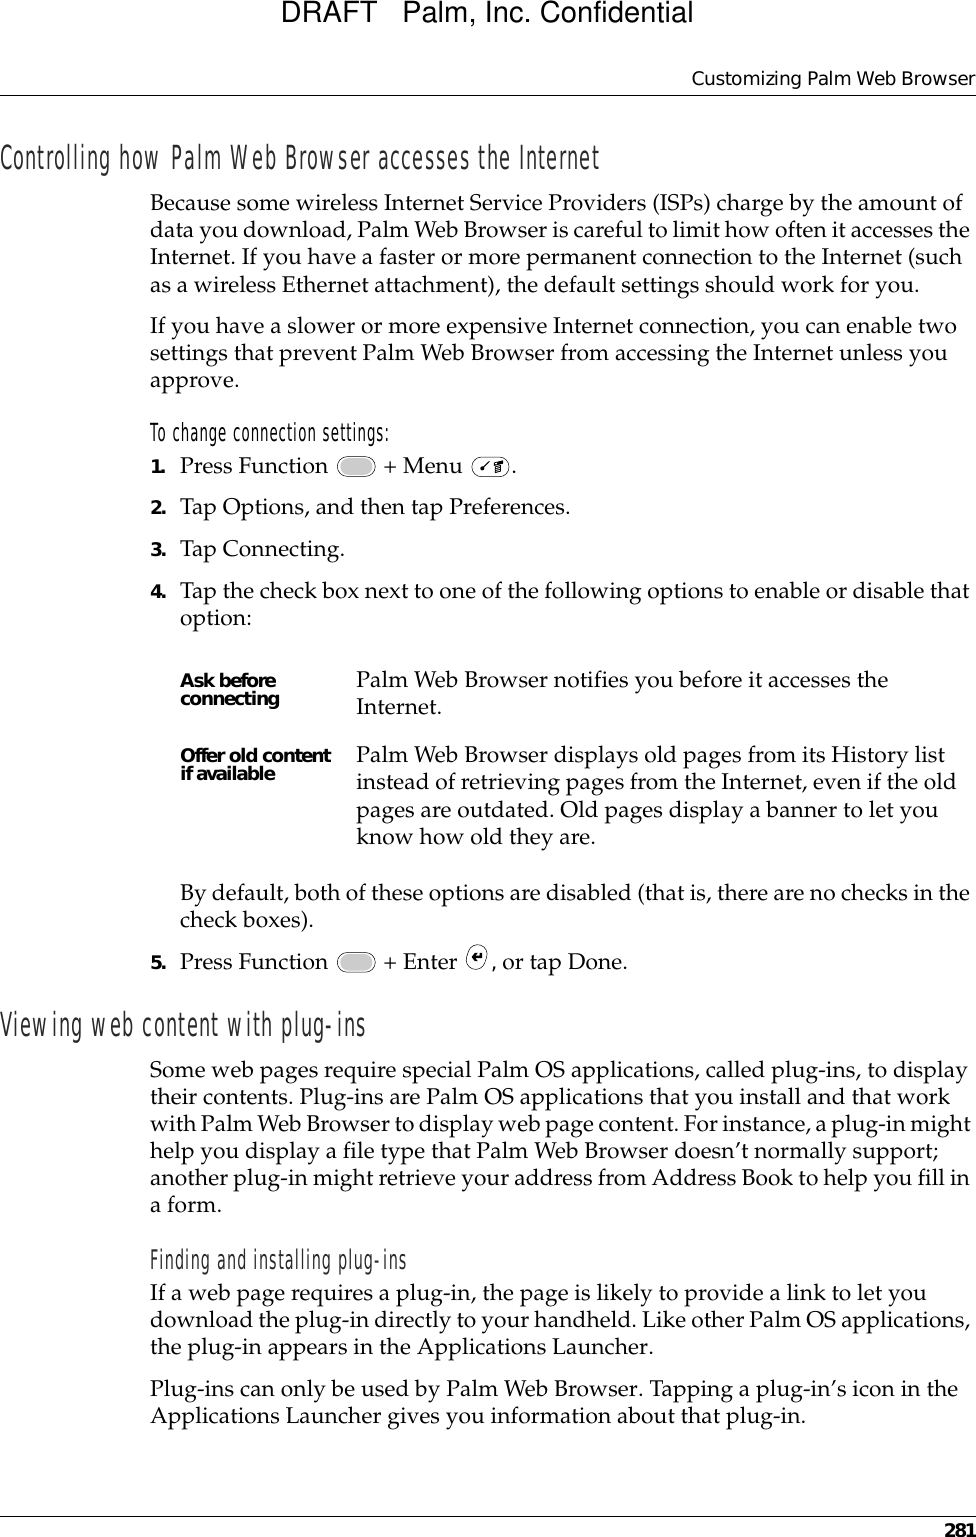

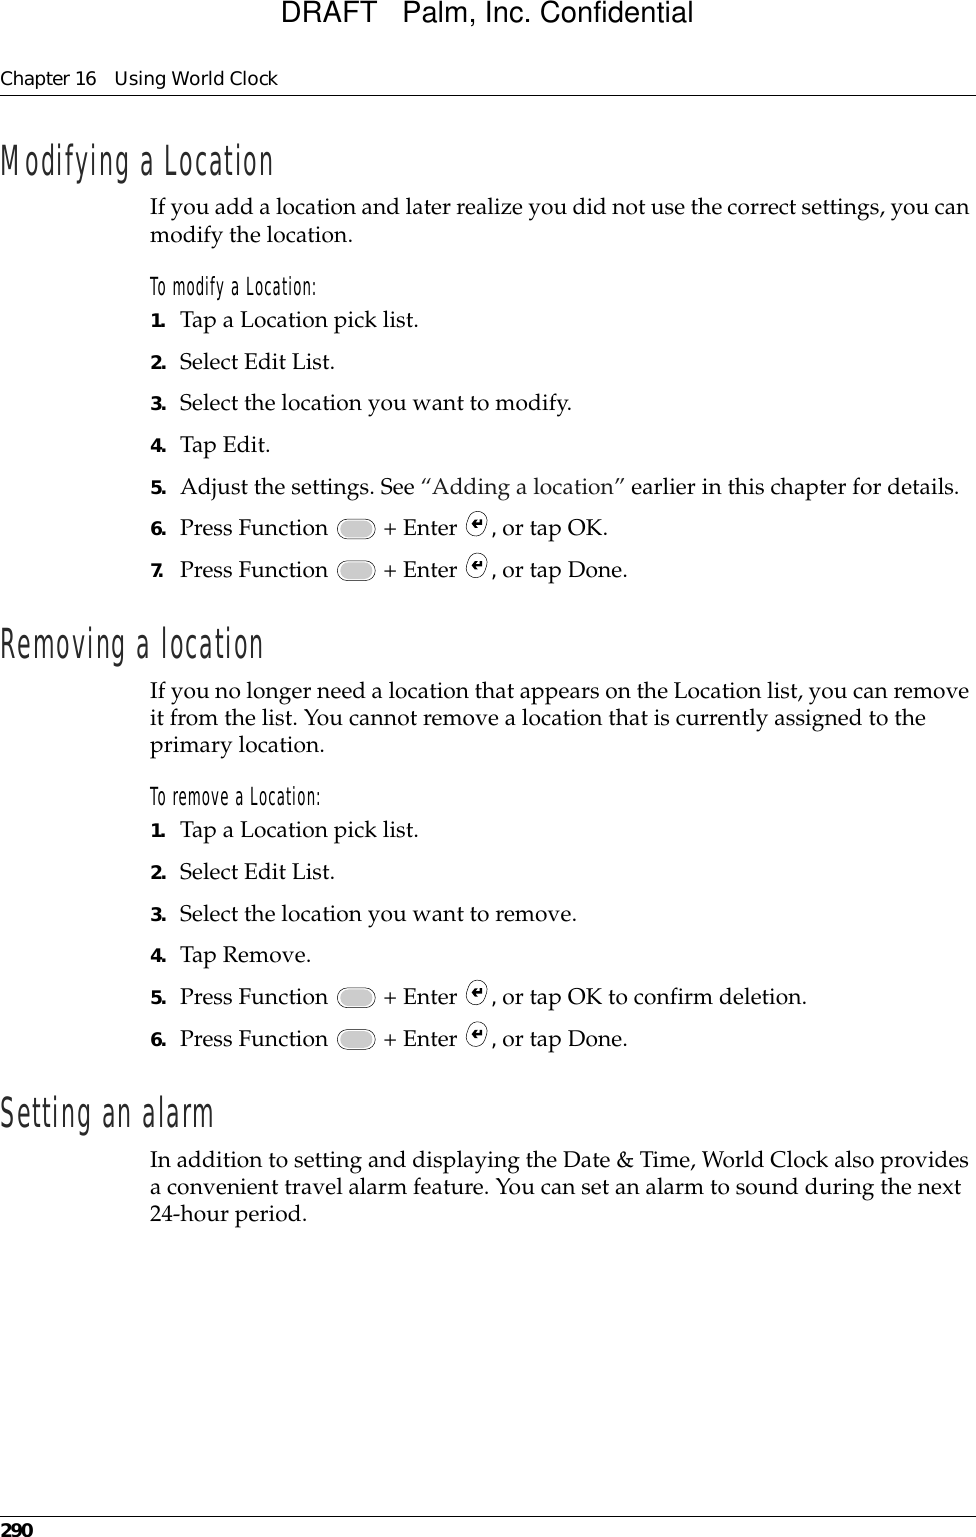

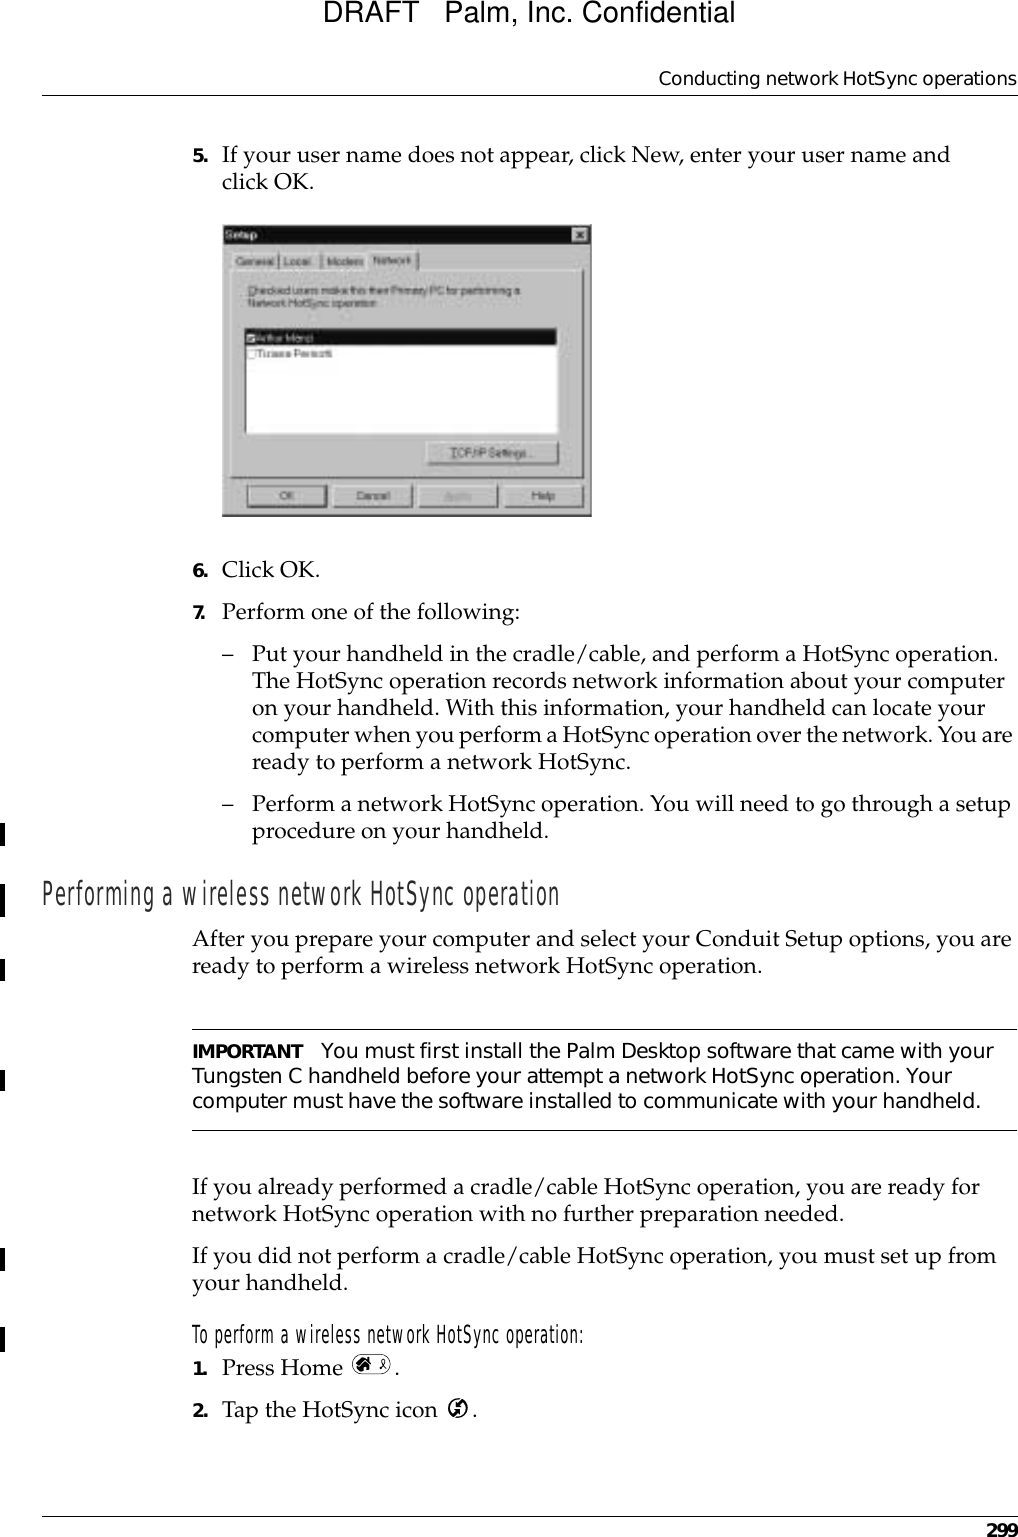


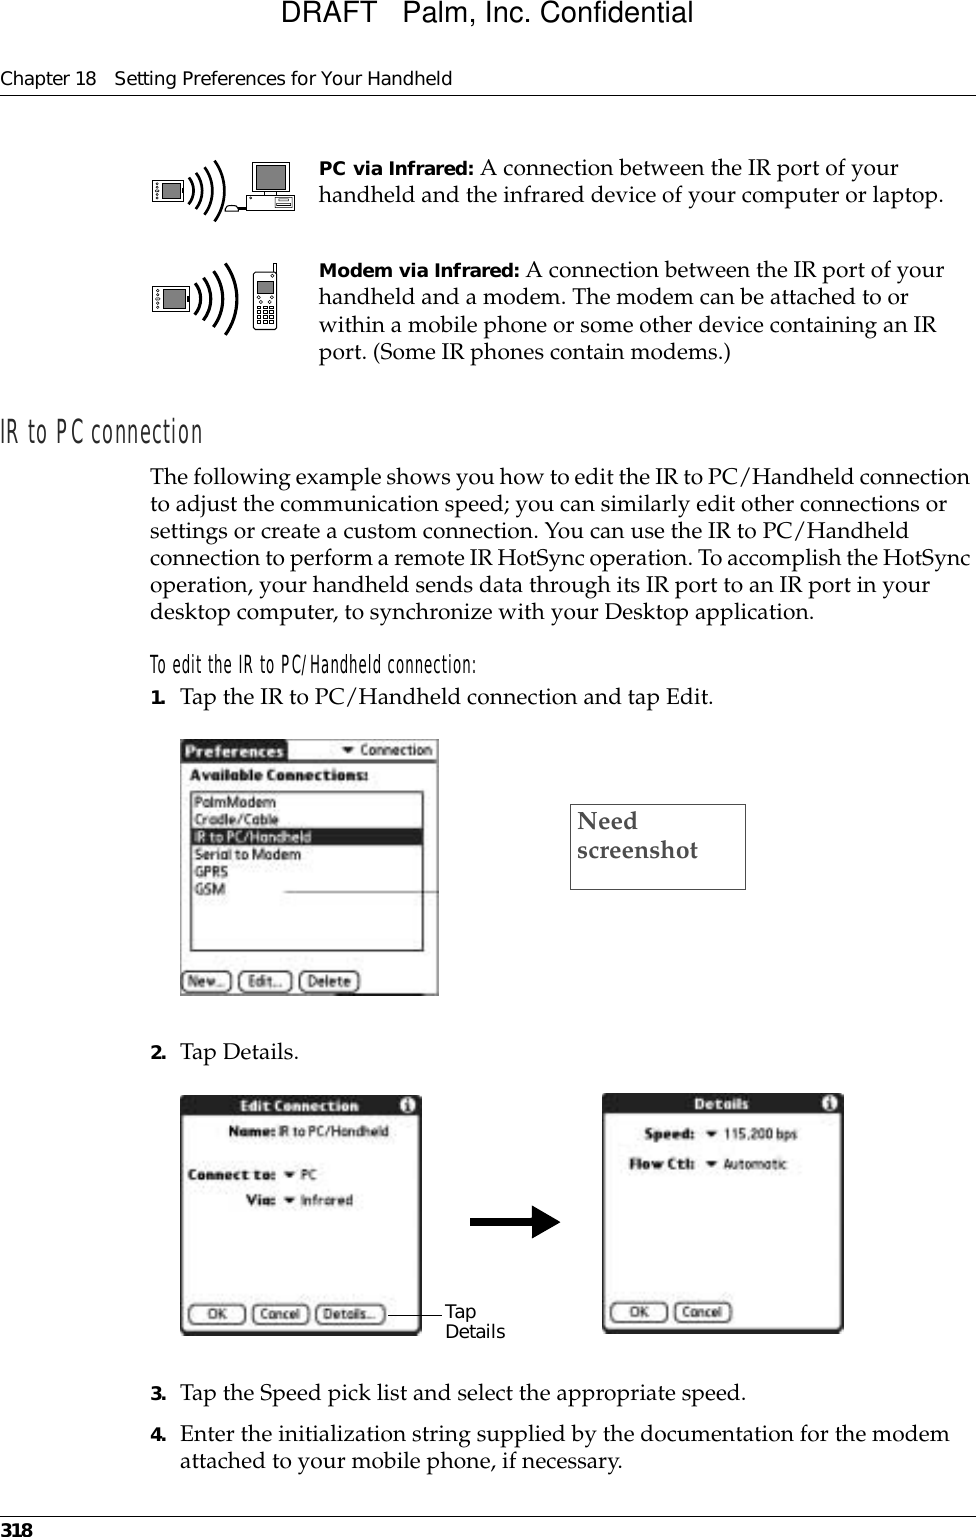
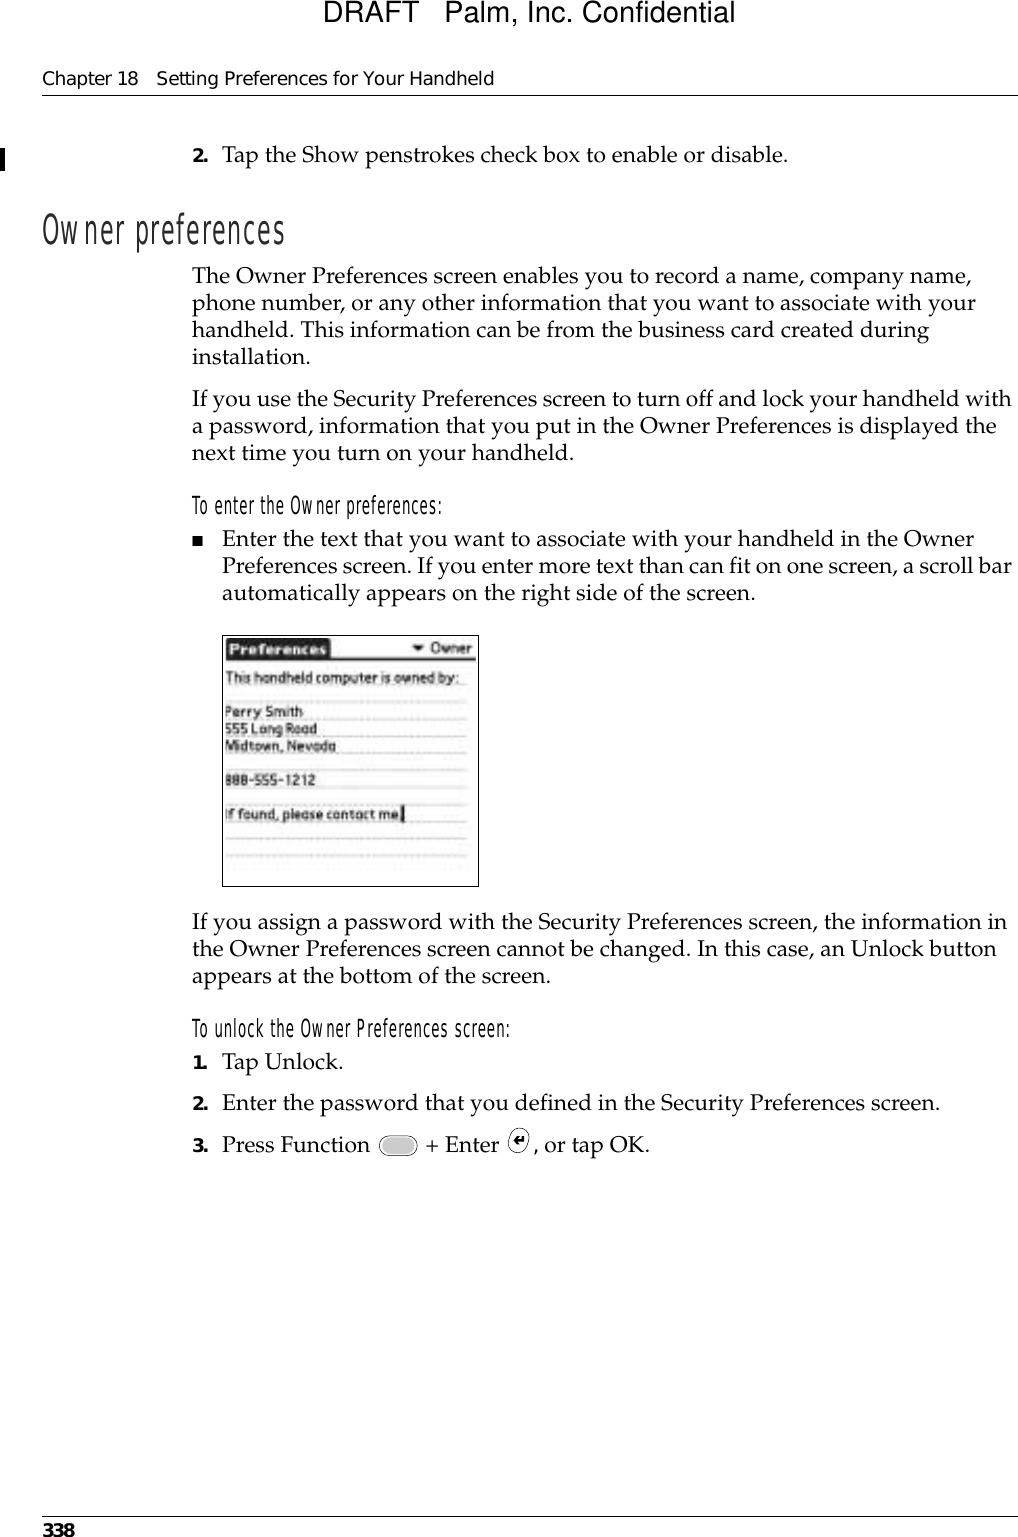
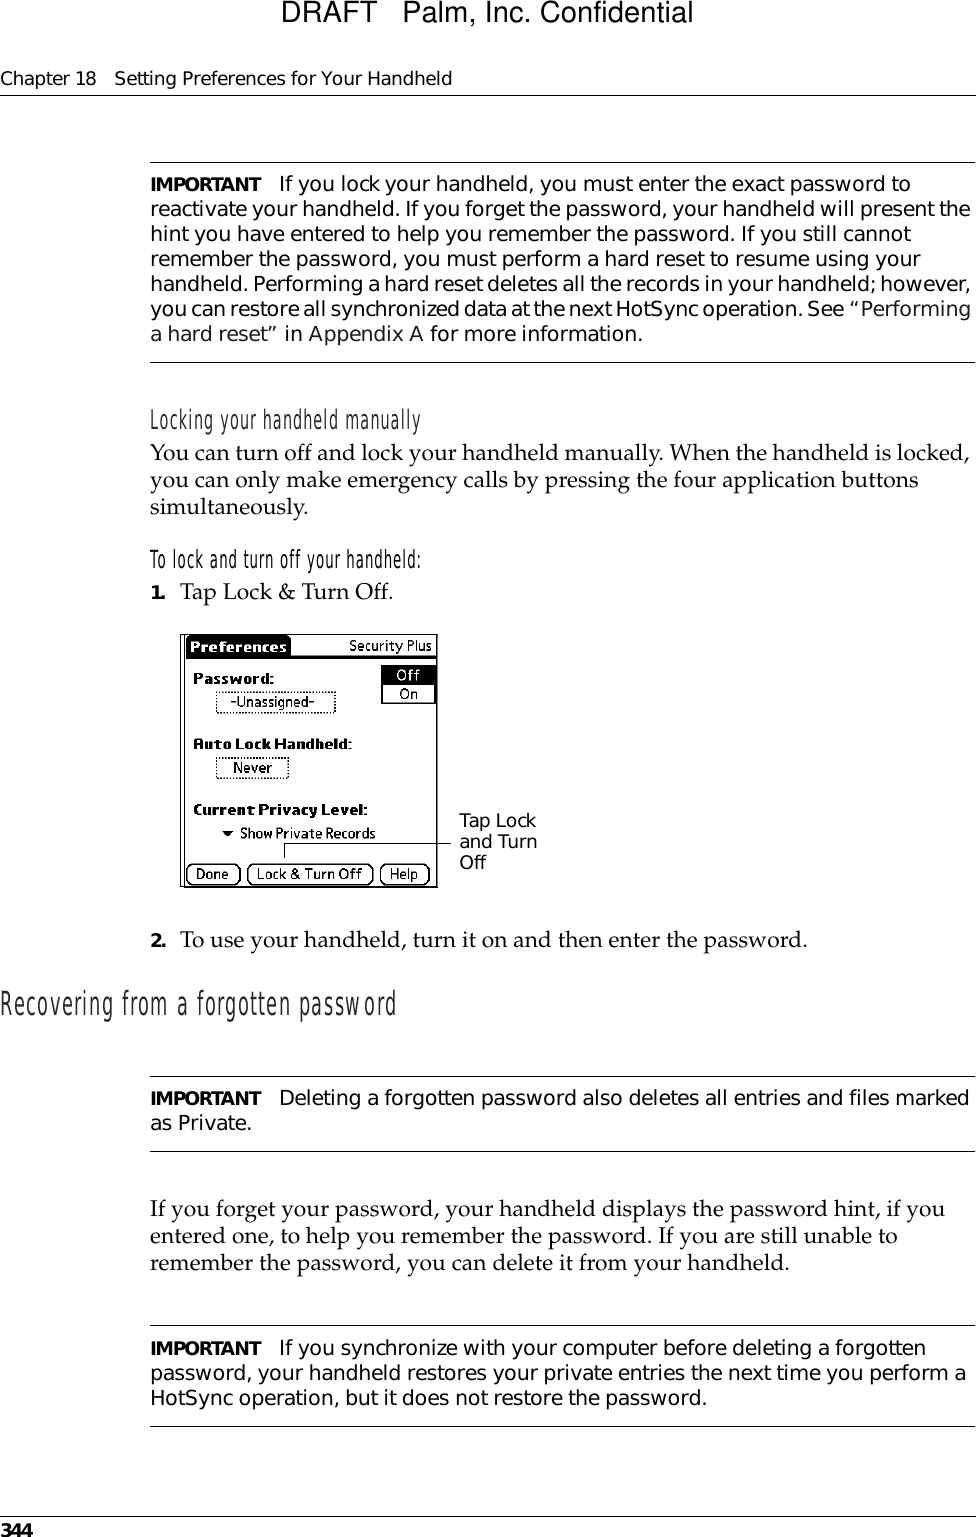
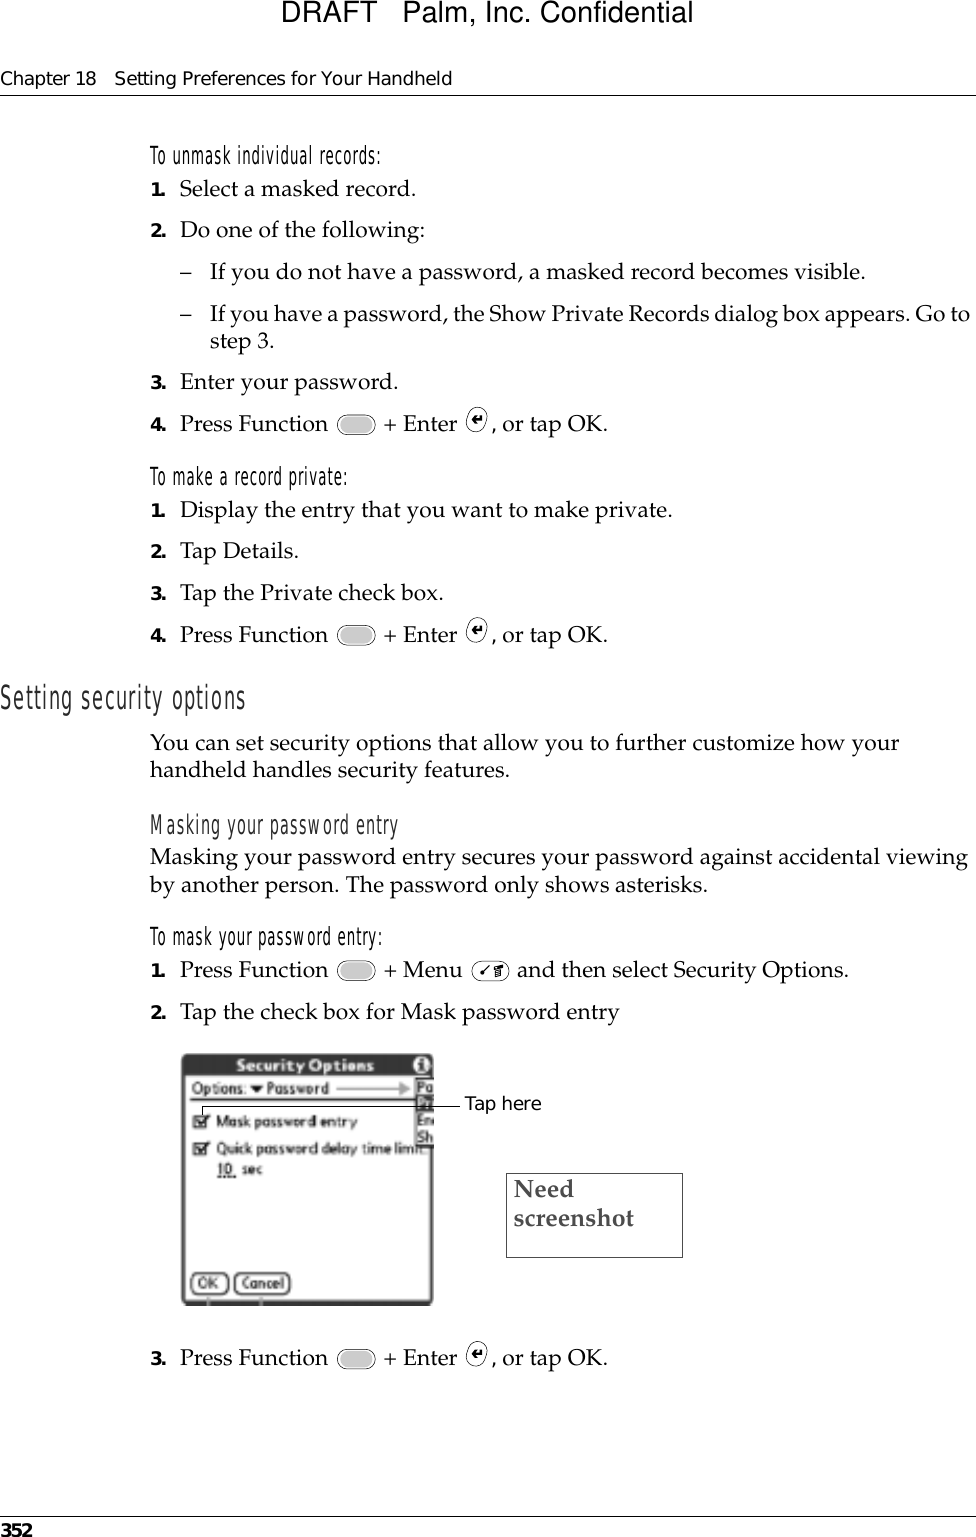
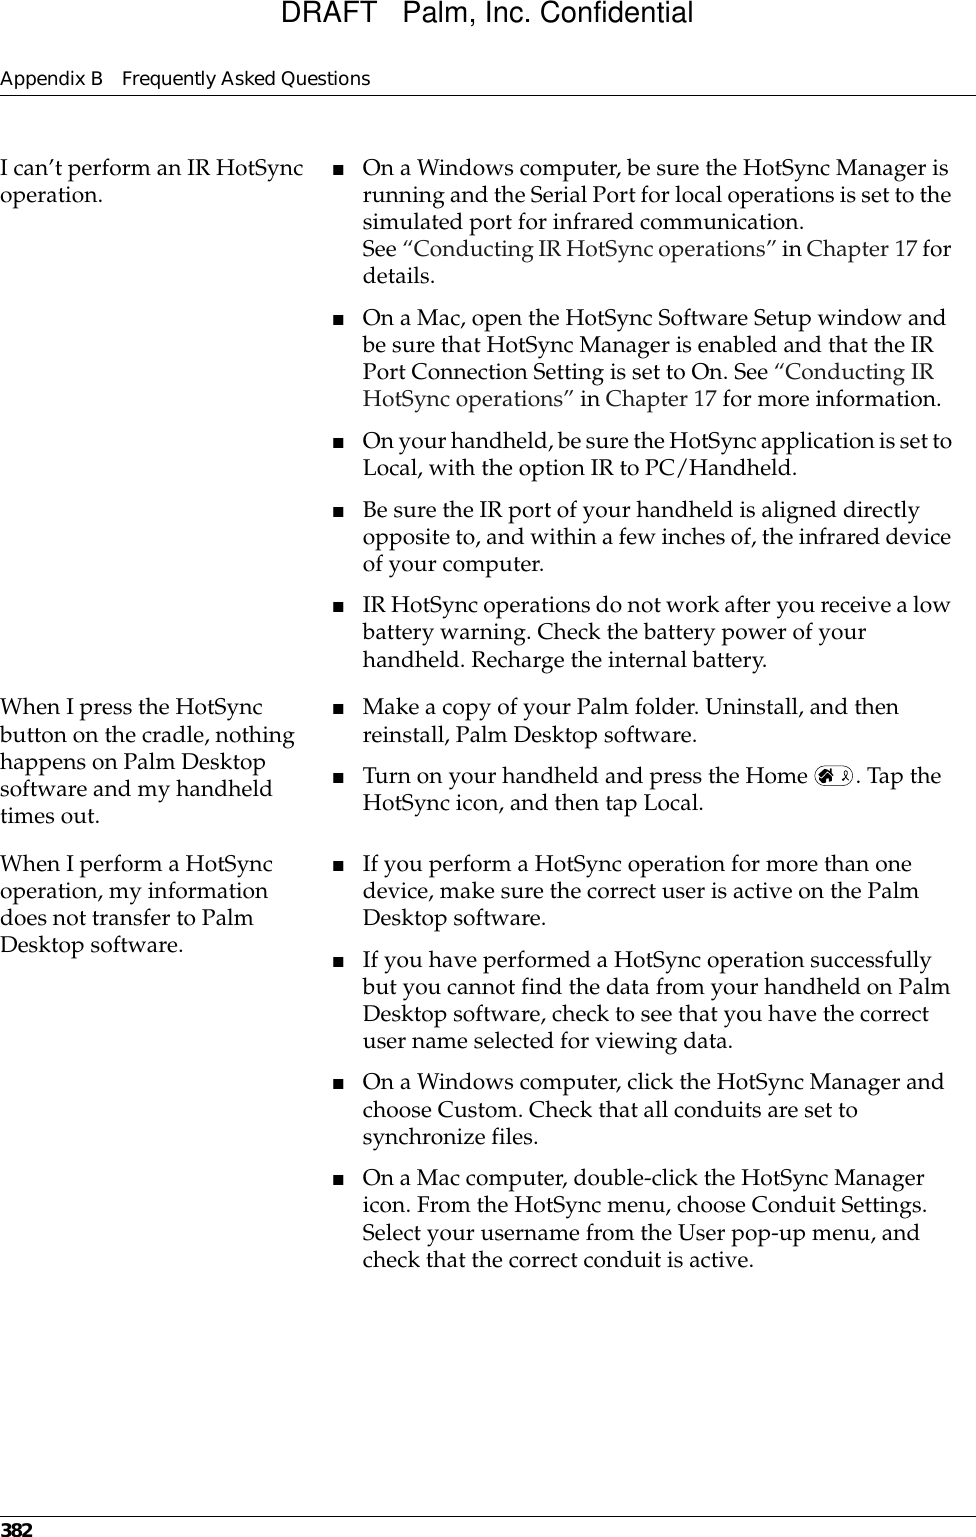
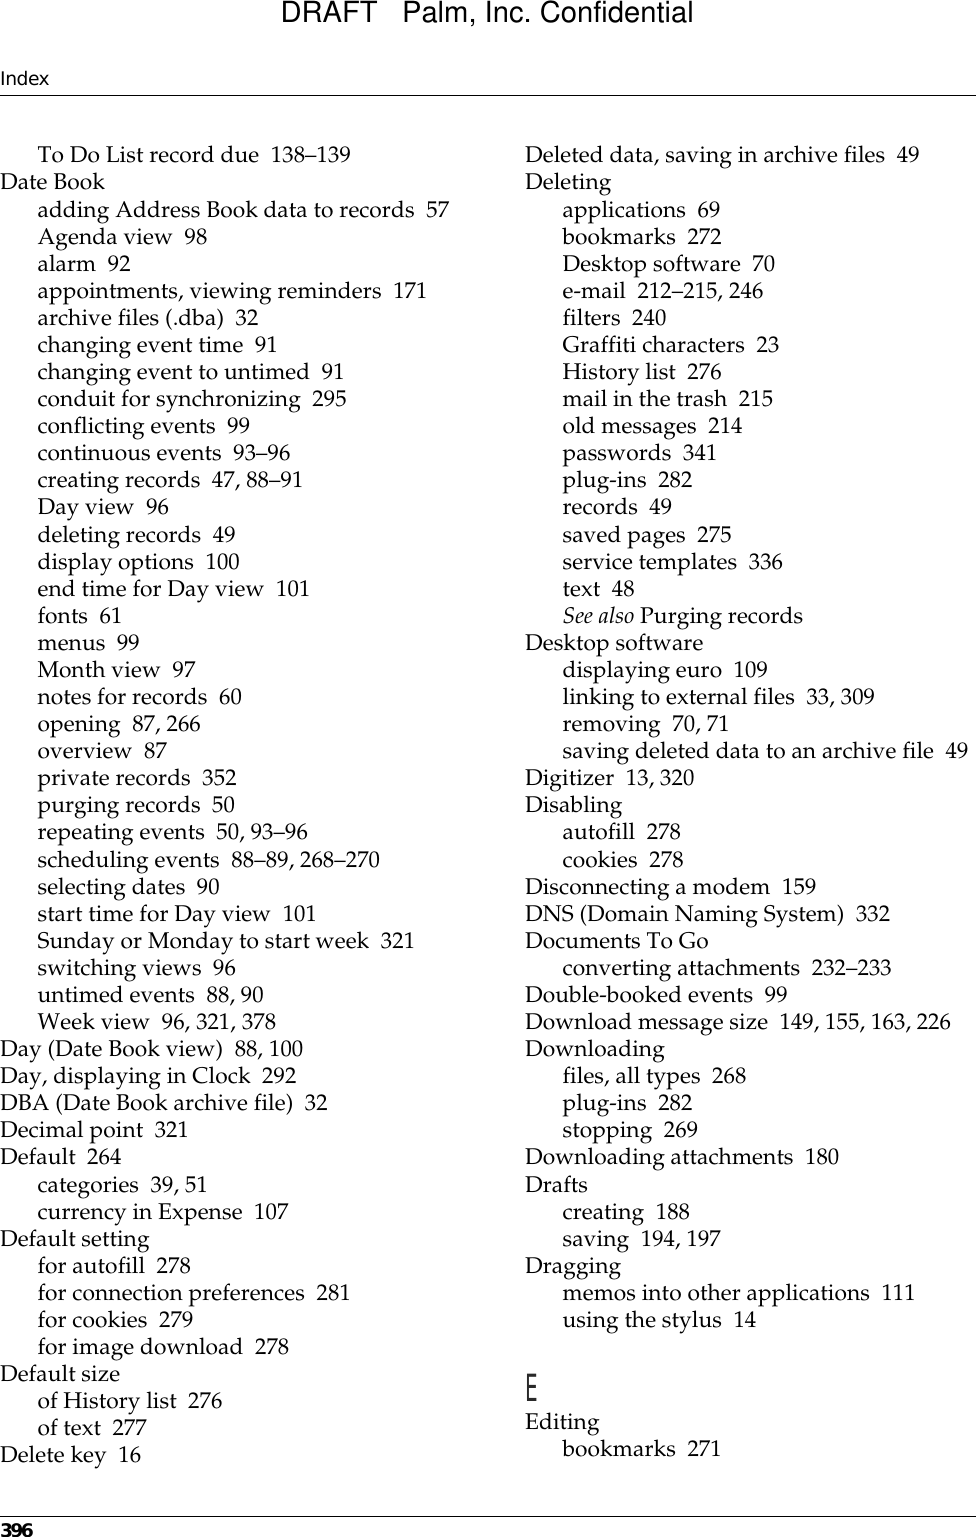
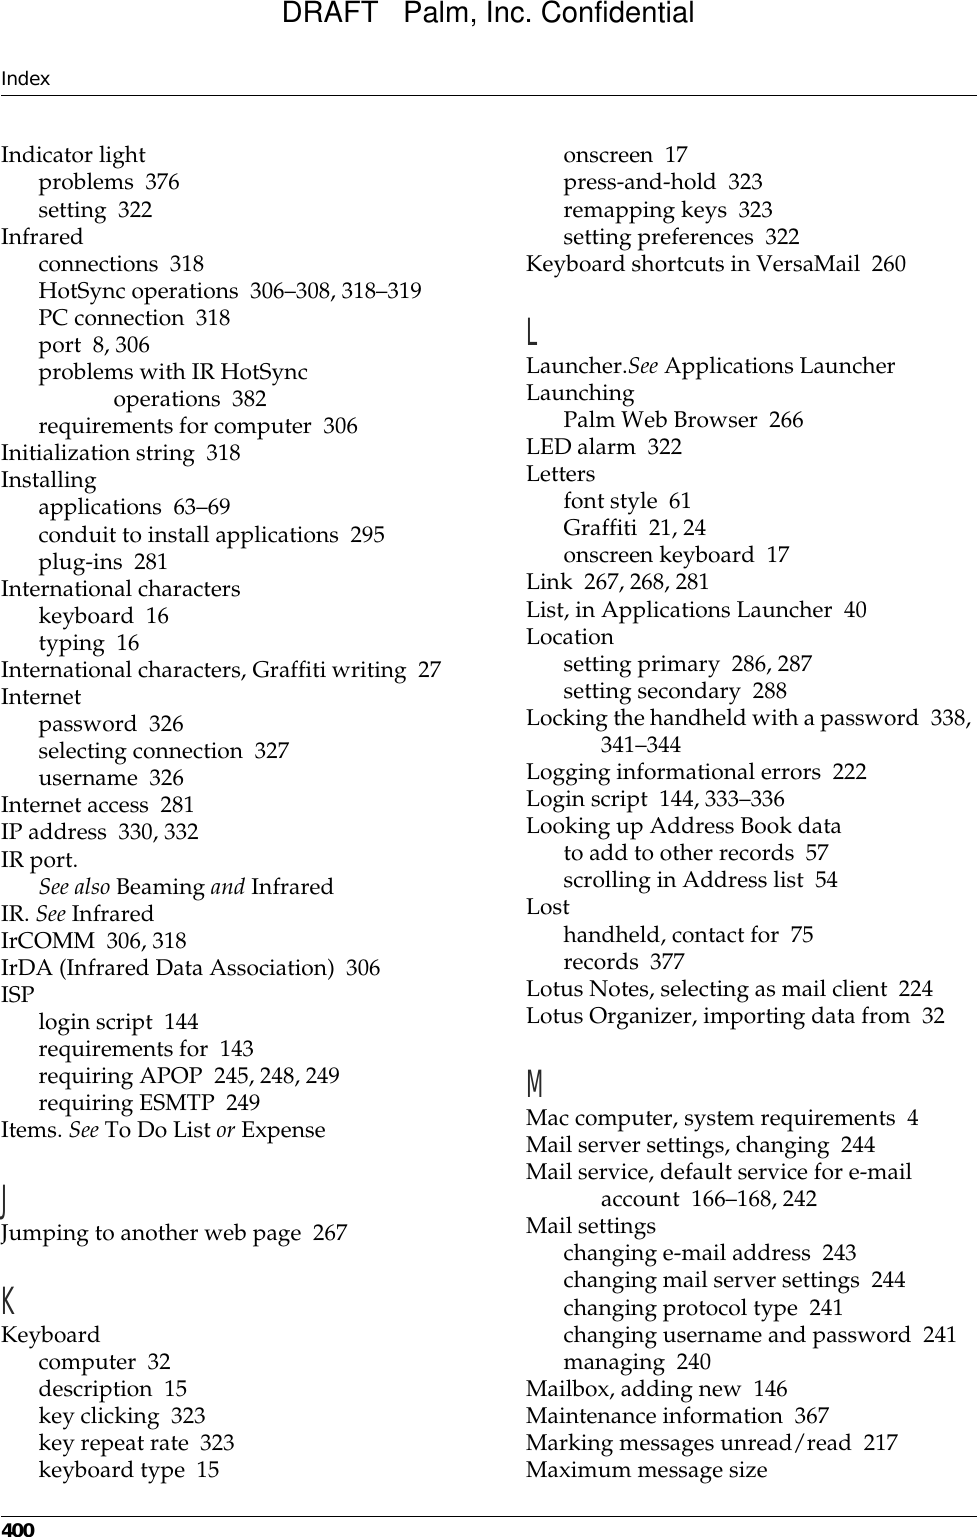
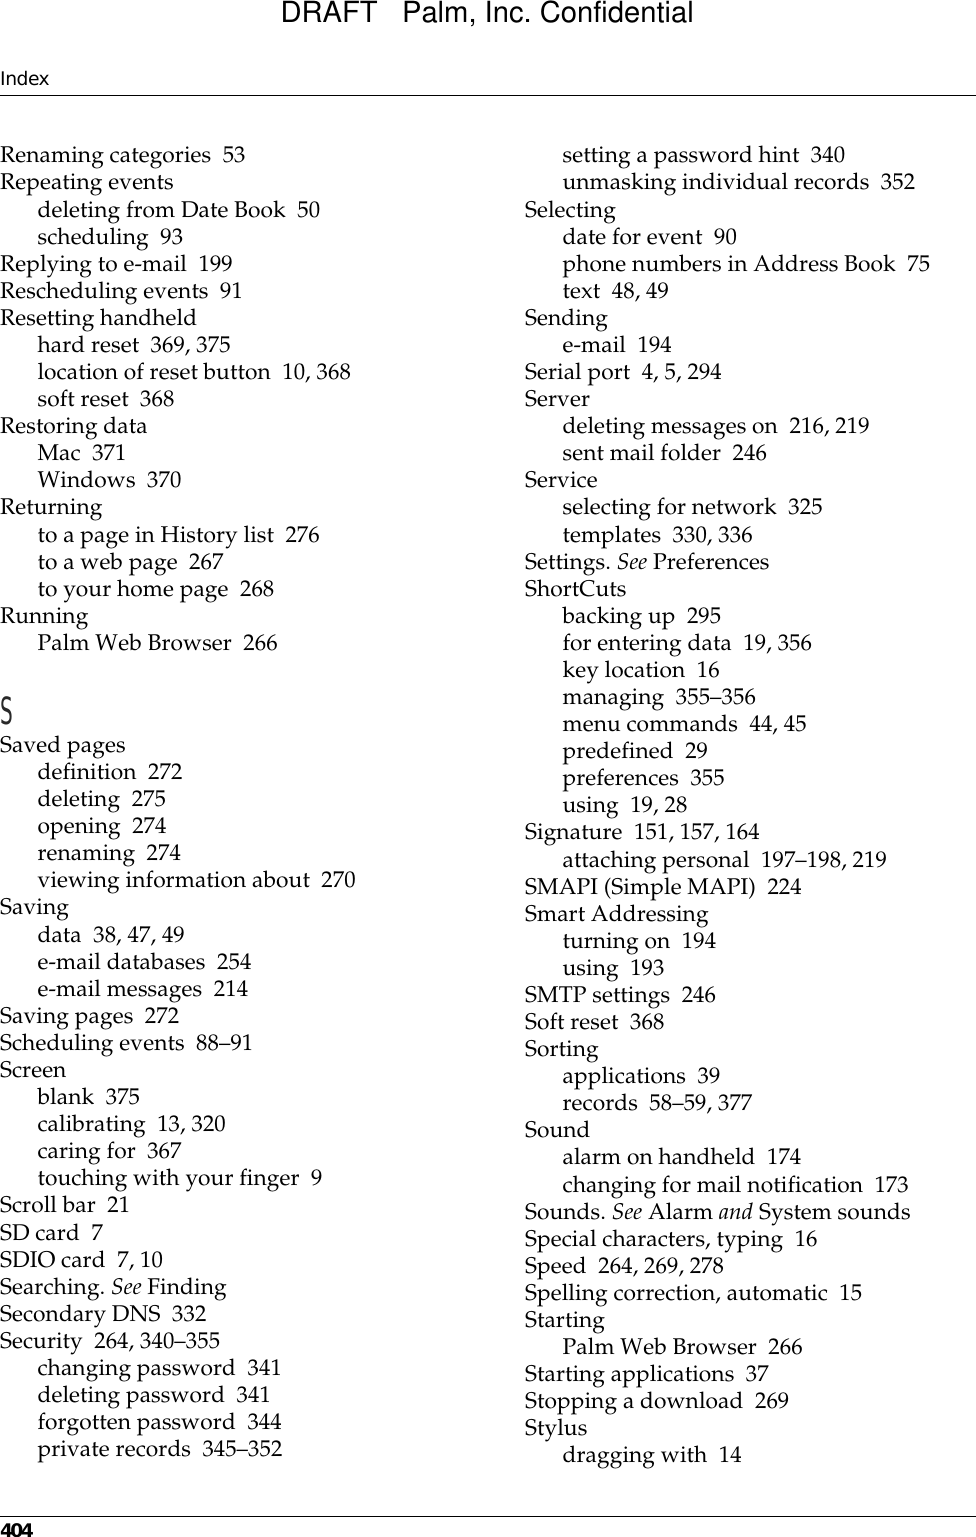
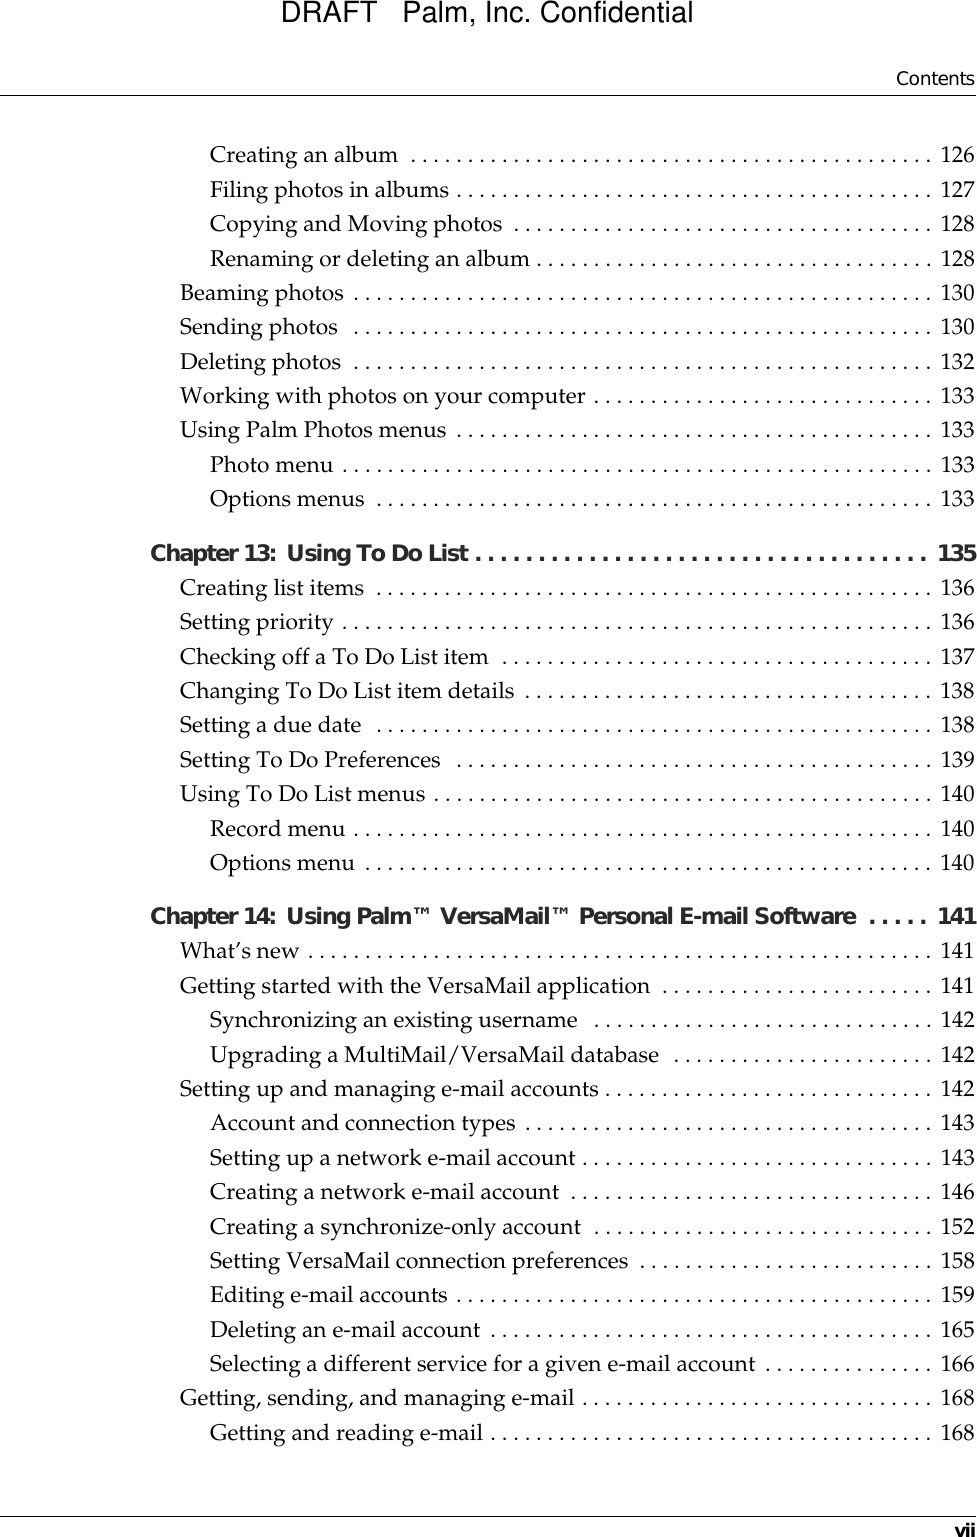
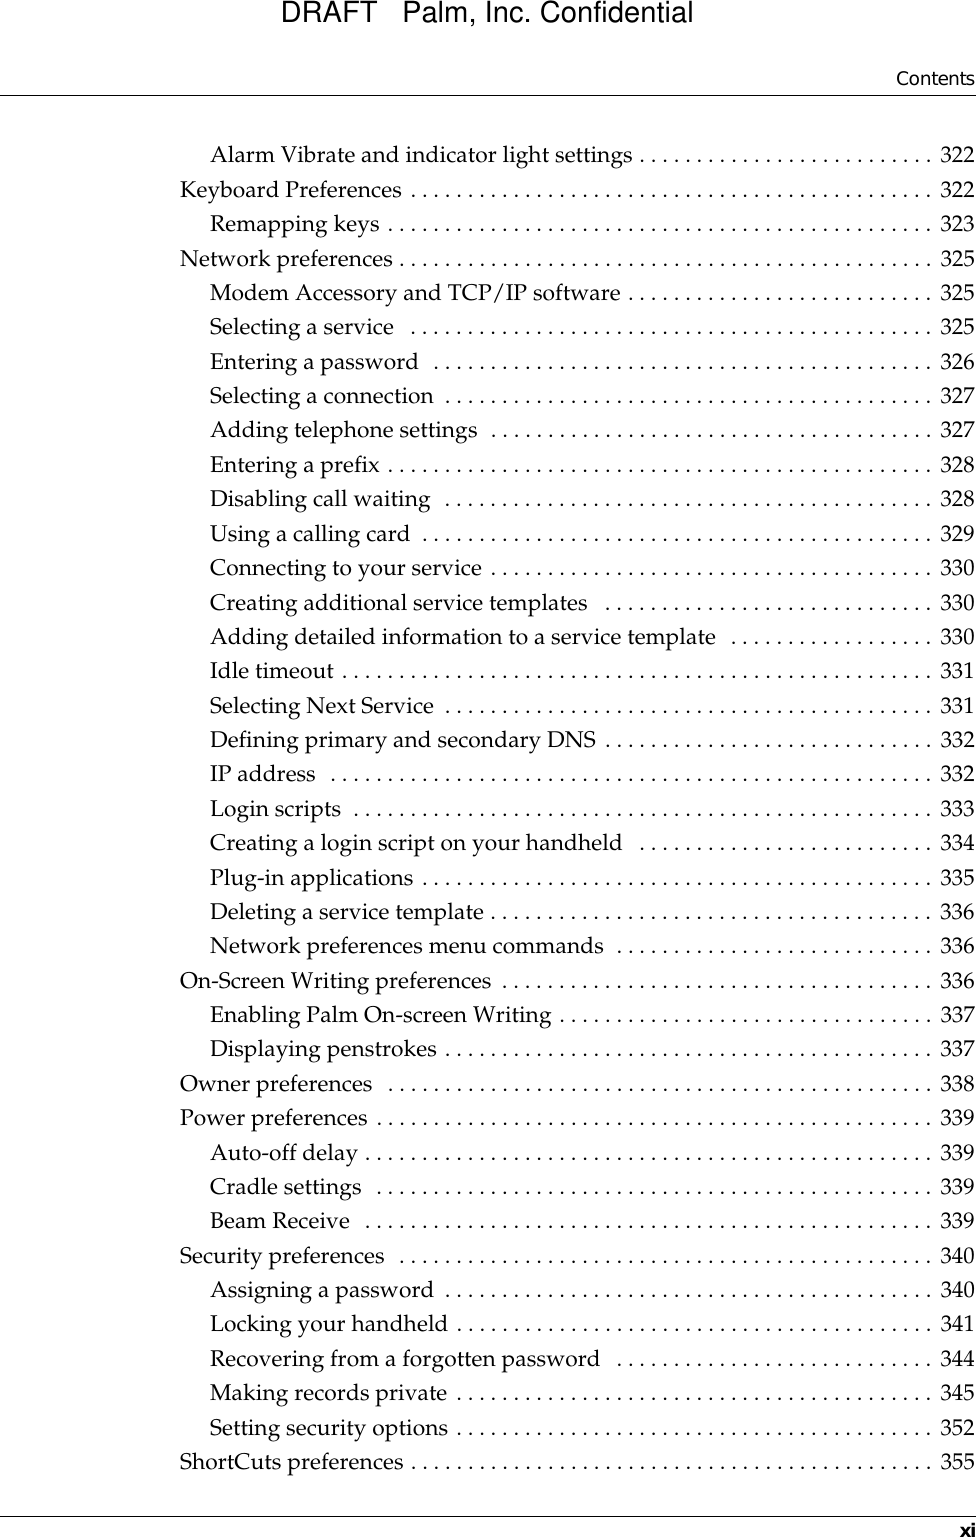
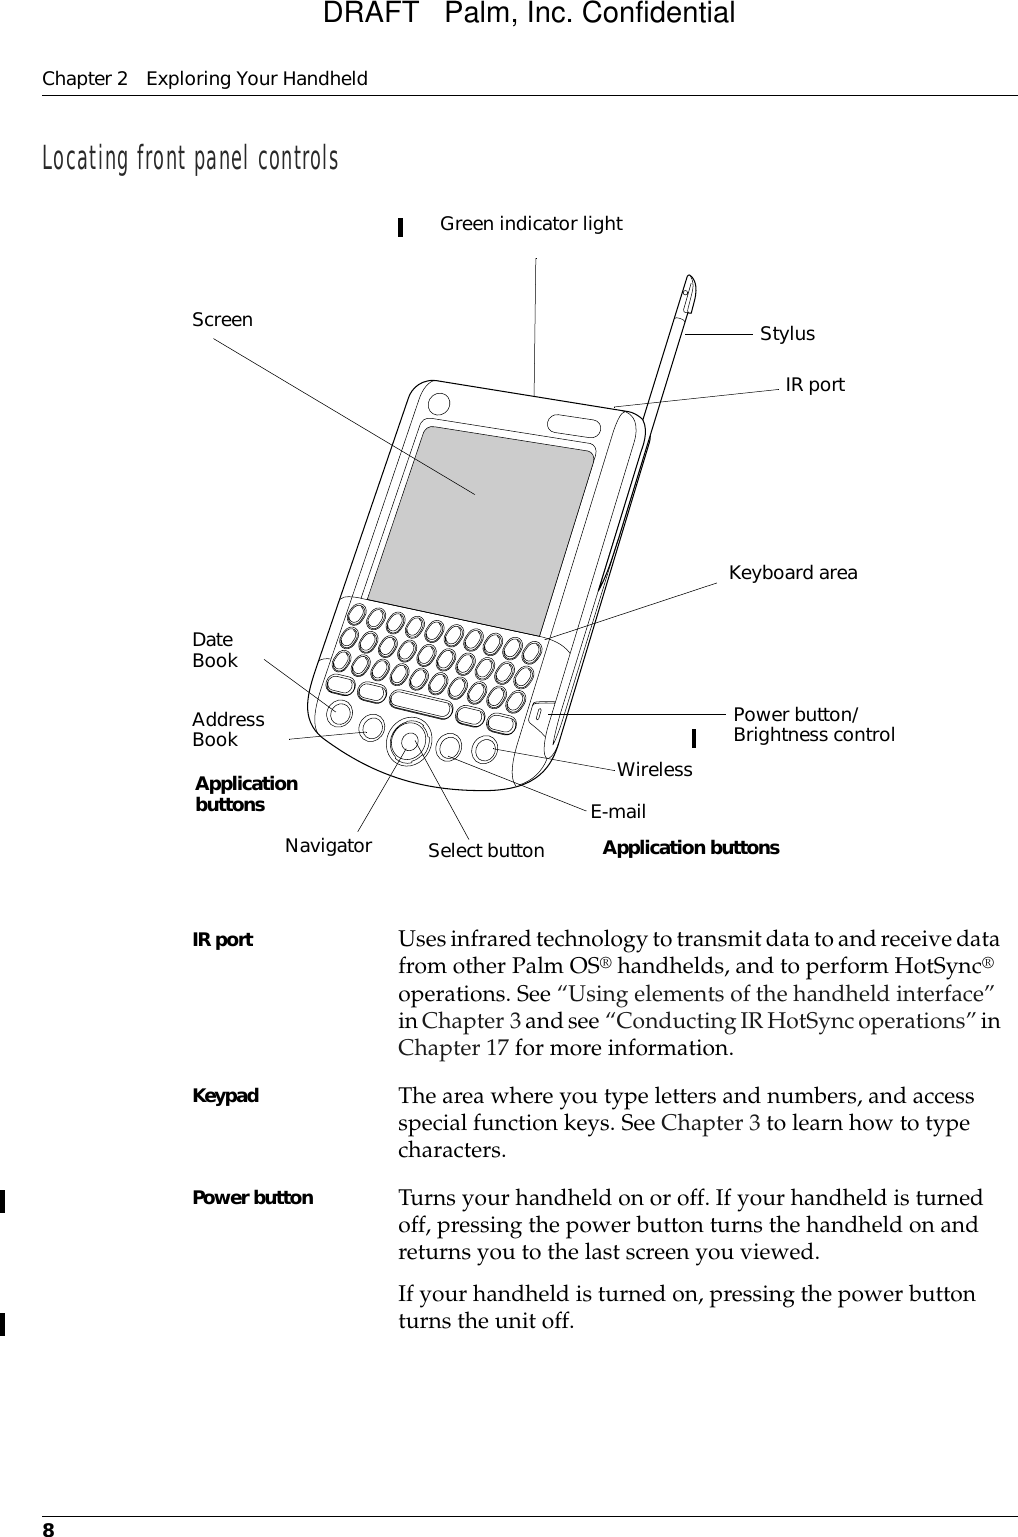
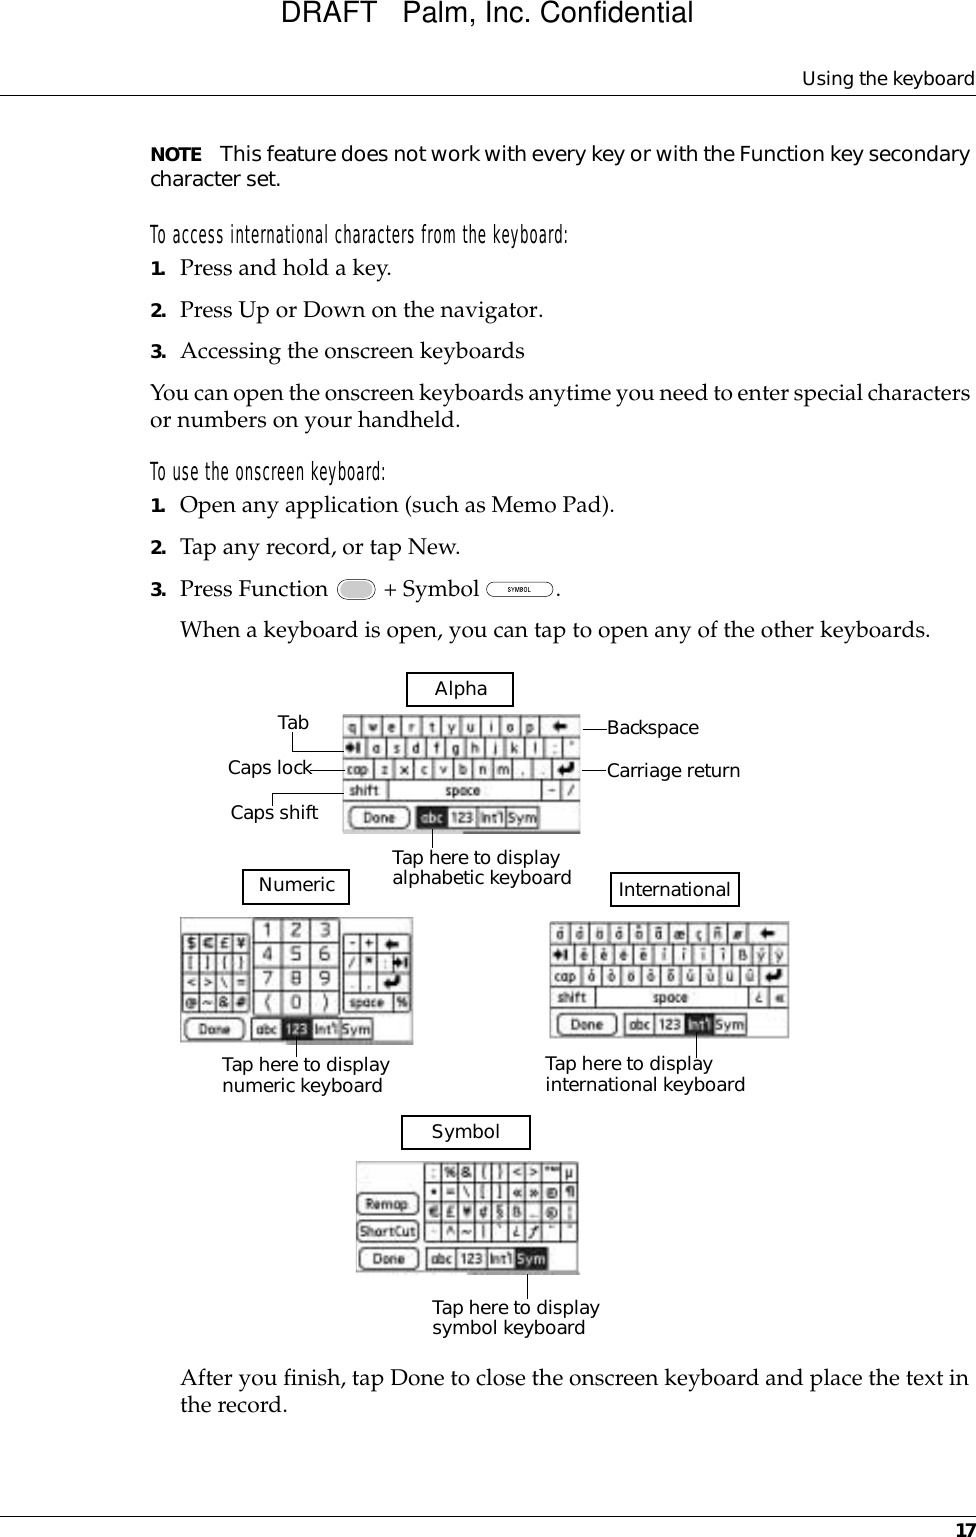
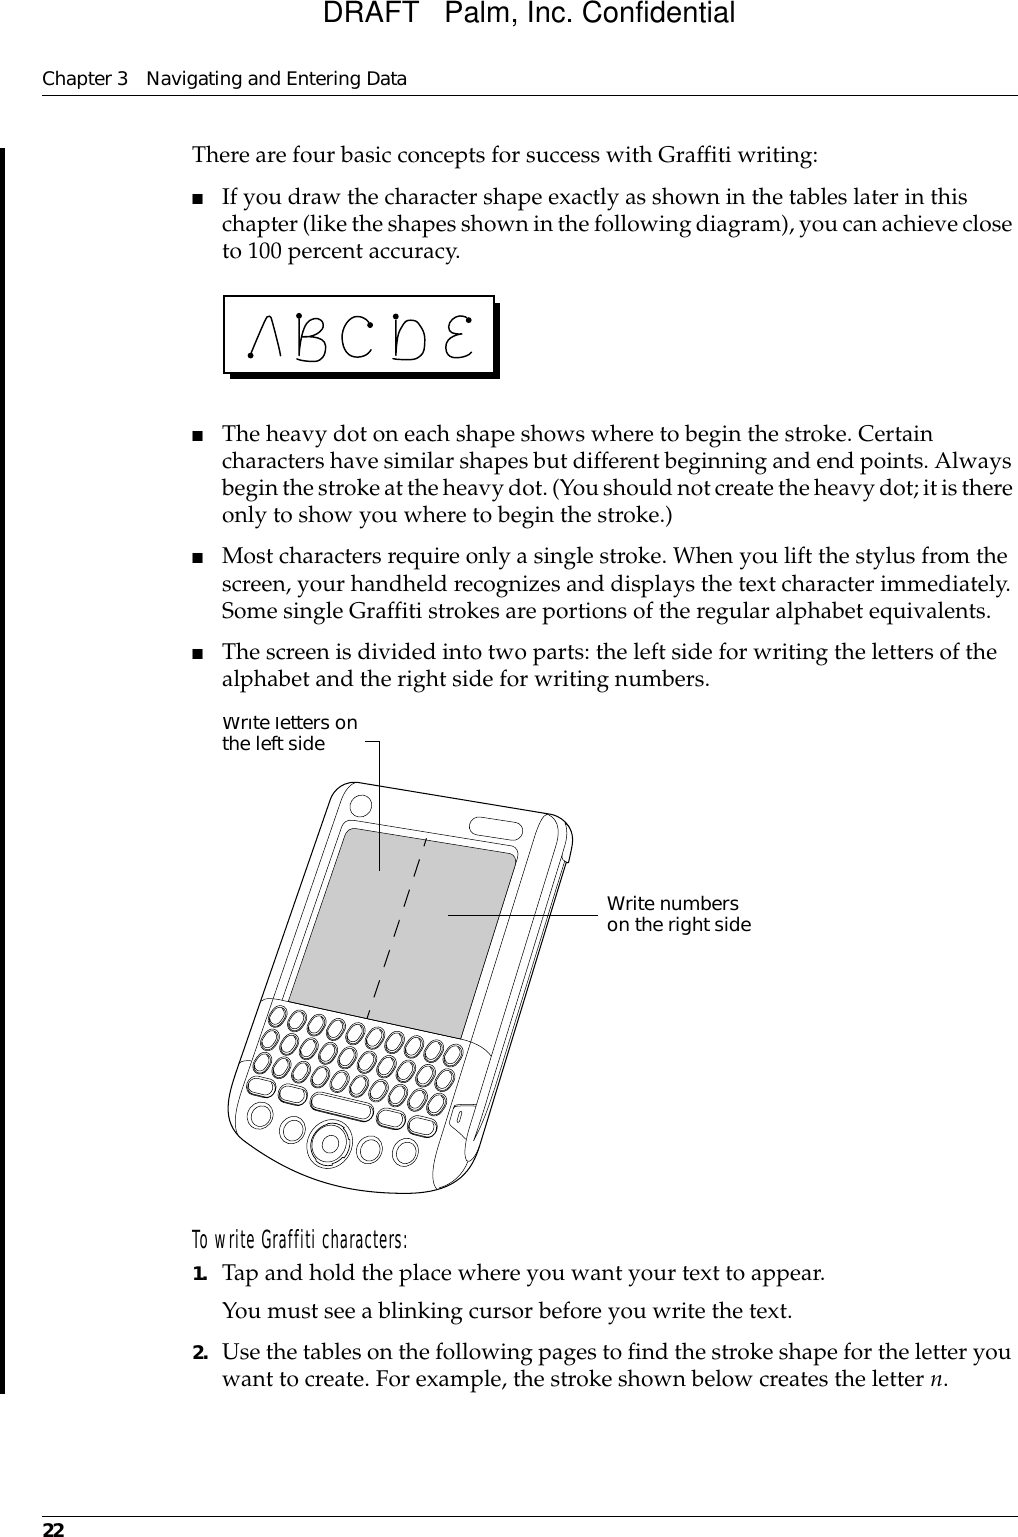
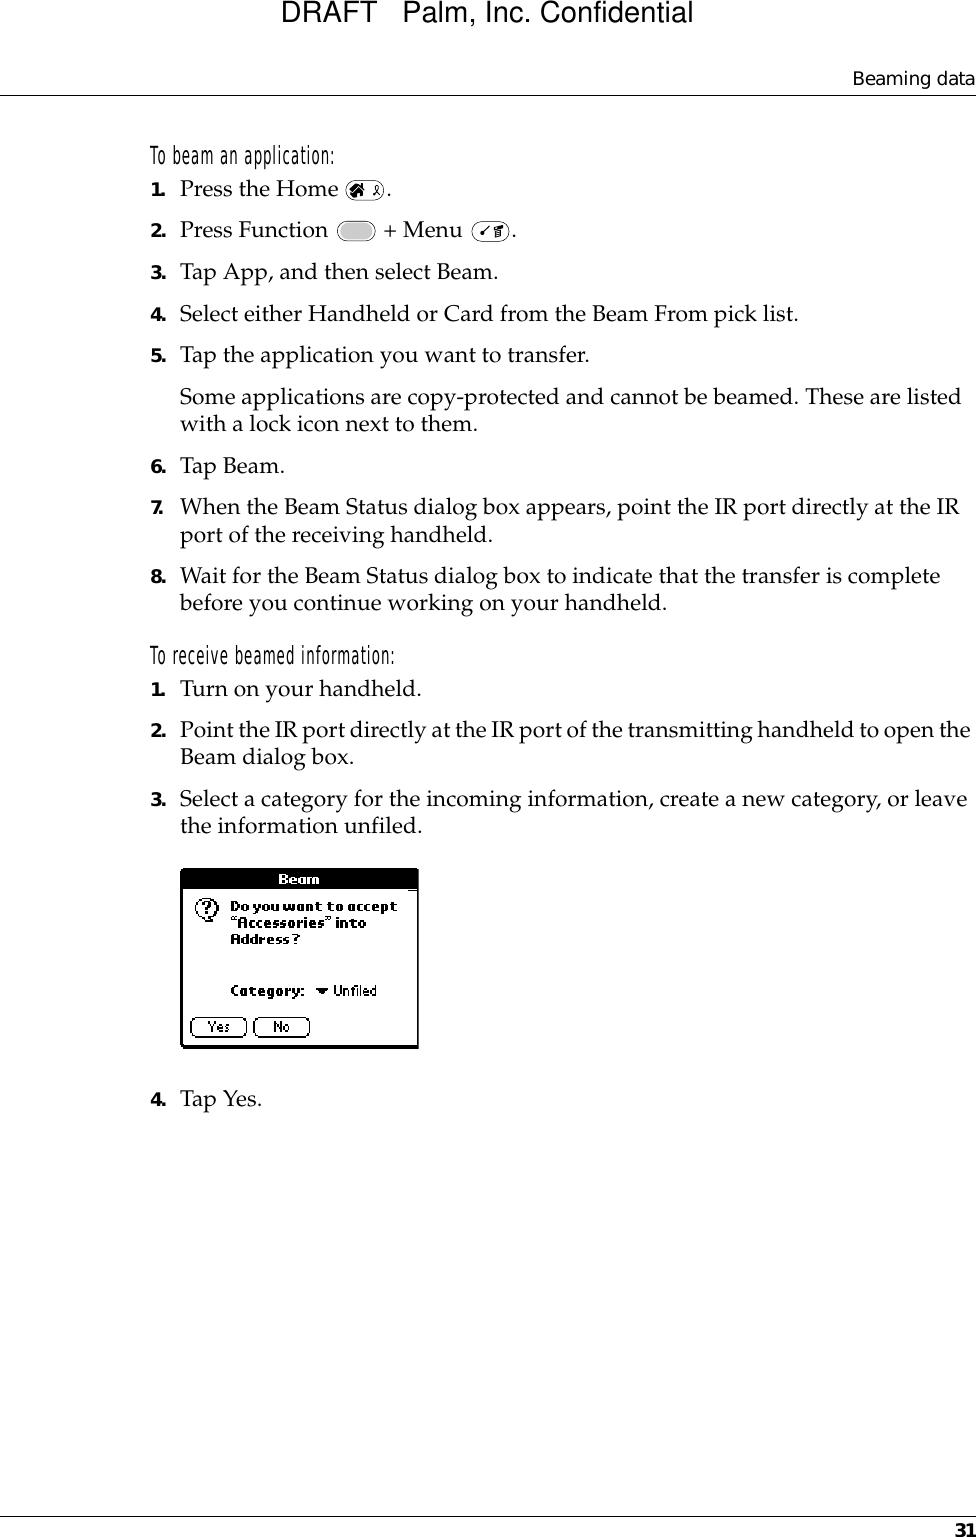
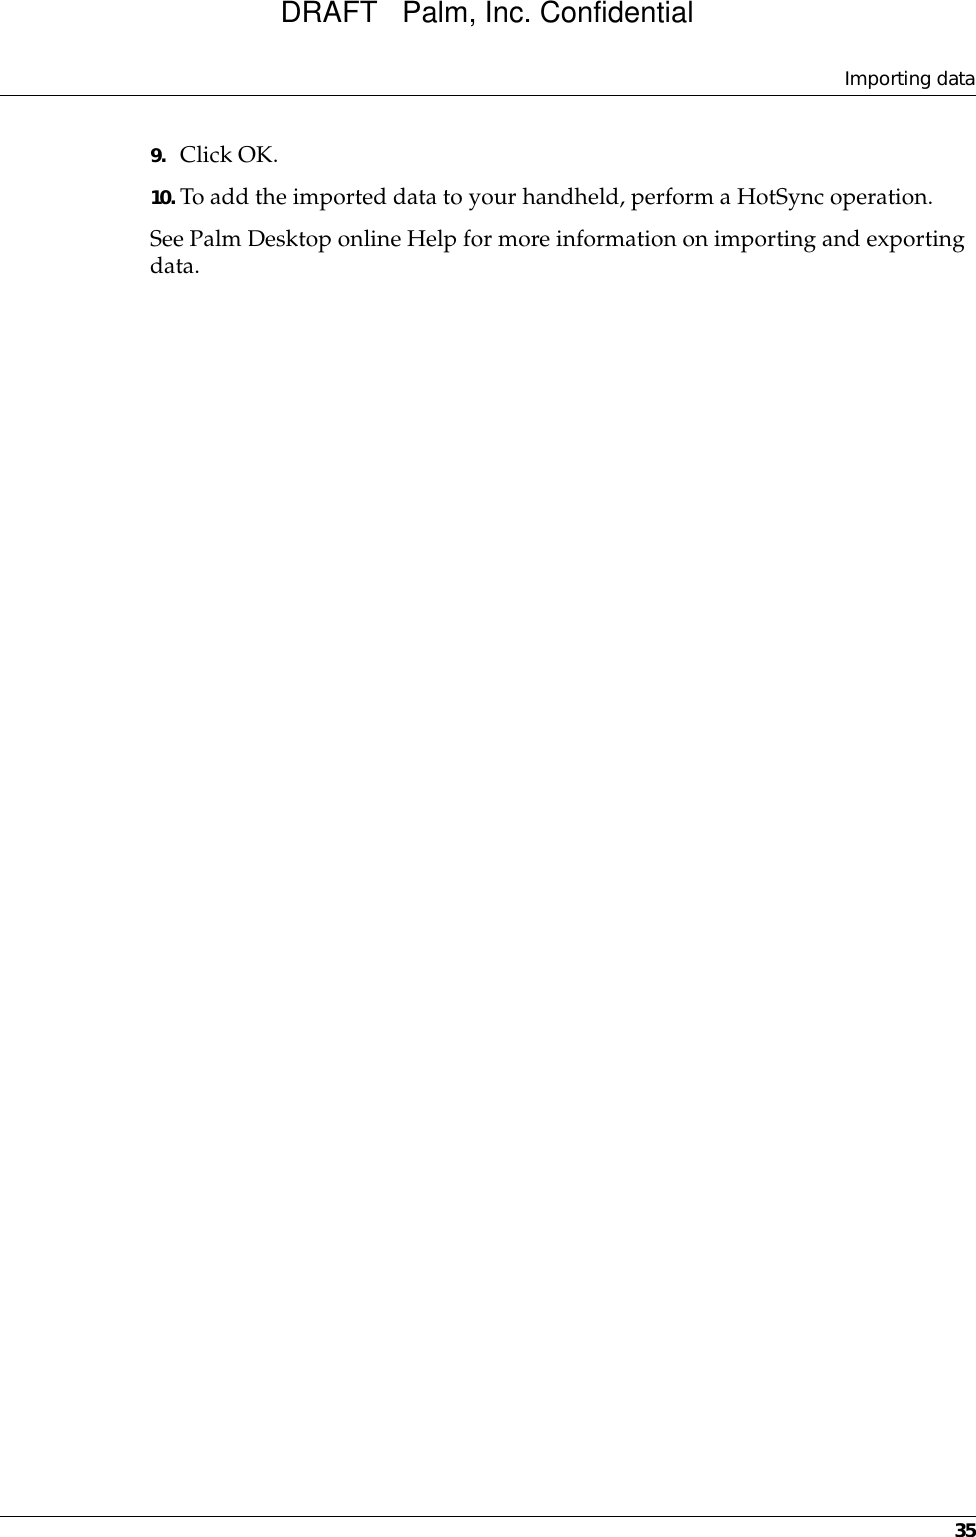
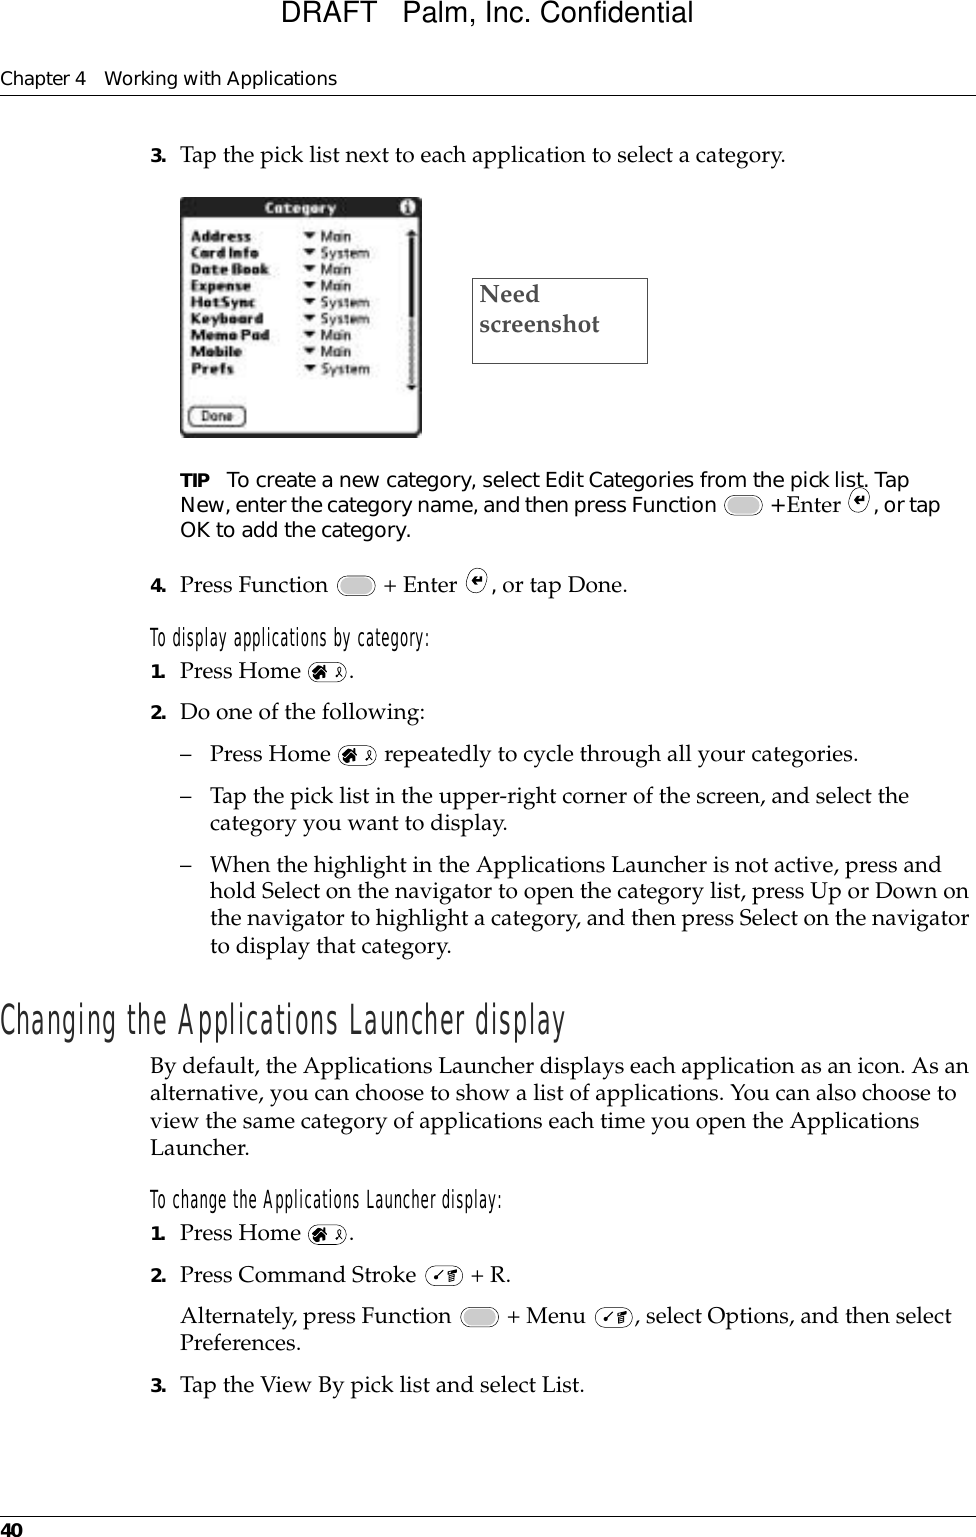
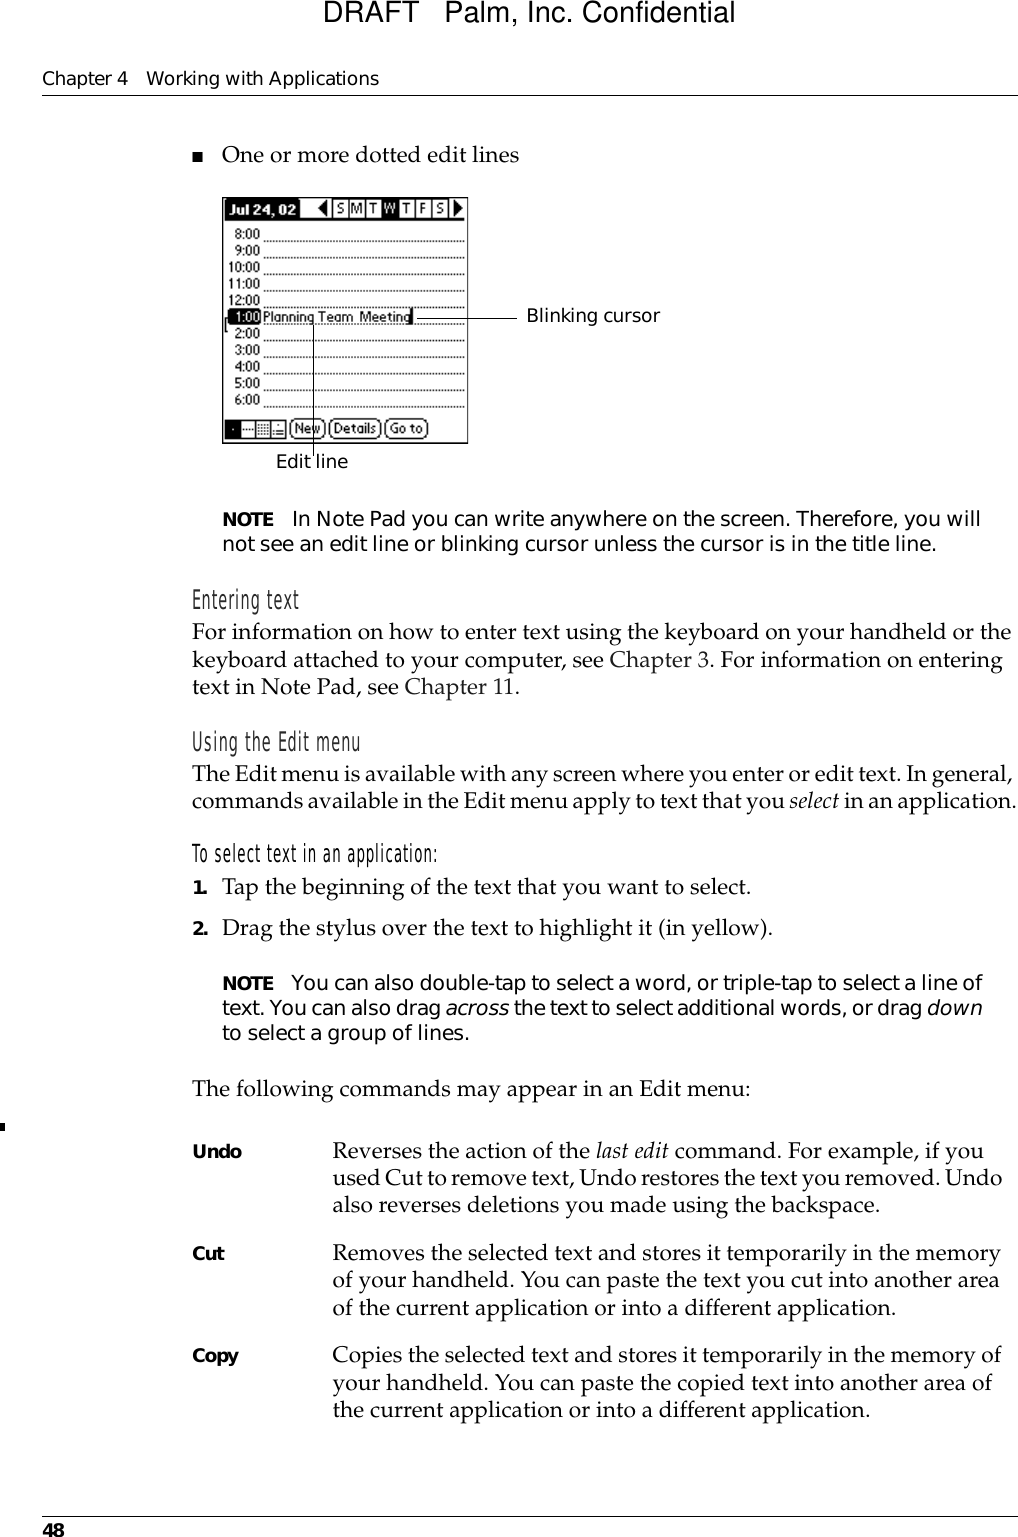
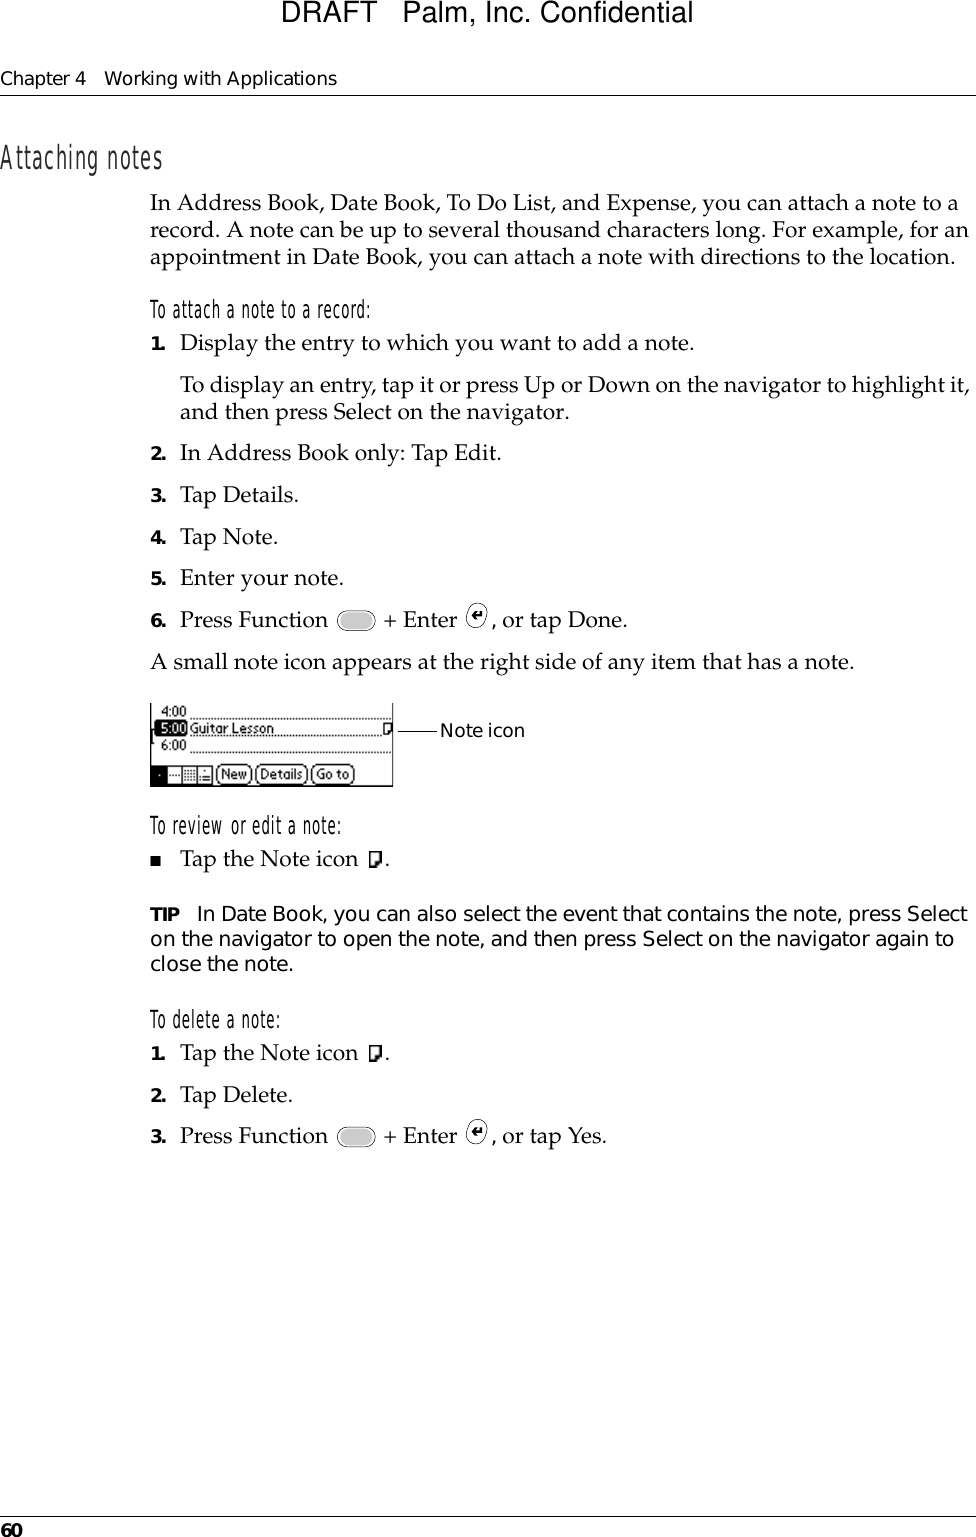
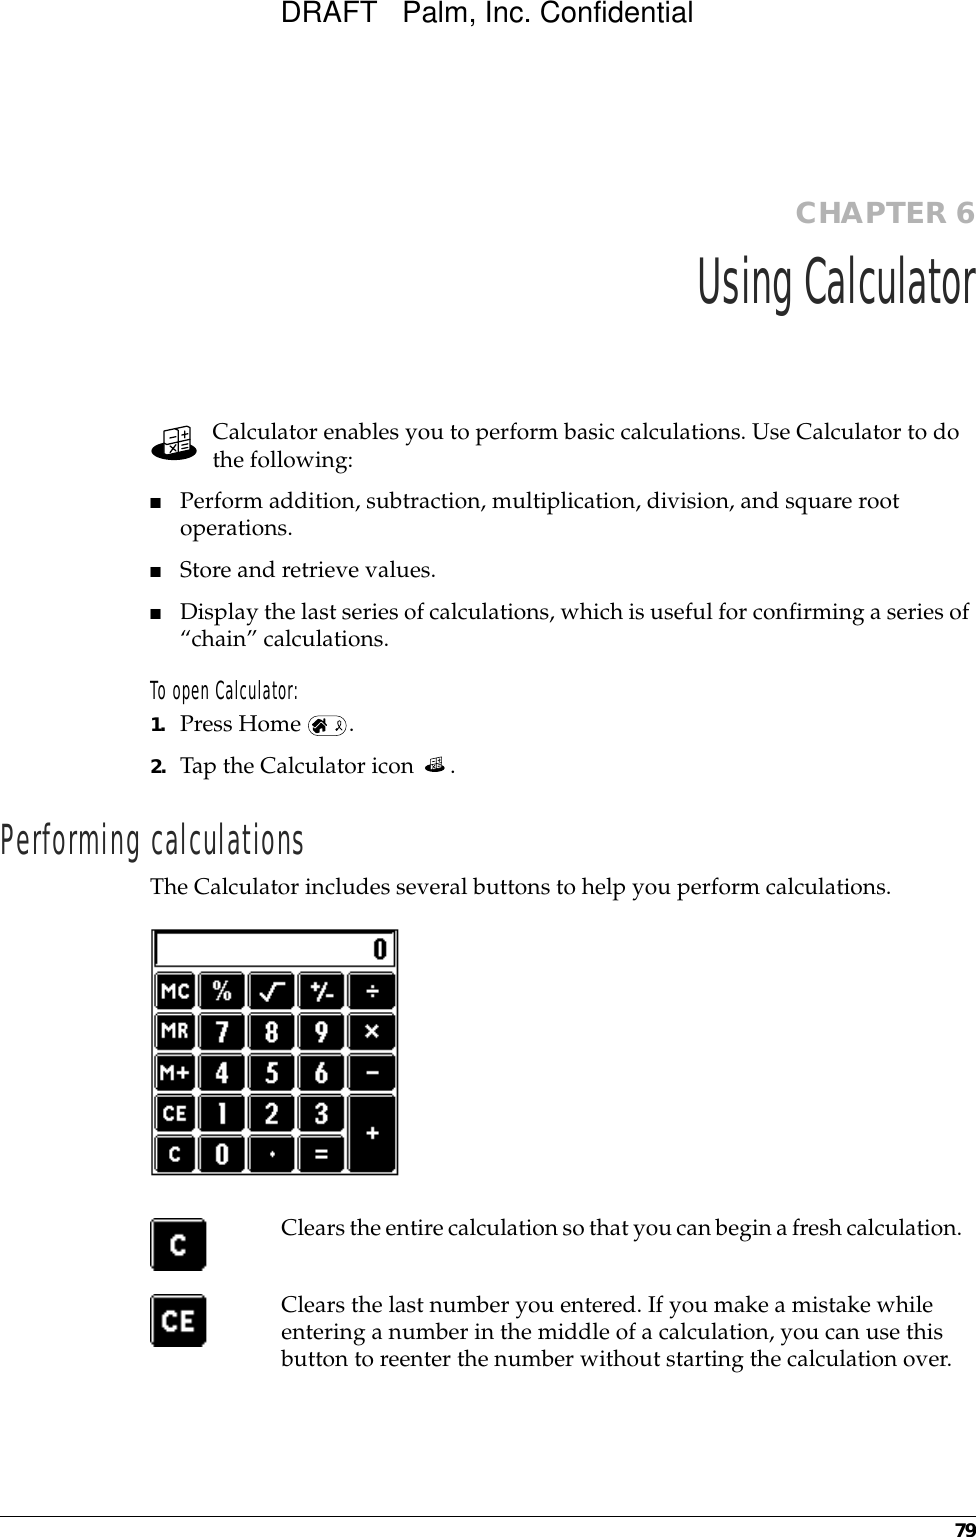
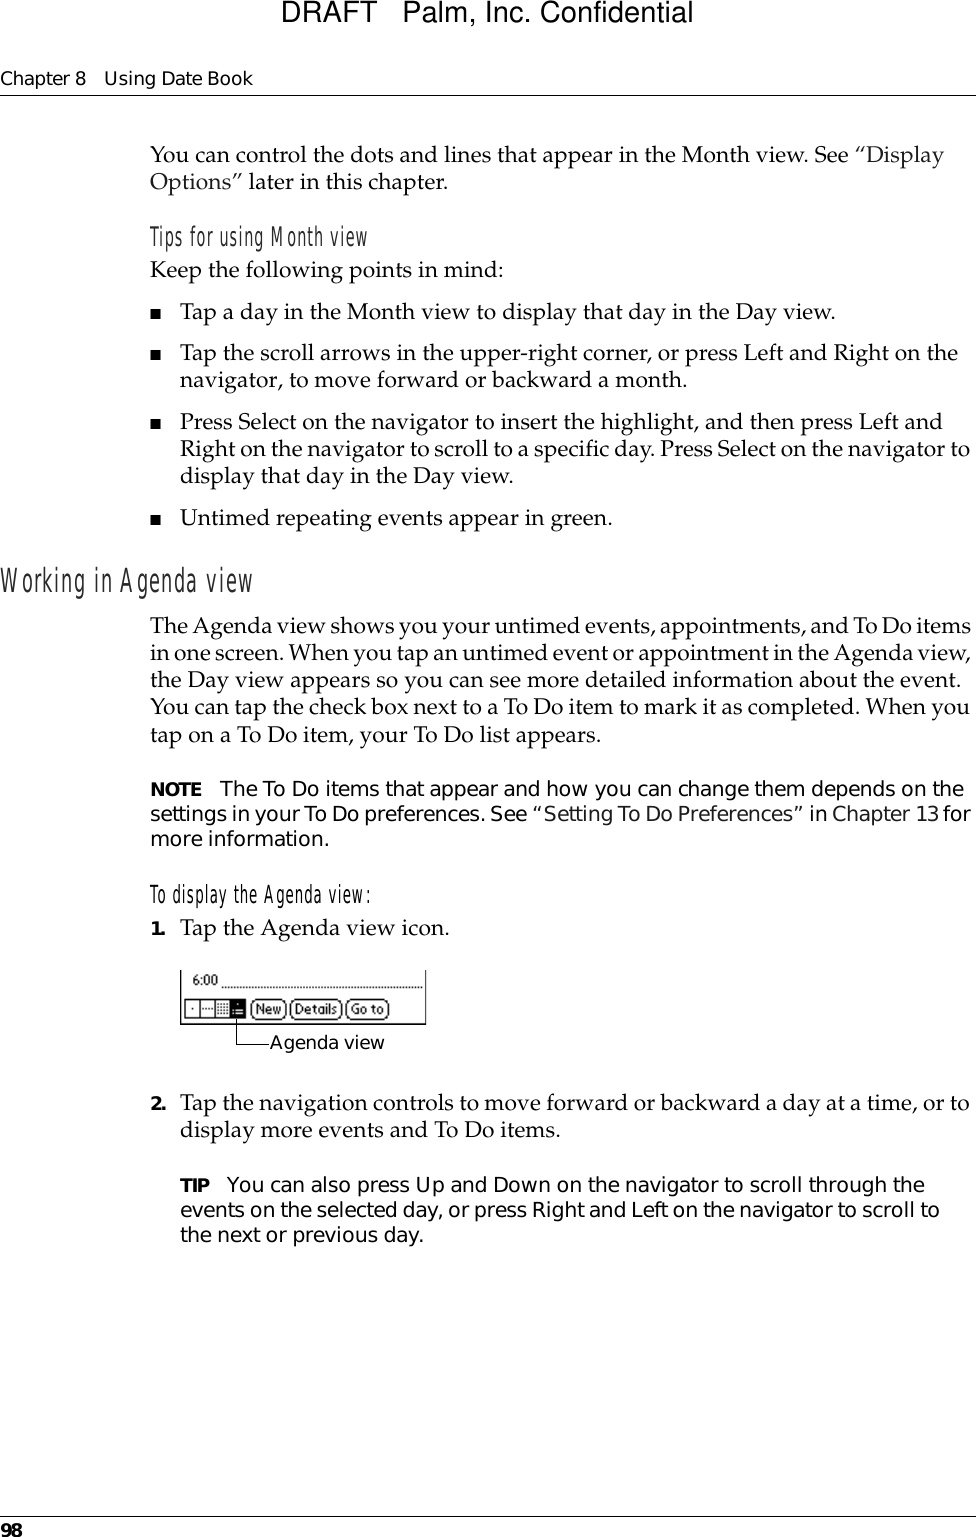
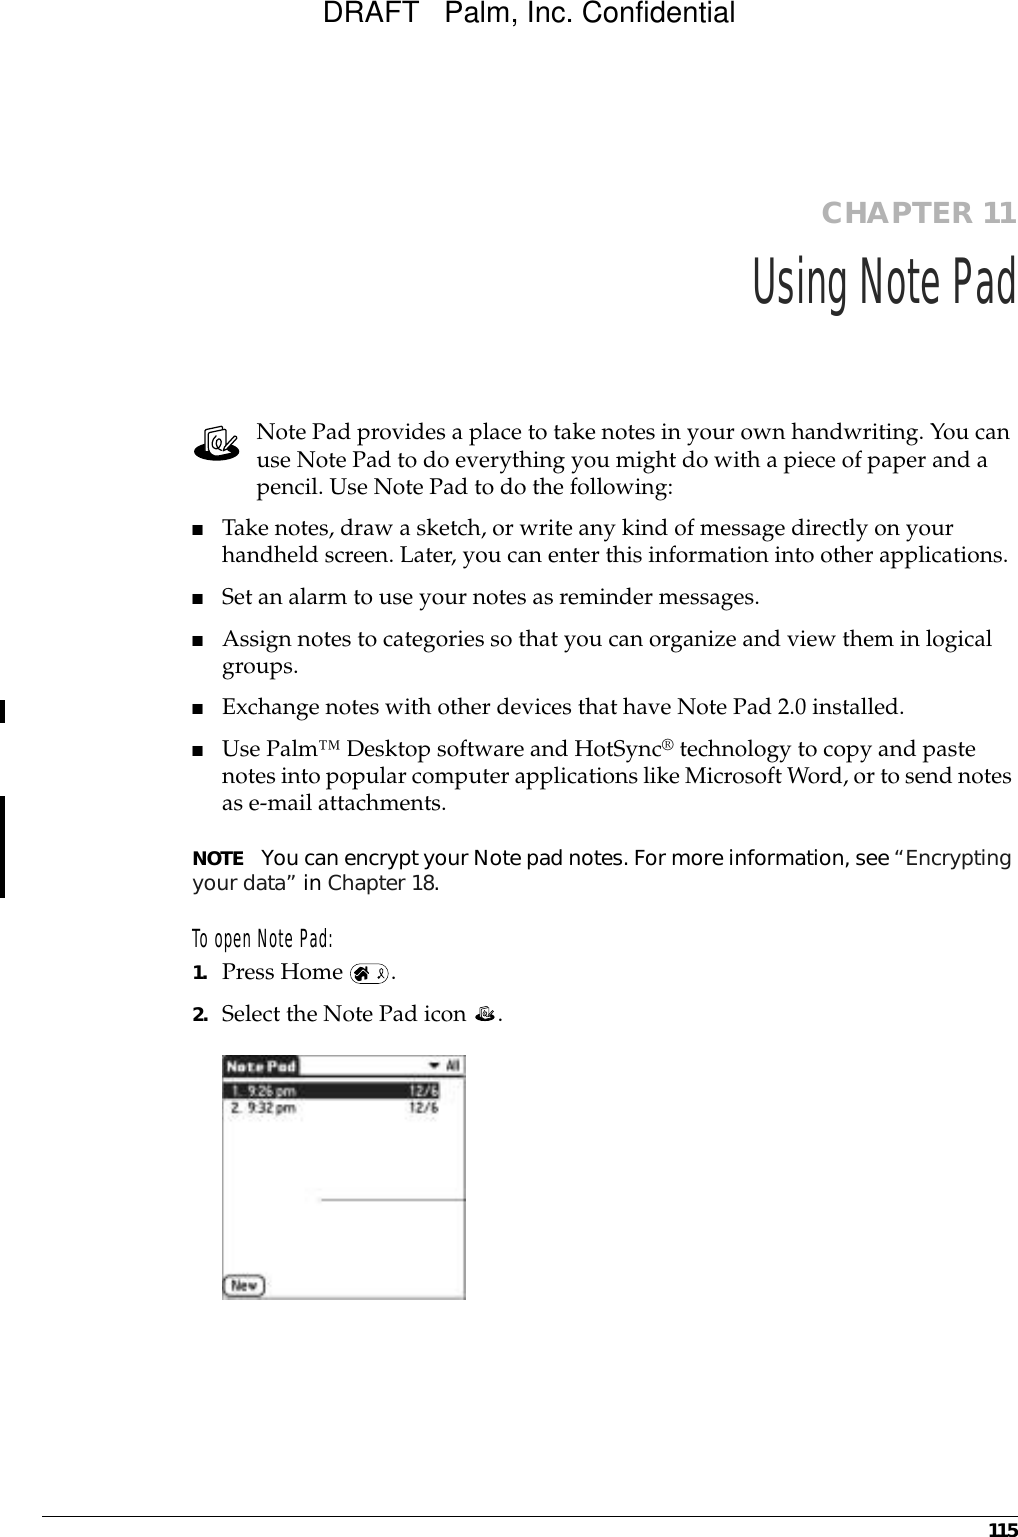
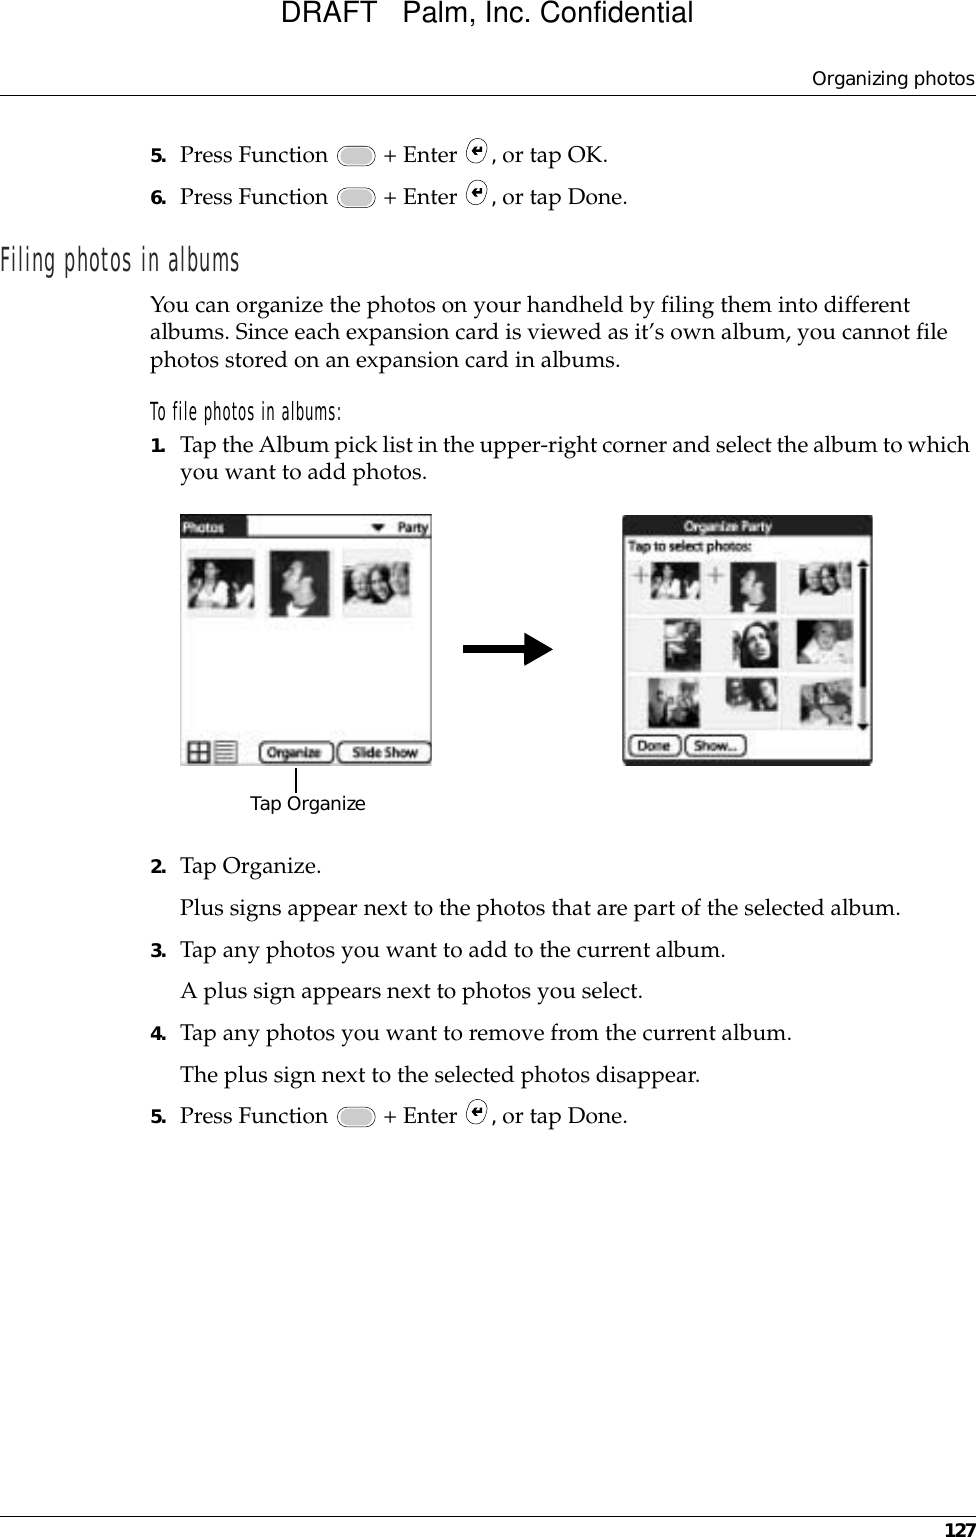
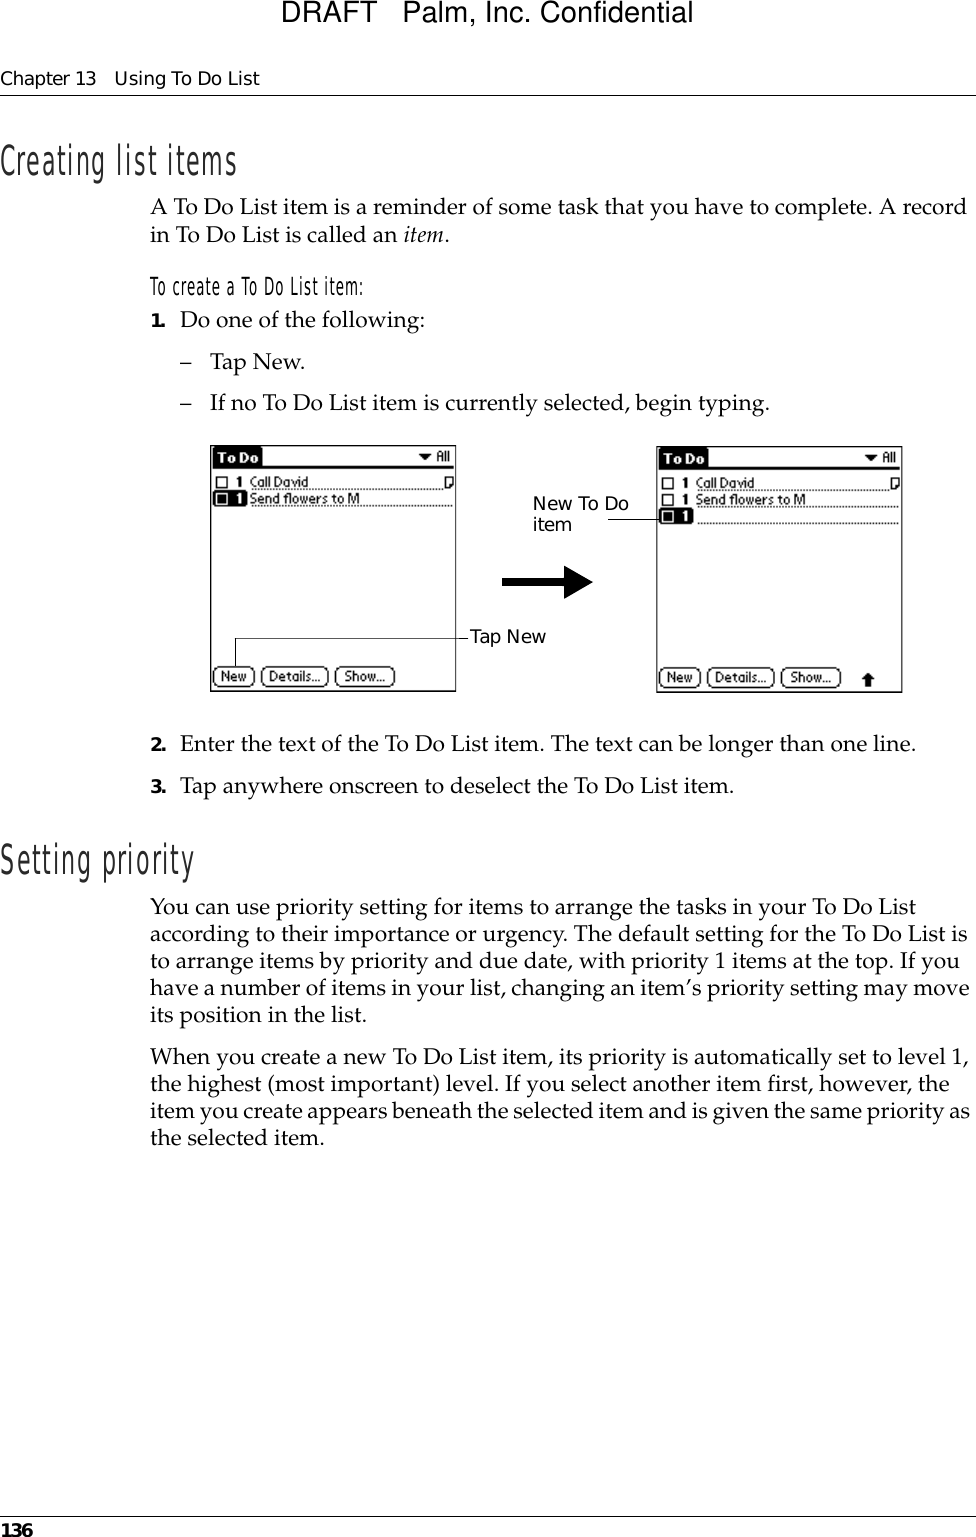
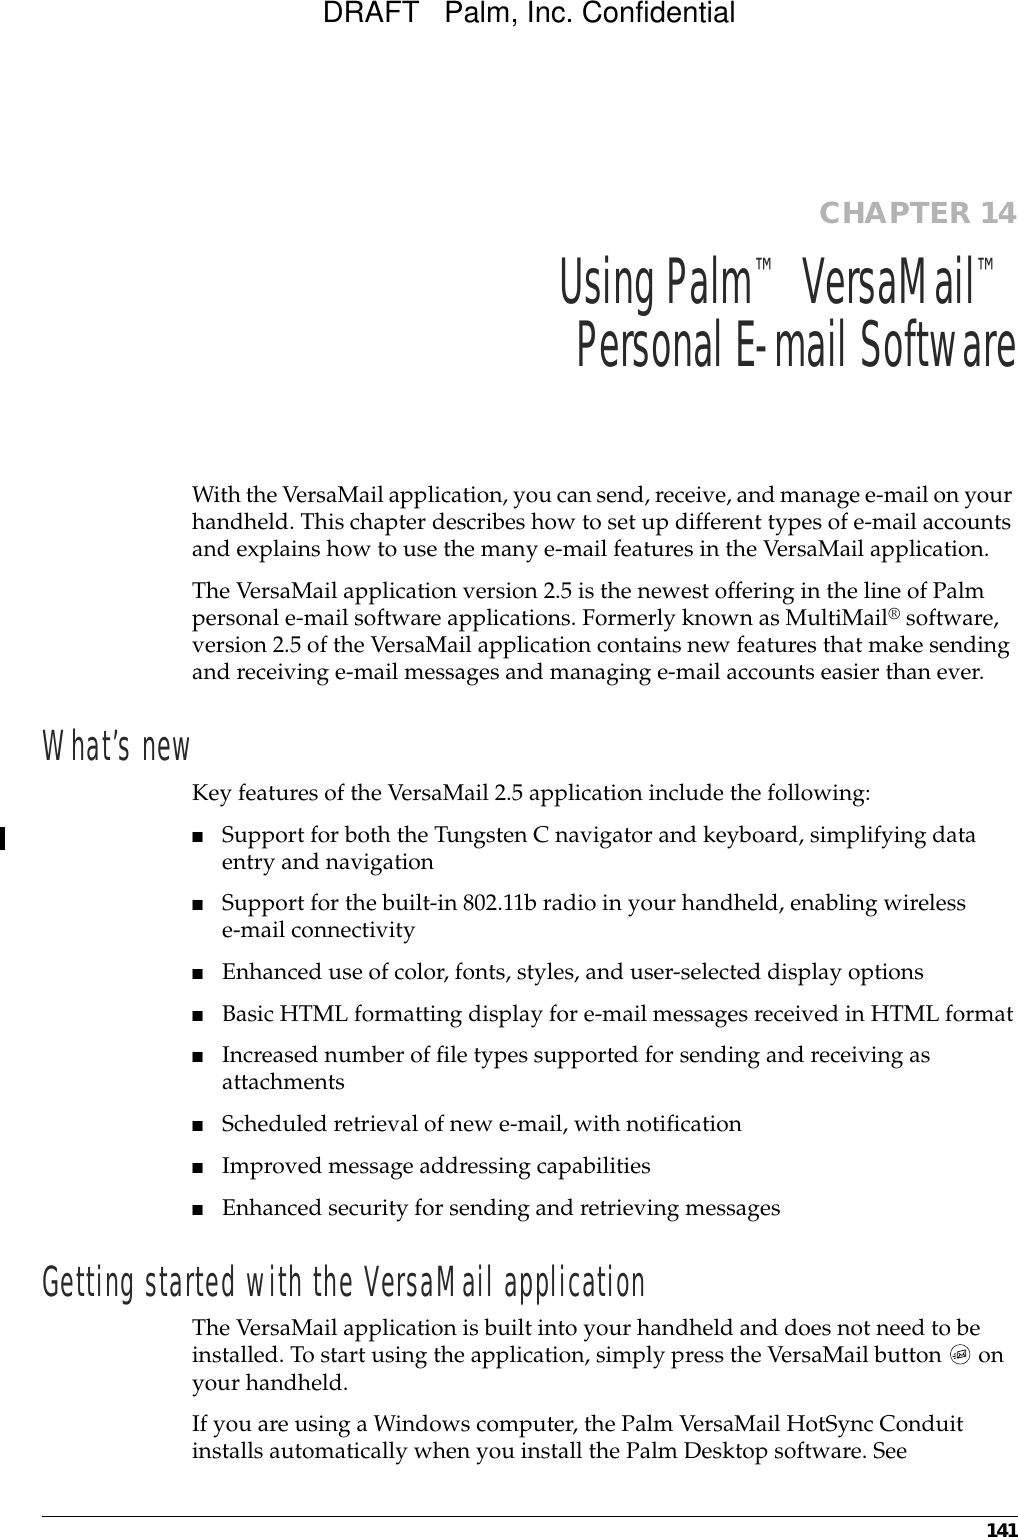
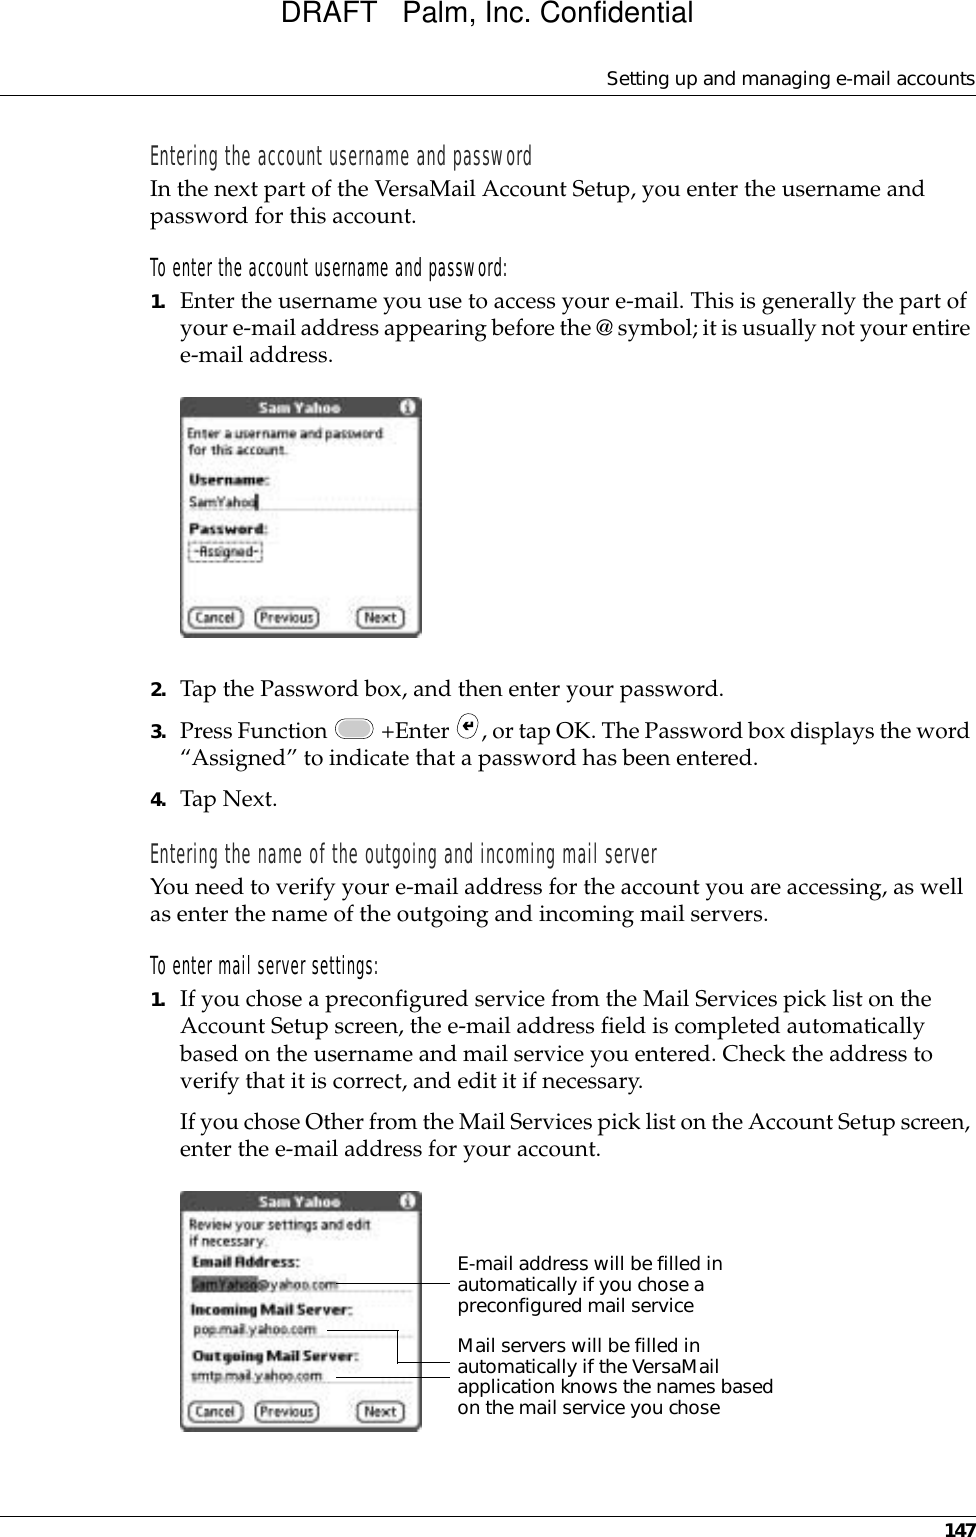
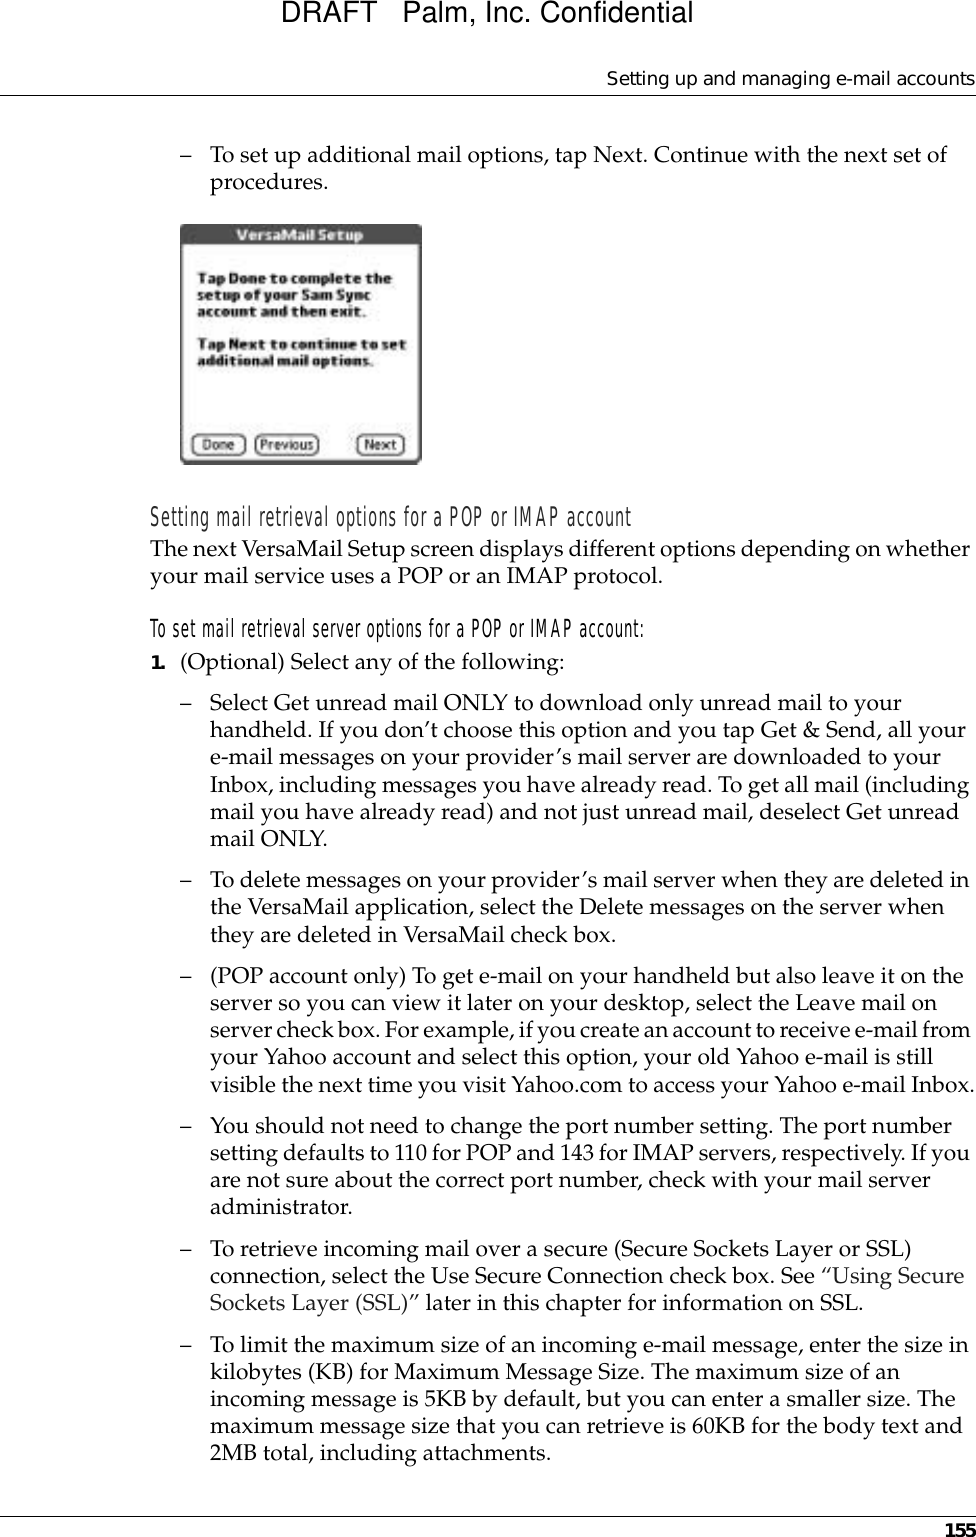
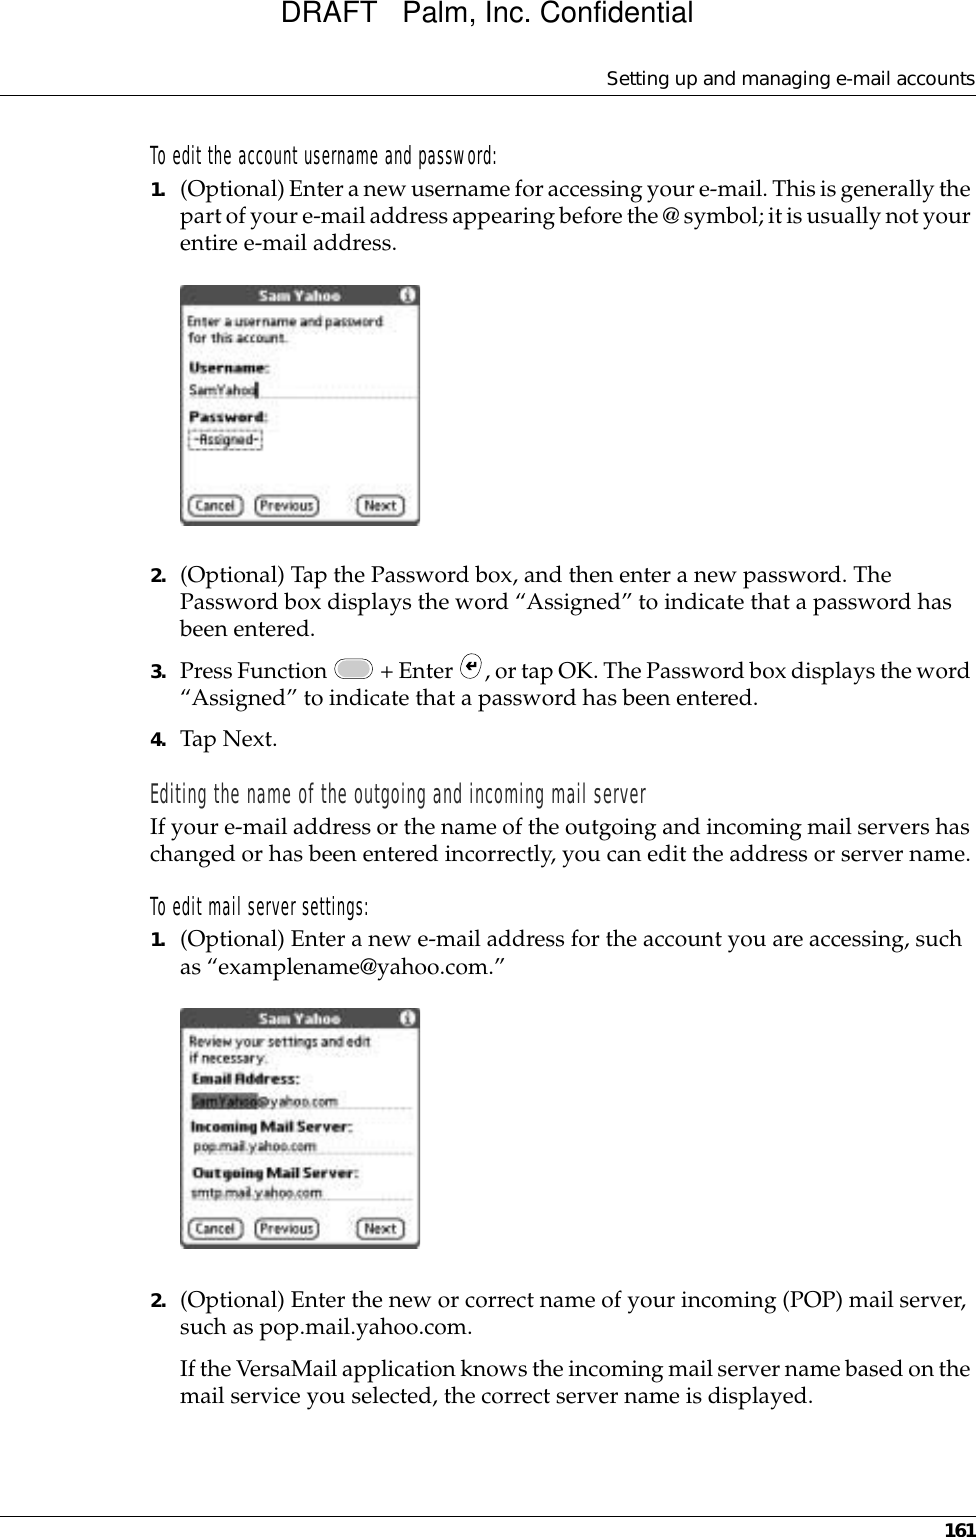
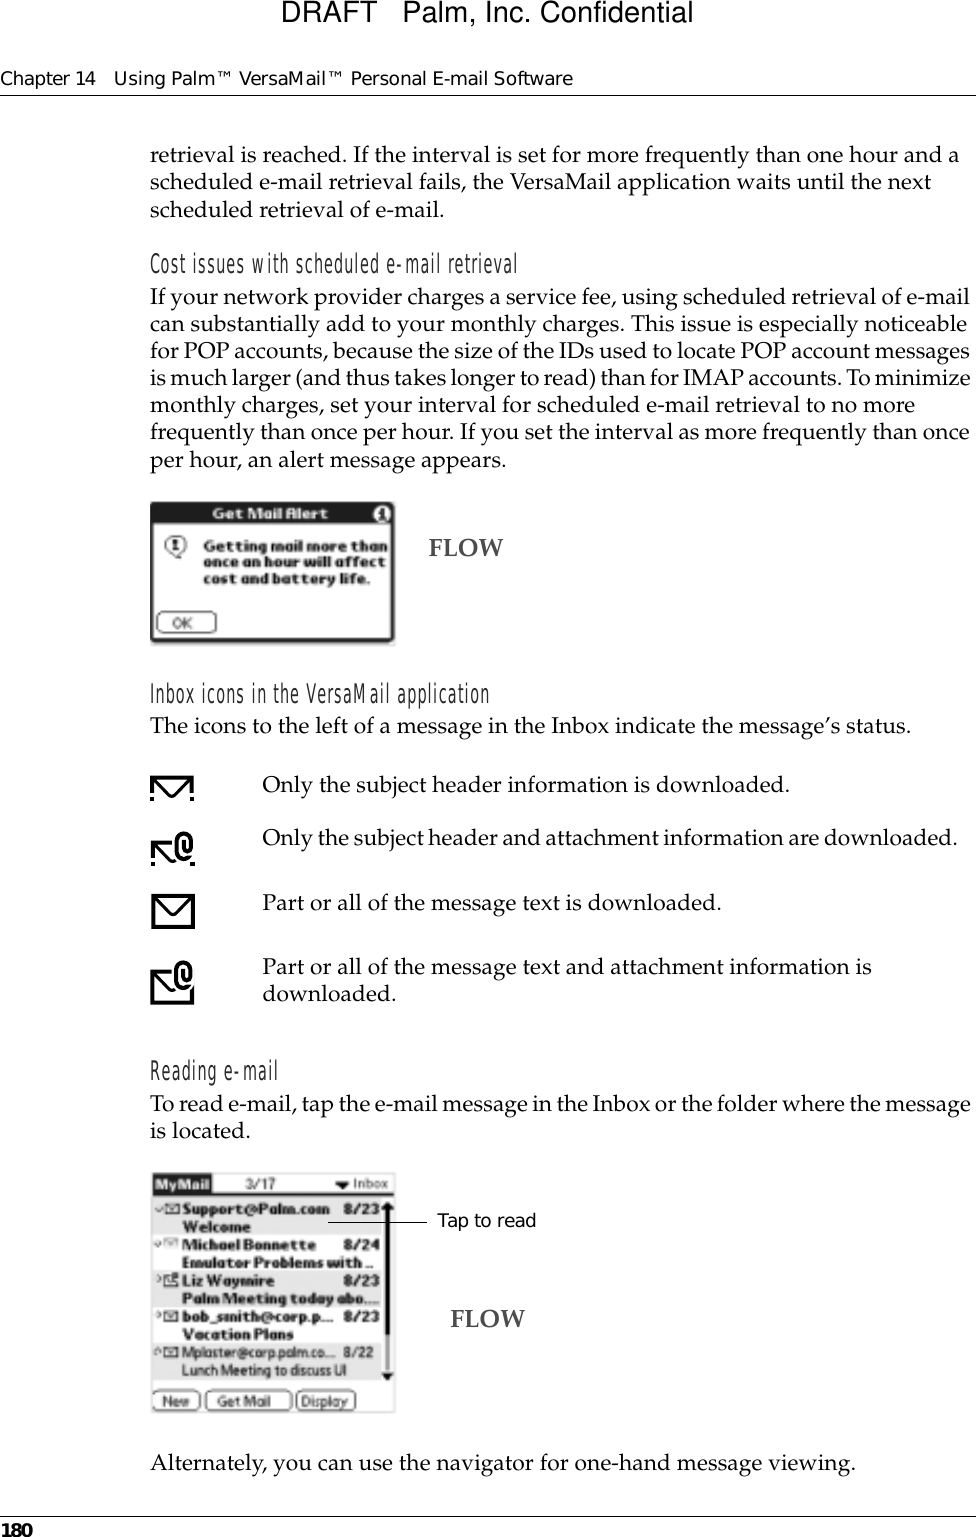
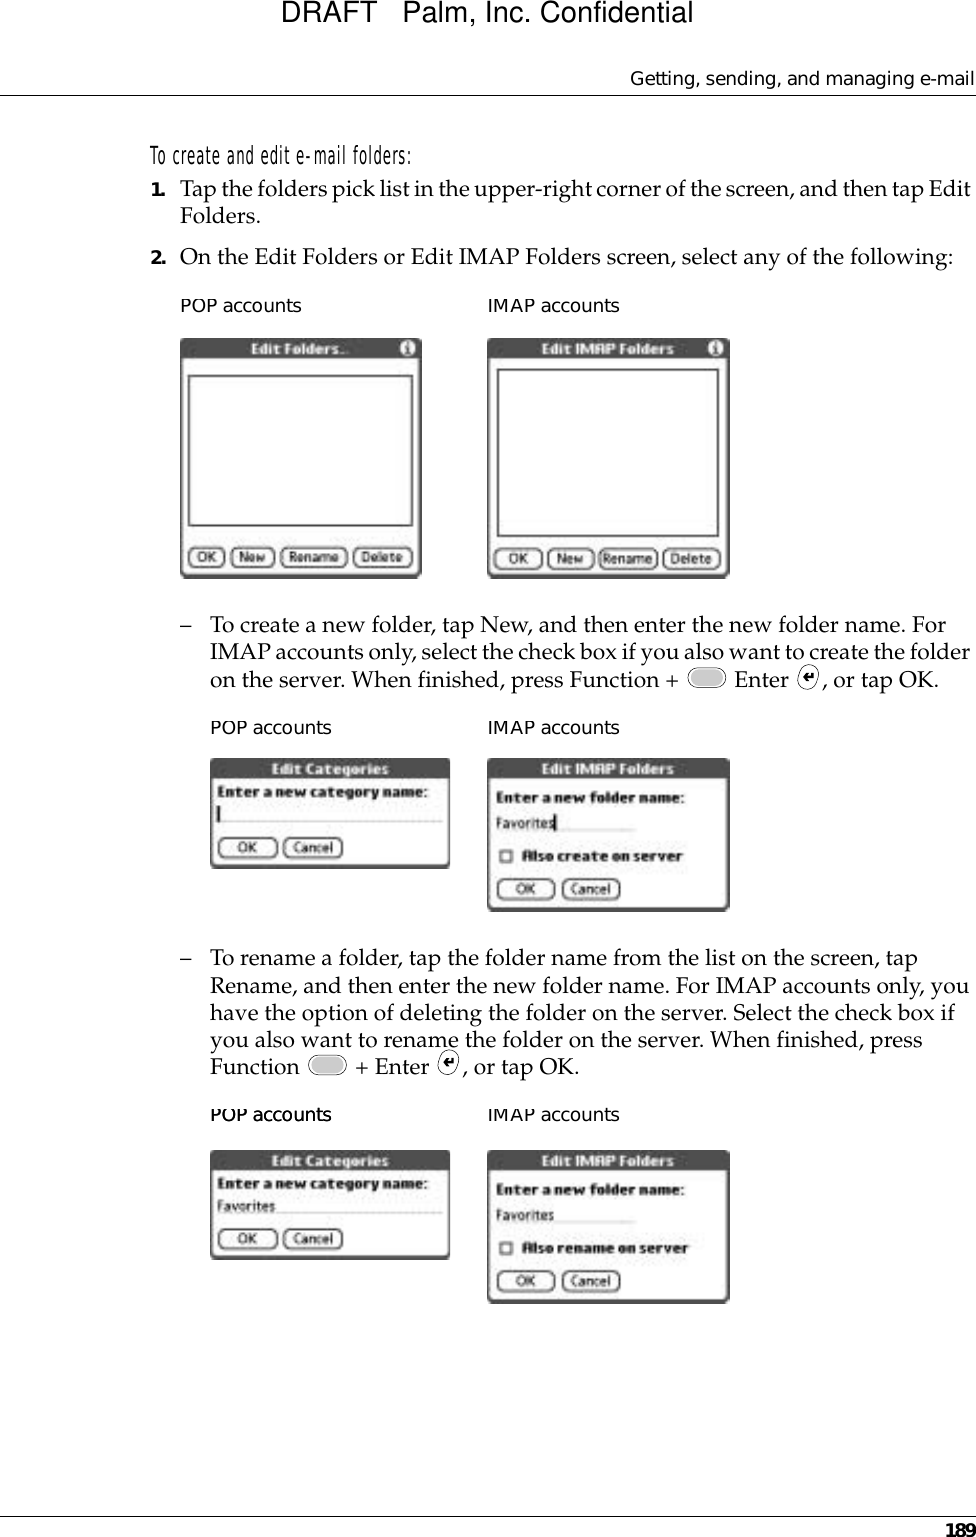
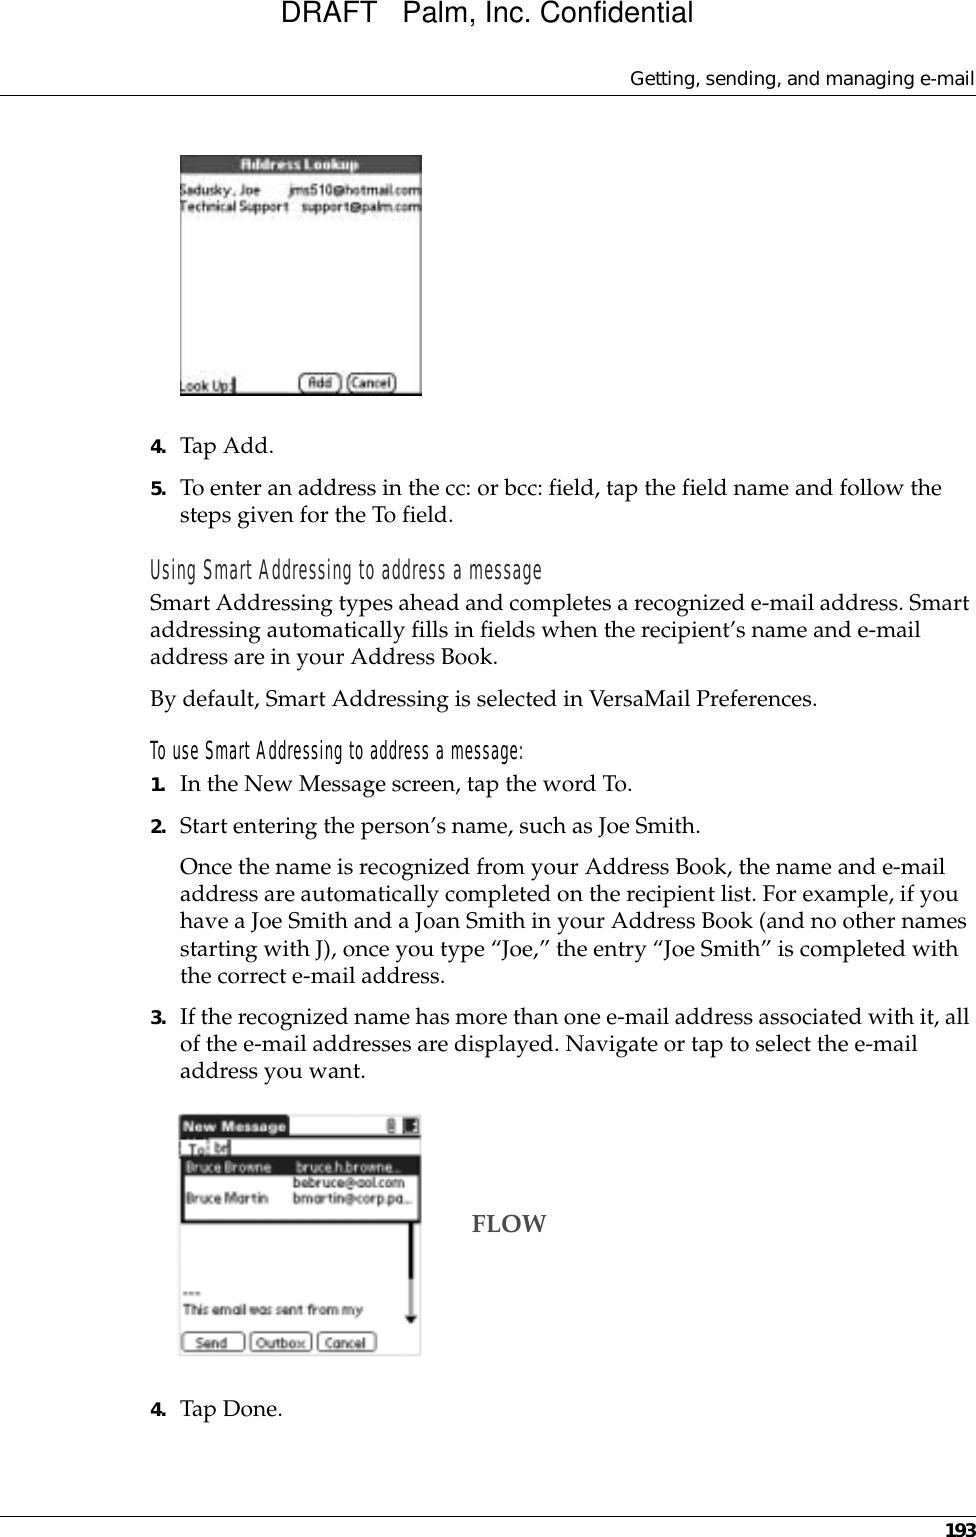
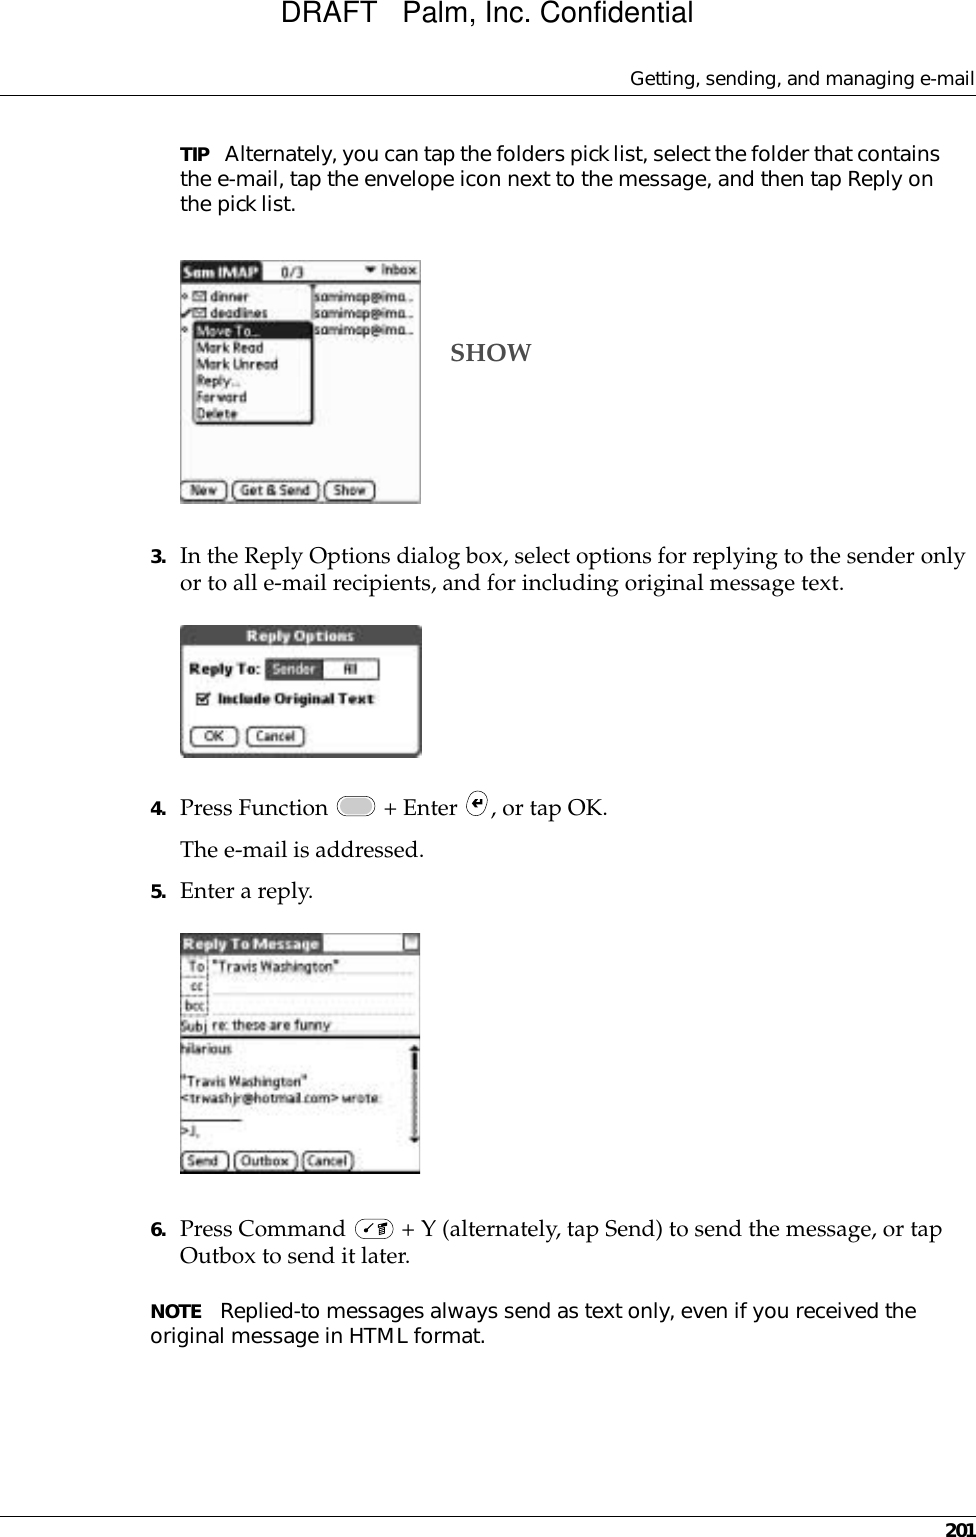
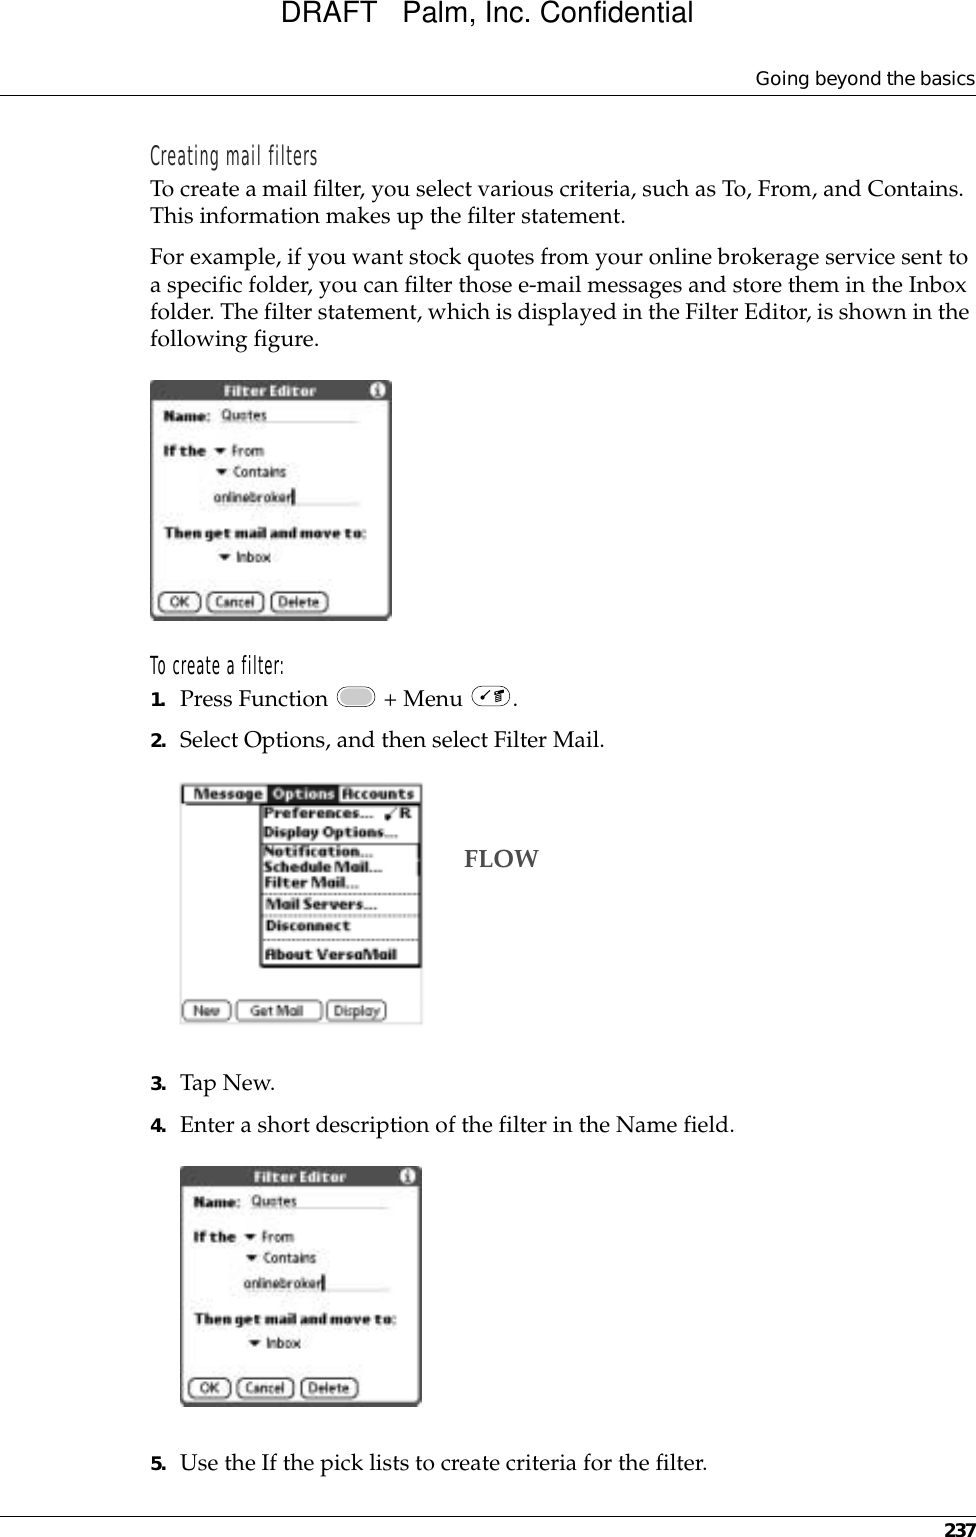
![Buttons preferences317Buttons preferencesThe Buttons Preferences screen enables you to associate different applications with the buttons on the front of the handheld. Any changes you make in the Buttons Preferences screen become effective immediately; you do not have to change to a different screen or application.If you assign a different application to a button, you can still access the original application using the Applications Launcher. To change the Buttons preferences:1. Tap the pick list next to the button you want to reassign.2. Select the application that you want to assign to the button.Connection preferencesThe Connection Preferences screen enables you to define the settings used to connect your handheld to other devices. The screen displays a list of available configurations that are ready to be further defined; the list varies depending on the kind of software you’ve added to your handheld.You can also create custom configurations, which include the following:Tap arrow to show pick listTap Default to restore all of the buttons to their factory settingsPC via Cradle/Cable: A local HotSync connection; the direct connection between your handheld and your desktop computer. Your handheld is connected by its universal connector to the cradle, and the cradle is attached by its cable to a USB port of your desktop computer. (If you are using the optional serial cradle, the cradle attaches by its cable to a serial [COM] port of your computer.)Modem via Universal Connector: A cable connection between your handheld’s universal connector and a modem for dialing in to a modem that is part of your computer or laptop. DRAFT Palm, Inc. Confidential](https://usermanual.wiki/Palm/200000.User-Manual/User-Guide-321231-Page-329.png)