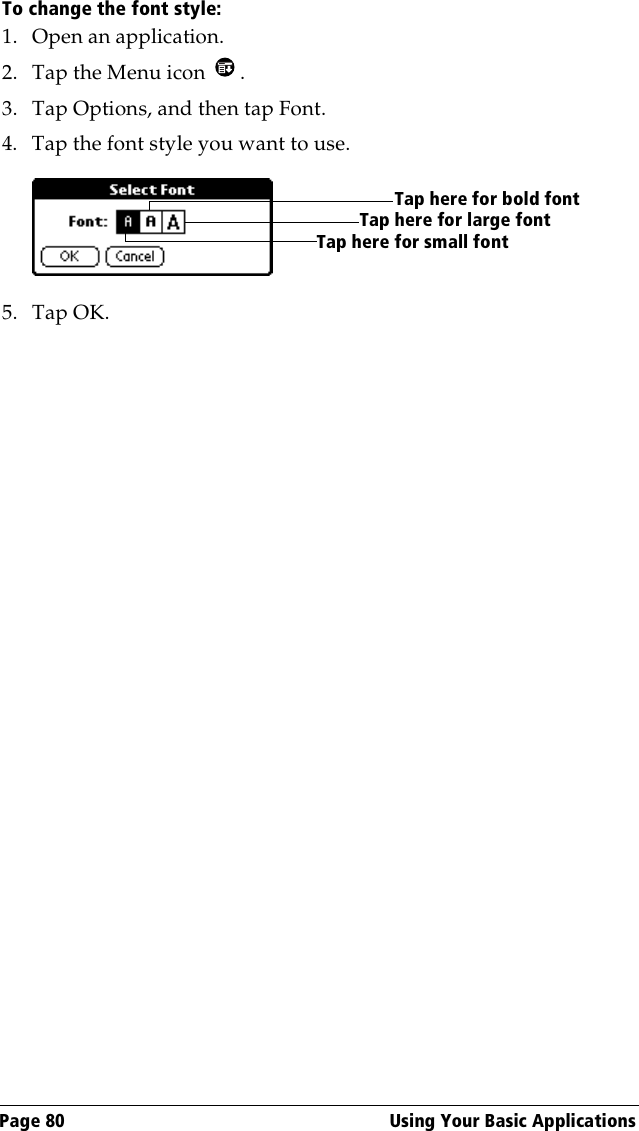
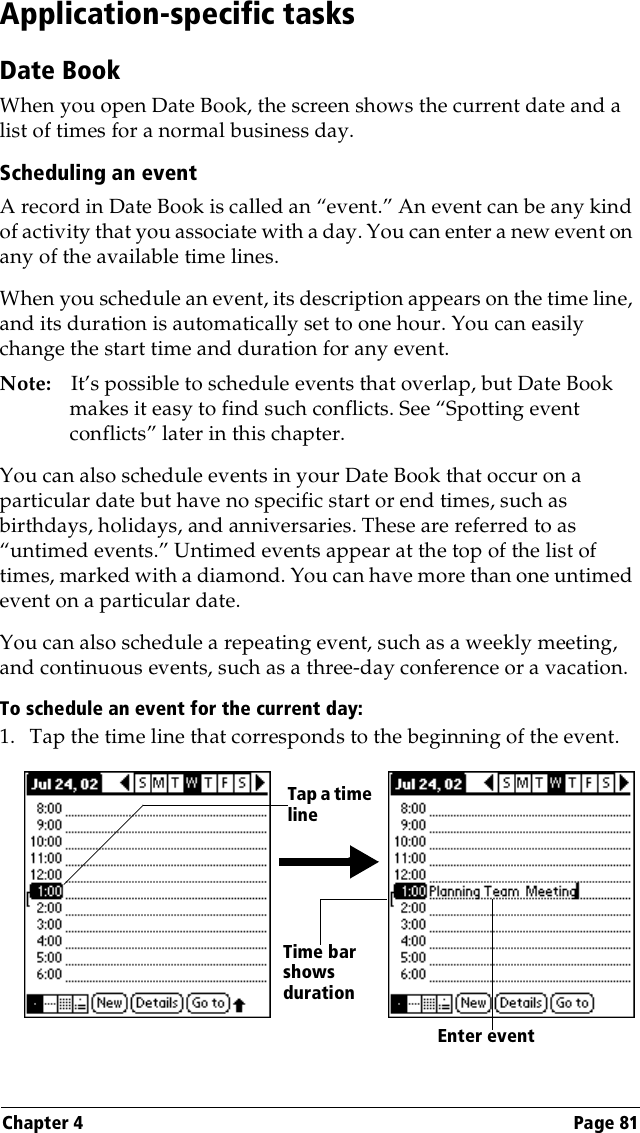
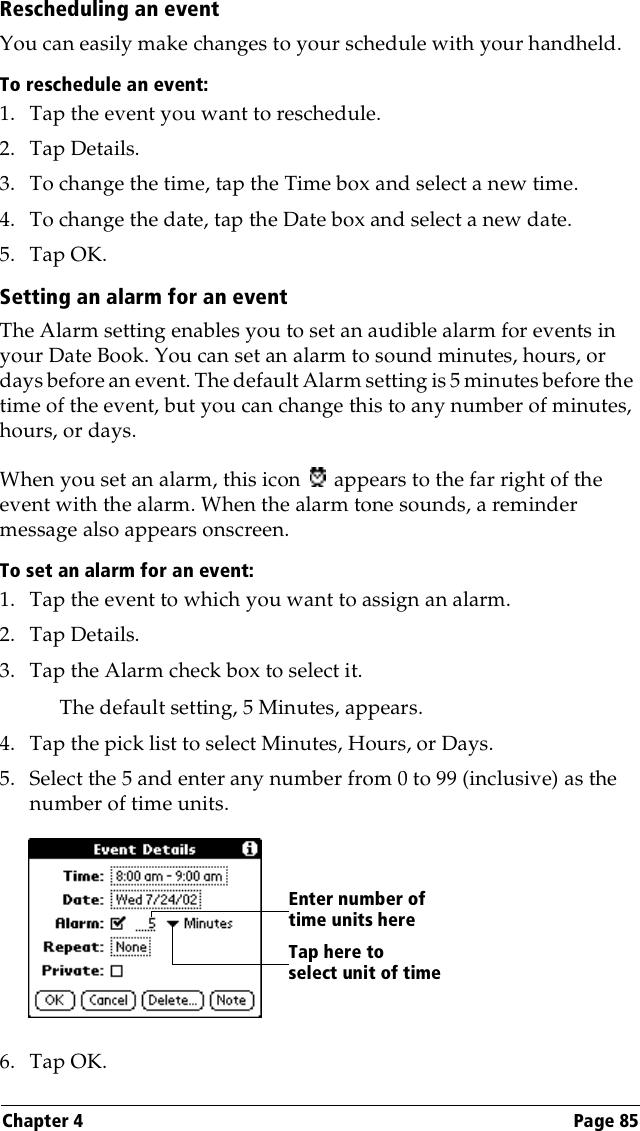
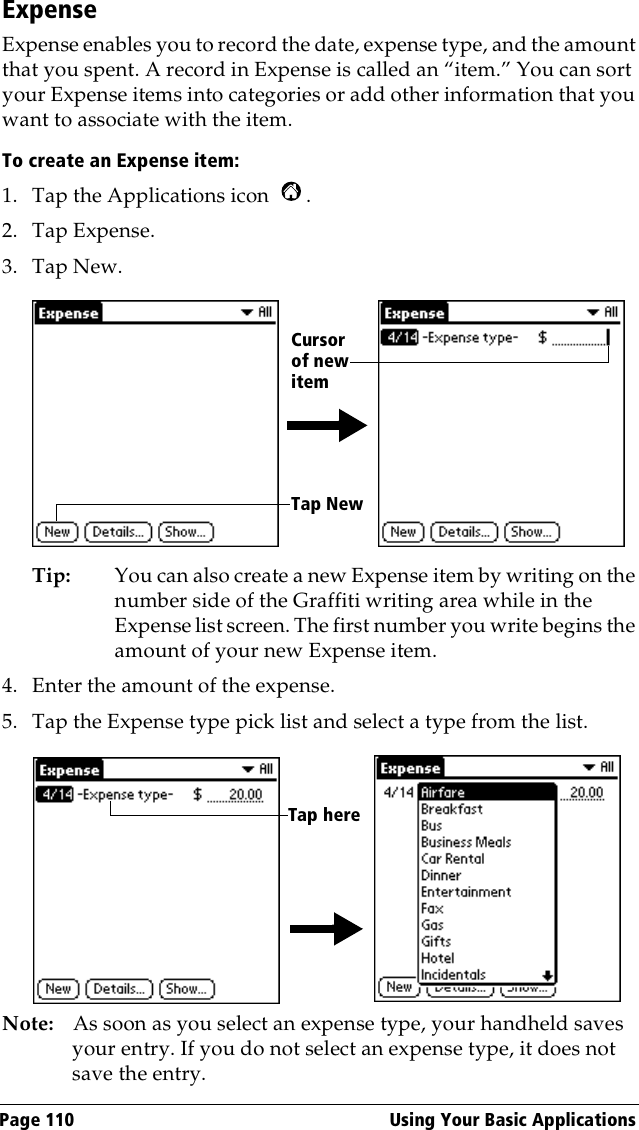
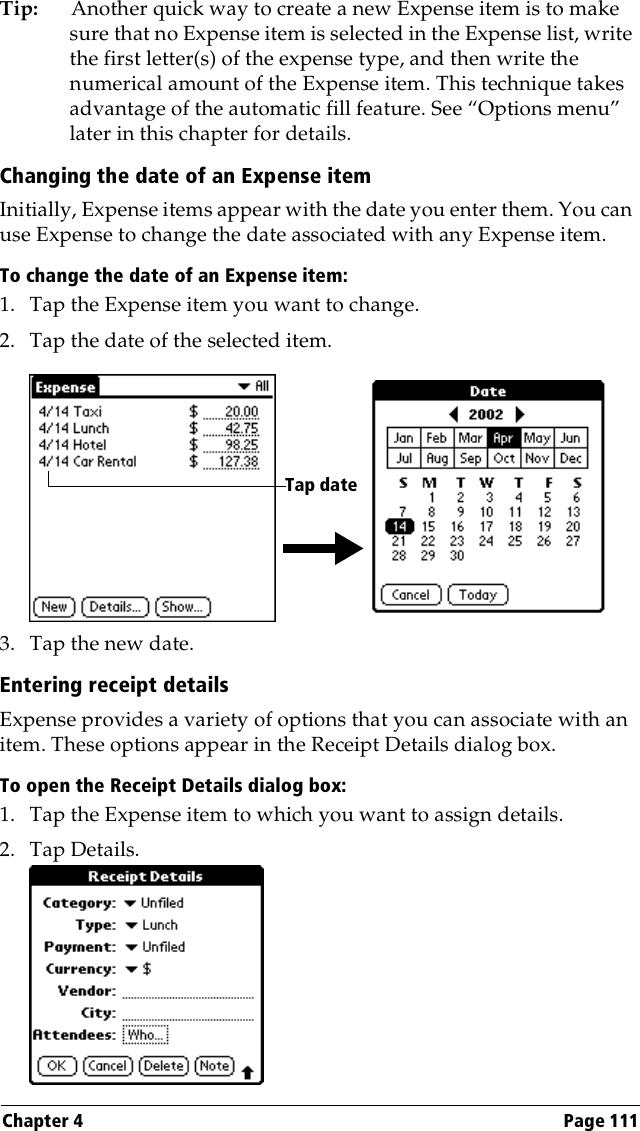
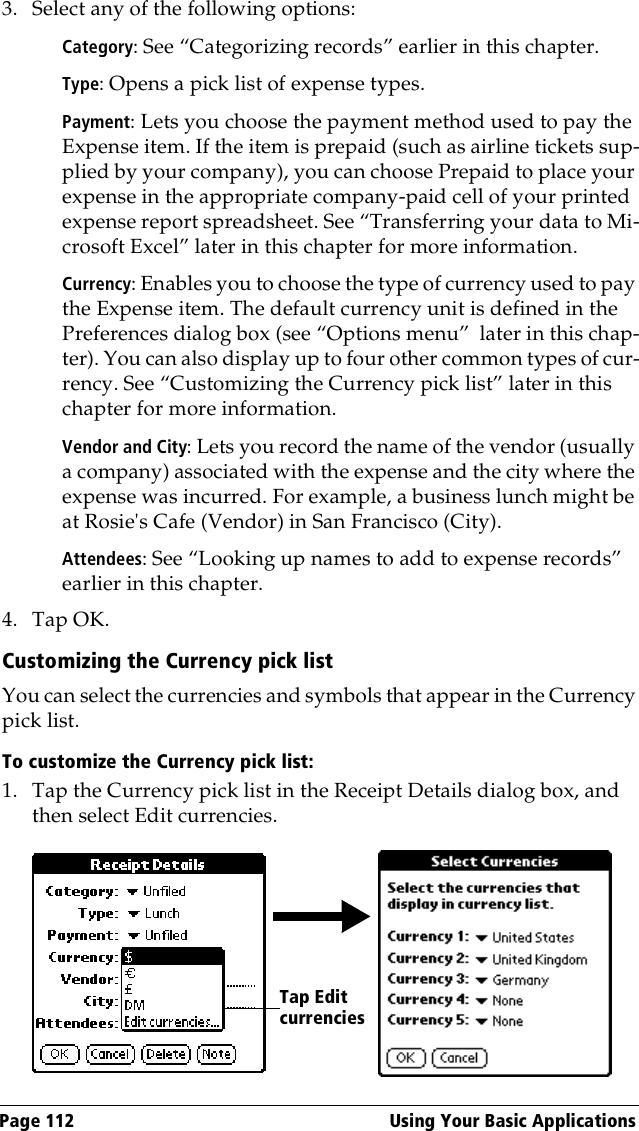
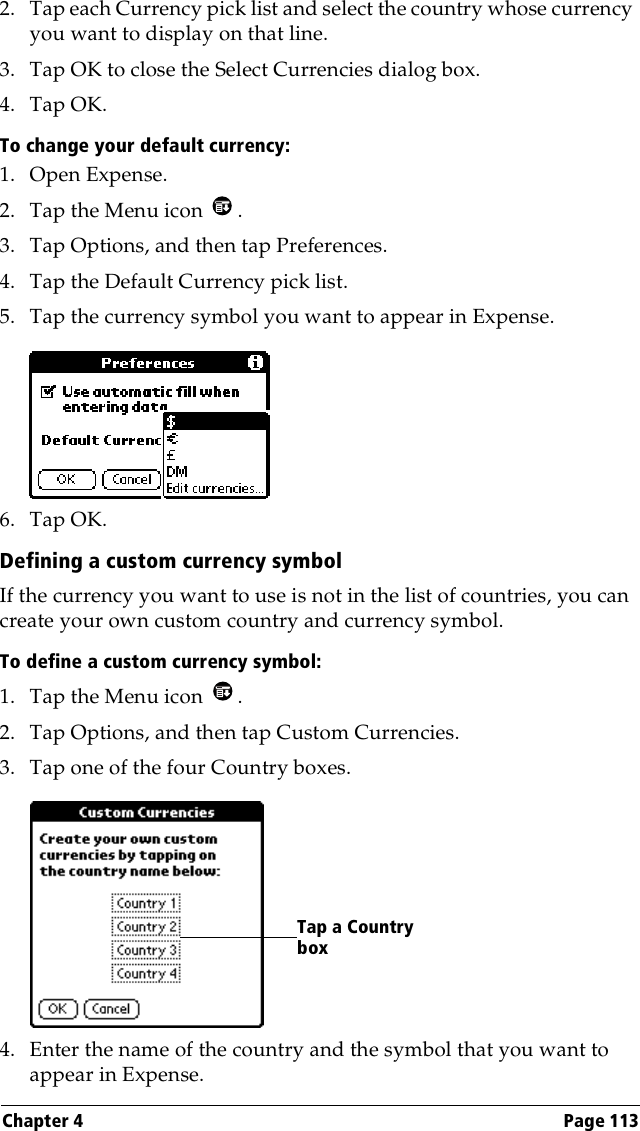
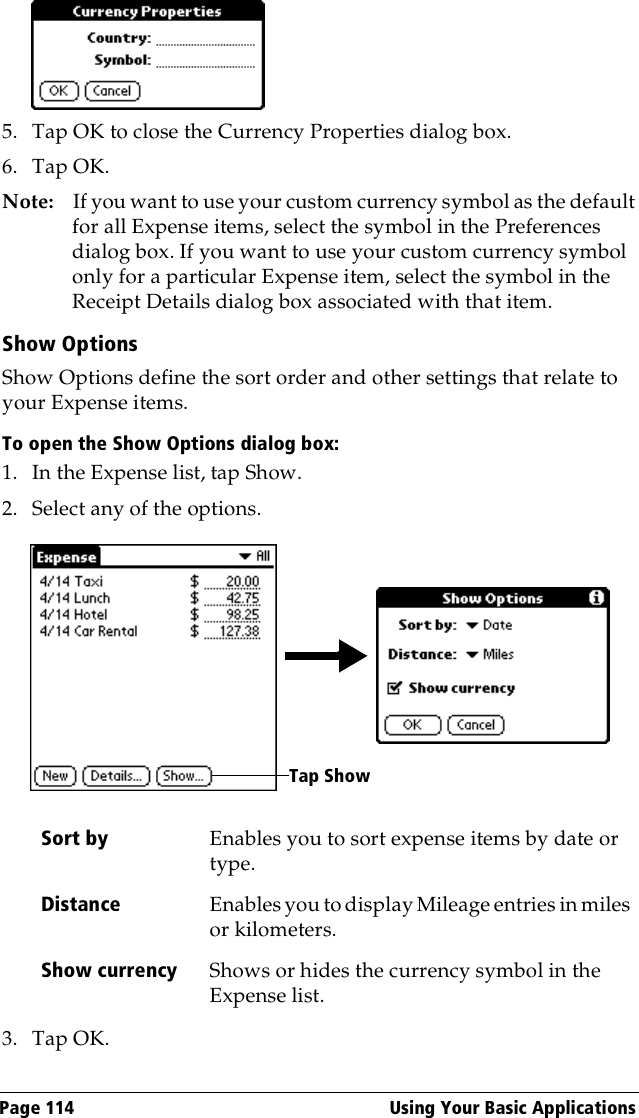
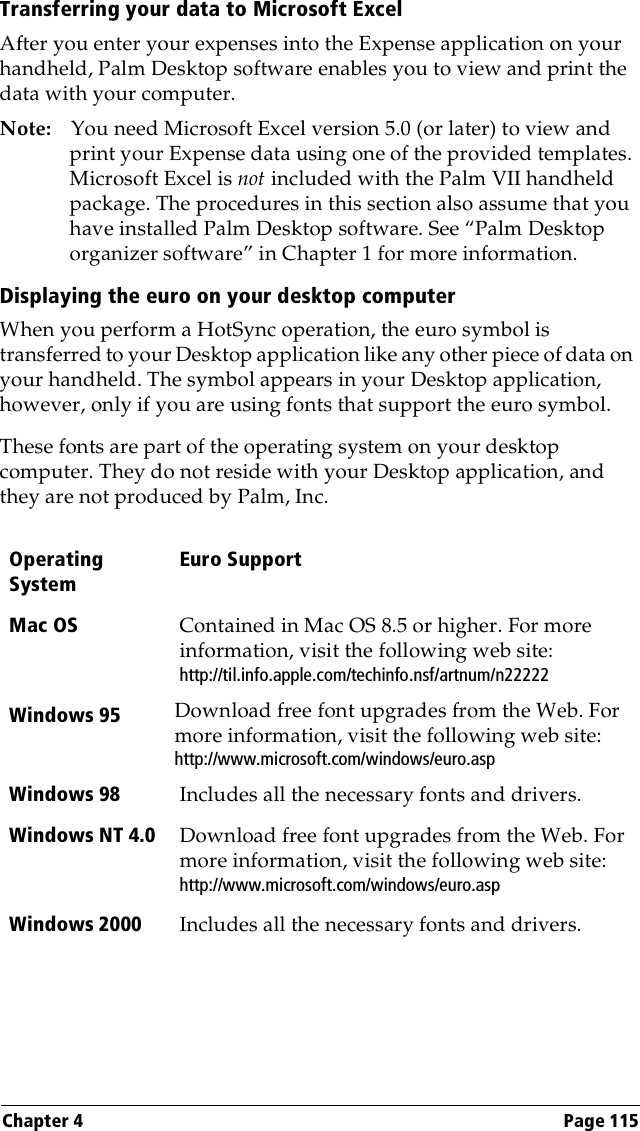
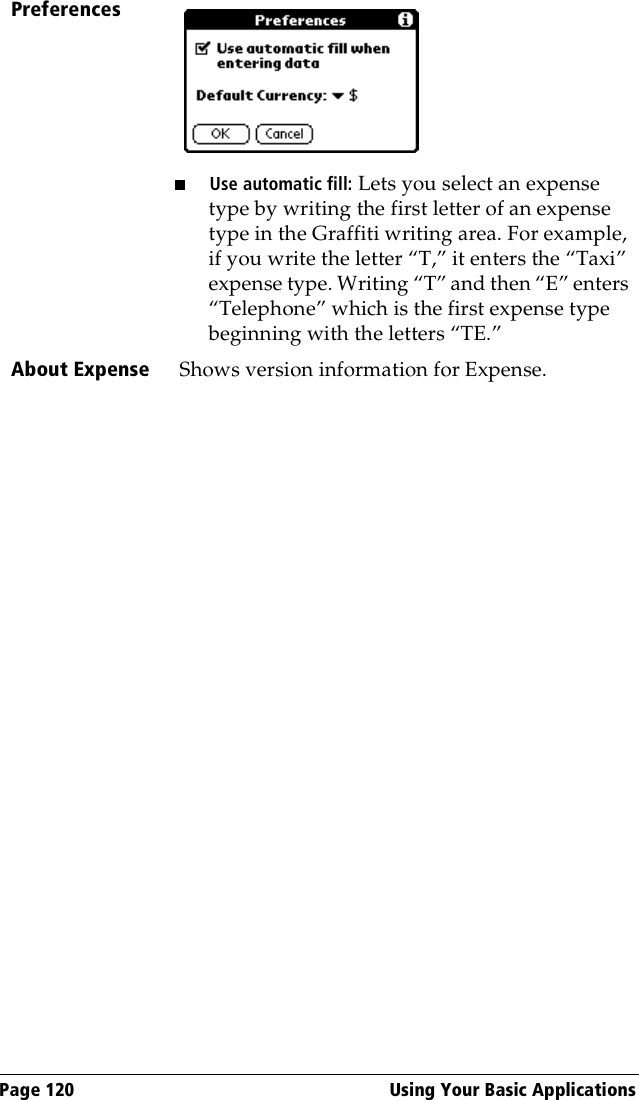
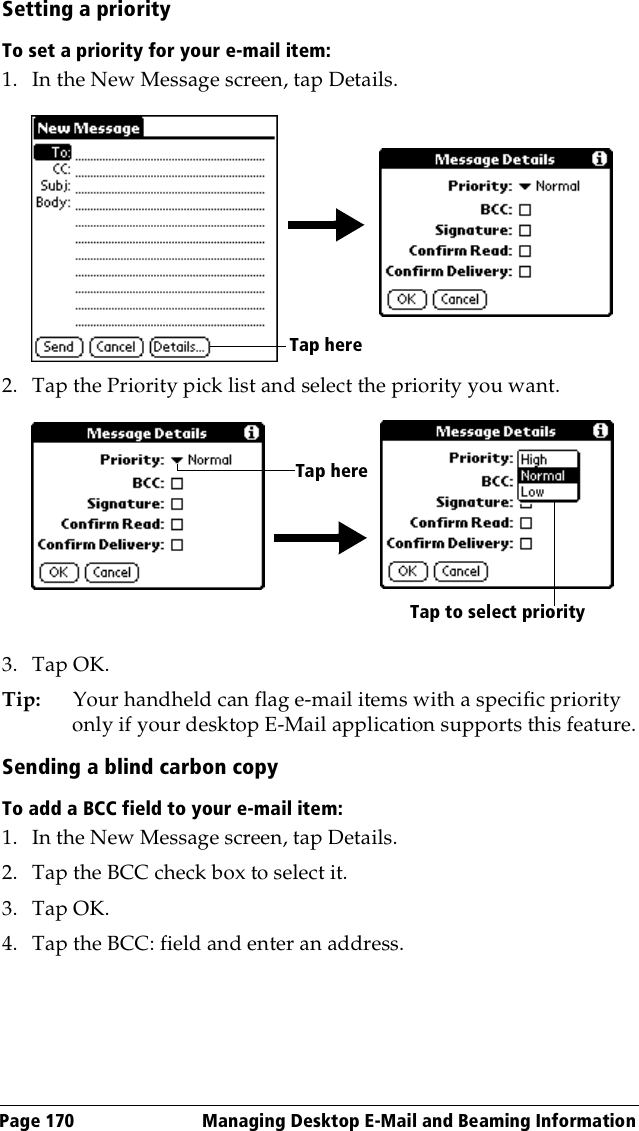
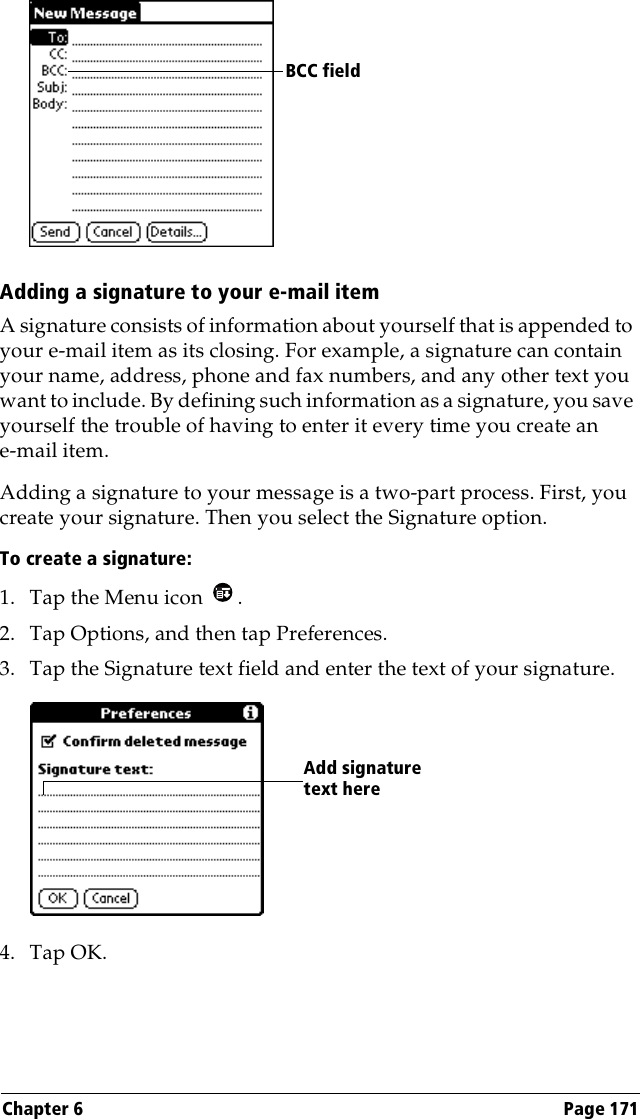
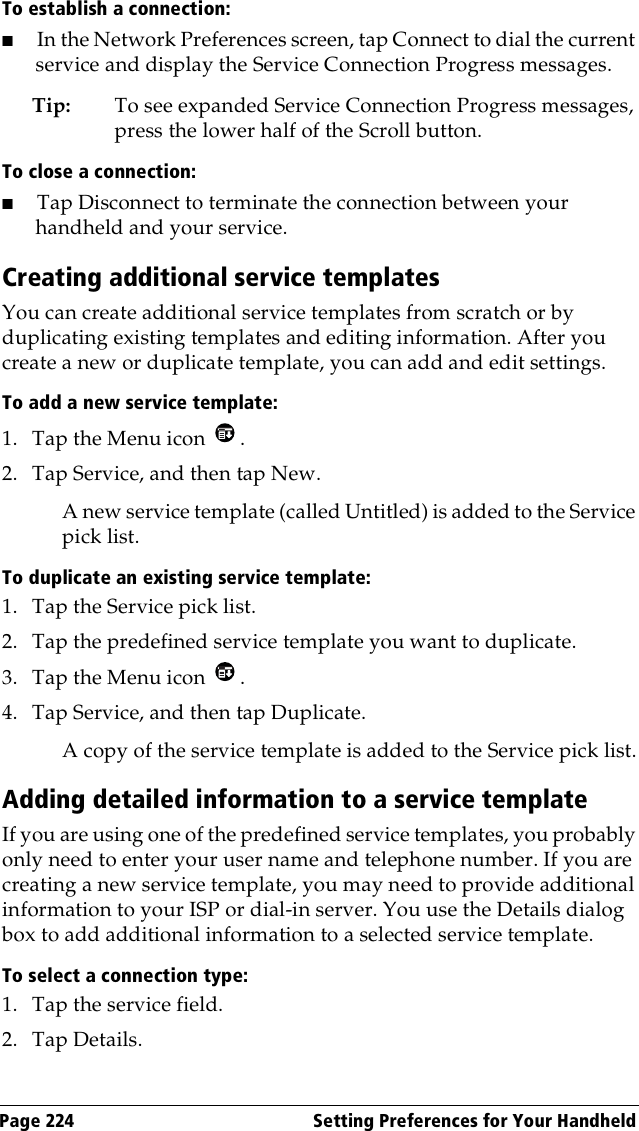
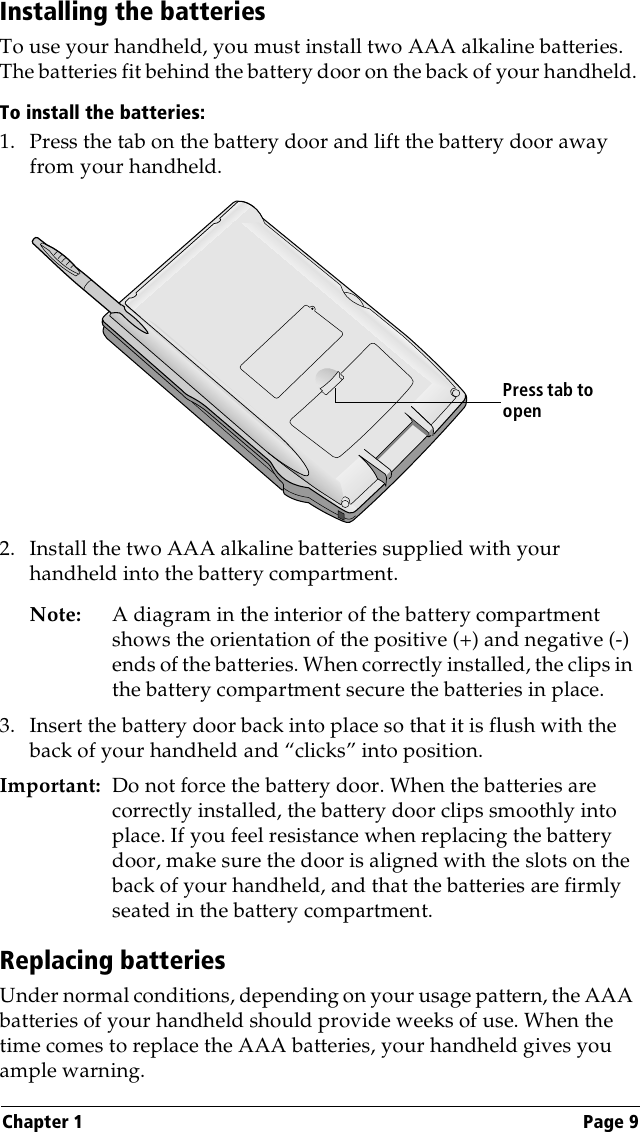
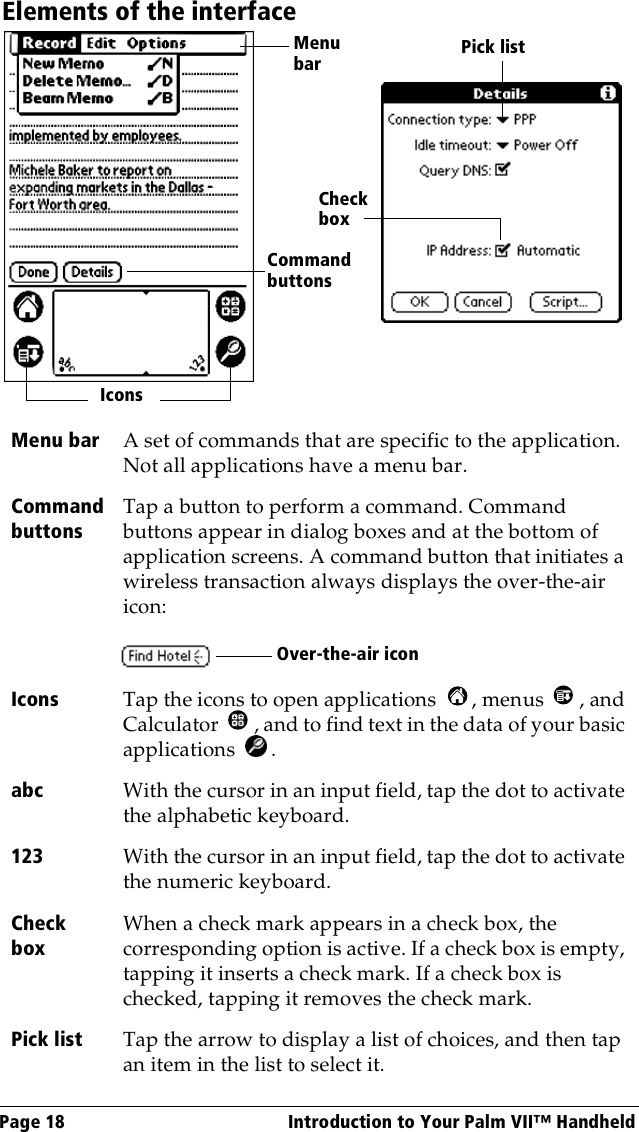
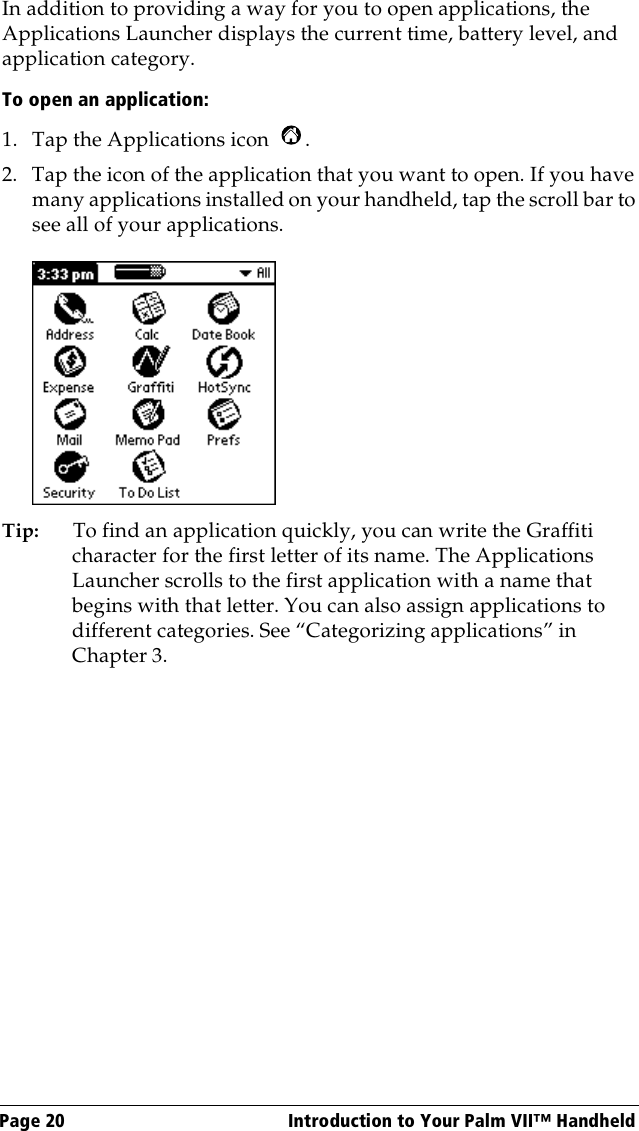
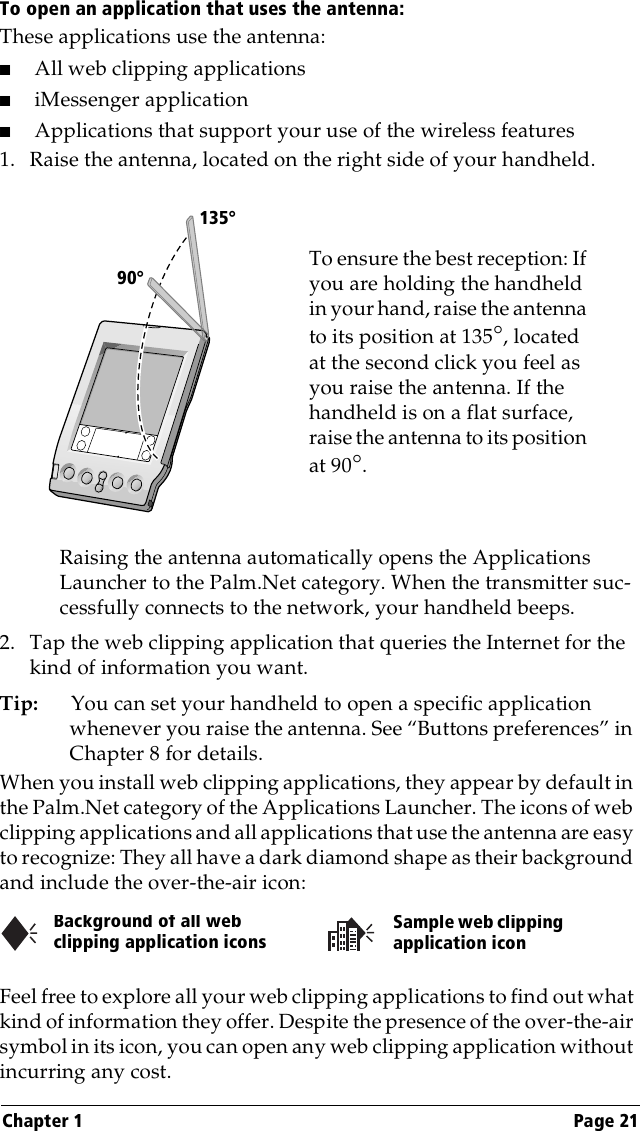
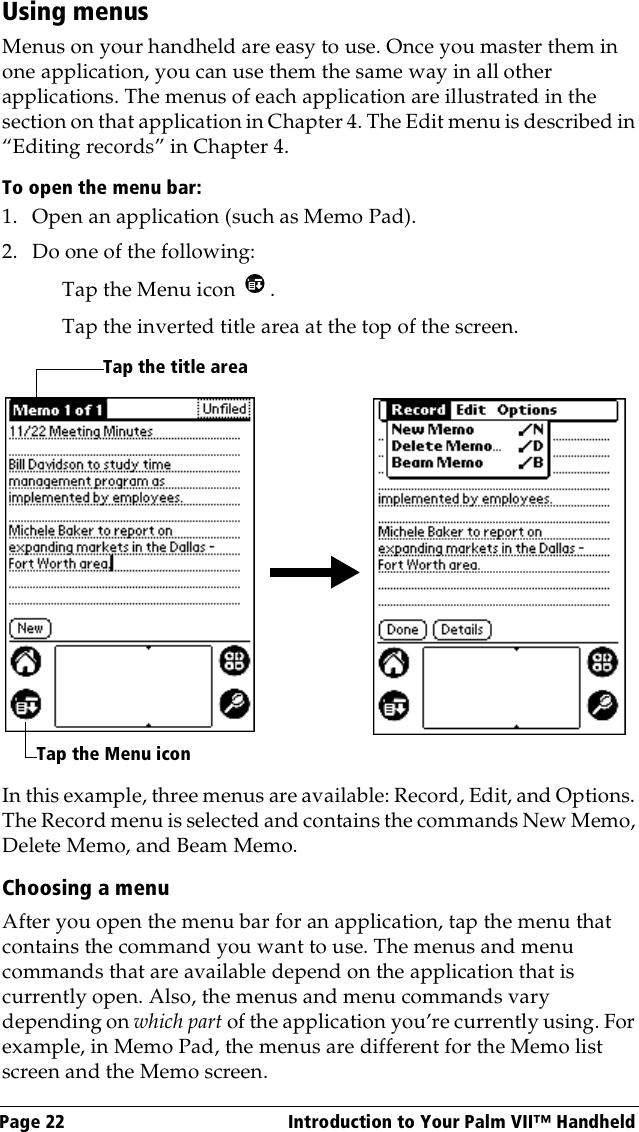
Palm 3C80500 Handheld PDA with low duty cycle packet data User Manual User hand book provided for information only no changes other than name
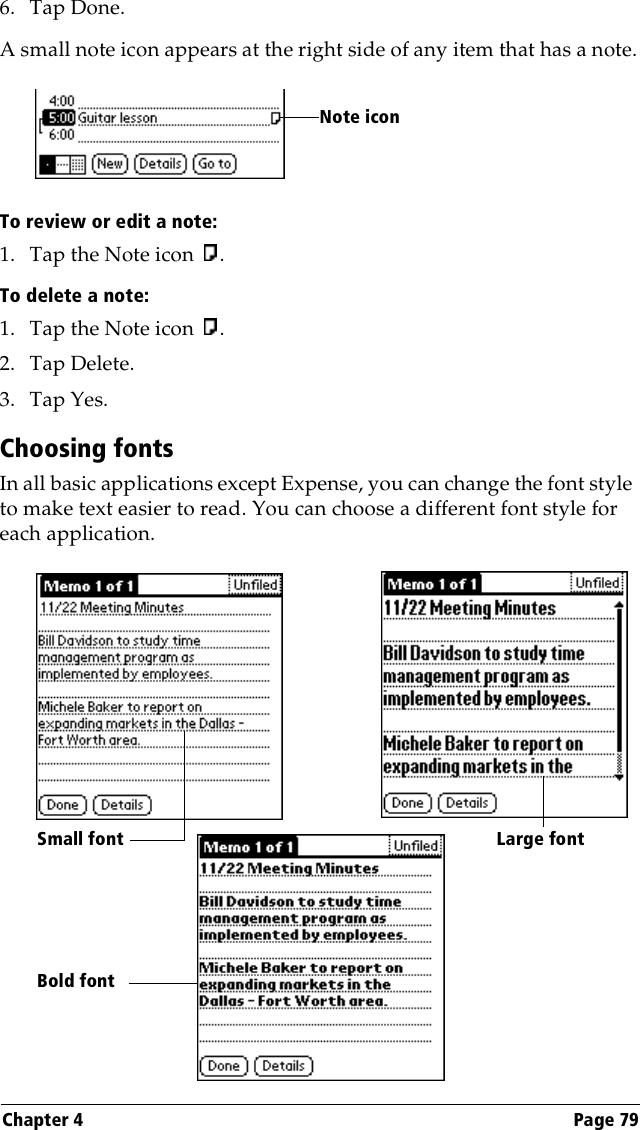
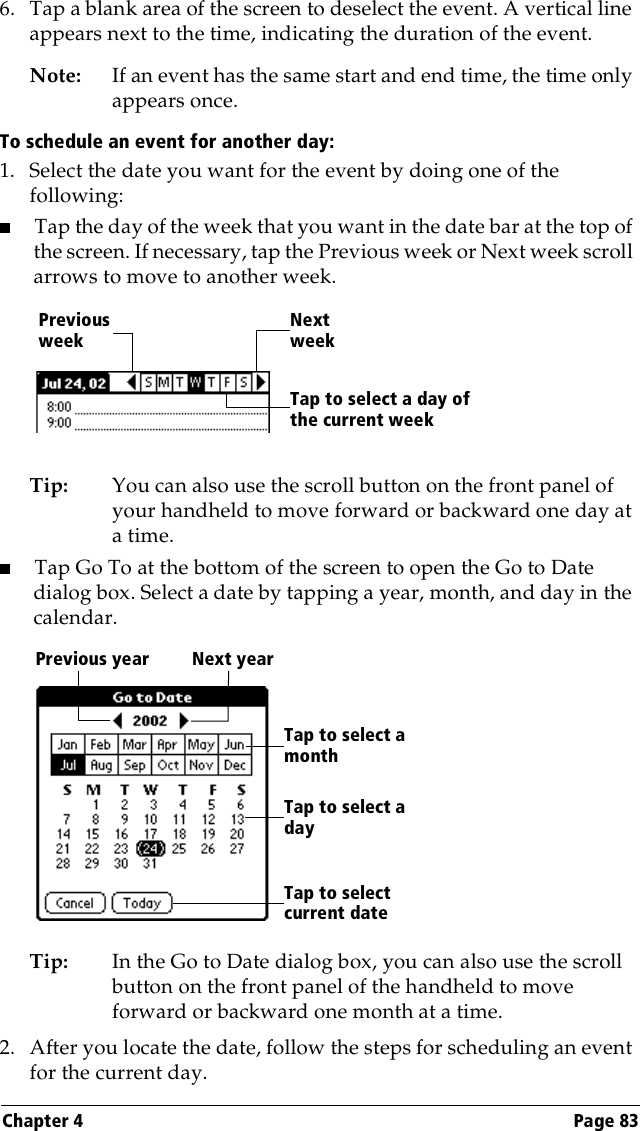
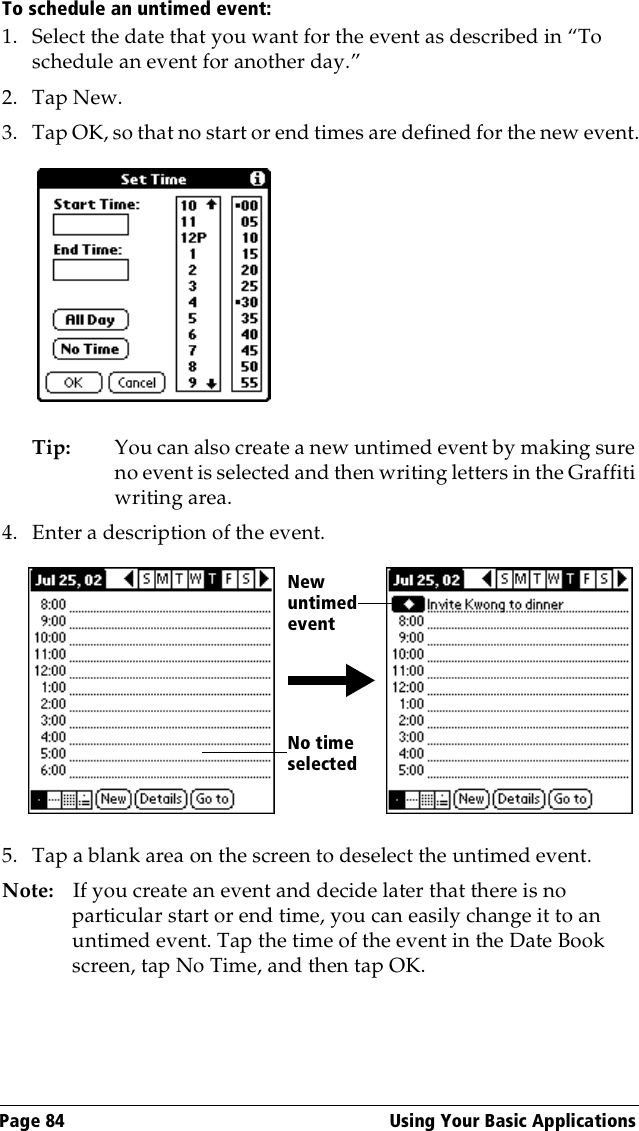
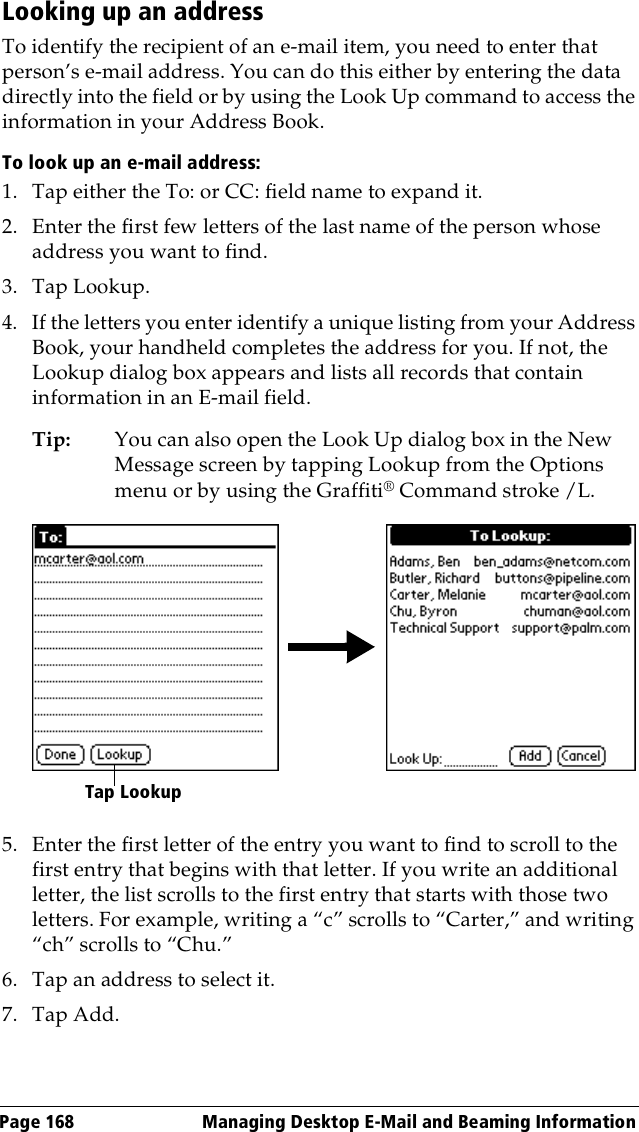
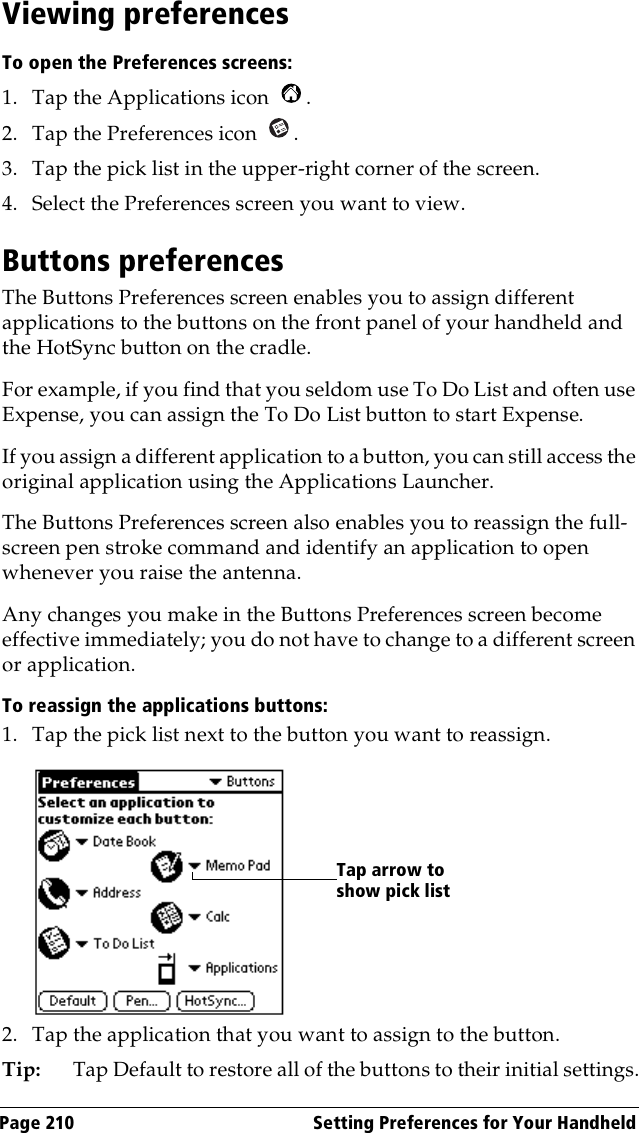
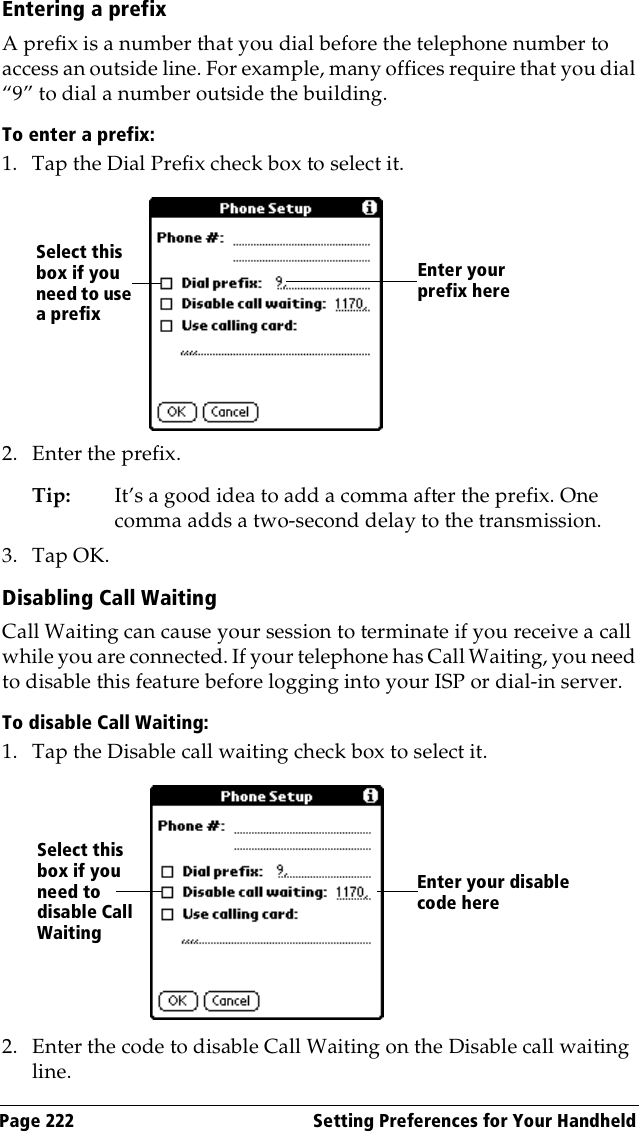
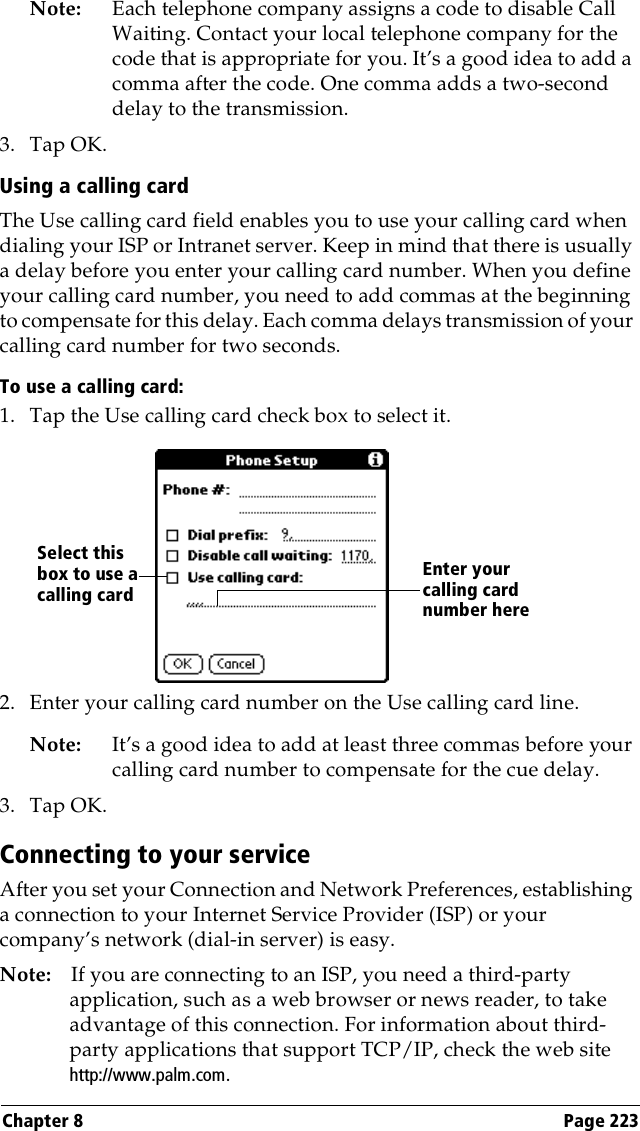
Palm Inc Handheld PDA with low duty cycle packet data User hand book provided for information only no changes other than name
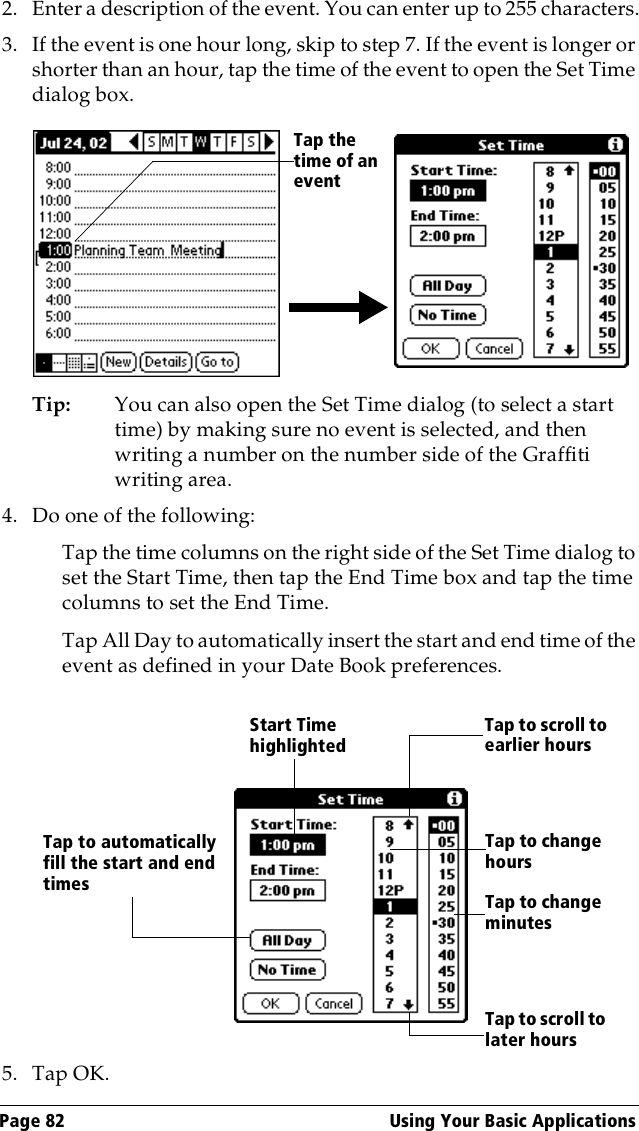
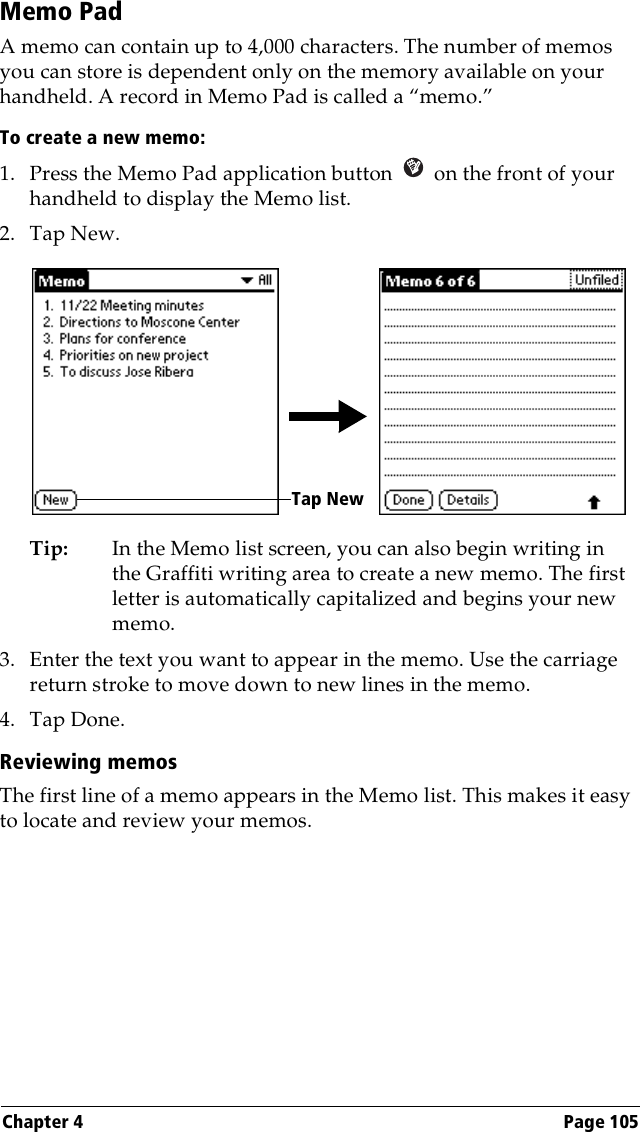
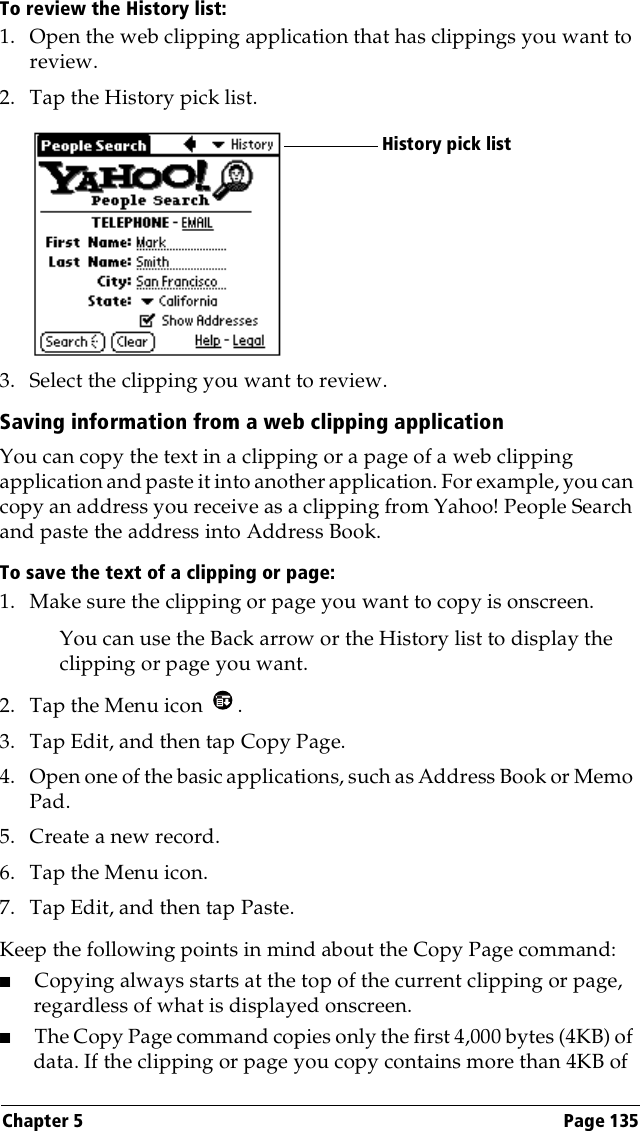
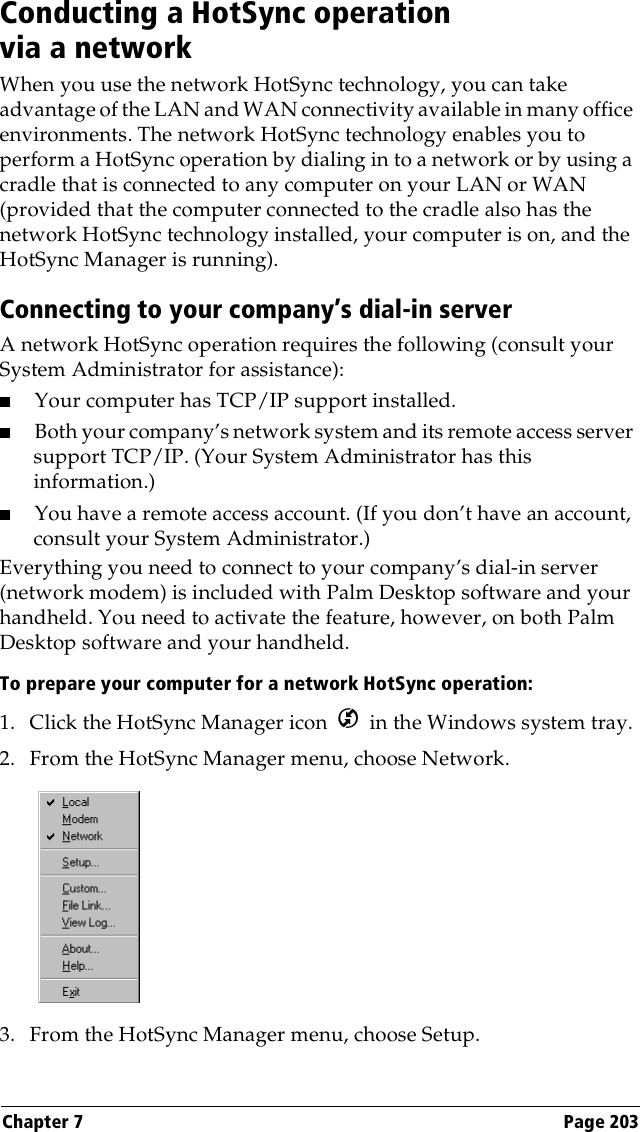
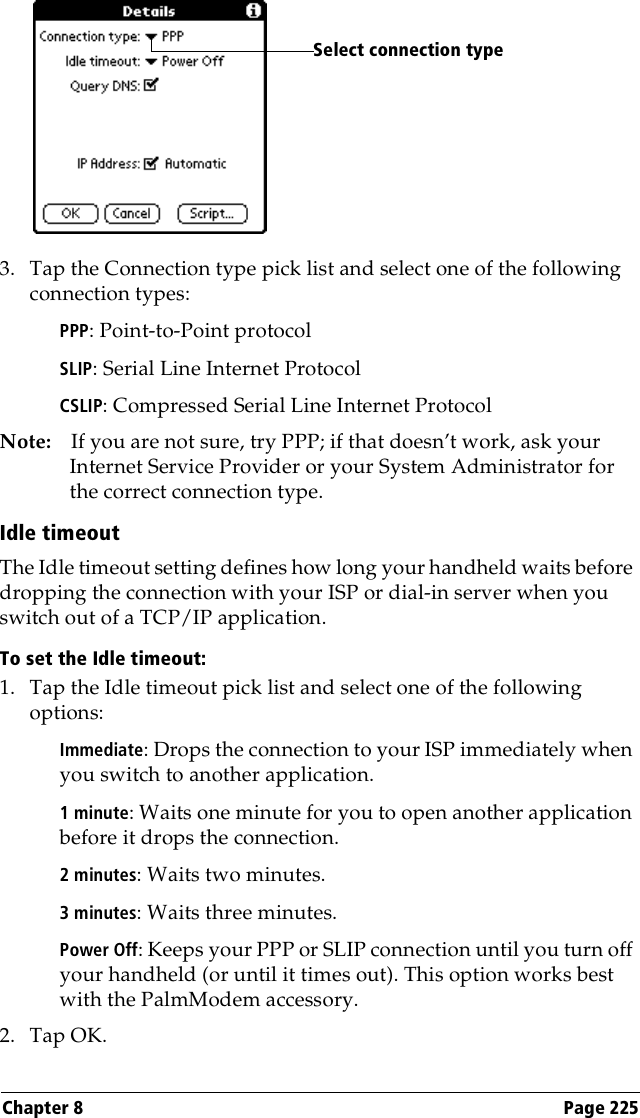
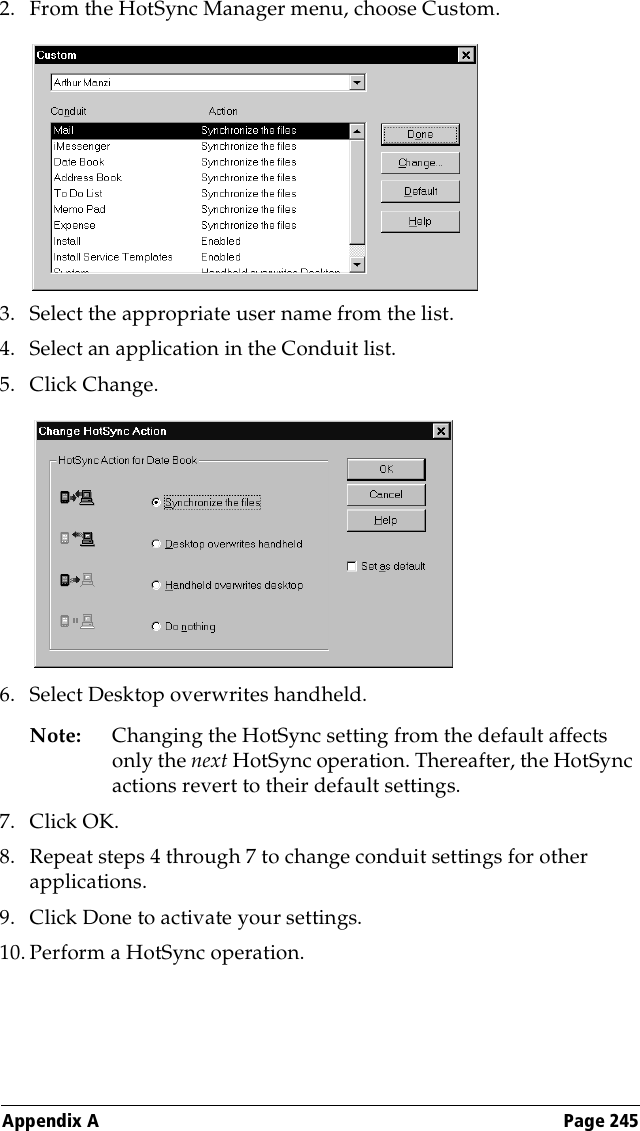
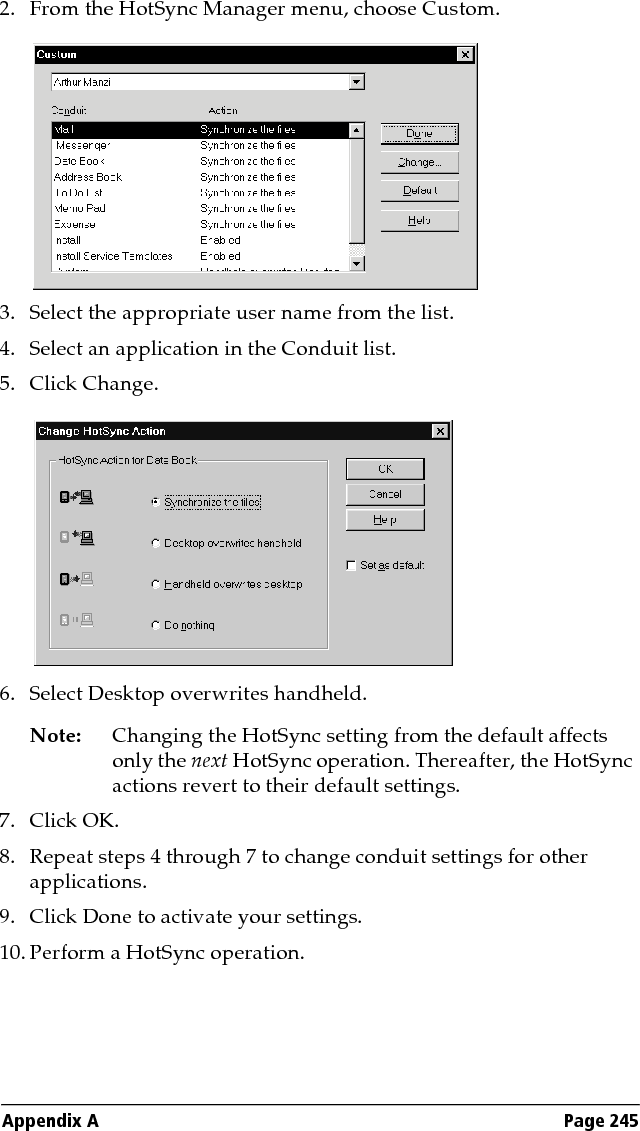
Palm >
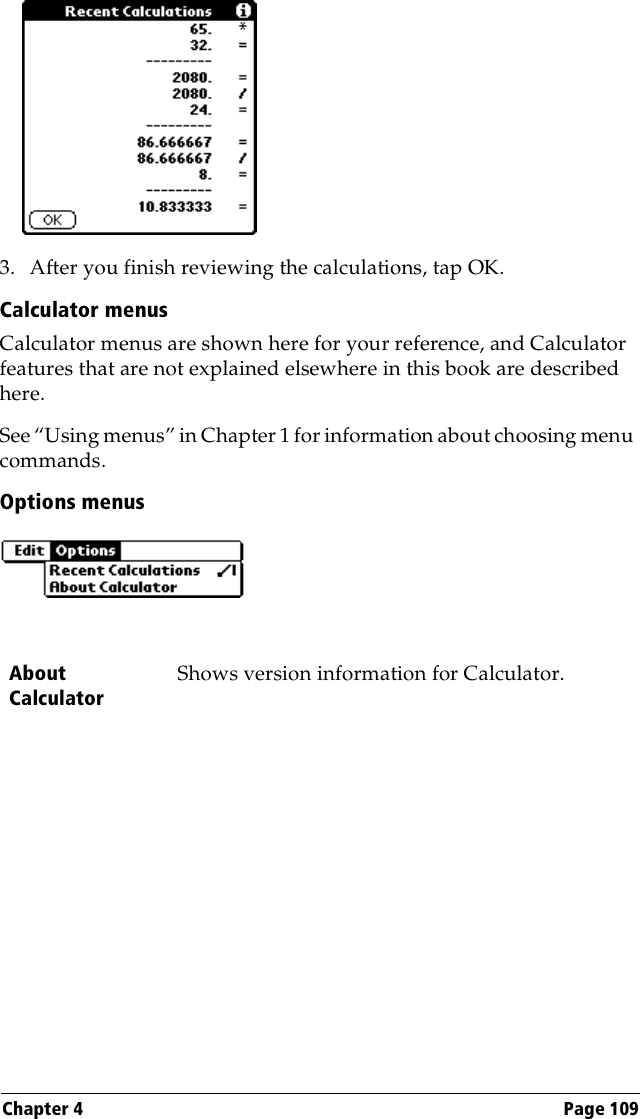
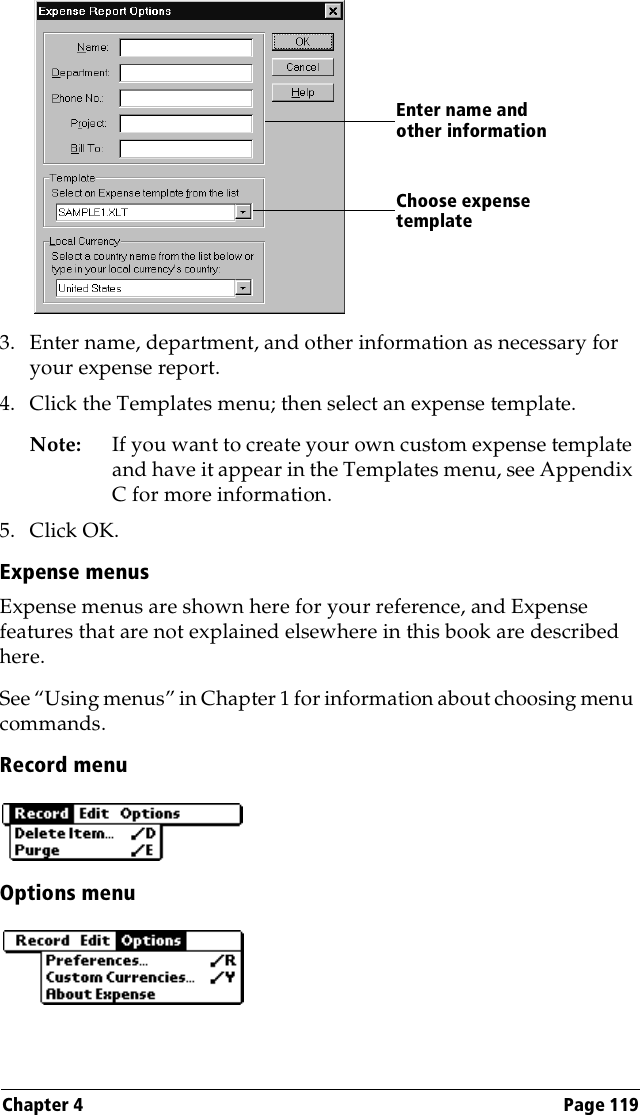
User hand book provided for information only no changes other than name
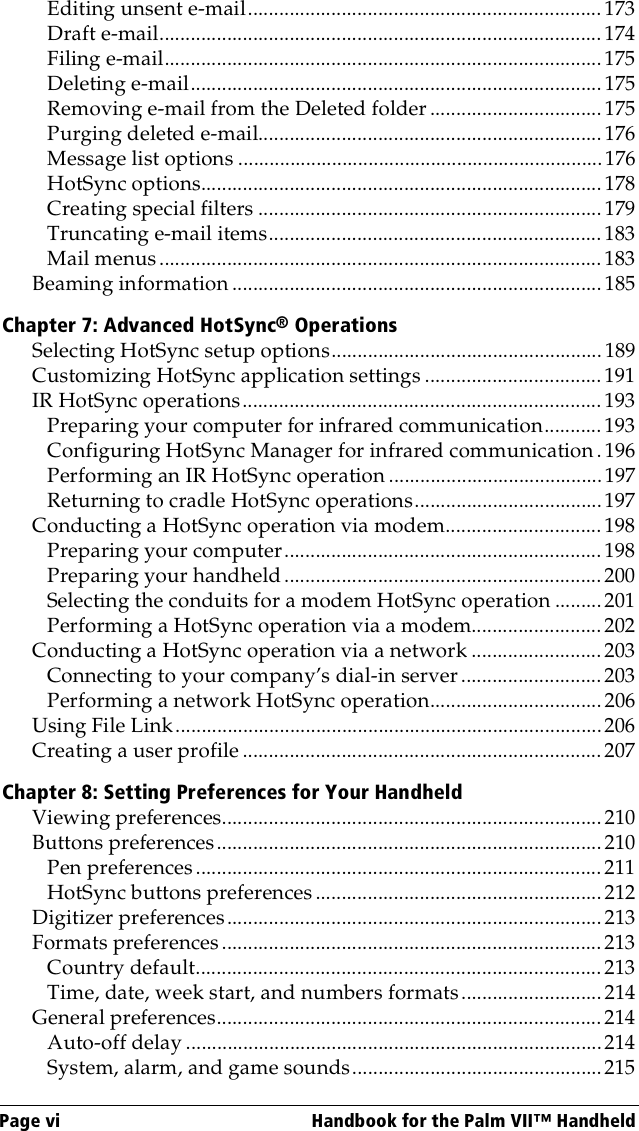

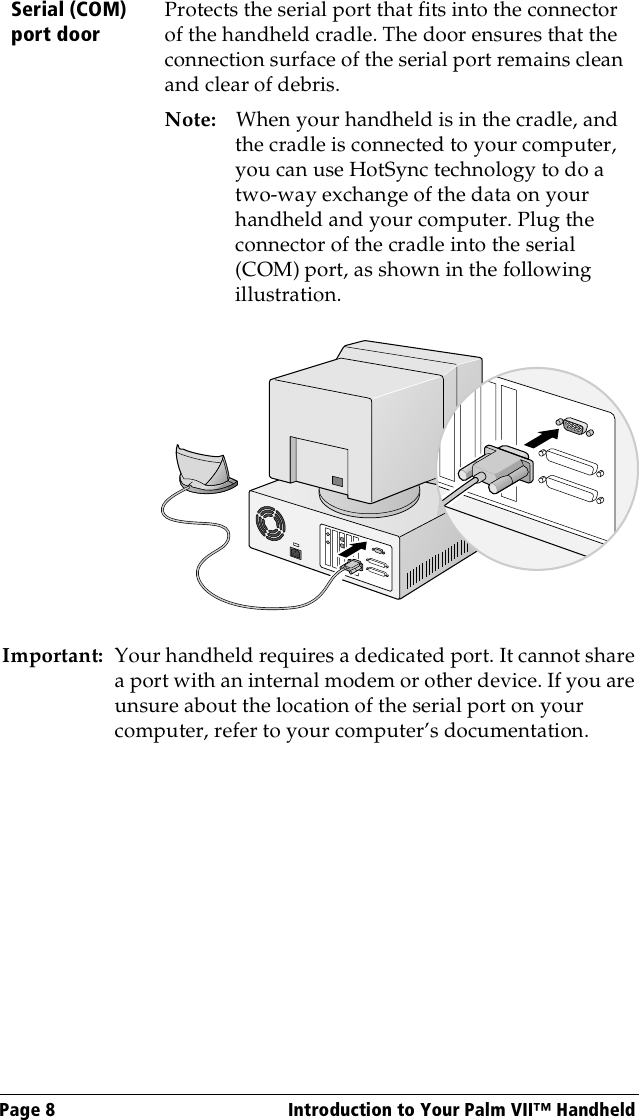


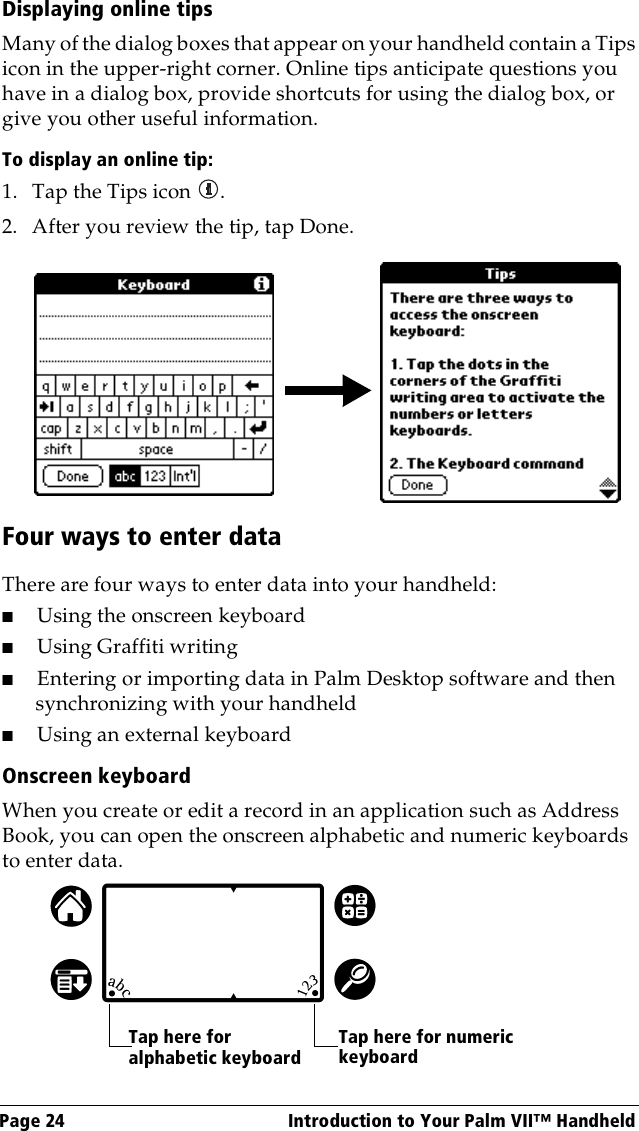
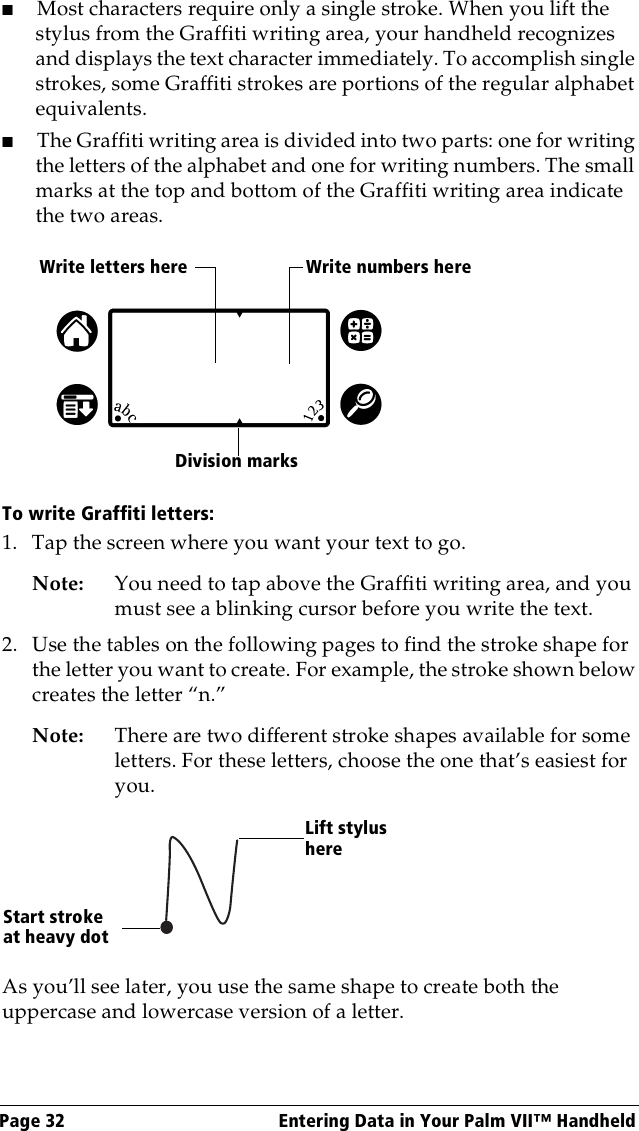
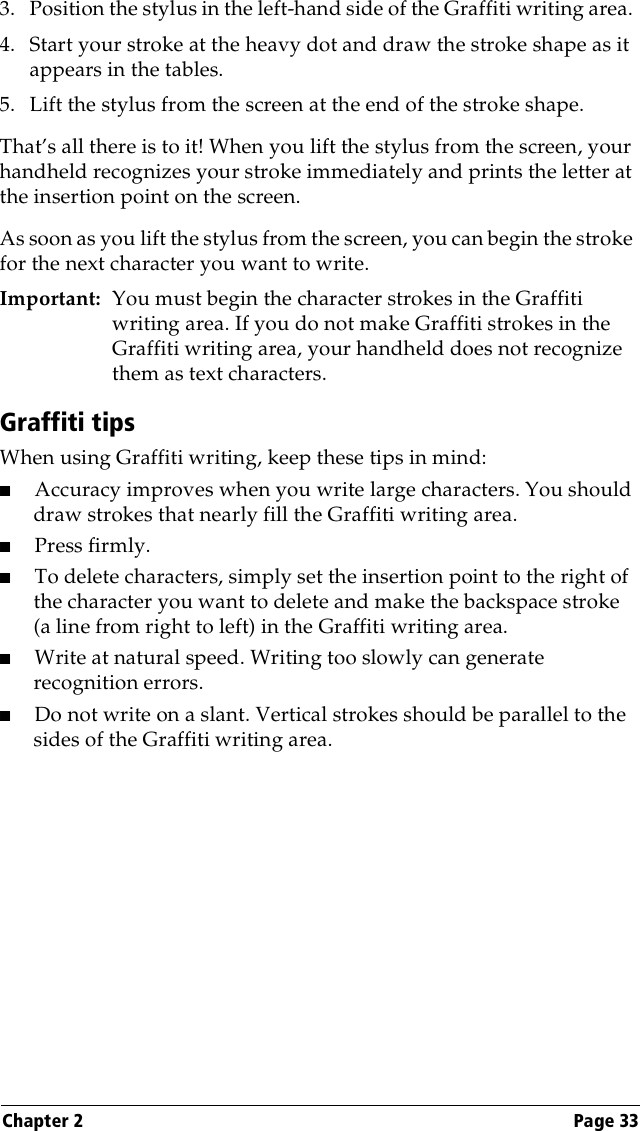
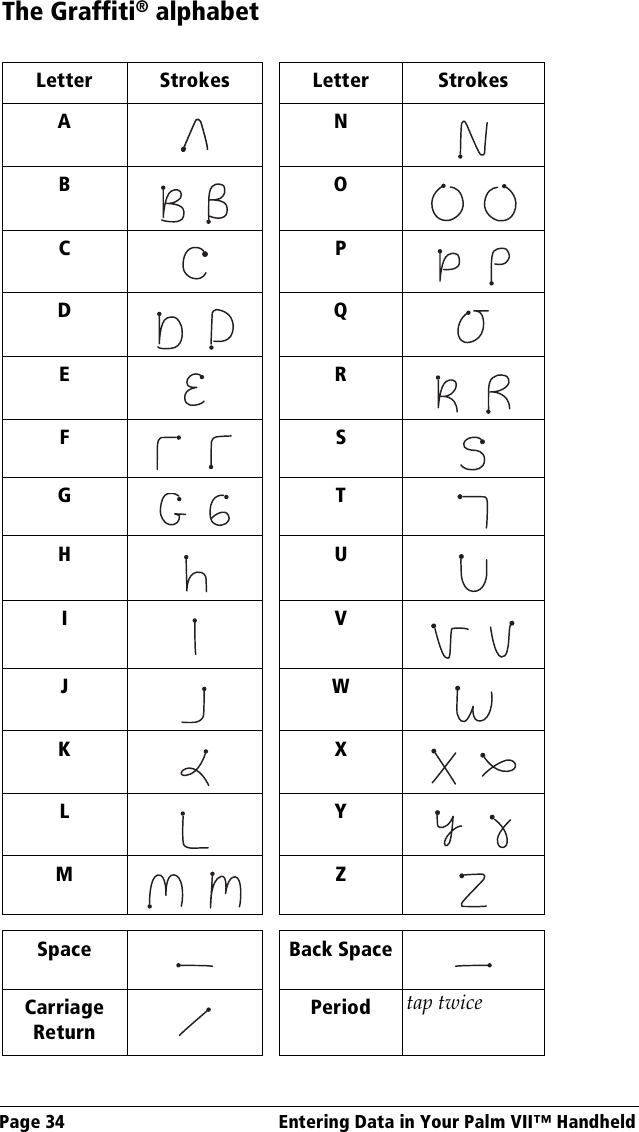
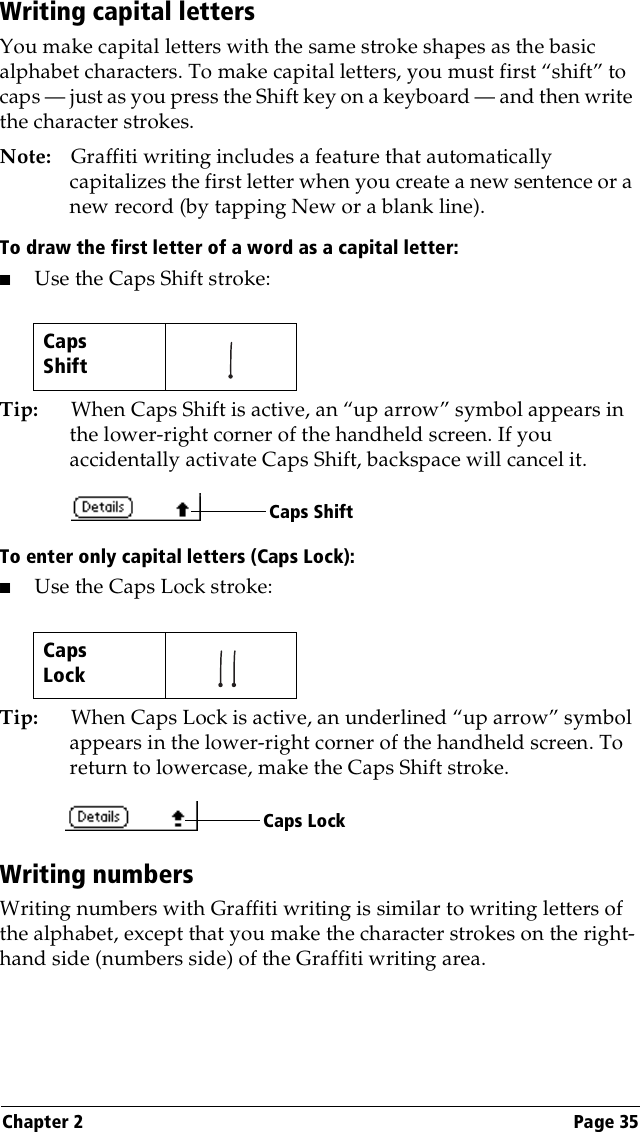
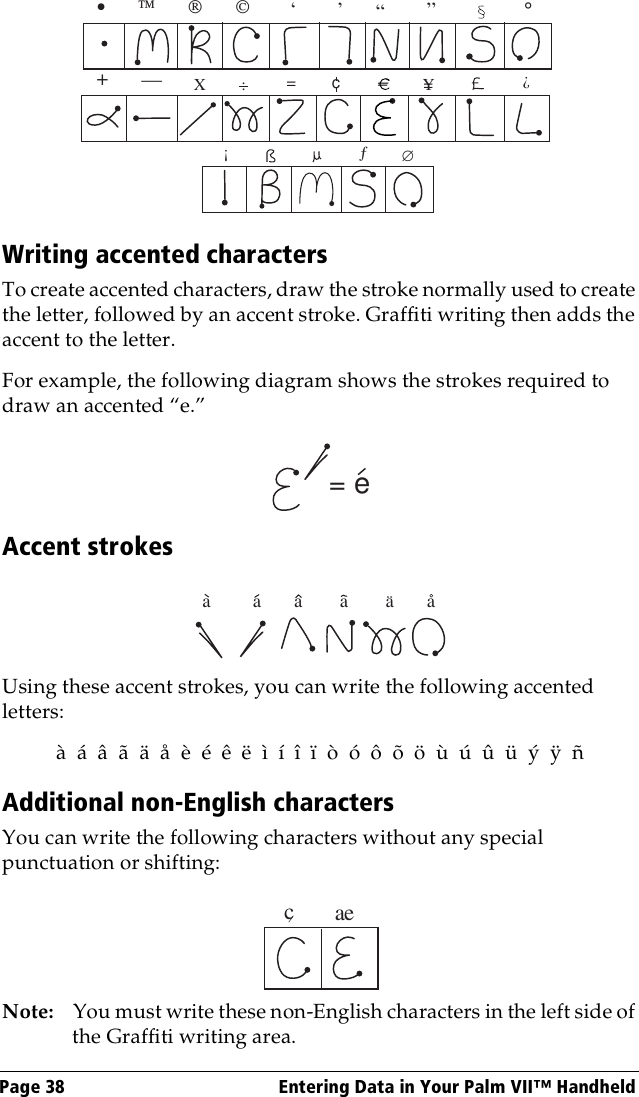
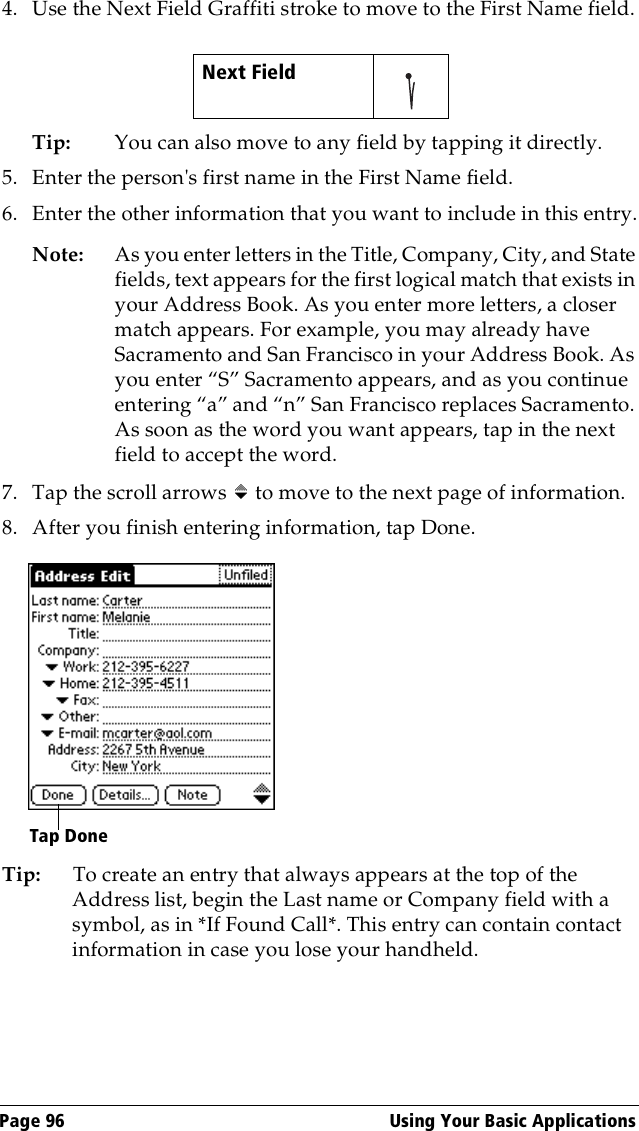
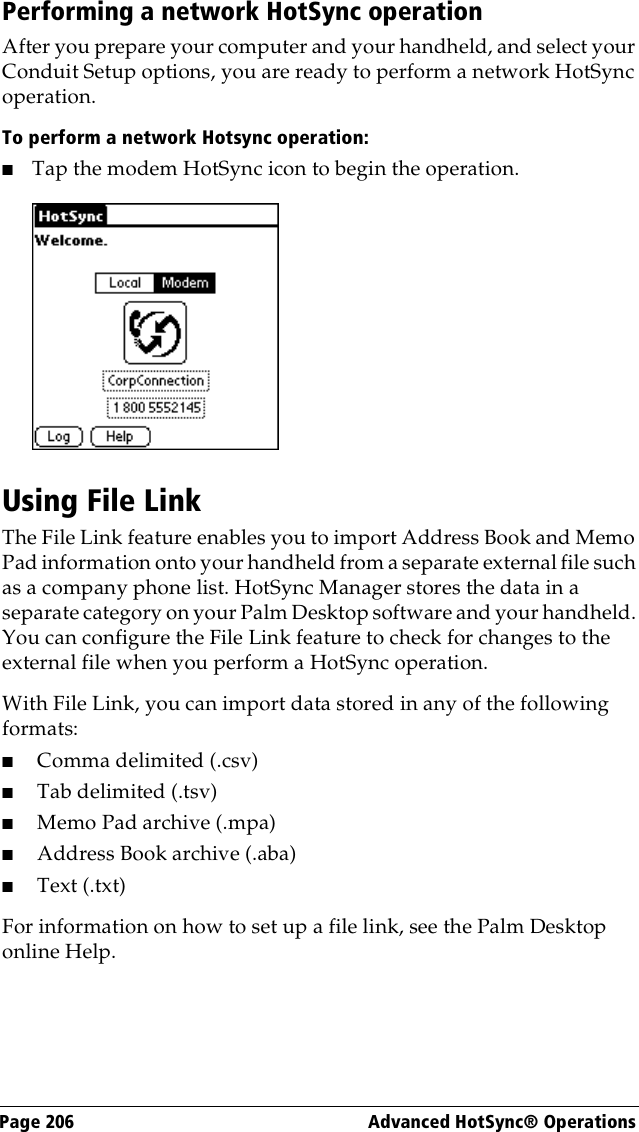
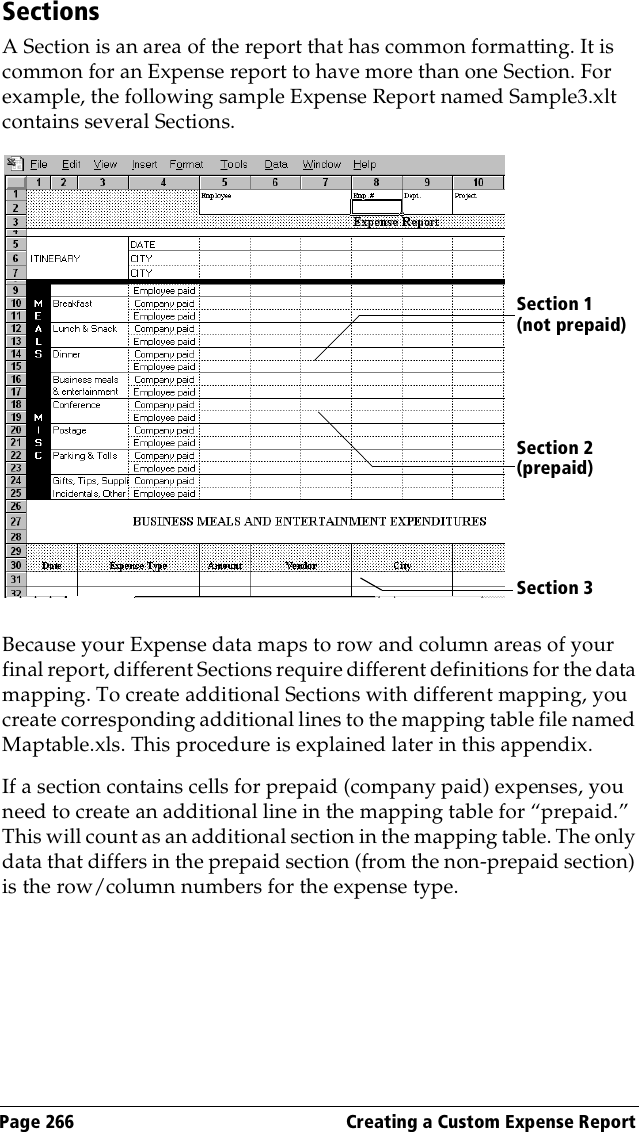
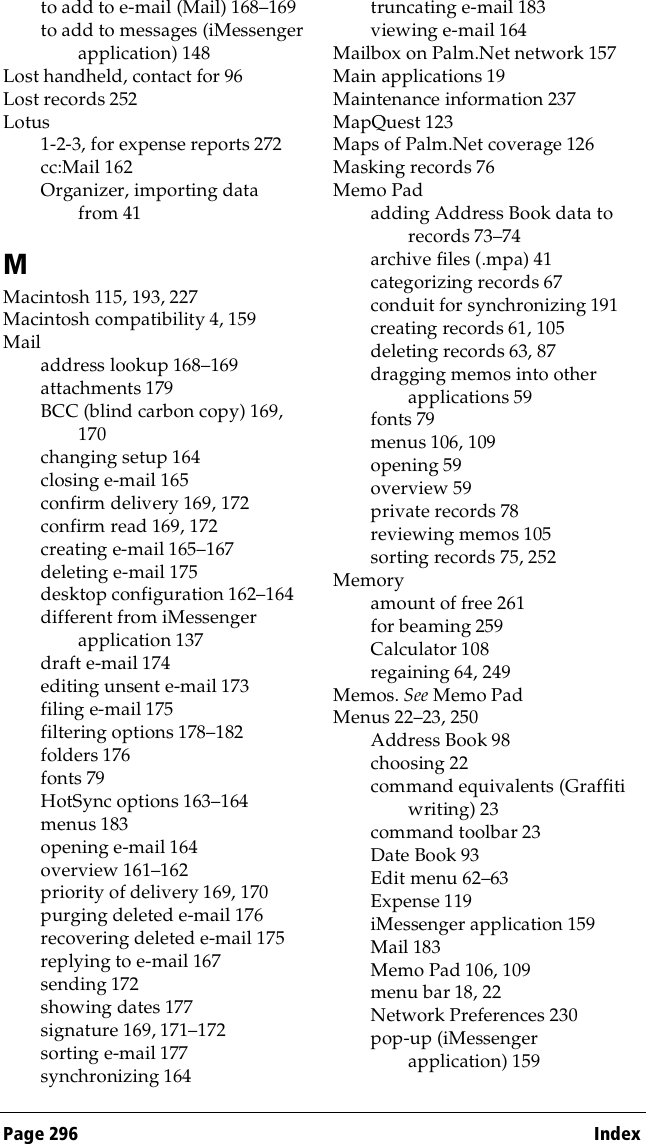
![Chapter 2 Page 37Additional Graffiti punctuationWriting symbols and extended charactersAll symbols and extended characters begin with the stroke in the Graffiti writing area of your handheld:When the Symbol Shift is active, a slanted shift symbol appears in the lower-right corner of the screen. The next stroke that you make creates the symbol or extended character.Symbol Stroke Symbol StrokePeriod. Dash—Comma,Left Paren(Apostrophe'Right Paren)Question?Slash/ Exclamation!Dollar$SymbolShift @ # % ^ & * < > + = | —\ { } [ ] ~ ` ; : " tabSymbol Shift](https://usermanual.wiki/Palm/3C80500/User-Guide-105925-Page-45.png)