Palm 747 SmartPhone With Bluetooth User Manual 2 of 3
Palm Inc SmartPhone With Bluetooth 2 of 3
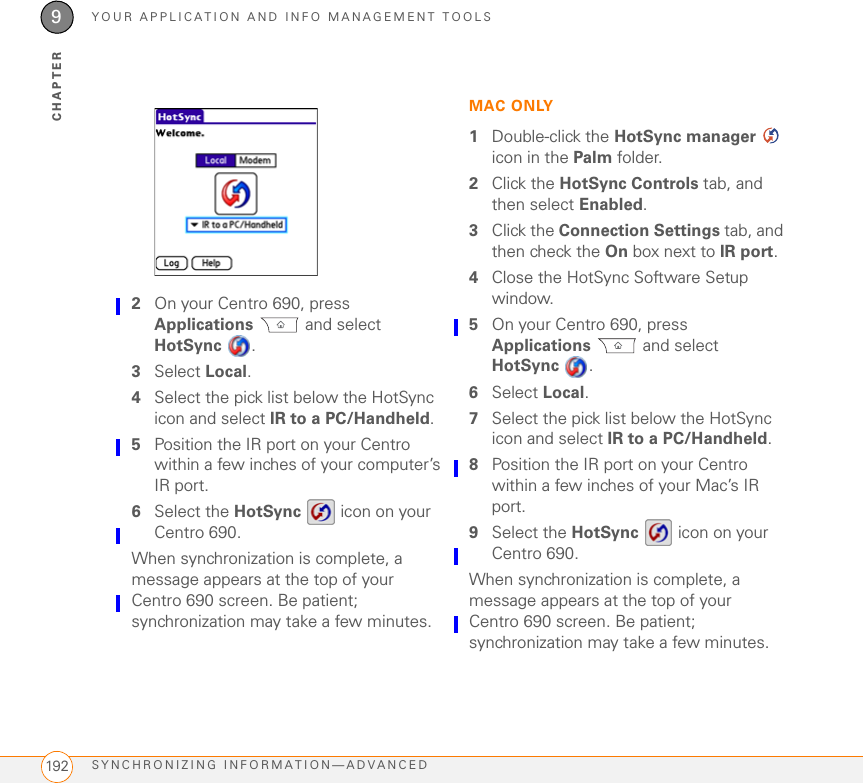
UserManual.wiki
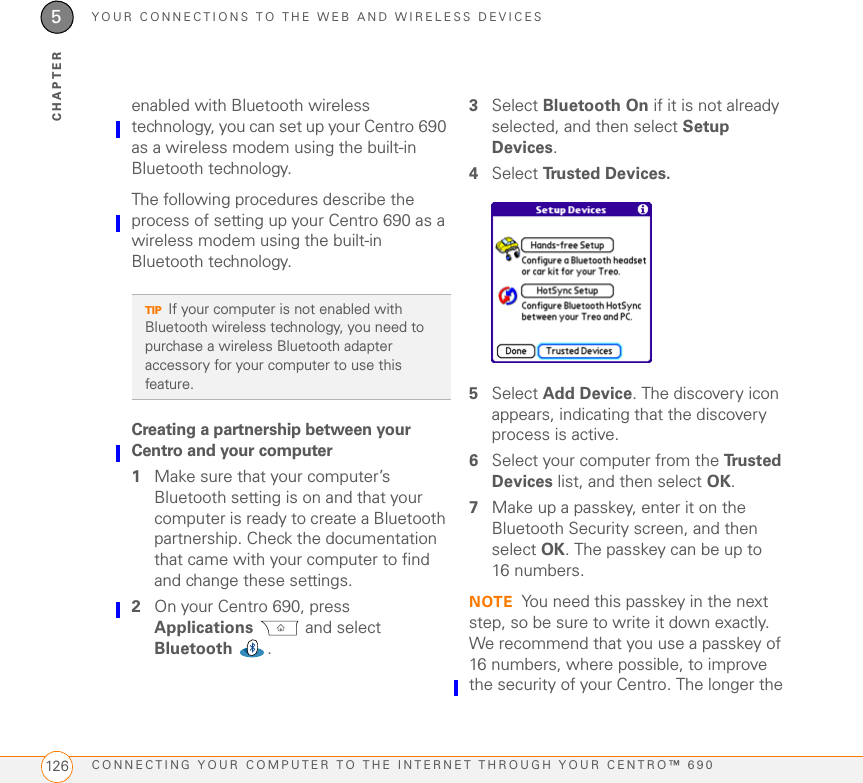
>
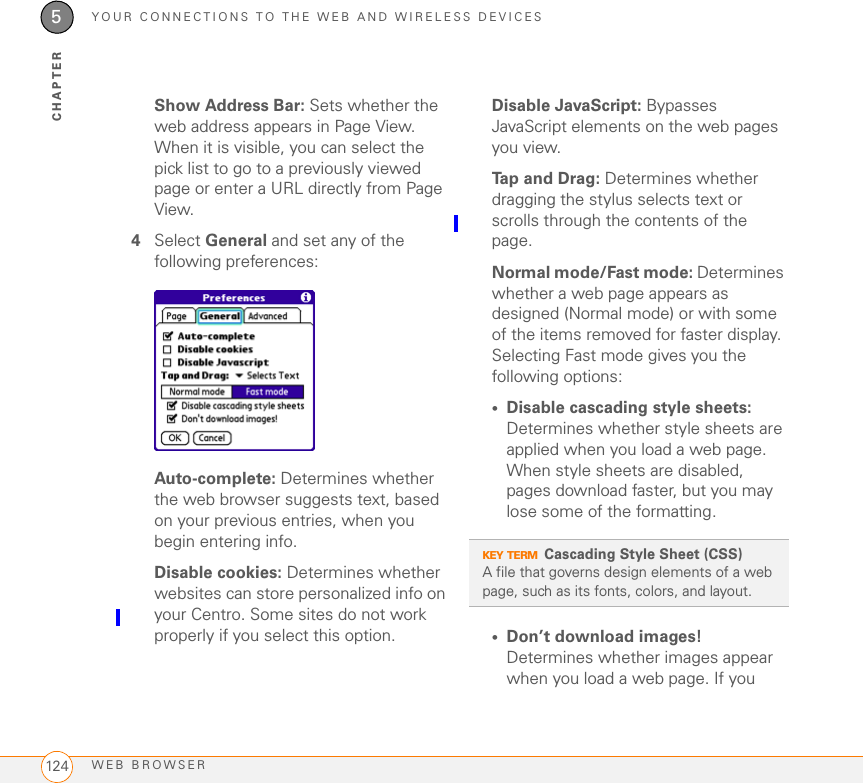
Palm
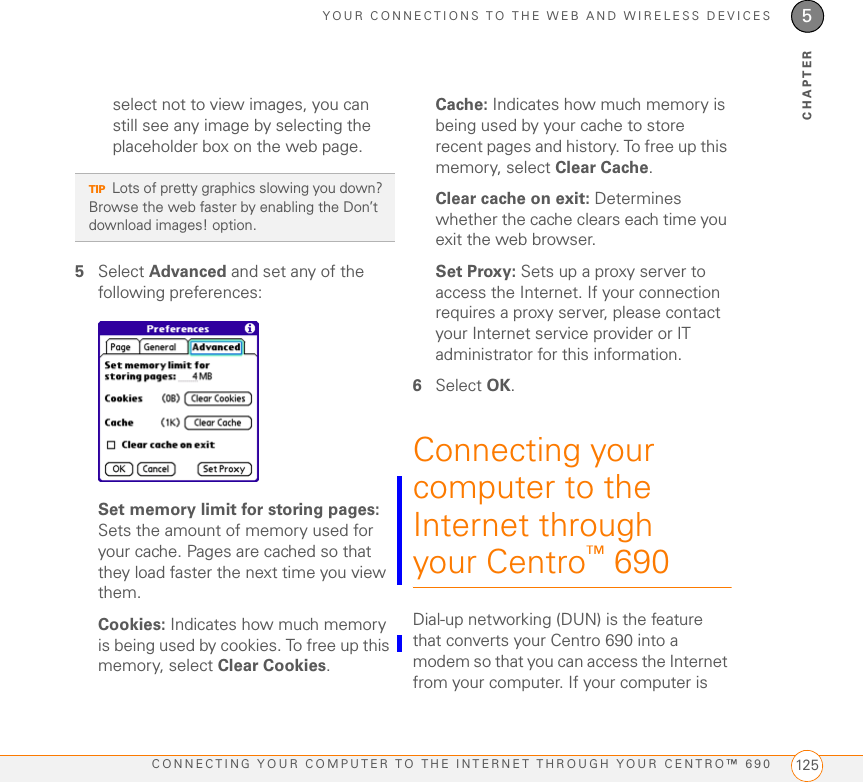
>
747 User Manual
>
User Manual 2 of 3
Contents
1.
User Manual 1 of 3
2.
User Manual 2 of 3
3.
User Manual 3 of 3
User Manual 2 of 3
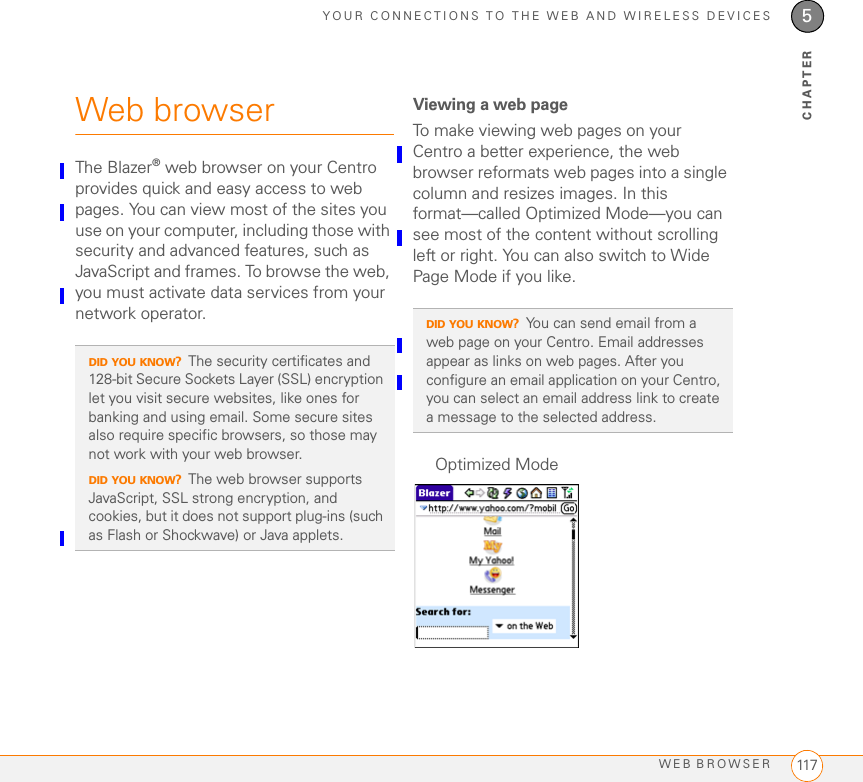
Navigation menu
Upload a User Manual
Namespaces
Wiki Guide
HTML
PDF
Info
Views
User Manual
Discussion / Help
Navigation
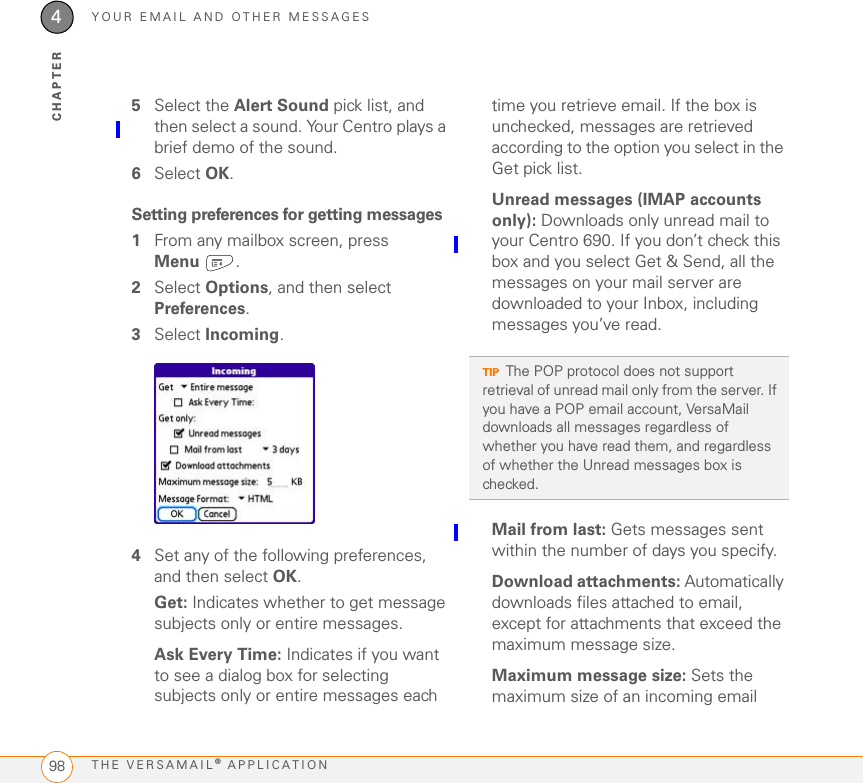
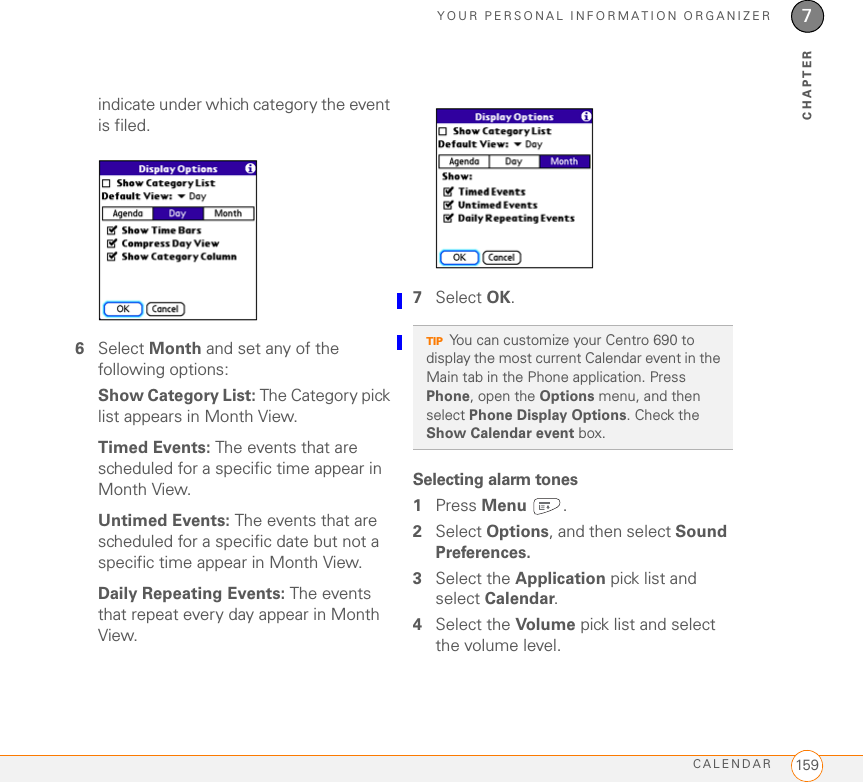
![YOUR EMAIL AND OTHER MESSAGESTHE VERSAMAIL® APPLICATION 994CHAPTERmessage. Enter the size in kilobytes (KB). The default is 5KB, but you can enter any size up to 2,048KB (approximately 2 megabytes [MB]), including attachments. The maximum message size that you can retrieve is 60KB for the body text and approximately 5MB of total data for any attachments. Message Format: Sets the format for messages you retrieve. •HTML: Displays messages sent in HTML format with basic formatting intact and displays other messages as plain text. •Text: Displays all messages as plain text, regardless of the format in which they were sent.Attaching a signature to a messageYou can attach a personal signature, with info such as your company’s address and phone numbers, to the bottom of all messages you send.1From any mailbox screen, press Menu .2Select Options, and then select Preferences.3Select Signature.4Check the Attach Signature box.5Enter your signature information, and then select OK.Working with Microsoft Exchange ActiveSync®Microsoft Exchange ActiveSync® works with the VersaMail, Calendar, and Contacts apps on your Centro 690 to directly access corporate groupware information on a Microsoft Exchange 2003 server. You can synchronize business email, calendar, and contact info with the Exchange 2003 server from your Centro 690 without using a desktop computer.When you create a Microsoft Exchange ActiveSync account in the VersaMail application, your email, calendar, and contact info sync directly with the Exchange server; information does not sync with the desktop software application on your computer, such as Microsoft Outlook or Palm Desktop software. Other information that is stored on your](https://usermanual.wiki/Palm/747.User-Manual-2-of-3/User-Guide-853100-Page-5.png)

![YOUR EMAIL AND OTHER MESSAGESINSTANT MESSAGING (IM) 1134CHAPTERInstant Messaging (IM)Instant Messaging (IM) is a form of real-time communication between two or more people based on the exchange of short, simple text messages via computer or mobile device. You can see which of your contacts are available to participate in an IM conversation or chat. You initiate a chat by selecting an available contact and sending a message.Instant messaging on your Centro is similar to instant messaging on your computer. Using the IM application, you can sign on to up to three IM communities, send and receive instant messages, and view contact status information and manage your presence. You can switch among IM communities with a touch of the 5-way.Messages are billed to the owner of the Centro no matter which IM account you use.Accessing IM1Press Applications and select Instant Messaging .2Select an IM community.Signing onIf you are signing on to your existing IM account on your Centro, sign on to the community using your existing username or email address, whichever your provider requires, and password. NOTE Some service providers allow you to sign on to multiple devices at the same time; for example, both your Centro and your computer. On other providers, signing on to an existing IM account on your Centro may automatically sign you out of another currently running IM session.[TBD--need to see sign on working to give exact steps. ]Sending a Message[TBD: need to see this working.]Receiving a Message[TBD: need to see this working.]](https://usermanual.wiki/Palm/747.User-Manual-2-of-3/User-Guide-853100-Page-19.png)

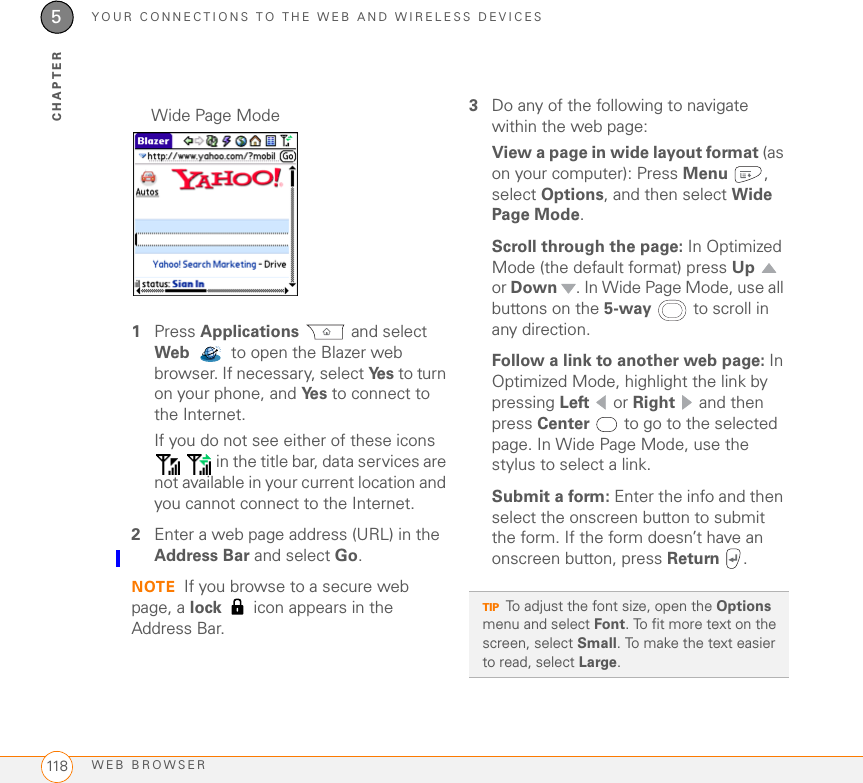
![YOUR PHOTOS, VIDEOS, AND MUSICPICTURES & VIDEOS1426CHAPTER3Select the pictures or videos to send, or select Select All to send the entire album. (A plus sign [+] appears next to selected items.)4Select Send.5Select how you want to send the picture or video: Messaging, Bluetooth, or Email.Copying a picture or videoYou can copy pictures or videos into another album. You can also copy pictures and videos between your Centro 690 and an expansion card.1From the Album list, select the album that contains the picture(s) or video(s) you want to copy. 2Press Menu .3Select Copy to from the Photo (or Video) menu.4Select the pictures or videos to copy, or select Select All to copy the entire album. (A + appears next to selected items.)5Select Copy.6Select the Copy items to pick list and select whether you want to copy the selected items to your device or to an expansion card.DID YOU KNOW?You cannot send copyrighted pictures or videos that appear with a Lock icon in Thumbnail View or in the Picture list.indicates that a picture is selected](https://usermanual.wiki/Palm/747.User-Manual-2-of-3/User-Guide-853100-Page-48.png)