Contents
User Manual
Pre User Guide
2
Intellectual property notices
© 2009 Palm, Inc. All rights reserved. Palm, Pre, and the Palm and Pre logos are among the trademarks or
registered trademarks owned by or licensed to Palm, Inc. Microsoft and Outlook are trademarks of the Microsoft
group of companies. Exchange ActiveSync Enabled. Google is a trademark of Google, Inc. Amazon, Amazon
MP3, and the Amazon MP3 logo are trademarks of Amazon.com, Inc. or its affiliates. Any reference to Palm
Products’ capabilities provided by the Documents To Go Software contained in Palm Product packaging, or in
marketing, promotional, or other mass-distribution materials for the Palm Products (e.g. sales slicks, web site,
FAQs), distributed during the term of this Agreement shall be noted with “provided by Documents To Go®, a
product of DataViz, Inc.”, or a similar mutually agreed statement, and shall also include DataViz contact
information. All other brand and product names are or may be trademarks of, and are used to identify products or
services of, their respective owners.
Disclaimer and limitation of liability
Palm, Inc. and its suppliers assume no responsibility for any damage or loss resulting from the use of this guide.
Palm, Inc. and its suppliers assume no responsibility for any loss or claims by third parties that may arise through
the use of this software. Palm, Inc. and its suppliers assume no responsibility for any damage or loss caused by
deletion of data as a result of malfunction, dead battery, or repairs. Be sure to make backup copies of all
important data on other media to protect against data loss.
Patent pending. This product also is licensed under United States patent 6,058,304.
Use of this device requires providing a valid email address, mobile phone number, and related information for
account setup and activation. A data plan is also required. Unlimited usage data plan strongly recommended or
additional data charges may apply.
Open Source License information
You can view the Open Source License terms on your phone. Press the Center button and then tap the Launcher
icon. Swipe left until the PDF View icon appears. Tap PDF View, then tap Open Source Information.pdf.
You can also view the file on your computer. Connect your phone to your computer with the USB cable. On your
phone, tap USB Drive. On your computer, open Computer (Vista), My Computer (XP), or Finder (Mac) and
double-click the Palm Pre drive. Then double-click the file Open Source Information.pdf.
Recycling and disposal
This symbol indicates that Palm products should be recycled and not be disposed of in unsorted
municipal waste. Palm products should be sent to a facility that properly recycles electrical and
electronic equipment. For information on environmental programs visit.palm.com/environment.
As part of Palm’s corporate commitment to be a good steward of the environment, we strive to use
environmentally friendly materials, reduce waste, and develop the highest standards in electronics recycling.
Our recycling program keeps Palm handhelds, phones, and other products out of landfills through evaluation and
disposition for reuse and recycling.
Palm customers may participate in the recycling program free of charge. Visit palm.com/recycle for additional
details and information about how you can help reduce electronic waste.
v.

CONTENTS 3
Contents
Chapter 1: Basics
Get to know your phone
Set up your phone
Turn the phone on/off
Make your first call
Open and close applications
Work with applications
Enter information
Use the menus
Search to find info and make calls
View and respond to notifications
Chapter 2: Phone
Make calls
Receive calls
Use voicemail
What can I do during a call?
Set up and use a Bluetooth® hands-free device
Chapter 3: Your personal information
organizer
Contacts
Calendar
Chapter 4: Your media and entertainment
center
Camera
Photos
Videos
Music

CONTENTS
4
Chapter 5: Your email and other messages
Email
Messaging
Chapter 6: Your connections to the web and
wireless devices
Wi-Fi
Web
Bluetooth® wireless technology
Chapter 7: Docs
Doc View
PDF View
Chapter 8: Preferences
Screen & Lock
Sounds & Ringtones
Chapter 9: Learn more
While using your phone
If you need more information
Chapter 10: Regulatory and Safety
Information
Regulatory and Safety Information
FCC Statements
Antenna Care/Unauthorized Modifications
Industry Canada
EU Regulatory Conformance
Radio Frequency (RF) Safety Exposure
Protecting your Battery
Power Specifications
Recycling and Disposal
User Safety
Product Handling & Safety
Driving Safety

CONTENTS 5
ESD Safety
Manual do utilizador - PSI

CONTENTS
6

BASICS
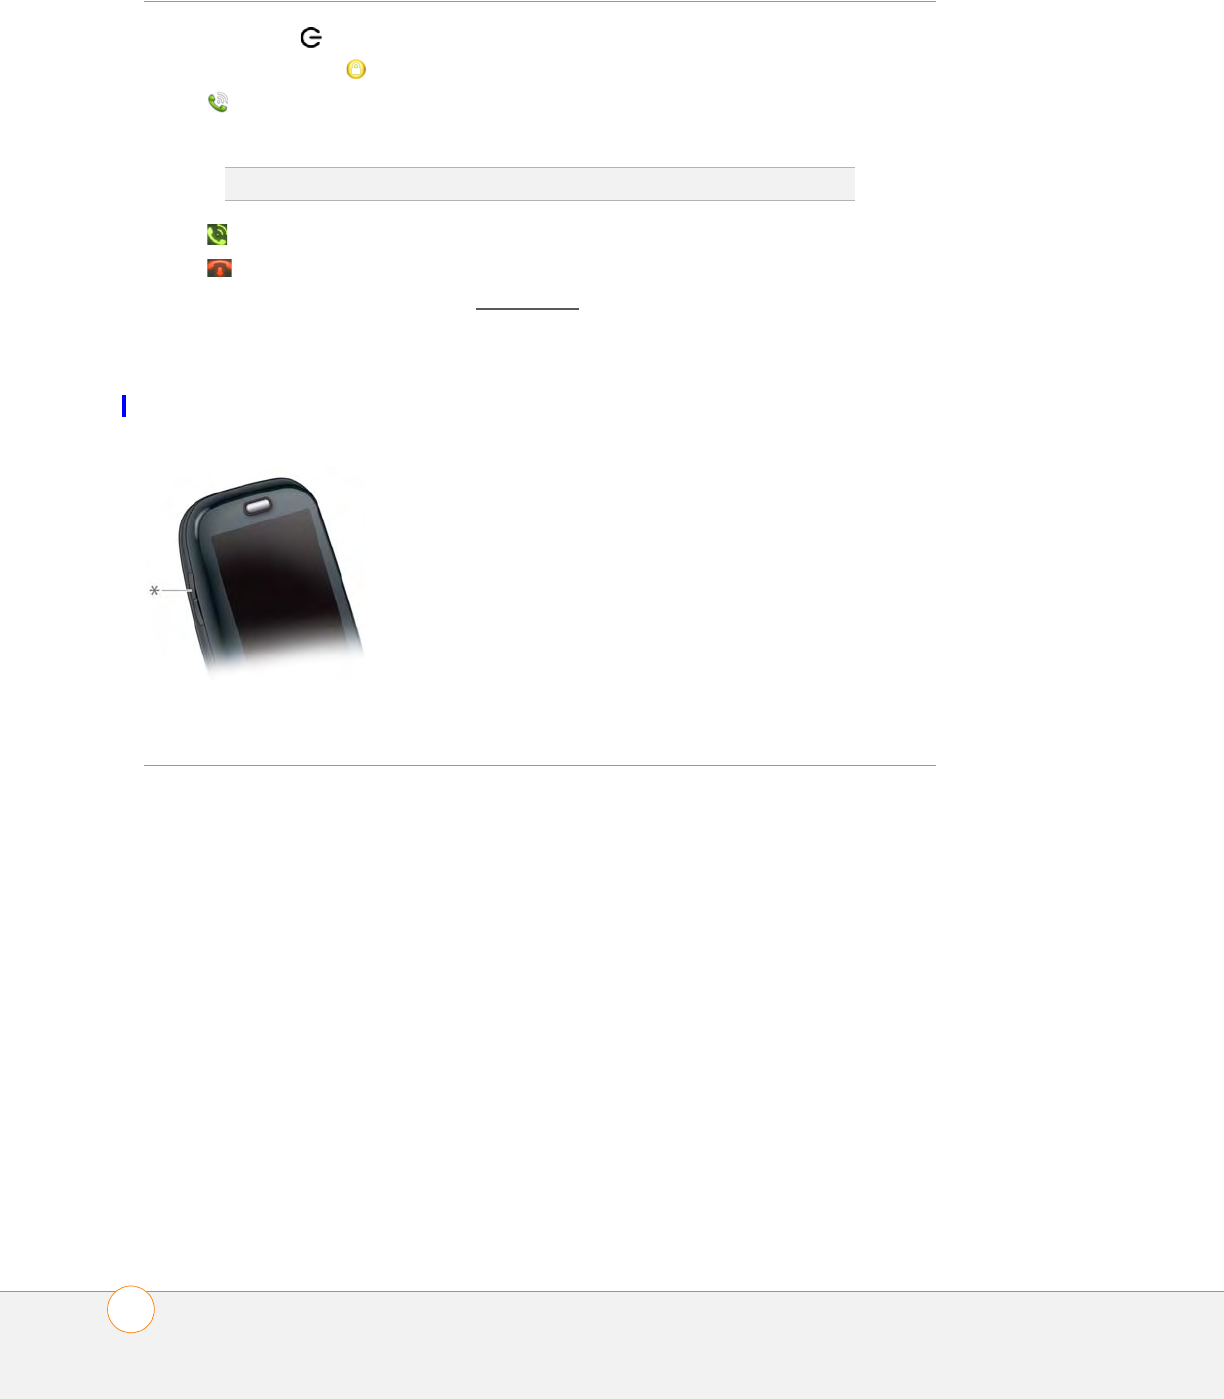
GET TO KNOW YOUR PHONE 9
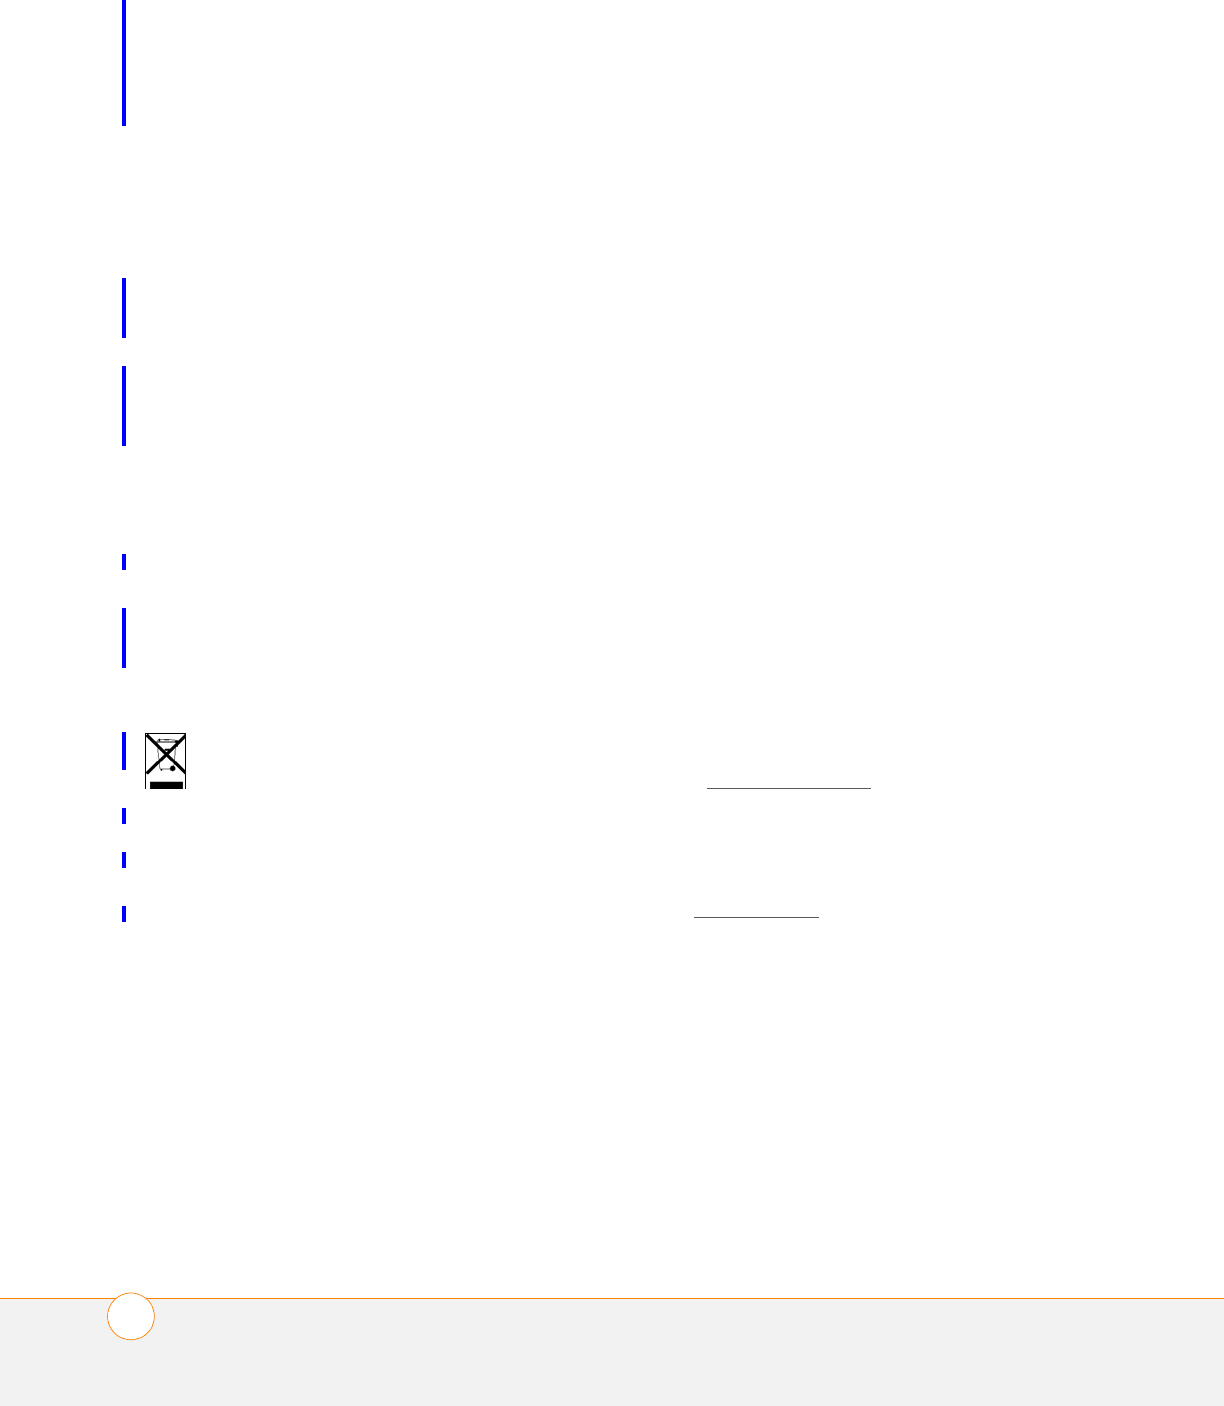
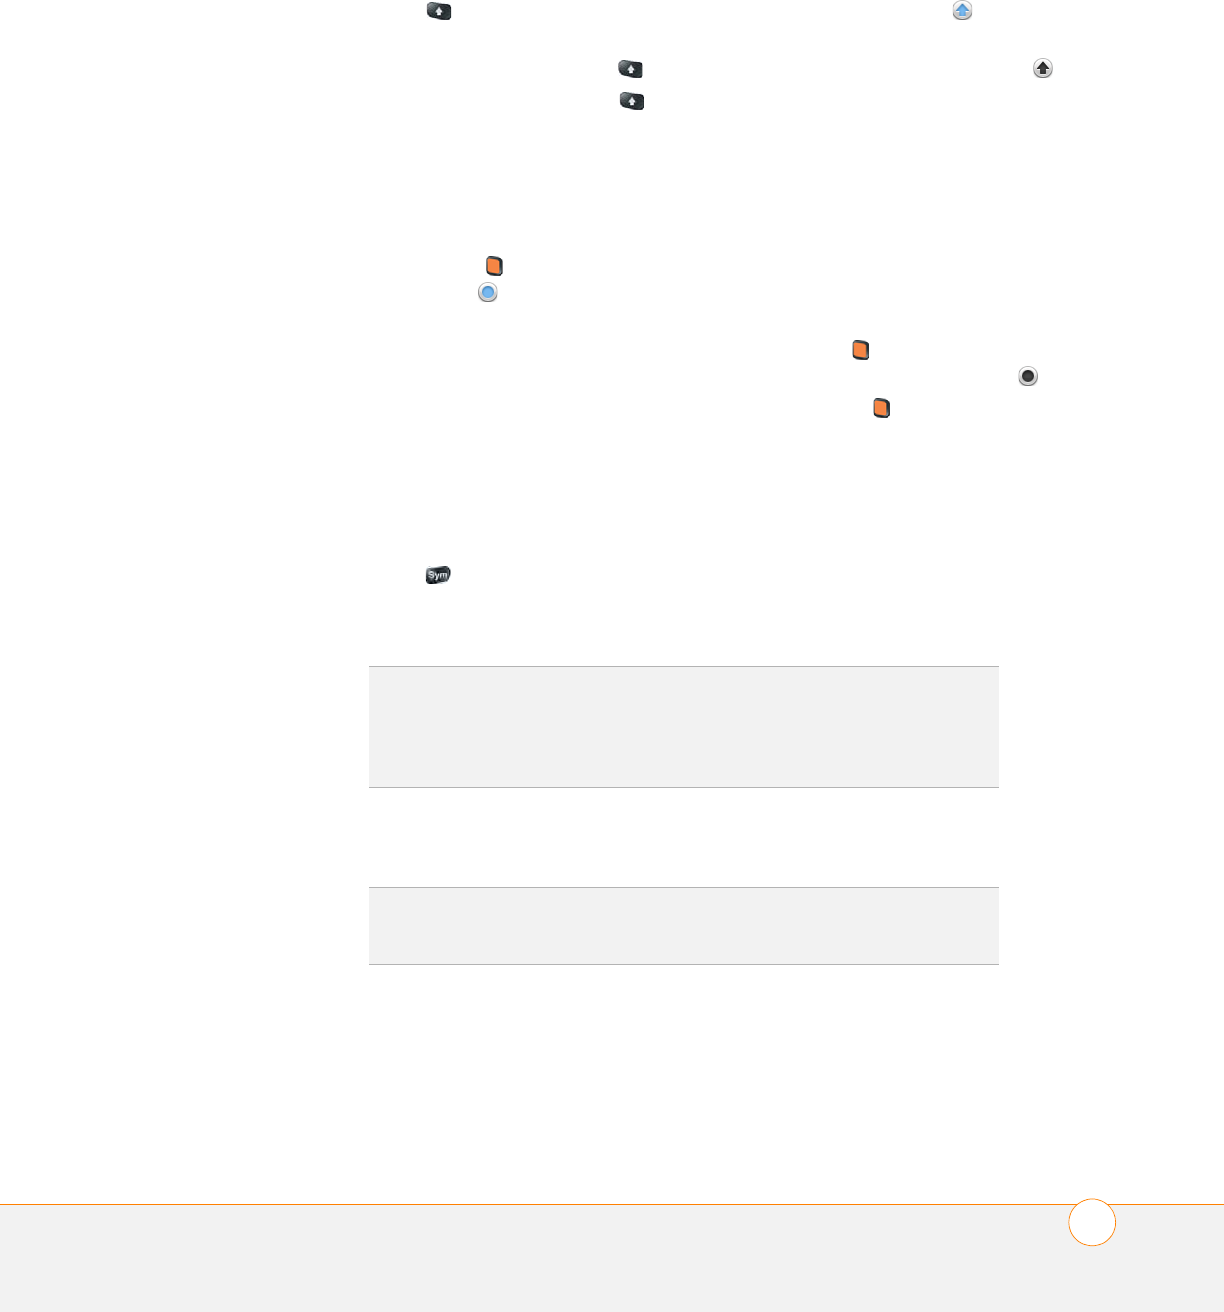
4 Gesture area: Make the back gesture and begin other gestures here.
5 Microphone
6Center: Press to display Card view (see Display all open applications (Card view)).
7Keyboard: See Use the keyboard.
8 Charger/microUSB connector
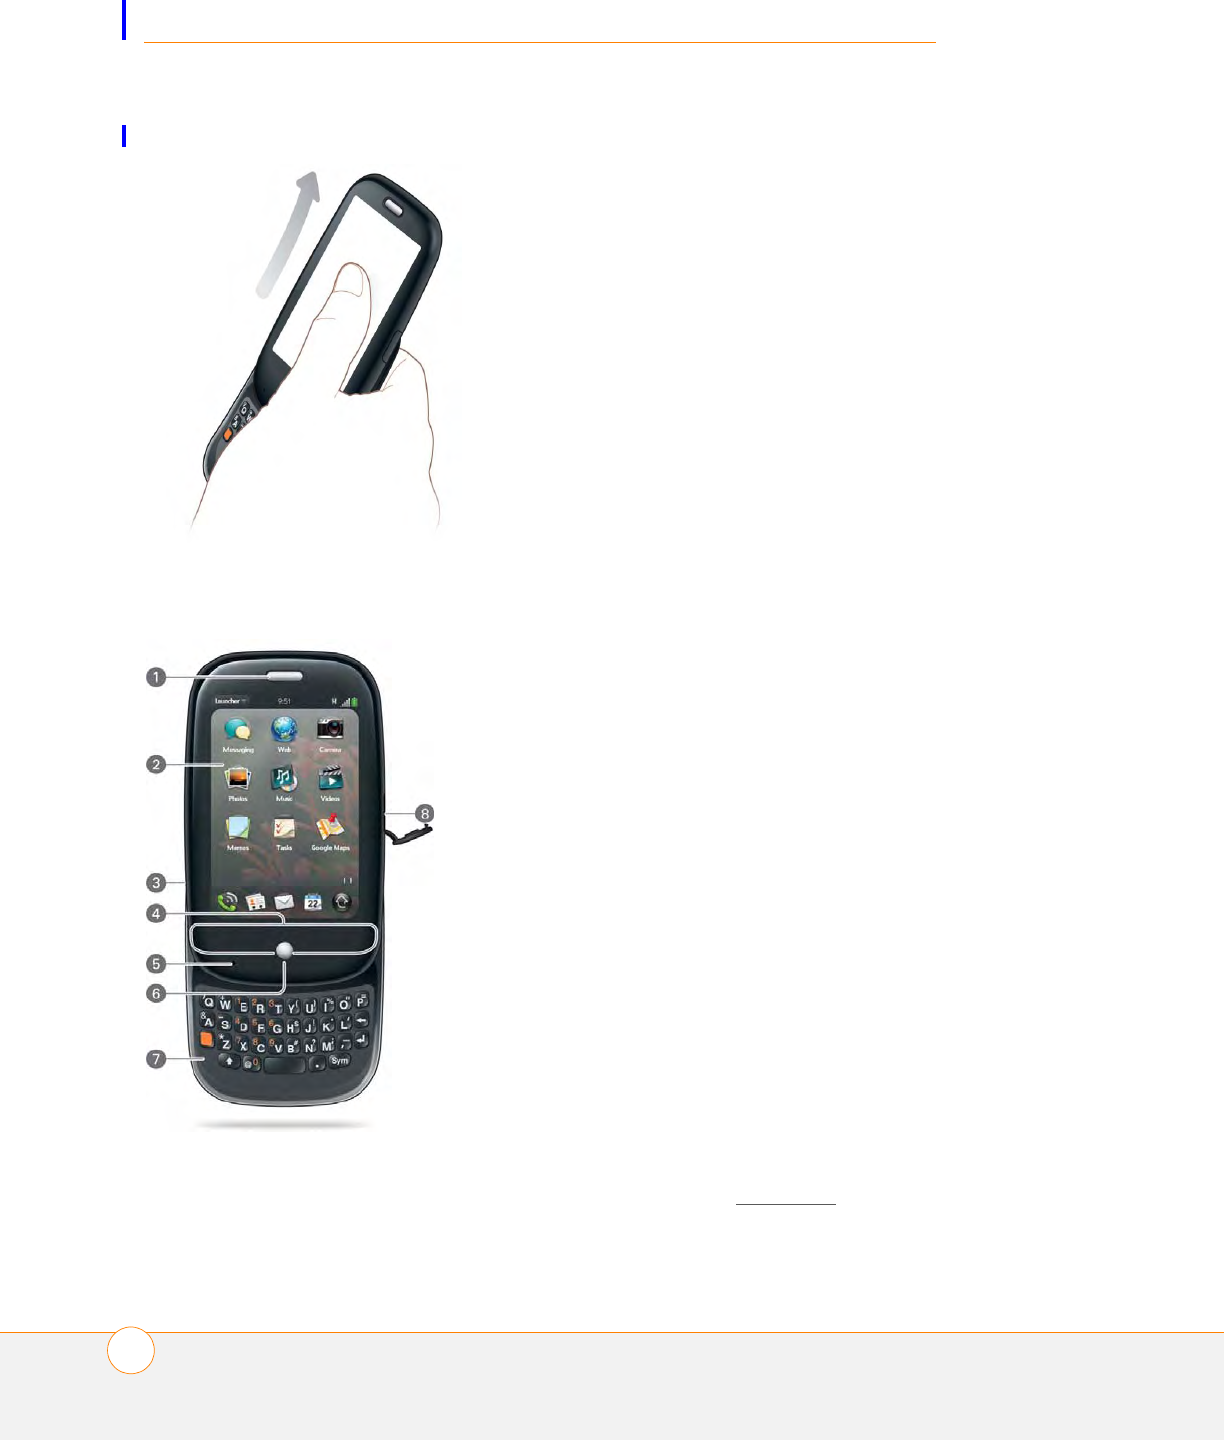
Back view
1 Camera flash
2 Camera lens
3 Speaker
Top view
1Power: Press to wake up or turn off the screen. Press and hold to turn your device and all
wireless services completely off and to turn your device back on after having turned it completely
off.
2 Ringer switch: Slide to turn the ringer and notification sounds on or off. (Red means off.) The
Ringer switch does not affect music or video playback sounds.
3 3.5mm headset jack
TIP
Be careful not to scratch, crush, or apply too much pressure on the
touchscreen. Do not store your phone in a place where other items might
damage it.
BASICS
SET UP YOUR PHONE
10
Bottom view
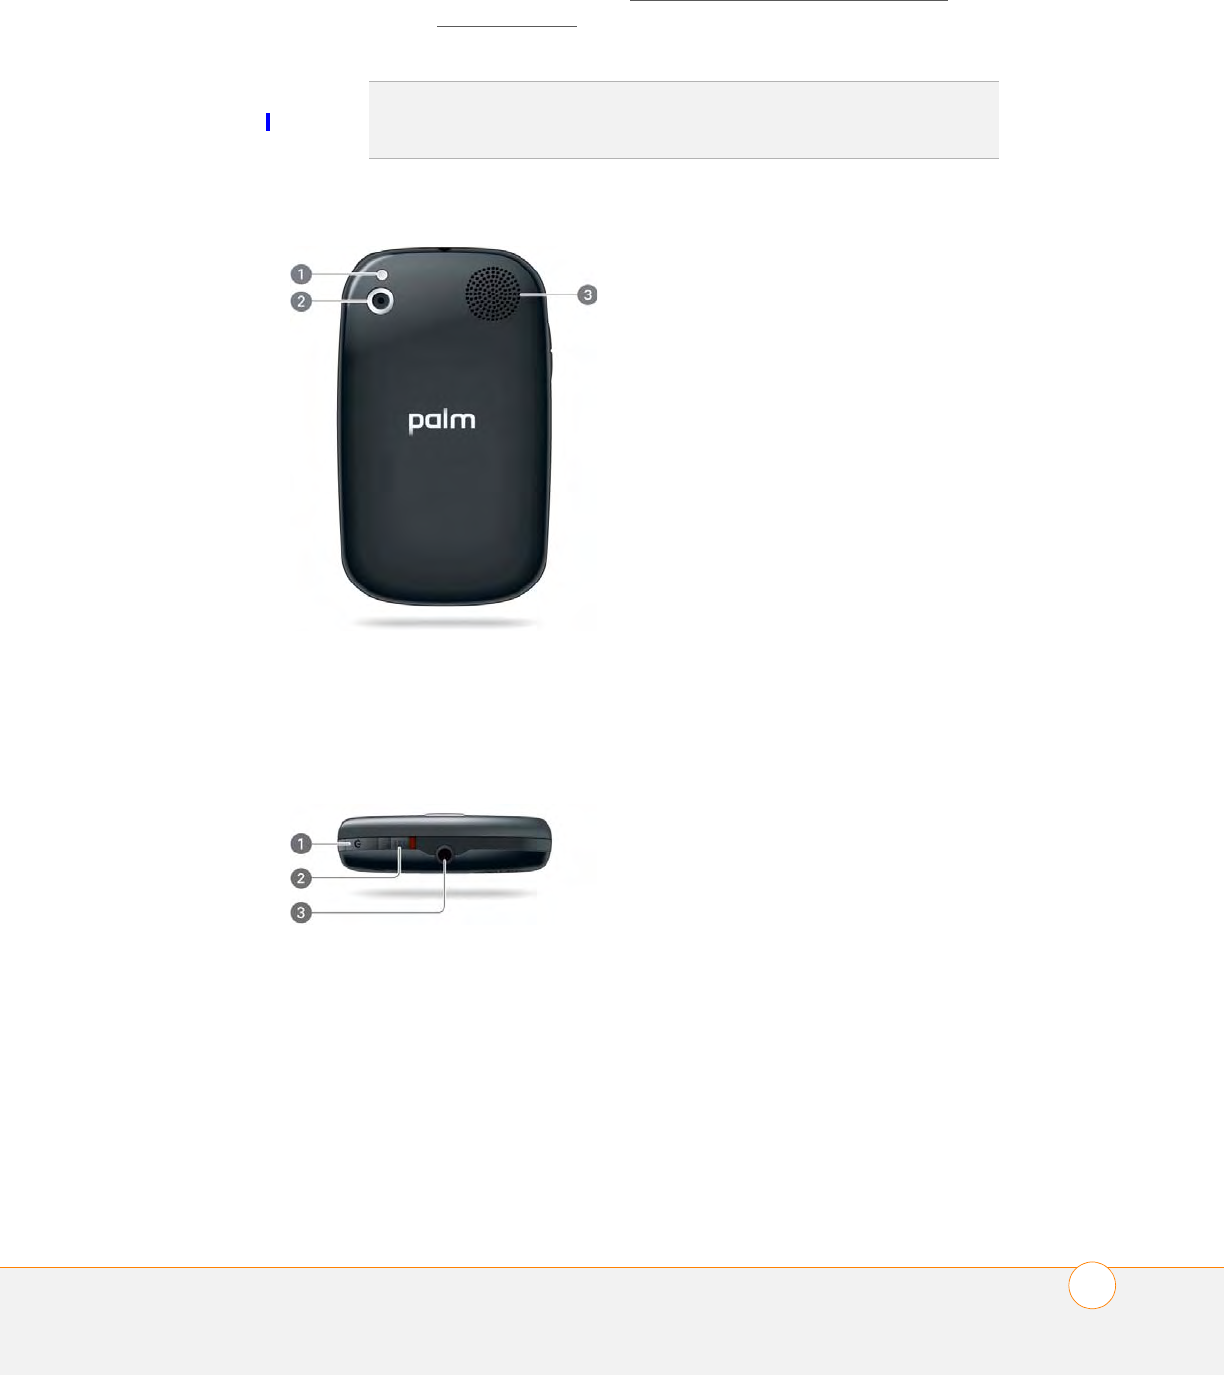
* Back cover release
Touchscreen
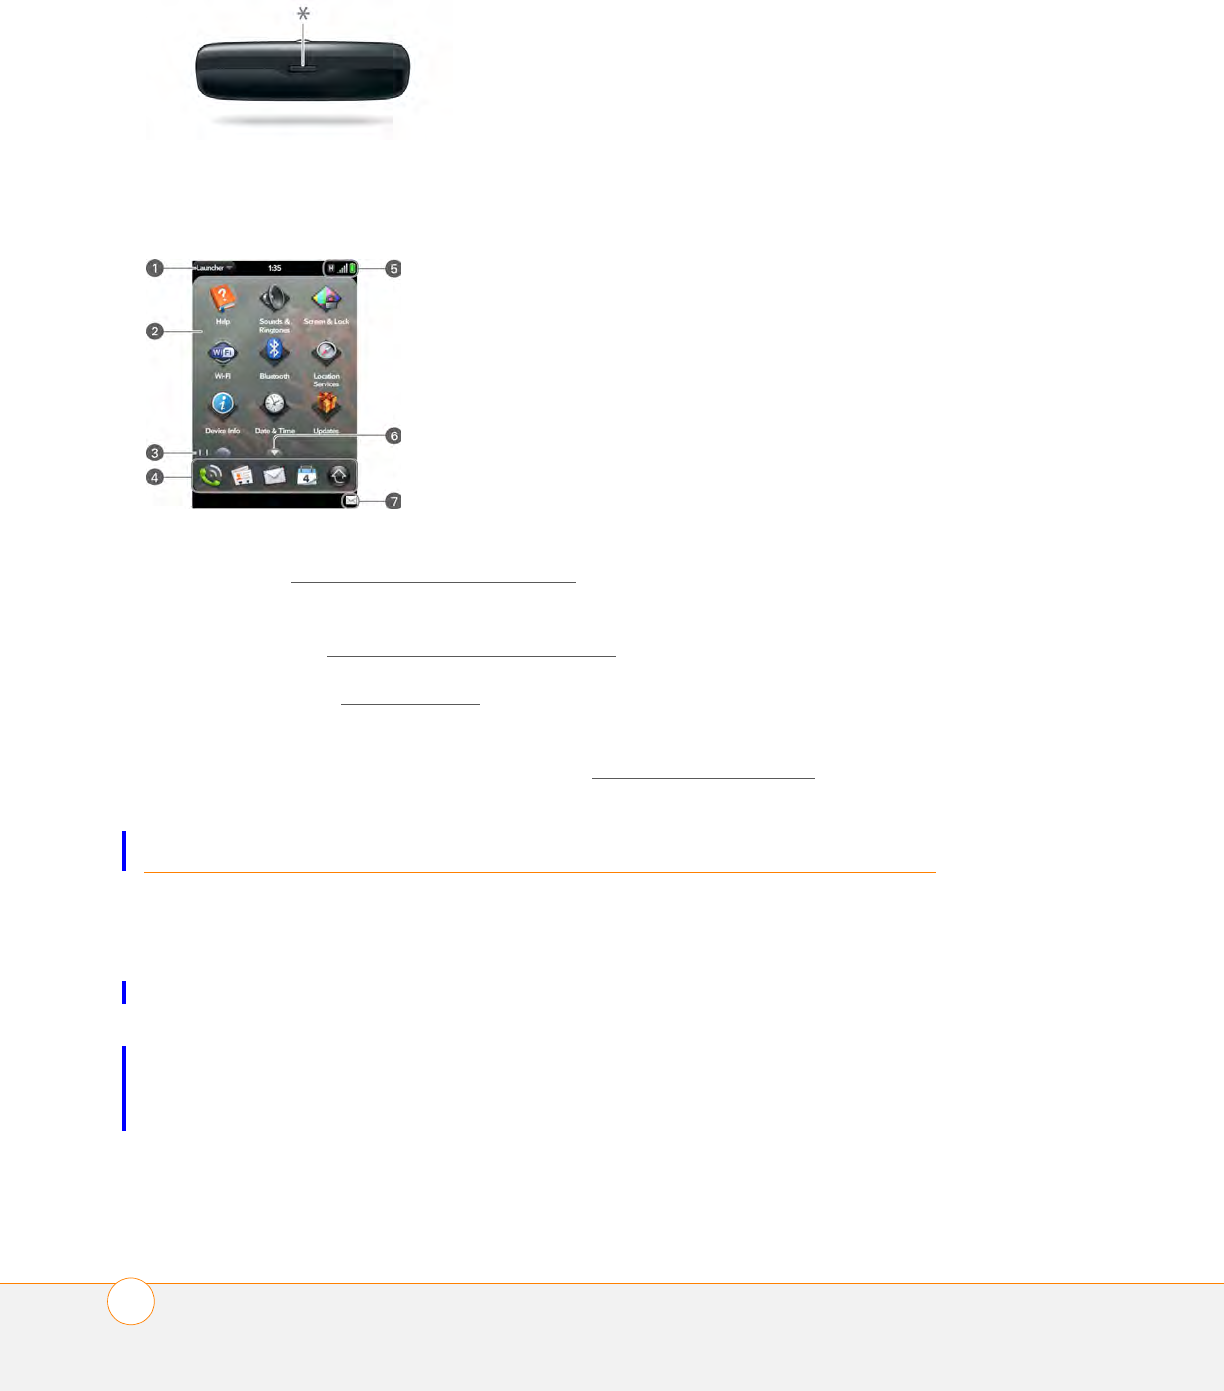
1 Application name: Displays the name of the currently open application. Tap the name to open
the app.
2 Launcher: See Open an application in the Launcher.
3 Page indicators: Show how many Launcher pages are to the right or the left of the currently
displayed page. Swipe left or right on the screen to see other pages.
4 Quick Launch: See Open an application in Quick Launch.
5 Connection icons: Show the status of wireless service connections and battery strength. Tap
the icons to open the connection menu.
6 Scroll arrow: Swipe down to see hidden icons.
7 Notification icons: Show missed calls, new voicemail and email messages, and more. Tap the
bottom of the screen to view notification details (see View all of your notifications)
Set up your phone
Insert the SIM card
Your SIM card contains account information such as your phone number and
voicemail access number. To make calls or use your phone’s email or web
features, you need to insert a SIM card.
If you don’t have a SIM card, contact your wireless service provider.
To take advantage of the high-speed data connection available on your phone, you
may need to have a 3G SIM card. Check with your wireless service provider for
information.
BASICS
SET UP YOUR PHONE 11
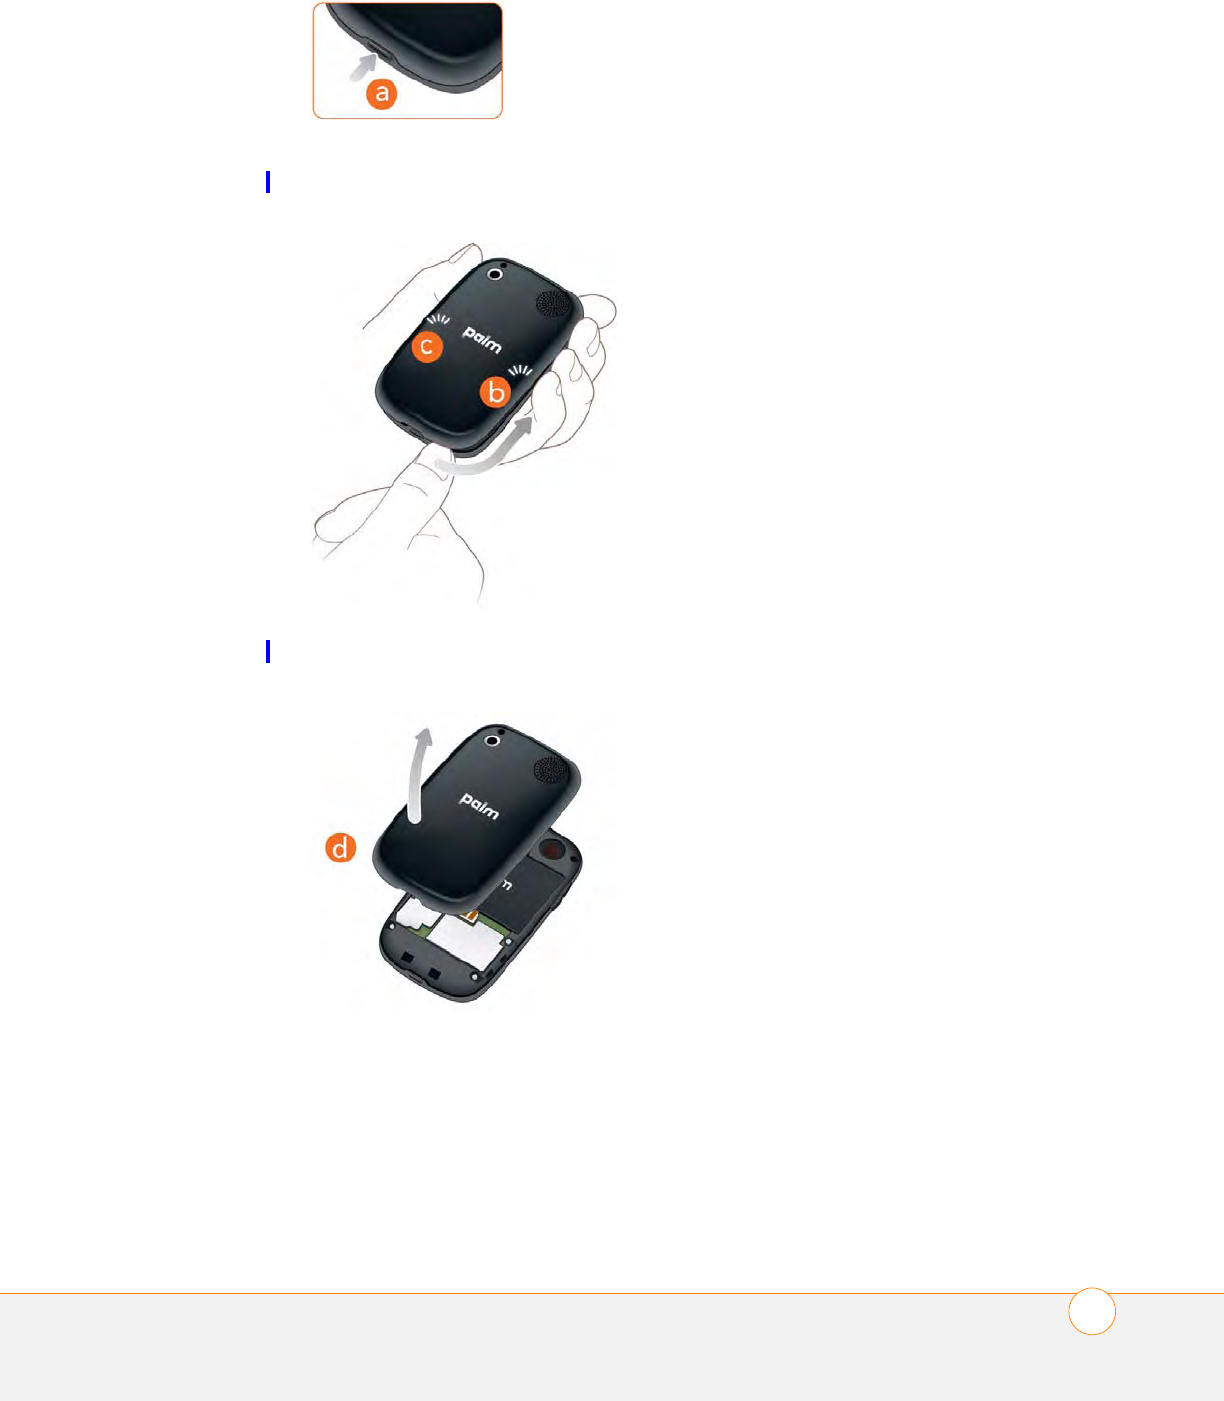
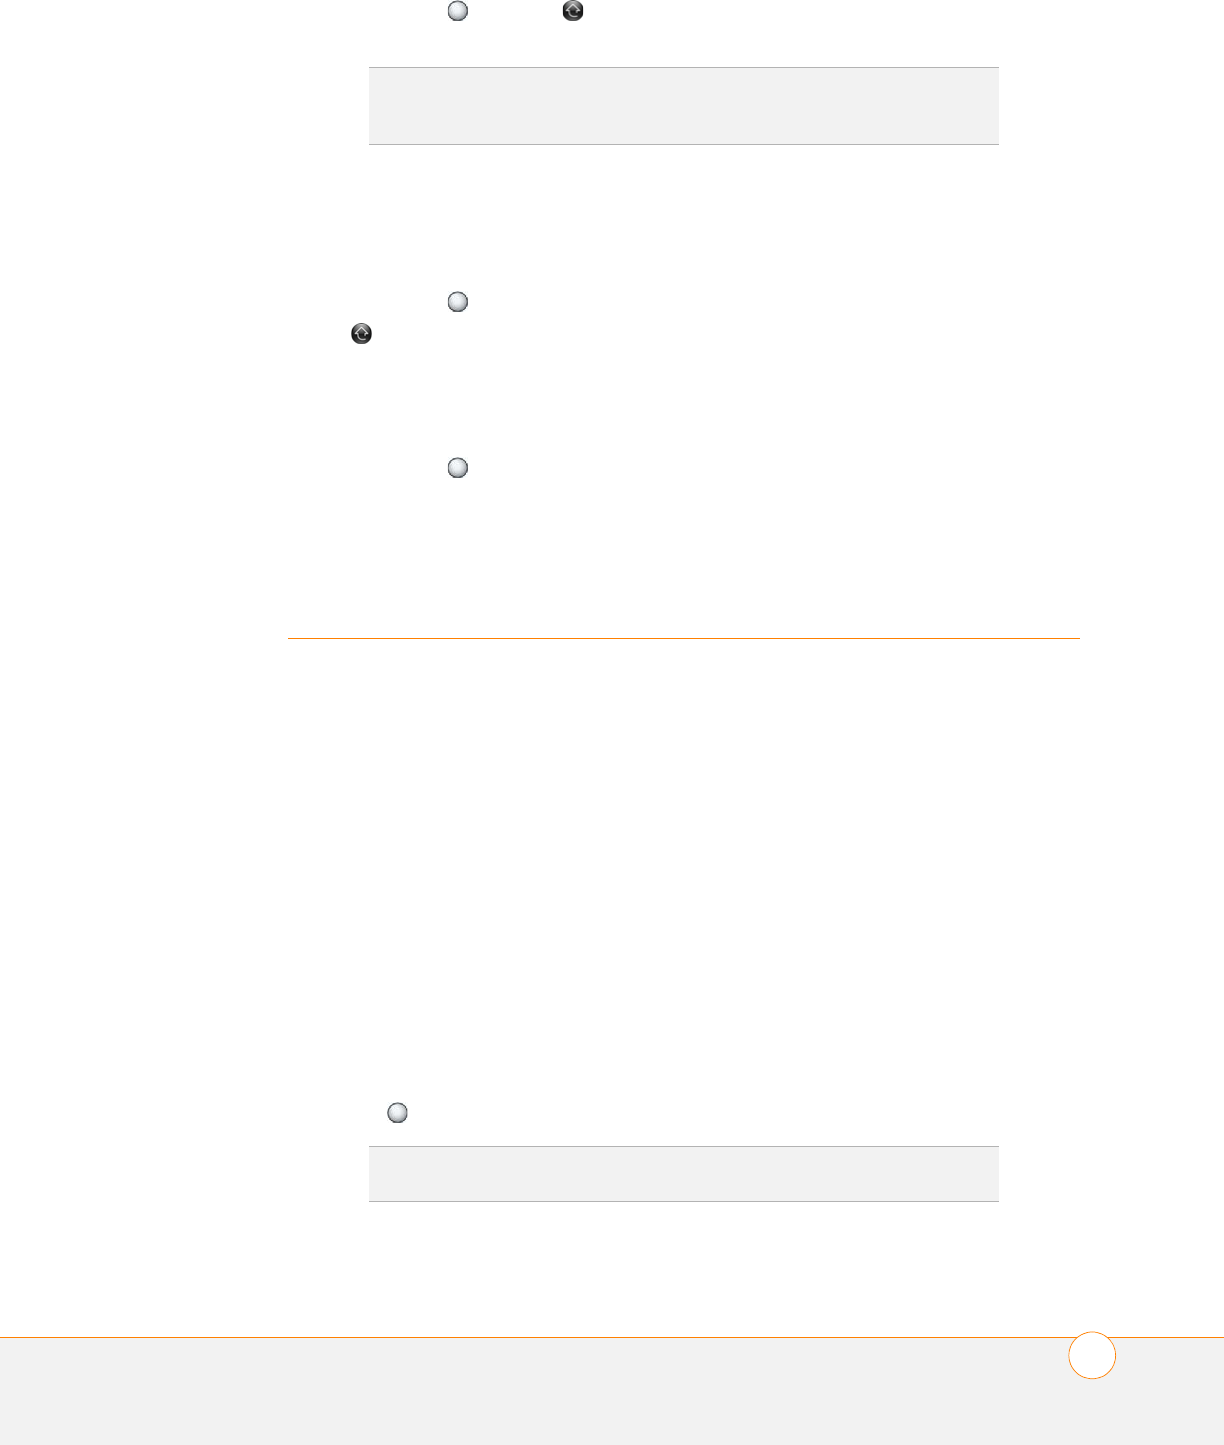
1Press and release the back cover release button.
2Insert your thumbnail into the hairline opening between the cover and the
phone.
3Slide your nail around to side (a) until you hear the clasp release.
4Repeat step 3 on the other side (b) of the phone.
5Lift off the back cover.
BASICS
SET UP YOUR PHONE
12
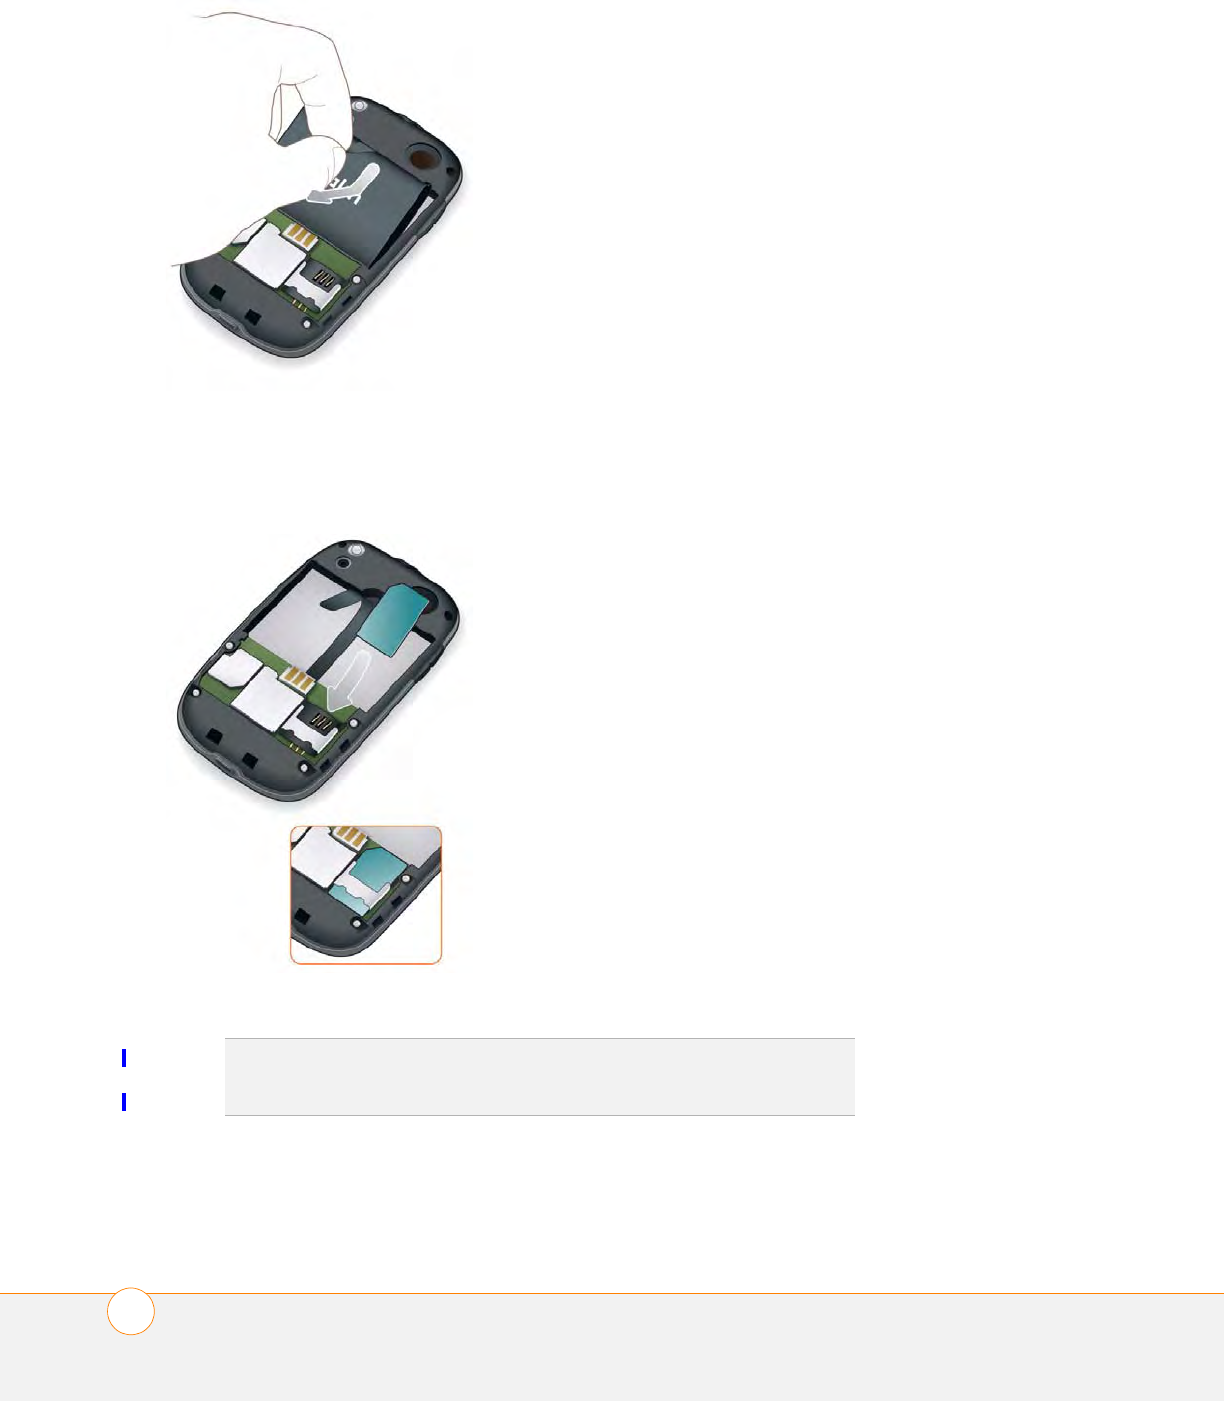
6Pull down and out on the tab to remove the battery.
WARNING You must remove the battery first whenever you insert or remove the
SIM card.
7Insert the SIM card.
8Replace the battery.
TIP
If your phone does not turn on after you insert the battery, you need to
connect it to the AC charger to charge it. If it still doesn’t start, restart your
phone.
BASICS
SET UP YOUR PHONE 13
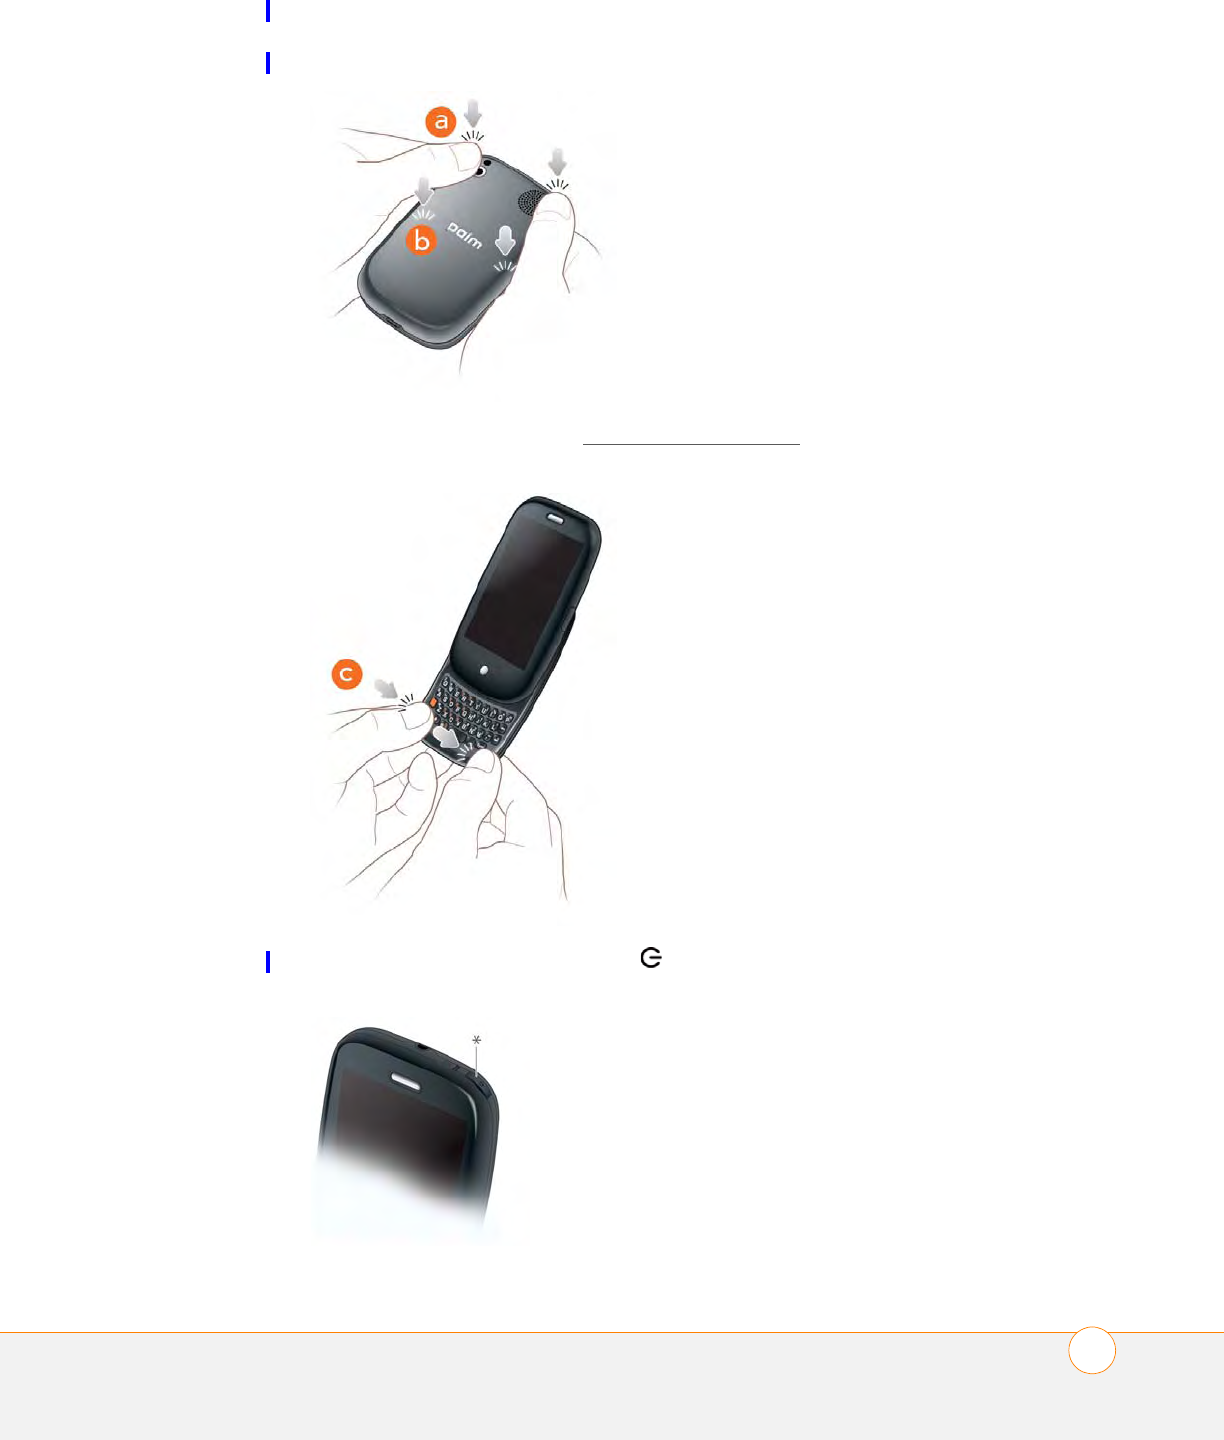
9Position the back cover over the phone and gently press the top two snaps,
located at the top corners. Then press the two snaps halfway down either side
of the phone.
10Slide out the keyboard (see Slide out the keyboard), and then press the two
snaps at the bottom corners.
11Press and hold the power button on the upper-right corner of your phone
until you see a logo on the screen.
BASICS
TURN THE PHONE ON/OFF
14
12Follow the onscreen instructions to complete setup.
IMPORTANT If you see a notification that an update is available, tap Install Now
to install it. Palm periodically sends updates to enhance the applications and
features on your phone.
13Your phone is ready to use.
Turn the phone on/off
The wireless services—phone, Bluetooth® wireless technology, and Wi-Fi—and
the screen of your phone can be turned off and on separately. This means you can
wake up the screen to use just the organizer features of your device (Calendar,
Contacts, Tasks, Memos, and so on) without turning on the phone and other
wireless features. Also, when the screen is turned off, the phone can be on and
ready for you to receive phone calls or messages.
Turn the screen on/off
Wake up the screen and leave the wireless services turned off when you want to
use only the organizer features, for example, when you’re on a plane and want to
look at your calendar. You can also turn off the screen without turning off the
wireless features on your phone.
To save power, the screen dims automatically after a period of inactivity, then
turns off. You can be on a call when the screen dims and turns off—this does not
affect the call.
•To brighten the screen if it has dimmed: Tap the screen.
•To turn the screen off: Press power .
To turn the screen on, do one of the following:
•Press power . Drag up to unlock the screen.
•Slide out the keyboard.
TIP
You can set how long the screen stays on during a period of inactivity
(see Set the interval for turning the screen off automatically).
BASICS
TURN THE PHONE ON/OFF 15
Turn wireless services off (airplane mode)
Airplane mode turns off your phone as well as the Bluetooth® wireless technology
and Wi-Fi features. Use it when you are on a plane or anywhere else you need to
turn off all wireless services. You can still use apps like Calendar, Contacts,
Photos, Music, Doc View, and PDF View.
Do one of the following:
•Tap the upper-right corner of any screen and tap Turn on Airplane Mode.
•Press and hold power and tap Airplane Mode.
When your phone is in airplane mode, the airplane mode icon appears at the
top of every screen, and Airplane Mode appears in the upper-left corner of the
screen in the Launcher, Card view, and Phone. Your phone is not connected to any
mobile network. Although you can no longer use the phone, you can still use all
the organizer features of your phone.
Turn wireless services on
When you turn on your phone, it connects to a mobile network so that you can
make and receive phone calls and use other wireless services (if supported by the
local network).
BEFORE YOU BEGIN To use the phone, you must have an active SIM card from
your wireless service provider inserted into your phone (see Insert the SIM card).
•Tap the upper-right corner of any screen and tap Turn off Airplane Mode.
When your phone locates a signal, your wireless service provider’s name appears
in the upper-left of the screen in the Launcher, Card view, and Phone, and the
signal-strength icon appears at the top of the screen.
When you are inside a coverage area, the bars on the signal-strength icon are
filled in. If you’re outside a coverage area, the bars in the signal-strength icon
appear dimmed with an X.
Turn everything (the screen and wireless services) on/off
•To turn both the screen and wireless services off: Press and hold power and
tap Tu rn O f f .
•To turn both the screen and wireless services back on: Press and hold
power .
TIP
When your phone is in airplane mode, you can turn the other wireless
features on individually. For Wi-Fi, see Turn Wi-Fi on and off, For Bluetooth,
see Bluetooth® wireless technology. To turn your phone back on, you must
turn airplane mode off.
BASICS
MAKE YOUR FIRST CALL
16
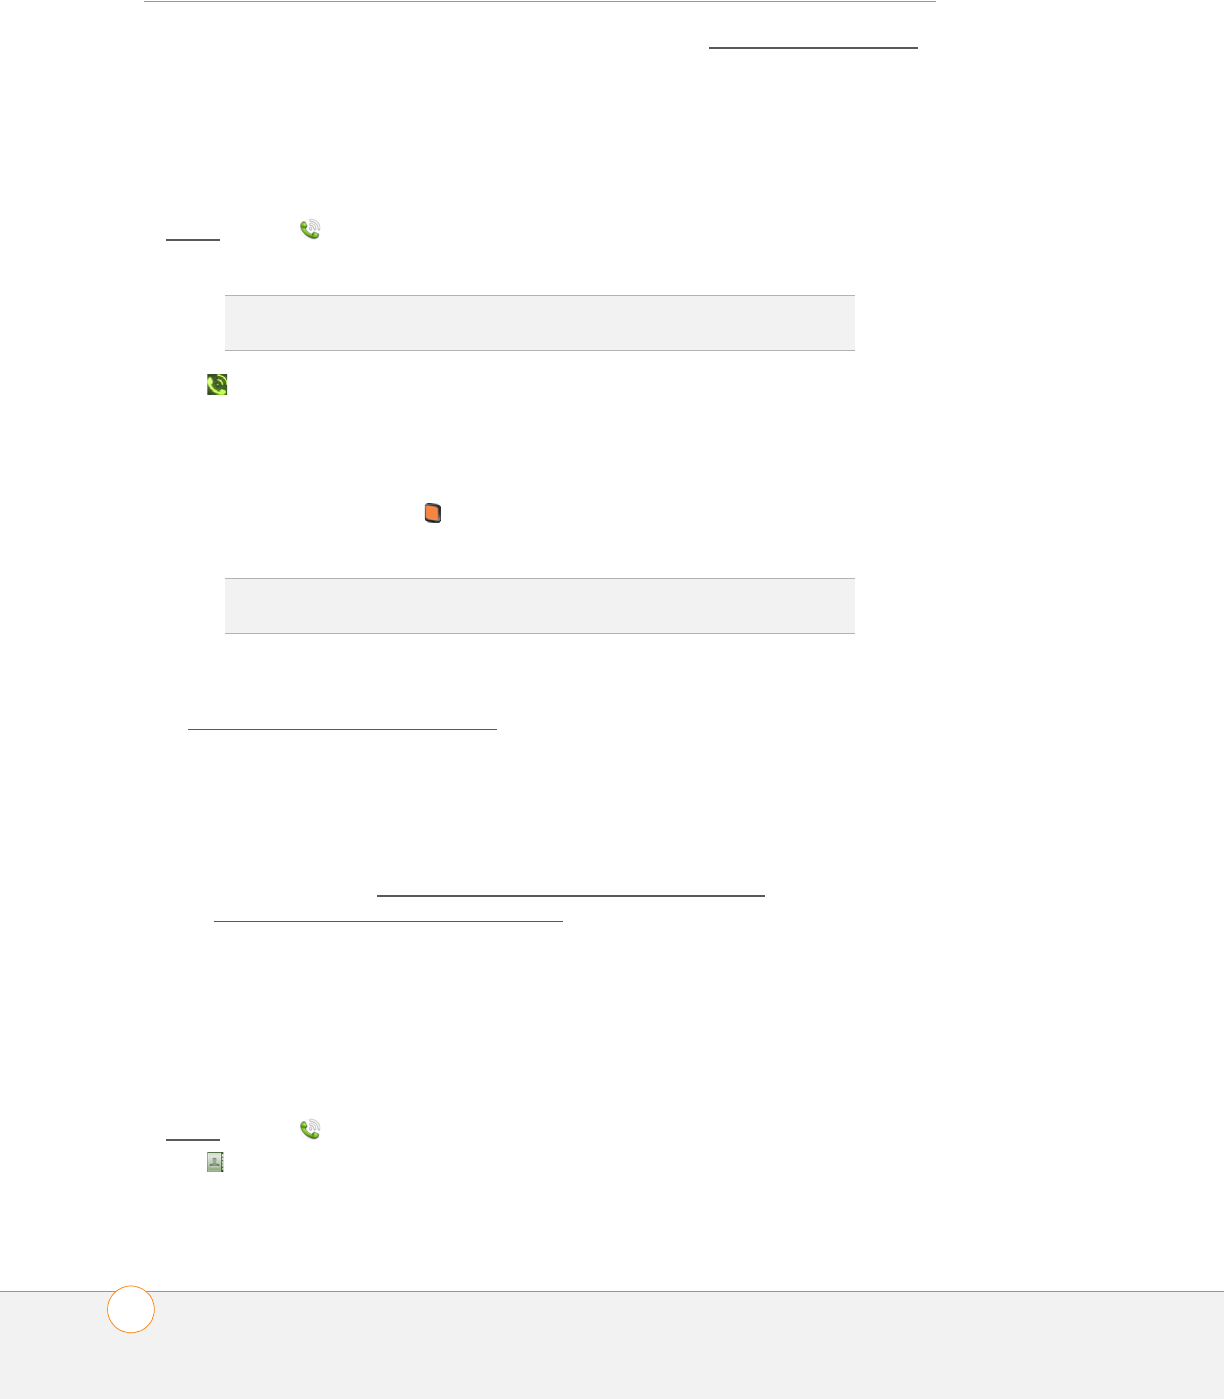
Make your first call
1Press power . This wakes up the screen.
2If necessary, drag up to unlock the screen.
3Tap .
4Tap numbers on the dial pad.
5Tap to dial.
6Tap to end the call.
For more ways to make calls, see Make calls.
Adjust call volume
When you’re on a call, press the Volume button on the side of your phone to
adjust the call volume.
Open and close applications
Open an application in Quick Launch
Quick Launch is the bar of five icons that is always available at the bottom of Card
view and the Launcher. By default it includes Calendar, Contacts, Email, Phone,
and the Launcher. To open an application from Quick Launch, just tap the icon.
When an application fills the whole screen, make the following gesture to display
Quick Launch and open one of its applications.
1Drag up slowly from the gesture area to the screen.
2Move your finger to the application icon. When you see the app name appear,
lift your finger. The application opens.
Open an application in the Launcher
The Launcher displays all your applications that are not on Quick Launch.
TIP
Press the onscreen backspace icon to delete numbers you’ve entered.
BASICS
WORK WITH APPLICATIONS 17
1Press Center , and tap .
2To find the app you want, swipe up or down to see all the icons on a page.
Swipe left or right to see other pages.
3Tap the application icon.
To close the Launcher, do one of the following:
•Press Center .
•Tap .
•Flick up from the screen to the gesture area.
Open an application using search
1Press Center to open Card view.
2Enter the name of the application.
3When the application icon appears in the search results, tap it.
Work with applications
Go up one level in an app
The back gesture takes you up one level from a detailed level to a more general
view of the application you're working in. For example, when you finish reading an
email message, make the back gesture to close the message and return to your
list of messages. Or when you finish writing a memo, make the back gesture to
close and save the memo and return to the display of all your memos. When you
make the back gesture in an application and that's the only screen of that app
that's open, you minimize the app and go back to Card view.
To make the back gesture, swipe right to left anywhere in the gesture area.
Display all open applications (Card view)
Card view displays open applications as small cards, so that you can easily scroll
through them and drag them to change their order.
•When an application fills the screen and you want to go to Card view, press
Center .
TIP
You can also open the Launcher by flicking up twice from the gesture
area to the screen. If you are in Card view, just flick up once to open the
Launcher
TIP
You can also open Card view by flicking up from the gesture area to the
screen.
BASICS
ENTER INFORMATION
18
Move among open applications
1In Card view (see Display all open applications (Card view)), swipe left or right
on the screen to see other open apps.
2Tap a card to maximize the application.
Reorder open application cards
1In Card view (see Display all open applications (Card view)), tap and hold a card
to further reduce the size of the cards.
2Tap and hold a card, and then drag it to another position.
Close an application
•In Card view (see Display all open applications (Card view)), throw the
application card off the top of the screen.
Enter information
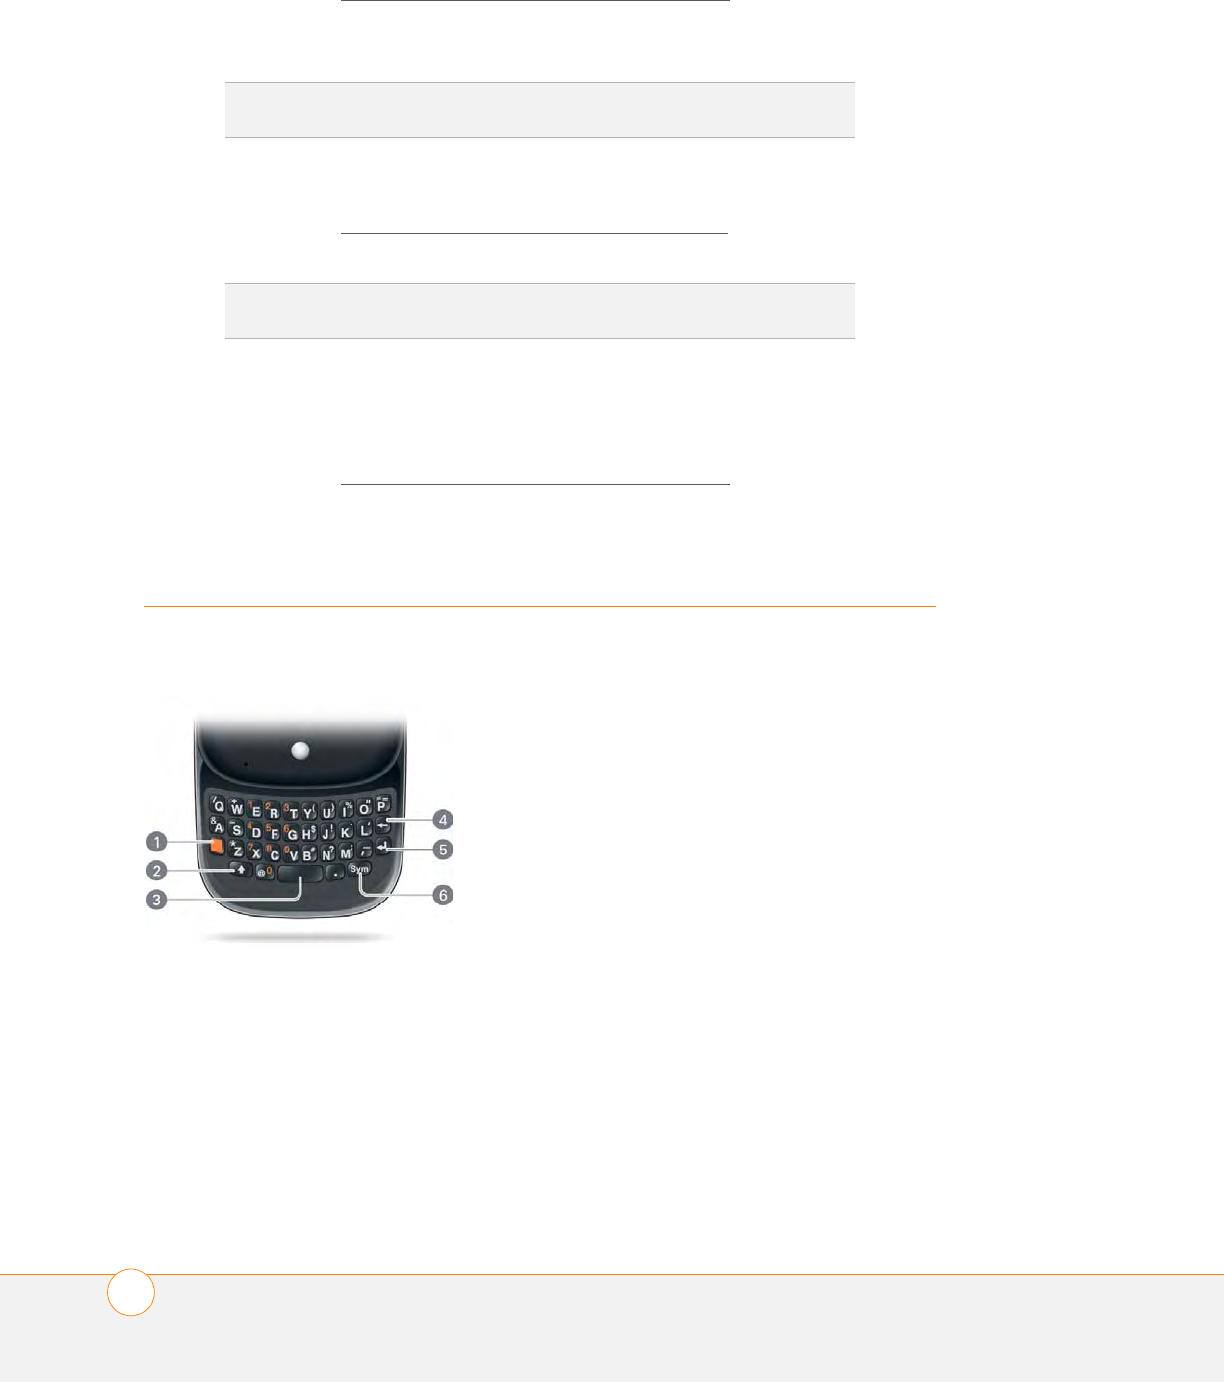
Use the keyboard
1Orange
2Shift
3Space
4Backspace
5Enter
6Sym
TIP
You can also maximize the center card in Card view by flicking down from
the screen to the gesture area.
TIP
You can also tap anywhere on the screen around the cards to reduce the
size of the cards.
BASICS
ENTER INFORMATION 19
Enter uppercase letters
By default, the first letter of each sentence or field is capitalized and the
remaining text you enter is lowercase. To enter other uppercase letters, do one of
the following:
•Press Shift and press the letter key. The Shift symbol appears: . You don’t
need to hold down Shift while you press the letter key.
•Turn on Caps Lock: Press Shift twice. The Caps Lock symbol appears: .
•Turn off Caps Lock: Press Shift .
Enter numbers, punctuation, and symbols
Numbers, punctuation, and symbols appear above the letters on the keys. To
enter these characters, do one of the following:
•Press the orange and press the key for the character. The alternate character
symbol appears: . You don’t need to hold down the orange key while
pressing the second key.
•Enter a series of alternate characters: Press the orange key twice to lock the
alternate character feature. The alternate character lock symbol appears: .
•Turn off the alternate character feature: Press the orange key.
Enter other symbols and accented characters
You can enter symbols and accented characters that don’t appear on the keys by
using the symbols list.
1Press Sym to display the symbols table.
2Narrow the list by pressing the key that corresponds to the character you want.
For example, to enter an é, press e.
3Scroll to find the character you want.
4Tap the character to insert it.
Enter information in a field
You can enter information in a field by typing or by pasting previously copied
information. To accept the information you entered, do one of the following:
•Tap outside the field.
TIP
The symbols and accented characters are grouped according to their
similarity to the corresponding key. For example, the symbol available for the
R key is ®, and for the T key is ™. If you press the wrong key, press
Backspace to return to the full list of symbols and accented characters. You
can then press another key.
TIP
Some symbols, such as $ and ¢, do not correspond to a letter key. To
enter these symbols, press Sym by itself and scroll to the bottom of the
table to select the symbol.

BASICS
USE THE MENUS
20
•Press Enter . If a screen contains multiple fields, pressing Enter accepts the
information you just entered and jumps the cursor to the next field.
Select items in a list
Lists enable you to select from a range of options. Lists are different from menus
(see Use the menus), which give you access to additional features.
Lists are hidden until you tap the currently displayed option for that list.
1Tap the currently displayed option to open the list. For example, when creating
a new event in Calendar, tap No Reminder to display the list of reminder
options.
2Tap the list option you want.
Save information
•On most screens, your information is saved automatically. Just make the back
gesture to close the screen (see Go up one level in an app), and your info is
saved at the same time.
•On screens with a Done button, tap Done to save your information.
Use the menus
Most applications have an application menu hidden in the upper-left corner, which
provides access to additional features. There is also a connection menu hidden in
the upper-right corner, which provides access to wireless services.
To get the most out of your phone, it’s a good idea to familiarize yourself with the
additional features available through the menus in various applications.
Open the application menu
The application menu contains options such as Cut and Copy, Preferences, and
other application-specific commands.
1Tap the application name in the upper-left corner of the screen.
2Tap a menu item to open it. If a menu displays a downward-pointing arrow
at the bottom, it means that more options are available. Scroll the menu to see
the additional options.
Open the connection menu
The connection menu lets you manage wireless services—the phone, Bluetooth®
wireless technology, and Wi-Fi.
DID
YOU
KNOW
?
The connection menu also displays the current day and date,
as well as the battery charge level.

BASICS
SEARCH TO FIND INFO AND MAKE CALLS 21
1Tap the upper-right corner of the screen.
2Tap a menu item to turn that wireless feature on or off or to open a list of
options for that feature.
Search to find info and make calls
Use universal search
You can search for contacts and applications on your phone, or search the web.
1Open Card view (see Display all open applications (Card view)) or the Launcher
(see Open an application in the Launcher).
2Begin typing the search term. As you type, search displays all contact names
application names that match the characters. As you continue typing, the
search results narrow.
3Do one of the following:
•To look up or get in touch with someone: Tap a contact name to open the
person’s contact information. Tap a phone number to dial it, an email address
to send a message, and so on. If only the contact name is displayed, tap the
name to display ways to get in touch.
•To perform a web search: Tap the search term you entered to open a list of
web search options, and tap the option. If your search returns no contacts or
applications, the web search options are displayed automatically.
•To open an application: Tap the application.
Search within an application
In applications such as Contacts, Memos, Doc View, and PDF View, you can
search for entries or files. From the list view, enter the file name; a few words
from a memo; or a contact name, initials, address, or number. See the application
chapter for details.
You can also enter a search term in the Help application to search for help content
related to the term.
View and respond to notifications
Respond to a notification
Notifications show up at the bottom of the screen to notify you of new voicemail
and messages, upcoming appointments, missed calls, and more.
Do one of the following:
•Tap the notification to act on it.

BASICS
VIEW AND RESPOND TO NOTIFICATIONS
22
•For some types of notifications, throw the notification off the side of the screen
to dismiss it.
View all of your notifications
For most types of notifications, if you do not tap a notification after a few
seconds, it becomes an icon in the lower-right portion of the screen.
1Tap anywhere on the bottom of the screen to display your notifications.
2Tap a notification to act on it. If a notification icon has a number next to it, the
number indicates how many items are included in the notification—how many
voicemail or email messages you have, and so on.

PHONE
MAKE CALLS
24
Make calls
For information on turning the phone off and back on, see Turn the phone on/off.
Dial using the onscreen dial pad
The onscreen dial pad lets you make a call without sliding out the keyboard. It is
also useful when you need to dial numbers that are expressed as letters and
when you need large, brightly lit numbers that you can tap.
1Open Phone .
2Tap the onscreen keys to enter the number.
3Tap to dial.
Dial using the keyboard
1In the Launcher or Card view, use the keyboard to enter the number. You do not
need to press the orange key to enter numbers, *, or #.
2When you finish entering the number, tap it to dial.
Dial using a speed dial
See Assign a speed dial to a contact for instructions on creating a speed dial.
•In the Launcher, Card view, or Phone, press and hold the speed-dial key you
assigned to the number.
Dial by contact name using universal search
1Open Card view (see Display all open applications (Card view)) or the Launcher
(see Open an application in the Launcher)
2Begin typing the contact first or last name, or initials.
3Tap one of the contact’s phone numbers to dial it. If only the contact name is
displayed, tap the name to display the phone numbers for that contact, and tap
the number.
Dial by contact name in the Phone application
1Open Phone .
2Tap to open contact search. Enter a name or initials until the contact you
want appears.
TIP
Tap the onscreen backspace icon to delete numbers you’ve entered one
at a time. Tap and hold the icon to delete all the numbers you’ve entered.
TIP
You can also enter a number with the keyboard when the dial pad is
displayed. After entering the number, tap the onscreen dial icon to dial.
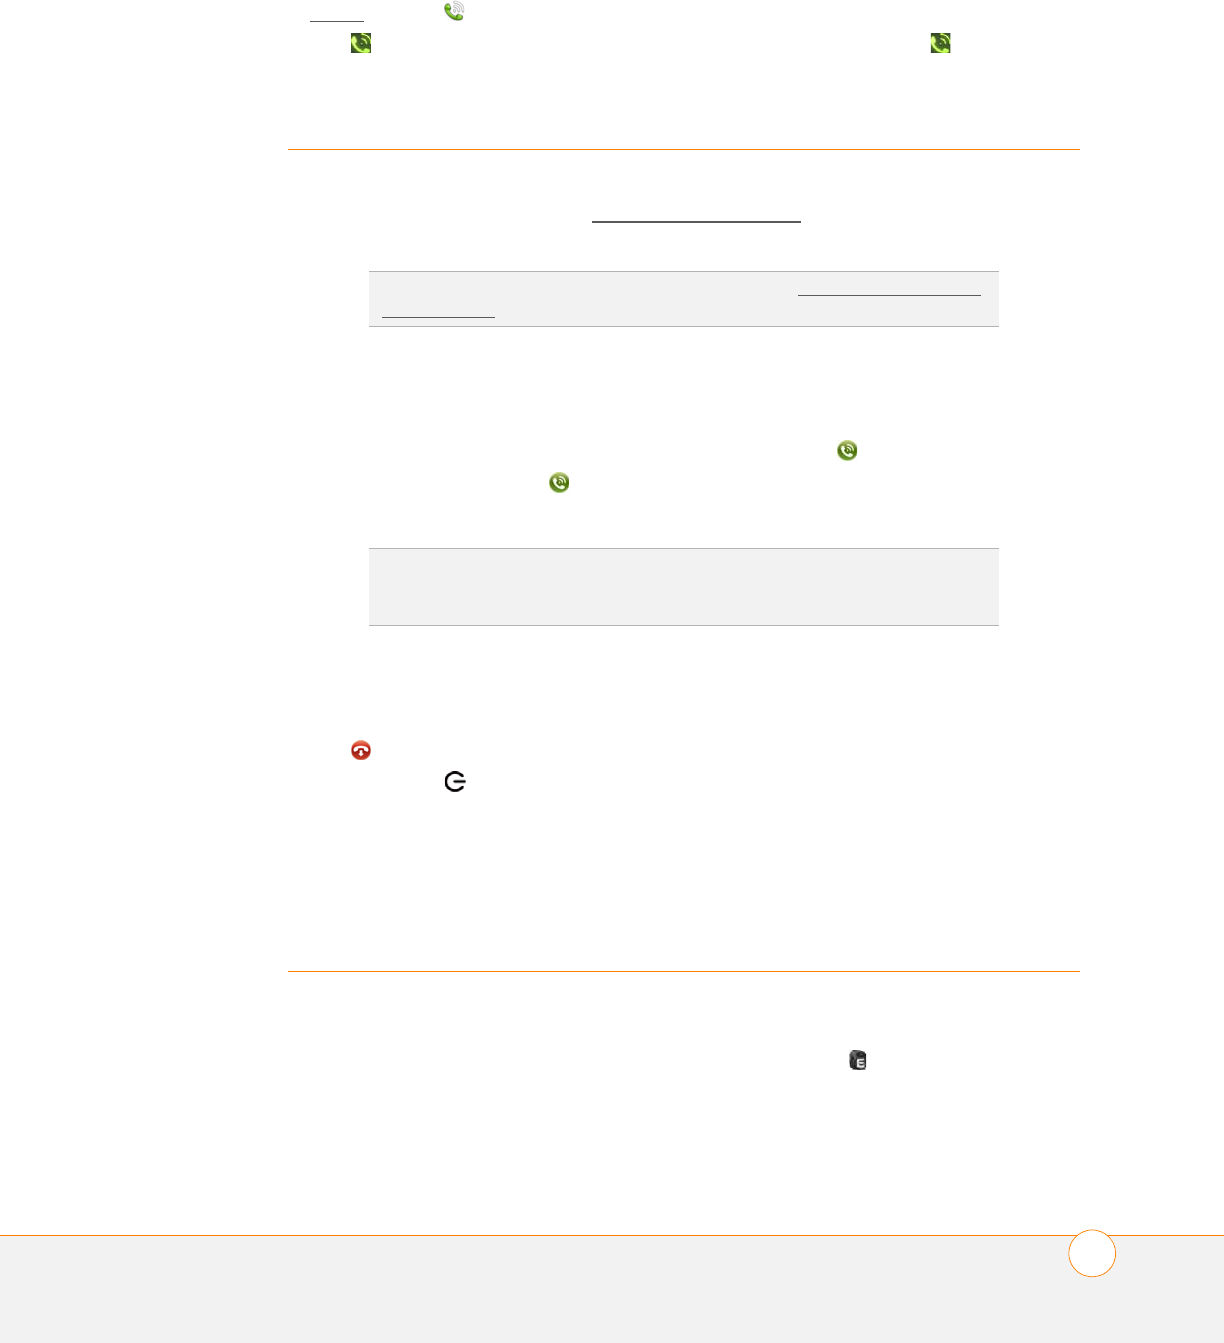
PHONE
RECEIVE CALLS 25
3Tap the number.
Redial the last number dialed
1Open Phone .
2Tap . When the number appears at the top of the screen, tap again to dial.
Receive calls
If you want to answer calls, your phone must be on. This is different from having
only the screen turned on (see Turn the phone on/off). When your phone is off,
your calls go to voicemail.
Answer a call
Do one of the following:
•If the screen is on when the phone starts ringing, tap .
•If the screen is off, drag up to unlock the screen and answer the call.
•If a headset is attached, press the headset button.
Ignore a call
To send a call immediately to voicemail, do one of the following:
•Tap .
•Press power twice.
To reply to a caller who is in your Contacts list after you ignore a call, tap the
ignored call notification. This opens the caller’s contact entry, where you can
select a reply method.
Use voicemail
Set up voicemail
1In the Launcher, Card view, or Phone, press and hold 1 .
2Follow the voice prompts to set up your voicemail.
TIP
You can pick the ringtone for incoming calls (see Select the ringtone for
incoming calls).
DID
YOU
KNOW
?
If you are playing music or a video on your phone and a call
arrives, playback pauses automatically and resumes when you hang up or
ignore the call.
PHONE
WHAT CAN I DO DURING A CALL?
26
Listen to voicemail messages
1Do one of the following:
•In the Launcher, Card view, or Phone, press and hold 1 .
•Tap a voicemail notification at the bottom of the screen.
•Open Phone . Then tap .
•Open Phone . Then tap 1 onscreen.
2Follow the voice prompts to listen to your messages.
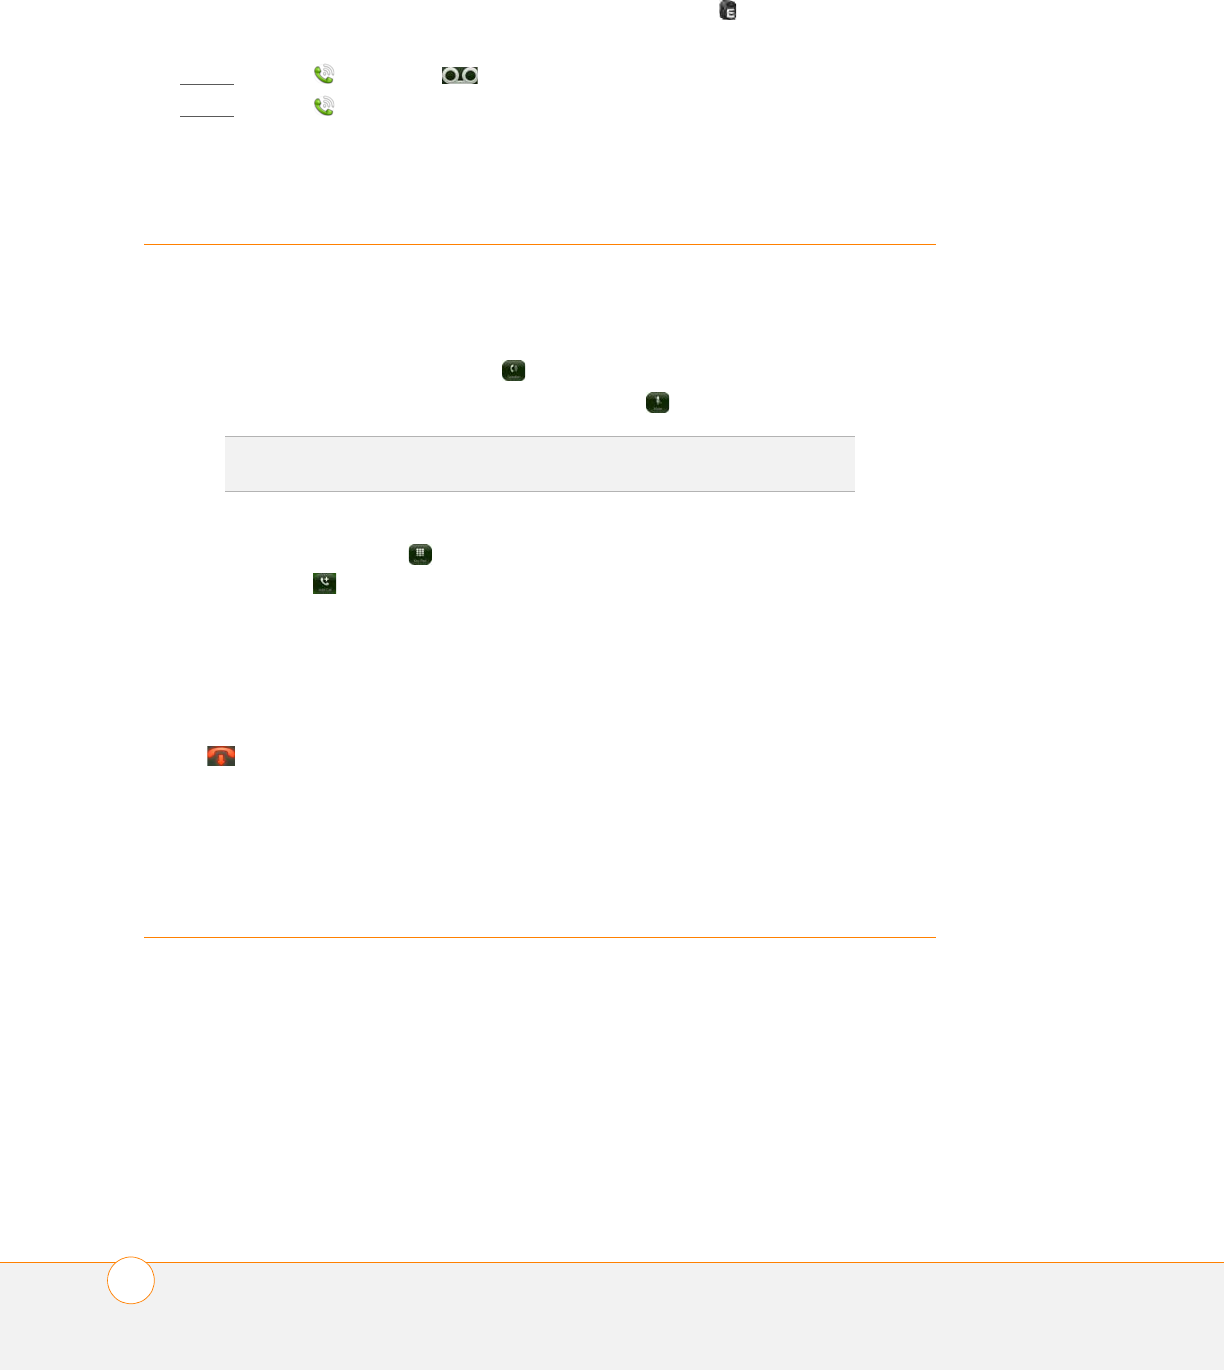
What can I do during a call?
Manage a call
Do any of the following:
•Put the call on speakerphone: Tap .
•Mute the microphone so you can’t be heard: Tap .
•Open the dial pad to enter numbers for navigating phone trees, responding to
prompts, and so on: Tap .
•Add a call: Tap .
•Adjust call volume: Press Volume.
End a call
Do one of the following:
•Tap .
•If a headset is attached, press the headset button.
Set up and use a Bluetooth® hands-free
device
WARNING If driving while using a phone is permitted in your area, we recommend
using a headset or hands-free car kit (sold separately). However, be aware that
use of a headset that covers both ears impairs your ability to hear other sounds.
Use of such a headset while operating a motor vehicle or riding a bicycle may
create a serious hazard to you and/or others, and may be illegal. If you must use a
stereo headset while driving, place a speaker in only one ear. Leave the other ear
free to hear outside noises, and use the headset only if it is legal and you can do
so safely.
TIP
You don’t need an on-hold button to put a call on hold. Just tap the mute
icon to mute your end of the line.
PHONE
SET UP AND USE A BLUETOOTH® HANDS-FREE DEVICE 27
Your phone is compatible with many headsets and car kits (sold separately)
enabled with Bluetooth® wireless technology version 2.1 with EDR and Stereo
(with AVRCP media controls).
After you set up a connection with a Bluetooth headset or hands-free car kit, you
can communicate with that device whenever it is within range and the Bluetooth
feature on your phone is turned on. The range varies greatly, depending on
environmental factors. The maximum is about 10 meters (30 feet).
NOTE You can use a stereo (A2DP-enabled) Bluetooth headset to listen to MP3
files on your phone. You cannot, however, use a mono Bluetooth headset to listen
to MP3 files.
1Open Bluetooth .
2If the Bluetooth setting at the top of the screen is off, tap Off to switch the
Bluetooth feature from Off to On
3Tap Add device and tap the device name.
4To use a Bluetooth device with your phone, follow the instructions that came
with the Bluetooth device.
5To switch to another Bluetooth device while on a call: Tap and tap the new
device name. You can also tap Handset or Speaker to use your phone without
the headset.

PHONE
SET UP AND USE A BLUETOOTH® HANDS-FREE DEVICE
28


YOUR PERSONAL INFORMATION ORGANIZER
CONTACTS
30
Contacts
If you have an address book in certain online accounts (for example, Google or
Microsoft Exchange ActiveSync), you can set up Contacts on your phone to
synchronize and display contacts in the online address book. You can also enter a
contact directly in Contacts and assign it to an online account (see Create a
contact).
Use Contacts for the first time
1Open Contacts .
2Do one of the following:
•To set up your first online account to sync: Tap the account type, enter the
account information, and tap Sign in.
•To set up an online account to sync other than the first one: Tap Add An
Account, enter the account information, and tap Sign In.
•To skip to your contact list: Tap Done.
Create a contact
You can add a contact that synchronizes with an online account you have, such as
Google or Microsoft Exchange ActiveSync. You can also add a contact in the Palm
profile account, which does not synchronize with an online account but is backed
up daily to your Palm profile.
If you are using Contacts for the first time, you go through a few different steps to
get or access the contacts on your phone (see Use Contacts for the first time).
Follow this procedure to add contacts directly on your phone after the first time
you use Contacts.
1Open Contacts .
2Tap .
3(Optional) Tap the account button to the right of Name to change the account to
which the new contact will be added.
4Tap any field to enter contact details, select a ringtone for that contact, add
notes, or add birthday details for the contact. Scroll to see all of the fields
available for contact info.
5In some fields, such as New Phone Number, when you enter the information a
label button appears on the right. Tap the button to change the label for your
entry--for example, to identify a number as a mobile or work phone.
6Tap Done.
Find a contact
1Open Contacts .
YOUR PERSONAL INFORMATION ORGANIZER
CALENDAR 31
2Enter any of the following:
•First, middle, or last name
•First and last initial (no space between)
•Company
•Nickname
3For more search options, tap Global Address Lookup. This option is available if
you are using Microsoft Exchange ActiveSync with a Global Address List.
4Tap the contact.
Assign a speed dial to a contact
You can assign a speed dial to any contact phone number. You can assign up to 26
speed dials.
1Open Contacts tap .
2Search for a contact (see Find a contact), and tap the contact name.
3Open the application menu and tap Set speed dial.
4Tap the phone number you want to assign a speed dial to, and then tap the key
to use as a speed dial. You may have to scroll to find the key you want.
Calendar
If you have a calendar in certain online accounts (for example, Google or Microsoft
Exchange ActiveSync), you can set up Calendar on your phone to synchronize and
display events in the online calendar. You can also enter an event directly in
Calendar and assign it to an online account (see Create an event).
Use Calendar for the first time
1Open Calendar .
2Do one of the following:
•To set up your first online account to sync: Tap the account type, enter the
account information, and tap Sign in.
•To set up an online account to sync other than the first one: Tap Add An
Account, enter the account information, and tap Sign In.
•To skip to your calendar: Tap Done.
DID
YOU
KNOW
?
You cannot assign 1 (the E key) as a speed dial. The number 1
is reserved for dialing your voicemail system.

YOUR PERSONAL INFORMATION ORGANIZER
CALENDAR
32
Create an event
You can create an event that synchronizes with an online calendar you have, such
as Google or Microsoft Exchange ActiveSync. You can also create an event in the
Palm profile account, which does not synchronize with an online calendar but is
backed up daily to your Palm profile.
1Open Calendar .
2Tap All or an online account name in the upper-right corner, and tap the
calendar you want to use for this event.
If you create an event in All Calendars View, the event is created in the calendar
set as the default.
3Go to the day you want and tap a blank time slot.
4Enter the event name and press Enter .
In Day view, blank time slots are compressed and labeled HRS Free. To expand
free time so you can enter an event, tap X Hrs Free.
Don't look for a save button -- your info is automatically saved when you make
the back gesture to close the event.
YOUR MEDIA AND ENTERTAINMENT CENTER
CAMERA
34
Camera
Your phone comes with an easy-to-use, built-in, 3-megapixel camera with an LED
flash.
1Open Camera .
2The camera is set to automatically determine if the flash is needed. If you want
to change the flash setting, tap to keep the flash on, and tap again to keep
the flash off.
3To take the picture in landscape view, turn your phone 90 degrees.
4Press Space or tap .
The picture you took is automatically saved. Keep snapping pictures, and then go
to Photos to look at them and delete the ones you don’t want.
Photos
To get pictures on the phone, you can do any of the following:
•Take a picture with your phone’s camera (see Camera)
•Copy pictures from your computer
•Receive pictures as email attachments or as part of a multimedia message.
You can view a picture as an email attachment or part of a multimedia message in
JPG, GIF, BMP, or PNG format. In the Photos application, you can view pictures
you take with the camera or copy from your computer in JPG format.
You can also look at pictures on the web directly in the web browser (see Web).
1Open Photos .
2Tap the album containing the picture, and tap the thumbnail of the picture. The
Photo roll album contains pictures you have taken with your phone’s camera.
3Swipe left or right on the screen to look at other pictures in the album.
Videos
To get videos on your phone, you can do either of the following:
•Copy videos from your computer
•Receive videos as email attachments or as part of a multimedia message.
You can view videos in the MPEG4, H.263, H.264, MP4, M4V, 3GP, 3GPP, 3G2,
and 3GP2 formats. Videos play on your phone in landscape orientation.
Use the YouTube application to view YouTube videos.
1Open Videos .
2Tap the video.
YOUR MEDIA AND ENTERTAINMENT CENTER
MUSIC 35
Music
You can listen to music through the speaker on the back of your phone or through
a stereo headset or headphones.
To get music onto your phone, you can do any of the following:
•Copy music files from your computer
•Receive music files as email attachments or as part of a multimedia message.
You can also listen to streaming music from the web directly in the web browser
(see Web).
You can play music that you copy from your computer or stream from the web in
the following formats: MP3, AAC, or AAC+ format. For files received as email
attachments or as part of a multimedia message, you can play files in the MP3,
AAC, AAC+, WAV, AMR, or QCLEP format.
1Open Music .
2If the Music application finds no music files on your phone, tap one of the
following:
•Get My Music: Read information about how to get music on your phone.
•Amazon MP3: Open the Amazon MP3 application to purchase songs.
3Do one of the following:
•Listen to all songs on your phone: Tap Shuffle All.
•Listen to a specific song: Tap Artists, Albums, Songs, Genres, or Playlists
to search that category. Continue making selections until the song you want
appears. Tap the song name.
•Listen to all songs from an artist: Tap Artists and tap the artist name. To listen
to the artist’s songs in the order they are displayed onscreen, tap the first
song. The songs play one after the other in sequence. To listen to the songs in
random order, tap Shuffle All.
•Listen to an album: Tap Albums and tap the album name. To listen to the
album’s songs in the order they are displayed onscreen, tap the first song. The
songs play one after the other in sequence. To listen to songs in random
order, tap Shuffle All.
•Listen to all songs in a genre: Tap Genres and tap the genre name. To listen to
the songs in the order they are displayed onscreen, tap the first song. The
songs play one after the other in sequence. To listen to the songs in random
order, tap Shuffle All.
•Browse a music store to preview or purchase songs (if available): Tap the
music store name. Continue making selections until the song you want
appears. Tap the song name.
DID
YOU
KNOW
?
Music continues to play in the background if you switch to
another application, turn off the screen, or slide the ringer switch off.

YOUR MEDIA AND ENTERTAINMENT CENTER
MUSIC
36


YOUR EMAIL AND OTHER MESSAGES
EMAIL
38
Email
Set up email
BEFORE YOU BEGIN
•Before you use your phone to send or receive messages, check with your
wireless service provider for pricing and availability of email services and data
rate plans.
•Make sure your phone is on and you’re inside a coverage area before you send
or receive messages.If you want delivery of Microsoft Office Outlook® email
using Microsoft Direct Push, make sure that your IT organization uses
Exchange Server 2007, or Exchange Server 2003 with Service Pack 2.
Follow this procedure if you have a common email provider, for example, AOL,
EarthLink, or Yahoo!
1Open Email .
2The first time you open Email, do one of the following:
•If this is the first email account you are setting up: Enter the email address
and password and tap Sign In.
•If you have already set up an email account and want to set up another one:
Tap Add An Account and enter the email address and password. Tap Sign In.
3Any other time you open Email, open the application menu, tap Preferences &
Accounts, and tap Add An Account. Enter the email address and password
and tap Sign In.
4Tap Add An Account to add another account.
Create and send an email message
1Open Email .
2If this is the first time you have opened the Email application, and you have set
up at least one email account, tap Done. If you have not set up an email
account, see Set up email.
3Tap .
4Tap From to change the email account you are using to send the message. This
option appears only if you have more than one email account set up on your
phone.
5In the To field, do one of the following to address the message:
•Enter a contact name, initials, or email address. Tap the email address when it
appears.
•Tap to open the full contact list. Tap the contact you want, or enter a name
or address to narrow the list.
•Enter the full email address for a recipient who is not a contact.
6(Optional) Tap To to open the Cc and Bcc fields, and enter an address.
7(Optional) Repeat steps 5 and 6 to enter additional addresses.
YOUR EMAIL AND OTHER MESSAGES
MESSAGING 39
8Enter the subject, press Enter , and enter the body text.
9(Optional) To set the priority for the message, open the application menu and
tap High priority or Normal priority.
10Tap .
Receive email messages
The Email application synchronizes messages anytime you open a mail folder. It
also synchronizes messages on an automatic schedule—the default interval is
every 30 minutes.
Follow these steps to manually retrieve messages.
1Open Email .
2If the folders for the account you want are hidden, tap to display the folders.
3Tap the folder you want to check messages for, and tap .
4Tap a message to open it.
5Tap or to view the previous or next message.
6To view messages for another account, make the back gesture (see Go up one
level in an app) to return to the account list, and tap the account name.
Messaging
Create and send a text or multimedia message
Each text message can have up to 160 characters.You can send a message of
more than 160 characters, but the message may be split into several messages. If
you send a text message to an email address, the email address is deducted from
the 160-character count.
Multimedia messages consist of both text and pictures. You can include pictures
in JPG format.
BEFORE YOU BEGIN
•Before you use your phone to send or receive multimedia messages, refer to
your service plan for pricing and availability of multimedia messaging services.
•Make sure that your phone is on and that you’re inside a coverage area (see
Turn wireless services on).
1Open Messaging .
2The first time you open Messaging, tap Done to send a text or multimedia
message. You can also set up an instant messaging (IM) account from this
DID
YOU
KNOW
?
You can send and receive text messages even while you are
on a phone call. This is easiest when using a hands-free headset or the
speakerphone.
YOUR EMAIL AND OTHER MESSAGES
MESSAGING
40
screen. Tap Add An Account and see Set up an instant messaging (IM)
account for instructions.
3Tap . The cursor is in the To field. Do one of the following to address the
message:
•Enter a contact first or last name or initials, screen name, phone number, or
email address. Tap the phone number when it appears.
•Tap to open your full contact list. Tap the contact you want, or enter a name
or address to narrow the list.
•Enter a phone number for a recipient who is not a contact.
4Tap the To field and repeat step 3 to enter additional recipients.
5Do one of the following to attach a picture to a multimedia message:
•Before entering the message text: Tap , Tap the album containing the
picture you want and tap the picture, or tap New Photo and take the picture.
•After entering the message text: Open the application menu and tap Add
picture. Tap the album containing the picture you want and tap the picture, or
tap New Photo and take the picture.
6Enter the message text and tap .
Receive and view text and multimedia messages
1Open Messaging .
2Tap a conversation to view messages.
3In a multimedia message, tap a file name to view the attached file. Tap Copy To
Photos to save an attached picture in JPG format.
Set up an instant messaging (IM) account
To use an IM account on your phone, you must already have the account online—
such as a GoogleTalk IM account. IM accounts for certain providers are
automatically added to your phone when you enter your username and password
for that provider in Email, Calendar, or Contacts.
1Open Messaging .
2Do one of the following:
•The first time you open Messaging: Tap Add An account.
•Any other time: Open the application menu and tap Preferences & Accounts.
Tap Add IM Account.
3Tap the account type and enter your username and password
4Tap Sign In.
TIP
Do you need to enter a short code that contains letters? Use the
keyboard to enter it; just press the letter keys. For example, if the code is
“win01,” press W to enter w, I to enter i, and so on. No need to figure out
the numbers that correspond to the letters.
YOUR EMAIL AND OTHER MESSAGES
MESSAGING 41
Sign in to an IM account
1Open Messaging .
2Tap Buddies.
3Tap to the left of the text Offline, and tap Available.
Send and receive IM messages
BEFORE YOU BEGIN Make sure that your phone is on and that you’re inside a
coverage area (see Turn wireless services on).
1Open Messaging .
2Do one of the following to start or continue a conversation:
•In Conversations view or Buddy List view, tap to start a new conversation.
•In Conversations view, tap an existing conversation and enter a new message.
•In Buddy List view, tap a buddy name and enter a new message.
3Tap Text or an IM account icon in the upper right, and tap the IM account you
want to use.
4Enter the message text and tap .
5When the message recipient replies, the reply appears below your message in
Conversations view. Repeat step 4 to send another message.

YOUR EMAIL AND OTHER MESSAGES
MESSAGING
42


YOUR CONNECTIONS TO THE WEB AND WIRELESS DE-
WI-FI
44
Wi-Fi
Turn Wi-Fi on and off
Do one of the following:
•Open Wi-Fi , and tap On or Off.
•From any screen: Open the connection menu, tap Wi-Fi, and tap Tu rn o n W i - F i
or Turn off Wi-Fi.
If your phone finds the network you want, tap the network name to connect to it.
Otherwise, see Connect to a new network.
Connect to a new network
1Open Wi-Fi .
2Make sure Wi-Fi is on (see Turn Wi-Fi on and off).
3Do one of the following:
•If the network you want is displayed: Tap the network name. If prompted,
enter your username and/or password, and tap Sign In.
•If the network you want is not displayed: Tap Join network and enter the
network name. To connect to an open network, make sure Open is displayed
in the Security field. To connect to a secure network, tap the Security field,
and then tap the network type: Open, WPA-personal, WEP, or Enterprise.
4Tap Connect.
5For a secure network, a series of different screens appears depending on the
network type. Enter or select the following if you are prompted to do so. Tap
Sign In when you have finished.
Username and/or Password
Certificate
Connect to a previously used network
•If Wi-Fi is turned off: Turn on Wi-Fi (see Turn Wi-Fi on and off). Your phone
automatically attempts to connect to a previously used network, starting with
the most recently used network.
•If Wi-Fi is turned on but you are not connected to a network: Your phone
automatically attempts to connect to a previously used network, starting with
the most recently used network.
•If you are connected to one network and want to use a different one: Open
Wi-Fi . Tap another network name.
YOUR CONNECTIONS TO THE WEB AND WIRELESS DE-
WEB 45
Web
Go to a website
The web browser on your phone is capable of displaying most web content. The
browser features the latest web standard technologies such as HTML 4.01, CSS
2.1, Ajax, and JavaScript. It does not support plug-ins such as Flash or Java
applets.
1Open Web .
2Enter the address of the page. You don’t need to enter the prefix http://www.
If the page appears in the list of viewed pages, tap it to go there again. If not,
press Enter
3To cancel a page while it is loading, tap .
Go to a website using search
You can also search the web from the Launcher or Card (see Use universal
search).
1Open Web .
2Enter the search term and tap a search option.
Bluetooth® wireless technology
To turn the Bluetooth feature on or off, do one of the following:
•Open Bluetooth , and tap On or Off.
•From any screen: Open the connection menu, tap Bluetooth, and tap Tu rn o n
Bluetooth or Turn off Bluetooth.

YOUR CONNECTIONS TO THE WEB AND WIRELESS DE-
BLUETOOTH® WIRELESS TECHNOLOGY
46


DOCS
DOC VIEW
48
Doc View
With Doc View, you can carry, view, and manage Microsoft Word, Excel®, and
PowerPoint® files on your phone.
Open a file
You can view a file that you copy from your computer or receive as an email
attachment. You can view files in DOC, DOCX, TXT, XLS, XLSX, PPT, and PPTX
formats.
NOTE Before you put files on your phone, make sure you have enough storage
space on your phone to fit the file.Open Device Info and look at the Available
field under Phone.
1Open Doc View . The list of your files appears onscreen.
2To search for a file, enter the name. Tap the file when it appears.
3To open a second file: Open the application menu and tap Open. Tap the file.
Change the display size
•Pinch out to zoom in.
•Pinch in to zoom out.
•Double-tap the screen repeatedly to zoom in or out a specified amount.
•Turn on horizontal scroll (Word documents only): Open the application menu
and tap Wide View. In Wide view, text does not wrap on the right side of the
screen. You can scroll horizontally or rotate the phone to see more text.
PDF View
With PDF View, you can carry, view, and manage PDF (Adobe Acrobat) files on
your phone.
Open a file
You can view a PDF file that you copy from your computer or receive as an email
attachment.
NOTE Before you put files on your phone, make sure you have enough storage
space on your phone to fit the file.Open Device Info and look at the Available
field under Phone.
1Open PDF View . The list of your files appears onscreen.
2To search for a file, type the name. Tap the file when it appears.

DOCS
PDF VIEW 49
3If the PDF file was created with a password, enter the password to open the
file.
4To open a second file: Open the application menu and tap Open. Tap the file.
Move around in a file
•Go to the next or preceding page: Tap or .
•Jump to a different page: Tap the current page number in the lower-left corner
of the screen. Enter the page number you want and press Enter .
•Move a part of the current page to the center of the display: Tap and hold on the
part of the page you want, and drag it to the center.
Change the display size
•Pinch out to zoom in.
•Pinch in to zoom out.
•Double-tap the screen repeatedly to zoom in or out a specified amount.

DOCS
PDF VIEW
50

PREFERENCES
SCREEN & LOCK
52
Screen & Lock
Change screen brightness
1Open Screen & Lock .
2Under Screen, tap, hold, and drag the Brightness slider to the preferred level.
Set the interval for turning the screen off automatically
By default, your screen turns off after one minute of inactivity to save battery
power. You can change this interval.
1Open Screen & Lock .
2In Tu rn o f f a f t e r , tap the number of seconds or minutes.
Change your wallpaper
Your wallpaper is the screen background in Card view. You can customize the
wallpaper to show a favorite picture.
1Open Screen & Lock .
2Tap Change Wallpaper.
3Do one of the following:
•Use an existing picture as the background: Tap the album containing the
picture, and tap the picture.
•Use a new picture as the background: Tap New Photo and take the picture.
4(Optional) Do either or both of the following:
•To move the picture so a portion appears in the center, tap and hold the
picture, and then drag. The portion in the onscreen box appears in the contact
entry.
•To zoom out or in on a part of the picture, pinch in or out on the picture.
5Tap Set Wallpaper.
Sounds & Ringtones
Select system sounds and notifications
You can turn system sounds such as ringtones, transition sounds, and
notifications on or off. You can also set the volume for system sounds.
TIP
Setting the ringer switch off turns off system sounds, regardless of the
settings you select here.

PREFERENCES
SOUNDS & RINGTONES 53
1Open Sounds & Ringtones .
2In Ringer Switch Off, tap On or Off to set whether your phone vibrates when
you slide the ringer switch off
3Under Ringer Switch On, set any of the following:
Ringtone: Select the ringtone for incoming calls (see Select the ringtone for
incoming calls). Tap, hold, and drag the slider to set the ringtone volume.
System Sounds: Set whether to turn on systemwide sounds for general
actions such as transitions. Tap, hold, and drag the Volume slider to set the
system sound volume.
Vibrate: Set whether your phone vibrates as well as plays a ringtone when you
slide the ringer switch on.
Select the ringtone for incoming calls
The ringtone you select here applies globally to all incoming calls. You can also set
a unique ringtone for a contact.
1Open Sounds & Ringtones .
2Tap the displayed ringtone to open the full list of tones.
3Tap a tone. Tap to preview it.
4To set the Ringtone Volume, tap, hold, and drag the slider.

PREFERENCES
SOUNDS & RINGTONES
54

55
Learn more
In this section
While using your phone
If you need more information
WARNING Please refer to Regulatory and Safety Information for information that
helps you safely use your phone. Failure to read and follow the important safety
information in this guide may result in serious bodily injury, death, or property
damage.

LEARN MORE
WHILE USING YOUR PHONE
56
While using your phone
•On-device Help: Read short how-tos and watch animations on your new
phone.
To view all Help: Open Help .
To view Help topics for a single application: Open the application, open the
application menu, and tap Help.
•Online Support from Palm: Visit palm.com/support to watch how-to
animations, access Data Transfer Assistant, and read comprehensive formation
about your phone.
If you need more information
•Customer service from your wireless service provider: For questions about
your mobile account or features, contact your wireless service provider’s
customer care.