Palm DK Treo 600 GSM PDA Phone User Manual 1 englishGSTpgs50 1063 00
Palm Inc Treo 600 GSM PDA Phone 1 englishGSTpgs50 1063 00
UserManual.wiki
>
Palm
>
DK User Manual
>
Users Manual Revised
Contents
1.
Users Manual
2.
Users Manual Revised
Users Manual Revised
Navigation menu
Upload a User Manual
Namespaces
Wiki Guide
HTML
PDF
Info
Views
User Manual
Discussion / Help
Navigation

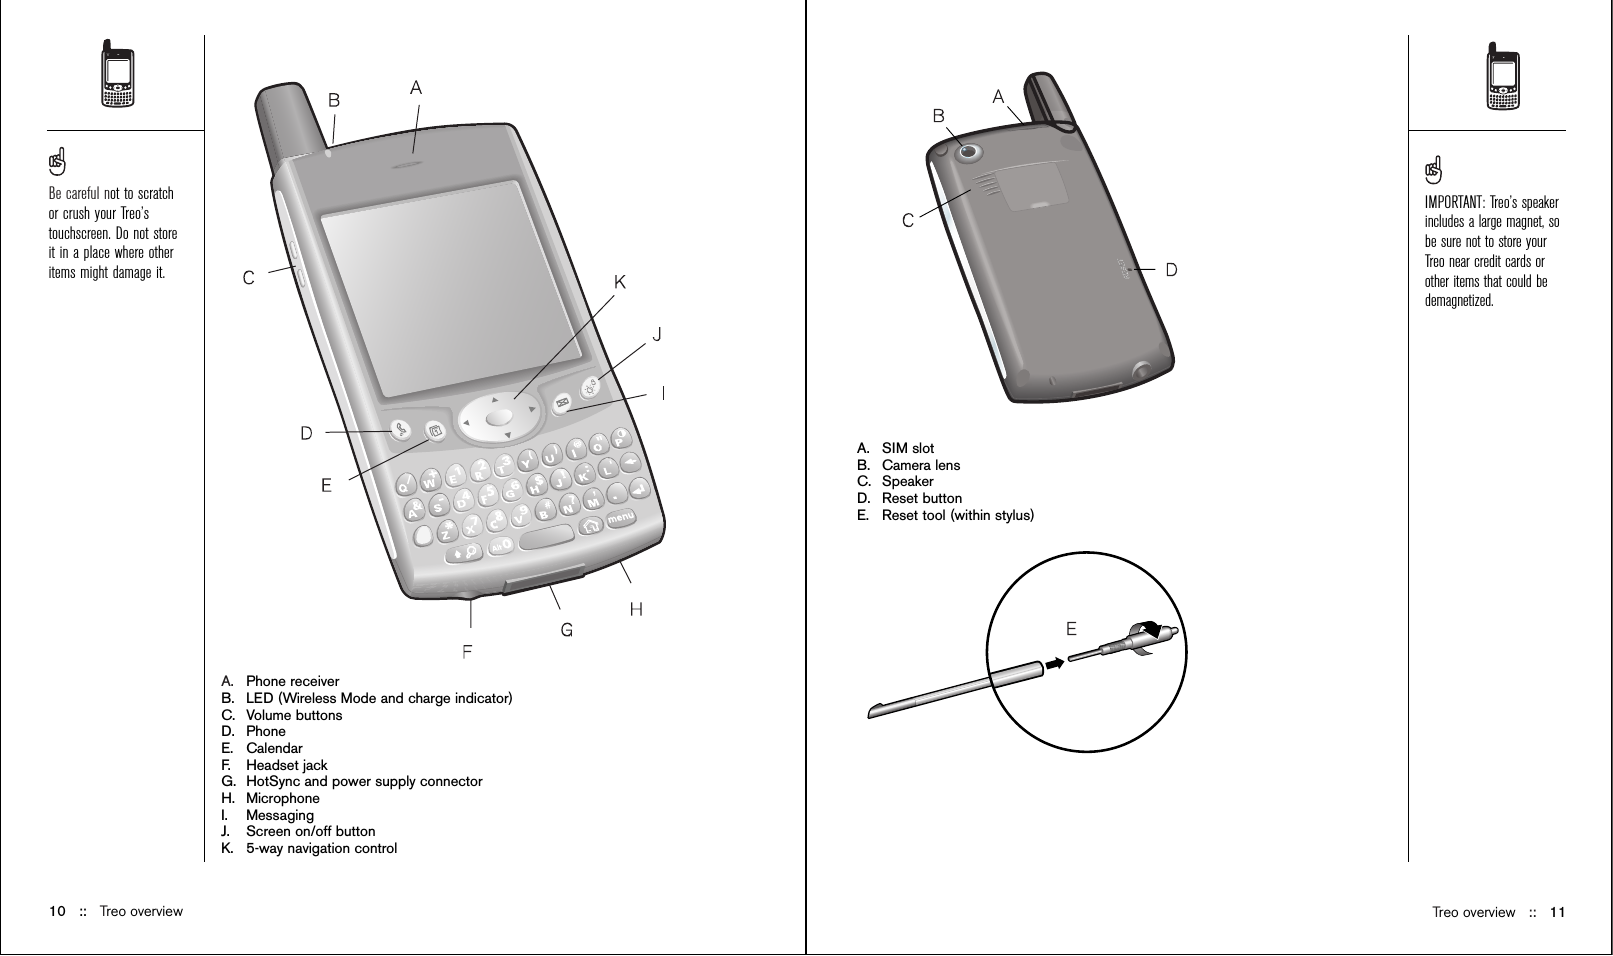
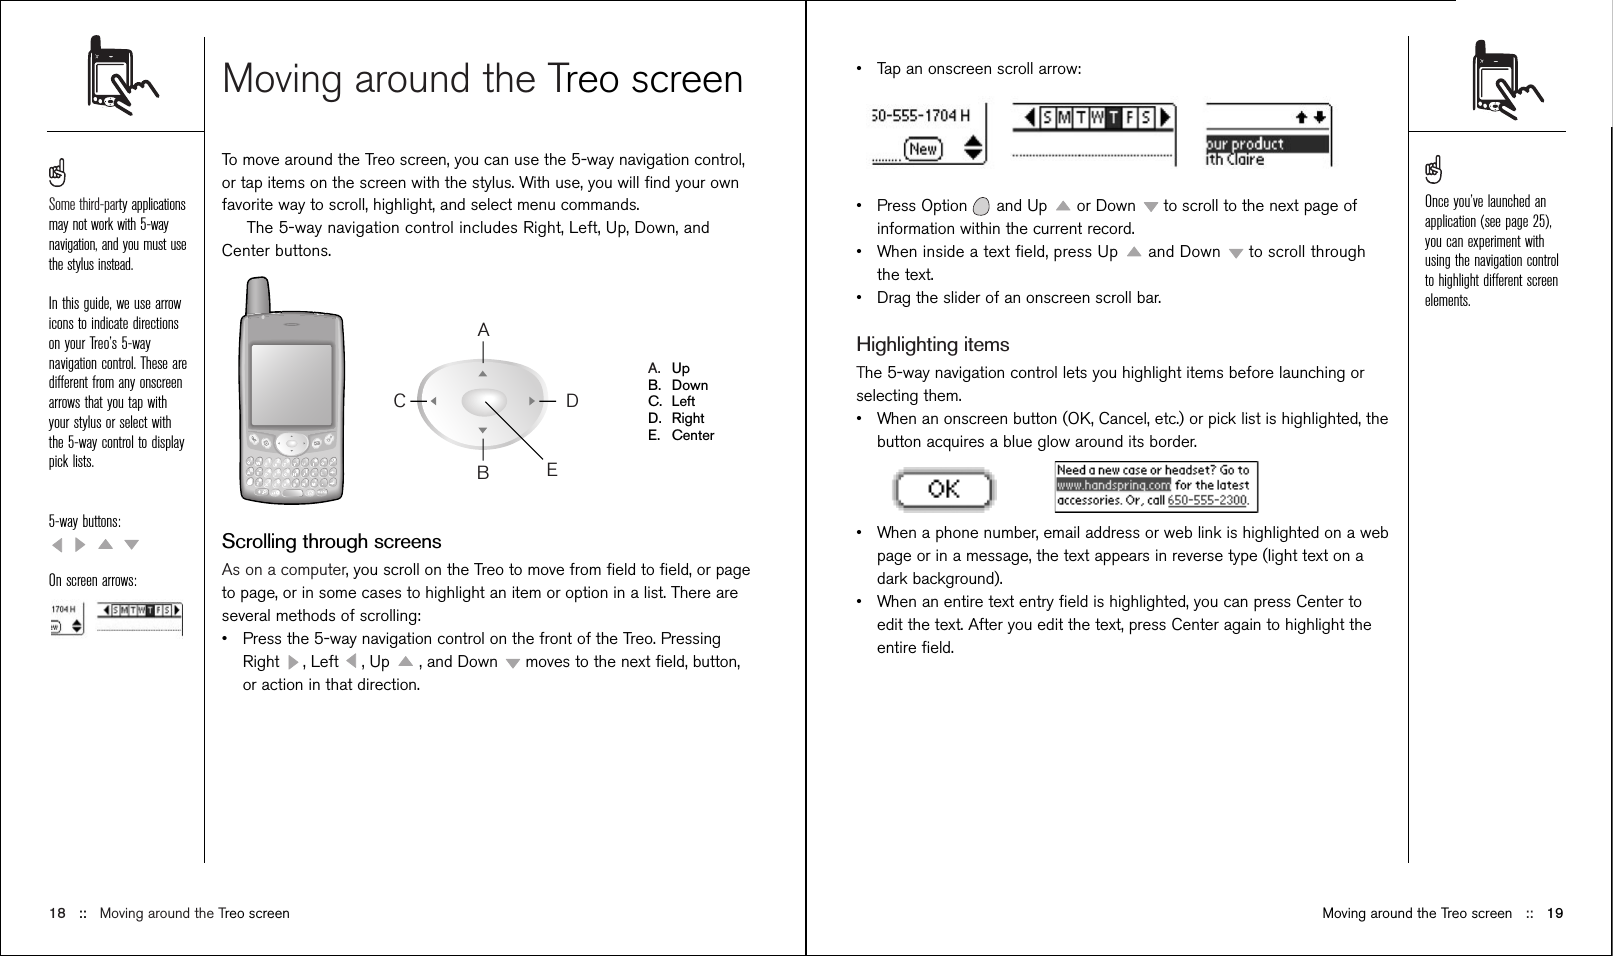
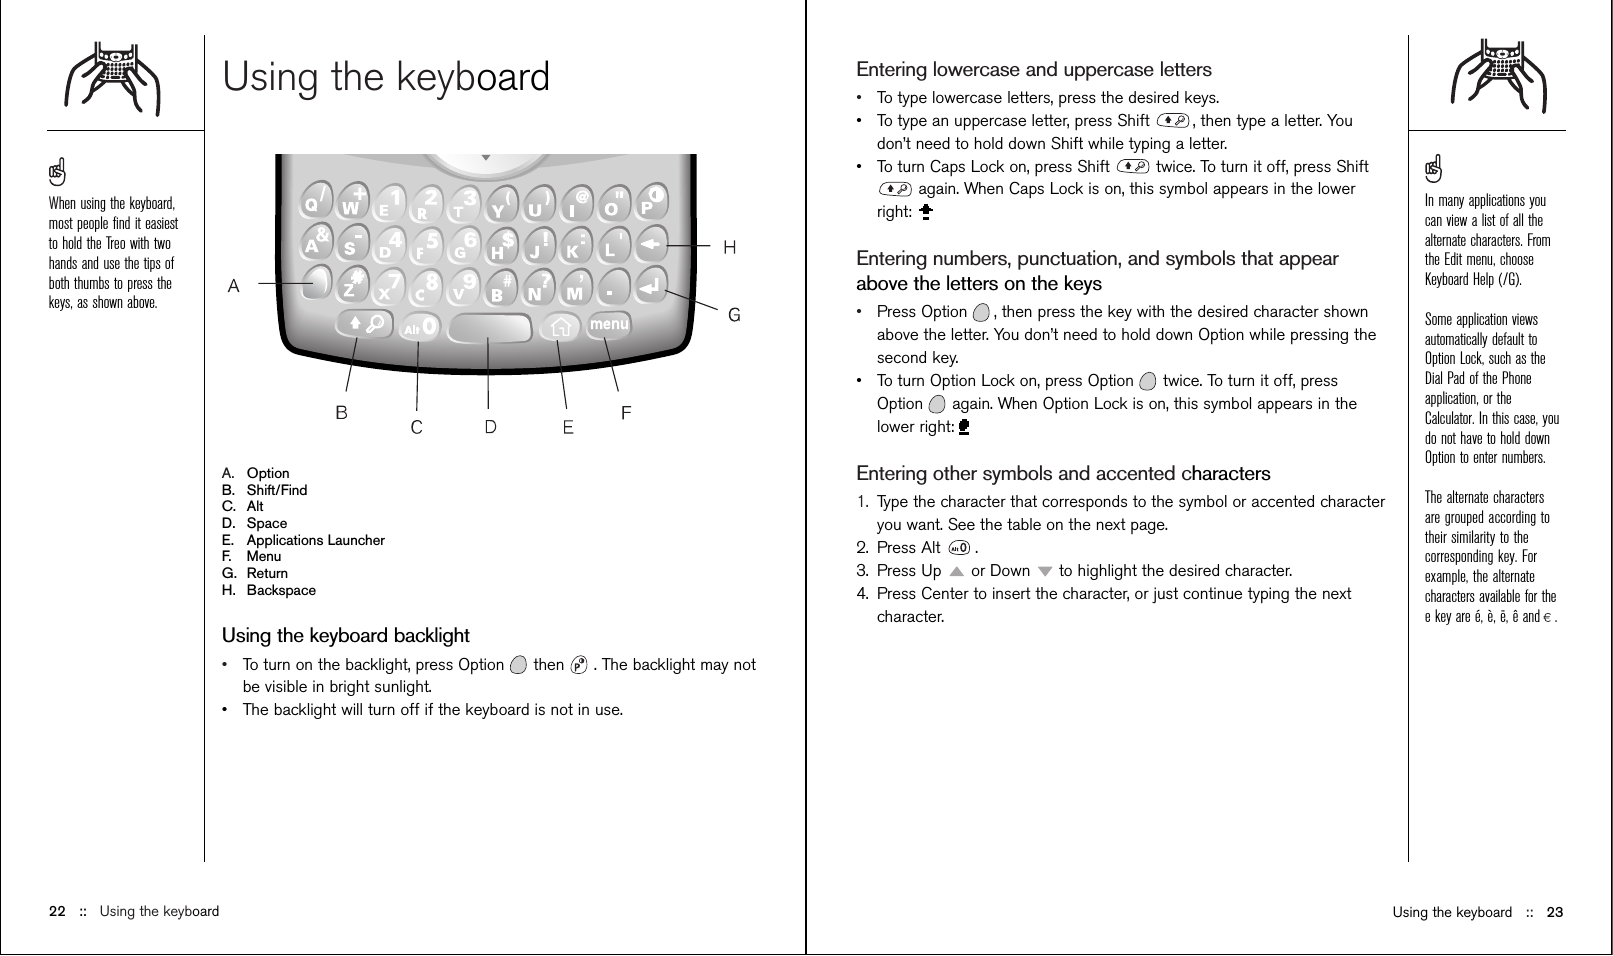
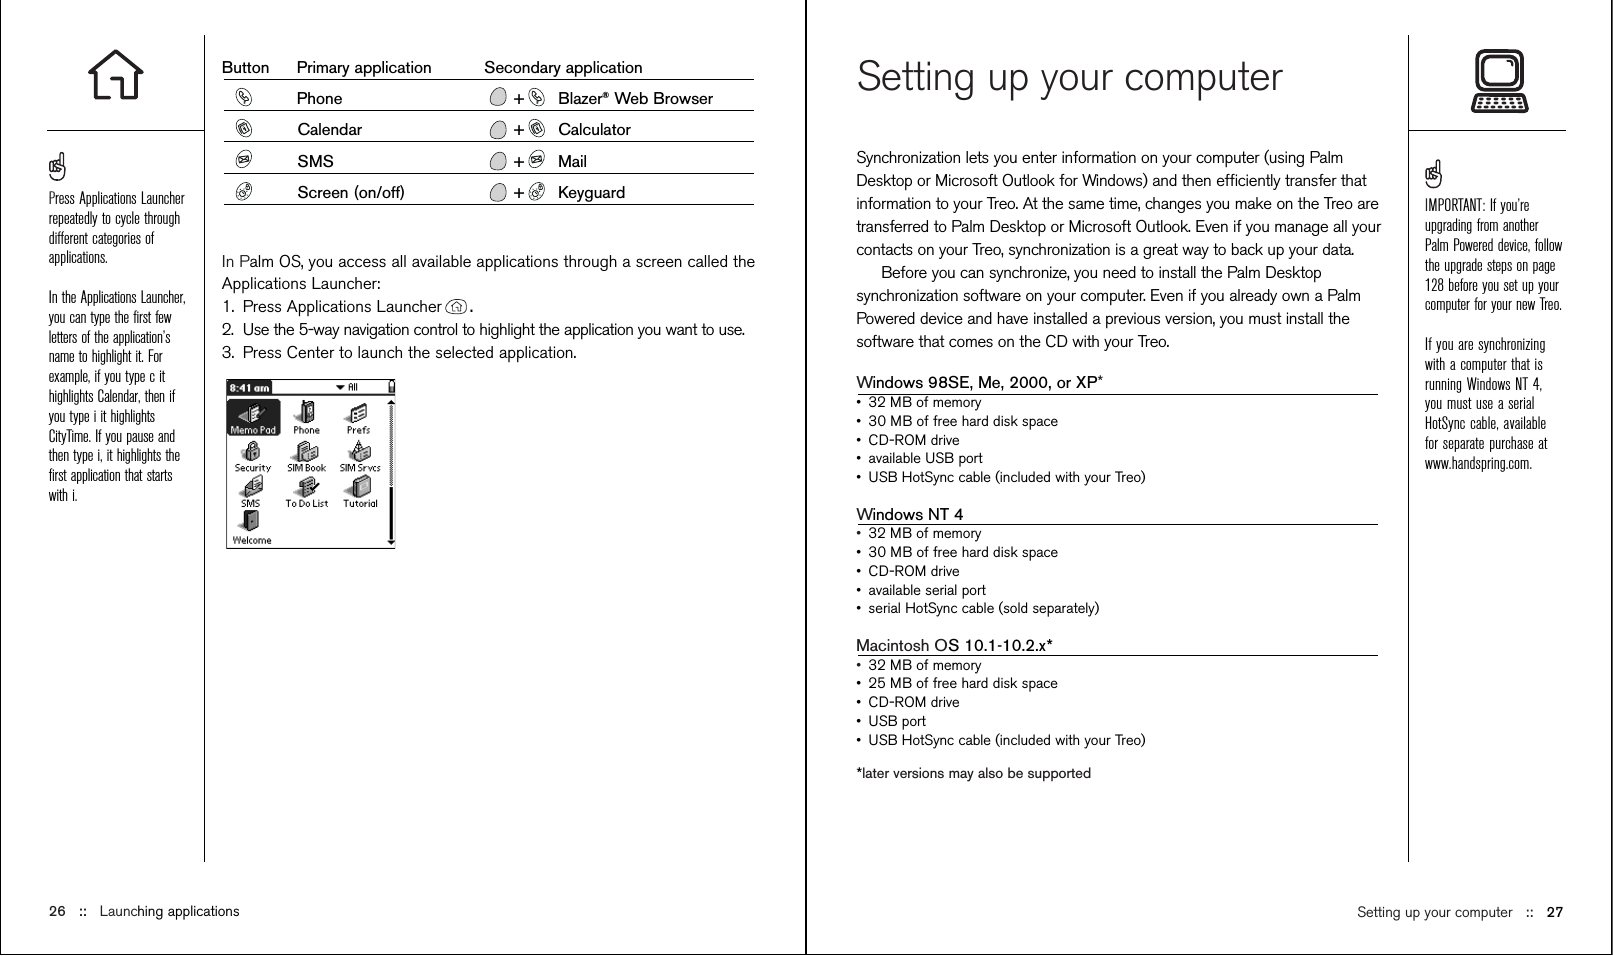
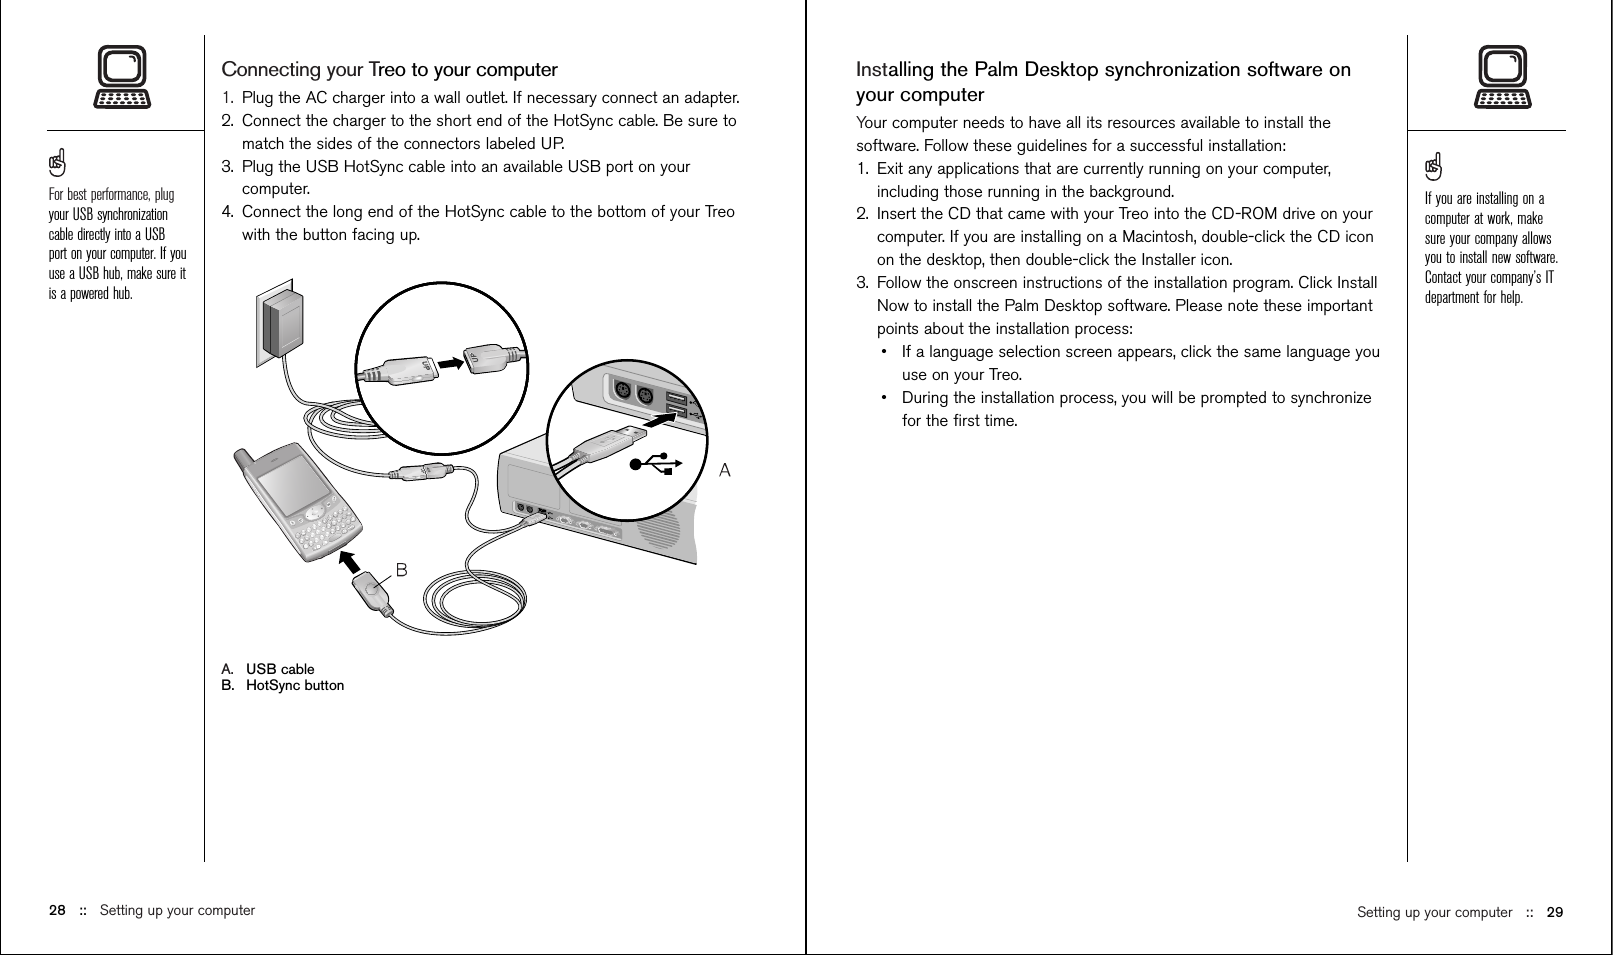
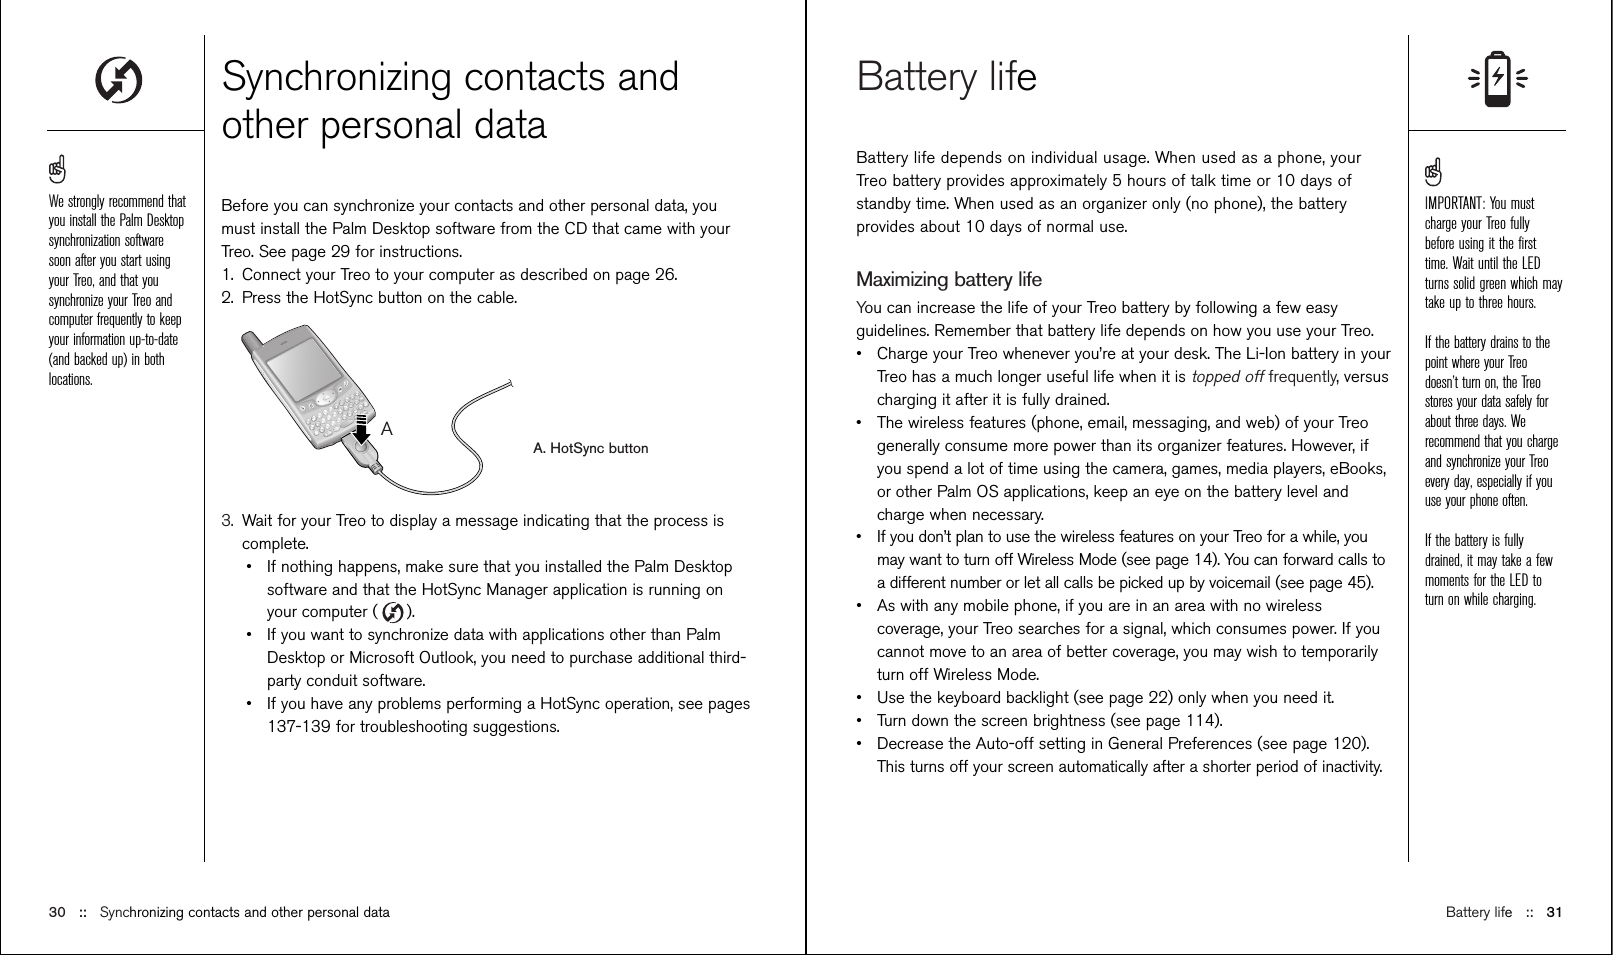
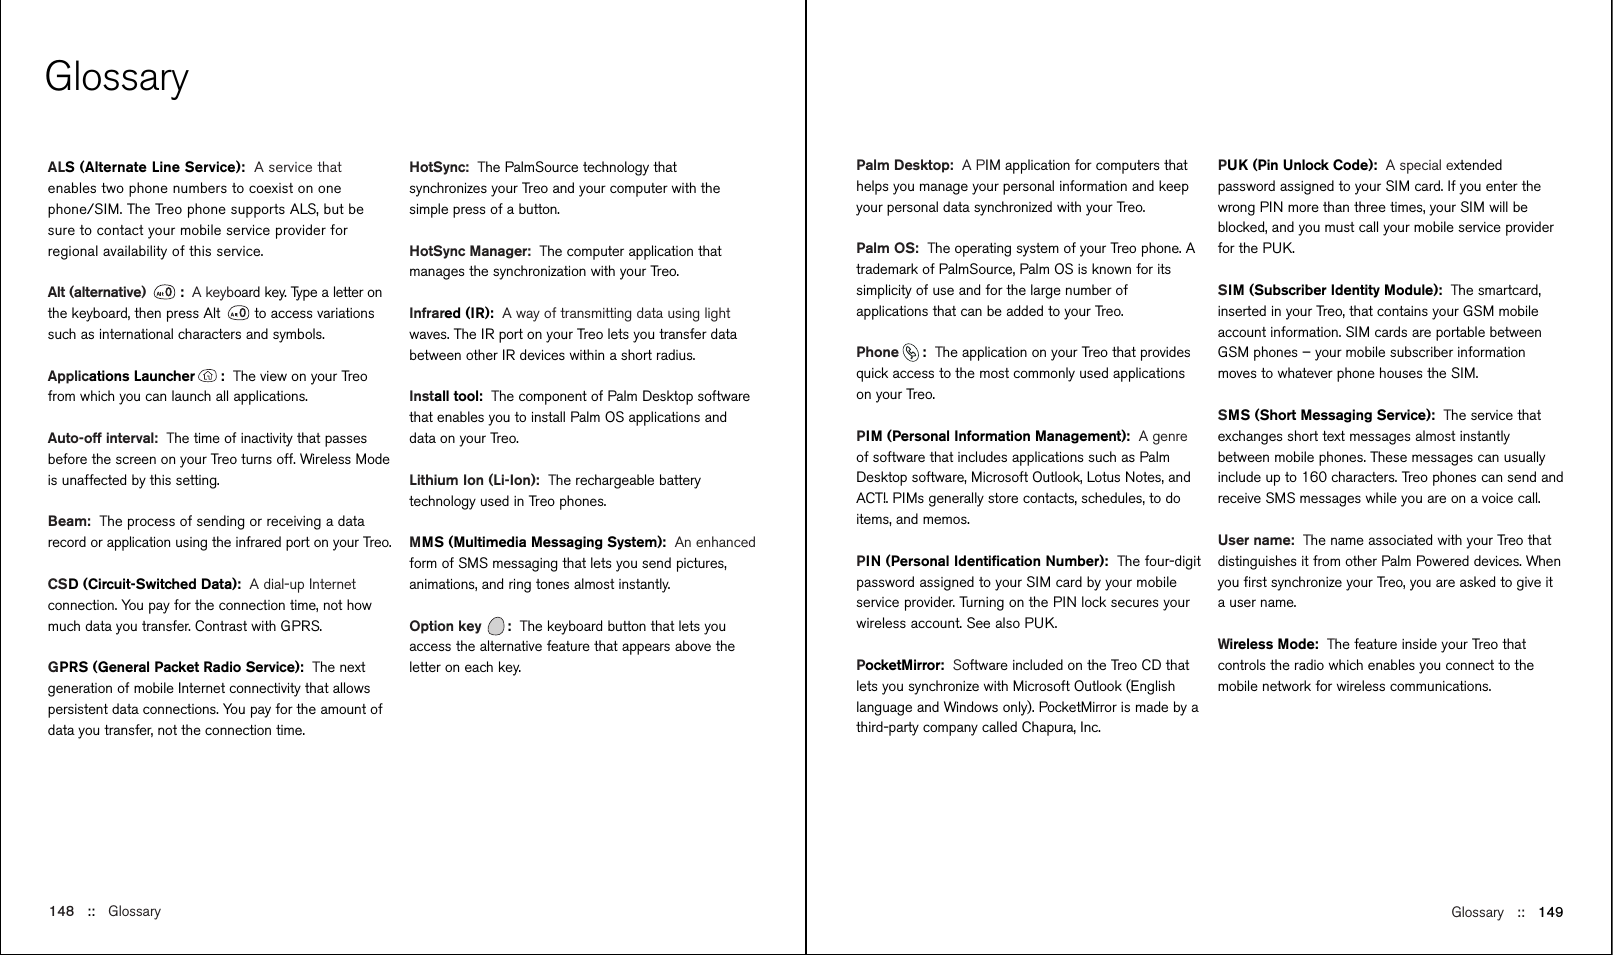
![Launching applicationsEach of the three application buttons on the front of the Treo can be used tolaunch two applications. To access a button’s primary application, simply pressthe button. To access a button’s secondary application, press Option , thenpress the application button. The fourth button turns the screen on and off,and controls the keyguard. A. PhoneB. CalendarC. MessagingD. ScreenLaunching applications :: 2524 :: Symbols and accented charactersSymbols and accented charactersType... then press Alt Type... then press Alt Type... then press Alt to choose... to choose... to choose...aAb or BcCdDeEf or FiIl or Lm or MnNá à ä â ã å æÁ À Ä Â Ã Å Æß ç ¢ © ^ ˆÇ ¢ © ^ ˆ† ‡† ‡ –Dé è ë ê É È Ë Ê ƒ í ì ï î Í Ì Ï Î£µñÑó ò ö ô œ õ øÓ Ò Ö Ô Œ Õ Ø % ¶®ß ˇs §ß ˇS §~ ™ † ‡ú ù ü ûÚ Ù Ü Ûx ÿ ¥Ÿ ¥% ‰ ˚? ! …„¡¿; :-) :-( ;-) :-D‘ ’ < > ~ `“ ” « »£ ¥ ¢&_ ~ • = – —% \ ÷| =< [ { ‹> ] } ›oOp or Pr or RsSt or TuUx or XyY0123.,!?:'"$+-/#()You can also customize thebuttons yourself; see page117 for details.Your mobile service providermay have customized theapplications associated witheach button.](https://usermanual.wiki/Palm/DK.Users-Manual-Revised/User-Guide-343948-Page-13.png)