Palm JIMI Cellphone with Bluetooth User Manual Palm Treo 700w smartphone Quick Reference Guide
Palm Inc Cellphone with Bluetooth Palm Treo 700w smartphone Quick Reference Guide
Palm >
Contents
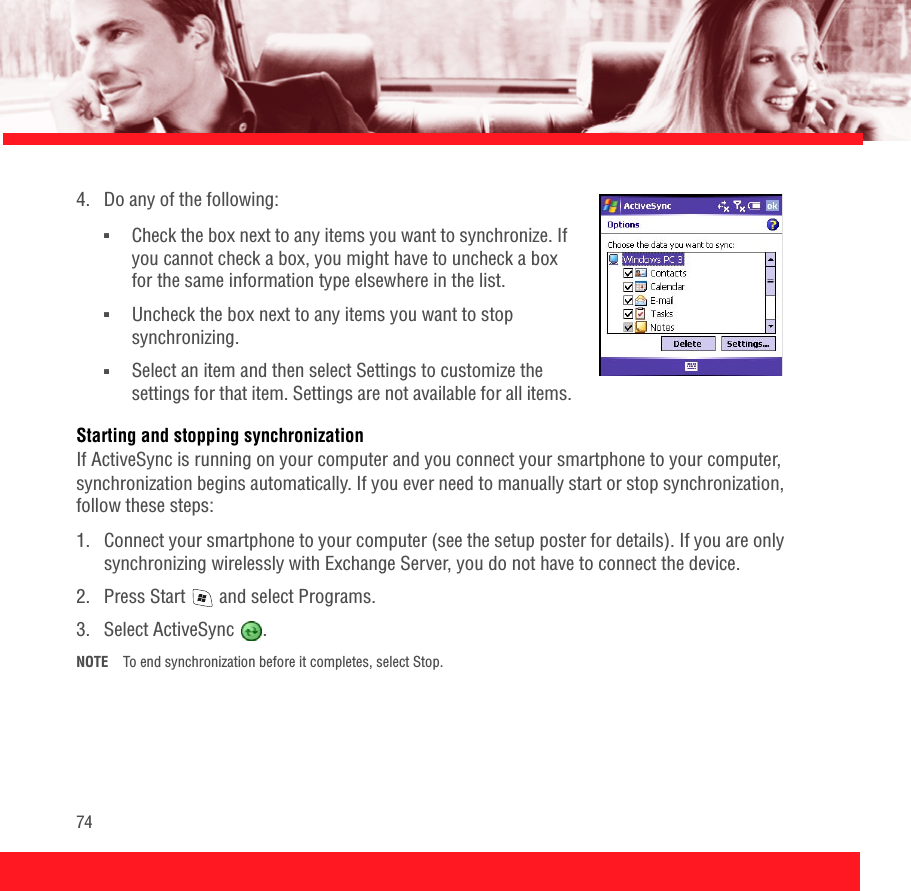
- 1. Users Manual
- 2. QPU User manual
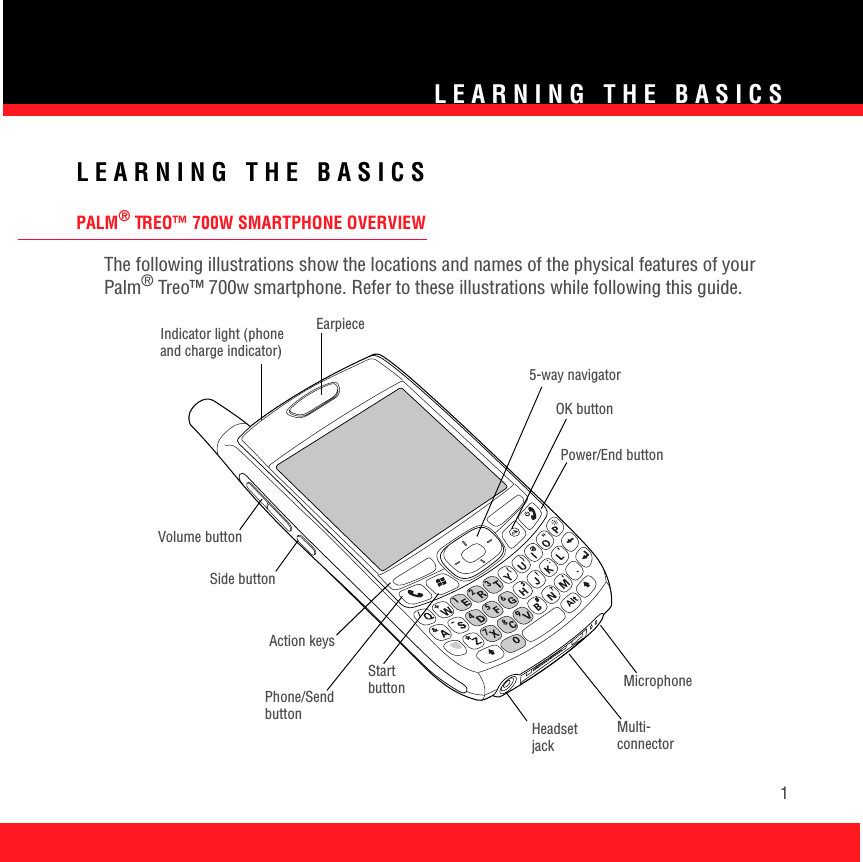
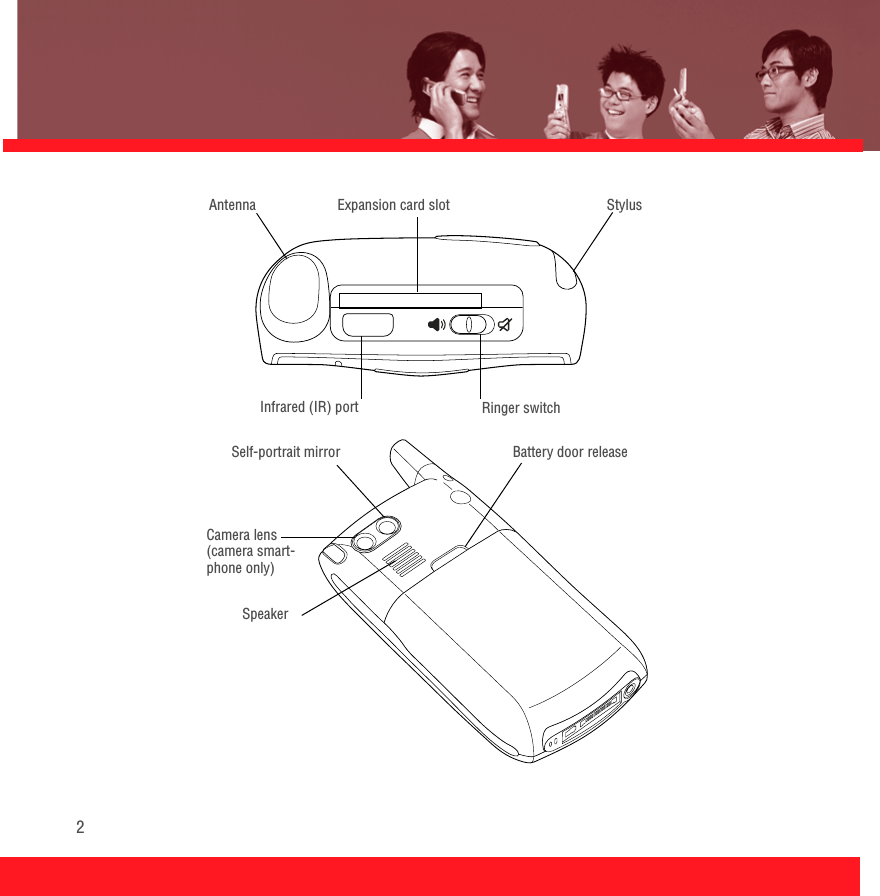
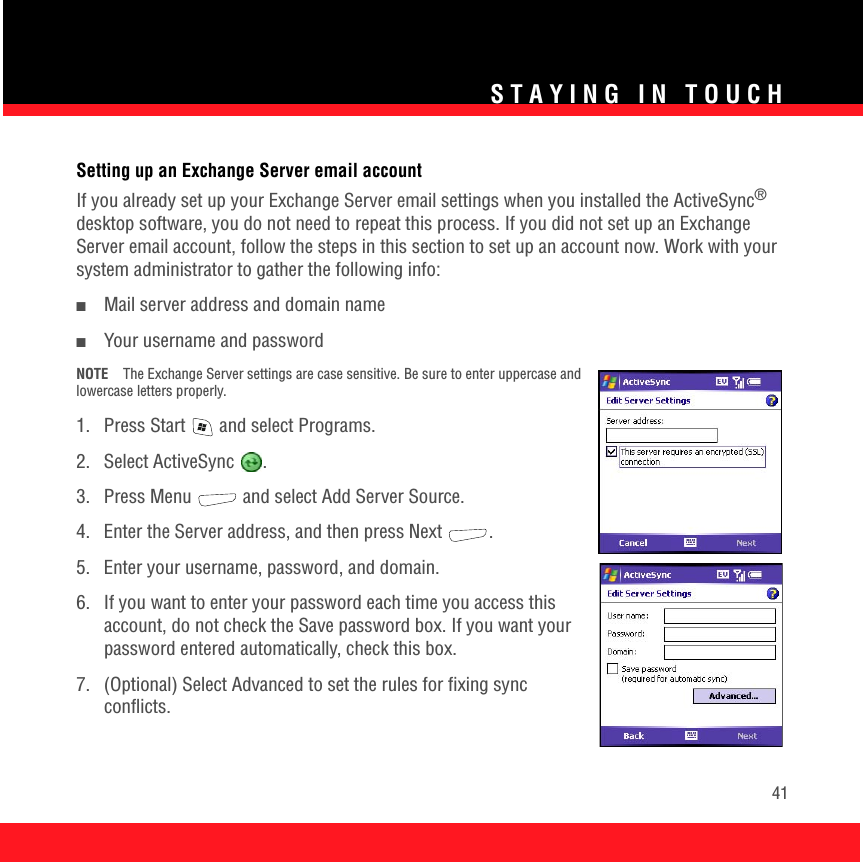
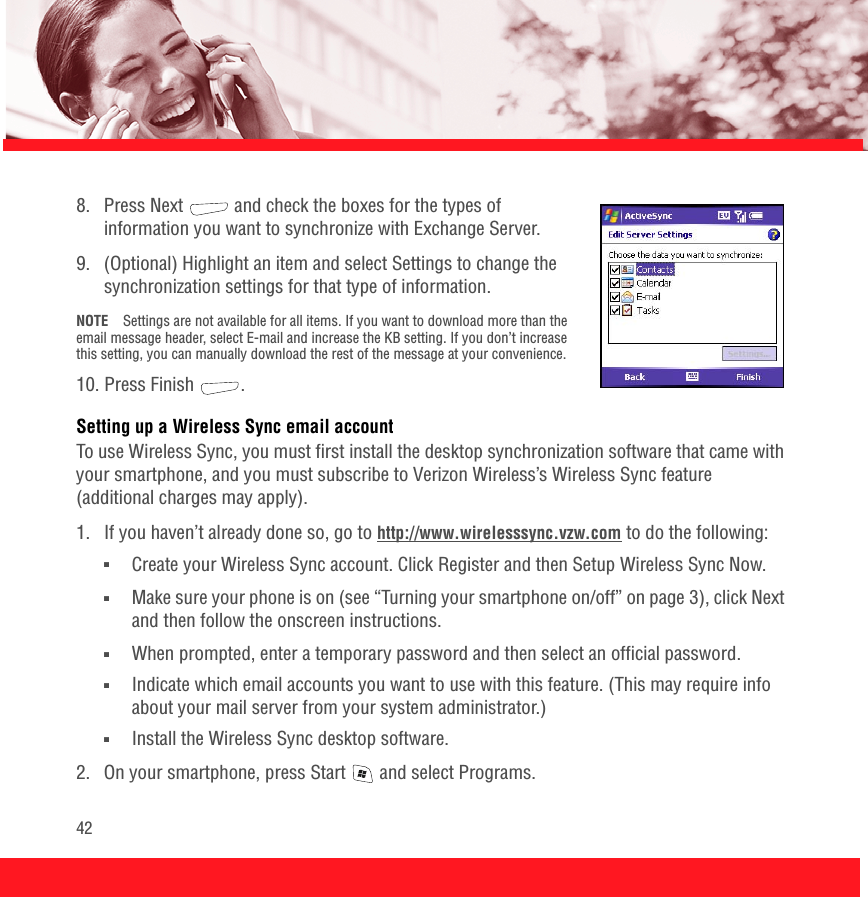
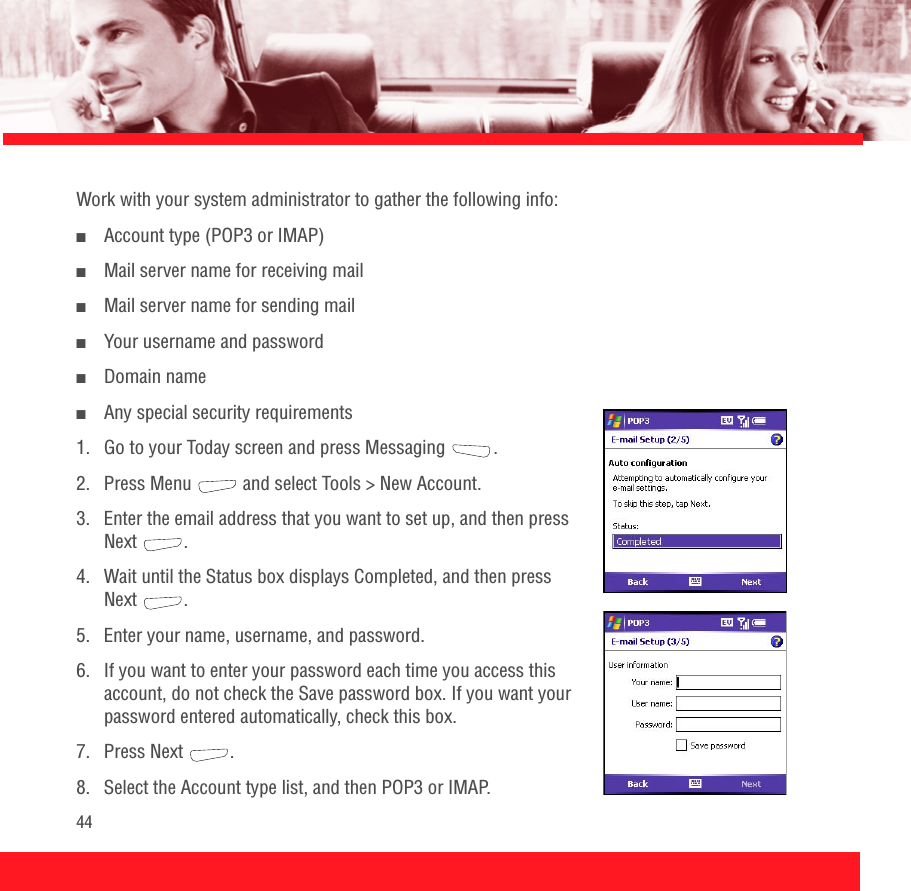
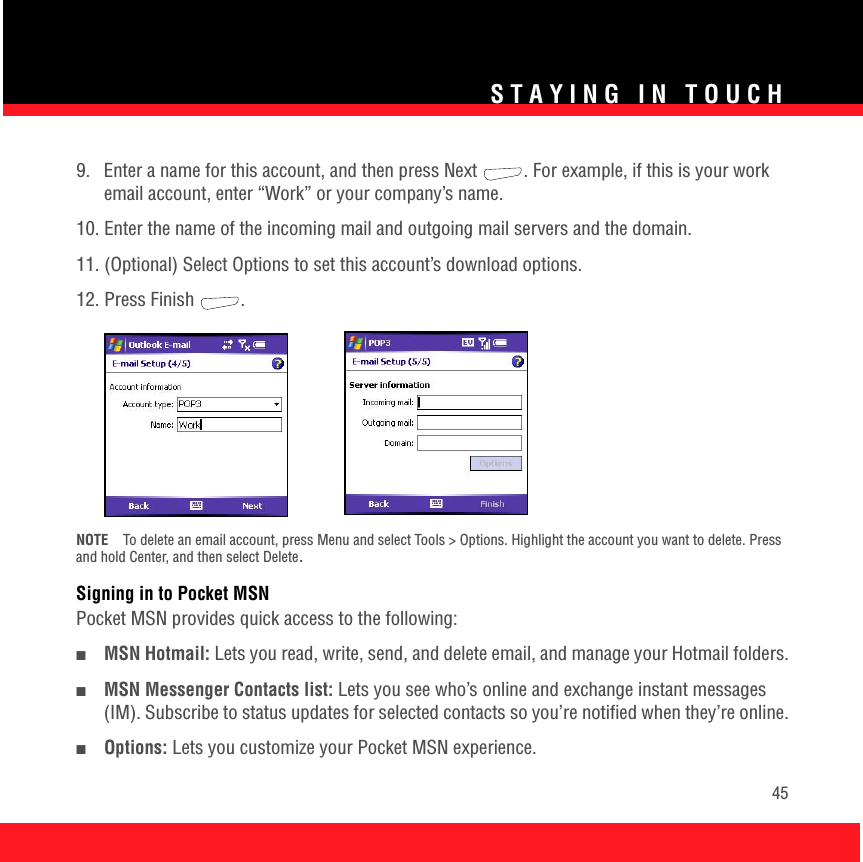
Users Manual

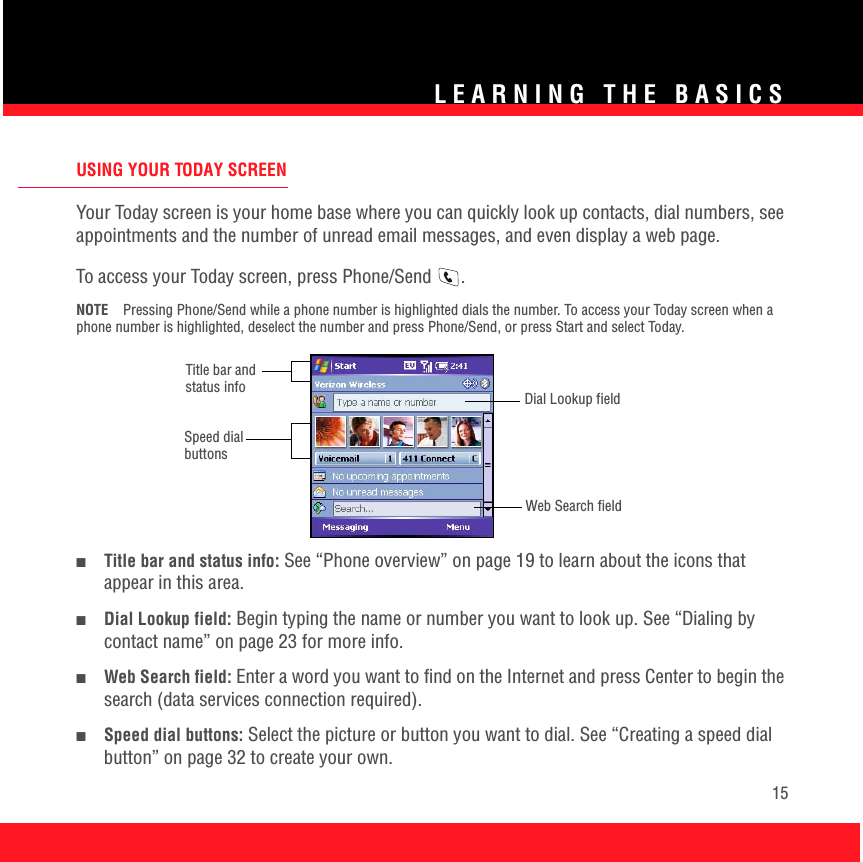
![LEARNING THE BASICS13Symbols and accented characters Press Alt and enter... to select... Press Alt and enter... to select... Press Alt and enter... to select...a á à ä â ã å æ o ó ò ö ô œ õ 0 °A Á À Ä Â Ã Å Æ O Ó Ò Ö Ô Œ Õ 1b or B ß p or P ¶ 2c ç ¢ © r or R ® 3C Ç ¢ © s ß Šs §e é è ë ê S ß ŠS §E É È Ë Ê t or T ™ $ £ ¥ ¢i í ì ï î u ú ù ü û ! ¡I Í Ì Ï Î U Ú Ù Ü Û ? ¿l or L £ x or X x ¤ ; :-) :-( ;-)n ñ y ÿ . , ' " @ + - * / # ( or ) : & _ • % = ÷ ^ £ ¥ ¢ [ ] { } < > « » © ® ° ~ \ Ø µ |NÑ Y Ÿ](https://usermanual.wiki/Palm/JIMI.Users-Manual/User-Guide-594787-Page-15.png)

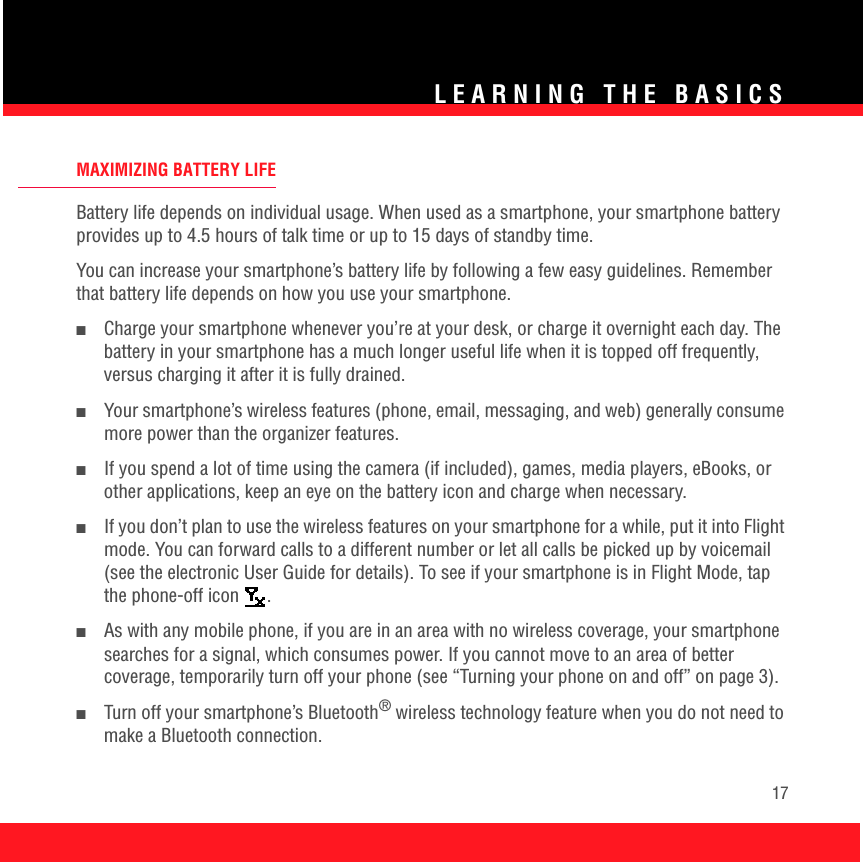
![USING YOUR PHONE35Headset specificationsYour smartphone works with headsets that have a 2.5mm, 3-pin connector. When in doubt, ask the third-party headset manufacturer if the product is compatible with Treo 700w smartphones. If you hear a headset buzz or poor microphone performance, your headset may be incompatible with your smartphone.Using a hands-free device with Bluetooth wireless technologyYour Treo smartphone is also compatible with many headsets and car kits enabled with Bluetooth wireless technology version 1.1 or 1.2. Please note, however, that you cannot use a Bluetooth headset to listen to MP3 files on your smartphone. [ ! ] IMPORTANT For a list of compatible hands-free devices with Bluetooth wireless technology, go to: www.palm.com/mytreo700wVerizon.To learn how to set up and connect to Bluetooth devices, see “Setting up a Bluetooth® connection” on page 56. Here are tips for working with a Bluetooth hands-free device:■To transfer a call from a wired headset to a Bluetooth headset that is within range and with which you’ve previously set up a partnership (Bluetooth headset required, sold separately), unplug the wired headset and press the button on the Bluetooth headset. ■To transfer a call from the handset to a Bluetooth hands-free device during a call, press Menu and select Connect. To transfer the call back to the Bluetooth hands-free device, press Menu and select Cancel Bluetooth.NOTE If you have both a compatible Bluetooth headset and car kit, the one you connected to your smartphone last becomes the active device.](https://usermanual.wiki/Palm/JIMI.Users-Manual/User-Guide-594787-Page-37.png)

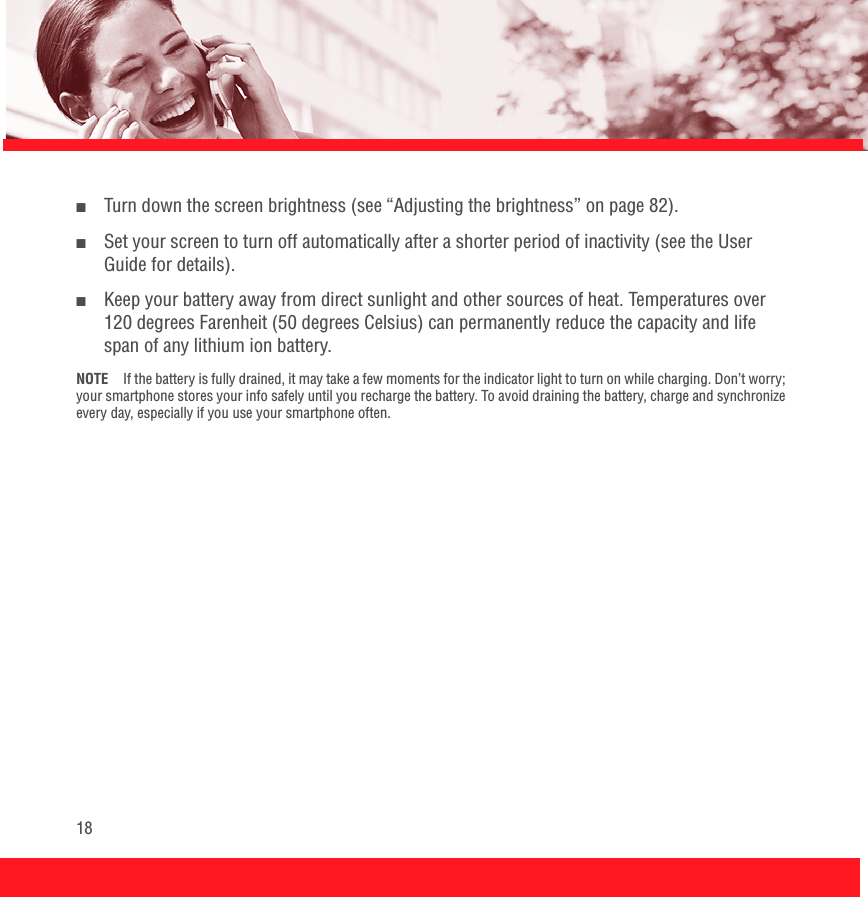
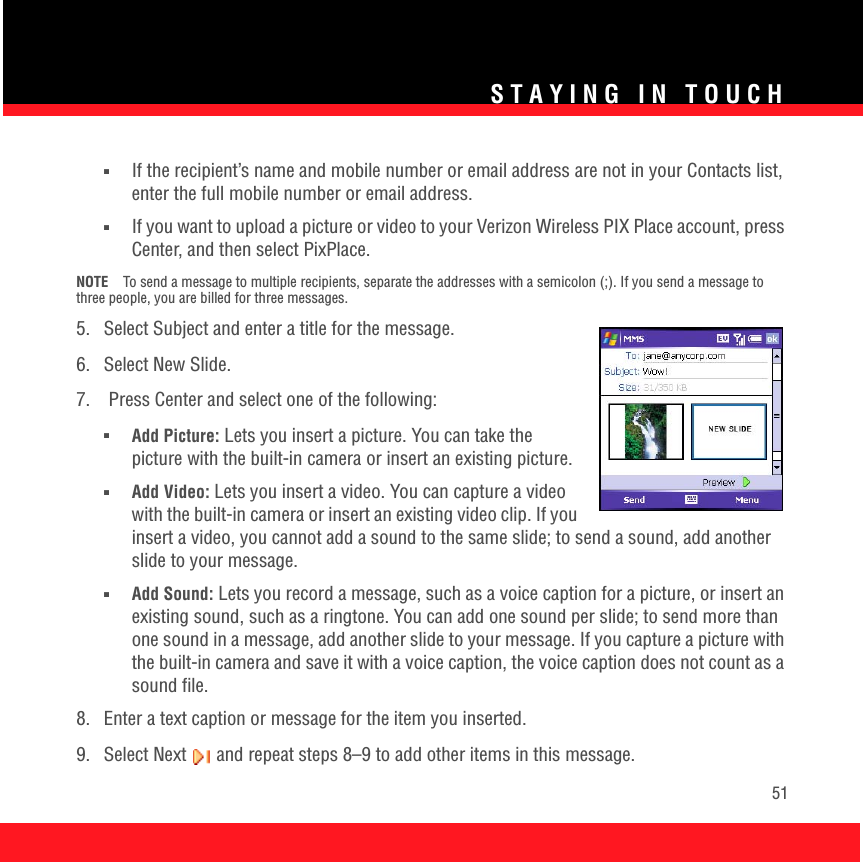
![STAYING IN TOUCH475. Select Subject and enter a title for the message.6. Enter your message, or press Menu , select My Text, and then select a predefined phrase you want to insert. 7. (Optional) Do any of the following:■Press Menu and select Insert. Select the type of item you want to attach, and then select the file or record a voice note. ■Press Menu and select Spell Check.■Press Menu and select Message Options. Select the Priority list, select a setting for the message, and then press OK .8. Press Send .NOTE If you have difficulty sending mail, try changing your outgoing mail settings to the following: User name: [9-digit phone number]@vzwmail.net (6505551212@vzmail.net), Password: Your www.vtext.com password, Outgoing Server: smtp.vzwmail.net. For details on accessing these settings, see “Finding Help” in the User Guide. To keep a copy of your outgoing messages in the Sent folder, you must turn on this setting. See “Customizing your Messaging settings” in the User Guide for details.Synchronizing your emailDuring synchronization, new messages are copied to your smartphone’s Inbox, and messages in the smartphone’s Outbox are sent. Your computer must be connected to the Internet when you sync your email.To sync your default email account, simply sync your smartphone with your computer. See “Synchronizing contacts and other info” on page 16 for details. To sync additional email accounts, such as an Internet Service Provider (ISP) account or a work account that you access using a VPN server connection, follow these steps:](https://usermanual.wiki/Palm/JIMI.Users-Manual/User-Guide-594787-Page-49.png)
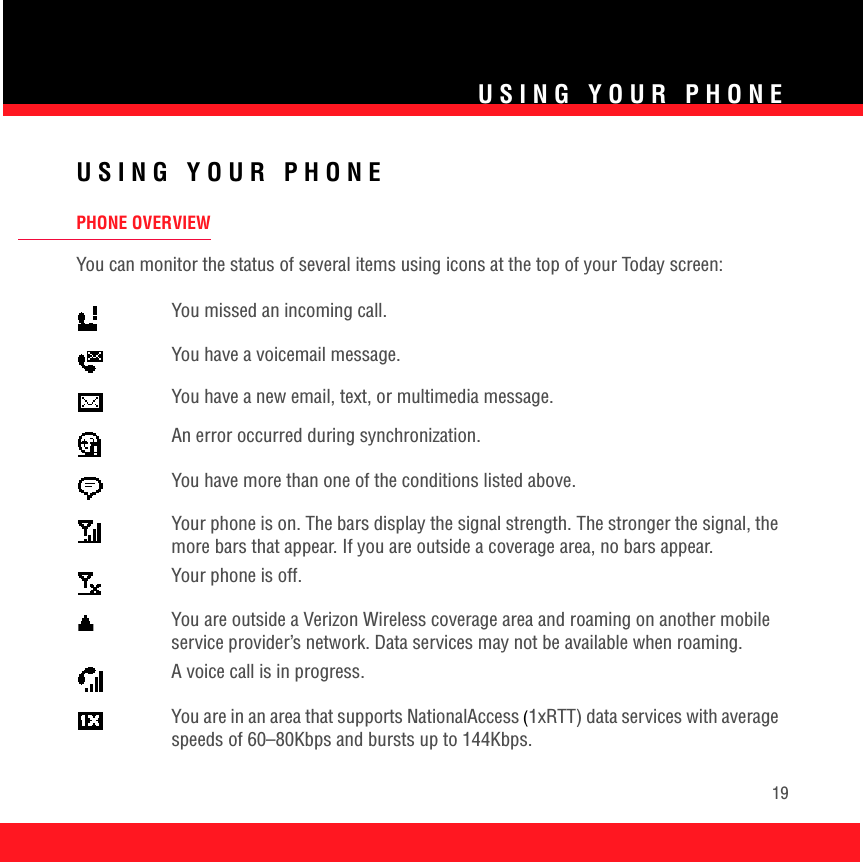
![56Downloading files and images from a web pageYou can download files that are usable on your smartphone, such as new applications, MIDI ringtones, or pictures that are specifically tagged for download. 1. Go to the page that contains the link to the file you want to download.2. Press Left or Right to highlight the link to the file.3. Press and hold Center, and then select Save As to download a file, or tap and hold and select Save Image to download an image.4. Select Name and enter a new name for the file. 5. Select the Folder list, and then select the folder where you want to save the file. 6. Select the Location list, and then select where you want to store the file: Main memory or Storage card. 7. Press OK .SETTING UP A BLUETOOTH® CONNECTIONWith your smartphone’s built-in Bluetooth® wireless technology, you can connect to a number of Bluetooth devices such as a headset, hands-free car kit, or GPS receiver, as well as to other phones, handhelds, or piconets. If your computer is enabled with Bluetooth wireless technology, you can also synchronize wirelessly.[ ! ] IMPORTANT For a list of hands-free devices with Bluetooth wireless technology that are compatible with your smartphone, go to www.palm.com/mytreo700wVerizon.](https://usermanual.wiki/Palm/JIMI.Users-Manual/User-Guide-594787-Page-58.png)
![STAYING IN TOUCH57After you set up a connection with a Bluetooth device, you can communicate with that device whenever it is within range (about 30 feet) and your smartphone’s Bluetooth feature is turned on. 1. If necessary, prepare the device you want to connect with to accept a new connection. Check the device’s documentation for details.2. Go to your Today screen, and then tap Bluetooth .3. Check the Turn on Bluetooth box to turn on your smartphone’s Bluetooth feature.4. Select the Devices tab, and then select New Partnership.5. Wait for your smartphone to search for devices and to display the device list.6. Select the device you want to connect with, and then press Next .7. Enter an alphanumeric passkey between 1 and 16 characters long, and then press Next .[ ! ] IMPORTANT Some Bluetooth devices have a built-in passkey; others let you choose the passkey. See the documentation for the Bluetooth device for more info.8. If the passkey is not built-in, enter the same passkey on the Bluetooth device, and then press Finish .](https://usermanual.wiki/Palm/JIMI.Users-Manual/User-Guide-594787-Page-59.png)

![MANAGING FILES AND APPLICATIONS71Exploring files and foldersFile Explorer lets you browse the contents of folders on your smartphone. The root folder on your smartphone is named My Device. My Device is similar to My Computer on your computer. 1. Press Start and select Programs.2. Select File Explorer .3. Select the Show list in the upper left, and then select the folder you want to explore. 4. Do any of the following:■To open an item, select it. ■To quickly delete, rename, copy, beam, or email an item, highlight the item, press and hold Center to open the shortcut menu, and then select the appropriate command. ■To highlight multiple items, tap and drag the stylus. [ ! ] IMPORTANT Do not delete any files that you cannot identify. These files may be required for your smartphone to function properly.](https://usermanual.wiki/Palm/JIMI.Users-Manual/User-Guide-594787-Page-73.png)