Palm ROAY GSM phone with 802.11b/g and Bluetooth User Manual Palm Pre 2 EU UMTS mini User Guide

Palm Inc GSM phone with 802.11b/g and Bluetooth Palm Pre 2 EU UMTS mini User Guide
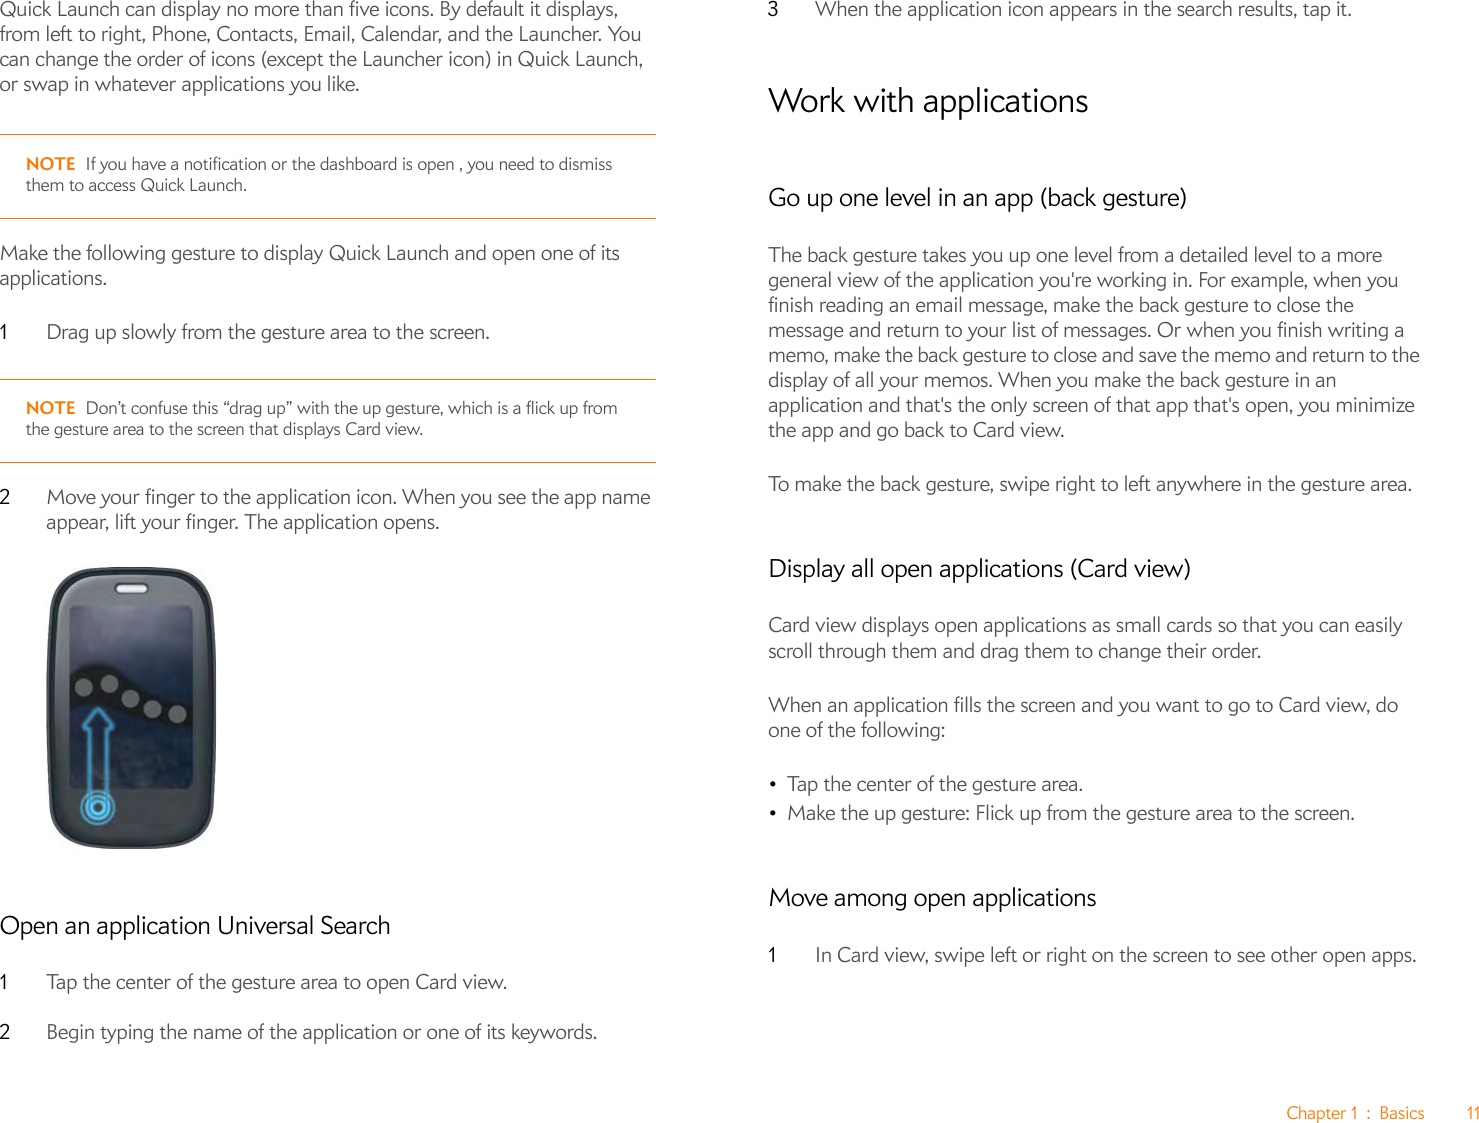
Mini UG V1

Palm® PreTM 2 User Guide
Intellectual property notices© 2010 Palm, Inc., a subsidiary of Hewlett-Packard Company. Palm, Pre, Synergy, Touchstone, webOS, and the Palm and Pre logos are among the trademarks or registered trademarks owned by or licensed to Palm, Inc. Microsoft and Outlook are trademarks of the Microsoft group of companies. Exchange ActiveSync Enabled. Facebook® is a registered trademark of Facebook, Inc. Google and Google Maps are trademarks of Google, Inc. Quickoffice is a registered trademark of Quickoffice, Inc. All other brand and product names are or may be trademarks of their respective owners.Disclaimer and limitation of liabilityPalm, Inc. and its suppliers assume no responsibility for any damage or loss resulting from the use of this guide. Palm, Inc. and its suppliers assume no responsibility for any loss or claims by third parties that may arise through the use of this software. Palm, Inc. and its suppliers assume no responsibility for any damage or loss caused by deletion of data as a result of malfunction, dead battery, or repairs. Be sure to make backup copies of all important data on other media to protect against data loss.Patent pending. This product also is licensed under United States patent 6,058,304.Use of this device requires providing a valid email address, mobile phone number, and related information for account setup and activation. A data plan is also required. An unlimited usage data plan is strongly recommended or additional data charges may apply.Open Source License informationYou can view the Open Source License terms on your phone. Tap the center of the gesture area and then tap the Launcher icon. Swipe left until the PDF View icon appears. Tap PDF View and then tap Open Source Information.pdf.You can also view the file on your computer. Connect your phone to your computer with the USB cable. On your phone, tap USB Drive. On your computer, locate and double-click the removable drive named for your phone. To locate the drive, do the following for your operating system:•Windows Vista/Windows 7: Open Computer.•Windows XP: Open My Computer.•Mac: Open Finder.•Linux (Ubuntu): The drive is displayed on the desktop.•Other Linux distribution: The location of the drive may vary by system.After you open the drive, double-click the file Open Source Information.pdf.Recycling and disposalThis symbol indicates that Palm products should be recycled and not be disposed of in unsorted municipal waste. Palm products should be sent to a facility that properly recycles electrical and electronic equipment. For information on environmental programs visit palm.com/environment or recyclewirelessphones.com/.As part of Palm’s corporate commitment to be a good steward of the environment, we strive to use environmentally friendly materials, reduce waste, and develop the highest standards in electronics recycling. v. 1.0
Contents 3ContentsChapter 1 Basics6 Get to know your phone9Set up your phone9 Turn the phone on/off10 Open applications11 Work with applications12 Enter and save information13 Use the menus14 View and respond to notifications15 Find info on your phoneChapter 2 Phone18 Make calls19 Receive calls19 Use voicemail19 What can I do during a call?20 Set up and use a Bluetooth® hands-free deviceChapter 3 Email and other messages22 Email23 MessagingChapter 4 Contacts, Calendar, and other personal information28 Contacts30 CalendarChapter 5 Photos, videos, and music32 Camera32 Photos33 Videos33 MusicChapter 6 Web and wireless connections36 Wi-Fi36 Web36 Bluetooth® wireless technologyChapter 7 Documents38 PDF ViewChapter 8 Preferences40 Screen & Lock40 Sounds & RingtonesChapter 9 Learn More44 While using your phoneRegulatory and Safety InformationIndex
4Contents
Chapter 1 : Basics 5BasicsYou’re about to discover the many things about your Palm® Pre™ 2 phone that will help you better manage your life and have fun, too. As you become more familiar with your phone, you’ll want to personalize the settings and add applications to make it uniquely yours.But first, take the few easy steps in this chapter to set up your phone and get it running. Then learn about the key features that make moving around on your phone and accessing your information easy: gestures, menus, search, notifications, and more.In this chapter6Get to know your phone9 Set up your phone9 Turn the phone on/off10 Open applications11 Work with applications12 Enter and save information13 Use the menus15 Find info on your phone
6Chapter1:BasicsGet to know your phoneSlide out the keyboard•Hold the phone as shown below and gently push up.Front view1Earpiece2Touchscreen: Tap and make other gestures directly on the screen. 3Volum e4Gesture area: Make the back gesture and begin other gestures here. 5Microphone6Keyboard: See Use the keyboard.7Charger/microUSB connector8Connector cap
Chapter 1 : Basics 7Keyboard1Option: Press to enter numbers, punctuation, and symbols that appear above the letters on the keys (see Enter alternate keyboard characters), or to move the cursor.2Shift: See Enter uppercase letters.3Space4Backspace5Enter: Press to enter a line return (for example, in a memo or in an email message you are composing) or to accept information you entered in a field.6Sym: Press to enter symbols and accented characters that don't appear on the keys.To u c h s c re e n1Application name: Displays the name of the currently open application. Drag down over the app name to open the application menu.2Launcher: See Open an application in the Launcher.3Scroll arrow: Swipe up or down to see icons that are on the page but hidden.4Quick Launch: See Open an application in Quick Launch.5Connection icons: Show the status of wireless service connections and battery strength. Drag down over the icons to open the connection menu. 6Page indicators: Show how many Launcher pages are to the right or the left of the currently displayed page. Swipe left or right on the screen to see other pages.7Notification icons: Show missed calls, new voicemail and email messages, and more. Tap the bottom of the screen to view notification details. TIP Be careful not to scratch, crush, or apply too much pressure on the touchscreen. Do not store your phone in a place where other items might damage it. Do not use harsh chemicals, cleaning solvents, or aerosols to clean the phone or its accessories.
8Chapter1:BasicsBack viewThe back cover of your Pre 2 phone is compatible with the TouchstoneTM charging dock (sold separately).1Camera flash2Camera lens3SpeakerTo p  v i ew1Power: Press to wake up or turn off the screen. Press and hold to turn wireless services on and off, replace the battery, or turn your device completely on and off. Turn your device completely off before you remove the battery.2Ringer switch: Slide to turn the ringer and notification sounds on or off. (Red means off.) The ringer switch does not affect music or video playback sounds.33.5mm headset jack.Bottom view*Back cover release
Chapter 1 : Basics 9Set up your phoneVerify your profileAfter you finish setup, look for an email on your computer at the address you used for your Palm profile. If you don’t see the confirmation email in your Inbox, check your spam mail folder in your desktop email program. Click the link in the email to do the following:•Verify your Palm profile.•Follow a link to learn about getting data like contacts and appointments onto your phone from your desktop organizer software.Tu rn t h e  p h o n e  o n /o ffYour Pre 2 phone’s screen can be turned on and off separately from its wireless services (which are the Phone   app, Wi-Fi   app, and Bluetooth®   app). This means you can wake up the screen to use just the organizer features of your device (Calendar, Contacts, Tasks, Memos, and so on) without turning on the phone and other wireless features. Also, when the screen is turned off, the phone can be on and ready for you to receive phone calls or messages.Turn the screen on/offTurn the screen on and leave the wireless services turned off when you want to use only the organizer features, for example, when you’re on a plane and you must turn off all wireless services, but you want to look at your calendar.To turn the screen on, do one of the following: •Press power  . Drag   up to unlock the screen.*Power•Slide out the keyboard.To turn the screen off, press power .To save power, the screen dims automatically after a period of inactivity, then turns off. You can be on a call when the screen dims and turns off—this does not affect the call. To brighten the screen after it dims, tap the screen.Turn wireless services off (airplane mode)Airplane mode turns off your phone as well as the Bluetooth® wireless technology and Wi-Fi features. Use airplane mode when you are on a plane or anywhere else you need to turn off all wireless services. You can’t browse the web, but you can still use apps like Calendar, Contacts, Photos, Music, Doc View, and PDF View.TIP You can also unlock the screen by dragging up from the gesture area across the onscreen lock icon.TIP You can set how long the screen stays on during a period of inactivity.
10 Chapter 1 : BasicsDo one of the following: •Tap the upper-right corner of any screen to open the connection menu. Ta p   Turn on Airplane Mode.•Press and hold power   and tap Airplane Mode.When your phone is in airplane mode, the airplane mode   icon appears at the top of every screen, and Airplane Mode appears in the upper-left corner of the screen in the Launcher, Card view, and Phone. Your phone is not connected to any mobile network. Turn wireless services onWhen you turn on your phone, it automatically connects to your mobile network so that you can make and receive phone calls and use other wireless services (if supported by the local network).If airplane mode is turned on, you need to turn it off before you can connect to your mobile network. Tap the upper-right corner of any screen to open the connection menu. Tap Tu r n  of f  Ai r p la ne  Mo d e .When your phone locates a signal, your wireless service provider name appears in the upper-left of the screen in the Launcher, Card view, and Phone, and the signal-strength   icon appears at the top of the screen.When you are inside a coverage area, the bars of the signal-strength   icon are filled in according to the strength of the signal. If you're outside a coverage area, the bars in the signal-strength icon appear dimmed with an X.Open applicationsYou can have as many applications open at one time as you like, limited only by the amount of memory available on your phone at the time.Open an application in the LauncherThe Launcher displays all your applications. The Launcher includes multiple pages, which you can organize to group apps the way you want.1If you’re in an app, tap the center of the gesture area to display Card view.2In Card View, tap  .3To find the app you want, swipe up or down to see all the icons on a page. To see other pages, swipe right or left on the screen, or tap the arrows in the upper-left and upper-right corner of the screen. 4Tap the application icon.To close the Launcher, do one of the following:•Tap the center of the gesture area.•Tap  .•Make the up gesture: Flick up from the gesture area to the screen.Open an application in Quick LaunchQuick Launch is the bar of five icons you can access from any app. Quick Launch always appears at the bottom of Card view.You can customize Quick Launch to contain the icons for apps you use most often. To open an application from Quick Launch, just tap the icon.TIP When your phone is in airplane mode, you can turn the Wi-Fi and Bluetooth features on individually (see Turn  W i - Fi  o n /o ff and Turn the Bluetooth feature on/off). To turn your phone back on, you must turn airplane mode off.
Chapter 1 : Basics 11Quick Launch can display no more than five icons. By default it displays, from left to right, Phone, Contacts, Email, Calendar, and the Launcher. You can change the order of icons (except the Launcher icon) in Quick Launch, or swap in whatever applications you like.NOTE If you have a notification or the dashboard is open , you need to dismiss them to access Quick Launch.Make the following gesture to display Quick Launch and open one of its applications.1Drag up slowly from the gesture area to the screen. NOTE Don’t confuse this “drag up” with the up gesture, which is a flick up from the gesture area to the screen that displays Card view.2Move your finger to the application icon. When you see the app name appear, lift your finger. The application opens.Open an application Universal Search1Tap the center of the gesture area to open Card view.2Begin typing the name of the application or one of its keywords.3When the application icon appears in the search results, tap it.Work with applicationsGo up one level in an app (back gesture)The back gesture takes you up one level from a detailed level to a more general view of the application you're working in. For example, when you finish reading an email message, make the back gesture to close the message and return to your list of messages. Or when you finish writing a memo, make the back gesture to close and save the memo and return to the display of all your memos. When you make the back gesture in an application and that's the only screen of that app that's open, you minimize the app and go back to Card view.To make the back gesture, swipe right to left anywhere in the gesture area.Display all open applications (Card view)Card view displays open applications as small cards so that you can easily scroll through them and drag them to change their order. When an application fills the screen and you want to go to Card view, do one of the following:•Tap the center of the gesture area. •Make the up gesture: Flick up from the gesture area to the screen.Move among open applications1In Card view, swipe left or right on the screen to see other open apps.
12 Chapter 1 : Basics2Tap a card to maximize the application.Close an application•In Card view, throw the card off the top of the screen.Enter and save informationUse the keyboard1Option: Press to enter numbers, punctuation, and symbols that appear above the letters on the keys, or to move the cursor .2Shift: See Enter uppercase letters.3Space4Backspace5Enter: Press to enter a line return (for example, in a memo or in an email message you are composing) or to accept information you entered in a field.6Sym: See Enter characters from the symbols table.Enter uppercase lettersBy default, the first letter of each sentence or field is capitalized and the remaining text you enter is lowercase. To enter other uppercase letters, do one of the following:•Press Shift   and press the letter key. The Shift symbol   appears. You don’t need to hold down Shift while you press the letter key.•Turn on Caps Lock: Press Shift   twice. The Caps Lock symbol   appears. •Turn off Caps Lock: Press  .Enter alternate keyboard charactersNumbers, punctuation, and symbols appear above the letters on the keys. To enter these characters, do one of the following:•Press Option   and press the key for the character. The alternate character symbol   appears. You don’t need to hold down Option while pressing the second key.•Enter a series of alternate characters: Press Option   twice to turn on Option Lock. The Option Lock symbol   appears.•Turn off Option Lock: Press Option .Enter passwordsYou can see each character of a password only as you enter it, so be careful. Be sure Caps Lock and Option lock are off unless you need them. For information on how to enter characters, see Enter uppercase letters and Enter alternate keyboard characters.TIP You can also maximize the center card in Card view by flicking down from the screen to the gesture area.TIP You can set a preference to move among open apps without first going to Card view.
Chapter 1 : Basics 13Enter characters from the symbols tableYou can enter symbols and accented characters that don't appear on the keys by using the symbols table. See Symbols and accented characters for a list of the available symbols and accented characters.1Press Sym   to display the symbols table.2Narrow the list by pressing the key that corresponds to the character you want. For example, to enter an é, press e. See the table below for a list of corresponding characters.3Scroll to find the character you want.4Tap the character to insert it.Enter information in a fieldYou can enter information in a field by typing or by pasting previously copied information. The auto-correct feature works with all text fields.To accept the information you entered, do one of the following:•Tap outside the field.•Press Enter  . If a screen contains multiple fields, pressing Enter accepts the information you just entered and moves the cursor to the next field.•When you are done entering information on the screen containing the field, make the back gesture to accept the information and back out of the screen.Select items in a listLists enable you to select from a range of options. Lists are different from menus, which give you access to additional features.Lists are hidden until you tap the currently displayed option for that list.1Tap the currently displayed option to open the list. For example, when creating a new event in Calendar, tap 15 minutes before to display the list of reminder options.2Tap the list item you want.Save information•On most screens, your information is saved automatically. Just make the back gesture to close the screen, and your info is saved at the same time.•Your info is also saved if you minimize an app screen to a card and throw the card off the top of the screen to close the app.•On screens with a Done button, tap Done to save your information.Use the menusMost applications have an application menu hidden in the upper-left corner, which provides access to additional features. There is also a connection menu hidden in the upper-right corner, which provides access to wireless services.Some applications have additional menus. For example, in Photos, tap an open picture and tap   to display a menu of tasks you can do with the picture.To get the most out of your phone, it’s a good idea to familiarize yourself with the additional features available through the menus in various applications.TIP The symbols and accented characters are grouped according to their similarity to the corresponding key. In some cases, the symbol is related to the alternate character on the key, not the letter. For example, to type a € or other currency symbol, press Sym + h. Why? Because the alternate character on the H key is $. TIP If you press the wrong key, press Backspace to return to the full list of symbols and accented characters. You can then press another key.
14 Chapter 1 : BasicsOpen the application menuThe application menu contains items for the application you are working in, such as Cut and Copy, Preferences, Help, and other application-specific menu items. Help is available on the app menu of every application.1In an app, do one of the following:•Drag down from the upper-left corner of the phone (above the screen) onto the screen.•Tap the application name in the upper-left corner of the screen. 2Tap a menu item to open it. If a menu item displays a right-pointing arrow  , tap the item to display the submenu for that item—for example, tap the Edit menu item to open a submenu containing Cut, Copy, and Paste items. If you see a downward-pointing arrow   at the bottom of the menu, scroll down to see additional menu items.3To close the menu without selecting an item, repeat one of the options in step 1.Open the connection menuThe connection menu lets you manage wireless services—the phone, Bluetooth® wireless technology, and Wi-Fi.1Do one of the following:•Drag down from the upper-right corner of the phone (above the screen) onto the screen.•Tap the upper-right corner of the screen.2Tap a menu item to turn that wireless feature on or to display a list of menu items for that feature. If you see a downward-pointing arrow   at the bottom of the menu, scroll down to see additional menu items.3To close the menu without selecting an item, repeat one of the options in step 1.View and respond to notificationsRespond to a notificationNotifications show up at the bottom of the screen to notify you of new voicemail and messages, upcoming appointments, missed calls, application updates, and more. By default, if a notification arrives when the screen is off, the gesture area light pulses. You can turn this feature off.Do one of the following:•Tap the notification to act on it. •For some types of notifications, throw the notification off the side of the screen to dismiss it.View all your notificationsFor most types of notifications, if you do not tap a notification after a few seconds, it becomes an icon in the lower-right portion of the screen.1Tap anywhere on the bottom of the screen to display your notifications.2Tap a notification to act on it. If the notification has a number next to it, the number indicates how many items are included in the notification—how many voicemail or email messages you have, and so on.DID YOU KNOW?The connection menu also displays the current day and date and the battery charge level.
Chapter 1 : Basics 15Some notifications enable you to perform multiple actions. For example, on a calendar notification, tap the calendar icon to open Calendar in Day view with the event displayed, or tap the event name to open the event details screen.Find info on your phoneYou can search for contacts and applications on your phone.1Open Card view or the Launcher. 2Begin typing the search term. As you type, your phone displays  the following items whose name matches the characters you entered. As you continue typing, the search results narrow.•Applications, including apps you have downloaded from App Catalog •Contacts3Do one of the following:•To open an application: Tap the application.•To look up or get in touch with someone: Tap a contact name to open the person’s contact information. Tap a phone number to dial it, an email address to send a message, and so on. If only the contact name is displayed, tap the name to display ways to get in touch. You can also tap Add Reminder to add a reminder message to the contact.•To search your company's Global Address List (GAL) for a contact: Ta p   Global Address Lookup.
16 Chapter 1 : Basics
Chapter 2 : Phone 17PhoneYo u r  P a l m ® Pre™ 2 phone enables you to effectively manage multiple calls. You can answer a second call, swap between calls, and set up a six-way conference call. You can also work with other applications while on a call. Your Palm® Pre™ 2 phone helps you to do all these tasks with ease.In this chapter18 Make calls19 Receive calls19 Use voicemail19 What can I do during a call?
18 Chapter 2 : PhoneMake callsFor information on turning the phone off and back on, see Turn the phone on/off.Dial using the onscreen dial padThe onscreen dial pad is useful when you need to dial numbers that are expressed as letters and when you need large, brightly lit numbers that you can tap.1Open Phone .2Tap the dial pad numbers to enter the number.3Ta p   to  di a l .Dial by contact name using Universal Search1Display Card view or open the Launcher.2Begin typing the contact first or last name, or initials.3Tap one of the contact’s phone numbers to dial it. If only the contact name appears, tap the name to display the phone numbers for that contact, and tap the number.Dial using the keyboard1In the Launcher, Card view, or Phone, use the keyboard to enter the number. You do not need to press Option   to enter numbers, *, or #.2When you finish entering the number, tap it to dial.Dial using a speed dialSee Assign a speed dial to a contact for instructions on creating a speed dial.•In the Launcher, Card view, or Phone, press and hold the speed-dial key you assigned to the number.Dial by contact name in the Phone applicationSee How do I add names and other info into Contacts? for instructions on adding contacts to your phone. You can also look up and dial contacts using Universal Search.1Open Phone .2Using the keyboard, enter a name or initials until the contact you want appears.3Tap the number.Redial the last number dialed1Open Phone .2Tap  . When the contact name or number appears at the top of the screen, tap   again to dial.TIP If you turn off the preference to show contact matches in the dial pad (see Turn contact match display on/off), this changes how you dial using the keyboard in the Phone application. In Phone, after you enter the number with the keyboard, tap the onscreen dial icon to dial.
Chapter 2 : Phone 19Receive callsIf you want to answer calls, your phone must be on. This is different from having only the screen turned on. When your phone is off, your calls go to voicemail.You can pick the ringtone for incoming calls. You can set a ringtone for individual contacts as well.Answer a callDo one of the following:•If the screen is on when the phone starts ringing, tap  . •If the screen is off, drag   up to unlock the screen and answer the call.•If a headset is attached, press the headset button.Ignore a callTo send a call immediately to voicemail, do one of the following:•Ta p  .•Press power  twice.To reply to a caller who is in your Contacts list after you ignore a call, tap the ignored call notification. This opens the caller’s contact entry, where you can select a reply method. To reply to a caller who is not in your Contacts list, go to your call history.Use voicemailSet up voicemail1In the Launcher, Card view, or Phone, press and hold 1 . When the search results screen appears, continue holding 1   until the Phone application appears.2Follow the voice prompts to set up your voicemail.Listen to voicemail messages1Do one of the following: •In the Launcher, Card view, or Phone, press and hold 1 .•Open Phone  . Then tap  .•Open Phone  . Then tap and hold 1 onscreen.2Follow the voice prompts to listen to your messages.What can I do during a call?Manage a callDo any of the following:•Put the call on speakerphone: Tap  .•Mute the microphone so you can’t be heard: Tap  .DID YOU KNOW?If you are playing music or a video on your phone and a call arrives, playback pauses automatically and resumes when you hang up or ignore the call.TIP You don’t need an on-hold button to put a call on hold. Just tap the mute icon to mute your end of the line.
20 Chapter 2 : Phone•Open the dial pad to enter numbers for navigating phone trees, responding to prompts, and so on: Tap  .•Add a call: See Make a second call.•Adjust call volume: Press Volume.End a call•Ta p  .•If a headset is attached, press the headset button.Set up and use a Bluetooth® hands-free deviceYour phone is compatible with many headsets and car kits (sold separately) enabled with Bluetooth® wireless technology version 2.1, with EDR and Stereo (with AVRCP media controls).After you set up a connection with a Bluetooth headset or hands-free car kit, you can communicate using that device whenever it is within range and the Bluetooth feature on your phone is turned on. The range varies greatly, depending on environmental factors. The maximum is about 30 feet (10 meters.NOTE You can use a stereo (A2DP-enabled) Bluetooth headset or speakers to listen to music files on your phone. You cannot, however, use a mono Bluetooth headset to listen to music files.1Open Bluetooth .2If the Bluetooth setting at the top of the screen is off, tap Off to switch the Bluetooth feature from Off to On.3Ta p   Add device and tap the device name.4To use a Bluetooth device with your phone, follow the instructions that came with the Bluetooth device.5To switch to another Bluetooth device while on a call: Tap   and tap the new device name. You can also tap Handset or Speaker to use your phone without the headset.
Chapter 3 : Email and other messages 21Email and other messagesEnjoy the ease and speed of keeping in touch with friends, family, and colleagues anywhere you can access your wireless service provider’s data network or a Wi-Fi network. You can send and receive attachments as well. And keep the Messaging app in mind for times when you need to send a short text, multimedia, or instant message to a mobile phone number—especially handy when you’re in a meeting that’s running late.In this chapter22 Email23 Messaging
22 Chapter 3 : Email and other messagesEmailSet up emailFollow this procedure if you have a common email provider, for example, AOL, EarthLink, or Yahoo! If you are setting up the Email application to work with your corporate email account that uses Microsoft Exchange ActiveSync, see Set up email: Microsoft Exchange. If the email account you set up takes advantage of the Synergy feature, then setting up email also synchronizes the provider's calendar and contacts.1Open Email .2Do one of the following:•The first time you open Email, tap an account type or tap Email Account. •If you have already set up an account that takes advantage of the Synergy feature and want to set up another one, tap Add An Account, and then tap an account type or tap Email Account.•Any other time you open Email, open the application menu, tap Preferences & Accounts, tap Add Account, and tap an account type or tap Email Account. 3Enter your email address and password, and tap Sign In. 4Ta p   Done. NOTE If automatic setup fails for your email account, an error message appears. Ta p   Manual Setup or Find a Synergy Service, gather the settings info you need, and enter the account settings.Create and send an email message1Open Email .2If this is the first time you have opened the Email application, and you set up synchronization with at least one email account already while setting up an account in Contacts, Calendar, or Messaging, tap Done. If you have not set up an email account. 3Tap  .4(Optional) Tap From to change the email account you are using to send the message. This option appears only if you have more than one email account set up on your phone.5In the To field, do one of the following to address the message:•Enter a contact name, initials, or email address. Tap the email address when it appears. When you enter a contact name, favorites appear at the top of the search results.•Tap   to open the full contact list. Tap the contact you want, or enter a name or address to narrow the list. •Enter the full email address for a recipient who is not a contact.6(Optional) Tap To  to open the Cc and Bcc fields, and enter an address.7(Optional) Repeat steps 5 and 6 to enter additional addresses.8Enter the subject, press Enter  , and enter the body text.9(Optional) To set the priority for the message: Open the application menu and tap Set As Normal Priority or Set As High Priority. 10 (Optional) To discard a message: Open the application menu and tap Discard Message.11 Tap  .
Chapter 3 : Email and other messages 23Receive and read email messagesThe Email application synchronizes messages anytime you open a mail folder. It also synchronizes messages on an automatic schedule—the default interval is every 20 minutes.Follow these steps to manually retrieve messages.1Open Email .2If the folders for the account you want are hidden, tap   to display the folders.3Tap the folder you want to check messages for. If synchronization doesn’t start, tap  .How can you tell if sync is happening? Look for the animated circular movement around the number of messages in the upper-right corner of the screen.4Tap a message to open it.5(Optional) Do any of the following:•To call a number: Tap the number, and tap   to call it. •To send a text message: Tap and hold the number, and tap Te x t . •To send an email: Tap the email address, enter your message, and tap .•To go to a web address: Tap it.•To share a link to a web site: Press and hold Option   and tap the link. Then tap Share Link.•To copy a link to a web site: Press and hold Option   and tap the link. Then tap Copy URL.6Tap   or   in the subject line to view the previous or next message.7To view messages for another account, make the back gesture to return to the account list, and tap the account name.MessagingCreate and send a text or multimedia messageEach text message can have up to 160 characters. You can send a message of more than 160 characters, but the message may be split into several messages. If you send a text message to an email address, the email address is deducted from the 160-character count.Multimedia messages consist of both text and pictures. You can include pictures in JPG format. BEFORE YOU BEGIN•Before you use your phone to send or receive multimedia messages, refer to your service plan for pricing and availability of multimedia messaging services.•Make sure that your phone is on and that you’re inside a coverage area.1Open Messaging .2The first time you open Messaging, tap Done to send a text or multimedia message. Thereafter, skip to step 3. 3Tap  . The cursor is in the To field. Do one of the following to address the message:•Enter a contact’s first or last name or initials, screen name, phone number, or email address. When you enter a contact name, favorites appear at the top of the search results. Tap the phone number, IM account name, or email address you want to use to send the message when it appears.•Tap   to open your full contact list. Tap the contact you want or enter a name or address to narrow the list.DID YOU KNOW?You can send and receive text messages even while you are on a phone call. This is easiest when using a hands-free headset or the speaker.
24 Chapter 3 : Email and other messages•Enter a phone number for a recipient who is not a contact.•Do you need to enter a short code that contains letters—for example, to text a vote to a TV poll or to make a donation to a charity? Use the keyboard to enter it; just press the letter keys and tap the code that appears under Short Code. This is not the same as dialing a number that is expressed as letters—for example, (555) 256 PALM. To dial a number like this, you must use the onscreen dial pad and tap the numbers that correspond to the letters P, A, L, M— which would be 7256.4Ta p  t h e  To  field and repeat step 3 to enter additional recipients.5To attach a picture in JPG format to a multimedia message, do one of the following:•If you did not yet enter the message text, tap  . Tap the album containing the picture you want. Tap the picture, or tap New Photo and take the picture. Tap Attach Photo.•If you already entered the message text, open the application menu and tap Add File. Tap the album containing the picture you want and tap the picture, or tap New Photo and take the picture. Tap Attach Photo.6To attach a video you recorded to a multimedia message, do one of the following:•Before entering the message text: Tap  , and tap  . Tap the album containing the video and tap the video, or tap New Video. If you tap New Video, tap   to start recording, tap   to stop, and then tap the new video’s date. If a video is above the maximum size allowed for sending by multimedia message you can trim the video to an appropriate size. •After entering the message text: Open the application menu, tap Add File, and tap  . Tap the album containing the video and tap the video, or tap New Video. If you tap New Video, tap   to start recording, tap   to stop, and then tap the new video’s date. If a video is above the maximum size allowed for sending by multimedia message you can trim the video to an appropriate size.7Enter the message text and tap  .Receive and view text and multimedia messagesYou can view pictures, videos, and animated GIFs, and listen to music files included in a multimedia message. You can save pictures in JPG format to your phone for viewing in the Photos application. Animated GIF files appear as JPG files in the Messaging app.1Open Messaging .2Tap a conversation to view messages. 3If Download MMS is displayed, tap it to view the attached file. 4To view an attached file in a multimedia message: Tap a music, video, or vCard file name. (Attached pictures are displayed within the message.) Tap Copy Photo to save an attached JPG picture.5(Optional) Do any of the following:•To call a number: Tap the number, and tap  .•To send a text message: Tap and hold the number, and tap Te x t . •To send an email: Tap the email address.•To go to a web address: Tap it.Set up an instant messaging (IM) accountYour phone supports Instant Messaging through popular online IM services, such as GoogleTalk and AIM. If you already have an IM account, you can sign in through the Messaging app or through the Accounts app. If your service provider takes advantage of the Synergy feature and you have already signed in to your account in Email, Calendar, or Contacts, the IM account should already be setup for you.1Open Messaging .2Do one of the following:•The first time you open Messaging: Tap Add An Account.
Chapter 3 : Email and other messages 25•Any other time: Open the application menu and tap Preferences & Accounts. Tap Add IM Account.3Tap the account type.4Enter your username and password.5Ta p   Sign In.6Ta p   Done.Sign out of an IM account1Open Messaging .2Ta p   Buddies.3Tap the status icon to the left of your online status (Available or Busy) and tap Sign off.Send and receive IM messagesBEFORE YOU BEGIN Make sure that your phone is on and that you’re inside a coverage area.1Open Messaging .2Do one of the following to start or continue a conversation:•In Buddies view, tap a buddy name. If there's more than one account for that buddy, the most recently used IM account is opened.•In Conversations view, tap an existing conversation.•In Conversations or Buddies view, if you tap , you start a new text message. To switch to IM, tap   and tap an IM address from your Contacts.3Enter the message text and tap  . 4When the message recipient replies, the reply appears below your message in the conversation. Repeat step 3 to reply to that person.5(Optional) Do any of the following from a message you receive:•To call a number: Tap the number, and tap  .•To send a text message: Tap and hold the number, and tap Te x t . •To send an email: Tap the email address.•To go to a web address: Tap it.
26 Chapter 3 : Email and other messages
Chapter 4 : Contacts, Calendar, and other personal information 27Contacts, Calendar, and other personal informationYo u r  P a l m ® Pre™ 2 phone is all you need to organize your personal information and keep it with you wherever you go.All your personal information is backed up and kept private either in your Palm profile or in one of your online accounts. In this chapter28 Contacts30 Calendar
28 Chapter 4 : Contacts, Calendar, and other personal informationContactsUse Contacts for the first time1Open Contacts .2Do one of the following:•To set up an online account to sync: Tap Add An Account and go to step 3.•To open Contacts without creating an online account: Tap Done. This opens your Palm profile account, and you can start creating contacts in this account.3To set up an account that is listed, tap the account type, enter the account information, tap Sign in, and then tap Done.Create a contactYou can add a contact to an account. If you don’t specify the account, the new contact is added to your default account.If you are using Contacts for the first time, you go through a few different steps to add or access the contacts on your phone. Follow this procedure to add contacts directly on your phone after the first time you use Contacts.1Open Contacts .2Ta p  .3(Optional) Tap the account icon to the right of Name to change the account to which the new contact will be added.NOTE If an account doesn’t appear in the list, you can’t add data to that account from your phone.4Ta p   Name to enter the contact name. 5To add detailed name information, such as prefix, suffix, or middle name, to a name, open the application menu and tap Name Details.6Tap fields to enter contact details, select a ringtone for this contact, and so on. Scroll to see all fields. You can add a reminder that appears whenever you and this person get in touch. 7In some fields, such as New Phone Number, when you enter the information a label button appears on the right. Tap the button to change the label for your entry—for example, to identify a number as a mobile or work phone.8Ta p   Done.Find a contactYou can find a contact from Card view or the Launcher view. To find a contact within the Contacts app, use these steps.1Open Contacts .2Begin typing any of the following:•First, middle, or last name•First and last initial (no space between)•Company•NicknameTIP When you enter a phone number that requires pauses—for example, a number for which you need to enter a password or respond to prompts, you can insert a pause or a stop in the number. To insert a two-second pause, enter a P where you want the pause to appear. To insert a stop, enter a W where you want the stop to appear. To dial the next set of numbers after the stop, tap the numbers you entered as they appear onscreen.
Chapter 4 : Contacts, Calendar, and other personal information 293For more search options, tap Global Address Search. (This option is available if you are using Microsoft Exchange with a Global Address List.)4Ta p  t h e  co n t a c t .View, edit, or delete contact information1Open Contacts .2Search for a contact, and tap the contact name.3(Optional) To copy a contact, open the application menu, tap Edit, and tap Copy All.The contents of the contact entry are copied as plain text, with carriage returns between each element.4To edit a contact, tap Edit.Info that’s dimmed means it originates from an account that you can’t edit on your phone (like Facebook).5In a linked contact, tap the account icon in the upper-right corner to edit fields specific to that account.NOTE The fields that make up the contact header (name, photo, job title, company) are unique to each account. You must open a specific account to enter these fields.6Do one or both of the following:•To add or change information: Tap a field .NOTE In a linked contact, when you enter info in a field for the first time, you can assign that info to any account by tapping the account button in the field.•To delete a piece of contact information: Throw the item off the side of the screen and tap Delete.7Ta p   Done.Assign a speed dial to a contactYou can assign a speed dial to any contact phone number. You can assign up to 23 speed dials.NOTE You cannot assign 1 (the E key) as a speed dial. The number 1 is reserved for dialing your voicemail system. The # (B) and * (Z) keys are also unavailable.1Open Contacts .2Search for a contact, and tap the contact name.3Open the application menu and tap Set Speed Dial. 4Tap the phone number you want to assign a speed dial to, and then do one of the following: •To assign a speed dial: Tap the key to use as a speed dial.•To reassign a speed dial to the selected number: Tap the assigned speed dial and then tap Reassign To [Name].TIP To remove a speed dial from a number, open the contact, open the application menu, and tap Set Speed Dial. Tap the number and tap Remove Speed Dial [key letter].
30 Chapter 4 : Contacts, Calendar, and other personal informationCalendarUse Calendar for the first time1Open Calendar .2Do one of the following:•To set up an online account to sync: Tap Add An Account and go to step 3.•To open Calendar without creating an online account: Tap Done. This opens your Palm profile account, and you can start creating events in this account.3To set up an account that is listed, tap the account type, enter the account information, tap Sign in, and then tap Done. Create an eventIf you are using Calendar for the first time, you go through a few different steps to add or access the calendar events on your phone . Follow this procedure to add events directly on your phone after the first time you use Calendar. For information on managing your phone’s time settings.1Open Calendar .2Ta p   All or an online account name in the upper-right corner, and tap the calendar you want to use for this event. NOTE If an account doesn’t appear in the list, you can’t add data to that account from your phone.If you create an event in All Calendars view, the event is created in the calendar set as the default.3Go to the day you want and tap a blank time slot.In Day view, available time slots between events are compressed and labeled X Hrs Free. To expand free time so you can enter an event, tap X Hrs Free.4Enter the event name, and then do one of the following: •Press Enter   to add the event to the calendar.•Tap   to the right of the name to enter more details about the event. Make the back gesture to return to Day view.Don’t look for a save button—your info is automatically saved when you make the back gesture to close the event.
Chapter 5 : Photos, videos, and music 31Photos, videos, and musicThere’s no need to carry a separate media player; you can play music and videos, and view photos, on your Palm® Pre™ 2 phone. Listen to music through the built-in speaker or through a 3.5mm headset or headphones (sold separately). Take pictures and record videos and then share them with your friends immediately, directly from your phone.In this chapter32 Camera32 Photos33 Videos33 Music
32 Chapter 5 : Photos, videos, and musicCameraYour phone comes with an easy-to-use 5-megapixel camera with an LED flash. You can use the camera to take pictures, and then use the Photos app to view them and send them to your friends and family. To add a personal touch to your phone, use your pictures as your wallpaper and as caller ID images.1Open Camera .2The camera is set to automatically determine if the flash is needed. To change the flash setting, tap the icon. Automatic Flash always on Flash always off3To take the picture in landscape view, turn your phone 90 degrees.4Press Space   or tap   to take the picture.The picture you took is automatically saved in JPG format. You can keep snapping pictures, and then go to Photos to look at them and delete the ones you don’t want.PhotosTo get pictures on the phone, you can do any of the following:•Take a picture with your phone’s camera.•Copy pictures from your computer.•Receive pictures as email attachments.•Receive pictures as part of a multimedia message.•Copy a picture from a web page.The following table shows you the photo formats that you can see on your phone and the apps you can see them in.NOTE You can download and look at GIFs in Email, and they are saved to USB storage, but you can't look at GIFs in Photos or use one as wallpaper.You can also look at pictures on the web directly in the web browser.1Open Photos .2Tap the album containing the picture, and tap the thumbnail of the picture. The Photo roll album contains pictures you took with your phone’s camera.3Swipe left or right on the screen to look at other pictures in the album.4To find photos you take on your phone, connect your phone and your computer using the USB cable and tap USB Drive on your phone. On your computer, click the drive representing your phone, click DCIM, and then click 100PALM.Table 1. Photo formats viewable on webOS phonesPhoto format View in Photos Download from EmailDownload from MMSBMP √√GIF √ (see Note)JPG √√√PNG √√
Chapter 5 : Photos, videos, and music 33VideosTo get videos on your phone, you can do any of the following:•Record a video.•Copy videos from your computer.•Receive videos as email attachments.•Receive videos as part of a multimedia message.You can view DRM-free videos that you receive as email attachments or that you copy from your computer in the MPEG-4, H.263, H.264, MP4, M4V, 3GP, 3GPP, 3G2, and 3GP2 formats. You can view videos you open in a multimedia message in MP4 format. Videos play on your phone in landscape orientation.BEFORE YOU BEGIN Before you put videos on your phone, make sure you have enough storage space on your phone to fit the file. Open Device Info   and look at the Available field under Phone.1Open Videos .2Tap an album and tap the video you want to watch. MusicYou can add and listen to DRM-free music files on your phone. You can listen to music through the speaker on the back of your phone, through the stereo headset included with your phone, or through headphones (sold separately). If you have speakers or a stereo headset (both sold separately) that are equipped with Bluetooth® wireless technology, you can also use them to listen to music. You can also listen to streaming music from the web directly in the web browser.Get music onto your phoneTo get music onto your phone, you can do any of the following:•Copy music files from your computer. You can copy music files to any folder on your phone’s USB drive. However, to make it easy to find and manage files, consider creating a “Music” folder and copy files to there.•Use solutions available from third-party software developers (sold separately) that facilitate the transfer of music files to your phone. For more information, open the browser on your computer and go to palm.com/sync-solutions.•Receive music files as email attachments.•Receive music files as part of a multimedia message.The following table lists music formats that you can play on your phone:NOTE You can download and listen to WAV and AMR files in Email, and they are saved to USB storage, but you won't find these files listed in your song list in Music. You can also download and listen to MP3 files in Email, but these files are not saved to USB storage, and they are not listed in Music.Table 2. Music formats playable on webOS phonesFile formatPlay in Music/Copy to USB storageDownload from EmailDownload from MMSAAC √√AAC+ √√ AMR √ (see Note)MP3TM √√√WAV √ (see Note)
34 Chapter 5 : Photos, videos, and musicListen to musicAfter you begin to play music, music continues to play if you switch to another application, turn off the screen, or slide the ringer switch off. If a call comes in, music pauses automatically and resumes when you hang up or ignore the call.If you put the Music app in the background while you work in another app, a music notification icon appears at the bottom of the screen. Tap the icon to display the music playback controls. You can use the controls even if the screen is locked.•To end play: Close the Music app.1Add music files to your phone. 2Open Music .3Do one of the following:•To listen to all songs on your phone: Tap Songs. Tap the first song.•To listen to a specific song: Tap Artists, Albums, Songs, Genres, or Playlists to search that category. Continue making selections until the song you want appears. Tap the song name.•To listen to all songs from an artist: Tap Artists and tap the artist name. Tap the first song. •To listen to an album: Tap Albums and tap the album name. Tap the first song. •To listen to all songs in a genre: Tap Genres and tap the genre name. Tap the first song. •To listen to playlists you synchronized to your phone: Tap Playlists. Go to palm.com/sync-solutions for a list of third-party solutions (sold separately) that you can use to sync music and playlists from your computer to your phone.Songs play in the order they are displayed onscreen. To listen to them in random order: Tap Shuffle All.
Chapter 6 : Web and wireless connections 35Web and wireless connectionsWith your wireless service provider’s network and your Palm® Pre™ 2 phone’s web browser, you can take the web with you almost anywhere you go.You can use your phone’s Wi-Fi feature to connect to a public, work, or home network. The Bluetooth® wireless technology on your Palm® Pre™ 2 phone helps you easily set up wireless connections to a number of devices.In this chapter36 Wi-Fi36 Web36 Bluetooth® wireless technology
36 Chapter 6 : Web and wireless connectionsWi-FiTu rn  W i - Fi  o n /o ffDo one of the following:•Open Wi-Fi  , and tap On or Off.•From any screen: Open the connection menu in the upper-right corner of the screen, tap Wi-Fi, and tap Turn  o n  W i - Fi  or Tu r n  o ff  Wi - Fi .If your phone finds the network you want, tap the network name to connect to it. WebGo to a websiteThe web browser on your phone is capable of displaying most web content. The browser features the latest web standard technologies such as HTML 4.01, CSS 2.1, Ajax, and JavaScript. It does not support plug-ins such as Flash or Java applets.1Open Web .2Enter the address of the page. You don’t need to enter the prefix http://www. If the page appears in the list of viewed pages, tap it to go there again. If not, press Enter3To cancel a page while it is loading, tap  .Go to a website using searchYou can also search the web from the Launcher or Card view.1Open Web .2Enter the search term and tap a search option.Bluetooth® wireless technologyTurn the Bluetooth feature on/offDo one of the following:•Open Bluetooth , and tap On or Off. •From any screen: Open the connection menu, tap Bluetooth, and tap Tu r n  o n  B l u e t o o t h  or Turn off Bluetooth.DID YOU KNOW?If you browse to a secure web page, the lock icon in the address line appears closed.
Chapter 7 : Documents 37DocumentsYo u r  P a l m ® Pre™ 2 phone enables you to take your office with you—including your Microsoft Office files. You can view and search Microsoft Word, Excel®, and PowerPoint® files on your phone. You can also view PDF files on your phone.In this chapter38 PDF View
38 Chapter 7 : DocumentsPDF ViewWith PDF View, you can view PDF (Adobe Acrobat) files on your phone.Open a fileYou can view a PDF file that you copy from your computer or receive as an email attachment.BEFORE YOU BEGIN Before you put a file on your phone, make sure you have enough storage space on your phone to fit the file. Open Device Info and look at the Available field under Phone.1Open PDF View  . The list of your files appears onscreen.2To search for a file, begin typing the name. Tap the file when it appears.If the PDF file was created with a password, enter the password to open the file.3To open another file: Open the application menu and tap Open. Tap the file.Move around in a file•Go to the next or preceding page: Tap   or  .•Jump to a different page: Tap the current page number at the bottom of the screen. Enter the page number you want and press Enter .•Move a part of the current page to the center of the display: Tap and hold on the part of the page you want, and drag it to the center.Change the text display sizeFor information on zooming in and out.•Pinch out to enlarge items onscreen.•Pinch in to decrease the size of items onscreen.•Double-tap the screen to zoom in or out a specified amount.TIP To move between open PDFs, tap the center of the gesture area to go to Card view. Tap the card of the PDF you want to read.
Chapter 8 : Preferences 39PreferencesThere are lots of ways to make your Palm® Pre™ 2 phone work better for you. Personalize your phone to make it match your lifestyle.You can easily customize many features of your phone like the wallpaper, screen brightness, ringtone for incoming calls, and more.In this chapter40 Screen & Lock40 Sounds & Ringtones
40 Chapter 8 : PreferencesScreen & LockChange screen brightness1Open Screen & Lock .2Under Screen, drag the Brightness slider to the preferred level.Set the interval for turning the screen off automaticallyBy default, your screen turns off after one minute of inactivity to save battery power. You can change this interval.1Open Screen & Lock .2In Tu r n  o f f  a f t e r , tap the interval shown, and then tap the number of seconds or minutes.Change your wallpaperYour wallpaper is the screen background in Card view. You can customize the wallpaper to show a favorite picture.1Open Screen & Lock .2Ta p   Change Wallpaper.3Do one of the following:•Use an existing picture as the background: Tap the album containing the picture, and tap the picture.•Use a new picture as the background: Tap New Photo and take the picture.4(Optional) Do either or both of the following:•To zoom out or in on a part of the picture: Pinch in or out on the picture.•To capture the portion of the picture you want for your wallpaper: Tap and hold the picture, and then drag the portion you want to the center of the onscreen box. This portion becomes the wallpaper.5Ta p   Set Wallpaper.Sounds & RingtonesManage system sounds and notificationsYou can turn system sounds, such as transition sounds, and notification alerts, on or off. You can also set the volume for system sounds.Sliding the ringer switch off not only turns off the ringer for incoming phone calls, it also turns off system sounds like the shutter click when you take a picture. The ringer switch does not affect music and video sound. By default, when the ringer switch is off, you can still hear the Clock alarm. If you want to change this setting so that turning off the ringer switch also turns off the Clock alarm sound, go to Clock > Preferences. Under Ringer Switch Off, change Play alarm anyway to No.1Open Sounds & Ringtones .2In Ringer Switch Off, tap Vibrate or Mute to set whether your phone vibrates when you slide the ringer switch off.3Under Ringer Switch On, set any of the following:Rings & Alerts: Select Sound & Vibrate or Sound. To change the ringtone for incoming calls.
Chapter 8 : Preferences 41Ringtone Volume: Drag the slider to set the ringtone volume. This also sets the Clock alarm volume.System Sounds: Set whether to turn on systemwide sounds for notifications, transitions, shutter click, and the like. Drag the Volume slider to set the system sounds volume. Select the ringtone for incoming callsThe ringtone you select here applies globally to all incoming calls. You can also set a unique ringtone for a contact.1Open Sounds & Ringtones .2Tap the displayed ringtone to open the full list of tones.3(Optional) Tap   to listen to the ringtone. 4Tap the name of the ringtone to select it.5To set the ringtone volume, drag the Ringtone Volume slider.TIP Adjusting the Ringtone Volume slider is the same as using the volume up and volume down buttons on the side of the phone.
42 Chapter 8 : Preferences
Chapter 9 : Learn More 43Learn MoreIn this chapter44 While using your phone
44 Chapter 9 : Learn MoreWARNING Please refer to Reg for information that hleps you safely use your phone. Failure to read and follow the important safety information in this guide may result in serious bodily injury, death, or property damage.While using your phone•On-device Help: Read short how-tos and watch animations on your new phone.To view all Help:   Open Help .To view Help topics for a single application: Open the application, open the application menu, and tap Help.•Online support from Palm: Visit palm.com/support to edit your Palm profile, watch how-to animations, access the Data Transfer Assistant, and read comprehensive formation about your phone.
 Regulatory and Safety Information 45Regulatory and Safety InformationFCC StatementsThis equipment has been tested and found to comply with the limits for a Class B digital device, pursuant to part 15 of the FCC Rules. These limits are designed to provide reasonable protection against harmful interference in a residential installation. This equipment generates, uses, and can radiate radio frequency energy and, if not installed and used in accordance with the instructions, may cause harmful interference to radio communications. However, there is no guarantee that interference will not occur in a particular installation. If this equipment does cause harmful interference to radio or television reception, which can be determined by turning the equipment off and on, the user is encouraged to try to correct the interference by one or more of the following measures:• Reorient or relocate the receiving antenna.• Increase the separation between the equipment and receiver.• Connect the equipment into an outlet on a circuit different from that to which the receiver is connected.• Consult the dealer or an experienced radio/TV technician for help.This device complies with Part 15 of the FCC Rules. Operation is subject to the following two conditions: (1) this device may not cause harmful interference, and (2) this device must accept any interference received, including interference that may cause undesired operation.This phone meets the FCC Radiofrequency Emission Guidelines and is certified with the FCC as:FCC ID: O8F-ROAYThe FCC ID on your Palm phone is located on a label inside the battery compartment. The battery must be removed as shown below to view the label.Table 1. Caution iconsIcon Description Icon DescriptionRead the Safety Information section of this user guide Do not use while re-fuellingDo not use hand-held while drivingThis device may produce a bright or flashing lightFor body-worn operation maintain a separation of 1.5 cmDo not dispose of in a fireSmall parts may cause a choking hazardAvoid contact with magnetic mediaThis device may produce a loud soundAvoid Extreme TemperaturesKeep away from pacemakers and other personal medical devicesAvoid contact with liquid, keep drySwitch off when instructed in hospitals and medical facilitiesDo not try and disassembleSwitch off when instructed in aircrafts and airportsDo not rely on this device for emergency communicationsSwitch off in explosive environmentsOnly use approved accessories
46 Regulatory and Safety InformationCAUTION Changes or modifications not expressly approved by the party responsible for compliance could void the user's authority to operate the equipment.Antenna Care/Unauthorized ModificationsUse only the supplied integral antenna. Unauthorized antenna modifications or attachments could damage the unit and may violate FCC regulations.EU Regulatory ConformanceWe, Palm, Inc., hereby declare that this device is in conformance to all essential requirements of the R&TTE Directive 1999/5/EC.This equipment is marked with the   0984   symbol and can be used throughout the European community.This indicates compliance with the R&TTE Directive 1999/5/EC and meets the relevant parts of following technical specifications:•ETSI EN 301 511• ETSI EN 301 908-1• ETSI EN 301 908-2• ETSI EN 300 328•ETSI EN 301 489-1/-7/-17/-24• EN 60950-1•EN 50360•EN 50371•EN 62311Marking by the symbol   indicates this equipment uses non-harmonized frequency bands.France - 2.4GHz for Metropolitan France:In all Metropolitan departments, wireless LAN frequencies can be used under the following conditions, either for public or private use:• Indoor use: maximum power (EIRP*) of 100 mW for the entire 2400-2483.5 MHz frequency band• Outdoor use: maximum power (EIRP*) of 100 mW for the 2400-2454 MHz band and with maximum power (EIRP*) of 10 mW for the 2454-2483 MHz bandPrecaution against hearing loss: Protect your hearing. Listening to this device at full volume for a long period of time can damage your hearing.A pleine puissance, l’écoute prolongée du baladeur peut endommager l’oreille de l’utilisateur. Consultez notre site web www.palm.com/fr pour plus d’informations.Responsible party(North America)Palm, Inc.950 W. Maude Ave.Sunnyvale, CA 94085 USA www.palm.com (Europe)Palm Europe ltd.*59-60 Thames StreetWindsor, Berkshire, SL4-1TXUKRadio Frequency (RF) Safety ExposureGeneral statement on Radio Frequency (RF) energy: Your phone contains a transmitter and a receiver. When it is ON, it receives and transmits RF energy. When you communicate with your phone, the system handling your call controls the power level at which your phone transmits.Specific Absorption Rate (SAR): Your mobile device is a radio transmitter and receiver. It is designed not to exceed the limits for exposure to radio waves recommended by international guidelines. These guidelines were developed by the independent scientific organization ICNIRP and include safety margins designed to assure the protection of all persons, regardless of age and health.In order to certify this unit for sale to the public, this unit has been tested for RF exposure compliance at a qualified test laboratory and found to comply with the regulations regarding exposure to RF Energy under the recommendations of the International Commission on Non-Ionizing Radiation Protection (ICNIRP). The tests are preformed in positions and locations as required by the FCC and IC for each model. As SAR is measured utilizing the device's highest transmitting power, the actual SAR of this device while operating is typically below that indicated below. This is due to automatic changes to the power level of the device to ensure it only uses the minimum power required to communicate with the network.The SAR limit for mobile devices set by FCC/IC is 1.6 W/kg averaged over 1 gram of tissue for the body or head (4.0 W/kg averaged over 10 grams of tissue for the extremities - hands, wrists, ankles, and feet).
Regulatory and Safety Information 47The highest reported SAR values of the Palm® Pre™ 2 Phone are:The SAR limit recommended by The Council of the European Union is 2.0 W/kg averaged over 10 grams of tissue for the body or head (4.0 W/kg averaged over 10 grams of tissue for the extremities – hands, wrists, ankles, and feet).In order to comply with FCC, IC, and EU RF exposure safety guidelines, users MUST use one of the following types of body-worn accessories:1A Palm® brand body-worn accessory that has been tested for (specific absorption rate) SAR compliance and is intended for use with this product.2An accessory that contains NO metal (snaps, clips, etc.) and provides AT LEAST 1.5 cm of separation between the user's body and the unit.Do NOT use the device in a manner such that it is in direct contact with the body (i.e., on the lap or in a breast pocket). Such use will likely exceed the FCC RF safety exposure limits. See fcc.gov/oet/rfsafety for more information on RF exposure safety.To view the most recent SAR values of the Palm® Pre™ 2 phone, visit palm.com/sarumts-pre.Body-worn operation: Important safety information regarding radio frequency (RF) radiation exposure: To ensure compliance with RF exposure guidelines the phone must be used with a minimum of 1.5 cm separation from the body. Failure to observe these instructions could result in your RF exposure exceeding the relevant guideline limits.Limiting exposure to radio frequency (RF) fields: For individuals concerned about limiting their exposure to RF fields, the World Health Organization (WHO) provides the following advice:Precautionary measures: Present scientific information does not indicate the need for any special precautions for the use of mobile phones. If individuals are concerned, they might choose to limit their own or their children's RF exposure by limiting the length of calls, or using “hands-free” devices to keep mobile phones away from the head and body.Further information on this subject can be obtained from the WHO home page who.int/mediacentre/factsheets/fs193/en/index.html WHO Fact sheet 193: June 2000.Protecting your BatteryThe guidelines listed below help you get the most out of your battery's performance.Recently there have been some public reports of wireless phone batteries overheating, catching fire, or exploding. It appears that many, if not all, of these reports involve counterfeit or inexpensive, aftermarket-brand batteries with unknown or questionable manufacturing standards. Use only manufacturer-approved batteries and accessories found at Carrier Stores or through your device's manufacturer. Buying the right batteries and accessories is the best way to ensure they are genuine and safe.• In order to avoid damage, charge the battery only in temperatures that range from 0° C to 45° C.• Don't use the battery charger in direct sunlight or in high humidity areas, such as the bathroom.• Never dispose of the battery by incineration.• Keep the metal contacts on top of the battery clean.• Don't attempt to disassemble or short-circuit the battery.• The battery may need recharging if it has not been used for a long period of time.• It's best to replace the battery when it no longer provides acceptable performance. It can be recharged hundreds of times before it needs replacing.• Don't store the battery in high temperature areas for long periods of time. It's best to follow these storage rules:Less than one month: -20° C to 60° CMore than one month: -20° C to 45° CBattery Handling• Do not disassemble or open; crush, bend or deform; puncture or shred the battery.• Do not modify or remanufacture, attempt to insert foreign objects into the battery; immerse or expose to water or other liquids; expose to fire, explosion, or other hazard. • Only use the battery for the system for which it is specified. • Only use the battery with a charging system that has been qualified with the system per the IEEE/CTIA-1725 standard. Use of an unqualified battery or charger may present a risk of fire, explosion, leakage, or other hazard. • Do not short-circuit a battery or allow metallic conductive objects to contact battery terminals. • Replace the battery only with another battery that has been qualified with the system per IEEE/CTIA-1725. Use of an unqualified battery may present a risk of fire, explosion, leakage, or other hazard. • Promptly dispose of used batteries in accordance with local regulations.Ta bl e  2 .Maximum 1g SAR values (W/kg) FCC Head 1.01Body 1.29Table 3. SAR Values (CE)Maximum 10g SAR values (W/kg) CE Head 0.930Body 0.618
48 Regulatory and Safety Information• Battery usage by children should be supervised. • Avoid dropping the phone or battery. If the phone or battery is dropped, especially on a hard surface, and the user suspects damage, take it to a service center for inspection. • Do not handle a damaged or leaking Lithium-Ion (LI-ion) battery as you can be burned.• Improper battery use may result in a fire, explosion, or other hazard.• Based on DOT rules, spare batteries must not be transported in checked luggage on commercial flights. Spare batteries can only be transported in carry-on luggage. For more information: http://safetravel.dot.gov/whats_new_batteries.htmlPower SpecificationsUse only Palm-approved power accessories such as AC-power adapters, USB cables, and batteries. Unauthorized and non-approved batteries will NOT operate with the Pre 2 phone.AC Power Adapter source: PalmPart Number: 157-10108-00Input Rating: 100-240 Vac, 50/60Hz, 0.2AOutput Rating: 5Vdc, 1000mABattery Source: PalmType: Rechargeable Li-ion PolymerModel: 157-10119-00Rating: 3.7Vdc, 1150mAh (minimum)Recycling and DisposalThis symbol indicates that Palm products should be recycled and not be disposed of in unsorted municipal waste. Please return Palm products to the electrical and electronic equipment collection points in your municipality or county or to a facility that properly recycles electrical and electronic equipment. These collection points are available free of charge. For detailed information please contact your municipality or county. For information on Palm’s environmental programs, visit palm.com/environment.Hazardous substances that may be included in electronic products can potentially affect human health and the environment. Recycling benefits the environment by diverting waste from landfills and by recovering materials that may be recycled into other products. Responsible recycling ensures materials are properly collected and disposed. Palm is committed to supporting the collection and recycling of its products. Palm is committed to participate in and support the European Union WEEE Directive (2002/96/EC) and the protection of the environment for future generations. For more information on the WEEE Directive implementation in the various EU member states please see weee-forum.org.It is everyone's responsibility to ensure that electrical and electronic products are properly reused, recycled, or recovered.As part of Palm's corporate commitment to be a good steward of the environment, we strive to use environmentally friendly materials, reduce waste, and collaborate with our channel partners to raise awareness and help keep Palm handheld devices, phones, and mobile companions out of landfills through evaluation and disposition for reuse and recycling. Visit palm.com/recycle for additional details and information about how you can help reduce electronic waste. User SafetyOperational WarningsIMPORTANT INFORMATION ON SAFE AND EFFICIENT OPERATION. Read this information before using your phone. For the safe and efficient operation of your phone, observe these guidelines:Potentially explosive atmospheres: Turn off your phone when you are in any areas with a potentially explosive atmosphere, such as fueling areas (gas or petrol stations, below deck on boats), storage facilities for fuel or chemicals, blasting areas and areas near electrical blasting caps, and areas where there are chemicals or particles (such as metal powders, grains, and dust) in the air.Interference to medical and personal Electronic Devices: Most but not all electronic equipment is shielded from RF signals and certain electronic equipment may not be shielded against the RF signals from your phone.Pacemakers: The Health Industry Manufacturers Association recommends that a minimum separation of 15 centimeters be maintained between a phone and a pacemaker to avoid potential interference with the pacemaker. These recommendations are consistent with the independent research by the recommendations of Wireless Technology Research.Persons with pacemakers should do the following:Audio Safety: This phone is capable of producing loud noises which may damage your hearing. When using the speakerphone feature, it is recommended that you place your phone at a safe distance from your ear.Other Medical Devices, Hospitals: If you use any other personal medical device, consult the manufacturer of your device to determine if it is adequately shielded from external RF energy. Your physician may be able to assist you in obtaining this information. Turn your phone OFF in health care facilities when any regulations posted in these areas instruct you to do so. Hospitals or health care facilities may be using equipment that could be sensitive to external RF energy.Repetitive Motion Injuries: When using the keyboard or playing games on your phone, you may experience discomfort in your neck, shoulders, hands, arms, or other parts of the body. To avoid any injury, such as tendonitis, carpal tunnel syndrome, or other musculoskeletal disorder, make sure to take necessary breaks from use, take longer rests (such as several hours) if discomfort or tiring begins, and see a doctor if discomfort persists. To minimize the risk of Repetitive Motion Injuries, when texting or playing games with your phone:• Do not grip the phone too tightly• Press the buttons lightly
Regulatory and Safety Information 49• Make use of the special features in the handset which minimize the number of buttons which have to be pressed, such as message templates and predictive text• Take lots of breaks to stretch and relaxBlackouts and Seizures: Blinking lights, such as those experienced with television or playing video games may cause some people to experience blackout or seizure, even if never experienced before. In the event a phone user should experience any disorientation, loss of awareness, convulsion, eye or muscle twitching, or other involuntary movements, stop use immediately and consult a doctor. Individuals with personal or family history of such events should consult a doctor before using the device. To limit the possibility of such symptoms, wherever possible every hour take a minimum break of 15 minutes, use in a well lighted area, view the screen from the farthest distance, and avoid exposure to blinking lights if you are tired.Operating Machinery: Do not use your phone while operating machinery. Full attention must be given to operating the machinery in order to reduce the risk of an accident.Aircraft: While in aircraft, follow all instructions regarding the operation of your phone. Use of your phone while on board an aircraft must be done in accordance and in compliance with airline instructions and regulations.Vehicles with Air Bags: Your phone should not be placed in a position that would affect the operation of air bag deployment or in a position that, should the air bag inflate, could propel the phone. Air bags will inflate with great force and care should be taken to protect yourself and your phone within a vehicle that has air bags. Do not place a phone in the area over an air bag or in the air bag deployment area. Store the phone safely before driving the vehicle.Hearing Aids: People with hearing aids or cochlear implants may experience interfering noises when using wireless devices or when one is nearby. The level of interference will depend on the type of hearing device and the distance from the interference source. Increasing the separation between them may reduce the interference. You may also consult your hearing aid manufacturer to discuss alternatives.Small children: Do not leave your phone and its accessories within the reach of small children or allow them to play with it. They could hurt themselves or others, or could accidentally damage the phone. Your phone contains small parts with sharp edges that may cause an injury or which could become detached and create a choking hazard.Keep the device away from the abdomens of pregnant women and adolescents, particularly when using the device hands-free.To reduce exposure to radiation, use your device in good reception areas, as indicated by the bars on your phone, at least 3 to 4 bars. Caution: Avoid potential hearing loss Prolonged exposure to loud sounds (including music) is the most common cause of preventable hearing loss. Some scientific research suggests that using portable audio devices, such as portable music players and cellular telephones, at high volume settings for long durations may lead to permanent noise-induced hearing loss. This includes the use of headphones (including headsets, ear buds, and Bluetooth® or other wireless devices). Exposure to very loud sound has also been associated in some studies with tinnitus (a ringing in the ear), hypersensitivity to sound, and distorted hearing. Individual susceptibility to noise-induced hearing loss and other potential hearing problems varies. The amount of sound produced by a portable audio device varies depending on the nature of the sound, the device, the device settings, and the headphones. You should follow some common sense recommendations when using any portable audio device:• Set the volume in a quiet environment and select the lowest volume at which you can hear adequately.• When using headphones, turn the volume down if you cannot hear the people speaking near you or if the person sitting next to you can hear what you are listening to.• Do not turn the volume up to block out noisy surroundings. If you choose to listen to your portable device in a noisy environment, use noise-cancelling headphones to block out background environmental noise.• Limit the amount of time you listen. As the volume increases, less time is required before your hearing could be affected.• Avoid using headphones after exposure to extremely loud noises, such as rock concerts, that might cause temporary hearing loss. Temporary hearing loss might cause unsafe volumes to sound normal.• Do not listen at any volume that causes you discomfort. If you experience ringing in your ears, hear muffled speech, or experience any temporary hearing difficulty after listening to your portable audio device, discontinue use and consult your doctor.• You can obtain additional information on this subject from the following sources:American Academy of Audiology 11730 Plaza America Drive, Suite 300Reston, VA 20190Voice: (800) 222-2336Email: info@audiology.orgInternet: audiology.orgNational Institute on Deafness and Other Communication Disorders National Institutes of Health31 Center Drive, MSC 2320Bethesda, MD USA 20892-2320Voice: (301) 496-7243Email: nidcdinfo@nih.govInternet: nidcd.nih.gov/health/hearingNational Institute for Occupational Safety and Health 395 E Street, S.W., Suite 9200Patriots Plaza BuildingWashington, DC 20201Voice: 1-800-CDC-INFO (1-800-232-4636)Internet: cdc.gov/niosh/topics/noise
50 Regulatory and Safety InformationProduct Handling & SafetyGeneral statement on handling and use: You alone are responsible for how you use your phone and any consequences of its use.You must always switch off your phone wherever the use of a phone is prohibited. Use of your phone is subject to safety measures designed to protect users and their environment.• Always treat your phone and its accessories with care and keep it in a clean and dust-free place.• Do not expose your phone or its accessories to open flames or lit tobacco products.• Do not expose your phone or its accessories to liquid, moisture, or high humidity.• Do not drop, throw, or try to bend your phone or its accessories.• Do not use harsh chemicals, cleaning solvents, or aerosols to clean the device or its accessories.• Do not paint your phone or its accessories.• Do not attempt to disassemble your phone or its accessories; only authorized personnel must do so.• Do not expose your phone or its accessories to extreme temperatures, minimum 0° C to 45° C.• Please check local regulations for disposal of electronic products.• Do not carry your phone in your back pocket as it could break when you sit down.Battery: Your phone includes an internal lithium-ion or lithium-ion polymer battery. Please note that use of certain data applications can result in heavy battery use and may require frequent battery charging. Any disposal of the phone or battery must comply with laws and regulations pertaining to lithium-ion or lithium-ion polymer batteries. Demagnetization: To avoid the risk of demagnetization, do not allow electronic devices or magnetic media close to your phone for a long time.Normal use position: When making or receiving a phone call, hold your phone to your ear, with the bottom towards your mouth or as you would a fixed line phone.Emergency calls: This phone, like any wireless phone, operates using radio signals, which cannot guarantee connection in all conditions. Therefore, you must never rely solely on any wireless phone for emergency communications.Phone heating: Your phone may become warm during charging and during normal use.Accessories: Use only approved accessories. Do not connect with incompatible products or accessories. Take care not to touch or allow metal objects, such as coins or key rings, to contact or short-circuit the battery terminals.Connection to a car: Seek professional advice when connecting a phone interface to the vehicle electrical system.Faulty and damaged products: Do not attempt to disassemble the phone or its accessory. Only qualified personnel must service or repair the phone or its accessory. If your phone or its accessory has been submerged in water, punctured, or subjected to a severe fall, do not use it until you have taken it to be checked at an authorized service center.Interference in cars and to other Electronic Devices: Please note that because of possible interference to electronic equipment, some vehicle manufacturers forbid the use of mobile phones in their vehicles unless a hands-free kit with an external antenna is included in the installation. RF energy may affect improperly installed or inadequately shielded electronic operating and entertainment systems in motor vehicles. Check with the manufacturer or representative to determine if these systems are adequately shielded from external RF energy. Also check with the manufacturer of any equipment that has been added to the vehicle.Driving SafetyDriving Safety Tips Overview Always obey all laws and regulations on the use of the phone in your driving area.Safety–Your most important call. The Wireless Industry reminds you to use your phone safely when driving.1Get to know your phone and its features, such as speed-dial and redial.2Use a hands-free device where it is allowed. In some areas, you may not use your phone while driving even with a hands-free accessory.3Position your phone within easy reach.4Let the person you are speaking to know you are driving; if necessary, suspend the call in heavy traffic or hazardous weather conditions.5Do not take notes, look up phone numbers, read/write email, or surf the Internet while driving.6Dial sensibly and assess the traffic; if possible, place calls when you are not moving or before pulling into traffic.7Do not engage in stressful or emotional conversations that may divert your attention from the road.8Dial your national emergency number to report serious emergencies. This is a free call from your phone.9Use your phone to help others in emergencies.10 Call roadside assistance or a special non-emergency wireless number when necessary.Driving Safety Tip Details 1Get to know your phone and its features such as speed-dial and redial. Carefully read your instruction manual and learn to take advantage of valuable features most phone models offer, including automatic redial and memory dial. Also, work to memorize the phone keyboard so you can use the speed-dial function without taking your attention off the road.2Use a hands-free device. A number of hands-free phone accessories are readily available today. Whether you choose an installed mounted device for your phone or a speakerphone
Regulatory and Safety Information 51accessory, take advantage of these devices. If driving while using a phone is permitted in your area, we recommend using a phone headset or a hands-free car kit (sold separately). However, be aware that use of a headset that covers both ears impairs your ability to hear other sounds. Use of such a headset while operating a motor vehicle or riding a bicycle may create a serious hazard to you and/or others, and may be illegal. If you must use a stereo headset while driving, place a speaker in only one ear. Leave the other ear free to hear outside noises, and do so only if it is legal and you can do so safely.3Make sure you place your phone within easy reach and where you can grab it without removing your eyes from the road. If you get an incoming call at an inconvenient time, let your voicemail answer it for you.4Suspend conversations during hazardous driving conditions or situations. Let the person you are speaking to know you are driving; if necessary, suspend the call in heavy traffic or hazardous weather conditions. Rain, sleet, snow, and ice can be hazardous, but so is heavy traffic. As a driver, your first responsibility is to pay attention to the road.5Do not take notes, look up phone numbers, read/write email, or surf the Internet while driving. If you are reading an address book or business card while driving a car, or writing a to-do list, then you are not watching where you are going. It's common sense. Do not get caught in a dangerous situation because you are reading or writing and not paying attention to the road or nearby vehicles.6Dial sensibly and assess the traffic; if possible, place calls when you are not moving or before pulling into traffic. Try to plan your calls before you begin your trip, or attempt to schedule your calls with times you may be temporarily stopped or otherwise stationary. But if you need to dial while driving, follow this simple tip: dial only a few numbers, check the road and your mirrors, then continue.7Do not engage in stressful or emotional conversations that may be distracting. Stressful or emotional conversations and driving do not mix—they are distracting and even dangerous when you are behind the wheel. Make people you are talking with aware you are driving and if necessary, suspend phone conversations which have the potential to divert your attention from the road.8Use your phone to call for help. Your phone is one of the greatest tools you can own to protect yourself and your family in dangerous situations-with your phone at your side, help is only three numbers away. Dial your national emergency number in the case of fire, traffic accident, road hazard, or medical emergencies. Remember, your national emergency number is a free call on your phone.9Use your phone to help others in emergencies. If you see an auto accident, crime in progress, or other serious emergency where lives are in danger, call your national emergency number, as you would want others to do for you.10 Call roadside assistance or a special wireless non-emergency assistance number when necessary. Certain situations you encounter while driving may require attention, but are not urgent enough to merit a call to your national emergency number. But you can still use your phone to lend a hand. If you see a broken-down vehicle posing no serious hazard, a broken traffic signal, a minor traffic accident where no one appears injured, or a vehicle you know to be stolen, call roadside assistance or other special non-emergency wireless number.General Operation Prolonged Views of Screen: If you are driving, do not access any function requiring a prolonged view of the screen. Pull over in a safe and legal manner before attempting to access a function of the system requiring prolonged attention. Even occasional short scans to the screen may be hazardous if your attention has been diverted away from your driving task at a critical time.Volume Setting: Do not raise the volume excessively. Keep the volume at a level where you can still hear outside traffic and emergency signals while driving. Driving while unable to hear these sounds could cause an accident.Let Your Judgment Prevail: The Device Software is only an aid. Make your driving decisions based on your observations of local conditions and existing traffic regulations. The Device Software is not a substitute for your personal judgment.Hands-Free Capability All CTIA Certified portable products provide the consumer with a toll-free number for the purchase of a compatible hands-free device, call 1-800-881-7256.ESD SafetyElectrostatic discharge (ESD) can cause damage to electronic devices if discharged into the device, so you should take steps to avoid such an occurrence. Do not touch the SIM card’s metal connectors or battery contacts.Description of ESD Static electricity is an electrical charge caused by the buildup of excess electrons on the surface of a material. To most people, static electricity and ESD are nothing more than annoyances. For example, after walking over a carpet while scuffing your feet, building up electrons on your body, you may get a shock—the discharge event—when you touch a metal doorknob. This little shock discharges the built-up static electricity.ESD-susceptible equipment Even a small amount of ESD can harm circuitry, so when working with electronic devices, take measures to help protect your electronic devices, including your Palm phone, from ESD harm. While Palm has built protections against ESD into its products, ESD unfortunately exists and, unless neutralized, could build up to levels that could harm your equipment. Any electronic device that contains an external entry point for plugging in anything from cables to docking stations is susceptible to entry of ESD. Devices that you carry with you, such as your device, build up ESD in a unique way because the static electricity that may have built up on your body is automatically passed to the device. Then, when the device is connected to another device such as a docking station, a discharge event can occur.Precautions against ESD Make sure to discharge any built-up static electricity from yourself and your electronic devices before touching an electronic device or connecting one device to another. The recommendation from Palm is that you take this precaution before connecting your device to your computer, placing the phone in a docking station, or connecting it to any other device. You can do this in many ways, including the following:• Ground yourself when you’re holding your mobile device by simultaneously touching a metal surface that is at earth ground. For example, if your computer has a metal case and is
52 Regulatory and Safety Informationplugged into a standard three-prong grounded outlet, touching the case should discharge the ESD on your body.• Increase the relative humidity of your environment.• Install ESD-specific prevention items, such as grounding mats.Conditions that enhance ESD occurrences Conditions that can contribute to the buildup of static electricity in the environment include the following:•Low relative humidity.• Material type. (The type of material gathering the charge. For example, synthetics are more prone to static buildup than natural fibers like cotton.)• The rapidity with which you touch, connect, or disconnect electronic devices.While you should always take appropriate precautions to discharge static electricity, if you are in an environment where you notice ESD events, you may want to take extra precautions to protect your electronic equipment against ESD.Owner’s Record The model number, regulatory number, and serial number are located on a nameplate inside the battery compartment. Record the serial number in the space provided below. This will be helpful if you need to contact us about your phone in the future.Product: Palm® Pre™ 2 PhoneModel: Serial No.:
Index 53IndexNUMERICS3G2 files 333GP files 333GP2 files 333GPP files 33Aaccented characters 13accessories 50accountscontacts and 28Acrobat Reader files. See PDF filesAdd An Account optionEmail 22Add device option 20Add Picture 24aircrafts 49airplane mode 9–??alarms 14All Calendars view 30alternate characters 12animations in Help 44answering phone 19antenna 46application menu 14applicationsclosing 12displaying 11Help 44in Quick Launch 10moving between 11opening 10–11artists 34attachmentsopening 24auto-shut off interval 40Bback cover release 8back gesture 11Back view 8batterycaring for 47charging 44blackouts 49Bluetooth devicesadding 20phone calls and 20setting up 20turning on and off 36Bluetooth wireless technology 20Bottom view 8Brightness slider 40browser. See web browserCcalendar accounts 30calendarsgetting started with 30saving 30camera 32–??capitalization 12Caps Lock 12car kits 20Card view 11, 12See also wallpaperChange Wallpaper option 40character searches 18characters 12, 13charging the battery 44children, safety of 49Clips (animations in Help) 44connection menu 14connectionsBluetooth devices and 20Internet 35contact header 29contact matches 18contactsadding 28dialing by name 18displaying 29editing 29getting started with 28ringtones for 41saving information for 28searching 28selecting 19speed dials for 29synchronizing 28, 30conversationsSee also instant messagescreatingcontacts 28emails 22events 30instant messages 25multimedia messages 23–24customer support 44customizinginstant messaging accounts 24
54 IndexDdemagnetization 50dial pad 18dialing 18–??, 29Digital Rights Management (DRM) 33display size 38displayingcontacts 29multimedia messages 24pictures 32text messages 24videos 33documentation 44downloadingemail 23pictures 32driving safety tips 50DRM-free music files 33Eeditingcontacts 29electrostatic discharge (ESD) 51emailcreating 22receiving 23retrieving 23sending 22synchronizing 23email accountsmultiple 22setting up 22–??email addressesentering 22email service providers 22emergency calls 50ESD safety ??–52eventscreating 30saving 30explosive atmospheres 48FFCC statements 45file typesmusic 33picture 32video 33filescopying 33opening 38searching for 38finding. See searchingFront View 6Ggenres 34Global Address Lookup option 29HH.263 files 33H.264 files 33hands-free devicessetting up 20headsets ??–20hearing aids 49hearing loss 49helpSee also troubleshootingHelp application 44hospitals 48Iiconssignal-strength 10informationentering 12–13saving 13, 28instant messages 24–??accounts 24–25creating 25sending 25JJPG files 23, 24, 32Kkeyboard 6, 12, 18Llabels 28Launcherpages 7lighted dial pad 18listsselecting items in 13lock icon 36lowercase letters 12MM4V files 33machinery, operating 49medical devices 48menus 13–14messages. See email; multimedia messages; text messages; voicemail; instant messagesMP4 files 33MPEG4 files 33multimedia messagesaddressing 23attachments 24creating 23–24displaying 24pictures and 24sending 23–24multitasking 10music 33–??answering phone and 19listening to 20, 33Music application 33–??mute 19NnamesSee also user namesdialing by 18normal use position 50notificationscontacts and 19icons 7responding to 14numbers 12
Index 55Oonline status 25online support 44openingapplication menu 14applications 10–11attachments 24connection menu 14files 38web pages 36Option key 7, 12organizer features 27Ppacemakers 48page indicators 7Palm online support 44Palm profile 9passwordsentering 12PDF files and 38pauses in phone numbers 28PDF files 38–??PDF View 38–??phoneSee also phone callsanswering 19caring for 50dialing 18–??, 29disposing of 48getting started with 6Help 44redialing 18safety information 45–52turning on and off 9volume 20phone calls 18–19driving and 50hands-free devices and 20hold 19making 18–??messages during 23receiving 19replying to 19ringtones for 41sending to voicemail 19phone headsets ??–20photos. See picturesPhotos application 32–??pictures 32–??displaying 32downloading 32sending 23, 24taking 32–??wallpaper 40playingvoicemail messages 19power accessories 48power button 8, 9priority settings 22punctuation 12QQuick Launchapplications in 10Rradio frequency 45, 46recycling 48redialing 18repetitive motion injuries 48ringer switch 8, 40ringtone volume 40ringtones 40–??Ssafety information 45–52SAR 46savingcalendar events 30contacts 28information 13, 28screenbrightness 40caring for 7turning on and off 9, 40Screen & Lock application 40–??searchingfor applications 11for contacts 28for files 38for websites 36secure websites 36securitylocking the screen 40seizures 49sendinginstant messages 25multimedia messages 23–24pictures 23, 24text messages 23–24Set speed dial command 29setting upBluetooth devices 20email accounts 22–??hands-free devices 20instant messaging accounts 24voicemail 19Shift 12signal 10songs. See musicsounds 40–??See also specific typesSounds & Ringtones application 40–??speakerphone 19Specific Absorption Rate. See SARspeed dialing 18, 29stereo headsets 20streamingmusic 33supported file types. See file types; specific file typesSym key 7symbols 13synchronizationemail 23online contacts 28, 30Ttechnical support 44text messagesaddressing 23creating 23–24displaying 24sending 23–24Tips (Help application) 44Top view 8
56 Indextouchscreen 7See also screenstroubleshooting 43Turn off Airplane Mode option 10Turn on Airplane Mode option 10turning on and offBluetooth feature 36phone 9screen 9Wi-Fi 36wireless services 9Uup gesture 11uppercase letters 12URLs 36user safety information 48Vvideosanswering phone and 19watching ??–33voicemail 19volumeadjusting for phone calls 20system sounds 40Wwaking up screen 9wallpaper 40See also Card viewweb addresses 36Web application 36–??web browser 36–??web pagesopening 36web-based email 22–??websitesaccessing customer support 44accessing secure 36connecting to 36playing music from 33searching for 36Wi-Fiturning on and off 36wireless servicesturning on and off 9, 10

Navigation menu