Panasonic Mobile Communications Development of USA 10A006A EB-TX310 User Manual OI
Panasonic Mobile Communications Development Corporation of USA EB-TX310 OI
Contents
- 1. Users Manual Part 1
- 2. Users Manual Part 2
- 3. Users Manual Part 3
- 4. Users Manual Part 4
Users Manual Part 3
Additional Operations 39
Advanced Operations
Additional Operations
Many features and settings are accessible only through the phone’s Menu.
This chapter will show you how to use your phone’s Menu to get the most
from these advanced features. If a particular Menu feature is not listed in
this chapter as it appears on the phone’s display, please turn to
“Phonebook Features” on page 31 or to “Service Provider Features” on
page 63, or check the Index for pointers to where the information is
located.
For an overview of how to move through the Menu and how to use the
shortcut keys, see “Moving through the Menu” in Chapter 2 and the Menu
Map inside the front cover.
Call History
From the Call History menu you can view and delete information related to
calls you have received and placed. You can also reset the timer that
monitors the time you spend in conversation on the phone.
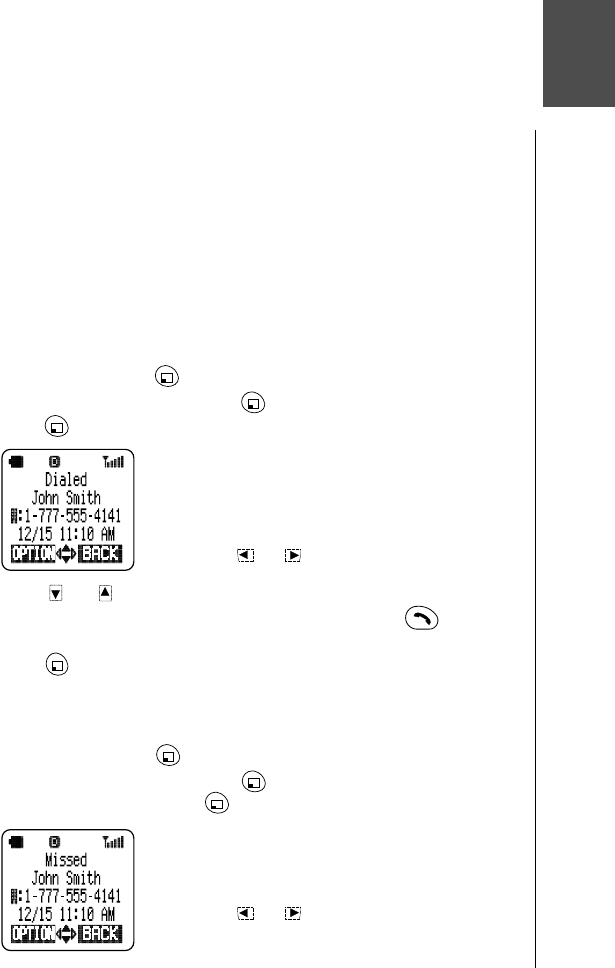
Dialed Calls
1From standby, press (MENU) to enter the Main Menu.
2Scroll to Call History and press (OK).
3Press (OK) to select Dialed.
• The last dialed number is displayed.
• If you place a phone call to a number that is
already in your dialed numbers list, the newer call
record will replace the older one.
•Missed or Received calls can be checked by
pressing or .
4Press or to scroll through the last 10 dialed numbers.
5When the number you want to call is displayed, press .
OR
Press (OPTION) to add a prefix, to delete a number, to save a
number, or to delete all entries in the list. See “Call History Options” on
page 40 for instructions.
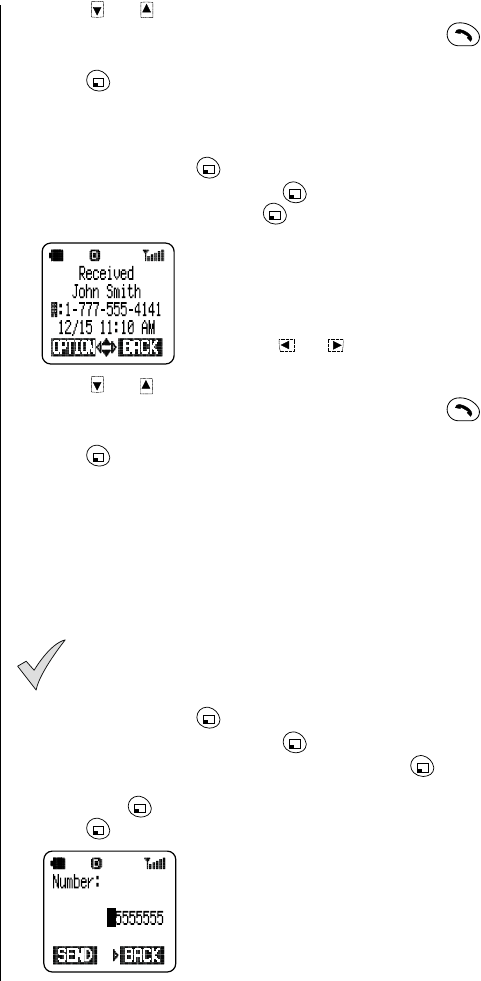
Missed Calls
1From standby, press (MENU) to enter the Main Menu.
2Scroll to Call History and press (OK).
3Scroll to Missed and press (OK).
• The last missed (unanswered) number is
displayed (unless the call was from a private or
unlisted number).
•Dialed or Received calls can be checked by
pressing or .
• A call without caller ID will be stored as Private ID.
6
Chapter 6
40 Additional Operations
4Press or to scroll through the last 10 missed calls.
5When the number you want to call is displayed, press .
OR
Press (OPTION) to add a prefix, to delete a number, to save a
number, or to delete all entries in the list. See “Call History Options” on
page 40 for instructions.
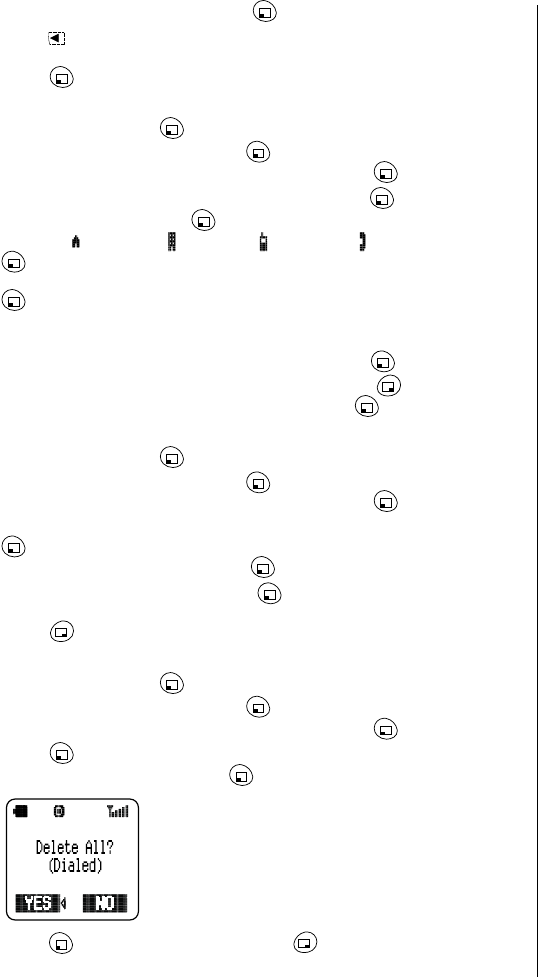
Received Calls
1From standby, press (MENU) to enter the Main Menu.
2Scroll to Call History and press (OK).
3Scroll to Received and press (OK).
• The last received number is displayed.
• If you receive a phone call from a number that is
already in your received numbers list, the newer
record will replace the older one.
•Dialed or Missed calls can be checked by
pressing or .
4Press or to scroll through the last 10 received calls.
5When the number you want to call is displayed, press .
OR
Press (OPTION) to add a prefix, to delete a number, to save a
number, or to delete all entries in the list. See “Call History Options” on
page 40 for instructions.
Call History Options
Adding a Prefix
This feature is useful if you call a local number and then travel to another
location (with a different area code) and want to call the same number. You
have the option of adding an area code.
Note: If the phone number was originally stored with its area
code, the 1 is automatically inserted in front of it. If only the local
(7-digit) phone number was stored, you have to add the area
code and then the 1 is automatically inserted.
1From standby, press (MENU) to enter the Main Menu.
2Scroll to Call History and press (OK).
3Scroll to Dialed, Missed, or Received and press (OK).
4Scroll until the phone number you want to add a prefix to is displayed.
Then press (OPTION).
5Press (OK) to select Prefix.
Chapter 6
Additional Operations 41
6Scroll to Edit Number and press (OK).
7Press repeatedly to position the cursor in front of the phone number
and then enter the 3-digit area code.
8Press (SEND) to place the call.
Saving a Number
1From standby, press (MENU) to enter the Main Menu.
2Scroll to Call History and press (OK).
3Scroll to Dialed, Missed, or Received and press (OK).
4Scroll to the number you want to save and press (OPTION).
5Scroll to Save and press (OK).
6Scroll to Home #,
Work #,
Cell #, or Other # and press
(OK).
7To enter additional information, scroll to an item and press
(SELECT).
8Follow the prompts to enter the name and email address. See Chapter
4, “Text Entry Operations” for information on entering text.
9After entering the information for one item, press (OK).
10 When you have entered all the information, press (FINISH).
11 When prompted to save the information, press (YES).
Deleting a Number
1From standby, press (MENU) to enter the Main Menu.
2Scroll to Call History and press (OK).
3Scroll to Dialed, Missed, or Received and press (OK).
4Scroll to the phone number you want to delete and press
(OPTION).
5Scroll to Delete Entry and press (OK).
6When prompted to confirm, press (YES) to delete the entry.
OR
Press (NO) to cancel the deletion.
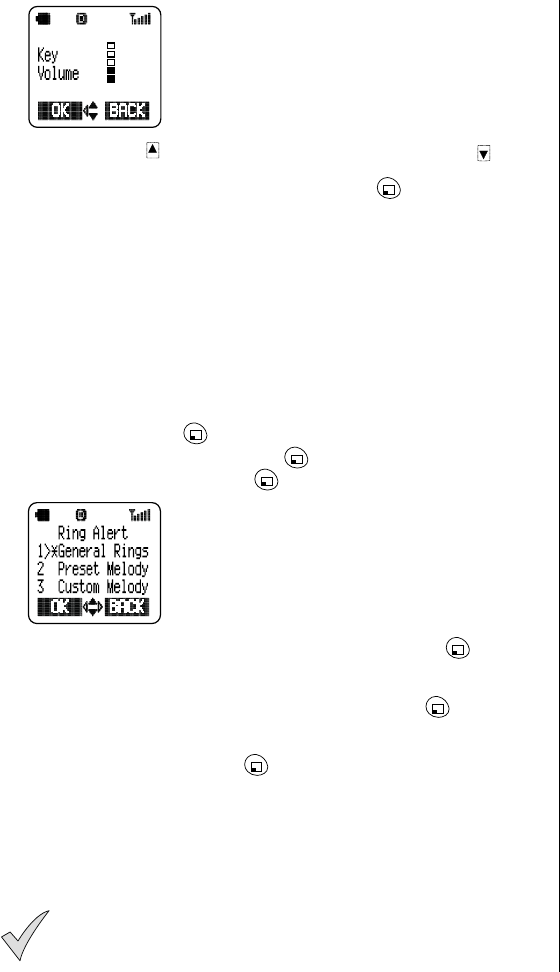
Deleting All Entries in a List
1From standby, press (MENU) to enter the Main Menu.
2Scroll to Call History and press (OK).
3Scroll to Dialed, Missed, or Received and press (OK).
4Press (OPTION).
5Scroll to Delete All and press (OK).
• The display prompts you to confirm the deletion of
all entries.
6Press (YES) to delete all entries or (NO) to cancel the deletion.

Chapter 6
42 Additional Operations
Setting Call Timers
The Last Call and All Calls options allow you to see how much time you
have spent connected on calls. The Custom call option allows you to reset
the timer. The Current Call option allows you to select whether or not the
timer is displayed during a call.
1From standby, press (MENU) to enter the Main Menu.
2Scroll to Call History and press (OK).
3Scroll to Call Timers and press (OK).
• Four options are shown: Last Call, All Calls, Custom, and Current
Call.
4To view the time you have spent on the Last Call or All Calls, scroll to
your choice and press (OK) to select.
OR
To view your phone’s call timer after the last reset, scroll to Custom
and press (OK). After viewing, press (OK) to return to standby.
Or, press (RESET), then (YES) to reset the custom timer.
OR
To determine whether the call timer will be displayed during
conversation, scroll to Current Call and press (OK) to select.
• The current setting is displayed with an asterisk ( ).
To change the setting, scroll to the other option and press (OK).
Note: The timers are displayed as hours:minutes:seconds.
When All Calls or Custom exceeds 999:59:59, the total timer
will be reset automatically.
Note: The actual time invoiced for calls by your service provider
will vary from the time represented on your call timer. The
invoiced time is affected by the number of network features
selected, when billing begins and ends, and rounding for billing.
Tone Settings
The Tone Settings menu lets you customize your phone for use in special
surroundings, or set the volume and tone of the phone’s ring. It also allows
you to select a specific alert for the text messages you receive.
Ring Volume
See “Setting Ring Volume” in Chapter 2.
Key Volume
1From standby, press (MENU) to enter the Main Menu.
2Scroll to Tone Settings and press (OK).
3Scroll to Key Volume and press (OK).
Chapter 6
Additional Operations 43
• The display indicates the current key volume
setting.
• If you select the lowest setting, the key volume is
muted (silent).
4Press and hold to increase key volume. Press and hold to
decrease key volume.
5When an acceptable volume is reached, press (OK) to select.
Ring Alert
See also “Selecting a Ring Alert” in Chapter 2.
Selecting a Ring Alert
You can choose your ring alert from four different types:
• General Rings
• Preset Melody
• Custom Melody
• Voice Ring
Within each type, you have further choices.
1From standby, press (MENU) to enter the Main Menu.
2Scroll to Tone Settings and press (OK).
3Scroll to Ring Alert and press (OK).
• The display lists the types of ring alerts.
4Scroll to the ring alert type you want to select and press (OK).
• If you select General Rings, you can choose from six different rings. As
you scroll through the rings, you can hear the ring associated with each
ring number. When you hear the ring you want, press (OK).
• If you select Preset Melody, you can choose from 12 preset melodies.
As you scroll through the list, the melodies are played. When you hear
the melody you want, press (OK).
• If you select Custom Melody, you can choose from five melodies that
you can customize and name. Initially, these melodies consist of the
notes of the musical scale. See “Custom Melodies” on page 46 for
instructions on composing your own melody.
• If you select Voice Ring, you can record the message you want to hear
when you receive a call. See “Voice Ring” on page 44.
Note: When selecting a new ring alert, you cannot hear the
sample alert if ring volume is muted (silent).
Chapter 6
44 Additional Operations
Voice Ring
You can choose to be notified by a voice message when you receive a call.
Note: This feature will not operate while you are in an analog
service area.
Recording a Voice Ring
1From standby, press (MENU) to enter the Main Menu.
2Press to scroll to Tone Settings and press (OK).
3Press to scroll to Ring Alert and press (OK).
4Scroll to Voice Ring and press (OK).
5Scroll to Record and press (OK).
• A start tone sounds. You have five seconds to record. An end tone
sounds at the end of five seconds and the recording automatically stops.
• You can record any sound you like, for up to five seconds.
6Record your voice ring and press (SAVE).
• The recording automatically plays back for you to hear.
7If satisfied with your recording, press to scroll to Accept and press
(OK).
OR
If you want to cancel the recording and re-record it, position the cursor
at Record and press (OK).
• The Ring Alert menu is displayed. Repeat from step 4 above.
To select Voice Ring as your ring or message alert type, see “Selecting a
Ring Alert” on page 43 or “Selecting a Message Alert” below.
Message Alert
You can choose from four different types for the alert you hear when a text
or voice message is received: General Rings, Preset Melody, Custom
Melody, Voice Ring.
Selecting a Message Alert
1From standby, press (MENU) to enter the Main Menu.
2Scroll to Tone Settings and press (OK).
3Scroll to Message Alert and press (OK).
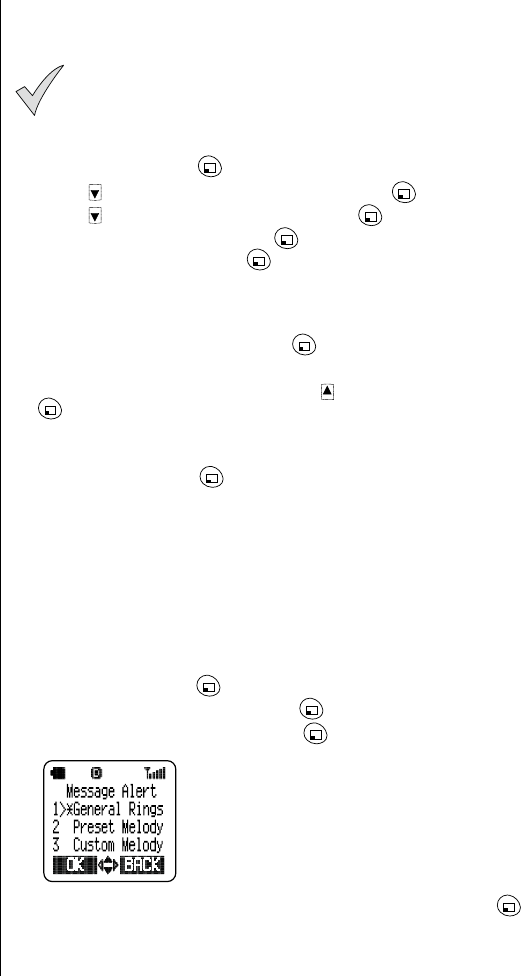
• The display lists the types of message alerts.
4Scroll to the message alert type you want to select and press (OK).
• If you select General Rings, you can choose from six different rings. As
you scroll through the rings, you can hear the ring associated with each

Chapter 6
Additional Operations 45
ring number. When you hear the ring you want for your message alert,
press (OK).
• If you select Preset Melody, you can choose from 12 preset melodies.
As you scroll through the list, the melodies are played. When you hear
the melody you want for your message alert, press (OK). You can
add to these melodies by accessing Panasonic’s website, downloading
melodies to your PC, and then transferring them to your phone. See
“Personalizing Your Phone” on page 15.
• If you select Custom Melody, you can choose from five custom
melodies. As you scroll through the list, the melodies are played. When
you hear the custom melody you want for your message alert, press
(OK). You can add to these custom melodies by accessing Panasonic’s
website, downloading melodies to your PC, and then transferring them
to your phone. See “Personalizing Your Phone” on page 15.
You cannot edit the melody or the title from the Message Alert menu—
you must use the Ring Alert menu for these actions. See “Editing the
Title of a Custom Melody” on page 46 and “Editing or Creating a Custom
Melody” on page 46.
• If you select Voice Ring, you can choose to hear a recorded voice when
you receive a message by pressing (OK). You cannot record a voice
ring from the Message Alert menu—you must record your voice ring
from the Ring Alert menu.
Note: When selecting a new message alert type, you cannot
hear the sample alert if ring volume is muted (silent).
Warning Tone
A warning tone is emitted when the battery charge is low, when attempting
to automatically redial a number, and when powering on the phone. The
Warning Tone setting allows you to turn some warning tones on and off.
You cannot disable or adjust the low battery warning tone.The low battery
warning tone sounds even if you are using the phone.
1From standby, press (MENU) to enter the Main Menu.
2Scroll to Tone Settings and press (OK).
3Scroll to Warning Tone and press (OK).
4To change the setting, scroll to the other option and press (OK) to
select.
Note: The low battery warning sounds regardless of Warning
Tone settings.
Chapter 6
46 Additional Operations
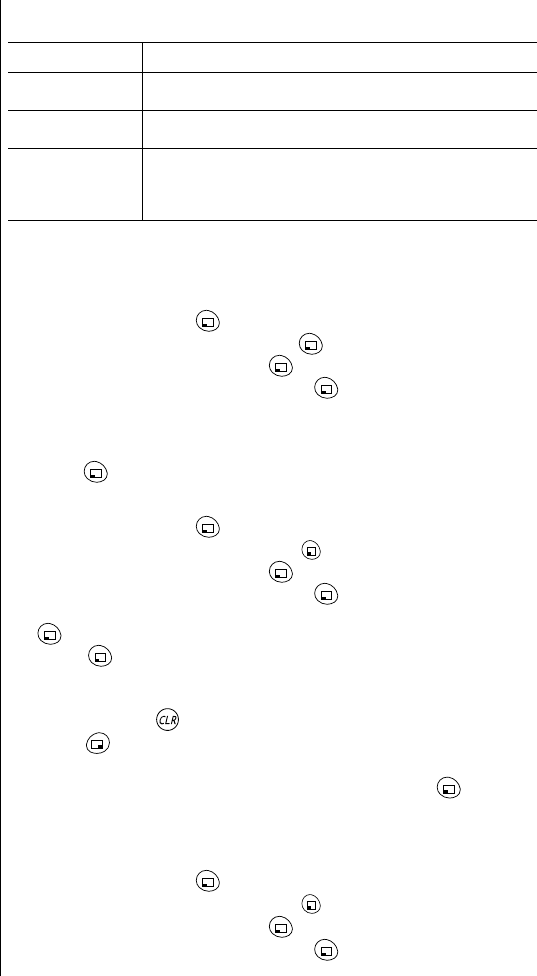
If your call cannot be completed because of a wireless system error, you
will hear one of the following warning tones:
Custom Melodies
Selecting a Custom Melody
1From standby, press (MENU) to enter the Main Menu.
2Scroll to Tone Settings and press (OK).
3Scroll to Ring Alert and press (OK).
4Scroll to Custom Melody and press (OK).
• The Custom Melody menu is displayed, listing five custom melodies.
• As you scroll through the list, each melody is played.
5Scroll through the list. When you reach the melody you want to select,
press (OK).
Editing the Title of a Custom Melody
1From standby, press (MENU) to enter the Main Menu.
2Scroll to Tone Settings and press (OK).
3Scroll to Ring Alert and press (OK).
4Scroll to Custom Melody and press (OK).
5Scroll to the custom melody whose title you want to modify and press
(EDIT).
6Press (OK) to select Edit Name.
• You are prompted to enter a name for the melody.
• If you have not yet assigned a name, Untitled 1 is displayed.
7Press and hold to erase the current name.
8Press (ABC) to change the text entry mode and enter the name
you want assigned to the melody (up to 16 characters).
9If you are satisfied with the name you entered, press (SAVE).
10 Press any key or wait three seconds to return to the renamed custom
melody screen.
Editing or Creating a Custom Melody
1From standby, press (MENU) to enter the Main Menu.
2Scroll to Tone Settings and press (OK).
3Scroll to Ring Alert and press (OK).
4Scroll to Custom Melody and press (OK).
Warning Tone Description
Dropped call tone A slow busy tone sounds when your call drops because of
low signal strength or if the other person hangs up.
Reorder tone A fast busy tone sounds when the cellular system is too
busy to complete the call.
Intercept tone A rapid high/low tone sounds when a call is attempted
before service has been established. Before placing a call,
confirm that you are within a wireless service provider’s
coverage area.
Chapter 6
Additional Operations 47
5Scroll to the custom melody you want to create or edit and press
(EDIT).
6Scroll to Edit Melody and press (OK).
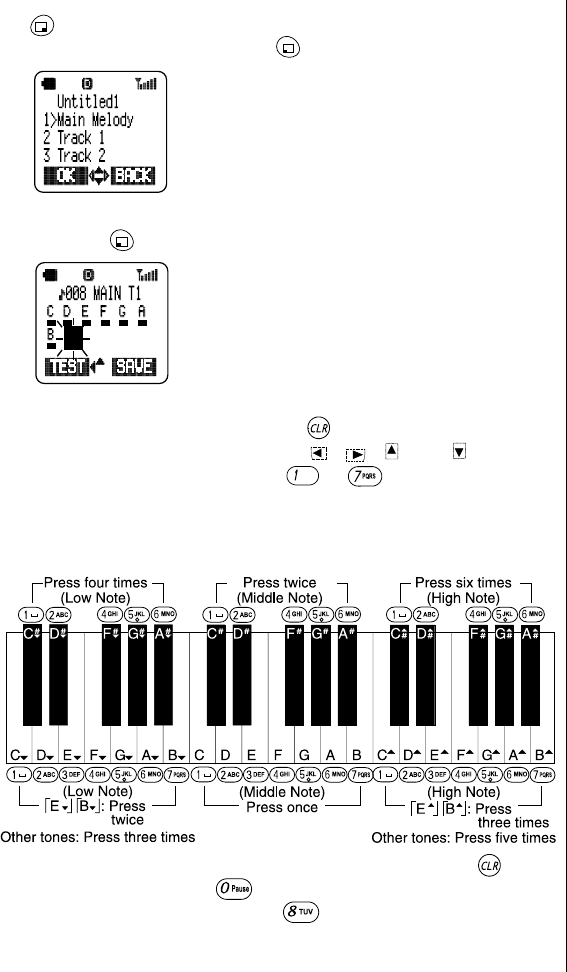
• A melody can consist of three separate parts (Main
Melody, Track 1 and Track 2), which are played
simultaneously.
7Select the part you want to edit: Main Melody, Track 1, or Track 2,
and press (OK).
• The notes for that part are displayed. (In this
example, Main Melody was selected.)
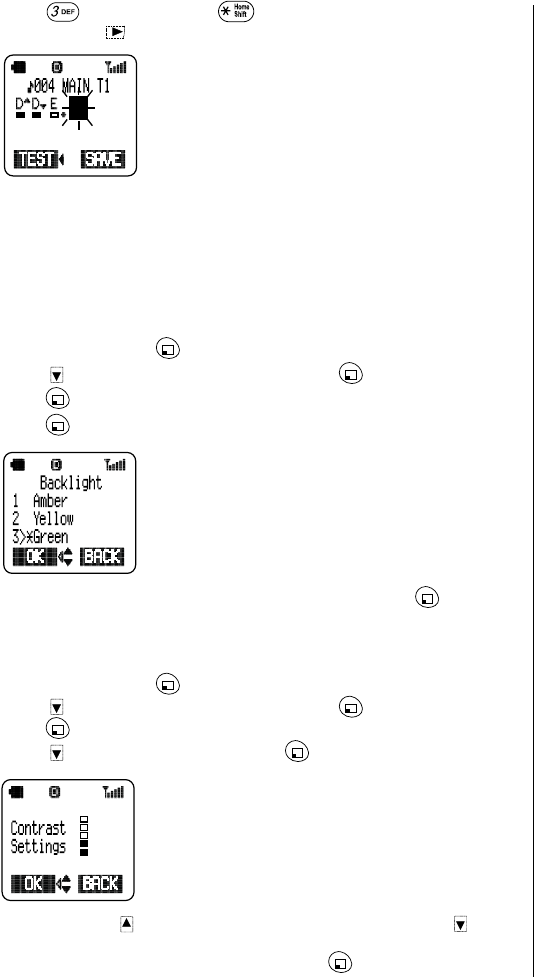
•008 is the current position of the cursor.
•T1 shows that the Tempo is set to 1.
• Initially, the notes C, D, E, F, G, A, B are displayed.
8Compose your own melody:
-To clear all notes, press and hold .
-To move about the screen, press , , , and .
-To enter notes, press the keys to .
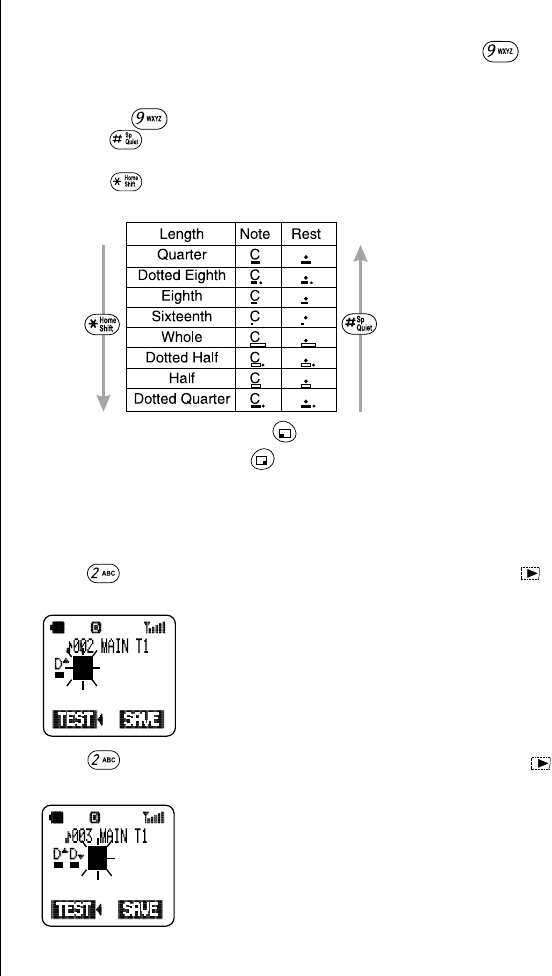
• Up to 255 notes in three octaves can be entered. ( the following
illustration, which shows the correspondence between the digit
keys on the keypad and the musical scale (in octaves).
-To erase a note, place the cursor on the note and press .
-To enter a rest, press .
-To set the tempo (1 - 4), press .
Chapter 6
48 Additional Operations
-To make a triplet of quarter notes or eighth notes:
1 Enter three notes (quarter or eighth).
2 Place the cursor on the first note of the three and press .
• The triplet is highlighted.
3 To release the triplet, place the cursor on any note of the triplet and
press .
-Press to increase the length of a note or rest (see following
illustration).
-Press to decrease the length of a note or rest (see following
illustration).
9To listen to your melody, press (TEST).
10 To save your melody, press (SAVE).
Example: Entering Notes
To compose your own melody, follow steps 1 - 8 on page 47 to clear the
melody on the display. The following steps are an example of how to
compose a new melody.
1Press five times to enter a quarter high note D, then press to
move the cursor.
2Press three times to enter a quarter low note D, then press
to move the cursor.
Chapter 6
Additional Operations 49
3Press once, then press six times to enter a half middle note
E, then press to move the cursor.
Phone Settings
The Phone Settings menu allows you to set specific features according to
your own preferences.
Display Settings
Backlight
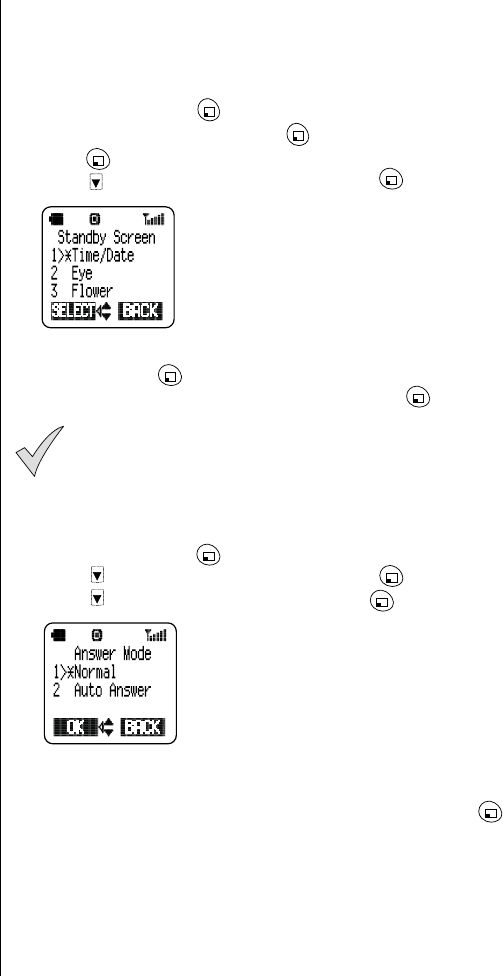
The backlight color can be set to amber, yellow, green, blue, purple, or teal.
1From standby, press (MENU) to enter the Main Menu.
2Press to scroll to Phone Settings. Press (OK).
3Press (OK) to select Display.
4Press (OK) to select Backlight.
5To change the setting, scroll to another color and press (OK) to
select it.
Display Contrast
The contrast level of the phone’s display can be adjusted.
1From standby, press (MENU) to enter the Main Menu.
2Press to scroll to Phone Settings. Press (OK).
3Press (OK) to select Display.
4Press to scroll to Contrast. Press (OK).
• The display indicates the current contrast setting.
5Press and hold to increase the contrast. Press and hold to
decrease the contrast.
6When you see the contrast you want, press (OK).
Chapter 6
50 Additional Operations
Standby Screen
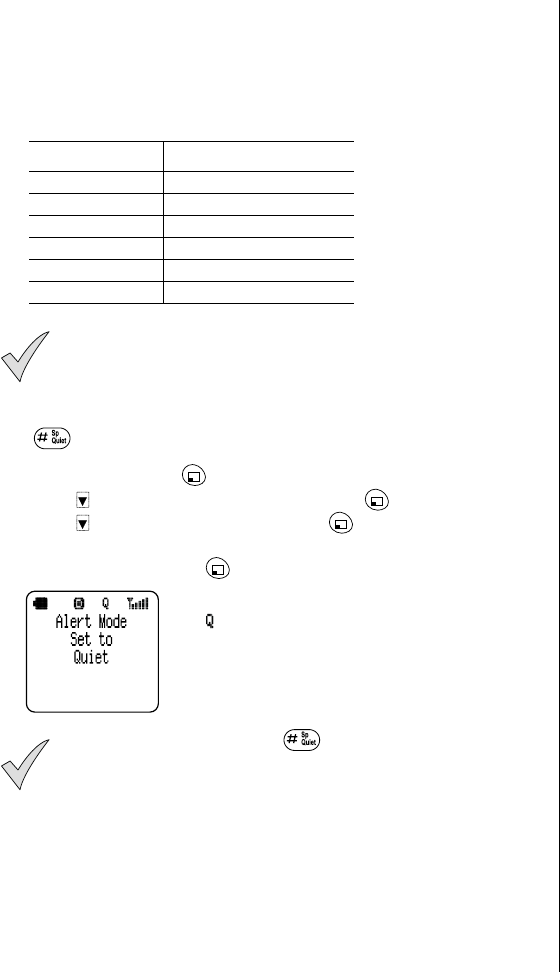
You can set your standby screen to show the current date and time or you
can choose one of eight pictures to be displayed when your phone is in
standby. (See “Personalizing Your Phone” on page 15, for information on
how you can choose from hundreds of pictures for your standby screen.)
1From standby, press (MENU) to enter the Main Menu.
2Scroll to Phone Settings. Press (OK).
3Press (OK) to select Display.
4Press to scroll to Standby Screen. Press (OK).
• The Time/Date screen is shown in 12- or 24-hour
format, depending on which format you chose.
(See “Setting Date and Time” in Chapter 2.)
5To change your standby screen to a picture, scroll to the picture you
want and press (SELECT).
6When the picture appears on your display, press (OK).
Note: A picture will replace the Time/Date screen only when you
are in your wireless service provider’s home area.
Answer Mode
You can choose how your phone will be answered when you receive a call.
1From standby, press (MENU) to enter the Main Menu.
2Press to scroll to Phone Settings. Press (OK).
3Press to scroll to Answer Mode. Press (OK).
•Normal: You answer calls by pressing the key you
selected on the Answer Key menu. See “Answer
Key Options” on page 22.
•Auto Answer: Auto Answer functions only when
the phone is used with the Private Handsfree
Headset or with the optional Handsfree Car Kit.
• When Auto Answer is activated, the phone automatically answers an
incoming call after 6 seconds.
4To change the setting, scroll to the other option and press (OK).
Chapter 6
Additional Operations 51
Alert Mode
Your phone has two customizable Alert Modes for use in different
environments: Normal mode for typical environments and Quiet mode for
use in meetings, restaurants, movies, and so on, where a loud, audible
alert would be disturbing. After selecting Normal or Quiet, you can then
individually customize the following settings within each mode from the
Tone Settings menu:
Note: In either mode, you can mute all of your phone’s audible
features except for low battery tone—the low battery warning
sounds, regardless of the settings. Also, the low battery warning
tone is not adjustable.
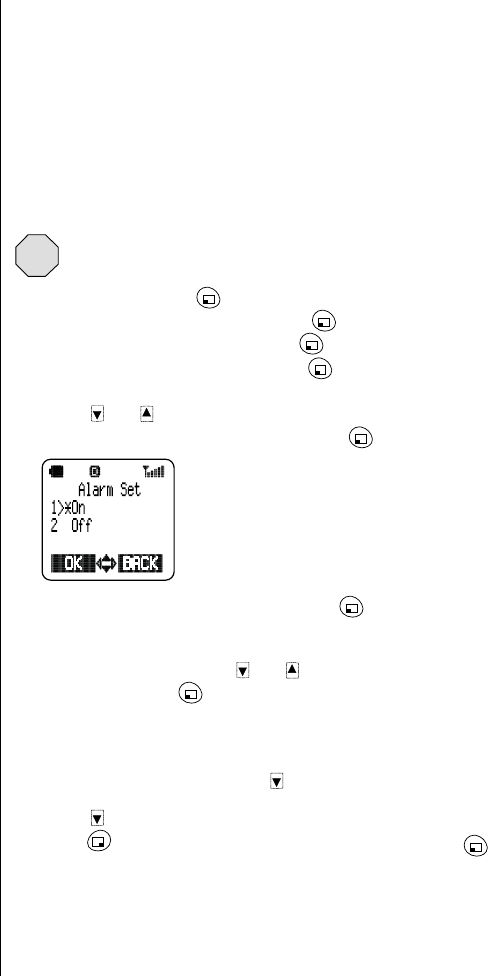
To select either Normal or Quiet mode from standby, press and
hold .
OR
1From standby, press (MENU) to enter the Main Menu.
2Press to scroll to Phone Settings. Press (OK).
3Press to scroll to Alert Mode. Press (OK).
4To change the setting, scroll to the other option (Normal Mode or
Quiet Mode) and press (OK).
• If Quiet Mode is selected, the Quiet Mode icon
( ) is displayed.
Note: If you press and hold during a call, the phone
switches to Speakerphone.
Menu Item For information, see . . .
Ring Volume page 13
Key Volume page 42
Ring Alert page 13
Message Alert page 44
Vibration page 14
Warning Tone page 45
Chapter 6
52 Additional Operations
Time Settings
Setting Date and Time
See “Setting Date and Time” in Chapter 2.
Setting the Alarm
You can set two types of alarms: a scheduled, one-time alarm or a daily
alarm. You can program your phone for up to 10 alarms, each with its own
specific message display. Even if your phone is turned off at the time set
for an alarm, the phone turns itself on and the alarm is activated. This
allows you to reduce battery usage and also use your phone as an alarm
clock.
Caution: Do not leave the phone without an attached battery
during the time set for an alarm. Doing so could harm the phone’s
internal battery.
1From standby, press (MENU) to enter the Main Menu.
2Scroll to Phone Settings and press (OK).
3Scroll to Time Settings and press (OK).
4Scroll to Alarm Settings and press (OK).
• Alarm 1 is displayed.
5Press or to scroll to a different alarm (10 alarms). When the
alarm you want to set is displayed, press (SELECT).
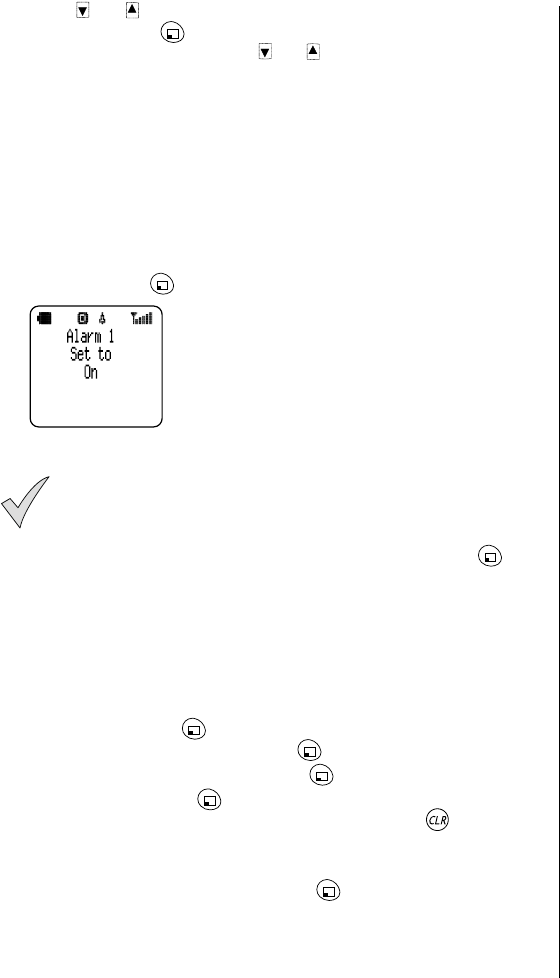
• The display indicates if the current alarm is set on
or off.
• If the alarm is set to on, the alarm icon is
displayed.
6Scroll to the setting you want and press (OK).
• If you select On, the Alarm Type menu is displayed.
• If you select Off, the display returns to standby.
7If you selected On, press or to select the alarm type (Daily or
One Time). Press (OK).
8If you selected Daily, enter the time using a 12-hour clock.
OR
If you selected One Time, enter the required alarm date using a
month/day/year format. Press and enter the time using a 12-hour
clock.
9Press to move to the AM/PM setting.
10 Press (AM/PM) to switch between AM or PM. Press (OK).
Chapter 6
Additional Operations 53
11 Press or to select Preset or Custom from the Alarm Memo
display and press (OK).
• If you selected Preset, press or to select one of the following
preset messages to be displayed when the alarm goes off:
• If you selected Custom, enter the message (16 characters or less) to be
displayed when the alarm goes off. See Chapter 4, “Text Entry
Operations” for details about entering text.
12 Once you have selected or entered the message to be displayed with
the alarm, press (OK).
13 Press any key or wait three seconds to return to standby.
Note: If the phone is turned off at the time set for the alarm, the
phone turns on and the alarm is activated. The phone remains
on until you turn it off.
The alarm alert lasts for 40 seconds. To stop the alarm, press
any key. To clear the message from the display, press (OK).
Answer Key
Choosing which key to use for answering your phone is described in
“Answer Key Options” on page 22.
Creating a Welcome Screen
You can create a personalized message (up to 64 characters, including
spaces) to be displayed briefly whenever you turn your phone on.
1From standby, press (MENU) to enter the Main Menu.
2Scroll to Phone Settings and press (OK).
3Scroll to Welcome Screen and press (OK).
4Scroll to On and press (OK).
5To delete the current message, if any, press and hold .
6Enter a new Welcome Screen message. See Chapter 4, “Text Entry
Operations” for details about entering text.
7When the message is complete, press (OK).
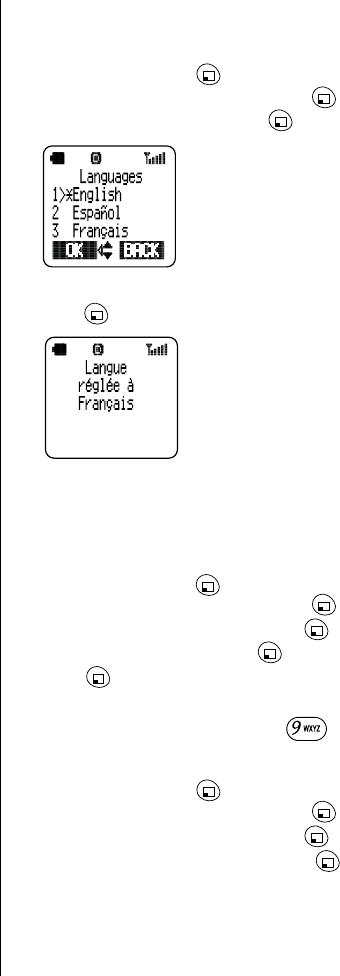
Wake-up Call Take Medicine
Reminder Pick Up/Drop Off
Appointment Special Day
Meeting Meal Time
Make Call
Chapter 6
54 Additional Operations
Selecting Another Language
You have the option of setting your phone so that the displayed language is
English, Spanish, French, or Portuguese.
1From standby, press (MENU) to enter the Main Menu.
2Scroll to Phone Settings and press (OK).
3Scroll to Language and press (OK).
4To select another language, scroll to the language of your choice and
press (OK).
• The display confirms the new language setting
then returns to standby in the language you
selected.
• All menu options and displayed words appear in
the selected language.
• The phone’s internal dictionary (used in WORD T9
Mode — see Chapter 4 for information on WORD
T9) also changes to the selected language.
Miscellaneous Menu
Model Type
To find out which model type your phone is, follow these steps:
1From standby, press (MENU) to enter the Main Menu.
2Scroll to Phone Settings and press (OK).
3Scroll to Miscellaneous and press (OK).
4To select Model Type, press (OK).
5Press (OK) to return to standby.
Emergency Call
When you purchase your phone, the key is programmed as a Super
Dial key to call the emergency number 911. However, you have to enable
this key assignment before you can use it. To do so, follow these steps:
1From standby, press (MENU) to enter the Main Menu.
2Scroll to Phone Settings and press (OK).
3Scroll to Miscellaneous and press (OK).
4Scroll to Emergency Call and press (OK).
Chapter 6
Additional Operations 55
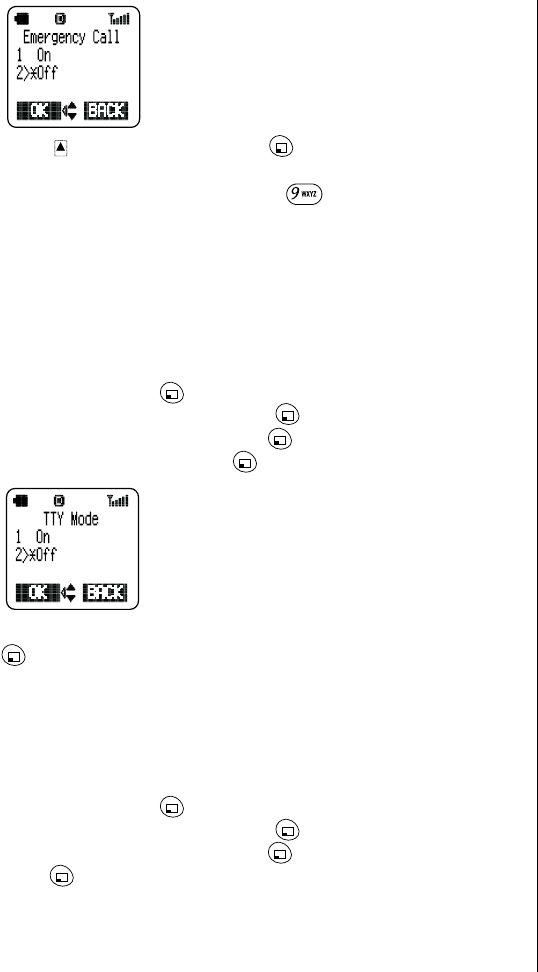
• The display shows that the Emergency Call key
assignment is Off.
5Press to scroll to On and press (OK).
• The display confirms the change and you can now call the emergency
number 911 by pressing and holding .
TTY Mode
TTY Mode allows a hearing-impaired person to use the phone by
connecting a TTY device.
When TTY Mode is set to On, any accessory that is connected through the
headset/TTY connector on the lower left-hand side of the phone is treated
as a TTY device.
When TTY Mode is set to Off, any accessory that is connected through the
headset/TTY connector is treated as a headset (handsfree device).
1From standby, press (MENU) to enter the Main Menu.
2Scroll to Phone Settings and press (OK).
3Scroll to Miscellaneous and press (OK).
4Scroll to TTY Mode and press (OK).
5To change the TTY Mode, scroll to the other option and press
(OK).
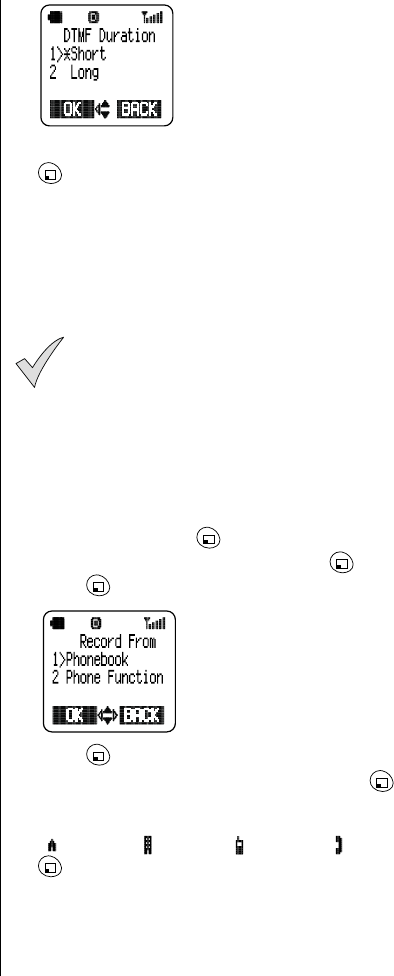
DTMF Duration
The tone you hear when you press a key on your keypad is called a
“DTMF” tone. Most phone services and answering machines require the
phone to transmit this tone when a digit key is pressed. This menu setting
allows you to shorten or lengthen the time the tone is emitted. DTMF tones
are transmitted even when key tones are turned off.
1From standby, press (MENU) to enter the Main Menu.
2Scroll to Phone Settings and press (OK).
3Scroll to Miscellaneous and press (OK).
4Press (OK) to select DTMF Duration.
Chapter 6
56 Additional Operations
5To change the DTMF setting, scroll to the other option and press
(OK).
Voice Commands
You can record up to 40 voice commands to call numbers in your
Phonebook and to perform other actions without having to press any keys.
This feature lets you place calls, change phone settings, such as turning
vibration alert on or off, and go to a specific place in a menu, simply by
speaking a command.
Note: Before you can use voice commands, you must record and
“program” them.
You should record your commands in a similar sound environment to
that in which they will be used. For example, if you will be using your
voice commands on a factory floor where there is a lot of background
noise, record the commands in the same sound environment or one
that is similar. Hold the phone to your ear as you do when in a
conversation.
Recording a Voice Command to Call a
Phonebook Number
1From standby, press (MENU) to enter the Main Menu.
2Scroll to Voice Commands and press (OK).
3Press (OK) to select Record.
4Press (OK) to select Phonebook.
5Scroll to the name of your choice and press (OK).
• All numbers for that person in your Phonebook are displayed.
6Scroll to the number you wish to call with this voice command
(
Home #,
Work #,
Cell #, or Other #) and press
(RECORD).
7When prompted (by voice and on the screen), say your command
within two seconds. You can say the name of the person, a nickname,
or any word(s) that you will easily remember for the command.
Chapter 6
Additional Operations 57
• Speak naturally without lengthy pauses between words. A pause of
more than half a second (½ sec.) will end the recording.
• Do not use words longer than five syllables.
• Hold the phone normally, as you would during a call.
• If you do not say anything or if you speak for more than two seconds, a
warning tone sounds, the message Name or Command Not
Understood is displayed and announced audibly. You are returned to
the Phonebook list. Repeat from step 6.
Note: This warning tone is sounded even when warning
tones have been set to Off.
• You have three opportunities to record a command. At least two of the
recordings must match in order for the command to be accepted.
8When prompted, repeat the command exactly as you said it the first
time.
• If the repeated command matches the first, and does not exceed the
2-second time limit, you are notified that the command was accepted.
• If you do not say anything or if you speak for more than two seconds, a
warning tone sounds, the message Name or Command Not
Understood is displayed and announced audibly. You are returned to
the Phonebook list. Repeat from step 6.
9When your command is accepted, press any key or wait three seconds
to return to the Voice Commands menu.
• You can now record another voice command, review your commands,
delete a command, or delete all your voice commands.
Recording a Voice Command for a Phone Function
1From standby, press (MENU) to enter the Main Menu.
2Scroll to Voice Commands and press (OK).
3Press (OK) to select Record.
4Scroll to Phone Function and press (OK).
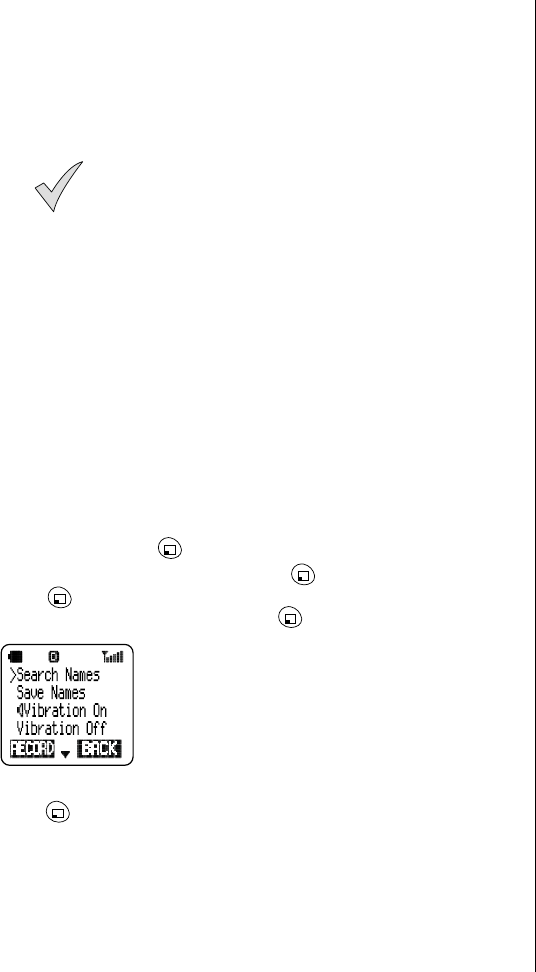
• A list of phone functions you can program to
perform with a voice command is displayed.
5Scroll to the function you want to perform with this voice command and
press (RECORD).
6When prompted (by voice and on the screen), say your command
within two seconds. For example, you could say “Vibrator on” to turn
vibration on, or “Quiet off” to turn quiet mode off.
• You can say anything at all for the command, but be sure it is something
you will easily remember.
• Speak naturally, without lengthy pauses between words. A pause of
more than half a second (½ sec.) will end the recording.

Chapter 6
58 Additional Operations
• Do not use words over five syllables in length.
• Hold the phone normally, as you would during a call.
• If you do not say anything or if you speak for more than two seconds, a
warning tone sounds, the message Name or Command Not
Understood is displayed and announced audibly. You are returned to
the list of phone functions. Repeat from step 5.
• You have three opportunities to record a command. At least two of the
recordings must match in order for the command to be accepted.
7When prompted, repeat the command exactly as you said it the first
time.
• If you say the command correctly and do not exceed the 2-second time
limit, you are notified that the command was accepted.
• If you do not say anything or if you speak for more than two seconds, a
warning tone sounds, the message Name or Command Not
Understood is displayed and announced audibly. You are returned to
the list of phone functions. Repeat from step 5.
8When your command is accepted, press any key or wait three seconds
to return to the Voice Commands menu.
• You can now record another voice command, review your commands, or
delete all your voice commands.
Using a Voice Command to Perform an Action
1From standby, press and hold .
• You are prompted audibly and on the display to say the command.
2Say the command within two seconds.
• If you do not say anything or if you speak for more than two seconds, a
voice and the display inform you that the command was not found, and
the display returns to standby.
• If you say the command and it is not recognized, you are prompted to
say it again. If the command is not recognized the second time you say
it, a voice prompt and the display inform you that the command was not
found, and the display returns to standby.
• If the command is recognized, the message Command Accepted is
displayed and announced audibly. After three seconds, the matching
command is shown on the display as the action is performed.
Reviewing and Deleting Voice Commands
1From standby, press (MENU) to enter the Main Menu.
2Scroll to Voice Commands and press (OK).
3Scroll to Review and press (OK).
4Select Phonebook or Phone Functions and press (OK).
• Any commands you have recorded are shown on the display.
5Scroll to the command you want to review and press (PLAY).
6When playback is complete, press (PLAY) to repeat the playback
or press (DELETE) to delete the voice command.
OR
Press to return to the Review Commands menu.
Chapter 6
Additional Operations 59
Deleting All Voice Commands
1From standby, press (MENU) to enter the Main Menu.
2Scroll to Voice Commands and press (OK).
3Scroll to Delete All and press (OK).
4Press (YES) to delete all voice commands.
OR
Press (NO) to cancel the deletion and return to the Voice
Commands menu.
Security Options
The Security Options menu allows you to place restrictions on several of
your phone’s functions. Options include locking specific features, limiting
the types of calls that can be placed and received, and setting your phone
so that it automatically locks whenever powered off. A lock code is
necessary to activate these features. Panasonic recommends changing
the preset lock code, which is in effect when you purchase your phone, to a
code of your own.
If you ever misplace or forget your lock code — and your phone is locked
— contact your wireless service provider.
Remember that emergency (911) calls can be placed from your phone
even when security features are selected and activated.
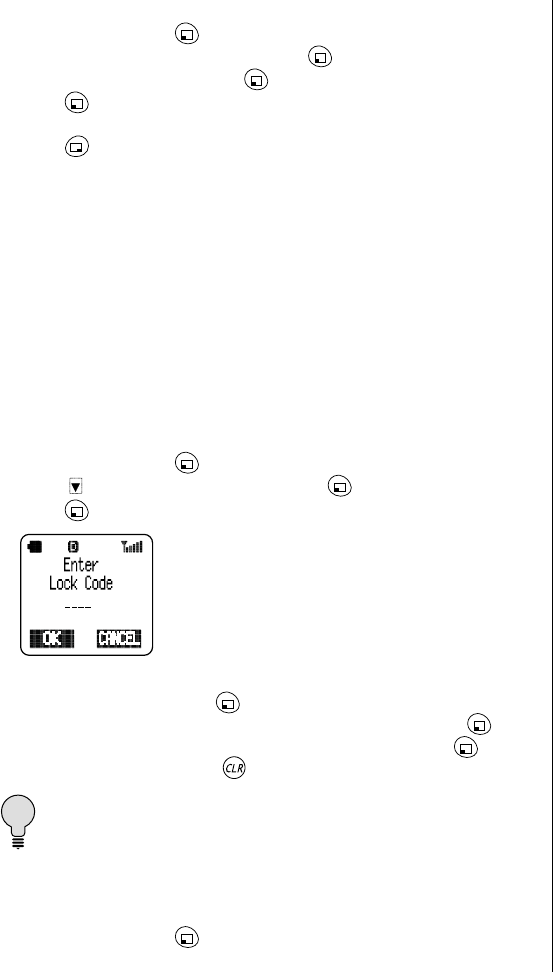
Changing Lock Code
1From standby, press (MENU) to enter the Main Menu.
2Press to scroll to Security and press (OK).
3Press (OK) to select Lock Code.
4Enter the four-digit lock code (enter 1234 if you have never changed
your lock code) and press (OK).
5When prompted, enter a new four-digit lock code and press (OK).
6To confirm your new code, re-enter the number and press (OK). If
you make a mistake, press briefly to erase the last digit entered.
Tip: Write down your new lock code on the inside back cover,
then try to memorize it. This number must be entered every time
you reset a security feature.
Call Lock
Call Lock allows you to determine what types of incoming or outgoing calls
you want to lock or restrict.
1From standby, press (MENU) to enter the Main Menu.
Chapter 6
60 Additional Operations
2Scroll to Security and press (OK).
3Scroll to Call Lock and press (OK).
• You can choose between setting lock features on Incoming or
Outgoing calls.
4Scroll to your choice and press (OK).
Locking Incoming Calls
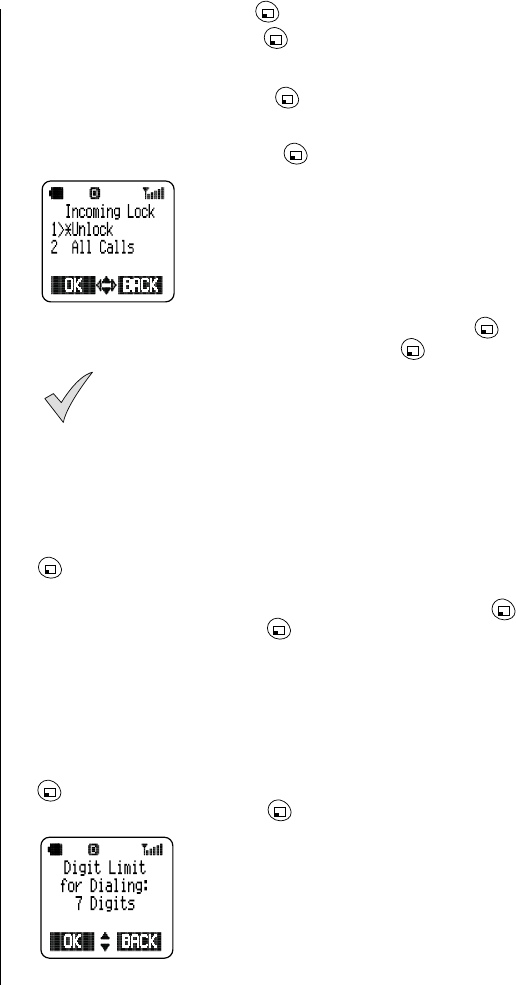
1From the Call Lock menu, press (OK) to select Incoming Calls.
• You have the option of unlocking or locking all
incoming calls.
2To change the setting, scroll to the other option and press (OK).
3When prompted, enter the lock code, and press (OK).
Note: Call Waiting (see page 63) will not function when
Incoming Lock is On.
Locking Outgoing Calls
You can lock and unlock all outgoing calls, or you can prevent calls from
being placed except from the Phonebook. This feature also lets you limit
the number of digits that can be dialed from your phone (to prevent long-
distance or international calls being made).
1From the Call Lock menu, scroll to Outgoing Calls and press
(OK).
• You can select from Unlock, All Calls, Phonebook, or Digit Limit.
2To change the setting, scroll to the desired option and press (OK).
3Enter the lock code and press (OK).
4If you selected Unlock, All Calls, or Phonebook, the display confirms
the new setting.
Limiting the Number of Digits Dialed
You can limit the number of digits that can be dialed from your phone. For
example, to allow only local calls, set the digit limit to 7.
1From the Outgoing Lock menu, scroll to Digit Limit and press
(OK).
2Enter the lock code and press (OK).

Chapter 6
Additional Operations 61
3Press to increase the digit limit. Press to decrease the digit
limit. The maximum digit limit is 31.
4When the digit limit you prefer is displayed, press (OK).
Power-On Lock
When Power-On Lock is activated, the phone locks automatically
whenever powered off and restricts unauthorized use. When the phone is
powered on again, you are required to enter the lock code. To disable this
feature completely, see “Disabling the Power-On Lock” on page 61.
Activating the Power-On Lock
1From standby, press (MENU) to enter the Main Menu.
2Scroll to Security and press (OK).
3Scroll to Power-On Lock and press (OK).
4To change the setting, scroll to the other setting and press (OK).
5If you select On, enter the lock code and press (OK).
Deactivating the Power-On Lock from Standby
Once Power-On Lock is activated, turning the phone off/on does not turn
this feature off. You can turn off Power-On Lock temporarily by following
these instructions.
1When the standby display indicates that Power-On Lock is activated,
press (UNLOCK).
2Enter the lock code, and press (OK).
3 Power-On Lock is temporarily deactivated (until you turn your phone
off/on again).
Disabling the Power-On Lock
1From standby, press (MENU) to enter the Main Menu.
2Scroll to Security and press (OK).
3Scroll to Power-On Lock and press (OK).
4Scroll to select Off and press (OK).
5Enter the lock code and press (OK).

Chapter 6
62 Additional Operations