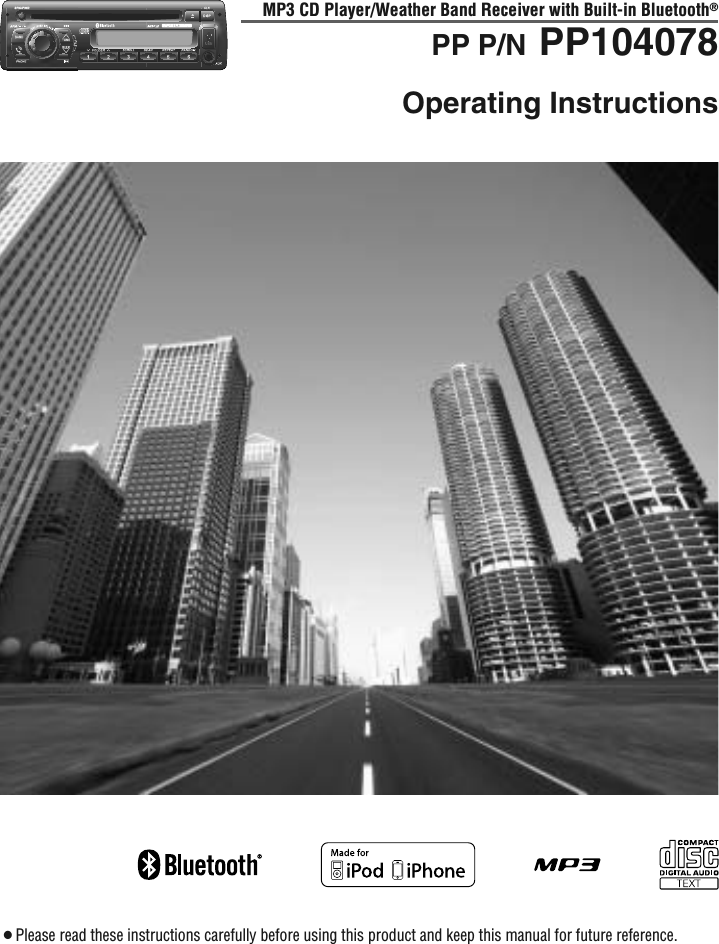
Panasonic of North America 932CQ-BT5557 Bluetooth Modular User Manual

Panasonic Corporation of North America Bluetooth Modular

User manual

¡Please read these instructions carefully before using this product and keep this manual for future reference.MP3 CD Player/Weather Band Receiver with Built-in Bluetooth®PP P/N PP104078Operating Instructions
2Safety InformationWarningObserve the following warnings when usingthis unit.❑The driver should not operate the system whiledriving.Operating the system will distract the driver from lookingahead of the vehicle and can cause accidents. Alwaysstop the vehicle in a safe location and use the parkingbrake before operating the system.❑Use the proper power supply.This product is designed for operation with a negativegrounded 12 V DC battery system. Never operate thisproduct with other battery systems, especially a 24 V DCbattery system.❑Protect the Deck Mechanism.Do not insert any foreign objects into the slot of thisunit.❑Do not disassemble or modify the unit.Do not disassemble, modify the unit or attempt to repairthe product yourself. If the product needs to be repaired,consult your dealership.❑Do not use the unit when it is out of order.If the unit is out of order (no power, no sound) or in anabnormal state (has foreign objects in it, is exposed towater, is smoking, or smells), turn it off immediately andconsult your dealership.❑Any NOAA broadcast weather report, includingcurrent and forecasts, may not reflect your ac-tual weather conditions at your exact time andlocation. You should always pay attention toyour actual weather conditions to make safe de-cisions accordingly.Observe the following warnings when in-stalling.❑Disconnect the lead from the negative (–) bat-tery terminal before installation.Wiring and installation with the negative (–) battery ter-minal connected may cause electrical shock and injurydue to a short circuit.Some trucks equipped with the electrical safety systemhave specific procedures of battery terminal disconnec-tion.FAILURE TO FOLLOW THE PROCEDURE MAY LEAD TOTHE UNINTENDED ACTIVATION OF THE ELECTRICALSAFETY SYSTEM RESULTING IN DAMAGE TO THE VE-HICLE AND PERSONAL INJURY OR DEATH.❑Never use safety-related components for instal-lation, grounding, and other such functions.Do not use safety-related vehicle components (fuel tank,brake, suspension, steering wheel, pedals, etc.) forwiring or fixing the product or its accessories.❑Check for piping, gasoline tank, electric wiring,and other items before installing the product.If you need to open a hole in the vehicle chassis to at-tach or wire the product, first check where the wire har-ness, gasoline tank, and electric wiring are located. Thenopen the hole from outside if possible.❑Never install the product in a location where it in-terferes with your field of vision.❑Never have the power cord branched to supplyother equipment with power.❑After installation and wiring, you should checkthe normal operation of other electrical equip-ment.The continuation of their using in abnormal conditionsmay cause fire, electrical shock or a traffic accident.❑Make sure the leads do not interfere with driv-ing or getting in and out of the vehicle.❑Insulate all exposed wires to prevent short cir-cuiting.This pictograph intends to alert you to thepresence of important operating instructionsand installation instructions. Failure to heedthe instructions may result in severe injury ordeath.■Read the operating instructions for the unit and all othercomponents of your truck audio system carefully beforeusing the system. They contain instructions about how touse the system in a safe and effective manner. We assumeno responsibility for any problems resulting from failure toobserve the instructions given in this manual.■This manual uses pictographs to show you how to use theproduct safely and to alert you to potential dangers result-ing from improper connections and operations. The mean-ings of the pictographs are explained below. It isimportant that you fully understand the meanings of thepictographs in order to use this manual and the systemproperly.WarningThis pictograph intends to alert you to thepresence of important operating instructionsand installation instructions. Failure to heed theinstructions may result in injury or materialdamage.Caution
3CautionObserve the following cautions when usingthis unit.❑Keep the sound volume at an appropriate level.Keep the volume level low enough to be aware of roadand traffic conditions while driving.❑Do not insert or allow your hand or fingers to becaught in the unit.To prevent injury, do not get your hand or fingers caughtin moving parts or in the disc slot. Especially watch outfor infants.❑This unit is designed for use exclusively intrucks.❑Do not operate the unit for a prolonged periodwith the engine turned off.Operating the audio system for a long period of timewith the engine turned off will drain the battery.❑Do not expose the unit to direct sunlight or ex-cessive heat.Otherwise these will raise the interior temperature of theunit, and it may lead to smoke, fire, or other damage tothe unit.❑Do not use the product where it will be exposedto water, moisture, or dust.Exposure of the unit to water, moisture, or dust may leadto smoke, fire, or other damage to the unit. Make espe-cially sure that the unit does not get wet in truck washesor on rainy days.❑To ensure safety, never attempt to preset sta-tions while you are driving.❑Depending upon the transmission condition ofelectro-magnetic waves, the geographical rea-sons and/or the weather conditions, you maynot receive the NOAA radio partially or at all.❑Make sure that your weather radio can receiveproperly before driving, especially, before usein a critical condition.❑Set the volume level to low enough before theAUX connection is completed.Failure to observe this, the loud noise may come out anddamage your speakers and your hearing. Direct connec-tion of the speaker/headphone output of an external de-vice without any attenuator may distort sound ordamage the connected external device.Observe the following cautions when in-stalling.❑Refer wiring and installation to qualified serv-ice personnel.Installation of this unit requires special skills and experi-ence. For maximum safety, have it installed by your deal-ership. We are not liable for any problems resulting fromyour own installation of the unit.❑Follow the instructions to install and wire the prod-uct.Not following the instructions to properly install and wirethe product could cause an accident or fire.❑Take care not to damage the leads.When wiring, take care not to damage the leads. Preventthem from getting caught in the vehicle chassis, screws,and moving parts such as seat rails. Do not scratch, pull,bend or twist the leads. Do not run them near heatsources or place heavy objects on them. If leads must berun over sharp metal edges, protect the leads by windingthem with vinyl tape or similar protection.❑Use the designated parts and tools for installa-tion.Use the supplied or designated parts and appropriatetools to install the product. The use of parts other thanthose supplied or designated may result in internal dam-age to the unit. Faulty installation may lead to an acci-dent, a malfunction or fire.❑Do not block the air vent or the cooling plate ofthe unit.Blocking these parts will cause the interior of the unit tooverheat and will result in fire or other damage.❑Do not install the product where it is exposed tostrong vibrations or is unstable.Avoid slanted or strongly curved surfaces for installa-tion. If the installation is not stable, the unit may falldown while driving and this can lead to an accident orinjury.❑Installation AngleThe product should be installed in a horizontal positionwith the front end up at a convenient angle, but not morethan 30˚.The user should bear in mind that in some areas theremay be restrictions on how and where this unit must beinstalled. Consult your dealership for further details.❑Wear gloves for safety. Make sure that wiring iscompleted before installation. ❑To prevent damage to the unit, do not connectthe power connector until the whole wiring iscompleted.❑Do not connect more than one speaker to oneset of speaker leads. (except for connecting to atweeter)Caution•PLEASE FOLLOW THE LAWS AND REGULATIONS OF YOUR STATE, PROVINCE OR COUNTRY FORWIRING, INSTALLATION, AND USE OF THIS UNIT AND THE DEVICES TO BE CONNECTED.
4Safety Information (continued)WarningTO REDUCE THE RISK OF FIRE OR ELECTRIC SHOCKOR PRODUCT DAMAGE, DO NOT EXPOSE THISAPPLIANCE TO RAIN, SPLASHING, DRIPPING ORMOISTURE.CautionTHIS PRODUCT IS A CLASS ILASER PRODUCT. USE OF CONTROLS OR ADJUSTMENTS ORPERFORMANCE OF PROCEDURES OTHER THAN THOSESPECIFIED HEREIN MAY RESULT IN HAZARDOUSRADIATION EXPOSURE.DO NOT OPEN COVERS AND DO NOT REPAIR BYYOURSELF. REFER SERVICING TO QUALIFIEDPERSONNEL.The following applies only in the U.S.A.Part 15 of the FCC RulesFCC Warning:This device complies with Part 15 of the FCC Rules forRadio Receiver. Operation is subject to the condition thatthis device may not cause harmful interference. Anyunauthorized changes or modifications to this equipmentmay void the user's authority to operate this device.
5Notice:The changes or modifications notexpressly approved by the partyresponsible for compliance could voidthe user’s authority to operate theequipment.IMPORTANT NOTE:To comply with the FCC RF exposurecompliance requirements, no change tothe antenna or the device is permitted.Any change to the antenna or the devicecould result in the device exceeding theRF exposure requirements and voiduser’s authority to operate the device.This equipment complies with FCC radiation exposurelimits set forth for uncontrolled equipment and meets theFCC radio frequency (RF) Exposure Guidelines inSupplement C to OET65. This equipment has very lowlevels of RF energy that it deemed to comply withoutmaximum permissive exposure evaluation (MPE). But itis desirable that it should be installed and operated withat least 20 cm and more between the radiator andperson’s body (excluding extremities: hands, wrists, feetand legs).NOTICEThis equipment has been tasted and found to complywith the limits for a Class B digital device, pursuant topart 15 of the FCC Rules. These limits are designed toprovide reasonable protection against harmfulinterference in a residential installation. This equipmentgenerates, uses and can radiate radio frequency energyand, if not installed and used in accordance with theinstructions, may cause harmful interference to radiocommunications. However, there is no guarantee thatinterference will not occur in a particular installation. Ifthis equipment does cause harmful interference to radioor television reception, which can be determined byturning the equipment off and on, the user is encouragedto try to correct the interference by one or more of thefollowing measures:¡Reorient or relocate the receiving antenna¡Increase the separation between the equipment andreceiver.¡Connect the equipment into an outlet on a circuitdifferent from that to which the receiver is connected.¡Consult the dealer or an experienced radio/ TVtechnician for help.This transmitter must not be co-located oroperated in conjunction with any otherantenna or transmitter.
6ContentsSafety Information  . . . . . . . . . . . . . . . . .2Features  . . . . . . . . . . . . . . . . . . . . . . . .7Front AUX terminal (AUX1)Rear AUX terminal (AUX2)Sound controlCAN-readinessFault detection of external amplifierNon-volatile memoryIllumination interlock control30 days clock memoryUSB connectorBluetooth®Controls Layout  . . . . . . . . . . . . . . . . . . .8Main unitPreparation . . . . . . . . . . . . . . . . . . . . . .9First time power onClock adjustmentGeneral . . . . . . . . . . . . . . . . . . . . . . . .10Source selectionPowerVolumeIndication at connecting external amplifierSound Controls  . . . . . . . . . . . . . . . . . .11Audio modes (Bass/Treble/Balance/Fader/SQ)Radio  . . . . . . . . . . . . . . . . . . . . . . . . .12BandFrequency adjustmentAuto preset memory (APM)Preset station selectionManual preset memoryTuning in a weather band stationCD/MP3/WMA Player  . . . . . . . . . . . . . .14PauseDisc loading/ejectionTrack/File selectionFolder selection (MP3/WMA)Display changeScan, repeat, randomUSB (MP3/WMA)  . . . . . . . . . . . . . . . . .16PauseUSB device connectionFile selectionFolder selectionDisplay changeScan, repeat, randomiPod Control  . . . . . . . . . . . . . . . . . . . .18PauseSong selectionDisplay changePlaying mode selectionRepeat, randomBluetooth®- General . . . . . . . . . . . . . . .20Display changeRegistration of a Bluetooth®device with this unitSetting of PIN (Personal Identity Number) codeConnection of the registered Bluetooth®device tothis unitDisconnection of the Bluetooth®deviceDeletion of the registered dataBluetooth®- Hands-Free Phone  . . . . . . .22Use of voice dial Switching between the private mode and hands-free modePhone answering Phone hanging upIncoming call rejectionOutgoing call terminationSetting of automatic answering function Use of receiving/calling records or telephonedirectory (phonebook)Bluetooth®- Music Player  . . . . . . . . . . .24Music mode activationSong selectionPauseAlarm Setting  . . . . . . . . . . . . . . . . . . .25Alarm time settingTurning ON/OFF the alarmActivating snoozeTroubleshooting . . . . . . . . . . . . . . . . . .26If you suspect something wrongCommonRadioCDMP3/WMAUSBBluetooth®Product servicingError Display Messages  . . . . . . . . . . . .30CD/MP3/WMABluetooth®USBMaintenance  . . . . . . . . . . . . . . . . . . . .32Cleaning this unitNotes on Discs . . . . . . . . . . . . . . . . . . .33How to hold the discUnusable discsDisc insertDisc cleaningNotes on CD-Rs/RWsNotes on MP3/WMA  . . . . . . . . . . . . . . .34Cautions as to compressed audio filesCautions as to the display of this unitRecording MP3/WMA Files on a CD-Media/USB-DeviceCommonNotes on Bluetooth® . . . . . . . . . . . . . . .36Frequency band usedUsage limitationsInfluence from other devicesApplication limitationsSpecifications  . . . . . . . . . . . . . . . . . . .37GeneralFM stereo radioAM radioWeather band radioCD playerBluetooth®Specification from the Terminal End (RearConnector of This Unit)  . . . . . . . . . . . . .38
7FeaturesFront AUX terminal (AUX1)Your mobile audio player and other devices areconnectable to this unit without any difficulty.Rear AUX terminal (AUX2)For more convenient connection, rear AUX terminalsare now provided on the unit itself.Sound controlSQ (Sound Quality)You have four preset modes (FLAT, ROCK, POP andVOCAL).CAN-readinessThis unit is a CAN (Controller Area Network)-readydevice that provides communication with a steeringwheel remote control and other CAN-ready units. Fault detection of external amplifierWhen an anomaly of the connected externalamplifier is detected, “FAULT” text appears (thesound will be mute) and the power of this unitturned off after 6 seconds to remind takinginspection with the external amplifier.Non-volatile memoryThis unit stores the memories of each setting (tuner,audio, mode, alarm time settings and callhistory/phone book entries) even if the power supplyis shut off or the power cable is unplugged. Illumination interlock controlThe intensity/illumination of display and button onthis unit is controlled by a PWM dimming modulelocated in the vehicle.This unit is connected in the vehicle to dimminganalog signal (PWM signal). It's capable of dimmingthe backlighting based on a voltage supplied by aPWM dimming module. 30 days clock memoryThis unit stores the memory of clock time for 30days even if the power supply is shut off or thepower cable is unplugged.USB connectorThe USB Connector is equipped on the front panel.(apage 16)By connecting a USB memory (not included) to USBconnector via a USB extension cable (USB 2.0, notincluded), you can enjoy MP3/WMA files stored onthe USB memory (not included) in your truck.By connecting iPod®series/iPhone®to USBconnector via a USB extension cable for iPod/iPhone(USB 2.0, not included), you can enjoy music filesstored on the iPod series/iPhone in your truck.Further information about the controllableiPod/iPhone is described on page 18.*iPhone and iPod are trademarks of Apple Inc., reg-istered in the U.S. and other countries.“Made for iPod” and “Made for iPhone” mean thatan electronic accessory has been designed to con-nect specifically to iPod, iPhone and has been certi-fied by the developer to meet Apple performancestandards. Apple is not responsible for the operationof this device or its compliance with safety and reg-ulatory standards.Bluetooth®This feature allows users to use a hands-free phoneand Bluetooth®audio systems.Compatible Bluetooth®devices¡Bluetooth®Version: 2.1+EDR¡HFP1.5 (Hands-Free Profile)¡OPP (Object Push Profile)¡A2DP (Advanced Audio Distribution Profile) v 1.2¡AVRCP1.0 (Audio/Video Remote Control Pro-file)¡HSP v 1.1 (Headset Profile)
8Controls LayoutMain unitDisc slotVOL Volume(apage 10, 11, 19, 23)PUSH SEL Select(apage 11, 19, 20, 21, 23)ALM Alarm (apage 25)1through 6(Preset Buttons)(apage 12, 13, 20, 21)SCROLL (apage 15, 17, 19)SCAN (apage 15, 17)REPEAT/RANDOM (apage 15, 17, 19)FOLDER {/}(apage 14, 16, 19)USB Connector(apage 16)u(Eject) (apage 14)SRC Source (apage 10)PWR Power (apage 9, 10)PHONE (apage 22, 23)AUXFrom line output ofexternalsound/audio device(ex. Silicon-audioplayer, HDD player,etc.)TUNE/SEEK {/}(apage 12, 13)FILE (Track/File) s/d(apage 9, 14, 16, 18, 21, 22, 24, 25)DISP Display(apage 15, 17, 19, 20)CLK Clock (apage 9)BAND (apage 12, 13, 21, 22, 23)y/5Pause/Play(apage 14, 16, 18, 24)APM Auto Preset Memory(apage 12)
9The 12-hour (AM/PM) system is used for the clockadjustment.1 Press [CLK] (Clock).(Clock display)2 Hold down [CLK] for more than 2 seconds.Hour blinks3 Adjust the hour.[d]:Sets ahead.[s]:Sets back.Hour entered4 Press [CLK].Minute blinks5 Adjust the minute.[d]:Sets ahead.[s]:Sets back.Minute entered6 Press [CLK].CompletedNotes:¡Clock can not be adjusted when the unit is poweroff, to perform clock setting when the unit ispower on.¡Clock time is displayed when the unit is power off.¡“CLK ADJ” is displayed when the clock is not ad-justed.¡Hold down [d]or [s]to change numbers rap-idly.¡When you want to readjust the time, repeat steps2to 6.PreparationFirst time power onClock adjustment1Turn the key in the ignition until theaccessory indicator lights. 2 Press [PWR] (Power).*Indicator for AM orPM time
10Notes:¡When an output signal from the rearAUX terminal is detected, this unit au-tomatically changes the source toAUX2. If this unit no longer detects thisinput signal, the source before AUX2immediately resumes.¡When an output signal from the rearAUX terminal is detected in the power-off mode of this unit, the power isturned on with the AUX2 source se-lected. If this unit no longer detectsthis input signal before manually se-lecting other sources, the power of thisunit is turned off.One-Hour Timer With the ignition off, pressing the [PWR] on thisunit will turn on the receiver and activate thereceiver's one-hour timer. The receiver will turn offautomatically after one hour.GeneralPowerTurn the key in the ignition until the accessoryindicator lights.Power on: Press [PWR] (Power).Power off:Hold down [PWR] for more than 1second.Volume level (0 to 40) (default:18)VolumeTurn [VOL] (Volume) clockwise to increasevolume, and counterclockwise to decrease vol-ume.Note: To mute the sound, set volume level to 0.UpDownIndication at connecting external amplifierlights when an external amplifier is connected. Note: When an anomaly of the external amplifier isdetected, “FAULT” appears (the sound will be mute/blinks repeatedly) and the power of this unit isturned off after 6 seconds. When an external amplifier is connected, theadjustable volume level: 0 to 33 (Maximum).Source selectionThe source changes as follows every time [SRC] (Source) is pressed.RadioFM, AM, WB(apage 12)Disc playerCD, MP3/WMA(apage 14)USBMP3/WMA(apage 16)AUX (when no external device isconnected to rear AUX terminal)When device connected to the front AUXterminal of this unitAUX1When device connected to thefront AUX terminal of this unitAUX2When device connected to therear AUX terminal of this unitBluetooth®Hands-free phone, musicplayer (apage 20)
11Sound ControlsAbout SQ (Sound Quality)SQ is a function that can call upvarious sound types inaccordance with your listeningmusic type.(ROCK) speedy and heavy sound:exaggerates bass and treble.(POP) wide-ranged and deep sound:slightly emphasizes bass and treble.(VOCAL) clear sound:emphasizes middle tone and slightlyemphasizes treble.(FLAT) flat frequency response:does not emphasize any part.(default)Audio modes (Bass/Treble/Balance/Fader/SQ)1Push [SEL] (Select) to select theaudio mode in sequence.Note: If no operation takes place for more than 5seconds in audio mode (2 seconds in volume mode),the display returns to the regular mode.2Turn [VOL] (Volume) clockwise or counter-clockwise to change each level or select a set-ting.(Setting Range: –12 dB to +12 dB by2 dB, default: 0 dB)(Setting Range: –12 dB to +12 dB by2 dB, default: 0 dB)(Setting Range: 15 levels each and 0(center), default: CNT)(Setting Range: 15 levels each and 0(center), default: CNT)(Setting Range: 0 to 40, default: 18)q:Increasedw:Decreasedq:Increasedw:Decreasedq:Right enhancedw:Left enhancedq:Front enhancedw:Rear enhancedq:Upw:Down(Bass)(Volume)(Treble)(Balance)(Fader)(Selectable setting:FLAT/ROCK/POP/VOCAL, default:FLAT)Turn to select(Refer to the below)(SQ)SQ indicator
12RadioBandPress [BAND] to change the band.Weather Band(apage 13)Frequency adjustment[TUNE/SEEK }]: Higher[TUNE/SEEK {]: LowerNote: Hold down for 0.5 sec. or more and releasefor station search.Preset station selectionPress the corresponding preset button [1]through [6] to tune in a preset station.Manual preset memory1 Use manual or seek tuning to find a station.2Press and hold one of the preset buttons[1] through [6] until the display blinks once.Note: New stations overwrite existing savedstations.CautionTo ensure safety, never attempt to presetstations while you are driving.Auto preset memory (APM)Press and hold [APM] (Auto Preset Memory)for more than 2 seconds.¡The 6 stations with good reception will be auto-matically saved in the memory under preset but-tons [1] through [6].¡Once set, the preset stations are sequentiallyscanned for 5 seconds each.¡Press one of the buttons [1] through [6] to stopsequentially scan.Note: New stations overwrite existing savedstations.blinks oncePreset Number(FM stereo) indicatorlights while receiving an FMstereo signal.
131Press [BAND] to select WB (WeatherBand). (apage 12)2Press any of the buttons [1] through [6] tomonitor the preset station.Note: The weather band (CH1-6) has been preset.CH7 is selected by pressing [TUNE}]or[TUNE{].Weather Band StationsNational Weather Radio Broadcasts from over 380Iocations throughout the U.S. on seven VHF/FMfrequencies.Tune to weather band to receive continuous weatherinformation 24 hours a day on one of the followingfrequencies.1. 162.550 MHz2. 162.400 MHz3. 162.475 MHz4. 162.425 MHz5. 162.450 MHz6. 162.500 MHz7. 162.525 MHzNote: Further and updated information about theNational Weather Radio station listing, please visitthe web site:http://www.nws.noaa.gov/nwr/nwrbro.htmOccasionally the frequency of an existing or plannedstation must be changed because of unexpectedradio frequency interfere with adjacent NOAAweather Radio Stations and/or with otherGovernment or commercial Operations within thearea. If you have a question concerning NOAAWeather Radio, please contact your nearest NationalWeather Service Office.Weather Band Frequency Weather Band Frequency(channel) NumberWarningAny NOAA broadcast weather report, includingcurrent and forecasts, may not reflect your actualweather conditions at your exact time and location.You should always pay attention to your actualweather conditions to make safe decisionsaccordingly.Weather Band IndicatorTuning in a weather band station
14CD/MP3/WMA PlayerDisc loading/ejectionLoadingLoad a disc in with the printed side facing up.Notes:¡The power will be turned on automatically when a disc isloaded.¡Playback will start automatically after the player recog-nized the loaded disc as an ordinary music CD orMP3/WMA disc.EjectionPress [u] (Eject) to eject the disc.Track/File selection[FILE d]: Next track/file[FILE s]: Back to the beginning of the currenttrack/file.Back to the previous track/file. (presstwice)Note: Hold down for fast forward/reverse. Releaseto resume the regular play.Folder selection (MP3/WMA)[FOLDER }]: Next folder[FOLDER {]: Preceding folderCautionsPausePress [h/5](Pause/Play)Press again to cancel.Text ScrollScan, Repeat, Random (apage 15)Display Change(apage 15)(DISC)indicator(Repeat)/ (Random)/indicator¡Do not insert a disc when the indi-cator lights.¡This unit does not support 8 cm {3"}discs.¡Do not use irregularly shaped discs. (apage 33)¡Do not use discs that have a seal or label at-tached.¡Do not insert foreign matter into the disc slots.¡Refer to the section on “Notes on CD-Rs/RWs” (apage 33).¡Refer to the section on “Notes on MP3/WMA”.(apage 34)¡This unit does not support a MIX mode CD (a CDcontaining both CD-DA and compressed audiodata). In case of using such a CD, problems mayoccur such as anacoustic playback.
15Scan playThe first 10 seconds of each track/file is played insequence.Press [SCAN]. Track/file number blinks.Press again to cancel.Folder scan play (MP3/WMA)From the next folder, the first 10 seconds of the firstfile in each folder is played in sequence.Hold down [SCAN] for more than 2 seconds.lights and folder number blinks.Hold down again to cancel.Repeat playThe current track/file is repeated.Press [REPEAT]. lights.Press again to cancel.Folder repeat play (MP3/WMA)The current folder is repeated. Hold down [REPEAT] for more than 2 sec-onds. ,  lights.Hold down again to cancel.Random playAll the available tracks/files are played in a randomsequence.Press [RANDOM]. lights.Press again to cancel.Folder random play (MP3/WMA)All the available files in current folder are played in arandom sequence.Hold down [RANDOM] for more than 2 sec-onds. ,  lights.Hold down again to cancel.Scan, repeat, randomDisplay changePress [DISP] (Display) to change the display.Notes:¡For scrolling text, press [SCROLL].¡“NO TEXT” is displayed when there is no information on the disc.CD-DA MP3/WMA*CD TEXT DisplayDisc title and Track title name are displayed.*ID3 Tag ON/OFFHold down [SCROLL] for more than 2 sec-onds.TAG ON: album title and song title/artist nameare displayed.TAG OFF: folder name/file name are displayed.(Default)Track number/Play timeDisc title*Track title*ClockFolder number/File numberPlay timeFolder name/Album*File name/Title, artist*Clock
16USB (MP3/WMA)Cautions¡Do not connect a USB device directly to this unit.If a USB device is connected directly to this unitand an accident occurs, or if the brakes are ap-plied suddenly, the driver or passenger maybump into the USB device and may be injured.¡Connect your USB device to your truck audiousing a standard USB extension cable (5 m orless).¡Position the USB device and USB extension cableso that they do not interfere with your driving.¡Do not connect any USB device other than a USBmemory or a USB audio player. Do not connectmultiple USB devices to the USB connector. Sup-plying power to multiple USB devices from theconnector could cause overheating and smoking.File selection[FILE d]: Next file[FILE s]: Back to the beginning of the currentfile.Back to the previous file. (press twice)Note: Hold down for fast forward/reverse. Releaseto resume the regular play.Folder selection[FOLDER }]: Next folder[FOLDER {]: Preceding folderPausePress [h/5](Pause/Play)Press again to cancel.Compatible USB devices¡USB Mass Storage Class    For details as to whether your USB memory/USBAudio is compatible with USB Mass StorageClass, please contact the USB memory/USBAudio manufacturer.¡USB Standard Compatibility 1.1/2.0 Full Speed¡File System FAT12/16/32¡Maximum current less than 1 A¡Capacity less than 4 GB (1 partition)USB device connectionOpen the USB connector cover and connect aUSB device to this unit.Notes:¡When connecting (disconnecting) a USB device,turn down the volume of the unit.¡When connecting a USB device, make sure theconnector is pushed all the way into the socket.indicatorlights when a USBdevice is loadedText ScrollScan, Repeat, Random(apage 17)Display change(apage 17)(Repeat)/ (Random)/indicatorNote: When an iPod compatible with this unit isconnected, the iPod mode is activated. (apage 18)
17Notes:¡Refer to the section on “Notes on MP3/WMA”.(apage 34)¡Do not leave the USB device for long periods oftime in places inside the truck where the tempera-ture rises too high.¡This unit may not operate correctly if a cableother than a USB standard cable is used.¡To prevent dirt and dust from adhering to theUSB connector, close the cover of this unit whennot in use.¡Back up any important data beforehand. We can-not accept responsibility for any lost data.¡The use of USB devices that contain data filesother than MP3/WMA format is not recom-mended.¡Playback or display may not be possible depend-ing on the type of USB device or the condition ofthe recording.¡Depending on the connected USB memory, theorder in which the files are played back may differfrom the order in which the files were stored.Scan, repeat, randomScan playThe first 10 seconds of each file is played insequence.Press [SCAN]. File number blinks.Press again to cancel.Folder scan playFrom the next folder, the first 10 seconds of the firstfile in each folder is played in sequence.Hold down [SCAN] for more than 2 seconds.lights and folder number blinks.Hold down again to cancel.Repeat playThe current file is repeated.Press [REPEAT]. lights.Press again to cancel.Folder repeat playThe current folder is repeated. Hold down [REPEAT] for more than 2 sec-onds. ,  lights.Hold down again to cancel.Random playAll the available files are played in a randomsequence.Press [RANDOM]. lights.Press again to cancel.Folder random playAll the available files in current folder are played in arandom sequence.Hold down [RANDOM] for more than 2 sec-onds. ,  lights.Hold down again to cancel.Display changePress [DISP] (Display) to change the display.Notes:¡For scrolling text, press [SCROLL].¡“NO TEXT” is displayed when there is no informa-tion on the USB device.*ID3 Tag ON/OFFHold down [SCROLL] for more than 2 sec-onds.TAG ON: album title and song title/artist nameare displayed.TAG OFF: folder name/file name are displayed.(Default)Folder number/File numberPlay timeFolder name/Album*File name/Title, artist*Clock
18iPod ControlThis unit is capable of controlling and playing musicfrom an iPod. (video playback is not feasible)¡5th generation iPod/ver. 1.3¡1st generation iPod nano/ver. 1.3.1¡2nd generation iPod nano/ver. 1.1.3¡3rd generation iPod nano/ver. 1.1.3¡4th generation iPod nano/ver. 1.0.4¡5th generation iPod nano/ver. 1.0.2¡iPod classic/ver. 2.0.4¡1st generation iPod touch/ver. 3.1.3¡2nd generation iPod touch/ver. 4.0¡iPhone/ver. 3.1.3¡iPhone 3GS/ver. 4.0.1* Operation check has been completed withsoftware available at the end of August, 2010. Wedo not guarantee the operation with our futureproducts or upgraded software.Preparation:¡Connect an iPod to USB connector of this unit.Song selection[FILE d]: Next song[FILE s]: Back to the beginning of the currentsong.Back to the previous song. (presstwice)Note: Hold down for fast forward/reverse.Release to resume the regular play.PausePress [h/5](Pause/Play)Press again to cancel.Text ScrollRepeat, Random (apage 19)Display change(apage 19)(Repeat)/ (Random) indicator/indicatorlights when a USB extension cable for iPod andiPod are connected with USB connector andUSB mode is selected.Playing Mode selection (apage 19)By connecting iPod series to USB connector via a USB extension cable for iPod (USB 2.0, not included), youcan enjoy music files stored on the iPod series in your truck.USB connectorControllable iPod/software version (USB connector)
19Display changePress [DISP] (Display) to change the display.Notes:¡For scrolling text, press [SCROLL].¡“NO TEXT” is displayed when there is no informa-tion on the iPod.Song number/Total songPlay timeSong titleAlbum nameArtist nameClockPlaying mode selectionThe type with which playback data is classified isselectable.1 Press [FOLDER }]to call up the playmode selection screen.2 Turn [VOL] (Volume) to select the playmode.PLAYLIST: Playback by playlist (default)ARTIST:  Playback by artistALBUM:  Playback by albumGENRE   Playback by genreNotes:¡When the [FOLDER }]button is pressed,the regular screen appears.¡“NO SONG” will appear if no song exists.3 Push [SEL] (Select) to determine the selec-tion.4 Turn [VOL] to select the portion to play.Note: When the [FOLDER }]button ispressed, the previous screen appears.5 Push [SEL] to determine the selection.Repeat, randomRepeat playThe current song is repeated.Press [REPEAT]. lights.Press again to cancel.Note: The all Repeat Play function of iPod is alwaysactivated and cannot be canceled from this unit.Random play (Shuffle)All the available songs are played in a randomsequence.Press [RANDOM]. lights.Press again to cancel.Album random playAll the playable albums are played in a randomsequence.Hold down [RANDOM] for more than 2 sec-onds. blinks.Hold down again to cancel.Notes:¡The shuffle function of iPod corresponds to theRANDOM function of this unit.¡Please make sure to detach the iPod after turningoff the truck engine (turning the ACC to OFF). TheiPod may not shut down while still connected,which may result in battery depletion.¡Please do not connect iPod accessories such asan iPod remote control or headphones while con-necting iPod with the unit. The unit may not oper-ate correctly.¡Connect this unit after turning down the volumeof the iPod.¡“PAUSE” appears until the iPod is recognizedafter connecting the iPod. This indicates there isnothing wrong with the main unit.¡We do not guarantee all the operations of con-nectable devices.qw
20Bluetooth®- General1 Press one of the preset buttons from [1]through [6] to select a registration numberassigned to the Bluetooth®device to be reg-istered.Note: Up to 8 devices memory registered withpreset buttons.[1] –[5]: Selects a registration number (1stpage: 1 – 5, 2nd page: 6 – 8)[6]         : Turns the registration pagesFor registration No.6:press [6], then press [1].For registration No.7:press [6], then press [2].For registration No.8:press [6], then press [3].2 Hold down the selected preset button formore than 2 seconds.3 Push [SEL] (Select) button to make this unitstandby for registration with waiting status.Note: To exit waiting status, press [DISP] but-ton.4 Operate your Bluetooth®device to input thePIN code for connection. (Default PIN codeis "0000") Once pairing/registration is successful, the regis-tered Bluetooth®device can automatically com-municate with this unit.Notes:¡The text display of Bluetooth device name andtelephone directory on this unit is only supportedwith English characters, other languages andundisplayable characters/symbols will be con-verted into an asterisk (*).¡If registration is not successfully completed within1 minute, “TIME OUT” appears and the screen forregistration number selection resumes. ¡If registration fails because of mismatched PINcode, “PAIR ERR” appears and the screen for reg-istration number selection resumes. ¡Depending on the communication status, it maytakes 5 to 40 seconds for device connection.(Bluetooth®) indicatorlights when a Bluetooth®device is connected,and blinks during a call.Display changePress [DISP] (Display) to change the display.ClockRegistered devicename(Example)Registration of a Bluetooth®device with this unit[BAND][SRC][s]/[d][VOL] (SEL) [1] through [6] (preset buttons)Registration number (1 – 8)
21Notes:¡We shall not guarantee all the functions of theBluetooth®device to be connected. When opera-tions cannot be performed via this unit, operatethe system via the Bluetooth®device.¡Be aware that the battery of a Bluetooth®devicedrains faster if the Bluetooth®device is connectedto this unit.¡Even when the Bluetooth®device that is con-nected to this unit is located near this unit, soundmay be interrupted or noise may be generated.¡The Bluetooth®device with over 5-digit PIN codeis not operated with this unit.¡“DISCONN.” (DISCONNECT) is displayed whenthe Bluetooth®device is disconnected.Setting of PIN (Personal Identity Number) code1 Hold down [6] for more than 2 seconds tocall the PIN code entry mode.2 Enter a number for each digit.[s]/[d]: Selects number (0 – 9). [6]              : Selects next digit to be entered.3 Press [6] to determine the PIN code entrywhen last digit is entered.CompletedConnection of the registered Bluetooth®device to this unit1 Press the preset button(s) [1] through [6] toselect the registration number of the Blue-tooth®device of interest. (Refer to theabove.)2 Hold down [BAND] for more than 2 secondsfor connection.The Bluetooth®indicator ( ) lights. Notes:¡Even if [SRC] (Source) is pressed to change thesource, the connection stays connected. ¡Depending on the communication status, it maytakes 5 to 40 seconds for device connection.Disconnection of the Bluetooth®deviceHold down [BAND] for more than 2 seconds.The Bluetooth®indicator ( ) turns off. Note: When the Bluetooth®device is out of receptionrange or encounter serious interference by outersignal, “ERROR” appears and this unit willautomatically disconnect the connections.Deletion of the registered data1 Press the preset button(s) [1] through [6] toselect a registration number assigned to theBluetooth®device whose data is to bedeleted. (Refer to the above.)2 Hold down the preset button [1] through [5]selected above for the registration numberfor more than 2 seconds.3 Press the preset button that was pressed atthe step above again. 4 Push [SEL].Deletioncompleted
22Bluetooth®- Hands-Free PhoneIncoming call rejectionHold down [PHONE] for more than 2 secondsduring a call incoming. Outgoing call terminationHold down [PHONE] for more than 2 secondsduring making a call. (When other party doesnot answer the call.)Switching between the private mode* and hands-free modePress [BAND] during a call. The private mode and hands-free mode switchalternately every time [BAND] is pressed. (Private mode)(Hands-free mode)* The private mode is defined as the mode whereconversation is conducted with the mobile phonein a usual manner without the hands-free function. [VOL] (SEL)Use of voice dial 1 Hold down [d]for more than 2 seconds atthe standby state.2 Pronounce the name registered on the tele-phone directory. If the name matches with a piece of data on thetelephone directory registered with the mobilephone, the telephone number of the name is di-aled.Note: The Bluetooth®mobile phone itself must beequipped and support voice dial function.Phone answering Press [PHONE] during a call incoming. The Bluetooth®indicator ( ) blinks during a callincoming/making a call. Notes:¡During a call incoming, the volume of this unit auto-matically switches to 18, it restores to the original vol-ume setting when phone answering or call rejecting. ¡If the automatic answering function is activated,conversation can be automatically started after re-ceiving a call. (Refer to the below.)Phone hanging upPress [PHONE] during a call.Setting of automatic answering function Hold down [PHONE] for more than 2 secondsat the standby state. The automatic answering function toggles betweenON and OFF every time [PHONE] is held down formore than 2 seconds. (Automatic answering deactivated)(Automatic answering activated)
23Note: To have a mobile phone conversation with use of this unit, the mobile phone shall be compatible withthe Hands-Free Profile.Use of receiving/calling records or telephone directory (phonebook)1 Press [BAND] at the standby state. 2 Push [SEL] (Select).The display changes as follows: Receiving record with no respondingThe record of receiving calls (up to 5 records) that have not been taken isdisplayed.Rotation of [VOL] allows users to switch the record to be dis-played.Pressing [PHONE] allows users to make a call to the displayedrecord.Receiving record with conversation madeThe record of receiving calls (up to 5 records) that have been taken isdisplayed.Rotation of [VOL] allows users to switch the record to be dis-played.Pressing [PHONE] allows users to make a call to the displayedrecord.Calling recordThe calling record (up to 5 records) is displayed. Rotation of [VOL] allows users to switch the record to be dis-played.Pressing [PHONE] allows users to make a call to the displayedrecord.Telephone directoryThe telephone directory is displayed. Rotation of [VOL] allows users to switch the data registered on thetelephone directory to be displayed. (up to 6 entries)Pressing [PHONE] allows users to make a call to the displayeddata.Pressing [BAND] allows the deletion mode to be activated todelete the displayed data on the telephone directory. If [BAND] ispressed again after “DEL THIS!?” appears, the currently displayedone piece of data on the telephone directory is deleted. Note: To use this function, the telephone directory must be imported fromBluetooth®mobile phone to this unit. (Refer to the below)Telephone directory manually import modeThis unit becomes standby for importing the telephone directory from aBluetooth®mobile phone. (Each time for single directory data transmission)Operate the Bluetooth®mobile phone to transmit the telephone di-rectory data to this unit. Notes:¡To use this function, the mobile phone must be compatible with the Ob-ject Push Profile.¡“FAIL” is displayed and the regular mode is restored if 1 minute elapsesin the “IMPORT” flashing period without importing the telephone direc-tory from mobile phone.
24Bluetooth®- Music PlayerMusic mode activationHold down [s]for more than 2 seconds.(Music mode)If [s]is held down for more than 2 secondsagain, the phone mode is activated.(Phone mode)Note: “INVALID” is displayed and the Phone mode isrestored if 1 minute elapse in the Music modewithout detecting A2DP compatible device. Song selection[FILE d]: Next fileHold down for fast forward. Release toresume the regular play.[FILE s]: Back to the beginning of the current file.Back to the previous file. (press twice)Notes:¡The control of pressing [FILE d]/[FILE s]in music mode depends on the key definitions ofconnected device.¡Depending on the specifications of the connectedaudio device, operations may not work.Note: The Bluetooth®audio devices that can beplayed with this unit must be compatible with A2DP(Advanced Audio Distribution Profile) or AVRCP(Audio/Video Remote Control Profile).PausePress [h/5](Pause/Play)Press again to cancel.Note: Some mobile phones automatically switch toenergy saving mode or sleep mode when pause themusic playback, and automatically disconnected theBluetooth®connection (“DISCONN.” is displayed onthis unit).But if you want to reconnect the Bluetooth®connection, performing playback on the mobilephone itself.
25[ALM][d]/[s]Alarm SettingAlarm time setting1 Hold down [ALM] (Alarm) for more than 2seconds.(Alarm time display)“ALM ADJ” is displayed when the alarm time isnot adjusted.2 Hold down [ALM] for more than 2 secondsafter the above display is shown.Hour blinks3 Adjust the hour.[d]:    Sets ahead.[s]:    Sets back.Hour entered4 Push [ALM].Minute blinks5 Adjust the minute.[d]:    Sets ahead.[s]:    Sets back.Minute entered6 Push [ALM] to complete.CompletedThe alarm is set to ON automatically after com-plete alarm time setting.Alarm indicator ( ) lights.Notes:¡When the clock (apage 9) is not set, performand complete the alarm time setting, the clocktime will set to “PM 1:00” automatically. Pleasereadjust the clock time depending on the actualclock time.¡Hold down [d]or [s]to change numbers rapidly.¡When you want to readjust the alarm time, repeatsteps 1to 6.Turning ON/OFF the alarm1 Hold down [ALM] for more than 2 seconds.(Alarm time display)2 Push [ALM].(Alarm ON/OFF setting)3 Turn [ALM]clockwise or counterclockwise toselect alarm ON or OFF, then push [ALM]again to confirm the setting.(Select alarm ON,  lights.)Notes:¡Before turn ON the alarm, make sure the alarmtime is set. Failure to heed this will cause invalidselection of alarm ON.¡Hold down [ALM] for more than 2 seconds whenthe alarm is sounding also turns off the alarm.¡Access of alarm ON/OFF is available by push[ALM] in the “Alarm time display”.Activating snoozePress any button on this unit when the alarm issounding.The alarm will sound again in 9 minutes.Notes:¡If you do not turn the alarm off when the alarm issounding, the alarm sound will shut off after anhour. (including the amount of time the alarm waspostponed (snooze))¡If you connect with the optional wired remote con-trol unit (RSA-300), please notice the ALARM but-ton on RSA-300 only reflect the function ofDisplay Alarm Time. (It's not feasible for long keyoperation)
26TroubleshootingIf you suspect something wrongCheck and take steps as described below.If the described suggestions do not solve theproblem, it is recommended to take the unit to yourdealership. The product should be serviced only byqualified personnel. Please refer the checking and therepair to professionals. We shall not be liable for anyaccidents arising out of neglect of checking the unitor your own repair after your checking.Never take measures especially for those other thanindicated by italicletters in “Possible Solution”described below because those are too dangerousfor users to handle themselves.Warning¡Do not use the unit in an irregular condition, forexample, without sound, or with smoke or a foulsmell, which can cause ignition or electric shock.Immediately stop using the unit and consult yourdealership.¡Never try to repair the unit by yourself because itis dangerous to do so.Problem Possible cause aPossible solutionNo power to the unit The power cord (battery, power and ground) is connected in thewrong way.aCheck the wiring.Sound is not generated.The sound volume level is zero (MUTE).aTurn [VOL] (Volume) clockwise to increase the sound volume.There is contact between the external mute lead and the chassis.aConnect the external mute lead correctly. If the lead is unused,insulate it.The wiring of speaker lines are not correct, or a break or poorcontact arises.aCheck the wiring in accordance with the wiring diagram.NoiseThere is an electromagnetic-wave generator such as a mobile phonenear the unit or its electrical lines.aKeep an electromagnetic-wave generator such as a mobilephone away from the unit and the wiring of the unit. In case thatnoise cannot be eliminated due to the wiring harness of thetruck, consult your dealership.The contact of the ground lead is poor.aMake sure that the ground lead is connected to an unpaintedpart of the chassis securely.Noise is made in step withengine revolutions.Alternator noise comes from the truck.aChange the wiring position of the ground lead.aMount a noise filter on the power supply.CommonSome operations are notexecutable.Some operations are not executable in particular modes such as menu mode.aRead the operating instructions carefully and cancel the mode.If the unit is still out of order, consult your dealership.No sound from speaker(s)BALANCE/FADER setting is not appropriate.aReadjust BALANCE/FADER.There is a break, a short circuit, poor contact or wrong wiringregarding the speaker wiring.aCheck the speaker wiring.The speaker channels arereversed between right and left.The speaker wiring is confused between right and left.aPerform the speaker wiring in accordance with the wiring diagram.The sound field is not clear inthe stereo mode. Centralsound does not settled.The plus and minus terminals at right and left channels of speakersare connected reversely.aPerform the speaker wiring in accordance with the wiring diagram.
27The power failsunintentionally.The safety device works.aConsult your dealership.Clock time is reset. Battery cable is not correctly connected.aConnect the battery cable to the terminal that is always active.Poor reception or noiseAntenna installation or wiring of antenna cable is faulty.aCheck whether the antenna mounting position and its wiring arecorrect. In addition, check to see whether the antenna ground issecurely connected to the chassis.No power is supplied to the antenna amplifier (when using a filmantenna, etc.).aCheck the wiring of the antenna battery lead.RadioThe number of auto presetstations is less than 6.The number of receivable stations is less than 6.aMove to an area where receivable stations number is maxi-mum, and try presetting.No playback or disc ejectedThe disc is inserted upside down.aInsert a disc correctly.There is a flaw or foreign material on the disc.aRemove the foreign material, or use a flawless disc.Sound skipping or noise There is a flaw or foreign material on the disc.aRemove the foreign material, or use a flawless disc. Sound skipping due tovibrationThe unit is not sufficiently secured.aSecure the unit to the console box.The unit is tilted at over 30˚ in the front-to-end direction.aMake the angle 30˚ or less.Disc unejectableSomething such as a peeled label obstructs the disc coming out.aConsult your dealership.The microcontroller in the unit operates abnormally due to noise orother factors.aUnplug the power cord and plug it again. In case the unit is stillout of order, consult your dealership.CDThe CD-R/RWs that areplayable on other devices arenot playable on this unit.The playability of some CD-Rs/RWs may depend on the combinationof media, recording software and recorder to be used even if theseCD-Rs/RWs are playable on other devices such as a PC.aMake CD-R/RWs in different combination of media, recordingsoftware and recorder after referring to the description aboutthe compressed audio player.Sound skipping or noiseThere is a flaw or foreign material on the disc.aRemove the foreign material, or use a flawless disc.Playing VBR (Variable Bit Rate) files may cause sound skipping.aPlay Non-VBR files.No playback or disc ejected The disc has unplayable formatted data.aCheck the file format.Note: Refer to “Notes on MP3/WMA”. (aPage 34)MP3/WMA
28Troubleshooting (continued)Music is not played back evenif the USB device isconnected.The USB device and USB extension cable are not connectedcorrectly.aConnect the USB device and USB extension cable correctly.There is no music stored in a format that is supported on this unit.aCheck if there is any music data that can be played stored onthe USB device.The file system of the USB device is not compatible with this unit.aUse a USB device with a FAT12/16/32 file system.The current consumption of the USB device exceeds 500 mA.aUse a USB device with a current consumption lower than 500mA.“READING” is displayed butmusic is not played back.A USB hub is connected.aDo not use a USB hub.Too many recorded folders/files exist.aWhen there are too many recorded folders/files, it may take along time to read all of the files.iPhone is paired and playingmusic via USB connection.After a phone call is receivedand ended, the radio returnsto USB/iPod mode but thespeakers are muted.iPhone is paired with this unit via Bluetooth®and the music is outputvia Bluetooth®communication. (the music is not output from USBconnection)aOperate iPhone, tap the bottom right icon  (Bluetooth) in theiPod mode to select the Audio Device option "Speaker" insteadof option "CAR BT", and the music is output from USB connec-tion.   Always pay attention to the music output setting (Audio Device)in the iPod mode when iPhone is paired and connected with thisunit via Bluetooth®communication.USBUnable to register, connect,or call.Devices incompatible with HFP (Hands-Free Profile) cannot be used. aUse devices compatible with HFP (Hands-Free Profile). The mobile phone is not registered on this product.aConnecting and calling with an unregistered mobile phone isnot possible. Register the mobile phone on this product.The mobile phone is not connected.aCalling is not possible if the mobile phone is not connected tothis product. Connect the mobile phone to this product.The Bluetooth®device can not pair/register with this unit successfully.aCheck the device Bluetooth®setting is set to ON.aDelete the paired memory within Bluetooth®device and mainunit, then pair again.aSwitch OFF and ON with device Bluetooth®function, then pair again.aCheck the device PIN code, then input the correct PIN code forconnection.This unit and Bluetooth®device are too far apart.aBring this unit and Bluetooth®device closer together and try topair again.The other party in the callcomplains of echoing ornoise.The voice of the other party heard from the car speakers is beingpicked up by the microphone and returned to the other party.aClose the windows.aMove the microphone away from the car speakers.aLower the volume.Bluetooth®
29Phone voice is of poorquality.Phone voice is inaudible.Mobile phone reception is poor.aCheck mobile phone reception.Bluetooth®audio does notwork.The Bluetooth®audio-compliant device does not support AVRCP(Audio/Video Remote Control Profile).aCheck the instruction manual of the Bluetooth®audio-compliantdevice for support conditions.iPhone cannot connect to thisunit automatically viaBluetooth®after ignitionOFF/ON (ACC ON/OFF).iPhone is still on the Bluetooth®device discovery screen (keepsearching for devices).aOperate iPhone, tap the upper left screen button "General" to goto the previous screen and the Bluetooth®connection will auto-matically reestablished.Bluetooth®audio cannot beheard.The main unit is not in the Bluetooth®music mode.aCheck and switch to the Bluetooth®music mode.Telephone voice dial does notwork.The mobile phone does not support the voice dial function.aChange to another mobile phone which supports the voice dial function. The distance between user and microphone is too far apart, thesound is low, or the surrounding is noisy.aSpeak toward the microphone closer and keep the surrounding quiet.Sound skipping withBluetooth®audioThis unit and Bluetooth®device are too far apart.aBring the Bluetooth®device closer to this unit.There is another wireless device near this unit and interference occurs.aSwitch off the other wireless device and keep it away from this unit.Other wireless device is using the Bluetooth®profile excluding frommain unit. (Ex. All phonebook transmission)aSwitch off the transmission with wireless device.Unable to import thetelephone directory. The mobile phone dose not support Bluetooth®OPP (Object PushProfile) function. aChange to another mobile phone which supports Bluetooth®OPP function. There is no telephone or name information within exported directory. aConfirm the directory information is completely and correctly. The mobile phone is too far apart or communication interferenceoccurs.aBring the mobile phone closer to this unit or switch off the otherwireless device and keep it away from this unit. Product servicingIf the suggestions in the charts do not solve the problem, we recommend that you take it to your dealership.The product should be serviced only by a qualified technician.
30Error Display MessagesThe player for some reason cannot read the file you are trying toplay. (File recorded in an unsupported file system, compressionscheme, data format, file name extension, damaged data, etc.)aSelect a file that the player can read. Check the type of datarecorded on the disc. Create a new disc if necessary.The disc is dirty, or is upside down.aCheck the disc.The disc has scratches.aCheck the disc.No operation by some cause.aUnplug the power cord and plug it again. In case the unit is stillout of order, consult your dealership.A WMA file can be copyrighted. aThe file protected by copyright is not playable.No disc in the player. aInsert disc into the disc slot.CD/MP3/WMABluetooth®Display Possible cause aPossible solutionThe Bluetooth®module for some reason cannot function.aUnplug the power cord and plug it again. In case the unit is stillout of order, consult your dealership.Bluetooth®communication error (Module and System)aSwitch the power or ACC ON/OFF. In case the unit is still out oforder, consult your dealership.
31USBA USB device the capacity of which exceeds the acceptable currentwas connected.For some reason, an over-current was detected.aUse a USB device that has a consumption current of less than 1 A.aSwitch the source, and select the USB mode again. aCheck that the USB connector section is not dirty, and that thereis no foreign material.No operation by some cause.aTurn off the power and turn on the power again, or turn the keyto the ACC OFF position and turn the key to ACC ON positionagain.If this does not solve the problem, unplug the powercord and plug it in again. In case the unit is still out of order,consult your dealership.The player for some reason cannot read the file you are trying toplay. (File recorded in an unsupported file system, compressionscheme, data format, file name extension, damaged data, etc.)aConfirm that the USB extension cable is firmly connected, andreconnect if not. Select a file that the player can read. Checkthe type of data stored in the USB device. Format the USB de-vice if necessary.A WMA file can be copyrighted. aThe file protected by copyright is not playable.A USB device is not connected or the connected device cannot berecognized.aUse the type of USB memory that is suitable for this unit.Your USB device has no playable file.aDownload playable file to your USB device.
32MaintenanceTo remove stubborn stains1Moisten the soft cloth in dishwash-ing soap diluted with water andwring well.2Wipe lightly. Go over the same sur-face with a dry cloth.Notes:¡Since there is the possibility of water drops get-ting inside of the unit, do not directly applycleanser to the surface.¡Do not scratch the screen with your nails or otherhard objects. The resulting scratches or markswill obscure the images.Your product is designed and manufactured to en-sure a minimum of maintenance. Use a dry softcloth for routine exterior cleaning. Never use ben-zine, thinner or other solvents.AlcoholPesticideWaxBenzineThinnerCaution¡If water drops or similar wet substances get in-side the unit, it may cause a malfunction.AlcoholPesticideWaxBenzineThinnerCleaning this unit
33Notes on DiscsHow to hold the disc¡Do not touch the underside of the disc.¡Do not scratch the disc.¡Do not bend disc.¡When not in use, keep disc in the case.Unusable discsDo not use discs that fit any of the descriptionsgiven below. Using these discs may damage thediscs or cause the unit to malfunction.¡Special discs in a shape which is not round¡Partly or wholly transparent disc*Wholly semi-transparent disc may not be playedback.¡Discs with adhered labels, etc. on them¡Damaged or deformed discsPartly transparent discWholly transparent disc*Labels created by a printerDisc with adhered stickersor tapeDisc accessories(stabilizers, etc.)Protective films or sheetsDiscs with cracks,scratches or parts missingShoddily made discsDiscs with burrsPlease remove the burrsbefore use.Disc insertThe surfaces of new discs tend to be slippery.Therefore, when using such a disc for the first time,it may not load satisfactorily even when it has beeninserted into the unit.  At a time like this, insert thedisc into the unit as far as it will go until it is loadedproperly.¡When inserting a disc into or ejecting andremoving it from the unit, insert it straight in oreject and remove it straight out in parallel withthe unit. Otherwise, the disc may be scratchedor marked in the process.¡When inserting a disc, do not put one disc onanother.  Failure to observe this may cause thediscs to be jammed.Do not leave discs in the following places:¡Direct sunlight¡Near truck heaters¡Dirty, dusty and damp areas¡On seats and dashboardsDisc cleaningUse a dry, soft cloth to wipe from the centeroutward.Do not attach any seals or labels to your discs.Do not write on the disc label in a heavy pen orballpoint pen.Notes on CD-Rs/RWs¡You may have trouble playing back some CD-R/RW discs recorded on CD recorders (CD-R/RW drives), either due to their recordingcharacteristics or dirt, fingerprints, scratches,etc. on the disc surface.¡CD-R/RW discs are less resistant to high temper-atures and high humidity than ordinary musicCDs. Leaving them inside a truck for extendedperiods may damage and make playback impos-sible.¡The unit may not successfully playback a CD-R/RW that was made by the combination of writ-ing software, a CD recorder (CD-R/RW drives)and a disc if they are incompatible with one an-other.¡This player does not play CD-R/RW discs if thesession is not closed.¡Be sure to observe the handling instructions ofCD-R/RW discs.¡This player does not play CD-R/RW discs whichcontain other than CD-DA or MP3/WMA data.<Correct> <Wrong>Printed side
34Notes on MP3/WMADisplay InformationDisplayable characters¡Displayable length of file name/folder name: within30 characters. (Unicoded file and folder names arereduced by half in the number of displayable char-acters.)¡Name files and folders in accordance with thestandard of each file system. Refer to the instruc-tions of writing software for details.¡ASCII character set and special characters in eachlanguage can be displayed.ASCII character setA to Z, a to z, digits 0 to 9, and the followingsymbols:(space) ! ” # $ % & ’ ( )  * + , - . / : ; < = > ? @ [ \ ] ˆ_ ` { | } ~Notes:¡Characters may be garbled depending on encodingsoftware to be used¡Undisplayable characters and symbols will be con-verted into an asterisk (*).Common¡High bit rate and high sampling frequency are rec-ommended for high quality sounds.¡Selecting VBR (Variable Bit Rate) is not recom-mended because playing time is not displayedproperly and sound may be skipped.¡The playback sound quality differs depending onthe encoding circumstances. For details, refer tothe user manual of your own encoding softwareand writing software.¡Be sure to put an extension compatible with theformat.MP3¡It is recommended to set the bit rate to “128 kbpsor more” and “fixed”.WMA¡It is recommended to set the bit rate to “64 kbpsor more” and “fixed”.¡Do not set the copy protect attribute on the WMAfile to enable this unit to play back.CautionNever put an extension indicating compressed audio (such as “.mp3” and “.wma”) tofiles other than compressed audio files. This may not only produce noise from thespeaker damage, but also damage your hearing.Cautions as to compressed audio filesBoth of MP3 (MPEG Audio Layer-3) and WMA (Windows Media™ Audio) is a format for compressed audiofile. These formats allow users to save all the files contained in approximately 10 pieces of existing CDs onone piece of CD-R/RW.Note: Each of encoding software is not included with this unit.*MPEG Layer-3 audio coding technology licensed from Fraunhofer IIS and Thomson.Compression method Bit rate VBR Sampling frequencyMPEG 1 audio layer 3 (MP3) 32 k – 320 kbps Yes 32, 44.1, 48 kHzMPEG 2 audio layer 3 (MP3) 8 k – 160 kbps Yes 16, 22.05, 24 kHzMPEG 2.5  audio layer 3 (MP3) 8 k – 160 kbps Yes 8, 11.025, 12 kHzWindows Media Audio Ver. 2, 7, 8, 9* 64 k – 160 kbps Yes 32, 44.1, 48 kHzCompression formats* WMA 9 Professional/LossLess/Voice are not supported.Cautions as to the display of this unit¡CD-TEXTDisc title Track title¡MP3/WMAFolder name, File name¡MP3 (ID3 tag)Album name, Title name/artist name¡WMA (WMA tag)Album name, Title name/artist name
35Compressed audio file writing¡Do not save an audio file (CD-DA file) and acompressed audio file on the same disc. Failureto observe this may result in difficulty in playing.¡If compressed audio files formatted with two ormore types are saved on the same disc, eachformat shall have a different folder.¡Do not write files other than compressed audiofiles.¡Playability may depend on the combination ofwriting software and disc writer to be used.¡This unit does not support the play list function.¡Write files in a disc-at-once manner unless other-wise needed.¡You can shorten the duration between data readand playback by decreasing the quantity of files orfolders, or the depth of the hierarchy.Supported file systems■ CD-mediaISO 9660 Level 1/Level 2, Apple Extension to ISO9660, Joliet, RomeoNote: Apple HFS, UDF 1.50, Mix CD and CD Extraare not supported.■ USB-deviceFile system is FAT12/16/32Folder selection order/file playback order■ CD-media/USB-deviceMaximum number of files/folders¡Maximum number of filesCD-media: 999USB device: 65 535¡Maximum number of files in one folderCD-media: 255USB device: 999¡Maximum depth of trees: 8¡Maximum number of folders: 255 (Root folder isincluded.)Notes:¡This unit counts the number of folders irrespectiveof the presence or absence of a compressed audiofile.¡If the selected folder does not contain any com-pressed audio file, the nearest compressed audiofile in the order of playback will play.¡Playback order of this unit may be different fromthat of other compressed audio players even if thesame disc is used¡“ROOT” appears when displaying the root foldername.Root Folder(Root Directory)Folder SelectionFile SelectionTree 1 Tree 2 Tree 3 Tree 4 Tree 8(Max.)2134qqwertyy5681 87–In the order–In the orderCopyrightIt is prohibited by copyright laws to copy, distributeand deliver copyrighted materials such as musicwithout the approval of copyright holder exceptenjoying yourself personally.No warrantyAbove description complies with our investigationsas of September 2010. It has no warranty forreproducibility and displayability of MP3/WMA.Recording MP3/WMA Files on a CD-Media/USB-DeviceCommon
36Notes on Bluetooth®Frequency band usedThis product uses the 2.4 GHz frequency band, butother wireless devices may also use the samefrequency. Note the following to prevent radio wavesinterfering with other wireless devices. Microwaveovens and other industrial, scientific, and medicalequipment, in-plant radio stations used for mobileobject identification on, for example, the productionlines of factories, specified low power radio stationsthat do not require a license, amateur radio stations,and the like (hereafter abbreviated as “other radiostations”) operate in the same frequency band as thisproduct.Usage limitations¡This product is not guaranteed to be able to per-form wireless communication with all Bluetooth®compatible devices.¡Bluetooth®compatible devices for wireless com-munication comply with the standard defined byBluetooth®SIG, Inc., and need to receive certifica-tion. However, even if a Bluetooth®compatible de-vice complies with the standard, a connection maynot be possible, or the operating procedure, dis-play, or operation may differ because of the speci-fications or settings of the device.¡This product includes support for security func-tions compliant with the Bluetooth®standard, butsecurity may sometimes be insufficient dependingon the operating environment and settings.    Be careful during wireless communication.¡We assume no responsibility whatsoever for datagenerated or information leaked during wirelesscommunication.Influence from other devices¡If this product is used near another Bluetooth®compatible device or a device that uses the 2.4GHz frequency band, problems such as the devicenot working properly and noise generation arelikely to occur because of radio wave interference.¡This product may not work properly if there is abroadcasting station or the like nearby, and thesurrounding signal is too strong.Application limitations¡To use this product for listening to music or for aHands-Free call, the Bluetooth®compatible deviceneeds to support the following Bluetooth®version.    Bluetooth®Standard Ver. 2.1¡To use this product for calling with a mobilephone, the mobile phone needs to support theHands-Free Profile.¡To transfer the contacts of a mobile phone to thisproduct, the mobile phone needs to support theObject Push Profile.¡A connection may not be possible, or the operat-ing procedure, display, or operation may differ be-cause of the specifications or settings of theBluetooth®compatible device.¡Even if this product and Bluetooth®compatibledevice are close to each other, sound may be in-termittent or affected by noise because of the stateof the signal.Bluetooth®The Bluetooth word mark and logo are registeredtrademarks of Bluetooth SIG, Inc.
37SpecificationsGeneralPower Supply:                 12 V DC (11 V – 16 V) testVoltage 14.4 V, NegativegroundCurrent consumption:     Less than 2.5 A (CD mode,0.5 W 4-speaker)Maximum Power Output:45 W x 4 channels at 400Hz, Volume Control maxi-mumTone adjustment range:       Bass:                         ± 12 dB at 100 Hz     Treble:                       ± 12 dB at 10 kHzPower Output:                 18 W per channel into 4 Ω,40 to 30 000 Hz at 3 %THDSuitable Speaker Impedance:                     4 ΩDimensions (W x H x D): 178 mm x 50 mm x 155mm {7” x 1 15/16” x 6 1/8”}Weight:                            1.2 kg{2 lbs. 10 oz.}USB connector                     USB standard      compatibility:             1.1/2.0 full speed     File system:               FAT12/16/32     Maximum supply      current:                      1 APlayable audio format: MP3/WMA     Recommended      capacity:                    Less than 4 GB (1 partition)Front AUX input                    Input impedance:       10 kΩ     Maximum input level:2.0 V     Connector:                 3.5 mm ø Stereo mini pin     Input sensitivity:        200 mVrmsRear AUX input                    Input impedance:       10 kΩ     Maximum input level:2.0 V     Input sensitivity:        200 mVrmsFM stereo radioFrequency Range:           87.9 MHz – 107.9 MHzUseable Sensitivity:         12 dBf (1.1 µV/ 75 Ω,S/N 30 dB)50 dB Quieting Sensitivity:17 dBf (1.8 µV/ 75 Ω)Frequency Response:      30 – 15 000 Hz ±3 dBAlternate ChannelSelectivity:                       75 dBStereo Separation:           35 dB at 1 kHzSignal/Noise Ratio:          70 dB (Mono)AM radioFrequency range:             530 kHz – 1 710 kHzUsable sensitivity:           28 dB/µV (S/N 20 dB)Weather band radioFrequency range:             162.400 MHz – 162.550MHzUsable sensitivity:           3 dB/µV (S/N 20 dB)Signal/Noise Ratio (40 dB/µV):                     50 dBCD playerSampling Frequency:       8 times oversamplingDA Converter:                  1 bit/4 DAC SystemError Correction System: Spot size detection methodPick-Up Type:                  3-beamLight Source:                   Semiconductor laserWavelength:                    790 nmFrequency Response:      20 – 20 000 Hz (±1 dB)Signal to Noise Ratio:      85 dBWow and Flutter:             Below measurable limitsChannel Separation:        75 dBBluetooth®CommunicationFrequency: 2 402 MHz – 2 480 MHzNumber of Channels: 79 ChannelsCommunication Mode: Frequency Hopped SpreadSpectrum CommunicationRF Output: 0 dBm (0.8 mW)Service Area: Within 10 mApplicable Bluetooth®Version: Version 2.1 + EDRAbove specifications comply with EIA standards.Note: Specifications and the design are subject tomodification without notice due to improvements intechnology.Power Output: 16 W RMS x 4 Channels at 4 Ω and ≤ 1% THD+NSignal to Noise Ratio: 85 dBA (reference: 1 W into 4 Ω)
38Specification from the Terminal End (Rear Connector of This Unit)Cavity Pin #Function I/OA1 1J1939 CAN-H*I/OA2 2J1939 CAN-L*I/OA3 3Park Lights IA4 4ACC (Ignition) IA5 5Amp ControlOA6 6Dim PWM IA7 7Battery IA8 8Power Ground IB1 9RR+ (Speaker)OB2 10 RR– (Speaker)   OB3 11 RF+ (Speaker) OB4 12 RF– (Speaker)   OB5 13 LF+ (Speaker) OB6 14 LF– (Speaker)   OB7 15 LR+ (Speaker) OB8 16 LR– (Speaker)   OC1 17 Power Ground IC2 18 Amp Sense IC3 19 N/CC4 20 N/CC5 21 ASWC IC6 22 N/CC7 23 L_AUX_IN IC8 24AUX_SHIELD_GNDIC9 25 AUX _COM IC10 26 R_AUX_IN IC11 27 AUX _ON_OFF IC12 28 Power Ground IC13 29 N/CC14 30 Power Ground IC15 31 MIC + IC16 32 MIC −  IC17 33 N/CC18 34 N/CC19 35 N/CC20 36 N/CSpecification from the terminal end (Rear connector of this unit)Cavity C191613107412017141185212345678123456783 6 9 12 15 1835322926232017363330272421189101112131415161234567819 22 25 28 31 34Cavity BCavity ACautionThis product is designed without a fuse inside due tofuses already exist in your vehicle. If your vehicle is without the fuse or a circuit breaker toprotect this unit, please consult your dealership add thespecified fuse* or a circuit breaker at the BATTERY leadof your vehicle's harness.*We would recommend to use fuses of the specifiedrating not exceed (15 A). Using fuses that exceed theprescribed capacity could cause this product to startsmoking, ignite or other malfunction.Note:*This pin (J1939 CAN-H/J1939 CAN-L) is not available because it is forfuture use. Please do not connect tothis pin.Attention:Install the Microphone at least 20 cm {7 7/8”} away from the mobilephone to prevent noise generation.
39Memorandum
                                                                    YFM264C223ZA    PTW1010-0        Printed in Taiwan

Navigation menu