Panasonic of North America 96NBL-C131 2.4GHz WIRELESS NETWORK CAMERA User Manual users manual
Panasonic Corporation of North America 2.4GHz WIRELESS NETWORK CAMERA users manual
UserManual.wiki
>
Panasonic of North America
>
96NBL C131 User Manual
users manual
Navigation menu
Upload a User Manual
Namespaces
Wiki Guide
HTML
PDF
Info
Views
User Manual
Discussion / Help
Navigation
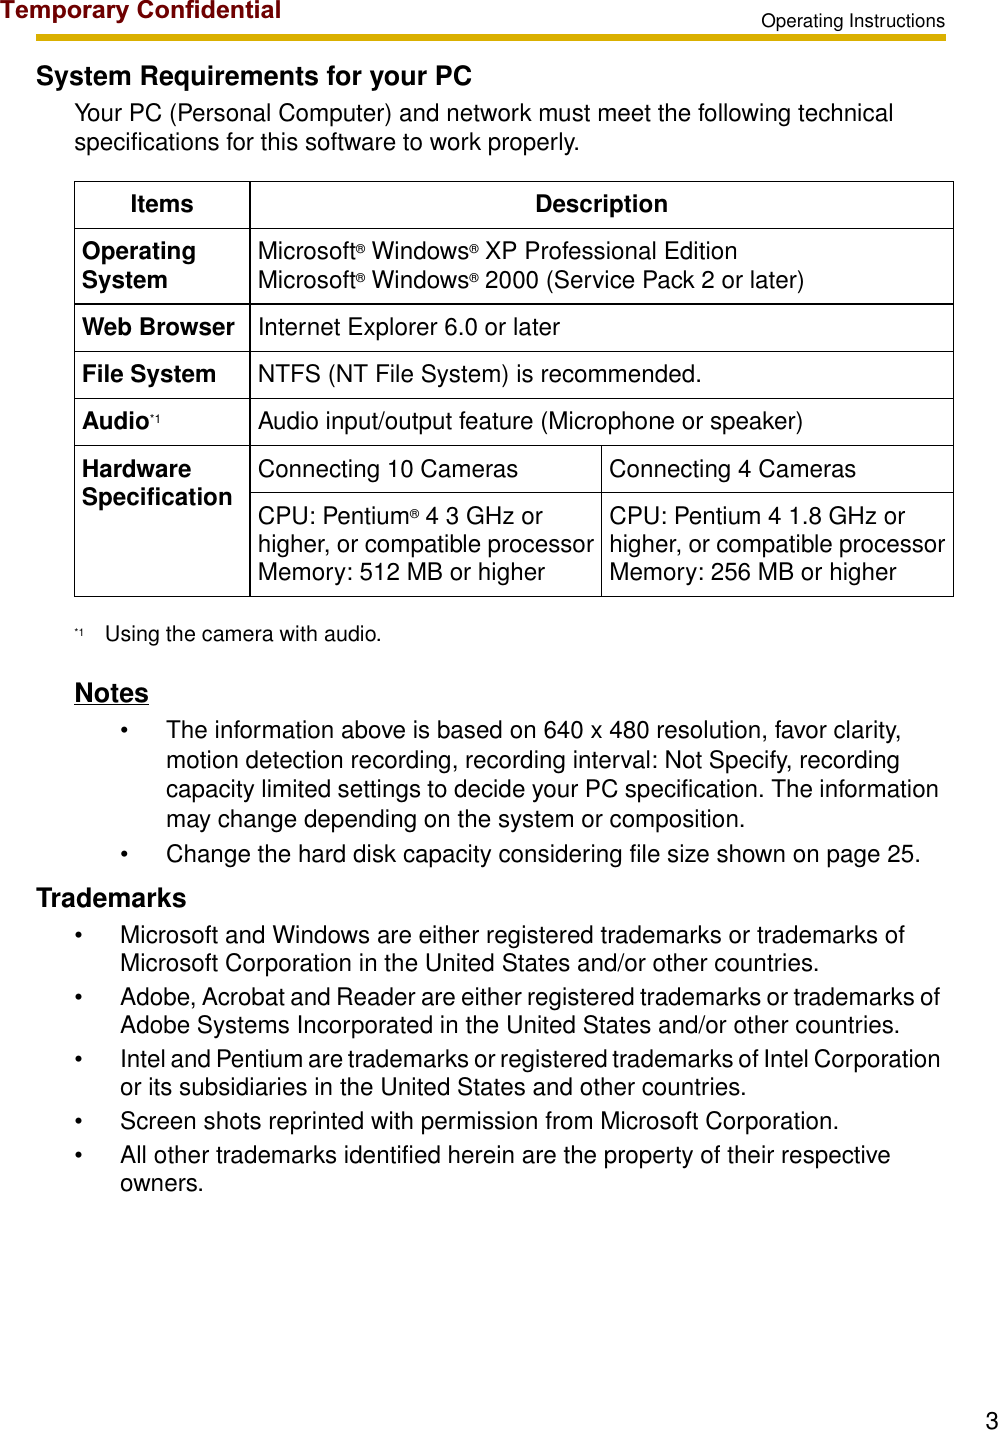


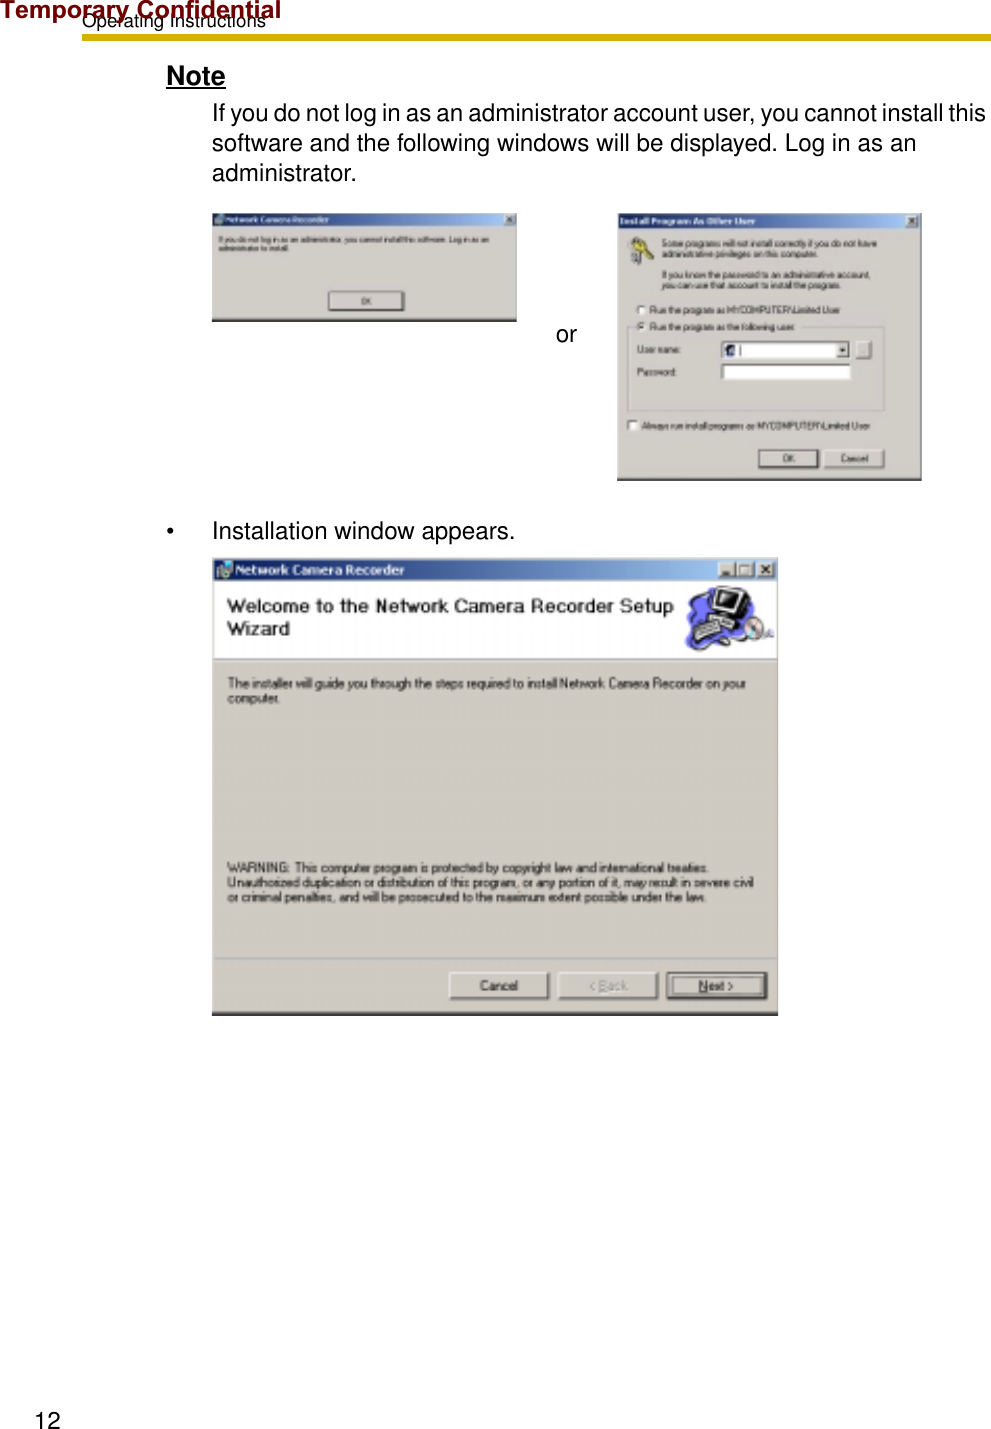
![Operating Instructions111.5 Installing This SoftwareIt is recommended that you create an administrator account user on your PC to securely manage recorded images. After logging in as the set user, install this software.1. Insert the CD-ROM to the CD-ROM drive.• Installation Selection window automatically appears.Notes• If Installation Selection window does not appear, open the CD-ROM and double-click "autorun.exe" file.• Adobe® Acrobat® Reader® must be installed on your PC. It can be downloaded from the Adobe website.2. Click [Install Network Camera Recorder].• If this software has been installed, the following window is displayed.Install this software after removing this software at [Start] [Settings] [Control Panel] [Add/Remove Programs] window.Temporary Confidential](https://usermanual.wiki/Panasonic-of-North-America/96NBL-C131/User-Guide-738029-Page-11.png)
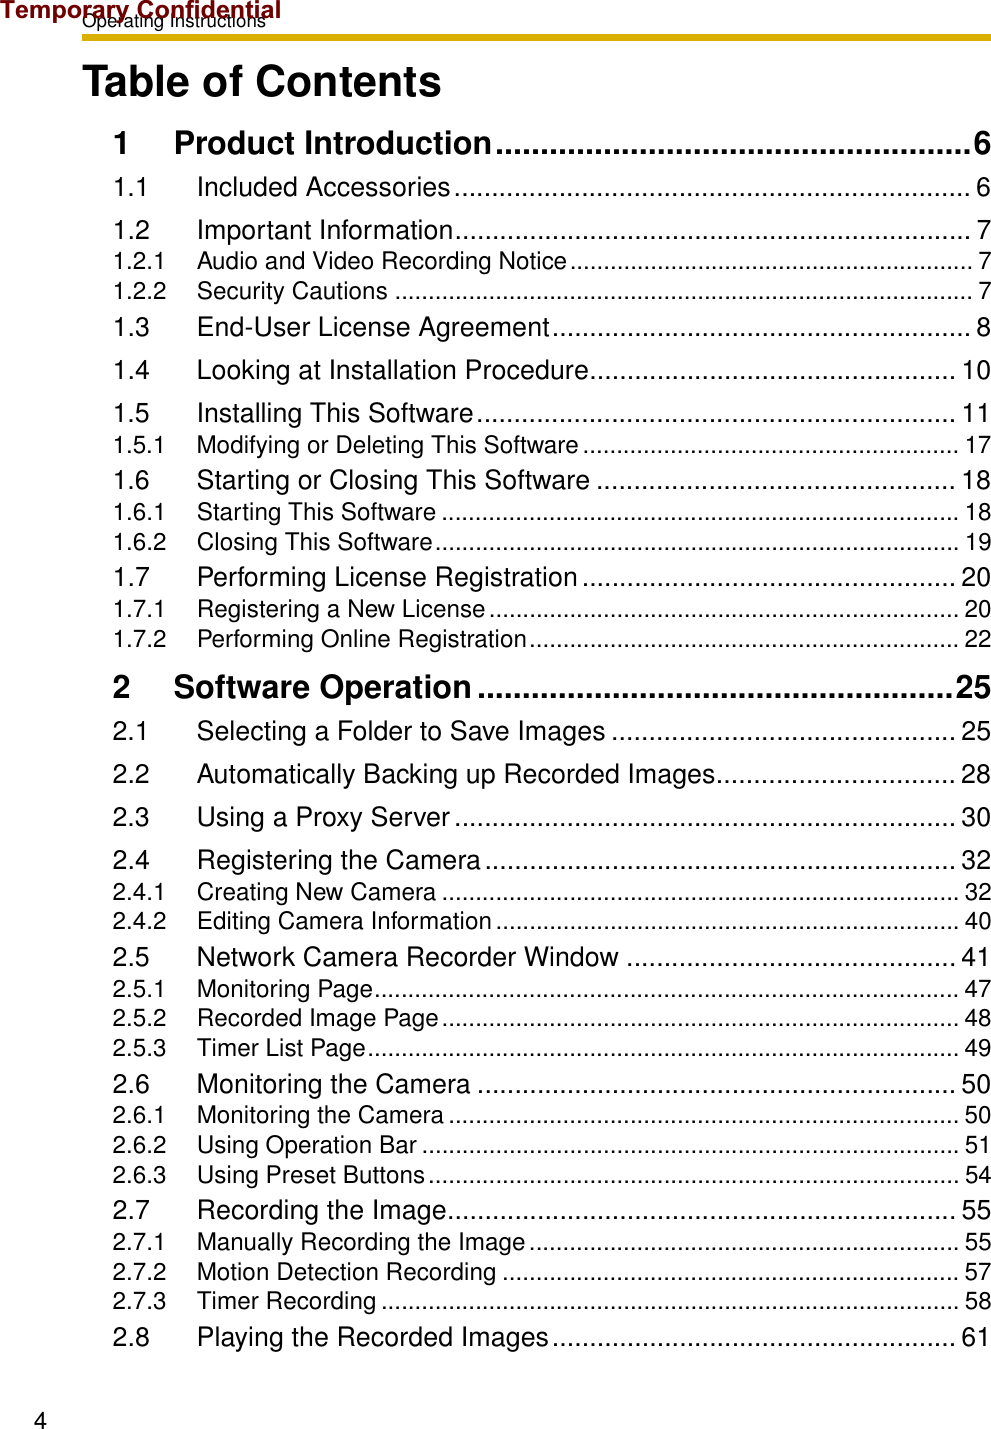
![Operating Instructions133. Click [Next>].• License Agreement window appears.4. Check [I Agree] and click [Next>].• Choose Destination Location window appears.Notes• To securely manage recorded images, selecting [Just me] is recommended.• [Everyone] means users having an administrator account.Temporary Confidential](https://usermanual.wiki/Panasonic-of-North-America/96NBL-C131/User-Guide-738029-Page-13.png)
![Operating Instructions14• Click [Browse...] to change the destination folder.• The destination must have more than 200 MB free capacity.• If you click [Disk Cost...], installable drives, each drive disk size and free capacity are displayed.5. Select the destination folder, and click [Next>].• Installation Confirmation window is displayed.Temporary Confidential](https://usermanual.wiki/Panasonic-of-North-America/96NBL-C131/User-Guide-738029-Page-14.png)
![Operating Instructions156. Click [Next>].• This software starts installation.• After the installation, Installation Complete window is displayed.Temporary Confidential](https://usermanual.wiki/Panasonic-of-North-America/96NBL-C131/User-Guide-738029-Page-15.png)
![Operating Instructions167. Click [Close].• is displayed on the desktop.• After the restart, is displayed on the system tray. lights red during recording.Notes• If the operation window is started but is displayed, this software is working. Timer recording is also working.• To close this software, right-click and select [Exit]. The button will be deleted from the system tray.Temporary Confidential](https://usermanual.wiki/Panasonic-of-North-America/96NBL-C131/User-Guide-738029-Page-16.png)
![Operating Instructions171.5.1 Modifying or Deleting This SoftwareTo modify or delete this software, follow the steps below.1. Insert the CD-ROM to the CD-ROM drive.• Installation Selection window automatically appears.• If Installation Selection window does not appear, double-click "setup.exe" file on the CD-ROM.2. Click [Install Network Camera].• If this software have been installed, the following window is displayed.3. Check [Repair Network Camera Recorder] or [Remove Network Camera Recorder], and click [Finish].• If the modification or deletion is complete, the confirmation window is displayed.NoteIf you delete this software, the camera settings and recorded images are not deleted. To delete them, manually delete NCR2 folder at the destination.Temporary Confidential](https://usermanual.wiki/Panasonic-of-North-America/96NBL-C131/User-Guide-738029-Page-17.png)
![Operating Instructions181.6 Starting or Closing This Software1.6.1 Starting This SoftwareDouble-click on the desktop to start this software.• Initial window of this software is displayed.Notes• These softwares cannot work at the same time. Use only a software.• This software can be started from the program menus. Clicking "ncr2.exe" file at the destination also starts this software.• If the license is not registered, the License Registration window is displayed. Click [Issue a license key on online registration] to register a license.Temporary Confidential](https://usermanual.wiki/Panasonic-of-North-America/96NBL-C131/User-Guide-738029-Page-18.png)
![Operating Instructions191.6.2 Closing This SoftwareClick [File] [Exit] on the menu bar.Temporary Confidential](https://usermanual.wiki/Panasonic-of-North-America/96NBL-C131/User-Guide-738029-Page-19.png)
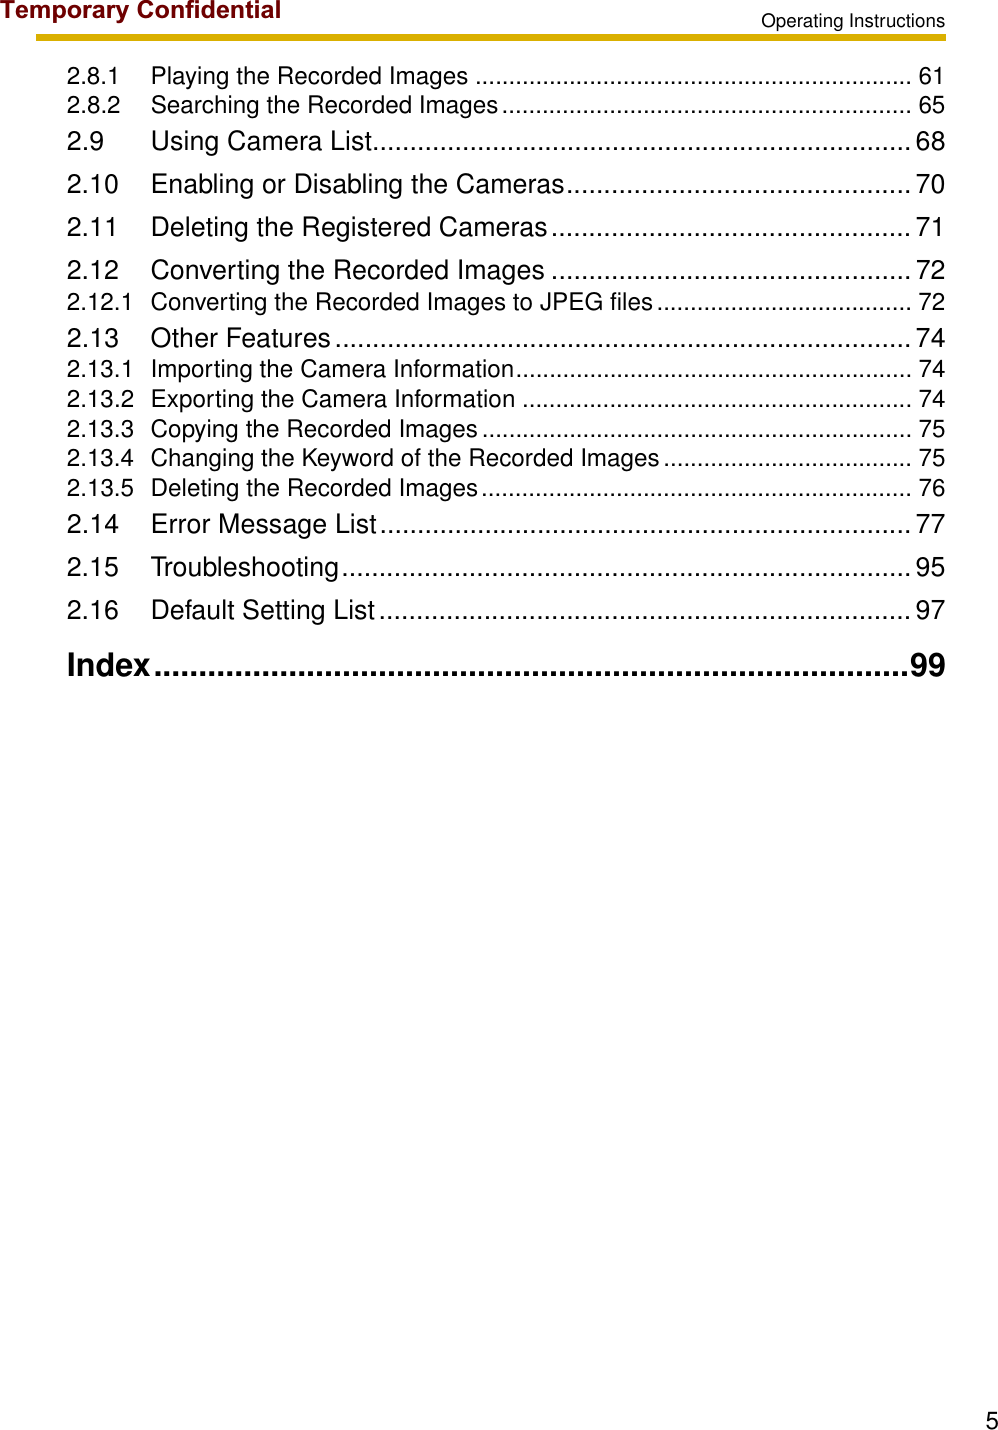
![Operating Instructions201.7 Performing License RegistrationIf the license is not registered, the License Registration window is displayed. Click [Issue a license key on online registration] to register a license.License key can be obtained after you registered online. Follow the steps below.1.7.1 Registering a New License1. Display the License Registration window.• If the license is not registered, the License Registration window is displayed.• You can also display the window by selecting [Help] [License Registration].2. Click [Issue a license key on online registration].• The online registration website is displayed.• See page 22 for the online registration.3. Enter the registration code and license key, and click [OK].• Characters are case sensitive.• The following window is displayed.Temporary Confidential](https://usermanual.wiki/Panasonic-of-North-America/96NBL-C131/User-Guide-738029-Page-20.png)
![Operating Instructions214. Click [OK].NoteIf the following window is displayed, the registration code or license key is incorrect. Confirm them, and enter them again.NoteIf the registration is complete, [License Registration] on the menu bar is grayed out.Temporary Confidential](https://usermanual.wiki/Panasonic-of-North-America/96NBL-C131/User-Guide-738029-Page-21.png)
![Operating Instructions221.7.2 Performing Online Registration1. Display the online registration website (step 1 and 2 on page 20).Notes• Enter "http://www.comm-9.com/ncr/" on the address bar, and press [enter] on the keyboard to access the online registration website.• Internet Explorer 6.0 or later is recommended. Other web browsers may not display the online registration website.• The online registration can be performed from other PCs that are connected to the Internet.Temporary Confidential](https://usermanual.wiki/Panasonic-of-North-America/96NBL-C131/User-Guide-738029-Page-22.png)
![Operating Instructions232. Enter the registration code, and click [Next>].• The registration code are shown on the attached registration code stickers.• The Privacy Information website is displayed.3. Enter the requirements, and click [Register].NoteThe login password will be required in the future support. Be sure to make a note to remember it.Temporary Confidential](https://usermanual.wiki/Panasonic-of-North-America/96NBL-C131/User-Guide-738029-Page-23.png)
![Operating Instructions24• The license key is displayed.NoteWrite the license key onto the registration code stickers to remember it. Attach the sticker on the back cover of this Operating Instructions.The E-mail to inform a license key is sent to the registered E-mail address.When the license key is lost1. Enter "http://www.comm-9.com/ncr/" on the address bar, and press [enter] on the keyboard to access the online registration website.2. Enter the registration code and login password, and click [Next>].• The license key is displayed.When the login password is lost1. Enter "http://www.comm-9.com/ncr/" on the address bar, and press [enter] on the keyboard to access the online registration website.2. Click [If you forget your login password, please click here].3. Enter the registration code and click [Submit].• The E-mail to inform a license key is sent to the registered E-mail address.Temporary Confidential](https://usermanual.wiki/Panasonic-of-North-America/96NBL-C131/User-Guide-738029-Page-24.png)
![Operating Instructions261. Start this software and select [Tools] [Preferences] [Destination Folder] on the menu bar.• The destination folder page is displayed.Temporary Confidential](https://usermanual.wiki/Panasonic-of-North-America/96NBL-C131/User-Guide-738029-Page-26.png)
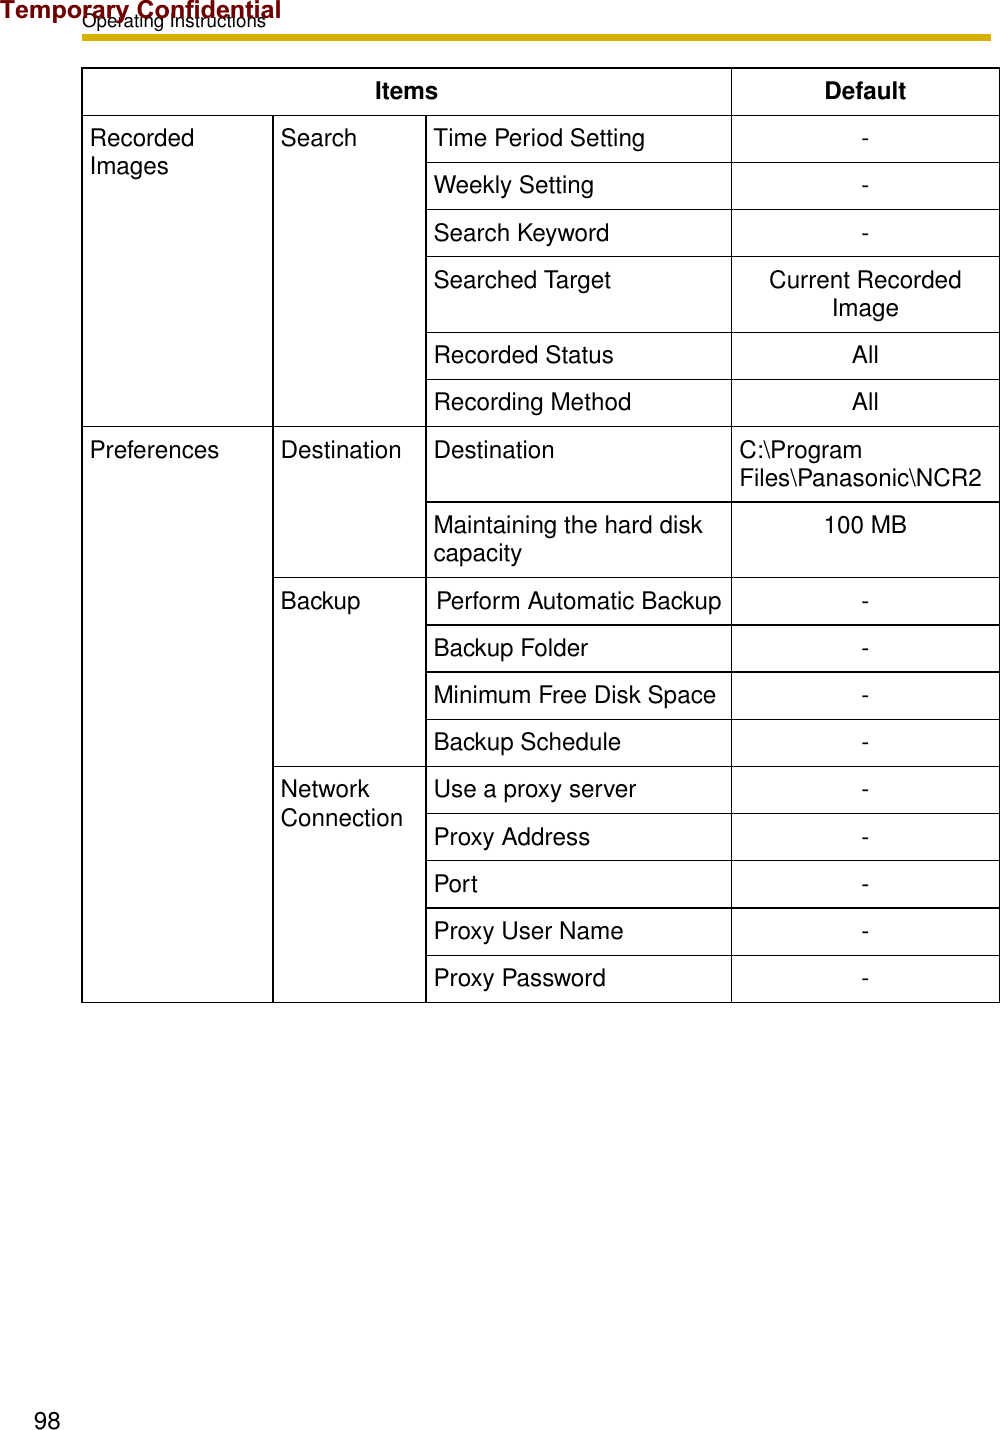
![Operating Instructions272. Click [Browse...].• The selecting folder page is displayed.3. Select the destination, and click [OK] .• Create the folder in advance.4. Set the hard disk free space.• Set enough capacity (100 MB or greater) as your destination folder to prevent the system from getting unstable.5. Click [OK].Notes• Recorded images are saved in the following folder.• If the image cannot be recorded, error message is displayed.•Do not manually delete, move or change any files in the index folder or data folder.NCR2data Folder to store recorded imagesDestination folderFolder to store data to search recorded imagesindexTemporary Confidential](https://usermanual.wiki/Panasonic-of-North-America/96NBL-C131/User-Guide-738029-Page-27.png)
![Operating Instructions282.2 Automatically Backing up Recorded ImagesRecorded images can be backed up automatically at the specified time.1. Select [Tools] [Preferences] [Backup] on the menu bar.• The backup setting page is displayed.2. Set the parameters, and click [OK].(a)(b)(c)Check the box.Temporary Confidential](https://usermanual.wiki/Panasonic-of-North-America/96NBL-C131/User-Guide-738029-Page-28.png)
![Operating Instructions29ParametersNotes• Backup feature automatically creates the last dated folder, and copies the recorded images and data for search in the destination folder. • Backup feature backs up only newly-recorded images after the last backup was executed.• If the capacity has reached the limit, the backup is stopped, and error message is displayed (see page 93).• The backup images can be searched. Select [Backup Image] on the search page (see page 65).• The recording operation of this software may be delayed during backup.• If images are recorded during backup, the recorded images will be backed up next time.•Do not manually delete, move or change any files in the index folder or data folder in the backup folder.(a) Select your destination folder for backup. See page 26 for how to access the backup page.• Create the folder in advance.• The level of the folder-hierarchy depth must be within 6 to prevent the system from getting unstable.(b) Set the hard disk free space to stop backing up before the system becomes full.• Set enough capacity (100 MB or greater) as your destination folder to prevent the system from getting unstable.(c) Set the date and time to execute backup.Temporary Confidential](https://usermanual.wiki/Panasonic-of-North-America/96NBL-C131/User-Guide-738029-Page-29.png)
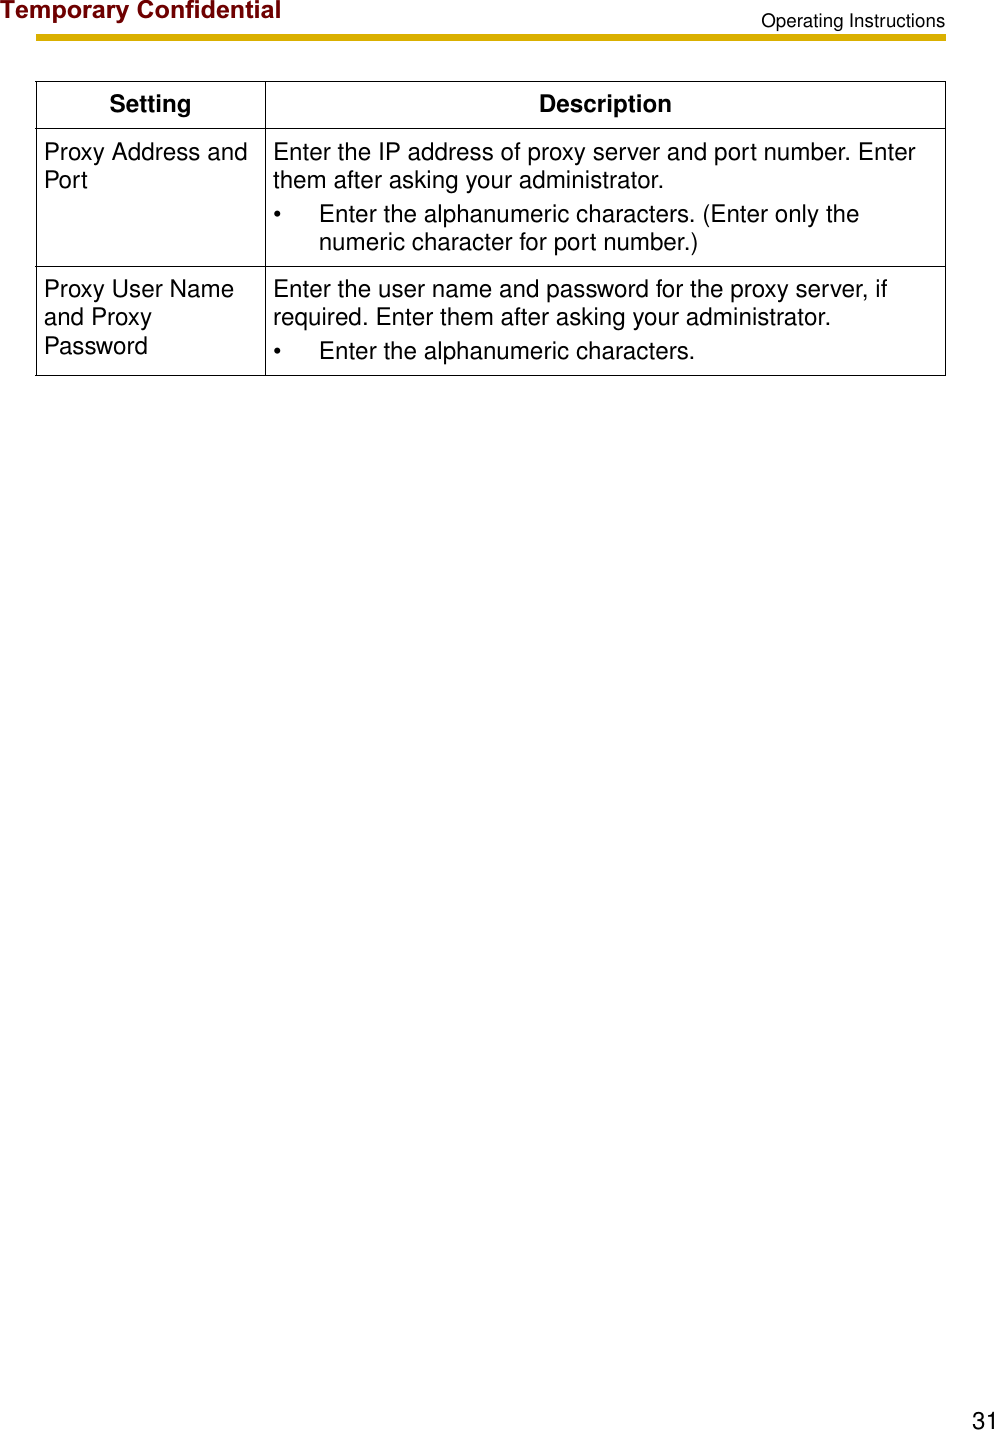
![Operating Instructions302.3 Using a Proxy ServerYou need to set the following settings to monitor the camera on the Internet you using a proxy server. (You cannot connect to the camera without the proxy settings.)If you do not use a proxy server, this setting is not required.1. Select [Tools] [Preferences] [Network Connection] on the menu bar.• The proxy setting page is displayed.2. Check [Use a proxy server], set the parameters, and click [OK].Temporary Confidential](https://usermanual.wiki/Panasonic-of-North-America/96NBL-C131/User-Guide-738029-Page-30.png)
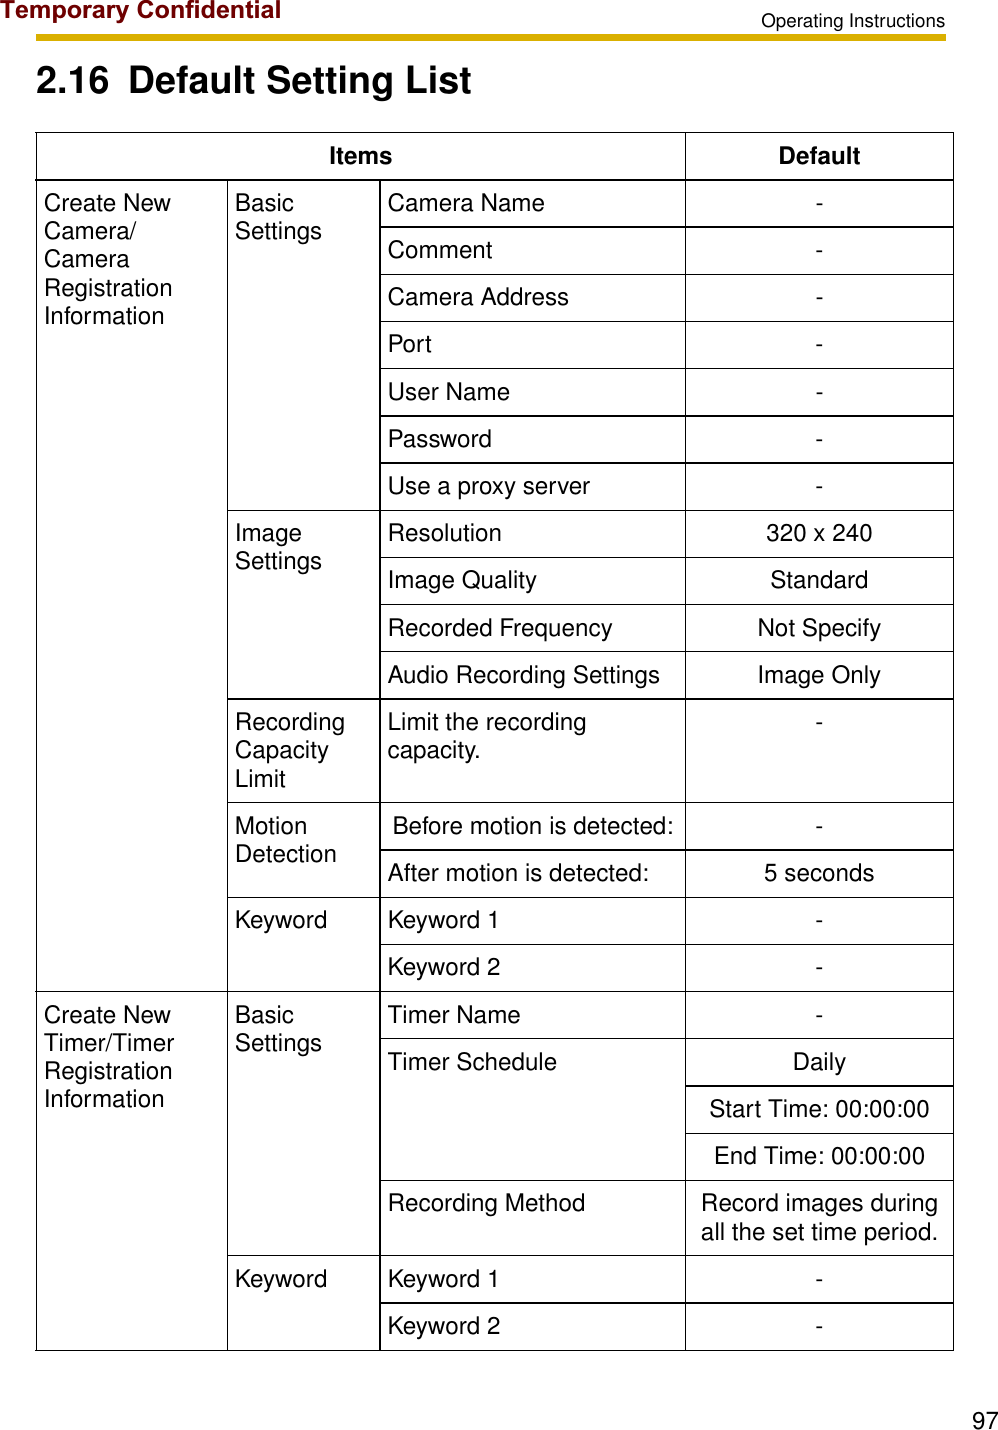
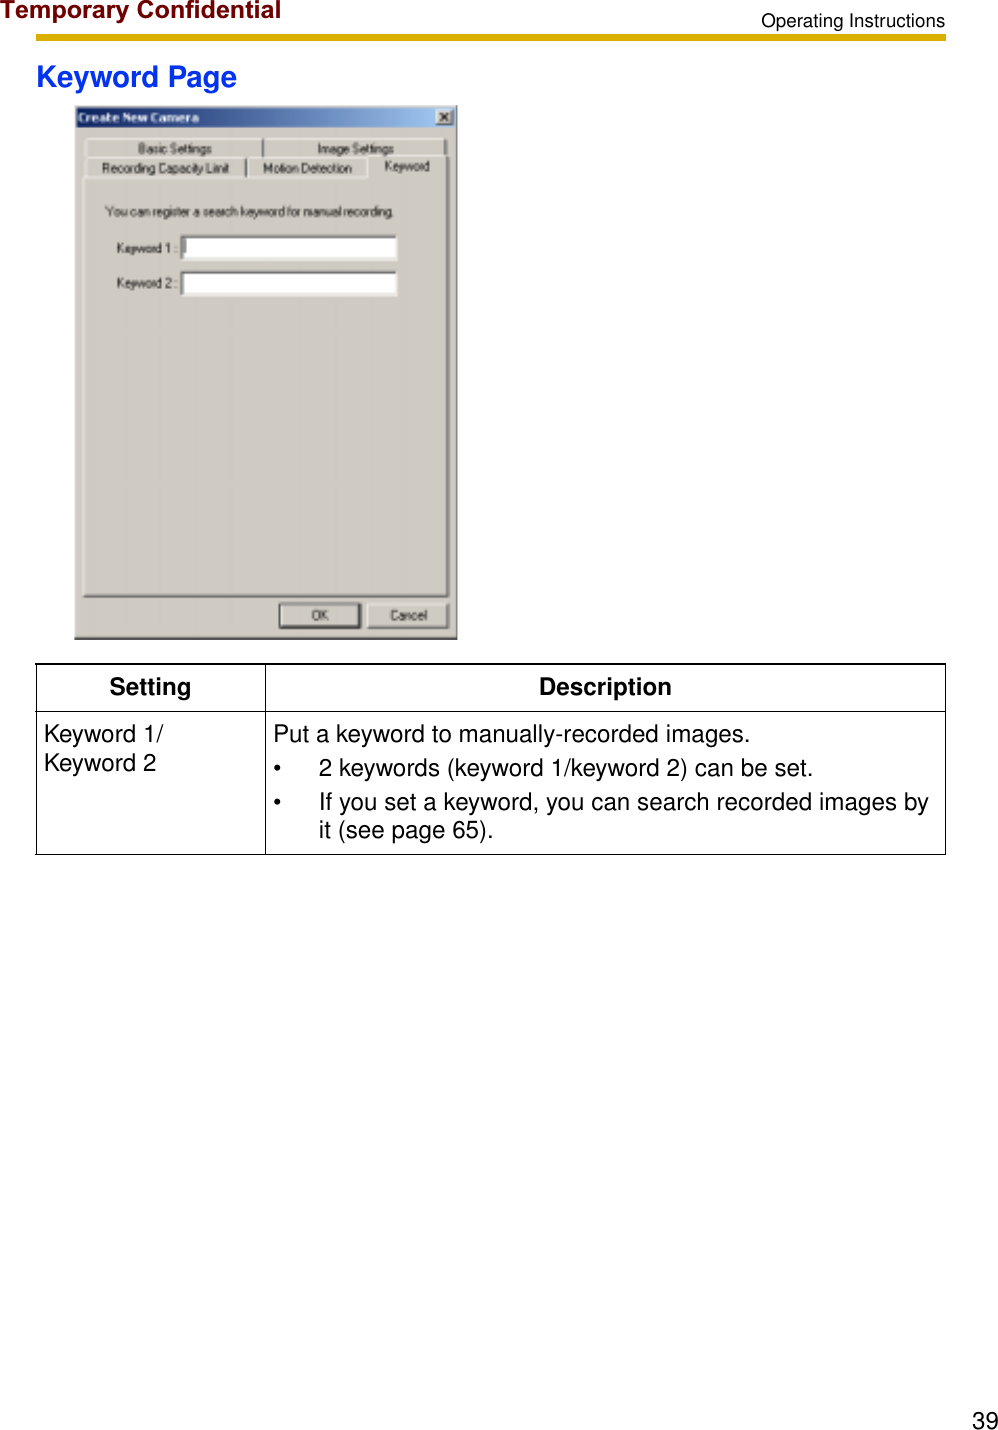
![Operating Instructions322.4 Registering the CameraBefore you can view or record images, each camera must be configured on this software.• If you change the destination folder from the default folder of this software, select a folder to save images in advance (see page 25).• The camera information can be imported and exported (see page 74).2.4.1 Creating New Camera1. Select [Camera] [Create New Camera] on the menu bar.• You can create a camera on the menu displayed by right-clicking on the camera list (see page 68).• The create new camera page is displayed.2. Set the parameters and click [OK].• The camera preview is displayed on the camera list.Page Selection TabBasic Settings : Displays the setup page for the camera name and IP address (see page 33).Image Settings : Displays the setup page for the image size and recording method (see page 35).Recording Capacity Limit : Displays the setup page for the recording capacity limit value (see page 36).Motion Detection : Displays the setup page for the motion detection recording (see page 37).Keyword : Displays the setup page for recorded image keyword (see page 39).Temporary Confidential](https://usermanual.wiki/Panasonic-of-North-America/96NBL-C131/User-Guide-738029-Page-32.png)
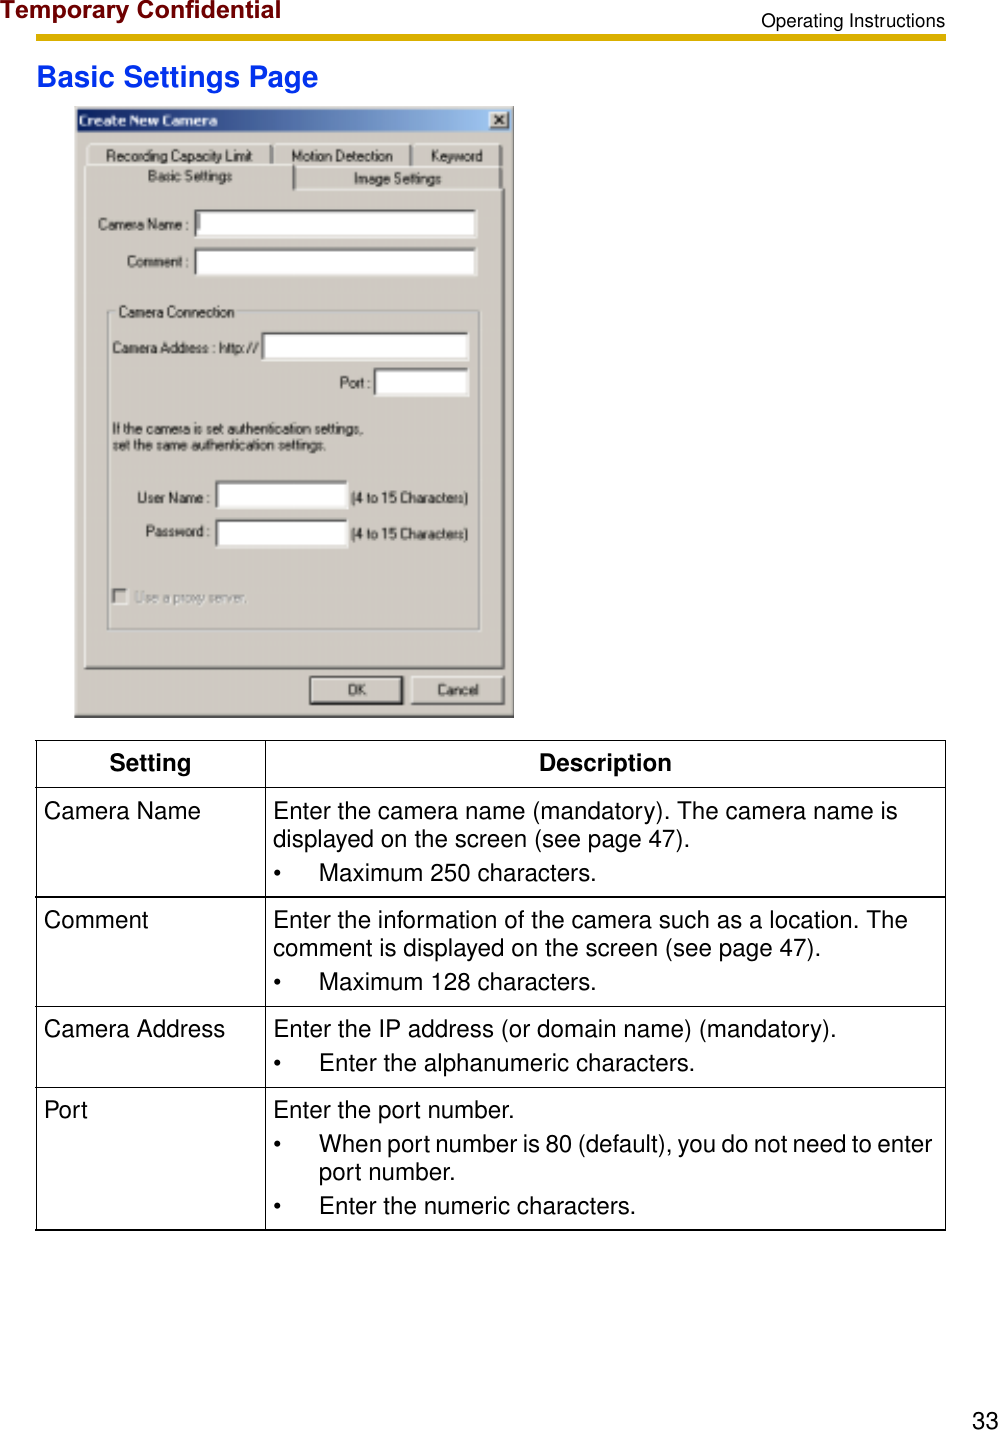
![Operating Instructions34NoteIf this software cannot access the camera, the following message is displayed. Confirm the camera setting and try again.User Name/Password If you set security setting (authentication setting), enter administrator user name and password of the camera.• Enter the alphanumeric characters.• 4 to 15 characters.• Password is saved in encryption.Use a proxy server If you enable the proxy settings (see page 30), [Use a proxy server] is enabled. If the camera is using a proxy server, check [Use a proxy server].Setting DescriptionTemporary Confidential](https://usermanual.wiki/Panasonic-of-North-America/96NBL-C131/User-Guide-738029-Page-34.png)
![Operating Instructions35Image Settings Page• Default is displayed when you register a camera.• If you can change default by checking [Set to Default] and clicking [OK], the current settings become as a default.• If you click [Return to Default], the settings return to a default.NoteIf the camera disables setting changes, resolution or image quality settings may not work properly.Setting DescriptionResolution Select 640 x 480, 320 x 240 (default) or 160 x 120.Image Quality Select Favor Clarity, Standard (default) or Favor Motion.Recorded Frequency Set the interval to record images.[Not Specify*1, Specify*2 or Setting Intervals*3]*1 If you record images as they are set on the camera, set to [Not Specify]. Images are recorded as the camera sends images through its max. bandwidth.*2 If you select [Audio and Image], you cannot specify the intervals.*3 Due to the network environment, you may not monitor the camera at the set intervals or max. bandwidth.Recording Setting Select to record the image with audio or only images.Temporary Confidential](https://usermanual.wiki/Panasonic-of-North-America/96NBL-C131/User-Guide-738029-Page-35.png)
![Operating Instructions36Recording Capacity Limit Page• Default is displayed when you register a camera.• If you change default by checking [Set to Default] and clicking [OK], the current settings become as a default.• If you click [Return to Default], the settings return to a default.• If you change the capacity to a smaller value than the current capacity, this software deletes old images. (E.g. if you change the capacity to 200 MB when you recorded images up to 250 MB, 50 MB old images are deleted.)Setting DescriptionLimit Recording Capacity To limit the capacity, check [Limit the recording capacity] and set the capacity. Select [Stop recording] or [Delete old images and keep recording] (by 1 minute) when the capacity is full.Temporary Confidential](https://usermanual.wiki/Panasonic-of-North-America/96NBL-C131/User-Guide-738029-Page-36.png)
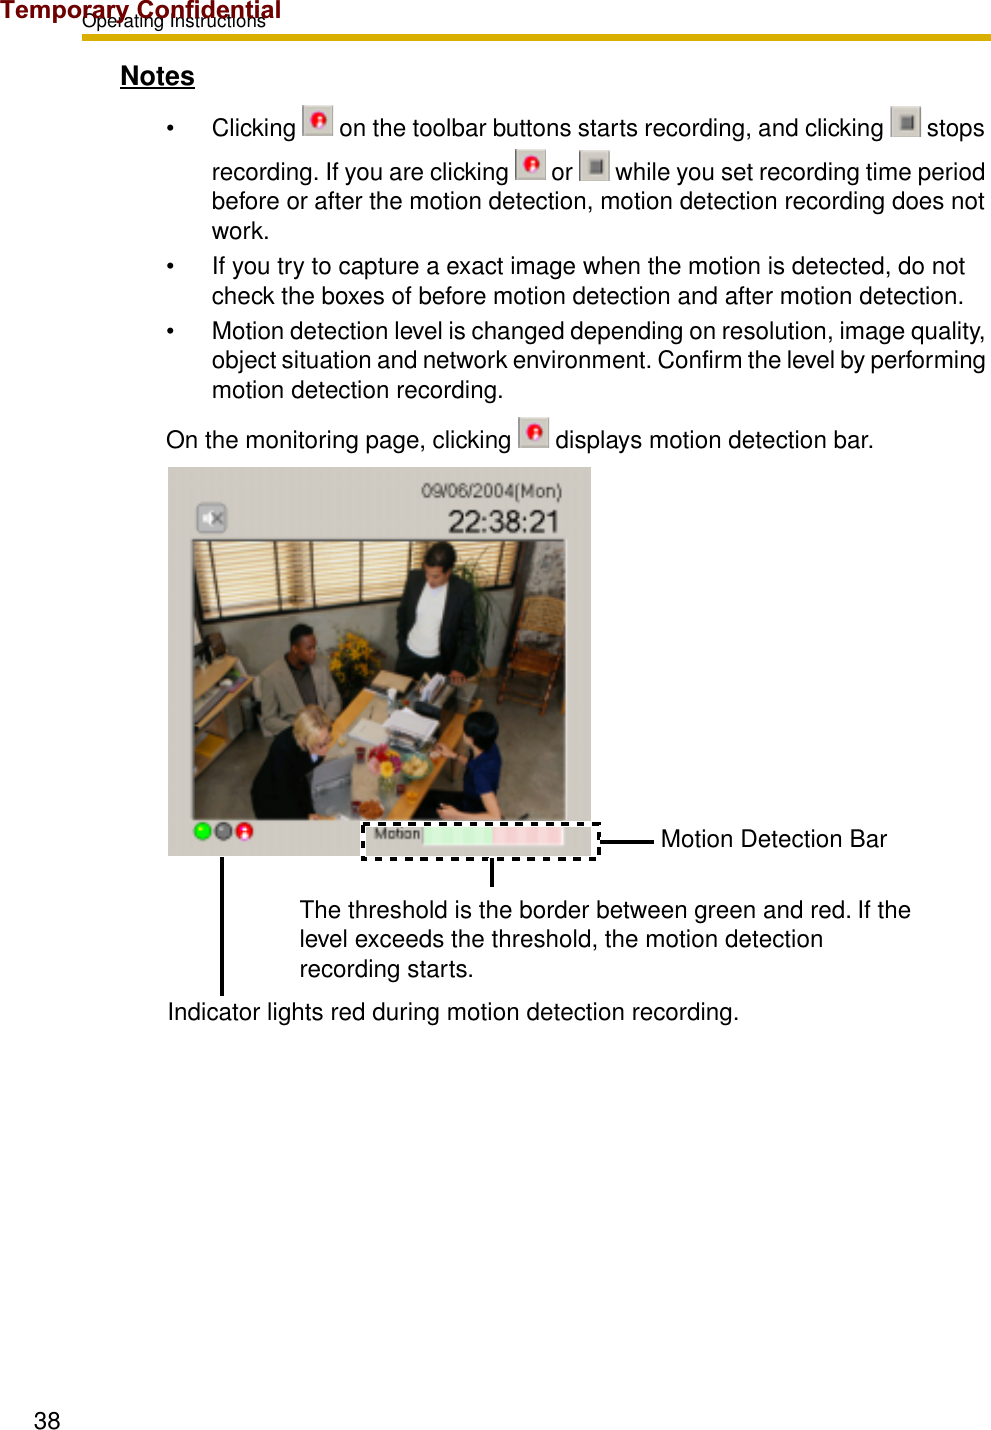
![Operating Instructions37Motion Detection PageE.g. If the recording time overlaps other settings, a continuous image is recorded.• If you set to record images before or after 5-second period and another motion is detected, 1 image is recorded.• Default is displayed when you register a camera.• If you can change default by checking [Set to Default] and clicking [OK], the current settings become as a default.• If you click [Return to Default], the settings return to a default.Setting DescriptionRecording Method Record images in the time period before or after motion detection.Threshold Adjust the threshold to start recording. If the threshold is set low, this software sensitively detects changes.Sensitivity If you set sensitivity high, amplitude of motion detection bar gets jumpy (see page 47).5 seconds 5 seconds5 seconds 5 secondsMotion is detected.Motion is detected.Temporary Confidential](https://usermanual.wiki/Panasonic-of-North-America/96NBL-C131/User-Guide-738029-Page-37.png)
![Operating Instructions402.4.2 Editing Camera Information1. Select [Camera] [Edit Current Camera] on the menu bar.• You can change camera information on the menu displayed by right-clicking on the camera list (see page 68).• The change camera information page is displayed.2. Set the parameters and click [OK].• See page 33 to page 39 for details about parameters.Temporary Confidential](https://usermanual.wiki/Panasonic-of-North-America/96NBL-C131/User-Guide-738029-Page-40.png)
![Operating Instructions42E.g. Changing the layout moving the operation barNoteIf you move the window while pressing [Ctrl] on the keyboard, the window is located as an independent window.You can move the location by dragging.The window is embedded by dragging on the page.Temporary Confidential](https://usermanual.wiki/Panasonic-of-North-America/96NBL-C131/User-Guide-738029-Page-42.png)
![Operating Instructions43E.g. Changing the layout moving the camera list• The camera list enables you to simultaneously monitor multiple cameras, and to view the camera in a larger size (see page 68).NoteIf you move the window while pressing [Ctrl] on the keyboard, the window is located as an independent window.The window is embedded on the page.Temporary Confidential](https://usermanual.wiki/Panasonic-of-North-America/96NBL-C131/User-Guide-738029-Page-43.png)
![Operating Instructions482.5.2 Recorded Image PageThe recorded image page displays recorded image list of the selected cameras and plays recorded images.NoteClicking on the upper side of the search page displays the page on another window.Playback Screen(see page 61)Displays the images selected on the recorded images.Recorded Image List(see page 61)Lists the recorded images.Recording Method Selection Tab• The recorded images are displayed in a group of recording method.• Clicking [Search] displays a search page.Search Page(see page 65)Searches the recorded images. The result is shown on the search tab page.The screen size can be changed by dragging the frame where the cursor is changed to .Search TabPageTemporary Confidential](https://usermanual.wiki/Panasonic-of-North-America/96NBL-C131/User-Guide-738029-Page-48.png)
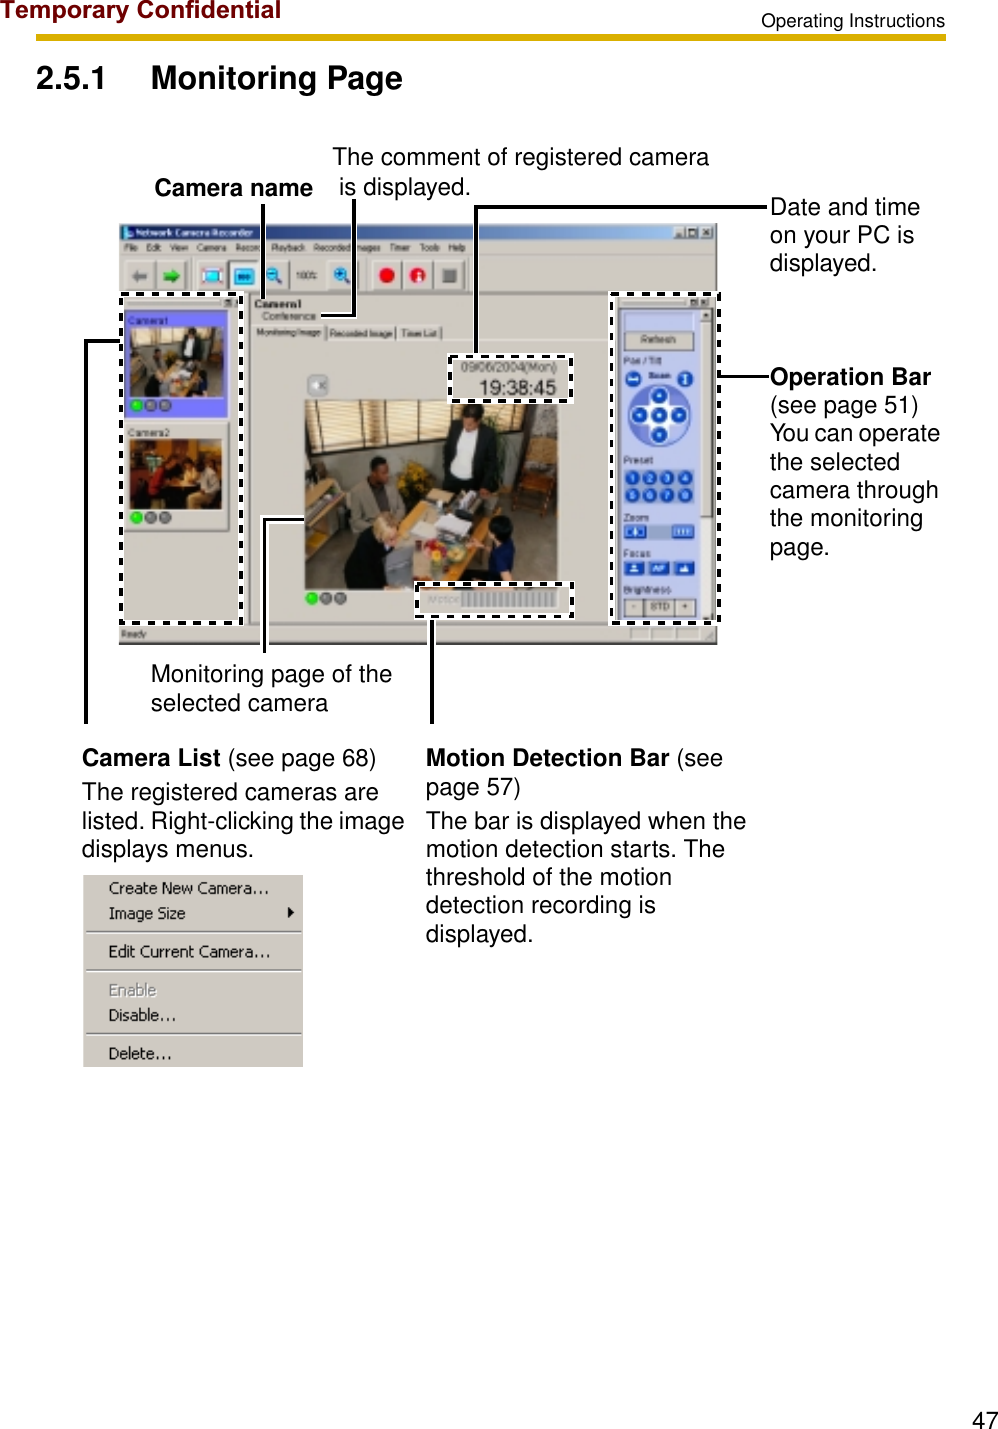
![Operating Instructions502.6 Monitoring the Camera2.6.1 Monitoring the Camera1. Select a camera preview on the camera list.• Selected camera image is displayed on the monitoring page.Notes• Sometimes Audio may be interrupted, or image may be paused.• Camera preview size can be changed (see page 68).• Page layout can be changed (see page 41 to page 43).• If you monitor the camera with audio feature, audio may be interrupted due to your PC performance or network environment. In this case, lower the max. bandwidth setting on the Network page of the camera.• If the camera is set to display a static image, the monitoring page displays a blue screen. is displayed if the camera supports audio.You can operate the camera (see page 51).Selected camera is displayed in a blue frame.Clicking [Monitoring] tab displays the monitoring page.Your PC's date and time settings are displayed.Temporary Confidential](https://usermanual.wiki/Panasonic-of-North-America/96NBL-C131/User-Guide-738029-Page-50.png)
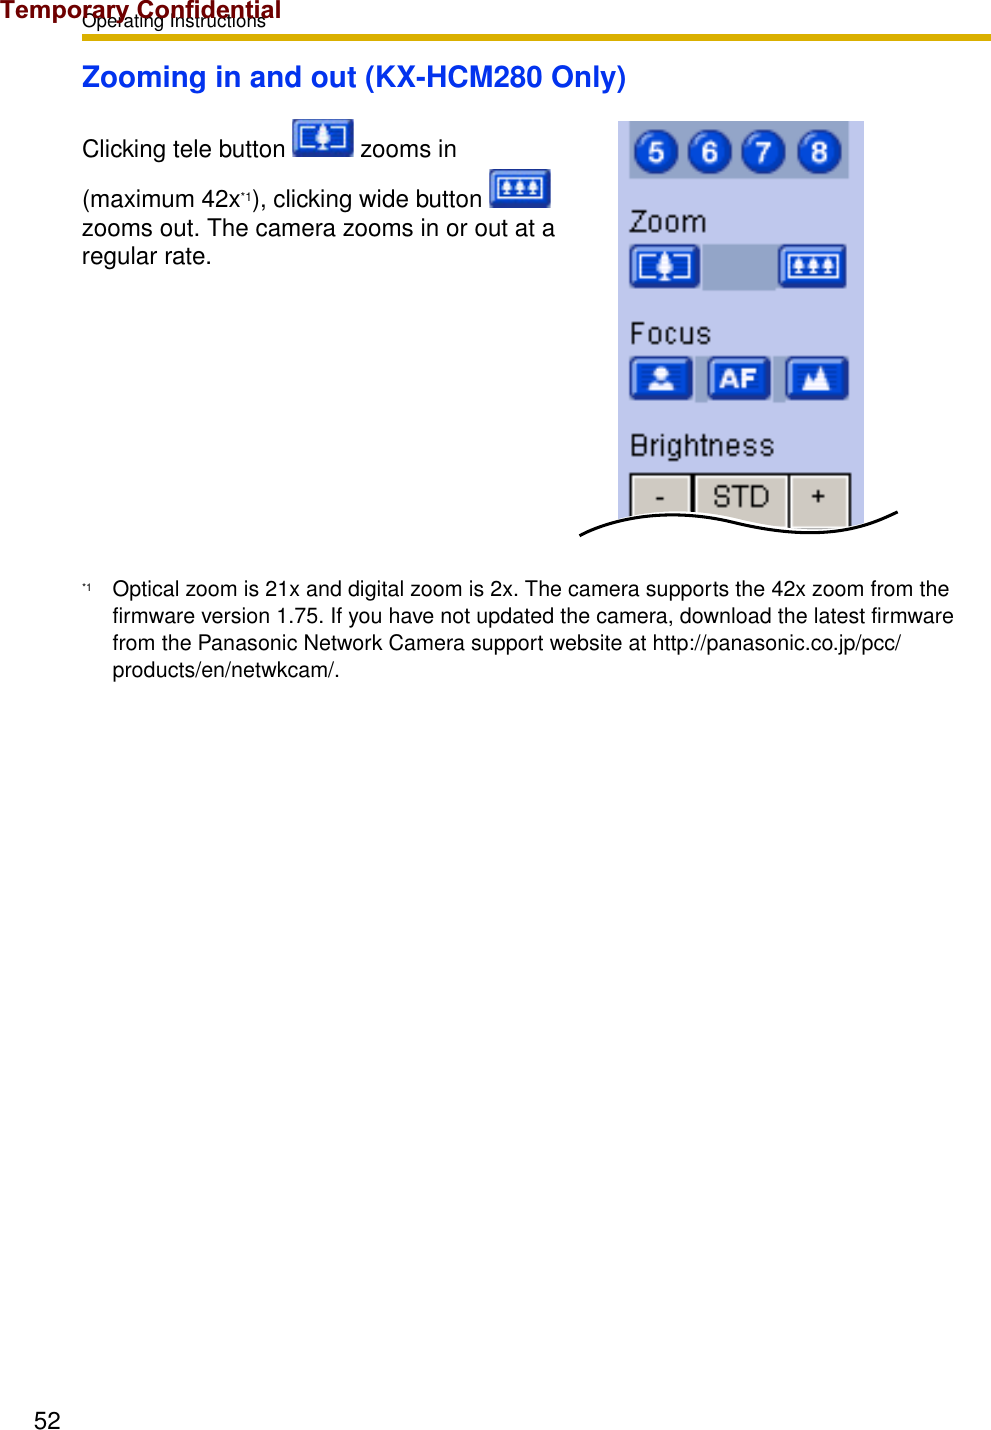
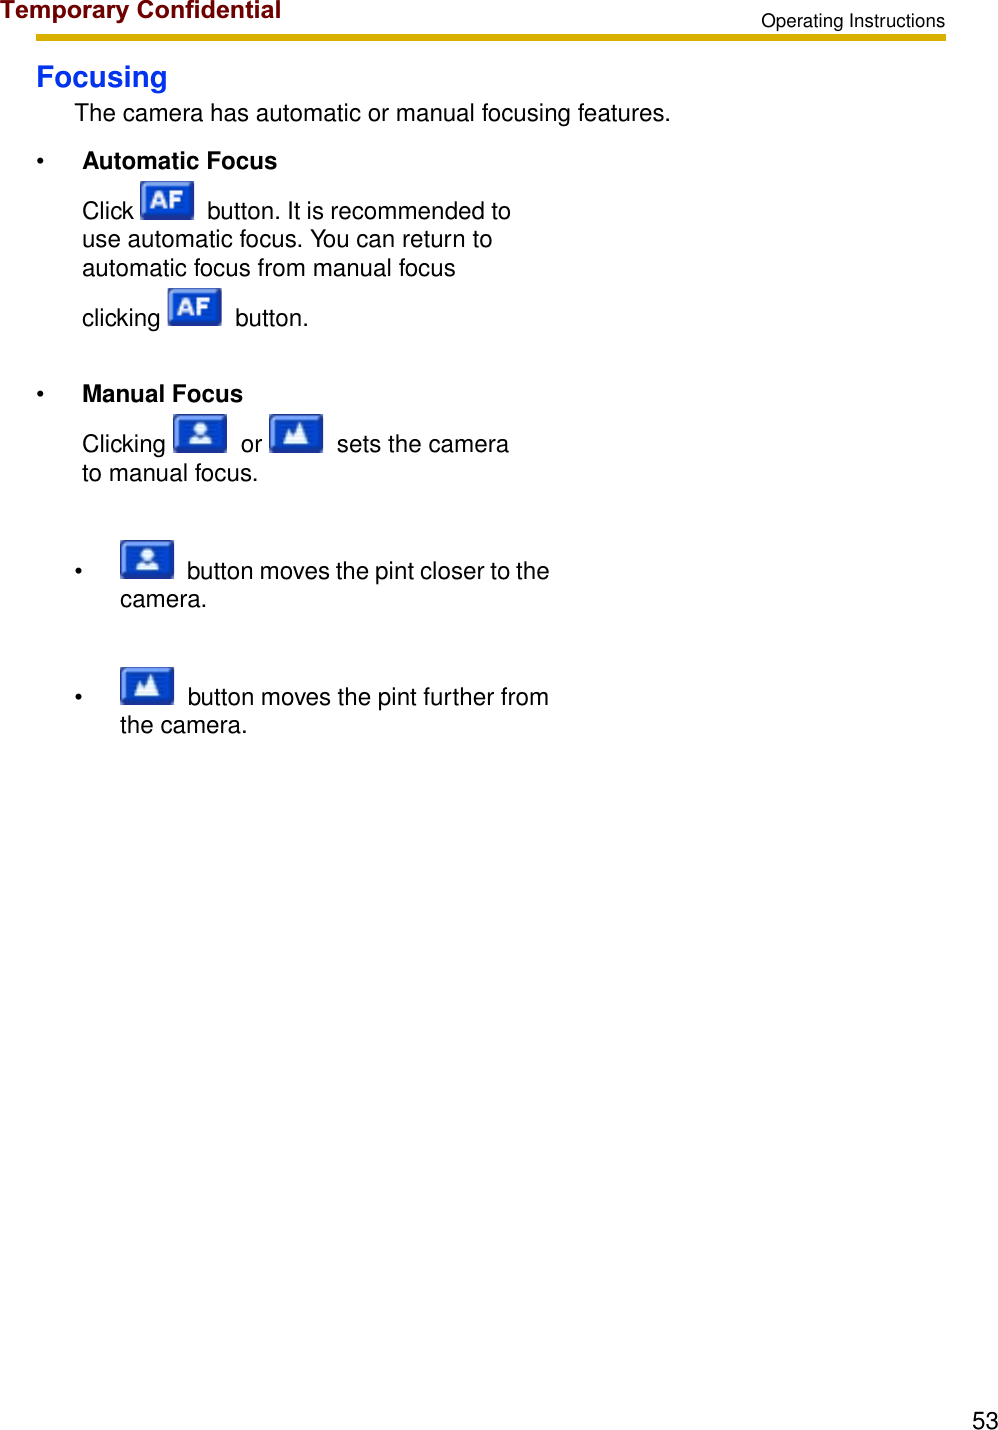
![Operating Instructions512.6.2 Using Operation BarYou can operate camera on the monitoring page. If the feature is not permitted, the buttons are grayed out.Preset Display: When clicking a preset button, the preset name appears. Camera operation information is also displayed.Refresh: The latest registered buttons are displayed (see page 54).Pan/Tilt Scan*1:*1 If the camera disables their controls, you cannot control their features.Moves the lens throughout the horizontal ( ) or vertical ( ) range, and returns to the original position.Pan/Tilt/Home Position*1Controls lens direction.Pan ( : Left, : Right), Tilt ( : Up, : Down) and Home Position ( : Center)Preset Button*1:Applies the camera direction to a preset position.Zoom*1Zooms in or out (see page 52).Tele , Wide Focus*1Focuses the image (see page 53).Near , Auto , Far Brightness*1:Changes brightness in nine steps including [STD] (Standard). Clicking [-] or [+] changes the image brightness.Resolution*1:Selects [640 x 480], [320 x 240] (default) or [160 x 120] pixels.Image Quality*1:Selects the image quality.• [Favor Clarity] optimizes the image for good clarity.• [Standard] keeps the standard quality. (default)• [Favor Motion] optimizes the image for motion display.Temporary Confidential](https://usermanual.wiki/Panasonic-of-North-America/96NBL-C131/User-Guide-738029-Page-51.png)
![Operating Instructions542.6.3 Using Preset ButtonsThe camera preset buttons can be used. Clicking home position or preset buttons (1-8) changes position to registered position.Registered buttons are displayed blue.Unregistered buttons are displayed gray.NoteIf the preset button is changed while this software is being used, the change is not reflected on this software. Clicking [Refresh] displays the latest preset buttons.1. Click the preset number.• Preset name is displayed in the upper side.Temporary Confidential](https://usermanual.wiki/Panasonic-of-North-America/96NBL-C131/User-Guide-738029-Page-54.png)
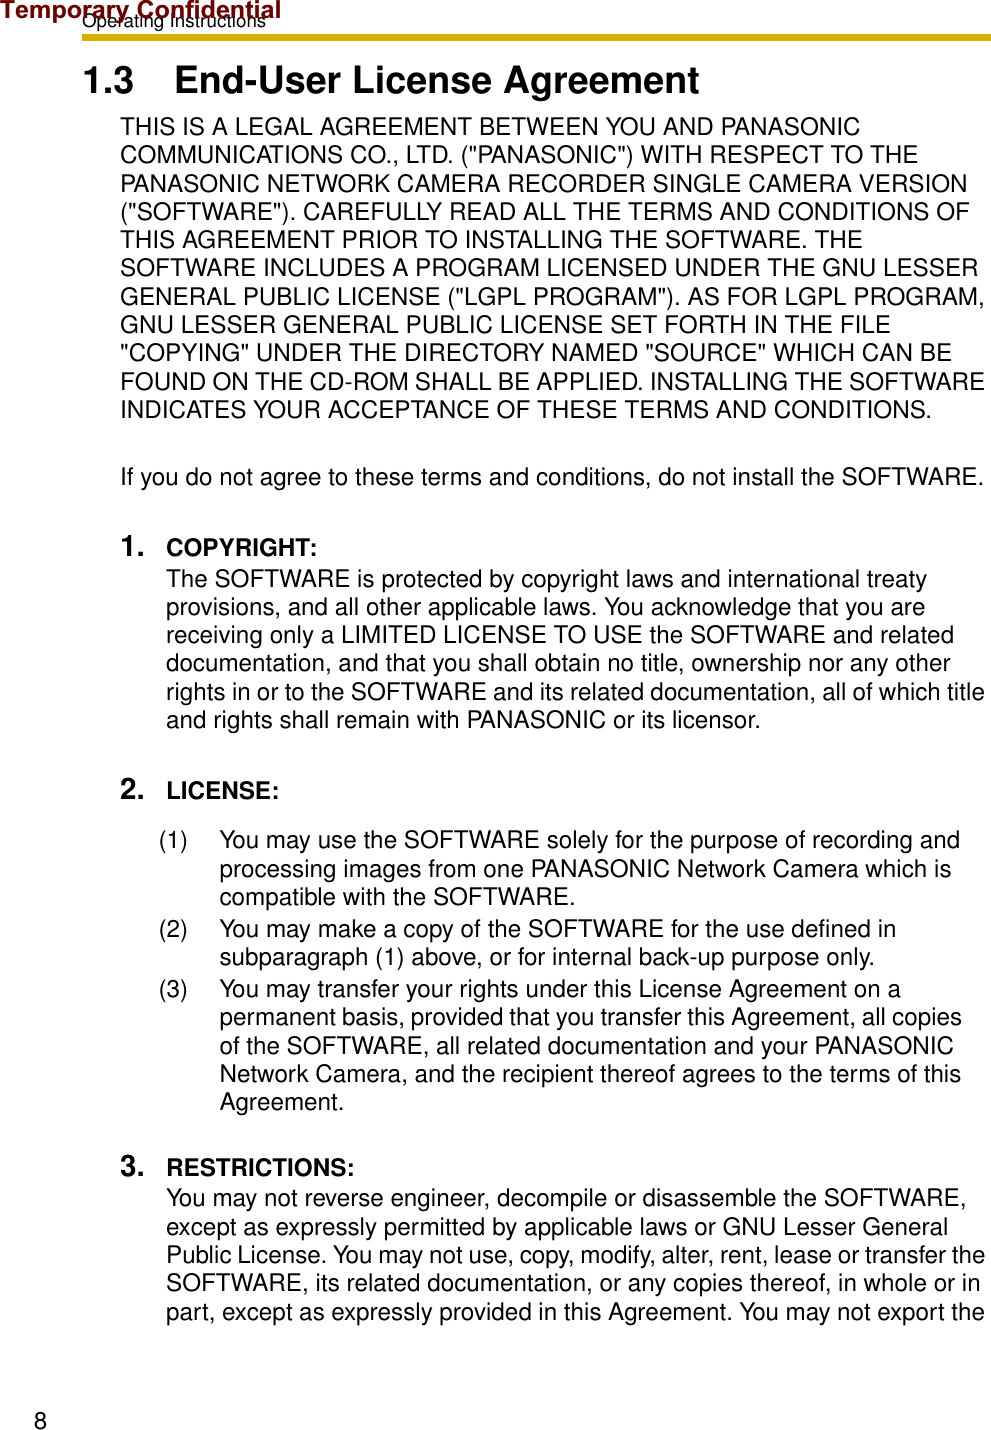
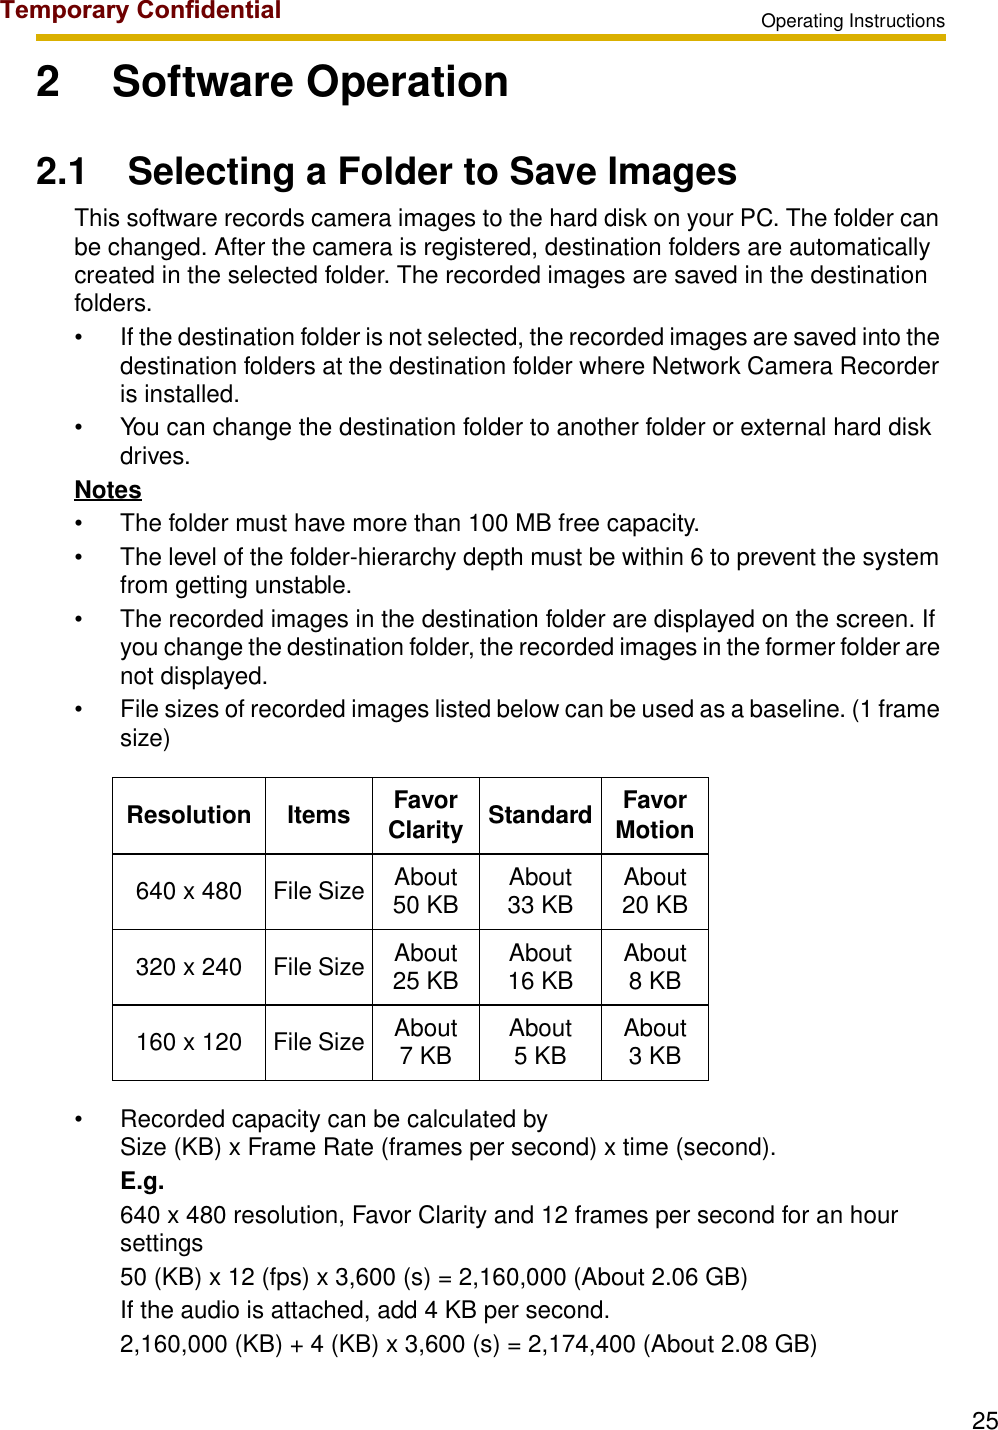
![Operating Instructions552.7 Recording the Image2.7.1 Manually Recording the ImageThis software allows you to manually record images. Set the image settings on the camera information page (see page 35).1. Select a camera preview on the camera list.• Selected camera is displayed in a blue frame (see page 68).2. Click .• Selected camera is recorded.• To stop recording, click .• is displayed during recording (see page 68). (Left: Green, Center: Red)• You can select [Start Recording] or [Stop Recording] on the record menu bar.• You can record multiple cameras simultaneously.Notes• If you select multiple cameras, select cameras while pressing [Ctrl] on the keyboard.• File sizes of recorded images listed below can be used as a baseline. (1 frame size)Resolution Items Favor Clarity Standard Favor Motion640 x 480 File Size About 50 KB About 33 KB About 20 KB320 x 240 File Size About 25 KB About 16 KB About 8 KB160 x 120 File Size About 7 KB About 5 KB About 3 KBTemporary Confidential](https://usermanual.wiki/Panasonic-of-North-America/96NBL-C131/User-Guide-738029-Page-55.png)
![Operating Instructions56• Recorded capacity can be calculated by Size (KB) x Frame Rate (frames per second) x time (second).E.g.640 x 480 resolution, Favor Clarity and 12 frames per second for an hour settings50 (KB) x 12 (fps) x 3,600 (s) = 2,160,000 (About 2.06 GB)If the audio is attached, add 4 KB per second.2,160,000 (KB) + 4 (KB) x 3,600 (s) = 2,174,400 (About 2.08 GB)• The setting change on operation bar is not reflected to recording. If you change resolution or image quality of recorded images, change the settings on the image settings page (see page 35).• To stop recording, always click button, or select [Record] [Stop Recording]. If you close the operation window, recording program does not stop. If icon is displayed on the system tray, the recording program is always working (see page 16).• If network is disconnected during recording, recording is paused. When network is connected, recording starts again.Temporary Confidential](https://usermanual.wiki/Panasonic-of-North-America/96NBL-C131/User-Guide-738029-Page-56.png)
![Operating Instructions572.7.2 Motion Detection RecordingRecord images when the motion is detected on the screen. Set the motion detection settings on the motion detection page (see page 37).1. Select a camera preview on the camera list.• Selected camera is displayed in a blue frame (see page 68).2. Click .• Selected camera is recorded.• To stop recording, click .• is displayed during motion detection recording (see page 68). (Left: Green, Center: Red, Right: Red)• You can select [Start Motion Detection Recording] or [Stop Recording] on the record menu bar.• You can record multiple cameras simultaneously.Notes• If you select multiple cameras, select cameras while pressing [Ctrl] on the keyboard.• You can record images before or after the motion is detected. Motion detection level is changed depending on resolution, image quality, object situation and network environment. Confirm the level by performing motion detection recording to assure the intended operation is realized (see page 37).• To stop motion detection recording, always click button, or select [Record] [Stop Motion Detection Recording]. If you close the operation window, recording program does not stop. If icon is displayed on the system tray, the recording program is always working (see page 16).Temporary Confidential](https://usermanual.wiki/Panasonic-of-North-America/96NBL-C131/User-Guide-738029-Page-57.png)
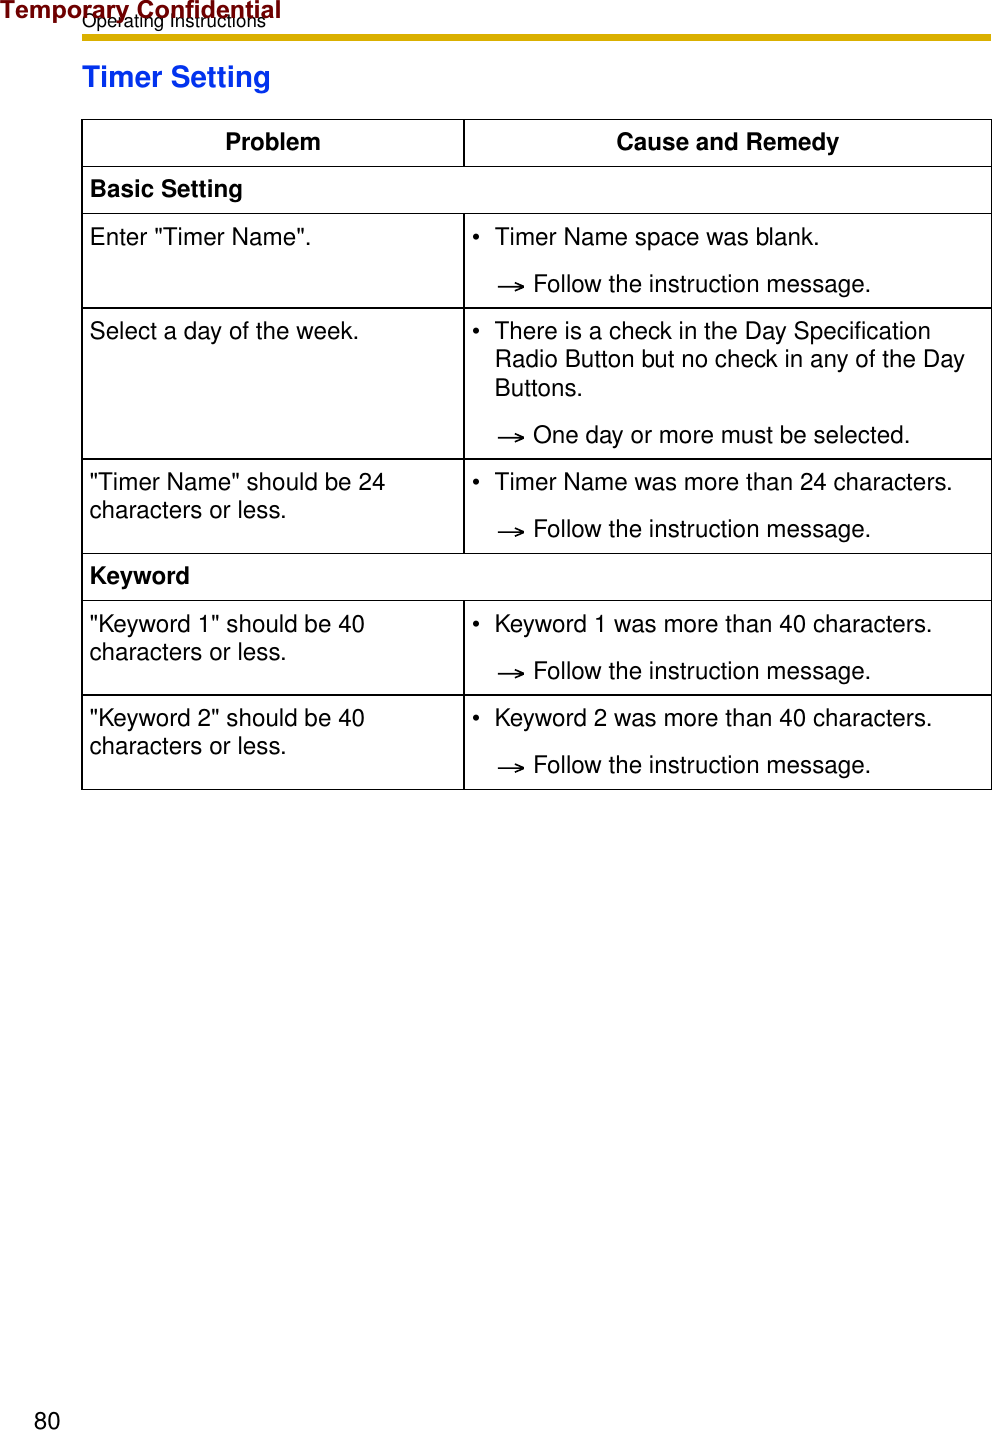
![Operating Instructions582.7.3 Timer RecordingYou can specify the day of the week and period of time for recording.1. Select a camera preview on the camera list.• Selected camera is displayed in a blue frame (see page 68).2. Select [Timer] [Create New Timer] on the menu bar.• The create new timer page is displayed.• Click [Create New Timer] on the menu displayed by right-clicking the timer list page (see page 49).3. Set the parameters, and click [OK].• The timer is displayed on the timer list page (see page 49).Items DescriptionsBasic SettingsTimer Name Enter a timer name (mandatory). The timer name is displayed on the timer list page.Temporary Confidential](https://usermanual.wiki/Panasonic-of-North-America/96NBL-C131/User-Guide-738029-Page-58.png)
![Operating Instructions59• If you change default by checking [Set to Default] and clicking [OK], the current settings become as a default.• If you click [Return to Default], the settings return to a default.Notes• If you click Record Stop button during timer recording, timer recording is not canceled. To cancel it, disable the timer on the timer list page (see page 60).• If you record images all day, the image is recorded from the start time to end time. If you set time period over midnight, the image is divided into 2 images at midnight.• 10 timers can be set for each camera.• If you close the operation window, recording program does not stop. If icon is displayed on the system tray, the recording program is always working (see page 16).Timer Schedule To set a timer, set start time, end time and the day of the week.• Checking [Daily] sets the daily timer recording during the specified time period.• If you set the day of the week, check [Day of the Week Setting] and specify the day or multiple days of the week. If the day of the week is not checked, the timer recording is not set.• If you record images all day, set the same time at start time and end time.Recording Method Select timer recording or motion detection recording.• If you select motion detection recording, time period before or after detection can be set. If you do not set it, this software records an image only at motion detection.KeywordKeyword 1/Keyword 2 You can search recorded images for each timer by keyword.Items DescriptionsTemporary Confidential](https://usermanual.wiki/Panasonic-of-North-America/96NBL-C131/User-Guide-738029-Page-59.png)
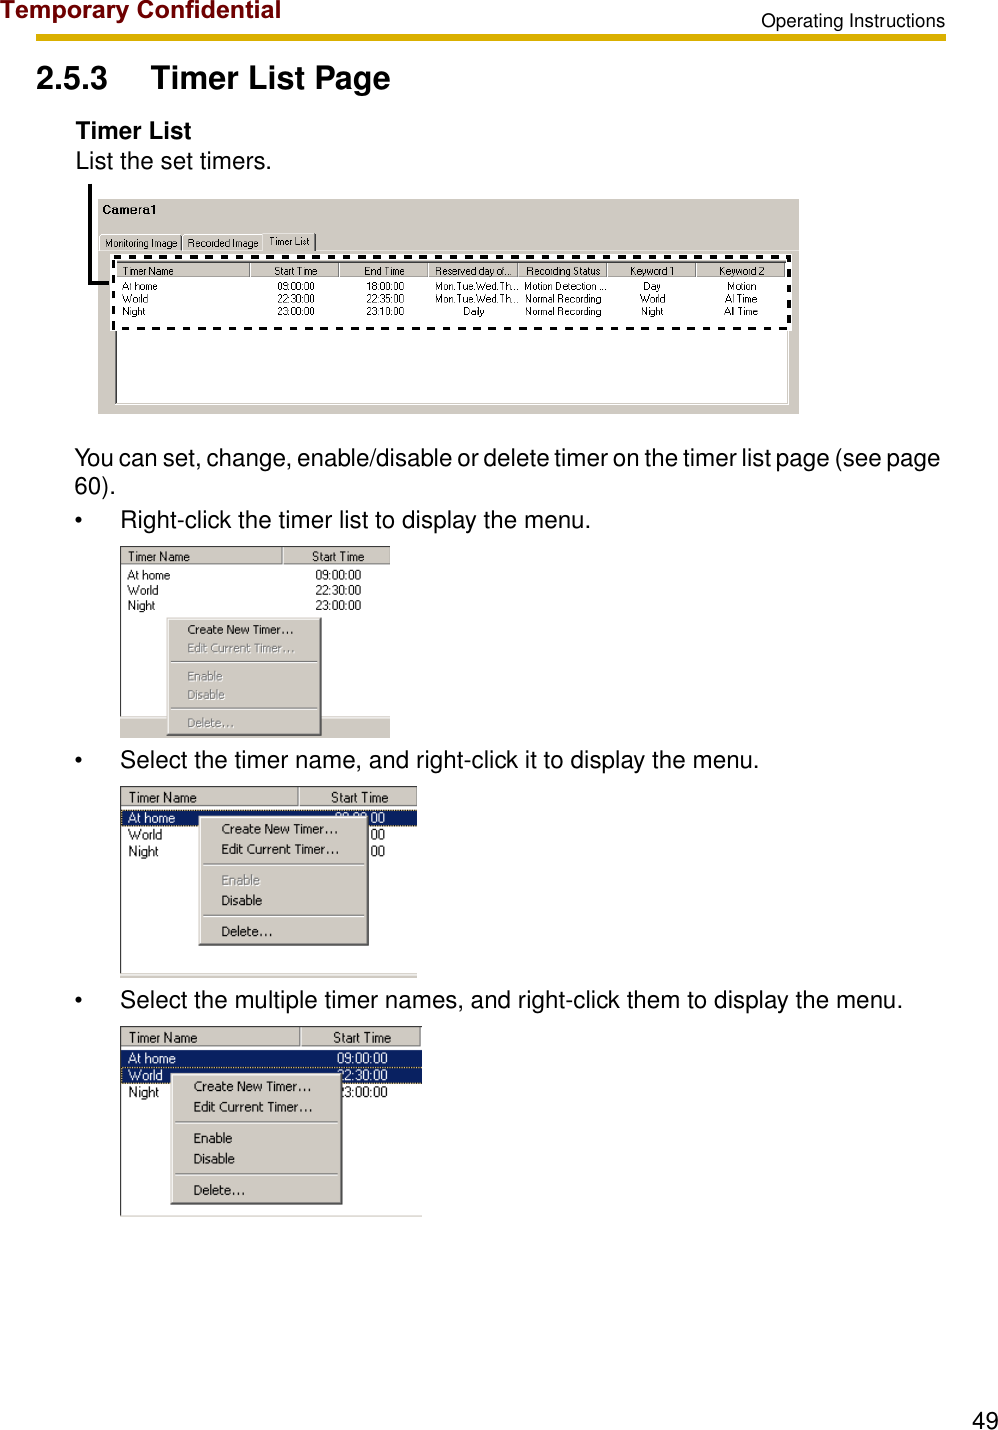
![Operating Instructions60• If network is disconnected during recording, recording is paused with the indictor on (see page 68). When network is connected, recording starts again.Editing Timer Settings1. Select a camera preview on the camera list, and select the timer to change.2. Change parameters at [Timer] on the menu bar.• See page 58 for details about parameters.• Click [Edit Current Camera] or double-click the timer to display the setting page.Enabling, Disabling or Deleting TimersIf you create a timer, the timer is enabled. The timer menu bar enables you to enable, disable or delete timers.• Timer recording is available only when the timer is enabled. The disabled timer is not working.• You can enable, disable or delete timers by right-clicking the timer list page.• The disabled timer is grayed out.If you disable the timer, the timer is grayed out.Temporary Confidential](https://usermanual.wiki/Panasonic-of-North-America/96NBL-C131/User-Guide-738029-Page-60.png)
![Operating Instructions612.8 Playing the Recorded Images2.8.1 Playing the Recorded Images1. Select a camera preview on the camera list.• Selected camera is displayed in a blue frame (see page 68).2. Select recorded images to play on the recorded image list.• The selected recorded image is displayed on the screen.The screen size can be changed by dragging the frame where the cursor is changed to .Camera name is displayed to play the recorded images.If the number of recorded images exceeds 100, [<100] and [100>] are displayed. The image before or after 100th can be displayed.Recorded Image ListSelect the image to play.Page Selection TabRecorded images are listed by the recording method.ScreenAll: Displays all recorded images.Manual Recording: Displays manually-recorded images.Timer Recording: Displays timer-recorded images.Motion Detection Displays recorded images of motion Recording: detection recording.Normal Recording: Displays recorded images during all time.Clicking displays the page on another window.Temporary Confidential](https://usermanual.wiki/Panasonic-of-North-America/96NBL-C131/User-Guide-738029-Page-61.png)
![Operating Instructions62NoteIf you click [Refresh] on the menu displayed by right-clicking the recorded image list, the recorded image list is refreshed.3. Play recorded images on the screen. Plays images. Stops playing images. Pauses playback. The button is changed to during pause.• To start playing again, click .If the camera does not support audio, is displayed.Displays the recorded date and time. Time is displayed with a millisecond.ScreenJump ButtonDisplays the time period button by 1 hour. Clicking the time period displays recorded images from that time on.Displays the next image.Display a previous image from the displayed image.Slider BarThe playback position can be set dragging the bar.Temporary Confidential](https://usermanual.wiki/Panasonic-of-North-America/96NBL-C131/User-Guide-738029-Page-62.png)
![Operating Instructions63Notes• Sometimes Audio may be interrupted, or image may be paused.• If you monitor the camera with audio feature, audio may be interrupted due to your PC performance or network environment. In this case, lower the max. bandwidth setting on the Network page of the camera.• If you click the minimize button during playback or change the page to monitoring page, recorded image or timer list page, the playback is paused.Recorded images can be played in the following ways• Double-clicking the recorded image.• Select [Playback] on the menu displayed by right-clicking the recorded image list.• Select [Playback] [Start] on the menu bar.NotePause, Stop, Next image or Previous image can be operated on the menu bar.Temporary Confidential](https://usermanual.wiki/Panasonic-of-North-America/96NBL-C131/User-Guide-738029-Page-63.png)

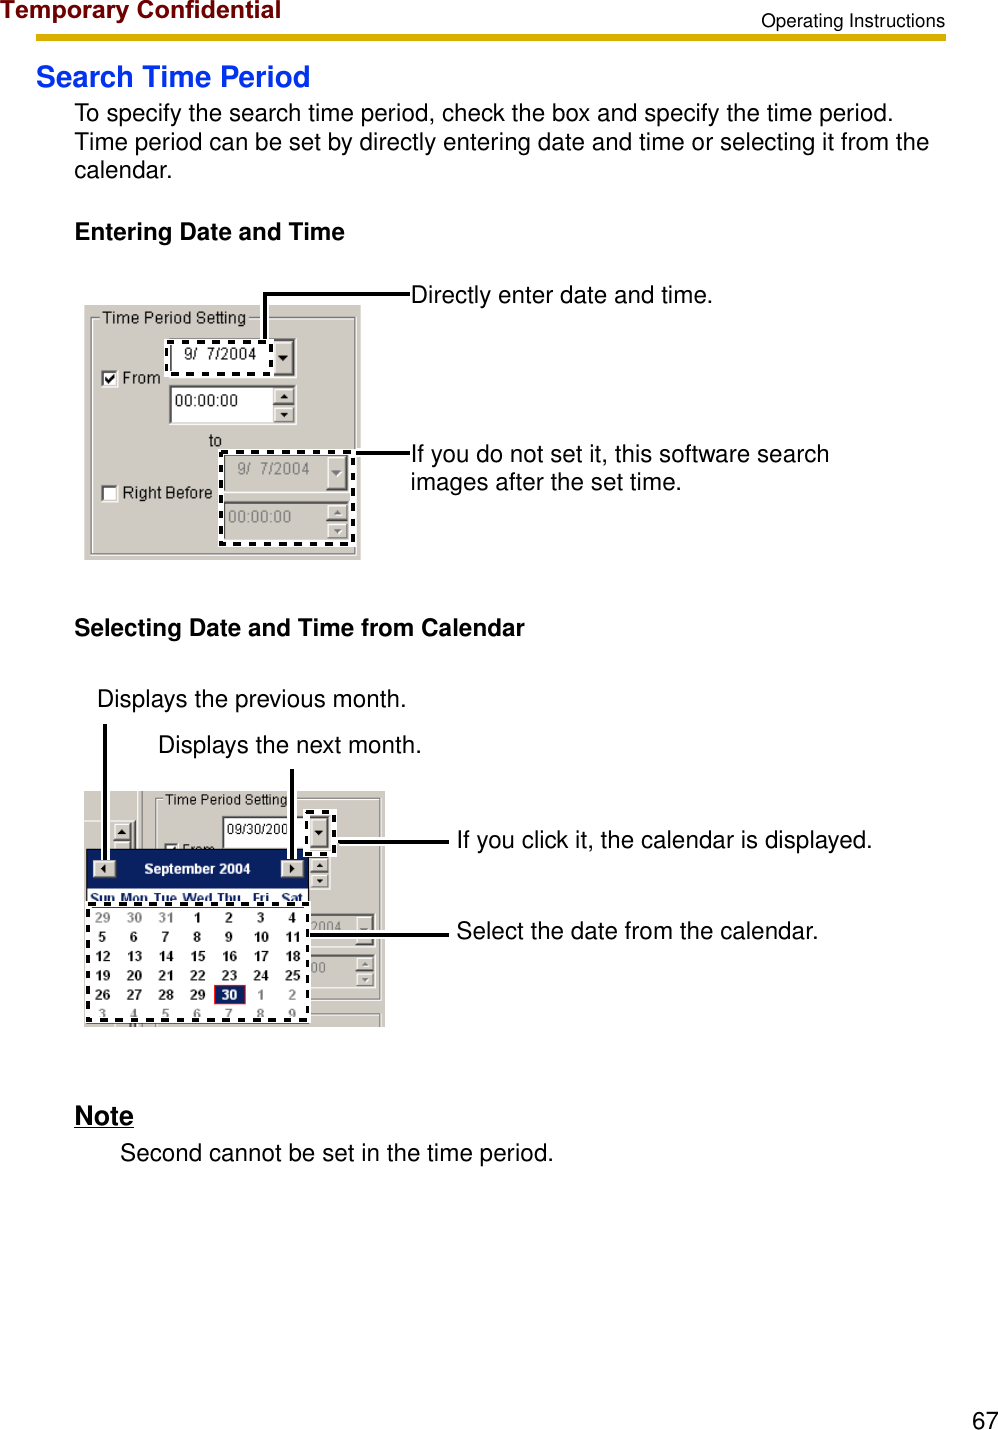
![Operating Instructions652.8.2 Searching the Recorded ImagesYou can search images by using recorded time or keyword.1. Select a camera preview on the camera list.• Selected camera is displayed in a blue frame (see page 68).2. Select [Edit] [Search] on the menu bar.• Clicking [Search] tab displays the search page.• The search page is displayed.Double-clicking or clicking displays the search page on another window.Specifies the time period to search images (see page 67).Specifies the day of the week.• To search in the day of the week, check it.Specifies the keyword you set.Specifies searching folder, recording status and recording method.Searched Target : Select destination folder or backup folder to search images.Recorded Status : Select recording status from all, normal recording*1 or motion detection recording*2.Recording Method: Select recording method from all, manual, or timer.*1:Normal recording means the images recorded by button or recorded all the set time period by timer recording.*2:Motion detection recording means the images recorded by button or recorded only when motion is detected by timer recording.Temporary Confidential](https://usermanual.wiki/Panasonic-of-North-America/96NBL-C131/User-Guide-738029-Page-65.png)
![Operating Instructions663. Set search conditions, and click [Search Operation].• The search result is displayed.Notes• If you set the time period, this software search images by the condition including the time period.• Conditions are added like A and B. For example, if you set [Tuesday] and [Current Recorded Image], this software searches images recorded on Tuesday.• Clicking deletes all search results.• Searched images can be played on the screen (see page 61).• The images that are being backed up cannot be the target for the search.The search condition is displayed.The search result is displayed.If the number of recorded images exceeds 100, [<100] and [100>] are displayed. The image before or after 100th can be displayed.Temporary Confidential](https://usermanual.wiki/Panasonic-of-North-America/96NBL-C131/User-Guide-738029-Page-66.png)
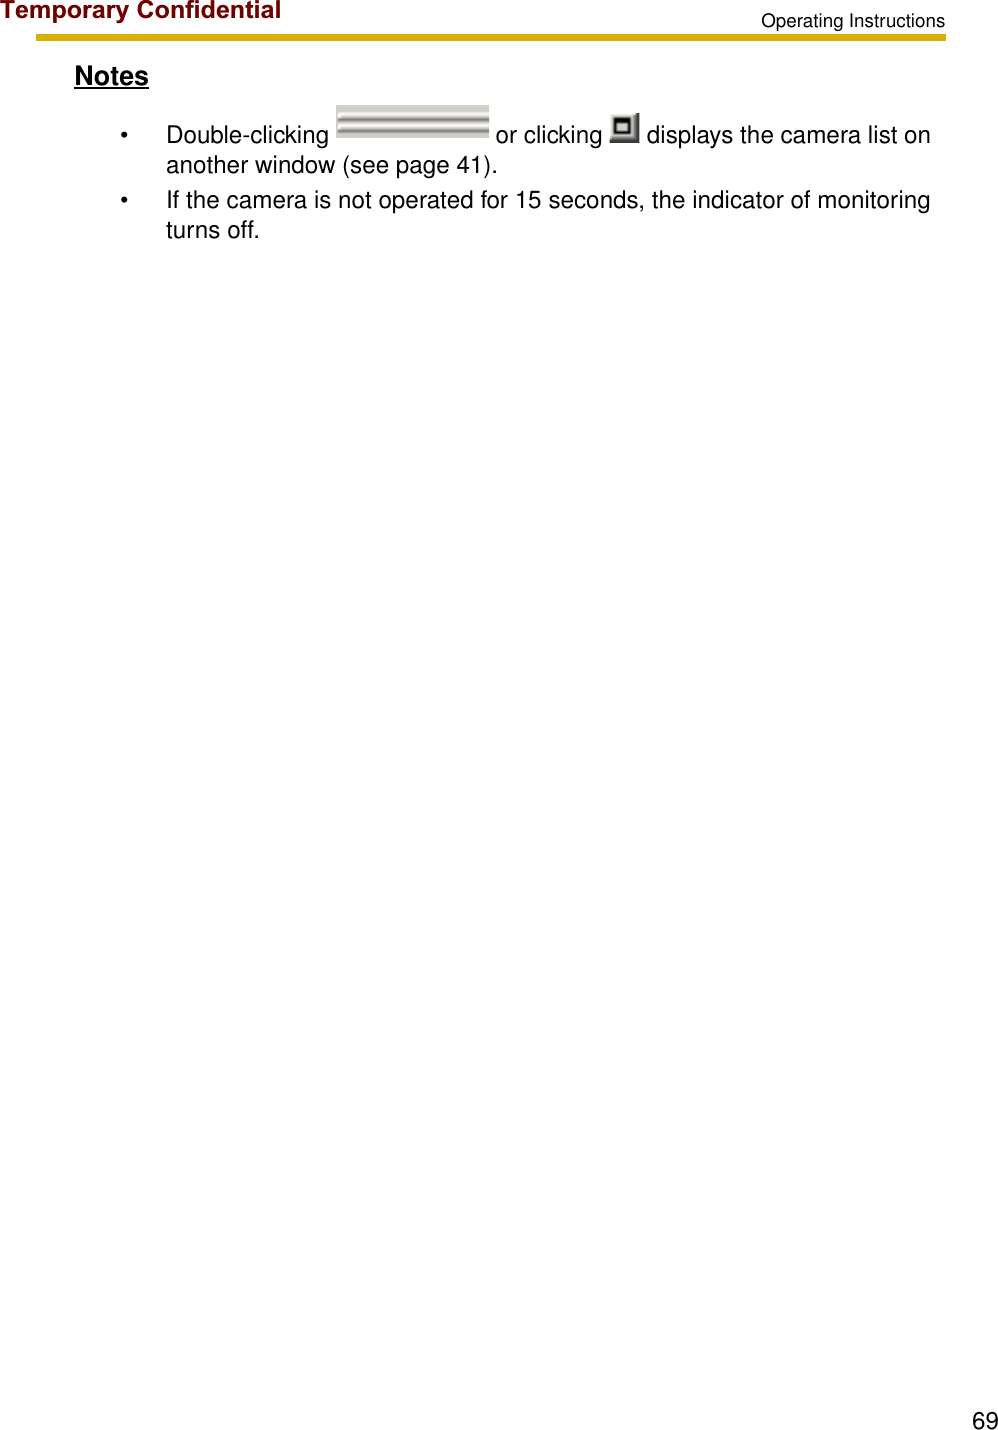
![Operating Instructions682.9 Using Camera ListThe camera list displays registered camera previews.The selected camera is displayed in a blue frame. If you select multiple cameras, select them while pressing [Ctrl] key on the keyboard.The image of the selected camera is displayed on the monitoring page.Indicator: Monitoring (Left: Green): Recording (Left: Green, Center: Red): Motion detection recording (Left: Green, Center and Right: Red): Stand-by state for motion detection recording (Left: Green, Right: Red)If you select a camera preview and right-click it, menu is displayed. The camera can be set from the menu.Create New Camera: Displays the create new camera page (see page 32).Image Size : Changes camera preview sizes (320 x 240, 240 x 180, 160 x 120, 120 x 90 (default), 80 x 60, 60 x 45)Edit Current Camera: Displays the camera information page (see page 40).Enable : Enables cameras.Disable : Disables cameras.Delete : Deletes cameras.Temporary Confidential](https://usermanual.wiki/Panasonic-of-North-America/96NBL-C131/User-Guide-738029-Page-68.png)
![Operating Instructions702.10 Enabling or Disabling the CamerasYou can enable or disable cameras.1. Select the camera to enable or disable, and select [Enable] or [Disable] on the menu bar [Camera] [Enable or Disable Cameras].• You can enable or disable cameras from the menu displayed by right-clicking camera list (see page 68).• You can enable or disable multiple cameras.• If you select multiple cameras, select cameras while pressing [Ctrl] key on the keyboard.To Disable Cameras• The following window is displayed. Click [OK] to disable it.• If you disable the camera, the monitoring page is not displayed. Manual recording and timer recording cannot be operated. Disabling the "Camera01" cameraNotes• You can play images recorded by the disabled cameras.• If you disable the camera, manual recording and timer recording is stopped. If you enable the camera, timer recording starts again.Temporary Confidential](https://usermanual.wiki/Panasonic-of-North-America/96NBL-C131/User-Guide-738029-Page-70.png)
![Operating Instructions712.11 Deleting the Registered CamerasYou can delete registered cameras.NoteIf you delete cameras, the recorded images are deleted with the cameras. If you keep recorded images, disable the cameras (see page 70).1. Select the camera to delete, and select [Camera] [Delete] on the menu bar.• You can delete cameras from the menu displayed by right-clicking camera list (see page 68).• You can delete multiple cameras.• If you select multiple cameras, select cameras while pressing [Ctrl] key on the keyboard.• Confirmation window is displayed.2. Click [Delete].• The camera and recorded images are deleted.• Clicking [Disable] disables the camera (see page 70).Temporary Confidential](https://usermanual.wiki/Panasonic-of-North-America/96NBL-C131/User-Guide-738029-Page-71.png)
![Operating Instructions722.12 Converting the Recorded Images2.12.1 Converting the Recorded Images to JPEG files1. Select a camera preview on the camera list.• Selected camera is displayed in a blue frame (see page 68).2. Select recorded images to convert to JPEG files on the recorded image page.• The selected recorded image is displayed on the screen.3. Select [Tools] [JPEG Conversion] on the menu bar.• You can select [JPEG Conversion] from the menu displayed by right-clicking the recorded image list.4. Specify the start time and end time.5. Set the interval to convert.6. Click [OK].• The folder selection window is displayed (see page 27).Temporary Confidential](https://usermanual.wiki/Panasonic-of-North-America/96NBL-C131/User-Guide-738029-Page-72.png)
![Operating Instructions737. Select the location, and click [OK].• JPEG conversion is started.• If JPEG conversion is complete, the following window is displayed.• JPEG-converted images are saved into the created folder in the location. The folder is created for each 1,000 images.Notes• If you do not set the time, all selected images are converted to JPEG files.• If it is canceled, images are saved till it is canceled.Temporary Confidential](https://usermanual.wiki/Panasonic-of-North-America/96NBL-C131/User-Guide-738029-Page-73.png)
![Operating Instructions742.13 Other Features2.13.1 Importing the Camera InformationThis software can import the camera information. The camera information can be imported to this software on another PC.1. Select [Tools] [Import Camera Settings] on the menu bar.• The import file selection window is displayed.• To import the camera information from BB-HNP60, select [BB-HNP60 Camera Definition File] at the file type. To import from this software, select [Camera Definition File].2. Select a file and click [Open].• The camera information is imported.Notes• This software can import camera information from BB-HNP60 or this software.• Setting information cannot be imported if you cannot access the target camera for the setting information.2.13.2 Exporting the Camera InformationThis software can export the camera information. The camera information can be exported for this software on another PC.1. Select [Tools] [Export Camera Settings] on the menu bar.• The export file save window is displayed.2. Select the location, and click [Save].• The camera information is exported.This software: All camera information can be imported.BB-HNP60: Basic settings and image settings can be imported. BB-HNP60 setting information file is saved in the destination folder.Temporary Confidential](https://usermanual.wiki/Panasonic-of-North-America/96NBL-C131/User-Guide-738029-Page-74.png)
![Operating Instructions752.13.3 Copying the Recorded ImagesThis software can copy the monitoring image to the clipboard.1. Right-click the image on the monitoring page.• The copy menu is displayed.2. Click [Copy].• This software copies the image to the clipboard.Notes• The clipboard is a place to temporarily save in copying or pasting data. The copied image can be used in the program such as Paint.• You can copy the image by selecting [Edit] [Copy] on the menu bar.2.13.4 Changing the Keyword of the Recorded ImagesYou can change the keyword set to the recorded images.1. Select a camera preview on the camera list.• Selected camera is displayed in a blue frame (see page 68).2. Select an image to change the keyword on the recorded image page.3. Select [Recorded Images] [Edit Keyword] on the menu bar.• You can select [Edit Keyword] from the menu displayed by right-clicking recorded image.• The keyword change window is displayed.4. Change the keyword, and click [OK].• The keyword is changed.Temporary Confidential](https://usermanual.wiki/Panasonic-of-North-America/96NBL-C131/User-Guide-738029-Page-75.png)
![Operating Instructions762.13.5 Deleting the Recorded Images1. Select a camera preview on the camera list.• Selected camera is displayed in a blue frame (see page 68).2. Select the recorded images to delete on the recorded image page.• You can select multiple images.3. Select [Recorded Images] [Delete] on the menu bar.• You can select [Delete] on the menu displayed by right-clicking the recorded image.• The confirmation window is displayed.4. Click [OK].• The selected images are deleted.NoteThis software can delete 100 images at a time. If images to delete exceeds 100, repeat the deletion.Temporary Confidential](https://usermanual.wiki/Panasonic-of-North-America/96NBL-C131/User-Guide-738029-Page-76.png)
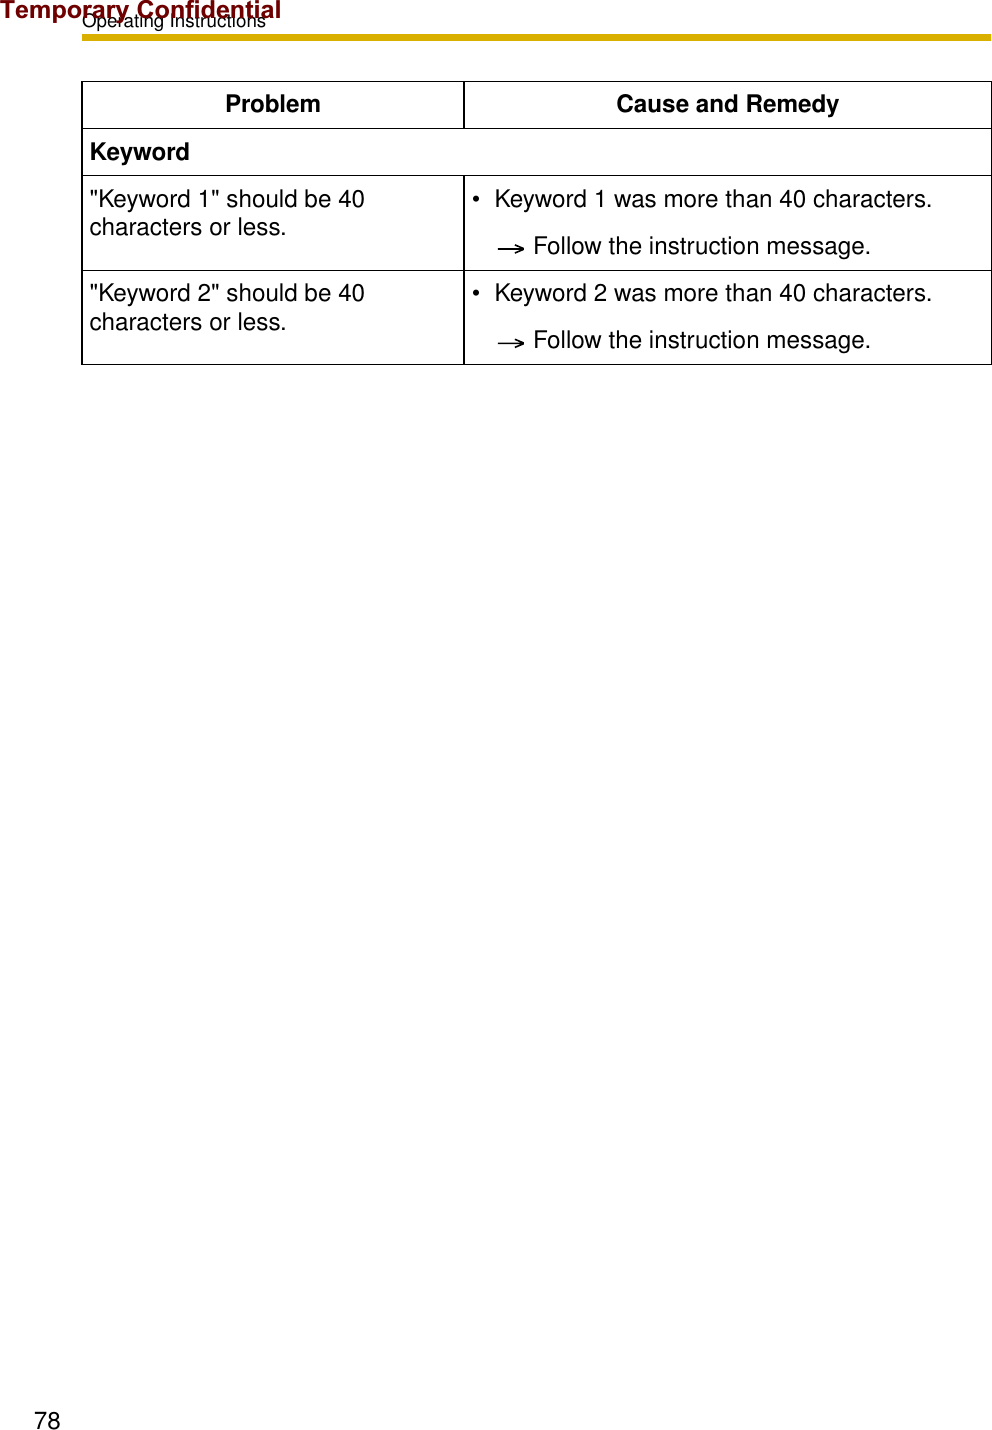
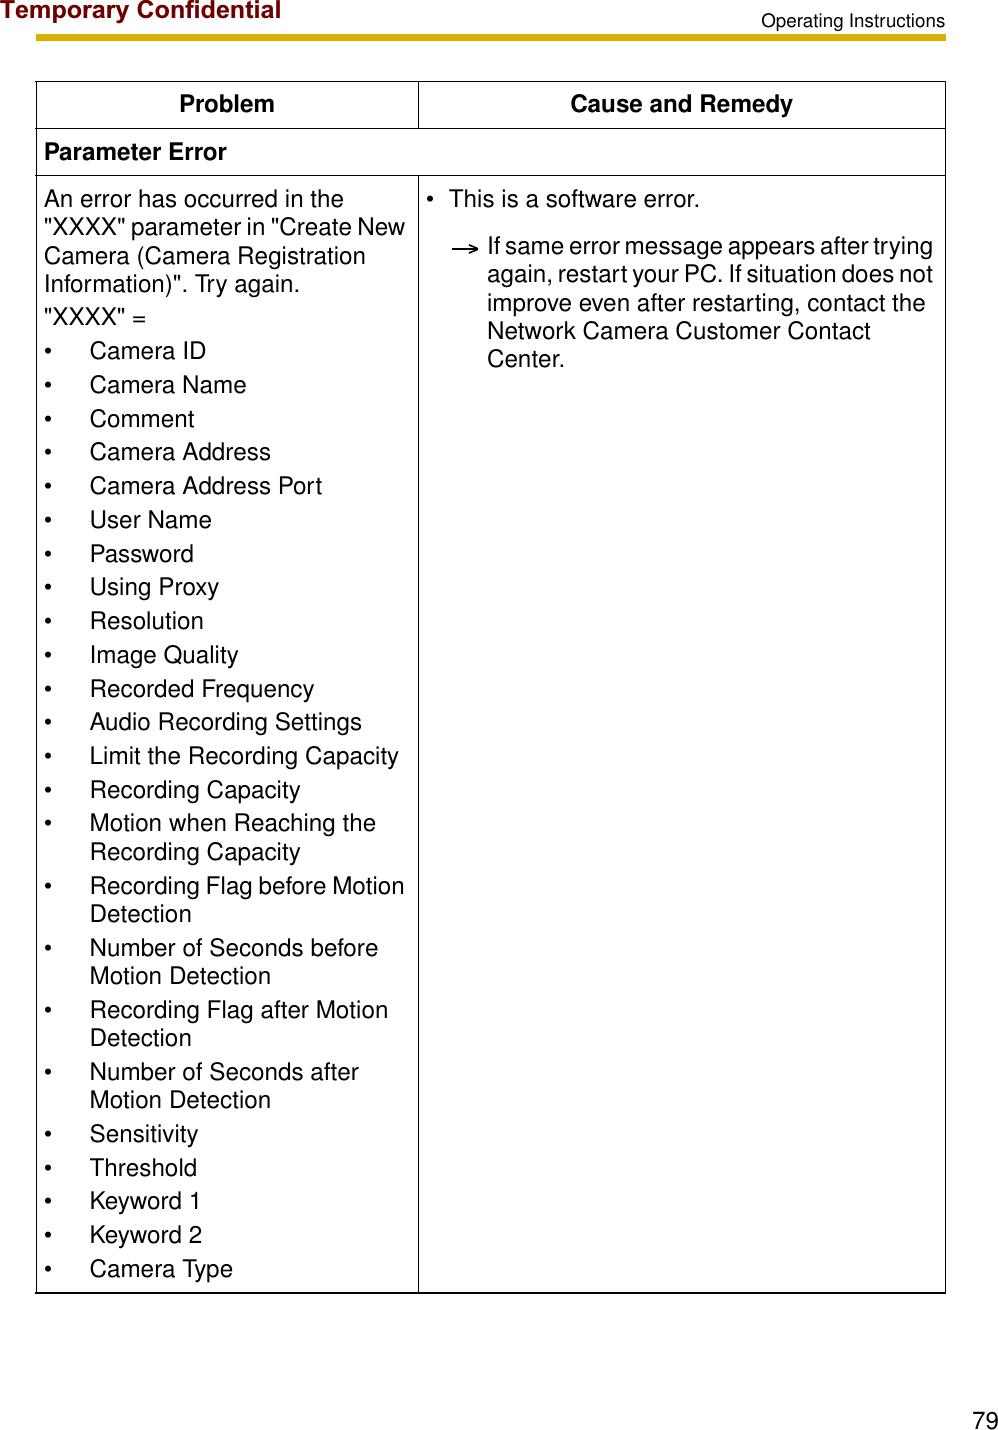
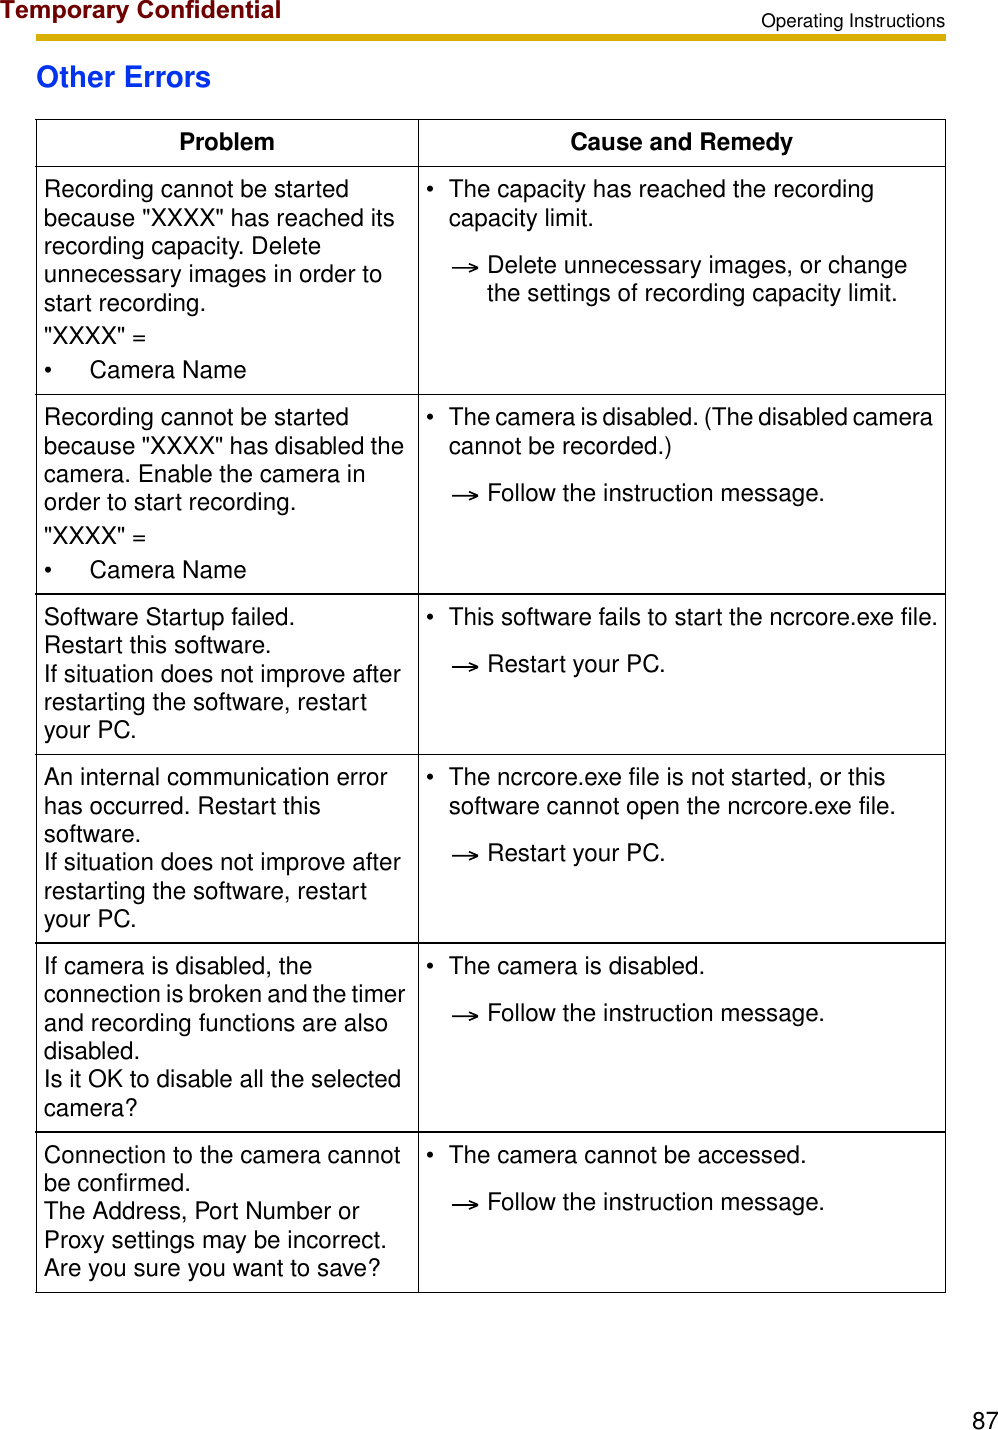
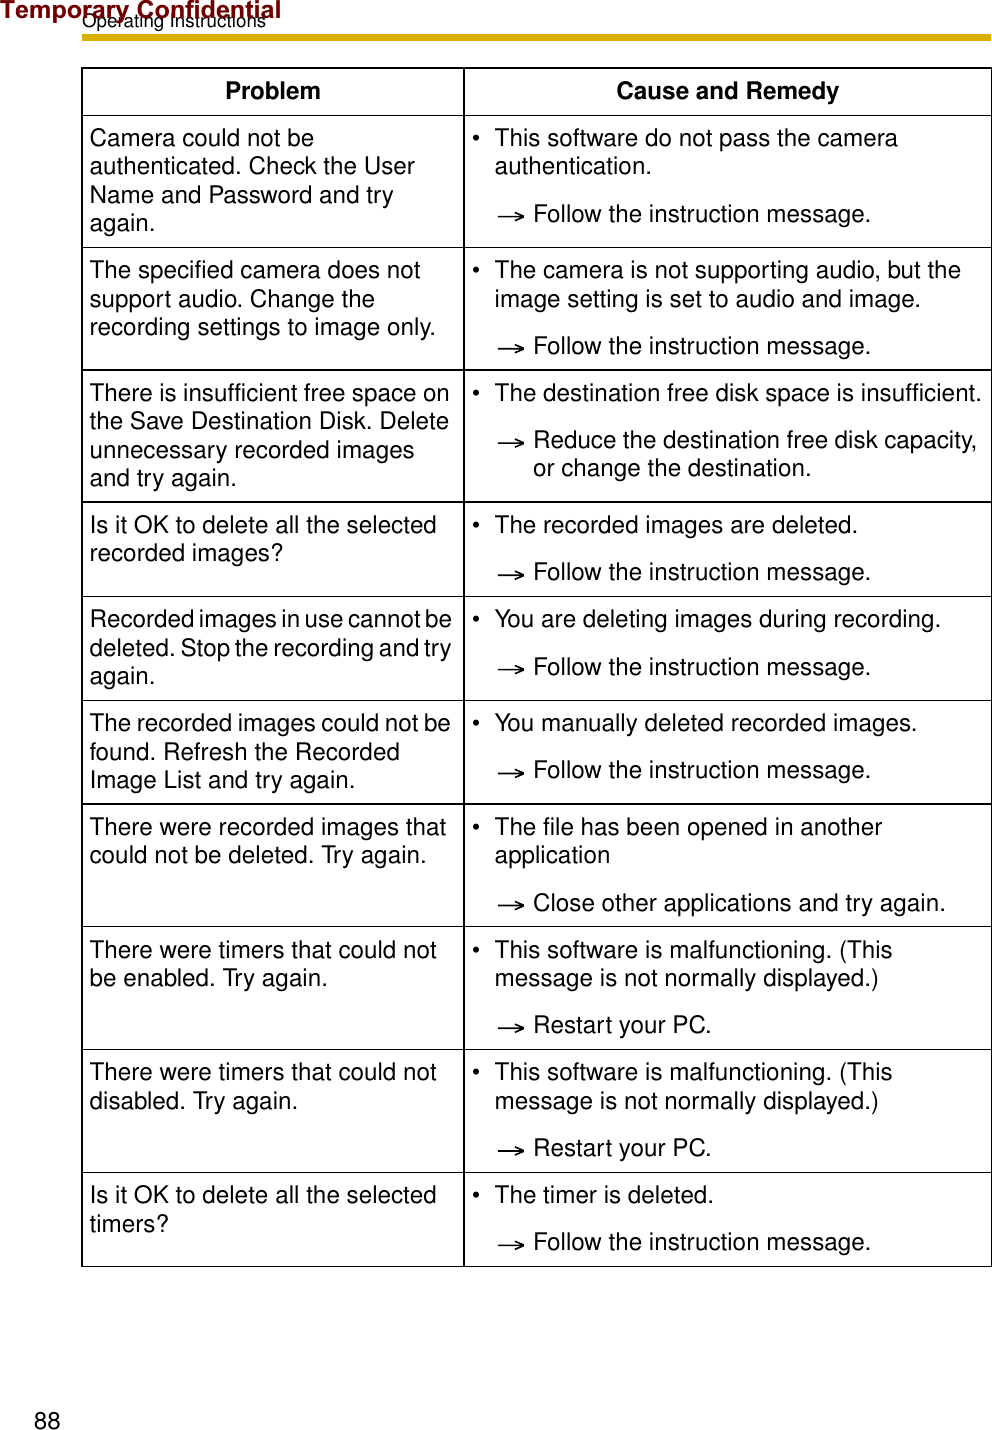
![Operating Instructions772.14 Error Message ListProblem Cause and RemedyBasic SettingEnter "Camera Name". • The Camera Name space was blank.Follow the instruction message.Enter "Camera Address". • The Camera Address space was blank.Follow the instruction message."Port" should be between 1 and 65535. • A number not between 1 and 65535 was entered in the Port blank.Follow the instruction message."Camera Name" should be 250 characters or less. • The Camera Name was more than 250 characters.Follow the instruction message."Comment" should be 128 characters or less. • The Comment was more than 128 characters.Follow the instruction message.Image SettingsSpecify Recorded Frequency and Sound Recording cannot be selected simultaneously. Either set Recorded Frequency to [Not Specify] or set the recording settings to [Image Only].• Image settings are set to [Recorded Frequency Specify], and [Audio and Image] are selected simultaneously. Or if another tab or OK is pressed in this state.Follow the instruction message.Recording CapacityEnter "Recording Capacity". • The Recording Capacity space was blank.Follow the instruction message."Recording Capacity" should be between 100 and 500000. • A number not between 100 and 50000 was entered in the Recording Capacity blank.Follow the instruction message.Temporary Confidential](https://usermanual.wiki/Panasonic-of-North-America/96NBL-C131/User-Guide-738029-Page-77.png)
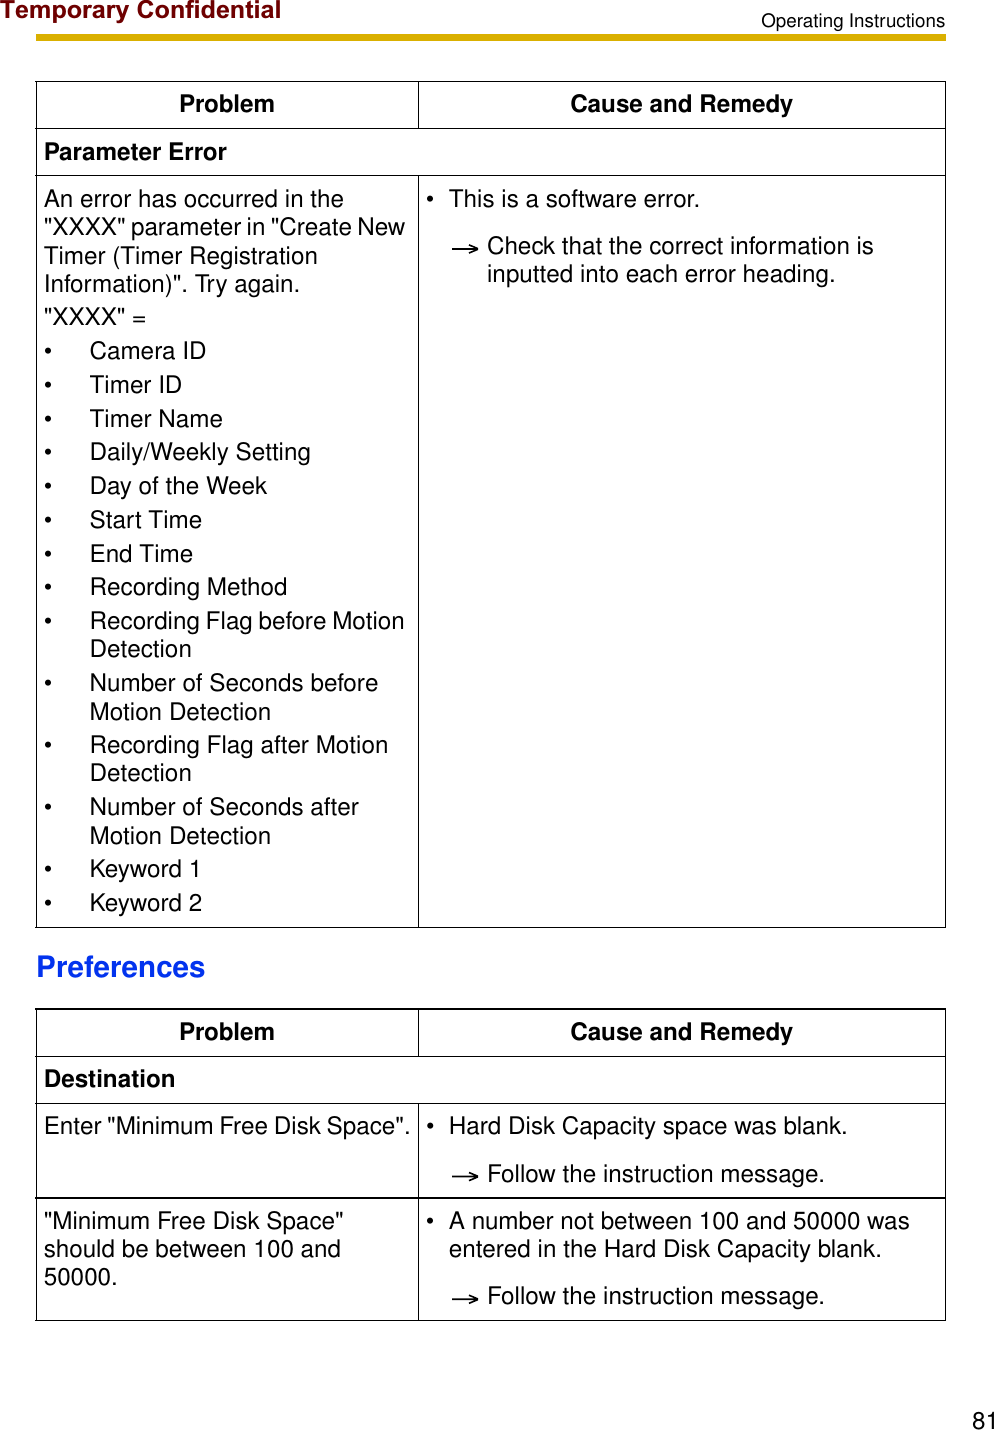
![Operating Instructions82"Minimum Free Disk Space" should be less than the current free space (*** MB).• The free space on the disk is larger than the free space on the drive.Follow the instruction message.Select "Save Destination Folder". • Save Destination Folder Path space was blank.Follow the instruction message.BackupEnter "Minimum Free Disk Space". • Minimum Free Disk Space field was blank.Follow the instruction message."Minimum Free Disk Space" should be between 100 and 50000.• A number not between 100 and 50000 was entered in the Minimum Free Disk Space blank.Follow the instruction message."Minimum Free Disk Space" should be less than the current free space (XXX MB).• The free space on the disk is larger than the free space on the drive.Follow the instruction message.Select "Backup Folder". • The Backup Destination Folder Path space was blank.Follow the instruction message.NetworkEnter "Proxy Server Address". • [Use a proxy server] is checked and the Address space was blank.Follow the instruction message."Port" should be between 1 and 65535. • A number not between 1 and 65535 was entered in the Port blank.Follow the instruction message.Problem Cause and RemedyTemporary Confidential](https://usermanual.wiki/Panasonic-of-North-America/96NBL-C131/User-Guide-738029-Page-82.png)

![Operating Instructions86JPEG ConversionProblem Cause and Remedy"Start Time" should be within the recording time. • The start time is not within the recording time.Follow the instruction message.Set the "Start Time" so that it comes before the End Time. • The start time comes after the end time.Follow the instruction message.Set the "End Time" to within the recording time. • The end time is not within the recording time.Follow the instruction message."Conversion Interval" should be between 1 and (the number of images - 1).• The frequency is not between 1 and (end time - start time [seconds]), or the space was blank.Follow the instruction message."Conversion Interval" should be between 1 and (end time - start time [seconds]).• The number is larger than the time period between the start time and end time.Follow the instruction message."Conversion Interval" should be between 1 and 3600. • The image is recorded for more than 1 hour, but the converted interval is not between 1 and 3600.Follow the instruction message.The conversion file is possibly being used in another application. Confirm that it is not being used and try again.• The converted file has been opened in another application.Close other applications and try again.The recorded images could not be found. Refresh the Recorded Image List and try again.• There is no recorded images.Refresh the recorded images and try again.A write error has occurred. • An error has occurred in JPEG conversion.Temporary Confidential](https://usermanual.wiki/Panasonic-of-North-America/96NBL-C131/User-Guide-738029-Page-86.png)
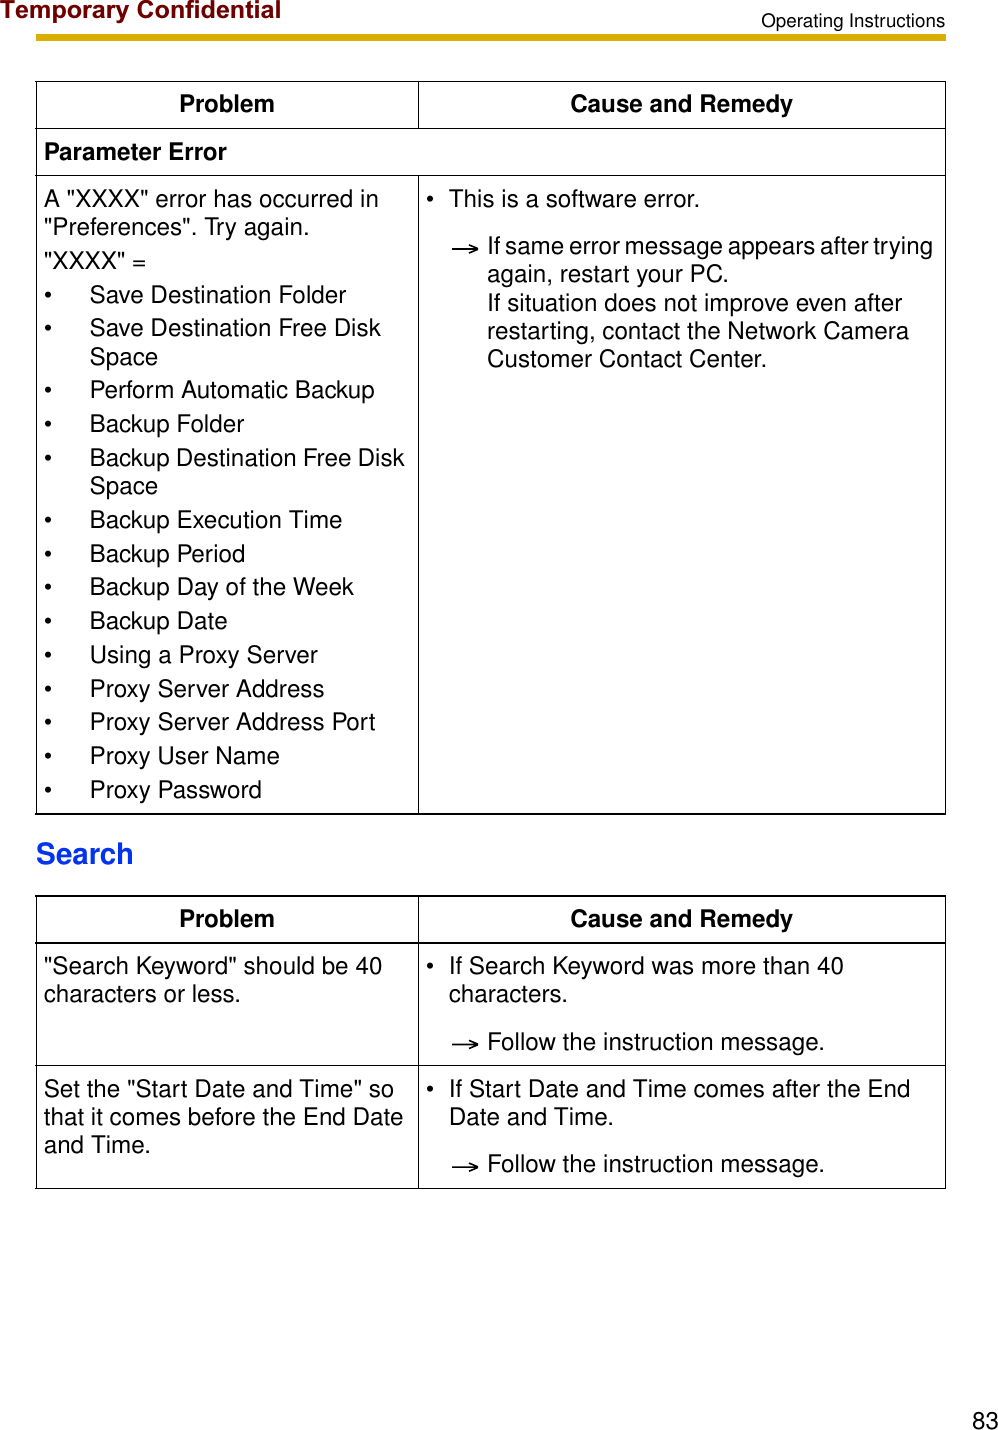
![Operating Instructions89There were timers that could not be deleted. Try again. • This software is malfunctioning. (This message is not normally displayed.)Restart your PC.Is it OK to apply the proxy settings to all cameras? • You checked [Use a proxy server] on the network page of the preferences. (The camera should be registered.)Follow the instruction message.All cameras have been set to use proxy settings. • You clicked [Yes] in the "Is it OK to apply the proxy settings to all of the cameras?" message, and the saving is complete.Follow the instruction message.Applying proxy settings to all cameras has failed. Apply individually.• You clicked [Yes] in the "Is it OK to apply the proxy settings to all of the cameras?" message, but the saving is failed.Check the [Use Proxy Server] box for each camera on the registration information change or basic settings page."XXXX" error occurred during importing."XXXX" =• File Type• File Size• Memory Shortage• Open• This software cannot import from the file at [Tools] [Import Camera Settings].The file is broken.The number of registered cameras reached the maximum of "XXX" cameras, so importing was canceled."XXX" =•64• The registered cameras has reached the maximum limit during import.Delete unnecessary cameras.Exporting failed. • This software cannot export to the file at [Tools] [Export Camera Settings].The file is broken.License registration is complete. • License registration is complete.Problem Cause and RemedyTemporary Confidential](https://usermanual.wiki/Panasonic-of-North-America/96NBL-C131/User-Guide-738029-Page-89.png)
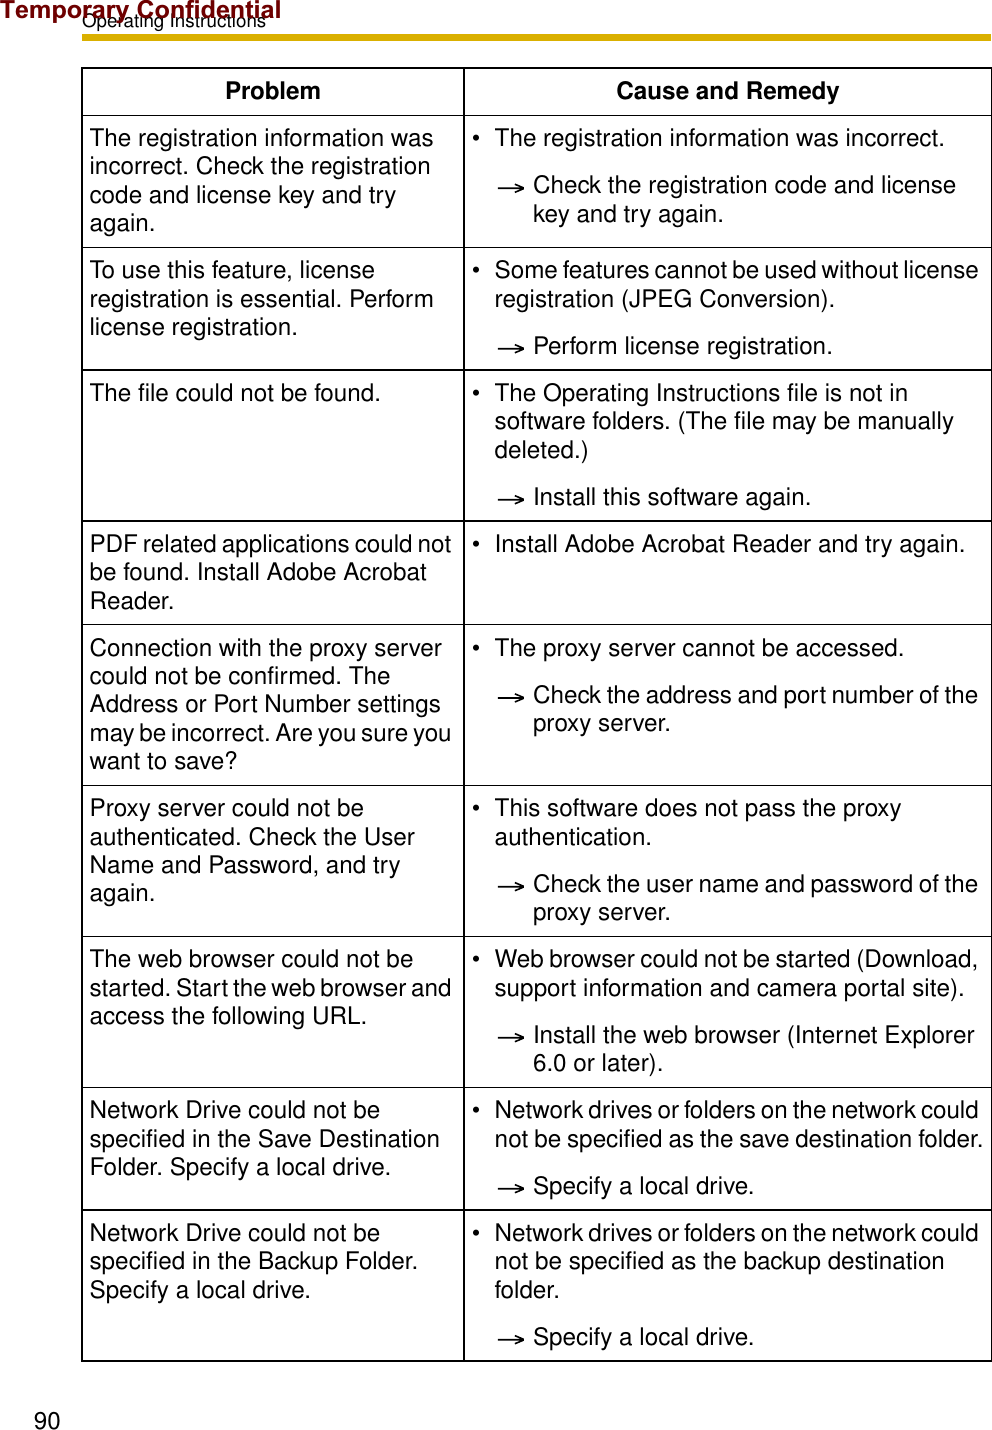
![Operating Instructions91Network Drive could not be specified in the Import File. Specify a local drive.• Network drives or folders on the network could not be specified to create an export file.Specify a local drive.Network Drive could not be specified in the Export File. Specify a local drive.• Network drives or folders on the network could not be specified to create an export file.Specify a local drive."Save Destination Free Disk Space" should be less than the current free space (XXX MB).• The disk free capacity set on the preferences page is larger than the actual capacity.Set the disk free capacity smaller than the actual capacity."Backup Destination Free Disk Space" should be less than the current free space (XXX MB).• The backup disk free capacity set on the preferences page is larger than the actual capacity.Set the disk free capacity smaller than the actual capacity."XXXX" cannot be accessed."XXXX" =• Save Destination Folder• Backup Folder• JPEG Conversion Folder• Import File• Export File• The folder or file cannot be accessed because the drive cannot be found or the path is not available.Properly select a folder of file.If "Set to Default" is checked, settings are returned to the state in "Create New Camera". The default registration information does not change.• You checked [Set to Default] on the create new camera page, or image, recording capacity limit or motion detection recording settings on the camera registration information page.Follow the instruction message.If "Set to Default" is checked, settings are returned to the state in "Create New Timer". The default registration information does not change.• You checked [Set to Default] on the create new timer page, or basic setting on the timer registration information page.Follow the instruction message.Problem Cause and RemedyTemporary Confidential](https://usermanual.wiki/Panasonic-of-North-America/96NBL-C131/User-Guide-738029-Page-91.png)
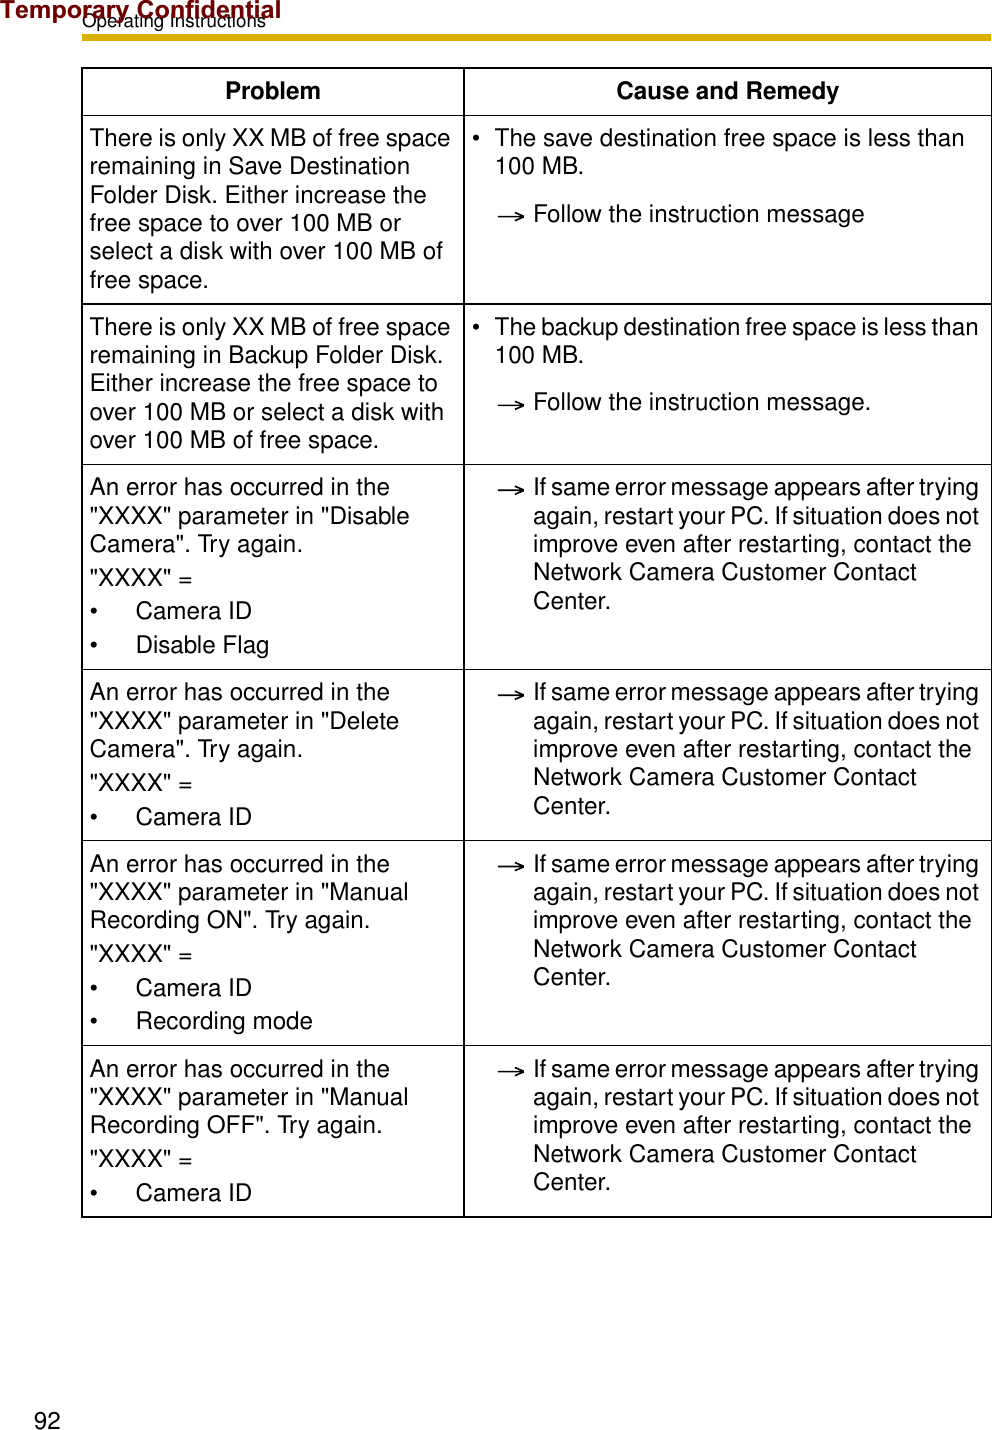
![Operating Instructions93Recording has stopped because either there is insufficient free disk space or the disk cannot be written on.Confirm that there is sufficient free space on the save destination disk and that the save destination folder is in a writable condition, then try recording again.• The destination free space has reached the limit set on the preferences page, or the save destination folder is not writable and recording is stopped.1. Decrease the save destination free space.2. Create enough free space on the destination folder.3. Confirm that there is a folder. If there is not, create it.4. Check if the folder is writable, and set it writable.Backing up has stopped because either there is insufficient free backup disk space or the disk cannot be written on.Confirm that there is sufficient free space on the backup destination disk and that the backup destination folder is in a writable condition, then back up again.• The backup destination free space has reached the limit set on the preferences page, or the backup destination folder is not writable and backup is stopped.1. Decrease the backup destination free space.2. Create enough free space on the backup destination folder.3. Confirm that there is a folder. If there is not, create it.4. Check if the folder is writable, and set it writable."XXXX" has reached its recording capacity, so recording has been stopped. Delete recorded images and try recording again."XXXX" =• Camera Name• The recorded images of the camera have reached the limit of recording capacity and recording is stopped.Delete the recorded images of the camera, or increase the recording capacity.When the software is shut down, the camera stops recording. Any set timers will also stop operating. Is it OK to shut down?• Right-click and select [Exit].Follow the instruction message.Problem Cause and RemedyTemporary Confidential](https://usermanual.wiki/Panasonic-of-North-America/96NBL-C131/User-Guide-738029-Page-93.png)
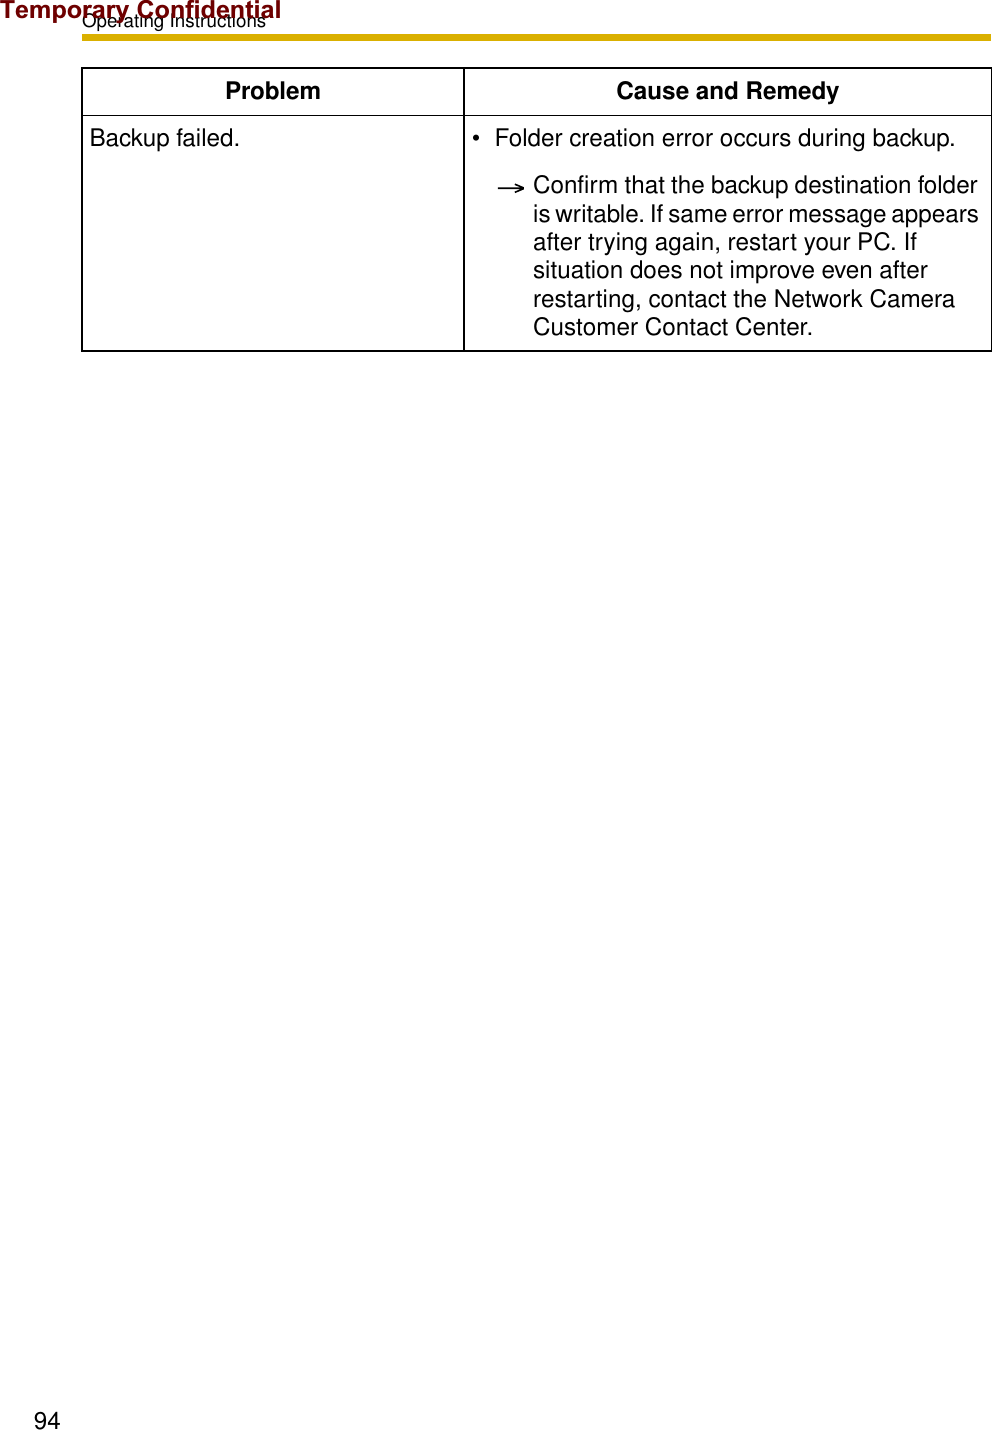
![Operating Instructions952.15 TroubleshootingProblem Cause and RemedyThe camera image is not displayed. • The camera is not powered up.Turn the camera on.• The camera IP address is incorrect.Set the proper IP address at the basic settings on the camera registration information page.• The authentication is required for the camera.Set the proper user name and password at the basic settings on the camera registration page.• Network to which your PC is connected is not working.Confirm that the network is working.• The network is congested.Pages may not be displayed immediately. Wait for a while.• The proxy setting is incorrect.If the camera cannot be accessed without a proxy server, the proxy setting should be set on this software. Check [Use Proxy Server] and set the proxy settings at [Tools] [Preferences] [Network Connection] on the menu bar."Register a license key." is displayed on the monitoring page.• The license registration is not performed.Perform the license registration entering registration code and license key at [Help] [License Registration] on the menu bar.Timer recording is not working. • The day of the week is not checked at the day of the week setting on the timer page.Check the day of the week to enable timer recording.• Timer is disabled. (Timer is grayed out on the timer list.)Select the timer on the timer list, and click [Enable] on the menu displayed by right-clicking the timer list.Temporary Confidential](https://usermanual.wiki/Panasonic-of-North-America/96NBL-C131/User-Guide-738029-Page-95.png)
![Operating Instructions96You cannot pan or tilt the camera. • Pan/tilt operation is not permitted on the camera settings.Permit the pan/tilt operation.• The camera does not support pan/tilt operation.This software is unstable or does not work.• Your PC specification does not meet the requirement.Close other applications.The audio cannot be listened during monitoring.• The camera does not support audio.The camera should support audio. • Microphone is not properly connected.Confirm that microphone is properly connected.• Volume setting on your PC is muted or set to minimum.Adjust the volume on the volume control window on your PC.• Speaker is malfunctioning.Confirm that the speaker is working.Audio cannot be listened while viewing images with audio.• [Image Only] is selected at record settings on the camera registration information page.If [Image Only] is selected, the audio is not recorded. Select [Image and Audio] to record audio.Audio is not synchronized with images on the monitoring page or screen.• Audio delays 1 or 2 seconds after the image. Audio may be interrupted or the image may be paused. This is not a problem.You cannot change resolution or image quality.• Resolution or image quality control is not permitted on the camera settings.Problem Cause and RemedyTemporary Confidential](https://usermanual.wiki/Panasonic-of-North-America/96NBL-C131/User-Guide-738029-Page-96.png)