Panasonic of North America 96NBL-C30A 802.11b/g Network Camera Transmitter User Manual BLC30A IT
Panasonic Corporation of North America 802.11b/g Network Camera Transmitter BLC30A IT
UserManual.wiki
>
Panasonic of North America
>
96NBL C30A User Manual
User Manual
Navigation menu
Upload a User Manual
Namespaces
Wiki Guide
HTML
PDF
Info
Views
User Manual
Discussion / Help
Navigation
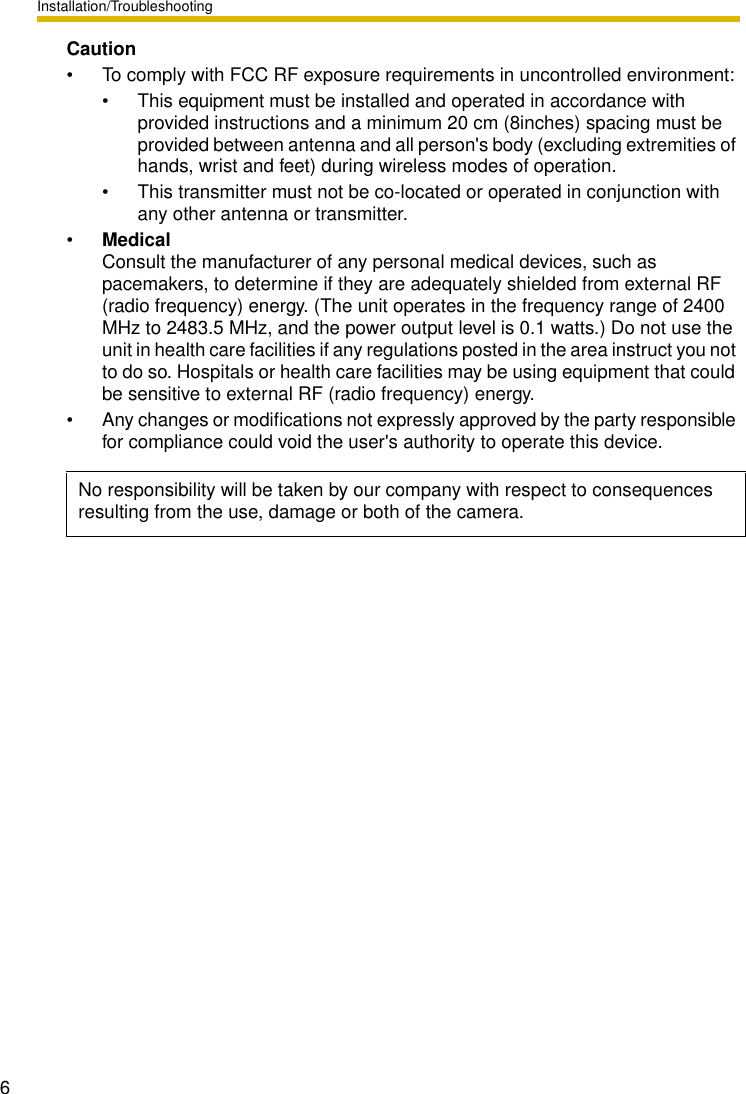
![Installation/Troubleshooting71.2 Camera Feature Locations1.2.1 Front ViewPrivacy ButtonTo temporarily deactivate the camera, press the privacy button. Once pressed, the button changes from green to red. The video will be temporarily turned off, camera features become unresponsive and the viewed image turns to a gray screen. To return to normal operation, press the privacy button again. It should turn green within a few seconds. To restore video, click [Refresh] on the web browser. Privacy mode can also be controlled from mobile phones or PCs (see page or page of the Operating Instructions in the Setup CD-ROM).Indicator DisplayAntennaPan/tilt PartDo not apply pressure to the pan/tilt portion of the camera. Any forced movement can damage the internal mechanism.Indicator/Privacy ButtonPyroelectric Infrared Sensor (see Getting Started)PoweronNormal Operation*1*1The indicator turns orange if the camera is not connected to the LAN.*2The indicator blinks orange if the camera is not connected to the LAN.Updating FirmwareGetting IP address*2 Got IP addressSettingFinished settingNot on the LAN Orange Orange blinkingOrange blinking(The camera restarts after that.)Pressing FACTORY DEFAULT RESET buttonOrange blinking Turning offUPnP Failure Orange blinking (About a 2-second interval)On the LANUsing DHCPAutomaticSetupIn Privacy Mode RedInternal Failure Red blinkingOrange GreenGreenGreenGreenOrange and green blinkingGreen blinkingGreen blinking](https://usermanual.wiki/Panasonic-of-North-America/96NBL-C30A/User-Guide-454895-Page-7.png)