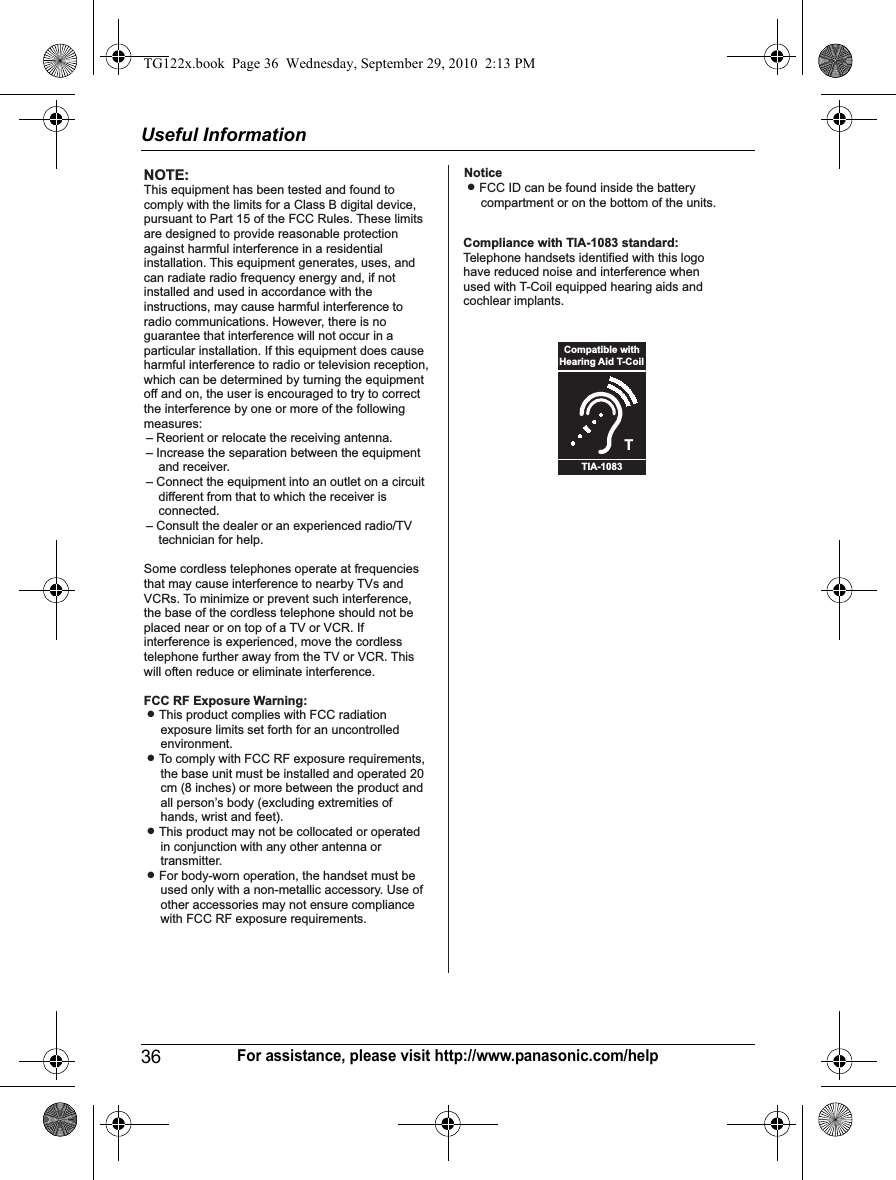
Panasonic of North America 96NKX-TGA120 FCC Part 15 D / DECT Cordless Telephone Handset User Manual
Panasonic Corporation of North America FCC Part 15 D / DECT Cordless Telephone Handset
UserManual.wiki
>
Panasonic of North America
>
96NKX TGA120 User Manual
User Manual
Navigation menu
Upload a User Manual
Namespaces
Wiki Guide
HTML
PDF
Info
Views
User Manual
Discussion / Help
Navigation

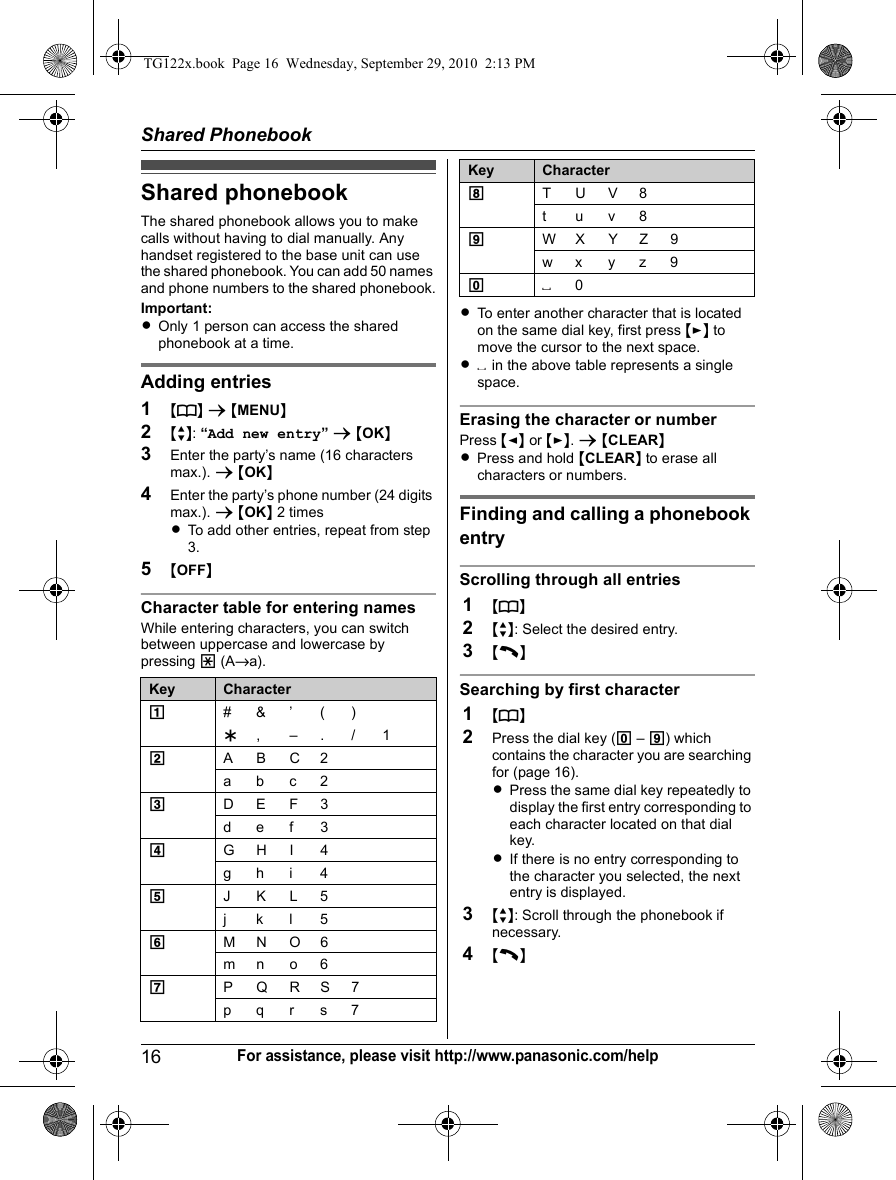
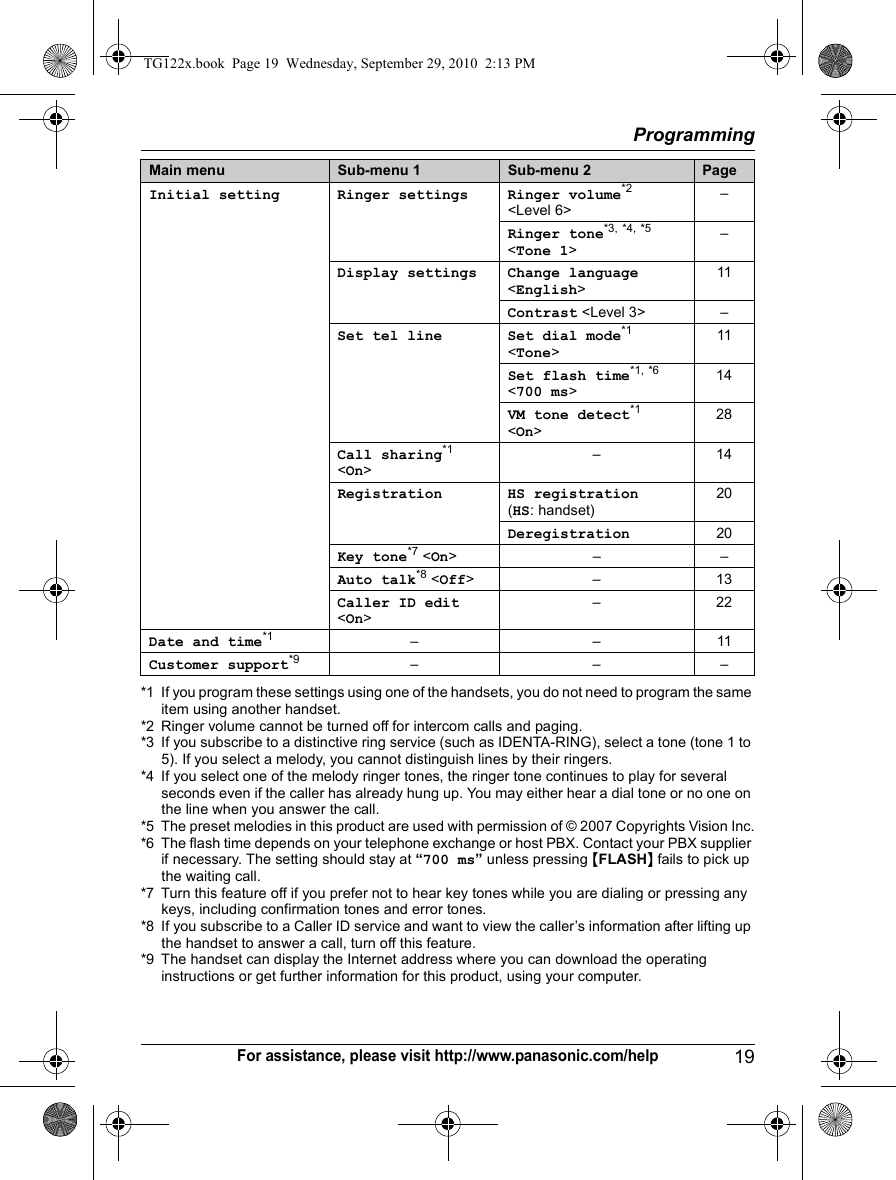
![Getting Started11For assistance, please visit http://www.panasonic.com/helpInitial settingsImportant:LWhen you install the batteries for the first time, the handset prompts you to set date and time. First press {OK}, then proceed to step 3 in “Date and time”, page 11.Date and time1{MENU}2{r}: “Date and time” s {OK}3Enter the current month, date, and year by selecting 2 digits for each.Example: July 15, 2011)7 15 114Enter the current hour and minute (12-hour clock format) by selecting 2 digits for each.Example: 9:30)9 3)5Press * to select “AM” or “PM”.6{OK} s {OFF}Note:LWhen English is selected as the display language, 12-hour clock format is used. When Spanish is selected, 24-hour clock format is used.LThe date and time may be incorrect after a power failure. In this case, set the date and time again.Display languageYou can select either “English” or “Español” as the display language. The default setting is “English”.1{MENU}2{r}: “Initial setting” s {OK}3{r}: “Display settings” s {OK}4{r}: “Change language” s {OK}5{r}: Select the desired setting.6{OK} s {OFF}Note:LHow to change from Spanish back to English:Voice guidance languageYou can select either “English” or “Español” as the voice guidance language of the answering system. The default setting is “English”.1{MENU}2{r}: “Answering device” s {OK}3{r}: “Settings” s {OK}4{r}: “Voice prompt” s {OK}5{r}: Select the desired setting.6{OK} s {OFF}Dialing modeIf you cannot make calls, change this setting according to your telephone line service. The default setting is “Tone”.“Tone”: For tone dial service.“Pulse”: For rotary/pulse dial service.1{MENU}ECO Eco mode is on. (page 9)[P] Call sharing mode is off. (page 19)[1] Handset number5Battery levelIn use LSomeone is using the line.LAnswering system is being used by another handset or the base unit.Symbol meaning:Example: {r}: “Off”Press {V} or {^} to select the words in quotations.Item Meaning1{MENU}2{r}: “Ajuste inicial” s {OK}3{r}: “Ajuste pantalla” s {OK}4{r}: “Cambiar idioma” s {OK}5{r}: “English” s {OK} s {OFF}TG122x.book Page 11 Wednesday, September 29, 2010 2:13 PM](https://usermanual.wiki/Panasonic-of-North-America/96NKX-TGA120/User-Guide-1394107-Page-11.png)