Panasonic of North America 9TGCF-281 Notebook Personal Computer User Manual Manual
Panasonic Corporation of North America Notebook Personal Computer Manual
Contents
- 1. Manual
- 2. Revised Manual and Statement
Manual
1
Illustrations in this Manual
Personal Computer
Supplementary Instructions
This Supplementary Instructions manual explains how to get started with a wireless LAN or a wireless LAN & internal LAN port
and point out cases where the operation of the computer will differ from that in the Operating Instructions and Reference Manual.
Windows 98 : Information for Microsoft® Windows® 98 Second Edition users.
Windows NT : Information for Microsoft® Windows NT® Workstation Version 4.0 users.
Windows 2000 : Information for Microsoft® Windows® 2000 Professional users.
Add the following “ Information to the User”.
Information to the User
This product and your Health
This product, like other radio devices, emits radio frequency electromagnetic energy. The level
of energy emitted by this product however is far much less than the electromagnetic energy
emitted by wireless devices like for example mobile phones.
Because this product operates within the guidelines found in radio frequency safety standards
and recommendations, we believe this product is safe for use by consumers. These standards
and recommendations reflect the consensus of the scientific community and result from delib-
erations of panels and committees of scientists who continually review and interpret the exten-
sive research literature.
In some situations or environments, the use of this product may be restricted by the proprietor
of the building or responsible representatives of the organization. These situations may for
example include:
Using this product on board of airplanes, or
In any other environment where the risk of interference to other devices or services is per-
ceived or identified as harmful.
If you are uncertain of the policy that applies on the use of wireless devices in a specific
organization or environment (e.g. airports), you are encouraged to ask for authorization to use
this product prior to turning on the product.
Regulatory Information
We are not responsible for any radio or television interference caused by unauthorized modifi-
cation of this product. The correction of interference caused by such unauthorized modification
will be the responsibility of the user. We and its authorized resellers or distributors are not liable
for damage or violation of government regulations that may arise from failing to comply with
these guidelines.
®
Read Me First “OPERATING INSTRUCTIONS”
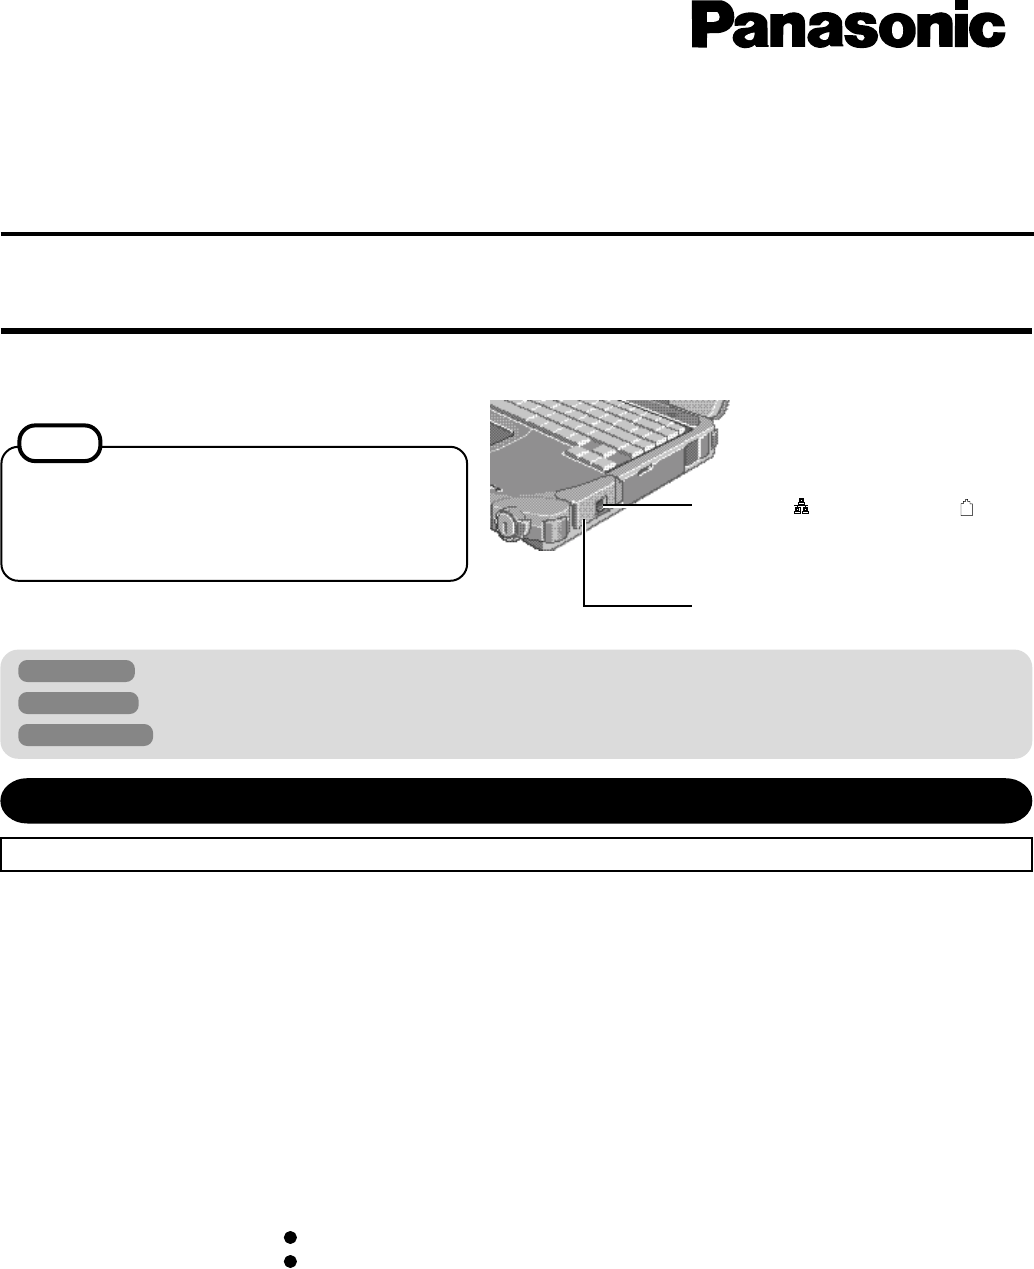
Wireless LAN Antenna
NOTE
Wireless LAN communications are done via an antenna.
Please do not shield this antenna with the hand, etc. This
will negatively effect the performance of your wireless
LAN communications.
LAN Port or Modem Port
(This part differs depending on the model.
Check the marking on the computer.)
CF-28 with Wireless LAN (CF-WWL282) & Modem Port
CF-28 with Wireless LAN (CF-WWL282) & LAN Port

2
1. This equipment complies with Part 68 of the FCC rules. On
the computer is a label that contains, among other informa-
tion, the FCC registration number and ringer equivalence
number (REN) for this equipment. If required, this informa-
tion must be provided to the telephone company.
2. An FCC compliant telephone cord and modular plug is pro-
vided with this equipment. This equipment is designed to be
connected to the telephone network or premises wiring using
a compatible modular jack which is Part 68 compliant. See
Installation Instructions for details.
3. The REN is used to determine the quantity of devices which
may be connected to the telephone line. Excessive RENs on
the telephone line may result in the devices not ringing in
response to an incoming call. In most, but not all area, the
sum of RENs should not exceed five (5.0). To be certain of
the number of devices that may be connected to a line, as
determined by the total RENs, contact the local telephone
company.
4. If your telephone equipment cause harm to the telephone net-
work, the telephone company will notify you in advice that
temporary discontinuance of service may be required. But if
advice notice isn’t practical, the telephone company will no-
tify the customer as soon as possible. Also, you will be ad-
vised of your right to file a complaint with the FCC if you
believe it is necessary.
5. The telephone company may take changes in it’s facilities,
equipment, operations or procedures that could affect the op-
eration of the equipment. If this happens the telephone com-
pany will provide advance notice in order for you to make
necessary modifications to maintain uninterrupted service.
6. If trouble is experienced with this equipment, for repair or
warranty information, please contact Matsushita Electric
Corporation of America at DIAL TOLL FREE 1-800-
LAPTOP5 (1-800-527-8675). If the equipment is causing
harm to the telephone network, the telephone company may
request that you disconnect the equipment until the problem
is resolved.
7. There are no user serviceable parts contained in this equipment.
8. This equipment may not be used on coin service provided by
the telephone company. Connection to party lines is subject
to state tariffs.
9. The Telephone Consumer Protection Act of 1991 makes it
unlawful for any person to use a computer or other electronic
device to send any message via a telephone fax machine un-
less such message clearly contains in a margin at the top or
bottom of each transmitted page or on the first page of the
transmission, the date and time it is sent and an identification
of the business or other entry, or other individual sending the
message and the telephone number of the sending machine
or such business, other entity, or individual. In order to pro-
gram this information into your fax software, you should re-
fer to the manual of the Fax software being used.
10.According to the FCC’s electrical safety advisory, we recom-
mend that you may install an AC surge arrestor in the AC outlet
to which this equipment is connected. Telephone companies
report that electrical surges, typically lightning transients, are
very destructive to customer terminal equipment connected to
AC power sources and that this is a major nationwide problem.
“Caution: To reduce the risk of fire, use only No.26 AWG or larger telecom-
munication line cord.”
“ATTENTION: Pour réduire le risque d’incendie, utiliser uniquement des
conducteurs de télécommunications 26 AWG ou de section supérieure.”
Supplementary Instructions
Read Me First - For U.S.A. “OPERATING INSTRUCTIONS”
Replace as follows.
Federal Communications Commission Radio
Frequency Interference Statement
Note: This equipment has been tested and found to comply with
the limits for a Class B digital device, pursuant to Part 15 of the
FCC Rules. These limits are designed to provide reasonable
protection against harmful interference in a residential
installation. This equipment generates, uses and can radiate radio
frequency energy and, if not installed and used in accordance
with the instructions, may cause harmful interference to radio
communications. However, there is no guarantee that
interference will not occur in a particular installation. If this
equipment does cause harmful interference to radio or television
reception, which can be determined by turning the equipment
off and on, the user is encouraged to try to correct the interference
by one or more of the following measures:
Reorient or relocate the receiving antenna.
Increase the separation between the equipment and receiver.
Connect the equipment into an outlet on a circuit different
from that to which the receiver is connected.
Consult the Panasonic Service Center or an experienced ra-
dio/TV technician for help.
Warning
To assure continued compliance, use only shielded interface
cables when connecting to a computer or peripheral. Also, any
changes or modifications not expressly approved by the party
responsible for compliance could void the user's authority to
operate this equipment.
FCC RF Exposure Warning: This computer is provided with
PC Card slots that could be used with wireless transmitter(s),
which will be specifically recommended, when they become
available. Other third-party wireless transmitter(s) have not been
RF exposure evaluated for use with this computer and may not
comply with FCC RF exposure requirements.
This device complies with Part 15 of the FCC Rules. Operation
is subject to the following two conditions:
(1) This device may not cause harmful interference, and
(2) This device must accept any interference received, including
interference that may cause undesired operation.
Responsible Party: Matsushita Electric Corporation of America
One Panasonic Way
Secaucus, NJ 07094
Tel No:1-800-LAPTOP-5 (1-800-527-8675)
CAUTION: To comply with FCC RF exposure compliance re-
quirements, a separation distance of at least 20 cm must be main-
tained between the antenna of this device and person’s body
during wireless mode operation.
<Only for models with modem port>
FCC Regulation Notice for modem
This equipment contains a FCC approved modem.
Manufacturer of modem: Aztech Labs, Inc.
Model No. MP3930V-W(C)
Notice for the products using LCD
This product uses one or more fluorescent lamps containing a
small amount of mercury. It also contains lead in some compo-
nents. Disposal of these materials may be regulated in your com-
munity due to environmental considerations. For disposal or
recycling information please contact your local authorities, or
the Electronics Industries Alliance: <http://www.eiae.org/>
Tested To Comply
With FCC Standards
FOR HOME OR OFFICE USE

3
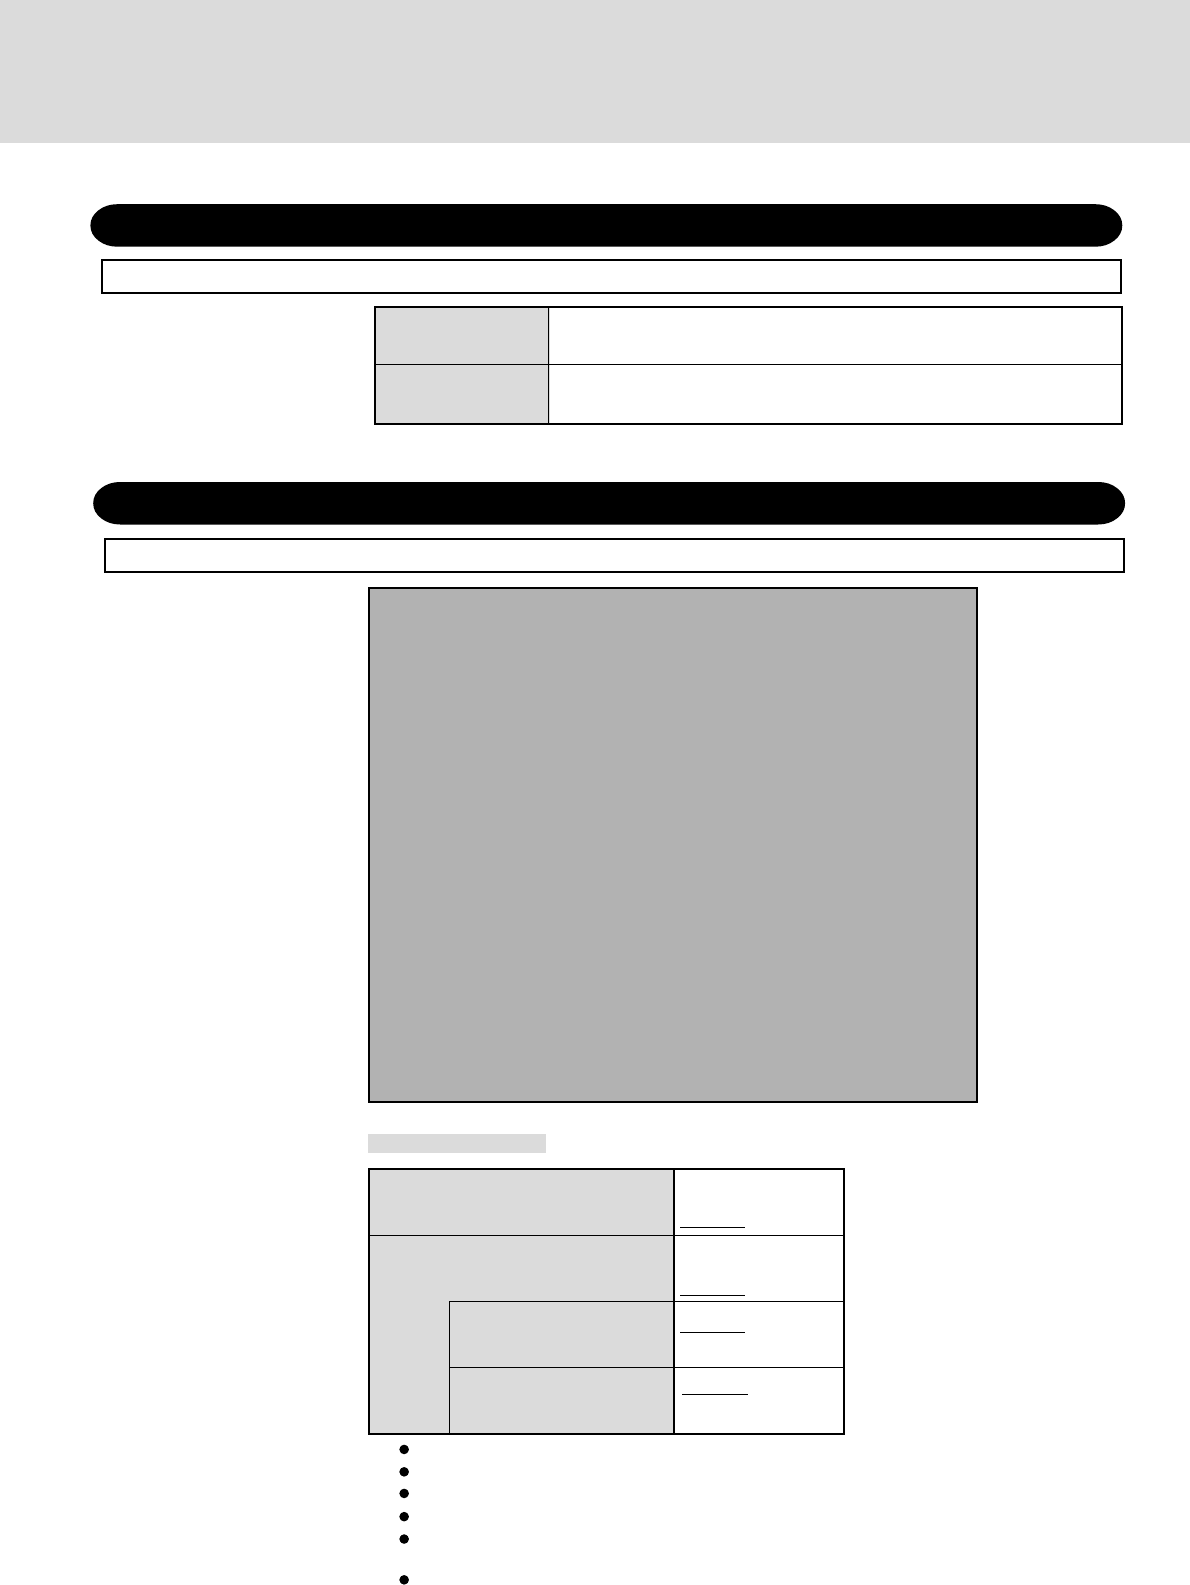
Replace the floppy disk drive with the optional CD drive
1Turn your computer over and open the cover by sliding the latch A.
2Slide and hold the latch B on the MP release lever, then turn the MP release lever.
3Remove the floppy disk drive by holding both sides of the drive.
4Gently insert the CD drive into the multimedia pocket by pushing on both corners
until it clicks into place.
First-time Operation “OPERATING INSTRUCTIONS ”
<Only for models with the CF-WWL282 Driver CD-ROM>
Insert the CD drive into the multimedia pocket with the following procedure before turning the computer on for the first time.
Turn your computer on and setup Windows
Windows 98
1Rotate the power switch clockwise and hold it for ap-
proximately one second until the power indicator turns
on before releasing it.
Each time [Add New Hardware Wizard] is
displayed, select [Cancel].
The display will ask you to restart Windows, select
[No].
2Select settings for your region and your keyboard lay-
out, then press [Next].
(for U.S.A.: United States 101)
3Enter your name, then press [Next].
4Select [Skip] at the [Using Your Modem to Connect].
5Select [Yes] at the [Cancel Dialing], then press [Next].
The License Agreement will be displayed.
6After reading the License Agreement, select [I accept
this agreement] or [I do not accept the agreement], then
press [Next].
NOTE
Moving the cursor ( ) or clicking buttons can be
performed with the touch pad.
If a driver is updated, the computer may skip some
steps. If you notice that a step has been skipped,
simply follow the instructions on the screen. If you
are unsure about how to proceed, ask your system
administrator or the person in charge of the network.
CAUTION
Do not install the drive upside-down.
The bottom of the drive may become disfigured.
Cover
Latch A
MP Release Lever
Install the drive with the plastic side
on top.
Latch B
1
2
3
4
If [I do not accept the agreement] is selected,
the Windows setup will be aborted.
<During the setup procedure after reinstall-
ing only>
After you accept the agreement, the [Windows
Product Key] may be displayed. In this case,
input the Product Key and then select [Next].
NOTE
After turning the computer on for the first time, perform the Windows setup procedure shown below.
(Be sure to follow the steps below and not the “Windows Setup” procedure in the “Operating Instructions”.)
7Press [Finish].
8Input the correct date, time and time zone and press
[Close]. You can also complete these settings at a later
time.
9<Only for models with the CF-WWL282 Driver CD-
ROM>
If the CD drive is not installed at this time, turn the
computer off, install the CD drive, and then turn the
computer on.
Each time [Add New Hardware Wizard] is
displayed, select [Cancel].
1) Set the CF-WWL282 Driver CD-ROM in the CD
drive.
Create“c:\util\drivers\aironet” folder. Select [Start] -
[Programs] - [MS-DOS Prompt] and input the following.
xcopy L:\*.* c:\util\drivers\aironet /s Enter
(“L” is the CD drive letter. You can change the letter
to suit your preference.)

4
Supplementary Instructions
Windows NT
1Rotate the power switch clockwise and hold it for ap-
proximately one second until the power indicator turns
on before releasing it.
2The License Agreement will be displayed. After read-
ing the agreement, select [I accept this Agreement].
7Select [Finish]. Windows will restart.
8Following the display, press Ctrl + Alt + Del .
Input the password set in step 6 and select [OK], then
select [Close] at the [Welcome] display.
As the computer starts up, it will be necessary to
input the password set in step 6 .
If [Service Control Manager] is displayed during
the subsequent operation, press [OK]. Install Ser-
vice Pack 6 after the Windows setup completes (
“Technical Information”).
9Add the check mark to [Install system provided driver
for this card] and press [OK].
Follow the on-screen instructions.
10
<Only for models with the CF-WWL282 Driver CD-ROM>
1) Set the CF-WWL282 Driver CD-ROM in the CD
drive.
Create“c:\util\drivers\aironet” folder. Select [Start] -
[Programs] - [Command Prompt] and input the following.
xcopy d:\*.* c:\util\drivers\aironet /s Enter
(“d” is the CD drive letter. You can change the letter to
suit your preference.)
2) Close [Command Prompt].
11
Install the Aironet Client Utility (ACU).
The Aironet Client Utility (ACU) is used to configure
your client adapter for use in a wireless enterprise and
perform user-level diagnostics on your client adapter.
In [Start]-[Run], input [c:\util\drivers\aironet\utilities\acu\setup.exe]
and press [OK]. Follow the on-screen instructions.
12
<Only for models with LAN port>
1) Select [Add] in [Start] - [Settings] - [Control Panel] -
[Network] - [Adapters].
2) Select [Have Disk].
3) Input [c:\util\drivers\lan], then select [OK].
4) Select [Intel(R) PRO Adapter] and then select [OK].
5) Select [Close] and follow the on-screen instructions.
13
In [Start]-[Settings]-[Control Panel]-[Network], make
necessary change.
The settings will vary for different network environ-
ments depending on the network system being used.
For more details, ask your system administrator or the
person in charge of the network.
14
Set the correct settings for all items in [Control Panel]-
[Regional Settings] and [Date/Time] etc.
( “Common Notes for Windows 98/Windows NT/Win
dows 2000” on page 6)
Remember this password! If the password is for-
gotten, Windows NT cannot be operated.
NOTE
2)
Remove the CD-ROM and turn the computer off,
and then replace the CD drive with floppy disk
drive. Turn the computer on.
10
<Perform this step when [Add New Hardware Wiz-
ard] for Intel 8255x-base PCI Ethernet Adapter (10/
100) is displayed.>
(Go on to the next step when [Add New Hardware Wiz-
ard] for Intel 8255x-base PCI Ethernet Adapter (10/100)
is not displayed.)
1) In [Add New Hardware Wizard] for Intel 8255x-
based PCI Ethernet Adapter (10/100), press [Next].
2) Select [Search for the best driver for your device], press
[Next].
3) Input [c:\util\drivers\lan], then press [Next].
4) Select [The update driver (Recommended)] and then
press [Next], then press [Next].
5) Press [Finish].
11
At [Add New Hardware Wizard] for Cisco Systems-340/
350 Series Wireless LAN Adapter, press [Next].
12
Select [Search for the best driver for your device], press [Next].
13
Input [c:\util\drivers\aironet] in [Specify a location], then
press [Next].
14
At [Windows driver file search for the device:], press [Next].
If [Insert Disk] is displayed, select [OK] and then input
[c:\util\drivers\aironet], then select [OK].
Each time [Version Conflict] is displayed, select [Yes].
15
When the message [Windows has finished installing the
software that your new hardware device requires] is dis-
played, press [Finish].
16
The display will ask you to restart Windows, press [Yes].
17
At [Enter Network Password], press [OK].
18
In [Start]-[Settings]-[Control Panel]-[Network], make
necessary change.
The settings will vary for different network environments
depending on the network system being used. For more
details, ask your system administrator or the person in
charge of the network.
19
Install the Aironet Client Utility (ACU).
The Aironet Client Utility (ACU) is used to configure
your client adapter for use in a wireless enterprise and
perform user-level diagnostics on your client adapter.
In [Start]-[Run], input [c:\util\drivers\aironet\utilities\acu\setup.exe]
and press [OK].
( “Common Notes for Windows 98/Windows NT/Win-
dows 2000” on page 6)
The display will ask you to restart Windows, select
[Yes].
Logon to Windows.
If [Insert Disk] is displayed, press [OK] and
then input [c:\util\drivers\lan], then press [OK].
Each time [Version Conflict] is displayed, select [Yes].
If [I don’t accept this Agreement] is selected, the
Windows setup will be aborted.
3Select [Next].
4Input your name and organization, then select [Next].
(It is possible to omit the organization item.)
5Input your computer name and select [Next].
6Input an Administrator password and select [Next].
CAUTION

5
7Input the correct date, time and time zone and press [Next].
You can also complete these settings at a later time.
8<Only for models with LAN port>
1) At the [Networking Settings], select [Typical
settings], then press [Next].
2) At the [Workgroup or Computer Domain], select
[No, this computer is not on a network, or is on a
network without a domain], then press [Next].
9Press [Finish]. The computer will restart.
10
<For models with LAN port>
1)
At the [Network Identification Wizard], press [Next].
2)
At the [Users of This Computer], select [Users must
enter a user name and password to use this computer],
then press [Next].
3)
Press [Finish].
4)
Logon as the administrator.
5)
At [Found New Hardware Wizard], select [Cancel].
<For models with modem port>
1)
Logon as the administrator.
2)
At [Found New Hardware Wizard], select [Cancel].
CAUTION
2)
Remove the CD-ROM and turn the computer off,
and then replace the CD drive with floppy disk
drive. Turn the computer on.
3)
Logon as the Administrator.
12
At [Found New Hardware Wizard], press [Next].
13
Select [Search for a suitable driver for my device] and
press [Next].
14
Select [Specify a location] and press [Next].
15
Input [c:\util\drivers\aironet] and press [OK].
16
Press [Next] and press [Finish].
17
Install the Aironet Client Utility (ACU).
The Aironet Client Utility (ACU) is used to configure
your client adapter for use in a wireless enterprise and
perform user-level diagnostics on your client adapter.
In[Start]-[Run], input [c:\util\drivers\aironet\utilities\acu\setup.exe]
and press [OK].
Follow the on-screen instructions.
18
<Only for models with LAN port>
1)
Select [Device Manager] in [Start] - [Settings] -
[Control Panel] - [System] - [Hardware].
2)
Double-click [Intel 8255x-based PCI Ethernet Adapter
(10/100)] in [Network adapters].
3)
Select [Driver] and press [Update Driver].
4)
Press [Next], then press [Next]
5)
Add the check mark for [Specify a location] and
press [Next].
6)
Input [c:\util\drivers\lan] and press [OK].
7)
Add the check mark for [Install one of the other
drivers] and press [Next].
8)
Select the driver for which the [Provider] is [Intel],
and then press [Next].
9)
Press [Finish] and press [Close].
19
In [Start]-[Settings]-[Control Panel]-[Network and
Dial-up Connections], make necessary change.
The settings will vary for different network environ-
ments depending on the network system being used.
For more details, ask your system administrator or the
person in charge of the network.
( “Common Notes for Windows 98/Windows NT/Win-
dows 2000” on next page)
Each time [Digital Signature Not Found] is dis-
played, press [Yes].
NOTE
At the steps 8 and
10
, we recommend asking
your system administrator or the person in charge
of the network.
4Select settings for your region, then press [Next].
5Enter your name and organization, then press [Next].
6Enter your computer name and administrator password,
then press [Next].
Remember this password! If the password is for-
gotten, Windows 2000 cannot be operated.
Windows 2000
1Rotate the power switch clockwise and hold it for ap-
proximately one second until the power indicator turns
on before releasing it.
2At the [Welcome to the Windows 2000 Setup Wizard],
press [Next].
3After reading the License Agreement, select [I accept
this agreement] or [I don't accept this agreement], then
press [Next].
CAUTION
Do not press any key or move the touch pad un-
til the Windows setup screen is displayed.
NOTE
If [I do not accept the agreement] is selected, the
Windows setup will be aborted.
<During the setup procedure after reinstalling only>
After you accept the agreement, the
[Windows Product Key] may be displayed. In this
case, input the Product Key and then select [Next].
NOTE
11
<Only for models with CF-WWL282 Driver CD-ROM>
If the CD drive is not installed at this time, turn the
computer off, install the CD drive, and then turn the
computer on.
If [Found New Hardware Wizard] is displayed, select
[Cancel].
1)
Set the CF-WWL282 Driver CD-ROM.
Create“c:\util\drivers\aironet” folder. Select [Start]
- [Programs] - [Accessories] - [Command Prompt]
and input the following.
xcopy d:\*.* c:\util\drivers\aironet /s Enter
(“d” is the CD drive letter. You can change the
letter to suit your preference.)
6
Supplementary Instructions
1The Software License Agreement will be displayed.
After reading the agreement, select [I Agree].
2Select [Next].
3Input your name and organization, then select [Next].
(It is possible to omit the organization item.)
4Input the Product ID written down in the column
“Customer’s record” ( “Operating Instructions”)
then select [Next].
To move the cursor to a particular item, press
Tab or click the desired box.
5Input your computer name and select [Next].
6Input an Administrator password and select [Next].
7Select [Next].
8Select [Do not connect this computer to a network at
this time], then select [Next].
(Settings can be made for a network even after Win-
dows starts up. In this case, be sure to read [When
Adding New Software or Hardware Components] in
the Reference Manual [Technical Information].)
If [I Disagree] is selected, the Windows setup
will be aborted.
Moving the cursor ( ) or clicking buttons can
be performed with the touch pad.
<Only for CF-28M series Windows NT model>
NOTE
CAUTION
9Press [Restart Computer].
10
Select “Windows NT Workstation Version 4.00” and
press Enter .
11
Following the display, press Ctrl + Alt +
Del . Input the password set in step 6 and select
[OK], then select [Close] at the [Welcome] display.
As the computer starts up, it will be necessary to
input the password set in step 6 .
Following this, if [Press any key to continue ...] is
displayed on the MS-DOS screen, press Enter .
12
Install Intel (R) Speed Step (TM).
(At the [Welcome], select [Next]. When the installa-
tion completes, select [No, I will restart my computer
later], select [Finish].)
13
Follow the on-screen instructions and install ESS Alle-
gro1 Utility.
(At the [Welcome], select [Next]. Confirm [Upgrade
Drivers] is selected, then select [Next]. When the in-
stallation completes, select [No. I will restart my com-
puter later], then select [Finish].)
Reinstalling
During Windows setup following reinstallation, follow the on-screen instructions while referring to the Supplementary In-
structions “Turn your computer on and setup Windows”.
For CF-28M series Windows NT model, refer to the procedure below.
NOTE
Common Notes for Windows 98/Windows NT/Windows 2000
If the cursor can not be pointed correctly with your finger, perform [Calibration] in [Start]-[Settings]-[Control Panel]-
[Mouse]-[TouchScreen].
If necessary, install the utility program with the following procedure.
When installing the program, see “c:\util\drivers\aironet\documentation” for a detailed explanation.
Installing the IP Setup Utility (IPSU):
The IP Setup Utility (IPSU) is used to get the IP address of a wireless ethernet device based on the device MAC ID.
In [Start]-[Run], input [c:\util\drivers\aironet\utilities\ipsu\setup.exe] and press [OK].
For information about the other utilities and documentation, access the following URL.
http://www.cisco.com/public/sw-center/sw-wireless.shtml
Using the Computer as a Network Computer
When using the computer as a network computer, some additional settings may have to be made depending on the
usage conditions. We recommend asking your system administrator or the person in charge of the network.
Remember this password! If the password is for-
gotten, Windows NT cannot be operated.
The driver for the internal LAN port is in
[c:\util\drivers\lan]. Be sure to select [Intel(R)
PRO Adapter].
It takes several minutes for the necessary files to
be copied. If the computer enters the ECO mode,
the power to the LCD is automatically turned off.
In this case, press a key unrelated to the direct
triggering of a selection, like Ctrl .
NOTE
When establishing settings for a network:
The settings will vary for different network envi-
ronments depending on the network system being
used. For more details, ask your system adminis-
trator or the person in charge of the network. Fol-
low the on-screen instructions.

7
If the cursor can not be pointed correctly with
your finger, perform [Calibration] in [Start]-[Set-
tings]-[Control Panel]-[Mouse]-[TouchScreen].
NOTE
14
<For models with LAN port>
Select [Cancel].
<For models with modem port>
Follow the on-screen instructions and install modem
driver.
(At the [Modem Board Installation Wizard], select
[Next]. Confirm [MP3930V-W(C) Modem] is dis-
played when “The wizard will install the modem driver
shown below” is displayed on the screen and select
[Next], then select [Finish].
15
Follow the on-screen instructions and install Phoenix
APM 2.0 for Windows NT.
When the installation completes, select [Don’t Restart
now].
16
Follow the on-screen instructions and install Phoenix
Card Executive for Windows NT.
When the installation completes, select [Restart now].
17
When the message [Press <F2> to enter SETUP] is dis-
played, press F2 and then run the Setup Utility.
If the password has been set, enter the Supervisor Pass-
word.
18
Press F9 .
At the confirmation message, select [Yes] and press
Enter . (The Setup Utility settings will return to their
default values. Even the security settings with the ex-
ception of the password(s) will return to their default
values.)
Change the settings where necessary.
19
Press F10 .
At the confirmation message, select [Yes] and press
Enter .
20
The [Begin Logon] display will appear. Perform the
operation in step
11
.
21
Press Fn + Tab on viewing [Card Executive 2.0
for NT Diagnostics] and check whether is displayed.
If so, select [Next].
22
Select [Next], then select [Finish].
Windows will restart.
23
The [Begin Logon] display will appear. Perform the
operation in step
11
.
24
Add the check mark to [Install system provided driver
for this card] and press [OK].
Follow the on-screen instructions.
If [Service Control Manager] is displayed, press [OK].
Install Service Pack 6 after the Windows setup com-
pletes ( “Technical Information”).
25
Select [Change] in [Start] - [Settings] - [Control Panel]
- [Mouse] - [General].
26
Press [Have Disk] and input [c:\util\drivers\mouse], then
press [OK].
27
Confirm [Touchpad/Touchscreen] is selected, then press
[OK].
If [Confirm Device Install] is displayed, press [Yes].
28
Press [Close].
The display will ask you to restart Windows, press [Yes].
29
The [Begin Logon] display will appear. Perform the
operation in step
11
.
30
Double-click the [Internet Explorer] icon to install
Internet Explorer.
31
Select [I accept the agreement], then select [Next].
32
Select [Install Minimal, or customize your browser],
then select [Next].
33
Select [Full] by clicking , then select [Next].
34
At the [Restart Computer], select [Finish].
35
The [Begin Logon] display will appear. Perform the
operation in step
11
.
36
Set the correct settings for all items in [Control Panel]-
[Regional Settings] and [Date/Time] etc.
37
Install the Acrobat Reader. ( “Operating Instruc-
tions”)
38
Turn the computer off and replace the floppy disk drive
with CD drive.
39
Turn the computer on and logon as the Administrator.
40
Set the CF-WWL282 Driver CD-ROM in the CD drive.
Create“c:\util\drivers\aironet” folder. Select [Start] -
[Programs] - [Command Prompt] and input the follow-
ing.
xcopy d:\*.* c:\util\drivers\aironet /s Enter
(“d” is the CD drive letter. You can change the letter
to suit your preference.)
41
Install the Aironet Client Utility (ACU).
The Aironet Client Utility (ACU) is used to configure
your client adapter for use in a wireless enterprise and
perform user-level diagnostics on your client adapter.
In [Start]-[Run], input [c:\util\drivers\aironet\utilities\acu\setup.exe]
and press [OK].
42
<Only for models with LAN port>
1) Select [Add] in [Start] - [Settings] - [Control Panel] -
[Network] - [Adapters] .
2) Select [Have Disk].
3) Input [c:\util\drivers\lan] and then select [OK].
4) Select [Intel(R) PRO Adapter] and then select [OK].
5) Select [Close] and follow the on-screen instructions.
43
In [Start]-[Settings]-[Control Panel]-[Network], make
necessary change.
The settings will vary for different network environments
depending on the network system being used. For more
details, ask your system administrator or the person in
charge of the network.
44
Remove the CD-ROM and turn the computer off, then
replace the CD drive with floppy disk drive.
8
Supplementary Instructions
Specifications “OPERATING INSTRUCTIONS ”
LAN IEEE 802.3 10Base-T
IEEE 802.3u 100Base-TX
Wireless LAN IEEE 802.11b compliant
Frequency 2.4GHz band
Add the following information.
CardBus Controller B*1Disable
Enable
LAN (Only for models with LAN port) Disable
Enable
Boot up from LAN*2Disable
Enable
Wake up from LAN*3Disable
Enable
Setup Utility “REFERENCE MANUAL”
Replace the “Advanced Menu” for the following.
Parameters ( : Default)
Device Configuration: [BIOS]
Serial Port A: [Auto]
Serial Port B: [Disable]
IrDA Port: [Auto]
MP Serial Port : [Disable]
Parallel Port: [Auto]
Mode: [ECP]
Sound Controller: [Enable]
CardBus Controller A: [Enable]
CardBus Controller B: [Enable]
Modem: [Enable]
LAN: [Enable]
Boot up from LAN: [Disable]
Wake up from LAN: [Disable]
*1In [CardBus Controller B], set the Wireless LAN to enable/disable.
*2This function may not be displayed depending on model.
[Disable] is automatically set when [LAN] is set to [Disable].
*3[Disable] is automatically set when [LAN] is set to [Disable].
Wake up function works on Windows 98 or Windows 2000 irrespective of the [Wake up from LAN]
setting.
When the [Wake up from LAN] has been enabled;
In the OFF state, if you are not recharging your battery pack or if the pack is fully charged, your computer
consumes approximately 3.0 W.
9
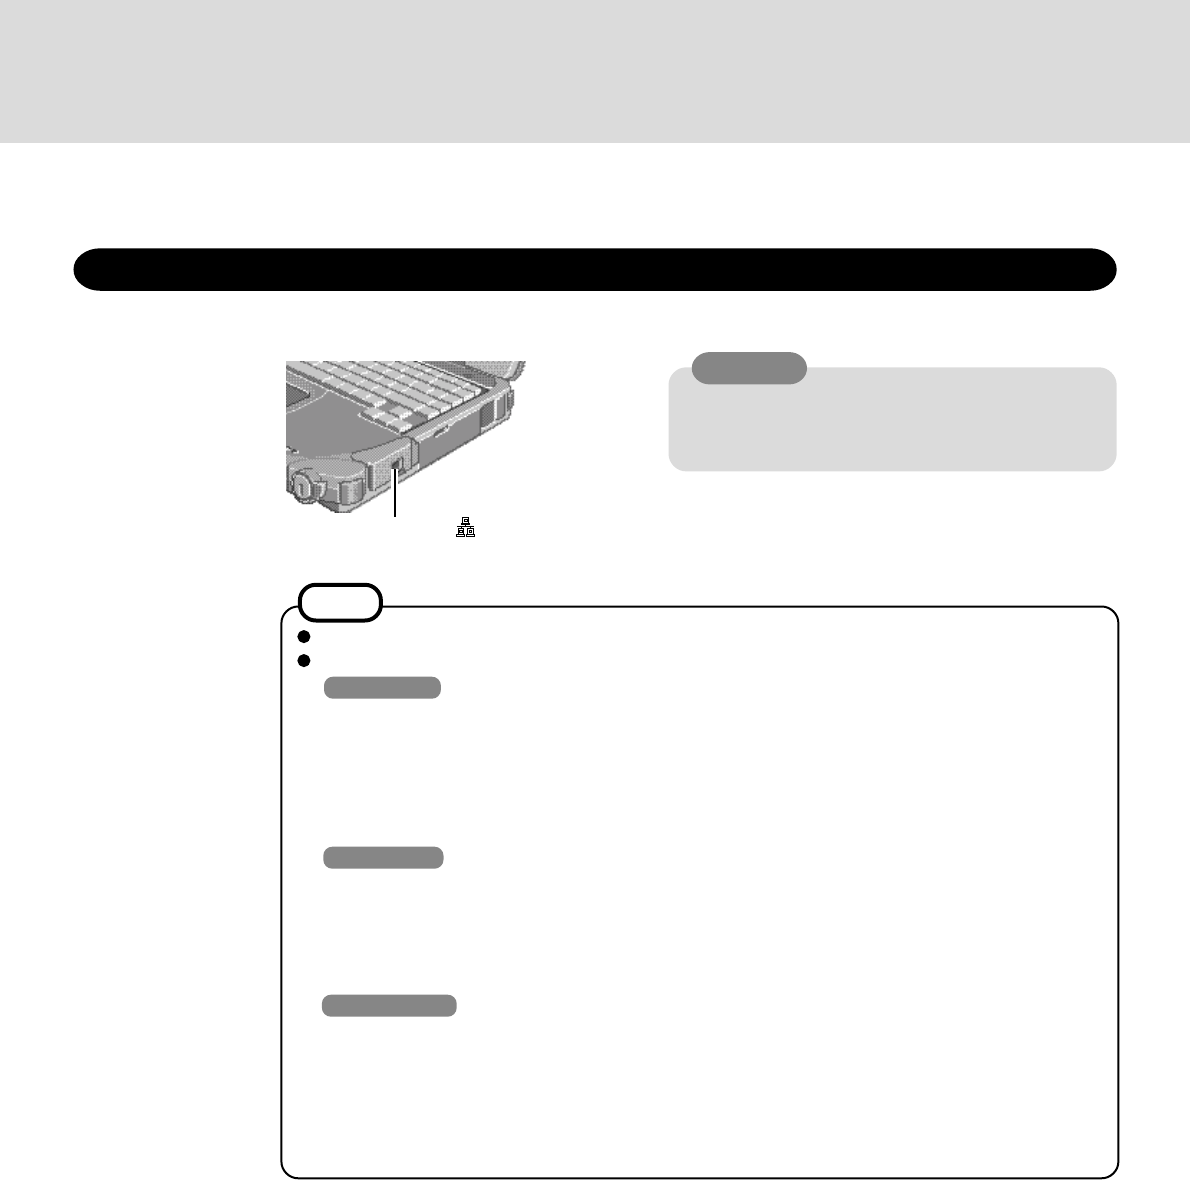
LAN Port
WARNING
Do not insert a telephone line connector (including a
PBX internal phone) into the LAN port. Doing so
may cause fire or electric shock.
Using LAN
This model has an internal LAN port.
When using the LAN, set [LAN] to [Enable]* in the Setup Utility. (* Default)
<Only for models with LAN port>
NOTE
Do not use standby or hibernation functions during communications.
Unable to connect to network (When the indicator of your HUB unit does not light):
Windows 98
1Select [Network] in [Start] - [Settings] - [Control Panel].
2Select [Intel 8255x-based PCI Ethernet Adapter (10/100)].
3Select [Properties].
4Select [Advanced].
5Select [Link Speed & Duplex] from [Property], set [Value] to the communication speed (10
Mbps or 100 Mbps) suitable for your network environment, and then press [OK].
Windows NT
1Select [Adapters] in [Start] - [Settings] - [Control Panel] - [Network].
2Select [Intel 8255x-based PCI Ethernet Adapter (10/100)].
3Select [Properties] - [Advanced].
4Select [Link Speed & Duplex] from [Setting], set [Value] to the communication speed (10 Mbps
or 100 Mbps) suitable for your network environment, and then press [OK].
Windows 2000
1Select [Device Manager] in [Start] - [Settings] - [Control Panel] - [System] - [Hardware].
2Select [Intel 8255x-based PCI Ethernet Adapter (10/100)] from [Network adapters].
3Select [Action] - [Properties].
4Select [Advanced].
5Select [Link Speed & Duplex] from [Property], and set [Value] to the communication speed (10
Mbps or 100 Mbps) suitable for your network environment, and then press [OK].

10
Be sure to connect the AC adaptor, and enable the supply of power.
Make settings to allow the use of a Local Area Network.
When the Wake up from LAN function is being used, data protection using the Access Key is not
possible since the power of the computer is on even without rotating the power switch.
Windows 98 Windows 2000
When using the Wake up from LAN function, delete the check mark for [Prompt for password when
computer goes off standby] in [Start] - [Settings] - [Control Panel] - [Power Management]* - [Ad-
vanced].
* Windows 2000 : [Power Options]
The Wake up from LAN function will not operate under the following conditions:
- When the computer has been shut down.
- When both the battery pack and the AC adaptor has been removed and connected again.
-Windows 98
When the computer has been placed in standby or hibernation mode from MS-DOS mode.
This works on Windows 98 or Windows 2000 irrespective of the [Wake up from LAN] setting of the
Setup Utility.
Windows NT
The Wake up from LAN function will not operate under the following conditions:
- When the computer has been shut down by rotating the power switch for more than four seconds (this
is when [Standby] or [Hibernation] has been set for [Power Switch] of the [Power] menu in the Setup
Utility).
- When the password has been input incorrectly, and the computer has returned to standby, hiberna-
tion, or power off status.
- When both the battery pack and the AC adaptor has been removed and connected again.
When using the Wake up from LAN function, the password is not necessary even if the password has
been set in the Setup Utility.
NOTE
<Only for models with LAN port>
This is a function to automatically power ON the computer from a network server. To use this function,
it is necessary to have a network environment that accommodates Wake up from LAN.
To use this function:
Windows 98 Windows 2000
1Select [Device Manager]*1 in [Start] - [Settings] - [Control Panel] - [System].
2Select [Intel 8255x-based PCI Ethernet Adapter (10/100)] from [Network adapters].
3Select [Properties]*2.
4Select [Power Management] and add the check mark for [Allow this device to bring the computer
out of standby], and then press [OK].
*1 Windows 2000: [Hardware] - [Device Manager]
*2 Windows 2000: [Action] - [Properties]
Windows NT
Set [Wake up from LAN] to [Enable] with the Setup Utility. ( page 8)
Wake up from LAN
Supplementary Instructions

11
MEMO

© 2001 Matsushita Electric Industrial Co., LTD. All Rights Reserved.
Printed in Japan
FJ1101-0
DFQX5294ZA
Panasonic Computer Solution Company,
50 Meadowlands Parkway, Panazip 2F-5,
Secaucus, NJ 07094
Panasonic Canada Inc.
5770 Ambler Drive Mississauga,
Ontario L4W 2T3