Panasonic of North America 9TGCF-29CA Panasonic Toughbook w/ WLAN, CDMA & OEM Modules User Manual Operating Instructions
Panasonic Corporation of North America Panasonic Toughbook w/ WLAN, CDMA & OEM Modules Operating Instructions
Contents
Users Manual 1
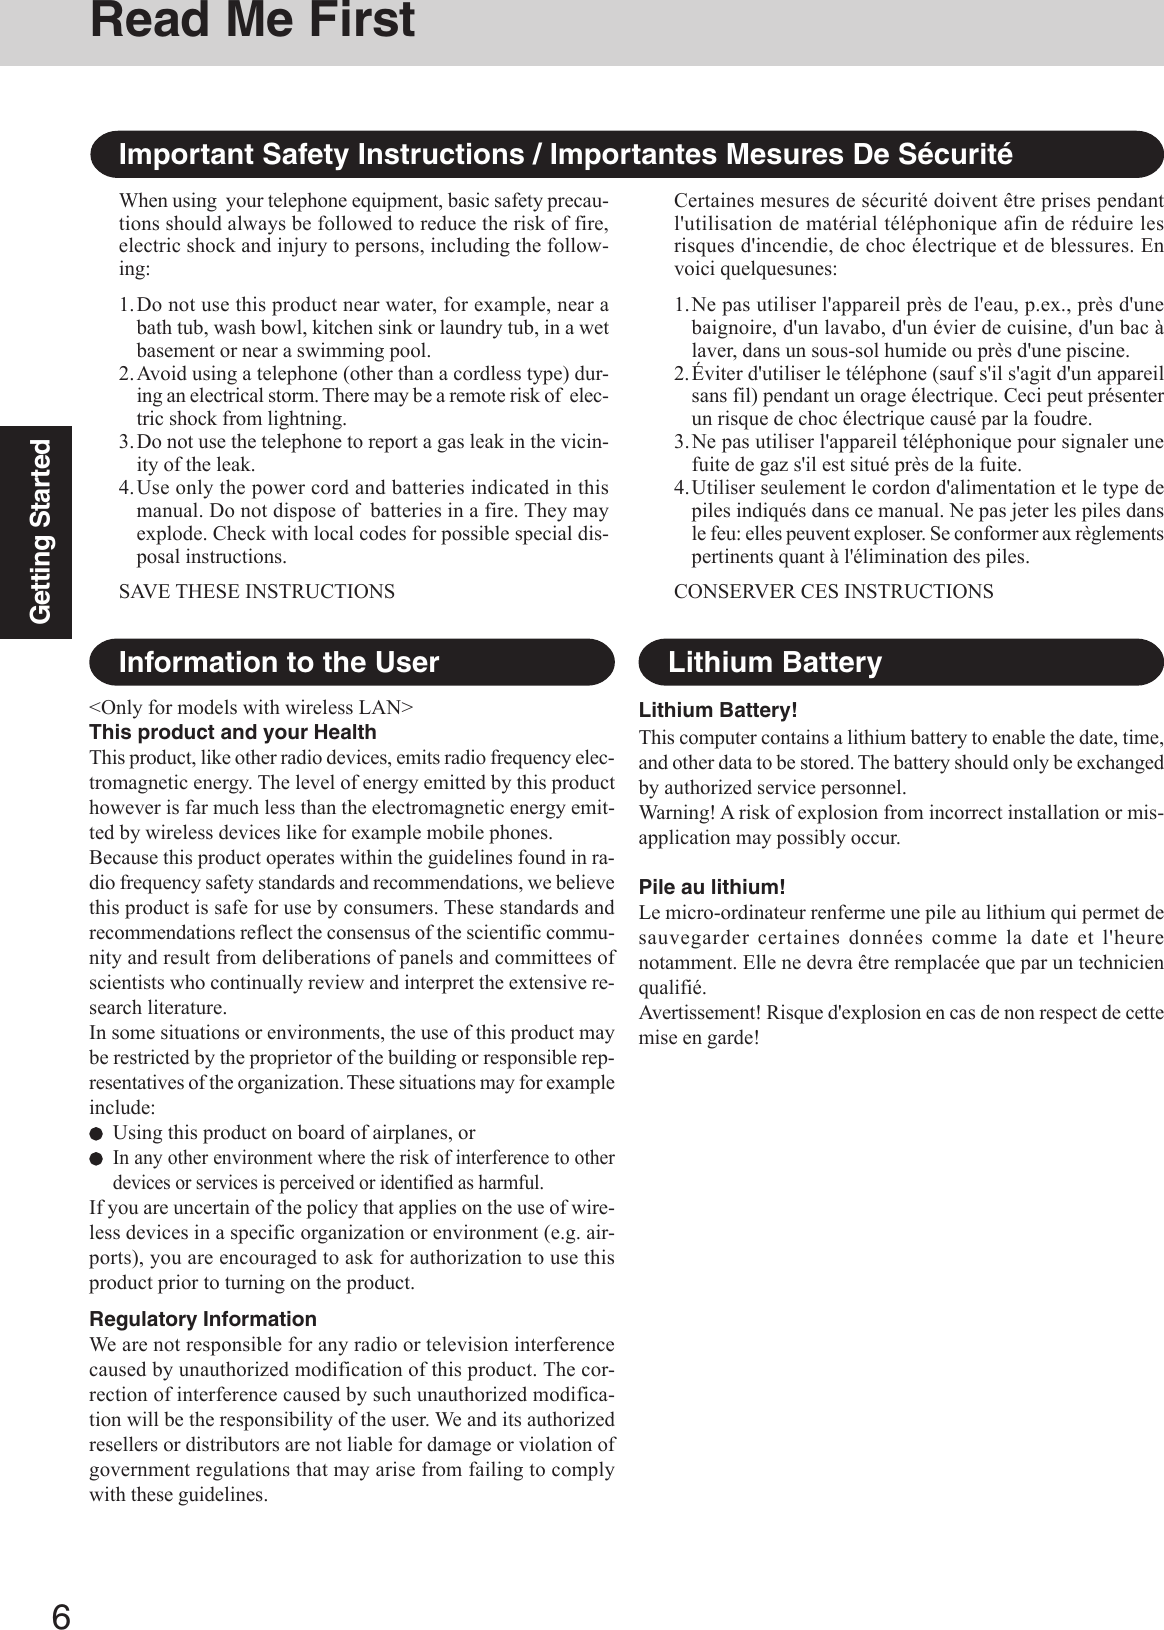
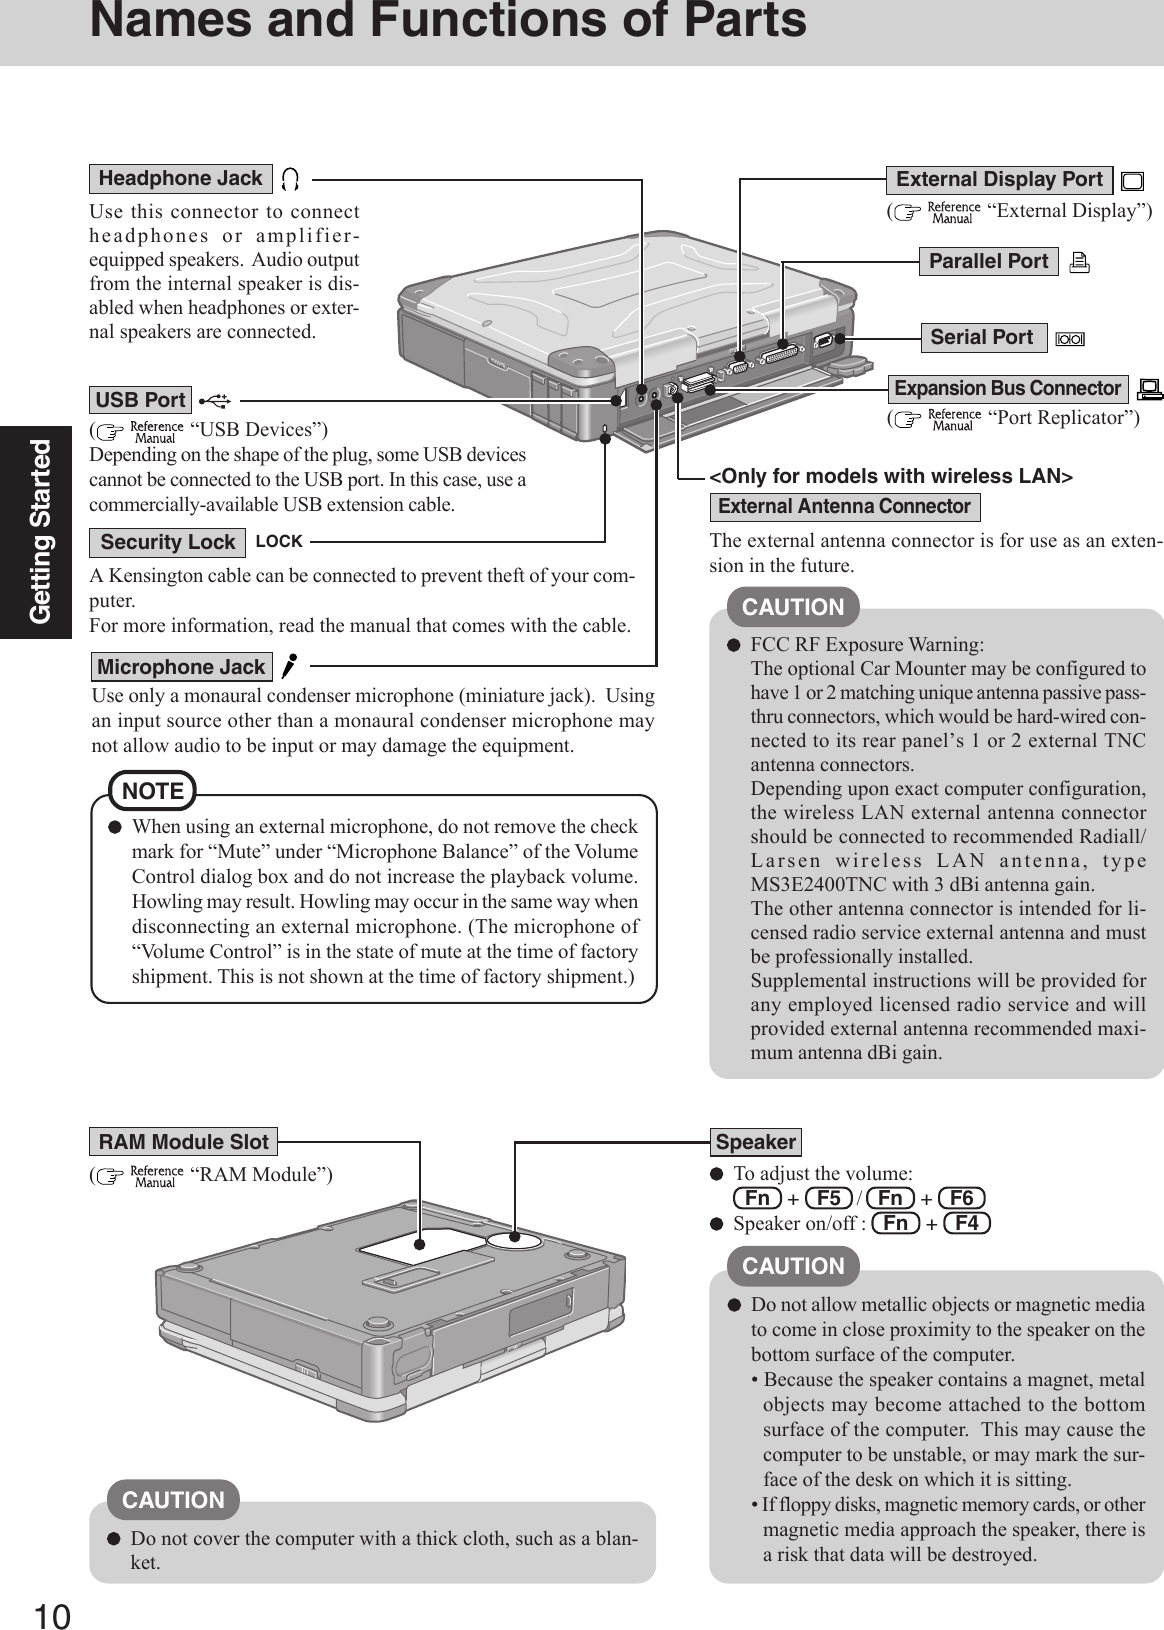
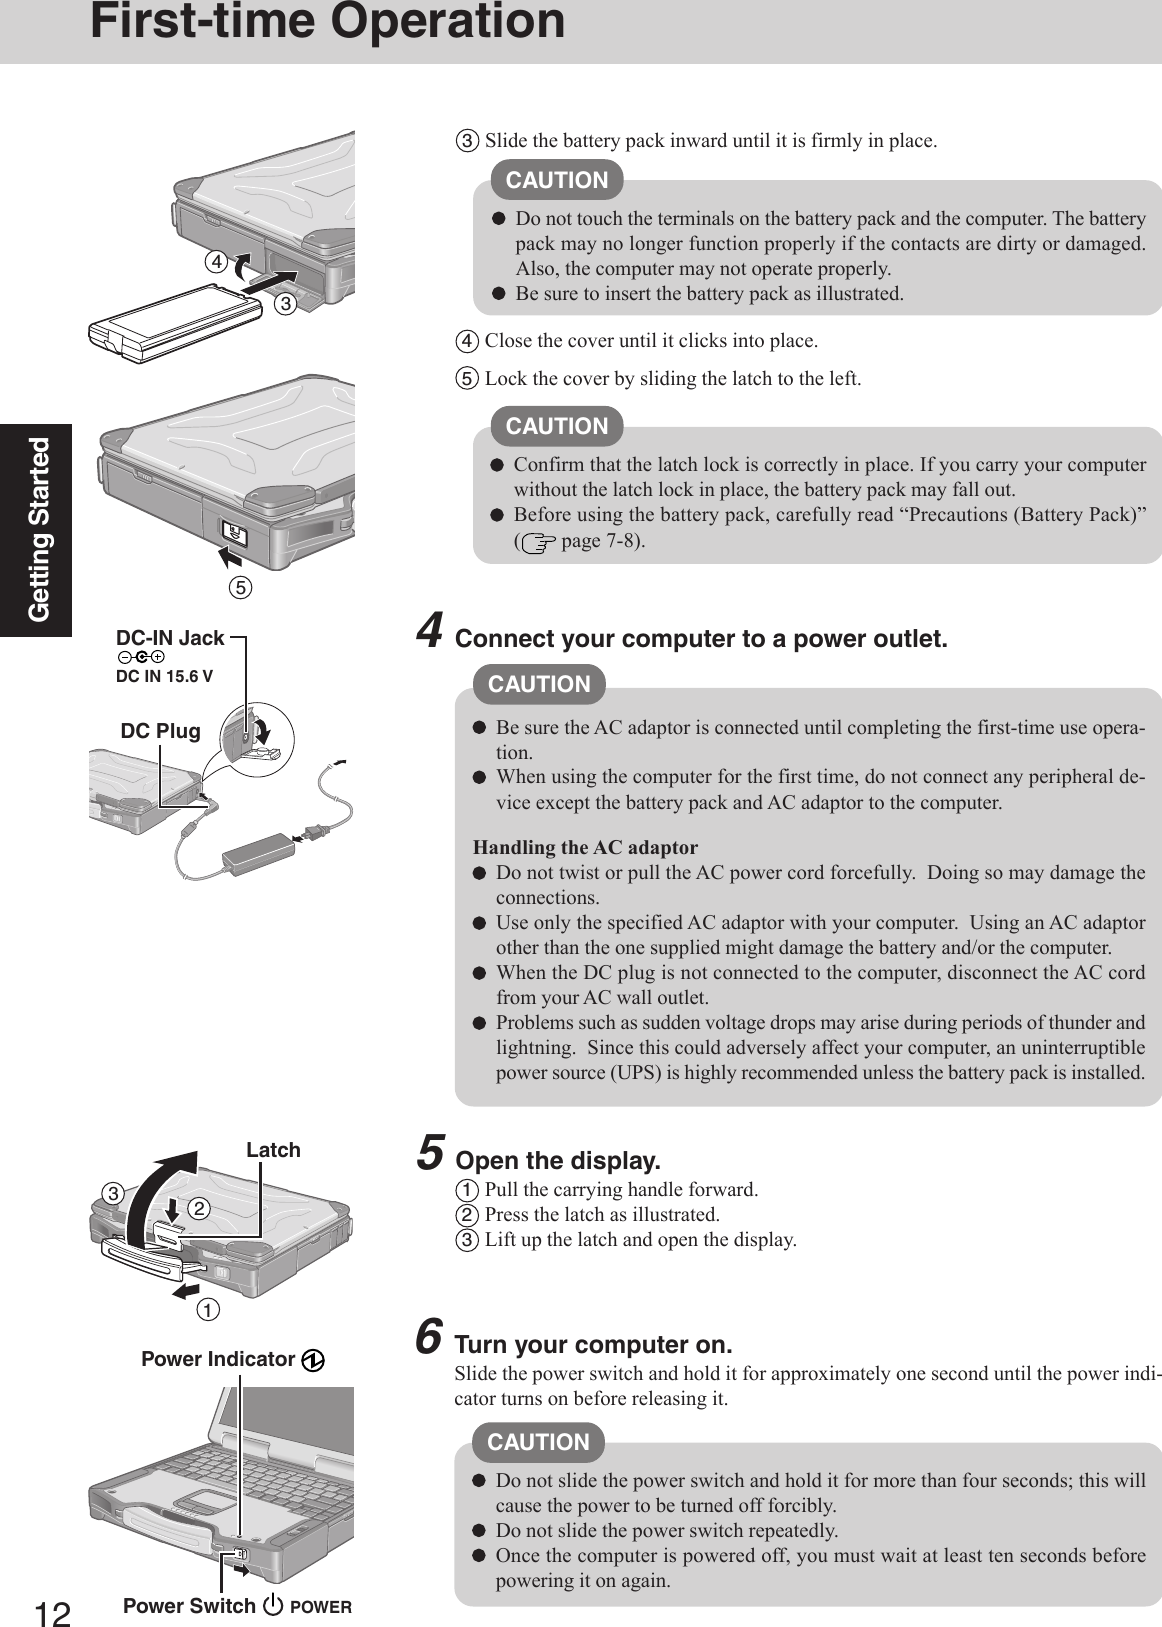
![Personal ComputerAppendixLIMITED USE LICENSE AGREEMENT .......... 35Hard Disk Backup Function ............................. 37Hard Disk Data Erase Utility ............................ 41Specifications ................................................... 42LIMITED WARRANTY ..................................... 44TroubleshootingList of Error Codes ........................................ 25Dealing with Problems (Summary) ....................... 26Reinstalling Software .................................... 33OperationStarting Up/Shutting Down............................ 16Touch Pad (Basic Operation) ........................ 19Reference Manual ......................................... 20Useful Information ......................................... 21Getting StartedRead Me First ................................................. 3Names and Functions of Parts ........................ 9First-time Operation ...................................... 11Contents[Additional Manual]Reference ManualThis manual can be accessed on your computer.Refer to page 20 on how to access the Reference Manual.Reference Manual•Read Me First•Key CombinationsReference Manual•Touch Pad•Touchscreen*1•Panasonic Hand Writing•Standby/HibernationFunctions•Security Measures•Computing on the Road•Battery Power•Multimedia Pocket•PC Cards•RAM Module•Port Replicator•External Display•Printer•USB Devices•Modem•LAN•Wireless LAN*2•Hard Disk Drive•Setup Utility•Icon Enlarger•Loupe UtilityReference Manual•Technical Information•DMI Viewer•List of Error Codes•Dealing with Problems(Advanced)Appendix Getting StartedOperationTroubleshootingModel No. CF-29 SeriesPlease read these instructions carefully before using this product and save this manual for future use.XP•LED Indicators*1Only for models with touchscreen*2Only for models with wireless LANOPERATING INSTRUCTIONS](https://usermanual.wiki/Panasonic-of-North-America/9TGCF-29CA.Users-Manual-1/User-Guide-548494-Page-1.png)
![2Getting StartedIntroductionThank you for purchasing the Panasonic computer. Read the operating instructions thoroughly for proper operation of your newcomputer.Illustrations and Terminology in this ManualCopyrightThis manual is copyrighted by Matsushita Electric Industrial Co., Ltd. with all rights reserved. No part of this manual may be reproduced in anyform without the prior written permission of Matsushita Electric Industrial Co., Ltd.No patent liability is assumed with respect to the use of the information contained herein.© 2004 Matsushita Electric Industrial Co., Ltd. All Rights Reserved.DisclaimerComputer specifications and manuals are subject to change without notice. Matsushita Electric Industrial Co., Ltd. assumes no liability fordamage incurred directly or indirectly from errors, omissions or discrepancies between the computer and the manuals.TrademarksMicrosoft, Windows and the Windows logo are registered trademarks of Microsoft Corporation of the United States and/or other countries.Intel, Pentium and PROSet are either registered trademarks or trademarks of Intel Corporation.Adobe, the Adobe logo and Adobe Reader are either registered trademarks or trademarks of Adobe Systems Incorporated in the United Statesand/or other countries.Panasonic is a registered trademark of Matsushita Electric Industrial Co., Ltd.Names of products, brands, etc., appearing in this manual are trademarks or registered trademarks of their respective owner companies.* For the Model No., insert the 12 digit number (for example, CF-29HTLGZBM) located onthe bottom of the computer.NOTE:NOTE provides a useful fact or helpful information.CAUTION:CAUTION indicates a condition that may result in minor or moderate injury.Enter : This illustration means to press the [Enter] key.Fn + F5 : This illustration means to press and hold the [Fn] key, then press the [F5] key.[start] - [Run]: This illustration means to click [start], then to click [Run]. For some applications, you may need to double-click.: Where to go for referred information. : This illustration means to refer to the Reference Manual, which is available on your computer.Refer to page 20 on how to access this manual.Some of the illustrations in this manual may differ slightly in shape from the actual items in order to make the explanationeasier to understand.The “CD/DVD drive” is a description about drives, such as DVD-ROM, CD-ROM, CD-R/RW, and DVD-ROM & CD-R/RW drives.This manual covers two types of models, as distinguished by the type of LCD screen (models with touchscreen and modelswithout touchscreen).If the user has logged on without the administrator authority, some functions may not be executable, and some screens maybe not displayed as shown in this manual. If this happens, log on with the administrator authority to enable these functions.Confirm the latest information on optional products in catalogs, etc.In this manual, “Microsoft® Windows® XP Professional Service Pack 2 with Advanced Security Technologies” is indicatedas “Windows” or “Windows XP”.Customer's RecordSerial No.orDate of PurchaseModel No.*Code No.Dealer's NameDealer's Address](https://usermanual.wiki/Panasonic-of-North-America/9TGCF-29CA.Users-Manual-1/User-Guide-548494-Page-2.png)
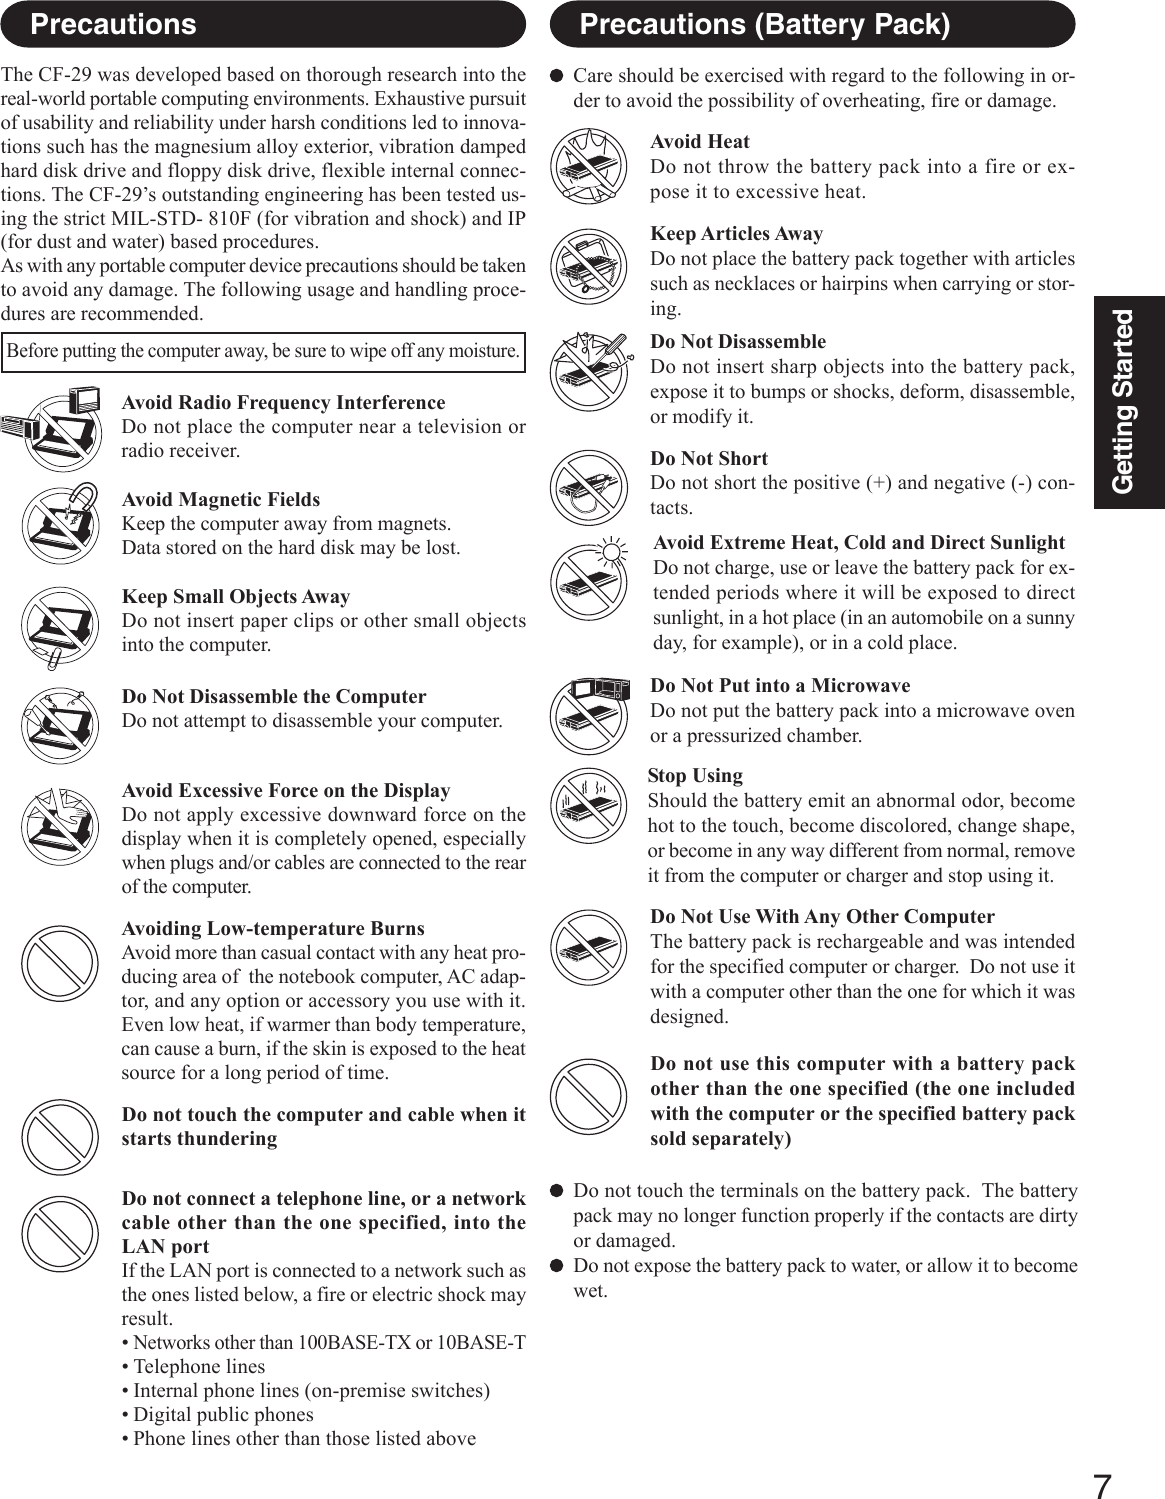

![13Getting Started7Setup Windows.Moving the cursor ( ) or clicking buttons can be performed with the touch pad.The touchscreen does not work properly during the Windows setup.NOTESelect settings for your region, then select [Next].4Enter your name and organization and then select [Next].5Enter your computer name and administrator password and then select [Next].Do not press any keys or touch the touch pad until [Windows XP ProfessionalSetup] is displayed.CAUTION1At [Welcome to the Windows XP Setup Wizard], select [Next].2After reading the agreement, select [I accept this agreement] or [I don’t accept thisagreement], then select [Next].NOTEIf [I don’t accept this agreement] is selected, the Windows setup will be aborted.3CAUTIONRemember this password! If the password is forgotten, Windows cannot beoperated.6Enter the correct date, time and time zone, then select [Next].The computer will restart.7Enter your administrator password and select .Wait until the hard disk drive indicator ( ) has turned off.NOTE8<Only for models with touchscreen>Calibrate the touchscreen.1Select [start] - [Control Panel] - [Printers and Other Hardware] - [Mouse] -[TouchScreen] - [Calibration].2Touch the “+” mark on the calibration screen with the stylus (included) for about onesecond.3After the calibration procedure is executed (e.g., after the nine “+” marks are touched),the procedure ends when Enter is pressed.4Select [OK].It may take some time before the computer restarts and the screen of step 7 isdisplayed. Wait, and do not press any keys, or touch the touch pad, etc.NOTEWhen Windows setup is completed, the following message will be displayed atthe bottom right of the screen: “Your computer might be at risk.” Continue tothe next step.The message is generated by the [Security Center] function in [Control Panel],and does not indicate an error or malfunction. For more information about [Se-curity Center]: page 22.](https://usermanual.wiki/Panasonic-of-North-America/9TGCF-29CA.Users-Manual-1/User-Guide-548494-Page-13.png)
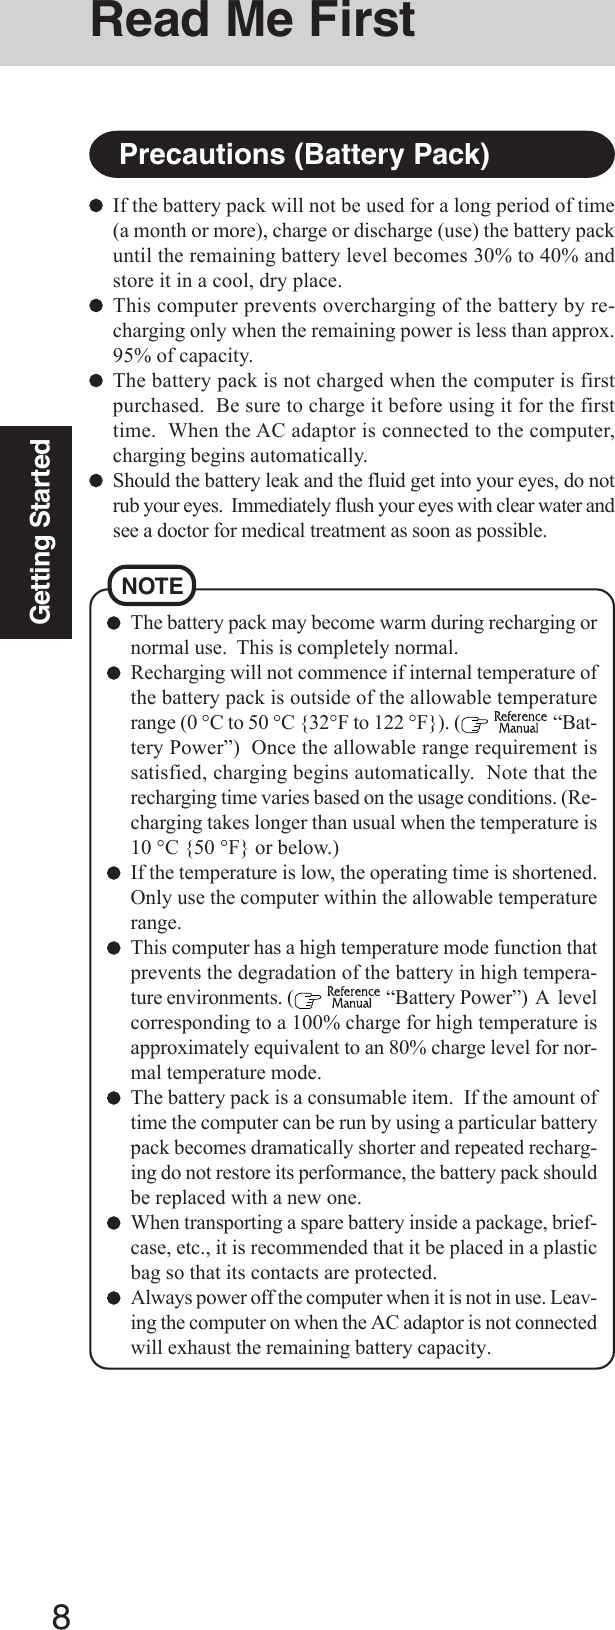
![14Getting StartedThis concludes the first-time use operation guidelines.9Create a new account.CAUTIONRemember this password! If the password is forgotten, Windows cannot be oper-ated. You can create a password reset disk beforehand ( page 15).When creating a new user account:• If you make mail settings, create password reset disks ( page 15), or conduct otherrelated operations before creating the user account, you will be unable to use any pre-vious mail history or settings.• When you create the first new account, you can only select [Computer administrator].Once a “Computer Administrator” account has been created, you can create additionallimited user accounts.Note also that only the added user account will be displayed in the Welcome screen.The account for the administrator created during Windows setup will not be displayed.The message “Your computer might be at risk,” which is displayed at the bottom right ofthe screen, is generated by the “Security Center” function in Windows XP, and does notindicate an error or malfunction.To prevent this message from being displayed, select (red icon) on the taskbar, thenselect [Turn on Automatic Updates].About the Icon Enlarger:• If the characters or icons on the screen are too small and difficult to see, after complet-ing step 9, select [start] - [All Programs] - [Panasonic] - [Icon Enlarger]. This willallow you to magnify the display of characters and icons on the screen.• The [Icon Enlarger] can be set separately for each account.You can also use [Loupe Utility], which enlarges a part of the screen.( “LoupeUtility”)<Only for models with wireless LAN>If you use the wireless LAN, be sure to refer to the Reference Manual’s “Wireless LAN”.NOTEFirst-time Operation1Select [start] - [Control Panel] - [User Accounts] - [Create a new account].2Enter a name for the new account, then select [Next].3Select [Computer administrator], then select [Create Account].4<When you want to create a password for the new account>Select the new account you have created and select [Create a password].Follow the instructions on the screen to create a password.5Select [start] - [Turn Off Computer] - [Restart] to restart the computer.](https://usermanual.wiki/Panasonic-of-North-America/9TGCF-29CA.Users-Manual-1/User-Guide-548494-Page-14.png)
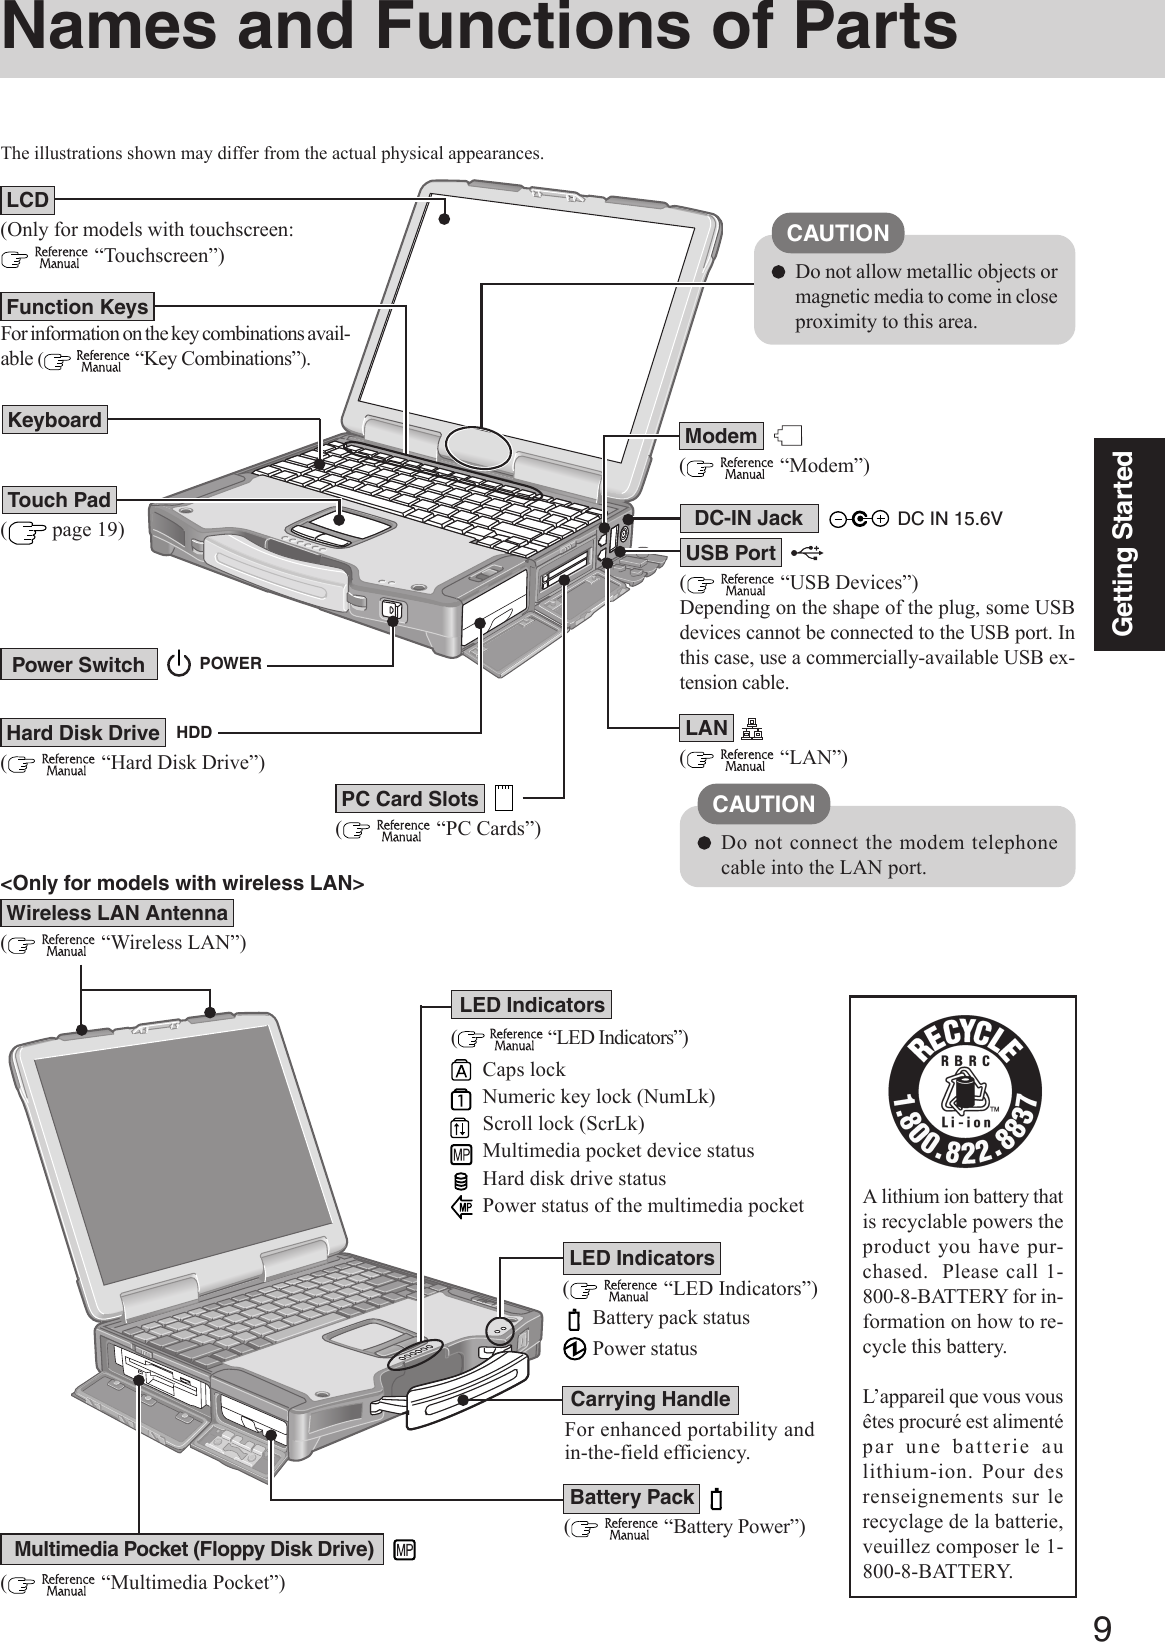
![15Getting StartedInformation for Windows XPDepending on the Windows settings, installed applications, and drivers, menus and otherdisplays may differ, or some functions (such as use of the password reset disk) may be inop-erable. Check with your system administrator for details.You can select Classic view for the Control Panel or select the Classic Start menu. You canalso change the way a user logs on or off.The procedure in this manual uses the method or view of the Windows XP default setting(not Classic view or Classic Start menu etc.).Resetting the passwordWindows XP has a function to reset a forgotten password.To use this function, you need to create a password reset disk beforehand following the stepsbelow.1Select [start] - [Control Panel] - [User Accounts].2Select [Prevent a forgotten password] from the [Related Tasks] menu of the account youhave logged on to, and create a password reset disk following the on-screen instructions.Store the password reset disk in a safe place.• Only the logon password for each account can be reset.The password set in the Setup Utility ( “Setup Utility”) cannot be reset.](https://usermanual.wiki/Panasonic-of-North-America/9TGCF-29CA.Users-Manual-1/User-Guide-548494-Page-15.png)
![16Operation1Open the display.Starting Up/Shutting DownStarting Up2Turn your computer on.Slide the power switch and hold it for approximately one second until the power indicatorturns on before releasing it.Under the condition that both the AC adaptor and the port replicator are not con-nected, the power will not go on if the display is closed.While booting, avoid the following until the hard disk drive indicator ( ) has turnedoff.• Connecting or disconnecting the AC adaptor.• Touching the power switch.• Performing any keyboard, touch pad, touchscreen (only for models with touch-screen), or external mouse operations.• Closing the display.Once the computer is powered off, you must wait at least ten seconds before pow-ering it on again.When the CPU temperature rises, the computer may not power on to prevent theCPU from overheating. Should this happen, allow the computer to cool down thenswitch the power on again.If the computer still does not power on, contact Panasonic Technical Support.CAUTION1Pull the carrying handle forward.2Press the latch as illustrated.3Lift up the latch and open the display.Power Indicator Power Switch 123LatchThree incorrect attemptsorNo password for about a minuteThe correct passwordWill StartEnter your password*1 and press Enter . ( “Security Measures”) Will Not Start(Power off)If [Enter Password] is displayed*1Supervisor Password or User Password set in the Setup Utility (notthe Windows password).Enter Password [ ]POWERWhen the power is turned on in a low-temperature environment, sometimes themessage “Warming up the system. Please wait...” is displayed (up to 20 minutes) orthe battery indicator alternately blinks green and orange. This function is designedto prevent hard disk drive malfunctions that may occur at low temperatures. Waitfor the computer to start up.NOTE](https://usermanual.wiki/Panasonic-of-North-America/9TGCF-29CA.Users-Manual-1/User-Guide-548494-Page-16.png)
![18OperationShutting Down (power off your computer)To quickly resume computer operation after shutting down,The standby or hibernation function is available ( “Standby/HibernationFunctions”).When you leave the computer or interrupt your work...If you use the “Standby” or “Hibernation” function, then when you turn on thepower next time, the application software and files you were using before will bedisplayed, and you can restart the same operations immediately ( “Standby/Hibernation Functions”).NOTE1Save important data and close each application.2Select [start] - [Turn Off Computer].3Select [Turn Off].Your computer will power off automatically.Restarting your computer (without shutting down)Select [Restart].To shut down using the keyboard;Press , U , and select [Turn Off] with U .CAUTIONDo not do the following during the shutdown/restart procedure.• Connecting or disconnecting the AC adaptor.• Touching the power switch.• Performing any keyboard, touch pad, touchscreen (only for models with touch-screen), or external mouse operations.• Closing the display.4Close the display until the latch clicks into place.Starting Up/Shutting Down](https://usermanual.wiki/Panasonic-of-North-America/9TGCF-29CA.Users-Manual-1/User-Guide-548494-Page-18.png)
![20OperationReference ManualIllustrations may be difficult to view depending on the magnification. If the illustrationis too small, magnify the display.If a printer is connected, we recommend printing the pages required. The illustrationsand display samples may not be printed with a high quality.NOTEThe Reference Manual and the Important Tips can be accessed on your computer. When aprinter is connected, these manuals can also be printed.Reference ManualThe Reference Manual explains functions for you to make greater use of the computer, suchas how to add peripheral devices, how the Setup Utility works, and other useful information.(Refer to the cover of this manual for a list of the main contents included.)How to access the Reference ManualSelect [Reference Manual] in [start].Important TipsImportant Tips provides information on how to maximize use of the battery pack, which isnecessary for computing away from your home or office.<Only for models with touchscreen>It also offers helpful explanations on how to use the touchscreen more effectively.How to access the Important TipsSelect on the desktop.Important Tips can also be accessed from [start] - [All Programs] - [Panasonic] - [On-Line Manuals] - [Important Tips].When the Reference Manual or Important Tips is started up for the first time, the License Agree-ment of the Adobe Reader may be displayed. If it is displayed, after reading the agreement, select[Accept] to access the Reference Manual or Important Tips.Refer to Adobe Reader Help to use the Adobe Reader.](https://usermanual.wiki/Panasonic-of-North-America/9TGCF-29CA.Users-Manual-1/User-Guide-548494-Page-20.png)
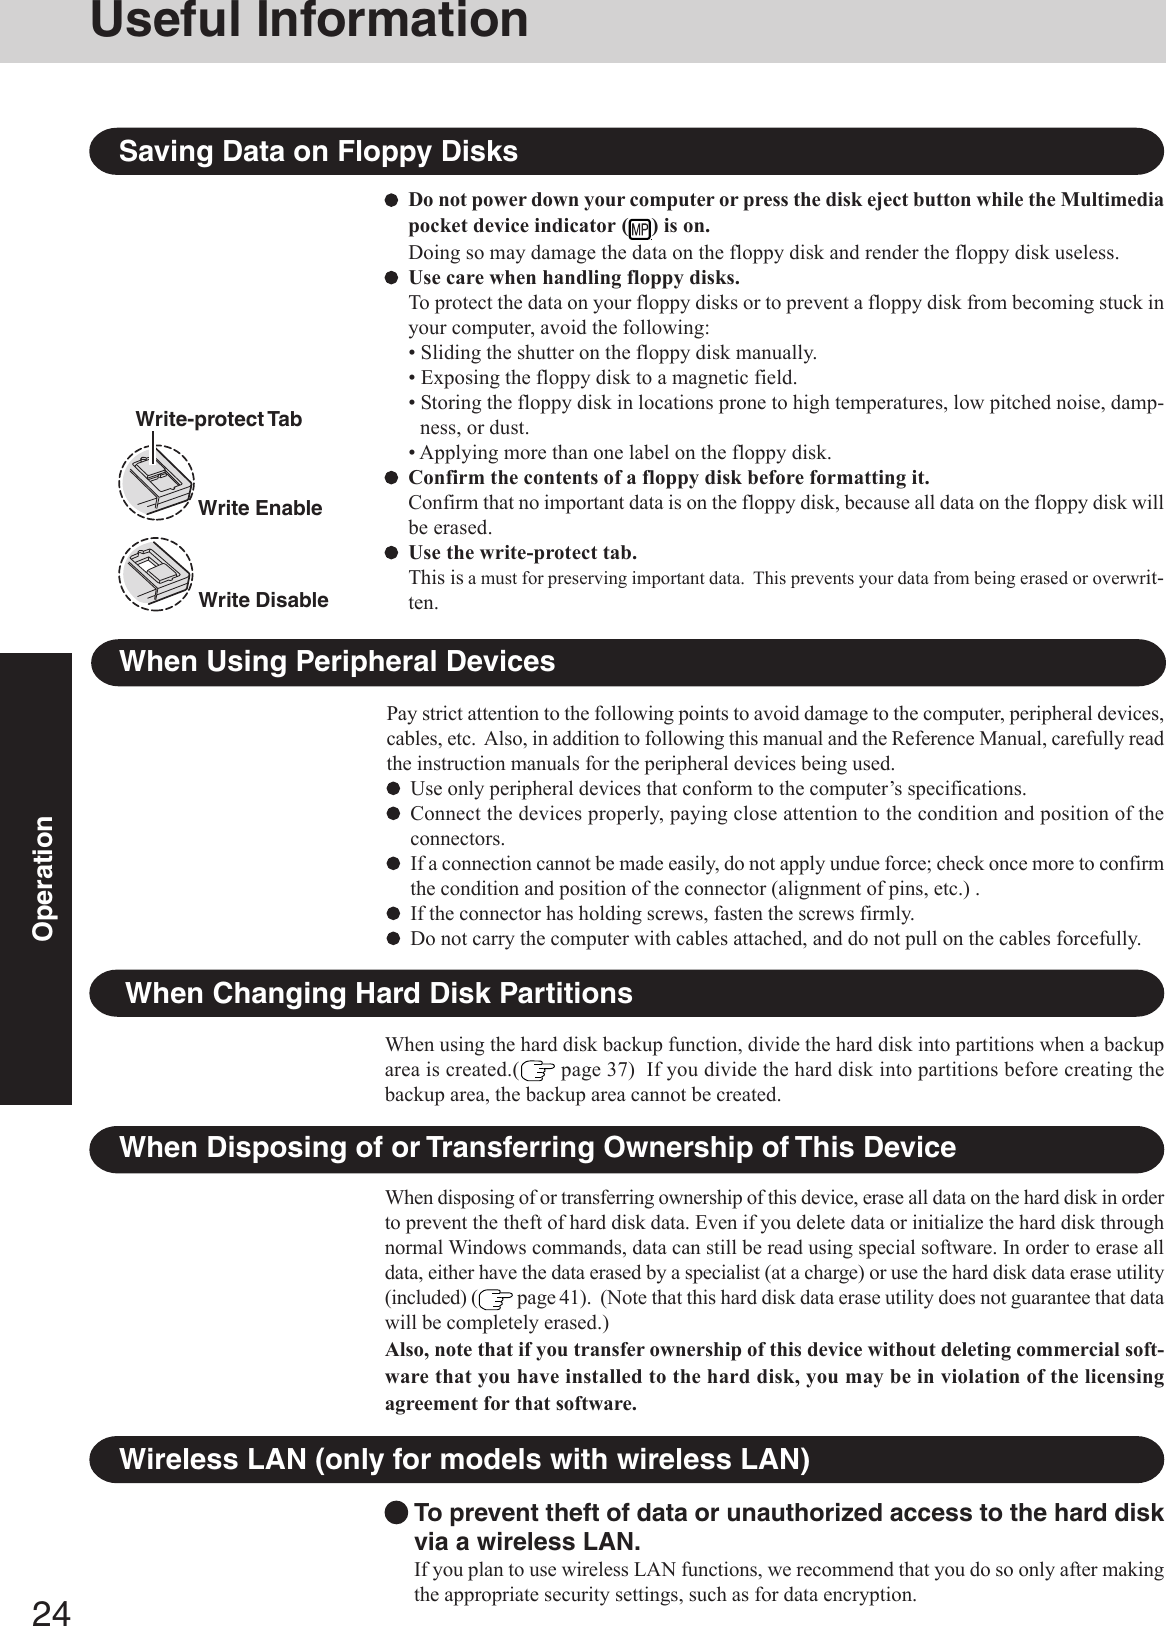
![21OperationUseful InformationEnvironmentOperation: Temperature: 5 °C to 35 °C {41 °F to 95 °F}Humidity : 30% to 80% RH (No condensation)Storage: Temperature: -20 °C to 60 °C {-4 °F to 140 °F}Humidity : 30% to 90% RH (No condensation)Usage EnvironmentHandlingThis computer has been designed so as to minimize shock to the LCD and hard disk drive, theleakage of liquid (e.g., water) on to the keyboard, etc., but no warranty is provided against suchtrouble. Therefore, as a precision instrument, be extremely careful when handling.When carrying the computer, be sure to keep to the following:Turn off the computer.Remove all external devices, cables, and PC Cards sticking out of the computer (see thefigure on the left) before transporting the computer.Do not drop or hit your computer against solid objects.Do not place the computer upright or allow it to tip over. When the computer receivesextremely strong shock after falling, the hard disk or floppy disk drive, etc., may becomeinoperable.Do not carry the computer while the display is open, or carry it by gripping the display.Do not put anything (e.g., a piece of paper) between the display and keyboard.When taking an airplane, always carry your computer with you. Never check it in withluggage. Before using the computer inside an airplane, we recommend asking the airlinesregarding their policy on this issue.Do not leave a disk in the drive while transporting your computer.When transporting spare batteries inside a package, briefcase, etc., it is recommended thatthe batteries be stored in a plastic bag.We recommend the following:Preparing a fully charged battery pack (and optional charger, if possible).Making backup copies on discs and carrying them with you.NOTEOnly use the computer within the allowable temperature range.When the computer is left powered on in a low temperature environment, set [Turn offhard disks] to [Never] in the following menu to avoid damage to the hard disk drive.[start] - [Control Panel] - [Performance and Maintenance] - [Power Options] - [PowerSchemes] Places not to use your computerSuch areas may result in damage to the computer.Areas with electronic equipmentThese areas may interfere with your display or cause your computer to produce strangesounds.Areas with extremely high/low temperaturesDo not leave things near the computer that are sensitive to heat. During operation, thecomputer may become warm.Before putting the computer away, be sure to wipe off any moisture.Even within the temperature and humidity ranges noted above, using the computer forlong periods of time in an environment with exceptionally low or high temperatures orhigh humidity may result in deterioration of the product, which can lead to a reduction inproduct life.](https://usermanual.wiki/Panasonic-of-North-America/9TGCF-29CA.Users-Manual-1/User-Guide-548494-Page-21.png)
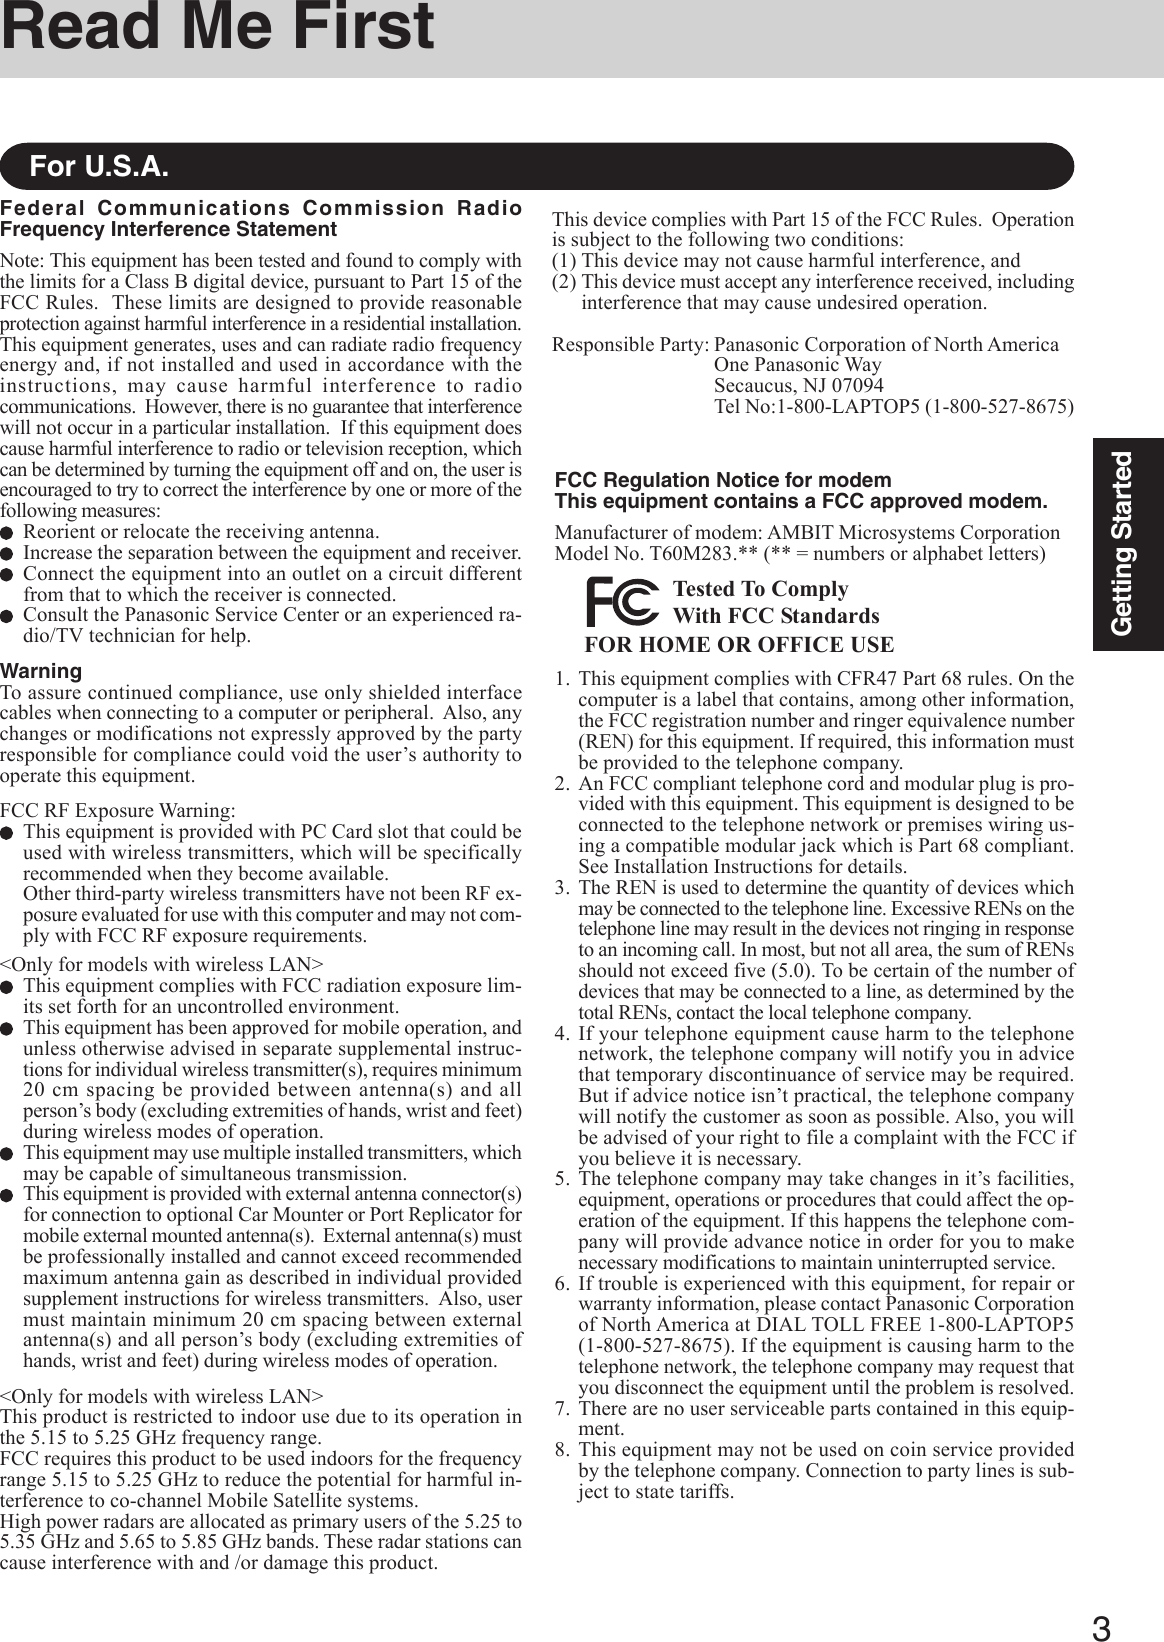
![22OperationUseful InformationMaintenanceDo not use benzene, thinner, or rubbing alcohol. Doing so may adversely affect the sur-face, e.g., discoloration. In addition, do not use commercially-available household clean-ers and cosmetics, as they may contain components harmful to the surface.Do not directly add or spray water or detergent. If liquid enters the inside of the com-puter, it may cause it to work improperly or be damaged.Display<Models with touchscreen>Use the Soft Cloth included with the computer. (For more information, refer to “SuggestionsAbout Cleaning the LCD Surface” that come with the Soft Cloth.)If the Protective Film becomes damaged, it may be time to replace your Protective Film. TheProtective Film is a disposable item. To find out the model number of your Protective Film,contact Panasonic Technical Support. (For more information, refer to the “Operating Instruc-tions” that come with the Protective Film.)<Models without touchscreen>Avoid using water when cleaning the panel. Ingredients included in water may leave residueand reduce readability of the screen.<When cleaning dust/dirt>Avoid rubbing off dust/dirt with cloth since it may leave scratch on the screen.Sweep dust/dirt with fine brush, then wipe it with “dry” soft cloth used for cleaning glasses.<When cleaning oily surface>Apply camera lens cleaner on a soft gauze and clean it with gentle force. Then, wipe with drysoft cloth used for cleaning glasses.CAUTIONAreas excluding the displayWipe these areas with a soft cloth, after applying water or detergent diluted with water to thesoft cloth and firmly wringing out excess water.Do not touch or use a touchscreen before you re-attach a Protective Film, as you mayleave a mark or a scratch on the touchscreen.CAUTIONSecurity Center/Antivirus ProtectionUse the Windows Security Center function to protect Windows from damage by computerviruses, etc.Windows Security CenterWhat is Windows Security Center?The Windows Security Center allows centralized management of Windows security infor-mation, and monitors antivirus measures and other Windows security settings to ensureoptimum safety.Use the Windows Security Center function to protect your computer from damage by vi-ruses, etc.Select [start] - [Control Panel] - [Security Center] to display the current settings for thefollowing security functions.• Windows FirewallA security system for protecting the computer from unauthorized access via the Internetor other external networks.The firewall regulates the data exchanged between the computer and the external net-work, so that only approved data can pass through.At the time of purchase, the Windows Firewall is set to be enabled.](https://usermanual.wiki/Panasonic-of-North-America/9TGCF-29CA.Users-Manual-1/User-Guide-548494-Page-22.png)
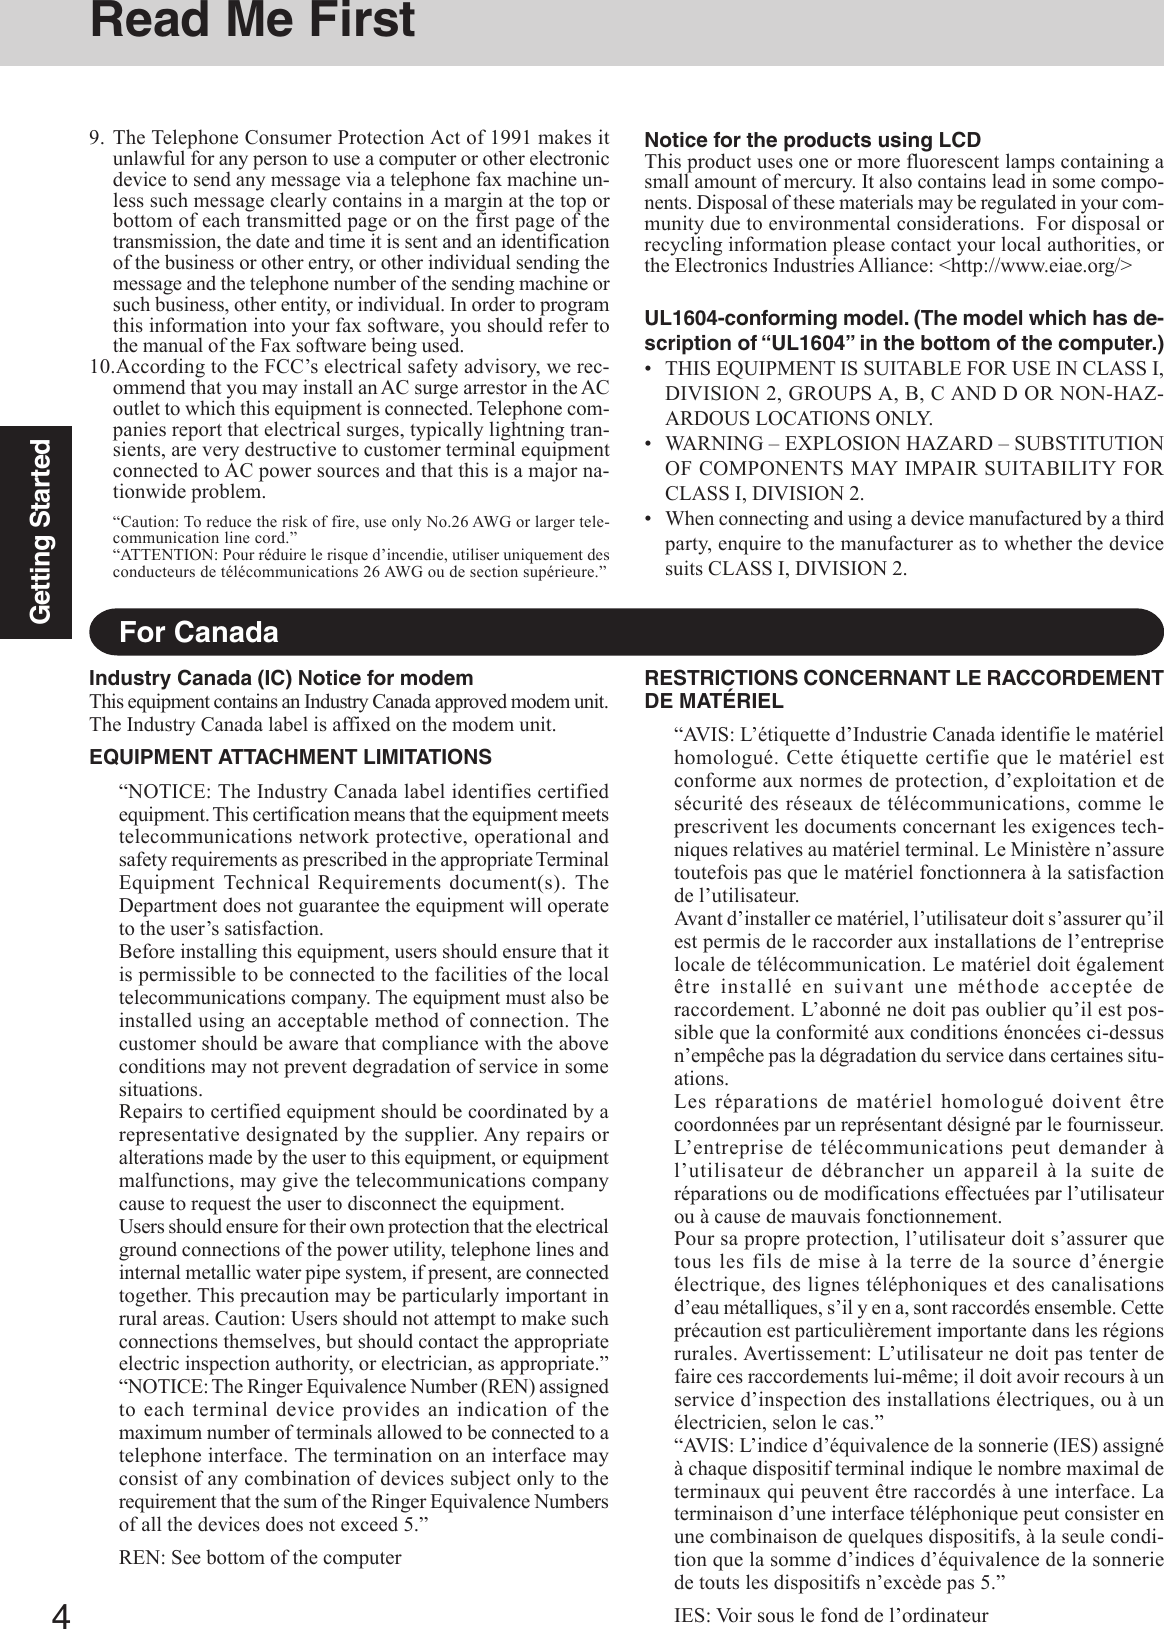
![23OperationSaving Data on the Hard DiskDo not expose your computer to shock.Use care when handling your computer, shock may damage your hard disk or make yoursoftware applications and data unusable.Do not power off your computer while software applications are running or hard diskdrive indicator ( ) is on.Properly shut Windows down to avoid problems.Save all valuable data to floppy disks, etc.Backing up data to floppy disks, etc. will limit damage should trouble occur to your com-puter or should you inadvertently change or erase data.Use the security function for all important data. ( “Security Measures”)Hard Disk LockWhen the Hard Disk Lock is set to [Enable], it is impossible to read/write data from/to thehard disk when the hard disk is installed in a different computer, since a password is also setfor the hard disk. When the hard disk is returned to the original computer, you can read andwrite data as before. In this case, however, make the settings in the Setup Utility exactly thesame as they were before the hard disk was removed. (Note that this Hard Disk Lock doesnot guarantee complete protection of data.) ( “Security Measures”)Users are advised to purchase the latest versions of virus protection software and usethem regularly.We recommend you run the software:• When booting your computer.• After receiving data.We recommend that you check data received on disks or from external sources, such as datadownloaded from the Internet, e-mail, etc. (For compressed files, uncompress them beforerunning a check).Computer VirusesWindows UpdateYou can use the latest patches and service packs for Windows with the following menus.Do not apply “Driver Updates” even if a message to update a driver appears. If a driverupdate is required, contact to Panasonic Technical Support. ( page 44)[start] - [All programs] - [Windows Update]• Automatic UpdatesIf your computer is connected to the Internet, this function regularly checks whether secu-rity updates and other important updates have been made available, and automaticallyinstalls these updates in their latest conditions.• Virus ProtectionThis function regularly checks whether antivirus software has been installed in the com-puter, and whether the version of that software is the latest version available.Read the message, select (red icon) on the taskbar, and make the appropriate settings.This message, which the Windows Security Center ( page 22) displays to confirm the security-related settings regularly, will be displayed until the settings are made more properly.If the message “Your computer might be at risk” is displayedNOTEThis message does not indicate an error. You can use the computer while the message isdisplayed. However, in order to operate the computer more safely, we recommend mak-ing the appropriate measures to reduce damage from virus and other attacks, thus avoid-ing the appearance of this message.](https://usermanual.wiki/Panasonic-of-North-America/9TGCF-29CA.Users-Manual-1/User-Guide-548494-Page-23.png)