Pantech Co CDMAPTI11 CDMA/ GSM/ WCDMA Phone with Bluetooth & WLAN User Manual
Pantech Co Ltd CDMA/ GSM/ WCDMA Phone with Bluetooth & WLAN Users Manual
Users Manual

Introduction
Table of Contents
Before Using Your
New Cell Phone
Basic Functions
Phone Functions
Mail Functions
Google Functions
Internet Functions
Multimedia
Functions
Useful Functions
In Case of
Loss of Your IS11PT
Appendix/Index

ii
Introduction
Thank you for purchasing the IS11PT. Before using
your IS11PT, be sure to read the IS11PT Basic
Manual (this PDF manual) to ensure correct usage.
After you have nished reading this manual, store this
PDF manual and the printed manuals in safe places
so you can retrieve them whenever you need them.
Manuals for the IS11PT
The IS11PT comes with the Basic Manual and
Instruction Manual.
●
For learning the basics:
Read the IS11PT Basic Manual (this manual).
●For learning details on using each function:
Read the supplied IS11PT Instruction Manual
(Japanese). Be sure to read the Safety Precautions
“安全上のご注意” to ensure proper usage of the
IS11PT.
The keyword searchable au Online Manual is also
available on the au homepage:
http://www.au.kddi.com/manual/index.html
Notes on Cell Phone Use
Cell Phone Etiquette
The cell phone always emits weak radio waves when
power is on.
Use the cell phone in an enjoyable and safe manner
without forgetting to be considerate of others around
you.
●Use of cell phones is not allowed in some
places.
• Do not use the cell phone while you are driving.
Doing so is both dangerous and prohibited by law.
• Using a cell phone in an aircraft is prohibited by law.
Be sure to turn the cell phone off.
●Radio waves from cell phones may interfere with
medical electrical equipment.
• Some people close to you in crowded places
such as packed trains may be using a cardiac
pacemaker. Turn the cell phone off in such places.
• Abide by the rules of hospitals and other medical
institutions where it is forbidden to use or carry cell
phones.
●Be considerate of where you use the cell phone
and how loudly you talk.
• Do not make calls in theaters, museums, libraries,
and other similar places. Turn power off or turn on
1
Introduction
manner mode not to disturb others around you by
ringtones.
• Do not use the cell phone on a street where you
might interrupt the ow of pedestrians.
• Move to areas where you will not inconvenience
others on trains or in hotel lobbies.
• Refrain from talking in a loud voice.
• Obtain the permission of other people before you
take their photos with the cell phone’s camera.
• Do not record information with the cell phone’s
camera in bookstores and other locations where
taking photos is not permitted.
Do not use the cell phone while driving!
Turn off your cell phone or put it in Drive mode while
driving.
Do not use the cell phone while driving a car/
motorcycle or riding a bicycle. It may result in a trafc
accident. Using a cell phone while driving is prohibited
by law. Using a cell phone while riding a bicycle may
also be punishable by law.
Prohibited!
• Looking at a cell phone display
• Talking on a cell phone while holding it
Illustrations and Screenshots in This Manual
The illustrations in this manual may look different from
the actual cell phone in shape, color and typeface.
The screenshots in this manual are simplied and may
look different from the actual cell phone screens.
Notation of Tapping Instructions in This
Manual
This instruction manual omits the phrase “tap” when
listing instructions that involve tapping menu items,
icons, keys, or other user interface elements.
Ex.: Registering a new contact in your Contacts from
the Dialer
[Phone]▶Enter phone number▶
▶[Create new contact]
→This means, Tap [Phone]▶Enter phone
number▶Tap
▶Tap [Create new contact].

2
Introduction .......................ii
Notes on Cell Phone Use
...ii
Illustrations and
Screenshots in This
Manual ............................. 1
Notation of Tapping
Instructions in This
Manual ............................. 1
Table of Contents ············ 2
Before Using Your
New Cell Phone
List of Icons ····················· 5
List of Included Items ····· 6
Names and Functions
of Parts ···························· 7
Included Items ················· 9
Battery Pack ..................... 9
au IC-Card...................... 11
microSD Memory Card
... 12
Turning On/Off the
Power····························· 13
Turning On the Power .... 13
Turning Off the Power .... 13
Switching the Display
Language ······················· 13
Using the System
Settings .......................... 13
Using the Initial Settings
Screen ............................ 13
Setting Manner Mode/
Airplane Mode ··············· 14
Setting Manner Mode ..... 14
Setting Airplane Mode .... 14
Touch Panel ··················· 14
Operating the Touch
Panel .............................. 14
Displaying the Home
Preview Screen .............. 17
Executing Widgets ......... 18
Locking the Screen ........ 20
Unlocking the Screen ..... 20
How to Input Character
· 21
Showing the Keyboard ... 21
Using the Android
Keyboard ........................ 21
Using the iWnn IME
Keyboard ........................ 22
Basic Functions
Using Android················ 25
Home Screen ················· 26
Using the Home Screen
... 26
Viewing the Status Bar ... 27
Showing the Notication
Panel/Using Easy
Setting ............................ 27
Using Applications/
Widgets/Folders ............. 28
Menu Screen ················· 31
Using Applications and
Other Functions.............. 31
Quick
Search ··················· 32
Using Quick Search ....... 32
Phone Functions
Making a Phone Call ····· 34
Entering a Phone
Number to Call ............... 34
Making International
Calls ............................... 34
Searching and Calling
From Your Contacts ....... 35
Making a Call Using the
Call Log .......................... 35
Receiving a Call ············ 36
In Call Functions ··········· 37
Adjusting the Receiver
Volume ........................... 37
Call Log ························· 37
Viewing Your Call Log .... 37
Making a Call From
Your Call Log ................. 37
Sending E-mail/C-mail
From Your Call Log ........ 37
Contacts ························ 38
Adding a New Contact ... 38
Viewing Your Contacts ... 39
Quick Contact................. 39
Deleting a Contact.......... 39
Editing a Contact ............ 39
Mail Functions
E-mail ····························· 41
Conguring E-mail Initial
Settings .......................... 41
Using E-mail Contacts.... 42
Sending E-mail ............... 43
Viewing Received
E-mails ........................... 44
Check the E-mails in
Each Folder .................... 44
Setting Mail Filters.......... 45
Table of Contents

3
Table of Contents
C-mail ···························· 48
Sending C-mail............... 48
Viewing Received
C-mails ........................... 49
C-mail Safety Block ........ 50
Setting Up a C-mail
Receiving Filter .............. 51
PC-mail ·························· 52
Setting Up PC-mail......... 52
Managing Received
PC-mail .......................... 53
Sending PC-mail ............ 54
Google Functions
Using Google Services
·· 56
Registering an Existing
Google Account.............. 56
Creating a New Google
Account ......................... 57
Gmail······························ 58
Viewing Your Inbox ........ 58
Sending Mails................. 59
Showing Labels .............. 59
Android Market ············· 60
Using the Android
Market ............................ 60
Google Voice Search····· 62
Using Voice Search........ 62
Using Other Google
Services ························· 63
Using Google Talk.......... 63
Using Google Maps........ 63
Using Google Maps
Navigation ...................... 63
Using Google Places...... 64
Using Google Latitude.... 64
Using Google News and
Weather.......................... 64
Using Google Calendar
... 64
Internet Functions
Connecting to the
Internet ·························· 66
Using Wi-Fi..................... 66
Using Data
Communication
Services ......................... 67
Browser ························· 68
Displaying a Web Page
... 68
Possible Actions While
Displaying a Web Page
... 68
au one Market ··············· 70
Downloading
Applications .................... 70
Deleting Downloaded
Applications .................... 71
Multimedia Functions
Camera ·························· 73
Before Taking a Photo ... 73
Taking a Photo ............... 73
After Taking a Photo ...... 74
Before Recording a
Movie.............................. 75
Record a Movie .............. 75
After Recording a
Movie.............................. 76
Gallery···························· 77
Viewing Photos .............. 77
Viewing Movies .............. 77
Useful Functions
Alarm/Wakeup Call ······· 79
Setting an Alarm............. 79
Setting a Wakeup Call.... 79
PocketBook ··················· 80
Voice Recorder .............. 80
Playing Back Your
Recordings ..................... 80
Using the Calculator ....... 81
Setting Up the World
Clock .............................. 81
Using the Stopwatch ...... 82
SmartNote ····················· 83
Creating a New Note ...... 83
Editing an Existing Note
... 84
Deleting a Note .............. 84
In Case of
Loss of Your IS11PT
Remote Control Lock ···· 86
Activating the Device
Administrator .................. 86
Setting Up the Remote
Control Lock ................... 86
Activating the Remote
Control Lock From a
Registered Phone .......... 87
Unlocking the Remote
Control Lock ................... 87
Security Lock Service ··· 88
Activating the Remote
Control Lock Using the
Security Lock Service..... 88
Appendix/Index
Troubleshooting ············ 90
Index ······························ 92

List of Icons
List of Included Items
Names and Functions of Parts
Included Items
Turning On/Off the Power
Switching the Display Language
Setting Manner Mode/Airplane Mode
Touch Panel
How to Input Character
Before Using Your
New Cell Phone
5
Before Using Your New Cell Phone
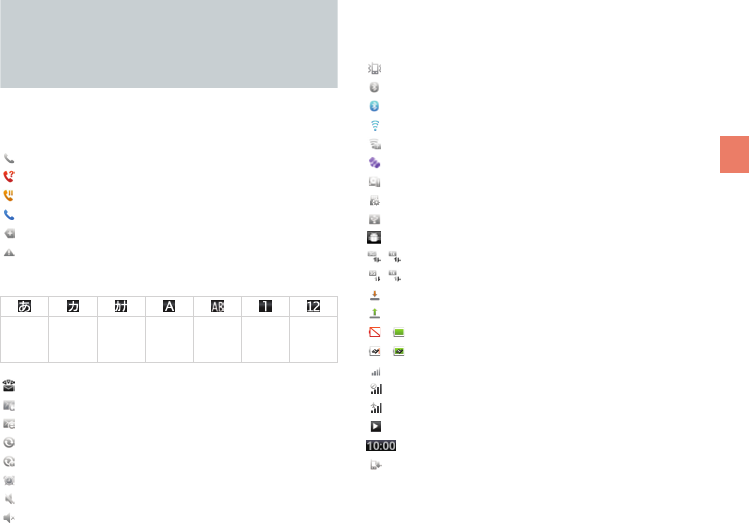
You can check the current settings and status of your
IS11PT by looking at the icons on the status bar at the
top of the display.
: Calling or currently in a call
: Missed call
: Putting a call on hold
: In a call using a Bluetooth® headset
: Information available
: An error occurred/Warning display
Character input mode display
Hiragana-
Kanji
Full-width
Katakana
Half-width
Katakana
Full-width
Alphabet
Half-width
Alphabet
Full-width
Numeric
Half-width
Numeric
: New E-mail
: New C-mail
: New PC-mail
: Syncing data
: Data sync failed
: Alarm/Wakeup call set
: Call volume muted
: Silent manner mode
List of Icons : Manner mode
: Bluetooth® standby
: Bluetooth® connecting
: Connected to Wi-Fi (display signal strength)
: Open network available
: Using GPS
: Insufficient disk space
: Preparing microSD memory card
: Connected by USB
: USB debugging
/ : Packet transmission available
/ : During packet transmission
: Receiving packets
: Sending packets
– : Battery power level
– : Battery power level (when charging)
: Signal strength
: Out of area
: Airplane mode
: Playing music
: Displays the current time
: Software update available
6
List of
Included
Items
●● IS11PT ●● Battery pack
(PTI11UAA)
●● microSD memory card
(2 GB) (Sample)
●● Warranty (Japanese)
●● Safety Precautions
(Japanese)
●● Software Update Guide
(Japanese)
●● au International Call
Guide (Japanese)
●● Instruction Manual
(Japanese)
●● Setting Guide
(Japanese)
7
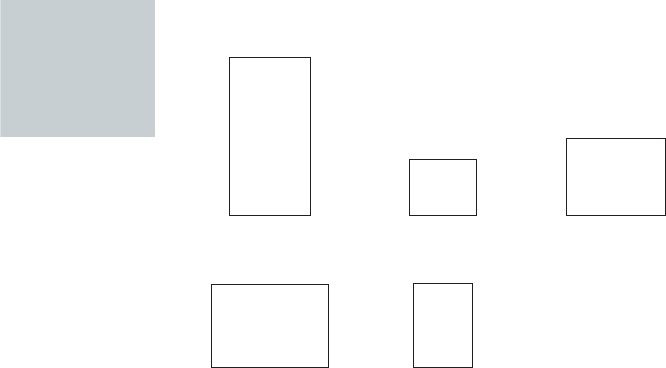
Before Using Your New Cell Phone
①
②
④
⑥
⑨
⑦
⑧
⑤
③
⑩
⑪
⑫
⑬
⑭
⑮
⑯
Built-in antenna
NOTE
Be careful not to place any stickers over the
built-in antenna or cover the built-in antenna with
your hand when transmitting data or talking. Call
and network connection quality will be adversely
affected.
Names and Functions of Parts
This manual represents each key as shown below.
Menu key ▶ (Menu)
Home key ▶ (Home)
Back key ▶ (Back)
Search key ▶ (Search)
Power key ▶ (Power)
Volume key ▶ (Volume)

8
①Proximity sensor
②Receiver
Allows you to hear ringtones, incoming call voice,
and multimedia playback audio, etc.
③microUSB connection jack
④Display (touch panel)
⑤Back key
Return to the previous screen.
⑥Home key
Displays the Home screen.
Hold down to display a list of recently used
applications and functions.
⑦Menu key
Displays a menu for the application or function
currently used.
⑧Microphone
Transmits your voice during a call.
Also used to record sounds.
⑨LED lamp
Lights up red while charging.
Flashes when receiving a call or when an alarm
rings depending on your settings.
⑩Power key
Turns on the IS11PT by holding down this key while
the power is turned off.
Used to turn the power on and off, turn the screen
on or off, or end a call. Hold down to display a
menu of phone options (manner/airplane mode).
⑪Strap eyelet
⑫Camera light
⑬Camera (lens)
⑭Volume key
⑮Search key
Press for application-specific search features or
to search your IS11PT information or the web via
Quick Search.
⑯Battery pack cover
NOTE
●■OperationTemperature:0-45℃(without
adaptor),0-45℃(withadaptor)
●■Excessivesoundpressurefromearphonescan
causehearingloss.
●■USBporthastobeconnectedtoUSBinterfaces
USB2.0versionsorhigher.

9
Before Using Your New Cell Phone
Included Items
Battery Pack
Removing the Battery Pack
① Insert the tip of your
finger (fingernail) into
the slot at the bottom
of the battery pack
cover and lift up.
② Use the groove to lift
the battery pack out.
Inserting the Battery Pack
① Confirm the location
of the connectors
in the IS11PT and
insert the battery
pack in the proper
orientation.
② Place the battery
pack cover back on
the IS11PT.
③ Push down on the
two locations at ③-1,
the two locations at
③-2, and the two
locations at ③-3, in
that order.
Battery Life
Standby time Approximately 200 hours
Talk time Approximately 300 minutes
●■Batterylifemaybeshorterthanthelistdepending
ontheapplicationsandfunctionsused.
CAUTIONS
●■RISKOFEXPLOSIONIFBATTERYISREPLACEDBYAN
INCORRECTTYPE.
●■DISPOSEOFUSEDBATTERYACCORDINGTOTHE
INSTRUCTIONS.

10
Charging the Battery Pack
Charging time takes approximately 190 minutes.
① Connect the cable to the common AC adapter 03
(sold separately).
② Plug the common AC adapter 03 (sold separately)
into an 100 V AC power outlet.
The LED lamp lights up red, and – will be
displayed.
The LED lamp will go out when charging is
complete.
③ Close the microUSB connection jack cover.
④ Unplug the common AC adapter 03 (sold
separately) from the power outlet.
●■IfyouchargetheIS11PTwhenthebatterypackhas
nopowerleft,itmaytakeafewmomentsforthe
chargingnoticetodisplayonthescreen.
CAUTIONS
●■Themainsplugisusedasthedisconnectdevice,
thedisconnectdeviceshallremainreadily
operable.
●■Adaptorsoldseparatelywiththeproduct,You
mustusetheadaptorwhichapprovedwiththeIEC
60950-1:2005orEN60950-1:2006tomeetLPStest.
· AC adapter 03 (sold separately) - 0301PQA
11
Before Using Your New Cell Phone
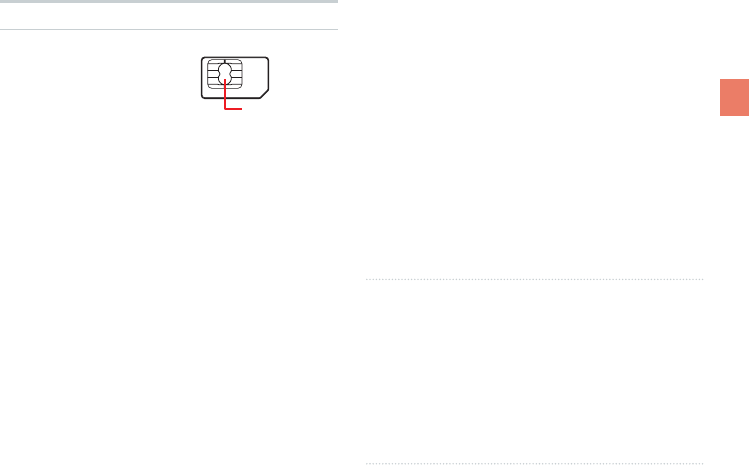
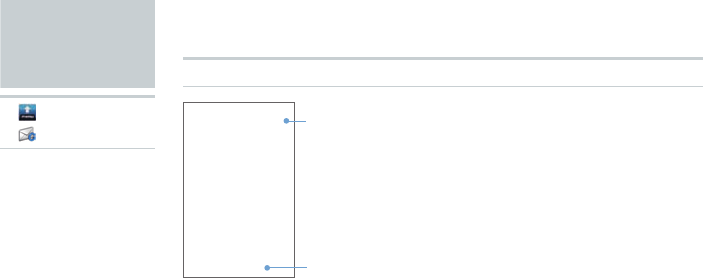
au IC-Card
The au IC-Card contains
your phone number and
other personal details.
IC (metal) portion
au IC-Card
Inserting/Removing the au IC-Card
① Turn off the IS11PT and remove the battery pack
cover.
② Slightly raise the au IC-Card and pull it out in the
direction of the arrow.
③ To insert the au IC-Card, insert it in the direction
of the arrow. Make sure the IC (metal) portion is
facing down and the cutout on the au IC-Card
matches that shown in the figure.
NOTE
●■Payattentiontothefollowingsnottodamagethe
auIC-Card.
•Do not touch the IC (metal) portion of the au
IC-Card or the IC card terminal on the IS11PT.
•Check to ensure that the au IC-Card is inserted in
the correct direction.
•Do not apply excessive force when inserting or
removing the au IC-Card.
●■BecarefulnottoloseyourauIC-Cardafter
removingit.

12
microSD Memory Card
Notes on Handling of microSD Memory Card
●■Do not remove the microSD memory card, the
battery pack, or turn off the power when loading,
writing, saving, playing, moving, or copying data
to and from the microSD memory card. Doing so
could result in the loss of some or all data stored on
the microSD memory card or the IS11PT.
●■Do not drop or apply excessive force to the IS11PT
when there is a microSD memory card inside.
Doing so could result in the loss of some or all data
stored on the microSD memory card.
●■Do not insert any liquid, metallic, flammable, or
other foreign objects in the microSD memory card
slot on the IS11PT. Doing so could result in a fire,
electrical shock, or damage to the IS11PT.
●■microSD memory card may become warm after
long periods of use. This is not a malfunction.
Inserting/Removing a microSD Memory Card
① Turn off the IS11PT. Remove the battery pack
cover and the battery pack.
② Insert the microSD memory card in the direction of
the arrow. Make sure that the metallic terminal is
facing down and the side with the microSD logo is
facing up.
③ Remove the microSD memory card by pulling it out
in the direction of the arrow.
●■You can save photos, movies, documents, music,
and other files to a microSD memory card.
●■Some applications may not function without a
microSD memory card.
●■To safely remove a microSD memory
card, unmount it by tapping [menu]▶
[Settings]▶ [System]▶ [microSD & phone
storage]▶[Unmount microSD], or turn off your
IS11PT before removing.
13
Before Using Your New Cell Phone
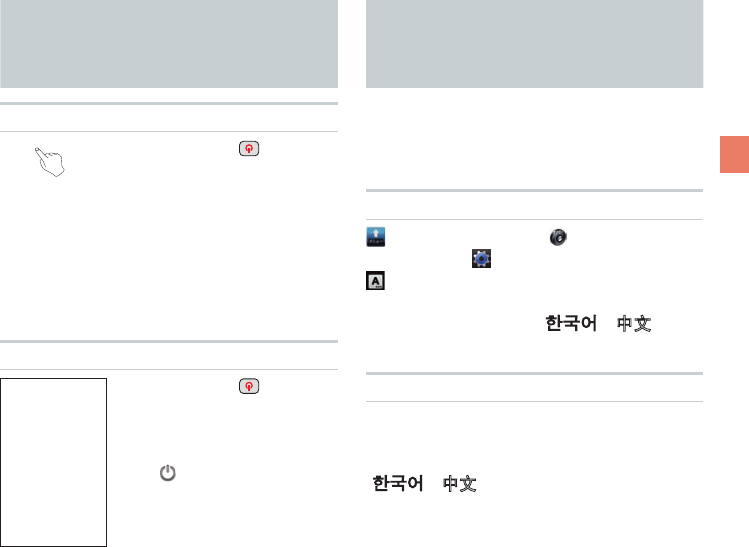
Turning On/Off the Power
Turning On the Power
Hold down (Power)
●■The logo will be displayed
and after a few moments
the lock screen will appear.
See “Unlocking the Screen”
(
▶
P.20) to unlock the
screen.
●■After unlocking the screen,
the display will turn off
and the screen will lock
automatically after a period
of inactivity.
Turning Off the Power
Hold down (Power)
until the Phone
options screen
appears
▶ [Power off]
▶[OK]
Switching the Display Language
You can switch the display language for function
names and other items to Japanese/Korean/Chinese/
English.
A part or all the contents may not be displayed in
Korean/Chinese/English depending on the application.
Using the System Settings
[メニュー] (menu)▶ [設定]
(Settings) ▶ [システム] (System)▶
[言語とキーボード] (Language &
keyboard)▶[言語を選択] (Select
language)▶[日本語]/[한국어]/[中文]/
[English]
Using the Initial Settings Screen
When you rst turn on the IS11PT▶
[言語変更] (change language) on the
screen with the Android robot▶[日本語]/
[한국어]/[中文]/[English]
14
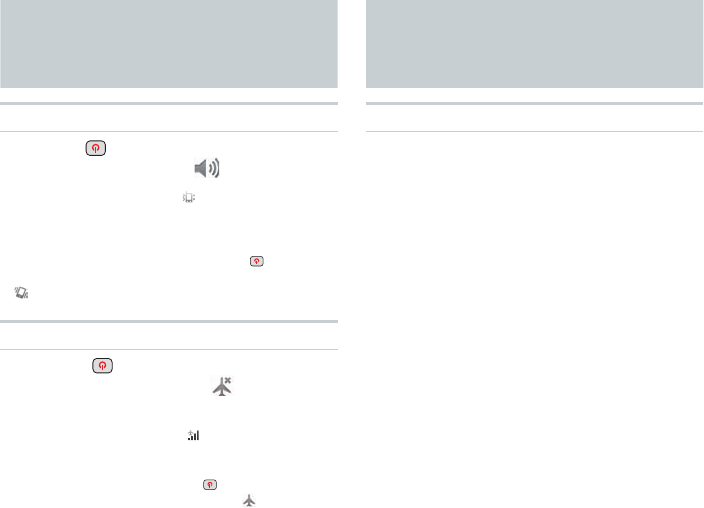
Setting Manner Mode/Airplane Mode
Setting Manner Mode
Hold down (Power) until the Phone
options screen appears▶ [Manner mode]
●■Whenmannermodeison, appearsinthestatus
barandallsounds,includingringtonesandother
soundeects,areturnedo.(Excludesmultimedia
playbackaudioandalarms.)
●■Toturnomannermode,holddown (Power)
againuntilthePhoneoptionsscreenappears▶
[Mannermode].
Setting Airplane Mode
Hold down (Power) until the Phone
options screen appears
▶
[Airplane
mode]
●■Whenairplanemodeison, appearsinthestatus
barandallcommunications/networkingfunctions
suchasWi-FiandBluetooth®areturnedo.Toturn
oairplanemode,holddown (Power)againuntil
thePhoneoptionsscreenappears▶ [Airplane
mode].
Touch Panel
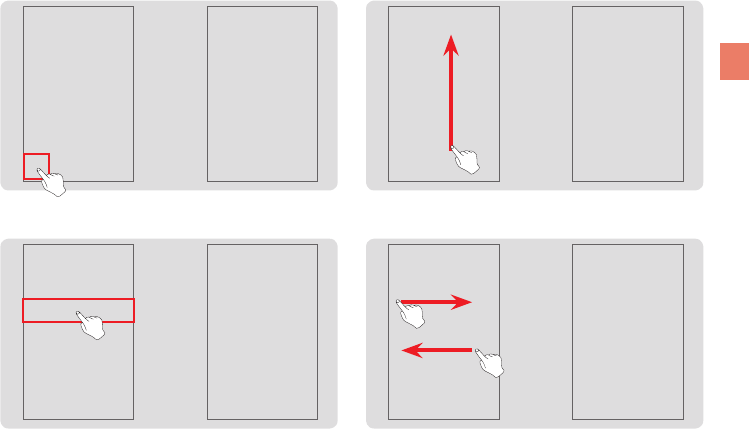
Operating the Touch Panel
●■The IS11PT is equipped with a touch panel screen.
You can perform actions by tapping items and keys
on the screen with your finger.
15
Before Using Your New Cell Phone
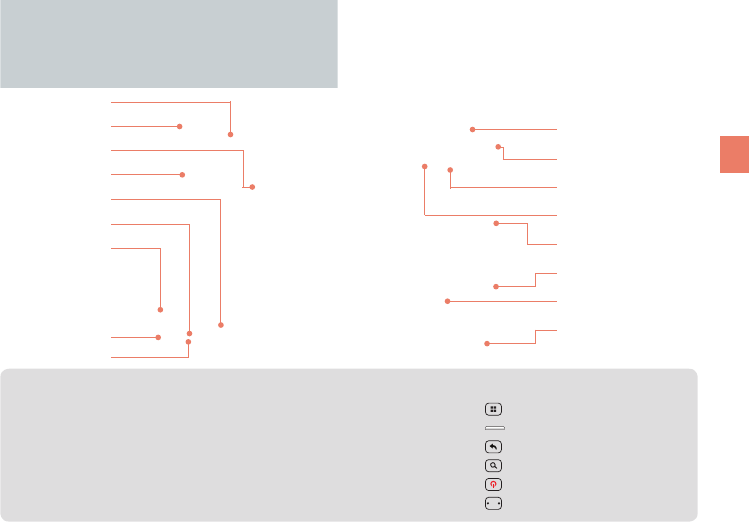
❷ Long Touch Keep touching a menu or item.
▶
▶
❶ Tap Touch a menu or item and quickly remove
your finger from the screen.
▶
▶
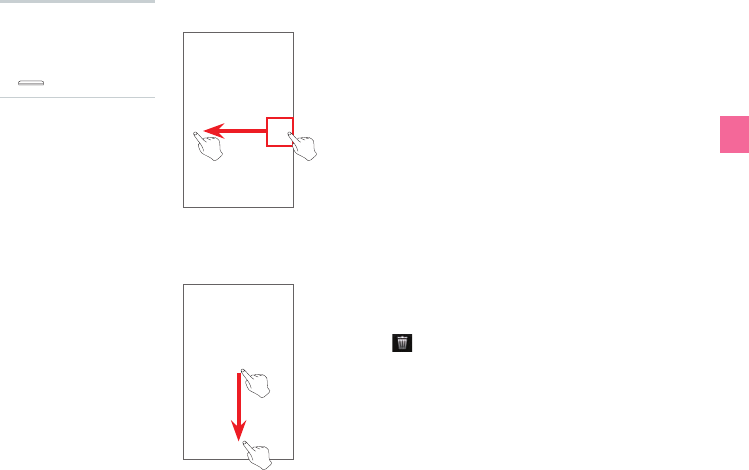
❸ Flick Up/Down
Touch and quickly slide your finger
up or down across the screen.
❹
Flick Left/Right
Touch and quickly slide your finger
left or right across the screen.
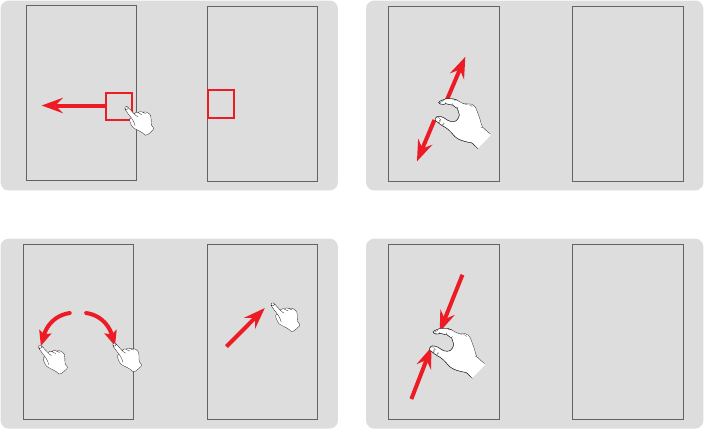
16
▶
❺ Drag Keep touching the item and slide your finger
to the desired location with the item.
❻ Slide Keep touching and slide your finger across
the screen in the target direction.
▶
❽
Pinch In (Zoom out)
Place two fingers on the
screen and slide them closer.
▶
❼
Pinch Out (Zoom in)
Place two fingers on the
screen and slide them apart.
17
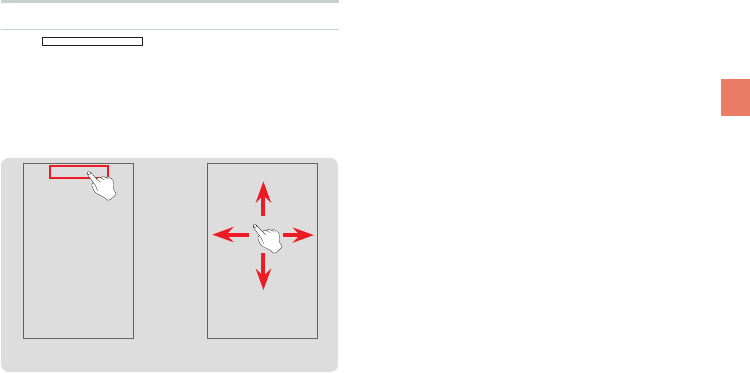
Before Using Your New Cell Phone
▶
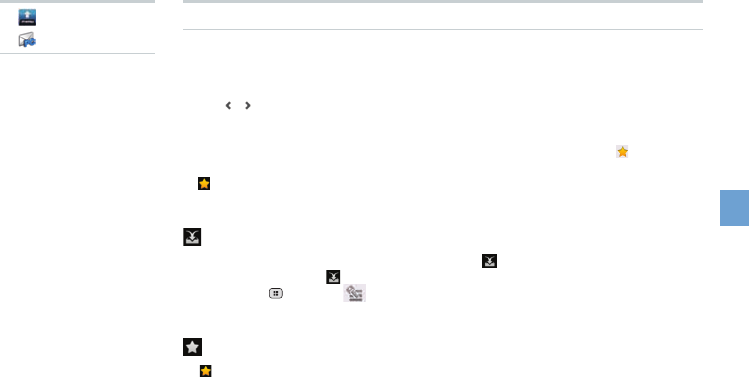
Displaying the Home Preview Screen
●■Tap at the top of the Home screen
to display the Home Preview screen in 3D.
●■You can flick the Home Preview screen to rotate it
left and right, or to tilt it up and down. Tap a Home
screen in the 3D display to move to that Home
screen.
<Home screen>
<Home Preview screen>
18
Tap (Menu) on the
Home screen▶Tap
[Widget]
Long-touch the widget
to select it and drag it
to the desired location
Tap the widget on the
Home screen
The 3D widget will be
executed
Tap [3D Widgets] Slide to the left and
right
▶ ▶ ▶
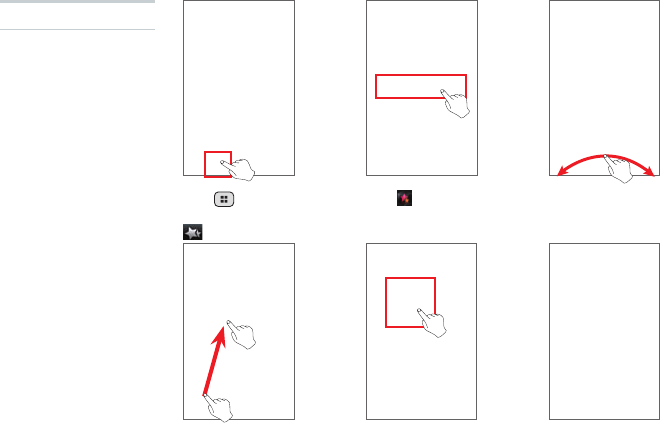
▶ ▶
Executing Widgets
❶ Executing 3D
Widgets
19
Before Using Your New Cell Phone
❷ Executing Widgets
Tap (Menu) on the
Home screen▶Tap
[Widget]
Tap the widget
Tap the widget on the
Home screen
The widget will be
executed
Tap [Widgets] Flick up or down
▶ ▶ ▶
▶ ▶
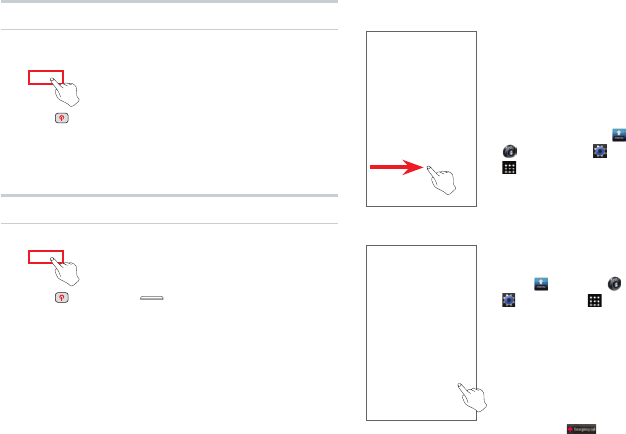
20
Locking the Screen
Lock the Screen
●■Press (Power) while using the IS11PT to turn off
the display and lock the screen.
●■After a period of inactivity, the display will turn off
and the screen will lock automatically.
Unlocking the Screen
●■Press (Power) or (Home) to turn on the
display.
Unlock Pattern
●■To further increase security,
you can set an unlock pattern
from [menu]▶ [Settings]▶
[System]▶ [Location &
security]▶[Set up screen lock].
●■Draw the unlock pattern to
unlock the screen.
●■If you fail to unlock the screen
five times in succession you
cannot try again for 30 seconds.
●■You can make an emergency call
by tapping [Emergency
call]▶[110] (Police)/[118] (Regional
Coast Guard Headquarters)/[119]
(Fire institution).
Slide Unlock
●■If a slide unlock has been set,
slide your finger across the
screen in the direction noted to
unlock the screen.
●■You can set a password or
PIN number to input after
slide unlock from [menu]▶
[Settings]▶ [System]▶
[Location & security]▶[Set
up screen lock].
21
Before Using Your New Cell Phone
How to Input Character
Input characters by tapping keys on the on-screen
keyboard (soft keyboard).
The IS11PT comes with two types of soft keyboards:
the Android keyboard for English and the iWnn IME
keyboard for Japanese.
Showing the Keyboard
Tap the character input eld
Using the Android Keyboard
Long-touch the character input eld
▶[Input method]▶[Android keyboard]
Icon Explanation
/ Switch between
uppercase/lowercase
Lowercase/
Uppercase/ Caps
lock
Delete one character
to the left of the
cursor
Switch to number/
symbol input
Switch to alphabet
input
Space
(
period
)
Long-touch for
symbol selection
input
●■Long-touch or toshowtheAndroid
keyboardsettings/Inputmethodselectionscreen.
●■YoucaninputEuropeancharactersbylong-
touchingtheletterssuchasa,e,i,o,u,y,c,s,n.
●■YoucannotenterJapanesecharacterswhenusing
theAndroidkeyboard.
22
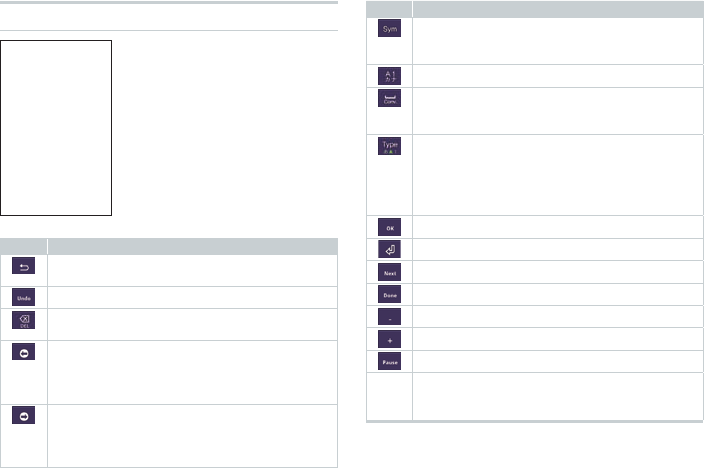
Using the iWnn IME Keyboard
Long-touch the
character input eld
▶[Input method]
▶[iWnn IME]
Icons and Their Functions
Icon
Explanation
Return to the previous character assigned
to the key
Return to the state before character conversion
Delete one character to the left of the cursor
Long-touch to delete continuously
Move cursor left
Shorten the segment for conversion by one
character
Delete one character of wildcard prediction
Move cursor right
Lengthen the segment for conversion by one
character
Add one character of wildcard prediction
Icon
Explanation
Display Emoji/Symbol/Emoticon
* Emoji can only be used with “E-mail”,
“C-mail”, and “SmartNote”.
Convert to alphanumeric kana
Insert space
Convert (group paragraph conversion also
possible)
Change Input mode (Hiragana →Half-width
Alphabet →Half-width Numeric)
Long-touch to display menu (Change
Settings, 10-key ⇔QWERTY, Input Mode,
Input Method)
Finalize segment conversion during input
Input carriage return
Move to next input field
Finish input
Input half-width “-”
Input half-width “+”
Input “P” (pause)
10-key
Input the character displayed on the key
(available characters depend on the input
mode)
●■Theiconsandmenusthatactuallyappearmayvary
dependingontheapplicationorfunctioninuse.
23
Before Using Your New Cell Phone
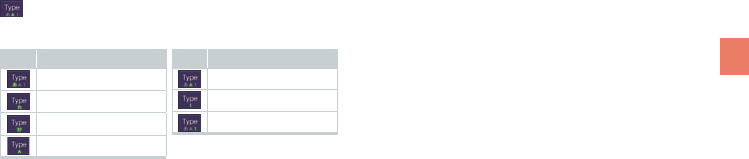
Changing Input Modes
While entering character▶Long-touch
▶[Input Mode]▶Select an input
mode
Icon Explanation
Hiragana-Kanji
Full-width Katakana
Half-width Katakana
Full-width Alphabet
Icon Explanation
Half-width Alphabet
Full-width Numeric
Half-width Numeric
●■Theinputmodeiconisalsodisplayedonthestatus
bar.
●■Theinputmodemaynotbechangeddepending
ontheapplicationsorfunctionsinuse.

Using Android
Home Screen
Menu Screen
Quick Search
Basic Functions
25
Basic Functions
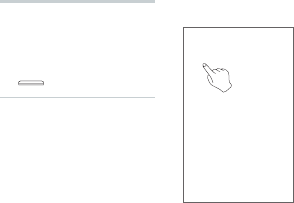
●■When you turn on the IS11PT for the first time and unlock the screen using slide
unlock, you will see an illustration of the Android robot. Tap the robot to begin
using your IS11PT.
●■If you already have a Google account, tap [Sign in] to register your Google
account to your IS11PT. Or you can create a new Google account by tapping
[Create]. You must register a Google account in order to use Google online
services such as Gmail, Google Talk, or Google Calendar or to download
applications and other items from the Android Market.
●■Follow the on-screen instructions to set up your Google account, configure your
Google location settings and data backup settings, then tap [Next]. Tap [Finish
setup] to return to the Home screen and begin using your IS11PT.
▶ ▶ ▶
Using
Android
▶ Using your
IS11PT for the
rst time
▶ Hold down
(Power)▶
NOTE
●■If you register multiple
accounts you can
synchronize contacts
and other information
for each registered
account.
●■If you do not register a
Google account, you
may not be able to
recover your contacts
if they are lost. Be
sure to register a
Google account
before using Android.
Tap the
Android robot
Read usage
instructions
Read setup
instructions
Google account
setup
26
●■Press (Home) when using an application or other function to display the
Home screen at any time.
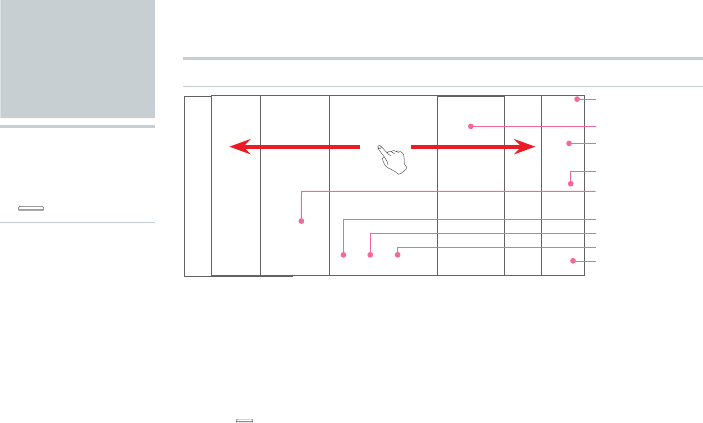
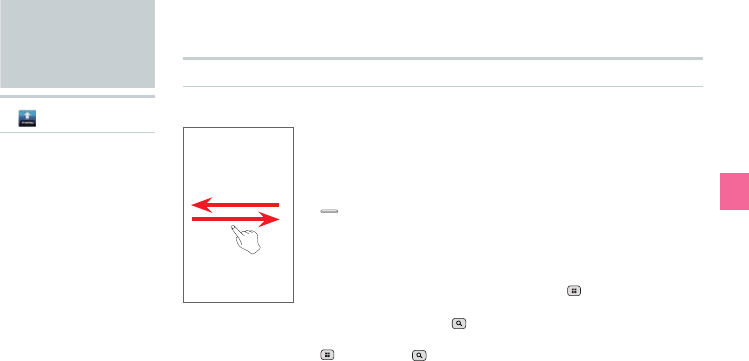
●■You can flick the Home screen to the left or right to change Home screens. There
are a total of seven Home screens: three to the left, and three to the right. You
can put icons and widgets on these Home screens as you like.
❶ Displays notification icons, status
icons, and the current time.
❷ An application that you can use by
adding it to the Home screen.
❸ Allows you to change the wallpaper
on your Home screen.
❹ Tap to open the folder.
❺ Execute the application or function.
❻ Opens the Dialer.
❼ Opens the browser.
❽ Opens your Contacts.
❾ Displays a list of applications and
other functions.
❶ Status bar
❷Widget
❸Wallpaper
❹
Folder icon
❺ Shortcut icon
❻Dialer
❼Browser
❽Contacts
❾Menu
Home
Screen
▶While using
a function/
application
▶ (Home)▶
What is the Home screen?
The Home screen is
displayed first when you turn
on the IS11PT, and is the
screen from which you start
all your applications, other
functions, and menus.
You can arrange the icons
for your applications and
other functions, menu
icons, widgets, and set any
wallpaper as you like.
Using the Home Screen
27
Basic Functions
●■A notification icon will appear if you have a missed
call or received a new mail. Status icons that inform
you about signal strength, remaining battery life,
and other essential status updates for your phone
are also displayed.
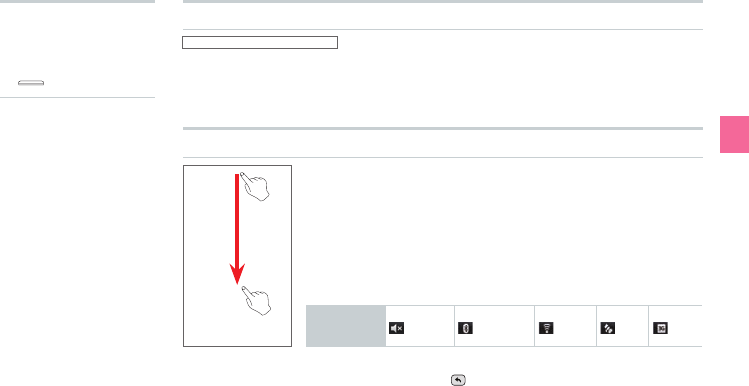
Drag the Status Bar down
●■The notification panel will open, and you will see detailed
information about the status icons and easy setting icons.
●■You can tap on these details to either use that function or
change settings for that function.
●■Simply tapping the easy setting icons turns on or off
functions such as manner mode, Bluetooth®, Wi-Fi, GPS, and
3G.
Easy Setting
Icons
Manner
Bluetooth
Wi-Fi
GPS
3G
●■To close the notification panel, drag the △ at the bottom of
the screen up or tap (Back).
▶While using
a function/
application
▶ (Home)▶
Viewing the Status Bar
Showing the Notication Panel/Using Easy Setting
28
▶While using
a function/
application
▶ (Home)▶
Using Applications/Widgets/Folders
Executing Applications and Widgets/Opening Folders
Tap the application/widget/folder
Adding a New Widget or Icon
Long-touch the wallpaper on the Home screen
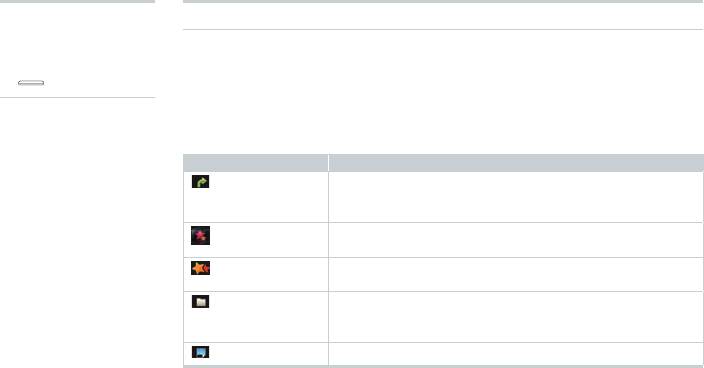
Icon Explanation
[Shortcuts] Add applications to the Home screen in the form of a
shortcut. You can also add shortcuts for bookmarks,
music playlists, contacts, settings, and other functions.
[3D Widgets] Add 3D widgets for photo albums, calendars, and other
functions to the Home screen.
[Widgets] Add widgets such as the RSS reader, YouTube, Google
Search to the Home screen.
[Folders] Add shortcuts to folders such as the Contacts to the
Home screen. Folders can also be used as containers to
organize the icons on the Home screen.
[Wallpaper] Change the wallpaper on the Home screen.
29
Basic Functions
Long-touch the application/widget/folder to
move
▶Drag to the desired location
▶While using
a function/
application
▶ (Home)▶
Moving Applications/Widgets/Folders
Long-touch the application/widget/folder to
delete
▶Drag to
Deleting Applications/Widgets/Folders
30
Tap the Folder
●■The folder will open, and you will see the contents of that
folder. Tap any of the icons in that folder to execute that
application or function.
●■You cannot put other folders or widgets inside a folder.
Managing Folders
▶While using
a function/
application
▶ (Home)▶
31
Basic Functions
Menu Screen
▶ [menu]▶
Using Applications and Other Functions
Executing an Item on the Menu Screen
Tap the Icon
●■When you open the Menu screen you will see icons for all the
applications and functions you can use on your IS11PT.
●■If you execute any other application or function or press
(Home) to return to the Home screen while you are
already using an application or function, the application or
function currently used will not close so that you can return
to it later.
●■When you are using an application or function, you can
access additional functions by tapping (Menu), or you
can use search functions unique to that application or
function by pressing (Search) on the side of the IS11PT.
Some applications and functions may not support the use of
(Menu) and (Search).
32
Quick
Search
▶ (Search)▶
Cradle
Using Quick Search
Text Search
Enter a keyword into the Quick Search input eld
●■Press (Search) on the side of the IS11PT to display the Quick Search screen.
●■When you are already using another application (Dialer, Gmail, browser, etc.),
pressing (Search) may allow you to use search functions unique to that
application.
Voice Search
▶Say the keyword into the microphone while [Speak now]
is displayed
●■The browser will load and Google search results will be displayed.
●■You can also hold down (Search) to display the Google Voice Search screen.
Using Cradle
●■When the device is connected to cradle and the Desk Clock is ON the Hard key
will not function. You can use limited function.(Alarm, Clock, Photo slide show)
●■When the device is connected to cradle and accessed to other application,
pressing Home/Back Hard key will take to Desk Clock screen not the Home
screen.

Making a Phone Call
Receiving a Call
In Call Functions
Call Log
Contacts
Phone Functions
34
Making a
Phone Call
▶ ▶
Entering a Phone Number to Call
Enter the phone number starting with the area
code▶
●■ If you make a mistake entering the phone number, tap
to delete the last digit you entered. Long-touch to delete
all digits.
●■ After you enter four digits or more, the Dialer will
automatically search through the Contacts and display
search results. Tap to view all search results. Select a
phone number from the search results to call it.
●■ Tap with no phone number entered to open your call log.
Long-touch to re-dial the last number you called.
Making International Calls
Calling Internationally From Your IS06 (001 International Call Service)
Enter access code “001010”▶Enter country code▶Enter
area code▶Enter the phone number you want to dial▶
For more information on 001 International Call Service, dial either of the
following numbers:
●■ From au cell phones (toll-free): 157 (area code not required)
●■ From xed-line phones (toll-free): 0077-7-111 (Open 9:00 to 20:00
everyday)
35
Phone Functions
Searching and Calling From Your Contacts
Press (Search)▶Enter all or a portion of a
name▶Select a contact▶
●■ You can use the search Contacts function by pressing
(Search) even while using the Phone, Call log, Group, or
Favorite.
Making a Call Using the Call Log
[Call log]▶ to the right of the phone number
▶ ▶
36
Receiving a
Call
Drag to the right when receiving an
incoming call
●■When receiving a call, the following information will appear.
•If the caller allows showing their phone number, their phone
number will appear on the display.
•If that phone number and name are registered in your
Contacts, the caller’s name and other information will be
shown. If an image for that contact is registered, the image
will also be displayed.
•If the caller does not allow showing their phone number, the
reason for blocking will be displayed.
“ID Unsent” “Payphone” “Not Support”
●■Tap [End] to end the phone call.
When You Missed a Call
●■ will appear on the status bar.
●■Open the notification panel to see what time the call was received and the phone
number of the caller. You can also tap any relevant information to view your call
log.
37
Phone Functions
In Call
Functions
▶In a call ▶
Adjusting the Receiver Volume
Press (Volume) to adjust the receiver volume to six
different levels
Call Log
▶
▶ [Call log]▶
Viewing Your Call Log
Select a call log
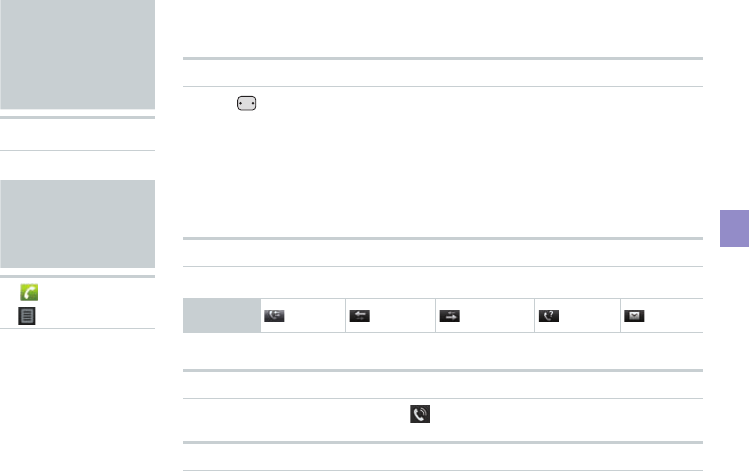
Key
Descriptions
All logs Incoming Outgoing Missed C-mail
●■ You can view all logs, incoming/outgoing/missed, and C-mail logs.
Making a Call From Your Call Log
Select the call log to call▶ [Call]
Sending E-mail/C-mail From Your Call Log
Long-touch a phone number▶[Send E-mail]/[Send C-mail]
38
Contacts
▶ ▶
Adding a New Contact
Add a New Contact from the Dialer
[Phone]▶Enter phone number▶ ▶[Create new
contact]
Add a New Contact from the Call Log
[Call Log]▶Long-touch a relevant phone number▶[Add
to contacts]▶[Create new contact]
Add a New Contact from the Contacts
[Contacts]▶ (Menu)▶ [New contact]▶Enter each
item▶[Done]
39
Phone Functions
▶
▶ [Contacts]▶
Viewing Your Contacts
Viewing Individual Contacts
Quick Contact
Select contact’s photo▶Select icon
Icon
Examples
Make phone call Send C-mail
Send E-mail
Chat
Send PC-mail
Send Gmail
View position using
Google Maps
Deleting a Contact
Long-touch contacts▶[Delete contact]
●■ By tapping (Menu)▶ [More]▶[Delete], you can delete multiple, or all,
contacts at once.
●■ After synchronizing your Contacts, deleting a contact on your IS06 will also
delete that contact from your Google Account Contacts.
Editing a Contact
Long-touch contacts▶[Edit contact]

E-mail
C-mail
PC-mail
Mail Functions
41
Mail Functions
Conguring E-mail Initial Settings
(Menu)▶ [Setting]▶[E-mail settings] ▶[Settings update]
▶[OK]
●■
YouneedtosignupforISNETtouseE-mails(XXX@ezweb.ne.jp).Ifyoudonot
havesignedupatthetimeofthepurchase,contactanaushoportheCustomer
ServiceCenter.
●■
YourE-mailaddressappearswhenyoucompletetheinitialsettings.
●■
Initialsettingsarenotnecessaryifyouchangedyourphonemodelfromanau
cellphone.
●■
E-mailcanbeexchangedwithcellphonessupportingE-mailsandcomputers.
Besidestext,datalikephotoandvideocanbesentaswell.
●■
ThepacketcommunicationchargeforsendingandreceivingE-mailsappliesto
theamountofdatasentandreceived.
●■
E-mailtransmissionmayrequiresometimedependingonthesignalstrengthof
theareaforE-mailswithattachment.
E-mail
▶ [menu]
▶ [E-mail]▶

42
▶ [menu]
▶ [E-mail]▶
Using E-mail Contacts
Create an E-mail address contact list by importing contacts from a Google account
registered on your IS06. E-mail addresses registered to your E-mail Contacts can
be selected as E-mail recipients.
Conguring E-mail Contacts Initial Settings
(Menu)▶ [E-mail Contacts] ▶On the screen [No
contacts. Import contacts from device?], tap [Yes]▶Select
an account
●■
Acontactlistnamed[Contactofdevice]iscreatedinE-mailContacts.
●■
InadditiontothecontactlistimportedfromyourIS06,severalothercontactlists
canberegisteredandmanagedinE-mailContacts.
43
Mail Functions
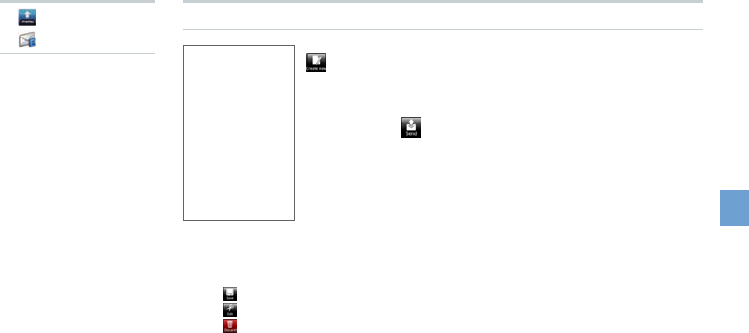
[Create new]▶[Recipient]▶[Direct input]
▶Enter recipient ▶[Done]▶[Subject] ▶Enter
subject▶[Return to edit body]▶Enter
message▶ [Send]
●■TherecipientcanbeselectedfromE-mailContacts,E-mailincomingand
outgoinglogs,etc.
●■
Tap [Save]tosavetheE-mailinthe[Draft]folder.
●■
Tap [Edit]toeditthemessagecontent.
●■
Tap [Discard]todiscardtheE-mail.
Sending E-mail
<E-mail composition screen>
▶ [menu]
▶ [E-mail]▶
44
▶ [menu]
▶ [E-mail]▶
Attaching Data
On the E-mail composition screen, tap [Attachment]▶[Add
attachments]
●■
Amaximumof5les(nomorethan2MBintotal)canbeattached.
Decorating a Message
On the E-mail composition screen, tap [Decorate]
●■
Youcancreatedecoratedmailsbychangingthetextandbackgroundcolorsor
addingDecorationemoticon.
Viewing Received E-mails
[Inbox]▶Select an E-mail
Opening/Saving Attachments
[Inbox]▶Tap / on E-mails with les attached ▶[Open] /
[Save only]
Checking and Receiving New E-mails
[Check new]
●■
Youcancheckthenewmailsandreceivethemwhenthe[AutoReceive]function
isdisabledorwhenthereceptionfailed.
Check the E-mails in Each Folder
Select a folder▶Select an E-mail
45
Mail Functions
▶ [menu]
▶ [E-mail]▶
Setting Mail Filters
Mail filters have functions to receive and reject specific mail messages and to
reject mail messages spoofing cell phones or PHSs.
Setting the Mail Filter as Recommended
(Menu)▶ [Setting]▶[E-mail settings]▶[Other settings]
▶[OK]▶[カンタン設 定はこちら] (See Simple Settings)▶[登録]
(Register)
●■
Setthemaillterthatenablestorejectspoongorauto-forwardedmail
messages,andtoreceivemailmessagesfromcellphones,PHSsorPCs.
Setting Details of the Mail Filter
(Menu)▶ [Setting]▶[E-mail settings] ▶[Other settings]
▶[OK]▶[迷惑メールフィルター] (Mail Filter)▶Select (Entry
eld)▶Enter your security code▶[送信] (Send)
カンタン設
定 (Simple
Settings)
1.
「携帯」「PHS」「PC」
メールを受信(1. Receive
Mail Messages from Cell
Phone, PHS or PC)
Rejects spoofing or auto-forwarded mail
messages, and receives mail messages
from cell phones, PHSs or PCs.
2.
「携帯」「PHS」メールの
みを受信 (2. Receive
only Mail Messages
from Cell Phone or PHS)
Rejects PC addresses, mail newsletters,
spoofing mail messages or auto-
forwarded mail messages, and receives
mail messages from cell phones or PHSs.

46
詳細設定
(Advanced
Settings)
一括指定受信 (Collective
Receive Setting)
Receives or rejects all mail messages
from the Internet or cell phones.
なりすまし規制 (Spoof
Restriction)
Rejects mail messages sent with an
alleged sender address. You can
set the following levels; 高 (High), 中
(Medium), 低 (Low).
指定拒否リスト設定 (Reject
Mail Address List Setting)
Rejects mail messages from certain
mail addresses, domains or parts of
addresses to the left of “@” that are
contained in the specified address list.
指定受信リスト設定
(Allowed Address List
Setting)
Prioritizes reception of mail messages
from certain mail addresses, domains or
parts of addresses to the left of “@” that
are contained in the specified address list.
•
To block mail messages from
addresses other than the specified
ones, unmark all items in 一括指定受信
(Collective Receive Setting) to set to off
(to reject receiving).
指定受信リスト設定(なりす
まし・転送メール許可)
(Allowed Address List
Setting (Spoofing or
Forwarded Mail Messages))
Avoids the mail block due to なりす
まし規 制 (Spoof Restriction) setting,
and receives auto-forwarded mail
messages.
HTMLメール規制 (HTML
Mail Restriction)
Rejects mail messages in HTML format.
▶ [menu]
▶ [E-mail]▶
47
Mail Functions
詳細設定
(Advanced
Settings)
URLリンク規制 (URL Link
Restriction)
Rejects mail messages that include a
URL.
拒否通知メール返信設定
(Block Mail Notification
Setting)
Sets whether to send a receiver error
(address unknown) mail message to the
sender of the rejected mail message.
設定確認/設定解除 (Check Settings/
Release Settings)
Checks the setting status of the mail
filters and releases all the settings at
one time.
PC設定用ワンタイムパスワード発行
(Issue One Time Password for PC
Setting)
Issues a one time password to set the
mail filter on your PC. The password
is available within 15 minutes after
issuance.
設定にあたって (Notes on Setting Mail
Filter)
Displays the explanation for setting mail
filters.
●■Securitycodeisthefour-digitnumberyouwroteonyoursubscriptionform.
●■
Ifthesecuritycodeisincorrectlyenteredthreetimesconsecutivelyduringa
singleday,themailltersettingoperationwillbedisableduntilthenextday.
●■
Notethatyoucannotreceivemailmessagesoncerejectedbymaillters.Be
carefulwhenyousetmaillters.
▶ [menu]
▶ [E-mail]▶
48
C-mail
▶ [menu]
▶ [C-mail]▶
Sending C-mail
Message
input field
Recipient
input field
[Create new]▶Tap the recipient
input eld▶Enter recipient phone
number▶Tap message input
eld▶Enter message▶[Send]
●■
C-mailisaservicethatusesphonenumbersasaddressestoexchangemessages
betweenaucellphonesthatsupportC-mail.
●■
Amaximumof50full-width/100half-widthcharacterscanbeenteredper
message.
●■
SomeEmojimaynotbedisplayedproperlywhensendingC-mailstoadierent
modelofcellphone.
●■
EveniftheC-mailhasbeensentsuccessfully,atransmissionerrormessagemay
sometimesbedisplayedifthesignalisweak.
●■
C-mailcannotbesentifyouareinalocationwithnosignalorifyourIS06isset
toairplanemode.
<C-mail Composition screen>
49
Mail Functions
Viewing Received C-mails
▶ [menu]
▶ [C-mail]▶
Message
input field
<Thread list screen>
<Thread details screen>
Select a contact on the thread list
screen▶Check the contents on the
thread details screen
●■
Onthethreaddetailsscreen,C-mailsreceived
fromthecontactandthosesenttohim/herare
displayedasadialog.
●■
YoucansendaC-mailreplybyenteringa
messageintheinputeldonthebottomof
thethreaddetailsscreen,andtapping[Send].
●■ReceivingC-mailsisfreeofcharge.
●■C-mailscanbereceivedonlyfromaucell
phonessupportingC-mail.
●■Receivedmailsmaynotbedisplayedproperly
dependingonthecontent.
●■C-mailcannotbereceivedifyouareina
locationwithnosignalorifyourIS06issetto
airplanemode.

50
C-mail Safety Block
C-mail safety block is a function that allows you to reject C-mails that include URLs
(http://△△△, https://△△△) or phone numbers in the C-mail message text.
●■
C-mailsafetyblockisvalidbydefault.Cancelthesettingifyouwanttoreceive
C-mailsthatincludeURLsandphonenumbersinthemessagetext.
Setting the C-mail Safety Block
You can set the C-mail safety block by sending C-mail to a specified phone
number.
Canceling the setting Input “Cancel” in the C-mail message and send to
09044440010.
Enabling the setting Input “Enable” in the C-mail message and send to
09044440011.
Confirming the setting Input “Confirm” in the C-mail message and send to
09044440012.
●■SendingtheC-mailforthissettingisfreeofcharge.
●■AC-mailreportingthatsettingsarecompletearrivesfrom“09044440012”.
When a C-mail is Blocked by the C-mail Safety Block
When a C-mail is blocked by the C-mail safety block, an error C-mail is returned
from “09044440019”.
●■ThepacketcommunicationchargesapplyevenifaC-mailisblocked.
▶ [menu]
▶ [C-mail]▶

51
Mail Functions
▶ [menu]
▶ [C-mail]▶
Setting Up a C-mail Receiving Filter
(Menu)▶[Settings]▶[Receiving lter settings]
Specified
No. setup
Specify a particular phone number to block incoming C-mails
Specified
No. list
Select a phone number to block incoming C-mails by tapping
(Menu)▶[Quote Contacts], [Quote Outgoing call log], [Quote
Incoming call log], [Quote C-mail log], or [Direct input]
•You can register up to 20 phone numbers.
•Long-touch an already registered phone number to edit or delete
that number.
Unregistered
Contacts
Block C-mails from all phone numbers that are not registered in
your Contacts
52
PC-mail
▶ [menu]
▶ [PC-mail]▶
Setting Up PC-mail
You can send and receive PC-mail compatible with POP3, IMAP, or Exchange on
your IS06.
In order to use PC-mail, you need to configure your user name, password,
incoming server, and outgoing server settings. Please refer to your PC-mail
provider for questions about these settings.
The “type of account”, “incoming server settings”, and “outgoing server settings”
will automatically be detected for some mail addresses.
Adding a PC-mail Account (First-time Registration)
Enter mail address and password▶[Next]▶Select account
type▶Incoming server settings▶[Next]▶Outgoing server
settings▶[Next]▶Account options▶[Next]▶Enter account
name and name to display for outgoing mail▶[Done]
Adding a PC-mail Account
(Menu)▶ [Accounts]▶ (Menu)▶ [Add account]
▶Enter mail address and password▶[Next]▶Select account
type▶Incoming server settings▶[Next]▶Outgoing server
settings▶[Next]▶Account options▶[Next]▶Enter account
name and name to display for outgoing mail▶[Done]
●■YoucanaddmultiplePC-mailaccountsandmanagetheincoming/outgoing
mailseparatelyforeachaccount.
53
Mail Functions
Managing Received PC-mail
Viewing Received PC-mail
Select account▶Select mail in Inbox
●■Tap / toviewtheprevious/nextmail.
●■Tap[Reply],[Replyall],or[Delete]toperformtherespectiveactionwhilethe
contentsofamailaredisplayed.
●■Youcanstarimportantmailssothattheyareeasytondlater.Tap totheright
ofthesubjectwhilethecontentsofamailaredisplayedtostarthatmail.Ortap
totherightofamailinyourInboxtostarthatmail.
Viewing Incoming PC-mail From All Registered Accounts
[Combined Inbox]
●■RegistermultiplePC-mailaccountstodisplay [CombinedInbox].
●■Youcanalsodisplay [CombinedInbox]withonlyonemailaccountregistered
bytapping (Menu)▶ [Account].
Viewing Starred Mails
[Starred]
●■ Starimportantmailsormailsyouwanttoreadagainlaterandyoucanview
themfromyourStarredInbox.
▶ [menu]
▶ [PC-mail]▶

54
Viewing Your Inbox/Drafts/Outbox/Sent/Trash Mails
Select account▶ (Menu)▶ [Folders]▶Select Inbox/
Drafts/Outbox/Sent/Trash
Sending PC-mail
Select account▶ (Menu)▶ [Compose]▶Enter recipient,
subject, and message body▶[Send]
●■Youcansendamailtomultiplecontactsbyseparatingtheirmailaddresseswith
acomma(,)orsemi-colon(;).
●■Youcansaveamailyouhavewrittenasadraftinsteadofsendingitimmediately.
●■Youcanalsoincludephotos,movies,documents,andotherdataasan
attachmenttoyourmails.Amaximumof5MBofdataisallowedforattachment
permail.
▶ [menu]
▶ [PC-mail]▶

Using Google Services
Gmail
Android Market
Google Voice Search
Using Other Google Services
Google Functions
56
Using
Google
Services
▶Using your
IS11PT for the
rst time
▶Hold down
(Power)▶
Registering an Existing Google Account
Registering an Existing Google Account for the First Time
Tap the Android robot▶[Begin]▶[Next]▶[Sign in]▶Enter
your username and password▶[Sign in]▶Follow the
on-screen instructions
●■ AftertheGoogleaccountregistrationscreen,theGoogleLocationSetupscreen
andBackupDataSetupscreenwillbedisplayed.YoumustperformtheGoogle
locationsetupsothatapplicationssuchasGoogleMapscancheckyourcurrent
physicallocation.IfyouwanttobackupsomeofyourIS11PTsettingsand
applicationdatatoGoogle’sservers,congureyourdatabackupsettings.
●■ YoucanregisteranexistingGoogleaccounttoyourIS11PTorcreatea
completelynewGoogleaccountfromyourIS11PTdirectly.
●■ AfterregisteringyourGoogleaccounttoyourIS11PT,youwillbeabletouse
GoogleservicessuchasGmail,GoogleCalendar,andGoogleTalkaswellas
downloadapplicationsfromtheAndroidMarket.
●■ YoucanonlyusetheGoogleaccountyouregisteredtoyourIS11PTinitially
forGoogleTalkandsomeotherfunctionsandmenus.Beawareofthiswhen
registeringGoogleaccountstoyourIS11PT.
●■ TodeletetheGoogleaccountyouregisteredrst,select [menu]▶
[Settings]▶ [System]▶ [Privacy]▶[Factorydatareset]toresetyourIS11PT
toitsfactorydefaultsettings.
●■ SomeAndroidMarketapplicationsmaynotbecompatiblewiththeIS11PT.
●■ Googleapplicationsandservicesaresubjecttochangewithoutanypriornotice.

57
Google Functions
Creating a New Google Account
[Create]▶Enter your rst name, last name and
username▶[Next]▶Follow the on-screen instructions
●■ IfyoudonothaveaGoogleaccount,orifyouwanttocreateanewGoogle
account,youcancreateonedirectlyfromyourIS11PT.
Registering an Existing Google Account to Use Google Services for the
First Time
[Next]▶[Sign in]▶Enter your username and
password▶[Sign in]▶Follow the on-screen instructions
●■ IfyoudidnotsetupyourGoogleaccountthersttimeyouusedyourIS11PT,
theGoogleAccountRegistrationscreenwillappearthersttimeyouusesome
GoogleservicesthatneedGoogleaccount.
●■ YoucanonlyusetheGoogleaccountyouregisteredtoyourIS11PTinitially
forGoogleTalkandsomeotherfunctionsandmenus.Beawareofthiswhen
registeringGoogleaccountstoyourIS11PT.
●■ TodeletetheGoogleaccountyouregisteredrst,select [menu]▶
[Settings]▶ [System]▶ [Privacy]▶[Factorydatareset]toresetyourIS11PT
toitsfactorydefaultsettings.
▶Using Google
services for the
rst time▶
▶
When registering
a Google account
▶
58
Gmail
▶ [menu]
▶ [Gmail]▶
What is Gmail?
Gmail is a mail service
provided by Google.
You can view and send
Gmail from your IS11PT.
Refer to the Google
homepage for more detailed
instructions on how to use
Gmail.
Viewing Your Inbox
View mails
●■If you have registered multiple Google accounts, the Inbox for the last account
you checked will be displayed.
●■Mails will appear in the order they were received. The number of unread mail
messages in your Inbox and the mail account currently viewed are shown at the
top of the screen.
●■Add a (Check) beside any mail to use the Archive, Delete, and Labels
functions.
●■Archived mails will not be shown in the Inbox. To view archived mails, tap
(Menu)▶ [Go to labels]▶[All Mail] in that order.
●■Tap to the right of a mail to star that mail. To view starred mails, tap
(Menu)▶ [Go to labels]▶[Starred] in that order.
Switching Gmail Accounts
(Menu) ▶ [Accounts]▶Select an account
●■You can switch accounts and add new accounts.
●■The number to the right of an account shows the number of unread mails for that
account.
59
Google Functions
▶ [menu]
▶ [Gmail]▶
Viewing the Contents of a Received Mail
Select a mail
●■Tap to the right of the sender’s name to star the mail.
●■Tap [Reply] to the right of the sender’s name to compose a reply to the mail.
Tap to use [Reply all] and [Forward].
●■Read mails will appear with a gray background in the Inbox to differentiate them
from unread mail.
●■Tap [Archive] below the mail body to save the mail in your Archive. To view
archived mails, tap (Menu)▶ [Go to labels]▶[All Mail] in that order.
●■Tap [Delete] below the mail body to delete the mail.
●■Tap / below the mail body to view the previous/next mail.
Sending Mails
(Menu)▶ [Compose]▶Enter recipient, subject, message
body▶[Send]
●■You can save a mail you have written as a draft instead of sending it immediately.
●■You can also include photos as an attachment to your mails.
Showing Labels
(Menu)▶ [Go to labels]
●■Select a label to view all mails set with that label.
●■ mails can be viewed and managed together in the Starred Inbox.
60
Using the Android Market
Downloading Applications
Select an application to download▶View application
information▶[Install]/[Buy]▶[OK]
●■ YoumustregisteraGoogleaccounttoyourIS11PTinordertousetheAndroid
Market.
●■ Applicationdownloadsandinstallcompletionnoticationswillappearinthe
statusbar.Wheninstallationnishes,theiconfortheinstalledapplicationwill
appearontheMenuscreen.
●■ Todownloadfee-basedapplications,youmustusetheGoogleCheckoutservice.
Followtheon-screeninstructionstoperformthenecessarysteps.
Searching for Applications
(Menu)▶ [Search]
●■ EntersomecharacterstosearchforanapplicationontheSearchscreen.
Android
Market
▶ [menu]
▶ [
Market]
▶
What is the Android
Market?
Android Market is an
application distribution
service run by Google. You
can download many free
and fee-based applications
for your IS11PT using the
Android Market.
Refer to the Google
homepage for more detailed
instructions on how to use
the Android Market.
61
Google Functions
NOTE
●■You take full responsibility for any applications you download. Check to make
sure an application is safe before installing it. Some applications may contain
viruses, cause data corruption, or transmit your current location, usage logs,
and/or personal information stored on your cell phone to the Internet.
●■au takes no responsibility for any damages or problems caused by applications
you install on your cell phone. Repairing any such problem may not be covered
under the warranty and only be performed for a fee.
●■au takes no responsibility for any losses to you or any other third party caused
by applications you install on your cell phone.
●■Some applications may not function without a microSD memory card.
●■Some applications may prevent your phone from entering sleep mode, or will run
in the background severely wasting the battery.
●■You can uninstall any applications you no longer need.
●■If you believe an application is causing a problem with your IS11PT, uninstall
the relevant application immediately. However, note that this will not solve all
problems in all cases.
▶ [menu]
▶ [Market]▶
Deleting Downloaded Applications
(Menu)▶ [My apps]
▶Select an application▶[Uninstall]▶[OK]
▶Select reason for uninstallation▶[OK]

62
Using Voice Search
Say the keyword into the microphone while [Speak now] is
displayed
●■The browser will load and your Google search results will be displayed.
Google
Voice Search
▶ [menu]
▶ [Voice
Search]▶

63
Google Functions
Using Other
Google
Services
▶ [menu]
▶ [Talk]▶
Using Google Talk
Google Talk is a chat service provided by Google.
Refer to the Google homepage for more detailed instructions on how to use Google
Talk.
▶ [menu]
▶ [Maps]▶
Using Google Maps
Google Maps is an online map service provided by Google. You can use Google
Maps to view your current location on the map and find directions to your
destination. You can superimpose aerial photographs and traffic information (only
in areas where such data is provided) directly on the map.
Refer to the Google homepage for more detailed instructions on how to use Google
Maps.
▶ [menu]
▶
[Navigation]
▶
Using Google Maps Navigation
Google Maps Navigation is a navigation service provided by Google. This service
provides you with navigation information to your destination.
Refer to the Google homepage for more detailed instructions on how to use Google
Maps Navigation.
64
▶ [menu]
▶ [Places]▶
Using Google Places
Google Places is an online information service provided by Google. You can use
Google Places to search for information related to shops, services, and places.
Refer to the Google homepage for more detailed instructions on how to use Google
Places.
▶ [menu]
▶ [
Latitude
]▶
Using Google Latitude
Google Latitude is a location information sharing service provided by Google. You
can use Google Latitude to see where your friends are on the map, send them mail
messages, and more.
Refer to the Google homepage for more detailed instructions on how to use Google
Latitude.
▶ [menu]
▶ [News &
Weather]▶
Using Google News and Weather
Google News and Weather is a news and weather service provided by Google.
Refer to the Google homepage for more detailed instructions on how to use Google
News and Weather.
▶ [menu]
▶ [
Calendar]
▶
Using Google Calendar
Google Calendar is an online calendar service provided by Google. You can use
Google Calendar to sync all calendars saved online to your Google account to
your IS11PT for easy schedule management.
Refer to the Google homepage for more detailed instructions on how to use Google
Calendar.

Internet Functions
Connecting to the Internet
Browser
au one Market
66
Connecting
to the
Internet
●■You can connect to the Internet on your IS11PT by either of the following
methods.
•Packet communications (IS NET, au.NET)
•Wi-Fi
Using Wi-Fi
●■You can connect to the Internet using the wireless LAN setup in your home or
through public wireless LANs when you are out on the go.
●■To connect from your home, you will need an Internet connection and an access
point (wireless router) so that you can connect wirelessly. You will also need to
know the network SSID (network name, SSID, ESS-ID) and password (WEP key,
WPA key, shared key, encrypted key) for your wireless access point.
●■To connect to a public wireless LAN, check the homepage of the public wireless
LAN provider to confirm the current status of the access point beforehand. In
some cases you may need an account with the service provider and an ID and
password for authentication.
Enabling Wi-Fi
[menu]▶ [Settings]▶ [System]▶ [Wireless &
networks]▶Add a (Check) beside [Wi-Fi]
67
Internet Functions
Registering and Connecting to an Access Point
[menu]▶ [Settings]▶ [System]▶ [Wireless &
networks]▶[Wi-Fi settings]▶Select network SSID▶Enter
password▶[Connect]
●■Enter the WEP key or shared key for the wireless access point in the password
field. If the access point does not require a password, the password entry screen
will not appear.
●■ (Check) [Show password] to view the password as you enter it.
●■To connect to an open network, add a (Check) beside [Network notification].
Using Data Communication Services
[menu]▶ [Settings]▶ [System]▶ [Wireless &
networks]▶[Mobile networks]▶Add a (Check) beside
[Data enabled]
●■You can connect to the Internet and transmit packets through IS NET or au.NET.
●■IS NET is an Internet connection service for smartphones. If you have signed
up for EZ WIN before using any IS-series phone, you do not need to sign up
for IS NET. The monthly fee for IS NET is 315 yen (tax included) plus additional
transmission fees.
●■If you are not registered for IS NET, use au.NET instead. The monthly fee for
au.NET is 525 yen (tax included, only for months you use au.NET) plus additional
transmission fees.
68
Browser
▶ [menu]
▶ [
Browser
]▶
Displaying a Web Page
●■The au one homepage will be displayed when you launch the browser (by
factory default settings).
Using the Search Box (URL Input Field)
Enter keyword or URL into the search box▶ (Go)
●■If you enter a URL into the search box, the web page for that URL will be
displayed.
●■If you enter a search keyword in the search box, the search results will be
displayed. Tap any relevant item in the list.
●■Tap to view your bookmarks.
●■To use the search box on your Home screen, press (Search) on the side of
your IS11PT.
Possible Actions While Displaying a Web Page
●■Pinch out to zoom in, and pinch in to zoom out. You can also lightly tap twice to
zoom in and zoom out.
●■You can also tap / that appear while dragging the screen to zoom in and
zoom out.
69
Internet Functions
Opening a New Window
(Menu)▶ [New window]
●■ The au website (http://auone.jp/ by default) is displayed in a new window. Enter
the URL of the website you want to visit or a keyword in the Search Box (URL
Input Field).
Switching Between Windows (When Multiple Windows Are Open)
(Menu)▶ [Windows]
●■A list of all currently open websites will appear. Tap the web page you want to
view and that page will be displayed.
●■Tap to close the window.
Bookmarking the Currently Displayed Web Page
(Menu)▶ [Bookmarks]▶[★Add]▶Enter/view name and
location▶[OK]
●■A list of web pages that you have bookmarked will appear by tapping
(Menu)▶ [Bookmarks]. Tap any web page you like from your bookmarks to
quickly connect to it.
Downloading Files
Long-touch the specied item (character, icon, etc.)▶[Save
link]/[Save image]
●■Downloaded files are stored on your microSD memory card. (Menu)▶
[More]▶[Downloads] allows you to find all of your previously downloaded
files.
▶ [menu]
▶ [
Browser
]▶

70
au one
Market
▶ [menu]
▶ [au one
Market]▶
●■
auoneMarketisanapplicationdistributionsiteforauAndroidsmartphones
runningauAndroidbyKDDI(au).
●■
Youcandownloadmanyfreeandfee-basedapplicationsandwidgetsforyour
IS11PT.
●■
TermsofServicearedisplayedforthersttimeyouactivateauoneMarket.
Checkthecontentandtap[同意](Agree)touseauoneMarket.
●■AnauoneIDisrequiredtousesomeoftheauoneMarketfunctions.Refer
totheInstructionManual(Japanese)formoreinformationaboutauoneID
registration.
Downloading Applications
Select an application to download ▶[ダウンロード] (Download)
●■
Downloadproceduresmaydierdependingonthedistributor.Followthe
on-screeninstructions.
●■
Asecuritypasswordisrequiredtobuyfee-basedapplicationsusingaukantan
paymentmethod.Thesecuritypasswordisyoursecuritycodebydefault.The
securitycodeisthefour-digitnumberyouwroteonthesubscriptionform.
●■
Applicationdownloadandinstallationcompletionnoticationswillappearin
thestatusbar.Wheninstallationnishes,theiconfortheinstalledapplication
willappearontheMenuscreen.Installedwidgetscanbesetandexecutedfrom
theHomescreen.

71
Internet Functions
▶ [menu]
▶ [au one
Market]▶
Deleting Downloaded Applications
[マイアプリ] (My apps)▶Select an application▶[アンインスト
ール] (Uninstall)▶[はい] (Yes)
NOTE
●■
Youtakefullresponsibilityforanyapplicationsyoudownload.Checktomake
sureanapplicationissafebeforeinstallingit.Someapplicationsmaycontain
viruses,causedatacorruption,ortransmityourcurrentlocation,usagelogs,
and/orpersonalinformationstoredonyourcellphonetotheInternet.
●■
autakesnoresponsibilityforanydamagesorproblemscausedbyapplications
youinstallonyourcellphone.Repairinganysuchproblemmaynotbecovered
underthewarrantyandonlybeperformedforafee.
●■
autakesnoresponsibilityforanylossestoyouoranyotherthirdpartycaused
byapplicationsyouinstallonyourcellphone.UseauoneMarketinaccordance
withtheTermsofService.Downloadproceduresandfee-basedapplications
paymentmethodsmaydierdependingontheauoneMarketdistributor.Some
applicationsmaynotfunctionwithoutamicroSDmemorycard.
●■
Someapplicationsmaypreventyourphonefromenteringsleepmode,orwill
runinthebackgroundseverelywastingthebattery.
●■
IfyoubelieveanapplicationiscausingaproblemwithyourIS11PT,uninstall
therelevantapplicationimmediately.However,notethatthiswillnotsolveall
problemsinallcases.

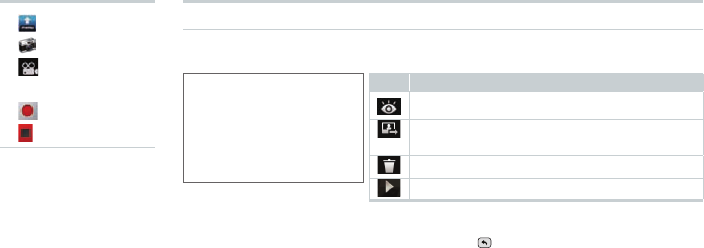
Camera
Gallery
Multimedia Functions
73
Multimedia Functions
Before Taking a Photo
Icon Explanation
Zoom adjustment
(9 levels)
Brightness
adjustment
(9 levels)
Function
Camera mode
setting
Icon Explanation
[VIEW]
Show Gallery
Take photo
(Shutter)
[SET]
Photography
mode
Movie mode
(◦denotes the
current mode)
Taking a Photo
(Take photo)
●■Photos taken using your IS11PT will be saved under “Camera” on your microSD
memory card automatically.
●■Tap the screen to display the icons.
Camera
▶ [menu]
▶ [Camera]▶
74
●■The icons will disappear automatically after a few moments. To display the icons
again, or to remove the icons when they are displayed, simply tap the screen.
●■When you want to take another photo, tap (Back) to return to Photography
mode.
▶ [menu]
▶ [Camera]
▶
(Take photo)
▶Icon Explanation
Zoom (10 levels)
Show Gallery
Send (Bluetooth®, E-mail, Gmail, PC-mail,
PhotoEditor, Picasa)
Delete automatically saved photos from the
microSD memory card
After Taking a Photo
When [View after Saving] is ON (Default)
75
Multimedia Functions
Before Recording a Movie
●■Tap the screen to display the icons.
Record a Movie
(Record)▶ (Stop)
●■Movies recorded using your IS11PT will be saved under “Camera” on your
microSD memory card automatically.
●■If you receive a phone call while recording a movie, the screen will change to the
incoming call screen after automatically saving your recording. After you finish
talking, the screen will return to the Movie Preview screen (the screen visible
after saving a recorded movie).
▶ [menu]
▶ [Camera]
▶ (Record
movie)▶
Icon Explanation
Zoom adjustment
(9 levels)
Brightness
adjustment
(9 levels)
Function
[VIEW]
Show Gallery
Icon Explanation
/ Record movie/
stop recording
[SET]
Photography
mode
Movie mode
(◦denotes the
current mode)
76
▶ [menu]
▶ [Camera]
▶ (Record
movie)
▶ (Record)
▶ (Stop)▶
●■The icons will disappear automatically after a few moments. To display the icons
again, or to remove the icons when they are displayed, simply tap the screen.
●■When you want to record another movie, tap (Back) to return to Movie mode.
Icon Explanation
Show Gallery
Send (Bluetooth®, E-mail, Gmail, PC-mail,
YouTube)
Delete
Play
After Recording a Movie
When [View after Saving] is ON (Default)
77
Multimedia Functions
Gallery
▶ [menu]
▶ [
Gallery
]▶
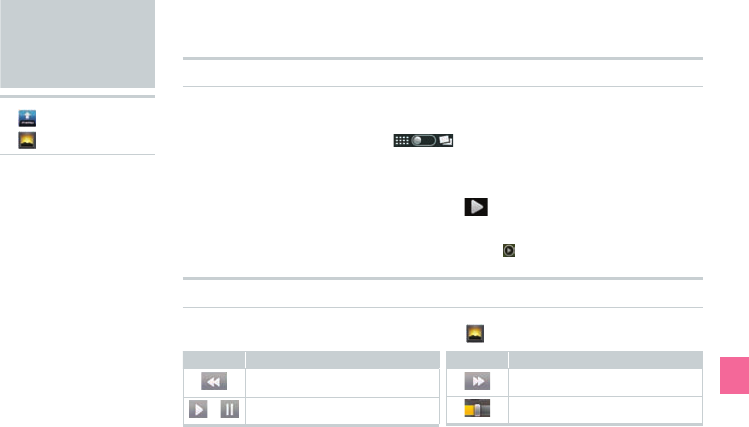
Viewing Photos
Select a folder▶Select a photo
●■ Afterselectingthefolder,slide intheupper-rightcornerofthescreen
toswitchbetweenviewingbysub-folderandviewingallles.
Slideshow Display
Select a folder▶Select a photo▶ [Slideshow]
●■ Photoswillbeshownone-by-onefromthephotoyouselected.
●■ Ifamovieisdisplayedduringtheslideshow,tap toplaythemovie.
Viewing Movies
Select a folder▶Select a movie▶ [Movies]
Icon Explanation
Rewind
/ Play/stop
Icon Explanation
Fast forward
Playback time slide bar
●■ Whenthemovienishesplayingthescreenwillreturntothelistofles.

Alarm/Wakeup Call
PocketBook
SmartNote
Useful Functions

79
Useful Functions
Setting an Alarm
[Alarm]▶ [Easy]/ [Timely]/ [Daily]/ [Weekly]
▶Select/enter each item▶ (Save) except for [Easy]
●■ Youcansetuptotendierentalarmsatonce.Afteryouhavesetonealarm,
select [Alarm]▶ (Menu)or (Open)▶ [Add]toaddmorealarms.To
deleteanalarm,select [Alarm]▶ (Menu)or (Open)▶ [Selectall]oradd
a (Check)besideeachoneyouwanttodelete▶ [Delete].
●■ Thealarmwillautomaticallystopifleftringingforapproximatelyoneminute.
●■ IfyourIS11PTisturnedoatthetimesetforanalarm,thealarmwillnotring.
Setting a Wakeup Call
[Wakeup Call]▶[+Add]▶Select/enter each item▶
(Save)
●■ Youcansetuptotendierentwakeupcallsatonce.Afteryouhavesetone
wakeupcall,select (Menu)or (Open)▶ [Add]toaddmorewakeupcalls.
Todeleteawakeupcall,select (Menu)or (Open)▶ [Selectall]oradda
(Check)besideeachoneyouwanttodelete▶ [Delete].
●■ Thewakeupcallwillautomaticallystopifleftringingforapproximately
oneminute.Evenifsnoozeisset,thewakeupcallwillstopringingafter
approximatelyoneminute.
Alarm/
Wakeup Call
▶ [menu]
▶ [Alarm/
Wakeup Call]▶

80
Voice Recorder
[Voice Recorder]▶ ▶ ▶
●■ Youcanrecordforamaximumof60minutes,andsaveupto20separate
recordings.(Youmaynotbeabletosave20recordingsdependingonthe
amountoffreespaceonyourmicroSDmemorycard.)
●■ Ifyouwanttostoprecordingwithoutsaving,press (Back).
Playing Back Your Recordings
Select a File
PocketBook
▶ [menu]
▶ [
PocketBook]
▶
Icon Explanation
[Volume] A slider bar for adjusting the volume will appear.
/ Pause/Play
Previous File
Next File
[List] Switch to the recordings list screen
[One Time]*
Play the selected file once
[Continuous]*
Play only the selected file on repeat
[Sequential]*
Play the files in order from the selected file
●■Items denoted with a * will appear in order with each tap on the icon.
81
Useful Functions
▶ [menu]
▶ [
PocketBook]
▶
Using the Calculator
Calculating 7 × 9
[Calculator]▶▶▶▶
Icon Explanation
(Save) Name and save the
calculation results
Switch to Scientific mode
Icon Explanation
(List)
Display a list of all saved
calculation results
Setting Up the World Clock
[World Clock]▶ [IntCity]▶ (Menu) or (Open)▶
[Add]▶Add (Check) beside city▶ (Save)
Icon Explanation
[DST]
Set for daylight saving
time
Icon Explanation
[IntCity]
Set for up to six different
cities shown in the World
Clock
●■ Whenyouhavesetsixcitiestoyour[IntCity],the [Add]menuwillnotbe
shown.
Thisiconwillappearagainifyoudeleteoneofthesixcities.
●■ The+/–timerepresentsthetimedierencewithJST(JapanStandardTime).
●■ SetDST(DaylightSavingTime)forcitiesthatgoondaylightsavingtime.

82
▶ [menu]
▶ [
PocketBook]
▶
Using the Stopwatch
[Stopwatch]▶ ▶
Icon Explanation
Start measurement again from
the stopped time
Icon Explanation
Clear the stopwatch value and
return to the initial screen
83
Useful Functions
Creating a New Note
If There Are No Previously Saved Notes
Enter note contents▶ (Save)
If There Are Previously Saved Notes
(New Note)▶Enter note contents▶ (Save)
Icon Explanation
(Add Photo)
Paste in a photo from your Gallery or start the Camera to
add a new photo
(Text Input)
Enter characters (font size, color, and position will not
change)
(Pen)
Select a pen
:Pen :Eraser :Highlighter
(Pen Option)
Set the thickness, stroke (except for the Eraser), and
color (except for the Eraser) of the selected pen
:Thickness :Stroke :Color
(BackGround
Set)
Set the background for your note
(Clear)
Clear all/Clear drawing
SmartNote
▶ [menu]
▶ [
SmartNote]
▶
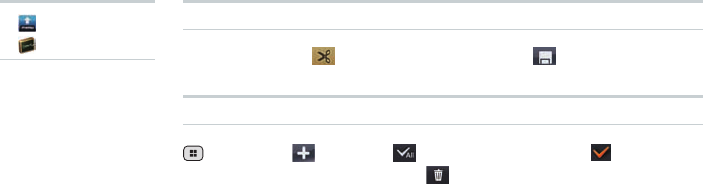
84
Editing an Existing Note
Select a note▶ (Edit)▶Edit contents▶ (Save)
Deleting a Note
(Menu) or (Open)▶ [Select All] or add a (Check)
beside each note to delete▶ [Delete]▶[Yes]
▶ [menu]
▶ [
SmartNote]
▶

Remote Control Lock
Security Lock Service
In Case of
Loss of Your
IS11PT
86
In case of loss of your IS11PT, you can activate the Remote control lock by calling
your IS11PT a set number of times from a registered phone number in order to
prevent others from using your IS11PT.
Activating the Device Administrator
[Location & security]▶[Select device administrators]
▶[Remote control lock]▶[Activate]
●■ ActivatethisitemtoremotelylockyourIS11PTusingeitherthe[Remotecontrol
lock]or“SecurityLockService.”
Setting Up the Remote Control Lock
[Location & Security]▶[Remote control lock]▶Select items
Remote control
lock
Enable/disable Remote control lock (Check this option to set
[Valid Caller ID], [Specified period] and [Incoming call count].)
Valid Caller ID You can register up to three phone numbers.
Specified
period
Set the time limit until the number of calls set in the [Incoming
call count] should be received. Set from 1 to 10 minutes.
Incoming call
count
Set the number of incoming calls until the Remote control lock is
activated. Accepts values between 3 and 10.
●■ If[Remotecontrollock]isnotcheckedunder[Selectdeviceadministrators]
(▶seeabove),tapping[Remotecontrollock]willdisplaythe“Activatedevice
administrator?”screen.Tap[Activate]ifyouwanttoconguretheRemote
controllock.
Remote
Control Lock
▶ [menu]
▶ [Settings]
▶ [System]▶
87
In Case of Loss of Your IS06
●■ IncaseoflossofyourIS11PT,youcancongureyourIS11PTsothatthescreen
willlockandbecomeunusableafterreceivingaspeciednumberofcallsfroma
registeredphonenumber.Werecommendthatyousetalockpattern,password,
orPINnumberbeforehandfrom [menu]▶ [Settings]▶ [System]▶
[Location&security]▶[Setupscreenlock]screen.
●■ If [Location&security]▶[Setupscreenlock]issetto[None],thePIN“1234”
willbeusedtolockyourscreenwhenyouusetheRemotecontrollockfunction.
Activating the Remote Control Lock From a Registered Phone
Call your IS11PT from a phone registered in your [Valid
Caller ID] list as many times as you set for [Incoming call
count] within the [specied period]
●■ Besurenottoblockyourphonenumberwhencalling.
●■ TheRemotecontrollockcannotbeactivatedifyourIS11PTisturnedo,is
outsidetheservicearea,orifairplanemodeisturnedon.TheRemotecontrol
lockmayalsofailifyourIS11PTisinanareawithpoorsignalquality.
Unlocking the Remote Control Lock
●■ Unlockthescreenlock.If [menu]▶ [Settings]▶ [System]▶ [Location&
security]▶[Setupscreenlock]issetto[None],youcanenter“1234”andtap[OK]
afterslidingtounlockinordertounlocktheRemotecontrollock.
●■ YoumustalsounlockthescreenlockfromyourIS11PTwhenyouretrieveiteven
ifyouappliedtheRemotecontrollockusingtheSecurityLockService.

88
Activating the Remote Control Lock Using the Security Lock Service
●■You can activate the Remote control lock on your IS11PT even if you did not
set up the Remote control lock beforehand by calling the Customer Service
Center or by submitting the necessary information from your computer. However,
[Remote control lock] under [Select device administrators] (▶P.86) must be
activated to use this feature (it is disabled under the factory default settings).
●■The Security Lock Service is available free of charge.
●■You must submit an application if using the Security Lock Service for the first
time. (This can be submitted even after losing your phone.)
●■To unlock the Remote control lock, unlock the screen lock of your IS11PT when
you retrieve it. You cannot unlock the Remote control lock through the Security
Lock Service itself.
Activate the Remote control lock by calling the Customer
Service Center
From au cell phones (toll-free): 113 (area code not required)
From any other cell phone or fixed-line phone (toll-free): 0077-7-111
●■Available 24 hours a day.
●■Follow the automated voice prompts to complete the process.
Activate the Remote control lock through au Customer
Support (https://cs.kddi.com/)
Security
Lock Service

Troubleshooting
Index
Appendix/Index
90
Troubleshooting
▶ Cannot turn on by pressing (Power)
•Do you hold down (Power)? (▶P.13)
•Is the battery pack charged? (▶P.10)
•Is the battery pack properly inserted? (▶P.9)
•Are the contacts on the battery pack dirty?
▶ The power is turned off automatically
•Has the battery run out? (▶P.10)
▶ The power is turned off at the startup screen
•Has the battery run out? (▶P.10)
▶ Cannot make any phone calls
•Is your IS11PT turned on? (▶P.13)
•Is the au IC-Card inserted? (▶P.11)
•Is the phone number you entered correct? (Did
you start with the area code first?) (▶P.34)
•Did you tap after entering the phone number?
(▶P.34)
•Is your IS11PT in airplane mode? (▶P.14)
▶ Cannot receive any phone calls
•Do you have sufficient signal strength?
(▶P.5)
•Are you outside the service area? (▶P.5)
•Is your IS11PT turned on? (▶P.13)
•Is the au IC-Card inserted? (▶P.11)
•Is your IS11PT in airplane mode? (▶P.14)
▶ (Out of Area) appears
•Are you outside the service area or in a location
with poor signal strength? (▶P.5)
•Are you covering the built-in antenna with your
fingers or hand? (▶P.7)
▶ Cannot connect to Wi-Fi
•Is your IS11PT receiving a signal from the
wireless access point?
•Did you configure your Wi-Fi settings? (▶P.66)
▶ The LED lamp ashes but I cannot hear any
ringtone
•Is your IS11PT in manner mode? (▶P.14)
▶ Cannot charge the battery pack
•Is the charger connected properly? (▶P.10)
•Is the battery pack properly inserted? (▶P.9)
▶ Cannot perform any key/touch panel operations
•Is your IS11PT turned on? (▶P.13)
•Did you unlock the screen? (▶P.20)
▶ “au IC-Card (UIM) error” is displayed
•Is the au IC-Card inserted? (▶P.11)
•Is a card different from the au IC-Card used?

91
Appendix/Index
▶ I hear a beeping sound and cannot make any
phone calls
•Are you outside the service area or in a location
with poor signal strength? (▶P.5)
•Either the network is very busy, or the person you
are trying to call is already on the phone.
▶ Cannot hear the other person on the line
•Is your receiver volume turned all the way down?
(▶P.37)
•Are you covering up the receiver with your ear?
Place the receiver to your ear.
▶ The microSD memory card is not recognized
•Is the microSD memory card inserted properly?
(▶P.12)
•Is the microSD memory card unmounted?
●■ Formoredetailedinformation,seeauCustomer
SupportontheauhomepageatthefollowingURL.
http://www.kddi.com/customer/service/au/
trouble/kosho/index.html

92
Number
3D Widget ····················18
A
Add Access Point ········67
Adding Widgets/
Icons ·························28
Airplane mode ··············14
Alarm/Wakeup Call ······79
Android keyboard ········21
Android Market ············60
au IC-Card ···················11
au one Market ··············70
B
Back key ························8
Battery pack
Charge ......................... 10
Insertion/Removal .......... 9
Battery pack cover ·········8
Before You Begin ·········25
Bookmark ····················· 69
Browser ························68
C
Calculator ·····················81
Calendar ······················64
Call Log ··················35, 37
Camera ························73
Camera (lens) ················8
Cell phone etiquette ······· ii
Charge ·························10
C-mail ··························· 48
C-mail Receiving Filter
Settings ····················· 51
C-mail Safety Block ······ 50
Contacts ·················35, 38
D
Daily Alarm ···················79
Data Communications
···67
Deleting Applications/
Widgets/Folders ········ 29
Device Administrator ····86
Display (touch panel) ····· 8
Drag ·····························16
E
Easy Alarm ··················· 79
Easy Setting ·················27
E-mail ···························41
F
Flick ······························15
Folder ····················· 28, 30
G
Gallery ··························77
Gmail ····························58
Google Account ··········· 56
Google Services ···········56
Google Voice Search ···62
H
Home key ······················· 8
Home Preview screen
··· 17
Home Screen ···············26
I
Icon list ···························5
Included items ···············6
Input mode ···················23
International Call ·········· 34
Internet Connection······66
iWnn IME keyboard ······ 22
K
Key name ······················· 7
L
Language ·····················13
Latitude ························64
LED lamp ·······················8
Light (camera) ················8
Long touch ··················· 15
M
Mail Filter ······················ 45
Make a Call ··················34
Manner mode ··············· 14
Maps ····························63
Market ··························60
Menu key ························8
Microphone ····················8
microSD memory
card ···························12
microUSB connection
jack ·····························8
Moving Applications/
Widgets/Folders ········ 29
Index

Appendix/Index
93
N
Navigation ···················· 63
News ····························64
Notification Panel ·········27
P
Pattern unlock ·············· 20
PC-mail ·························52
Pinch out/in ··················16
Places ··························64
PocketBook ·················· 80
Power key ·······················8
Power ON/OFF ············· 13
Proximity sensor ············· 8
Q
Quick Contact ··············39
Quick Search ···············32
R
Receive a Call ·············· 36
Receiver ························· 8
Receiver Volume ·········· 37
Record ·························80
Record Movie ··············· 75
Remote Control Lock ···86
S
Screen lock ··················20
Search Box ···················68
Search key ·····················8
Security Lock
Service ······················ 88
Shortcut ························28
Slide ·····························16
Slideshow ····················· 77
Slide unlock ··················20
SmartNote ···················· 83
Standby time ·················· 9
Starred mail ·················· 53
Status Bar ·····················27
Stopwatch ····················82
Strap eyelet ···················· 8
Switch Windows ··········· 69
T
Take Photo ····················73
Talk ······························· 63
Talk time ·························9
Tap ·······························15
Text input method ·········21
Timely Alarm ················79
Touch panel
operation ··················· 14
Troubleshooting ············90
V
View Movie ···················77
View Photo ···················77
Voice Search ·········· 32, 62
Volume key ····················· 8
W
Wakeup Call ················· 79
Wallpaper ····················· 28
Weather Forecast ········· 64
Weekly Alarm ···············79
Widget ··························18
Wi-Fi ·····························66
World Clock ··················81
Safety Information
SAFETY INFORMATION FOR FIXED WIRELESS TERMINALS.
POTE NTIALLY EXPLOSIVE ATMOSPHERES
Turn your phone OFF when in any area with a potentially explosive atmosphere and obey all signs and instructions.
Sparks in such areas could cauls e an explosion or fire resulting in bodily injury or even death.
INTERFERENCE TO MEDICAL DIVICES
Certain electronic equipment may be shielded against RF signal from you wireless phone. (pacemakers, Hearing Aids,
and so on) Turn your phone OFF in health c are
facilities when any regulations posted in these areas instruct you to do so. RF signals may affect improperly installed or
inadequately shielded electronic system in motor vehicles.
EXPOSURE TO RF ENERGY
Use only the supplied or an approved replacement antenna. Do not touch the antenna unnecessarily when the phone is
in use. Do not move the antenna close to, or couching any exposed part of the body when making a call.
SAFETY INFORMATION FOR RF EXPOSURE
Body worm operation
This device was tested for typical body-worn operations with the back of the phone kept 1 cm. from the body. To maintain
compliance requirements, use only belt-clips, holsters or similar accessories that maintain a 1 cm separation distance

between the user’s Body and the back of the phone, including the antenna. The use of belt-clips, holsters and similar
accessories should not contain metallic components in its assembly. The use of accessories that do not satisfy these
requirements may not comply with FCC RF exposure requirements, and should be avoided.
For more information about RF exposure, please visit the FCC website at www.fcc.gov.
SAR INFORMATION
THIS MODEL PHONE MEETS THE GOVERNMENT’S
REQUIREMENTS FOR EXPOSURE TO RADIO WAVES.
Your wireless phone is a radio transmitter and receiver. It is designed and manufactured not to exceed the emission limits
for exposure to radiofrequency (RF) energy set by the Federal Communications Commission of the U.S. Government.
These limits are part of comprehensive guidelines and establish permitted levels of RF energy for the general population.
The guidelines are based on standards that were developed by independent scientific organizations through periodic
and thorough evaluation of scientific studies. The standards include a substantial safety margin designed to assure the
safety of all persons, regardless of age and health. The exposure standard for wireless mobile phones employs a unit of
measurement known as the Specific Absorption Rate, or SAR. The SAR limit set by the FCC is 1.6 W/kg. *
Tests for SAR are conducted with the phone transmitting at its highest certified power level in all tested frequency bands.
Although the SAR is determined at the highest certified power level, the actual SAR level of the phone while operating
can be well below the maximum value. This is because the phone is designed to operate at multiple power levels so as
to use only the power required to reach the network. In general, the closer you are to a wireless base station antenna,
the lower the power output. Before a phone model is available for sale to the public, it must be tested and certified to the
FCC that it does not exceed the limit established by the government adopted requirement for safe exposure. The tests
are performed in positions and locations (e.g., at the ear and worn on the body) as required by the FCC for each model.
The highest SAR value for this model phone when tested for use at the ear is 0.617 W/Kg and when worn on the body
, as described in this user guide, is 1.02 W/Kg . (Body-worn measurements differ among phone models, depending

upon available accessories and FCC requirements). While there may be differences between the SAR levels of various
phones and at various positions, they all meet the government requirement for safe exposure. The FCC has granted an
Equipment Authorization for this model phone with all reported SAR levels evaluated as in compliance with the FCC RF
exposure guidelines. SAR information on this model phone is on file with the FCC and can be found under the Display
Grant section of http://www.fcc.gov/ oet/fccid after searching on FCC ID: JYCCDMAPTI11.
Additional information on Specific Absorption Rates (SAR) can be found on the Cellular Telecommunications Industry
Asso-ciation (CTIA) web-site at http://www.wow-com.com. * In the United States and Canada, the SAR limit for mobile
phones used by the public is 1.6 watts/kg (W/kg) averaged over one gram of tissue. The standard incorporates a sub-
stantial margin of safety to give additional protection for the public and to account for any variations in measurements.
U.S.A.
U.S.FEDERAL COMMUNICATIONS COMMISSION
RADIO FREQUENCY INTERFERENCE STATEMENT
INFORMATION TO THE USER
NOTE : This equipment has been tested and found to comply with the limits for a Class B digital device pursuant to
Part 15 of the FCC Rules. These limits are designed to provide reasonable protection against harmful Interference in a
residential installation This equipment generates, uses, and can radiate radio frequency energy and, if Not installed and
used in accordance with the instructions, may cause harmful Interference to radio communications. However, there is no
guarantee that interference will not occur in a particular Installation. If this equipment does cause harmful interference to
radio or television reception, which can be determined by turning the equipment off and on, the user is encouraged to try
to correct the interference by one or more of the following measures:
*- Reorient or relocate the receiving antenna.
Increase the separation between the equipment and receiver.
*- Connect the equipment into an outlet of a circuit different from that to which the receiver is
connected.
*- Consult the dealer or an experienced radio/TV technician for assistance.
Changes or modification not expressly approved by the party responsible for Compliance could void the user’s authority
to operate the equipment. Connecting of peripherals requires the use of grounded shielded signal cables.
FCC Compliance Information
This device complies with Part 15 of FCC Rules.
Operation is subject to the following two conditions:
(1) This device may not cause harmful interference, and
(2) This device must accept any interference received. Including interference that may cause undesired operation.
We, Pantech Co.,Ltd., declare under our sole responsibility that our product CDMA PTI11 and in combination with
KDDI AC-charger03(0301PQA), KDDI microUSB stereo earphone adaptor 01(0301QVA) and Pantech Desktop
stand(PTI11PUA) to which this declaration relates is in conformity with the appropriate standards.

For inquiries, call:
Customer Service Center
For general information and charges (toll free)
For loss, theft or damage and operation information
(toll free)
From fixed-line phones:
PRESSING ZERO WILL CONNECT YOU TO AN OPERATOR
AFTER CALLING 157 ON YOUR au CELLPHONE
From au cellphones:
From fixed-line phones:
In case above numbers are not available,
From au cellphones:
area code not required
0120-977-033 (except Okinawa)
0077-7-113113
area code not required
0077-7-111 157
0120-977-699 (Okinawa)
Sales: KDDI CORPORATION •
OKINAWA CELLULAR TELEPHONE COMPANY
Manufactured by: Pantech Co., Ltd.
Stember 2011 Edition
Cellphone and PHS operators collect and recycle unused
telephones, batteries and battery chargers at stores
bearing the logo regardless of brand and manufacturer
to protect the environment and reuse valuable resources.