Pantech Co GB310 Dual Band GSM 850 / PCS 1900 (with WAP & GPRS) User Manual GF200
Pantech Co Ltd Dual Band GSM 850 / PCS 1900 (with WAP & GPRS) GF200
UserManual.wiki
>
Pantech Co
>
GB310 User Manual
UserMan
Navigation menu
Upload a User Manual
Namespaces
Wiki Guide
HTML
PDF
Info
Views
User Manual
Discussion / Help
Navigation
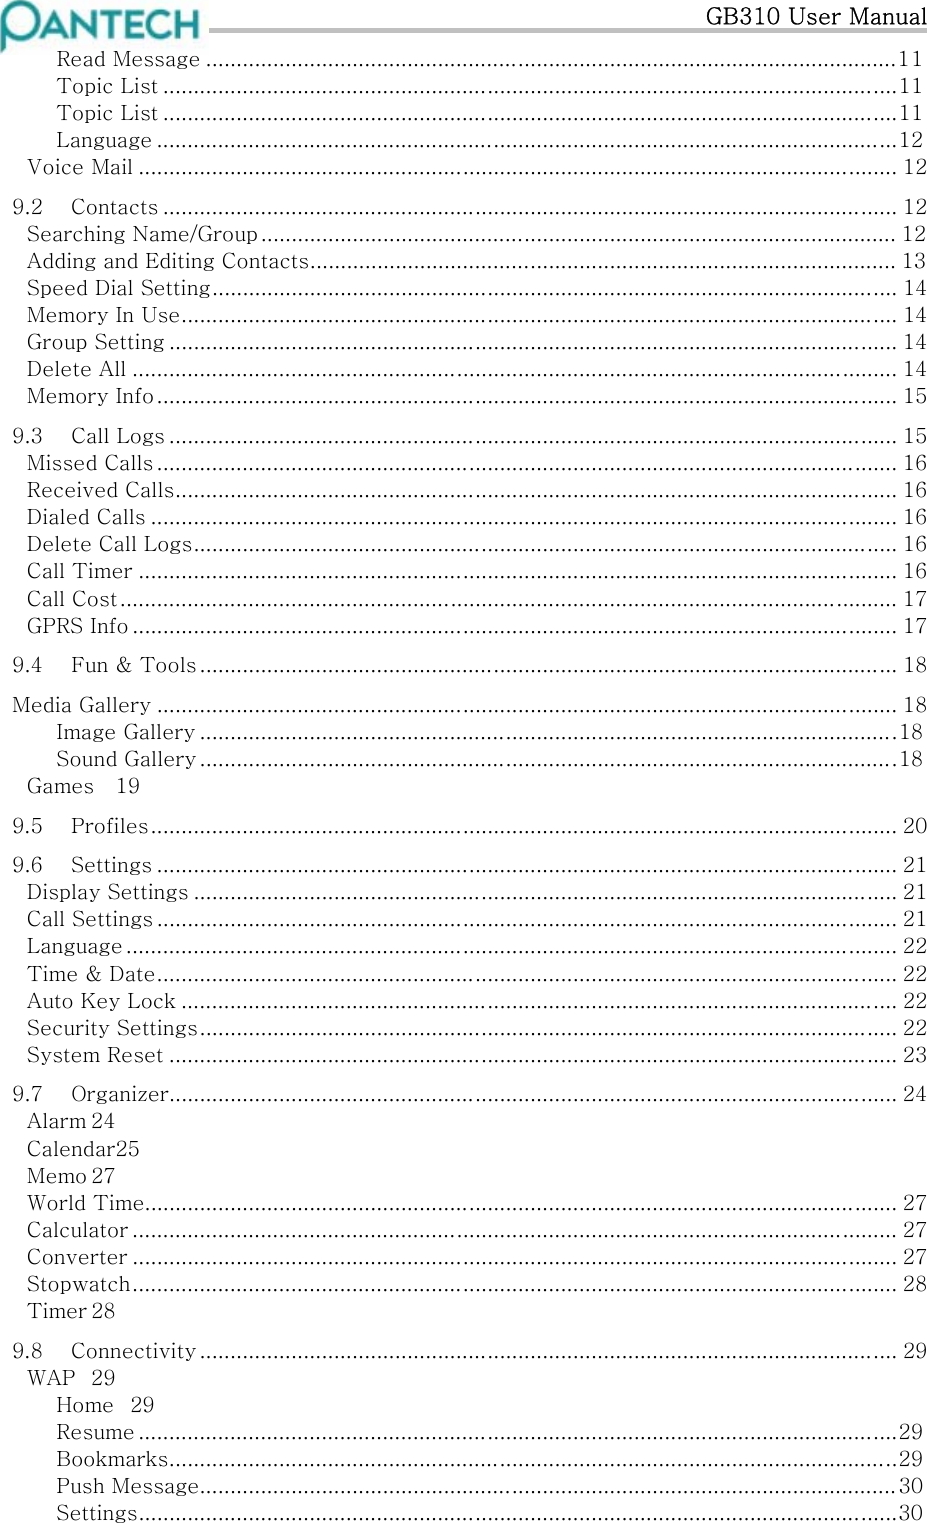

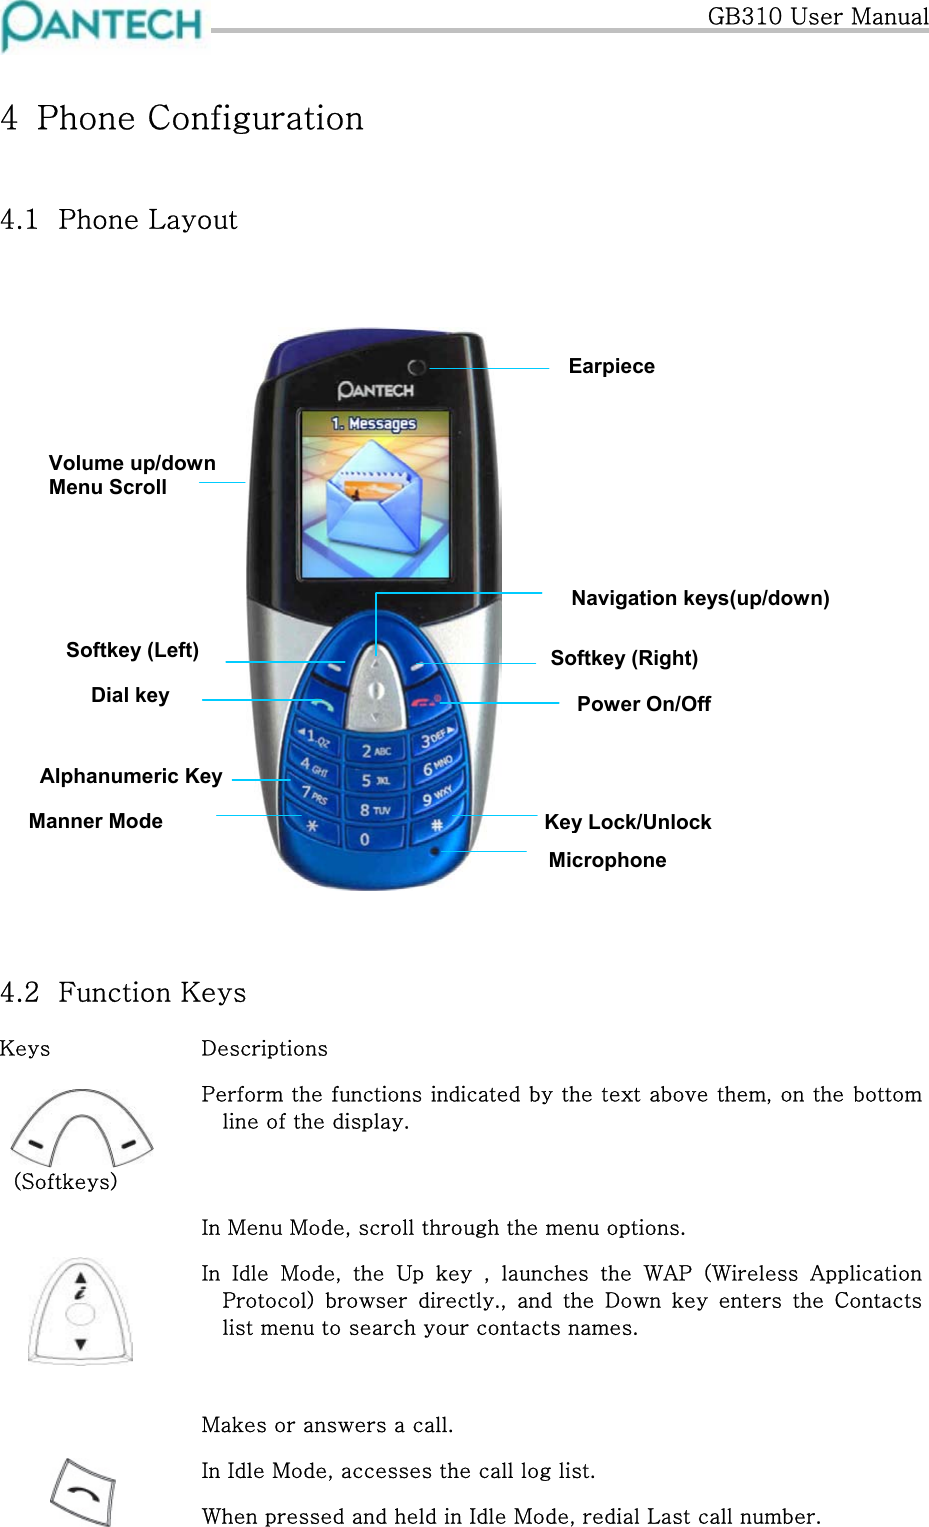
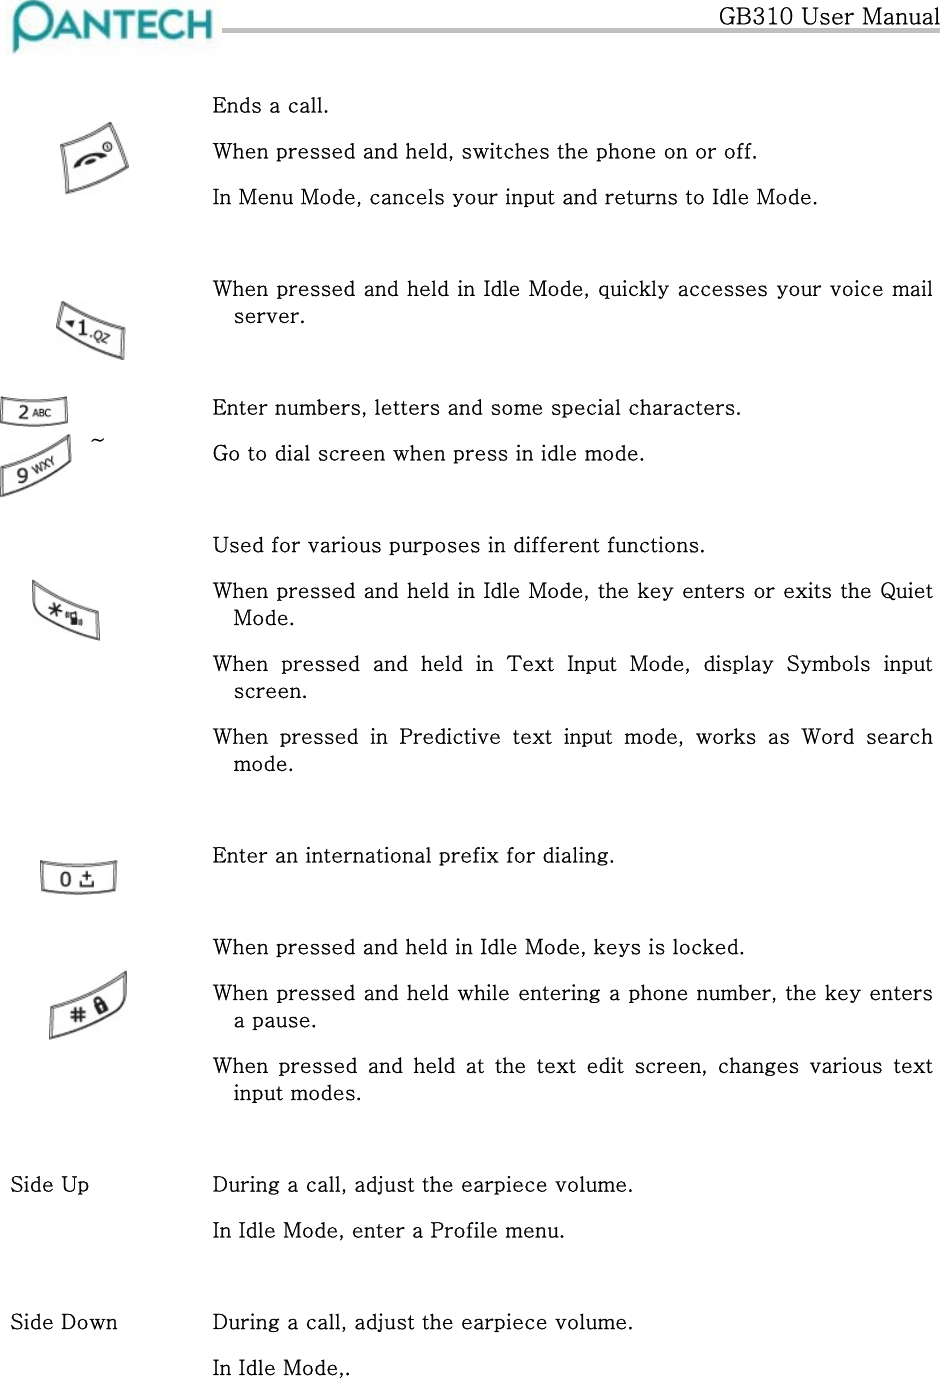
![GB310 User Manual 1 Overview of functions 1.1 Special User Interface Features You can choose from two types of menu interface: List and Grid. See “Menu Theme” on page xx for more information. In the List Menu Style interface, full color animated images introduce every main menu. Use the [Navigation Up] and [Navigation Down] keys to navigate through the menus. In the Grid Menu Style interface, multiple menu icons appear on a single display. Use [Up/Down navigation keys] to navigate through the icons.](https://usermanual.wiki/Pantech-Co/GB310/User-Guide-441844-Page-5.png)

![GB310 User Manual 3 Caution 3.1 Clues Text Clues Text Clues make instructions easy to follow. Bold indicates one of the following items: -A word of phrase on the display -Special text such as Note, Tip and Warnings. Underline indicates the following item: -one of items in the next level menu -Bold indicates the following item: -one of items in the option menu { } indicates one of the following items: -The name of Soft1 key -The name of Soft2 key ex) {Option}, {Set} [ ] indicates the following item: -All keys except two soft keys in the phone ex) [Send], [3] < > indicates the following item: -One of icons in the menu It is defined in icon description. NET indicates the following item: -the menu dependents on the network of user SIM indicates the following item: -the menu dependents on the SIM of user MEM indicates the following item: -the menu dependents on the phone memory of user Graphic clues * Tip : Provides a shortcut or an alternate method to do something ! Warning : Helps you avoid information loss, personal injury, damage to the phone, or property damage. Note : the contents: Explains a feature of points out an important concept](https://usermanual.wiki/Pantech-Co/GB310/User-Guide-441844-Page-7.png)

![GB310 User Manual 5 Getting Started 5.1 Installing/Removing the SIM Card 5.2 Using the Battery Installing the Battery Removing the Battery Charging the Battery Low Battery Indicator 5.3 Switching the Phone On or Off 5.4 Selecting Functions and Options 5.5 Locking Unlocking Keypad You can lock keypad to avoid keys by mistake. To lock keypad manually, press “#” long. To lock keypad automatically, use Auto key lock of Setting Menu. In the key lock mode, you can dial emergency calls and answer incoming call To unlock keypad, press soft1 key[Unlock] and then press the # key.](https://usermanual.wiki/Pantech-Co/GB310/User-Guide-441844-Page-13.png)
![GB310 User Manual 6 Basic Call Functions 6.1 Making a Call You can dial in many ways. Automatic redial function until connected. (In case that the Auto Redial of Call Setting is set to ON) Once connected, Current Time, Service Time, Status Icon, and Receiver Name or Number will be displayed in the idle screen. Note: If you retrieve a number from Contact, the registration name in Contact will be displayedUsing the Numeric Keypad Type in a local code and phone number during idling and press [Send] for dialing. Tip: Press the last number long without pressing [Send] for dialing. Making the International Call Firstly, press and hold [0] key until ‘+’ shows up on display or enter the outgoing national code. Then enter the number you want to call and press the [Send]. Using Contacts Approach at Contacts for Search or select a number from All Contacts and press [Send] for dialing (See Contacts for more details.) Tip: Press the right soft key and down key in the Idle screen and you will approach at ’contacts’ and ‘All Contact’ respectively. Using Call Logs Press [Send] short and you see Call Log List aligning dialed, received, or missed numbers chronologically. Press the ↑ or ↓ key to select a number. Press [Send] for dialing. (See Call Log for more details.) Tip: Press and hold [Send] long and the latest number in Call log will be automatically redialed. Viewing Missed Calls If for any reason, an incoming call cannot be answered, a missed call message will appear on the screen to remind you of the call you missed (Network and subscription dependent feature, not available in all areas) To reply to the missed call Press [View] to display a list of missed calls. If necessary, scroll to the number you want by pressing up or down key. Press [Send] to recall the missed call.](https://usermanual.wiki/Pantech-Co/GB310/User-Guide-441844-Page-14.png)
![GB310 User Manual Press {Exit} or [END] to close Missed Call Notification. Speed-dialing from Contacts You can retrieve and call the desired number by pressing and holding the number of the ‘Speed Dial’ in which you saved the number to call. For example, press the “5” key long to dial a number which has been saved “5” in Speed Dial List. (For numbers more than 2 digits, press the first one short and the second one long.) (See Speed Dial for more details.) Making the Emergency Call Emergency call is available even without available SIM. Choose {SOS}. Dial 112. Press the [Send]. 6.2 Ending a Call Press [END] or use the ‘End Call’ option to end a Call. Upon the end of Call, the Call summary (Receiver Name or Number, Service Time) will be displayed. 6.3 Answering a Call When somebody calls you, the phone rings(or vibrates) and screen will display the name or the number of the caller(If network supports and you subscribe to it). Display of name is dependent on data in the Phonebook. To answer a call, open the folder. If It is already open, press the [Send]. With special option [Any Key] as Answer type, you could answer a call by pressing any key except [END]. * Tip: Press {Silent} or the [side key] short during ringing to mute the bell. 6.4 Rejecting a Call Press [END] / {Reject} or press [Side key] long during ringing. 6.5 Adjusting the Volume Press [Side up key] to volume up. Press [Side down key] to volume down. The volume level change will be display in the screen Select a way of volume control depending on the situation. Being on the telephone: Volume Folder being open in the Idle mode: Key Tone](https://usermanual.wiki/Pantech-Co/GB310/User-Guide-441844-Page-15.png)
![GB310 User Manual 6.6 During Call Options When you are on a telephone call, you can press {Option} to enter the call options. Service Time Single call (Active) Single call (Hold) Multiparty (Active) Multiparty (Hold) Mute Switching the Microphone Off (Mute) Switch off the microphone while you are on a phone call, in short, prevent your voice from being heard by the counterpart. However, you can keep hearing his voice. Select {Mute} or Option followed by Mute to activate the Mute function. Once selected, the Mute icon and ‘MUTE’ will be displayed in the Preview at the bottom and the Right Soft key will be replaced with ‘UNMUTE’. Select Option followed by Unmute or {Unmute} to deactivate the Mute function. Putting a Call on Hold Hold puts the current call on standby and neither part can hear other’s voice. In the Hold mode, you are able to be on another line. Select Option followed by Hold to activate this function. Once held, the Option menu will be replaced with ‘Retrieve’. Select Retrieve Option to resume the previous call. Once held, the name and icon of the caller will be faded in gray. Second call while you are on a phone call By Hold Option: 1. Hold the current call by Hold Option. 2. Dial as if you dial in the idle status. By [Send] : 1. Type in a phone number directly or search it from Contact Option while you are on a phone call. 2. Press [Send]. 3. The current call will be automatically held and the number will be dialed. (Refer to ‘Answering a Second Call’ for the use of Second Call.) Searching for a Number in Contacts Select the ‘contact’ option to activate the Contact Search function while you are on a phone call. (Refer to ‘Contact’ for more details.) Using the DTMF tones This function allows you to turn DTMF tone on / off.](https://usermanual.wiki/Pantech-Co/GB310/User-Guide-441844-Page-16.png)
![GB310 User Manual If DTMF is turned off, the recipient will not hear the key sounds while you’re pressing the key. Answering a Second Call Net You may answer a second call provided this service is available on network and the Call Waiting function is active. Press [SEND] to answer a second call while you are on a phone call. At this time, the previous call will be automatically held. Press {Swap} or use ‘Swap’ Option to switch 2 calls. The ‘End Call’ option finishes the call in action and activates the held call to hang up. Press [END] or use the ‘End All Calls’ option to hang up all the current calls. Call Waiting When you receive a second call, the information on a waiting call will pop up and the call waiting tone will notify you of ringing. You may receive or reject the incoming call. Transferring a Call Transfers the current call to a held call to connect both calls of your use. Select the ‘Transfer’ option for this function. Using the Message Service Select the ‘Message’ option to write or read text messages or multimedia messages. Broadcast when you are on a call. (Refer to Message for more details.) Making a Multi-party Call You can communicate with 2 to 5 telephones simultaneously. far multiparty far held Setting up the Multi-party Call Select the ‘Join’ option while you are on a phone call with a call held and you may be through all multi-party calls as the held call joins. The ‘Join’ option allows you to add more people to Multi-party call where necessary. Upon composition of Multi-party call, you may view the people and their status in Multiparty with the or key. (An icon indicates either Far Multiparty or Far Held.) Having a Second Call During a Multi-party Call](https://usermanual.wiki/Pantech-Co/GB310/User-Guide-441844-Page-17.png)
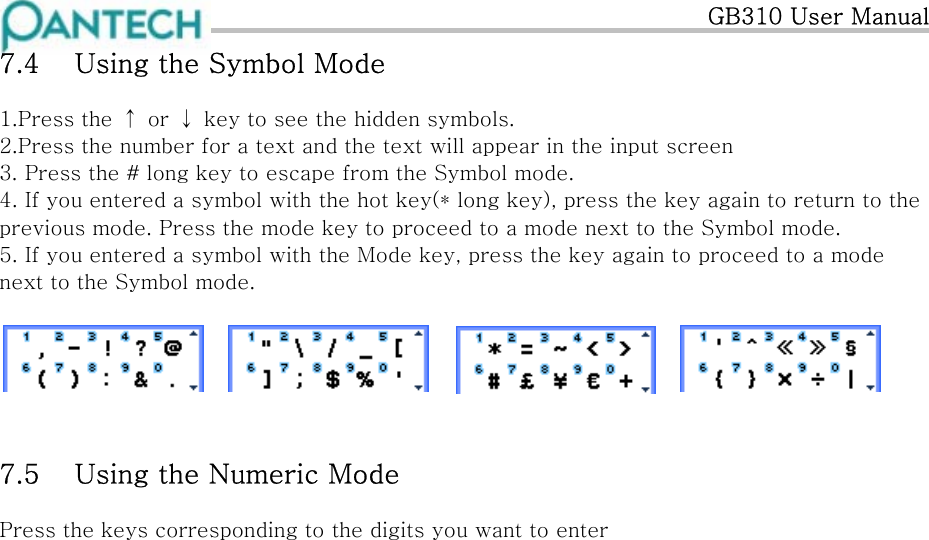
![GB310 User Manual 7 Entering Text You shall type in texts to write a message, input a name in Contacts, or write a memo by using the Input mode as follows. - ABC: for alphabet input - 123: for number or operation symbol input - Symbol: for the input of symbols like Greek letter, currency unit, or period mark. - T9: for text input by one text per one keystroke. Look up a word from the Internal Linguistic Dictionary as typed in by your keystroke. Require far less keystrokes than the traditional ABC mode. 7.1 Changing the Text Input Mode Press ‘#’ long in the Edit screen to change the text input mode. {Language} option allows you to change text input language mode. * TIP : Input Keys in Common [*] long press Symbol {Back} soft key Moves to Previous screen [0] short press space {Clear} soft key Press short to delete a character. Press long to delete all and change soft key to {BACK} soft key [#] long press Moves to the Input mode. [Up] Navigation key [At Full Editor] Press short to move the cursor to the left with a character. Press long to move the cursor to an upper line left with a character. [END] short press Returns to the standby screen. [Down] Navigation key [At Full Editor] Press short to move the cursor to the right with a character. Press long to move the cursor to a lower line left with a character. 7.2 Using the T9 Mode As for the T9 alphabet Editor, the more texts, the more complete word. 1. Press the keys numbered [2] to [9] to type in texts. For example, press [4][3][5][5][6] in sequence to type in ‘hello’. The word you are typing appears on the display. It may change with each key that you press. 2. Enter the whole word before editing or deleting any keystrokes. 3. Upon search of a word, type in the next text. 4. If you fail to search a word, press the [*] key to search which text can be typed in. If multiple texts are searched, the text in the most frequent use will be listed first. 5. Continue entering the next word.](https://usermanual.wiki/Pantech-Co/GB310/User-Guide-441844-Page-19.png)
![GB310 User Manual * TIP: To Change the case, Press the [#] key to change the case. - Lower case(no indicator) - Initial capital ( ) - Capital lock( ) 7.3 Using the ABC Mode Whenever you press a key, the numbers on the key will be typed in one by one.(Ex: [3]) One touch - first letter (d) Two touch - second letter (e) Three tough - third letter (f) Four touch – number (3) Press other key and the cursor will automatically move to the right. If you need to type in a text twice or two other texts in a same key, press the [#] key or wait for a few seconds then the cursor will automatically move to the right. Characters in the order Displayed KEY English Spanish Portuguese 1 . , - ? ! ' @ : 1 . , - ¿ ? ¡ ! @ 1 . , - ? ! ' @ : 1 2 a b c 2 a b c á ã ç 2 a b c ç ã á à â 2 3 d e f 3 d e f é 3 d e f é ê 3 4 g h i 4 g h i í 4 g h i í 4 5 j k l 5 j k l 5 j k l 5 6 m n o 6 m n o ó ñ 6 m n o õ ó ô ñ 6 7 p q r s 7 p q r s 7 p q r s 7 8 t u v 8 t u v ú ü 8 t u v ú ü 8 9 w x y z 9 w x y z 9 w x y z 9 0 Space 0 Space 0 Space 0 KEY Russian Turkish German 1 . , - ? ! ' @ : 1 . , - ? ! ' @ : 1 . , - ? ! ' @ : 1 2 а б в г ґ 2 a b c ç â ä á 2 a b c ä á à 2 3 д е ё ж з є 3 d e f é 3 d e f é è 3 4 и й к л і ї 4 g h i ı ğ î 4 g h i 4 5 м н о 5 j k l 5 j k l 5 6 п р с 6 m n o ö ó ô 6 m n o ö 6 7 т у ф х 7 p q r s ş ß 7 p q r s ß 7 8 ц ч ш щ ъ 8 t u v ü û ú 8 t u v ü 8 9 ы ь э ю я 9 w x y z 9 w x y z 9 0 Space 0 Space 0 Space 0 KEY French Italian Arabic](https://usermanual.wiki/Pantech-Co/GB310/User-Guide-441844-Page-20.png)

![GB310 User Manual 8 Using the Menus 8.1 Accessing a Menu Function Press both Menu and the Contacts Soft key in the Idle mode to access to the main menu and sub-menu. Use the Navigation keys to scroll the menu, and press the Select soft key to go down to the lower menu and {Back} soft key to return to the previous menu. ① Press the {Menu} Soft key to gain access to the main menu in the Idle mode. Press the {Contacts} Soft key to gain access to the Contacts Menu. ② Press the Up/Down Navigation key in the main menu to go to the menu you want. ③ Press the Up/Down Navigation key to search a sub menu. ④ Press the {Select} soft key to gain access to the sub menu. In case sub menus over multi stages have been selected, repeat both ③ and ④ procedures.⑤ See the bottom of the Sub Menu List to check the current set values in the sub menu. Press the [1], [3] key to change the preset value of the menu, and press the Save soft key to save it. Note: Press the {Back} soft key to return to the previous menu. Type the number of a menu to gain a quick access to the sub menu.](https://usermanual.wiki/Pantech-Co/GB310/User-Guide-441844-Page-23.png)
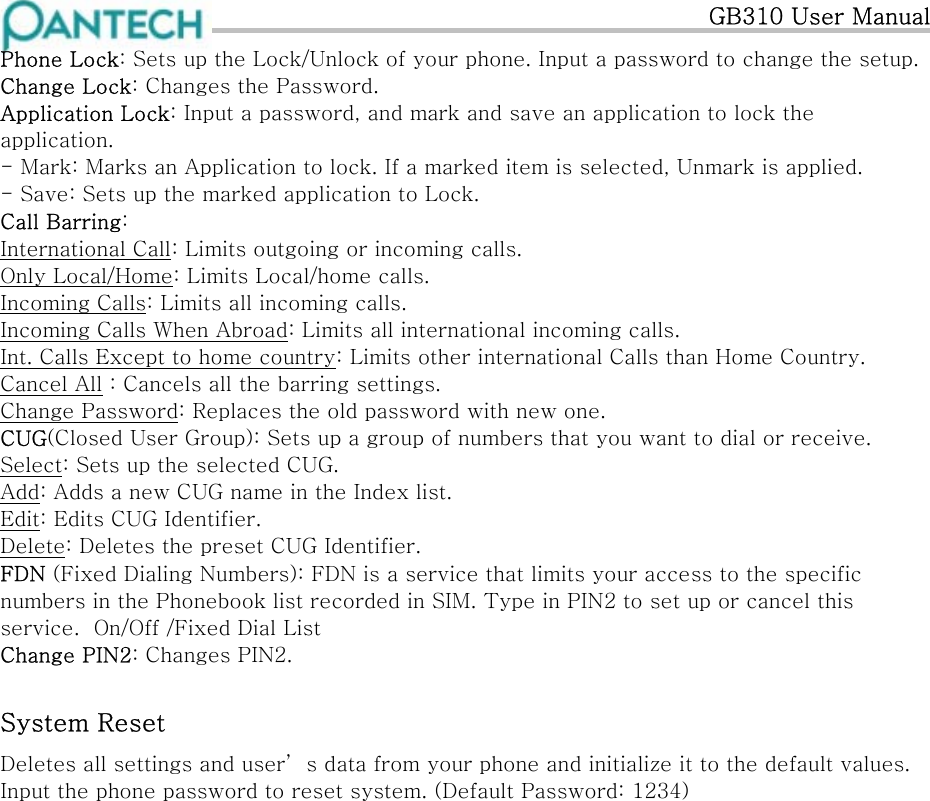
![GB310 User Manual 6.2.1 Call Divert 6.2.2 Answer type 6.2.3 Auto Redial 6.2.4 Call Waiting 6.2.5 Send Caller ID 6.2.6 Own Number 6.3 Language 6.4 Time & Date 6.5 Auto key lock 6.6 Network Selection 6.7 Security Settings 6.7.1 SIM Lock 6.7.2 Change PIN 6.7.3 Phone Lock 6.7.4 Change Lock 6.7.5 Application Lock 6.7.6 Call Barring 6.7.7 CUG 6.7.8 FDN 6.7.9 Change PIN2 6.8 System Reset 7.Organizer 7.1 Alarm 7.2 Calendar 7.3 Memo 7.4 World Time 7.5 Calculator 7.6 Converter 7.7 Stopwatch 7.8 Timer 8. Connectivity 8.1 WAP 8.1.1 Home 8.1.2 Resume 8.1.3 Bookmarks 8.1.4 Push Message 8.1.5 Settings 8.1.5.1 Security Cert 8.1.5.2 Cache Mode 8.1.6 Go to URL 8.1.7 Profiles 8.1.7.1 Profile Name 8.1.7.2 Home URL 8.1.7.3 GSM Setting 8.1.7.4 GPRS Setting 8.1.7.5 Bearer 8.1.7.6 Clear Profile 8.1.8 cache 8.1.8.1 Cache Mode 8.1.8.2 Clear Cache 8.1.8 Version 9. SIM Toolkit [SIM]](https://usermanual.wiki/Pantech-Co/GB310/User-Guide-441844-Page-26.png)
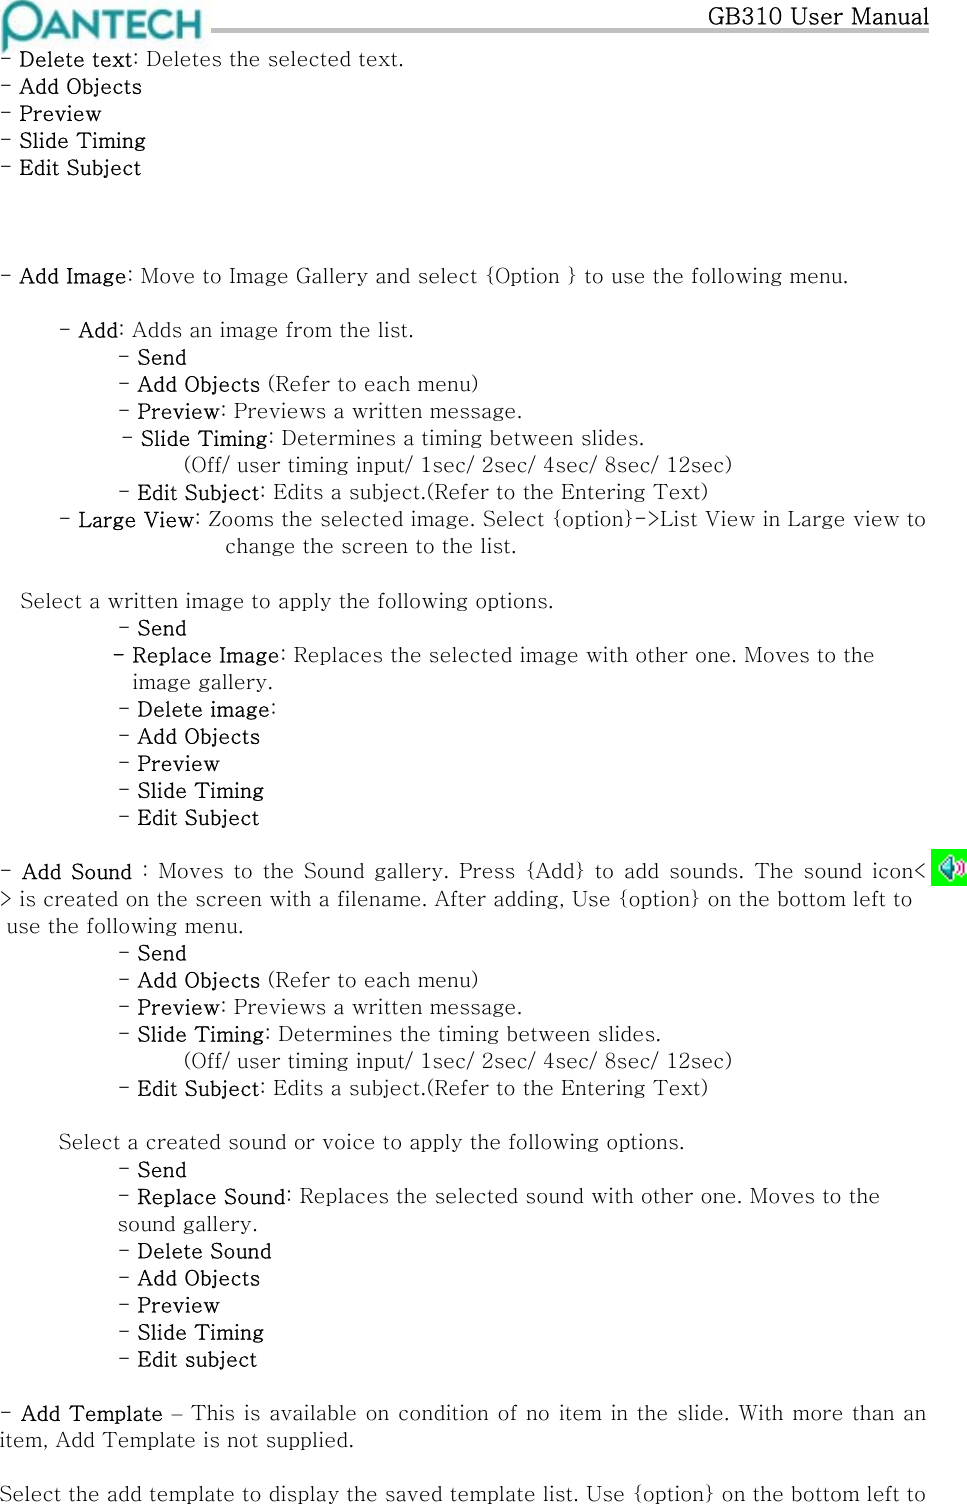
![GB310 User Manual 9 Menu Functions 9.1 Messages This menu is to create, send, read, save, or delete SMS(Short Message Service), MMS(Multimedia Message Service), EMS(Enhanced Message Service), and LMS(Long Message Service). EMS provides pictures, animation, melodies, or emoticons as well as the existing SMS. MMS is a message type to support various kinds of media type like full color image. Note : Be sure to check if the service center number has been set up before he starts this menu. The number is usually supplied by the company and saved in the SIM card. Text Message Write New: Writes a new SMS/EMS. Inbox: Displays messages received. Save in the SIM memory. ‘10’ of [10/20] represents the number of messages unread and ‘20’ represents the number of messages saved. Outbox: Displays messages in the SIM memory saved by you. [10] represents the total number of messages saved in the Outbox. Saved box: Saves messages drafted from Inbox or Outbox. Store in the Phone memory. [10] represents the total number messages in the Save box. Text Templates: Displays the basic Templates. Settings: Sets up the environment of text messages. Memory Info: Displays the free space of SIM or the phone memory. Write New 1. Select Write New and select {select}. 2. Refer to the Entering Text menu to type in a text. In case of Multi-SMS, the relative information displays to < > on the top right corner. It notifies the number of character to be written in the present page. 3. Use {option} to insert picture, animation, melody, emoticon, and template the moment you type in texts. Press {Back} to go to the previous stage screen. - Send: Refer to the following menu for sending and saving a message. - Add Picture: Press the [1].[3] key to select an item and press [Add] to load the selected item. - Add Animation: Press the [1].[3] key to select an item and press [Add] to load the selected item. - Add Melody: Press the ↑ and ↓ key to select a melody and press [Add], then the melody will be set up and played once. - Add Emoticon: Press the [1].[3] key to select an item and press [Add] to load the selected item. - Add Template: Types in a clause stored in Template. - Text Style: Possible to select one among Normal/ Bold. - Language: Possible to select one among English/ French/ Simplified/ Traditional/ Russian/ Thai. Once selected, the language will be displayed on the bottom right corner.](https://usermanual.wiki/Pantech-Co/GB310/User-Guide-441844-Page-27.png)
![GB310 User Manual Sending and saving a message 1. After typing in all messages, select [send]. And then, Send {option} is pop up. Press {Back}to go to the previous stage screen. - Send: You can type in the receiver phone number for yourself or use {option} to select the number for more convenience. Send: Sends a message. All Contacts: Displays your contacts list one by one. Name Search: Type in a name to search the receiver’ s phone number. Group Search: Displays your lists by groups one by one. Recent Calls: Displays the latest phone number that you dialed one by one. Edit message: Edits messages. - Send & Save: Sends out messages like SEND. Outgoings messages are automatically saved in Outbox. - Save: Saves messages in Saved Box. 2. Type in a number and press the [OK] key. Then, the sending progress will be displayed with the sending animation. 3. If you fail to send out a message, select {Yes} to resend a message. If you select {No} or {End}, the message is saved in outbox with fail. Inbox Select Inbox and press {Select} to see messages received one by one. Press {Back} on the bottom right corner to go to the previous stage screen. Read Report Unread Select {Option} on the left of Total Message List to select the following menu. - Read: Displays the selected message. Use [1],[3] key to see the previous message or the next message. - Reply: Writes and sends a new message with a basic value of Callback Number. (refer to 8.1.1.1 write new) It is possible to register additional numbers except a Callback Number. - Forward: Forwards a received message to the other receiver directly. - Edit: Edits and sends a received message. - Delete: Deletes the selected message. - Delete All: Deletes all messages in the inbox. Select a message (read) and select {Option} on the left to select the following menu. - Reply: Writes and sends a new message with a basic value of your Number. - Forward: Forwards a received message to the other receiver directly.](https://usermanual.wiki/Pantech-Co/GB310/User-Guide-441844-Page-28.png)
![GB310 User Manual - Edit: Edits and sends a received message. - Cut Objects: Saves the object of the messages received. Select a function from View to extract and list up message objects and edit each object. Press [Cut] to save them. - Cut Numbers: Selects any number in the message received. Select a function from View to extract and list up phone numbers of messages. Press [OK] to add each number to the new or existing phone diary. (Refer to New Phone Number Registration Procedure.) - Cut URLs: Selects a function from View to extract and list up URLs within messages. It is possible to add them to Bookmark. - Move to Saved Box: Saves the selected message in Saved Box. The old message will be deleted. - Delete: Deletes the selected message. Outbox Sent Fail Pending In case of Sent Messages, Select Outbox and press [Select] to see messages sent one by one. - Read: Displays the selected message. Use [1],[3] key to see the previous message or the next message. - Delete: Deletes the selected message. - Delete All: Deletes all messages in the inbox. - Edit: Edits and sends a message. Select a message and {Option} on the left to select the following menu. - Edit: Edits the selected message. - Move to Saved box: Moves the message to the saved box. The old message is deleted. - Delete: Deletes the selected message. Note: The name or number of the firstly registered receiver is displayed at multi-message. In case of Failed, Pending Messages, - Read: Displays the selected message. Use [1],[3] key to see the previous message or the next message. - Resend: Resends the selected message. - Edit: Edits the selected message. - Delete: Deletes the selected message. - Delete All: Deletes all messages in the outbox. - Select a message and select {Option} on the left to select the following menu.](https://usermanual.wiki/Pantech-Co/GB310/User-Guide-441844-Page-29.png)
![GB310 User Manual - Resend: Resends the selected message. - Edit: Edits the selected message. - Move to Saved box: Moves the message to the saved box. - Delete: Deletes the selected message. Note : A receiver with no information will be expressed in No Name. Saved Box The message to be saved in the saved Box has been forwarded from Inbox or Outbox. Select {Option} on the left to select the following menu. - Read: Displays the selected message. Use [1],[3] key to see the previous message or the next message. - Resend: Resends the selected message. It is changed according to the selected message. - Forward: Forwards a received message to the other receiver directly. - Edit: Edits the selected message. - Delete: Deletes the selected message. - Delete All: Deletes all messages in the saved box. All messages keep their feature as if they were in the existing box and each option is applicable. 1. From the Inbox (Refer to Inbox Menu) - Reply - Forward - Edit - Cut Objects - Cut Numbers - Cut URLs - Move to SIM - Delete 2.From the outbox (sent) ( Refer to outbox Menu) - Edit - Move to SIM - Delete 3.From the outbox (failed, pending) (Refer to outbox Menu) - Resend - Edit - Move to SIM - Delete Text Template Basically 5 are supplied and additionally 10 more can be added by you.(Totally 15) The existing template (preloaded) is undeletable. Press {Select} after selecting Text Templates menu to see the present templates. Press {option} on the bottom left to use the menu. - Read: Displays the selected Template. Press {Option} on the bottom left to select the following menu. - Edit: Edits the selected template. - Send: Sends the selected template. - Delete: Deletes the selected template.](https://usermanual.wiki/Pantech-Co/GB310/User-Guide-441844-Page-30.png)
![GB310 User Manual use the following menu. - Add: Adds the selected template. - Read: Displays a template in the slide written present. Note: In case of more than one slide, Delete Slide is added in the option. More than one object cannot be entered in the slide. The Add Objects option does not contain the currently added objects. (ex: After Text add, Add Objects - Add Image - Add Sound - Add Photo - Take a Photo - Add Slide Add Text is unavailable.) Sending and saving a message 1.After entering all messages, Press {option}->Send to popup Send Option menu. - Send: You can type in the receiver phone number for yourself or use {option} for more convenience. - Send: Sends a message. - All Contacts: Displays your address list one by one. - Name Search: Possible to search the receiver’ s phone number by typing in a name. - Group Search: Displays your items by groups. - Recent Calls: Displays the latest phone number that you dialed one by one. - Edit Message: Edits a written composer. - Send & Save: Sends out messages like SEND. - Outgoing messages are automatically saved in Outbox. - Save: Saves messages in outbox. - Save as Template: Saves the currently written message as template. 2. After entering a number, select the [send] to display sending progress with the sending animation. 3. If you fail to send out a message, select press {Yes} to resend. Select {No} or {End} to save in outbox as fail. Note: In case the MMS size reaches its sending limit, a message pops up. If you fail to send out a message but forget to save it, it will be automatically saved in Saved Box. The Save option is not applicable to a message once saved. Inbox Select Inbox and press [Select] to display received messages one by one. Press {Back} on the bottom right to move the previous stage screen. Select {Option} on the left of the whole message list to select the following menu. - Read: The selected message is played automatically. - Reply: Writes and sends a new message with a basic value of your number. - Forward: Forwards the received message to the other receiver directly. - Delete: Deletes the selected message. - Delete All: Deletes all messages in Inbox. Select a message and select {Option} on the left to select the following menu.](https://usermanual.wiki/Pantech-Co/GB310/User-Guide-441844-Page-33.png)
![GB310 User Manual - Replay: Replays the written message. - Reply: Writes and sends a new message with a basic value of your number. - Forward: Forwards the messages received to the other receiver directly. - Edit: Edits the received message. - Cut Objects: Displays all the objects entered in a message at one screen Select more than one object to save them at once. (Image - >Image Gallery, Sound -> Sound Gallery) 1. Use the Up/Down direction key to select an object to save and press [Select]. 2. Edit the object name and press [Cut] to save it. - Cut Numbers: Selects any number in the message received. 1. Select a number by using the Up/Down direction key. 2. Press {Cut} to add a number to contacts. (Refer to New Phone Number Registration Procedure.)) - Move to Saved Box: Moves a message to the saved box. - Save as Template: Saves a written message as template. - Delete: Deletes the selected message. - Message Info: Displays the information of a selected message. (From, subject, size) Note: The Mute/Unmute toggle is supported on the bottom right corner when a sound is provided. Press [Side key] to control the volume. Receiving a message Download 1.Receive a MMS notification through the SMS network and read only the MMS message downloaded by you. 2. While Auto Download is on, skip notification and save the message in Inbox as unread. 3. Check a new message from MMS Inbox. Select Notification and OK to download a remote message. Outbox In case of Sent Messages Select Outbox and press {Select} to see the messages sent one by one. - Read: Displays the selected message. Use [1],[3] key to see the previous message or the next message. - Edit: Edits and sends a message. - Delete: Deletes the selected message.](https://usermanual.wiki/Pantech-Co/GB310/User-Guide-441844-Page-34.png)
![GB310 User Manual - Delete All: Deletes all messages in the Outbox. Select a message and select {Option} on the left to select the following menu. - Replay: Replays a written message. - Edit: Edits the selected message. - Move to Saved Box: Moves a message to the Saved Box. - Save as Template: Saves a written message as Template. - Delete: Deletes the selected message. In case of Failed, Pending Messages - Read: Displays the selected message. Use [1],[3] key to see the previous message or the next message. - Resend: Resends a message. - Edit: Edits the selected message. - Delete [Object type]: Deletes the selected Object. - Add Objects: Adds an Object. - Preview: Previews a written message. - Slide Timing: Determines the timing between slides. (Off/ user timing input/ 1sec/ 2sec/ 4sec/ 8sec/ 12sec) - Delete Slide: Deletes a Slide. - Edit Subject: Edits a subject..(Refer to the Entering Text) - Replace [Object type]: Replaces the selected Object. - Delete: Deletes the selected message. - Delete All: Deletes all messages in the Outbox. Select a message and select {Option} on the left to select the following menu. - Replay: Replays a written message. - Resend: Resends a message - Edit: Edits the selected message. - Move to Saved Box: Moves a message to the Saved Box. - Save as Template: Saves a written message as Template. - Delete: Deletes the selected message. Saved Box The message to be saved in Saved Box has been forwarded from Inbox or Outbox. Select {Option} on the left to select the following menu. - Read: Displays the selected message. Use [1],[3] key to see the previous message or the next message. - Edit: Edits the selected message. - Delete: Deletes the selected message. - Delete All: Deletes all messages in the Saved box. All messages keep their feature as if they were in the existing box and each option is applicable. Move the files in Saved Box to the folder where each file came from with the Move function. 1. From Inbox (Refer to the inbox menu) - Replay - Reply - Forward - Edit - Move to inbox - Cut Objects](https://usermanual.wiki/Pantech-Co/GB310/User-Guide-441844-Page-35.png)
![GB310 User Manual - Cut Numbers - Delete 2.From Outbox (Sent) (Refer to the Outbox menu) - Replay - Edit - Move to outbox - Delete 3.From Outbox (failed, pending)(Refer to the outbox menu) - Replay - Resend - Edit - Move to outbox - Delete Note: The Mute/Unmute toggle is supported on the bottom right corner when a sound is provided. Press [Side key] to control the volume. MMS Template Select MMS Templates and press {Select} to display the messages saved in Template one by one. - Read: Displays the selected Template. - Edit: Edits and sends a message. (Refer to the Write New) - New: Creates a new template. (Refer to the Write New) - Delete: Deletes the selected template. - Delete All: Deletes all templates in the MMS Template. Select a specific template and press {Option} on the left to select one out of Replay, Edit, Send, Delete Menu. - Replay: Replays the selected template. - Edit: Edits the selected template. (Refer to the Write New) - Send: Sends the selected template. (Refer to the Write New Send) - Delete: Deletes the selected template. Settings - Message Life Time: Sets up the life of message to Maximum Time/ 1 Week/ 3 Days/ 1 Day/ 12 Hours/ 6 Hours/ 1 Hour. (Default: Maximum Time) - Auto Download: ON / OFF (Default: ON) - Delivery Report: ON / OFF (Default: ON) - Delivery Rep. Allow: ON / OFF (Default: ON) - Read Report: ON / OFF (Default: ON) - Read Rep. Allow: ON / OFF (Default: ON) - Spam Filter: Off / Prompt If Spam / Reject Spam (Default: Off) MMS Profiles Select MMS Profiles and press {Select} to display the current profile list. Select {Option} on the bottom left to use the select and edit functions. - Profile Name: Input the profile name. - MMS Center: Input the connection URL. - GSM Setting: Set up the GSM environment.](https://usermanual.wiki/Pantech-Co/GB310/User-Guide-441844-Page-36.png)
![GB310 User Manual Enter a name. - Search: Searches a name. - Language: Sets up the Language. The phonebook list is shown and the cursor is placed on an item that matches your input data. Press [1], [3] key to view the recorded numbers. Option Details Displays the selected contact detail. Edit Pops up the Edit Contacts window to edit the content. Move As far as the selected number stays in the Phone memory, it can be moved to the SIM card. Send Message Sends the message to a selected one. New Contact Saves a new contact by moving the Edit Contact. Delete Deletes the selected item. Add to speed dial Adds a contact to Speed dial. Group Search : Searches the number of each group. Adding and Editing Contacts Add Contacts: Adds other’s information to the phonebook list. An empty field is filled with gray text but these texts disappear and are replaced with new texts the moment you type in them. Name Mobile. Tip : Press ‘*’ long and P-Pause will appear. Home Office Fax Designates a Group SIM E-mail Memo Depending on the Memory in Use setup, the following field is seen to you. 1. Phone: Name, Mobile, Home, Office, Fax, Group, Picture, Melody, Email, Memo 2. SIM: Name, Mobile, Group 3. Phone or SIM: Able to choose either Phone or SIM when you save a number. Edit Contacts: Edits an object. (The same screen with Add Contacts) Note : Name -> 30byte, Home/Office/Mobile/Fax -> 40byte, Email/Memo -> 50byte (In the event of SIM, both name Length and number Length may change.) Able to save namesakes and the default value is composed of Group-No group, Melody-Default. The Edit screen has two kinds, one for a third language and the other for Chinese except for English. (Depending on your nation, it varies)](https://usermanual.wiki/Pantech-Co/GB310/User-Guide-441844-Page-39.png)
![GB310 User Manual Speed Dial Setting Press a number in the phonebook at standby status for Speed Dial. If you add Speed Dial, use Add to Speed Dial of the options. The Speed Dial number ranges from No. 2 to No. 99, summing up to 98 dials. Setting Up 1. Press [Up] or [Down] key to move to Empty and press {Add}. 2. Press [Up] or [Down] key to select a person and press [1] or [3] key to select his number.. Press {Select} to save an item in the Speed Dial list. Option Edit Edits an item. The Edit procedure has one thing in common with New, overwriting all the old numbers. A number saved in SIM is copied in your phone and the type is expressed in a phone icon. Remove Deletes an item. Memory In Use The default is Phone or SIM and you may choose either Phone or SIM/Phone/SIM Card. Group Setting You can designate a group with saved lists for control. -Default Group: No Group, Family, Friends, Business, VIP -Options by Groups and Lists Group name List Option Details View Option No Group Add only Friends Family Business VIP Group Ring Tone, New Rename and Delete are not included in the default group. Tip: Group Ring Tone is precedent over Personal Ring Tone. Support of Remove and Add. Items move to No Group for Remove. User Defined Group Supports Group Ring Tone, Rename, Delete, New Support of Remove and Add. Items move to No Group for Remove. Delete All Deletes all the information saved in Phone/ SIM Card.](https://usermanual.wiki/Pantech-Co/GB310/User-Guide-441844-Page-40.png)


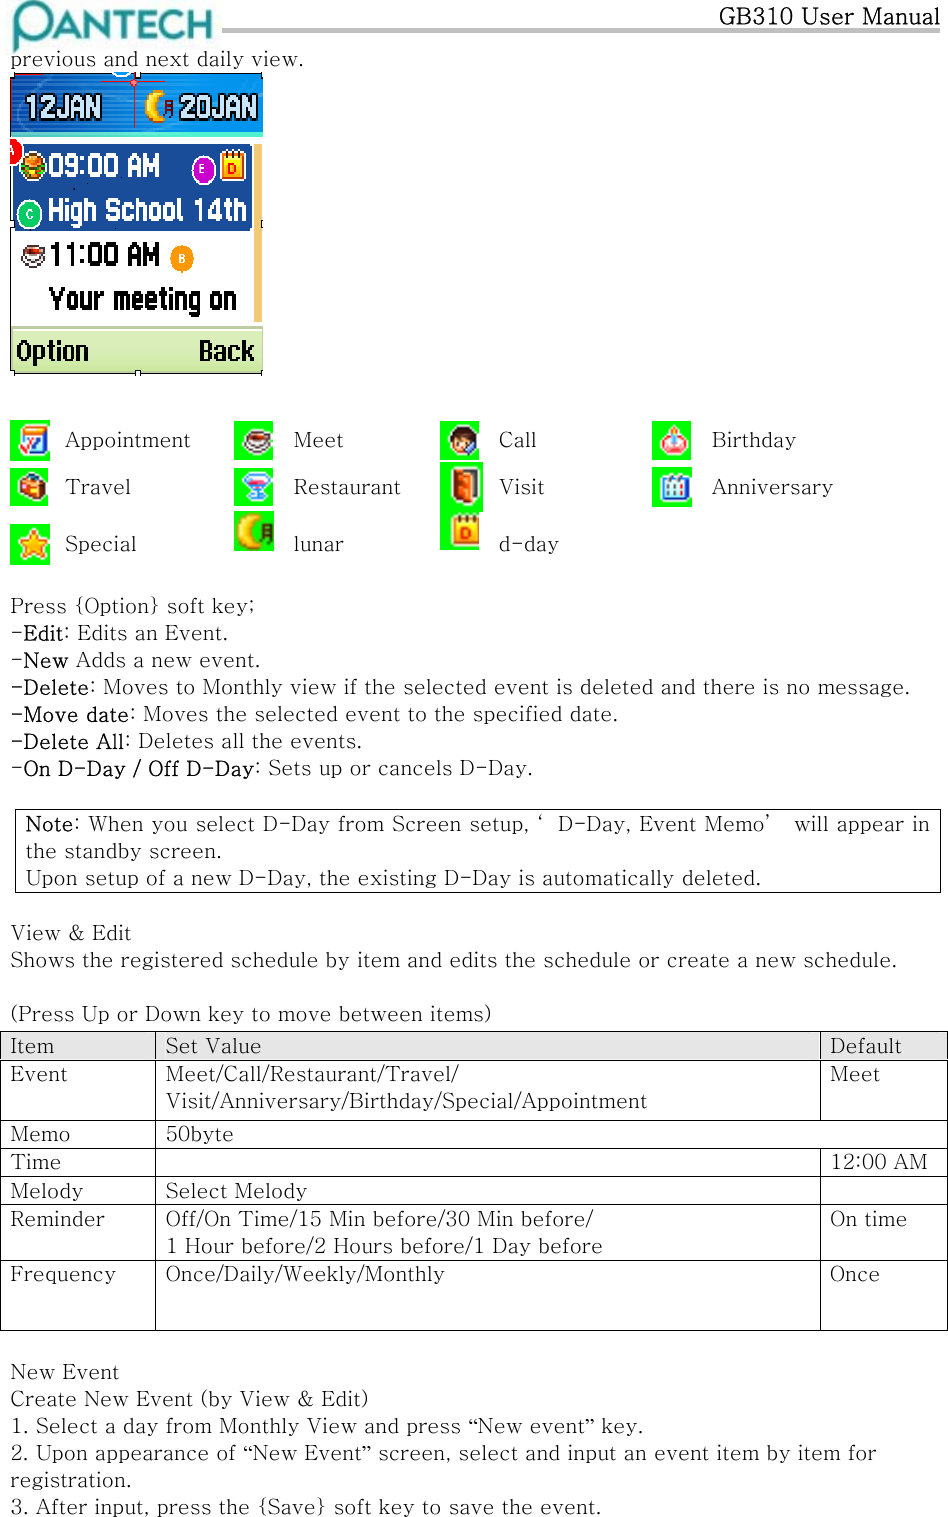
![GB310 User Manual Calendar Helps to main your schedule including your time for call or special day. Alarm service on a set date is also included in this function. Calendar consists of Monthly View, Daily View, and Event View & Edit. Schedule view Monthly View Today Date of Registration Scheduled Date - Consulting the Calendar To Press the Move to another day [1] Previous Day [3] Next Day Move to another week [Up] Previous Week [Down] Next Week Move to the previous or next month -Previous month Press “1” or “Up” from the first day and press “Up” or [UP] side key from the first week. -Next month Press “3” or “Down” from the last day and press “Down” “Down” side key from the last week. Monthly View Select ‘7.Organizer->2.Calendar’ from the menu to display Monthly View. Press {Option} soft key; -Details : Show the details of the selected day. If no event, go to edit new event screen. -New : Adds a new Event. -Go to Date : Moves to the set date. -Go to Today : Moves to today for selection. -View All Events: Shows all of your scheduled events -Del Past Events: Deletes your past scheduled events. -Del All Events: Deletes all of your scheduled events. -Memory Info: Displays the number of stored event, not more than 200. Daily View Select {Option} -> Detail to display Daily View. You can check a schedule in Daily View when you select a day registered a schedule, and adds a new schedule when you select no scheduled day. You can check a registered event from LCD bottom by icon. Use “1”, “3” key to see the](https://usermanual.wiki/Pantech-Co/GB310/User-Guide-441844-Page-51.png)
![GB310 User Manual Note : Maximum Schedules for Registration: 50 Maximum Daily Schedules for Registration: 7 Period of Registration: 01/01/2000 ~01/01/2010 Memo Saves short notes in your phone. Press “1”, ”3” key to see the previous memo and the next memo. Press {option} soft key; -Details: Displays a memo in details. -Edit: Same as to “Edit” of {option}. -Delete: Deletes a memo. -Edit: Retrieves existing memos, edits the part at your choice. -Save: Saves after editing. -Delete: Deletes a memo. -New Memo: Type in texts to create a new memo. -Delete/Delete All : Deletes any or all items. World Time Informs you of the world time. Press {option} soft key; -Set as Local: Changes the Target Area to the Home Area. -Day Light Saving: The Day Light Saving function fits the time of the countries in summer who enforce Summer Time. Select Day Light Saving from the option menu and press ON or OFF for setup. The icon for the country with Summer Time will be activated. Displays the Summer Time Saving function is on. * Tip : Summer Time sets the clock one hour fast. Calculator Your phone has a Calculator function. Calculator provides 4 basic operations like +, -, x, and / by using Up/Down key. To perform Press number key and Up/Down key to input a formula and press {=} to display the result. * Tip : Press {*} to input a decimal point. Press [CLR] short to delete a text of the formula and press [CLR] long to delete the whole formula. Converter Converts a figure between different unit in length, area, volume, weight, and temperature. To perform 1. Select one among Length, Area, Volume, Weight, or Temperature by using “1”, “3” key. 2. Press [Down] to move to the next line, and select a target unit. And then press number key to input numbers.](https://usermanual.wiki/Pantech-Co/GB310/User-Guide-441844-Page-53.png)
![GB310 User Manual 3. Press [Down] again to move to the next line and select a result unit to get a right answer. Tip : The result is automatically recalculated upon change of unit or value. Unit Item & Unit Item Unit Length m, Cm, mm, Km, inch, feet, yard, mile Area sq.meter, a, sq.feet, sq.yard, acre Volume cu.Cm, cu.meter, liter, cu.inch, cu.feet, cu.yard, gallon Weight g, kg, t, grain, oz, pound Temperature C, K, F Stopwatch Measures the time for all sorts of sports. Stopwatch shall be accompanied by the navigation key. To perform 1. Press {Start} soft key to operate Stopwatch. 2. Press {Stop} soft key to pause Stopwatch and press {Start} soft key to re-operate Stopwatch. 3. Press “*” key to select a new Lap. The 2 times as a maximum are displayed and the Lap function is cancelled. 4. Press “#” key to initialize all. Timer Sets alarm bell to ring at a preset time. To perform Press the {Set} soft key to input a time and minute for countdown and press “*” key to start. icon is created and the displayed time will be counted down. Now, press “*” key again to create icon and stop the timer. Press “*” key once more to restart countdown. After the preset time, an additional animation and alarm sound will be provided.](https://usermanual.wiki/Pantech-Co/GB310/User-Guide-441844-Page-54.png)
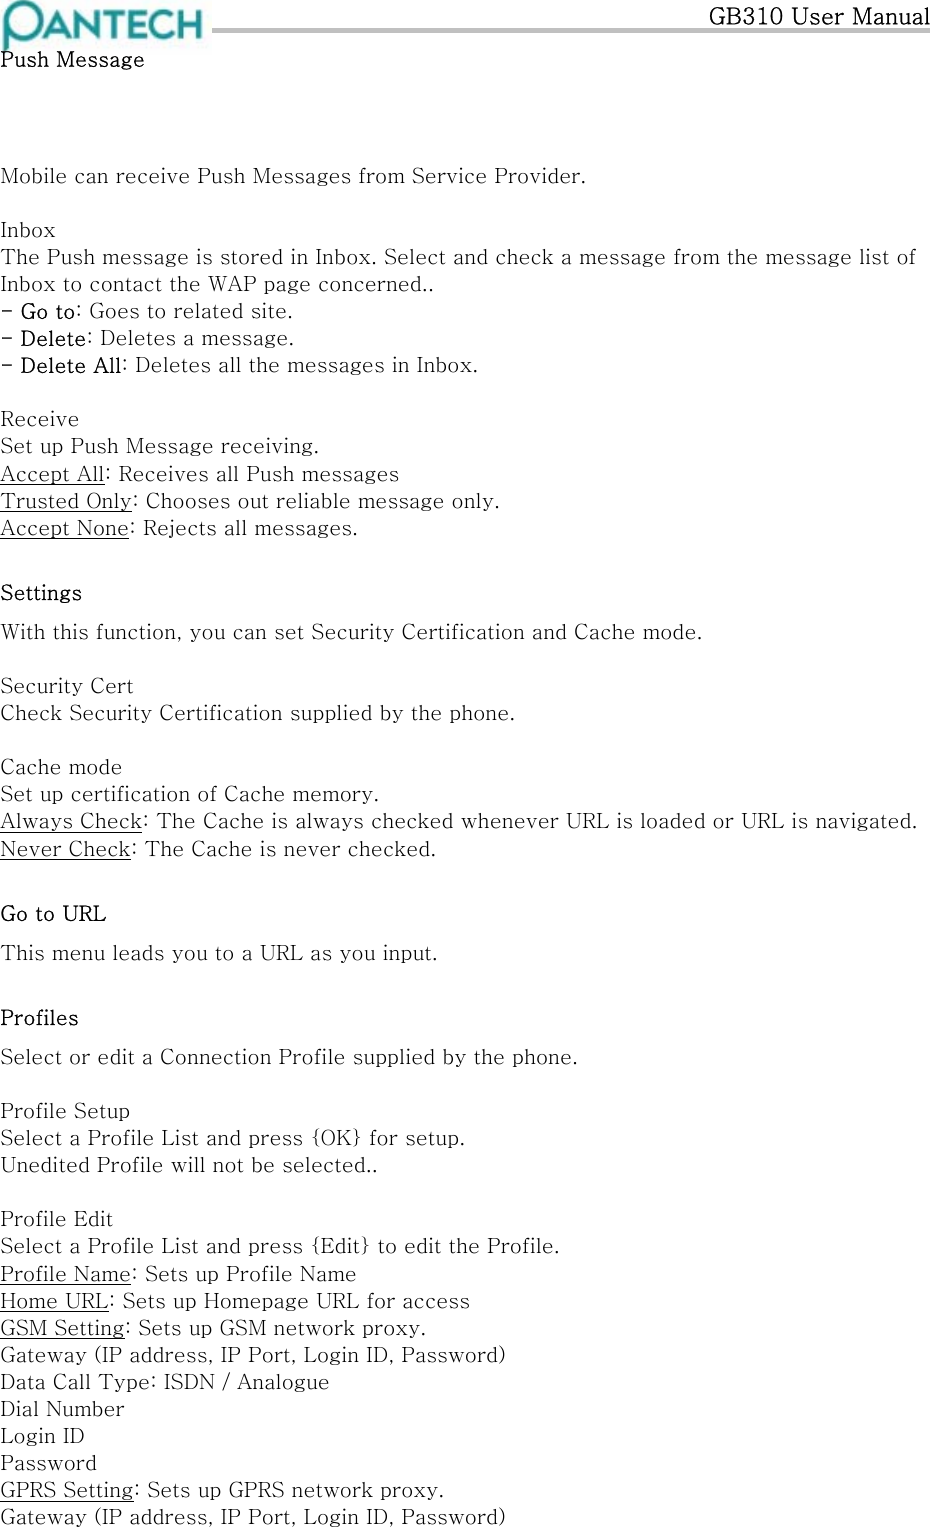
![GB310 User Manual 9.8 Connectivity WAP You can surf on Internet with WAP (Wireless Application Protocol) browser. That means you can connect to Internet anywhere, anytime. The descriptions below can vary according to your Network provider. Therefore, ask your Network provider for detailed information. Note : Press Up Navigation Key long in the idle mode to proceed to WAP Homepage. Navigating the WAP Browser To Press the Scroll through and select browser items Up or Down key until the item you want highlight, and then press the {Select}. Return to the previous page [CLR] key Return to the startup homepage {Option}>5.Home Entering Text in the WAP Browser When you are prompted to enter text, the current text input mode appears above the right soft key. Refer to the ‘Entering Text’ for details. Home This menu contacts the network to load the Wireless Web service provider homepage. Resume You can reconnect the latest web site. Bookmarks You can bookmark Internet address using the WAP browser just as you do with a PC Internet browser. You can have up to a maximum of 20 bookmarks. New Registers URL and Name in the closest empty number of Bookmark List. Option - Edit: Edits the address and name of a bookmark. But, this is not available provided a default bookmark is provided by the manufacturer. - Delete: Deletes a bookmark from List. But, this is not available provided a default bookmark is provided by the manufacturer. - Send Message: Once selected, a bookmark address automatically composes the text of a SMS message. - Go : Goes to related site](https://usermanual.wiki/Pantech-Co/GB310/User-Guide-441844-Page-55.png)
![GB310 User Manual 10 Appendix [End of Doc]](https://usermanual.wiki/Pantech-Co/GB310/User-Guide-441844-Page-58.png)