Pantech Co P1010 DUAL-BAND GSM/GPRS MOBILE STATION User Manual P1010
Pantech Co Ltd DUAL-BAND GSM/GPRS MOBILE STATION P1010
UserManual.wiki
>
Pantech Co
>
P1010 User Manual
Users Manual
Navigation menu
Upload a User Manual
Namespaces
Wiki Guide
HTML
PDF
Info
Views
User Manual
Discussion / Help
Navigation


![12 Battery performance Battery Type Capacity Standby Time Talk Time Standard Lithium-Ion (Li-ion) TBD TBD .TBD Turn on/off the phone To turn on 1. Press and hold [ ]. To turn off 1. Press and hold [ ]. Display indications Essential icons Signal strength Roaming/Forwarding* / Flight mode / Missed Call Ring/Vib/Vib and Ring/Vib then Ring unread SMS / unread MMS / Voice mail / Wap msg / Msg Full / GPRS Alarm/SD Card/Ear Mic/Java/Stopwatch Lock Battery strength * Network dependent Keypad lock To lock the keypad 1. Press and hold [ ]. To unlock the keypad 1. Press Unlock > [ OK ]. Memory card You can use microSD card as memory card. It gives you space to save pictures, videos, music and etc. Inserting and removing the memory card 1. Remove the battery cover from the unit. 2. Remove the battery. 3. Open the memory card cover. 4. Put the memory card into the slot. 5. Close the memory card cover. 1](https://usermanual.wiki/Pantech-Co/P1010/User-Guide-1240807-Page-12.png)
![13 Using memory card You can save, move and delete the files in your external memory card. You can also move and copy the files to computer from your external memory card. To copy the file to the card 1. Select the file > Options > Copy. 2. Select Memory card To move the file to the card 1. Select the file > Options > Move 2. Select Memory card To delete the file from the card 1. Select the file from the card > Options > Delete. To move the file from the card to the computer 1. Connect the data cable with mobile and the computer. 2. Select Mass storage 3. Follow the instruction on your computer screen. 4. To disconnect, disconnect the data cable. Entering text You can enter text with multitap, predictive, numeric or symbol. Useful keys [ ] Display symbols [ ] Change the text input mode Multitap (first letter caps/all small caps/all caps) Abc, abc, ABC Es, es, ES Pt, pt, PT Predictive(first letter caps/all small caps/all caps) Abc, abc, ABC Es, es, ES Pt, pt, PT Numeric 123 Special key characters by language key English Español Portugués 1 . , - ? ! „ @ : # $ / _ 2 á à ç á à â ã ç 3 é è é ê 4 í ï í 6 ñ ó ò ó ô õ 8 ú ü ú ü 0 Space Predictive mode (T9) The T9 mode automatically compares your keystrokes with an internal](https://usermanual.wiki/Pantech-Co/P1010/User-Guide-1240807-Page-13.png)
![14 linguistic dictionary to determine the correct word. It will appear the most commonly used word first. 1. Press and hold [ ] to change the mode as T9 2. Press [ ] to [ ] to input text. For example, to write „hello‟ press [ ] [ ] [ ] [ ] [ ]. Multi-tap input mode Press the key labeled with the target letter once for the first letter; press it twice for the second letter, and so on. 1. Press and hold [ ] to change the mode as multi-tap. 2. Press [ ] to [ ] to input text repeatedly. To write the letter “C”, press [ ] 3 times. Numeric mode You can input numbers in this mode. 1. Press [ ] to change the mode 123. 2. Press [ ] to [ ].](https://usermanual.wiki/Pantech-Co/P1010/User-Guide-1240807-Page-14.png)
![16 Making, receiving & ending a call To make a call 1. Enter the area code and phone number. 2. Press [ ] key. To answer a call 1. Press [ ]. To end a call 1. Press [ ]. To reject a call 1. Press [ ] or Reject. To make a call using call list Your phone logs received and missed call numbers. 1. Press [ ] to display the Call logs list. 2. Select a number. 3. Press [ ] to dial the selected number. NOTE: To redial the last number in the Call logs list, press and hold [ ]. To make a call during a call 1. Enter the phone number or look it up in Contacts. 2. Press [ ] to dial the second call. The first call is automatically put on hold. To make an international call 1. Press and hold [ ] key for the international prefix until the „+‟ character appears. 2. Type the country code, area code, and phone number. 3. Press [ ]. To reply to a missed call** 1. Press View to display the list of missed calls. 2. Select a number to call by pressing the [ / ] key. 3. Press [ ]. To answer a second call** 1. Press [ ]. The first call is automatically put on hold. 2. Press [ ] to end the second call. The call on hold is automatically reconnected](https://usermanual.wiki/Pantech-Co/P1010/User-Guide-1240807-Page-16.png)
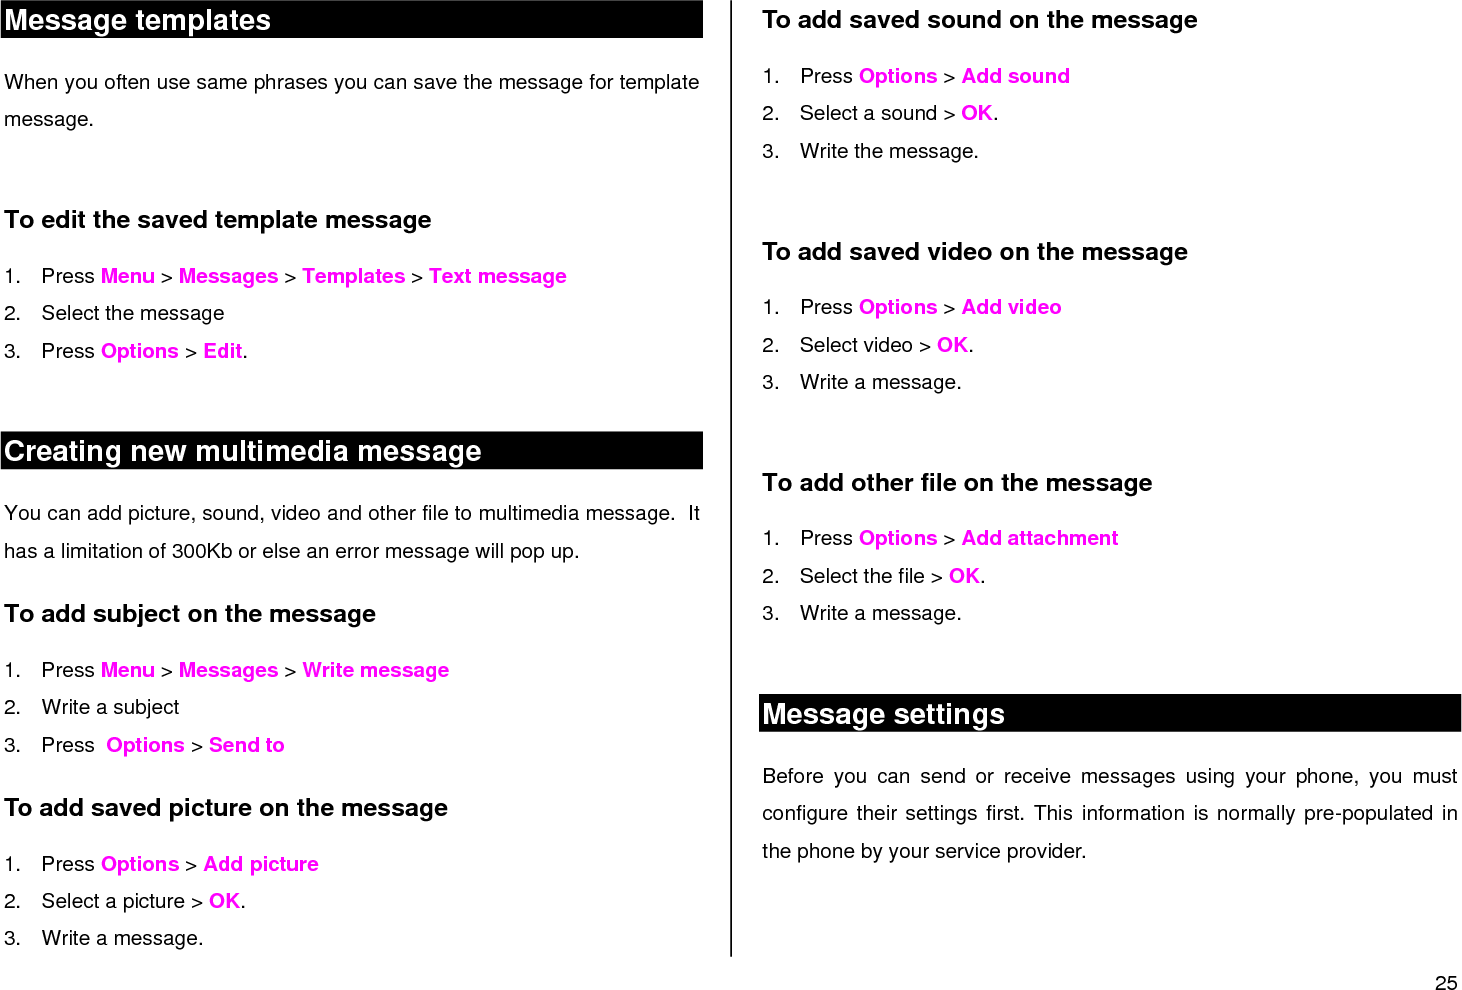
![17 Options during a call Microphone off and on To switch your phone’s microphone off 1. Press Mute. To switch your phone’s microphone back on 1. Press Unmute. To talk on speaker 1. Press . To record voice during a call 1. Select Options > Sound recorder. 2. Press OK. To put a call on hold and return** To put a call on hold 1. Select Options > Hold 2. Press OK. To return to a held call 1. Select Options > Retrieve. 2. Press OK. To switch between two calls 1. Select Options > Swap. 2. Press OK. Multi-party calls** You can talk with more than one person or conference call. To make a multi-party call 1. Call the first participant. 2. Call the second participant. The first call is automatically put on hold. 3. Press Options > Conference. To add a caller to a multi-party call 1. Press Options > Conference. To search a number in address book during a call 1. Press Options > Contacts > Quick search 2. Select a number > [ ]. To search for a name or group in address book Enter the first letters of the name for Name Search. The entries are displayed starting with the first entry matching your input.](https://usermanual.wiki/Pantech-Co/P1010/User-Guide-1240807-Page-17.png)
![18 To find a name manually in address book 1. Press the [ / ] key. To view the details of highlighted entry in address book 1. Press OK. For the address book, see page 17. To read a message during a call 1. Press Options > Messages. 2. Press Inbox > select a message To write a message during a call 1. Press Options > Messages. For creating message, see page 22. NOTE: During the call, you can only send text messages. Multimedia messages cannot be sent. Call Setting To set call forwarding** You can divert incoming calls to another phone number or voice mail. 1. Press Menu > Settings > Call settings > Call divert. 2. Select divert option. 3. Select Activate > To new number / To voice mail. 4. Press OK. For voice mail number setting, see page 24. To cancel call forwarding** You can cancel call forwarding. 1. Press Menu > Settings > Call settings > Call divert. 2. Select divert option. 3. Select Deactivate 4. Press OK. To check call forwarding status** You can check call forwarding is set or not. 1. Press Menu > Settings > Call settings > Call divert. 2. Select divert option. 3. Select Query status 4. Press OK. To set auto redial 1. Press Menu > Settings > Call settings > Advanced settings > Auto redial.](https://usermanual.wiki/Pantech-Co/P1010/User-Guide-1240807-Page-18.png)
![19 2. Select On or Off. To answer with any key press 1. Press Menu > Settings > User profiles > select a profile 2. Press Options > Customize > Answer mode 3. Select Any key. 4. Press OK. NOTE: you can answer with any key except [ ] and Reject. Checking all calls You can view information about all Call history. For more options for all, missed, received and dialed calls press [OK]. To view missed calls 1. Press Menu > Contacts > Call history > Missed calls. To view received calls 1. Press Menu > Contacts > Call history > Received calls. To view dialed calls 1. Press Menu > Contacts > Call history > Dialled calls. To delete call logs 1. Press Menu > Contacts > Call history > Delete call logs. To view total call time 1. Press Menu > Contacts > Call history > Call time. 2. To reset press Reset all > Yes. To view data transmitted information 1. Press Menu > Contacts > Call history > GPRS counter - Last sent: You can view Sent of transmitted in previous sessions, in Kbytes. - Last received: You can view Received of transmitted in previous sessions, in Kbytes. - All sent: You can view all Sent transmitted data in Kbytes. - All received: You can view all Received transmitted data in Kbytes. - Reset counter: You can reset each counter Speed dialing You can dial quickly using speed dialing. It can be saved of 8 numbers from 2 to 9. [ ] : Voice mail [ ] : Prefix for international call](https://usermanual.wiki/Pantech-Co/P1010/User-Guide-1240807-Page-19.png)
![20 To set speed dial 1. Press Menu > Contact > Speed dial 2. Select an empty entry and press Edit. 3. Select a person and number > OK. To update speed dial 1. Select a number and press Options > Edit. 2. Update information and press OK. To remove from speed dial 1. Select a number and press Options > Delete. 2. Press OK. Using address book You can save names, phone numbers, and information up to 500 contacts on the SIM or phone. Entries can be depends on the capacity of the SIM card. To add a contact 1. Press Menu > Contacts > Add new contact. 2. Choose Phone or SIM for place to save. To view contacts list 1. Press Menu > Contacts > Quick search To search for a phone number 1. Press Menu > Contacts > Quick search 2. Input a name. 3. Press OK to view detail information. To call from contacts list 1. Press Menu > Contacts > Quick search 2. Press [ ]. To forward contacts details 1. Press Menu > Contacts > Quick search 2. Select a contact > Options > Send contact. 3. You can send the information via As text message/As multimedia message. To delete a contacts entry 1. Press Menu > Contacts > Quick search 2. Select a contact > Options > Delete.](https://usermanual.wiki/Pantech-Co/P1010/User-Guide-1240807-Page-20.png)
![21 To edit a groups 1. Press Menu > Contacts > Caller groups. 2. Choose Group to edit 3. Press OK Call waiting & caller identification To activate call waiting** 1. Press Menu > Settings > Call settings > Call waiting. 2. Select Activate Caller identification** 1. Press Menu > Settings > Call settings > Caller ID. Using your headset You can send or receive a call using your headset. When you connect your headset to the jack the button on the headset works as follows. While in standby mode 1. Press and hold the button to list recent calls. Service number & fixed number To call your service numbers* You can see the service number to reach the service provider. 1. Press Menu > Contacts > Extra numbers >Service dialing number. 2. Select a number > press [ ]. To view Fixed Dial list Fixed dialing is a service that limits your access to specific numbers in the address book list recorded on the SIM. Input the PIN2 to set up or cancel this service. 1. Press Menu > Settings > Security settings > Fixed dial NOTE: PIN2 must be correctly entered within 3 times. PIN2 code is dependable by your SIM.](https://usermanual.wiki/Pantech-Co/P1010/User-Guide-1240807-Page-21.png)


![29 Resolution 160x128 320x240 640x480 800x600 1280x1024 Advanced Settings Shutter sound Sound1, Sound2, Sound3, Off Anti-flicker 50Hz, 60Hz Image quality Low Normal High Storage Phone Memory card Restore default Icons for video Icon Name Description Video Mode Zoom x1, x2, x3 Brightness -4, -3, -2, -1 0 +1, +2, +3, +4 Settings for video Icons Name Sub Name Sub Icons Description Effect Normal Grayscale, Sepia, Sepia green Sepia blue Color invert White balance Auto Daylight Tungsten Fluorescent Cloudy Incandescent Night mode Off On Advanced Settings Shutter sound On, Off Anti-flicker 50Hz, 60Hz Video quality Low Normal High Restore default To zoom in and out 1. Press [ / ]. To increase or decrease the brightness 1. Press [ /].](https://usermanual.wiki/Pantech-Co/P1010/User-Guide-1240807-Page-29.png)
![30 To take a picture 1. Press Menu > Multimedia > Camera 2. Focus on the object > press OK or NOTE: Your photo will be saved automatically to File manager > Driver > Fotos. To change to video camera mode 1. Press Menu > Multimedia > Camera 2. Press [ ] while camera mode is activated. 3. Focus on the object > press OK. 4. Record the motion > press [ ]. To view the taken picture 1. Press Menu > Multimedia > Image viewer 2. Select the picture > OK. After taking pictures To Press Send as message Options > Send > As multimedia message Set as standby screen Options > Use as > Wallpaper Set as screen saver Options > Use as > Screen Saver Set a photo for a specific contact Options > Use as > Caller picture Delete the photo Options > Delete To record a video 1. Press Menu > Multimedia > Video recorder 2. Put the camera where to record > press OK. 3. Press [ ]. NOTE: Your video will be saved automatically to File manager > Memory card > Videos. To set video settings 1. Press Menu > Multimedia > Video recorder. 2. Press before recording a video. To change to camera mode 1. Press Menu > Multimedia > Video recorder 2. Press [ ] while video camera mode is activated. 3. Focus on the object > press OK. To view the record video clip 1. Press Menu > Multimedia > Video player 2. Select the video clip > OK. After recording video clips To Press Send as message Options > Send > As multimedia message Delete the video clip Options > Delete](https://usermanual.wiki/Pantech-Co/P1010/User-Guide-1240807-Page-30.png)
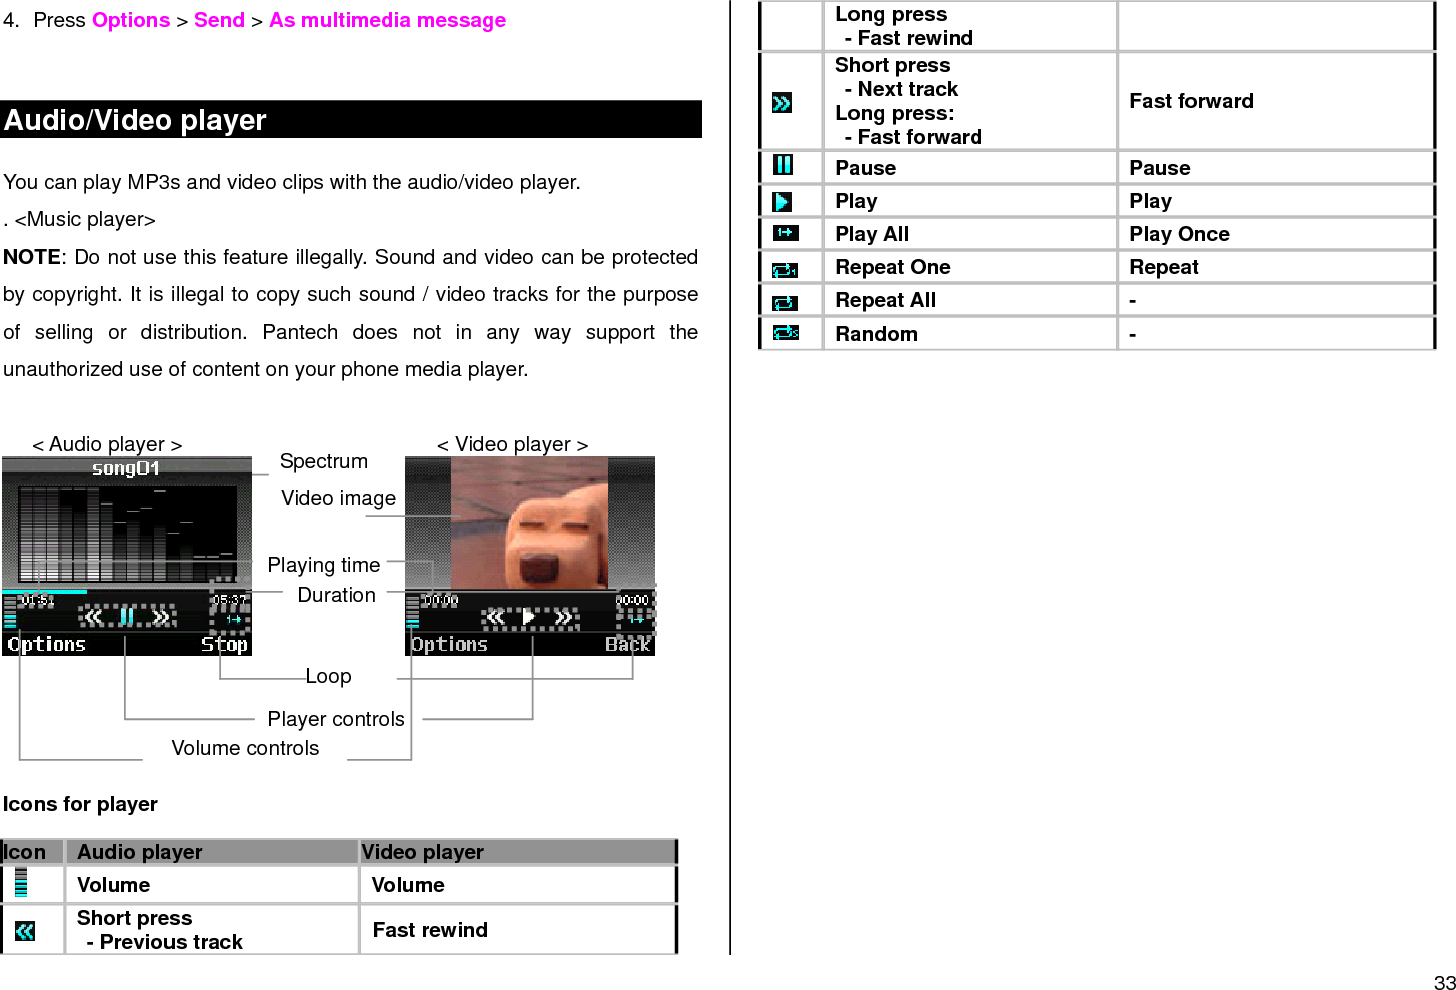
![31 During recording a video To Press Receive an incoming call [ ] Stop recording Pause recording OK, Deactivate pause Pictures album You can view, send, and delete the saved pictures. The supported formats are JPEG, GIF, BMP, WBMP and PNG. To view the saved pictures 1. Press Menu > Multimedia >Image viewer 2. Select a picture > Options > View. To set as wallpaper in the display 1. Press Menu > Multimedia >Image viewer 2. Select a picture > Options > Use as > Wallpaper To move or copy a picture to other folder 1. Press Menu > File manager 2. Select driver > Fotos. 3. Select a picture. 4. Press Options > Copy or Move 5. Select target folder To send pictures using multimedia message 1. Press Menu > Multimedia > Image viewer 2. Select a picture. 3. Press Options > Send > As multimedia message Video album To play the saved video clips 1. Press Menu > Multimedia > Video player 2. Select a video clip > Options > Play To use video controls To Press Play or Pause OK Stop Stop, Back Rewind Hold Fast forward Hold Control volume Navi key up or down](https://usermanual.wiki/Pantech-Co/P1010/User-Guide-1240807-Page-31.png)


![37 Calendar Calendar helps you manage your schedule including your time for calls or special days. You can set alarms service on a set date with this function. To view calendar 1. Press Menu > Organizer > Calendar. NOTE: Monthly view is displayed as default. In the monthly view To Press Move to another day [] for Previous [] for Next Move to another week [ ] for Previous [ ] for Next To create a new event and edit 1. Press Menu > Organizer > Calendar. 2. Select a day > Options > Add event 3. On the Add event screen, select and input an event item by item for registration. 4. Input the events > OK. NOTE: You can create up to 50 events including schedule, task and Note. You can create events for dates from 01/01/1970 to 12/31/2030. Alarm To set an alarm 1. Press Menu > Organizer > Alarm. 2. Select a alarm > edit a new alarm > OK. To view the saved alarms 1. Press Menu > Organizer > Alarm. To edit existing alarms 1. Press Menu > Organizer > Alarm. 2. Select an alarm > Edit.](https://usermanual.wiki/Pantech-Co/P1010/User-Guide-1240807-Page-37.png)
![38 Stopwatch, calculator & converter To use stopwatch 1. Press Menu > Organizer > Stopwatch. 2. Select split time or lap time. 3. Press Start. To use the calculator 1. Press Menu > Organizer > Calculator. 2. Use [ / / / /OK] to calculate. 3. Use [ ] to use the decimal point. To use the converter 1. Press Menu > Organizer > Unit converter. 2. Select a item to use 2. Select the current unit and the unit to be changed. 3. Enter the figure. Notepad & sound recorder To use notepad 1. Press Menu > Organizer > Notes. 2. To create new memo press Add or Options > New note. 3. To edit memo press Options > Edit. To record sound 1. Press Menu > Organizer > Sound recorder 2. Press Options > New record. 3. To stop recording, press Stop. 4. To listen to the recording, press Options > Play. vCard You can send your information by sending it as message To create your own number 1. Press Menu > Contacts > My number. 2. Press Edit my number > edit the file 3. Press OK.](https://usermanual.wiki/Pantech-Co/P1010/User-Guide-1240807-Page-38.png)