Pantech Co S100 TripleBand GSM850/DCS1800/PCS1900 (WAP&GPRS;&BT;) User Manual UserMan
Pantech Co Ltd TripleBand GSM850/DCS1800/PCS1900 (WAP&GPRS;&BT;) UserMan
UserManual.wiki
>
Pantech Co
>
S100 User Manual
UserMan
Navigation menu
Upload a User Manual
Namespaces
Wiki Guide
HTML
PDF
Info
Views
User Manual
Discussion / Help
Navigation

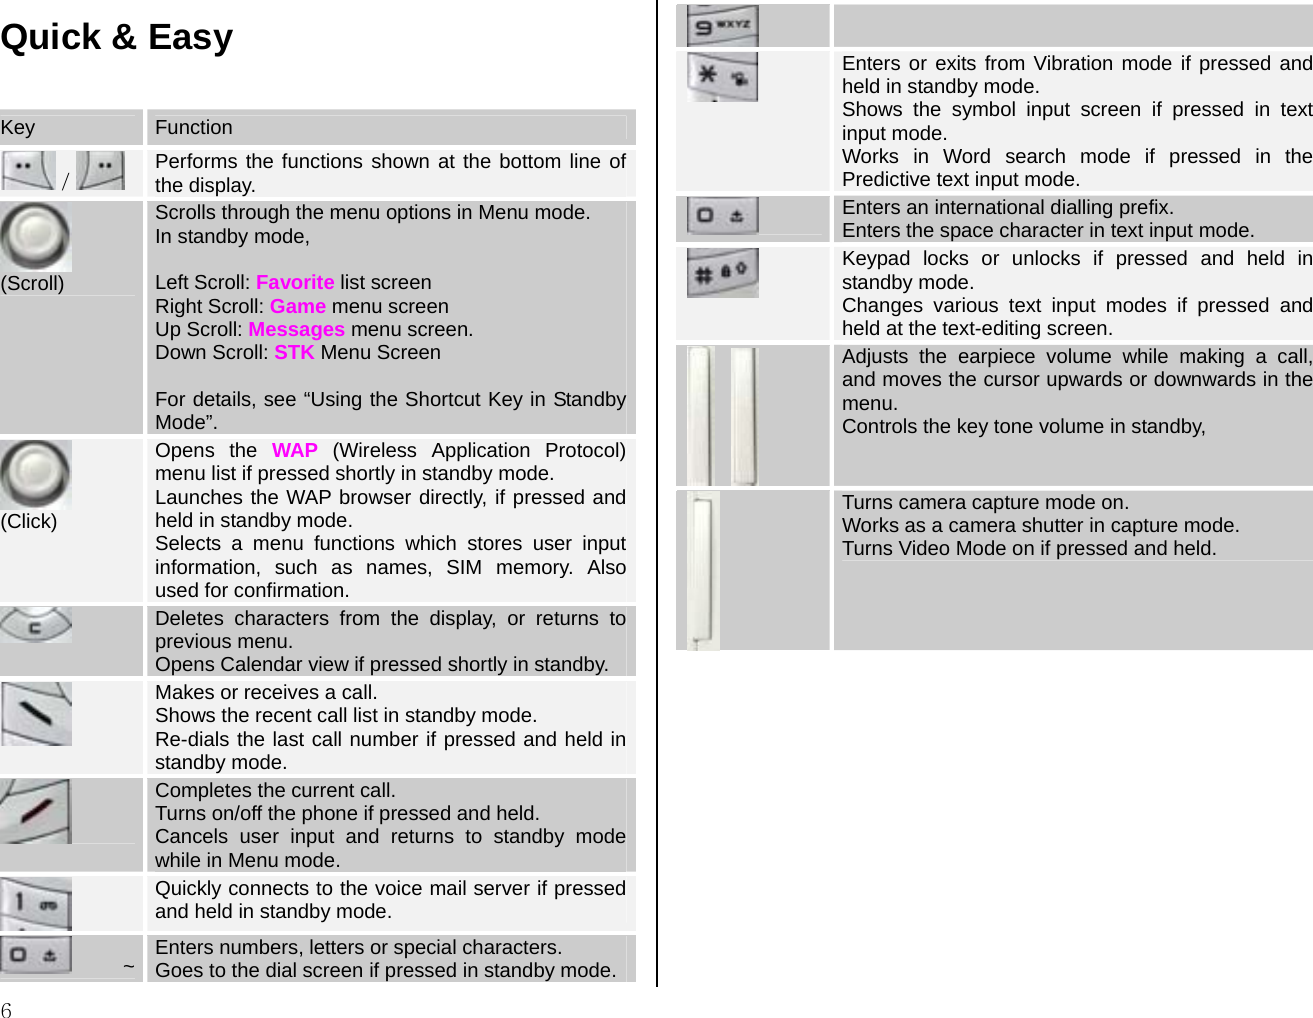
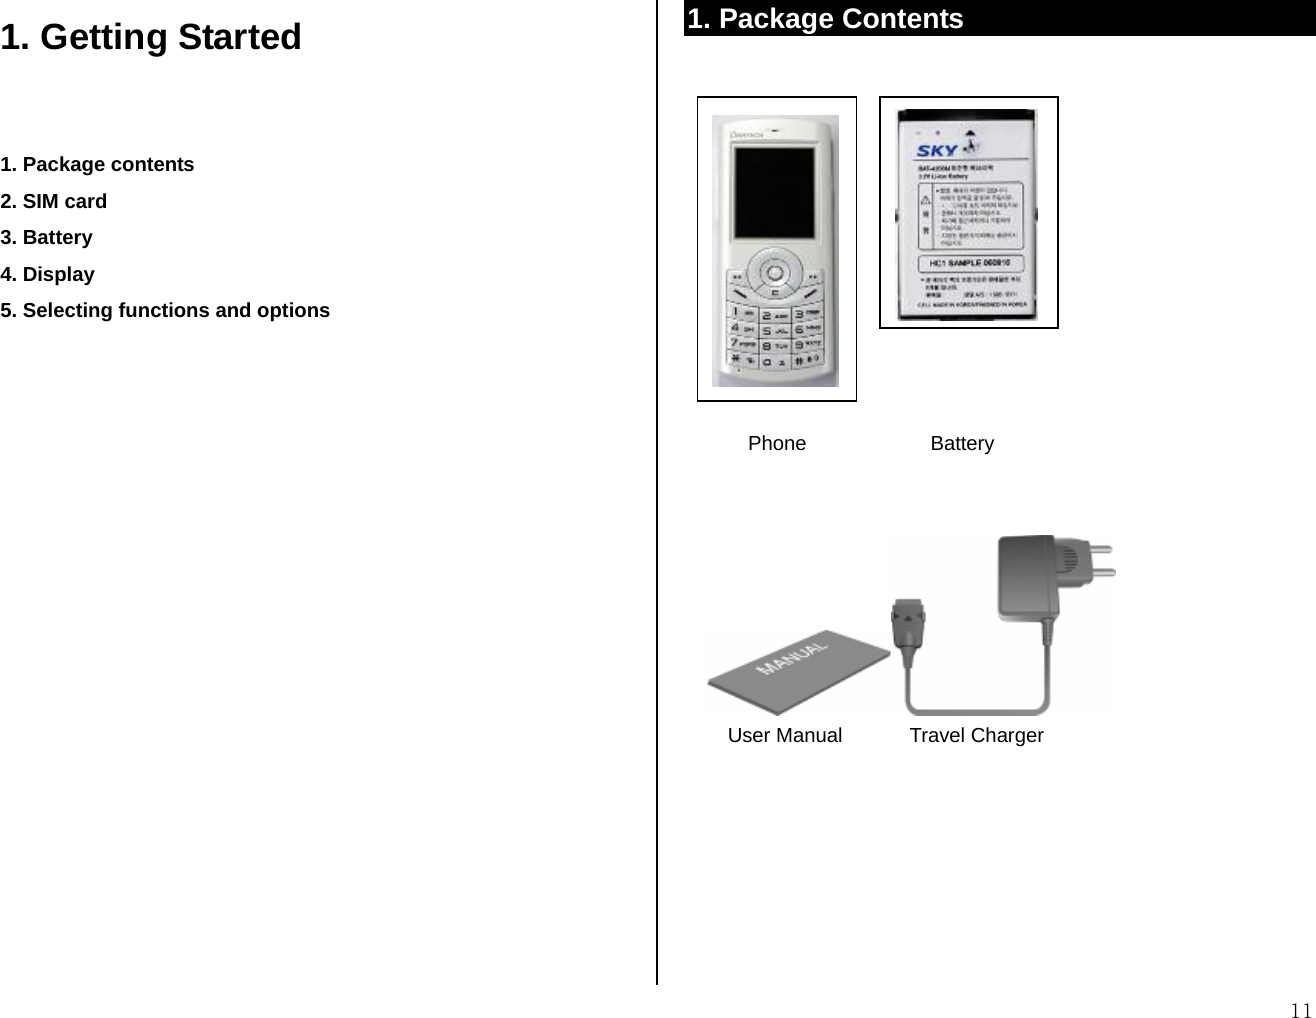
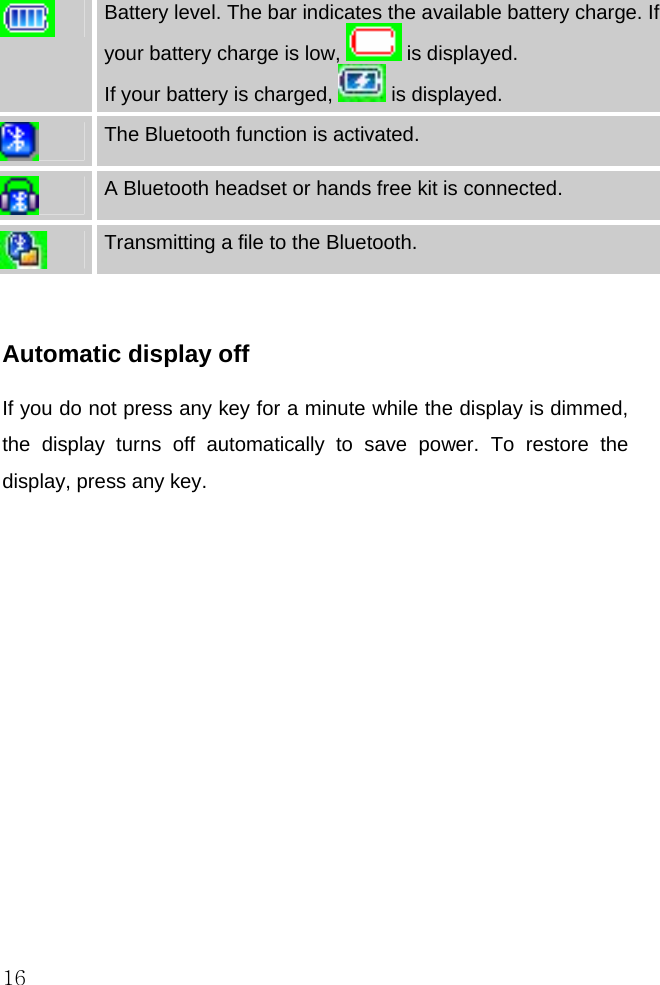
![3Phone Specification Design Bar type phone with single display Display 28.032 mm x 35.04 mm display for 1.8” internal LCD Supports up to 262,144 colors within 128 x 160 pixels 7 lines for text in basic mode with 16-pixel font Two Soft keys and four-way scroll and selection ([OK]) keys Melody Yamaha 64 Poly sound(Support MP3 Ringtones) MP3 Support fixed bit rate until 320kbps Micro SD Not Supported Camera Integrated VGA (300k) CMOS Camera z Resolution up to 640 x 480 (307,200 pixels) z Self timer function (5 sec or 10 sec) z Phone display used as a viewfinder z Photo album in Gallery z Photo Gallery for image storing and editing z 3 image quality options: Fine, Normal, Low z Auto white balance (AWB), Auto exposure (AE), Various effects Dimensions & Weight z Weight: 70 g (with standard battery) z Dimensions: 105 mm x 42 mm x 11.9 mm Bluetooth z Bluetooth version 2.0 compliant z SupportMono headset call, FTP, DUN, vCard, serial communication Operating frequencies z EGSM: 850Mhz, DCS: 1800Mhz, PCS: 1900MHz networks in Europe, Africa, Asia-Pacific, North America, and South America where these networks are supported z Automatic band switching](https://usermanual.wiki/Pantech-Co/S100/User-Guide-729504-Page-3.png)
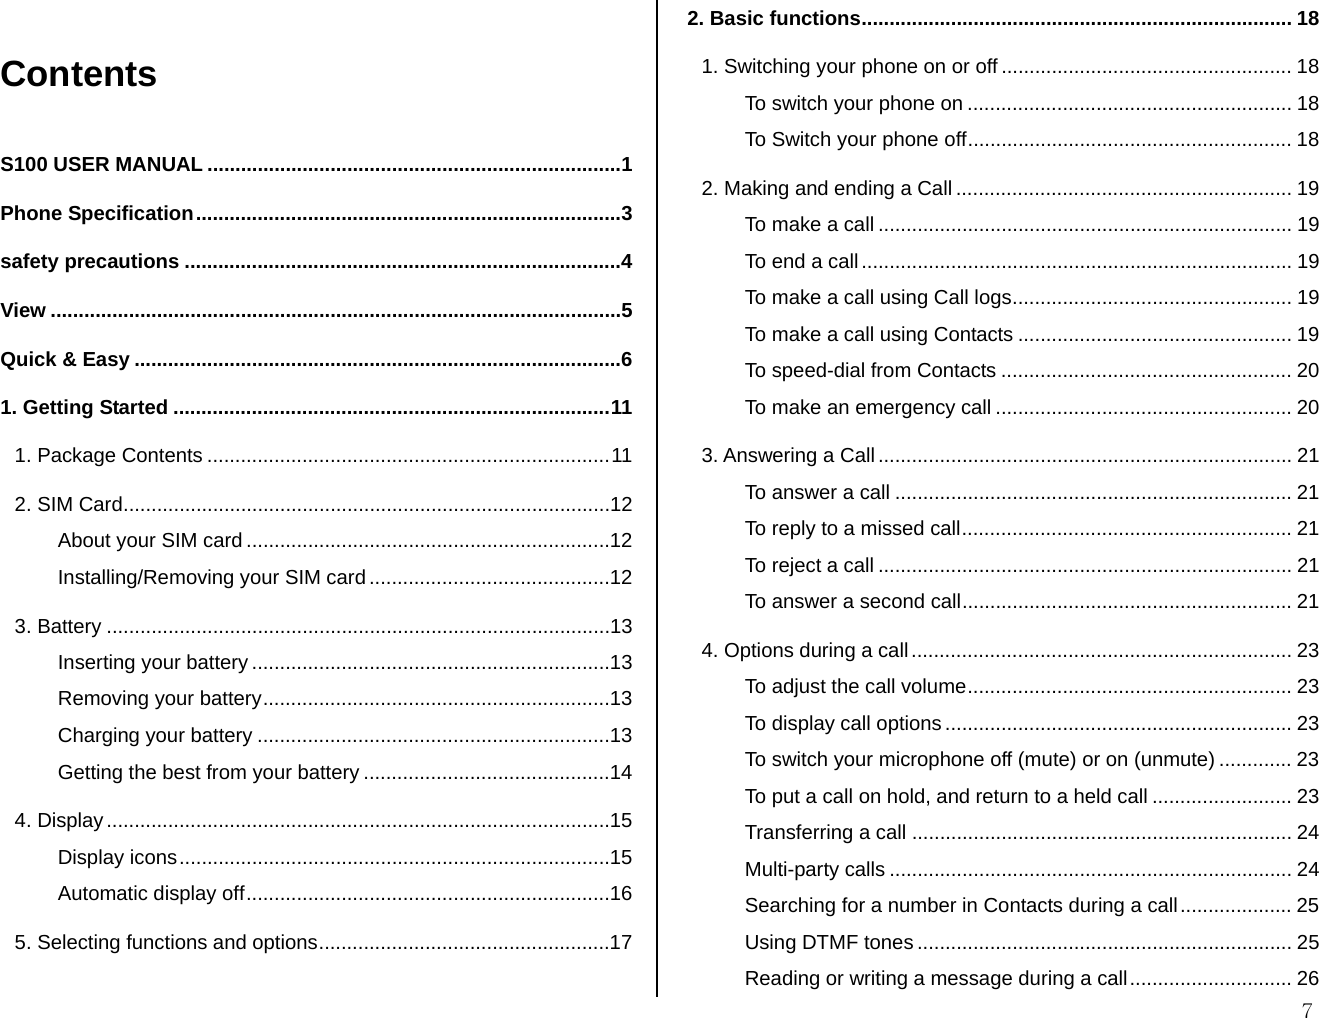
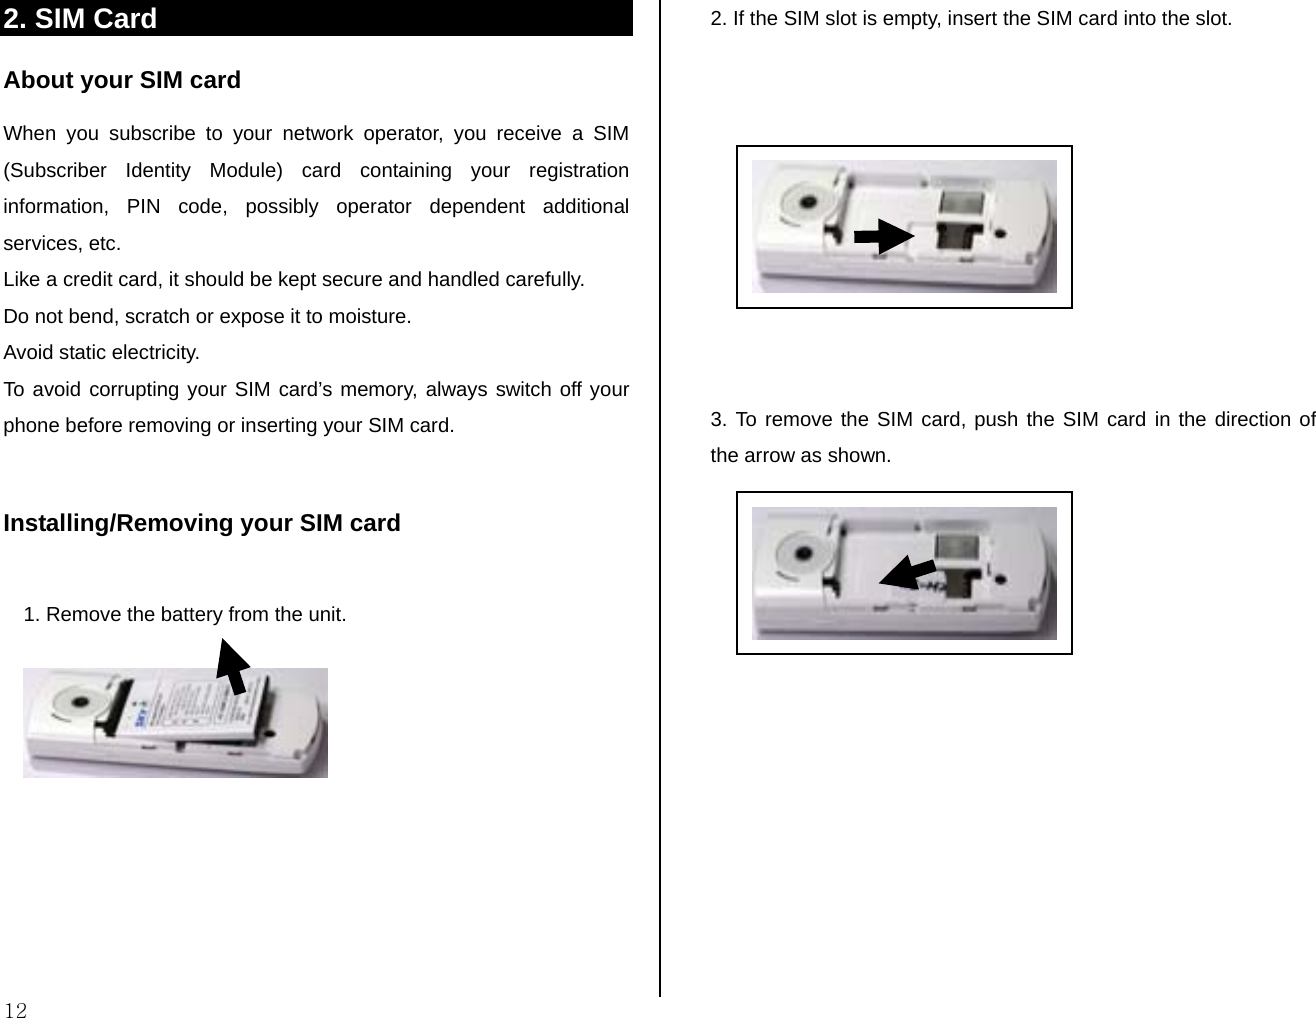


![175. Selecting functions and options Your phone offers many phone operating and customization functions arranged in menus and sub-menus. You can access these functions using the left and right selection (“Soft”) keys ([ ] and [ ]). Each menu and sub-menu allows you to view and change the settings of the particular function. Soft key functions change depending on the current context. The label or icon in the bottom line of the display, above the Soft keys, shows each key’s current function. To display the functions and options available, or select the one required: 1. Press the left or right Soft key as appropriate. 2. To select the function displayed or option highlighted, press the left Soft key or the [OK] key. 3. To highlight the next or previous option in a list, press the Down or Up scroll key. 4. To move back to the previous function or option in a list, press the [C] key. 5. To return to Standby mode, press the [ ] key. NOTE: In some functions, you may be asked to enter a password or PIN. Enter the required code then press the [OK] key. Side Key Special Functions The following section describes display screen and easy-to-control sub-menus and their functions. Side Up - Adjusts the earpiece volume and moves the cursor up in the menu during a call. - Mutes the ring tone of an incoming call. - Rejects the incoming call. - Turns the flash on if pressed and held. - Increases the volume in MP3. Side Down - Adjusts the earpiece volume and moves the cursor down in the menu during a call. - Mutes the ring tone of an incoming call. - Rejects the incoming call. - Decreases the volume in MP3. Extra Key - Turns the camera capture mode on. - Works as a camera shutter in the capture mode. - Turns Video Mode on if pressed and held.](https://usermanual.wiki/Pantech-Co/S100/User-Guide-729504-Page-17.png)
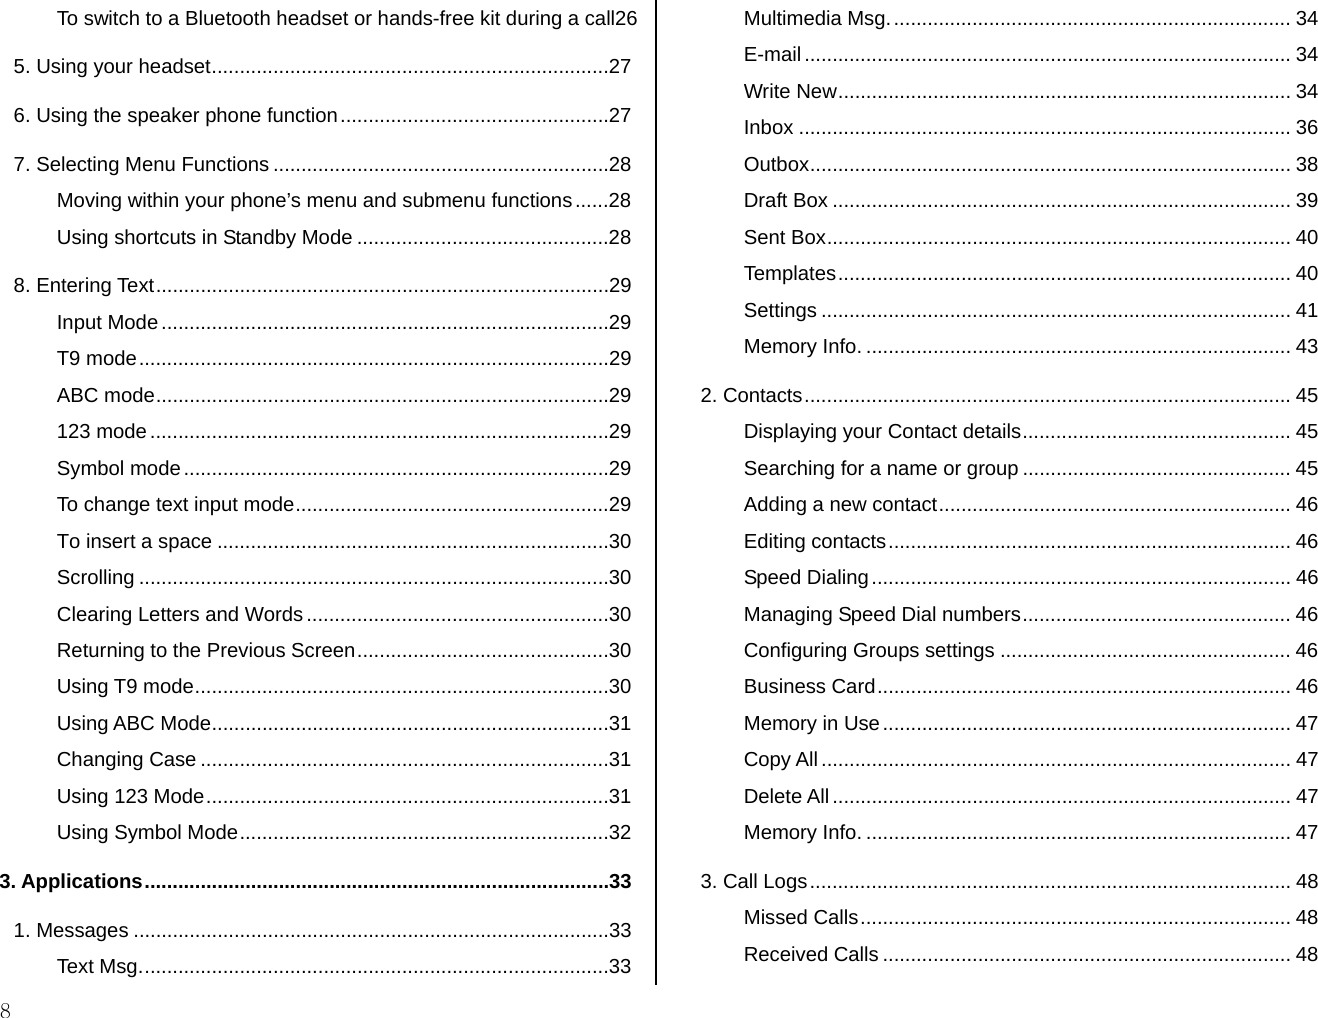
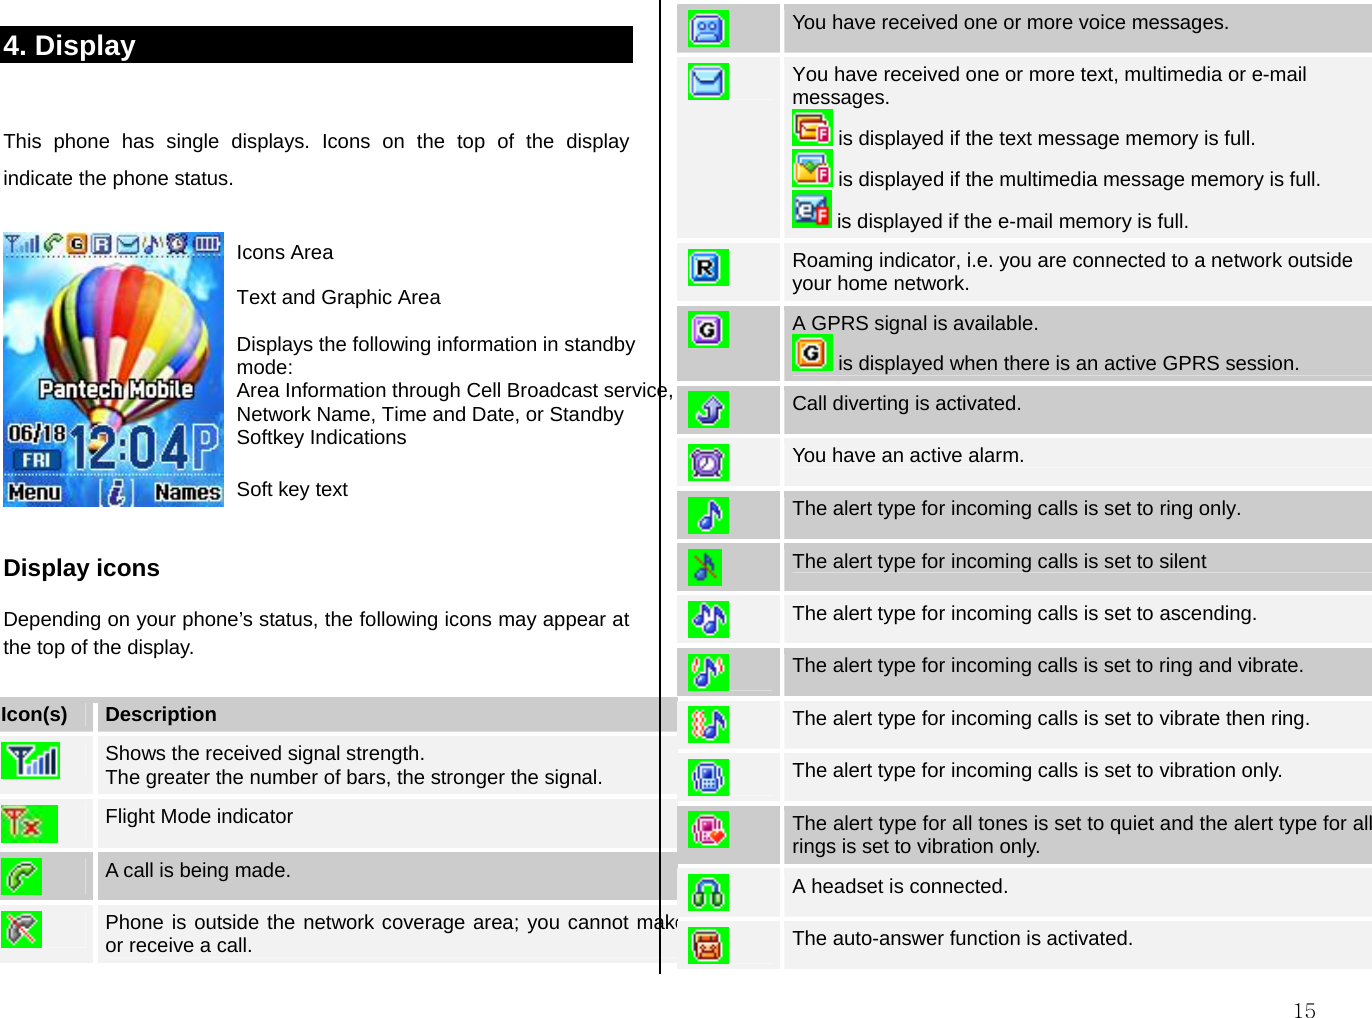
![18 2. Basic functions 1. Switching the Phone On or Off 2. Making a Call 3. Answering a Call 4. Calling Options 5. Using the Headset 6. Using the Speaker Phone 7 Selecting Menu Functions 8. Entering Text 1. Switching your phone on or off To switch your phone on 1. Press the [ ] key until the phone switches on. 2. If you are asked to input your PIN (Personal Identification Number), enter your SIM card’s PIN and press the [OK] key. (For further details, see Security Settings on page 67) Your phone starts to search for an available network and the current date and time is shown on the display. Once connected to the network, you can make and receive calls. NOTE: If a malfunction occurs while you use your phone or it is not turned on, remove the battery then insert it again after 5 to 10 seconds. NOTE: To change the language, select the Language menu option. (For further details, see Language on page 66) To Switch your phone off Press and hold the [ ] key until the power-off animation is displayed.](https://usermanual.wiki/Pantech-Co/S100/User-Guide-729504-Page-18.png)
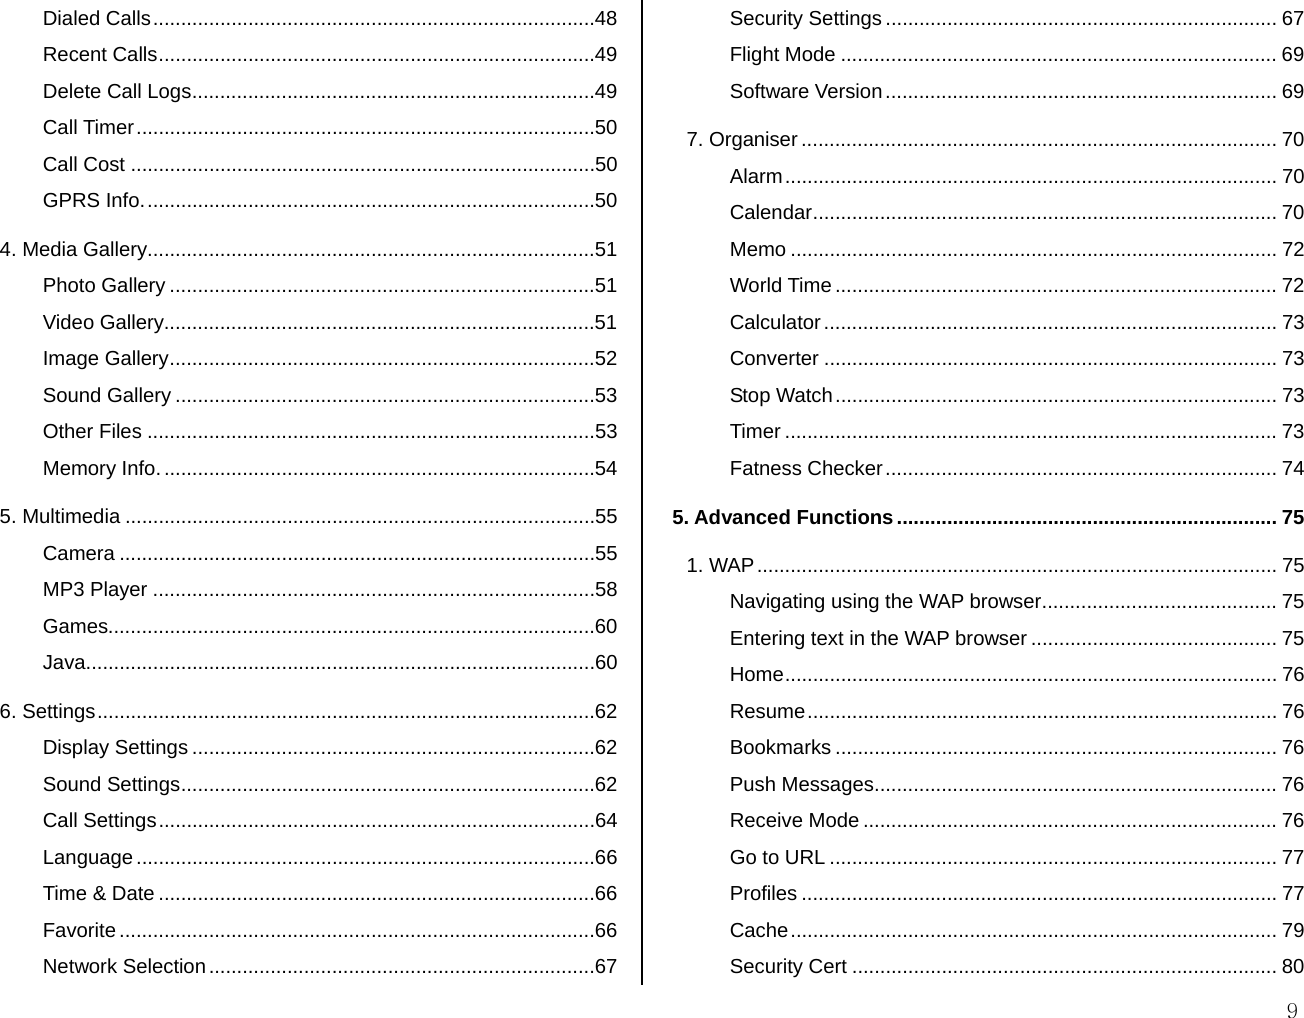
![192. Making and ending a Call To make a call Enter the area code and the phone number Standby mode, then press the [ ] key. To clear the last digit displayed, press the [C] key. To clear the all digits displayed, press and hold the [C] key. NOTE: If you have set the [Auto Redial] option on the phone will attempt to make a call automatically for up to 10 times if it is not answered. To clear the last digit displayed, press the [C] key. To clear the all digits displayed, press and hold the [C] key. To end a call Press the [ ] key. Once the call is completed, a call summary (displaying the recipient’s name or number, and the call length) is displayed. To make a call using Call logs Your phone logs dialled, received and missed call numbers. The last call number is saved in the first position. 1. Press the [ ] key to see the Call Log list of dialled, received or missed call numbers in reverse chronological order. 2. Press the [Up] or [Down] scroll key to select the number you want. 3. Press the [ ] key to dial the selected number. NOTE: To redial the last number in the Call Logs list, press and hold the [ ] key. To make a call using Contacts You can store frequently used names and phone numbers, called Contacts, in your SIM card or your phone’s memory. You therefore do not have to remember all your phone numbers; simply select the name to recall the associated number. 1. From Standby mode, press the [ ] key to display the View Names list, or press the [ ]Navigation Down key to display the 2.Contacts menu. 2. Select the number you want from View Names. Press the [ ] key to dial the selected number. To make an international call 1. Press and hold the [0] key for the international prefix until the ‘+’](https://usermanual.wiki/Pantech-Co/S100/User-Guide-729504-Page-19.png)
![20 character appears on the display, or enter the outgoing national code. 2. Enter the country code, area code and phone number you want to make a call to. 3. Press the [ ] key. To speed-dial from Contacts Press and hold the Speed Dial number to make a call using the number you have saved. For example, press and hold the “5” to dial a number which you have saved as “5” in Speed Dial list. For speed dial numbers longer than 2 digits, press the first one and then press and hold the second one. To make an emergency call You can make emergency calls even if your phone does not contain a SIM card. 1. Select Emergency Number, or press the [SOS] Soft key if your phone does not contain a SIM card. 2. Press the [ ] key. NOTE: This function is standard to all mobile phones. In an emergency, you can make an emergency call using any mobile phone that does not contain a SIM card.](https://usermanual.wiki/Pantech-Co/S100/User-Guide-729504-Page-20.png)
![213. Answering a Call To answer a call When you receive a call, your phone rings (or vibrates). If the caller can be identified, the caller’s phone number is displayed (or the caller’s name, if it is stored in your Contacts). NOTE: This function is network and subscription dependent, and may not be available in all areas. 1. To answer a call, press the [ ] key. 2. If your answer type is set to [Any Key], you can answer calls by pressing any key except the [ ] key. To reply to a missed call If the incoming call could not be answered, a missed call message is shown on your phone’s display to remind you of the call you have missed. NOTE: This function is network and subscription dependent, and may not be available in all areas. To reply to a missed call, do the following. 1. Press the [View] Soft key to display the list of missed calls. 2. If necessary, scroll to highlight the number you want by pressing the [Up] or [Down] scroll key. 3. Press the [ ] key to call the missed call’s number. 4. Press the [C] key or [ ] key to close the 'missed call' notification message. To reject a call • Press the [ ] key or the [Reject] Soft key. • Press and hold the [Up] or [Down] scroll key during the incoming call. The caller hears a ‘busy’ tone. To answer a second call You can answer an incoming call while you have a call in progress, if your network service provider supports this service and you have activated the Call waiting option. (For further details, see Call Waiting on page 65. You will be notified of an incoming call by a ‘call waiting’ tone.](https://usermanual.wiki/Pantech-Co/S100/User-Guide-729504-Page-21.png)
![22 • To answer a call while you have another call in progress: 1. Press the [ ] key to answer the incoming call. 2. The first call is automatically put on hold. To switch between two calls, press the [Swap] Soft key or [ ] key. To end the current call, press the [ ] key. The call on hold is automatically reconnected to you. • To switch between two calls Press the [Swap] Soft key.](https://usermanual.wiki/Pantech-Co/S100/User-Guide-729504-Page-22.png)
![234. Options during a call To adjust the call volume To adjust the earpiece volume during a call, do one of the following. • To increase the call volume during a call, press the [Up] volume key on the left side of the phone. • To decrease the call volume during a call, press the [Down] volume key on the left side of the phone. In Standby mode, you can adjust the key tone volume using the [Up/Down] volume keys. To display call options During a call, press the [ ] key to show the call options. To switch your microphone off (mute) or on (unmute) You can temporarily switch your phone’s microphone off so that the person you talk to on the phone cannot hear you. For example, you may wish to say something to another person in the room but do not want the person calling to hear you. • To switch your phone’s microphone off Press the [Mute] Soft key, or press Option then Mute. • To switch your phone’s microphone back on Press the [Sound] Soft key, or press Option then Sound. To put a call on hold, and return to a held call You can put a call on hold whenever you want. You can make another call while you have a call in progress if your network service provider supports this service. Of these two calls, one is active and the other is on hold, and you can switch between the calls. • To put a call on hold Press the [Option] Soft key then [Hold], or press the [ ] key. The callers name and icon are grayed while the call is held. • To return to the call Press the [Option] Soft key then [Retrieve]. • To make a call while you are in a call 1. Enter the phone number that you want to dial or look it up in Contacts. 2. Press the [ ] key to dial the second call. The first call is automatically put on hold. • To switch between two calls Press the [Swap] Soft key or [ ] key. The current call is put on hold and the call on hold is reactivated so that you can continue your conversation with the caller.](https://usermanual.wiki/Pantech-Co/S100/User-Guide-729504-Page-23.png)
![24 • To end a call Press the [ ] key in the normal way. Transferring a call You can transfer (connect) the current call to the held call if your network service provider supports this service, so that callers can talk to each other. You will be disconnected from both of them. 1. During a call, make or answer a call in the normal way then press the [Option] Soft key. 2. Press the [Up] or [Down] scroll key to highlight the [Transfer] option then press the [OK] key. The two callers will be connected to each other. Multi-party calls A multi-party call feature is a network service that allows up to six people to take part in a multi-party or conference call simultaneously. For more information, contact your service provider. • To make a multi-party call 1. Call the first participant in the normal way. 2. Call the second participant in the normal way. The first call is automatically put on hold. 3. To join the first participant to a multi-party call, press the [Option] Soft key then press the [Join All] option. 4. Press the [OK] key. • To add a new person to a multi-party call 1. Call the person in the normal way. 2. Press the [Option] Soft key then press the [Join All] option. 3. Press the [OK] key. • To add a caller to a multi-party call Press the [Option] Soft key then press the [Join All] option. • To view the status of multi-party call participants Press the [Left] or [Right] scroll key. An icon indicates whether the remote party is participating in the multi-party call (‘Far Multiparty’) or on hold (‘Far Held’.) • To answer/make a second call during a multi-party call 1. Place the multi-party call on hold by pressing the [Option] Soft key then pressing the [Hold All Calls] option. 2. Answer or make a call in the normal way. 3. To reactivate the multi-party call on hold, press the [Swap] Soft key. 4. To end the multi-party call, press the [ ] key in the normal way. • To have a private conversation with one participant 1. Press the [Option] Soft key then press the [Private] option. 2. Press the [OK] key.](https://usermanual.wiki/Pantech-Co/S100/User-Guide-729504-Page-24.png)
![253. Press the [Up] or [Down] scroll key to highlight the participant you want then press the [OK] key. Now you can talk privately with that person. 4. The other participants can continue the conversation with each other. 5. To return to the multi-party call, press the [Option] Soft key then press the [Join All] option. 6. Press the [OK] key. All of the multi-party call participants can now hear each other. • To remove one participant from a multi-party-call 1. Press the [Option] Soft key then press the [Exclude] option. 2. Press the [Up] or [Down] scroll key to highlight the participant then press the [OK] key. The call ends with that participant, but you can continue to talk with the other participants. 3. End the multi-party call by pressing the [ ] key. Searching for a number in Contacts during a call 1. Press the [Option] Soft key. 2. If necessary, press the [Up] or [Down] scroll key to highlight the [Contacts] option. Press the [OK] key. 3. Select the preferred search type like Name, Group, or Photo. 4. Press the [OK] key. 5. The Contacts entries are displayed. • To search for a name or group in Contacts Enter the first letters of the name for Name Search, or the first letters of the group for Group Search. The entries are displayed starting with the first entry matching your input. • To find a name manually in Contacts Press the [Up] or [Down] scroll key. • To view the highlighted entry in Contacts Press the [OK] key. Using DTMF tones You can turn the DTMF key tones off or on during a call. When the [DTMF Off] option is selected, your phone does not transmit the key tones. It allows you to press keys without hearing any key tones during calls. To communicate with answering machines or computerized telephone systems, you must select the [DTMF On] option. • To turn DTMF tones off or on Press the [Option] Soft key then the [DTMF Off] or the [DTMF On] option.](https://usermanual.wiki/Pantech-Co/S100/User-Guide-729504-Page-25.png)
![26 Reading or writing a message during a call You can read or write a message during a phone call. 1. Press the [Option] Soft key. 2. Press the [Up] or [Down] scroll key to highlight the [Messages] option then press the [OK] key. • To read a received message, select the Inbox subcommand then scroll to the message that you want to read. • To write a new message, select the Write New subcommand then press the [OK] key. (For further details, see Write New on page 34) To switch to a Bluetooth headset or hands-free kit during a call This function is available when a Bluetooth headset or hands free kit is connected during a call. • To switch to a Bluetooth headset or hands free kit Press the [Option] Soft key then press the [Retrieve Call in Headset/Handsfree] option. • To switch back to your phone during a call Press the [Option] Soft key then press the [Retrieve Call in Phone] option. NOTE: While you are on a call using your mobile phone, you can also press a button on the Bluetooth headset or hands free kit to talk using the headset or hands free kit. Retrieving Call in Headset/Phone [4.9] This function becomes available when Bluetooth Headset is connected during a call. To talk using the Bluetooth Headset during a phone, select [Option] and [Retrieve Call in Headset]. On the other hand, selecting [Option] and [Retrieve Call in Phone] allows you to talk using the phone again. NOTE: While you are on a call using your mobile phone, a certain button of the Bluetooth Headset allows you to talk using the Bluetooth Headset.](https://usermanual.wiki/Pantech-Co/S100/User-Guide-729504-Page-26.png)
![275. Using your headset You can make or receive a call without touching your phone, using your headset. When you connect your headset to the jack located at the top of your phone, the button on the headset works as follows: • To list recent calls, press the button in Standby mode • To redial the last call, press the button twice in Standby mode • To answer a call, press the button when you receive the call • To end a call, press the button when you have finished the call 6. Using the speaker phone function To use the speaker phone function during a call, press the [Option] Soft key [ ] then [Speaker On]. To deactivate the speaker phone function, press the [Option] Soft key then [Speaker Off], NOTES: 1. You may cause an accident if you use the speaker phone function when driving. When driving you should use an EarMic and Speaker Phone car kit instead. While using the speaker phone function, do not place your phone](https://usermanual.wiki/Pantech-Co/S100/User-Guide-729504-Page-27.png)
![28 7. Selecting Menu Functions Moving within your phone’s menu and submenu functions To move within your phone’s functions and select the function or value you want, press the following keys. Key Function [] key Goes to the main menu in standby mode. [] navigation key Moves within the main menu. Searches for the submenu. [] [OK]key Goes to the submenu. Goes to the WAP menu. Press the 4-way navigation keys in the main menu to move the menu. See the bottom of the Sub Menu List to check the current setting values in the sub-menu. Then, press the [Left/Right] key followed by the [OK] key to change the preset menu value. If you do not press the [OK] key, the new value will be cleared without saving. NOTE: Press the [C] key to return to the previous menu. Input the menu number to access the submenu quickly. Using shortcuts in Standby Mode Key Menu selected if pressed If pressed and held [] key Menu [] key 'View Names' [] Up key Messages Displays ‘Write New’ [] Right key Game Displays ‘Game’ [] Down key STK [] OK key WAP Directly connects to WAP browser [] Left key Favorite Organizer menu [] key Calendar [] key Recent Calls Redial last call [] key Photo capture mode Video capture mode](https://usermanual.wiki/Pantech-Co/S100/User-Guide-729504-Page-28.png)
![298. Entering Text Input Mode On many occasions you need to input text while you are using your phone, (e.g., storing a name in the Contacts, writing a new message, creating your greeting or scheduling events on your calendar). The available text input modes included. T9 mode You can input a letter using only one keystroke per letter. The keypad has more than one letter on it – when you press the [5] key once, J, K or L may be displayed. The T9 mode automatically compares your keystrokes with an internal linguistic dictionary to determine the correct word, thus requiring far fewer keystrokes than the conventional ABC mode. ABC mode In this mode, you can input the letter you want by pressing the keypad once, twice, three or four times until the target letter appears. 123 mode You can input a number in this mode. Symbol mode You can input the special characters like Greek letters, currency units, or a period mark in this mode. To change text input mode When you are in the area where you can input the text, the text input mode indicator will be displayed at the bottom of the LCD. Example: Entering a memo. To switch to other text input modes: 1. Press the right Soft key indicating the current text input mode. Toggle to the mode you want to use by pressing the [ ] right Soft key. The ‘Language select’ option allows you to change the text input language. The number of remaining characters you can enter. Editing area The current text input mode and language.](https://usermanual.wiki/Pantech-Co/S100/User-Guide-729504-Page-29.png)
![30 To insert a space To insert a space between words, press the [0] key. To insert a space at the end of a line, press the [Right] scroll key to add a new space character. Scrolling To move the cursor to the left or right within the text, press the [Left/Right] scroll key. And also, to move the cursor to the up or down among the lines, press the [Up/Down] scroll key. NOTE: By pressing the [Up/Down] scroll key, the cursor can be moved very quickly to the beginning or the end of the text. Clearing Letters and Words To clear the letter to the left of the cursor, press the [C] key. To clear all of the letters on the display, press the [C] key longer. Returning to the Previous Screen When the text input field is empty, press the [C] key to return to the previous screen. TIP: To change the text input mode quickly [*] Press long Shows symbol screen. [0] Press short Enters a space Character. [#] Press long Changes the text input mode. [C] Press short Deletes characters one by one. Returns to previous screen after deleting all characters. [C] Press long Deletes all characters and moves the cursor to the beginning of the input screen. Using T9 mode In the T9 alphabet Editor, each word is composed completely as you input the text. 1. Press the keys numbered [2] to [9] to input text. For example, press [4][3][5][5][6] in sequence to input ‘hello’. The word you are typing appears on the display. It may change with each key you press. 2. Enter the whole word before editing or deleting any keystrokes. 3. Upon searching a word, input the next text. 4. If the search fails, press the [ ] key to search which text can be typed in. The phone displays the most commonly used choices first. 5. Continue entering the next word.](https://usermanual.wiki/Pantech-Co/S100/User-Guide-729504-Page-30.png)
![31 Using ABC Mode When typing in ABC mode, press the key labelled with the target letter: • Press the key once for the first letter. • Press twice for the second letter. Example: To display the letter “C”, quickly press the [2] key three times. To display the letter “K”, press the [5] key twice. This method is called Multi-tap typing. NOTE: The cursor moves to the right when you press a different key. When entering the same letter twice or a different letter on the same key, just press the Right key or wait a few seconds for the cursor to move to the right automatically, and then enter the next letter. Refer to the table for more information about the characters available. The characters vary, depending on the text input language. Changing Case To change the case of the next letter(s) that you type, press the [#] key. There are three cases: • Lower case (no indicator) • Initial capital ( ) • Capital lock ( ) [English] KEY Characters in displayed order 1 . , - ? ! ' @: 1 2 a b c 2 3 d e f 3 4 g h i 4 5 j k l 5 6 m n o 6 7 p q r s 7 8 t u v 8 9 w x y z 9 0 Space 0 Using 123 Mode The number mode allows you to enter numbers into the text. Press the key corresponding to the digit you want to enter.](https://usermanual.wiki/Pantech-Co/S100/User-Guide-729504-Page-31.png)
![32 Using Symbol Mode The symbol mode allows you to enter symbols into your text. To display more symbols, press the [Up/Down] scroll key. To input a symbol, press the number for a symbol, and the text will appear in the input screen. Press the [#] key longer or the [ ] Soft key to escape from Symbol mode. If you entered a symbol with the hot key ([#] long key), press the key again to return to the previous mode. Press the [ ] key to proceed to a mode next to the Symbol mode. If you entered a symbol with the [ ] key, press the key again to proceed to next mode from Symbol mode.](https://usermanual.wiki/Pantech-Co/S100/User-Guide-729504-Page-32.png)
![333. Applications 1. Messages 2. Contacts 3. Call Logs 4. Media Gallery 5. Multimedia 6. Settings 7. Organizer 1. Messages This function allows you to create, send, read and save a message using the Short Message Service (SMS: text messages), Enhanced Message Service (EMS: messages including a simple image, animation or melody) or Multimedia Message Service (MMS: messages supporting presentation of various media types, such as full color images and polyphonic ring tones) provided by your network operator, or an E-mail service. Voice mails are also available. Press the [Menu] Soft key then select 1. Messages. Note: These features are available only if your service provider’s network supports it. Contact your service provider for more information. Text Msg. Short message service (SMS) allows you to send and receive a short text message to and from other GSM phones. Your phone also supports the Enhanced Messaging Service (EMS), which allows you to make a short message consisting of a simple picture, melodies, animation and styled text that add new features to simple text messages. To send a text message by phone, you must obtain the number of the SMS centre from your service provider.](https://usermanual.wiki/Pantech-Co/S100/User-Guide-729504-Page-33.png)
![34 Multimedia Msg. Multimedia Message Service (MMS) is a messaging service similar to Short Message Service (SMS). It provides asynchronous delivery of personal multimedia messages. In addition to the familiar text content of text messages, multimedia messages can contain images, graphics, sound and/or video. An MMS message is a separate multimedia presentation in a single entry, not an attachment to the text file. Using the MMS feature, your phone can receive a multimedia message and/or send a picture message, depending on MMS availability from your service provider. Only the phone that supports the multimedia message feature can receive or display the multimedia message. E-mail Before you send, receive, retrieve, reply to, and forward E-mail to a separate e-mail account, you must define your E-mail settings correctly. (For further details, see Settings on page 41) Write New Press the [Menu] Soft key then select 1. Messages then select 1.Write New, then press [OK] key. Select the type of message you want to write. • Text Msg.: Write new SMS or EMS message. • Multimedia Msg.: Write new MMS message. • E-mail: Write new E-mail. • Editor options for Text Msg. While you are entering your message, press the [Option] Soft key [] to select from the following options. • Add Picture: Loads the selected item. • Add Animation: Loads the selected item. • Add Melody: Inserts the selected melody and plays it back once. • Add Template: Inserts a clause stored in a Template. • Save as Draft: Transfers the message to Draft Box and saves it in your phone’s memory. • Language: The selected language is displayed at the bottom right corner of your phone’s display. • Editor options for Multimedia Msg. While you are editing multimedia messages, slide page information is displayed in the top right corner of your phone’s display. 1. While you are creating a multimedia message, press the [Option] Soft key to select from the following functions. • Add Subject: Edits the message subject. (For further details, see 7. Selecting Menu Functions on page 28) • Add Text: Enters new text into the message. (For further details, see 7. Selecting Menu Functions on page 28) • Add Image: Adds an image from the Image Gallery. Press the [OK] key to select the image from the image list. (For further details, see 오류! 참조 원본을 찾을 수 없습니다. on page 51)](https://usermanual.wiki/Pantech-Co/S100/User-Guide-729504-Page-34.png)
![35• Add Photo: Adds a photo from Photo Gallery. Press the [OK] key to select the phone from the photo list in a folder. (For further details, see Photo Gallery on page 51) • Take a Photo: Adds a new photo by taking a photo using the camera feature. (For further details, see Taking photos on page 55) • Add Sound: Adds a sound. Press the [OK] key to select the sound from the sound list. (For further details, see Sound Gallery on page 53) • Add Template: Adds a multimedia message template. This feature is available only when there are no items on the slide. If there is more than one slide, the Add Template function is not available. 2. While you are editing a multimedia message, press the [Option] Soft key to select from and use the following options. The options menu may not appear depending on situations. • Delete Text: Deletes the selected text. • Delete Image: Deletes the selected ImageItem. • Delete Sound: Deletes the selected Sound Item. • Delete Photo: Deletes the selected Photo Item • Add Subject: Edits the message subject. • Add Object: Adds an image, photo, sound, slide or video. • Preview: Shows the message as it appears on the recipient’s phone. • Edit Subject: Edits or modifies the subject. (For further details, see 7. Selecting Menu Functions on page 28.) • Slide Timing: Sets how long the received message is displayed for. The display automatically scrolls to the next slide page after the specified time. • Page Layout: Arranges the image and text display position in the slide page. You can set this to Image at Top or Text at Top. • Save as Draft: Transfers your message to Draft Box and saves it in your phone’s memory. 3. Press the [Edit], [Add] or [Replace] Right Soft key to use the following options. • Edit: Edits the displayed text. • Add: Adds an image, photo, sound or slide, or takes a photo or video clip. • Replace: Changes added objects. • Editor options for E-mail While you are entering an E-mail message, press the [Option] Soft key to select from the following functions. • Add Subject (or Edit Subject): Adds or edits a subject. • Add Text (or Edit Text): Adds or edits text. • Add Attachment: Adds an E-mail attachment. • Add Template: Adds the text of an E-mail template to the E-mail text. • Save as Draft: Moves the E-mail message to the Draft Box and saves it in your phone’s memory. Press the [Edit], [Add] or [Replace] Right Soft key to use the following options. • Add: Adds the subject, main text or attachment. • Edit: Adds the subject, main text or attachment.](https://usermanual.wiki/Pantech-Co/S100/User-Guide-729504-Page-35.png)
![36 • Delete: Deletes the selected object. • Sending a message To send Text Msg.: 1. When you have completed entering the message, press the [OK] key. 2. Input the recipient’s phone number on the Number screen. Press the [Option] Soft key to search for a number in Contacts or Recent Calls. You can add up to 5 recipients. 3. Press the [OK] key. If the transmission fails, the message is saved in the Outbox, from where you can send it again. To send Multimedia Msg. and E-mail: 1. When you finish creating the message, press the [OK] key. 2. Input the recipient’s number or E-mail address. You can also search for a number or E-mail address in Contacts by pressing the [Option] Soft key. 3. To send the message to several recipients (up to 15 recipients), repeat from step 3. 4. When you have finished entering recipients, press the [OK] key. Inbox Press the [Menu] Soft key then select 1.Messages then select 2.Inbox, and then press the [OK] Key. The Inbox contains all message types, each of which is detailed below. • Text Msg. To list text messages in Inbox: In the Inbox, select Text Msg. then press the [OK] key. To open a text message in Inbox: When the Text Msg. in Inbox are displayed, select the text message then press the [OK] key. To reply to a text message: Press the [Reply] Soft key to write a new message to the sender’s number. The Write New screen is displayed. (For further details, see Write New on page 34.) To manage text messages in Inbox: In Text Msg., select a text message then press the [Option] Soft key to select from the following functions: • Delete: Deletes the selected message. • Forward: Prepares the received message for sending to another recipient. • Delete All: Deletes all text messages in the Inbox. • Save to Phone/SIM: Saves the selected message to Phone or SIM. • Check for E-mail: Checks whether you have received E-mails that have not been downloaded from your service provider’s POP server. NOTE: The POP server does not delete unread E-mails, since there may be truncated E-mails depending on your phone’s storage capacity. New E-mails are downloaded to your phone, not unread E-mails](https://usermanual.wiki/Pantech-Co/S100/User-Guide-729504-Page-36.png)
![37Press the [Reply] Soft key [ ] to write and send a new message to the sender’s number. To manage a text message opened in Inbox: When the text message is open, press the [Reply] Soft key [ ] to create a new text message for sending to the sender’s number, or press the [Option] Soft key to select from the following functions. • Delete: Deletes the selected message. • Forward: Prepares the received message for sending to another recipient. • Cut: Cuts the following objects included in the message. 1.Objects: Displays all objects included in the message. 2.Numbers: Displays a list of all numbers contained in the received message, enabling you to select one for adding to a new or existing Contacts entry. 3.URLs: Saves the URL information contained in the message. The selected URL is saved in the bookmark. • Save as Template: Saves the current message in template form. • Multimedia Msg. You can choose to receive multimedia message notifications through the SMS network and so select which specific multimedia messages you want to download. To select multimedia messages for download in Inbox: 1. In the Inbox, select Multimedia Msg. then press the [OK] Key. 2. Check for new messages, and then select a message you wish to download. 3. Select Download to download the message. 4. If Auto Download is set to On, you will not be notified and the message will be downloaded automatically and saved in the Inbox as unread. 5. Press the [Reply] Soft key [ ] to create a new multimedia message for sending to the sender’s number, or press the [Option] Soft key [ ] to select from the following functions. • Delete: Deletes the selected message. • Forward: Edits or sends the received message to another recipient. • Delete All: Deletes all messages in the Inbox. • Check for E-mail: Checks whether you have received E-mails that have not been downloaded from your service provider’s POP server. NOTE: The POP server does not delete unread E-mails, since there may be truncated E-mails depending on your phone’s storage capacity. New E-mails are downloaded to your phone, not unread E-mails To manage a multimedia message opened in Inbox: 1. In Multimedia Msg., select the multimedia message you want to edit then press the [OK] key. 2. Press the [Reply] Soft key [ ] to create a new multimedia message for sending to the sender’s number, or press the](https://usermanual.wiki/Pantech-Co/S100/User-Guide-729504-Page-37.png)
![38 [Option] Soft key [ ] to select from the following functions. • Delete: Deletes the selected message. • Forward: Prepares the received message for sending to another recipient. • Cut: Cuts the following objects included in the message. 1.Objects: Displays all objects included in the message. 2.Numbers: Displays a list containing all numbers contained in the received message, enabling you to select one for adding to a new or existing Contacts entry. 3.URLs: Saves the URL information contained in the message. The selected URL is saved in the bookmark. • Save as Template: Saves the current message in template form. • Message Info.: Displays information on the selected message (sender, subject, and size). • CB Msg. options Cell Broadcast (CB) messages are messages sent regularly to you through your service provider’s network. These contain information such as news bulletins, weather forecasts, sports results or other information sent to you automatically. These messages are downloaded automatically into the CB Msg. folder of the Inbox. To select from either of the following functions, press the [Option] Soft key: • Delete: Deletes the selected message. • Delete All: Deletes all CB messages in the Inbox. • E-mail options 1. In the Inbox, select E-mail then press the [OK] key. 2. To select from the following functions, press the [Option] Soft key []: • Check for E-mail: Checks whether you have received E-mails that have not been downloaded from your service provider’s POP server. NOTE: The POP server does not delete unread E-mails, since there may be truncated E-mails depending on your phone’s storage capacity. New E-mails are downloaded to your phone, not unread E-mails. • Download in Full: Downloads into your phone’s user memory all E-mails that have been truncated or could not be received due to the size limit in your phone’s E-mail Settings. Outbox The Outbox contains all messages you have not yet sent. Press the [Menu] Soft key then select 1.Messages then select 3.Outbox, and then press the [OK] key. To resend an unsent message: 1. In the Outbox, select the unsent message you want to resend. 2. Press the [Resend] Soft key [ ] to resend the message. To manage messages in Outbox: 1. In the Outbox, select the unsent message you want to manage.](https://usermanual.wiki/Pantech-Co/S100/User-Guide-729504-Page-38.png)
![392. Press the [Resend] Soft key [ ] to resend the message, or press the [Option] Soft key [ ] to select from the following functions. • Edit: Edits the selected message. • Delete: Deletes the message. • Delete All: Deletes all messages in the Outbox. To manage a message opened in Outbox: 1. In the Outbox, select the unsent message you want to edit then press the [OK] key. 2. Press the [Resend] Soft key [ ] to resend the message, or press the [Option] Soft key [ ] to select from the following functions. • Edit: Edits the selected message. • Delete: Deletes the message. • Save as Template: Saves the current message as a template. Draft Box Draft Box contains all messages you have edited and saved. Press the [Menu] Soft key then select 1.Messages then select 4.Draft Box, then press the [OK] key. To manage messages in Draft Box: 1. In the Draft Box, select the saved message you want to manage. 2. Press the [Edit] Soft key [ ] to edit the saved message, or press the [Option] Soft key [ ] to select from the following functions: • Delete: Deletes the message. • Delete All: Deletes all messages in the Draft Box. To manage a message opened in Draft Box: 1. In the Draft Box, select the unsent message you want to edit. 2. (MMS) Press the [Edit] Soft key [ ] to edit the selected message or press the [Option] Soft key [ ] to select from the following functions. • Delete: Deletes the selected message. • Save as Template: Saves the current message as a template. • Send: Sends the selected message. (SMS) Press the [Send] Soft key [ ] to edit the selected message or press the [Option] Soft key [ ] to select from the following functions. • Edit: Edits the selected message • Delete: Deletes the selected message. • Save as Template: Saves the current message as a template.](https://usermanual.wiki/Pantech-Co/S100/User-Guide-729504-Page-39.png)
![40 Sent Box Sent Box saves all messages sent from your phone. Press the [Menu] Soft key then select 1.Messages then select 5.Sent Box, then press the [OK] key. To resend a sent message: 1. In the Sent Box, select the sent message you want to resend. 2. Press the [Resend] Soft key [ ]. To manage messages in Sent Box: 3. In the Sent Box, select the sent message you want to manage. 4. To select from the following functions, press the [Option] Soft key: • Edit: Edits the selected message. • Delete: Deletes the selected message. • Delete All: Deletes all messages in the Sent Box. To manage a message opened in Sent Box: 1. In the Sent Box, select the sent message you want to edit then press the [OK] key. 2. To select from the following functions, press the [Option] Soft key []: • Edit: Edits the message. • Delete: Deletes the message. • Save as Template: Saves the current message as a template. Templates A template contains a block of text for quick insertion into text messages, multimedia messages or E-mails. Press the [Menu] Soft key then select 1.Messages then select 6.Templates, and then press the [OK] key. To manage message in Templates: 1. In Templates, select the template you want to manage. 2. To select from the following functions, press the [Option] Soft key []: • New: Makes a new template. Not available if the template space is full. 1.Text Msg.: Creates a new text template. 2.Multimedia Msg.: Creates a new multimedia template. 3.E-mail: Creates a new E-mail template. • Delete: Deletes the selected template. • Delete All: Deletes all templates. To manage message opened in Templates: 1. In Templates, select the template you want to edit then press the [OK] key. 2. Press the [Edit] Soft key [ ] to edit the selected template, or press the [Option] Soft key [ ] to select from the following functions. • Send: Sends the template.](https://usermanual.wiki/Pantech-Co/S100/User-Guide-729504-Page-40.png)
![41• Delete: Deletes the template. Settings Before you can send or receive messages using your phone, you must configure their settings first. This information is normally provided by your service provider. Press the [Menu] Soft key then select 1.Messages then select 7.Settings and then press the [OK] key. • Text Msg. Before you can send and receive text messages, you must configure the following settings. Press the [Menu] Soft key then select 1.Messages then select 7.Setting and then select 1.Text Msg.. • Message Centre: The number of your SMS center, required when sending a message. You must obtain this number from your service provider. • Message Lifetime: The length of time your message is stored at the message center while attempting to deliver it. • Message Type: The message type: Normal, Fax, Voicemail, ERMES, National Paging, X.400, or Internet. The service provider’s network converts text messages sent from your phone to the selected format. • Receive to: The location where a text message is stored after it is received. If the storage space of the selected location is full, the message is saved in the other storage location. Press the [Left] or [Right] scroll key to choose either Phone or SIM. • Save Message: Specifies whether the completed message is saved in the Sent Box after it is sent. Press the [Left] or [Right] scroll key to choose either On or Off. • Delivery Report: Specifies whether the network informs you whether or not your message has been delivered. • Multimedia Msg. Before you can send and receive multimedia messages, you must configure the following settings. Press the [Menu] Soft key then select 1.Messages then select 7. Setting and then select 2.Multimedia Msg.. MMS Profile: • Profile Name: Input the profile name. • Home URL: Input the connection URL. • Connection Type: Select WAP or HTTP. GSM Settings • Gateway • IP Address: The IP address. A point is added after every 3 digits. • IP Port: The IP port number. • Login ID: The ID used to sign in to the gateway. • Password: The password used to sign in to the gateway. • Data Call Type: Press the [Left or [Right] scroll key to choose either ISDN or Analog. • Dial Number: The dial number. • Login ID: The ID to sign in via GSM. • Password: The password used to sign in via GSM. GPRS Settings](https://usermanual.wiki/Pantech-Co/S100/User-Guide-729504-Page-41.png)
![42 • Gateway • IP Address: The IP address. A point is added after every 3 digits. • IP Port: The IP port number. • Login ID: The ID used to sign in to the GPRS service • Password: The password used to sign in to the GPRS service. • APN: The Access Point Name. • Login ID: The ID used to sign in to the GPRS service. • Password: The password used to sign in to the GPRS service. DNS Settings: The IP addresses for the Domain Name Servers. You can enter the primary and secondary DNS. This function is available only when you are connected to HTTP. Bearer: Press the [Left] or [Right] scroll key to select either GPRS Only or GSM Only. Message Lifetime: Allows you to set the duration of time your message is stored at the message centre while attempting to deliver it. Auto Download: Specifies whether you receive multimedia messages automatically on your phone or you are notified of receiving a multimedia message. Press the [Left] or [Right] scroll key to select either On or Off. Save Message: Specifies whether multimedia messages are saved in the Sent Box after they are sent. Press the [Left] or [Right] scroll key to select either On or Off. Read Report: Specifies whether the message recipient sends you a ‘Read Report’ when the message is read. Delivery Report: Specifies whether the network informs you whether or not your message has been delivered. • E-mail Before you can send and receive E-mail messages, you must configure the following settings. Press the [Menu] Soft key then select 1.Messages then select 7. Setting and then select 3.E-mail. Max. Message Download Size: Defines the maximum size of E-mail messages downloaded. If the E-mail message is larger than the specified size, it is truncated. Press the [Left] or [Right] scroll key to select between 30KB, 60KB, 100KB, and 300KB. E-mail Accounts: Specifies the list of E-mail accounts. Press the [OK] key to delete, rename, set as the default, or edit the selected account. The default account is the account, which is used to send E-mails. The default account cannot be deleted. When you choose to edit an account, you can configure the settings below. You can also create a new account. • User Display Name: The name, which appears in sent E-mail headers. • E-mail Address: Your E-mail address. • Incoming Server: The POP3 server used to receive e mail. Address : The address of the POP3 Server](https://usermanual.wiki/Pantech-Co/S100/User-Guide-729504-Page-42.png)
![43User ID: The ID used to sign in to the e-mail server. Password: The password used to sign in to the e-mail server. • Outgoing Server: The SMTP server used to send e-mail. Address : The address of SMTP Server User ID: The ID used to sign in to the e-mail server. Password: The password used to sign in to the e-mail server SMTP Authenticate: If set to On, then the username and password are used to authenticate your identity when you send e-mail messages using the SMTP protocol. • Save Message: Specifies whether e-mail messages are saved in the Sent Box after they are sent. Press the [Left] or [Right] scroll key to select either On or Off. • E-Mail Bearers: The Internet data connection used to connect to the e mail server: GPRS: Select this item then press the [Edit] Soft key to edit the APN Name, Login ID, and Password. CSD: Select this item then press the [Edit] Soft key to edit the Dial Number, Login ID, Password, and Modem Type (ISDN or Analog). • CB Msg. Before you can receive Cell Broadcast (CB) messages, you must configure the following settings. • Language: Specifies the language of CB messages your phone will receive. • Info. Subjects: Specifies the subject of CB messages your phone will receive: Standard: Predefined subject list. Custom: User-defined subject list. • Receive: Press the [Left] or [Right] scroll key to specify whether or not you want to receive CB messages. • Voice Mail Before you can access the voice mailbox provided by your network service provider, you must configure the following settings. • Call: Calls the predefined voice mail system to check whether you have voice mail. • Voice Mail Number: Specifies the voice mail recipient number manually. Memory Info. This function displays the amount of used and available memory on your phone. Press the [Menu] Soft key then select 1.Messages then select 8.Memory Info, then press the [OK] key.](https://usermanual.wiki/Pantech-Co/S100/User-Guide-729504-Page-43.png)
![45 2. Contacts You can store your personal contacts, which can be added or deleted at any time. You can save up to 800 contacts on the SIM or phone memory. The number of contacts on the SIM depends on SIM memory. Displaying your Contact details Press the [Menu] Soft key then select 2.Contacts. Searching for a name or group • Name Search Press the [Menu] Soft key then select 2.Contacts then select 1.Search then select 1.Name Search. To search for a phone number from Contacts, do the following. 1. Input a name then press the [OK] key. The contact list is shown and the cursor is placed on an item that matches your input data. 2. Press the [Left] or [Right] scroll key to view the recorded numbers. 3. Press the [OK] key to view all numbers. To manage contacts, press the [Option] Soft key [ ] to select from the following functions: • Send Message: Sends a message to a selected recipient. • Edit: Edits and saves the selected contact’s details • Delete: Deletes the selected item. • Send via Bluetooth: Transmits the selected contact’s information via Bluetooth. • Add to Speed Dial: Adds the selected number to Speed dial. • Move to SIM/Phone: Moves the selected contact’s details to SIM or Phone. • Language: Changes the language. • New: New contact. • Group Search Press the [Menu] Soft key then select 2.Contacts then select 1.Search then select 2.Group Search. This function lists all phone numbers in the group you specify. • Service Number This function displays the list of service numbers available using your SIM card is displayed. Press the [Menu] Soft key then select 2.Contacts then select 1.Search then select 3.Service Number. If necessary, scroll to a number by pressing the [Up] or [Down] scroll key then press the [ ] key to dial the number. NOTE: This feature may not be available depending on your SIM card.](https://usermanual.wiki/Pantech-Co/S100/User-Guide-729504-Page-45.png)
![46 Adding a new contact 1. Press the [Menu] Soft key then select 2.Contacts then select 2.Add Contact. 2. Add the information for your new contact. Initially, an empty field with a gray color will appear until you input text. NOTE: Depending on how your phone’s Memory in Use setting is configured, the following fields are displayed. • Phone: Name, Mobile, Home, Office, Fax, Group, Picture, Melody, E-mail, and Memo. • SIM Card: Name, Mobile, and Group • Phone or SIM: Select the saving location – phone or SIM. Editing contacts You edit your contacts using the Add Contact screen. Speed Dialing This function enables you to use the Speed Dialing function to dial a Contact by pressing a Speed Dial number in Standby mode. Managing Speed Dial numbers Press the [Menu] Soft key then select 2.Contacts then select 3. Speed Dial. The Speed Dial numbers range from 2 to 9, totaling 8 Speed Dial numbers. To add a Speed Dial number: 1. Press the [Up] or [Down] scroll key to move to an empty entry then press the [Add] Soft key. 2. Press the [Up] or [Down] scroll key to choose a contact then press the [Left] or [Right] scroll key to select their number. 3. Press the [OK] key to save the number in the Speed Dial list. • To delete a Speed Dial number Press the [Up] or [Down] scroll key to move to the entry you want to remove from the Speed Dial list then press the [Option] Soft key [], then select Delete. • To edit a Speed Dial number Press the [Up] or [Down] scroll key to move to the entry you want to edit then press the [Edit] Soft key [ ]. Configuring Groups settings This function is used to configure the settings for the five predefined caller groups: No Group, Family, Friends, Business, and VIP. Press the [Menu] Soft key then select 2.Contacts then select 4.Groups. To change the group ring tone, press the [Option] Soft key then select Group Ring Tones. To add your own groups to the predefined groups, press the [Right] scroll key when the predefined five groups are displayed. Business Card This function enables you to save your business card and send it to](https://usermanual.wiki/Pantech-Co/S100/User-Guide-729504-Page-46.png)
![47the phone of another Bluetooth user. You can edit or delete the saved numbers. Press the [Menu] Soft key then select 2.Contacts then select 5.Business Card. To manage your business card information, press the [Edit] Soft Key [ ] to edit the saved business cards, or press the [Option] Soft key [ ] to select from the following functions: • Send via Bluetooth: Sends your business card via Bluetooth. • Edit: edit the saved business card • Delete: Deletes the saved business card. Memory in Use This function enables you to specify whether you want to save your contact information on your Phone, on your SIM Card, or on either Phone or SIM. • Press the [Menu] Soft key then select 2.Contacts then select 6.Memory in Use. Copy All Press the [Menu] Soft key then select 2.Contacts then select 7.Copy All. Select one of the following. • Phone to SIM: Enables you to copy the numbers saved on your Phone onto your SIM card. • SIM to Phone: Enables you to copy the numbers saved on your SIM card onto your Phone. Delete All This function deletes all information saved on the Phone or SIM card. Press the [Menu] Soft key then select 2.Contacts then select 8.Delete All. Memory Info. This function displays the amount of Phone/SIM memory in use. Press the [Menu] Soft key then select 2.Contacts then select 9.Memory Info.](https://usermanual.wiki/Pantech-Co/S100/User-Guide-729504-Page-47.png)
![48 3. Call Logs This function displays missed calls, received calls, and dialed calls. You can delete a call log and see the information for the call timer, call cost, and GPRS info in this menu. Press the [ ] key in Standby mode, or press the [Menu] Soft key then select 3.Call Logs. This function displays missed calls, received calls, and dialled calls. You can delete a call log and see the information for the call timer, call cost, and GPRS info in this menu. NOTE: If Contacts contains the phone number that you want to dial, the name will be displayed, or phone number, date, and time will be displayed alternatively on the Screen. To dial a number, press SEND when the number or name is highlighted. Missed Calls This function displays the missed calls list showing the time and date of missed calls as well as the number or name of the caller. Press the [Menu] Soft key then select 3.Call Logs then select 1.Missed Calls. Press the [Left] or [Right] scroll key to select a missed call. Press the [Delete] Soft key[ ] to delete the missed call record from the list, or press the [Option] Soft key [ ] to select from the following functions: • Save Number: (Displayed when the number is not found in Contacts.) Enables you to record the caller’s or recipient’s name and number in Contacts. • Delete: Deletes selected call record from the list. • Delete All: Deletes all call records from the list. • Send Message: Sends a message to the person you called or who called you. Received Calls This function displays the received call list showing the time and date of a received call as well as the number or name of the caller. Press the [Menu] Soft key then select 3.Call Logs then select 2.Received Calls. Press the [Left] or [Right] scroll key to select a received call. Press the [Delete] Soft key [ ] to delete the received call record from the list, or press the [Option] Soft key [] to select from the following functions: • Save Number: (Displayed when the number is not found in Contacts.) Enables you to record the caller’s or recipient’s name and number in Contacts.](https://usermanual.wiki/Pantech-Co/S100/User-Guide-729504-Page-48.png)
![49• Delete: Deletes selected call record from the list. • Delete All: Deletes all call records from the list. • Send Message: Sends a message to the person you called or who called you. Dialed Calls This function displays the dialed calls list showing the time and date of dialed calls as well as the number or name of the caller. Press the [Menu] Soft key then select 3.Call Logs then select 3.Dialled Calls. Press the [Left] or [Right] scroll key to select a dialed call. Press the [Delete] Soft key [ ] to delete the call record from the list, or press the [Option] Soft key [ ] to select from the following functions: • Save Number: (Displayed when the number is not found in Contacts.) Enables you to record the caller’s or recipient’s name and number in Contacts. • Delete: Deletes selected call record from the list. • Delete All: Deletes all call records from the list. • Send Message: Sends a message to the person you called or who called you. Recent Calls This function lists all recent missed calls, received calls and dialed calls, showing the time and date of the calls as well as the number or name of the other party. Press the [Menu] Soft key then select 3.Call Logs then select 4.Recent Calls. Press the [Left] or [Right] scroll key to select a call. Press the [Delete] Soft key [ ] to delete the call record from the list, or press the [Option] Soft key [ ] to select from the following functions: • Save Number: (Displayed when the number is not found in Contacts.) Enables you to record the caller’s or recipient’s name and number in Contacts. • Delete: Deletes selected call record from the list. • Delete All: Deletes all call records from the list. • Send Message: Sends a message to the person you called or who called you. Delete Call Logs This function allows you to choose to delete all missed, received, or dialed call records or delete all call records. Press the [Menu] Soft key then select 3.Call Logs then select 5.Delete Call Logs. Press the [Yes] Soft key [ ] or [No] Soft key [ ] to confirm you want to execute or cancel this function.](https://usermanual.wiki/Pantech-Co/S100/User-Guide-729504-Page-49.png)
![50 Call Timer This function displays information on call times. Press the [Menu] Soft key then select 3.Call Logs then select 6.Call Timer. The following information is displayed. • Last Call Time: Displays the last call’s length, date and time. • Received, Dialed, Total Call Time: Displays the total call time. • Reset Call Times: Resets the call timer. To confirm the resetting of all call times, input your phone’s password then press the [OK] key. Call Cost This function records information on call cost and limits the call charge to prevent you from exceeding your subscription charge. Press the [Menu] Soft key then select 3.Call Logs then select 7.Call Cost. The following information is displayed. • Last Call Cost: Displays the cost of the last call. • Total Call Cost: Displays the cost of all calls. • Clear Logs: If you input your PIN2 password, this function deletes all call cost logs. • Max. Cost: Reads or sets the maximum call cost within the service area: Read Limit: Reads the maximum number of units. Set Limit: Sets the maximum number of units. • Cost Unit: Reads or sets the cost unit for the service area. Read Unit: Reads the cost unit value. Set Unit: Sets the current cost unit value and the cost per unit. GPRS Info. This function displays the following information on the volume of GPRS data transmitted. Press the [Menu] Soft key then select 3.Call Logs then select 8.GPRS Info. The following information is displayed. Current Info.: Displays the total volume of GPRS data transmitted in the current session, in Kbytes. Last Info.: Displays the total volume of GPRS data transmitted in previous sessions, in Kbytes. Total Info.: Displays the total volume of GPRS data transmitted and received, in Kbytes. Clear Logs: Clears the logs recording how much GPRS data you have transmitted.](https://usermanual.wiki/Pantech-Co/S100/User-Guide-729504-Page-50.png)
![514. Media Gallery This function is used to view, play, delete or edit the photos, images and sounds you have saved on your phone. Photo Gallery This function allows you to view or edit the photos saved in your phone. • Viewing and managing your photo albums Either press the [Menu] Soft key then select 4.Media Gallery then select 1.Photo Gallery, or press the [Menu] Soft key then select 5.Multimedia then select 1.Camera then select 3.Photo Gallery, to display your Photo Album list. Press the [New] Soft key to add an album to your Photo Gallery. You can add up to 6 albums to the default album My Photo. Press the [Option] Soft key then select Delete to delete an album you have created. Select an album in the list then press the [OK] key to display the list of photos in the album. You can press [Small] or [List] to change the list’s appearance. Select a photo and press the [OK] key to enlarge the photo view. Press the [Left] or [Right] scroll key to view other photos in the album. • Viewing and managing photos in your photo albums Select a photo then press the [OK] key to enlarge the photo. To manage the photo you select in an album, press the [Option] Soft key [] to select from the following functions. • Set as: Displays the following sub-functions: Wallpaper – Adds the photo to the Wallpaper list in Display Settings and sets it as the background image shown on your display. Contact – Assigns the photo to a contact in Contacts. • Send via: Displays the following sub-functions: MMS – Sends the selected photo in a multimedia message. Bluetooth – Sends the selected photo via Bluetooth. E-MAIL – Sends the selected photo in E-MAIL . • Search: Searches in the album for the photo name you specify. • Rename: Renames the selected photo. • Crop Photo: To zoom in to the selected photo, press the Left Soft key [ ]; press the Right Soft key [ ] to zoom out from the selected photo. The photo size is set to the display size when you save the photo. • Delete: Deletes the selected photo. • Delete All: Deletes all photos in the album. • Information: Views details of the selected photo. • Print: Prints the selected photo using Bluetooth. Video Gallery This function allows you to view or manage the videos saved on your phone.](https://usermanual.wiki/Pantech-Co/S100/User-Guide-729504-Page-51.png)
![52 • Viewing and managing your video albums Either press the [Menu] Soft key then select 4.Media Gallery then select 2.Video Gallery, or press the [Menu] Soft key then select 5.Multimedia then select 1.Camera then select 4.Video Gallery, to display your Video Gallery list. Press the New to add an album to your Video Gallery. You can add up to six albums to the default album My Video. Press the [Option] Soft key [ ] then select Delete to delete an album you have created. Select an album in the list then press the [OK] key to display the list of videos in the album. You can press [Small] or [List] to change the list's appearance. Select a video then press the [OK] key to play the video automatically. • Viewing and managing videos in your video albums Select a video and then press the [OK] key to enlarge the video. To manage the video you select in an album, press the [Option] Soft key [] to select from the following functions. • Set as: Displays the following sub-functions: Wallpaper – Adds the video to the Wallpaper list in Display Settings and sets it as the background image shown on your display. Contact – Assigns the video to a contact in Contacts. NOTES: 1. Files downloaded from other sources may not be supported. • Search: Searches in the album for the video name you specify. • Rename: Renames the selected video. • Delete: Deletes the selected video. • Delete All: Deletes all videos in the album. • Information: Views details of the selected video. Image Gallery This function allows you to view or manage the images saved on your phone. Press the [Menu] Soft key then select 4.Media Gallery then select 4.Image Gallery to display your Image Gallery listing all images stored on your phone. • Viewing and managing images in your Image Gallery Press the [Large] Soft key or press the [OK] key to zoom in to the image selected in your Image Gallery Press the [Left] or [Right] scroll key to view other images in your Image Gallery. Press List to return to your Image Gallery list. To manage the image you select in your Image Gallery, press the [Option] Soft key [] to select from the following functions. Wallpaper – Adds the image to the Wallpaper list in Display Settings and sets it as the background image shown on your display.](https://usermanual.wiki/Pantech-Co/S100/User-Guide-729504-Page-52.png)
![53Contact – Assigns the image to a contact in Contacts. • Rename: Renames the selected image. • Delete: Deletes the selected image. • Delete All: Deletes all images in your Image Gallery. • Information: Views details of the selected image. • Send via: MMS – Files are transmitted via MMS. E mail – Files are transmitted via E-mail. Bluetooth – When Bluetooth is turned on, this function sends an image file to another Bluetooth device. Sound Gallery This function allows you to play back or manage the sound files saved on your phone. Press the [Menu] Soft key then select 4.Media Gallery then select 5.Sound Gallery to display your Sound Gallery listing all sound files stored on your phone. The selected sound file is automatically played back once. • Managing sound files in your Sound Gallery To manage the sound file you select in your Sound Gallery, press the [Option] Soft key [] to select from the following functions. • Set as Ring Tone: Sets the selected sound file as a ringtone. NOTE: You can use MP3 files of up to 500 KB as ringtones. • Rename: Renames the selected sound file. • Delete: Deletes the selected sound file. • Delete All: Deletes all sound files in your Sound Gallery. • Information: Views details of the selected sound file. • Send via: MMS – Files are transmitted via MMS. E mail – Files are transmitted via E-mail. Bluetooth – When Bluetooth is turned on, this function sends an music file to another Bluetooth device. NOTE: Consumers who convert MP3 files containing commercial music may be subject to copyright law. You therefore should not distribute those files illegally. Your phone incorporates DRM (Digital Rights Management) software that prevents protected commercial music from being forwarded illegally and so infringing copyright. Other Files This function allows you to manage files in unsupported formats saved on your phone. It also lists files received via Bluetooth from other devices. Press the [Menu] Soft key then select 4.Media Gallery then select 6.Other Files to list all other files stored on your phone. • Managing other files saved on your phone To manage the other files you select, press the [Option] Soft key](https://usermanual.wiki/Pantech-Co/S100/User-Guide-729504-Page-53.png)
![54 [] to select from the following functions. • Rename: Renames the selected file. • Delete: Deletes the selected file. • Delete All: Deletes all files in your Other Files. • Information: Views details of the selected file. • Send via: MMS – Files are transmitted via MMS. E mail – Files are transmitted via E-mail. Bluetooth – When Bluetooth is turned on, this function sends an image, photo or music file to another Bluetooth device. Memory Info. Press the [Menu] Soft key then select 4.Media Gallery then select 7.Memoru Info. to display the following memory information: Displays how much memory is used and available on your phone for photos, videos, images, sound files, Java applications, multimedia messages and your phone’s System information. NOTE: Special objects, user-defined wallpapers and similar information are stored as System information on your phone.](https://usermanual.wiki/Pantech-Co/S100/User-Guide-729504-Page-54.png)
![55 5. Multimedia Camera This function enables you to use your camera phone to take a photo or video. You can then save and edit the photo or video on your phone. • Taking photos 1. Press the [Menu] Soft key then select 5.Multimedia then select 1.Camera then select 1.Take a Photo to enter your phone’s Photo Capture mode. Tip: You can press the [ ] key in Standby mode to prepare to take photos directly. 2. To change the photo shooting mode, press the Right Soft key. This toggles between the following options, represented by icons on your phone’s display. Shooting Mode Icon Description Single Capture General mode for a single photo. Multi Capture Takes multiple photos. The quantity of photos is determined by the Multi-Shot option. Frame Capture Takes the photo with the saved frame. Image size: 128X160 pixels (fixed) 3. If necessary, adjust the camera options to improve the photo quality. 4. Frame the image by aiming your phone’s camera at the subject. 5. Press the [ ] key or [ ] key to take the photo previewed on your phone’s display. Tip: You can use the following keys to adjust your phone’s camera directly. Function Options displayed Soft key Image Size LCD/QVGA/VGA/ [] Brightness 7 levels (from 0 to 6) [] key Left & Right Zoom Control by levels [] key Up & Down Hide Icons On/Off [] • Viewing your photos Press the [Up] or [Down] scroll key to zoom in or out of the selected photo relative to its original size. NOTE: You cannot zoom in VGA mode. Press the [Cancel] Soft key or the [C] key to return to the camera preview screen.](https://usermanual.wiki/Pantech-Co/S100/User-Guide-729504-Page-55.png)
![56 • Saving your photos 1. In Multi Capture mode, select Mark or Unmark to check or uncheck the image box beside the captured images to save them. 2. Press the [ ] key to display the Save Option screen, where you can select a Photo Album and edit the name under which the photo is saved. In Multi Capture mode, the photo is given a name automatically. However, you can input a name manually if you select only one photo. • Using the camera’s photo options When your phone’s camera is in Photo Capture mode, press the [Option] Soft key [ ] to select the following options adjusting how the photo is taken or appears. • Video: Switches to Video Capture mode. • Photo Gallery: Displays the Photo Gallery. • Image Size: Specifies the size of photo you want to take. You can choose LCD(128X160), QVGA(320X240), VGA(640X480), • Effect: Applies an effect to the photo. • White Balance: Adjusts the photo’s white balance according to the ambient lighting. You can choose Auto, Sunlight, Cloudy Fluorescent or Incandescent. • Multi-Shot: Controls the number of photos taken rapidly in sequence. • Self Timer: Specifies the delay time for all shooting modes. When you press the [ ] key or [ ] key, the camera takes a photo automatically after the specified time. NOTE: The time value is reset to its default value when you exit Camera mode. • Hide Icons: Specifies whether the icons are shown on your phone’s display. • Taking a video 1. Press the [Menu] Soft key then select 5.Multimedia then select 1.Camera then select 2.Take a Video to enter your phone’s Video Capture mode. The image taken by your phone’s internal camera is displayed. 2. Press the [Up] and [Down] scroll keys to zoom in or out. Press the [Left] and [Right] scroll keys to control the brightness. 3. Frame the image by aiming your phone’s camera at the subject. 4. Press the [ ] key to record the previewed video. 5. Press the [Cancel] Soft key to cancel recording and return to the Preview screen, or press the [ ] key to stop recording. 6. If you press the [ ] key, the Save Option screen is displayed enabling you to select a Video Album to save the video then enter a video name.](https://usermanual.wiki/Pantech-Co/S100/User-Guide-729504-Page-56.png)
![57NOTE: When Auto Save is selected in the camera settings, the video is automatically saved with the default name in the default Video Album. 7. To cancel saving the video, press the [C] key to return to the Preview screen. To play the recorded video, press the [OK] key. • Using the camera’s video options When your phone’s camera is in Video Capture mode, press the [Option] Soft key [ ] to select the following options adjusting how the video is taken or appears. • Photo: Switches to Camera Capture mode. • Video Gallery: Displays the Video Gallery. • Effect: Applies an effect to the video. • Frame Rate: Specifies the video frame rate. You can choose 15 or 30 frames per second. • Settings Use this function to define your phone’s default camera settings. You can configure the following default camera settings. • Image Size: Defines the default size of photos you shoot. You can choose LCD*(128X160), QVGA(320X240), VGA(640X480), • Image Quality: Defines the default quality of photos you shoot. You can choose Normal, Fine or Low. • White Balance: Adjusts the video’s default white balance * LCD is referred to as one of the image sizes. according to the ambient lighting. You can choose Auto, Sunlight, Cloudy, Fluorescent or Incandescent. • Self Timer: Specifies the default delay time for all shooting modes. When you press the [ ] key or [ ]key, the camera takes a photo automatically after the specified time. • Multi-Shot: Controls the number of video taken rapidly in sequence. • Shutter Sound: Specifies whether or not your phone’s camera makes a sound when you take photos. You can choose Off, Shutter, 123, Smile, Whisky, or Cheese. • Auto Save: Specifies whether or not your phone chooses a default name and album when you take photos and videos. • Creating a video caller ID This feature enables you to save a video clip representing a contact, then set that video clip to represent the contact in Contacts. Whenever you receive a call from that contact, your phone plays the corresponding video clip on its display. You can use either of the following methods to create a video caller ID. To create a video caller ID for a contact from Contacts: 1. Display the contact’s information in the Add Contact screen. (For further details, see Adding a new contact on page 46.)](https://usermanual.wiki/Pantech-Co/S100/User-Guide-729504-Page-57.png)
![58 2. Press the navigation key when the image field is highlighted. The Contact Image screen is displayed. 3. Select 3.Take a Video (For further details, see Taking a video on page 56), or 4.Video Gallery (For further details, see Video Gallery on page 51) to specify a video file. The selected video is played whenever you receive calls from the contact. To create a video caller ID for a contact from Multimedia: 1. Create and save a video. (For further details, see Taking a video on page 56) 2. Display the Video Gallery. (For further details, see Video Gallery on page 51) 3. Select the Video Album containing the video clip then press the [Option] Soft key [ ] then select Set as. 4. Select 2.Contact in the Set as screen, then select the contact then press the [ ] OK key. (You must have stored at least one person in your Contacts already.) The selected video is played whenever you receive calls from the contact. • Selecting a video for display in Standby mode You can set a video clip to play on your phone’s display whenever it is on standby. 1. Create and save a video. (For further details, see Taking a video on page 56) 2. Display the Video Gallery. (For further details, see Video Gallery on page 51) 3. Select the Video Album containing the video clip then press the [Option] Soft key [] then select Set as. 4. Select 1.Wallpaper in the Set as screen. The selected video will play on your phone’s display whenever it is on standby. MP3 Player This function enables you to play MP3 music files on your phone. Press the [Menu] Soft key then select 5.Multimedia then select 2.MP3 Player then, press the [OK] key. The following functions are listed. • Player: Plays MP3 music. • Music Album: Loads an existing Music Album of music tracks, or adds tracks to or deletes tracks from the Album. • File Manager: Allows you to select music on your phone memory directly or make a Music Album. • Settings: Specifies the MP3 Player’s skin and mode. • Flight Mode: Deactivates your phone’s telephony functions. When you turn off the phone, it will reboots. • Player This function displays the MP3 player’s Player screen. Press the [Menu] Soft key then select 5.Multimedia then select 2.MP3 Player then select 1.Player.](https://usermanual.wiki/Pantech-Co/S100/User-Guide-729504-Page-58.png)
![59To manage your MP3 Player’s features, press the [Option] Soft key [] to select from the following functions. • Play All: Lists all MP3 music files stored on your phone memory. If you want, you can then select or unselect MP3 tracks from the list so they are not played. • Music Album: Selects a Music Album made previously. • Skin: Changes the images displayed in the Player. • File Info.: Displays file information on the music currently selected. To control playback of the tracks in your Music Album, press the following keys. Press the [A-B] Soft key [ ] to repeat between A and B. Function Available key Play/Pause [OK ] key Next/Previous play [Left/Right ] key Stop [Down ] key Type of repeat [Up ] key Volume control [Left Side Up/Down ] key NOTE: Type of repeat: 1. : Plays the tracks in sequence with no repetition. 2. : Replays the selected track once. 3. : Plays one track repeatedly. 4. : Replays all the tracks in sequence repeatedly. 5. : Plays the music randomly without any repetition. 6. : Replays all the music randomly and without end. • Music Album This function allows you to make a Music Album of music tracks. If there is no Music Album on your phone, a Music Album containing all tracks on your Phone Memory is created automatically. You can select, unselect and save the tracks you want in a Music Album. Press the [Menu] Soft key then select 5.Multimedia then select 2.MP3 Player, and then select 2.Music Album. • File Manager This function lists all MP3 files on your phone memory for you to select or unselect MP3 files for playback. Press the [Menu] Soft key then select 5.Multimedia then select 2.MP3 Player, and then select 3.File Manager. To manage your MP3 files, press the [Option] Soft key [] to select from the following functions. • Save Album: Saves the selected MP3 files in the Album List. • Rename: Changes title of the selected MP3 file.](https://usermanual.wiki/Pantech-Co/S100/User-Guide-729504-Page-59.png)
![60 • Delete: Deletes the selected MP3 files. • Delete All: Deletes all MP3 files. • Select All: Selects all MP3 files. • Unselect All: Unselects all selected MP3 files. • Information: Shows information on the selected MP3 files. • Settings This function allows you to configure your MP3 Player’s operation. Press the [Menu] Soft key then select 5.Multimedia then select 2.MP3 Player then select 4.Settings. • Mode: Adjusts how MP3 music is played. You can choose Normal, Pop, Jazz, Classic, Rock, Dance or Country. • Skin: Specifies which image is displayed on the Player screen during playback. You can choose Equalizer, Animation01 or Animation02. • Flight mode This function deactivates your phone’s telephony features, enabling you to use it as an MP3 player in places where mobile phone use is not permitted, for example. Press the [Menu] Soft key then select 5.Multimedia then select 2.MP3 Player, and then select 5.Flight Mode. Games Your phone includes one or more games for you to play. Each game contains Help information explaining how to use your phone’s keys that control the game. The control keys differ depending on the game. Java This function allows you to download and run Java games on your phone. You can use your WAP browser to search for Java games and download them for installation on your phone. Press the [Menu] Soft key then select 5.Multimedia then select 4.Java. • Listing Java games stored on your phone Press the [Menu] Soft key then select 5.Multimedia then select 4.Java then select 1.Games. • Running and managing Java games on your phone Display the list of Java games stored on your phone. To run or manage Java games, select the Java game in the list then do the following. To: Press: Run the game Press the [Option] Soft key [ ] then select Run, or press the [OK] key. View details of the game Press the [Option] Soft key [ ] then select Info., or press the [ ] Soft key.Delete the game Press the [Option] Soft key [ ] then select Delete.](https://usermanual.wiki/Pantech-Co/S100/User-Guide-729504-Page-60.png)
![61• Viewing the amount of Java application memory used Press the [Menu] Soft key then select 5.Multimedia then select 4.Java then select 2.Memory Info.](https://usermanual.wiki/Pantech-Co/S100/User-Guide-729504-Page-61.png)
![62 6. Settings This function enables you to personalize how your phone operates. Display Settings You can define how information is displayed on your phone. Press the [Menu] Soft key then select 6.Settings then select 1.Display Settings. • Main Screen This function allows you to change the background image shown on your phone’s display. Press the [Menu] Soft key then select 6.Settings then select 1.Display Settings then select 1.Main Screen. • Wallpaper: Sets your phone’s wallpaper by selecting from the Wallpaper list. Wallpaper lists images you can use to set as your wallpaper from your Photo Gallery or Image Gallery. To delete wallpapers other than the default, press the [Delete] Soft key. (You cannot delete the default wallpaper.) • Wallpaper Type: Specifies which information is displayed on your phone’s display. You can choose Digital Clock 1, Digital Clock 2, Analog Clock, Calendar, Greeting or D-day. • Greeting This function allows you to set the greeting message displayed in Startup or Idle mode. 1. Press the [Menu] Soft key then select 6.Settings then select 1.Display Settings then select 2.Greeting. 2. Input the greeting message then press the [OK] key. • Back Light This function allows you to specify for how long your phone’s display is backlit. 1. Press the [Menu] Soft key then select 6.Settings then select 1.Display Settings then select 5.Back Light. 2. Choose how long you want backlighting of your phone’s displays to remain on if you do not touch any key. You can choose 5 Sec, 10 Sec, 20 Sec, 1 Min, or 10 Min. 3. Press the [OK] key. Sound Settings You can define how sound is played on your phone. Sound Settings define how your phone reacts when you receive a call or a message, how your keypad sounds when you press a key, and more. You can either leave the default ring tone, key tone, and other settings for each of the five available profiles unchanged, or you can personalize them to your needs. The five profiles available are Normal, Silent, Meeting, Outdoor and Car. Press the [Menu] Soft key then select 6.Settings then select 2.Sound Settings. • Ring Tone Either press the [Menu] Soft key then select 6.Settings then select](https://usermanual.wiki/Pantech-Co/S100/User-Guide-729504-Page-62.png)
![632.Sound Settings then press the [Edit] Soft key then select 1.Ring Tone. You can personalize the following. • Ring Type: Specifies how your phone rings or vibrates when you receive calls. You can choose Ringing, Vibration, Vib then Ring, Vib and Ring, Ascending, or None (Quiet). • Ringing Volume: Specifies how loudly your phone rings. You can choose from eight levels ranging from silent to loud (0~7). • Bell Sound This function allows you to specify whether your phone rings, plays music or plays a sound when you receive calls. Press the [Menu] Soft key then select 6.Settings then select 2.Sound Settings then press the [Edit] Soft key then select 2.Bell Sound. You can personalize the following. • Sound Box: Specifies whether your phone plays a Melody Sound, Bell Sound, or User Sound. • Melody Sound, Bell Sound or User Sound: Specifies the melody, ringtone or sound played. User Sound plays melodies from the Sound Gallery. • Message Alert This function allows you to specify how your phone alerts you when you receive messages. Press the [Menu] Soft key then select 6.Settings then select 2.Sound Settings then press the [Edit] Soft key then select 3.Message Alert. You can personalize the following. • Reminder: Specifies at what intervals you will be reminded when you have received a message. Press the [Left] or [Right] scroll key to select Off, Once, Every 2 Min, or Every 5 Min. • Ring Volume: Specifies how loudly your phone rings. You can choose from eight levels ranging from silent to loud (0~7). • Sound: Specifies the Message Alert Tone. Press the [Left] or [Right] scroll key to set the Message Alert Tone to Bell1, Bell2, or Bell3. • Key Tone This function allows you to select the sound you hear when you press the phone’s keys. Press the [Menu] Soft key then select 6.Settings then select 2.Sound Settings then press the [Edit] Soft key then select 4.Key Tone. You can personalize the following. • Tone Type: Specifies whether key tones are turned on or off. • Ring Volume: Specifies the key tone’s loudness. You can choose from eight levels ranging from silent to loud (0~7). • Sound: Specifies the key tone sound. • Sound Effect This function allows you to turn the default sound effect on or off for various events. Press the [Menu] Soft key then select 6.Settings then select](https://usermanual.wiki/Pantech-Co/S100/User-Guide-729504-Page-63.png)
![64 2.Sound Settings then press the [Edit] Soft key then select 5.Sound Effect. You can specify whether the sound effect is played for the following events. • Menu Moving: When you change a menu with the Navigation key. • Power On & Off: When you turn the power on or off. • Option Popup: When you press the [ ] Soft key and a popup window is displayed. • Call Connection: When you dial or hang up. • WAP Connection: When you connect or end a WAP session. • Hour Alert: Every hour while your phone is in Standby mode. • Minute Minder: Every minute while making a phone call. • Popup Alert: A warning, error, information or question. • Profile Name This function allows you to rename your phone’s profiles. Select a profile name menu from the Sound Setting editing screen to rename it manually. 1. Press the [Menu] Soft key then select 6.Settings then select 2.Sound Settings then press the [Edit] Soft key then select 6.Profile Name. 2. Input a new name for the profile. 3. Press the [OK] key. • Reset This function allows you to reset all sound related values in the profile. 1. Press the [Menu] Soft key then select 6.Settings then select 2.Sound Settings then press the [Edit] Soft key then select 7.Reset. 2. To confirm you want to reset the sound related values in the profile, press the [Yes] Soft key. Call Settings Call Settings define how your phone reacts when you receive a call or make a call, and more. Press the [Menu] Soft key then select 6.Settings then select 3.Call Settings. • Call Divert This function allows you to divert incoming calls to another phone number. Press the [Menu] Soft key then select 6.Settings then select 3.Call Settings then select 1.Call Divert. Choose All Calls, When Busy, On No Answer, When not Found, or Cancel All. • Answer Type This function allows you to specify how calls are to be answered on your phone. 1. Press the [Menu] Soft key then select 6.Settings then select 3.Call Settings then select 2.Answer Type. 2. Press the [Left] or [Right] scroll key to specify which of the following methods is to used to answer calls.](https://usermanual.wiki/Pantech-Co/S100/User-Guide-729504-Page-64.png)
![65• SEND key: Incoming calls are answered by pressing the [ ] key. • Any Key: Incoming calls are answered by pressing any key except the [ ] key and [Reject] Soft key. • Auto Receive: Your phone automatically answers calls after 10 seconds. This feature is available only when a headset is connected to your phone’s headset jack. 3. Press the [OK] key. • Auto Answer The Auto Answer function works like an automatic answering machine. It plays the recorded message to your caller if you do not answer the call within the defined time. Press the [Menu] Soft key then select 6.Settings then select 3.Call Settings then select 3.Auto Answer. The following information is displayed. • Auto Answer: Specifies whether or not the Auto Answer function is activated. • Recorded Message: Displays a list of messages recorded. Each recorded message is displayed with its date and time, and the caller’s number. Using the [Option] menu, you can make calls from the Recorded Message list, send messages and delete messages from the list. • Response Message: Defines which message your phone plays to callers depending on your current situation. These include Absent, Meeting, Driving, and User Message. • Response Time: Defines the automatic answering time (After 3 Sec, 5 Sec, 10 Sec, or 20 Sec). If the incoming call is not answered within this time, your phone plays the recorded message to the caller. • User Message: Displays your voice message set as the Response Message. Press the [ ] key to play your voice message. If no message is recorded, the function only records the caller’s message. • Auto Redial This function automatically redials the number you call if your call is unsuccessful. 1. Press the [Menu] Soft key then select 6.Settings then select 3.Call Settings then select 4.Auto Redial. 2. Select On or Off. • Call Waiting This function informs you that you have received a second call while you are in a call. 1. Press the [Menu] Soft key then select 6.Settings then select 3.Call Settings then select 5.Call Waiting. 2. Press the [Option] Soft key to select from the following options. • Activate: Activates the Call Waiting feature. • Deactivate: Cancels the Call Waiting feature. • Status: Indicates whether or not the Call Waiting feature is activated.](https://usermanual.wiki/Pantech-Co/S100/User-Guide-729504-Page-65.png)
![66 • Send Caller ID This function prevents your phone number from being displayed on the phone of the people you call. NOTE: This service is network dependent. Please inquire with your network provider. 1. Press the [Menu] Soft key then select 6.Settings then select 3.Call Settings then select 6.Send Caller ID. 2. Select On or Off. • Own Number This function allows you to record your own phone number on your phone. NOTE: This function is SIM card dependent. 1. Press the [Menu] Soft key then select 6.Settings then select 3.Call Settings then select 7.Own Number. 2. Press the [Edit] Soft key [ ] to edit your Own Number, or press the [Option] Soft key [] to select from the following options. • Add: Adds your own number to your SIM card. • Delete: Deletes your own number from your SIM card. Language This function allows you to select which language is displayed on your phone. Press the [Menu] Soft key then select 6.Settings then select 4.Language. Time & Date This function allows you to set the time and date displayed on your phone. Press the [Menu] Soft key then select 6.Settings then select 5.Time & Date. You can set the Time, Date, and Date Format. Favorite This function allows you to add your own favorites to a Favorite screen, enabling you to access your favorite functions and files quickly. Press the [Menu] Soft key then select 6.Settings then select 6.Favorite. If there is no item in the Favorite screen, press the [OK] key to add a favorite; if an item is selected, press the [OK] key to go to that item. NOTES: You can add functions down to two levels of function commands. You cannot delete Media Gallery because it is the default function. For the set values in Favorite, the Application Lock item asks you to input a password before you can Go to that item. For the set values in Favorite, all items requiring security ask you to input a password before you can access that item. Auto Keypad Lock If you don’t press any keypad during the specified duration, you](https://usermanual.wiki/Pantech-Co/S100/User-Guide-729504-Page-66.png)
![67can block key press action. Press the [Menu] Soft key then select 6.Settings then select 7.Auto Keypad Lock. The keypad lock duration to one of Off/15 Secs/30 Secs/1 Min/2 Mins. Push Up/Down the joystick to select the value that you want and push in on the joystick. Network Selection This function allows you to specify whether your phone selects its service provider network manually or automatically. Press the [Menu] Soft key then select 6.Settings then select 8.Network Selection. Select either Automatic or Manual. Security Settings The security settings enable you to restrict the use of your phone to specific people and types of calls. Codes and passwords are used to protect these features of your phone. They are described in the following sections. See also Access codes in the Appendix, on page 91. Your phone’s security features keep your phone and SIM card safe from unauthorized use, and you can either set a password for your phone or use the Call Barring service and Fixed Dialling mode to restrict which calls can be made using your phone. Press the [Menu] Soft key then select 6.Settings then select 9.Security Settings. • SIM Lock This function allows you to specify whether your phone requests the PIN number of SIM cards inserted in it. Press the [Menu] Soft key then select 6.Settings then select 9.Security Settings then select 1.SIM Lock. You must input the password before you decide whether to set SIM Lock . Press the [Left] or [Right] scroll key to select Lock or Unlock. • Lock: You must input the PIN number to access to the main menu after you power on your phone. • Unlock: You are not asked to input the PIN number to access to the main menu after you power on your phone. NOTE: If you fail to input the correct PIN number 3 times in succession, you will be prompted to input the PUK number. • Change PIN This function enables you to change your SIM card’s PIN number. Press the [Menu] Soft key then select 6.Settings then select 9.Security Settings then select 2.Change PIN. You must input the previous PIN2 number and the new PIN2 number to change. • Phone Lock This function allows you to lock your phone until the correct password is input. Press the [Menu] Soft key then select 6.Settings then select](https://usermanual.wiki/Pantech-Co/S100/User-Guide-729504-Page-67.png)
![68 9.Security Settings then select 3.Phone Lock. You must input the password before you can access this function. • Change Password This function allows you to change your phone’s password. Press the [Menu] Soft key then select 6.Settings then select 9.Security Settings then select 4.Change Password. You must input the password before you can access this function. Input the new password then press the [OK] key. The default password is 1234. • Application Lock This function does not allow specific features access. You must input the password before you can access to this function.. This function allows you to lock an application. Press the [Menu] Soft key then select 6.Settings then select 9.Security Settings then select 5.Application Lock. You must input the password before you can access this function. • Call Barring This function allows you to set restrictions on making certain types of calls. Press the [Menu] Soft key then select 6.Settings then select 9.Security Settings then select 6.Call Barring. You must input the password before you can access this function. You can choose the following. • Handset Barring: Specifies whether incoming calls and certain outgoing calls are restricted on your phone. • Network Barring: This feature is network and subscription dependent. Some bars are set by the network service provider. You can set restrictions on making the following types of calls. International Calls: Restricts outgoing and incoming international calls. Outgoing Calls: Restricts all outgoing calls. Incoming Calls: Restricts all incoming calls. Incoming Calls When Abroad: When you are abroad, this feature allows you to restrict incoming calls. Int. Calls Except to Home Country: Restricts international calls except to your home country. Clear All: Cancels all barring settings. Change Password: Replaces the old password with a new one. • CUG (Closed User Group) This function allows you to set up a group of numbers that you want to dial or receive calls from. Press the [Menu] Soft key then select 6.Settings then select 9.Security Settings then select 7.CUG. Select the CUG name then press the [Edit] Soft key [ ] to edit the CUG identifier, or press the [Option] Soft key [] to select the following.](https://usermanual.wiki/Pantech-Co/S100/User-Guide-729504-Page-68.png)
![69• Delete: Deletes the preset CUG Identifier. • Fixed Dialing (Fixed Dialing Numbers) Fixed Dialing is a service that limits access to specific numbers in the Contacts list recorded on your SIM card. You must input your PIN2 code to set up or cancel this service. Press the [Menu] Soft key then select 6.Settings then select 9.Security Settings then select 8.Fixed Dialling. Press the [Option] Soft key [] to select one of the following. • On • Off • Fixed Dial List: Defines the numbers recorded in your Fixed Dialing List. • Change PIN2 This function allows you to change your phone’s PIN2 code. Press the [Menu] Soft key then select 6.Settings then select 9.Security Settings then select 9.Change PIN2. You must input the previous PIN2 number and the new PIN2 number to change. • System Reset This function allows you to delete all user settings and data from your phone and return to the factory default settings. Press the [Menu] Soft key then select 6.Settings then select 9.Security Settings then select 10.System Reset. Input the phone password then press the [OK] key. The default phone password is 1234. Flight Mode Press the [Menu] Soft key then select 6.Settings then select 10.Flight Mode. Once you select "Flight Mode On", you cannot make or receive calls. This mode enables you to switch off all telephone communications functions but maintains power to other functions such as the calendar, games, MP3 Player, etc. This mode supports use of these features in environments where transmitters and/or receivers are not allowed, such as on aircraft. If you select “Flight Mode Off”, your phone will restart. Software Version This function allows you to display your phone’s current software version. Press the [Menu] Soft key then select 6.Settings then select 11.Software Version. NOTE: If no record exists, press the [Add] Soft key to display the name input screen for a new CUG.](https://usermanual.wiki/Pantech-Co/S100/User-Guide-729504-Page-69.png)
![70 7. Organiser Press the [Menu] Soft key then select 7.Organiser. Organiser provides various functions alarm setting, main event record, memo, world time, calculator, unit conversion, stopwatch and timer. Alarm Press the [Menu] Soft key then select 7.Organiser then select 1.Alarm. You can set an alarm to sound up to 5 specific times. (Once you set the On Morning Call, an icon appears on the display) Setting an alarm Press the [Menu] Soft key then select 7.Organiser then select 1.Alarm to display the current alarm list. Select an alarm to set and press [OK]. Press the [New] Soft key in the list to set a new alarm with the edit alarm screen. Press the [Option] Soft key [ ] to: Delete: Deletes an Alarm from the list. On Snooze/Off Snooze: The alarm that is set to Snooze rings every 5 minutes for 3 times. Only one alarm can be set to On Snooze. On Wakeup Call/Off Wakeup Call: Alarm always sounds regardless of the ring type, vibration or whatever. Delete All: Deletes all Alarms from the list. Press the [OK] key to edit the Alarm, and then press the [Up/Down] key in the ‘Edit Alarm’ screen to set on Set, Time, or Melody. In the case of Melody type, press the [ ] Right key to enter the Sound Gallery to select a melody. In the case of Date, the selection is possible only when the alarm type is “Weekly.” After Date is selected, pressing the [ ] Right key allows you to move the screen where you can set desired weekday.. When selecting the desired weekday, you can set it by pressing the [Mark] Soft key which toggles between [Mark] and [Unmark]. Press the . [OK] key to save the day and move to the previous screen.. Calendar Press the [Menu] Soft key then select 7.Organiser then select 2.Calendar. The Calendar helps you manage your schedule including your time for calls or special days. Alarm service on a set date is included in this function. The Calendar consists of Monthly View, Daily View, and Event View & Edit.](https://usermanual.wiki/Pantech-Co/S100/User-Guide-729504-Page-70.png)
![71Monthly View To: Press: Move to another day [Left] Previous Day [Right] Next Day Move to another week [Up] Previous Week [Down] Next Week Move to the previous or next month [1] Previous Month [3] Next Month Press the [Menu] Soft key then select 7.Organiser then select 2.Calendar from the menu to display the Monthly View. Press the [New] Soft key to add a new event. Press the [Option] Soft key [ ] to: View All Events: Shows all of your scheduled events Del Past Events: Deletes your past scheduled events. Del All Events: Deletes all of your scheduled events. Go to Today: Moves to today for selection. Go to Date: Moves to the set date. Memory Info.: Displays the number of stored events, not more than 50. Use the Navigation key to select the date and press the [OK] key. On a date with any schedule registered, move to Daily View to check the schedule. On a date with no registered schedule, add a new schedule. Any event registered on a date will be displayed at the bottom of the display in form of an icon. Daily View Shows the schedule registered for a date. Select a schedule and press the [OK] key to view or edit the details of an event. Press the [Option] Soft key [ ] to: Delete: Deletes an event On D-day/Off D-day: Sets up or cancels D-Day. Move Date: Transfers an event to a specific date. Delete All: Deletes all events. Send Via Bluetooth: Sends the selected event via Bluetooth NOTE: When you select D-Day from Screen Control, ‘D-Date, Event Memo Content Part’ will appear in the standby screen. Upon setup of a new D-Day, the existing D-Day is automatically deleted. Event View & Edit Shows the registered schedule item by item and edits the schedule or creates a new schedule. Create New Event (by View & Edit) 1. Select a day from Monthly View and press the [New] Soft key 2. Upon appearance of the New Event screen, select and input an event item by item for registration. 3. After input, press the [OK] key to save the event. NOTE: Maximum Quantity of Schedule for Registration: 50Maximum Daily Quantity of Schedule for Registration: 8 Period of Registration: 01/01/1950 ~31/12/2043](https://usermanual.wiki/Pantech-Co/S100/User-Guide-729504-Page-71.png)
![72 Memo You can keep text memo or voice memo on your phone. Text Memo Saves short notes in your phone. You can input text right after you enter to the text input menu on your phone if there is no memo saved. Memory List window pops up is there is a memo saved. Press the [New] Soft key and input texts to create a new memo. Press the [Option] Soft key [ ] to: Edit: Retrieve existing memos, edit the parts of your choice, and press the [OK] key for save. * Tip: Press the [OK] key and [Edit] Soft key to return to the editing screen. Delete/Delete All: Deletes any or all items. • Voice Memo The Voice Memo function records your voice message. You can use Record, Stop, Play, and Save for voice recording and playback. You can use the Text Editor for title input. Record 1. Press the [New] Soft key from the Option menu and press the [] key. 2. Press the [ ] key to terminate the recording process and press the [Play] Soft key to hear the recorded data. 3. Press the [ ] key, input a name, and press the [OK] Soft key to save the data. * Tip: When the memory is full, the “Not Enough Memory” message will appear and returns to the upper menu. Play Select an item and press the [ ] key to start play immediately. Press the [Option] Soft key [ ] to: Delete: Deletes the selected voice memo. Delete All: Deletes all voice memos. Rename: Renames the voice memo Send Via: MMS – The selected item is transmitted via MMS. E-mail – The selected item is transmitted via E-mail Bluetooth – When Bluetooth is turned on, this function sends the selected item to another Bluetooth device. World Time Press the [Menu] Soft key then select 7.Organiser then select 4.World Time. This function informs you of world time. Press the [Option] Soft key [ ] to: On/Off Day Light Saving: The Day Light Saving function fits the time of the countries in summer who enforce Summer Time.](https://usermanual.wiki/Pantech-Co/S100/User-Guide-729504-Page-72.png)
![73Select Day Light Saving from the Option menu for setup. The icon for the country with Summer Time will be activated Shows that the Summer Time Saving function is on. * Tip: Summer Time sets the clock one hour ahead. Set as Local: Press the [Set] Soft key or select [Set as Local] from the Option menu and Target Area will be replaced with Home Area. Calculator Press the [Menu] Soft key then select 7.Organiser then select 5.Calculator. Your phone has a Calculator function. Calculator provides 4 basic operations +, -, x, and /. Press the number keys and direction keys to input a formula and press the [=] Soft key to display the result. * Tip: Press the [.] Soft key to input a decimal point. Press the [C] Soft key to reset the formula. Press the [C] key short to delete the text of a formula and press and briefly hold the [C] key to delete the whole formula. Converter Press the [Menu] Soft key then select 7.Organiser then select 6.Converter. Converter converts a figure between different units i.e. Length, Area, Volume, Weight, and Temperature. Select one from Length, Area, Volume, Weight, or Temperature. Press the [Down] key to move to the next line, press the [Left/Right] key to select a target unit, and press the number keys to input numbers. Press the [Down] key again to move to the next line and select a result unit and you will get the correct answer. * Tip: The result is automatically recalculated upon a change of unit or value. Press the [.] Soft key to input a decimal point. Stop Watch Press the [Menu] Soft key then select 7.Organiser then select 7.Stop Watch. The Stop Watch measures time for all sorts of sports. Press the [ ] key to operate the Stop Watch. Press the [ ] key to pause the Stop Watch and press the [ ] key to restart the Stop Watch. Whenever you select the [Lap] Soft key, the 4 lap times as a maximum are displayed and when you select the fourth [Lap], the Stop Watch stops. Press the [Reset] Soft key to initialise all. Timer Press the [Menu] Soft key then select 7.Organiser then select 8.Timer. Sets the alarm bell to ring at a preset time. Press the [Set] Soft key to input a time and minute for countdown and press the [OK] key for setup.](https://usermanual.wiki/Pantech-Co/S100/User-Guide-729504-Page-73.png)
![74 Press the [ ] key after input and the displayed time will start counting down. Now, press the [ ] key to pause the countdown and press the [ ] key to restart the countdown. After the preset time, an additional animation and alarm sound will be provided. Press the [Stop] Soft key to pause both. Press the [Set] Soft key to return to the initial state while Timer is out of operation. When the alarm is ringing with animation at the set time, stop their motion to return to the initial state. Fatness Checker Press the [Menu] Soft key then select 7.Organiser then select 9.Fatness Checker. This function enables you to easily check your physical condition, which is affected by your weight changes, by displaying the fatness level and BMI index based on your height and weight data input by you. After inputting your height and weight, press the [OK] key to check your fatness level and BMI index. Press the [Option] Soft key [ ] to: Measure Again : This function allows you to re-input your height and weight. About Fatness :Shows the fatness level determined based on the fatness value. . About BMI : Shows the fatness level determined based on the BMI value. NOTE: Fatness : Present weight ratio against standard weight. BMI(Body Mass Index) : The Index of weight against height.](https://usermanual.wiki/Pantech-Co/S100/User-Guide-729504-Page-74.png)
![755. Advanced Functions 1. WAP 2. Bluetooth 3. SIM Toolkit 1. WAP You can access the Internet with a WAP (Wireless Application Protocol) browser on your phone. This means you can connect to the Internet anywhere and anytime you have network coverage. NOTE: The descriptions below may vary depending on your service provider. Ask your service provider for detailed information. Press the [Menu] Soft key [] then select 8.Connectivity then select 1.WAP. TIP: Press the [OK] key to access the WAP menu directly. Navigating using the WAP browser To scroll through and select browser items, press the [Up] or [Down] scroll key until the item you want is highlighted then press the [OK] key. • To display the next or previous page, press the [Down] or [Up] scroll key, respectively. • To return to the previous page, press the [C] key. • To return to the startup homepage, press the [Option] Soft key [] then select Home. Entering text in the WAP browser When you are asked to input text, the current text input mode is displayed above the right Soft key.](https://usermanual.wiki/Pantech-Co/S100/User-Guide-729504-Page-75.png)
![76 Home This function contacts your network to load your Wireless Web service provider’s homepage. Press the [Menu] Soft key [] then select 8.Connectivity then select 1.WAP then select 1.Home. Resume This function allows you to reconnect to the Web page displayed most recently. Press the [Menu] Soft key [] then select 8.Connectivity then select 1.WAP then select 2.Resume. Bookmarks This function allows you to bookmark an Internet address using the WAP browser just as you do with a PC Internet browser. 1. Press the [Menu] Soft key [] then select 8.Connectivity then select 1.WAP then select 3.Bookmarks. 2. To record a URL and Name in the first empty number in your Bookmark List, press the [Add] Soft key. To manage existing bookmarks, select the bookmark then press the [Option] Soft key [] to select from the following functions. • Edit: Edits the URL and name of a bookmark. NOTE: This function is not displayed for default bookmarks. • Delete: Deletes a bookmark from the List. NOTE: This function is not displayed for default bookmarks. • Go: Goes to the bookmarked site. Push Messages Your phone can receive Push Messages from your service provider. Push messages are stored in your Inbox. 1. Press the [Menu] Soft key [] then select 8.Connectivity then select 1.WAP then select 4.Push Messages then select 1.Inbox. 2. Select a Push Message then press the [OK] key to contact the WAP page concerned. To manage your Push Messages, select the message then press the [Option] Soft key [] to select from the following functions. • Delete: Deletes the selected message. • Delete All: Deletes all Push Messages in your Inbox. • Go to: Goes to the site of the selected message. Receive Mode This function allows you to set up your phone for receiving Push Messages. 1. Press the [Menu] Soft key [] then select 8.Connectivity then select 1.WAP then select 4.Push Messages then select 2.Receive Mode. 2. Press the Left or Right scroll key to select one of the following options. When the user receives an SI (Service Indication) message • Auto 1. Press the [Options] Soft key [ ] on the Push Message Alerting screen. ·Load: Enters the browser.](https://usermanual.wiki/Pantech-Co/S100/User-Guide-729504-Page-76.png)
![77·Postpone: The message is placed in the WAP PUSH inbox. ·Ignore: Deletes the received message. 2. Press the [Options] Soft key [ ] on the Push Message Alerting screen. ·Exit: Saves and exits the Push Message service. • Acknowledge 1. Press the [Options] Soft key [ ] on the Push Message Alerting screen. · Accept: Shows the information for the selected message. 2. Press the [Options] Soft key [ ] on the Push Message Alerting screen. · Reject: Deletes the received message. • Off Does not accept messages. • Silent When the user receives a push message, it is saved to the Inbox without an alert. The push message icon appears on the idle screen. When the user receives an SL (Service Load) message • Auto When the user receives a message, it attempts an automatic connection with the corresponding URL. Only an alert occurs. • Acknowledge 1. Press the [Options] Soft key [ ] on Push Message Alerting screen. ·Accept: Shows the information for the selected message. 2. Press the [Options] Soft key [ ] on the Push Message Alerting screen. · Reject: Deletes the received message. • Off Does not accept messages. • Silent When the user receives a push message, it is saved to the Inbox without an alert. The push message icon appears on the idle screen. Go to URL This function allows you to directly input the address of a URL and connect to it. 1. Press the [Menu] Soft key [] then select 8.Connectivity then select 1.WAP then select 5.Go To URL. 2. Input the URL you want to go to, then press the [OK] key. Profiles This function selects or edits WAP connection profiles on your phone. NOTE: The settings for your WAP service are already entered as required by your service provider. Care should be taken when you make any modification to a profile since it may cause WAP to be inoperative. Your phone is compatible with OTA (Over The Air) messages. These are used by service providers to send connection details directly to your phone. Please ask your service provider for details of this service. 1. Press the [Menu] Soft key [] then select 8.Connectivity then select 1.WAP then select 6.Profiles.](https://usermanual.wiki/Pantech-Co/S100/User-Guide-729504-Page-77.png)
![78 2. To select a profile, highlight it in the Profile List then press the [OK] key. You cannot select Unedited Profile. To edit a profile, select it in the Profile List then press the [Edit] Soft key to select from the following functions. • Profile Name: Press the [OK] key to change the profile name. • Home URL: Press the [OK] key to edit the Homepage URL provided by your service provider. • Connection Type: Press the [Left] or [Right] scroll key to select either WAP or HTTP. • GSM Settings: This function allows you to set the GSM network proxy by inputting the following information. Gateway/Proxy: If you set the Connection Type to WAP, Gateway is displayed. If you set it to HTTP, Proxy is displayed. Press the [OK] key to display the sub-functions IP Address, IP Port then input the appropriate information for each of the following sub-functions, inputting the information provided by your service provider.](https://usermanual.wiki/Pantech-Co/S100/User-Guide-729504-Page-78.png)
![79Data Call Type: Press the Left or Right scroll key to select ISDN or Analog. Dial Number: Press the [OK] key to input the appropriate dialup number. Login ID: Press the [OK] key to input the appropriate login ID. Password: Press the [OK] key to input the appropriate password. • GPRS Settings: This menu allows you to set the GPRS network proxy by inputting the following information. Gateway/Proxy: If you set the Connection Type to WAP, Gateway is displayed. If you set it to HTTP, Proxy is displayed. Press the [OK] key to display the sub-functions IP Address, IP Port then input the appropriate information for each of the following sub-functions, inputting the information provided by your service provider. APN: (Access Point Name.) Press the [OK] key to input the appropriate APN. Login ID: Press the [OK] key to input the appropriate login ID. Password: Press the [OK] key to input the appropriate password. • DNS Settings: Input the appropriate IP address for the Domain Name Server. You can input the primary and secondary DNS. NOTE: This function is available only when your Connection Type is set to HTTP. • Bearer: Select the bearer type for each type of network access. Press the [Left] or [Right] scroll key to select GSM Only or GPRS Only. • Reset Profile: Press the [OK] key to reset the settings of the selected profile. Press the [Left] or [Right] scroll key to select Yes or No. Cache This function sets up your phone’s cache. This feature is used to store WAP pages directly on your phone, to display them rapidly when you return to them. • Cache Mode This function sets up the cache memory check, which verifies whether the WAP page’s information is already stored in your phone’s cache memory. 1. Press the [Menu] Soft key then select 8.Connectivity then select 1.WAP then select 7.Cache then select 1.Cache Mode. 2. Select one of the following options. • Always Check: The cache is always checked whenever a URL is loaded. • Never Check: The cache is never checked. • Clear Cache This function clears all data stored in the cache (recently visited WAP pages). Press the [Menu] Soft key then select 8.Connectivity then select 1.WAP then select 7.Cache then select 2.Clear Cache.](https://usermanual.wiki/Pantech-Co/S100/User-Guide-729504-Page-79.png)
![80 Security Cert This function displays and manages all security certificates stored on your phone. 1. Press the [Menu] Soft key then select 8.Connectivity then select 1.WAP then select 8.Security Cert. 2. Select a security certificate then press the [Option] Soft key [] to select one of the following functions. • Delete: Deletes the selected security certificate. • Delete All: Deletes all security certificates stored on your phone. Version This function displays the software version of your phone’s WAP browser. Press the [Menu] Soft key then select 8.Connectivity then select 1.WAP then select 9.Version.](https://usermanual.wiki/Pantech-Co/S100/User-Guide-729504-Page-80.png)
![81 2. Bluetooth The term Bluetooth refers both to the specifications for connecting various devices such as computers, mobile phones and home appliances wirelessly over a short distance and then enabling real time, bidirectional communication between them, and to the products complying with those specifications. Your Pantech S100 mobile phone supports the following Bluetooth profiles: • Serial Port Profile (SPP) for communication with PC connectivity software • Dial-Up Networking profile (DUN) as an Internet gateway for a PC • Hands-Free Profile (HFP) as an audio gateway • Object Push Profile (OPP) as a client and server • File Transfer Profile (FTP) as a client and server • Basic Image Profile (BIP) for printing photos • Advanced Audio Distribution Profile (A2DP) for A/V headsets Bluetooth technology enables cost-free wireless connections between electronic devices within a maximum range of 33 feet (10 meters). A Bluetooth connection can be used to send images, videos, texts, business cards, calendar notes, or to connect wirelessly to devices using Bluetooth technology, such as computers. Since devices using Bluetooth technology communicate using radio waves, your phone and the other devices do not need to be in direct line-of-sight (unlike infrared communication). The two devices need only to be within 33 feet (10 meters) of each other, although connections may be subject to interference from obstructions such as thick walls or other electronic devices. Bluetooth communication consumes your phone’s battery charge and your phone’s operating time will be reduced. You should take this into account when performing other operations with your phone. NOTE: There may be restrictions on using Bluetooth communication in certain areas. Check with your local authorities. NOTE: It is recommended to use the Pantech PS1 unit because the Stereo Bluetooth function may not be compatible with stereo Bluetooth headsets made by other companies. Please refer to the Bluetooth Headset manual for Headset operation information. Bluetooth This function activates or deactivates your phone’s Bluetooth feature. 1. Press the [Menu] Soft key then select 8.Connectivity then select 2.Bluetooth then select 1.Bluetooth. 2. Select On to activate Bluetooth, or select Off to deactivate Bluetooth. Paired devices This function displays the paired device or allows you to add a new device. The icon displayed beside each paired device varies depending on the device’s type. 1. Press the [Menu] Soft key [ ] then select 8.Connectivity then select 2.Bluetooth then select 2.Paired Devices. Press the [Option] Soft key [ ] to select from the following functions.](https://usermanual.wiki/Pantech-Co/S100/User-Guide-729504-Page-81.png)
![82 (The functions displayed vary depending on which profiles are supported by the paired device.) • Connect/Disconnect: Displayed for devices supporting the Bluetooth Headset/Hands-free profile. Connects or disconnects the selected device. • Browser Folder: Displayed for devices supporting the FTP Server profile. Displays the FTP directory of the other device. • Edit Name: Allows you to edit the name of the selected other device. • Delete: Deletes the selected device from the Paired Device List. • Set Authorized /Unauthorized: Displayed for PCs and PDAs. If the selected device is set to Authorized, it can access your phone with any permission. If the selected device is set to Unauthorized, the selected device must have permission to access your phone. • Set as Default/Don’t set as Default: Displayed for PCs and PDAs. If two or more headsets/hands-free devices have been paired, choose one of them to be set as the default headset. All headset/hands-free calls will be made or received through the default headset/hands-free. Although you can set a default headset using this function, the last headset connected is automatically set as the default headset. If a device is set as “Don’t set as Default,” the settings of the device set as default are disabled. Press the [New] Soft key [ ] to register a new device. When you select this function, a submenu is displayed listing device types. Select which device type you want to register from the following options. • Search All • Audio Accessory • PC • Phone • Others After you select which device type you want to search for, the message “Search a device” is displayed. 3. Press the [New] Soft key to begin searching for all devices of the selected type. • Searching for a device Every time you search for a new device, the Paired Device List is updated. To cancel the search and display the search results, press the [Cancel] Soft key. You can then press the [Refresh] Soft key to resume the search. Select the device to be paired then press the [OK] key to pair with it. • Pairing with a device Your phone next requests the Passkey to be used to register with the other device. If you and the other device’s owner both enter the same Passkey decided between yourselves, registration is completed. Sending an object To send an object via Bluetooth, do the following. 1. Select the file you want to send. 2. Press the [Option] Soft key then select Send via then select Bluetooth. Your phone searches for other Bluetooth devices](https://usermanual.wiki/Pantech-Co/S100/User-Guide-729504-Page-82.png)
![83nearby. Select the Bluetooth device that is to receive the object then press Send. NOTE: If the other Bluetooth device requests pairing, the object is sent after pairing is completed. Receiving an object Your phone only receives objects when this has been approved. If you receive Contacts information, it is saved in your phone’s memory. If you receive an Event, it is saved in your Calendar. Business Card This function allows you to exchange electronic business cards with another device via Bluetooth. 1. Press the [Menu] Soft key then select 8.Connectivity then select 2.Bluetooth then select 3.Business Card. 2. Press the [Option] Soft key then select one of the following functions. • Receive: Receives the business card from the other Bluetooth device and displays the card. • Send: Sends your business card to the other Bluetooth device. • Exchange: Sends your business card to the other Bluetooth device and receives a business card from the other Bluetooth device then displays it. Your phone searches for other Bluetooth devices supporting the OPP Profile. 3. Select the appropriate Bluetooth device from the list of other Bluetooth devices found then press the [OK] key. Your phone exchanges business cards with the other Bluetooth device in the way you have specified. Outgoing Call Device This function allows you to choose whether your phone or a Bluetooth headset/hands-free device is to be used to make calls. 1. Press the [Menu] Soft key then select 8.Connectivity then select 2.Bluetooth then select 4.Outgoing Call Device. 2. Press the [Option] Soft key then select one of the following functions. • Phone: You make a call using your phone in the normal way. • Headset: You make a call through the Bluetooth headset, provided it has been successfully registered as the default headset. • Always Ask: When you make a call, a message is displayed asking you if you wish to use the headset/hands-free. To make the call using the headset/hands-free, press Yes. To make a call using your phone in the normal way, press No. The message continues to be displayed until the called party answers your call. NOTE: If you do not press Yes or No, the call is made through your phone. Visibility This function allows you to choose whether or not your phone is visible to unpaired Bluetooth devices. 1. Press the [Option] Soft key then select 8.Connectivity then select 2.Bluetooth then select 5.Visibility.](https://usermanual.wiki/Pantech-Co/S100/User-Guide-729504-Page-83.png)
![84 2. Press the [Option] Soft key then select one of the following functions. • Shown to All: Allows other Bluetooth devices to detect your phone in their searches. • Hidden: Allows only Bluetooth devices listed in your Paired Device List to detect your phone in their searches. Name This function allows you to edit the name of your phone. This is shown to other Bluetooth devices in their searches. Press the [Menu] Soft key then select 8.Connectivity then select 2.Bluetooth then select 6.Name. Address This function displays the Bluetooth address of your phone. Press the [Menu] Soft key then select 8.Connectivity then select 2.Bluetooth then select 7.Address.](https://usermanual.wiki/Pantech-Co/S100/User-Guide-729504-Page-84.png)