Pantech L1 Dual Band CDMA Phone With Bluetooth User Manual 061227 CDM 8935 EN M indd
Pantech Co., Ltd. Dual Band CDMA Phone With Bluetooth 061227 CDM 8935 EN M indd
UserManual.wiki
>
Pantech
>
L1 User Manual
User Manual
Navigation menu
Upload a User Manual
Namespaces
Wiki Guide
HTML
PDF
Info
Views
User Manual
Discussion / Help
Navigation
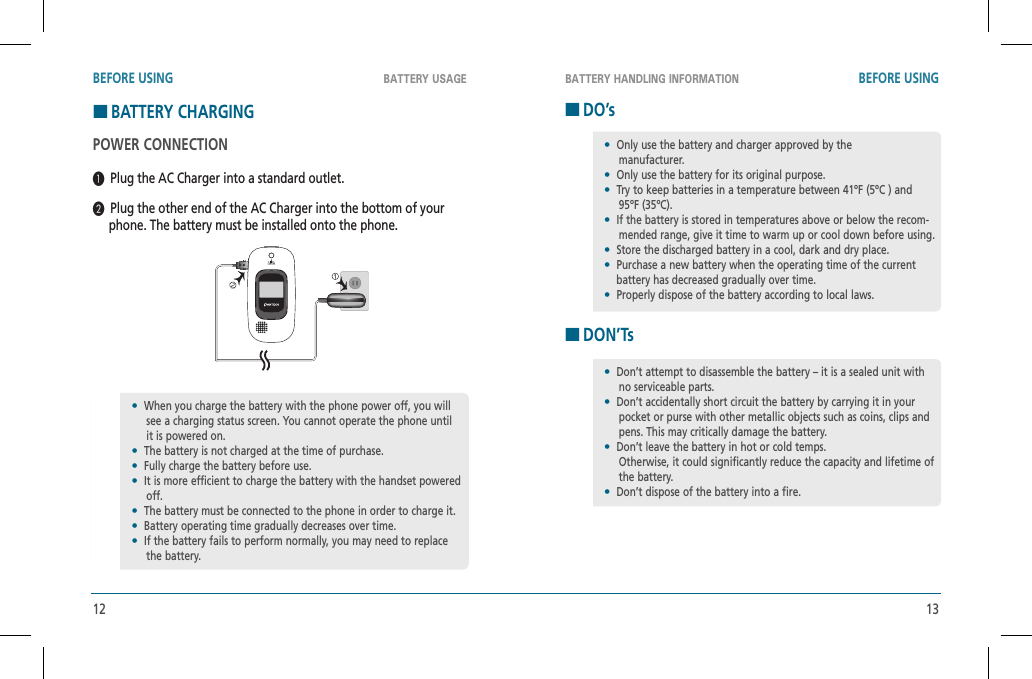
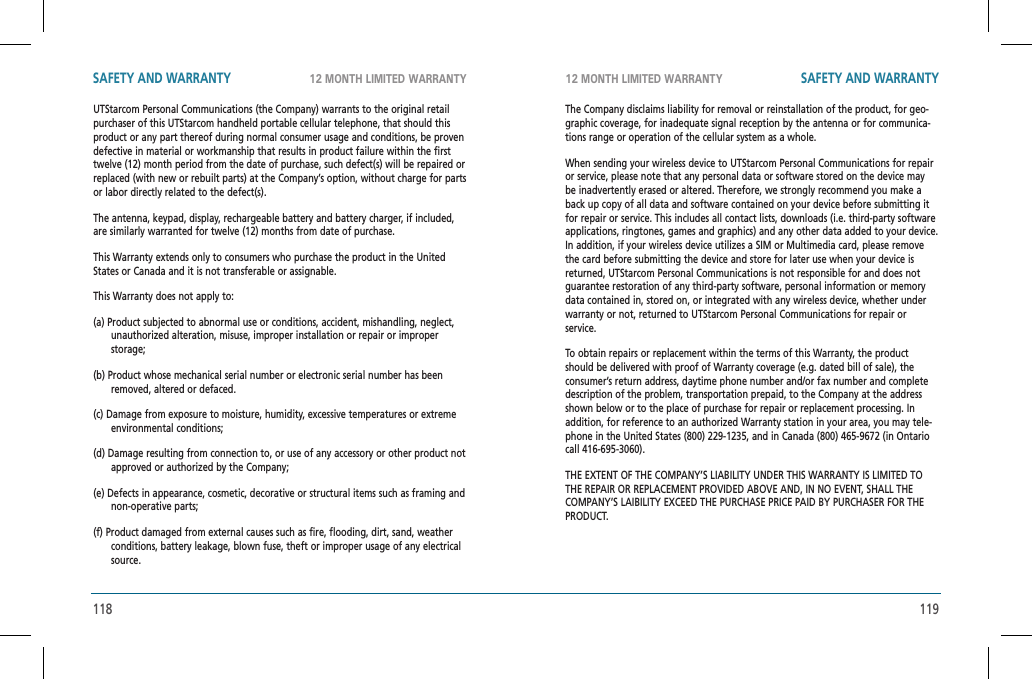
![16 17TURNING THE PHONE ON / OFF ACCESSING THE MENUBASIC OPERATION BASIC OPERATIONHTURNING THE PHONE ON Press , until animation appears and the wake up tone sounds.HTURNING THE PHONE OFF Press and hold until your “Power Off” logo appears.•Immediately change or recharge the battery when “Low Battery Warning Power Off” appears on the display. Memory may possibly be damaged if the phone turns off due to the battery completely draining.•Turn the phone off before removing or replacing the battery. If the phone is on, unsaved data may be lost. To access the menu in idle mode, press [MENU]. Use the to scroll through the menu. To return to the previous page, press . To exit the current menu and return to idle mode, press . Press the to enter a function when its main page is displayed or press its assigned number to have direct access to the function.HotkeyIn idle mode, move the as follows to access these functions:•Leftward movement: Shortcut Key 1 •Upward movement: Shortcut Key 2•Rightward movement: Shortcut Key 3•Downward movement: Shortcut Key 4Your phone can be customized via the menu. Each function can be accessed by scrolling with the or by pressing the number that corresponds with the menu item.](https://usermanual.wiki/Pantech/L1/User-Guide-744027-Page-9.png)
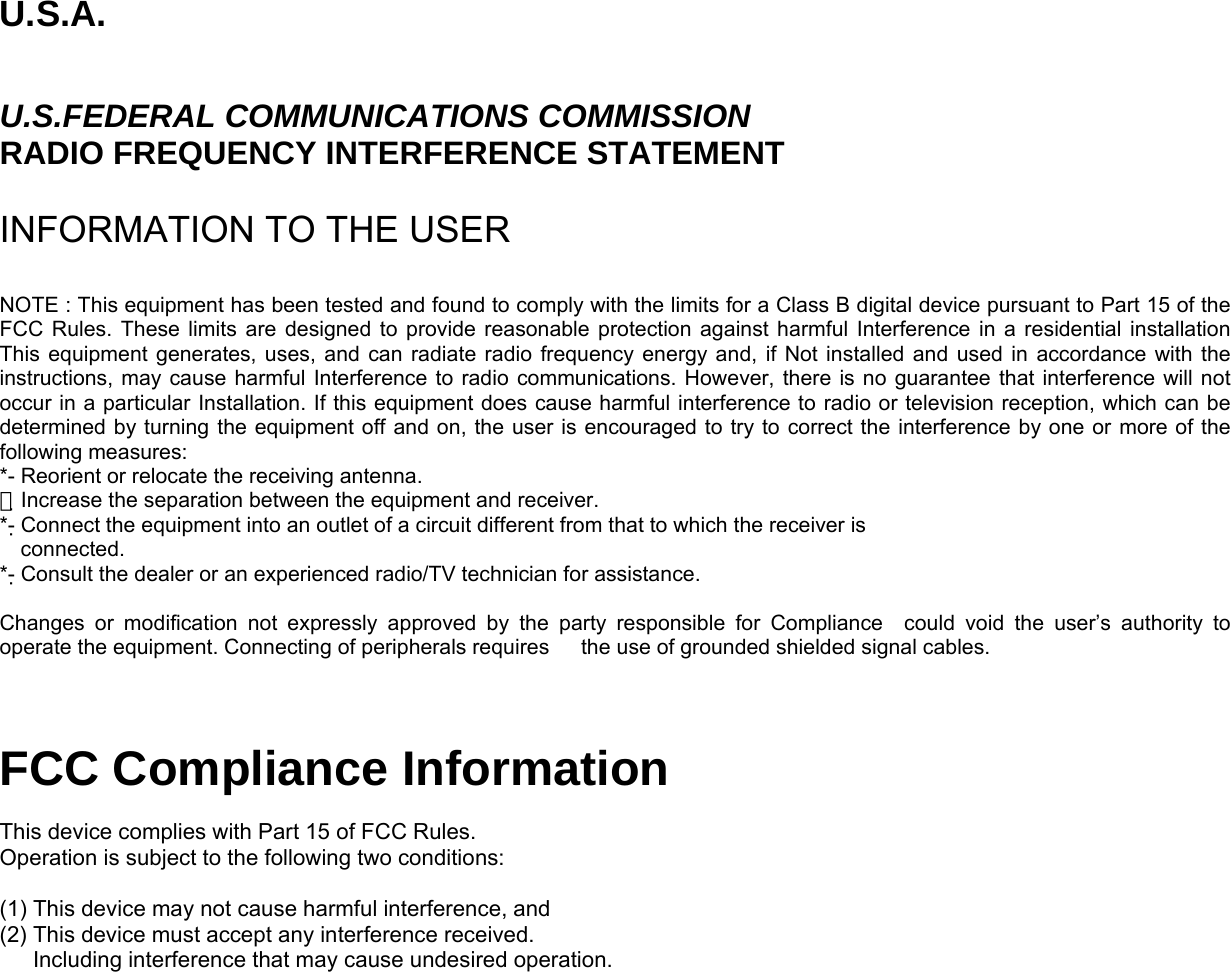
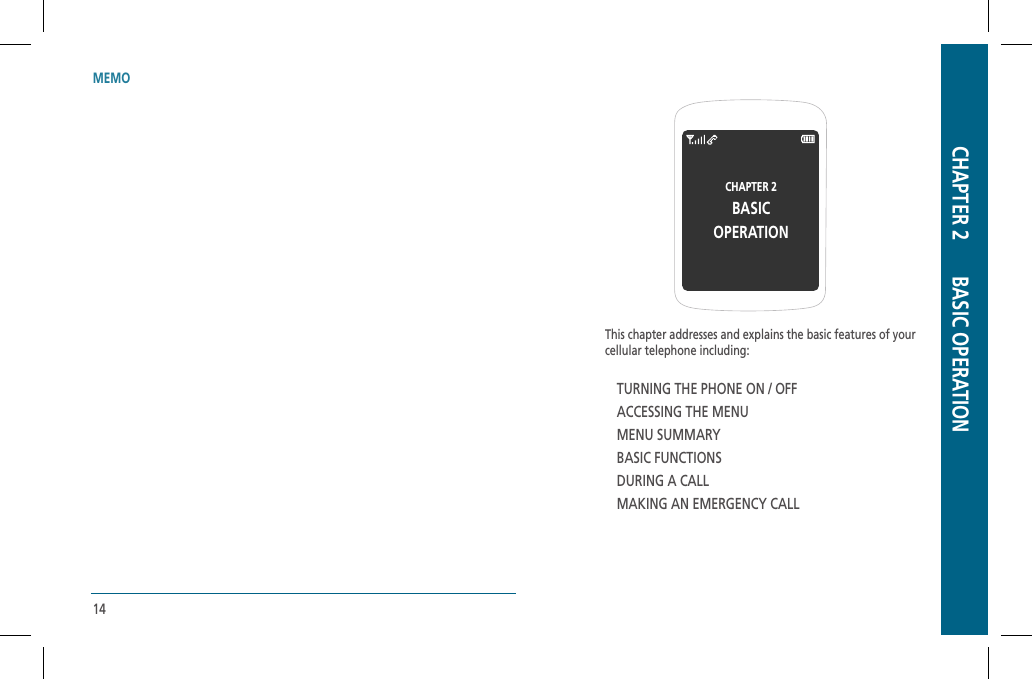
![20 21MENU SUMMARY BASIC FUNCTIONSBASIC OPERATION BASIC OPERATIONMAIN MENU 2ND DEPTH 3RD DEPTH 4TH DEPTH6. Call Settings7. Bluetooth Menu8. Memory9. Phone Info3. Language4. Location5. Security6. System Select7. NAM Selection1. Answer Options2. Auto Retry3. TTY Mode4. One Touch Dial5. Voice Privacy6. Voice Service7. DTMF Tones1. Add New Device1.Memory Usage2.My Pictures3.My Sounds1. My Number2. SW Version3. Icon Glossary1. Lock Mode2. Edit Code1. Auto NAM2. Change NAM1. Voice Dial2. Voice Setting3. Train wordsHMAKING A CALL Enter a phone number.To modify the phone number you have entered:• Erase one digit at a time by pressing .• Erase the entire number by pressing and holding .To send the TXT or PIX message with phone number :• To enter a part of the phone number, then press [OPTIONS], select “TXT Message or Picture Message”. Please refer to page 97 or page 98 for more details on “Send New TXT Message or Send New Picture Message”. Press . •If “CALL FAILED” appears on the display or the line is busy, press or .•If you activate the “AUTO RETRY” function, the phone will automatically retry for the number of times you have selected. (refer to page 55).•When you place or receive a call from stored phone numbers, the saved name will be displayed.•There is another way to make a call through the VR mode, which is called “VAD (Voice Activated Dialing)”. Please refer to page 69 (Voice Service) for more details.•If “Enter Lock Code” appears on the display enter your 4-digit password to unlock your phone. To end a call, press .NUMBER](https://usermanual.wiki/Pantech/L1/User-Guide-744027-Page-11.png)
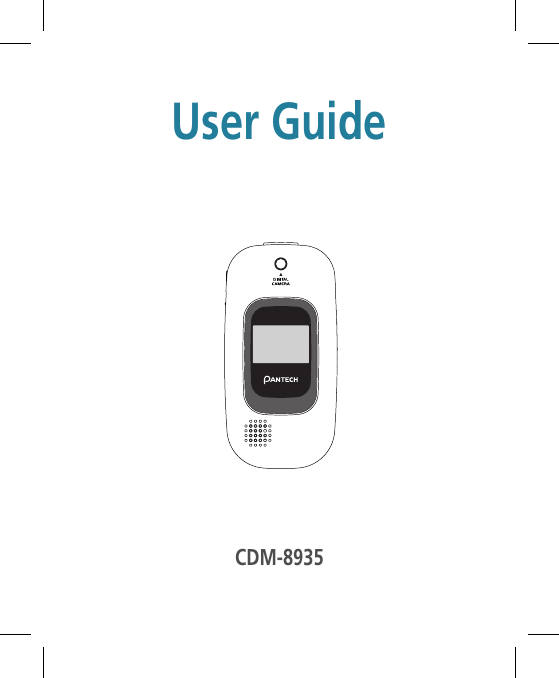
![22 23BASIC FUNCTIONS BASIC FUNCTIONSBASIC OPERATION BASIC OPERATIONHANSWERING A CALL When your phone rings or vibrates, press to answer the incoming call. (Depending on your phone’s settings, you may also answer incoming calls by opening the phone or by pressing any number key.)To ignore incoming calls and silence the ringer, press[IGNORE]. To end the call, press .HSPEAKERPHONEThe speaker phone feature lets you hear audio through the speaker andtalk without holding the phone. To activate the speakerphone in idle, answering or calling modes, press . The phone returns to normal (Speakerphone Off) after ending a call or when the phone is turned off and back on.HCALLER IDIdentifies callers by displaying their phone number. If the caller’s name and number are already stored in your phone book, the name will be displayed.The caller ID information is stored in Recent Calls.H3-WAY CALLINGWith 3-Way Calling, you can talk to two people at the same time. When using this feature, normal airtime rates will apply to both of the calls. Enter a number you wish to call and press . Once you have established the connection, enter the second number you wish to call and press . When you’re connected to the second party, press again to begin your 3-Way call.If one of the people you called hangs up during your call, you and the remaining caller stay connected. If you initiated the call and are the first to hang up, all three callers are disconnected.HCALL WAITINGNotifies you of an incoming call when you are already on a call by sounding a beep tone and displaying the caller’s phone number.To answer another call while on the phone, press . This places the first call on hold. To switch back to the first caller, press again.NUMBERNUMBER](https://usermanual.wiki/Pantech/L1/User-Guide-744027-Page-12.png)
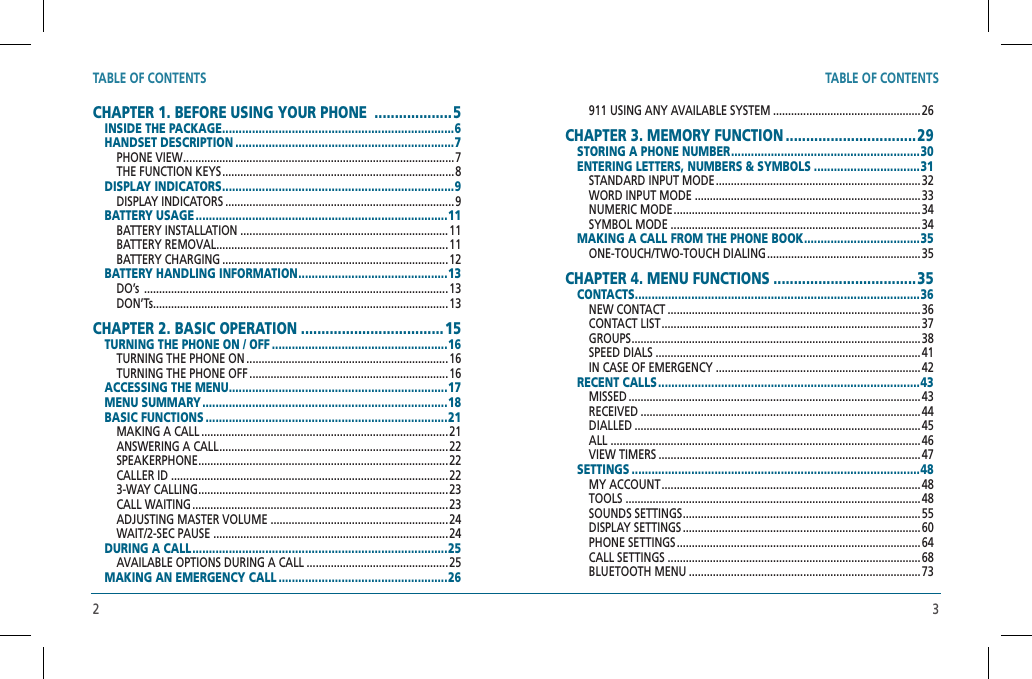
![24 25BASIC FUNCTIONS DURING A CALLBASIC OPERATION BASIC OPERATIONHADJUSTING MASTER VOLUMEAdjust the volume of the master volume. In idle mode, press the side volume key up or down. Select one of the following options, then press [OK] to save it.• Move the Navigation Key up or down to adjust Earpiece volume during a call.• Move the Side Volume Key up or down to adjust Earpiece volume during a call.HWAIT/2-SEC PAUSEPauses are used for automated systems (i.e., Voicemail, calling cards). Insert a pause after a phone number then enter another group of numbers. The second set of numbers is dialed automatically after the pause. This feature is useful for dialing into systems that require a code. To insert a pause, enter a phone number then press [OPTIONS]. Select either a 2-Sec Pause (“P” appears) or a Wait (“W” appears). Press to dial or [SAVE] to store.Please refer to page 30 for more details about storing a phone number.•All Sounds Off•Alarm Only•Vibrate Only•Low / Medium Low / Medium / Medium High / HighNUMBERSelect“P”or”W” ORHAVAILABLE OPTIONS DURING A CALLTo display menu options during a call, press [OPTIONS].MUTE (UNMUTE)The caller cannot hear you or any sounds from your side but you can still hear them.Press [MUTE].CONTACTSTo select the phone number in your internal Contact List.Press [OPTIONS] .RECENT CALLSTo select the phone number in your recent calls List.Press [OPTIONS] .SEND TXT MESSAGEEnables you to send a TXT message (SMS) during a call.Press [OPTIONS] .VOICE PRIVACYIncreases security during a call.Press [OPTIONS] .• To deactivate, press [UNMUTE].•The phone will automatically unmute in Emergency Call or Callback mode.](https://usermanual.wiki/Pantech/L1/User-Guide-744027-Page-13.png)
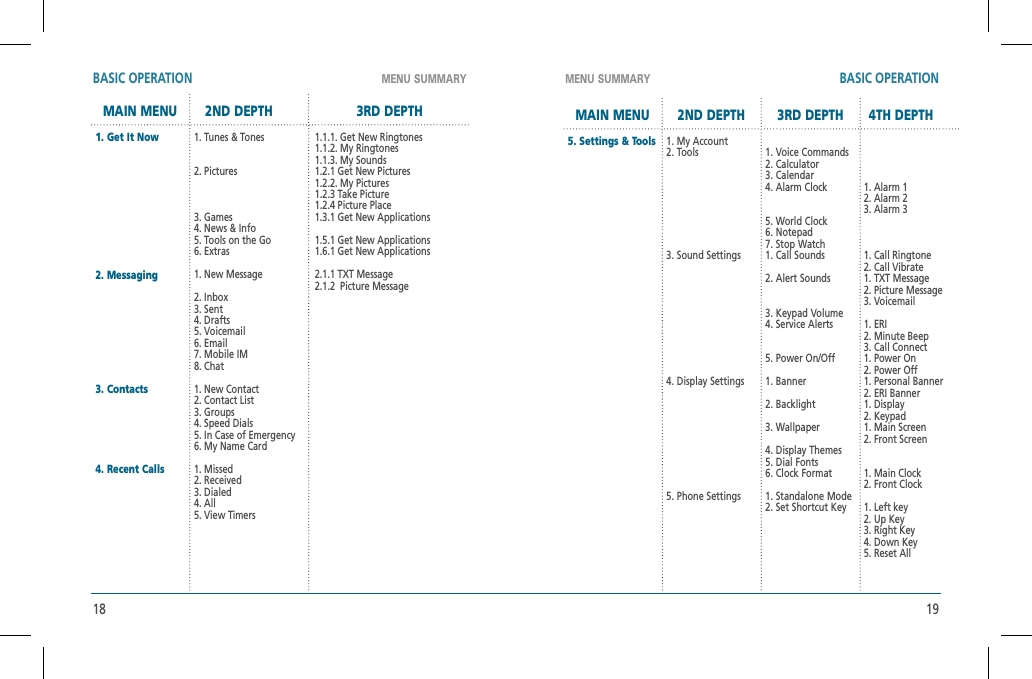
![28 29STORING A PHONE NUMBER ENTERING LETTERS, NUMBERS & SYMBOLSMEMORY FUNCTIONS MEMORY FUNCTIONSThe phone book stores up to 500 entries. Enter phone # then press [SAVE] then choose “Add New Contact” or “Update Existing”. Press [OK] to select. If “Add New Contact” is selected, the phone number will appear above a list. Press the Navigation Key up or down to choose the type of number you’re adding, as indicated by the icon. Press [OK] to select. If “Update Existing” is selected, your contact list is displayed. Choose the entry to add the phone number to, then press [OK]. Press the Navigation Key up or down to choose the type of number you’re adding, as indicated by the icon. Press [OK] to select. Enter a name. Please refer to page 31 for more details on entering letters, numbers & symbols. To change the input mode, press [Abc]. Press the Navigation Key down to select other options(Mobile1.2, E-mail1.2, etc...). If you entered a phone number, press [OPTIONS] to select one of the following options: To store the entry, press [SAVE]. “CONTACT SAVED” will be displayed.• Set speed dial• Save as default• Add PauseThe input mode (Alpha editor) will automatically be activated when necessary to enter letters and numbers. As shown below, there are 5 available modes : Standard input mode (Abc) and standard all capitals (ABC), T9Word input mode (Word), Numeric mode (123), and symbol mode (Symbols).The input mode indicator appears on the upper right of the display when letters and numbers are entered. To select the desired input mode among the 5 modes below, press [Abc], then enter letters and numbers.The following illustrates the function assigned to each key in the Alpha Editor.AbcPress to change mode. [Word][Abc][ABC][123][Symbols]NextPress to view the next matching word if the highlighted word is not the word you intended in Word input mode.SpacePress to accept a word and add a space.ClearPress to delete a character to the left of the cursor.OKConfirm the letters and numbers you entered.Caps LockPress to select a letter case of the standard text input or T9 text input mode. [Abc], [ABC] and [abc] indicate the standard text input. [Word], [WORD] and [word] indicate the predictive text input. Press and hold to change mode.KEY FUNCTION](https://usermanual.wiki/Pantech/L1/User-Guide-744027-Page-15.png)
![30 31ENTERING LETTERS, NUMBERS & SYMBOLS ENTERING LETTERS, NUMBERS & SYMBOLSMEMORY FUNCTIONS MEMORY FUNCTIONSHSTANDARD INPUT MODEUse the number keys to enter letters, numbers and characters. Enter letters using the key pad as follows: Press to select the symbol you want to enter with the Navigation Key or press the corresponding numeric keys.To change the input mode, press [Abc]. To enter a space, press . The cursor will automatically move to the next column. Repeat until letters are entered. To delete one digit, press . If you press and hold , it will delete the entire entry, and entire numbers. To change from lowercase to uppercase, press .Key Pad Press1 TimePress2 timesPress3 timesPress4 timesPress5 times2ABC3DEF4GHI:9WXYZADG:WBEH:XCFI:Y234:ZADG:9HWORD INPUT MODEThe Word input mode incorporates a built-in-dictionary to determine a word based on the entered characters. A Word can be entered more quickly by pressing a key once per character. Select the Word mode by pressing [Abc], select “Word”, then press [OK]. Press a digit key once to enter the character you want then enter all the characters to input the word you want. To view the next matching word, press . To accept the matching word and enter a space, press .To enter a compound word:•Enter the first part of the word then press to accept it.•Enter the last part of the word then press to enter the word.](https://usermanual.wiki/Pantech/L1/User-Guide-744027-Page-16.png)
![32 33ENTERING LETTERS, NUMBERS & SYMBOLS MAKING A CALL FROM THE PHONE BOOKMEMORY FUNCTIONS MEMORY FUNCTIONSHNUMERIC MODEAllows you to enter numbers. Select the Numeric mode by pressing [OPTIONS], select “123”, then press [OK]. To enter a number, press a digit key. HSYMBOL MODEAllows you to enter symbols. Select the Symbol mode by pressing [OPTION], select “Symbols”, then press [OK]. Select the symbol you want to enter with the or press the corresponding numeric keys.HONE-TOUCH/TWO-TOUCH DIALINGIdeal for frequently dialed numbers, this feature allows phone book entries to be dialed via the keypad with only one or two key presses.ONE-TOUCH DIALING:1-9: Press and hold the corresponding memory number for more than 1 second.TWO-TOUCH DIALING:10-96, 97, 98, 99: Press the first digit and second digits of thememory number short and long respectively.If no phone number is stored in the location entered, “UNASSIGNED LOCATION” will appear on the screen.](https://usermanual.wiki/Pantech/L1/User-Guide-744027-Page-17.png)

![36 37CONTACTS CONTACTSMENU FUNCTIONS MENU FUNCTIONS To save the entry, press [SAVE]. To return to the previous page, press .At least one phone number or an email address needs to beentered to save the new contact. Otherwise, it will display“NO DATA ENTERED”.If only a phone number is entered and the name field is left blank, the contact will still be saved and the Contact List will display the phone number.HCONTACT LISTAdds a new contact entry. To add a new entry to the phone book, press [MENU] or press [CONTACTS], then press ,“Contact List”. The list of names in your contact is displayed alphabetically. Enter a name or its character string or scroll through the list with the Navigation Key. Please refer to page 31 for more details on entering letters, numbers & symbols.Stores up to 500 entries, each of which can be assigned to a group.Entries can be retrieved by name or group.HNEW CONTACTAdds a new contact entry. To add a new entry to the phone book, press [MENU] , . To enter a name or number, use the to select the contact fields.Please refer to page 31 for more details on entering letters, numbers & symbols.•Contact Fields: Name/Mobile 1/Home/Work/Email 1/Group/Picture/Ringtone/Mobile 2/Fax/Email 2.• Under “Mobile 1”, “Mobile 2”, “Home”, “Work” or “Fax”, input the phone number, then by press [OPTIONS], you can choose from the following: 1. Set Speed Dial 2. Set Voice Dial 3. Set As Default 4. Add Pause• Scroll to “Picture” and press [SET] to select an image. (Please refer to page 89 “My Pictures” for more details.)• Scroll to “Ringtone” and press [SET] to add a ringtone. (Please refer to page 87 “My Ringtones” for more details.)](https://usermanual.wiki/Pantech/L1/User-Guide-744027-Page-19.png)
![38 39CONTACTS CONTACTSMENU FUNCTIONS MENU FUNCTIONS To edit the entry, press [EDIT]. To view the contact details, press [VIEW]. To call the selected number, press [OPTIONS] then select “Call” or press .HGROUPSAllows you to classify phone entries into as many as 30 groups.Existing group names include Family and Work and can’t be renamedor Erased, however the user can create up to 28 additional groupnames which can be changed or deleted. The user can add up to10 phone numbers per group.ADD NEW GROUP Press [MENU], then press “Groups”. To select “New”, press [NEW]. Input a new group name. To save it, press [SAVE].ASSIGN PHONE NUMBER TO GROUP To assign phone numbers to a Group, select “Add”, press [OPTIONS]. Your contact entries will be displayed in alphabetical order. Select a location and press [MARK] or press [MARK ALL]. Select the contact for the group then press [DONE]. “CONTACTS ADDED TO GROUP” will be displayed. Repeat for each location for the Group.CHANGE GROUP NAME Press [MENU], then press “Groups”. Select an existing group name that you have added withthe . To select “Rename”, press [OPTIONS]. Input a new group name. To save it, press [SAVE].•To use and manage contacts, press [OPTIONS] then select: 1. New Contact: To add a New Contact. 2. Erase: To delete a contact. 3. New TXT Msg: To create a TXT message. 4. New Picture Msg: To create a Picture message. 5. Call: To call the contact. 6. Erase All: To delete all contacts list.](https://usermanual.wiki/Pantech/L1/User-Guide-744027-Page-20.png)
![40 41CONTACTS CONTACTSMENU FUNCTIONS MENU FUNCTIONSNEW TXT MSG. GROUP Press [MENU], then press “Groups”. Select an existing group name with the . To select “New TXT Msg.”, press [OPTIONS]. Input a “Message”, press [OPTIONS] to select “Save As Draft”, “Add Graphic”, “Add Sound”, “Add Quick Text”, “Priority Level” and “Cancel Message”. 5.1. To send the TXT message, press [SEND]. 5.2. To save the TXT message, press [OPTIONS] then select “Save As Draft”, then press .NEW PICTURE MSG. GROUP Press [MENU], then press “Groups”. Select an existing group name with the . To select “New TXT Msg.”, press [OPTIONS]. Input a “Text”, “PIX”, “Sound”, “Subject”, press [OPTIONS] to select “Preview”, “Add Quick Text”, “Save As Draft”, “Priority Level”, “Add Slide” and “Cancel Msg”. 5.1. To send the Picture message, press [SEND]. 5.2. To save the Picture message, press [OPTIONS] then select “Save As Draft”, then press .ERASE GROUP Press [MENU], then press “Groups”. Select an existing group name with the . To select “Erase”, press [OPTIONS]. Select “Yes” to erase it, press .HSPEED DIALSIn idle mode, calls can be placed to numbers stored in speed dial bypressing & holding the location number on the key pad. For a 2-digitlocation number, press the first number, then press and hold thesecond number.ADD NEW GROUP Press [MENU] , . To assign a phone number to a location, select the location and press [SET]. Select the entry with the and press [OK].](https://usermanual.wiki/Pantech/L1/User-Guide-744027-Page-21.png)
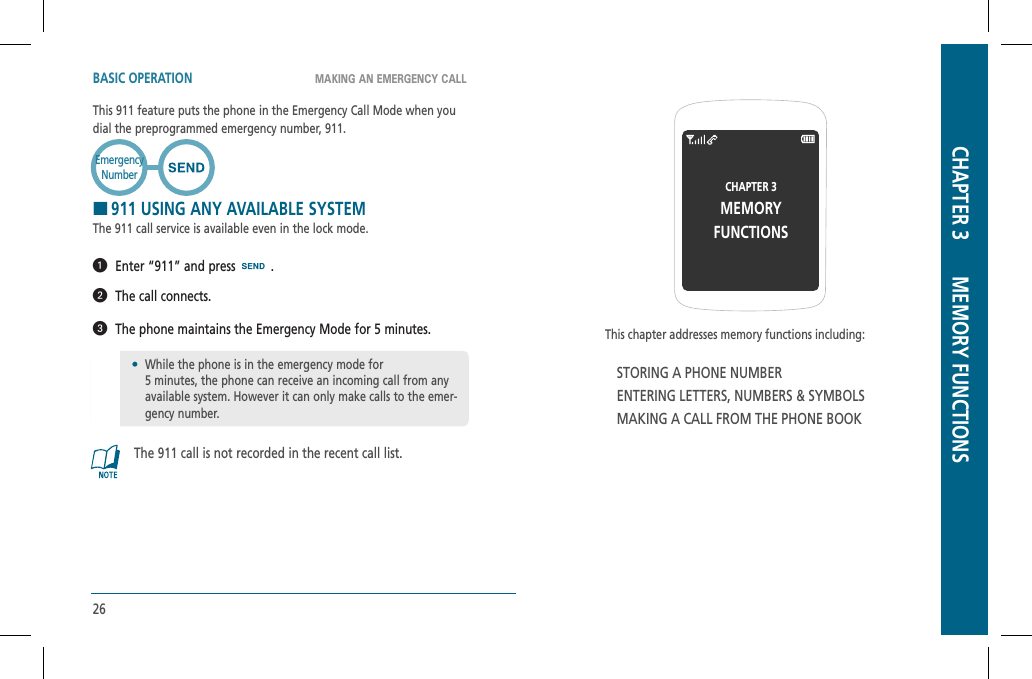
![42 43CONTACTS RECENT CALLSMENU FUNCTIONS MENU FUNCTIONS Select phone number with the and press [OK].“Unassigned” appears if the location is available.To call an assigned number, press & hold the last digit of thespeed dial #. “SPEED DIAL SET” will be displayed.HIN CASE OF EMERGENCY Press [MENU] , .HMY NAME CARD Press [MENU] , . To view My Name Card, press [OPEN].HMISSEDDisplays information about the 90 most recently missed calls.Place a call to a missed call number by simply pressing . To see a list of the 90 most recently answered calls, press [MENU] , . If the number is already stored in your contact, only the name appears. If the number is not stored, only the phone number appears. To view missed call details, press [OPEN].Call details include date, time and phone number. Press [MESSAGE] to send the TXT or Picture message. Press [OPTIONS] to see the options below:After 90 missed calls, the oldest call will automaticallybe erased from the history.•Save: To store the phone number in your phone book.•Erase: To erase a received calls listing.•Lock/Unlock: To lock or unlock a received calls listing. •Erase All: To erase all received calls listings.•View Timers: To display usage time.](https://usermanual.wiki/Pantech/L1/User-Guide-744027-Page-22.png)
![44 45RECENT CALLS PHONE SETTINGSMENU FUNCTIONS MENU FUNCTIONSHRECEIVEDDisplays information about the 90 most recently answered calls.Place a call to a received call by simply pressing . To see a list of the 90 most recently answered calls, press [MENU] , . If the number is already stored in your phone book, only the name appears. If the number is not stored, only the phone number appears. To view received call details, press [OPEN].Call details include date, time and phone number. Press [MESSAGE] to send the TXT or Picture message. Press [OPTIONS] to see the options below:After 90 received calls, the oldest call will automaticallybe erased from the history.HDIALEDDisplays information about the 90 most recently dialed numbers.Place a call to a dialed call by simply pressing . To see a list of the 90 most recently dialed numbers, press [MENU] , . If the number is already stored in your phone book, only the name appears. If the number is not stored, only the phone number appears. To view dialed call details, press [OPEN].Call details include type of call, date, time and phone number. Press [MESSAGE] to send the TXT or Picture message. Press [OPTIONS] to see the options below:After 90 dialed calls, the oldest call will automatically be erased from the history.•Save: To store the phone number in your phone book.•Erase: To erase a received calls listing.•Lock/Unlock: To lock or unlock a received calls listing. •Erase All: To erase all received calls listings.•View Timers: To display usage time.•Save: To store the phone number in your phone book.•Erase: To erase a received calls listing.•Lock/Unlock: To lock or unlock a received calls listing. •Erase All: To erase all received calls listings.•View Timers: To display usage time.](https://usermanual.wiki/Pantech/L1/User-Guide-744027-Page-23.png)
![46 47RECENT CALLS RECENT CALLSMENU FUNCTIONS MENU FUNCTIONSHALLDisplays information about the most recent received, dialed and missed calls. To see a list of the 270 most recent received, dialed and missed calls, press [MENU] , . If the number is already stored in your phone book, only the name appears. If the number is not stored, only the phone number appears. To view details, press [OPEN].Call details include type of call, date, time and phone number. Press [MESSAGE] to send the TXT or Picture message. Press [OPTIONS] to see the options below:After 270 received, dialed or missed calls, the oldest call will automatically be erased from the history when a new call is added.HVIEW TIMERSChecks the usage time and manages your calls within the limit youset. The 11 timers include (Last Call, All Calls, Received Calls,Dialed Calls, Roaming Calls, Transmit Kb, Received Kb, Total Kb,Last Reset, Lifetime Calls, Lifetime Data Count): Press [MENU] , . If “Last Call”, “All Calls”, “Received Calls”, “Dialed Calls”, “Roaming Calls”, “Transmit Kb”, “Received Kb”, “Total Kb” is selected with .To reset the timer, press [RESET], then select “Yes”, then press [OK].To reset all timer, press [RESET ALL], then select “Yes”, then press [OK].If “Last Reset”, “Lifetime Calls”, “Lifetime DataCount” is selected with .To reset all timer, press [RESET ALL], then select “Yes”, then press [OK]. To return to the previous page, press .•Save: To store the phone number in your phone book.•Erase: To erase a recent calls listing.•Lock/Unlock: To lock or unlock a recent calls listing. •Erase All: To erase all recent calls listings.•View Timers: To display usage time.](https://usermanual.wiki/Pantech/L1/User-Guide-744027-Page-24.png)
![48 49SETTINGS SETTINGSMENU FUNCTIONS MENU FUNCTIONSHMY ACCOUNT Press [MENU] , . Connect “WAP Browser”.HTOOLSVOICE COMMANDSTo access the Voice Commands: Press [MENU] , , .CALCULATORTo access the Calculator: Press [MENU] , , . Follow the instructions below to calculate 8҂6앦4Ҁ2.5҃9.50 To reset, press [CLEAR].•To change the displayed number from positive (+) to negative (-) and vice versa, press [앐].• Press [OPERATOR] to use parenthesis and “Exponent”.CALENDARSets an event and reminds you of that event.ADD NEW PLAN Press [MENU] , , . Move the left, right, up or down to choose a date in the calendar and then press [OK]. Press [OPTIONS] to 1. Weekly View, 2. Add, 3. Go To Date, 4. Erase Passed or 5. Erase All.• Input 8.• Press the Navigation Key rightward (*).• Input 6.• Press the Navigation Key leftward (/).• Input 4.• Press the Navigation Key downward (-).• Input 2 and press the to input (.).• Press 5, .•Answer appears on the right side of the grey box below calculation.](https://usermanual.wiki/Pantech/L1/User-Guide-744027-Page-25.png)
![50 51SETTINGS SETTINGSMENU FUNCTIONS MENU FUNCTIONS To set a new event, press [OPTIONS] then select “Add”. The appointment field is highlighted. Press the to set the alarm options.•APPOINTMENTUse the keypad to enter an appointment in your schedule.•START TIMEUse the keypad to set a start time and to select “am” or “pm”.•END TIMEUse the keypad to set an end time and to select “am” or “pm”.•START DATEUse the keypad to change or enter the start date.•RECURRENCEUse the to select a repeat setting for the the calendar. (Daily, Weekly, Monthly or Yearly).•BY COUNTUse the keypad to enter an account.•END DATEUse the keypad to change or enter the end date.•TIME ZONEUse the to select a time zone, press [SET]. (EST, EDT, CST, CDT, MST, MDT, PST, PDT, AKST, AKDT, HAST, HADT, GMT/UTC).•ALERTUse the keypad to select the alert tone you wish to set.•VIBRATEUse the to select vibrate On/Off.•REMINDERUse the Navigation Key to select an alert time interval option (0 Minutes, 5 Minutes, 10 Minutes, 15 Minutes). Press [SAVE], then select “Yes” to save it or press to return to the calendar. The date of the event will be marked on your calendar.VIEW PLAN LISTTo view the Calendar List: Move the to choose an event and then press [VIEW]. Press [OPTIONS] to 1. Monthly View, 2. Weekly View, 3. Add, 4. Go To Date, 5. Erase, 6. Erase Today or 7. Erase Passed.](https://usermanual.wiki/Pantech/L1/User-Guide-744027-Page-26.png)
![52 53SETTINGS SETTINGSMENU FUNCTIONS MENU FUNCTIONSALARM CLOCK Press [MENU] , , . Select one of the entries using the . To set a new alarm, choose alarm 1, 2 or 3. To edit an existing alarm, select that alarm. Press [OK]. The setting field will be highlighted. Press the to select alarm options.•ALARMUse the to select alarm On/Off.•TIMEUse the keypad to set a time for the alarm and to select “am” or “pm”.•FREQUENCYUse the to select a setting for the alarm (Once, Daily, Mon - Fri, Weekends).•RINGERPress [SET], to use the keypad to select the alert tone you wish to set. To save an alarm setting press [SAVE].WORLD CLOCKTo display the time and date in pre-programmed cities: Press [MENU] , , . Select a city with the [CITIES]. Or use the to select another city. The world map appears with the city, its date and time. Use the to select another city.Pressing [DST], turns all cities supporting Daylight Savings Time on or off. To return to the previous page, press [OK].NOTEPADYour phone includes an internal notepad that can be used tocompose and store reminders and notes. Press [MENU] , , .ADD MEMOTo compose a memo (there is an 80-letter limit): To add a new memo, press [NEW]. Input a new text memo. Please refer to page 31 for more details on entering letters, numbers & symbols.)](https://usermanual.wiki/Pantech/L1/User-Guide-744027-Page-27.png)
![54 55SETTINGS SETTINGSMENU FUNCTIONS MENU FUNCTIONS To save memo, press [SAVE].VIEW MEMOTo view a saved memo: Press [MENU] , , . The list of all memos, in saved order, is displayed. Select a memo then press [VIEW]. The selected memo will appear. To edit it, press [EDIT] and input a new text memo, then press [SAVE] to save it. 4.2. To erase a memo, press [OPTIONS] “Erase”. 4.1. To add a new memo, press [NEW]. 4.3. To erase all memos, press [OPTIONS] “Erase All”.STOP WATCHSimultaneously times up to six different events. To operate the stop watch: Press [MENU] , , . To measure a time period. 1. To start the stop watch, press [START]. 2. To pause it, press [STOP]. 3. To resume it, press [START]. To reset it, press [RESET]. To time up to six events at once: 1. To start, press [START]. 2. To stop a time period and continue measuring another one, press [CONT]. 3. To stop the second and continue measuring a third one, press [CONT]. 4. To measure up to six time periods, repeat the above steps. 5. To stop the stop watch, press [STOP]. 6. To review the results, press [VIEW]. 7. To return to the stop watch, press . 8. To reset it, press [RESET].HSOUNDS SETTINGSCALL SOUNDSTo select a ringer type for incoming calls:CALL RINGTONE Press [MENU] , , , . Select your desired ringer type.•Up or Down : 1. Get New App. or select your desired ringer type.•Press to Play/Stop the ringer.](https://usermanual.wiki/Pantech/L1/User-Guide-744027-Page-28.png)
![56 57SETTINGS SETTINGS MENU FUNCTIONS MENU FUNCTIONS Select one of the available ring types. To confirm, press .CALL VIBRATE Press [MENU] , , , . Select “On” or “Off” with the then press to save it.ALERT SOUNDSWhen selected, this setting alerts you to the following handset changes:TXT MESSAGE Press [MENU] , , , . Select “Tone”, “Vibrate” or “Reminder” with the then select one of the following options by pressing the . To save, press .PICTURE MESSAGE Press [MENU] , , , . Select “Tone”, “Vibrate” or “Reminder” with the then select one of the following options by pressing the . To save, press .VOICEMAIL Press [MENU] , , , . Select “Tone”, “Vibrate” or “Reminder” with the then select one of the following options by pressing the . To save, press .•Tone: 1. Get New App. or select your desired ringer type.•Vibrate: Select “On” or “Off”.•Reminder: Select “Once”, “Every 2 Minutes”, “Every 15 Minutes” or “Off”.•Tone: 1. Get New App. or select your desired ringer type.•Vibrate: Select “On” or “Off”.•Reminder: Select “Once”, “Every 2 Minutes”, “Every 15 Minutes” or “Off”.•Tone: 1. Get New App. or select your desired ringer type.•Vibrate: Select “On” or “Off”.•Reminder: Select “Once”, “Every 2 Minutes”, “Every 15 Minutes” or “Off”.](https://usermanual.wiki/Pantech/L1/User-Guide-744027-Page-29.png)
![58 59SETTINGS SETTINGS MENU FUNCTIONS MENU FUNCTIONSKEYPAD VOLUMETo select a keypad tone you will hear when you press a key: Press [MENU] , , . Select one of the following options with the . Press [OK] to save it.SERVICE ALERTSERI (ENHANCED ROAMING INDICATOR)The Enhanced Roaming Indicator (ERI) feature displays a text banneron the display screen informing the handset user of which systems thewireless device is using as compared to the service plan they purchased. The ERI Banner text changes to tell a customer if they areusing the: “Verizon Network”, “Extended Network” or “Roaming”.Using a Personal Message Banner may prevent the ERI from displayingon the phone. Press [MENU] , , , . Select “On” or “Off” with the then press to save it.Display -> Banner -> ERI Banner must be set for “ON” forsmooth operation of all the functions.MINUTE BEEPSounds an alert every minute during a call. Press [MENU] , , , . Select “On” or “Off” with the then press to save it.CALL CONNECTNotifies you that a call has been successfully placed. Press [MENU] , , , . Select “On” or “Off” with the then press to save it.POWER ON/OFFPOWER ONAllows you to activate/deactivate the power on tones. Press [MENU] , , , . Select “On” or “Off” with the then press to save it.POWER OFFAllows you to activate/deactivate the power off tones. Press [MENU] , , , . Select “On” or “Off” with the then press to save it.•High•Medium High•Medium•Medium Low•Low•Off](https://usermanual.wiki/Pantech/L1/User-Guide-744027-Page-30.png)
![60 61SETTINGS SETTINGS MENU FUNCTIONS MENU FUNCTIONSHDISPLAY SETTINGSAllows you to customize the display.BANNERYou can choose to display a personal Banner greeting or theEnhanced Roaming Indicator (ERI) banner on the phone’s screens:PERSONAL BANNERThe text greeting can be up to 16 characters and is displayed onyour phone’s screen in standby mode. Press [MENU] , , , . Enter a new personal greeting. To change the input mode, press [Abc]. Press to save it.ERI BANNER Press [MENU] , , , . Select “On” or “Off” with the then press to save it.BACKLIGHTBacklights the display and key pad and activates dimming for easyviewing in dark places.DISPLAY Press [MENU] , , , . Select one of the following options with the . Press to save it.KEYPAD Press [MENU] , , , . Select one of the following options with the . Press to save it.•7 Seconds, 15 Seconds, 30 Seconds, Always On, Always Off•7 Seconds, 15 Seconds, 30 Seconds, Always On, Always Off](https://usermanual.wiki/Pantech/L1/User-Guide-744027-Page-31.png)
![62 63SETTINGS SETTINGSMENU FUNCTIONS MENU FUNCTIONSWALLPAPER Press [MENU] , , . Select “Main Screen” or “Front Screen” then select Default to choose a pre-installed display, Downloads or PIX # to choose a display you have downloaded to your phone. To launch “Get It Now”, press [GET NEW]. To expand selected image, press [VIEW]. Select a display from the Animation and the Graphic list using the and press to save it.DISPLAY THEMES Press [MENU] , , . Select one of the following options with the . Press to save it.DIAL FONTS Press [MENU] , , . Select “Normal” or “Large” with the then press to save it.CLOCK FORMATTo change the main or front clock’s appearance on the standby screen: Press [MENU] , , . Select “Main Clock” or “Front Clock”. If “Main Clock” selected, select one of the following options with the . If “Front Clock” selected, select one of the following options with the . Press to save it.• Default• Business• Tropical• Blue• Digital• Analog• Off• Blue• Digital• Analog• Minimize• Off](https://usermanual.wiki/Pantech/L1/User-Guide-744027-Page-32.png)
![64 65SETTINGS SETTINGSMENU FUNCTIONS MENU FUNCTIONSHPHONE SETTINGSSets an event and reminds you of that event.STANDALONE MODE Press [MENU] , , . Select “On” or “Off” with the then press to save it.SET SHORTCUT KEYYour phone offers you the option of assigning a shortcut key(Up, Down, Left, Right Navigation Key) to a favorite or often-usedfunction. To assign a shortcut to the key: Press [MENU] , , . Select “Left Key”, “Up Key”, “Right Key” or “Down Key”. Select one of the following options with the . Press to save it. To reset all already set shortcut key, press “Reset All”, then select “Yes”, press .LANGUAGESelects the language in which letters are displayed on the screen. Press [MENU] , , . Select “English” or “Spanish” with the . Press to save it.LOCATIONTo determine whether or not the network system can detect your position: Press [MENU] , , . Select “Location On” or “E911 Only” with the . Press to save it.SECURITYPrevents unauthorized use of your phone. The following settings can be restricted: Press [MENU] , ,, then enter your password, press .The default password is the last 4 digits of your phone number.• Get It Now/Get Tunes & Tones/Get PIX/Get Fun & Games/ Get News & Info/My PIX/My Ringtones/My Sounds/Inbox/Email/ Chat/IM/Settings & Tools/Alarm Clock/Calculator/Calendar•Location On: Your location is now available to the network.•E911 Only: Your location will be hidden from network & application except 911.](https://usermanual.wiki/Pantech/L1/User-Guide-744027-Page-33.png)
![66 67SETTINGS SETTINGSMENU FUNCTIONS MENU FUNCTIONS Select “Lock Mode”. Select “Device” or “Location” then select one of the following options with the . Press to save it.EDIT CODEChanges your Device/Location 4-digit password. Press [MENU] , ,, then enter your password, press .The default password is the last 4 digits of your phone number. Select “Edit Code”. Enter a “New Code” then press . Enter a “Confirm Code” then press to save it.SYSTEM SELECTSelects the Preferred System. Press [MENU] , , . Select one of the following options with the . Press to save it.NAM SELECTEnables Auto NAM (Number Assignment Modules) or manuallyselects a NAM.AUTO NAMAutomatically switches phone to proper NAM when you have multipleNAM registrations. Press [MENU] , , , . Select “On” or “Off” with the then press to save it.•Device : Lock Now, Unlock, On Power Up•Location: Lock, Unlock•Automatic B•Automatic A•Home Only](https://usermanual.wiki/Pantech/L1/User-Guide-744027-Page-34.png)
![68 69SETTINGS SETTINGSMENU FUNCTIONS MENU FUNCTIONSCHANGE NAMChanges the NAM used by the phone when you have multipleregistrations. Press [MENU] , , , . Select one of the following options with the . Press to save it.HCALL SETTINGSANSWER OPTIONSTo select an answer mode: Press [MENU] , , . Select one of the following options with the . Press to save it.AUTO RETRYAutomatically redials a call after a set time interval.To end a call, press . Press [MENU] , , . Press the up or down to choose the amount of time. Press to save it.TTY MODEYour phone is able to operate with a TTY (Teletypewriter) digitalmodes. This feature is system dependent and may not be availablein all areas. Press [MENU] , , . Select one of the following options with the . Press to save it.•NAM 1 - VERIZON•NAM 2 - VERIZON•Flip Open•Any Key•Send Only•Auto Answer•Off•Every 3 Seconds•Every 5 Seconds•Every 7 Seconds•Every 10 Seconds•TTY Full•TTY + Talk•TTY + Hear•TTY Off](https://usermanual.wiki/Pantech/L1/User-Guide-744027-Page-35.png)
![70 71SETTINGS SETTINGSMENU FUNCTIONS MENU FUNCTIONSONE TOUCH DIAL Press [MENU] , , . Select “On” or “Off” with the . Press to save it.VOICE PRIVACYEnhances voice privacy and avoids tapping during a call. Press [MENU] , , . Select “On” or “Off” with the . Press to save it.VOICE SERVICESVOICE DIALVoice Dial allows you to call a person by simply saying their name.To access Voice Dial: Press [MENU] , , , . 2.1. Press [NEW]. The contact list will be displayed alphabetically. Select a name then press . Instructions (Press OK and say name) will be displayed and . You will hear “Name Please”. 2.2. Say the name for the voice tag and repeat the name when prompted. You will hear “Added”. To play a voice dial: Highlight the voice tag you want to play then press [PLAY]. To detail a voice dial: Highlight the voice tag you want to detail view then press [OPTIONS] then select “Detail”. To re-record a voice dial: Highlight the voice tag you want to re-record then press [OPTIONS] then select “Re-record”. To play back a voice dial entry through the speaker: Highlight the voice tag you want to play, press [OPTIONS] then select “Play Speaker”. To erase a voice dial entry or all voice dial entries: Highlight the voice tag that you want to erase, press [OPTIONS] then select “Erase” for a single entry or “Erase All” to erase all voice tags.•On : Makes it more difficult to wire tap.](https://usermanual.wiki/Pantech/L1/User-Guide-744027-Page-36.png)
![72 73SETTINGS SETTINGSMENU FUNCTIONS MENU FUNCTIONSVOICE SETTINGAfter turning on Set Active, open the flip to go on to VR mode. Afterturning on HFK mode, put Hands-free kit and say “wake up” to go onto VR mode. Press [MENU] , , , . Under “Set Active”, select a option “Off”, “Send Key” or “Active Flip”. Under “HFK Mode”, select a option “On” or “Off”. Press to save it.TRAIN WORDTrain allows you to use Control words to make a call without usingthe keypad. Use to train or untrain the Voice Recognition with thecontrol word, “Yes”, “No” or “Wake-Up”. Press [MENU] , , , . Select one of the control words - “Yes”, “No” or “Wake-Up”. “Please begin recording after the prompt tone” will be dis-played and you will hear “Now training control words. Please say the word”. Say the word. You will hear “Again”. Say the word again. You will hear “Training word successful”. To undo voice recognition, select a word you want to undo then press [UNDO]. Under “Undo Train All”. “Undo voice recognition for all procedures?” will be displayed. Press to undo all trained words.DTMF TONESEnhances voice privacy and avoids tapping during a call. Press [MENU] , , . Select one of the following with the . Press to save it.HBLUETOOTH MENUAdd New Device Press [MENU] , , . Select “Headset” or “Handsfree” with the then press to save it.•Normal•Long](https://usermanual.wiki/Pantech/L1/User-Guide-744027-Page-37.png)
![76 77GET IT NOW MENU FUNCTIONS To erase downloaded ringtones. Select the Ringtone you want to erase, then press [OPTIONS]. Select “Erase”, “Rename” or “Ringtone Info”, then press .RECORDING NEW TONES Press [MENU] , , then select “Record New”. To record a voice memo, press . Instructions (Please OK to start recording) will be displayed and and you will hear “Beep Sound”. To stop recording a memo, press [STOP].• By pressing [SET AS], you can choose from the following: 1. Ringtone 2. Contact ID 3. Alert Tone - 1. All Msg 2. TXT Msg 3. PIX Msg 4. Voicemail MsgHGET TUNES & TONESGET NEW RINGTONES Press [MENU] , , . Use your navigation key to select a provider’s browser, press . Use your navigation key to select “Ringtones” you wish to download, press .MY RINGTONES Press [MENU] , , . To play downloaded ringtones. Select the tunes or tones you want to play, then press [PLAY]. To assign downloaded ringtones. Select the Ringtone you want to assign, then press [SET AS]. Select “Ringtone”, “Contact ID” or “Alert Tone”, then press .• By pressing [OPTIONS], you can choose from the following: 1. Erase 2. File Info](https://usermanual.wiki/Pantech/L1/User-Guide-744027-Page-39.png)
![78 79GET IT NOW GET IT NOWMY SOUNDS Press [MENU] , , . To play downloaded sounds. Select the sound you want to play, then press [PLAY]. To erase downloaded sounds. Select the sound you want to erase, then press [OPTIONS]. To send the PIX message, press [SEND]. Please refer to page 98 for more details on “Send New Picture Message”.HPICTURESDOWNLOADING NEW PIX Press [MENU] , , . Use your navigation key to select a provider’s browser, press . Use your navigation key to select a “Picture or FLIX” you wish to download, press .MY PICTURESIn Review Mode you can view all the pictures you have taken, storeselected images in your phone, send pictures to the Online Album,delete images and access additional picture options. Press [MENU] , , . In Review Mode, you can view all the pictures you have stored in your phone. Select picture with the Navigation Key, then press [VIEW]. You can see detail picture.• By pressing [OPTIONS], you can choose from the following: 1. To Pix Place 2. Rename 3. Lock/Unlock 4. Erase 5. Erase All 6. Sound Info](https://usermanual.wiki/Pantech/L1/User-Guide-744027-Page-40.png)
![80 81GET IT NOW GET IT NOWMY PICTURESIn Review Mode you can view all the pictures you have taken, storeselected images in your phone, send pictures to the Online Album,delete images and access additional picture options. Press [MENU] , , . Or press or . Point the camera lens at your subject. You can check the picture framing through the main display screen. Press side camera key or press to take the picture.• In detail view, user can view previous or next picture by pressing left or right navigation key.• By pressing [OPTIONS], you can choose from the following:DOWNLOADED or TAKEN PIX : 1. Send: To send a picture message. 2. To PIX Place: To upload the selected picture to a PIX server. 3. Get New PIX: To download a “New PIX” through “Get It Now”. 4. Set As: Assigns the selected PIX to display for specific tasks. (Wallpaper/Screensaver/Picture ID). 5. Rename: To edit the picture’s title. 6. Lock/Unlock: To select “Lock” or “Unlock”. 7. Erase: Erase the current picture from your phone. 8. Erase All: To erase all the pictures in your phone. 9. PIX Info: Displays information on the selected picture, such as File Name, Date, Time, Res and Size. PRELOADED PIX : 1. Get New: To download a “New PIX” through the “Get It Now”. 2. Set As: Assigns the selected PIX to display for specific tasks. (Wallpaper/Screensaver). 3. Erase All: To erase all the pictures in your phone. 4. PIX Info: Displays information on the selected picture, such as File Name, Date, Time, Res and Size.• Press [CAMERA] to return to Camera mode to take another picture.• Press [My Pics], you can view the captured pictures.• By pressing [OPTIONS], you can choose from the following: 1. Resolution: To select a resolution for a picture. (640x480/320x240/160x120) 2. Self Timer: To activate the camera’s timer function. (Off/3 Seconds/5 Seconds/10 Seconds) 3. Brightness: To brightness up & down ( -2, -1, 0, +1, +2). 4. White Balance: To select white balance. (Auto/Sunny/ Cloudy/Tungsten/Fluorescent/Darkness) 5. Shutter Sound: To select a shutter sound. (Shutter/Silent/ Say “Cheez”/Ready! 123) 6. Color Effects: To select a color effects. (Normal/Antique/ Black & White/Negative) 7. Capture Mode: To select a capture mode. (Landscape/Portrait) 8. Multi Shots: 9. Sub Display: To take a picture using the Sub display. By pressing [OPTIONS], you can choose Sub Display options: 1. Main Display/2. Self Timer/ 3. Flash/4. Shutter Sound• User can control zoom directly by pressing up and down navigation key.• Navigation Left / Right: Zoom up & down.](https://usermanual.wiki/Pantech/L1/User-Guide-744027-Page-41.png)
![82 83GET IT NOW MENU FUNCTIONS The picture taken should be displayed. To save the picture, press [SAVE]. To go back to idle mode without saving the picture, press . To take another picture without saving the picture you just took, press [ERASE]. To send the picture to someone, press [SEND]. Please refer to page 98 for more details on “Send New PIX Message”.PICTURE PLACE Press [MENU] , , . Connect “Mobile Web” launches and connects you to “Picture Place”.HGAMESDOWNLOADING NEW GAMES Press [MENU] , , . Use your navigation key to select a provider’s browser, press . Use your navigation key to select a game you wish to download, press . To save a downloaded fun or games to the “Get Fun & Games” list and to sort by alphabet order.DOWNLOADING NEW GAMES Press [MENU] , . To play downloaded games. Select the game you want to play, then press [PLAY]. Selected “Mobile Web” game will launch.HNEWS & INFODOWNLOADING NEW GAMES Press [MENU] , , . Connect “Mobile Web”.](https://usermanual.wiki/Pantech/L1/User-Guide-744027-Page-42.png)
![84GET IT NOWHTOOLS ON THE GOCONNECTING GET GOING Press [MENU] , , . “Get It Now” service will launch.HEXTRASCONNECTING GET GOING Press [MENU] , , . “Get It Now” service will launch.This chapter addresses Voice Mail, TXT, PIX Messaging functionsincluding:WHEN A NEW MESSAGE ARRIVESVOICE MAILNEW MSGINBOXSENTDRAFTSE- MAILMOBILE IMCHATERASE ALLSETTINGSCHAPTER 6VOICE MAIL, TXT, PIXMESSAGINGCHAPTER 6 VOICE MAIL, TXT, PIX MESSAGING](https://usermanual.wiki/Pantech/L1/User-Guide-744027-Page-43.png)
![86 87EXISTING USER Dial *86 and press . At the recording, enter your 4 digit password, then press . To listen to new messages, press .HNEW MESSAGETo send a new TXT and Picture message:TXT MESSAGE Press [MENU] , , or , , . Under “To”, input the phone number and press . Under text filed, input a new text message. (Please refer to page 33 for more details on entering letters, numbers and symbols.)VOICE MAIL, TXT, PIX MESSAGING VOICE MAIL, TXT, PIX MESSAGINGHWHEN A NEW MESSAGE ARRIVES The following display appears when a new message arrives. To display the message, select “View Now”, then press [OK].HVOICE MAILDisplays the number of voice mails and accesses them by pressing . To access your voice mail, press [MENU] , or , .FIRST TIME USER Dial *86 and press . At the recording, press . Follow the voice tutorial to set up your account.OR• By pressing [ADD], you can choose from the following: 1. From Contacts: Search for a phone number stored in the Contacts list. 2. Recent Calls: Search for a phone number stored in the recent calls list. 3. Groups: Search the groups stored in the contacts list. 4. To Contacts: To store the phone number in contacts.OR](https://usermanual.wiki/Pantech/L1/User-Guide-744027-Page-44.png)
![88 89 To send the text message, press [SEND].• Input at least one text msg field to save in the draft box.PICTURE MESSAGE Press [MENU] , , or , , . Under “To”, input the phone number and press .•By pressing [OPTIONS], you can choose from the following: 1. Save As Draft: To save message in draft folder. 2. Add Graphic: Inserts simple graphic images in Text Msg. 3. Add Sound: Inserts EMS sound in Text Msg. 4. Add Name Card: Inserts Name Card. 5. Quick Text: Inserts already written sentences in Text Msg. 6. Priority: To select “Normal” or “High”. 7. Cancel Msg: To cancel message. 8. Font Size: To select "Small/Normal/Lagre".• By pressing [ADD], you can choose from the following: 1. From Contacts: Search for a phone number stored in the Contacts list. 2. Recent Calls: Search for a phone number stored in the recent calls list. 3. Groups: Search the groups stored in the contacts list. 4. To PIX Place : To send pictures by using online Address. 5. To Contacts : To store the phone number in your contact.You may enter up to 10 contacts. Under “Text”, input a new TXT Message then press . Under “Picture”, only one picture can be inserted per message. Press [My Pics], then select the picture you’d like to send and press . Under “Sound”, only one sound can be inserted. Press [SOUNDS], then select the sound you’d like to send and press . Under “Subject”, input a subject then press . (Please refer to page 31 for more details on entering letters, numbers and symbols. Max 100 characters support.) Under “Name Card”, input a Name Card then press .•By pressing [OPTIONS], you can choose from the following: 1. Save As Draft: To save message in draft folder. 2. Add Quick Text: Inserts already written sentences in Text Msg. 3. Add Slide: Inserts slide. 4. Priority: To select “Normal” or “High”. 5. Cancel Msg: To cancel message.VOICE MAIL, TXT, PIX MESSAGING VOICE MAIL, TXT, PIX MESSAGING](https://usermanual.wiki/Pantech/L1/User-Guide-744027-Page-45.png)
![90 91VOICE MAIL, TXT, PIX MESSAGING VOICE MAIL, TXT, PIX MESSAGING To preview a written picture message, press [OPTIONS], then select “Preview”. To save the PIX Message, press [OPTIONS], then select “Save As Draft”. Press [OPTIONS], then select “Priority Level”, select “High” or “Normal”, then press . To add slide, press [OPTIONS], then select “Add Slide”. To exit the message, press [OPTIONS], and then select “Cancel Msg”. (If you want to save the message, inputted message will be saved in “Drafts”.) To send the Picture Message, press [SEND].HINBOXThe Inbox manages received Text messages. To access: Press [MENU] , or , . Select a message and press [OPEN]. The message is displayed. To erase a received message press [ERASE]. By pressing [OPTIONS], the user can choose from the following:REPLYType your reply and then press [SEND].REPLY W. COPY To reply to a received message and include the received message into the message: Select to reply with the original message included. The default call back number is automatically included in the Default CB# field. To send the text message, press [SEND].OR](https://usermanual.wiki/Pantech/L1/User-Guide-744027-Page-46.png)
![92 93VOICE MAIL, TXT, PIX MESSAGING VOICE MAIL, TXT, PIX MESSAGINGFORWARD To forward the Text message: Input the phone number of the person you are sending the message to, then press . Input any Text message to go along with the forwarded message, then press [SEND].LOCK & UNLOCKSelect “Lock” to lock the message or “Unlock” to unlock the message.SAVE GRAPHICSTo save a graphic image. This option is only available if you are reading an enhanced (EMS) text message. It will not display in a standard text message.SAVE SOUNDTo save a sound file. This option is only available if you are reading an enhanced (EMS) text message. It will not display in a standard text message.ADD TO CONTACTSTo save number to contacts.ERASE INBOXTo erase all the inbox messages, select “Erase Inbox” and then select “Yes”, press [OK].MESSAGE INFOTo show received text message information.](https://usermanual.wiki/Pantech/L1/User-Guide-744027-Page-47.png)
![94 95VOICE MAIL, TXT, PIX MESSAGING VOICE MAIL, TXT, PIX MESSAGINGHSENTManages sent TEXT messages or messages waiting to be sent. Press [MENU] , or , . Select a message and press [VIEW]. The message is displayed. To erase a sent message press [ERASE]. By pressing [OPTIONS], the user can choose from the following:FORWARD To forward the Text message: Input the phone number of the person you are sending the message to, then press . Input any Text message to go along with the forwarded message, then press [SEND].RESENDSelect to resend a TXT message.LOCK & UNLOCKSelect “Lock” to lock the message or “Unlock” to unlock the message.ORADD TO CONTACTSTo save number to contacts.MESSAGE INFOTo show received text message information.](https://usermanual.wiki/Pantech/L1/User-Guide-744027-Page-48.png)
![96 97VOICE MAIL, TXT, PIX MESSAGING VOICE MAIL, TXT, PIX MESSAGINGHDRAFTSDraft Folder contains any draft messages or saved messages. If message composition is interrupted by a voice call or other interrupting event, the text of the current composition is automatically saved in the drafts folder. Press [MENU] , or , . Select a message and then press [EDIT]. The message is displayed. To erase a draft message press [ERASE]. By pressing [OPTIONS], the user can choose from the following:SENDTo send a selected message.LOCK & UNLOCKSelect “Lock” to lock the message or “Unlock” to unlock the message.ADD TO CONTACTSTo save number to contacts.ERASE DRAFTSTo erase all draft messages, select “Erase Drafts” or “Yes”, and then press [OK].ORHE- MAIL Press [MENU] , or , . Launch “Mobile Web”.HMOBILE IMGET NEW APP Press [MENU] , , or , , . Launch “Mobile Web”.MOBILE IM Press [MENU] , , or , , . Connect “Mobile IM”.OROR](https://usermanual.wiki/Pantech/L1/User-Guide-744027-Page-49.png)
![98VOICE MAIL, TXT, PIX MESSAGINGHCHAT Press [MENU] , or , . Launch “Mobile Web”.ORThis chapter addresses the safety guidelines and precautions to follow when operating your phone. Before operating your phone, please be aware of all the safety details.This chapter contains the terms and conditions of services and the warranty for your phone. Please review them thoroughly.SAFETY INFORMATION FOR WIRELESS HANDHELD PHONESSAFETY INFORMATION FOR FCC RF EXPOSURESAR INFORMATIONFCC HEARING-AID COMPATIBILITY (HAC) REGULATIONS FORWIRELESS DEVICESFDA CONSUMER UPDATEPROTECT YOUR WARRANTY12 MONTH LIMITED WARRANTYCHAPTER 7SAFETY ANDWARRANTYCHAPTER 7 SAFETY AND WARRANTY](https://usermanual.wiki/Pantech/L1/User-Guide-744027-Page-50.png)
![108 109FCC HEARING-AID COMPATIBILITY(HAC) REGULATIONS FOR WIRELESS DEVICESFCC HEARING-AID COMPATIBILITY(HAC) REGULATIONS FOR WIRELESS DEVICESSAFETY AND WARRANTY SAFETY AND WARRANTYOn July 10, 2003, the U.S. Federal Communications Commission (FCC) Report and Order in WT Docket 01-309 modified the exception of wireless phones under the Hearing Aid Compatibility Act of 1988 (HAC Act) to require digital wireless phones be compatible with hearing-aids. The intent of the HAC Act is to ensure reasonable access to telecommunications services for persons with hearing disabilities.While some wireless phones are used near some hearing devices (hearing aids and cochlear implants), users may detect a buzzing, humming, or whining noise. Some hearing devices are more immune than others to this interference noise, and phones also vary in the amount of interference they generate.The wireless telephone industry has developed a rating system for wireless phones, to assist hearing device users find phones that may be compatible with their hearing devices. Not all phones have been rated. Phones that are rated have the rating on their box or a label located on the box.The ratings are not guarantees. Results will vary depending on the user’s hear-ing device and hearing loss. If your hearing device happens to be vulnerable to interference, you may not be able to use a rated phone successfully. Trying out the phone with your hearing device is the best way to evaluate it for your personal needs.M-Ratings: Phones rated M3 or M4 meet FCC requirements and are likely to generate less interference to hearing devices than phones that are not labeled. M4 is the better/higher of the two ratings.Hearing devices may also be rated. Your hearing device manufacturer or hearing health professional may help you find this rating. Higher ratings mean that the hearing device is relatively immune to interference noise. The hearing aid and wireless phone rating values are then added together. A sum of 5 is considered acceptable for normal use. A sum of 6 is considered for best use.In the above example, if a hearing aid meets the M2 level rating and the wireless phone meets the M3 level rating, the sum of the two values equal M5. This should provide the hearing aid user with “normal usage” while using their hearing aid with the particular wireless phone. “Normal usage” in this context is defined as a signal quality that is acceptable for normal operation.The M mark is intended to be synonymous with the U mark. The T mark is intended to be synonymous with the UT mark. The M and T marks arerecommended by the Alliance for Telecommunications Industries Solutions (ATIS). The U and UT marks are referenced in Section 20.19 of the FCC Rules. The HAC rating and measurement procedure are described in the American National Standards Institute (ANSI) C63.19 standard.For information about hearing aids and digital wireless phone• Fcc Hearing Aid Compatibility and Volume Control http://www.fcc.gov/cgb/dro/hearing.html• Gallaudet University, RERC http://tap.gallaudet.edu/DigWireless.KS/DigWireless.htm• Self Help for Hard of Hearing People Inc. [SHHH] www.hearingloss.org/hat/TipsWirelessPhones.htm• The Hearing Aid Compatibility FCC Order http://hraunfoss.fcc.gov/edocs_public/attachmatch/ FCC-03-168A1.pdf](https://usermanual.wiki/Pantech/L1/User-Guide-744027-Page-55.png)