Pantech PC-7130 CDMA Cellular Phone User Manual PC 7130 EN 051118 indd
Pantech Co., Ltd. CDMA Cellular Phone PC 7130 EN 051118 indd
Pantech >
Contents
- 1. User Manual 1
- 2. User Manual 2
User Manual 2
65
MENU FUNCTION
64
MENU FUNCTION
H
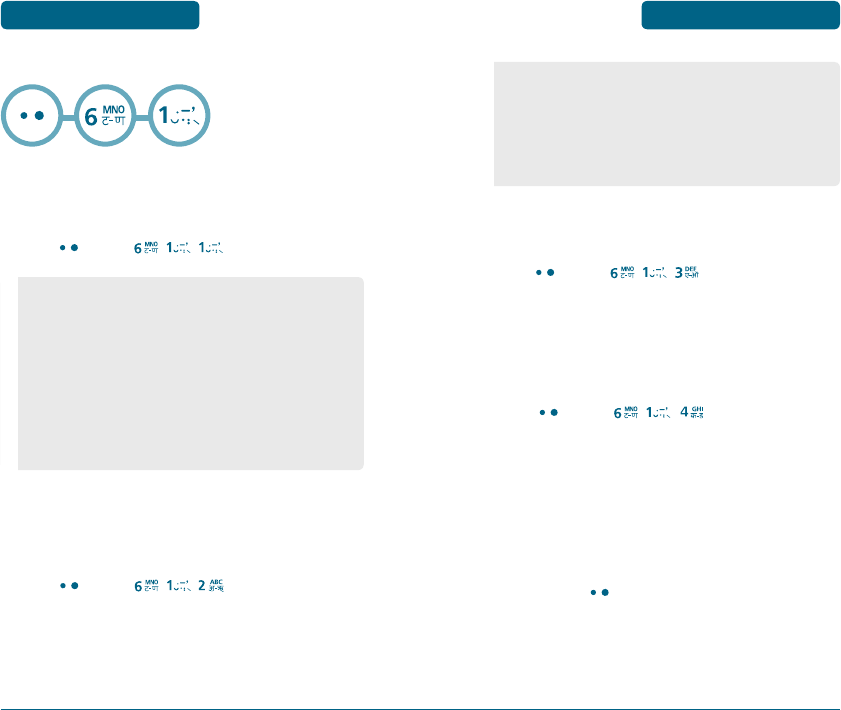
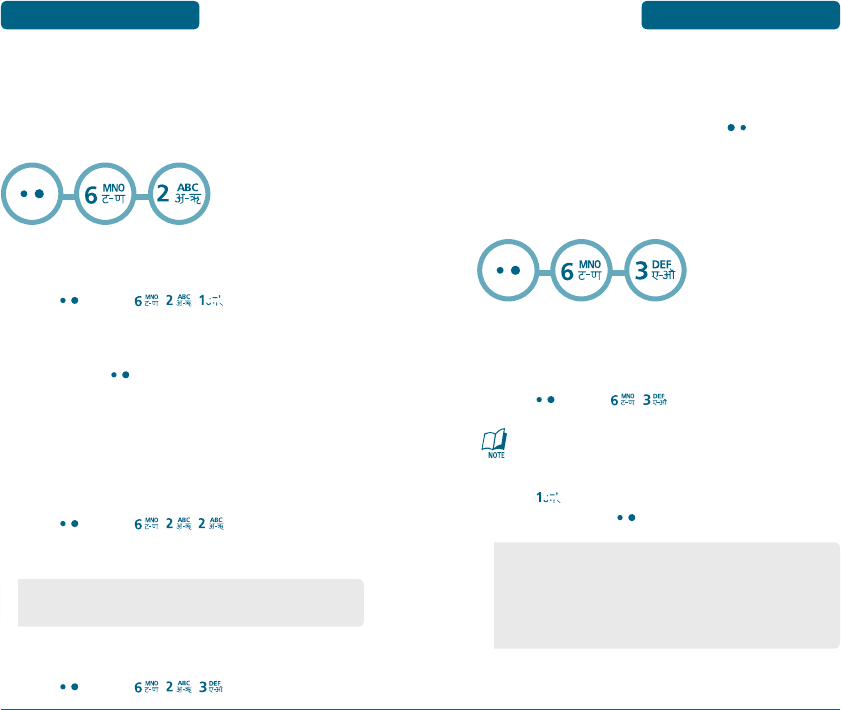
CALL
CALL FORWARD
This network service enables incoming calls to be rerouted to a
number that you specify.
Press
[MENU]
,
,
.
CALL WAIT
Notifies you of an incoming call when you’re on a call by sounding a
beep and displaying the caller’s phone number on the screen.
Press
[MENU]
,
,
.
• Immediate : To forward all incoming calls to another
number or to voice mail in case of "turn off",
"busy" or "not reachable".
• When Busy : Calls are diverted when you are already on
another call.
• No Reply/Not reachable : Calls are diverted when you do
not answer the phone or do not
reach the call.
• Disable All : All of the call forward settings are cancelled.
SETTINGS
SETTINGS
ANY KEY ANSWER
You can answer an incoming call by pressing any key.
Press
[MENU]
,
,
.
Select “On” or “Off” with the Navigation key.
AUTO REDIAL
Automatically redial a call up to 5 times after a set time interval.
Press
[MENU]
,
,
.
Select Retry Time and Select a time interval option
(Off, 3 Secs, 5 Secs, 7 Secs, 10 Seconds) with the
Navigation key.
Select Repeat and Select a time interval option
(1 time, 3 times, 5 times) with the Navigation key.
To save, press
[OK]
.
• Enable : If you select enable, you can accept a waiting
(receiving) call.
• Disable : If you select disable, you cannot recognize the
waiting (receiving) call.
• Edit Feature Code : If you select edit feature code, you can
edit code.
PC 7130(EN)-051118.indd 64-65 2005.11.21 9:34:12 PM
67
SETTINGS MENU FUNCTION
66
SETTINGS
MENU FUNCTION
VOICE PRIVACY
Enhances voice privacy and avoids tapping during a call.
Press
[MENU]
,
,
.
Select “Standard” or “Enhanced” with the Navigation
key.
To save, press
[OK]
.
CALL TIMER
Enable option to see the amount of time spent on a call.
Press
[MENU]
,
,
.
Select Off or On option with th navigation key.
To save, press
[OK]
.
AUTO ANSWER
To answer calls when your cellular telephone is connected to an
optional Hands free :
Press
[MENU]
,
,
.
Select “Hands Free” with the Navigation Key.
Select one of the following options and press
[OK]
.
•
On : Displays time during a call.
•
Off : During a call, time is not displayed.
TONE LENGTH
To adjust tone length :
Press
[MENU]
,
,
.
Select “Normal” or “Long” with the Navigation Key then
press
[OK]
to save it.
CONNECT CALL ALERT
Press
[MENU]
,
,
.
Select “On” or “Off” with the Navigation Key then press
[OK]
to save it.
DISCONNECT CALL ALERT
Press
[MENU]
,
,
.
Select “On” or “Off” with the Navigation Key then press
[OK]
to save it.
EDIT SMS ON CALL
Press
[MENU]
,
,
.
Edit Messages.
After editing messages, then press
[MENU].
• Off / 5 Secs / 10 Secs / 15 Secs
PC 7130(EN)-051118.indd 66-67 2005.11.21 9:34:14 PM
69
SETTINGS MENU FUNCTION
68
SETTINGS
MENU FUNCTION
To save it, select "SAVE".
To exit it, select " Exit".
H
PHONE
KEY GUARD
Press
[MENU]
,
,
.
Select “Off” or “On” with the Navigation Key.
To save, press
[OK]
(“Activated!” displays).
Press 1,2,3 to unlock your keypad.
DATA SETTINGS
Allows you to transfer data when your cellular telephone is
connected to a PC.
Press
[MENU]
,
,
.
Select one of the following item.
VERSION
Press
[MENU]
,
,
.
You are to see the version of software, hardware and
others.
To return to the previous page, press
[BACK].
H
SECURITY
Prevents unauthorized use of your cellular telephone. The following
settings can be restricted :
PHONE LOCK
Prevents the phone from being used without entering the password
first.
Press
[MENU]
,
then enter “Password”.
The default password is the last 4 digits of your phone
number.
Press
then select“Lock Now”, “Lock On Power Up”
or “Off” and press
[OK]
.
• Lock Now : Lock the phone now.
• Lock On Power Up : Do not lock the phone now, but it is
automatically locked when power recy
cled.
• Off : Do not lock the phone.
• Receive Mode : Voice Call/Data Only/Fax only.
• Data Speed : 19200 bps/115200 bps/230400 bps.
PC 7130(EN)-051118.indd 68-69 2005.11.21 9:34:17 PM
71
SETTINGS MENU FUNCTION
CHANGE CODE
Changes your 4-digit password.
Press
[MENU]
,
then enter “Password”.
The default password is the last 4 digits of your phone
number.
Press
.
Enter a new password then press
[OK]
.
Enter the new password again and press
[OK]
.
70
SETTINGS
MENU FUNCTION
RESTRICT
Phone Book
Blocks access to phone book.
Press
[MENU]
,
then enter “Password”.
Press
,
then select “Allow” or “Restrict”
with the Navigation Key and press
[OK]
.
Call History
Blocks access to call history.
Press
[MENU]
,
then enter “Password”.
Press
,
then select “Allow” or “Restrict”
with the Navigation Key and press
[OK]
.
Dialled Call
Blocks all Dialled Calls – except emergency calls – but allows an
incoming call to be placed.
Press
[MENU]
,
then enter “Password”.
Press
,
then select “Allow” or “Restrict”
with the Navigation Key and press
[OK]
.
• Allow : Allows access to the phone book.
• Restrict : Restricts access to the phone book.
• Allow : Allow access to call history.
• Restrict : Restrict access to call history.
• Allow : Allows a dialed call.
• Restrict : Restricts a dialed call.
PC 7130(EN)-051118.indd 70-71 2005.11.21 9:34:19 PM
73
SETTINGS MENU FUNCTION
Messages
Blocks access to message.
Press
[MENU]
,
then enter “Password”.
Press
,
then select “Allow” or “Restrict”
with the Navigation Key and press
[OK]
.
EMERGENCY NUMBERS
Stores 3 phone numbers that can be called even in the lock mode.
Press
[MENU]
,
then enter “Password”.
The default password is the last 4 digits of your phone
number.
Press
then select a location with the Navigation
Key, press
[OK]
.
Input a phone number, press
[OK]
again to save.
Press the erase key to delete the saved numbers in case the
numbers are saved.
ERASE ALL
Clears all phone book, downloads, and messages.
Press
[MENU]
,
then enter “Password”.
72
SETTINGS
• Allow : Allows access to the message.
• Restrict : Restricts access to the message.
The default password is the last 4 digits of your phone
number.
Press
.
Check “Phone Book:Phone/Call history/Download” and
Select with the Navigation key and then
[OK]
to
erase all the items in those categories.
RESET PHONE
Resets phone to default settings.
Press
[MENU]
,
then enter “Password”.
The default password is the last 4 digits of your phone
number.
Press
.
Select “Reset” or “Clear Memory & Reset” with the
Navigation key. Press
[OK]
.
MENU FUNCTION
PC 7130(EN)-051118.indd 72-73 2005.11.21 9:34:21 PM
75
MENU FUNCTION
H
AIRPLANE MODE
When your phone is in Airplane Mode, it cannot make or receive
any calls or access online information. However, you may still use the
phone’s other features, such as Games, etc..
Press
[MENU]
,
.
Read the message, then press
[OK]
.
Select “On” or “Off” then press
[OK]
to save your
Airplane Mode setting.
74
SETTINGS
MENU FUNCTION ORGANIZER
H
SCHEDULER
Sets schedule and reminds you of that event.
ADD EVENT
Press
[MENU]
,
,
[MENU],
.
Move the Navigation Key left, right, up or down to
choose a date in the calendar.
DATE
Use the keypad to change or enter the date.
TIME
Use the keypad to set a time and
[OK]
to select “AM” or
“PM”.
EVENT
Shows the events saved for the currently selected date.
Press the
[MENU] key in the calendar mode to select
from List All, Add Event, View, Erase, and Erase all.
• By pressing
[MENU], the user can choose from the
following :
List all
Add event
View : View today Events
Erase : Erase today Events
Erase all
PC 7130(EN)-051118.indd 74-75 2005.11.21 9:34:23 PM
77
ORGANIZER MENU FUNCTION
SETTING
Select an alert time interval option (On Time, 10 MinBefore,
30 Min Before, 1 Hour Before, No Alarm) using the
Navigation Key.
RINGER
To set a Ringer, press
[MENU], then select “Change” or
“Default” using the Navigation Key, press
[OK]
.
Press
[OK] to save it or
[BACK] to return to the
calendar.
The date of the event will be marked on your calendar.
VIEW EVENT
To view the Event List, Press
[MENU]
,
.
Move the Navigation Key to choose an event then
Press
[MENU]
, you can see the saved schedule in
detail.
76
ORGANIZER
MENU FUNCTION
• List All : Shows all events saved in the scheduler.
• Add Event : Adds new events.
• Erase : Deletes all events for the currently selected date.
• Erase All : Deletes all events saved in the scheduler.
• Default : To set default ringer type.
• Change : To set custom ringer type.
H
ALARM
You can set up to 3 alarms.
To display alarm entries, press
[MENU]
,
.
Select one of the entries using the Navigation Key.
To set a new alarm, choose alarm 1, 2 or 3. To edit an
existing alarm, select that alarm. Press
[OK]
.
Press the Navigation Key down to select alarm options.
SETTING
Use the Navigation Key to select a setting for the alarm
(Once/Daily/Mon-Fri/Weekly/Monthly/Off).
• By pressing
[MENU], the user can choose from the
following :
View
Add new
Erase
Erase All
PC 7130(EN)-051118.indd 76-77 2005.11.21 9:34:24 PM
7978
ORGANIZER MENU FUNCTION
ORGANIZER
MENU FUNCTION
DATE
Use the keypad to change or enter the date for the alarm.
TIME
Use the keypad to set a time for the event and the
to
select “AM” or “PM”.
SNOOZING
Use the Navigation Key to select a Snoozing (Off, 1 time
after 5 min, 1 time after 10 min, 3 times by 5 min).
RINGER
To set a “Ringer” press
[MENU], then select “Change” or
“Default” using the Navigation Key. To save it,
press
[OK]
.
H
D-DAY
press
[MENU]
,
.
DATE
Use the keypad to change or enter the date for the alarm.
TIME
Use the keypad to set a time for the event and the
to
select “AM” or “PM”.
Alarm
Select an alert time interval option (On Time, 10 MinBefore,
30 Min Before, 1 Hour Before, No Alarm) using the
Navigation Key.
RINGER
To set a Ringer, press
[MENU], then select “Change” or
“Default” using the Navigation Key, press
[OK]
.
MEMO
There is a 20-letter limit.
• Once : To enter the date filed.
• Mon-Fri : Alarm goes off from Monday until Friday.
• Daily : Alarm goes off everyday.
• Mon-Sat
• Weekend
• Sunday
• Weekly : To select “Monday”, “Tuesday”, “Wednesday”,
“Thursday”, “Friday”, “Saturday”, “Sunday”.
• Monthly : To select 1~31.
• Off
• Default : To set default ringer type.
• Change : To set custom ringer type.
PC 7130(EN)-051118.indd 78-79 2005.11.21 9:34:25 PM
81
ORGANIZER MENU FUNCTION
The selected memo will appear. To edit it, press
[MENU], select “Edit” and input a new text memo.
Press
[OK]
to save edited memo.
SETTINGS
To select memo pad background image :
Press
[MENU]
,
,
.
Select (Paper/Pattern/Sea/Sky/Flower/White) with the
Navigation Key (left or right) then press
[OK]
.
H
RESERVED CALL
This menu can start with phonebook, Sms and call history pop up
menu
Press
[MENU]
,
.
H
MEMO
Your cellular telephone includes an internal memo pad that can be
used to compose and store and notes.
ADD NEW
To compose a memo (there is an 80-letter limit) :
Press
[MENU]
,
,
.
Input a new text memo.
(Please refer to page 38 for more details on entering letters,
numbers & symbols.)
Press
[OK]
to save memo.
VIEW MEMO
To view a saved memo :
1.1. Press
[MENU]
,
,
.
View selected item press
[MENU]
“View”.
1.2. To add a new memo, press
[MENU]
“Add
New”.
1.3. To erase a memo, press
[MENU]
“Erase”.
1.4. To erase all memos, press
[MENU]
“Erase All”.
The list of all memos, in saved order, is displayed.
Select a memo then press
[OK]
.
80
ORGANIZER
MENU FUNCTION
• Phone Number
• Alarm : Once, Daily, Mon-Fri, Mon-Sat, Sat-Sun, Weekly, Off.
• Date
• Time
• Ringer
• Memo (Default : Phonebook name )
PC 7130(EN)-051118.indd 80-81 2005.11.21 9:34:26 PM
83
ORGANIZER MENU FUNCTION
H
STOPWATCH
Simultaneously times up to six different events. To operate the
stopwatch :
Press
[MENU]
,
.
To measure a time period.
1. To start the stop watch, press
[START].
2. To pause it, press
[STOP].
To time up to FIVE events at once :
1. To start, press
[START].
2. To stop a time period and continue measuring
another one, press
[SPLIT].
3. To stop the second and continue measuring a third
one, press
[SPLIT].
4. To measure up to five time periods, repeat the above
steps.
5. To stop the stop watch, press
[STOP].
6. To review the results, press
[VIEW].
7. To return to the stop watch, press
[Back].
8. To reset it, press
[RESET].
82
ORGANIZER
MENU FUNCTION
H
CALCULATOR
To access the calculator :
Press
[MENU]
,
.
Follow the instructions below to calculate (8*6)/4-2.5
To reset, press [RESET].
H
CURRENCY CONVERTER
To access the calculator :
Press
[MENU]
,
.
: X, : -, : /, : +, : ., : Reset,
: Clear/Back.
Input 8.
Move the Navigation Key rightward.
Input 6 then press the Navigation Key.
Move it leftward.
Input 4 then press the Navigation Key.
Move it downward.
Input 2 then press the
to input (.).
Press 5,
[OK]
.
• Input currency unit.
• Input an amount of domegstic or intermational money.
PC 7130(EN)-051118.indd 82-83 2005.11.21 9:34:29 PM
85
R-WORLD MENU FUNCTION
84
ORGANIZER
MENU FUNCTION
H
WORLD CLOCK
To display the time and date in pre-programmed cities :
Press
[MENU]
,
.
Select a city.
The world map appears with the city, its date and time.
As the daylight saving time is not applied, it may be
different from the actual time during DST.
To return to the previous page, press
[BACK].
• Use the Navigation Key to select another city.
Your phone provides “BREW”, a unique feature that enables you to
download melody ringers, wallpapers, games, and more from your
network to your phone. Please contact your service provider for the
availability of these services.
H
R-WORLD
Press
[MENU]
,
.
H
RESET R-WORLD
Press
[MENU]
,
.
H
GAME
Press
[MENU]
,
.
PC 7130(EN)-051118.indd 84-85 2005.11.21 9:34:31 PM

CHAPTER 5 VOICE MAIL AND TEXT MESSAGE
This chapter addresses Voice Mail and Text Messaging or Picture
message functions including:
WHEN A NEW MESSAGE ARRIVES
WRITE
INBOX
OUTBOX
VOICE MAIL
DRAFTS
TEMPLATES
ERASE ALL
SETTINGS
MSG. GROUP
MSG COPY
CHAPTER 5
VOICE MAIL AND
TEXT MESSAGE
86
R-WORLD
MENU FUNCTION
SNAKE
Press
[MENU]
,
,
.
ICARUS
Press
[MENU]
,
,
.
PC 7130(EN)-051118.indd 86-87 2005.11.21 9:34:33 PM

89
Under “Message”, input a new text message.
(Please refer to page 38 for more details on entering
letters, numbers and symbols.)
Press the Navigation Key down for more fields.
Under “Priority”, select “Normal”, “Urgent”.
Press the Navigation Key down for more fields.
Under “Deferred Deliv.”, select “Immediate”, “After 30
Minutes”, “After 1 Hour“, “After 2 Hours“, “After 12
Hours“, “After 1 Day“ or “After 2 Days“.
TEXT MESSAGE
• By pressing
[MENU], the user can choose from the
following :
OK : After inputting the phone number, select a "Next".
Find : Allows the user to search the phone number which is
stored in the phone book.
Save to Phonebook : Stores the inputted phone number to
Phone Book.
Msg. Group : Allows to select all the phone numbers in a
group.
Erase : To erase selected dialled call.
• By pressing
[MENU], the user can choose from the
following :
Send
Insert Template : Inserts a template message into a Text Msg.
Save to Templates : Saves the written sentences into
Templates.
Save to Drafts
88
TEXT MESSAGE
H
WHEN A NEW MESSAGE ARRIVES
The following display appears when a new message
arrives.
To display the message, press
[READ].
H
WRITE
To send a new text message :
Press
[MENU]
,
or
,
.
Under “Send to” and press
[MENU]
”Edit”
Input the phone number.
PC 7130(EN)-051118.indd 88-89 2005.11.21 9:34:35 PM
91
H
INBOX
The Inbox manages received text messages. To access:
Press
[MENU]
,
or
,
.
Select a message and press
[OK]
.
The message is displayed.
Press
[MENU].
To reply to the text message, press
[OK]
.
TEXT MESSAGE
• : Urgent New Msg (not read)
• : Urgent Read Msg
• : New Msg (not read)
• : Old Msg (already read)
• : Lock (already read and locked)
90
Press the Navigation Key down for more fields.
Under “Delivery Ack.”, select “On“ or “Off“.
Press the Navigation Key down for more fields.
Under “Insert Signature”, select “On“ or “Off“.
9.1. To send the text message, press
[MENU], select
"Send", then press
[OK]
.
9.2. To save the text message press
[MENU] ,
select “Save To Drafs” then press
[OK]
.
TEXT MESSAGE
PC 7130(EN)-051118.indd 90-91 2005.11.21 9:34:36 PM
93
Move to Archieve Lock
To move the text message to archieve Lock
LOCK & UNLOCK
To lock or unlock the text message, press
.
Select “Lock” to lock the message or “Unlock” to
unlock the message, then press
[OK]
.
It is not displayed for stored message on UIM.
ERASE
To erase this message, select “Erase”, press
.
“Erase This Message?” will be displayed.
RESERVED CALL
To set the Reserved Call, press
.
TEXT MESSAGE
92
REPLY
To reply to the text message, press
.
Type your reply and press
[OK]
.
FORWARD
To forward the text message, select “Forward”,
press
.
Input the phone number of the person you are sending
the message, then press
[OK]
.
Input any text message to go along with the forwarded
message, then press
[OK]
.
To send the text message, press
[SEND].
SAVE TO TEMPLATES
To save received text msg to “Save to Templates”,
press
.
SAVE TO PHONE BOOK
To save number to contact, press
.
SAVE TO DRAFTS
To save the text message in your phone, press
.
TEXT MESSAGE
PC 7130(EN)-051118.indd 92-93 2005.11.21 9:34:37 PM
95
Input any text message to go along with the forwarded
message, then press
.
To send the text message, press
[SEND].
SAVE TO PHONE BOOK
To save number to contact, select “Save to Phone
book”.
Move to Archieve Lock
To move the text message to archieve Lock
SAVE TO DRAFTS
To save the text message in your cellular telephone,
select “Save to Draft”.
LOCK & UNLOCK
To lock or unlock the text message, select “Lock &
Unlock”.
Select “Lock” to lock the message or “Unlock” to
unlock the message, then press
[OK]
.
TEXT MESSAGE
94
H
OUTBOX
Manages sent text messages or messages waiting to be sent.
H
CHECKING SENT TEXT MESSAGES
Press
[MENU]
,
or
,
.
Select a message, then press
[OK]
.
The text message is displayed.
Press
[MENU].
SEND TO
To forward the text message, select “Send to”.
Input the phone number of the person you are sending
the message, then press
.
TEXT MESSAGE
• : Auto resend
• : Fail
• : Not send
• : Sent
• : Canceled
PC 7130(EN)-051118.indd 94-95 2005.11.21 9:34:38 PM
97
H
ACHIEVE
Manages saved messages from the Inbox/Outbox/Drafts
Press
[MENU]
,
.
H
1234 SERVICE
This is a message service that is mainly bused on SMS
.
Press
[MENU]
,
.
TEXT MESSAGE
• To select inbox menu : Reply, Forward, Save to Templates,
Save to Phone book, Lock & Unlock,
Erase
• To select outbox menu : Send to, Save to Phone book,
Lock & Unlock, Erase
96
ERASE
To erase this message, select “Erase”.
“Erase This Message?” will be displayed.
H
DRAFTS
Manages saved messages from the Inbox/Outbox.
Press
[MENU]
,
or
,
.
Select a text message then press
[OK]
.
The text message is displayed.
Press
[MENU].
If the text message is saved from the “Inbox” menu, this
screen will be displayed.
If the text message is saved from the “Outbox” menu,
this screen will be displayed.
Select one by pressing
[OK]
.
TEXT MESSAGE
PC 7130(EN)-051118.indd 96-97 2005.11.21 9:34:39 PM
99
H
SETTINGS
Manages messaging features through various features.
SAVE SENT MSG
Press
[MENU]
,
,
or
,
,
.
Select one from “Off”, “On” or “Prompt” with the
Navigation Key and press
[OK]
.
AUTO ERASE
Automatically erases inbox/outbox messages when new messages
arrive.
Inbox
Press
[MENU]
,
,
or
,
,
.
Press
.
Select “Disable” or “Enable” with Navigation Key and
press
[OK]
.
• Read : To erase all messages already read.
(However, the locked Message(s) will not be deleted).
• All : To erase all messages.
TEXT MESSAGE
98
H
TEMPLATES
To edit the template message you have saved :
Press
[MENU]
,
or
,
.
Select a message from the list. Press
[MENU].
To view the selected template message, select "View".
To add a new template message, select “Add New”.
To edit the template message you have selected, select
“Edit”.
To erase the saved template message, select “Erase”.
H
ERASE ALL
Press
[MENU]
,
,or
,
,.
1. To erase all the Inbox messages, press
.
2. To erase all the Outbox messages, press
.
3. To erase all the Drafts messages, press
.
4. To erase all the message, press
.
TEXT MESSAGE
PC 7130(EN)-051118.indd 98-99 2005.11.21 9:34:41 PM
101
TEXT MESSAGE
100
Outbox
Press
[MENU]
,
,
or
,
,
.
Press
.
Select “Disable” or “Enable” with Navigation Key and
press
[OK]
.
SIGNATURE
When this option is checked, you can attach your name, phone
number, a simple memo, or tag line as a signature to your e-mail
messages.
Press
[MENU]
,
,
or
,
,
.
Select “On” or “Off” with the Navigation key
and
press
[OK]
.
DIRECT VIEW
If the Direct View is set to on, the user will be able to view the message
by pressing the read key. If the Direct View is set to off, the user can
view the message by entering SMS Menu-> Inbox.
Press
[MENU]
,
,
or
,
,
.
Select “On” or “Off” with the Navigation key
and
press
[OK]
.
• ON : Set to read msg without entering inbox in SMS menu.
• OFF : Set to read msg after entering inbox in SMS menu.
TEXT MESSAGE
DELIVERY ACK
When this option is checked, the network informs you whether or
not your message has been delivered.
Press
[MENU]
,
,
or
,
,
.
Select “On” or “Off” with the Navigation key
and
press
[OK]
.
PRIORITY
You can select the priority level of your messages.
Press
[MENU]
,
,
or
,
,
.
Select "Normal", "Urgent" with the Navigation key
and
press
[OK]
.
• Normal/Urgent
PC 7130(EN)-051118.indd 100-101 2005.11.21 9:34:45 PM
103
Select the entry for the Msg Group location and press
[OK]
. “Saved!” will be displayed. Repeat for each
location for the Msg Group.
CHANGE MSG. GROUP NAME
Press
[MENU]
,
.
Select an existing group name.
Press
[MENU] then select “3. Rename”.
Input a new group name.
Press
[OK]
to save it.
• There is a 32-letter limit.
SEND TEXT MSG.
Press
[MENU]
,
.
Select an existing group name.
Press
[MENU] then select “4. Send Msg”.
Scroll to Message field and enter your message.
Press
[OK]
. Then scroll to the Priority, and Insert
fields. Set each as desired.
Press
[MENU] then select “1. Send” or “2. Save
Msg”.
Press
[OK]
.
Please refer to page 88 for more details on “Write”.
TEXT MESSAGE
102
H
MSG. GROUP
Allows the user to five group, each group in a directory can have up
to 10 phone numbers. The user can add, change, and delete Msg.
Group.
Select "SMS Group" or " E-Mail Group" with the
Navigation key.
ADD NEW MSG. GROUP
To add a new group, press
[MENU]
,
.
A maximum of five groups is allowed.
Press
[MENU] then select “2. Add Group”.
Input a new group name.
Press
[OK]
to save it.
ASSIGN PHONE NUMBER TO MSG. GROUP
To assign phone numbers to a Msg Group,
[MENU]
then select 1. select
Ten “unassigned” locations appear.
Select a location and press
SET
.
Your phone book entries will be displayed in
alphabetical order.
TEXT MESSAGE
PC 7130(EN)-051118.indd 102-103 2005.11.21 9:34:48 PM
CHAPTER 6 SAFETY AND WARRANTY
This chapter addresses the safety guidelines and precautions to
follow when operating your cellular telephone. Before operating
your cellular telephone, please be aware of all the safety details.
This chapter contains the terms and conditions of services and the
warranty for your cellular telephone. Please review them
thoroughly.
SAFETY INFORMATION FOR WIRELESS HANDHELD
PHONES
SAFETY INFORMATION FOR FCC RF EXPOSURE
SAR INFORMATION
PRECAUTIONS WHEN USING BATTERIES
CARE AND MAINTENANCE
TROUBLESHOOTING
PROTECT YOUR WARRANTY
12 MONTH LIMITED WARRANTY
CHAPTER 6
SAFETY AND
WARRANTY
104
ERASE MSG. GROUP
Press
[MENU]
,
.
Select the group name to be deleted.
Press
[MENU] then select “5. Erase”.
TEXT MESSAGE
PC 7130(EN)-051118.indd 104-105 2005.11.21 9:34:49 PM
107
SAFETY INFORMATION
FOR WIRELESS
HANDHELD PHONES
SAFETY
AND WARRANTY
The design of your cellular telephone complies with the FCC
guidelines (and those standards).
ANTENNA CARE
Use only the supplied or an approved replacement antenna.
Unauthorized antennas, modifications, or attachments
could damage the phone and may violate FCC regulations.
1* : American National Standards Institute.
2* : National Council on Radiation protection and measurements.
3* : International Commission on Nonionizing Radiation Protection.
106
EXPOSURE TO RADIO FREQUENCY SIGNALS
Your wireless handheld portable telephone is a low power
radio transmitter and receiver. When it is ON, it receives
and also sends out radio frequency (RF) signals.
In August 1996, the Federal Communications Commissions
(FCC) adopted RF exposure guidelines with safety levels for
handheld wireless phones. Those guidelines are consistent
with the safety standards previously set by both U.S. and
international standards bodies:
ANSI C95.1 (1992) *
NCRP Report 86 (1986) *
ICNIRP (1996) *
Those standards were based on comprehensive and peri-
odic evaluations of the relevant scientific literature. For
example, over 120 scientists, engineers, and physicians from
universities, government health agencies, and industry
reviewed the available body of research to develop the
ANSI Standard (C951).
SAFETY
AND WARRANTY
SAFETY INFORMATION
FOR WIRELESS
HANDHELD PHONES
Read This Information Before Using Your
Handheld Portable Cellular Telephone
PC 7130(EN)-051118.indd 106-107 2005.11.21 9:34:49 PM
109
SAFETY INFORMATION
FOR WIRELESS
HANDHELD PHONES
SAFETY
AND WARRANTY
H
ELECTRONIC DEVICES
Most modern electronic equipment is shielded from RF
energy. However, certain electronic equipment may not be
shielded against the RF signals from your wireless phone.
PACEMAKERS
The Health Industry Manufacturers Association recommends
that a minimum separation of six (6”) inches be maintained
between a handheld wireless phone and a pacemaker to
avoid potential interference with the pacemaker. These
recommendations are consistent with the independent
research by and recommendations of Wireless Technology
Research. Persons with pacemakers :
• Always keep the phone more than six inches from your
pacemaker when the phone is turned on.
• Do not carry the phone in a breast pocket.
• Use the ear opposite the pacemaker to minimize the
potential for interference.
• If you have any reason to suspect that interference is
taking place, turn your cellular telephone OFF
immediately.
OTHER MEDICAL DEVICES
If you use any other personal medical device, consult the
manufacturer of your device to determine if they are
adequately shielded from external RF energy. Your
physician may be able to assist you in obtaining this
information.
108
H
DRIVING SAFETY
Talking on the phone while driving is extremely dangerous
and is illegal in some states.
Remember, safety comes first. Check the laws and
regulations on the use of phones in the areas where you
drive. Always obey them.
Also, if using your phone while driving, please:
• Give full attention to driving. Driving safely is your first
responsibility.
• Use hands-free operation, if available.
• Pull off the road and park before making or answering a
call, if driving conditions so require.
If you must use the phone while driving, please use
one- touch, speed dialing, and auto answer modes.
An airbag inflates with great force. DO NOT place objects,
including both installed or portable wireless equipment, in
the area over the airbag or in the air bag deployment area.
If in-vehicle wireless equipment is improperly installed and
the air bag inflates, serious injury could result.
SAFETY
AND WARRANTY
SAFETY INFORMATION
FOR WIRELESS
HANDHELD PHONES
WARNING : Failure to follow these
instructions may lead to serious
personal injury and possible
property damage.
PC 7130(EN)-051118.indd 108-109 2005.11.21 9:34:49 PM

111
SAFETY
AND WARRANTY
H
OTHER SAFETY GUIDELINES
AIRCRAFT
FCC and Transport Canada Regulations prohibit using your
cellular telephone while in the air. Turn your cellular
telephone OFF before boarding an aircraft.
BLASTING AREAS
To avoid interfering with blasting operations, turn your
cellular telephone OFF when in a “blasting area” or in
areas posted: “Turn off two-way radio.” Obey all signs and
instructions.
POTENTIALLY EXPLOSIVE ATMOSPHERES
Turn your cellular telephone OFF when in any area with a
potentially explosive atmosphere and obey all signs and
instructions. Sparks in such areas could cause an explosion
or fire resulting in bodily injury or even death.
Areas with a potentially explosive atmosphere are often,
but not always, clearly marked. They include fueling areas
such as gas stations; below deck on boats; fuel or chemical
transfer or storage facilities; vehicles using liquefied
petroleum gas (such as propane or butane); areas where
the air contains chemicals or particles, such as grain, dust,
or metal powders; and any other area where you would
normally be advised to turn off your vehicle's engine.
110
Turn your cellular telephone OFF in healthcare facilities
when any regulations posted in these areas instruct you to
do so. Hospitals or healthcare facilities may be using
equipment that could be sensitive to external RF energy.
POSTED FACILITIES
Turn your cellular telephone OFF where posted notices so
require.
SAFETY
AND WARRANTY
SAFETY INFORMATION
FOR WIRELESS
HANDHELD PHONES
SAFETY INFORMATION
FOR WIRELESS
HANDHELD PHONES
PC 7130(EN)-051118.indd 110-111 2005.11.21 9:34:50 PM

113
SAFETY INFORMATION
FOR FCC RF EXPOSURE
H
CAUTIONS
In August 1996 the Federal Communications Commission
(FCC) of the United States with its action in Report and
Order FCC 96-326 adopted an updated safety standard for
human exposure to radio frequency electromagnetic energy
emitted by FCC regulated transmitters. Those guidelines are
consistent with the safety standard previously set by both
U.S. and international standards bodies. The design of this
phone complies with the FCC guidelines and these
international standards. Use only the supplied or an
approved antenna. Unauthorized antennas,
modifications, or attachments could impair call quality,
damage the phone, or result in violation of FCC regulations.
Do not use the phone with a damaged antenna. If a
damaged antenna comes into contact with the skin, a
minor burn may result.
Please contact your local dealer for replacement antenna.
WARNING! Read this Information
before using
112
H
PRECAUTIONS
Your Handheld Portable Telephone is a high quality piece
of equipment. Before operating, read all instructions and
cautionary markings on (1) AC Adaptor (2) Battery and (3)
Product Using Battery.
• DO NOT use this equipment in an extreme environment where
high temperature or high humidity exists.
• DO NOT abuse the equipment. Avoid striking, shaking or
shocking. When not using, lay down the unit to avoid possible
damage due to instability.
• DO NOT expose this equipment to rain or spilled beverages.
• DO NOT use unauthorized accessories.
• DO NOT disassemble the phone or its accessories. If service or
repair is required, return unit to an authorized Pantech cellular
service center. If unit is disassembled, the risk of electric shock or
fire may result.
• DO NOT short-circuit the battery terminals with metal items etc.
• When connecting to any other device, read its user guide for
detailed safety instructions. Do not connect incompatible
products.
• Do not use or store the device in dusty, dirty areas. Its moving
parts and electronic components can be damaged.
• Do not touch the antenna unnecessarily when the phone is
switched on. Contact with the antenna affects call quality and
may cause the phone to operate at a higher power level than
otherwise needed.
SAFETY
AND WARRANTY
SAFETY INFORMATION
FOR WIRELESS
HANDHELD PHONES
SAFETY
AND WARRANTY
PC 7130(EN)-051118.indd 112-113 2005.11.21 9:34:50 PM

115
SAR INFORMATION SAFETY
AND WARRANTY
THIS MODEL PHONE MEETS THE GOVERNMENT’S
REQUIREMENTS FOR EXPOSURE TO RADIO WAVES.
Your wireless phone is a radio transmitter and receiver. It is
designed and manufactured not to exceed the emission
limits for exposure to radiofrequency (RF) energy set
by the Federal Communications Commission of the U.S.
Government. These limits are part of comprehensive
guidelines and establish permitted levels of RF energy for
the general population. The guidelines are based on
standards that were developed by independent scientific
organizations through periodic and thorough evaluation of
scientific studies. The standards include a substantial safety
margin designed to assure the safety of all persons,
regardless of age and health.
114
BODY-WORN OPERATION
This device was tested for typical body-worn operations
with the back of the phone kept 1.5 cm. from the body. To
maintain compliance with FCC RF exposure requirements,
use only belt-clips, holsters or similar accessories that
maintain a 1.5 cm. separation distance between the user’s
body and the back of the phone, including the antenna.
The use of belt-clips, holsters and similar accessories should
not contain metallic components in its assembly. The use of
accessories that do not satisfy these requirements may not
comply with FCC RF exposure requirements, and should be
avoided.
VEHICLE MOUNTED EXTERNAL ANTENNA
(OPTIONAL, IF AVAILABLE)
A minimum separation distance of 7.9 inches (20cm) must
be maintained between the user/bystander and the vehicle
mounted external antenna to satisfy FCC RF exposure
requirements.
For more information about RF exposure, please visit the
FCC website at www.fcc.gov
SAFETY
AND WARRANTY
SAFETY INFORMATION
FOR FCC RF EXPOSURE
PC 7130(EN)-051118.indd 114-115 2005.11.21 9:34:50 PM

117116
SAR INFORMATION SAFETY
AND WARRANTY
user guide, is 1.18W/Kg. (Body-worn measurements differ
among phone models, depending upon available
accessories and FCC requirements). While there may be
differences between the SAR levels of various phones and
at various positions, they all meet the government
requirement for safe exposure.
The FCC has granted an Equipment Authorization for this
model phone with all reported SAR levels evaluated as in
compliance with the FCC RF exposure guidelines. SAR
information on this model phone is on file with the FCC
and can be found under the Display Grant section of http://
www.fcc.gov/ oet/fccid after searching on PP4PC-7130.
Additional information on Specific Absorption Rates (SAR)
can be found on the Cellular Telecommunications Industry
Association (CTIA) website at http://www.wow-com.com.
* In the United States and Canada, the SAR limit for mobile
phones used by the public is 1.6 watts/kg (W/kg) averaged
over one gram of tissue. The standard incorporates a
sub-stantial margin of safety to give additional protection
for the public and to account for any variations
inmeasurements.
The exposure standard for wireless mobile phones employs
a unit of measurement known as the Specific Absorption
Rate, or SAR. The SAR limit set by the FCC is 1.6 W/kg. *
Tests for SAR are conducted with the phone transmitting
at its highest certified power level in all tested frequency
bands. Although the SAR is determined at the highest
certified power level, the actual SAR level of the phone
while operating can be well below the maximum value.
This is because the phone is designed to operate at multiple
power levels so as to use only the power required to reach
the network. In general, the closer you are to a wireless
base station antenna, the lower the power output.
Before a phone model is available for sale to the public,
it must be tested and certified to the FCC that it does not
exceed the limit established by the government adopted
requirement for safe exposure. The tests are performed in
positions and locations (e.g., at the ear and worn on the
body) as required by the FCC for each model.
The highest SAR value for this model phone when tested
for use at the ear is 1.37 W/Kg and when worn on the body,
as described in this
SAFETY
AND WARRANTY
SAR INFORMATION
PC 7130(EN)-051118.indd 116-117 2005.11.21 9:34:51 PM

119
PRECAUTIONS WHEN
USING BATTERIES SAFETY
AND WARRANTY
• Do not leave the battery in hot or cold places, such as in a
car in summer or winter conditions, as you will reduce the
capacity and lifetime of the battery. Always try to keep
the battery at room temperature. A phone with a hot or
cold battery may temporarily not work, even when the
battery is fully charged. Li-ion batteries are particularly
affected by temperatures
below 0 °C (32 °F).
• Dispose of used batteries in accordance with local regula
tions. Always recycle. Do not dispose of batteries in a fire.
118
• Never use any charger or battery that is damaged in any
way.
• Use the battery only for its intended purpose.
• If you use the phone near the network’s base station, it
uses less power; talk and standby time are greatly
affected by the signal strength on the cellular network
and the parameters set by the network operator.
• Battery charging time depends on the remaining battery
charge and the type of battery and charger used. The bat
tery can be charged and discharged hundreds of times,
but it will gradually wear out. When the operation time
(talk time and standby time) is noticeably shorter than
normal, it is time to buy a new battery.
• If left unused, a fully charged battery will discharge itself
over time.
• Use only Pantech-approved batteries and recharge your
battery only with Pantech approved chargers. When a
charger is not in use, disconnect it from the power source.
Do not leave the battery connected to a charger for more
than a week, since overcharging may shorten its life.
• Extreme temperatures will affect the charging capacity of
your battery: it may require cooling or warming first.
SAFETY
AND WARRANTY
PRECAUTIONS WHEN
USING BATTERIES
PC 7130(EN)-051118.indd 118-119 2005.11.21 9:34:51 PM

121
CARE AND
MAINTENANCE SAFETY
AND WARRANTY
• Do not use harsh chemicals, cleaning solvents, or strong
detergents to clean the phone. Wipe it with a soft cloth
slightly dampened in a mild soap-and-water solution.
• Do not paint the phone. Paint can clog the device’s
moving parts and prevent proper operation.
• Do not put the phone in or on heating devices, such as a
microwave oven, stove, or radiator. The phone may
explode when overheated.
• Use only the supplied or an approved replacement
antenna. Unauthorised antennas or modified accessories
may damage the phone and violate regulations
governing radio devices.
• If the phone, battery, charger, or any accessory is not
working properly, take it to your nearest qualified service
facility. The personnel there will assist you, and if
necessary, arrange for service.
120
Your phone is a product of superior design and
craftsmanship and should be treated with care. The
suggestions below will help you fulfill any warranty
obligations and allow you to enjoy this product for many
years.
• Keep the phone and all its parts and accessories out of the
reach of small children.
• Keep the phone dry. Precipitation, humidity, and liquids
contain minerals that corrode electronic circuits.
• Do not use the phone with a wet hand. Doing so may
cause an electric shock to you or damage to the phone.
• Do not use or store the phone in dusty, dirty areas, as its
moving parts may be damaged.
• Do not store the phone in hot areas. High temperatures
can shorten the life of electronic devices, damage
batteries, and warp or melt certain plastics.
• Do not store the phone in cold areas. When the phone
warms up to its normal operating temperature, moisture
can form inside the phone, which may damage the
phone’s electronic circuit boards.
• Do not drop, knock, or shake the phone. Rough handling
can break internal circuit boards.
SAFETY
AND WARRANTY
CARE AND
MAINTENANCE
PC 7130(EN)-051118.indd 120-121 2005.11.21 9:34:51 PM

123122
TROUBLESHOOTING SAFETY
AND WARRANTY
“No Service” or “Network Failure,” displays
• The network connection has been lost. You may be in a
weak signal area. Move and try again.
• You are trying to access an option for which you have no
subscription with your service provider. Contact the
service provider for further details.
When call quality is poor:
• End the phone call and try again.
When the other party cannot hear you speaking:
• Your phone may have been set to Mute.-
• therefore, activate "UNMUTE" by pressing the ok key.
When battery lifetime becomes shorter than usual:
• This may happen when you are in an area with low signal
strength.
Turn off your mobile phone when it is not in use.
Change the battery when the battery lifetime ends.
When your phone does not turn on:
• Make sure your battery is charged. Check to see if your
phone works while recharging the battery.
When you are unable to send a message:
• Either you have not been registered to receive the sms
service, or you may be out of the service range of your
network service provider.
To save the time and expense of an unnecessary service call,
perform the simple checks in this section before contacting a service
professional.
When you switch on your phone, the following messages
may appear:
“Insert UIM”
• Be sure that the UIM card is correctly installed.
“Phone lock”
• The automatic locking function has been enabled.
You must enter the phone’s password before you can use
the phone.
“Enter PIN”
• You are using your phone for the first time. You must en
ter the PIN supplied with the UIM card.
• The PIN Check feature is enabled. Every time the phone is
switched on, the PIN has to be entered. To disable this
feature, use the PIN check menu.
“Enter PUK”
• The PIN code has been entered incorrectly three times in
succession, and the phone is now blocked. Enter the PUK
supplied by your service provider.
SAFETY
AND WARRANTY
TROUBLESHOOTING
PC 7130(EN)-051118.indd 122-123 2005.11.21 9:34:51 PM

125
PROTECT YOUR
WARRANTY SAFETY
AND WARRANTY
Read your Warranty carefully, with the special consider-ation to
paragraph seven of the Limited Warranty for your unit.
“Warranty does not apply to... or to any product or part there
of which has suffered through alteration... mishanding misuse,
neglect or accident”.
Many companies are making look alike accessories and in some
cases, promoting that their product is equal to or better than the
product Be careful. Some of these products may not be compatible
to use with your prod-uct and may damage the unit or cause it to
malfunction. It service is required on your unit and it is determined
that a non-Pantech accessory has created the problem with your
unit the Warranty with not apply. In addition if the unit has already
suffered irreversible damage by rea-son of a non-compatible acces-
sory the Warranty will be voided. To protect your Warranty use only
compatible accessories which cannot damage or interfere with the
functioning of your product.
124
When you are unable to charge the battery:
• This may be the result of one of the following three cases.
1. Your charger may be out of order. contact your nearest
dealer.
2. You may be attempting to use the phone in overly
hot/cold temperature.
Try changing the charging environment.
3. Your battery may have not been connected to the
charger properly. check the connector.
When you are unable to input data into the phone book:
• Your phone book memory may be full. Try deleting some
entries from your phone book.
When you are unable to select a certain function:
• You may not have been subscribed for that function, or
your network service provider may be in an area where
such service cannot be provided. Contact your local
service provider.
SAFETY
AND WARRANTY
TROUBLESHOOTING
PC 7130(EN)-051118.indd 124-125 2005.11.21 9:34:52 PM

127
PROTECT YOUR
WARRANTY SAFETY
AND WARRANTY
Read your Warranty carefully, with the special consider-ation to
paragraph seven of the Limited Warranty for your unit.
“Warranty does not apply to... or to any product or part there
of which has suffered through alteration... mishanding misuse,
neglect or accident”.
Many companies are making look alike accessories and in some
cases, promoting that their product is equal to or better than the
product Be careful. Some of these products may not be compatible
to use with your prod-uct and may damage the unit or cause it to
malfunction. It service is required on your unit and it is determined
that a non-Pantech accessory has created the problem with your
unit the Warranty with not apply. In addition if the unit has already
suffered irreversible damage by rea-son of a non-compatible acces-
sory the Warranty will be voided. To protect your Warranty use only
compatible accessories which cannot damage or interfere with the
functioning of your product.
126
When you are unable to charge the battery:
• This may be the result of one of the following three cases.
1. Your charger may be out of order. contact your nearest
dealer.
2. You may be attempting to use the phone in overly
hot/cold temperature.
Try changing the charging environment.
3. Your battery may have not been connected to the
charger properly. check the connector.
When you are unable to input data into the phone book:
• Your phone book memory may be full. Try deleting some
entries from your phone book.
When you are unable to select a certain function:
• You may not have been subscribed for that function, or
your network service provider may be in an area where
such service cannot be provided. Contact your local
service provider.
SAFETY
AND WARRANTY
TROUBLESHOOTING
PC 7130(EN)-051118.indd 126-127 2005.11.21 9:34:52 PM

U.S.A.
U.S.FEDERAL COMMUNICATIONS COMMISSION
RADIO FREQUENCY INTERFERENCE STATEMENT
INFORMATION TO THE USER
NOTE : This equipment has been tested and found to comply with
the limits for a Class B digital device pursuant to Part 15 of the FCC
Rules. These limits are designed to provide reasonable protection
against harmful Interference in a residential installation This
equipment generates, uses, and can radiate radio frequency energy
and, if Not installed and used in accordance with the instructions,
may cause harmful Interference to radio communications. However,
there is no guarantee that interference will not occur in a particular
Installation. If this equipment does cause harmful interference to
radio or television reception, which can be determined by turning
the equipment off and on, the user is encouraged to try to correct
the interference by one or more of the following measures:
*- Reorient or relocate the receiving antenna. Increase the
separation between the equipment and receiver.
*- Connect the equipment into an outlet of a circuit different from
that to which the receiver is connected.
*- Consult the dealer or an experienced radio/TV technician for
assistance.
Changes or modification not expressly approved by the party
responsible for Compliance could void the user’s authority to
operate the equipment. Connecting of peripherals requires the use
of grounded shielded signal cables.
FCC Compliance Information
This device complies with Part 15 of FCC Rules. Operation is subject
to the following two conditions:
(1) This device may not cause harmful interference, and
(2) This device must accept any interference received.
Including interference that may cause undesired operation.
ANY IMPLIED WARRANTIES, INCLUDING ANY IMPLIED WARRANTY
OF MERCHANTABILITY SHALL BE LIMITED TO THE DURATION OF
THIS WRITTEN WARRANTY. ANY ACTION FOR BREACH OF ANY
WARRANTY HEREUNDER INCLUDING ANY IMPLIED WARRANTY OF
MECHANTABILITY MUST BE BROUGHT WITHIN A PERIOD OF
24 MONTHS FROM DATE OF ORIGINAL PURCHASE IN NO CASE
SHALL THE COMPANY BE LIABLE FOR ANY CONSEQUENTIAL OR
INCIDENTAL DAMAGES FOR BREACH OF THIS OR ANY OTHER
WARRANTY, EXPRESS OR IMPLIED, WHATSOEVER.
No person or representative is authorized to assume for the
Company any liability other than expressed herein in connection
with the sale of this product.
Some states do not allow limitations on how long an implied
warranty lasts or the exclusion or limitation of incidental or
consaquential damage so the above limitation or exclusions may not
apply to you.
This Warranty gives you specific legal rights, and you may also have
other rigths which vary from state to state.
PANTECH Help Line : 1800 224 537
SAFETY
AND WARRANTY
12 MONTH LIMITED
WARRANTY
128
PC 7130(EN)-051118.indd 128-129 2005.11.21 10:32:25 PM