Pantech PN-E330 Dual-Mode CDMA Phone with Bluetooth User Manual PN E330 NOKIA 060511
Pantech Co., Ltd. Dual-Mode CDMA Phone with Bluetooth PN E330 NOKIA 060511
UserManual.wiki
>
Pantech
>
PN-E330 User Manual
>
User Manual
Contents
1.
Users Manual
2.
Manual
3.
User Manual
User Manual
Navigation menu
Upload a User Manual
Namespaces
Wiki Guide
HTML
PDF
Info
Views
User Manual
Discussion / Help
Navigation
![ACCESSING THE MENUCH2Your phone can be customized via the menu. Each function can beaccessed by scrolling with the Navigation Key or by pressing thenumber that corresponds with the menu item.1To access the menu in the idle mode, press [MENU].2To scroll through the menu use the NavigationKey.3To return to the previous page, press .To exit the current menu and return to the idlemode, press . 4Press the Navigation Key to enter a functionwhen its main page is displayed or press itsassigned number to have direct access to the function.17Hotkey In idle mode, move the Navigation Key as follows to access these functions:• Upward movement : Shortcut Key 1• Downward movement : Shortcut Key 2• Rightward movement : Shortcut Key 4• Leftward movement : Shortcut Key 3GET IT NOWMESSAGINGCONTACTSRECENT CALLSSETTINGS & TOOLS](https://usermanual.wiki/Pantech/PN-E330.User-Manual/User-Guide-744110-Page-18.png)
![BASIC FUNCTIONSCH220MAKING A CALL1Enter a phone number.To modify the phone number you have entered :• To erase one digit at a time press .• To erase the entire number, press and hold .Phone number display in contact listIf there is no name in the Contact’s name field, the highestpriority phone number is displayed. If no phone numbersare stored, the email address appears. All matching entries will be displayed. To call the selectednumber, press .To send the TXT, PIX or FLIX message with phone number :• Enter a part of the phone number and then press[OPTIONS], select “New TXT Msg, New PIX Msg or NewFLIX Msg”. Please refer to page 113, page 114 or page116 for more details on “Send New TXT Message, Send New PIX Message or Send New FLIX Message”.2Press . The indicator, , appears on the display.• If “CALL FAILED” appears on the display or the line is busy,press or . • If you activate the “AUTO RETRY” function, the phone willautomatically retry. (Refer to page 72).• When you place or receive a call from stored phonenumbers, the name will be displayed.• There is another way to make a call through the VR mode,which is called “VAD (Voice Activated Dialing)”. Please refer to page 74 (Voice Service) for more details.• If “Enter Lock Code” appears on the display enter your 4-digit password to unlock your phone.3To end a call, press .](https://usermanual.wiki/Pantech/PN-E330.User-Manual/User-Guide-744110-Page-21.png)
![CH221BASIC FUNCTIONSTo ignore incoming calls, press [IGNORE].ANSWERING CALLS1When your phone rings or vibrates, press to answer the incoming call. (Depending on your phone’s settings, you mayalso answer incoming calls by opening thephone or by pressing any key.)2To end a call, press .The speaker phone feature lets you hear audio through the speaker andtalk without holding the phone.1To activate the speaker phone in idle, answeringor calling modes, press .2The phone returns to normal (Speaker Phone Off)after ending a call or when the phone is turned offand back on.VIBRATE ON/OFF MODESPEAKER PHONETo vibrate on/off mode, press and hold .Identifies caller by displaying their phone number. If the caller’s name and number are already stored inyour contact list, name will appear. The caller ID isstored in the recent calls list.CALLER ID FUNCTION](https://usermanual.wiki/Pantech/PN-E330.User-Manual/User-Guide-744110-Page-22.png)
![BASIC FUNCTIONSCH222ANSWERING A CALL1To answer a call, press any key except , ,, , or .2To end the call, press .In Auto Answer Mode a call is automatically answered after apreset number of ring tones. See page 72 for more details.lTo select an answering option, press [MENU] and thenselect the “Settings & Tools” by pressing , selecteither “Flip Open”, “Any Key”, “Send Only” or “Auto Answer” lf “Send Only” is selected the phone can only be answered bypressing . See page 72 for more information.Pauses are used for automated systems (i.e., voice mail, calling cards).Insert a pause after a phone number and then enter another group ofnumbers. The second set of numbers is dialed automatically after thepause. This feature is useful for dialing into systems that require a code.WAIT/PAUSE FEATURE1To insert a wait/pause, enter a phone numberand then press [OPTIONS]. Select either 2-Sec Pause (“P”) or a Wait (“W”).2Press to dial or to save.Please refer to page 32 for more details about storing a phone number.](https://usermanual.wiki/Pantech/PN-E330.User-Manual/User-Guide-744110-Page-23.png)
![BASIC FUNCTIONSCH224Adjusts the volume of the ringer, key beep and speaker.ADJUSTING VOLUME1Press [MENU] and then select “Settings &Tools” menu, press and then select one ofthe following.2Adjust volume and then press to save it.Master Volume : Controls the ringer volume.Keypad Volume : Controls the keypad volume.Earpiece Volume : Controls the earpiece volume.lll• To adjust earpiece volume during a call, press the NavigationKey up or down.• To adjust master volume, press short side up/ down key.•In Idle Mode:Side Volume Up key Long Press: Volume key shall bring device out of silence.Side Volume Down key Long Press: Volume key shall bring device into silence mode.Nokia shall not be responsible for any action or liability as a resultof any breach of copyright or other misuse of music contents.Music Player is for playing WMA files saved on theTrans Flash Card. To display music list with the phoneclosed, press and hold and select a music filewith the Navigation Key, press [PLAY], then press [PAUSE] or in order to stop the musicplayer while it is playing with shell closed, it isrequired to open the shell and press .MUSIC PLAYER](https://usermanual.wiki/Pantech/PN-E330.User-Manual/User-Guide-744110-Page-25.png)
![DURING A CALLCH225Enables you to send a TXT message (SMS) during a call.SEND TXT MSG1Press [OPTIONS] .To select a phone number in your Recent Calls List:RECENT CALLSTo display the recent call menu for received, dialed,and missed calls.CONTACTS1Press [OPTIONS] .1Press [OPTIONS] .The caller cannot hear you or any sounds from your side but you canstill hear him.MUTE (UNMUTE)1Press [MUTE].To deactivate, press [UNMUTE].The phone will automatically un-mute in Emergency Call or Callback mode.ll](https://usermanual.wiki/Pantech/PN-E330.User-Manual/User-Guide-744110-Page-26.png)
![DURING A CALLCH226This menu appears only when connect Bluetooth Audio Device.TO PHONE/TO BLUETOOTH1Press [OPTIONS] .Increases security during a call. To select “On” or “Off”.VOICE PRIVACY1Press [OPTIONS] .To Phone : To deactive bluetooth audio device.To Bluetooth : To active bluetooth audio device.ll](https://usermanual.wiki/Pantech/PN-E330.User-Manual/User-Guide-744110-Page-27.png)


![Enter a name. Please refer to page 33 for more details onentering letters, numbers & symbols. To change the input mode, press [Abc]. Press the Navigation Key down to select otheroptions (Mobile1.2, E-mail1.2, etc...). If entering a phone number, press [OPTIONS]to select one of the following options:STORING A PHONE NUMBERCH.3The phone book stores up to 500 entries.1Enter phone # and press [SAVE]. Choose“Create New” or “Update Existing” and pressto Select.2If “Create New” is selected, the phone numberwill appear above a list. Press the NavigationKey up or down to choose the type of numberyou’re adding, as indicated by the icon. Press to select. If “Update Existing” isselected, your contact list is displayed. Choosethe entry to add the phone number to, and thenpress . You will see the phone numberupdated in the existing list. Press to select.34To store the entry, press [SAVE]. “CONTACT SAVED” or “CONTACT UPDATED” will be displayed.32lSet Speed DiallSet Voice DiallSet As DefaultlAdd Pause](https://usermanual.wiki/Pantech/PN-E330.User-Manual/User-Guide-744110-Page-33.png)
![Input mode indicatorWord : Input modeAbc : Abc modeABC : ABC mode123 : Number modeSymbols : Symbol modeENTERING LETTERS, NUMBERS & SYMBOLSCH3The input mode (Alpha editor) will automatically beactivated when necessary to enter letters and numbers.As shown below, there are 4 available modes ; Standardinput mode (Abc), Input mode (Word), Numeric mode(123), and Symbol mode (Symbols). The input modeindicator appears on the upper right of the display whenletters and numbers are entered. To select the desiredinput mode among the 5 modes below, press [Abc],and then enter letters and numbers.The following illustrates the function assigned to each key in the Alpha Editor.33AbcNextSpaceCaps LockClearSendPress to change mode.[Word][Abc][ABC][123][Symbols]Press to view the next matching word ifthe highlighted word is not the word youintended.Press to accept a word and add a space.Press to select a letter case of thestandard text input or text input mode.[Abc], [ABC] and [abc] indicate thestandard text input.[Word], [WORD] and [word] indicate thepredictive text input.Press to delete a character to the left ofthe cursor.Send the letters and numbers you enter.KEY FUNCTION](https://usermanual.wiki/Pantech/PN-E330.User-Manual/User-Guide-744110-Page-34.png)
![ENTERING LETTERS, NUMBERS & SYMBOLSSelect Abc mode by pressing [Abc].When you select this mode, the Abc icon appears as a visualconfirmation.- Find the key that corresponds to the letter you want to enter.- Press it as many times as needed for the letter to appear on thescreen.- To enter the name “John”:Press [ ] JPress [ ] oPress [ ] hPress [ ] nCH3Use the digit keys to enter letters, numbers and characters.STANDARD INPUT MODE1Enter letters using the key pad as follows:2To enter a space, press . The cursor willautomatically move to the next column.3Repeat until letters are entered. There is a 160-letter limit.4To delete one digit, press . To delete theentire entry, press and hold .To change the input mode, press [Abc].When entering special character such as .@?!-, &:’ 1, press repeatedly.34Key Pad2ABC3DEF4GHI:9WXYZADG:WBEH:XCFI:Y234:ZADG:91 TimeRepetitions2 timesRepetitions3 timesRepetitions4 timesRepetitions5 times5To change from lowercase to uppercase, press .](https://usermanual.wiki/Pantech/PN-E330.User-Manual/User-Guide-744110-Page-35.png)
![ENTERING LETTERS, NUMBERS & SYMBOLSCH3The input mode incorporates a built-in-dictionary to determine a wordbased on the entered characters. A word can be entered morequickly by pressing a key once per character.WORD INPUT MODE1Select the Word mode by pressing [Abc].2Press a digit key once to enter the characteryou want and then enter all the characters toinput the word you want.3To view the next matching word, press .To enter a compound word:• Enter the first part of the word and then press to accept it.• Enter the last part of the word and then press to enter the word.354To accept the matching word, enter a spaceand then press .To enter “Fun fare” in the input mode.- After you enter the 1st letter, press [Abc] to select input modeand to choose the lower case (Word).- Press and you will see “Fun” highlighted. Press to select it.- Press and until you see “ease” highlighted. Press to select the next matching word, you will see “fare” and then enter a space.](https://usermanual.wiki/Pantech/PN-E330.User-Manual/User-Guide-744110-Page-36.png)
![ENTERING LETTERS, NUMBERS & SYMBOLSNUMERIC MODE1Press [Abc] and scroll down to “Symbols”and press to change to Symbol Mode.CH3361Press [Abc] and scroll down to “123” andpress to change to Numeric Mode.2To enter a number, press a digit key.Press [ ],orPress [ ].2Select symbol you want to enter with theNavigation Key.lUse the Navigation Key to view a different line of symbols.SYMBOL MODEAllows you to enter numbers.Allows you to enter symbols.](https://usermanual.wiki/Pantech/PN-E330.User-Manual/User-Guide-744110-Page-37.png)

![CH440Stores up to 500 entries, each of which can be assigned to a group.Entries can be retrieved by name or group.CONTACTS12Press [MENU] and then press “New Contact”.Adds a new entry.NEW CONTACTTo enter a name or number, use the NavigationKey to select the contact field.Please refer to page 33 for more details on enteringletters, numbers & symbols.33.1 To save the entry, press [SAVE]. 3.2 To return to the previous page, press .PHONE BOOK FIELDS :Name/Mobile 1/Home/Work/Email 1/Group/Picture/Ringtone/Mobile 2/Fax/Email 2.Under “Mobile 1”, “Mobile 2”, “Home”, “Work” or “Fax” inputthe phone number and then by pressing [OPTIONS], youcan choose from the following:1. Set Speed Dial2. Set Voice Dial3. Set As Default4. Add Pausell• For each new contact, at least 1 phone number or emailaddress needs to be saved with the contact. “NO DATAENTERED” will be displayed if neither have been added.• Even though entry name is left empty while the phone numberis provided, the entry will be saved and displayed with phonenumber.](https://usermanual.wiki/Pantech/PN-E330.User-Manual/User-Guide-744110-Page-41.png)
![CH441Retrieves an entry by name and calls by simply pressing . You can review all the entries stored in your contact list or quicklyfind an entry by entering a name or its character string. CONTACT LISTCONTACTS12345Press [MENU] and then press“Contact List” or press [CONTACTS].Enter a name or its character string or scrollthrough the list with the Navigation Key. Please refer to page 33 for more details onentering letters, numbers & symbols.The list of names in your contacts is displayedalphabetically.To edit the entry, press [EDIT]. To show detail of the entry, press [VIEW]. To call the selected number, press [OPTIONS]and then select “Call” or press .To use and manage contacts, press [OPTIONS] then select:1. New Contact: To add a New Contact.2. Erase: To delete a contact.3. Send TXT Msg: To create a TXT message.4. Send PIX Msg: To create a PIX message.5. Send FLIX Msg: To create a FLIX message.6. Call: To call the contact.7. Erase All: To delete all contact list.](https://usermanual.wiki/Pantech/PN-E330.User-Manual/User-Guide-744110-Page-42.png)
![CH442CONTACTSGROUPSGroups allows you to classify phone entries into groups with up to 10numbers in each group. The existing groups include Family and Workand they cannot be erased or renamed. You can add up to 28 moregroups which can be changed or erased.13Press [MENU] and then press “Groups”.ADD NEW GROUPInput a new group name.4To save it, press [SAVE].2To select “New”, press [NEW].13To assign phone numbers to a Group, select “Add”, press [OPTIONS].ASSIGN PHONE NUMBER TO GROUPSelect the contact for the group and thenpress [DONE]. “CONTACT ADDED TOGROUP” will be displayed.Repeat for each location for the Group.2Select a location and then press [MARK]. Your contact entries will be displayed inalphabetical order.](https://usermanual.wiki/Pantech/PN-E330.User-Manual/User-Guide-744110-Page-43.png)
![CH4CONTACTS43CHANGE GROUP NAME2Select an existing group name that you haveadded with the Navigation Key.4Input a new group name.5To save it, press [SAVE].3To select “Rename”, press [OPTIONS].1Press [MENU], press “Groups”.1Press [MENU], press “Groups”.SEND TXT MSG. TO A GROUP2Select an existing group name with theNavigation Key.4Input a “Message”, press [OPTIONS] to select“Save As Draft”, “Add Graphic”, “Add Sound”,“Add Quick Text”, “Priority Level” and “CancelMsg”.53To select “Send TXT Msg.”, press [OPTIONS].5.1. To send the text message, press [SEND].5.2. To save the text message, press [OPTIONS]and then select “Save As Draft” and then press .](https://usermanual.wiki/Pantech/PN-E330.User-Manual/User-Guide-744110-Page-44.png)
![CH444CONTACTSSEND PIX MSG. GROUP1Press [MENU], press “Groups”.2Select an existing group name with theNavigation Key.4Input a “Text”, “PIX”, “Sound”, “Subject”, andthen press [OPTIONS] to select “Preview”,“Add Quick Text”, “Save As Draft”, “PriorityLevel”, “Remove PIX”, “Remove Sound”, “Add Slide” or “Cancel Msg”.53To select “Send PIX Msg”, press [OPTIONS].5.1. To send the PIX message, press [SEND].5.2. To save the PIX message, press [OPTIONS] and then select “Save As Draft” and then press .](https://usermanual.wiki/Pantech/PN-E330.User-Manual/User-Guide-744110-Page-45.png)
![CH4CONTACTS45SEND FLIX MSG. GROUP1Press [MENU], press “Groups”.2Select an existing group name with theNavigation Key.4Input a “Text”, “FLIX”, “Subject”, and then press [OPTIONS] to select “Preview”, “AddQuick Text”, “Save As Draft”, “Priority Level”,“Remove FLIX” or “Cancel Msg”.53To select “Send FLIX Msg”, press [OPTIONS].5.1. To send the FLIX message, press [SEND].5.2. To save the FLIX message, press [OPTIONS] and then select “Save As Draft” and then press .](https://usermanual.wiki/Pantech/PN-E330.User-Manual/User-Guide-744110-Page-46.png)
![CH446CONTACTSWhen using Erase Group, the saved entries are moved to the “No Group”.ERASE GROUP2Select an existing group name with theNavigation Key.3To select “Erase”, press [OPTIONS].4Select “Yes” to erase it, press .1Press [MENU], press “Groups”.](https://usermanual.wiki/Pantech/PN-E330.User-Manual/User-Guide-744110-Page-47.png)
![CH4CONTACTS47In idle mode, calls can be placed to numbers stored in speed dial bypressing & holding the location number on the key pad. For a 2-digitlocation number, press the first number and then press and hold thesecond number.SPEED DIALS12To assign a phone number to a location, selectthe location and then press [SET].3Select the contact with the Navigation Key thenpress . 4Select the phone number with the Navigation Key then press . 5“SPEED DIAL SET” will be displayed.• “Unassigned” appears if the location is available.• To call an assigned number, press & hold the last digit of thespeed dial #.Press [MENU], press “Speed Dials”.](https://usermanual.wiki/Pantech/PN-E330.User-Manual/User-Guide-744110-Page-48.png)
![CH448RECENT CALLSDisplays information about the 90 most recently missed calls. Place a call to a missed call number by simply pressing . To see a list of the 90 most recently missed calls, press [MENU] and then select“Recent Calls” menu, press “Missed”. If the number is already stored in your contacts,only the name appears. If the number is notstored, only the phone number appears.MISSED12To view missed call details, press [OPEN].Call details include date, time and phone number.• After 90 missed calls, the oldest call will automatically be erased from the history.• Press [MESSAGE], to send the TXT, PIX or FLIX message.3Save : To store the phone number in your phone book.Details : If the selected entry has already been stored the contacts list, to view the caller’s information.Erase : To erase a missed calls listing.Lock/Unlock : To lock or unlock a missed calls listing. Erase All : To erase all missed calls listings.View Timers : To display usage time.llllllPress [OPTIONS] and then select “Save”to save it or select “Erase” to delete it.](https://usermanual.wiki/Pantech/PN-E330.User-Manual/User-Guide-744110-Page-49.png)
![CH449RECENT CALLSCall details include date, time and phone number.• After 90 received calls, the oldest call will automatically be erased from the history.• Press [MESSAGE], to send the TXT, PIX or FLIX message.Displays information about the 90 most recently received calls. Place a call to a received call by simply pressing .RECEIVED1To see a list of the 90 most recently receivedcalls, press [MENU] and then select “RecentCalls” menu, press “Received”. If thenumber is already stored in your contacts, onlythe name appears. If the number is not stored,only the phone number appears.2To view received call details, press [OPEN].3Save : To store the phone number in your phone book.Details : If the selected entry has already been stored the contacts list, to view the caller’s information.Erase : To erase a received calls listing.Lock/Unlock : To lock or unlock received calls listing. Erase All : To erase all received calls listings.View Timers : To display usage time.llllllPress [OPTIONS] and then select “Save”to save it or select “Erase” to delete it.](https://usermanual.wiki/Pantech/PN-E330.User-Manual/User-Guide-744110-Page-50.png)
![CH450RECENT CALLSCall details include type of call, date, time and phone number.• After 90 dialed calls, the oldest call will automatically be erased from the history.• Press [MESSAGE], to send the TXT, PIX or FLIX message.Displays information about the 90 most recently dialed numbers.Place a call to a dialed call by simply pressing .DIALED1To see a list of the 90 most recently dialednumbers, press [MENU] and then select“Recent Calls” menu, press “Dialed”. If the number is already stored in your contacts,only the name appears. If the number is notstored, only the phone number appears.2To view dialed call details, press [OPEN].3Save : To store the phone number in your phone book.Details : If the selected entry has already been stored the contacts list, to view the caller’s information.Erase : To erase a dialed calls listing.Lock/Unlock : To lock or unlock dialed calls listing.Erase All : To erase all dialed calls listings.View Timers : To display usage time.llllllPress [OPTIONS] and then select “Save”to save it or select “Erase” to delete it.](https://usermanual.wiki/Pantech/PN-E330.User-Manual/User-Guide-744110-Page-51.png)
![CH451RECENT CALLSCall details include type of call, date, time and phone number.• After the 270 received, dialed or missed calls, the oldest call will automatically be erased from the history.• Press [MESSAGE], to send the TXT, PIX or FLIX message.Displays information about the most recent received, dialed andmissed calls.ALL1To see a list of the 270 most recent received,dialed and missed calls, press [MENU] and then select “Recent Calls” menu, press “All”. If the number is already stored in your contacts,only the name appears. If the number is notstored, only the phone number appears.23To view details, press [OPEN].Save : To store the phone number in your phone book.Details : If the selected entry has already been stored the contacts list, to view the caller’s information.Erase : To erase a recent calls listing.Lock/Unlock : To lock or unlock recent calls listing.Erase All : To erase all recent calls listings.View Timers : To display usage time.llllllPress [OPTIONS] and then select “Save”to save it or select “Erase” to delete it.](https://usermanual.wiki/Pantech/PN-E330.User-Manual/User-Guide-744110-Page-52.png)
![If “Last Call”, “All Calls”, “Received Calls”, “DialedCalls”, “Roaming Calls”, “Transmit Kb”, “ReceivedKb”, “Total Kb” is selected with Navigation Key.To reset the timer, press [RESET], then select “Yes”, press .To reset all timer, press [RESET ALL], then select “Yes”, press .52CH4RECENT CALLSChecks the usage time and manages your calls within the limit youset. The 11 timers include (Last Call, All Calls, Received Calls, Dialed Calls, Roaming Calls, Transmit Kb, Received Kb, Total Kb,Last Reset, Lifetime Calls, Lifetime Data Counter):VIEW TIMERSPress [MENU], select “Recent Calls” menu,press “View Timers”.To return to the previous page, press .123If “Last Reset”, “Lifetime Calls”, “Lifetime DataCounter” is selected with Navigation Key.To reset all timer, press [RESET ALL], then select “Yes”, press .](https://usermanual.wiki/Pantech/PN-E330.User-Manual/User-Guide-744110-Page-53.png)
![CH453SETTINGSControls the Ringer volume and alerts you to incoming calls in themodes listed in the gray box below.Customizes your phone and optimizes performance through a varietyof settings.SOUNDS SETTINGSMASTER VOLUME2Select one of the following options by pressingthe Navigation Key to the right.3Select one of the available ring types.To confirm, press .1Press [MENU] and then select “Settings &Tools” menu, press “Sounds Settings” andthen select “Master Volume”.Low, Medium Low, Medium, Medium High, High.Vibrate OnlyAlarm OnlyAll Sounds OffPress [PLAY/STOP] to play/stop sound.](https://usermanual.wiki/Pantech/PN-E330.User-Manual/User-Guide-744110-Page-54.png)
![CH454SETTINGS54To select a ringer type for incoming calls:CALL SOUNDS2Select your desired ringer type.3Select one of the available ring types.To confirm, press .1Press [MENU] and then select “Settings &Tools” menu, press “Sounds Settings” andthen select “Call Sounds”, press “CallRingtone”.Up or Down key : 1. Get New App. or select your desired ringer type.Press [PLAY/PAUSE] to play/pause sound.CALL RINGTONE2Select “On” or “Off” with the Navigation Key andthen press to save it.1Press [MENU] and then select “Settings &Tools” menu, press “Sounds Settings” andthen select “Call Sounds”, press “CallVibrate”.CALL VIBRATE](https://usermanual.wiki/Pantech/PN-E330.User-Manual/User-Guide-744110-Page-55.png)
![CH455SETTINGSWhen selected, this setting alerts you to the following handset changes:ALERT SOUNDS1Press [MENU] and then select “Settings &Tools” menu, press “Sounds Settings” andthen select “Alert Sounds”, press “TXTMessage”.TXT MESSAGE2Select “Tone”, “Vibrate” or “Reminder” with theNavigation Key and then select one of thefollowing options by pressing the Navigation Key.Tone : 1. Get New App. or select your desired ringer type.Vibrate : Select “On” or “Off”.Reminder : Select “Once”, “Every 2 Minutes”, “Every 15 Minutes” or “Off”.3To save, press .1Press [MENU] and then select “Settings &Tools” menu, press “Sounds Settings” andthen select “Alert Sounds”, press “PIX-FLIX Msg”.PIX-FLIX MSG2Select “Tone”, “Vibrate” or “Reminder” with theNavigation Key and then select one of thefollowing options by pressing the Navigation Key.Tone : 1. Get New App. or select your desired ringer type.Vibrate : Select “On” or “Off”.Reminder : Select “Once”, “Every 2 Minutes”, “Every 15 Minutes” or “Off”.3To save, press .](https://usermanual.wiki/Pantech/PN-E330.User-Manual/User-Guide-744110-Page-56.png)
![CH456SETTINGS561Press [MENU] and then select “Settings &Tools” menu, press “Sounds Settings” andthen select “Alert Sounds”, press“Voicemail Msg”.VOICEMAIL MSG2Select “Tone”, “Vibrate” or “Reminder” with theNavigation Key and then select one of thefollowing options by pressing the Navigation Key.Tone : 1. Get New App. or select your desired ringer type.Vibrate : Select “On” or “Off”.Reminder : Select “Once”, “Every 2 Minutes”, “Every 15 Minutes” or “Off”.3To save, press .](https://usermanual.wiki/Pantech/PN-E330.User-Manual/User-Guide-744110-Page-57.png)
![CH457SETTINGSTo adjust key pad tone:KEYPAD VOLUME2Select one of the following options by pressingthe Navigation Key to the right.3Select one of the available ring types.To confirm, press .1Press [MENU] and then select “Settings &Tools” menu, press “Sounds Settings” andthen select “Keypad Volume”.Low, Medium Low, Medium, Medium High, HighOffTo adjust earpiece volume:EARPIECE VOLUME2Select one of the following options by pressingthe Navigation Key to the right.3Select one of the available ring types.To confirm, press .1Press [MENU] and then select “Settings &Tools” menu, press “Sounds Settings” andthen select “Earpiece Volume”.Low, Medium Low, Medium, Medium High, High](https://usermanual.wiki/Pantech/PN-E330.User-Manual/User-Guide-744110-Page-58.png)
![SETTINGSCH458The Enhanced Roaming Indicator (ERI) feature displays a text banneron the display screen informing the handset user of which systems thewireless device is using as compared to the service plan theypurchased. The ERI Banner text changes to tell a customer if they areusing the: “Verizon Network”, “Extended Network” or “Roaming”. SERVICE ALERTS1Press [MENU] and then select “Settings &Tools” menu, press “Sounds Settings” andthen select “Service Alerts”, press “ERI”.ERI (Enhanced Roaming Indicator)2Select “On” or “Off” with the Navigation Key andthen press to save it.Sounds an alert every minute during a call.1Press [MENU] and then select “Settings &Tools” menu, press “Sounds Settings” andthen select “Service Alerts”, press “Minute Beep”.MINUTE BEEP2Select “On” or “Off” with the Navigation Key andthen press to save it.Display Settings -> Banner -> ERI Banner must be set for “ON”for smooth operation of all the functions.](https://usermanual.wiki/Pantech/PN-E330.User-Manual/User-Guide-744110-Page-59.png)
![SETTINGSCH459Notifies you that a call has been successfully placed.1Press [MENU] and then select “Settings &Tools” menu, press “Sounds Settings” andthen select “Service Alerts”, press “Call Connect”.CALL CONNECT2Select “On” or “Off” with the Navigation Key andthen press to save it.Allows you to activate/deactivate the power on tones.POWER ON/OFF1Press [MENU] and then select “Settings &Tools” menu, press “Sounds Settings” andthen select “Power On/Off”, press “Power On Sound”.POWER ON SOUND2Select “On” or “Off” with the Navigation Key andthen press to save it.Allows you to activate/deactivate the power off tones.1Press [MENU] and then select “Settings &Tools” menu, press “Sounds Settings” andthen select “Power On/Off”, press“Power Off Sound”.POWER OFF SOUND2Select “On” or “Off” with the Navigation Key andthen press to save it.](https://usermanual.wiki/Pantech/PN-E330.User-Manual/User-Guide-744110-Page-60.png)
![SETTINGSCH460To select a ringer type for alarm sound:ALARM SOUNDS2Select your desired ringer type.3Select one of the available ring types.To confirm, press .1Press [MENU] and then select “Settings &Tools” menu, press “Sounds Settings” andthen select “Alarm Sounds”, press “Alarm Tone”.ALARM TONE2Select “On” or “Off” with the Navigation Key andthen press to save it.1Press [MENU] and then select “Settings &Tools” menu, press “Sounds Settings” andthen select “Alarm Sounds”, press “Alarm Vibrate”.ALARM VIBRATEUp or Down key : 1. Get New App. or select your desired ringer type.Press [PLAY/PAUSE] to play/pause sound.](https://usermanual.wiki/Pantech/PN-E330.User-Manual/User-Guide-744110-Page-61.png)
![SETTINGSCH461Allows you to customize the display.DISPLAY SETTINGSYou can choose to display a personal Banner greeting or theEnhanced Roaming Indicator (ERI) banner on the phone’s screens:The text greeting can be up to 16 characters and is displayed onyour phone’s screen in standby mode.BANNER2Enter a new personal greeting.To change the input mode, press [Abc]. 3Press to save it.1Press [MENU] and then select “Settings &Tools” menu, press “Display Settings” andthen select “Banner”, press “Personal”.PERSONAL2Select “On” or “Off” with the Navigation Key andthen press to save it.1Press [MENU] and then select “Settings &Tools” menu, press “Display Settings” andthen select “Banner”, press “ERI Banner”.ERI BANNER](https://usermanual.wiki/Pantech/PN-E330.User-Manual/User-Guide-744110-Page-62.png)
![SETTINGSCH462Backlights the display and key pad and activates dimming for easyviewing in dark places.BACKLIGHT2Select one of the following options with theNavigation Key.3Press to save it.1Press [MENU] and then select “Settings &Tools” menu, press “Display Settings” andthen select “Backlight”, press “Display”.DISPLAY7 Seconds, 15 Seconds, 30 Seconds, Always On, Always Off.2Select one of the following options with theNavigation Key.3Press to save it.1Press [MENU] and then select “Settings &Tools” menu, press “Display Settings” andthen select “Backlight”, press “Keypad”.KEYPAD7 Seconds, 15 Seconds, 30 Seconds, Always On, Always Off.](https://usermanual.wiki/Pantech/PN-E330.User-Manual/User-Guide-744110-Page-63.png)
![SETTINGSCH463To adjust the display contrast:CONTRAST3Press to save it.1Press [MENU] and then select “Settings &Tools” menu, press “Display Settings” andthen select “Contrast”.2Select one of the following options with theNavigation Key.Level 1 ~ Level 5WALLPAPERMAIN SCREEN1Press [MENU] and then select “Settings &Tools” menu, press “Display Settings” andthen select “Wallpaper”, press “Main Screen”.3Select Default to choose a pre-installed display,Downloads, PIX # or FLIX # to choose a displayyou have downloaded to your phone.To launch “Get It Now”, press [GET NEW]. To expand selected image, press [VIEW].4Select a display from the Animation and theGraphic list using the Navigation Key and then press to save it.2Select “My PIX” or “My FLIX” with theNavigation Key.](https://usermanual.wiki/Pantech/PN-E330.User-Manual/User-Guide-744110-Page-64.png)
![SETTINGSCH464FRONT SCREEN1Press [MENU] and then select “Settings &Tools” menu, press “Display Settings” andthen select “Wallpaper”, press “Front Screen”.2Select Default to choose a pre-installed display,Downloads, PIX # to choose a display you havedownloaded to your phone.To launch “Get It Now”, press [GET NEW]. To expand selected image, press [VIEW].3Select a display from the Graphic list using theNavigation Key and then press to save it.](https://usermanual.wiki/Pantech/PN-E330.User-Manual/User-Guide-744110-Page-65.png)
![SETTINGSCH465DISPLAY THEMES3Press to save it.3Press to save it.1Press [MENU] and then select “Settings &Tools” menu, press “Display Settings” andthen select “Display Themes”.2Select one of the following options with theNavigation Key.DefaultBusinessTropicalBlueDIAL FONTS1Press [MENU] and then select “Settings &Tools” menu, press “Display Settings” andthen select “Dial Fonts”.2Select “Normal” or “Large” with theNavigation Key.](https://usermanual.wiki/Pantech/PN-E330.User-Manual/User-Guide-744110-Page-66.png)
![SETTINGSCH4661Press [MENU] and then select “Settings &Tools” menu, press “Display Settings” andthen select “Clock Format” and then select “Main Clock”.3To save, press .CLOCK FORMATMAIN CLOCK2Select one of the following with the Navigation Key.DigitalAnalogOfflllTo change the main clock’s appearance on the standby screen:1Press [MENU] and then select “Settings &Tools” menu, press “Display Settings” andthen select “Clock Format” and then select “Front Clock”.3To save, press .FRONT CLOCK2Select one of the following with the Navigation Key.DigitalAnalogMinimizeOffllllTo change the main clock’s appearance on the standby screen:](https://usermanual.wiki/Pantech/PN-E330.User-Manual/User-Guide-744110-Page-67.png)
![SETTINGSCH467PHONE SETTINGSThe device shall provide the ability for the user to turn off all radios inorder to utilize the native or downloaded capability within the devicewhen in areas where radio transmission is restricted.STANDALONE MODE1Press [MENU] and then select “Settings &Tools” menu, press “Phone Settings” andthen select “Standalone Mode”.2Select “On” or “Off” with the Navigation Key andthen press to save it.Your phone offers you the option of assigning a shortcut key (Up, Down, Left, Right Navigation Key) to a favorite or often-usedfunction. To assign a shortcut to the key:SET SHORTCUT KEY1Press [MENU] and then select “Settings &Tools” menu, press “Phone Settings” andthen select “Set Shortcut Key”.4To reset all already set shortcut key, press “Reset All”, then select “Yes”, press .3Select one of the following options with theNavigation Key, press to save it.2Select “Left Key”, “Up Key”, “Right Key” or “Down Key”.Get It Now/Get Tunes &Tones/Get PIX & FLIX/Get Fun & Games/Get News & Info/My PIX/My FLIX/My Ringtones/My Music/MySounds/Inbox/Email/Chat/IM/Settings & Tools/Alarm Clock/Calculator/Calender.Allows you to use the menu functions except making calls, bluetooth.](https://usermanual.wiki/Pantech/PN-E330.User-Manual/User-Guide-744110-Page-68.png)
![SETTINGSCH468Selects the language in which letters are displayed on the screen.LANGUAGE1Press [MENU] and then select “Settings &Tools” menu, press “Phone Settings” andthen select “Language”.3Press to save it.2Select “English” or “Spanish” with the Navigation Key.To determine whether or not the network system can detect yourposition:LOCATION1Press [MENU] and then select “Settings &Tools” menu, press “Phone Settings” andthen select “Location”.3Press to save it.2Select “Location On” or “E911 Only” with the Navigation Key.Location On: Your location is now available to the network.E911 Only: Your location will be hidden from network & application except 911.](https://usermanual.wiki/Pantech/PN-E330.User-Manual/User-Guide-744110-Page-69.png)
![SETTINGSCH4694Press to save it.Device : Lock, Unlock, On Power UpLocation : Lock, UnlockPrevents unauthorized use of your phone. The following settings canbe restricted:Prevents the phone from being used without entering the password first.SECURITY1Press [MENU] and then select “Settings &Tools” menu, press “Phone Settings” andthen select “Security” and then enter yourpassword, press .3Select “Device” or “Location” and then select oneof the following options with the Navigation Key.2Select “Lock Mode”.LOCK MODEThe default password is the last 4 digits of your phone number.](https://usermanual.wiki/Pantech/PN-E330.User-Manual/User-Guide-744110-Page-70.png)
![SETTINGSCH470Selects the Preferred System.SYSTEM SELECT1Press [MENU] and then select “Settings &Tools” menu, press “Phone Settings” andthen select “System Select”.3Press to save it.2Select one of the following options with theNavigation Key.Automatic BAutomatic AHome Only3Enter a “New Code” then press . 4Enter a “Confirm Code” then press to save it. 1Press [MENU] and then select “Settings &Tools” menu, press “Phone Settings” andthen select “Security” and then enter yourpassword, press .2Select “Edit Code”.EDIT CODEThe default password is the last 4 digits of your phone number.Changes your Device/Location 4-digit password.](https://usermanual.wiki/Pantech/PN-E330.User-Manual/User-Guide-744110-Page-71.png)
![SETTINGSCH471Enables Auto NAM (Number Assignment Modules) or manuallyselects a NAM.NAM SELECT1Press [MENU] and then select “Settings &Tools” menu, press “Phone Settings” andthen select “NAM Select”, press “Auto NAM”.3Press to save it.2Select one of the following options with theNavigation Key.NAM 1 - VERIZONNAM 2 - VERIZONAutomatically switches phone to proper NAM when you have multipleNAM registrations.AUTO NAM2Select “On” or “Off” with the Navigation Key andthen press to save it.1Press [MENU] and then select “Settings &Tools” menu, press “Phone Settings” andthen select “NAM Select”, press “Change NAM”.Changes the NAM used by the phone when you have multipleregistrations.CHANGE NAM](https://usermanual.wiki/Pantech/PN-E330.User-Manual/User-Guide-744110-Page-72.png)
![SETTINGSCH472CALL SETTINGSANSWER OPTIONS1Press [MENU] and then select “Settings &Tools” menu, press “Call Settings” and thenselect “Answer Options”.2Select one of the following with the Navigation Key.3To save, press .To select an answer mode:Flip OpenAny KeySend OnlyAuto Answer1Press [MENU] and then select “Settings &Tools” menu, press “Call Settings” and thenselect “Auto Retry”.Automatically redials after a set time interval.2Retry time field is shown.(Off, Every 3 Seconds, Every 5 Seconds, Every 7 Seconds or Every 10 Seconds)3To save, press .AUTO RETRY](https://usermanual.wiki/Pantech/PN-E330.User-Manual/User-Guide-744110-Page-73.png)
![SETTINGSCH4731Press [MENU] and then select “Settings &Tools” menu, press “Call Settings” and thenselect “TTY Mode”.Your phone is able to operate with a TTY (Teletypewriter) device inboth analog and digital modes. This feature is system dependent andmay not be available in all areas.3To save, press .TTY MODE2Select one of the following with the Navigation Key.TTY FullTTY+ TalkTTY + HearTTY Offllll1Press [MENU] and then select “Settings &Tools” menu, press “Call Settings” and thenselect “One Touch Dial”.ONE TOUCH DIAL2Select “On” or “Off” with the Navigation Key andthen press to save it.](https://usermanual.wiki/Pantech/PN-E330.User-Manual/User-Guide-744110-Page-74.png)
![SETTINGSCH474Enhances voice privacy and avoids tapping during a call.On : Makes it more difficult to wire tap.l1Press [MENU] and then select “Settings &Tools” menu, press “Call Settings” and thenselect “Voice Privacy”.VOICE PRIVACY2Select “On” or “Off” with the Navigation Key andthen press to save it.VOICE SERVICES1Press [MENU], select “Settings & Tools”menu, press “Call Settings”, select“Voice Services”, and press “Voice Dial”.Voice Dial allows you to call a person by simply saying their name.To access Voice Dial:2.1. Press [NEW]. The phone book list will be displayed alphabetically. Select a name and then press . Instructions (Press OK and say name) will be displayed and press . You will hear “Name Please”.2.2. Say the name for the voice tag and repeat the name when prompted. You will hear “Added”.To play a voice dial: Highlight the voice tag you want to play and andthen press [PLAY].To review a voice dial: Highlight the voice tag youwant to review, and press [OPTIONS] and thenselect “Detail”.VOICE DIAL234](https://usermanual.wiki/Pantech/PN-E330.User-Manual/User-Guide-744110-Page-75.png)
![SETTINGSCH475To re-record a voice dial: Highlight the voice tagyou want to re-record and press [OPTIONS] and then select “Re-record”.To erase or erase all voice dials: Highlight thevoice tag you want to erase or erase all and press [OPTIONS] and then select “Erase” or“Erase All” to erase all voice tags.To hear a voice dial from speaker: Highlight thevoice tag you want to hear and press [OPTIONS]and then select “Play Speaker”.567](https://usermanual.wiki/Pantech/PN-E330.User-Manual/User-Guide-744110-Page-76.png)
![CH476SETTINGS1Press [MENU], select “Settings & Tools”menu, press “Call Settings”, select“Voice Services”, and press “Voice Setting”.VOICE SETTING2Under “Set Active”, select “Off”, “Active Flip”or “Clear Key”.3Under “HFK Mode”, select an option “On” or “Off”, press to save it.Select Set Active to activate voice-dial. If the handset is connected toHFK, select HFK to activate voice-dial by simply saying “Wake up”.When Clear Key is set to be the activation key 1.Press and hold until your phone turns to Voice Recognition mode.2.Say the indicator, such as a person's name you saved for the number you are calling.Clear Key : Voice Dialing can be activated by pressing and holding in idle mode.Active Flip : Voice Dialing can be activated after the flip opens.Off : Voice Dialing canceled.lll](https://usermanual.wiki/Pantech/PN-E330.User-Manual/User-Guide-744110-Page-77.png)
![CH477SETTINGS1Press [MENU], select “Settings & Tools” menu,press “Call Settings”, select “VoiceServices”, and press “Train Words”.TRAIN WORDS2Select one of the control words - “Yes”, “No” or“Wake-Up”. “Please begin recording after theprompt tone” will be displayed and you will hear“Now training control words. Please say theword”. Say the word. You will hear “Again”. Saythe word again. You will hear “Training wordsuccessful”. To undo voice recognition, select aword you want to undo then press [UNDO].3Under “Undo Train All”.“Undo voice recognition for all procedures?” will be displayed. Press to undo all trainedwords.Train allows you to use Control words to make a call without usingthe keypad. Use to train or untrain Voice Recognition with the controlwords, “Yes”, “No” or “Wake-Up”.1Press [MENU] and then select “Settings &Tools” menu, press “Call Settings” and thenselect “DTMF Tones”.3To save, press .DTMF TONES2Select one of the following with the Navigation Key.NormalLongllTo adjust tone length:](https://usermanual.wiki/Pantech/PN-E330.User-Manual/User-Guide-744110-Page-78.png)
![CH478SETTINGSThe PN-E330 is compatible with devices that support theBluetooth headset and hands-free profile(s)*. You may create andstore 30 pairings within the PN-E330 and connect to one device ata time. The approximate communication range for Bluetooth wirelesstechnology is up to 30 feet (10 meters).Pairing is the process that allows the handset to locate establish andregister 1-to-1 connection with the target device.BLUETOOTHBLUETOOTH ON/OFF1Press [MENU] and then select “Settings &Tools” menu, press “Bluetooth”.2Press [ON/OFF] to activate/deactivatebluetooth mode.ADD NEW DEVICE1Press [MENU] and then select “Settings &Tools” menu, press “Bluetooth”.2Select “1. Add New Device”, press .If Blurtooth is set to off, you will be prompted to“Turn Bluetooth on?”. Select “Yes” and press .By pressing [SETTINGS], you can choose from the following:My Phone Name: Your phone’s Bluetooth name will appear to other in-range Bluetooth devices, depending on your discovery mode. Enter a new name and press to save and exit.Discovery Mode: To Select discovery “On” or “Off”. If discovery “On” selected, for one minute other devices can find you.Read user guide of each Bluetooth accessory that you are trying topair with your phone because the instructions may different.](https://usermanual.wiki/Pantech/PN-E330.User-Manual/User-Guide-744110-Page-79.png)
![CH479SETTINGS5Once pairing is successful, select “Yes” andpress to connect with ths device.6Once paired, you will see the device listed in the“1. Add New Device” menu.3Instructions (Place device you are connecting toin discoverable mode) will be displayed.Highlight the device and press .4The handset will prompt you for the passkey.Consult the Bluetooth accessory instructions forthe appropriate passkey (typically “0000” - 4zeroes). Enter the passkey and press .By pressing [OPTIONS], you can choose from the following:Remove Device: To erase selected device.Rename Device: To rename selected device.Incoming Security: To Select “Always Ask” or “Always Connect”.Device Info: To view device information.](https://usermanual.wiki/Pantech/PN-E330.User-Manual/User-Guide-744110-Page-80.png)
![CH480SETTINGSMEMORYSAVE OPTIONS1Press [MENU] and then select “Settings &Tools” menu, press “Memory” and thenselect “Save Options”.2Select “PIX”, “FLIX” or “Sounds”with the Navigation Key and then select one of thefollowing options by pressing the Navigation Key.Phone MemoryCard Memory3To save, press .PHONE MEMORY1Press [MENU] and then select “Settings &Tools” menu, press “Memory” and thenselect “Phone Memory”.2Select one of the following options by pressingthe Navigation Key.Memory UsageMy PIXMy FLIXMy MusicMy Sounds3To display the phone memory information.4To save, press .](https://usermanual.wiki/Pantech/PN-E330.User-Manual/User-Guide-744110-Page-81.png)
![CH481SETTINGSCARD MEMORY1Press [MENU] and then select “Settings &Tools” menu, press “Memory” and thenselect “Card Memory”.2Select one of the following options by pressingthe Navigation Key.Memory UsageMy PIXMy FLIXMy MusicMy Sounds3To display the card memory information.4To save, press .](https://usermanual.wiki/Pantech/PN-E330.User-Manual/User-Guide-744110-Page-82.png)
![CH482SETTINGSPHONE INFODisplays your phone number.MY NUMBER1Press [MENU] and then select “Settings &Tools” menu, press “Phone Info” and thenselect “My Number”.3To return to the previous page, press .2You will see the MDN/MIN andprovider name.Displays the (Software/PRL/ERI/Browser/Get It Now) version.SW VERSION1Press [MENU] and then select “Settings &Tools” menu, press “Phone Info” and thenselect “SW Version”.3To return to the previous page, press .2You will see the version of software, browser and others.](https://usermanual.wiki/Pantech/PN-E330.User-Manual/User-Guide-744110-Page-83.png)
![CH483SETTINGSDisplays the Indicator Icons of your cellular telephone.ICON GLOSSARY1Press [MENU] and then select “Settings &Tools” menu, press “Phone Info” and thenselect “Icon Glossary”.3To return to the previous page, press .2You should see a list of the Indicator Icons ofyour cellular telephone with a short label ordescription.](https://usermanual.wiki/Pantech/PN-E330.User-Manual/User-Guide-744110-Page-84.png)
![TOOLSCH4842Follow the instructions below to calculate8*64-2.5= 9.503To reset, press [CLEAR].To access the calculator:CALCULATORInput 8.Move the Navigation Key rightward.Input 6 and then press the Navigation Key.Move it leftward.Input 4 and then press the Navigation Key.Move it downward.Input 2 and then press the to input (.). Press 5.Then press and you will see the answer.: X, : -, : /, : +, : ., : Clear, : =.1Press [MENU] and then select “Settings &Tools” menu, press “Tools” and then select“Calculator”.• To change the displayed number from positive (+) to negative (-)and vice versa, press [].• Press [OPERATOR] to use parenthesis and “Exponent”.](https://usermanual.wiki/Pantech/PN-E330.User-Manual/User-Guide-744110-Page-85.png)
![TOOLSCH485CALENDARADD NEWSets an event and reminds you of that event.23Move the Navigation Key left, right, up or down tochoose a date in the calendar and then press .Press [OPTIONS] to 1. Add, 2. Go To Date, 3. Erase, 4. Erase Passed or 5. Erase All.Press [MONTHLY/WEEKLY] to exchangedisplay mode.Use the keypad to set a start time and toselect “am” or “pm”. START TIMEUse the keypad to enter an appointment in yourschedule.APPOINTMENTUse the keypad to change or enter the start date. START DATEUse the Navigation Key to select a repeat setting forthe the calendar. (Daily, Weekly, Monthly or Yearly). RECURRENCETo set a new event, press [OPTIONS] thenselect “Add”. The appointment field is highlighted.Press the Navigation Key down to set the alarmoptions.Use the keypad to set an end time and toselect “am” or “pm”. END TIME1Press [MENU] and then select “Settings &Tools” menu, press “Tools” and then select“Calendar”.](https://usermanual.wiki/Pantech/PN-E330.User-Manual/User-Guide-744110-Page-86.png)
![CH486TOOLSUse the keypad to change or enter the end date. END DATEUse the Navigation Key to select a time zone,press [SET]. (OFF, EST, EDT, CST, CDT,MST, MDT, PST, PDT, AKST, AKDT, HAST,HADT or GMT/UTC). TIME ZONEUse the Navigation Key to select vibrate On/Off.VIBRATE4Press [SAVE] to save it or [CLR] toreturn to the calendar.5The date of the event will be marked on yourcalendar.1To view the Calendar List:VIEW PLAN LIST2Move the Navigation Key to choose an event andthen press , press [VIEW]. Press [ERASE] and then select “Yes”, press .Use the keypad to enter an account.BY COUNTUse the keypad to 1. Get New or select the alerttone you wish to set.ALERTUse the Navigation Key to select an alert timeinterval option (0 Minutes, 5 Minutes, 10 Minutes, 15 Minutes). REMINDER](https://usermanual.wiki/Pantech/PN-E330.User-Manual/User-Guide-744110-Page-87.png)
![CH487TOOLSALARM CLOCKSelect one of the entries using the Navigation Key.To set a new alarm, choose alarm 1, 2 or 3.To edit an existing alarm, select that alarm. Press .21The setting field will be highlighted. Press theNavigation Key down to select alarm options.3Use the Navigation Key to select a setting for thealarm (Once, Daily, Mon - Fri, Weekends). FREQUENCYPress [MENU] and then select “Settings &Tools” menu, press “Tools” and then select“Alarm Clock”.Use the Navigation Key to select alarm On/Off.ALARMUse the keypad to set a time for the alarm andto select “am” or “pm”. TIMEPress [SET], to use the keypad to 1. Get NewApp. or select the alert tone you wish to set.RINGERTo save an alarm setting press [SAVE].4](https://usermanual.wiki/Pantech/PN-E330.User-Manual/User-Guide-744110-Page-88.png)
![CH488TOOLSTo display the time and date in pre-programmed cities:WORLD CLOCK24Select a city by pressing the [CITIES].Or use the Navigation Key to select another city.3The world map appears with the city, its dateand time.Use the Navigation Key to select another city.Pressing [DST], turns all cities supporting Daylight SavingsTime on or off.To return to the previous page, press .1Press [MENU] and then select “Settings &Tools” menu, press “Tools” and then select“World Clock”.](https://usermanual.wiki/Pantech/PN-E330.User-Manual/User-Guide-744110-Page-89.png)
![CH489TOOLSYour phone includes an internal notepad that can be used tocompose and store reminders and notes.NOTEPAD1Press [MENU] and then select “Settings &Tools” menu, press “Tools” and then select“Notepad”.ADD MEMO2To add a new memo, press [NEW].Input a new text memo.(Please refer to page 33 for more details on enteringletters, numbers & symbols.)1VIEW MEMO2The list of all memos, in saved order, is displayed.Select a memo and then press [VIEW].43The selected memo will appear. To edit it, press [EDIT] and input a new text memo and then press [SAVE] to save it.To compose a memo (there is an 80-letter limit):To view a saved memo:Press [MENU] and then select “Settings &Tools” menu, press “Tools” and then select“Notepad”.3.2. To erase a memo, press [OPTIONS] “Erase”.3.1. To add a new memo, press [NEW].3.3. To erase all memos, press [OPTIONS] “Erase All”.3To save memo, press [SAVE].](https://usermanual.wiki/Pantech/PN-E330.User-Manual/User-Guide-744110-Page-90.png)
![CH490TOOLS213Simultaneously times up to eight different events. To operate thestop watch:STOP WATCHTo measure a time period:1. To start the stop watch, press [START].2. To pause it, press [STOP].3. To resume it, press [START].To reset it, press [RESET]. To time up to eight events at once:1. To start, press [START].2. To stop a time period and continue measuring another one, press [CONT].3. To stop the second and continue measuring a third one, press [CONT].4. To measure up to six time periods, repeat theabove steps.5. To stop the stop watch, press [STOP].6. To review the results, press [VIEW].7. To return to the stop watch, press .8. To reset it, press [RESET].Press [MENU] and then select “Settings &Tools” menu, press “Tools” and then select“Stop Watch”.](https://usermanual.wiki/Pantech/PN-E330.User-Manual/User-Guide-744110-Page-91.png)
![CH491MY ACCOUNTMY ACCOUNT12Press [MENU], then select “Settings & Tools”menu, press “My Account”.Connect “WAP Browser”.](https://usermanual.wiki/Pantech/PN-E330.User-Manual/User-Guide-744110-Page-92.png)

![CH594GET IT NOWGET TUNES & TONES3Highlight the music that you want to purchase.Press [BUY] to purchase.GET VCAST MUSIC1From the Get Tunes & Tones menu, press“Get V Cast Music”.2Browse of Search the catalog to preview thesongs you want.4The Confirm Purchase screen will display theprice and items you selected to purchase. Press [BUY] to accept the terms.5You’lll receive a confirmation that your purchasewas successful and your music is available fordownload. Press to continue.7Press [PLAY] to play the downloaded songimmediately. 6Highlight Phone Memory or Memory Card forStorage location (Memory Card is recommended,and is only an option if a memory card is in yourphone). Press to begin downloading. Wait for the phone to acquire the content license. Press when download is complete.To access the Get Tunes & Tones menu. Press [MENU], then select “Get it Now” menu, press “Get Tunes & Tones”.You can use the V Cast Music option to download musicfrom the V Cast music catalog.](https://usermanual.wiki/Pantech/PN-E330.User-Manual/User-Guide-744110-Page-95.png)
![CH595GET IT NOWGET NEW RINGTONES1From the Get Tunes & Tones menu, press“Get New Ringtones”.3To download a ringtone, select the applicationfrom the Get New Ringtones menu. Once theapplication has launched, follow the directions todownload your ringtones. Downloaded ringtonesare saved to the My Ringtones menu.2If you have not downloaded any ringtones orringtone applications previously, select “Get New App.”. The Get It Now browser willlaunch. From the Download menu, select aservice provider and press . Then select theapplication and press to download it.4Your recording is saved with a number. To rename your recording, scroll to it in the My Sounds menu, them press [OPTIONS]. Then press “Rename”.RECORDING NEW TONES1From the Get Tunes & Tones menu, press “My Sounds”.3Press to begin recording. When done, press [STOP] to finish recording. The recording is automatically saved to your My Sounds list.2Select “Record New”. “Press OK to startrecording” will be displayed.](https://usermanual.wiki/Pantech/PN-E330.User-Manual/User-Guide-744110-Page-96.png)
![CH596GET IT NOWMY RINGTONES1From the Set Tunes & Tones menu, press “My Ringtones”.4To assign downloaded tunes or tones:Select the tunes or tones you want to assign and then press [SET AS]. Select “Ringtone”,“Contact ID” or “Alert Tone” and then press .By pressing [SET AS], you can choose from the following:1. Ringtone2. Contact ID3. Alert Tone - 1. All Messages2. TXT Message3. PIX-FLIX Msg4. Voicemail Msgl2To play downloaded tunes or tones:Select the tunes or tones you want to play andthen press [PLAY].3To erase downloaded tunes or tones:Select the tunes or tones you want to erase andthen press [OPTIONS] and select “Erase” andthen select “Yes”, press .By pressing [OPTIONS], you can choose from the following:DOWNLOADED RINGTONE :1. Erase: Erase the current ringtone from your phone.2. Rename: To edit the ringtone’s title. 3. Ringtone Info: Displays information on the selected ringtone.PRELOADED SOUND :1. Erase: Erase the current ringtone from your phone.2. Ringtone Info: Displays information on the selected ringtone.Press [PLAY/STOP] to play/stop ringtone.ll](https://usermanual.wiki/Pantech/PN-E330.User-Manual/User-Guide-744110-Page-97.png)
![CH597GET IT NOWTo play a saved song, scroll through the list oftracks and press [PLAY]. Press [MUTE] to mute the song. Press [OPTIONS] to 1. Play All track, 2. Shuffle or 3. Get V Cast Music.MY MUSIC1From the Get Tunes & Tones menu, press “My Music”.2The My Music Menu consists of Get V CastMusic and all your saved songs - saved to yourphone or your Trans-Flash card.3To download more music, highlight Get V CastMusic and press . You will connect to the VCast service.45Press to start the song over again. Press to skip to the next song if there areother songs to be played. Press to pause orplay the song.1From the Get Tunes & Tones menu, press “My Sounds”.MY SOUNDS2To play downloaded sounds, select the soundyou want to play, then press [PLAY].](https://usermanual.wiki/Pantech/PN-E330.User-Manual/User-Guide-744110-Page-98.png)
![CH598GET IT NOWSYNC MUSIC1Use the USB cable to connect your phone toyour PC.2Press [MENU], then select “Get it Now” menu, press “Get Tunes & Tones”, press “Sync Music”.3Open Windows Media™ Player 10 on your PCand select the “Sync” tab.4Select “Edit Playlist” and select the songs fromyour library that you want to sync.34To erase downloaded sounds, select the soundyou want to erase, then press [OPTIONS].Select “Erase” or “Erase All”, then press .To send the PIX message, press [SEND].Please refer to page 114 for more details on“Send New PIX Message”.By pressing [OPTIONS], you can choose from the following:DOWNLOADED or RECORD SOUND :1. To PIX Place: To upload selected sound to PIX server.2. Rename: To edit the sound’s title. 3. Move: To move the selected sound to the other save location.4. Lock/Unlock: To select “Lock” or “Unlock”. 5. Erase: Erase the current sound from your phone.6. Erase All: To erase all the sounds in your phone. 7. Sound Info: Displays information on the selected sound.PRELOADED SOUND :1. Erase: Erase the current sound from your phone.2. Erase All: To erase all the sounds in your phone. 3. Sound Info: Displays information on the selected sound.Press [PLAY/STOP] to play/stop sound.ll](https://usermanual.wiki/Pantech/PN-E330.User-Manual/User-Guide-744110-Page-99.png)
![CH599GET IT NOW5In Windows Media Player 10, select “V CASTMobile Phone - Removable Storage Card” unlessno memory card is available. Start the syncprocess in Windows Media Player 10 by pressing“Start Sync”. Remember, your phone must be in“Sync Music” mode.6When synching completes, disconnect the cablefrom your phone and exit “Sync Music”.7Under the “Get Tunes & Tones” menu, open“Manage Music” or “My Music” to view and playyour music.V CAST Music phones only support music imported from a CD viaWindows Media™ Player 10, purchased from the V CAST MusicService, or other purchased Windows Media™ formatted music.iPod®and iTunes®compatible music files are not compatible with V CAST Music.MANAGE MUSIC1From the Get Tunes & Tones menu, press“Manage Music”.2The Music Library screen will appear. Choose tomanage by 1. Genres, 2. Artists, 3. Albums, 4. Songs, 5. Playlists, 6. Inbox, 7. Play All or 8. Shuffle.3Press [CATALOG] to launch the browser.](https://usermanual.wiki/Pantech/PN-E330.User-Manual/User-Guide-744110-Page-100.png)
![CH5100GET IT NOWGET PIX & FLIXGET V CAST VIDEO1Press [MENU] and then select “Get It Now”menu and then press “Get PIX & FLIX”, and then select “Get V Cast Video”.2Connection to the V CAST Video Service.GET NEW PIX1Press [MENU] and then select “Get It Now”menu and then press “Get PIX & FLIX”,and then select “Get New PIX” then select“Get New App.”. (Get It Now will launch and takeyou to the download menu.)2Use your Navigation Key to select a provider’sbrowser, press . 34Select the desired application from the applicationlist and then press to download it. After executing the downloaded application,download the desired PIX. (The downloadedcontents are saved in My PIX.)The downloaded application will be included in the list displayedwhen you access: Get New PIX > 1. Get New App.](https://usermanual.wiki/Pantech/PN-E330.User-Manual/User-Guide-744110-Page-101.png)
![CH5101GET IT NOWMY PIX3Select the picture with the Navigation Key andthen press [VIEW].2In Review Mode, you can view all the picturesyou have stored in your phone.To view the previous or next picture in detail view, press theNavigation Key right or left.By pressing [OPTIONS], you can choose from the following:DOWNLOADED or TAKEN PIX :1. Send: To send a picture message.2. To PIX Place: To upload selected picture to PIX server.3. Get New: To download picture.4. Set As: Assigns the selected PIX to display for specific tasks. (Wallpaper/Screensaver/Picture ID)5. Rename: To edit the picture’s title. 6. Move: To move the selected picture to the other save location. 7. Lock/Unlock: To select “Lock” or “Unlock”. 8. Erase: Erase the current picture from your phone.9. Erase All: To erase all the pictures in your phone. 10. PIX Info: Displays information on the selected picture, such as “File Name”, “Date”, “Time”, “Resolution”, “Size”.PRELOADED PIX :1. Get New: To download picture.2. Set As: Assigns the selected PIX to display for specific tasks. (Wallpaper/Screensaver)3. Erase All: To erase all the pictures in your phone. 4. PIX Info: Displays information on the selected picture, such as “File Name”, “Date”, “Time”, “Resolution”, “Size”.Press [CAMERA] to return to Camera mode to take another picture.In Review Mode you can view all the pictures you have taken, storeselected images in your phone, send pictures to the Online Album,delete images and access additional picture options.1Press [MENU] and then select “Get It Now”menu and then press “Get PIX & FLIX”,and then select “My PIX”.](https://usermanual.wiki/Pantech/PN-E330.User-Manual/User-Guide-744110-Page-102.png)
![CH5102GET IT NOWMY FLIX3Select the video with the Navigation Key andthen press [PLAY].2In Review Mode, you can view all the videos youhave stored in your phone.To view the previous or next video in detail view, press theNavigation Key right or left.By pressing [OPTIONS], you can choose from the following:DOWNLOADED or TAKEN FLIX :1. Send: To send a picture message.2. To PIX Place: To upload selected video to flix server.3. Get V CAST Video: To download V CAST video.4. Set As: Assigns the selected FLIX to display for specific tasks. (Wallpaper/Screensaver/Picture ID) 5. Rename: To edit the video’s title. 6. Move: To move the selected video to the other save location. 7. Lock/Unlock: To select “Lock” or “Unlock”. 8. Erase: Erase the current video from your phone.9. Erase All: To erase all the videos in your phone. 10. FLIX Info: Displays information on the selected video, such as “File Name”, “Date”, “Time”, “Resolution”, “Size”.Press [VIDEO] to return to Camera mode to take another video.In Review Mode, you can view all the videos you have taken, storeselected video in your phone, send video to the Online Album, deletevideo and access additional video options.1Press [MENU] and then select “Get It Now”menu and then press “Get PIX & FLIX”,and then select “My FLIX”.](https://usermanual.wiki/Pantech/PN-E330.User-Manual/User-Guide-744110-Page-103.png)
![CH5103GET IT NOWPIX PLACE2Connect “WAP Browser”.1Press [MENU] and then select “Get It Now”menu and then press “Get PIX & FLIX”,and then select “PIX Place”.](https://usermanual.wiki/Pantech/PN-E330.User-Manual/User-Guide-744110-Page-104.png)
![CH5104GET IT NOWTAKE PIX1Press camera key or press and hold side camerakey when flip is closed.3Press side camera key or press [TAKE] totake the picture.2Point the camera lens at your subject. You cancheck the picture framing through the maindisplay screen.To view captured images, press [MY PIX].By pressing [OPTIONS], you can choose from the following:1. Resolution: To select a resolution for a picture.(Landscape: 1280x960/640x480/320x240/176x144/160x120, Portrait: 960x1280/480x640/240x320/144x176/120x160)2. Self Timer: To activate the camera’s timer function.(Off/3 Seconds/5 Seconds/10 Seconds)3. Flash: To activate the flash function. (Off/On/Only This Shot)4. Brightness: To brightness up/down( -2, -1, 0, +1, +2).5. White Balance: To select white balance. (Auto/Sunny/Cloudy/Tungsten/Fluorescent/Darkness)6. Shutter Sound: To select a shutter sound.(Shutter/Silent/Say “Cheez”/Ready! 1 2 3)7. Color Effects: To select color effect among the following: (Normal/Antique/Black & White/Negative)8. Capture Mode: To select Capture mode “Landscape” or “Portrait”.9. Sub Display: To take a picture using the Sub LCD.By pressing [OPTIONS], you can choose Sub LCD options: 1. Main Display/2. Resolution/3. Self Timer/4. Flash/5. Brightness/6. White Balance/7. Shutter Sound/8. Color EffectsUser can control zoom directly by pressing the Navigation Key.Navigation Right / Left: Zoom up / down.(Except 1280X960, 960X1280 mode).](https://usermanual.wiki/Pantech/PN-E330.User-Manual/User-Guide-744110-Page-105.png)
![CH5105GET IT NOW4After taking the picture it will be displayed.To save the picture, press [SAVE].To go back to idle mode without saving thepicture, press . To take another picture without saving the pictureyou just took, press [ERASE].To send the picture to someone, press [SEND].Please refer to page 114 for more details on“Send New PIX Message”.](https://usermanual.wiki/Pantech/PN-E330.User-Manual/User-Guide-744110-Page-106.png)
![CH5106GET IT NOWRECORD FLIX1Press [MENU] and then select “Get It Now”menu and then press “Get PIX & FLIX”,and then select “Record FLIX”. OR, in idlemode, press and hold . OR, in camerapreview mode, press .2Point the camera lens at your subject. You cancheck the video framing through the maindisplay screen.3Press camera key or press [REC] to take thevideo.To view captured videos, press [MY FLIX].By pressing [OPTIONS], you can choose from the following:1. FLIX Light: To activate the flash function. (Off/On/Only This Shot)2. Brightness: To brightness up/down( -2, -1, 0, +1, +2).3. White Balance: To select white balance. (Auto/Sunny/Cloudy/Tungsten/Fluorescent/Darkness)4. Sub Display: To take a video using the Sub LCD.By pressing [OPTIONS], you can choose Sub LCD options: 1. FLIX Light/2. Brightness/3. White Balance/4. Main DisplayUser can control zoom directly by pressing the Navigation Key.Navigation Right / Left: Zoom up / down.4To pause/resume recording,press [PAUSE/RESUME].To stop recording, press [STOP].](https://usermanual.wiki/Pantech/PN-E330.User-Manual/User-Guide-744110-Page-107.png)
![CH5107GET IT NOW5After taking the video it will be displayed.To save the video, press [SAVE].To go back to idle mode without saving the video,press . To replay video, press [REPLAY].To send the video to someone, press [SEND].Please refer to page 116 for more details on“Send New FLIX Message”.](https://usermanual.wiki/Pantech/PN-E330.User-Manual/User-Guide-744110-Page-108.png)
![CH5108GET IT NOWGET FUN & GAMESDOWNLOADING NEW FUN & GAMES1Press [MENU] and then select “Get It Now”menu, and then press “Get Fun & Games”and then select “Get New App.”, press . (Get It Now will launch and take you to thedownload menu.)3Use your Navigation Key to select a game youwish to download, and press .2Use your Navigation Key to select a provider’sbrowser, press . PLAYING DOWNLOADED FUN & GAMES1Press [MENU] and then select “Get It Now”menu, and then press “Get Fun & Games”.2To play the game you downloaded, select thegame and press [PLAY].GET NEWS & INFOCONNECTING NEWS & INFO1Press [MENU] and then select “Get It Now”menu, and then press “Get News & Info”.2Connect “WAP Browser”.](https://usermanual.wiki/Pantech/PN-E330.User-Manual/User-Guide-744110-Page-109.png)
![CH5109GET IT NOWGET EXTRASCONNECTING GET EXTRAS1Press [MENU] and then select “Get It Now”menu, and then press “Get Extras” and thenselect “Get New App.”.GET IT NOW INFOPress [MENU] and then select “Get It now”menu, and then press “Info”.Select one of the following options with theNavigation Key.To return to the previous page, press .1Displays information about “App. Memory”, “Content Memory”, “ViewLog” and “Help”:23lApp. MemorylContent MemorylView LoglHelpGET GOINGCONNECTING GET GOING1Press [MENU] and then select “Get It Now”menu, and then press “Get Going” and thenselect “Get New App.”.](https://usermanual.wiki/Pantech/PN-E330.User-Manual/User-Guide-744110-Page-110.png)

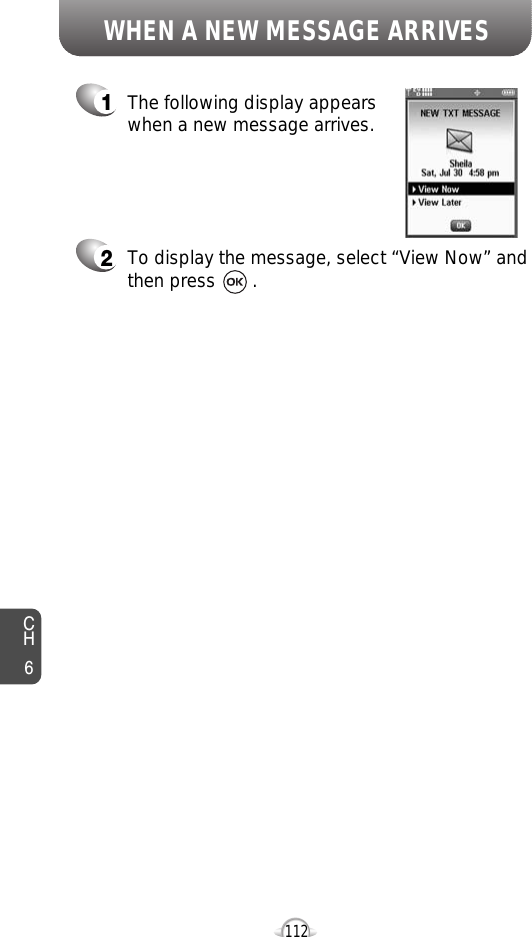
![CH6113NEW MSG1Press [MESSAGE], press “New Msg”,then press “TXT Msg”.2Under “To”, input the phone number and then press .3Under “Message”, input a new TXT messageand then press [SEND].By pressing [ADD], you can choose from the following:1. From Contacts : Search for a phone number which is stored in the contacts list.2. Groups : Search the groups stored in the contacts list.3. Recent Calls : Search the phone number which is stored in the recent calls list.4. To Contacts : To store the phone number in contacts.Press [OPTIONS], you can choose from the following:Add Graphic : Inserts simple graphic images in TXT Msg.Add Sound : Inserts EMS sound in TXT Msg.Add Quick Text : Inserts already written sentences in TXT Msg.(Please refer to page 33 for more details on entering letters,numbers and symbols.)• If one of the fields is inserted in TXT msg field, the message issaved in the draft box.• Input at least one TXT msg field to save in the draft box.5To send the TXT message, press [SEND].4Press [OPTIONS] and then select “Priority Level”,select “High” or “Normal” and then press .To cancel message, press [OPTIONS] and thenselect “Cancel Msg.”, then select “Yes”, press .To save the TXT message, press [OPTIONS] and then select “Save As Draft”.SEND NEW TXT MESSAGE](https://usermanual.wiki/Pantech/PN-E330.User-Manual/User-Guide-744110-Page-114.png)
![NEW MSGCH61142Under “To”, input the phone number and then press .3Under “Text”, input a new TXT message andthen press .By pressing [ADD], you can choose from the following:1. From Contacts : Search for a phone number which is stored in the contacts list.2. Groups : Search the groups stored in the contacts list.3. Recent Calls : Search the phone number which is stored in the recent calls list.4. To PIX Place : To send pictures by using online Address.5. To Contacts : To store the phone number in contacts.By pressing [OPTIONS].Add Quick Text : Inserts already written sentences in TXT Msg.Add Slide : To add a another message.(Please refer to page 33 for more details on entering letters,numbers and symbols. A maximum of 1,000 characters is allowed.)4Under “PIX”, user can insert/remove only onepicture. Press [MY PIX], select the My PIX and thenpicture you’d like to send and then press .5Under “Sound”, user can insert/remove only onesound.Press [SOUNDS], select the sound you’d like to send and then press .1Press [MESSAGE], press “New Msg”,then press “PIX Msg”.SEND NEW PIX MESSAGE](https://usermanual.wiki/Pantech/PN-E330.User-Manual/User-Guide-744110-Page-115.png)
![NEW MSGCH6115By pressing [OPTIONS].Add Quick Text : Inserts already written sentences in TXT Msg.Add Slide : To add a another message.6Under “Subject”, input a subject and then press[SEND].(Please refer to page 33 for more details on entering letters,numbers and symbols. Max 100 characters support.)8To send the PIX message, press [SEND].7Press [OPTIONS] and then select “Priority Level”,select “High” or “Normal” and then press .To save the PIX message, press [OPTIONS] and then select “Save As Draft”.To preview a written picture message, press[OPTIONS] and then select “Preview”.To remove slide, press [OPTIONS] and then select “Remove Slide”.To remove sound, press [OPTIONS] and then select “Remove Sound”.To remove PIX, press [OPTIONS] and then select “Remove PIX”.To cancel message, press [OPTIONS] and thenselect “Cancel Msg.”, then select “Yes”, press .](https://usermanual.wiki/Pantech/PN-E330.User-Manual/User-Guide-744110-Page-116.png)
![NEW MSGCH61162Under “To”, input the phone number and then press .3Under “Text”, input a new TXT message andthen press .By pressing [OPTIONS].Add Quick Text : Inserts already written sentences in TXT Msg.(Please refer to page 33 for more details on entering letters,numbers and symbols. A maximum of 1,000 characters is allowed.)4Under “FLIX”, user can insert/remove only onevideo. Press [MY FLIX], select the My FLIX and then video you’d like to send and then press .1Press [MESSAGE], press “New Msg”,then press “FLIX Msg”.SEND NEW FLIX MESSAGEBy pressing [ADD], you can choose from the following:1. From Contacts : Search for a phone number which is stored in the contacts list.2. Groups : Search the groups stored in the contacts list.3. Recent Calls : Search the phone number which is stored in the recent calls list.4. To PIX Place : To send video by using online Address.5. To Contacts : To store the phone number in contacts.](https://usermanual.wiki/Pantech/PN-E330.User-Manual/User-Guide-744110-Page-117.png)
![NEW MSGCH61175Under “Subject”, input a subject and then press[SEND].By pressing [OPTIONS].Add Quick Text : Inserts already written sentences in TXT Msg.(Please refer to page 33 for more details on entering letters,numbers and symbols. Max 100 characters support.)7To send the FLIX message, press [SEND].6Press [OPTIONS] and then select “Priority Level”,select “High” or “Normal” and then press .To save the PIX message, press [OPTIONS] and then select “Save As Draft”.To preview a written picture message, press[OPTIONS] and then select “Preview”.To cancel message, press [OPTIONS] and thenselect “Cancel Msg.”, then select “Yes”, press .To remove FLIX, press [OPTIONS] and then select “Remove FLIX”.](https://usermanual.wiki/Pantech/PN-E330.User-Manual/User-Guide-744110-Page-118.png)
![INBOXCH6118The Inbox manages received TXT,PIX/FLIX, Web Alert messages. To access:2Select a message and then press [OPEN]. The message is displayed. To delete a message,press [ERASE], press .When you select WAP PUSH message, press , to launch the browser.Press [OPTIONS].3REPLY1Type your reply and then press .PLAY AGAIN1To play a received PIX/FLIX message.1Press [MESSAGE], press “Inbox”.“Play Again" menu appears only when you receive a PIX/FLIXmessage.: Lock: Priority: Read: EMS Unread: PIX Unread: PIX Read: Unread: EMS ReadERASE INBOX1To erase all inbox message, select “EraseInbox” and then select “Yes”, press .](https://usermanual.wiki/Pantech/PN-E330.User-Manual/User-Guide-744110-Page-119.png)
![INBOXCH6119SAVE PICTURE (MMS PIX)1Select to save a picture to the “My PIX” folder.SAVE VIDEO (MMS VIDEO)1Select to save a video to the “My FLIX” folder.FORWARD1Select to forward the TXT or PIX/FLIX message.2Input the phone number of the person you aresending the message and then press .3Input any text message to go along with theforwarded message and then press [SEND].REPLY W. COPY123Select to reply with the original messageincluded.The default call back number is automaticallyincluded in the Default CB# field. You can scroll to the number and edit it.To send the TXT or PIX/FLIX message, press [SEND].• “Reply with Copy” menu appears only when you receive a TXTmessage.• “Save Picture” menu appears only when you receive a PIXmessage.• “Save Video” menu appears only when you receive a FLIXmessage.](https://usermanual.wiki/Pantech/PN-E330.User-Manual/User-Guide-744110-Page-120.png)
![SENTCH6121“Play Again” menu appears only when you send a MMS message.1Press [MESSAGE], press “Sent”.Manages sent TXT, PIX/FLIX messages or messages waiting to be sent.23Select a message and then press [OPEN]. The message is displayed. To delete a message,press [ERASE], press .Press [OPTIONS].FORWARD1Select to forward the TXT or PIX/FLIX message.2Input the phone number of the person you aresending the message and then press .3Input any text message to go along with theforwarded message and then press [SEND].PLAY AGAIN1Select to play sent MMS message.: Lock: Priority: Sent: Incomplete Delivery: Delivered: Sent but Delivery Failed](https://usermanual.wiki/Pantech/PN-E330.User-Manual/User-Guide-744110-Page-122.png)

![DRAFTSCH6123ERASE DRAFTS1To erase this message, select “Erase Drafts” andthen select “Yes”, press .TO CONTACTS1Select to save number to contacts.SEND1Select to send a selected message.LOCK/UNLOCK1Select to lock or unlock the TXT or PIX/FLIXmessage.2Select “Lock” to lock the message or “Unlock”to unlock the message and then press .1Press [MESSAGE], press “Drafts”.2Select a message and then press [EDIT]. The message is displayed. To delete a message,press [ERASE], press .Press [OPTIONS].3Draft Folder contains any draft messages or saved messages.If message composition is interrupted by a voice call or otherinterrupting event, the text of the current composition is automaticallysaved in the drafts folder.: Lock: PIX Drafts: SMS/EMS Drafts](https://usermanual.wiki/Pantech/PN-E330.User-Manual/User-Guide-744110-Page-124.png)
![CH6124VOICEMAILDisplays the number of voice mails and accesses them by pressing .FIRST TIME USER1Dial *86 and then press [SEND].2At the recording, press .3To set up your account follow the voice tutorial.EXISTING USER1Dial *86 and then press [SEND].2At the recording, enter your 4 digits password,and then press .3To listen to new messages, press .1Press [MESSAGE], press “Voicemail”.](https://usermanual.wiki/Pantech/PN-E330.User-Manual/User-Guide-744110-Page-125.png)
![CH6125E- MAIL1Press [MESSAGE], press “E-mail”.2Browser launches.](https://usermanual.wiki/Pantech/PN-E330.User-Manual/User-Guide-744110-Page-126.png)
![CH6126MOBILE IMPress [MESSAGE], press “Mobile IM” and then select “Get New App.” withNavigation Key.Launch “Get It Now”.GET NEW12Press [MESSAGE], press “Mobile IM” andthen select “Mobile IM” with Navigation Key.Connect “Mobile IM”.MOBILE IM12](https://usermanual.wiki/Pantech/PN-E330.User-Manual/User-Guide-744110-Page-127.png)
![CH6127CHAT1Press [MESSAGE], press “Chat”.2Browser launches.](https://usermanual.wiki/Pantech/PN-E330.User-Manual/User-Guide-744110-Page-128.png)
![CH6128ERASE ALL22.1. To erase all the inbox messages, press [ERASE INBOX].3Select “Yes” and then press .2.3. To erase all the drafts messages, press [ERASE DRAFTS].2.4. To erase the all message, press [ERASE ALL].2.2. To erase the sent messages, press [ERASE SENT].1Press [MESSAGE], press [OPTIONS].](https://usermanual.wiki/Pantech/PN-E330.User-Manual/User-Guide-744110-Page-129.png)
![CH6129SETTINGSALL MSG SETTINGSPress [AUTO SAVE]. Select “On”, “Off” or “Prompt” with theNavigation Key.Press .Set messaging preferences and default settings.Automatically erases inbox messages when new messages arrive.Press [MESSAGE], press [SETTINGS],press “All Msg”.Press [AUTO ERASE]. Select “On” or “Off” with the Navigation Key.Press .On : All sent messages saved in the Sent box.Off : All sent messages not saved in the Sent box.Prompt : “Yes”, “No” dialogue box displayed after sent message.On : Oldest message erased from inbox automatically when message is full.Off : Oldest message not erased from inbox automatically when message is full.AUTO SAVEAUTO ERASE1Press [MESSAGE], press [SETTINGS],press “All Msg”.12323](https://usermanual.wiki/Pantech/PN-E330.User-Manual/User-Guide-744110-Page-130.png)
![CH6130SETTINGSTo edit the Quick Text message you have saved:Press [QUICK TEXT].2.1. Select a message from the list. Press .2.2. To add a new Quick Text message, press [NEW], then enter text, press .To erase the saved Quick Text message, press [ERASE].Pre-defined quick text as below.1. What’s up?/2. Let’s meet./3. Check this out!/4. Whachadoing?/5. Thanks/6. What do you think?/7. You’ve gotta be hereto enjoy this./8. Would you like to join me for a date tonight?/9. On my way./10. Yes/11. You’re the best!/12. Call me.Press [VOICEMAIL#].Input a new voice call back number or editvoice call back number.Press .QUICK TEXTVOICEMAIL#Press [MESSAGE], press [SETTINGS],press “All Msg”.1Press [MESSAGE], press [SETTINGS],press “All Msg”.12332](https://usermanual.wiki/Pantech/PN-E330.User-Manual/User-Guide-744110-Page-131.png)
![CH6131SETTINGSEdits a default callback number so that the recipient can callback orreply.Press [CALLBACK#]. Input a new callback number, press .Press [ENTRY MODE].Select “Word”, “Abc”, “ABC”, “123” or“Symbols” with the Navigation Key.Press .Sets an Entry Mode as a default. For example, if Word Mode is thedefault, its icon will appear.ENTRY MODECALLBACK #3322Press [MESSAGE], press [SETTINGS],press “All Msg”.1Press [MESSAGE], press [SETTINGS],press “All Msg”.1](https://usermanual.wiki/Pantech/PN-E330.User-Manual/User-Guide-744110-Page-132.png)
![CH6132SETTINGSCreate a signature that can be automatically inserted at the end ofall TXT and PIX messages.Press [SIGNATURE].To activate Signature function, put the cursoron Insert Signature then select “Custom” byusing up or down direction keys. To deactivateSignature function, select “None”.To input “Signature”, put the cursor on EditSignature and then enter Signature Edit windowby using right or left direction keys. Press .ALL MESSAGE SIGNATURE432Press [MESSAGE], press [SETTINGS],press “All Msg”.1](https://usermanual.wiki/Pantech/PN-E330.User-Manual/User-Guide-744110-Page-133.png)
![CH6133SETTINGSTXT MSG SETTINGSPress [TXT AUTO VIEW]. Select “On” or “Off” with the Navigation Key.Press .If the “Auto View” is set to on, the user will be able to view themessage. If the “Auto View” is set to off, the user can view themessage by entering SMS Menu-> Inbox.On : Text message displayed automatically.Off : Text message displayed by going to the inbox or responding to interactive notification.Press [MESSAGE], press [SETTINGS],press “TXT Msg”.Create a signature that can be automatically inserted at the end of amessage.Press [SIGNATURE].To activate Signature function, put the cursoron Insert Signature then select “Custom” byusing up or down direction keys. To deactivateSignature function, select “None”.TXT AUTO VIEWTXT MESSAGE SIGNATURE321Press [MESSAGE], press [SETTINGS],press “TXT Msg”.12To input “Signature”, put the cursor on EditSignature and then enter Signature Edit windowby using right or left direction keys. Press .43](https://usermanual.wiki/Pantech/PN-E330.User-Manual/User-Guide-744110-Page-134.png)
![SETTINGSCH6134PIX-FLIX MSG SETTINGSPress [AUTO RECEIVE]. Select “On” or “Off” with the Navigation Key.Press .On : PIX msg downloaded automatically.Off : PIX message must be retrieved from the inbox or at new TXT message prompt.Press [MESSAGE], press [SETTINGS],press “PIX-FLIX Msg”.Create a signature that can be automatically inserted at the end of amessage.PIX-FLIX MESSAGE SIGNATUREAUTO RECEIVE1Press [MESSAGE], press [SETTINGS],press “PIX-FLIX Msg”.123Press [SIGNATURE].To activate Signature function, put the cursoron Insert Signature then select “Custom” byusing up or down direction keys. To deactivateSignature function, select “None”.2To input “Signature”, put the cursor on EditSignature and then enter Signature Edit windowby using right or left direction keys. Press .43](https://usermanual.wiki/Pantech/PN-E330.User-Manual/User-Guide-744110-Page-135.png)
![BROWSER MENUThe browser menu lists the actions necessary to operate the browser.To access, press and then press [MENU].STARTING INTERNET BROWSERCH7136LAUNCHING MOBILE WEB 2.01To start your Internet browser and accesswebsites through your wireless handset press . Now you can access news, sports, weather, and e-mail from yourphone. Mobile Web 2.0 keeps you updated by providing access to up-to-date information such as news, sports, weather and stockquotes when you subscribe to Internet service with your serviceprovider. Please contact your service provider for a list of availablewebsites and service details.ADD FAVORITE1To select “Add Favorite”.Press , then press [MENU] . VZW HOME1To select “VZW Home”.Press , then press [MENU] . Returns the user to the home page.Takes user to the VZW Add Favorite page.For favorites, page name and URL need to auto-populate.](https://usermanual.wiki/Pantech/PN-E330.User-Manual/User-Guide-744110-Page-137.png)
![BROWSER MENUCH7137BACK1To select “Back”.Press , then press [MENU] . GO TO URL1To select “Go to URL”.Press , then press [MENU] . Provides the ability to redisplay the page previously displayed.Will display following list of options.Takes user to the VZW Search>Go to Site page.Displays the current URL.Takes user to the VZW Search page.SHOW URL1To select “Show URL”.Press , then press [MENU] . SEARCH1To select “Search”.Press , then press [MENU] . MANAGE MEMORY1To select “Manage Memory”.Press , then press [MENU] . Clear Cache : Clears the cache. Clear History : Clears the list of recently visited URLs. Clear Cookies : Clears saved cookies.Autofill : Automatically fills in character for browser recognized words.](https://usermanual.wiki/Pantech/PN-E330.User-Manual/User-Guide-744110-Page-138.png)
![BROWSER MENUCH7138SETTINGS1To select “Settings”, will display following list ofoptionsPress , then press [MENU] . Downloads : Selecting the “Downloads” item allows the user toenable/disable downloading images, background sounds, and object downloads when a URL is accessed.Restart Browser : Selecting “Restart Browser” causes the history and cache to be cleared and returns the user to the homepage.Scroll Mode : Selecting “Scroll Mode” from the Settings menu allows the user to select the way text scrolls and the scroll speed. Send Referrer : When the “Send Referrer” item is selected from the Settings menu, the browser allows the user to turn on or off sending the referrer URL. Key Press Time Out : When the “Key Press Timeout” item is selected from the Settings menu, the browser allows the user to set the key press timeout as fast, medium or slow. Medium is 1.5 seconds, slow 2 seconds and fast is 1 second. The key press timeout is the period of time after which the cursor auto-advances to the next entry position. In most cases, a single key can be used to enter more than one character. Each time the key is pressed the last character of the line is replaced by the next choice for that key. As long as the same key is re-pressed within key press timeout, the last character cycles between all the choices for the key. Connection Time Out : When the Connection Timeout item is selected from the Settings menu, the browser allows the user to set the connection timeout. The connection timeout determines how long the browser will wait for a response from the network for a network request.](https://usermanual.wiki/Pantech/PN-E330.User-Manual/User-Guide-744110-Page-139.png)
![BROWSER MENUCH7139ADVANCED1To select “Advanced”, will display following list ofoptions.Press , then press [MENU] . About... : Displays the name of the supplier of the Browser and the Browser SW version. Refresh : Allows the user to reload the current URL. History : Displays the previous 20 number of visited URLs, where X=20.Encryption : Displays the following list of options.1. Authentication : Gives the option to turn Authentication Caching ON or OFF. 2. Root Certificate : Shows the root security keys for TLS.3. Current Certificate : Shows the current site security key for TLS (if applicable).Press , the user exits out of the browser and is returned to the phone idle mode.EXIT](https://usermanual.wiki/Pantech/PN-E330.User-Manual/User-Guide-744110-Page-140.png)


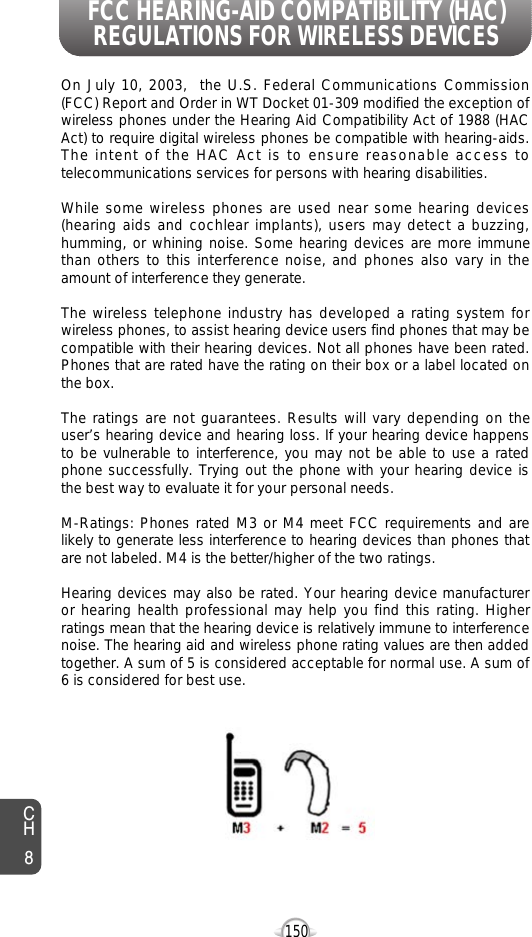
![151CH8In the above example, if a hearing aid meets the M2 level rating and thewireless phone meets the M3 level rating, the sum of the two valuesequal M5. This should provide the hearing aid user with “normal usage”while using their hearing aid with the particular wireless phone. “Normalusage” in this context is defined as a signal quality that is acceptablefor normal operation. The M mark is intended to be synonymous with the U mark. The T markis intended to be synonymous with the UT mark. The M and T marksare recommended by the Alliance for Telecommunications IndustriesSolutions (ATIS). The U and UT marks are referenced in Section 20.19of the FCC Rules. The HAC rating and measurement procedure aredescribed in the American National Standards Institute (ANSI) C63.19standard.For information about hearing aids and digital wireless phonelFcc Hearing Aid Compatibility and Volume Controlhttp://www.fcc.gov/cgb/dro/hearing.htmllGallaudet University, RERChttp://tap.gallaudet.edu/DigWireless.KS/DigWireless.htmlSelf Help for Hard of Hearing People Inc. [SHHH]www.hearingloss.org/hat/TipsWirelessPhones.htmlThe Hearing Aid Compatibility FCC Orderhttp://hraunfoss.fcc.gov/edocs_public/attachmatch/FCC-03-168A1.pdfFCC HEARING-AID COMPATIBILITY (HAC)REGULATIONS FOR WIRELESS DEVICES](https://usermanual.wiki/Pantech/PN-E330.User-Manual/User-Guide-744110-Page-152.png)