Pantech PX-800 Tri-Band USB Modem (CDMA/PCS/AWS) User Manual
Pantech Co., Ltd. Tri-Band USB Modem (CDMA/PCS/AWS)
UserManual.wiki
>
Pantech
>
PX 800 User Manual
User Manual
Navigation menu
Upload a User Manual
Namespaces
Wiki Guide
HTML
PDF
Info
Views
User Manual
Discussion / Help
Navigation
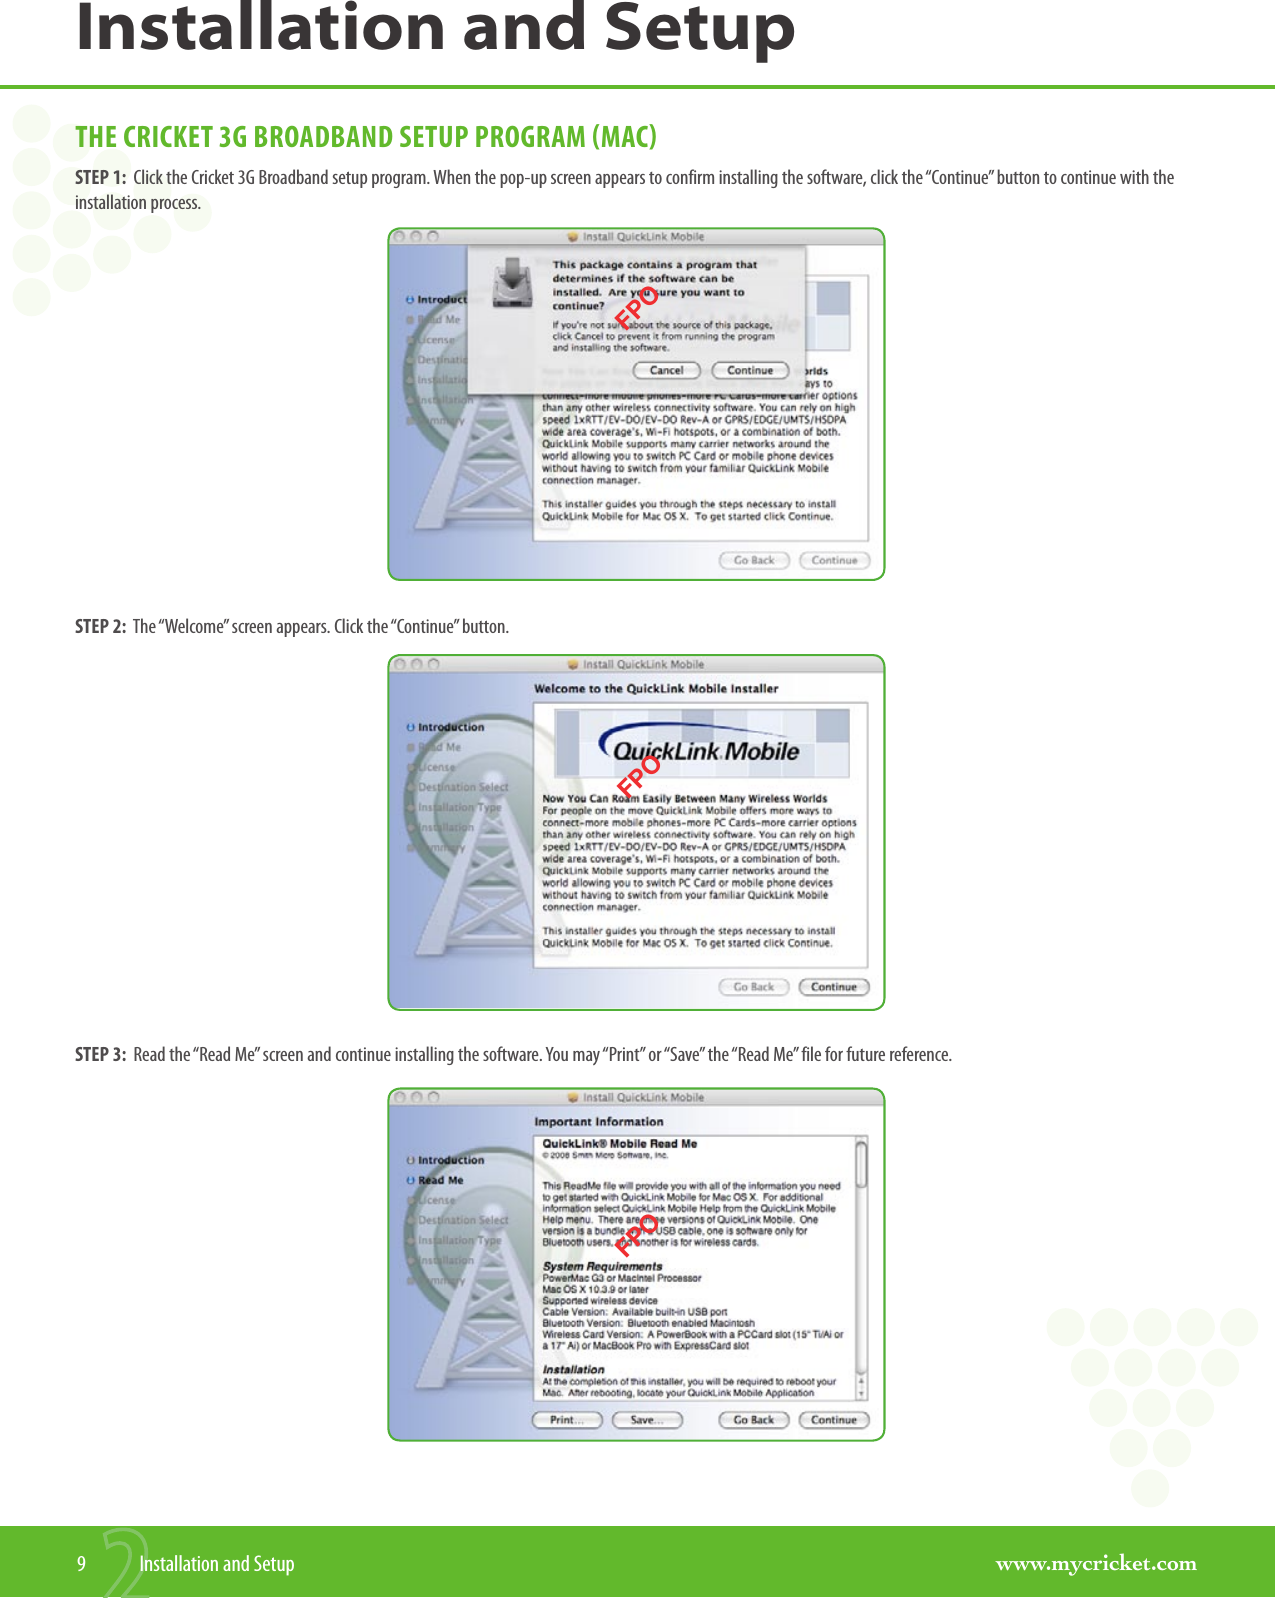
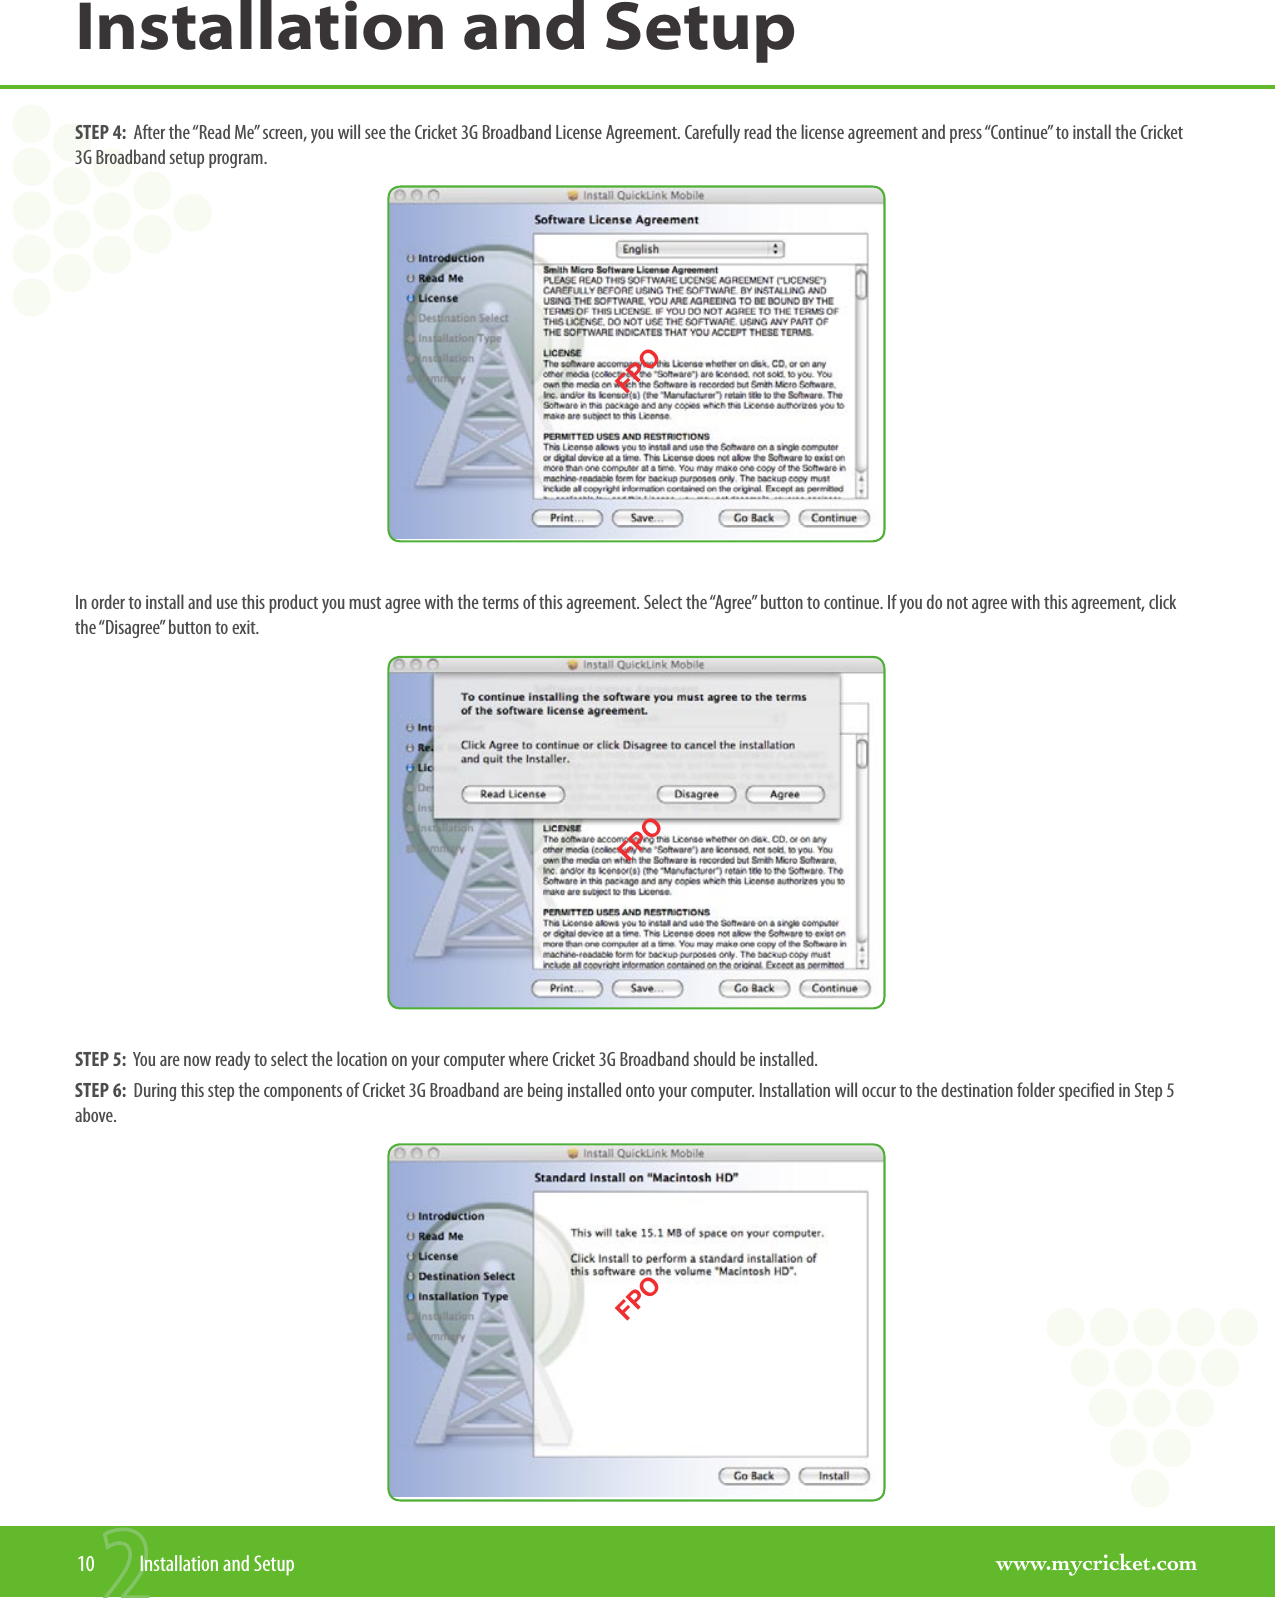
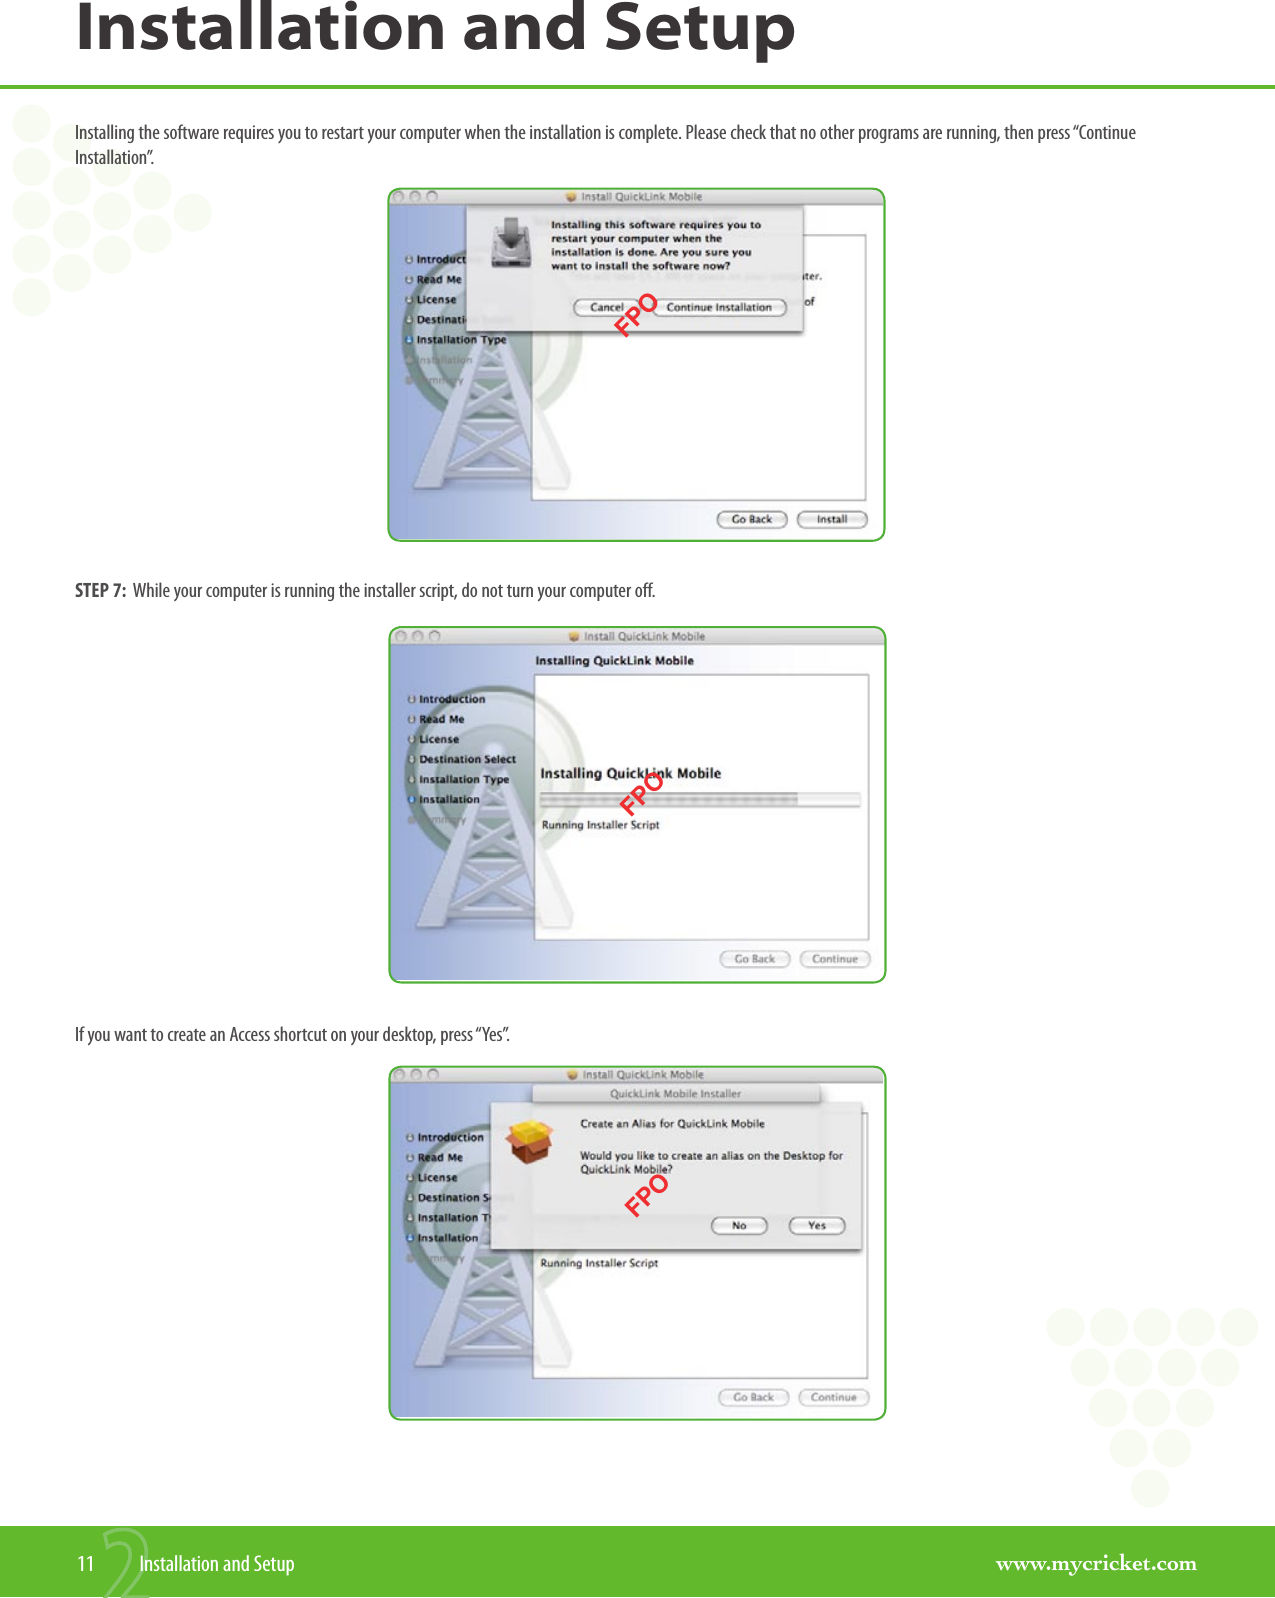
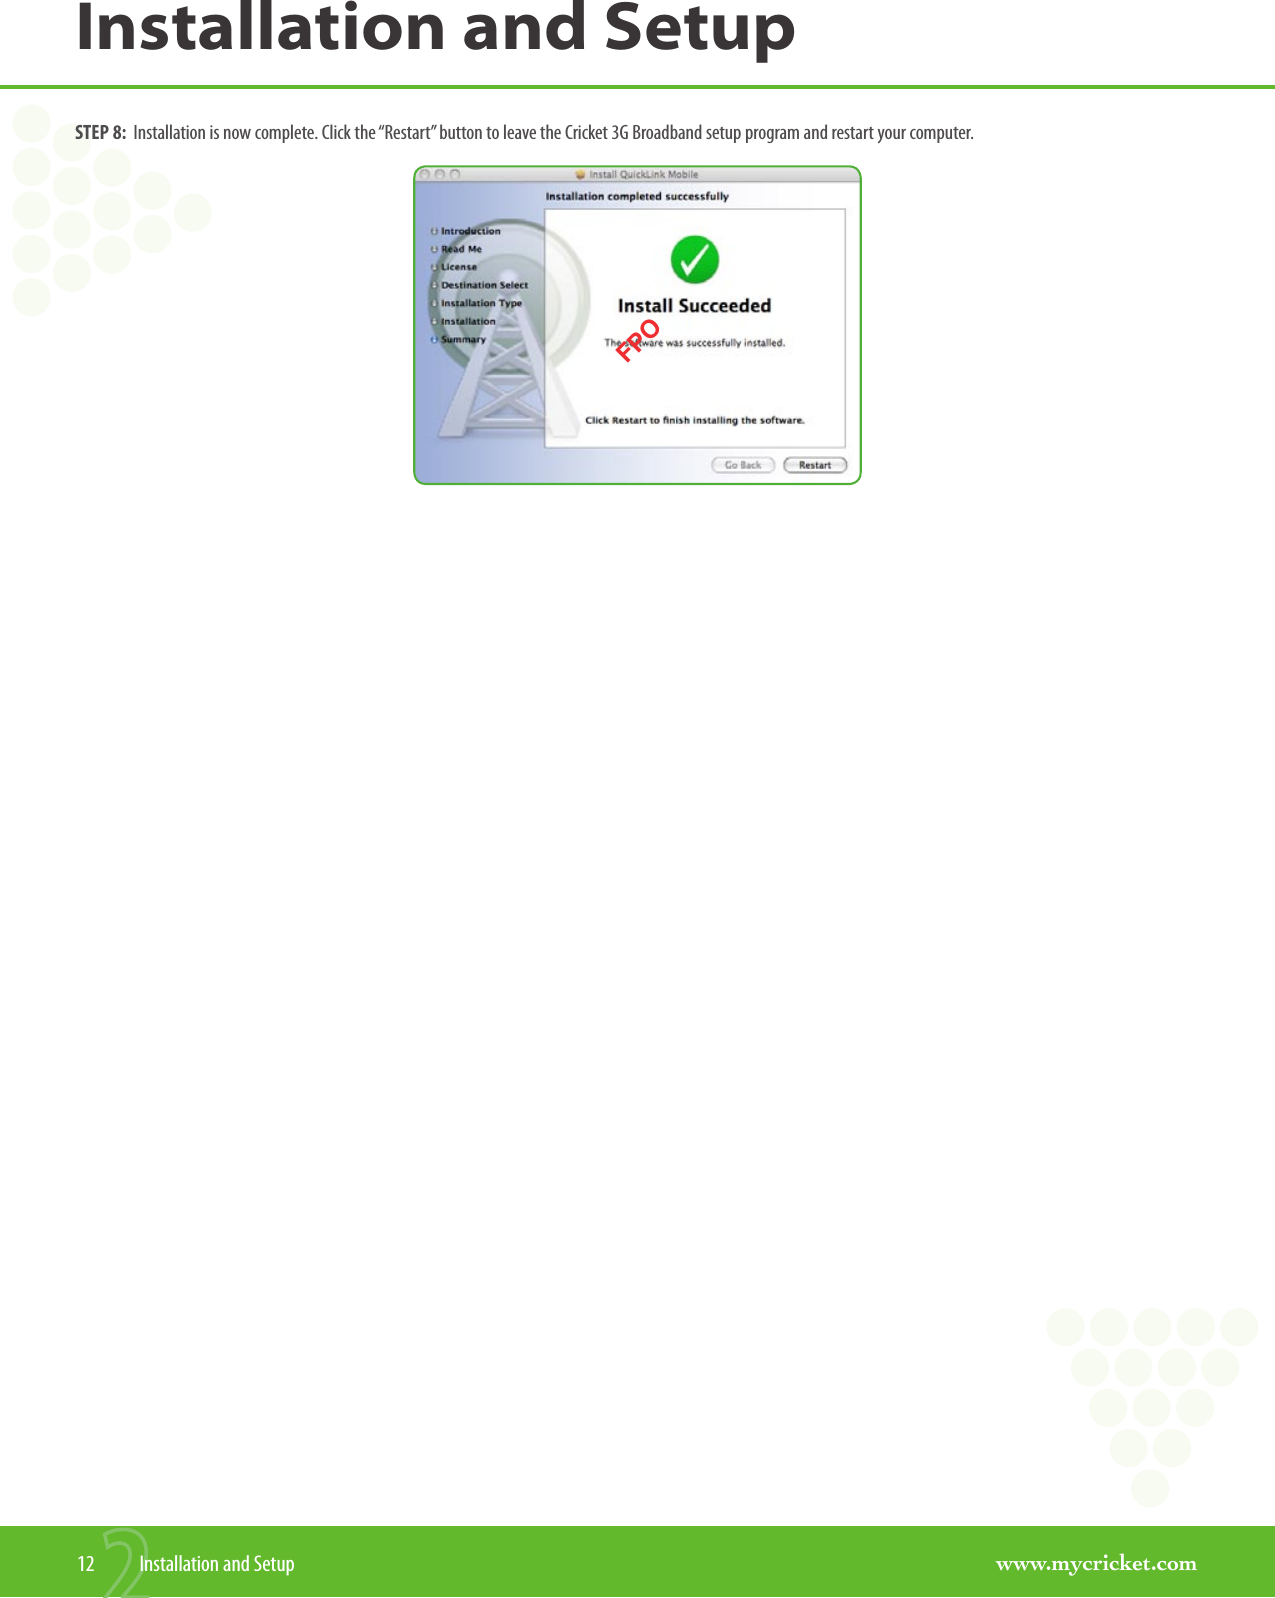
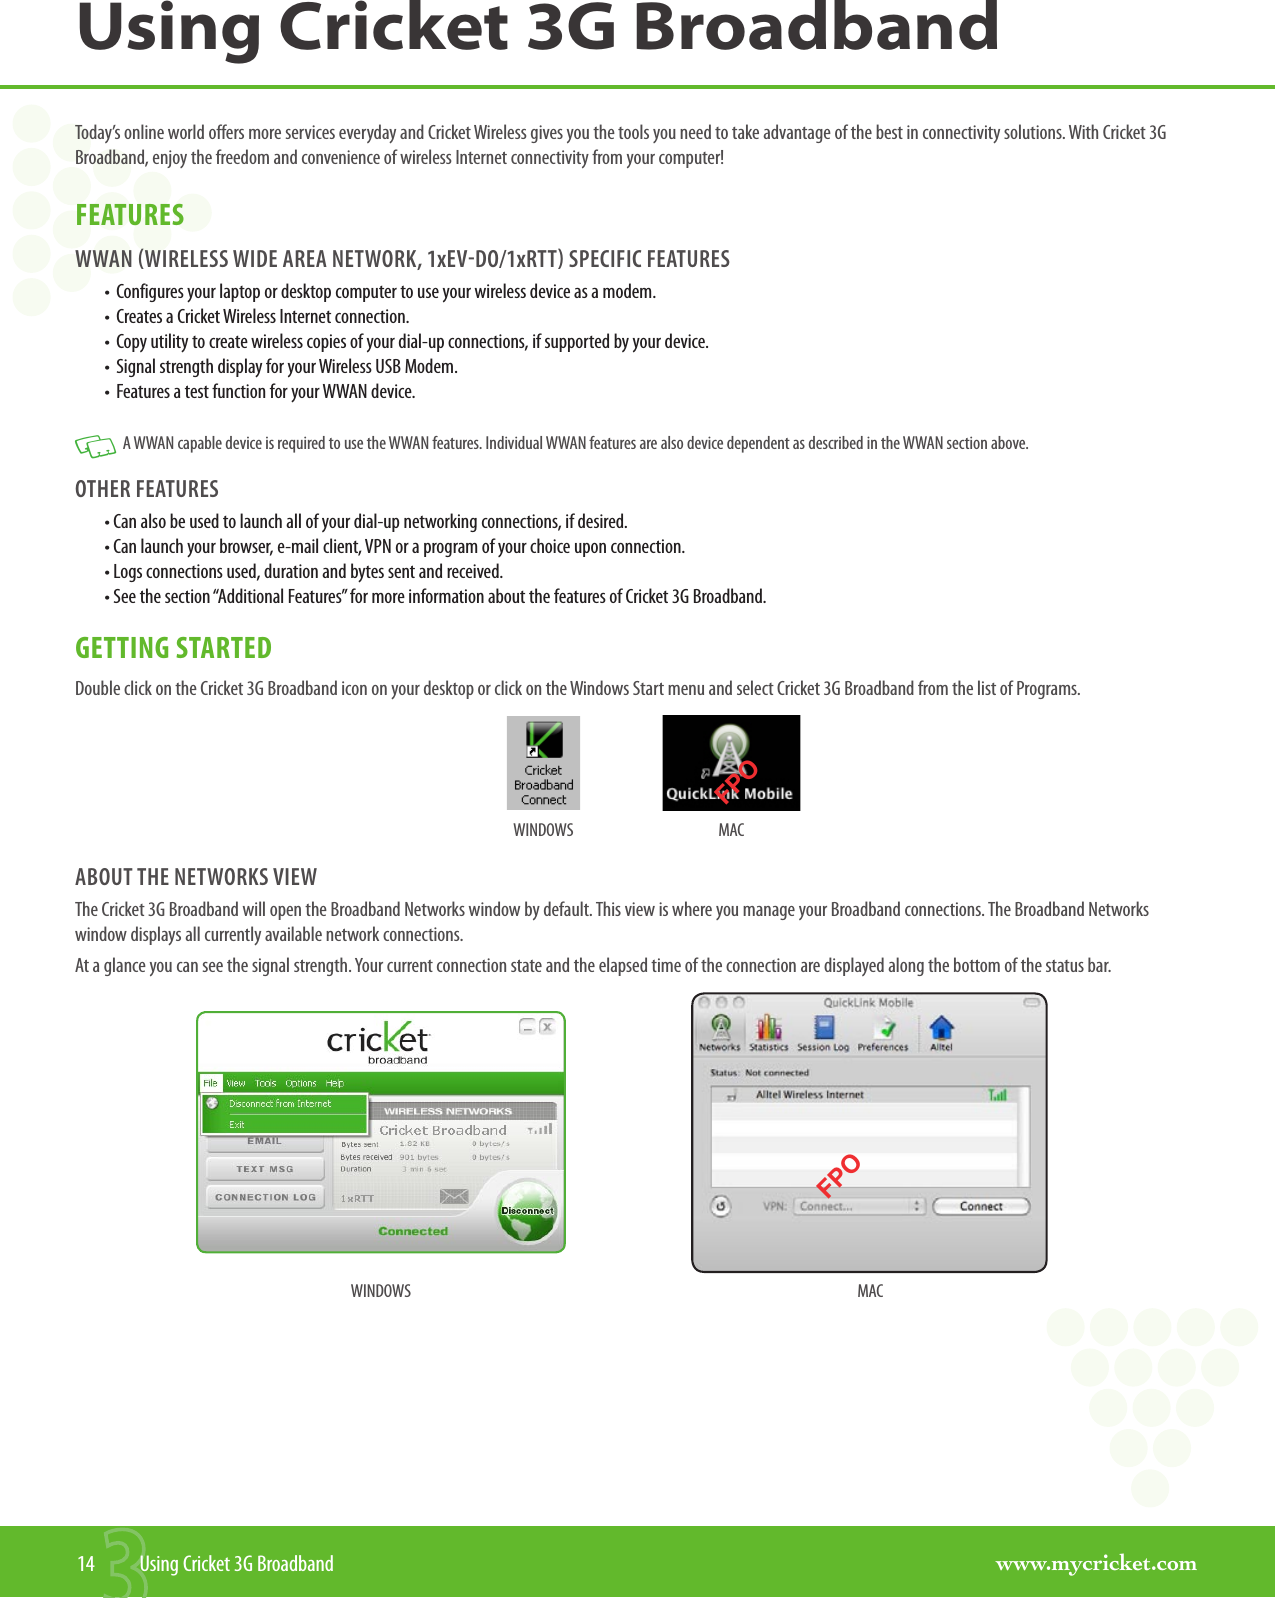
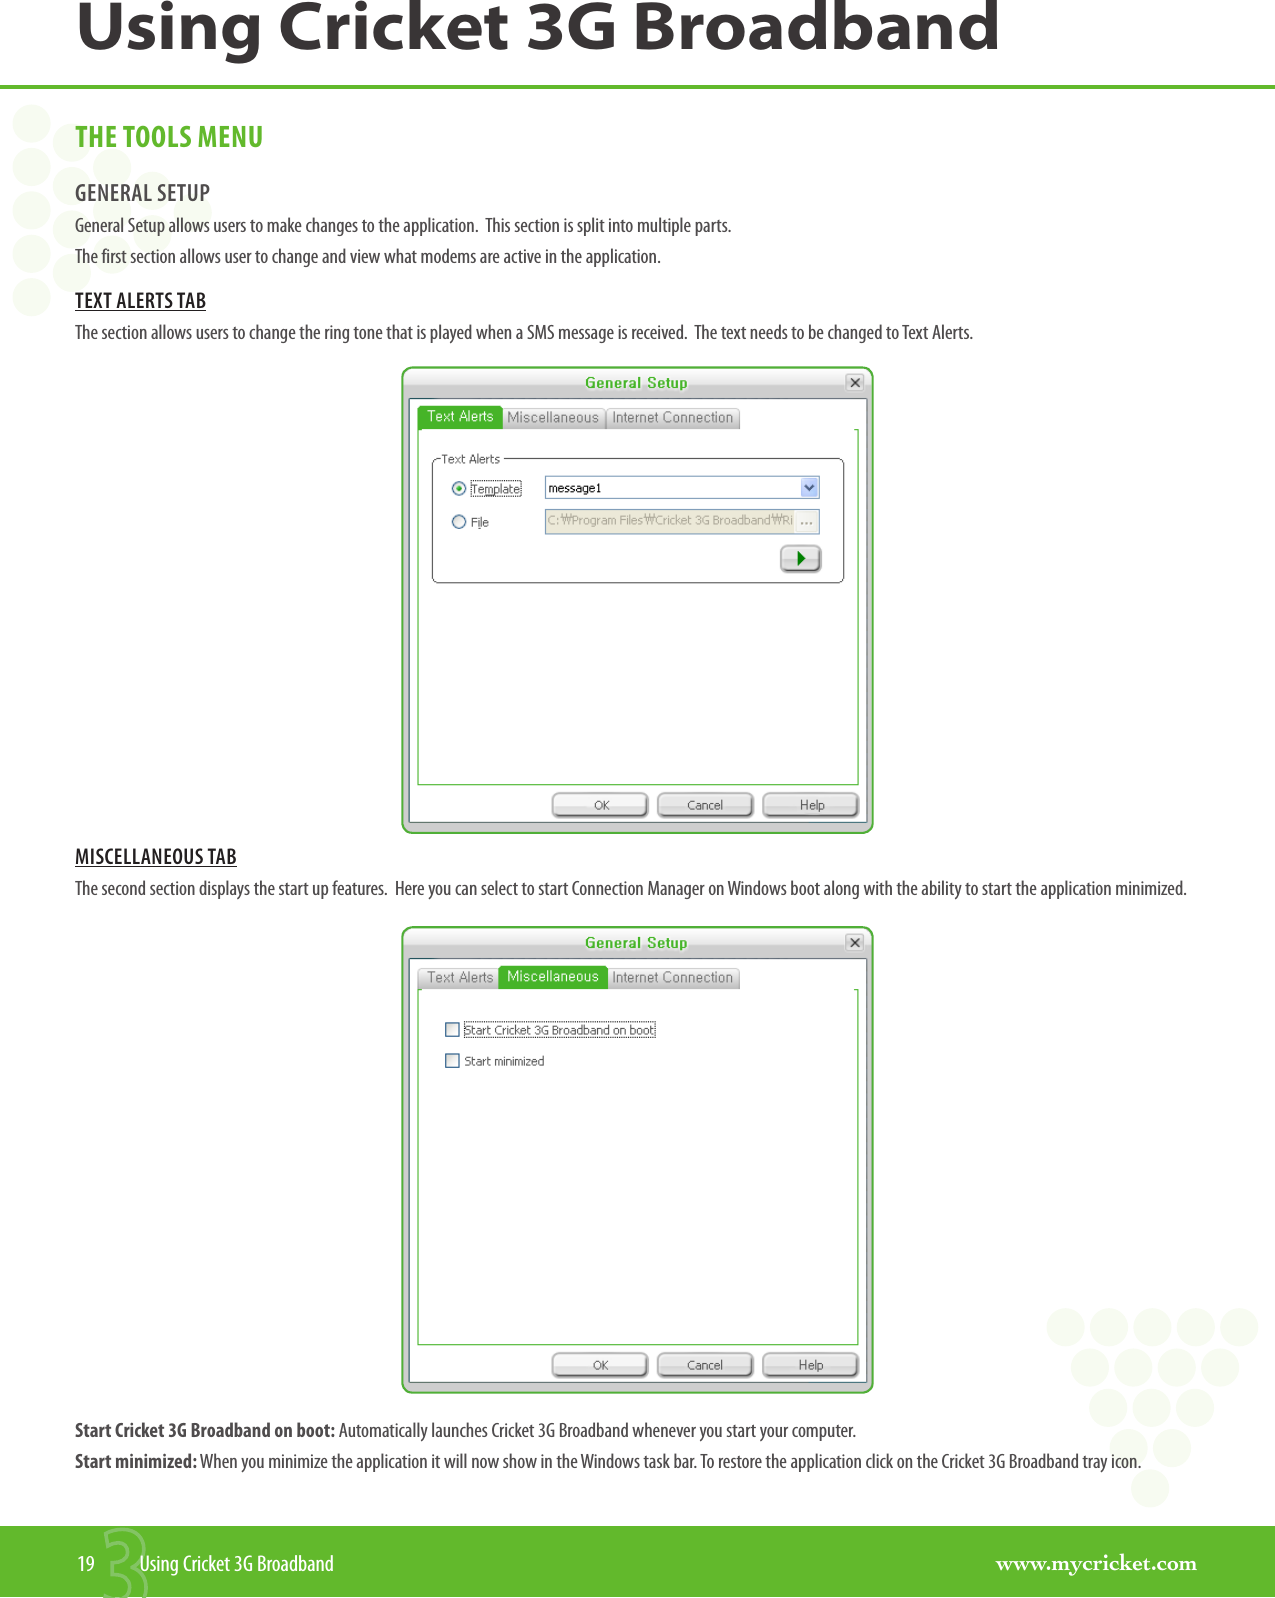
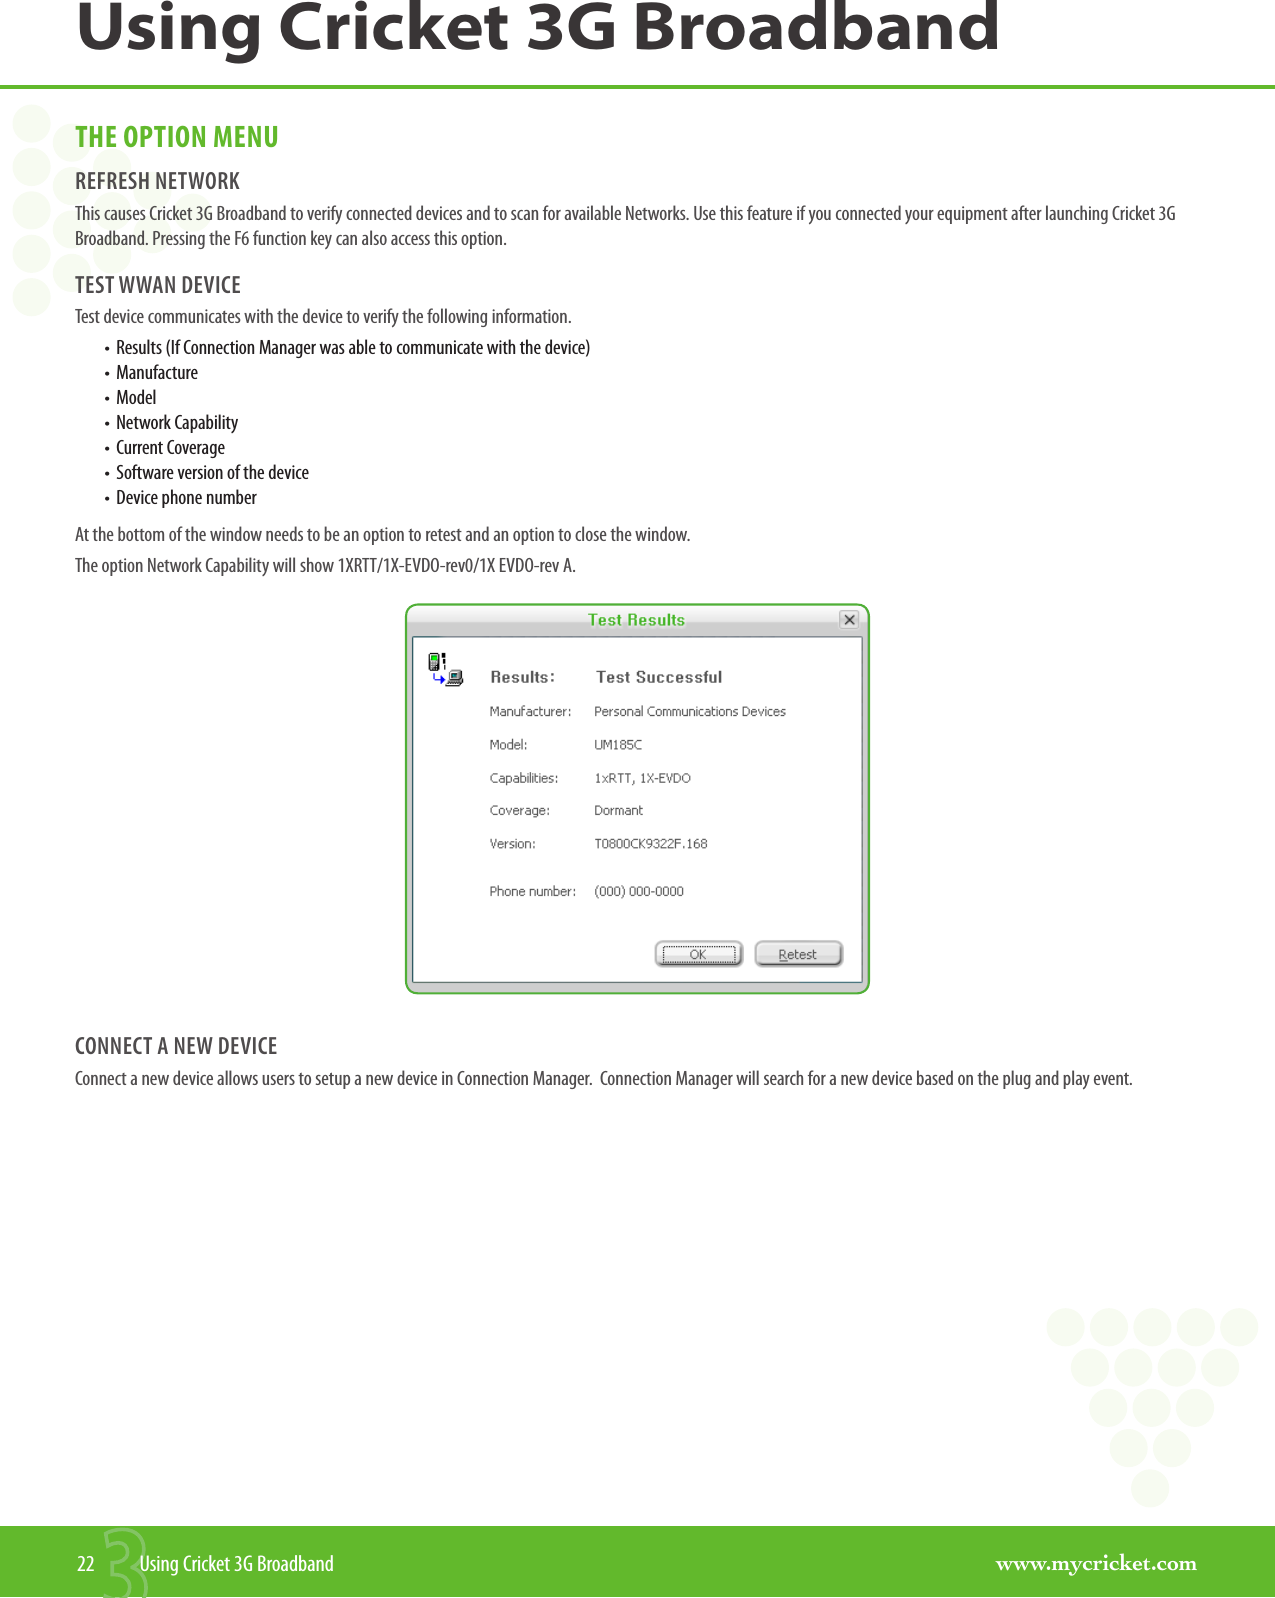
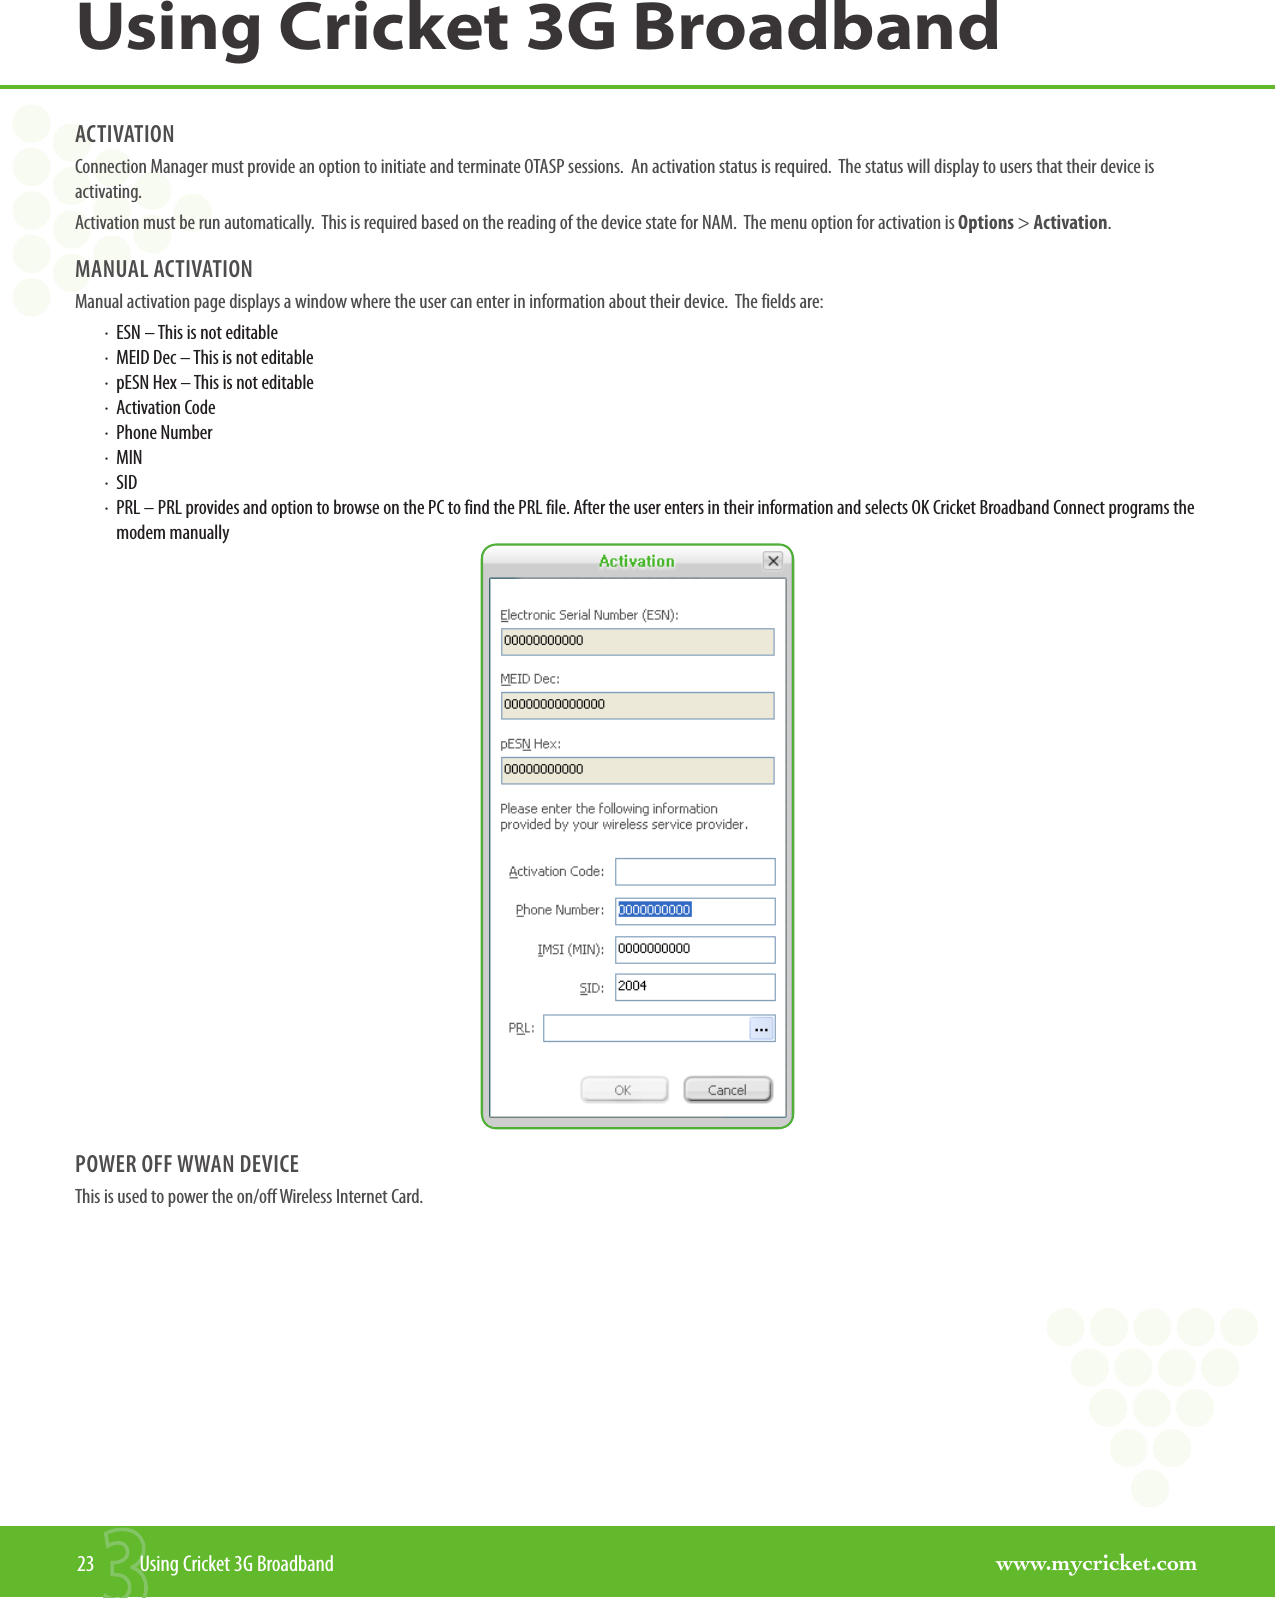
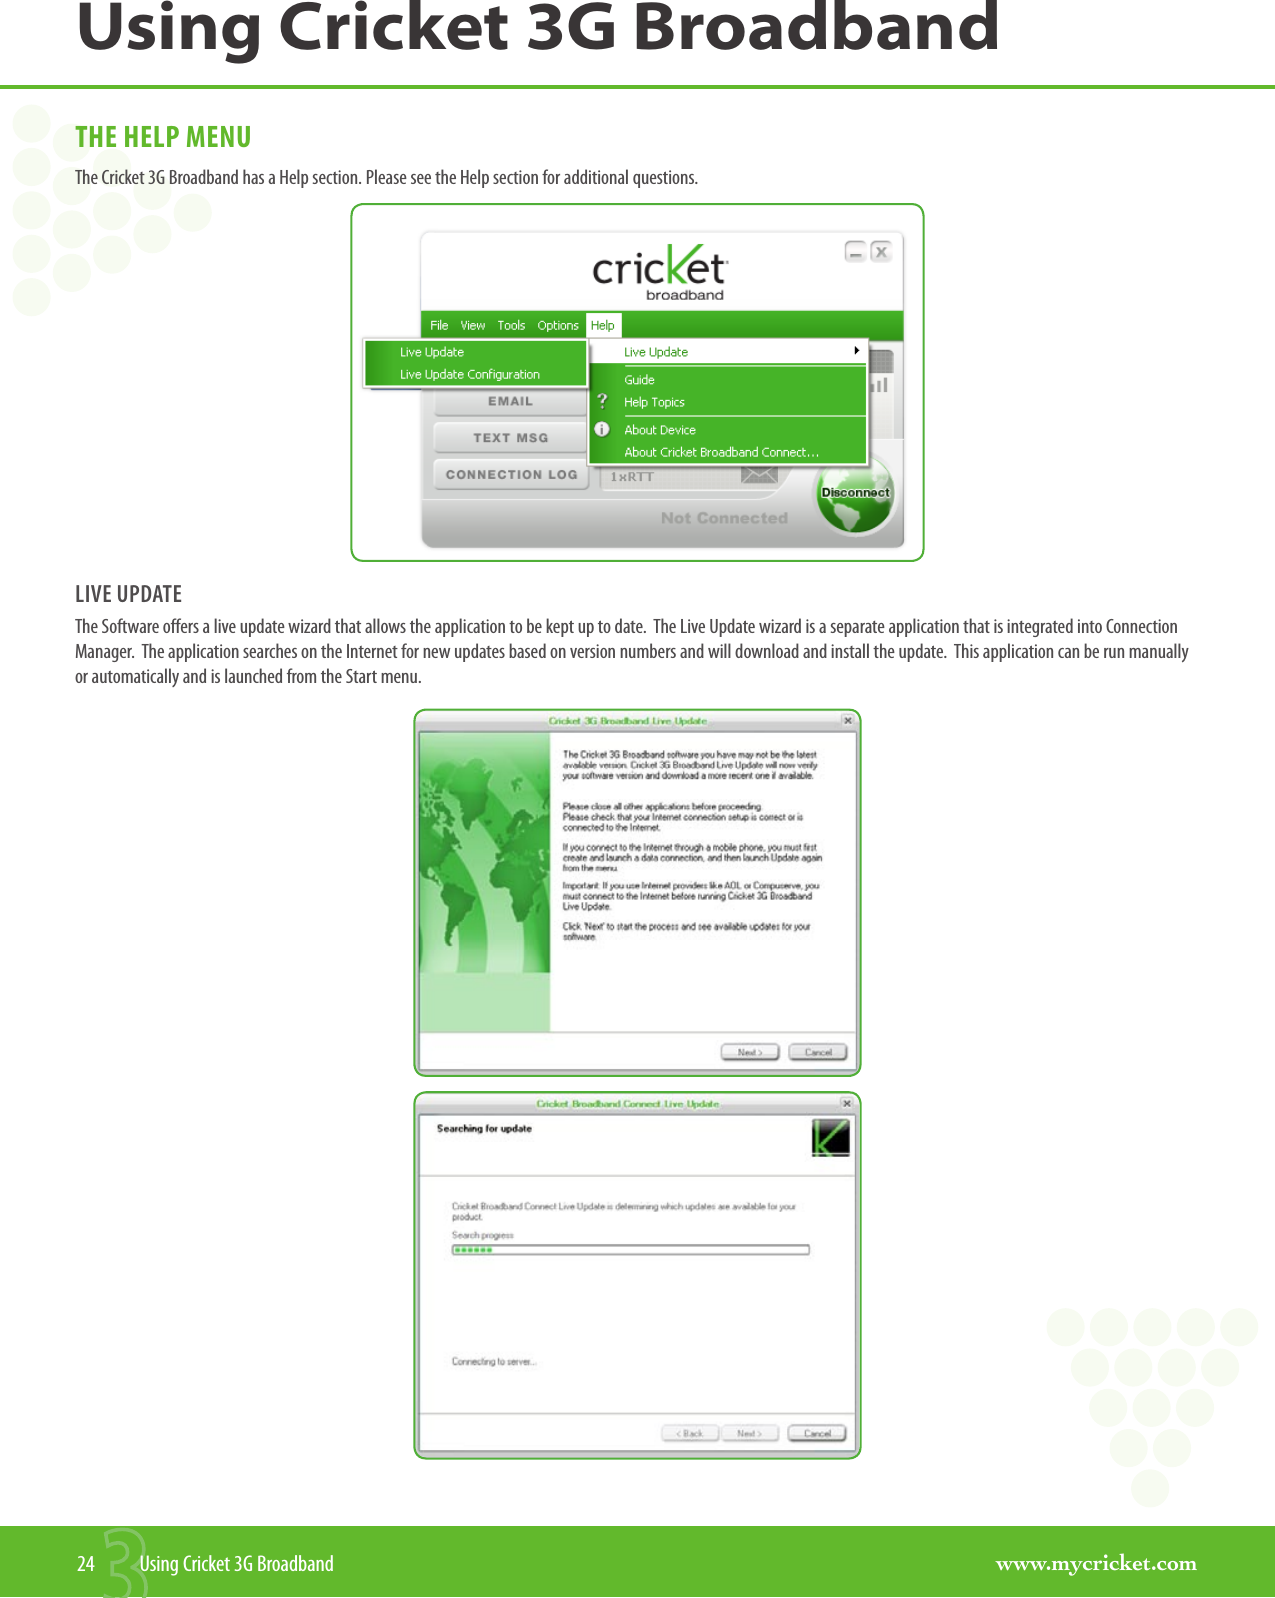
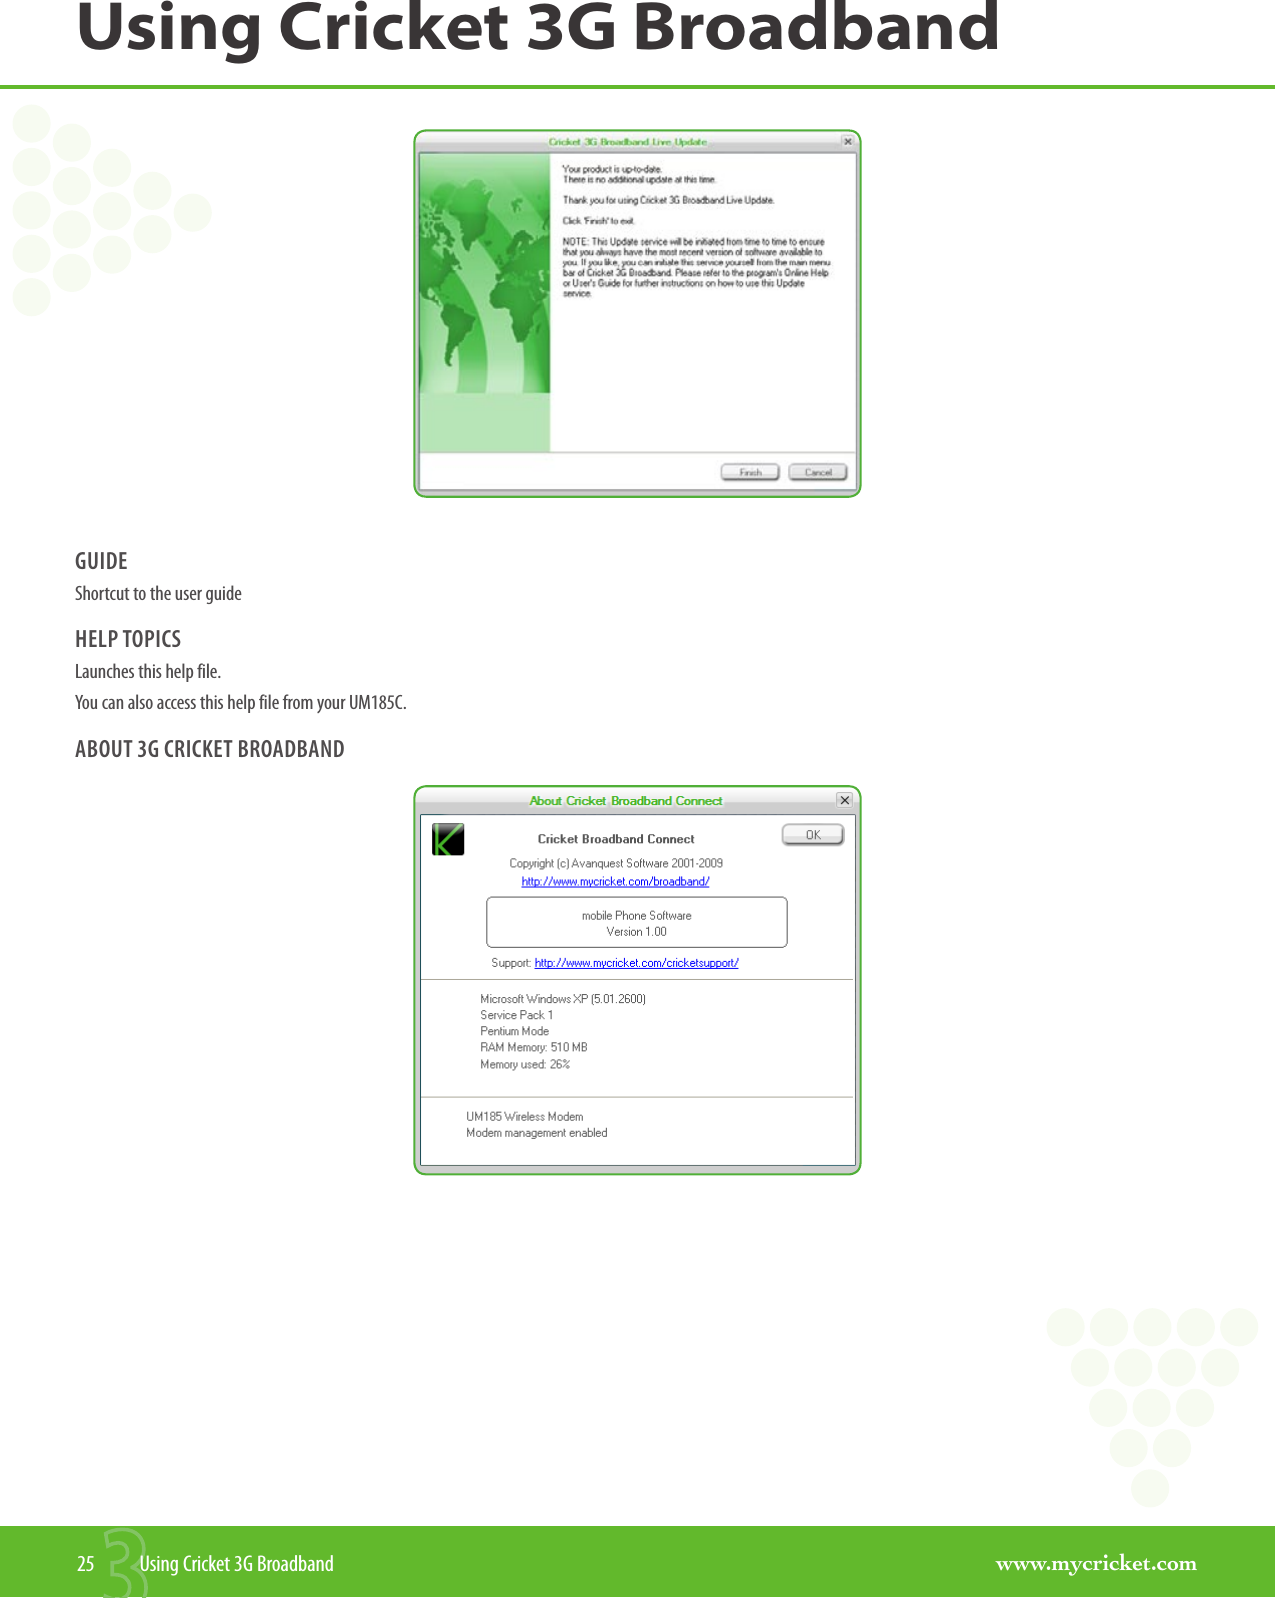
![www.mycricket.comBefore Using UM185C4 Before Using UM185CPRODUCT FEATURES• Power management: The UM185C utilizes power management and system overhead reduction functions provided by the USB interface for maximum power savings.• Antenna design: Efficient, innovative internal antenna design optimizes data transfer rate and sensitivity to network signals.• USB Modem that supports Type A USB Port interface.• Supports North American US_PCS, Cellular CDMA and AWS bands.• Utilizes QUALCOMM QSC6085 chipset.• Supports 3G network technologies.• Maximum Data Rate: 3.1 Mbps download; 1.8 Mbps upload.• Supports Windows XP and Vista systems with installed host software and driver.• Compatible with Mac OS X 10.4.X (Tiger), 10.5.X (Leopard) or higher. • Provides Cricket Wireless Internet service. • The datacard cover automatically closes when you push the designated point as displayed in the following figure. PRODUCT HANDLING1. Do not put any adhesive label on the USB connector. It may leave a sticky residue that can cause problems inside the USB port.2. The UM185C USB device should easily slide into the USB port. Do not force the UM185C into the USB port as it may cause damage to the modem and/or the port.3. Keep the UM185C in a dry and clean place. (Storage temperature: -22°F to 149°F [- 30°C to 65°C]). Keep your device away from liquids, dust and excessive heat. CONFIGURATIONTo use the UM185C, you should first install the software included on the device and configure the UM185C USB device. See the next section for more information on software installation and USB device configuration.](https://usermanual.wiki/Pantech/PX-800/User-Guide-1097274-Page-4.png)


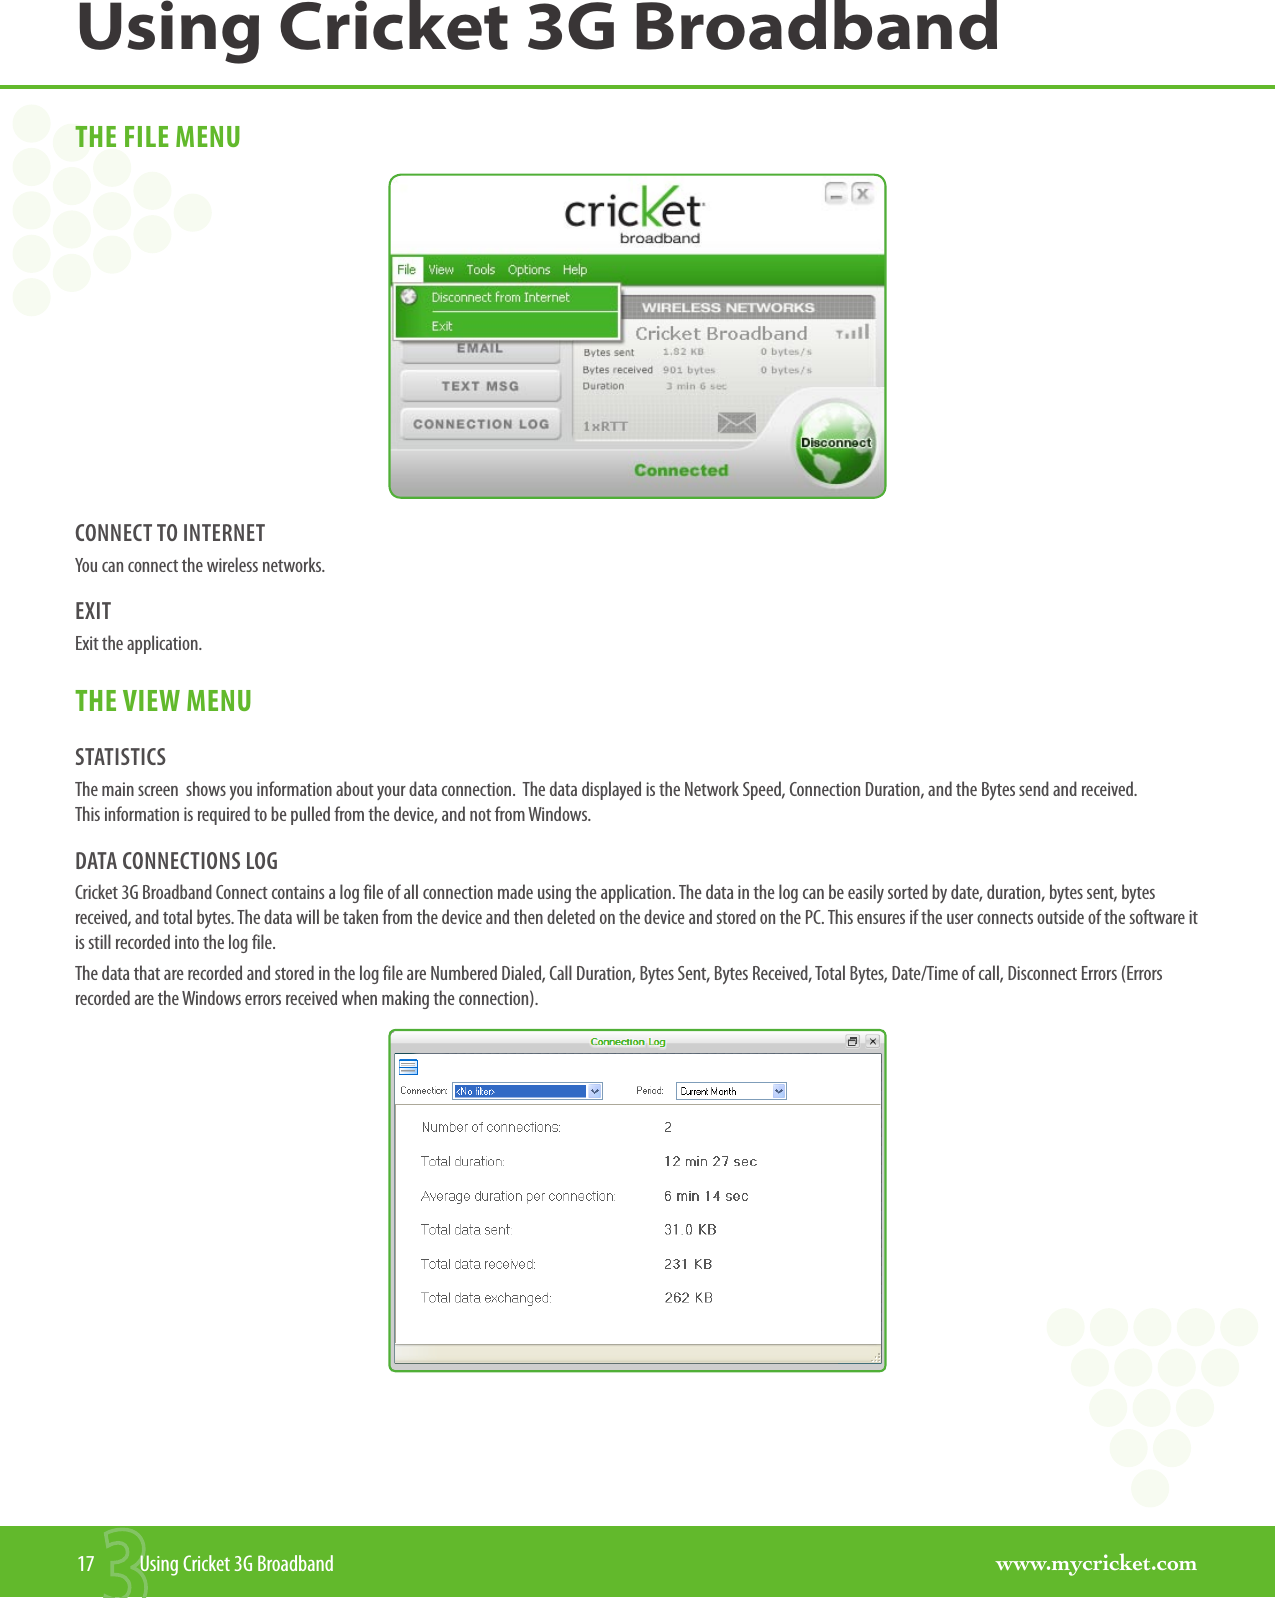
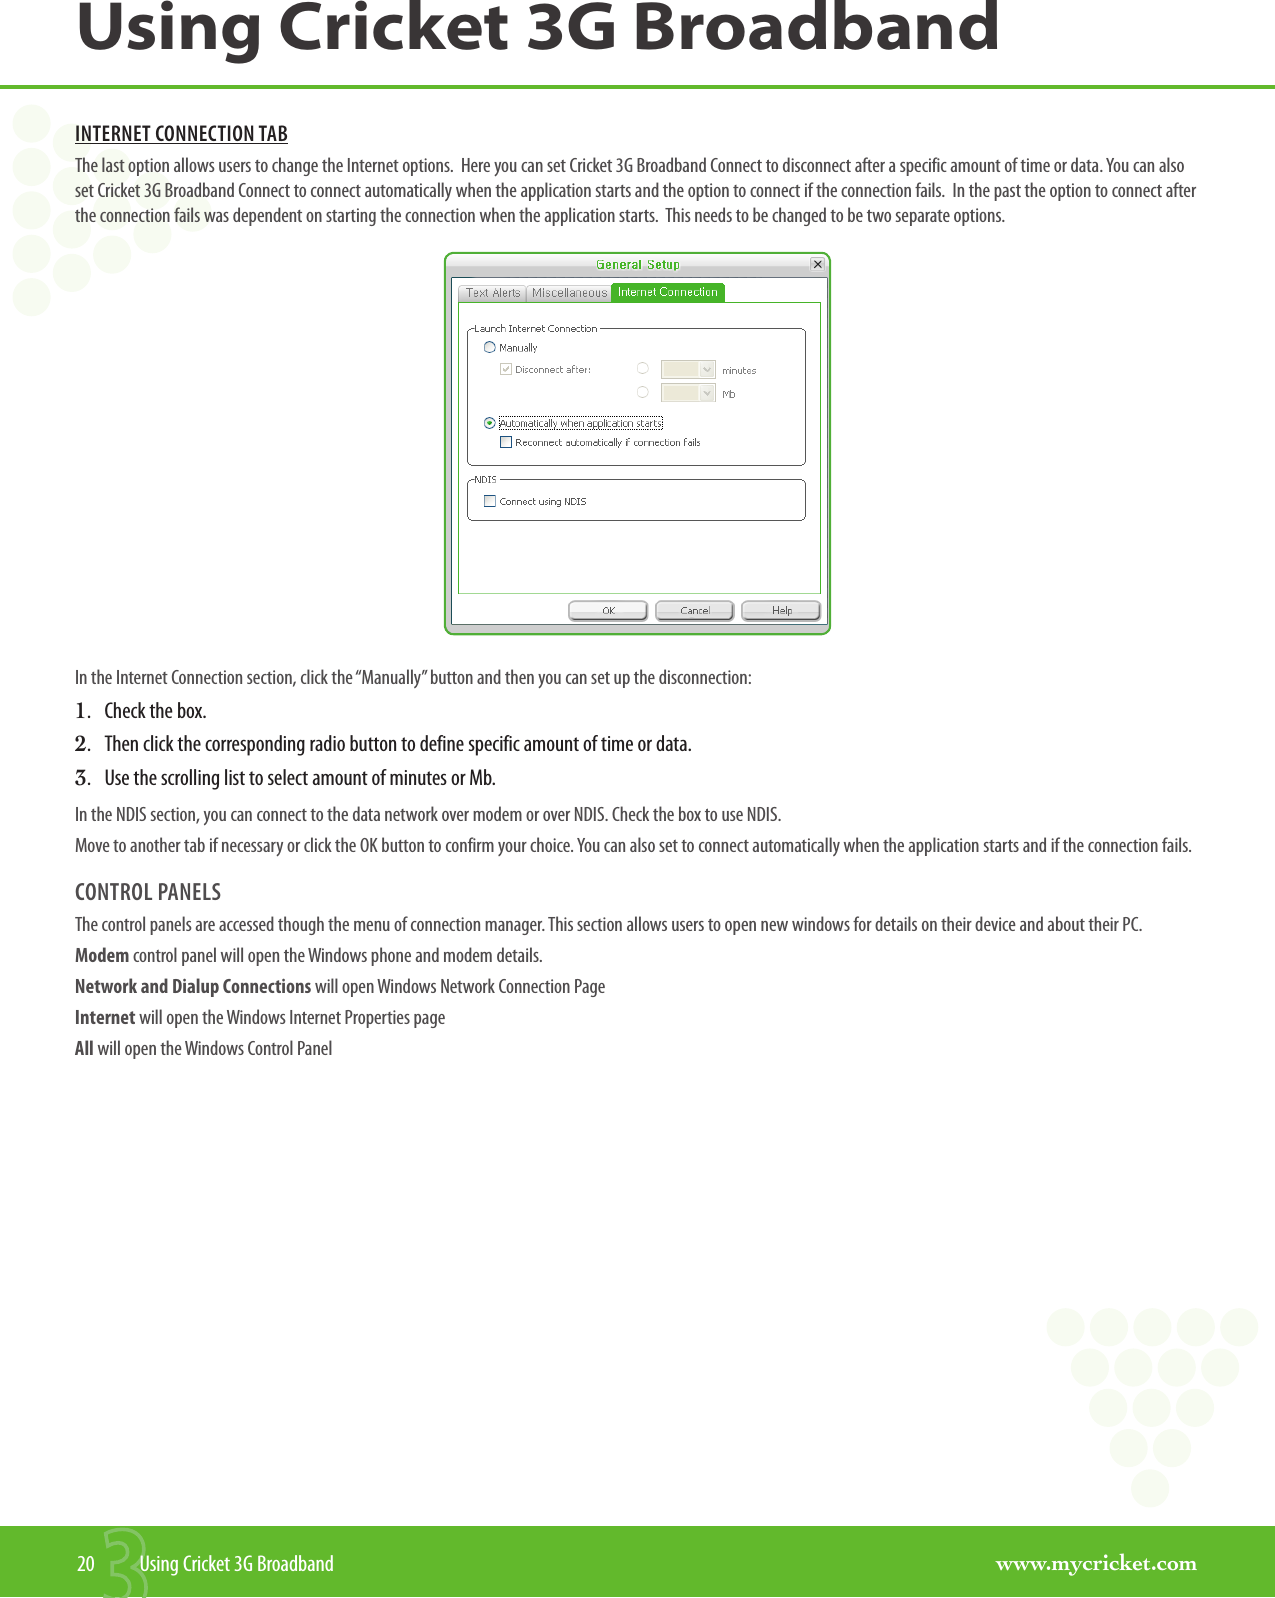

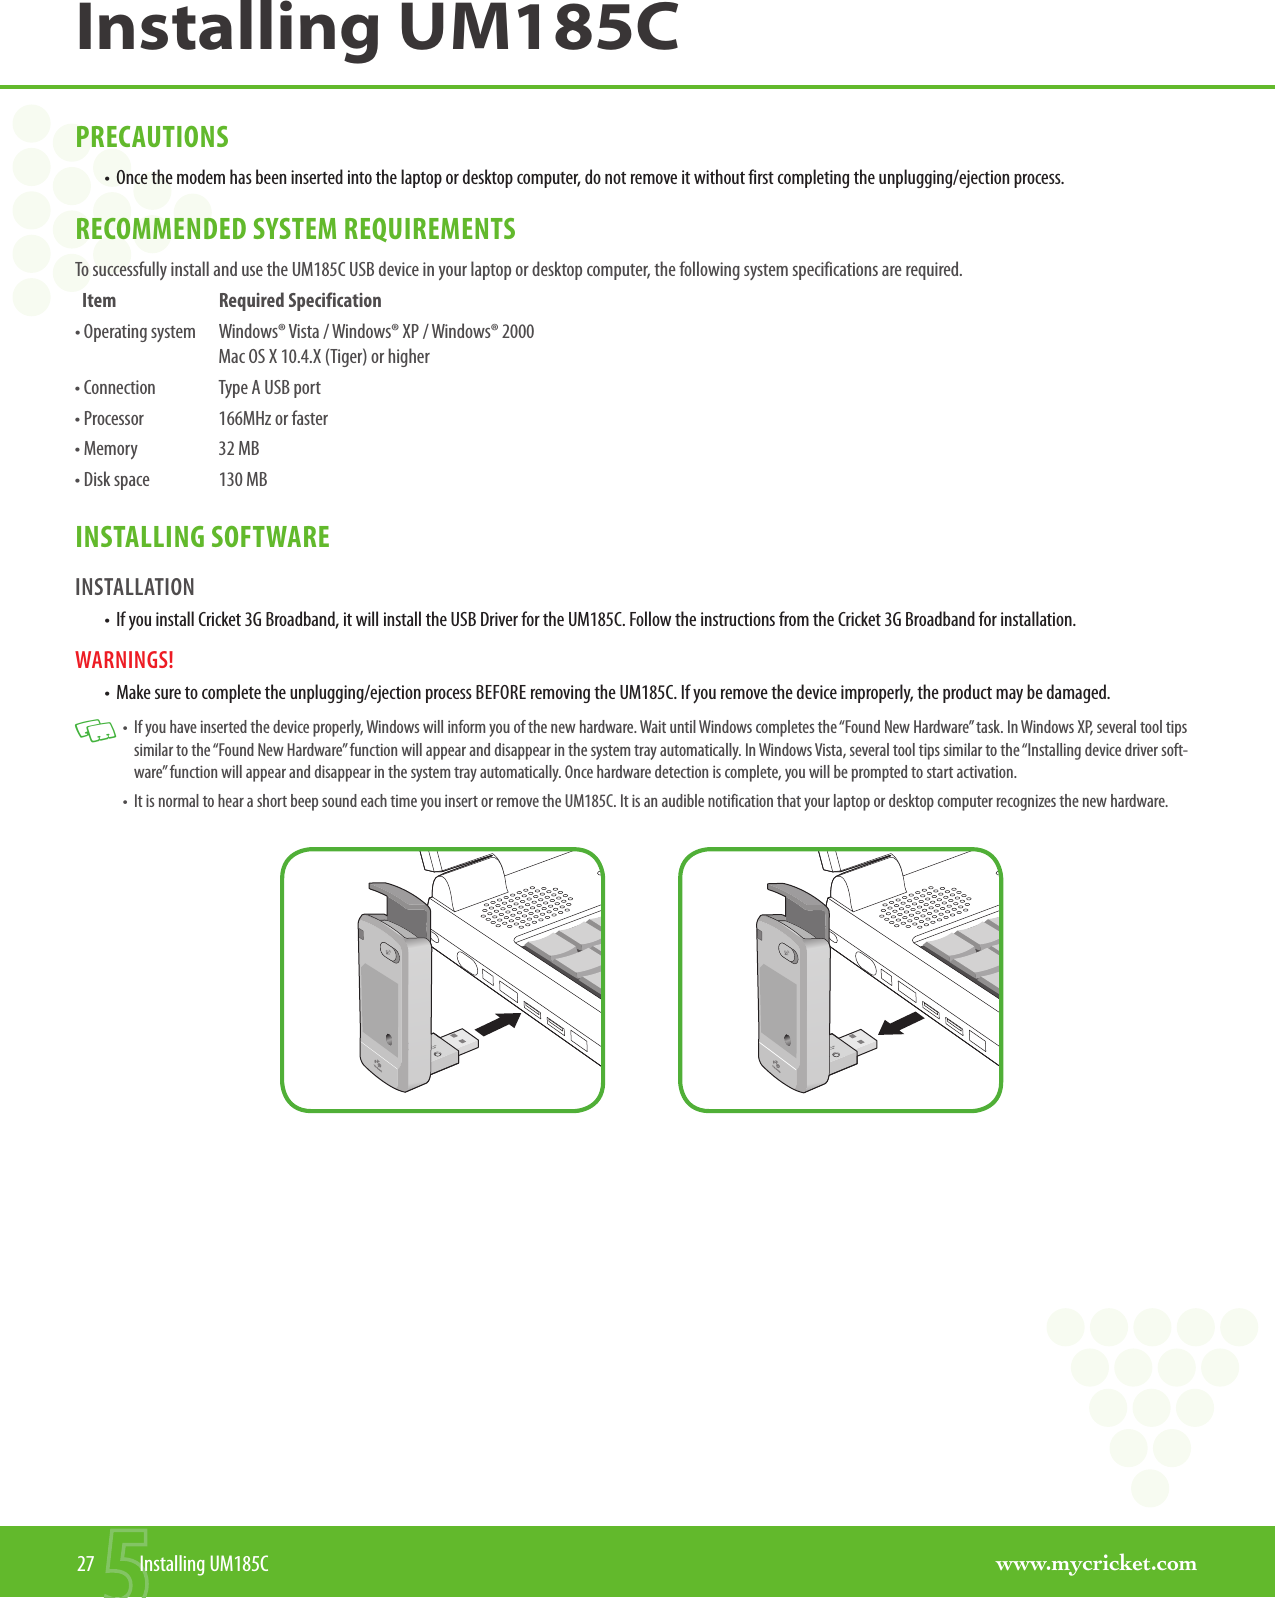
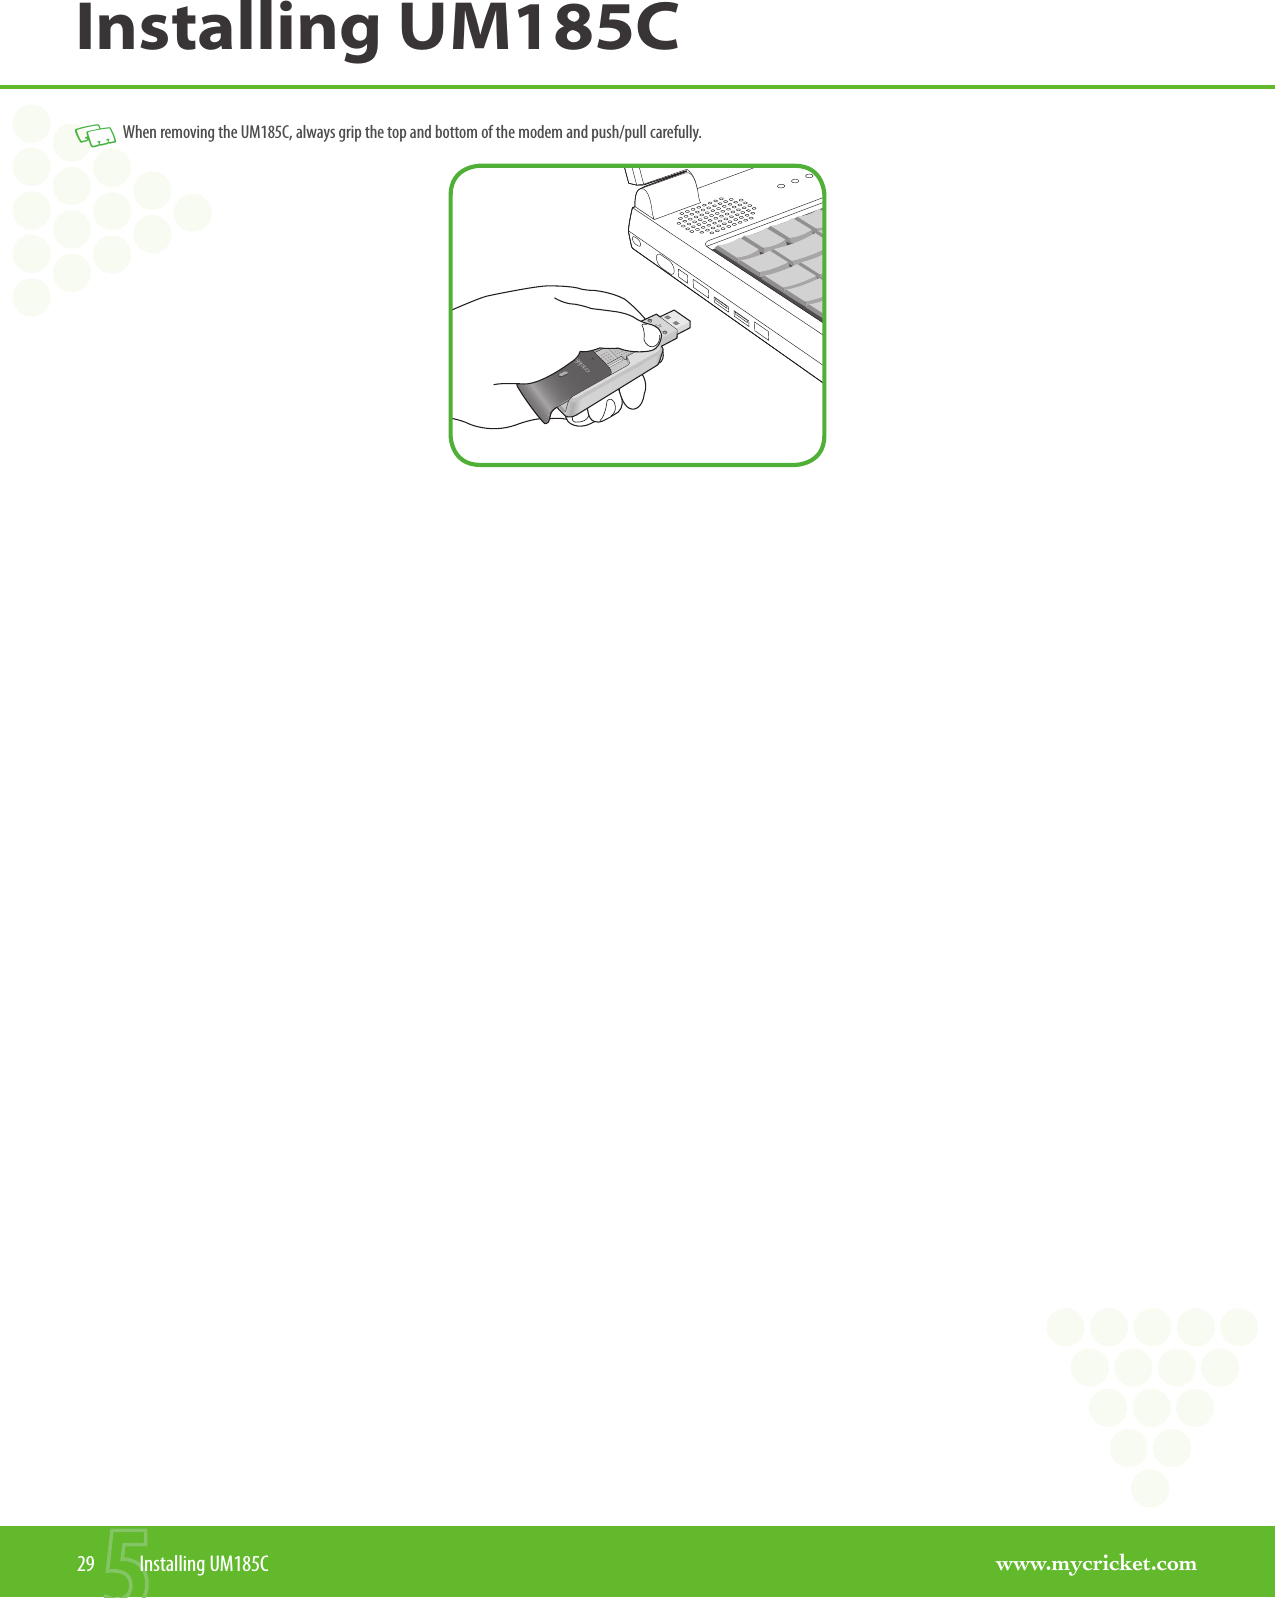
![www.mycricket.comInstalling UM185C28 Installing UM185CUNPLUGGING OR EJECTING THE DEVICE Make sure to complete the unplug/eject process on your computer BEFORE removing the UM185C from your PC. If you remove the USB device improperly, the product may be damaged.WINDOWS • When disconnecting the UM185C from the computer, close all windows and quit all running applications that are stored on the device and double click the Unplug/Eject Hardware icon in the System tray.• When you press the Unplug/Eject icon in the system tray, the pop-up window will appear.• Click the [Stop] button. Now, you can remove the UM185C from your PC.MACINTOSH • When disconnecting the UM185C from the computer, close all windows and quit all running applications that are stored on the device and drag the device’s icon into the trash to dismount it from the Desktop prior to unplugging the device from the USB port or Hub. Windows XP VistaSystem Tray Unplug / Eject Hardware icon](https://usermanual.wiki/Pantech/PX-800/User-Guide-1097274-Page-28.png)