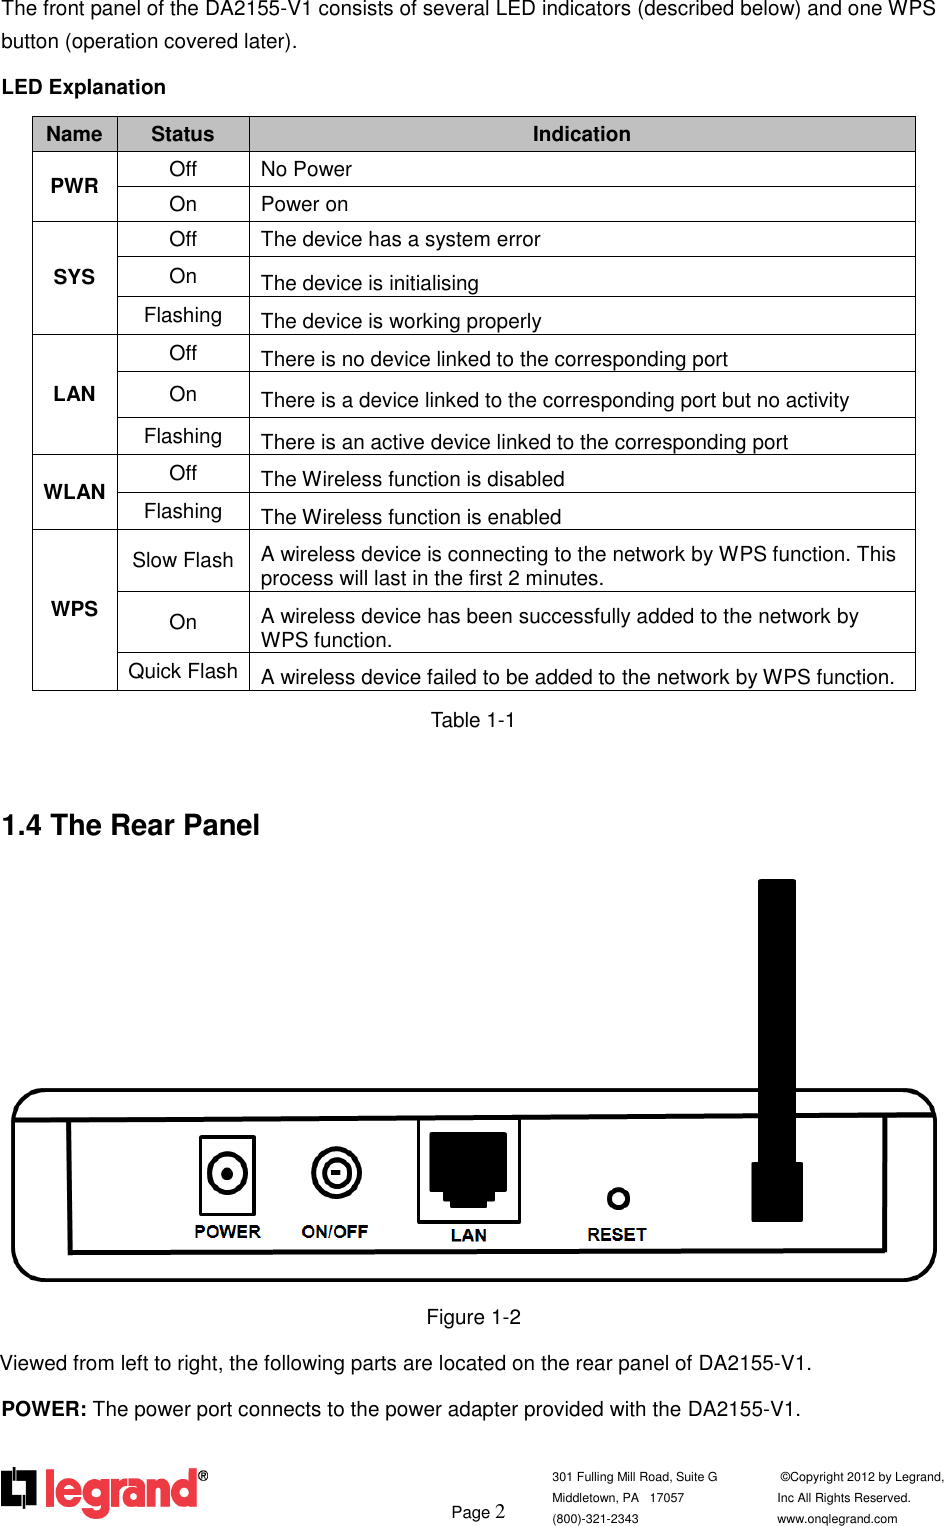
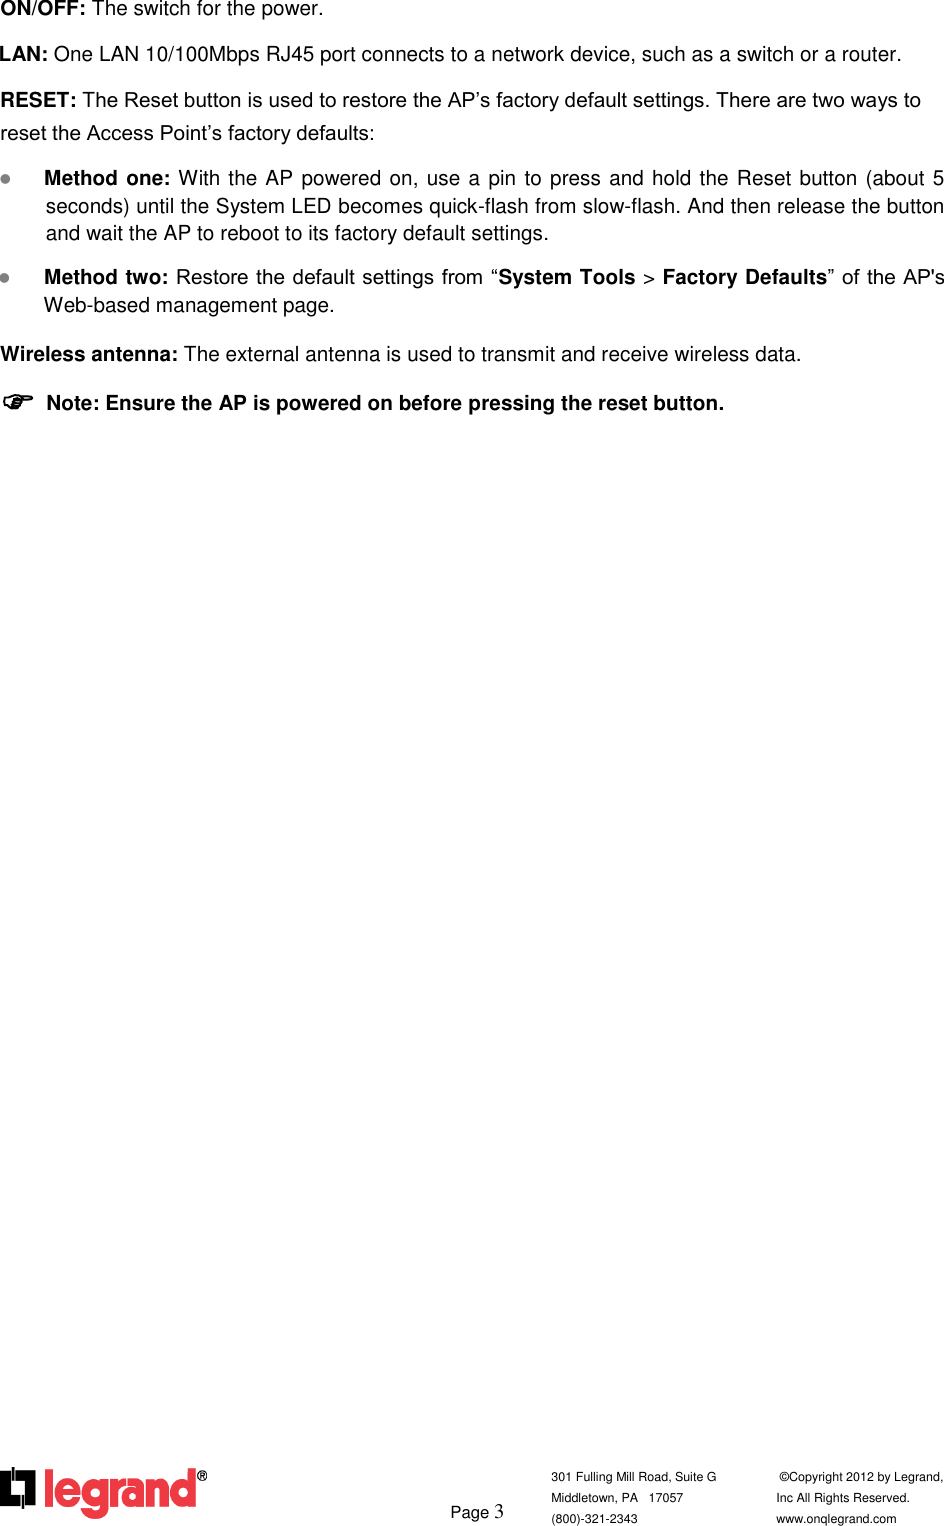
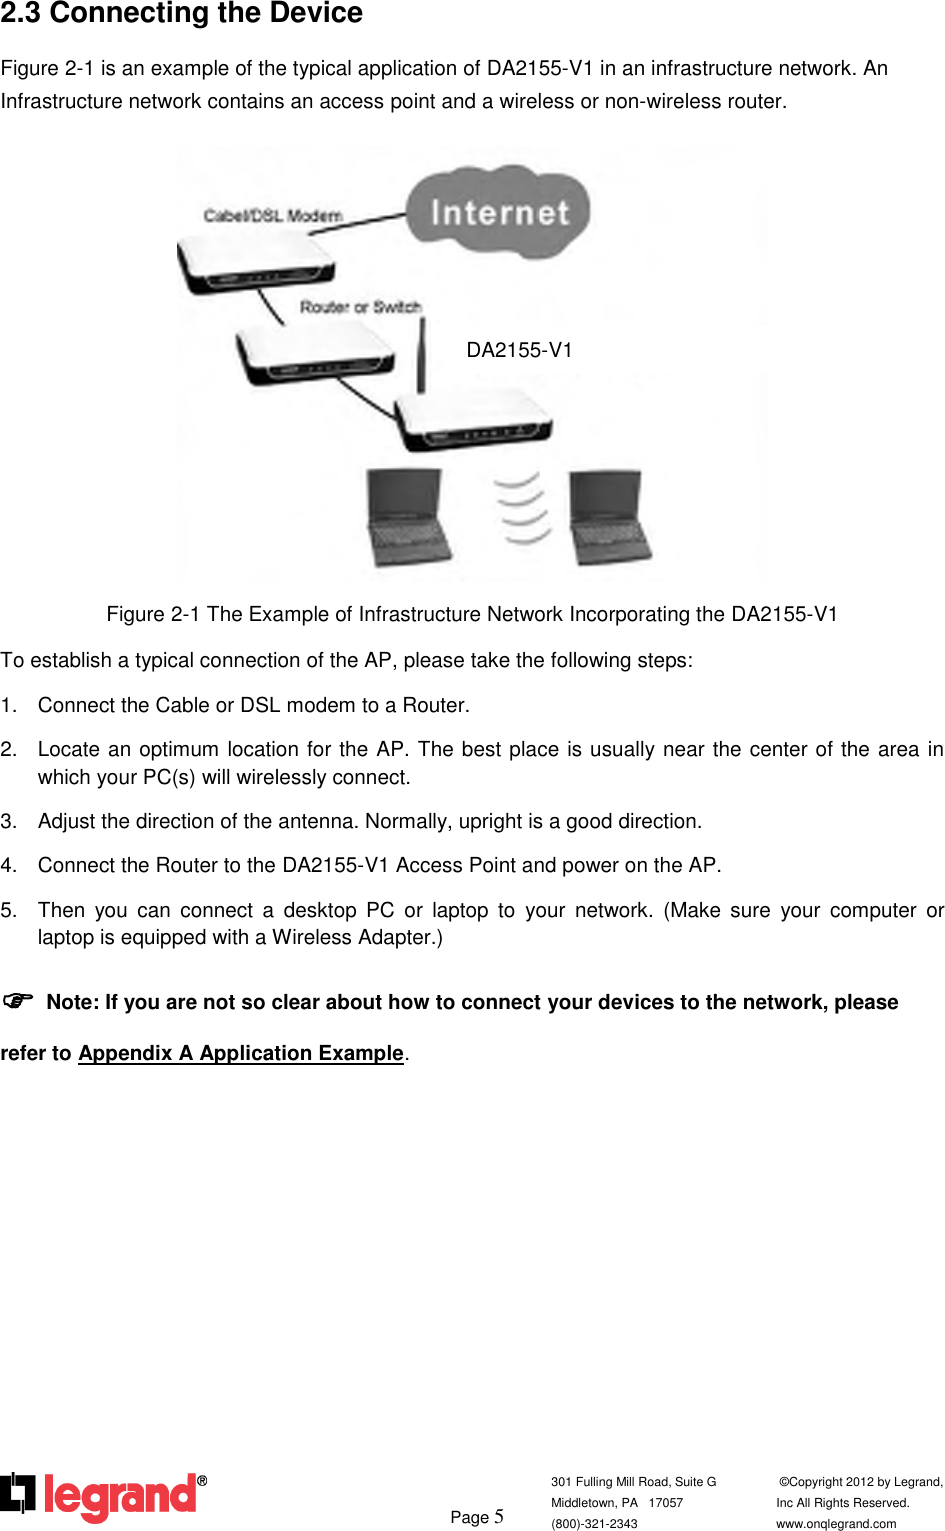
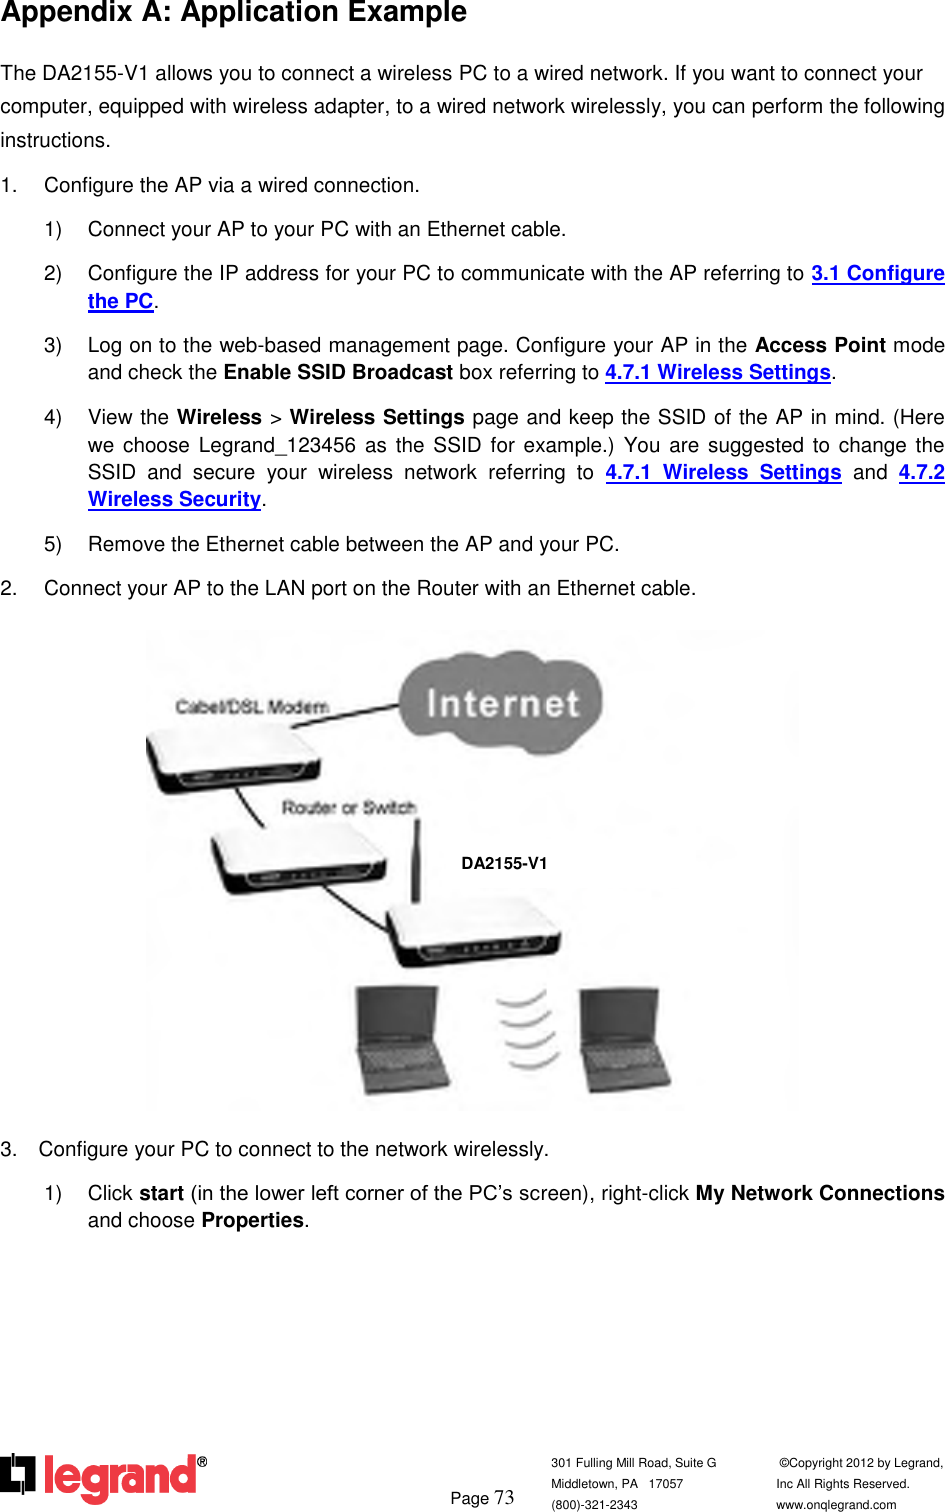
Pass and Seymour d b a Legrand DA2155V1 150M Wireless N Access Point User Manual Selective Call System User s Guide
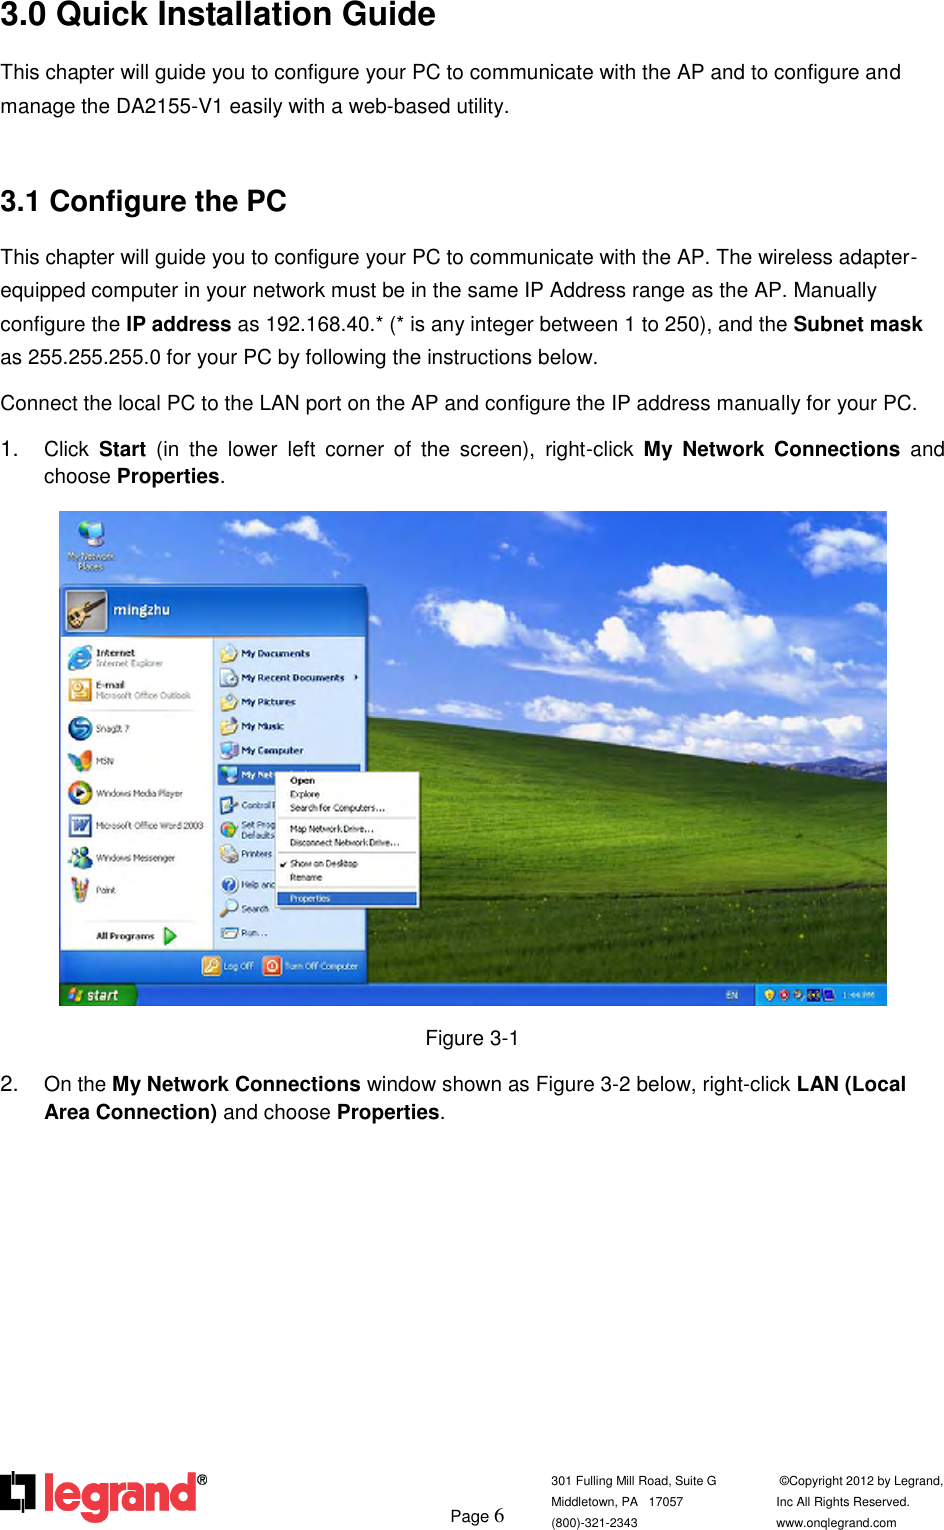
Pass & Seymour, Inc. d/b/a Legrand 150M Wireless N Access Point Selective Call System User s Guide
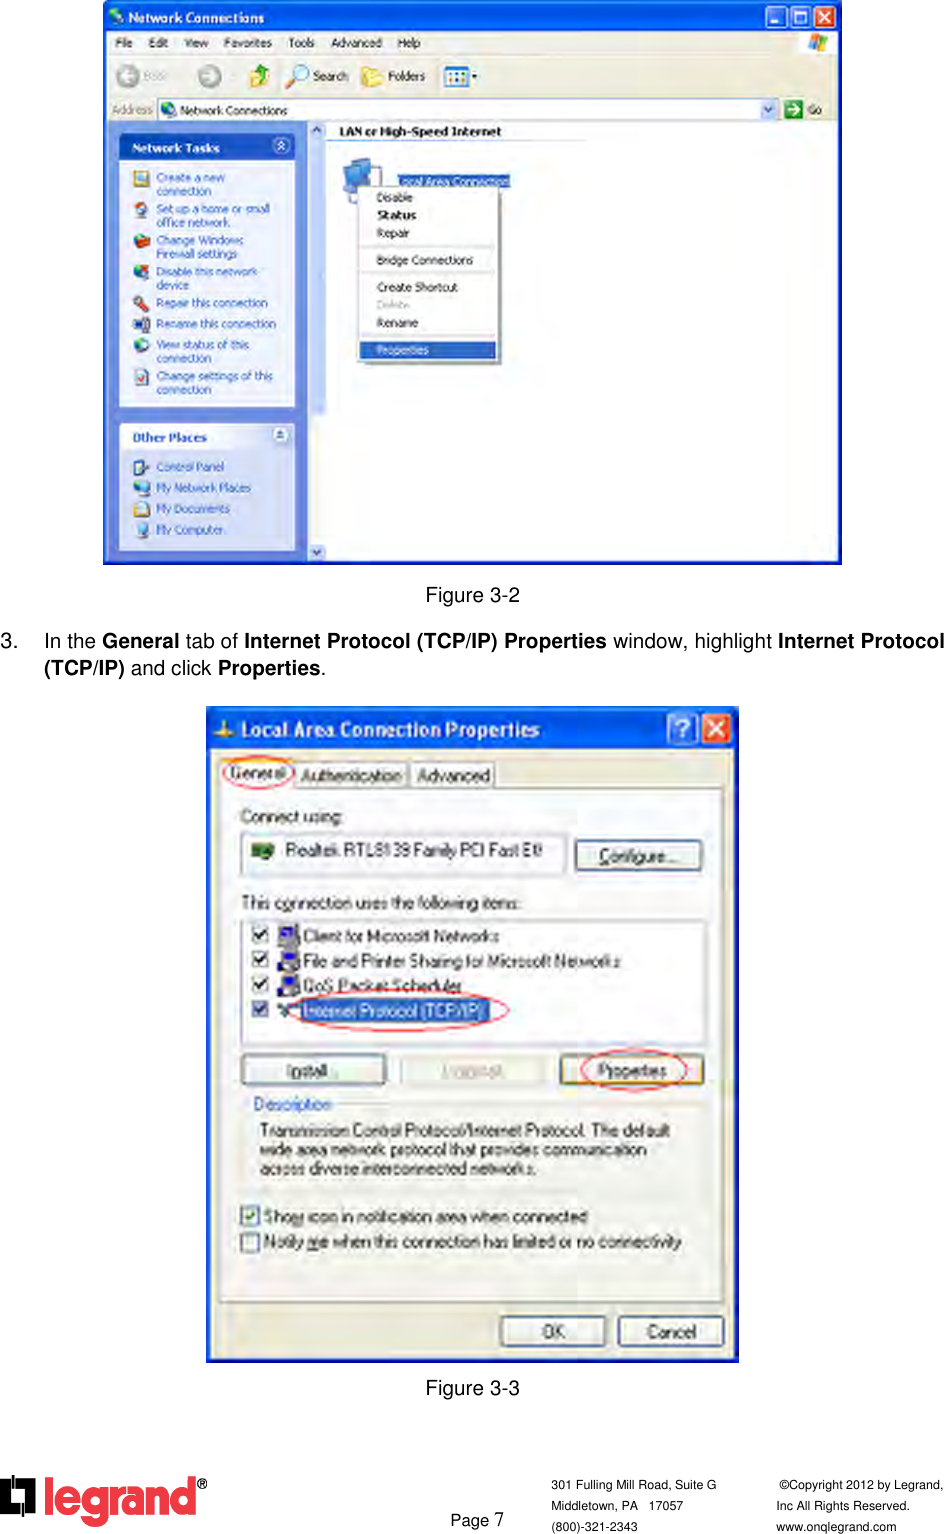
UserManual.wiki
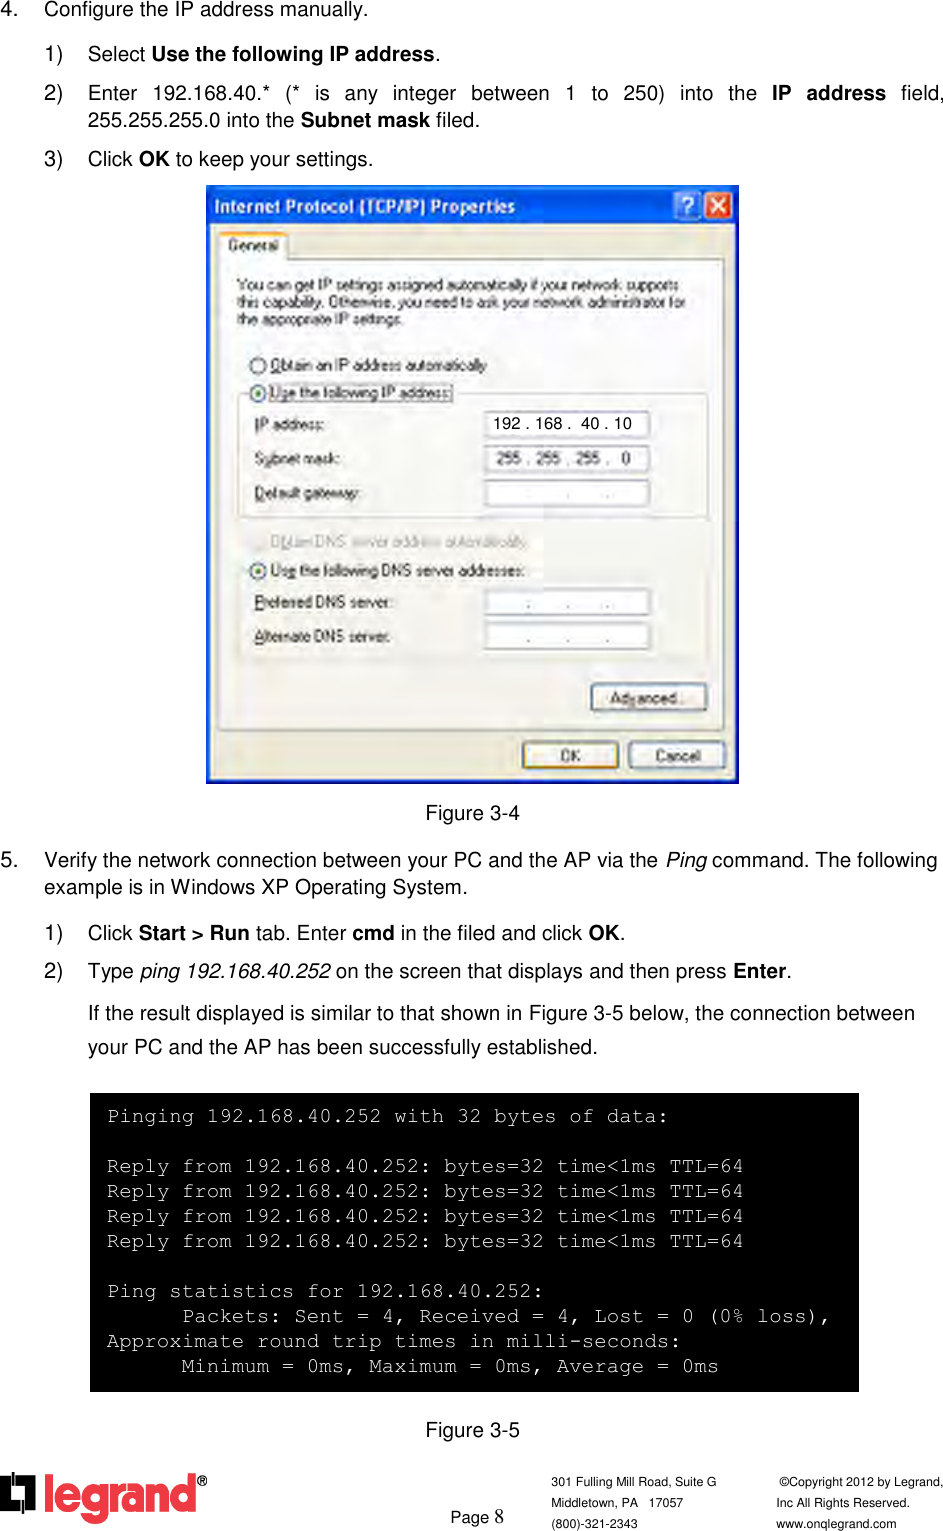
>
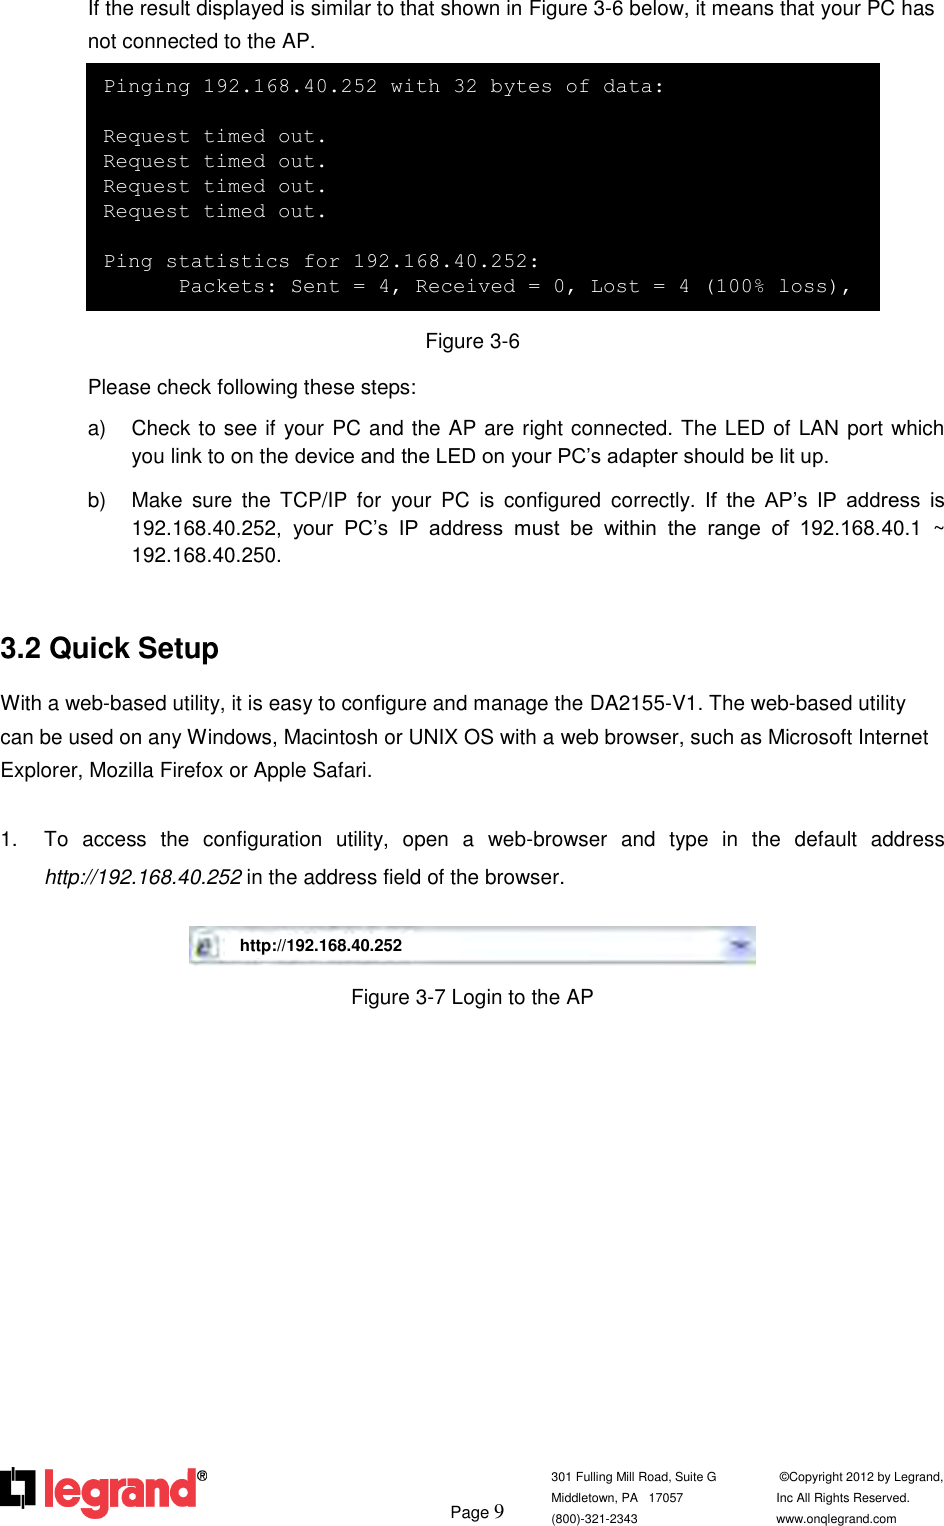
Pass and Seymour d b a Legrand
>
DA2155V1 User Manual
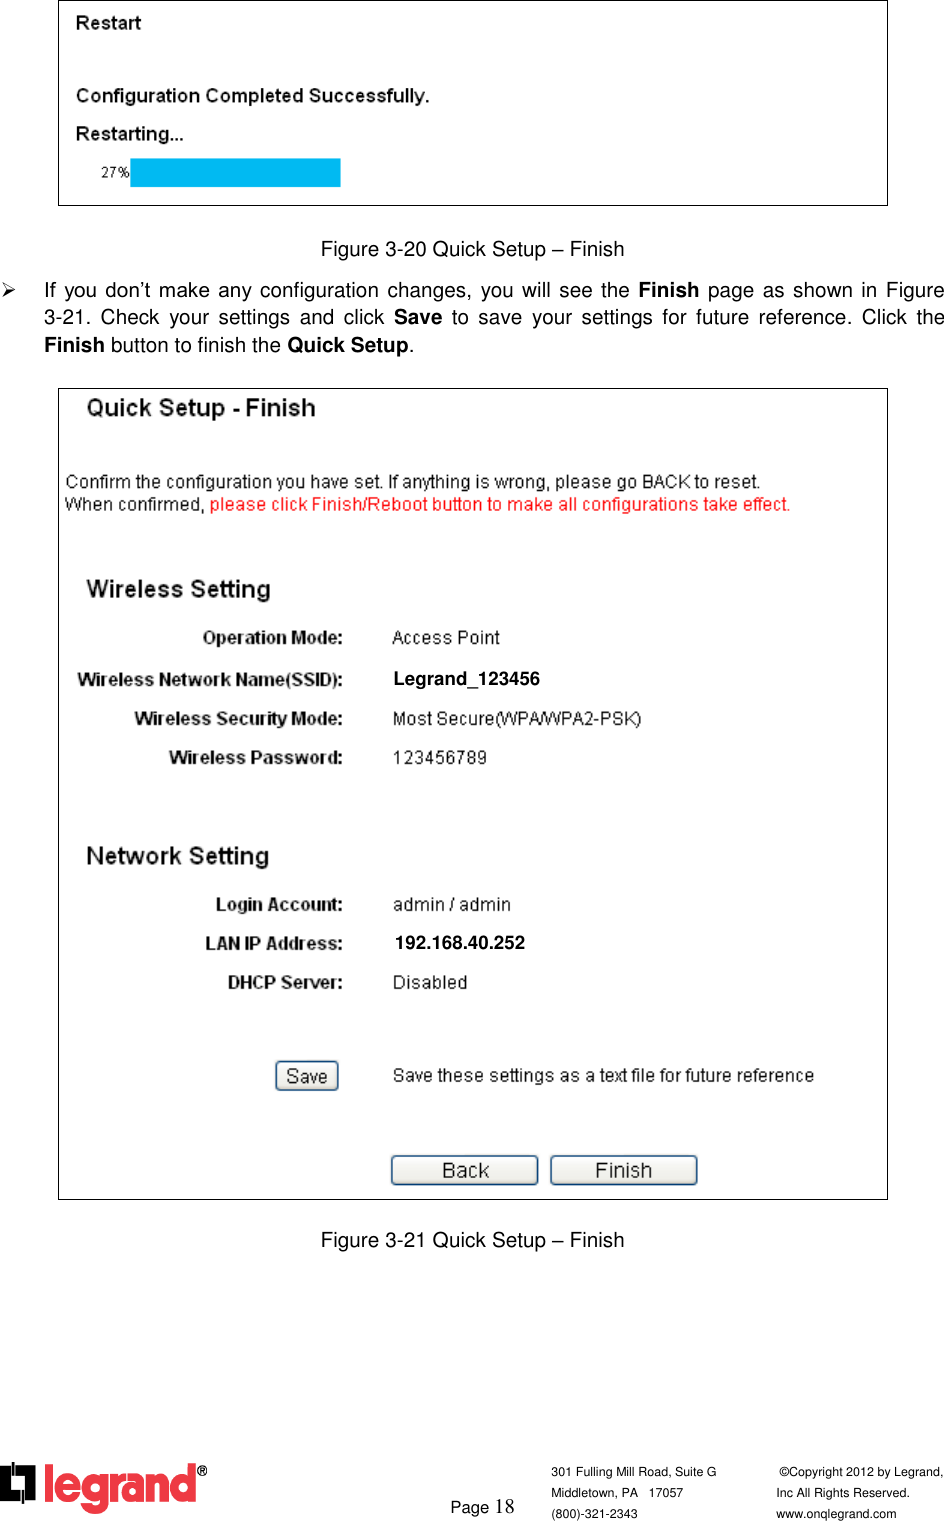
User Man_YV8-DA2155V1_rev
Navigation menu
Upload a User Manual
Namespaces
Wiki Guide
HTML
PDF
Info
Views
User Manual
Discussion / Help
Navigation