Paxar Monarch Dos Based Pathfinder Ultra System 6035 Users Manual Toc
6035 to the manual 0e794b26-0a89-4bc5-81ce-5e03545e8043
2015-02-06
: Paxar Paxar-Monarch-Dos-Based-Pathfinder-Ultra-System-6035-Users-Manual-517441 paxar-monarch-dos-based-pathfinder-ultra-system-6035-users-manual-517441 paxar pdf
Open the PDF directly: View PDF ![]() .
.
Page Count: 210 [warning: Documents this large are best viewed by clicking the View PDF Link!]
TC6035CMUM Rev. AB 12/01 ©2001 Monarch Marking Systems, Inc. All rights reserved.
Monarch
DOS-based
PATHFINDER
Ultra System

Each product and program carries a respective written warranty, the only
warranty on which the customer can rely. Monarch reserves the right to make
changes in the product and the programs and their availability at any time and
without notice. Although Monarch has made every effort to provide complete
and accurate information in this manual, Monarch shall not be liable for any
omissions or inaccuracies. Any update will be incorporated in a later edition of
this manual.
©2001 Monarch Marking Systems, Inc. All rights reserved. No part of this
publication may be reproduced, transmitted, stored in a retrieval system, or
translated into any language in any form by any means, without the written
permission of Monarch Marking Systems, Inc.
Trademarks
MONARCH®, PATHFINDER®, Ultra® and PATHFINDER Ultra® are registered trademarks of Monarch
Marking Systems, Inc.
6035 is a trademark of Monarch Marking Systems, Inc.
Paxar is a registered trademark of Paxar Corporation.
Microsoft, MS-DOS and Windows are trademarks of Microsoft Corporation.
TrueType is a trademark of Apple Computer, Inc.
Hewlett-Packard is a trademark of Hewlett-Packard Company.
CG Triumvirate and CG Triumvirate Bold are trademarks of AGFA Monotype Corporation.
Monarch Marking Systems, Inc.
170 Monarch Lane
Miamisburg, OH 45342
Table of Contents i
TABLE OF CONTENTS
Introduction..........................................................................................1-1
Features ...........................................................................................1-1
Terms to Know ..................................................................................1-2
Label Sizes .......................................................................................1-3
How this Manual is Organized ............................................................1-4
Getting Started..................................................................................... 2-1
Using the Keypad and the Display....................................................... 2-2
Using the Function Keys.................................................................. 2-3
Using the Most Common Keys ............................................................ 2-4
Reading the Display........................................................................... 2-4
Entering a Sample Format..................................................................2-5
Printing the Sample Format ................................................................2-8
Using the Operator Data Entry Form ...................................................2-9
Sample Operator Data Entry Form ................................................. 2-10
Operator Data Entry Form Page 1 .................................................. 2-11
Operator Data Entry Form Page 2 .................................................. 2-12
Configuring the Printer..........................................................................3-1
General Options ................................................................................ 3-2
Toggle Backlight.............................................................................3-2
Set Print Method............................................................................. 3-3
Set Date ........................................................................................3-3
Set Time ........................................................................................ 3-3
Set I2 of 5 Scan Lengths ................................................................. 3-4
Reset/Clear Formats .......................................................................3-4
Select Currency..............................................................................3-4
Set Supply Type ............................................................................. 3-5
Suppress Warnings.........................................................................3-5
Format Header Options ......................................................................3-5
Generate Fmt Name........................................................................3-6
ii Table of Contents
Format Text Options ..........................................................................3-6
Use Default Gap ............................................................................. 3-6
Use Default Color ........................................................................... 3-7
Set Default Color ............................................................................ 3-7
Use Default Character Rotation ....................................................... 3-7
Format Bar Code Options...................................................................3-8
Use Default UPC Appearance .......................................................... 3-8
Set Default UPC Appearance...........................................................3-8
Use Default Alignment.....................................................................3-8
Designing a Format .............................................................................. 4-1
Design Overview ............................................................................... 4-1
Determining Format Data ...................................................................4-1
Determining the Print Area .................................................................4-2
Drawing Rough Sketches ................................................................... 4-2
Using Supply Layout Grids ................................................................. 4-3
Considering Field Types..................................................................... 4-4
Starting the Design Process ............................................................... 4-6
Placing Fields on a Format................................................................. 4-7
Defining Text Fields.............................................................................. 5-1
About Text Fields .............................................................................. 5-1
Entering a Sample Text Field.............................................................. 5-6
Printing the Sample Text Format......................................................... 5-9
Using a Combo Text Field ................................................................ 5-10
Entering a Sample Combo Text Field ................................................ 5-12
Printing the Sample Combo Format................................................... 5-17
Defining Bar Code Fields ......................................................................6-1
About Bar Code Fields ....................................................................... 6-1
Setting the Appearance ................................................................... 6-5
Setting the Density ......................................................................... 6-6
Entering Simple Bar Code Fields ........................................................ 6-6
Sample 1: Simple Fixed Bar Code .................................................... 6-7
Printing the Simple Fixed Bar Code Format ......................................... 6-9
Sample 2: Simple Variable Bar Code.............................................. 6-10
Printing the Simple Variable Bar Code Format ................................... 6-13
Table of Contents iii
About Combo Bar Code Fields.......................................................... 6-14
Entering a Sample Combo Bar Code Field ......................................... 6-15
Printing the Sample Combo Bar Code Format .................................... 6-22
Bar Code Specifications ................................................................... 6-24
UPC Bar Codes ............................................................................ 6-24
EAN Bar Codes ............................................................................ 6-25
Code 128 Bar Codes..................................................................... 6-25
MSI ............................................................................................. 6-26
Interleaved 2 of 5 Bar Codes ......................................................... 6-26
Code 39 Bar Codes....................................................................... 6-26
Codabar Bar Codes ...................................................................... 6-27
Code 93 ....................................................................................... 6-27
Defining Constant Text Fields................................................................ 7-1
About Constant Text Fields ................................................................ 7-1
Entering a Sample Constant Text Field................................................7-5
Printing the Sample Constant Text Format........................................... 7-8
Defining Line Fields..............................................................................8-1
About Line Fields ..............................................................................8-1
Entering a Sample Line Field (Segments) ............................................ 8-3
Printing the Sample Line (Segment) Format.........................................8-5
Entering a Sample Line Field (Vectors) ............................................... 8-5
Entering a Sample Line Field (Vectors) ............................................... 8-6
Printing the Sample Line (Vector) Format ............................................8-8
Defining Special Fields ......................................................................... 9-1
About Price and System Date/Time Fields ........................................... 9-1
Entering a Sample Price Field ............................................................9-7
Printing the Sample Price Format........................................................9-9
Entering a Sample Date/Time Field ................................................... 9-11
Printing the Sample Date/Time Format .............................................. 9-14
Applying Data Edits ............................................................................ 10-1
Using Data Edits ............................................................................. 10-2
Printing the Format ....................................................................... 10-5
Padding Data ............................................................................... 10-6
Printing the Format ....................................................................... 10-9
iv Table of Contents
Extracting Characters ................................................................. 10-10
Printing the Format ..................................................................... 10-13
Stripping Characters ................................................................... 10-14
Printing the Format ..................................................................... 10-17
Extracting Characters from the Middle.......................................... 10-18
Printing the Format ..................................................................... 10-21
Inserting Characters ................................................................... 10-21
Inserting Characters ................................................................... 10-22
Printing the Format ..................................................................... 10-25
Make Into Price .......................................................................... 10-26
Printing the Format ..................................................................... 10-27
Make Into Shoe Size ................................................................... 10-27
Printing the Format ..................................................................... 10-31
Editing a Format................................................................................. 11-1
Copying a Format ............................................................................ 11-1
Editing a Field................................................................................. 11-2
Adding a Field .............................................................................. 11-2
Printing the Format ....................................................................... 11-4
Deleting a Field ............................................................................ 11-4
Printing the Format ....................................................................... 11-6
Modifying an Existing Field............................................................ 11-6
Printing the Format ....................................................................... 11-9
Changing Header Information ........................................................ 11-9
Printing the Format ..................................................................... 11-12
Deleting a Format.......................................................................... 11-13
Troubleshooting ................................................................................. 12-1
Troubleshooting Information ............................................................. 12-2
If You Receive an Error Message................................................... 12-2
Calling Technical Support.............................................................. 12-2
Table of Contents v
Data Errors ..................................................................................... 12-3
Format Errors (1 - 99) ................................................................... 12-3
Batch Errors (100 - 199)................................................................ 12-5
Option Errors (200 - 249) .............................................................. 12-5
Online Configuration Errors (250 - 299) .......................................... 12-6
Check Digit Errors (300 - 324) ....................................................... 12-7
General Packet Errors (400 - 435).................................................. 12-8
Data Formatting Failures.................................................................. 12-9
Machine Faults.............................................................................. 12-10
Sample Formats ...................................................................................A-1
Item Pricing ......................................................................................A-1
Item Identification............................................................................A-12
Receiving/Inventory .........................................................................A-19
Using Fonts .........................................................................................A-1
Monospaced Font Magnification..........................................................B-2
Height Magnification .......................................................................B-2
Proportional Font Magnification ..........................................................B-3
Height Magnification .......................................................................B-3
Height Magnification .......................................................................B-4
Height Magnification .......................................................................B-4
Height Magnification .......................................................................B-5
Height Magnification .......................................................................B-5
Height Magnification .......................................................................B-6
Height Magnification .......................................................................B-7
Height Magnification .......................................................................B-7
Height Magnification .......................................................................B-8
Height Magnification .......................................................................B-8
Height Magnification .......................................................................B-9
Height Magnification .....................................................................B-10
vi Table of Contents

Introduction 1-1
INTRODUCTION
The Monarch DOS-based Pathfinder Ultra Configurable printer lets
you design custom labels to fit your needs. You can use the printer for a
variety of applications.
♦ Print in-store merchandise marking labels to mark every item in your
store with scannable bar codes for increased data accuracy.
♦ Print shelf labels with the product bar code number, description, and
price.
♦ Print labels for restocking of merchandise. Just scan a bar-coded
product and the printer duplicates the bar code.
♦ Print warehouse carton labels for easy carton sorting.
Features
The flexibility of this printer also provides you with the ability to:
♦ Print a variety of tags ranging from .55 to 4.0 inches in length.
♦ Print numeric, alphanumeric, or special characters. You can print 14
fonts: monospaced or proportionally spaced fonts.
♦ Use 24 different bar codes.
♦ Print horizontally or vertically on the label.
♦ Design data entry prompts for the Operator.
♦ Scan bar codes.
♦ Select different currency symbols for International use.
♦ Print combination fields. This feature allows the Operator to enter data
once, and use it in multiple fields.
1

1-2 Introduction
Terms to Know
Barrier bar The horizontal bars above and below I2of5 bar codes used
to ensure a clean scan and avoid partial scans.
Baseline Bottom of the font.
Check digit A number added to a bar code ensuring that the bar code
data is read accurately.
Fixed length bar
code
A bar code with a fixed character length: UPC-A, UPC-E,
EAN-8, and EAN-13.
Font The print style of text.
Format The layout of data on a label. The format determines where
and how data appears on a label.
Horizontal bar
code or text
Data that prints across the width of a label.
Human Readable
characters
The characters that are visible such as a text field. Bar
codes embed characters.
Intercharacter gap Default spacing between characters in monospaced fonts.
Monospaced font Font with fixed character spacing such as Letter Gothic.
Number system
code
A number added to a bar code ensuring that the bar code
data is read accurately.
Overlay The placement of one field over another such as a line on
top of a price signifying a price reduction.
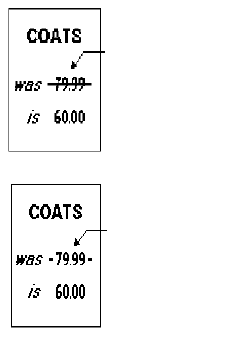
79.99
Pad Characters Characters that are added to the left or right of a field
allowing you to fill in empty spaces when the entered data
does not fill an entire field. For example, the Operator
enters “23” and the format automatically adds zeros: 2300.
Prompt A message on the printer’s screen that tells you to
enter/scan data.

Introduction 1-3
Proportionally
spaced font
Font with variable character spacing – all characters have
different widths. For example, an “i” versus a “w.”
Proportionally spaced fonts include CG Triumvirate, CG
Triumvirate Condensed, and CG Triumvirate Bold.
Quiet Zone An area of white space required at the beginning and end of
a bar code to allow scanning. Also at the beginning/end and
edges of a label. Also know as non-print zone.
Segment line type A line type with a starting point and an end point.
Start/stop
character
Distinct characters used at the beginning and end of each
bar code symbol that provides initial timing references and
indicates the direction of scanning.
Variable length
bar code
A bar code of variable character length: I2 of 5, Code 39,
Codabar, Code 128, MSI, PostNet, and Code 93.
Vector line type A line type with a starting point, angle, and length of line.
Vertical bar code
or text
Data that is rotated and prints down the length of a label.
Void Light area on a label in a bar code or text.
Label Sizes
The printer allows you to print the following label sizes.
Supported Supply
Widths:
1.20 Inches
1.50 Inches
2.00 Inches
Supported Supply Lengths:
.55 inches
.785 inches
1.1 inches
1.5 inches
2.0 inches
3.0 inches
4.0 inches
NOTE: Most of the sample formats in this manual use 2” X 2” labels unless
indicated otherwise.
Call 1-800-543-6650 for more information about the various label sizes and
label types available with this printer.

1-4 Introduction
How this Manual is Organized
Chapter 1 Introduction Provides an overview of the printer and
terms to know.
Chapter 2 Getting Started Provides a checklist to get you started,
keypad tips, and a sample format.
Chapter 3 Configuring the Printer Tells you how set defaults for your printer
and select print methods.
Chapter 4 Designing a Format Provides instructions on how to determine
the kind of data you want on a label and
where to place the data.
Chapter 5 Defining Text Fields Tells you how to design a text field.
Chapter 6 Defining Bar Code
Fields
Tells you how to design a bar code field.
Chapter 7 Defining Constant Text
Fields
Tells you how to design a constant text
field.
Chapter 8 Defining Line Fields Tells you how to design lines and
borders.
Chapter 9 Defining Special Fields Tells you how to design time, date, and
price fields.
Chapter 10 Applying Data Edits Tells you how to pad data, extract data,
and insert it into another field.
Chapter 11 Editing a Format Tells you how to change a format.
Chapter 12 Troubleshooting Provides solutions to the most common
errors and provides a list of all error
codes.
Appendix A Sample Formats Provides sample formats of various
applications.
Appendix B Using Fonts Provides information about fonts.

Getting Started 2-1
GETTING STARTED
This chapter tells you how to start using the printer and provides a
sample format to show you how easy it is to create your labels.
NOTE: Before you begin, read the Equipment Manual that came with your
printer.
Use this checklist when creating a format.
✔ Load labels into the printer.
✔ Charge the battery handle.
✔ Configure the printer. Refer to Chapter 3, “Configuring the Printer.”
✔ Create a format, which is the layout of your data on a label. Refer to
Chapter 4, “Designing a Format.”
✔ Print and test your label.
✔ Prepare an Operator Data Entry form for the Operator. Refer to “Using the
Operator Data Entry Form” at the end of this chapter.
2
2-2 Getting Started
Using the Keypad and the Display
Your printer has an 8-line display and a 48-key keypad. This section
provides tips on
♦ Navigating through the screens on the display
♦ Using the most commonly used keys.
Getting Started 2-3
Using the Function Keys
The key combinations on the list below make scrolling and navigating easier.
Key Combination Description
f 1 Turns the backlight on the display on or off.
f 2 Sets the print method.
f 3 Select the currency symbol.
f 4 Battery Level Status
f 5 Exit
f 6 Set the supply type.
f <Home> Takes you to the beginning of a list. NOTE: If you have 11
formats, pressing f <Home> takes you to format 1.
f <End> Takes you to the end of a list. NOTE: If you have 11 formats,
pressing f <End> takes you to format 11.
f <PgUp> Takes you to the beginning of a list on the display. Pressing
f <PgUp> again moves one full screen length up. NOTE: If
you see options 3 through 10 on the display, pressing f
<PgUp> takes you to option 3.
f <PgDn> Takes you to the end of a list on the display. Pressing f
<PgDn> again moves one full screen length down. NOTE: If
you see options 3 through 10 on the display, pressing f
<PgDn> takes you to option 10.
NOTE: See the Equipment Manual for information about using special
characters.
2-4 Getting Started
Using the Most Common Keys
The keys listed below are the most commonly used.
Key Description
b Returns you to the previous screen.
g Moves the cursor the left and deletes the character on the left.
e Accepts your selection.
ç,è,é,ê Scrolls left, right, up, or down through the options on the display.
When your selection is highlighted, press e.
ç,è,
fç,
fè
Left and right move the cursor inside an entry. When inside an
entry, fç moves the cursor to the extreme left (beginning of
data) and fè moves the cursor to the extreme right (end of
data).
s Toggles between upper case and lower case/numeric.
fs Enters Caps lock.
f Ins Toggles between overwrite mode and normal mode. In overwrite
mode, when you type, it replaces characters.
NOTE: See the Equipment Manual for more information.
Reading the Display
The icons listed below tell you what data entry mode you are in.
If you see You are in
F Function Key Mode.
é Upper-case Alpha Mode.
X Delete Mode. Pressing g deletes the current character.
L Caps Lock Mode.
NOTE: See the Equipment Manual for more information.
Getting Started 2-5
Entering a Sample Format
Turn on the printer. You will see the Main Menu.
- = Main Menu = -
1. Design Formats
2. Print Labels
3. Configuration
1. Press 1 to design your formats.
- = Design Menu = -
1. Create New Format
2. Edit Old Format
3. Copy Format
4. Delete Format
2. Press 1 to create a new format.
Enter Format Name
> _ _ _ _ _ _ _ _ _ _ _ _ _
L
3. Type SIZE. Press e.
Enter Length of
supply (55 – 400)
(eg. 400 = 4 inches)
> _ _ _
4. Type 200 for a 2-inch long label. Press
e.
Select Supply Width
1. 1.20 Inches
2. 1.50 Inches
3. 2.00 Inches
5. Press 3 for the supply width.
Select Type: Fld #1
1. Text Field
2. Bar Code Field
3. Constant Text
4. Line
5. Finished
6. Press 1 to define a text field.
Select Field Class
1. Simple Field
2. Price Field
3. System Date/Time
4. Complex (Merged)
7. Press 1 to define a simple field.
Numeric or
Alpha-Numeric Data?
A/N > _
L
8. Press A (alpha-numeric).
Enter Max. Length
> _ _ _ 9. Type 10 as the maximum number of characters
in the field. Press e.
2-6 Getting Started
Enter Min. Length
> _ _ _ 10. Type 1 as the minimum number of characters
in the field. Press e.
Enter Field Prompt
> _ _ _ _ _ _ _ _ _ _ _ _ _ _ _ _
L
11. Type ENTER SIZE. Press e.
Enter Fixed Data
Press ENTER if none
> _ _ _ _ _ _ _ _ _ _ _ _ _ _ _ _
L
12. Type /TL for the fixed data. Press e.
Add fixed data
Before or After
entry chars? B/A
> _
L
13. Press A to print the fixed data after the entry
characters.
Enter Row #
> _ _ _ 14. Type 100 for the row location. Press e.
Enter Col. #
> _ _ _ 15. Type 10 for the column location. Press
e.
- = Select Font = -
1. CG Trium 6.5 1000
2. CG Trium 8 pt 1001
3. CG Trium 10p 1002
4. CG Trium 12p 1003
5. CG Trium 18 p 1004
6. CG Trium 22p 1005
7. CG TrCon 6.5 1006
8. CG TrCon 8 pt 1007
9. CG TrCon 10p 1008
10. CG TrCon 12p 1009
11. CG TrCon 18p 1010
12. CG TrCon 22p 1011
13. LetGoth 6.5 1012
14. LetGoth 9pt 1013
16. Select CG Trium 8 pt 1001. Press e.
Enter Height Mag for
this font (1-7) > _ 17. Press 1 for the height magnification.
Enter Width Mag for
this font (1-7) > _ 18. Press 1 for the width magnification.
Getting Started 2-7
Set Justification
1. Left (L)
2. Right (E)
3. Center (B)
19. Press 1 for the alignment of characters in
the field.
Top of Field at:
1. Top of Supply
2. Left of Supply
3. Bottom of Supply
4. Right of Supply
20. Press 1 for the field rotation.
Select Edit #1
1. None
2. Make into Price
3. Pad Data Field
4. Extract Chars
5. Strip Chars
6. Extract from Mid
7. Insert Chars
8. Make Shoe Size 21. Press 1 for no data edits. See Chapter 10,
“Applying Data Edits,” for more information.
Select Type:Fld#2
1. Text Field
2. Bar Code Field
3. Constant Text
4. Line
5. Finished
22. Press 5.
Save current
format? Y/N > _ 23. Press Y to save the format. You return to the
Design Menu.
2-8 Getting Started
Printing the Sample Format
After designing your format, print it to see how it looks.
- = Design Menu = -
1. Create New Format
2. Edit Old Format
3. Copy Format
4. Delete Format
1. Press b to exit the Design Menu.
- = Main Menu = -
1. Design Formats
2. Print Labels
3. Configuration
2. Press 2 to print your format.
Select Format
to Print
- = Format Menu - =
01 SIZE
3. Select SIZE and press e.
ENTER SIZE
_ _ _ _ _ _ 4. Type XLarge. Press e. The label prints.
Printed: 1
5. Press the trigger to print another label or press
b to return to the prompt and print a different
label.

Getting Started 2-9
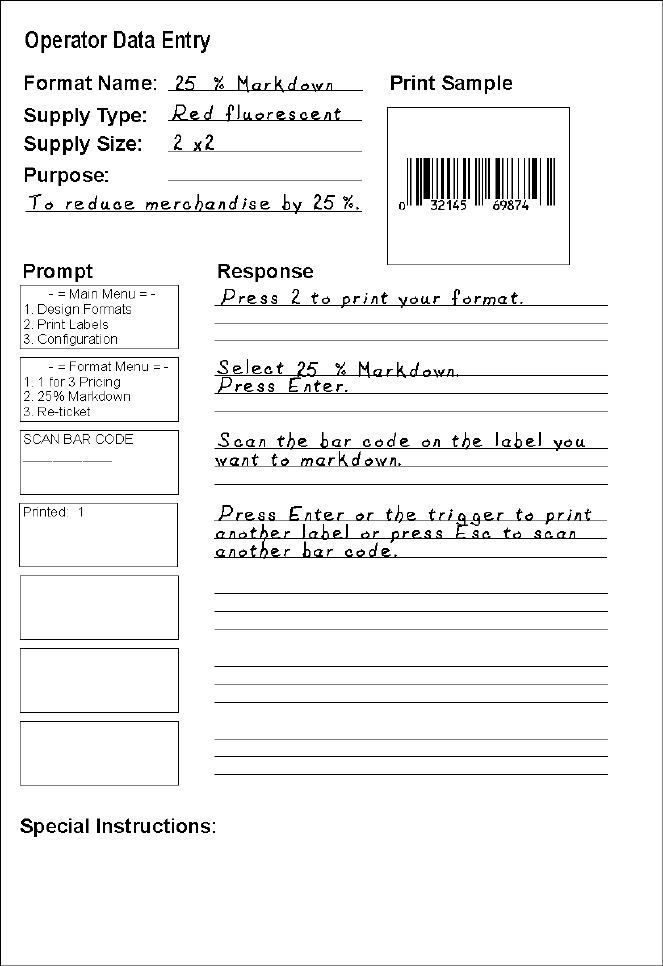
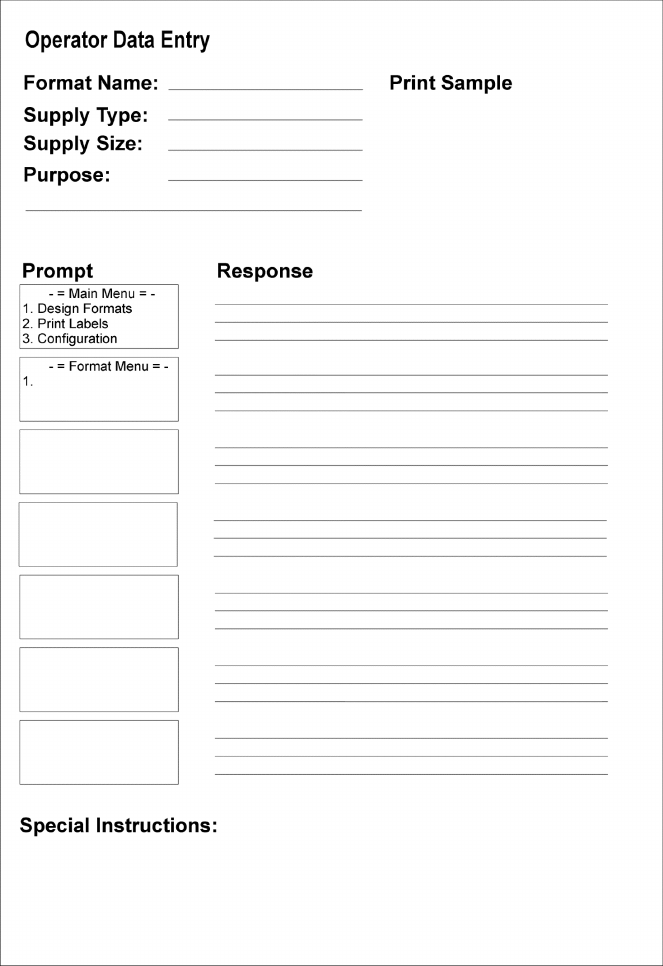
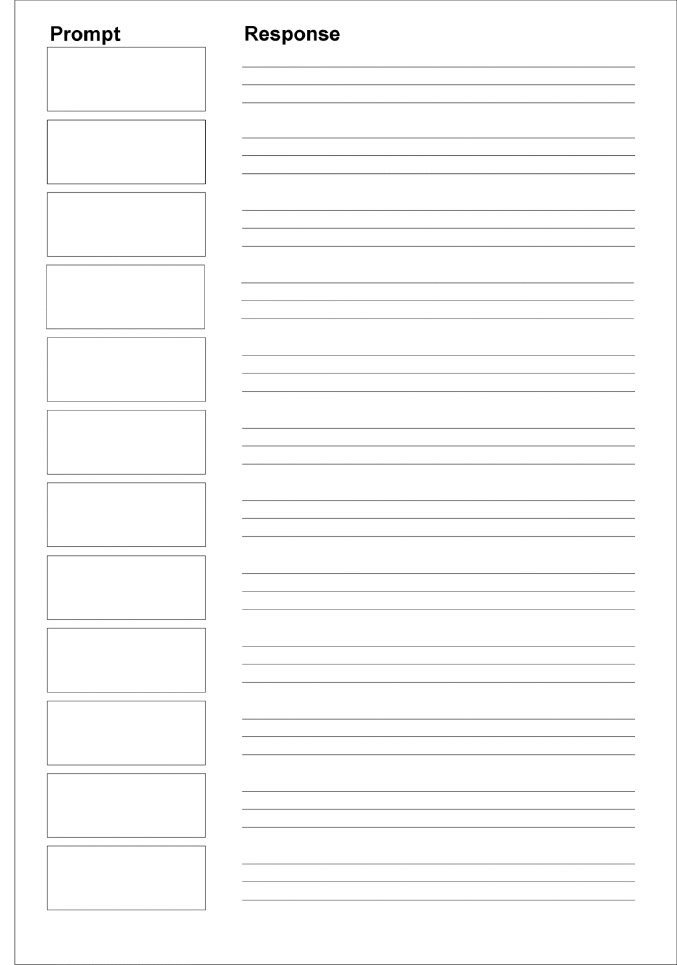
Using the Operator Data Entry Form
After you create a format, fill out the operator data entry form. This form can
be used as an instruction sheet for your operators to follow while they print
labels. Record the data entry prompts that the operator will see when using
the printer.
Follow these steps to record the data entry procedures.
1. Format Name Enter the Format Name in the upper right corner of
the form.
2. Supply Type Enter information about the supply type the Operator
must use.
3. Supply Size Enter the supply size to use.
4. Purpose Enter the purpose of the label on the next line. For
example, you can write standard label or 25%
markdowns.
5. Print Sample Apply a sample of the label.
6. Prompt Enter the first data entry prompt in the empty box at
left.
7. Response Enter the response for the prompt. Continue entering
prompts and responses until you reach the end of the
format.
8. Special Instructions In the "Special Instructions" section at the bottom of
the form, record any special instructions to the
Operator. For example, you can tell them to load the
labels for peel mode.
Blank forms are provided at the end of the chapter for you to copy.
2-10 Getting Started
Sample Operator Data Entry Form
Getting Started 2-11
Operator Data Entry Form Page 1
2-12 Getting Started
Operator Data Entry Form Page 2

Configuring the Printer 3-1
CONFIGURING THE PRINTER
The printer’s configuration sets both hardware and software
options. For example, you can set defaults for the printer to use during
format design and printing. This chapter describes the configurable options.
To get started, go to the Main Menu. When you see:
-=Main Menu=-
1. Design Formats
2. Print Labels
3. Configuration
1. Press 3. The Configuration Main Menu.
-Config. Main Menu-
1.General Options
2.Fmt Header Optns
3.Fmt Text Options
4.Fmt Barcode Optns
2. Select the option you want to configure.
Selections on the Configuration Main Menu are:
General Options Sets up the printer’s backlight, print method, date,
time, scan lengths for I2 of 5 bar codes, currency
symbol, and supply type. It also deletes formats
and turns off warning messages.
Format Header Options Sets up how you can identify the format you are
printing or editing.
Format Text Options Sets up the default settings for text fields during
Format Design.
Format Barcode Options Sets up the default settings for bar code fields
during Format Design.
NOTE: When you finish configuring the printer, press b until you return to
the Main Menu.
3

3-2 Configuring the Printer
General Options
To set miscellaneous options, go to the General Options Menu. When you
see:
-=General Options=-
1. Toggle Backlight
2. Set Print Method
3. Set Date
4. Set Time
5. Set I2of5 ScanLen
6. Reset/Clear Fmts
7. Select Currency
8. Set Supply Type
9. Suppress Warnings
Select an option (1-9).
Toggle Backlight
Turn the backlight on or off. The General Options Menu remains on the
screen.
Configuring the Printer 3-3
Set Print Method
Select Print Method
Auto Print 1 Label
Print Strips
Print Loop –Trigger
On-Demand Printing
On-Demand w/Limit
Full Auto
Scroll to select a print method (described below)
and press e. The General Options Menu
appears. Default: Print Loop - Trigger.
Auto Print 1 Label Prints one label.
Print Strips Prints a strip of labels, prompting the operator for a
quantity.
Print Loop – Trigger Prints one label at a time, printing another at the press
of any key or the trigger. Press b to end.
On-Demand Printing Peel Mode Only. Prints labels one at a time,
continuing only after you remove the previous one.
Press b to end.
On-Demand w/Limit Peel Mode Only. Prints labels one at a time,
continuing only after you remove the previous one.
The software prompts the operator for a quantity.
Full Auto Prints a strip of labels at one time. Press b to end.
Set Date
Current date is Thu
2-08-2001
Enter new date (mm-d
d-yy):
Enter the date (with a four-digit year), and press
e. If the date is correct, press e.
The General Options Menu appears.
Set Time
Current time is 03:0
0:34.65p
Enter new time:
Enter the time (including a colon to separate the
hour and minute). To indicate a.m. or p.m.,
include an a or p at the end. For example, 5:00p.
24-hour mode also works. When finished, press
e. If the time is already correct, press
e. The General Options Menu appears.
3-4 Configuring the Printer
Set I2 of 5 Scan Lengths
I2 of 5 bar codes are used in industrial environments and contain only
numeric data. This menu option specifies the two valid data lengths (number
of digits) when you scan this bar code. See Chapter 6, “Defining Bar Code
Fields,” for more information about I2 of 5 bar codes.
Enter I2of5 Scan
Length #1 >_ _ 1. Enter the first length and press e.
Enter I2of5 Scan
Length #2 >_ _ 2. Enter the second length and press e.
The General Options Menu appears.
NOTE: Both lengths must be an even number.
Reset/Clear Formats
Delete All Formats?
Are you sure? Y/N
L
Press Y to delete all formats in the printer. Press
N to keep the formats. The General Options
Menu appears.
CAUTION: You cannot undo a deletion.
Select Currency
-Select Currency-
US Dollars
French Francs
Spanish Pesetas
Belgian Francs
German Marks
British Pounds
Euro
Swedish Krona
Danish Marks
Austrian Schilling
Japanese Yen
Scroll to select the currency symbol to use with
price fields and press e. The General
Options Menu appears. Default: US Dollars.
Configuring the Printer 3-5
Set Supply Type
Select Supply Type
1. Paper Label/Tag
2. Fax Paper
3. Synthetic Label
Select the type of supplies (1-3) you are using.
The General Options Menu appears. Default:
Paper Label/Tag.
Suppress Warnings
Suppress Warnings:
Disabled
Change? Y/N:
L
Specify whether to display warning messages.
Default: Disabled.
Press Y to enable or disable the option. Then,
press e to return to the General Options
Menu.
Setting Description
Enabled Warning messages will not appear on
the display.
Disabled Warnings messages will appear on
the display. This value is the default.
Press N to cancel and return to the General
Options Menu.
See Chapter 4, “Designing a Format,” to learn
about a case where you might want to suppress
warnings.
Format Header Options
Format Header Options allow operators to select the format label they want
to print and allow you to edit a format you have created. When you see:
Format Header Optns
1. Generate MPCL Num
2. Generate Fmt Name
3. Skip Desc. Prompt
Press 2 to select Generate Fmt Name.
NOTE: Generate MPCL Num and Skip Desc. Prompt are for future use.
3-6 Configuring the Printer
Generate Fmt Name
Auto-Assign Format
Name for Menu? N
(Default = N)
L
Press Y for the software to automatically assign
format names, or press N to prompt the operator
for a name. The Format Header Options Menu
appears. Default: N.
When you assign a name, we recommend that
you use a meaningful name that the operator can
easily identify, such as “20% Sale.”
Format Text Options
To set options for text fields, you must go to the Format Text Options Menu.
When you see:
-Format Text Optns-
1. Use Default Gap
2. Use Default Color
3. Set Default Color
4. Use Dflt Char Rot
Select an option (1-4).
NOTE: See Chapter 5, “Defining Text Fields”, for more information on these
options.
Use Default Gap
Use Default Gap
Value (0) in Text
Fields? Y
(Default = Y)
L
The gap is the number of dots (basic units of
print) between characters. Press Y to use the
default gap value of 0 in the formats, or press N
to prompt the operator for a value. The Format
Text Options Menu appears. Default: Y.

Configuring the Printer 3-7
Use Default Color
Use Default Color
(0) in Text
Fields? Y
(Default = Y)
L
Press Y to use the default color for text fields, or
press N to prompt the operator for a value. The
Format Text Options Menu appears. Default: Y.
NOTE: You set the default color with the next menu selection—Set Default
Color.
Set Default Color
Sel. Default Color
1. Black –Opaque
2. White –Opaque
3. Black –Transpar.
4. White –Transpar.
Select the color (1-4) to you want to use. The
Format Text Options Menu appears. For more
information about font colors, see Chapter 5,
“Defining Text Fields.” Default: Black -Transpar.
Use Default Character Rotation
Use Default Char.
Rotation (0) in
Text Fields? Y
(Default = Y)
L
Press Y to use the default character rotation (0)
in text fields, or press N to prompt the operator
for a value. The Format Text Options Menu
appears. For more information about character
rotation, see Chapter 5, “Defining Text Fields.”
Default: Y.
3-8 Configuring the Printer
Format Bar Code Options
To set options for bar code fields, go to the Format Bar Code Options Menu.
When you see:
-Fmt Barcode Optns-
1. Use Dflt UPC Appr
2. Set Dflt UPC Appr
3. Use Default Align
Select an option (1-3).
NOTE: See Chapter 6, “Defining Bar Code Fields”, for more information on
these options.
Use Default UPC Appearance
Use Default
Appearance (8) for
UPC/EAN Barcodes? Y
(Default = Y)
L
Press Y to use the default bar code appearance
in UPC and EAN bar code fields (others use non-
human readable only), or press N to prompt the
operator during field definition. The Format Bar
Code Options Menu appears. Default: Y.
NOTE: You set the default appearance with the next menu selection—Set
Default UPC Appearance.
Set Default UPC Appearance
Sel Dflt Appearance
1. No C/D or Num Sys
2. Number Sys. Only
3. Check Digit Only
4. Chk Dig & Num Sys
5. No Human Readable
Select a bar code appearance for UPC and EAN
bar code fields. The Format Bar Code Options
Menu appears. See Chapter 6, “Defining Bar
Code Fields,” for more information about bar code
appearances. Default: No Human Readable.
Use Default Alignment
Use Default
Alignment (L) in
Barcode Fields? Y
(Default = Y)
L
Press Y to use the default alignment (L = left
justification) in bar code fields, or press N to
prompt the operator for the justification. The
Format Bar Code Options Menu appears.
Default: Y.

Designing a Format 4-1
DESIGNING A FORMAT
This chapter describes how to
♦ determine what kind of information to use in your format.
♦ draw a rough sketch of your label or tag using the Supply Layout Grid
before you create the format.
♦ categorize data into field types (text, bar code, price, etc.).
♦ select fonts to use in your format.
Design Overview
Before you create a format, you must design your label.
1. Decide which fields should appear on your label. See "Determining
Format Contents" for more information.
2. Determine your label size. Labels are available from Monarch in a wide
variety of sizes. Your application and the amount of data you need to
print determines the supply size. Contact Monarch Marking for more
information.
3. Draw a rough sketch of your label. You may want to draw several
variations to see what works best. See "Drawing Rough Sketches" for
more information.
4. Identify the field types that appear on your label. See "Considering Field
Types" for more information.
5. Decide which fonts you want to use. See "Considering Fonts" for more
information.
Determining Format Data
Before you lay out your format, you need to make a few decisions. What
data do you want to print on your label? For example:
♦ How large is your supply?
♦ Which fonts do you want to use?
♦ Do you want to include a bar code?
4
4-2 Designing a Format
Determining the Print Area
The print area varies, depending on the size of your supply. Below are the
maximum and minimum print areas. Notice that the top edge of the supply
exits the printer first.
Unit of
Measure
Maximum
Supply Size
Maximum
Print Area
Minimum
Supply Size
Minimum
Print Area
English
(1/100")
200 x 400 183 x 365 120 x 55 109 x 46
NOTE: You receive a “field off tag” error if you try to place a field in the
quiet zone (non-printable area).
Supported Supply
Lengths:
.55 inches, .785 inches, 1.1 inches, 1.5 inches,
2.0 inches, 3.0 inches, and 4.0 inches
Supported Supply
Widths:
1.20 inches, 1.50 inches, and 2.0 inches
Drawing Rough Sketches
As you sketch your design, you should:
♦ Identify the items you want on the label,
such as a price and bar code.
♦ Select a label size.
♦ Determine the direction of printing.
♦ Place items on the label roughly where
you would like them to appear in the
finished design.
♦ Mark any areas that are preprinted on the
label, such as a logo.
As soon as you know what information to
include on the label, and you have a rough
sketch, you can use a supply layout grid to
help you layout and size your label.
Designing a Format 4-3
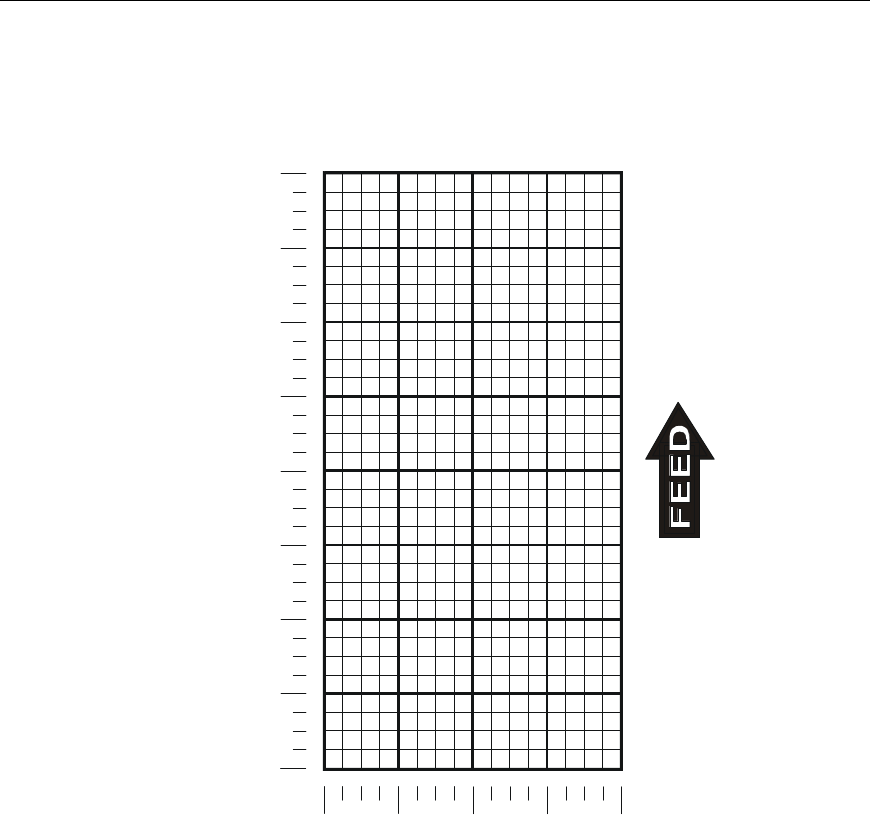
Using Supply Layout Grids
A supply layout grid contains measurement markers. These markers help
you accurately position information on your label.
If you want to use supply layout grids, a copy is shown on this page. Make
copies of this page for each of your formats.
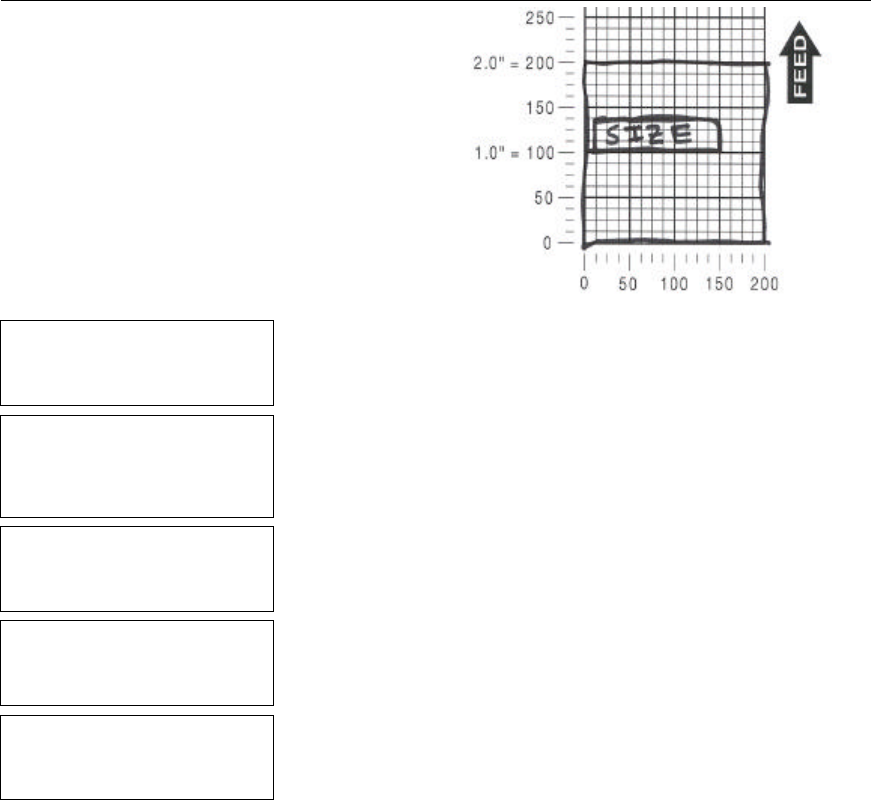
Supply Layout
(Inches)
4.0" = 400
350
3.0" = 300
250
2.0" = 200
150
1.0" = 100
50
0
0
50
100
150
200

4-4 Designing a Format
Considering Field Types
After you select a supply size, the next step in designing a format is to
decide what information you want to print on the label. For example, you
may want to print your company name, price of an item, and a bar code that
combines information from other places. Everything you want to print falls
into one of the following categories.
Field Type Field Class Description Examples
Text Simple
Price
Date/Time
Combo
Contains letters,
numbers, or symbols
you want to print.
Item number, item
description, department
number, price, date
Bar Code Simple
Price
Date/Time
Combo
Used for printing bar
codes that can be
scanned.
Item or serial numbers, zip
codes, information you do
not want to have visible to
customers
Constant
Text
N/A Prints fixed characters
that print without
changing.
Company name or
company address
Line N/A Highlights or separates
items.
Line marking out the
regular price
For each field type, keep the following in mind:
Maximum field
length
The maximum number of characters in the field. The number of
characters depends on the font size, label size, whether you are
using a check digit, or if the field is printed horizontally or
vertically. If your data is a price, remember to include the
currency symbol (dollar sign, Franc, etc.) in the length of your
field. See Chapter 3, “Configuring the Printer” for more
information about setting a currency symbol. The range is 0 –
40.
Designing a Format 4-5
Font and Font
Size
When working with fonts, you have three considerations:
♦ font appearance
♦ font size
♦ font spacing (monospaced or proportional)
See Appendix B, "Using Fonts," for more information.
Rotation The rotation of your field or individual characters. Fields and
characters can be rotated 0, 90, 180, or 270 degrees.
Row The horizontal line where printing begins. The number of rows
available depends on the label size you use. You can begin a
field at any row. However, towards the top and bottom of the
label, you must make sure there are enough rows to print the
font size or bar code selected.
Column The vertical line where printing begins. You can begin a field at
any column. However, on the edges of the label, you must make
sure there are enough columns to print all the characters in a
field. Bar codes require a “quiet zone” (non-printing zone) on
each side of the bars for scanning. The quiet zone is .10 inches
per side. Fore more information about bar codes, see Chapter 6,
“Defining Bar Code Fields.”
NOTE: All samples shown in the “Defining Fields” chapters are created
using 2.0-inch long by 2.0-inch wide supplies.
4-6 Designing a Format
Starting the Design Process
Turn on the printer. You will see the Main Menu.
- = Main Menu = -
1. Design Formats
2. Print Labels
3. Configuration
1. From the Main Menu, press 1 to design
your formats.
- = Design Menu = -
1. Create New Format
2. Edit Old Format
3. Copy Format
4. Delete Format
2. Press 1 to create a new format.
Enter Format Name
> _ _ _ _ _ _ _ _ _ _ _ _ _
L
3. Type UPCA for the format name. Press
e.
Enter Length of
supply (55 – 400)
(eg. 400 = 4 inches)
> _ _ _
4. Type 200. Press e.
Select Supply Width
1. 1.20 Inches
2. 1.50 Inches
3. 2.00 Inches
5. Press 3 for your supply width.
Select Type: Fld #1
1. Text Field
2. Bar Code Field
3. Constant Text
4. Line
5. Finished
6. Select a field type (1-5) for field 1.
♦ To define text fields, see Chapter 5, “Defining
Text Fields.”
♦ To define bar code fields, see Chapter 6,
“Defining Bar Code Fields.”
♦ To define constant text fields, see Chapter 7,
“Defining Constant Text Fields.”
♦ To define line fields, see Chapter 8, “Defining
Line Fields.”
♦ Select 5 when finished designing your
format (after all fields are defined).
Save current
format? Y/N > _ 7. Press Y to save the format or press N to exit
without saving the format. You return to the
Design Menu.

Designing a Format 4-7
Placing Fields on a Format
You must be careful where you place a field on a format to ensure it does
not go off the format. There are two ways this can occur. You have placed
the field
♦ on the format, but based on its maximum length, it may go off the edge.
This way causes the software to display a warning, which you can ignore.
See Chapter 3, “Configuring the Printer,” to learn how to suppress the
display of warnings if you prefer to do so.
♦ completely off the format.
This way causes an error. You must redefine the field.
NOTE: Remember that the field can go off the format on any of the four
sides (top, bottom, left, right).
See Chapter 12, “Troubleshooting,” to learn about this error and warning.
4-8 Designing a Format

Defining Text Fields 5-1
DEFINING TEXT FIELDS
Create a separate definition for each text field. There are two types of text
fields:
Simple Contains data entered specifically for that field.
Combo
(combination)
Contains data pulled from up to 10 other fields.
NOTE: If text falls on two lines, each line of text requires a separate
definition.
All samples shown in this chapter are created using 2.0-inch long by 2.0-inch
wide supplies.
About Text Fields
Read the following information to become familiar with the prompts for text
fields. Valid ranges for the prompts are listed as well as information about
using text fields.
Format Name Depending on your printer’s configuration, enter a name for
the format. For more information about your printer’s
configuration, see Chapter 3, “Configuring the Printer.” The
maximum number of characters for the format name is 16.
Format Number Reserved for future use. (Depending on your printer’s
configuration, enter a number for the format. The format
number range is 1 – 99.)
Format
Description
Reserved for future use. (Depending on your printer’s
configuration, enter a description for the format.)
Supply Length The length of your loaded supply. Measure from the top of
one black mark to the top of the next black mark. The
standard supply lengths are: 55, 78, 110, 150, 200, 300, or
400 inches.
5
5-2 Defining Text Fields
Supply Width The width of your loaded supply. Choices include 1.20, 1.50,
or 2.00 inches.
Field Type Choices include text, bar code, constant text, and line.
Field Class Choices include simple, price, system date/time, and combo.
Price and system date/time fields are explained in Chapter 9,
“Defining Special Fields.” Combo (combination) fields are
explained later in this chapter. Simple fields are the most
commonly used.
Type of Data Choices include alphanumeric and numeric. Decide if you
need letters or letters and numbers in your field. When
selecting a font for your data, keep in mind that point sizes
greater than 12 include only the following characters:
0123456789#$%&(),./@DFKLMPS\kprö¢£¥c
Maximum Length The maximum number of characters in the field. The number
of characters depends on the font size, label size, whether
you are using a check digit, or if the field is printed
horizontally or vertically. If your data is a price, remember to
include the currency symbol (dollar sign, cent sign, etc.) in the
length of your field. The range is 0 – 40.
Minimum Length The minimum number of characters in the field.
The range is 0 – 40.
Field Prompt Contains the prompt displayed during data entry. The
maximum number of characters is 40.
Fixed Data In situations where the same data appears on all labels, you
can enter the repetitive data as fixed data. The operator does
not enter the data. The maximum number of characters is 40;
however, each field has a maximum length defined, so the
fixed data must be below that maximum.
Fixed data is stored with the format and automatically
displayed with the prompt during data entry. Fixed data can
also be added before or after entry characters.
An example of fixed data is the manufacturer’s code in a
UPCA bar code.
Defining Text Fields 5-3
Row The horizontal line where printing begins. For monospaced
fonts, distance from the bottom of print area to the pivot point.
The pivot point varies depending on how text is justified.
For proportionally spaced fonts, distance
from the bottom of print area to baseline of
characters in field. The range is 0 – 365.
Column The vertical line where printing begins. Type
the column position for the field. The distance
from the left edge of the print area to the pivot
point is the column location. The range is
0 – 183.
Gap Depending on your printer’s configuration, enter the number of
dots between characters. For more information about your
printer’s configuration, see Chapter 3, “Configuring the
Printer.”
The gap range is 0 – 9. For mono-spaced fonts, the additional
spacing is added to the existing inter-character gap. This is
also true for proportionally spaced fonts, but the inter-
character gap varies with character combinations. Any
number other than 0 affects your field width. Default spacing:
Letter Gothic Bold 6pt 1 dot
Letter Gothic Bold 9pt 2 dots
All other fonts vary with each letter
Use the default unless you want to create a special effect,
such as P R I C E (additional character spacing) in a field.
Baseline
Baseline
5-4 Defining Text Fields
Font The style of font for your format. Choices include CG
Triumvirate Bold 6.5, 8, 10, 12, 18, or 22 point; CG
Triumvirate Bold Condensed 6.5, 8, 10, 12, 18, and 22 point;
and Letter Gothic 6.5 and 9 point.
Height
Magnification
Height magnifier for the selected font. Use a magnifier of 1
with proportionally spaced fonts, because characters lose
smoothness at higher magnifications. The range is 1 – 7.
Width
Magnification
Width magnifier for the selected font. Proportionally spaced
fonts do not have a set width. The range is 1 – 7.
Font Color Depending on your printer’s configuration, enter the color of
the selected font. For more information about your printer’s
configuration, see Chapter 3, “Configuring the Printer.”
Solid black print should not exceed 30% on a given square
inch of the label, or printhead life may be decreased. There
are two types of field color overlay attributes:
Transparent The overlay field (text or
constant text) does not block
out or “erase” existing fields.
Opaque The overlay field blocks out or
“erases” existing fields.
Field placement is an important consideration when using
field color attributes. If a line field is defined before the
overlay (text or constant text) field, the line field is blocked
out by the overlay field, depending on the overlay field's
color attribute. If a line field is defined after the overlay
field, the line field is not blocked out by the overlay field,
regardless of the overlay field's color attribute.
Choices include Black Opaque, White Opaque, Black
Transparent and White Transparent.
Justification Alignment of the text within the field. Choices include Left
(L), Right (E), and Center (B). Fonts 1012 and 1013 (Letter
Gothic 6.5 and 9 pt) default to L (left), regardless of
selection.
Line field
blocked
out by
opaque
field using
attribute B
Line field
not
blocked
out by
transparent
field using
attribute O
Defining Text Fields 5-5
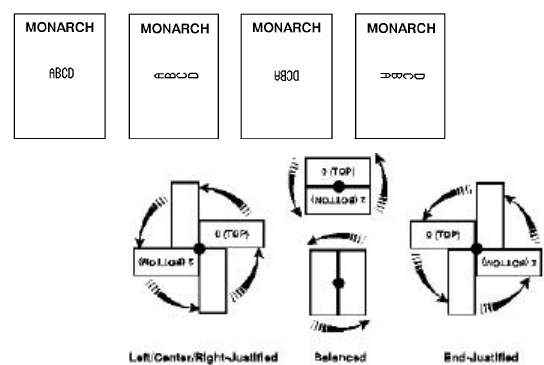
Character
Rotation
Depending on your printer’s configuration, enter the
character rotation of the selected field. For more
information about your printer’s configuration, see Chapter
3, “Configuring the Printer.” Choices include Top of Field,
Left of Field, Bottom of Field, and Right of Field.
The field or supply does not rotate, only the characters do.
See “ABCD” in the example below.
Field Rotation Rotation of the
selected field.
Choices include:
Top of Supply,
Left of Supply,
Bottom of Supply,
and Right of
Supply.
Data Edits Data edits are used on text and bar code (simple and
combo) fields only. For more information about data edits,
see Chapter 10, “Applying Data Edits,” for more information.
Choices include: none, Make into Price, Pad Data Field,
Extract Characters, Extract from Middle, Insert Characters,
and Make Shoe Size.
Only two data edits are allowed per field. Shoe size and
price edits are not allowed for bar code fields.
5-6 Defining Text Fields
Entering a Sample Text Field
We will create a sample format,
SIZE (2.0-inch long by 2.0-inch
wide) and a sample text field, TEXT.
NOTE: This sample uses the
printer’s factory-set
defaults. For more
information about your
printer’s configuration, see
Chapter 3, “Configuring the
Printer.”
- = Main Menu = -
1. Design Formats
2. Print Labels
3. Configuration
1. Press 1 to design your formats.
- = Design Menu = -
1. Create New Format
2. Edit Old Format
3. Copy Format
4. Delete Format
2. Press 1 to create a new format.
Enter Format Name
> _ _ _ _ _ _ _ _ _ _ _ _ _
L
3. Type SIZE for the format name. Press
e.
Enter Length of
supply (55 – 400)
(eg. 400 = 4 inches)
> _ _ _
4. Type 200 for the length of your supply. Press
e.
Select Supply Width
1. 1.20 Inches
2. 1.50 Inches
3. 2.00 Inches
5. Press 3 for the supply width.
Defining Text Fields 5-7
Select Type: Fld #1
1. Text Field
2. Bar Code Field
3. Constant Text
4. Line
5. Finished
6. Press 1 to define a text field.
Select Field Class
1. Simple Field
2. Price Field
3. System Date/Time
4. Combo (Merged)
7. Press 1 to define a simple field.
Numeric or
Alpha-Numeric Data?
A/N > _
L
8. Press A (alpha-numeric).
Enter Max. Length
> _ _ _ 9. Type 10 as the maximum number of
characters in the field. Press e.
Enter Min. Length
> _ _ _ 10. Type 1 as the minimum number of characters
in the field. Press e.
Enter Field Prompt
> _ _ _ _ _ _ _ _ _ _ _ _ _ _ _ _
L
11. Type ENTER SIZE. Press e.
Enter Fixed Data
Press ENTER if none
> _ _ _ _ _ _ _ _ _ _ _ _ _ _ _ _
L
12. Type /TL for the fixed data. Press e.
Add fixed data
Before or After
entry chars? B/A
> _
L
13. Press A to print the fixed data after the entry
characters.
Enter Row #
> _ _ _ 14. Type 100 for the row location. Press e.
Enter Col. #
> _ _ _ 15. Type 10 for the column location. Press
e.
5-8 Defining Text Fields
- = Select Font = -
1. CG Trium 6.5 1000
2. CG Trium 8 pt 1001
3. CG Trium 10p 1002
4. CG Trium 12p 1003
5. CG Trium 18 p 1004
6. CG Trium 22p 1005
7. CG TrCon 6.5 1006
8. CG TrCon 8 pt 1007
9. CG TrCon 10p 1008
10. CG TrCon 12p 1009
11. CG TrCon 18p 1010
12. CG TrCon 22p 1011
13. LetGoth 6.5 1012
14. LetGoth 9pt 1013
16. Select CG Trium 8 pt 1001. Press e.
Enter Height Mag for
this font (1-7) > _ 17. Press 1 for the height magnification.
Enter Width Mag for
this font (1-7) > _ 18. Press 1 for the width magnification.
Set Justification
1. Left (L)
2. Right (E)
3. Center (B)
19. Press 1 for the alignment of characters in
the field.
Top of Field at:
1. Top of Supply
2. Left of Supply
3. Bottom of Supply
4. Right of Supply
20. Press 1 for the field rotation.
Select Edit #1
1. None
2. Make into Price
3. Pad Data Field
4. Extract Chars
5. Strip Chars
6. Extract from Mid
7. Insert Chars
8. Make Shoe Size
21. Press 1 for no data edits.
Defining Text Fields 5-9
Select Type:Fld#2
1. Text Field
2. Bar Code Field
3. Constant Text
4. Line
5. Finished
22. Press 5.
Save current
format? Y/N > _ 23. Press Y to save the format. You return to the
Design Menu.
♦ To print the format, see “Printing the Sample Text Format.”
♦ To define a combo (combination) text field, see “Using a Combo Text
Field,” for more information.
♦ To define bar code fields, see Chapter 6, “Defining Bar Code Fields.”
♦ To define constant text fields, see Chapter 7, “Defining Constant Text
Fields.”
♦ To define line fields, see Chapter 8, “Defining Line Fields.”
Printing the Sample Text Format
After designing your format, print it to see how it looks.
- = Design Menu = -
1. Create New Format
2. Edit Old Format
3. Copy Format
4. Delete Format
1. Press b to exit the Design Menu.
- = Main Menu = -
1. Design Formats
2. Print Labels
3. Configuration
2. Press 2 to print your format.
Select Format
to Print
- = Format Menu - =
01 SIZE
3. Select SIZE and press e.
ENTER SIZE
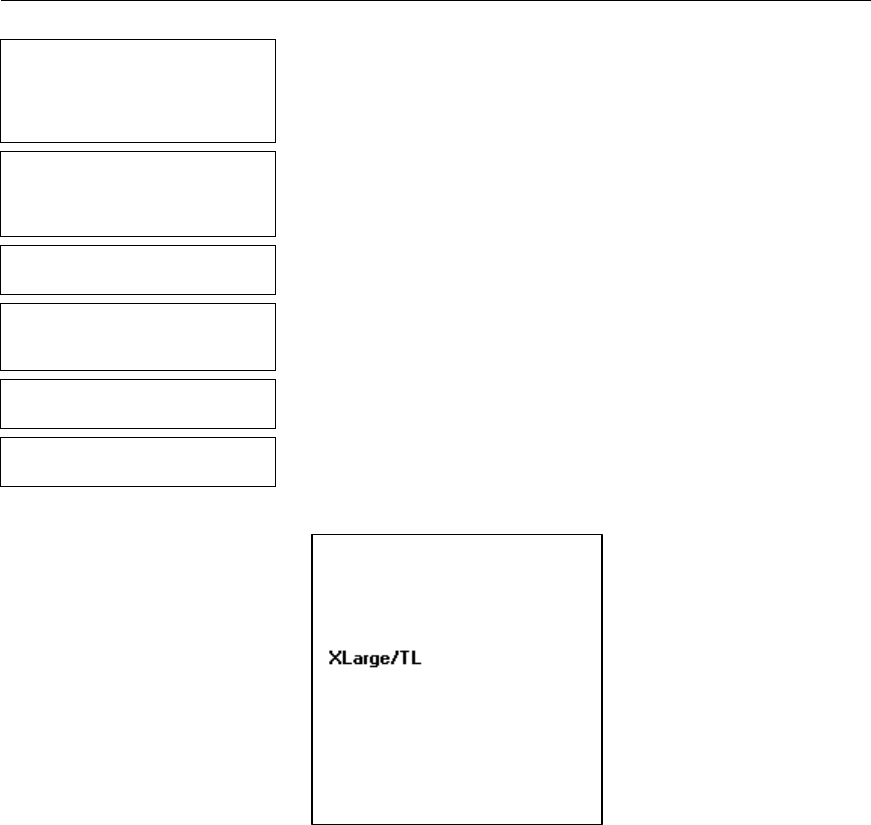
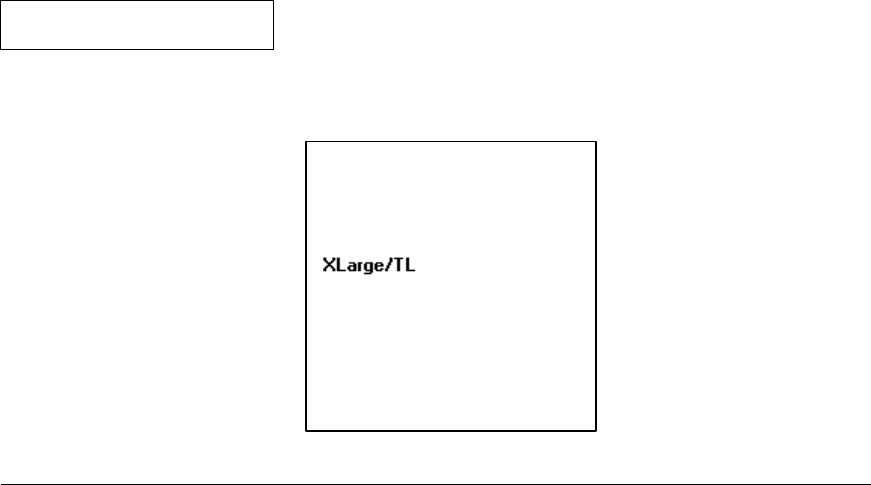
_ _ _ _ _ _ 4. Type XLarge. Press e. The label
prints.
5-10 Defining Text Fields
Printed: 1
5. Press the trigger to print another label or
press b to return to the prompt and print a
different label.
This sample prints the following label.
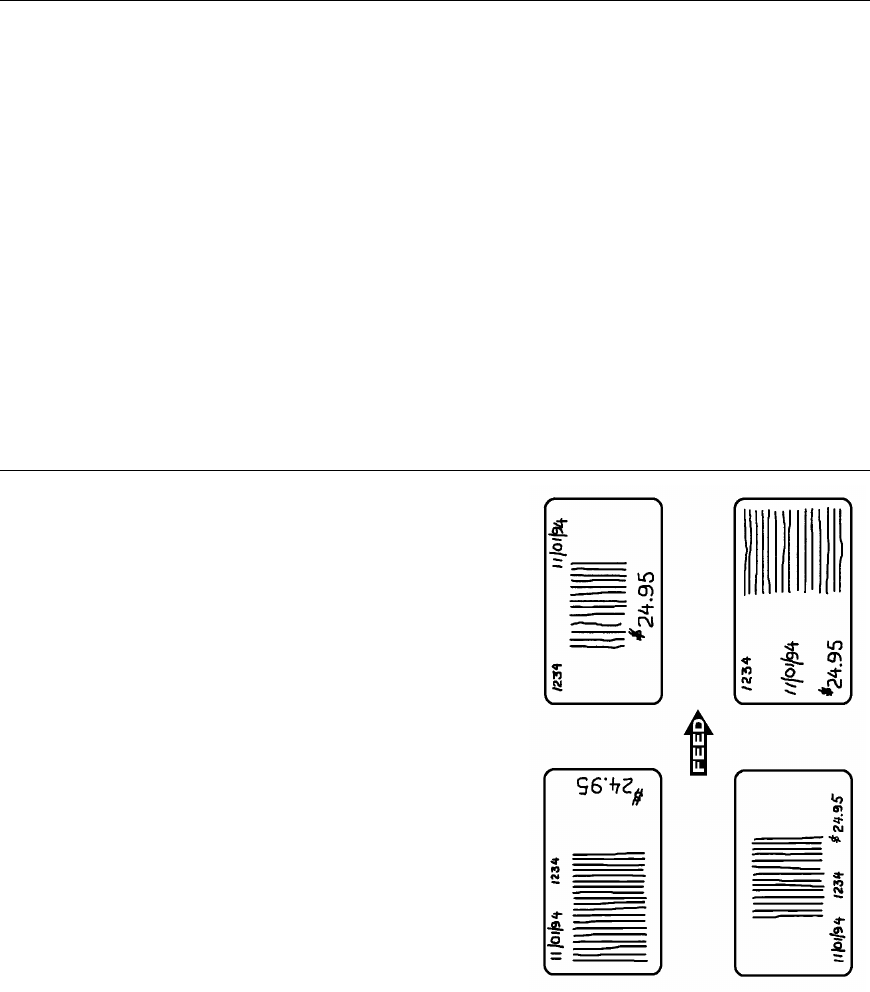
Using a Combo Text Field
Combo (combination) fields pull data from other fields (text or bar code),
eliminating the data from being entered by an operator more than once.
These are also known as merged fields. Each combo field can pull data from
up to 10 different fields. Combo fields have three parameters:
Field Number Field number from which data is copied.
For example, 3 is field #3.
Starting Position Position number in the source field of the first character to
be copied. Character positions are numbered 1 to 99,
starting from the left. For example, 1 is the character in
the first position to be copied.
Number of Digits
to use
Number of characters to copy. The range is 1 to 99. For
example, 3 copies three characters.
In cases where the source field is shorter than the combo
field, you have the option of filling (padding) data from the
left or right or none. You are also prompted for the fill
character.
Defining Text Fields 5-11
Fill Direction Specifies whether to fill a short source field from the left,
right, or not fill the field. For example, if the source field
only contains 5 characters, but the combo field contains
10, you can fill the field from the left or right with zeroes or
another character.
Fill Character Specifies which character to use for filling a field.
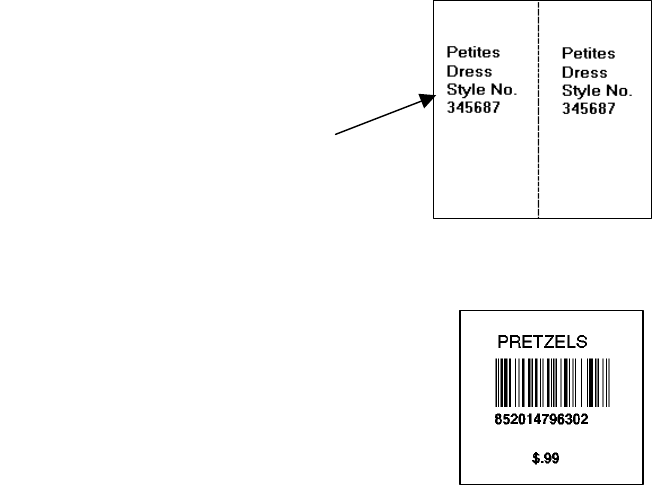
An example of using text fields to create a combo
text field can be seen in multi-part tags. If you need
a two-part identical tag, use combo text fields to
mirror the data. The operator only has to answer the
prompts one time for both tags.
NOTE: When creating your combo field, remember
that lines and constant text fields do not count as fields, even
though they appear in the list as fields when editing a format.
For example, the constant text field, “Pretzels,” does not count as field 01,
the bar code field is field 01, if the fields were defined
in this order: pretzels, bar code, combo field (for
human readable), and price field.
NOTE: You will receive an error or unexpected data
may print in the combo field if you use the
wrong field number.
Use combo fields to copy data from
one part of tag to the other.
5-12 Defining Text Fields
Entering a Sample Combo Text Field
To use a combo field, you must already have created the field(s) you want to
copy or use data from.
We will create a sample format COMBO (2.0-inch long by 2.0-inch wide) that
includes a text field (SIZE), and then create a combo text field (COPY) that
copies the data from SIZE.
NOTE: This sample uses the printer’s factory-set defaults. For more
information about your printer’s configuration, see Chapter 3,
“Configuring the Printer.”
- = Main Menu = -
1. Design Formats
2. Print Labels
3. Configuration
1. Press 1 to design your formats.
- = Design Menu = -
1. Create New Format
2. Edit Old Format
3. Copy Format
4. Delete Format
2. Press 1 to create a new format.
Enter Format Name
> _ _ _ _ _ _ _ _ _ _ _ _ _
L
3. Type COMBO for the format name. Press
e.
Enter Length of
supply (55 – 400)
(eg. 400 = 4 inches)
> _ _ _
4. Type 200 for the length of your supply. Press
e.
Select Supply Width
1. 1.20 Inches
2. 1.50 Inches
3. 2.00 Inches
5. Press 3 for the supply width.
Select Type: Fld #1
1. Text Field
2. Bar Code Field
3. Constant Text
4. Line
5. Finished
6. Press 1 to define a text field.
Defining Text Fields 5-13
Select Field Class
1. Simple Field
2. Price Field
3. System Date/Time
4. Combo (Merged)
7. Press 1 to define a simple field.
Numeric or
Alpha-Numeric Data?
A/N > _
L
8. Press A (alpha-numeric).
Enter Max. Length
> _ _ _ 9. Type 10 as the maximum number of
characters in the field. Press e.
Enter Min. Length
> _ _ _ 10. Type 1 as the minimum number of characters
in the field. Press e.
Enter Field Prompt
> _ _ _ _ _ _ _ _ _ _ _ _ _ _ _ _
L
11. Type ENTER SIZE. Press e.
Enter Fixed Data
Press ENTER if none
> _ _ _ _ _ _ _ _ _ _ _ _ _ _ _ _
L
12. Press e for no fixed data.
Enter Row #
> _ _ _ 13. Type 100 for the row location. Press e.
Enter Col. #
> _ _ _ 14. Type 10 for the column location. Press
e.

5-14 Defining Text Fields
- = Select Font = -
1. CG Trium 6.5 1000
2. CG Trium 8 pt 1001
3. CG Trium 10p 1002
4. CG Trium 12p 1003
5. CG Trium 18 p 1004
6. CG Trium 22p 1005
7. CG TrCon 6.5 1006
8. CG TrCon 8 pt 1007
9. CG TrCon 10p 1008
10. CG TrCon 12p 1009
11. CG TrCon 18p 1010
12. CG TrCon 22p 1011
13. LetGoth 6.5 1012
14. LetGoth 9pt 1013
15. Select CG Trium 8 pt 1001. Press e.
Enter Height Mag for
this font (1-7) > _ 16. Press 1 for the height magnification.
Enter Width Mag for
this font (1-7) > _ 17. Press 1 for the width magnification.
Set Justification
1. Left (L)
2. Right (E)
3. Center (B)
18. Press 1 for the alignment of characters in
the field.
Top of Field at:
1. Top of Supply
2. Left of Supply
3. Bottom of Supply
4. Right of Supply
19. Press 1 for the field rotation.
Select Edit #1
1. None
2. Make into Price
3. Pad Data Field
4. Extract Chars
5. Strip Chars
6. Extract from Mid
7. Insert Chars
8. Make Shoe Size
20. Press 1 for no data edits.
Select Type:Fld#2
1. Text Field
2. Bar Code Field
3. Constant Text
4. Line
5. Finished
21. Press 1 to define your other text field.
Defining Text Fields 5-15
Select Field Class
1. Simple Field
2. Price Field
3. System Date/Time
4. Combo (Merged)
22. Press 4 to define a combo field.
Enter Max. Length
> _ _ _ 23. Type 10 as the maximum number of
characters in the field. Press e.
Enter Min. Length
> _ _ _ 24. Type 1 as the minimum number of characters
in the field. Press e.
For Combo Fields
Enter up to 10
User Field sources.
(Press key) _
25. Press any key to continue.
Enter Field#
(First is Fld One)
(ENTER when done)
> _ _
26. Type 1. Press e.
Enter Start Position
(First is One)
> _ _ _
27. Type 1. Press e.
Enter # of Chars
> _ _ _ 28. Type 6. Press e.
Enter Field#
(First is Fld One)
(ENTER when done)
> _ _
29. Press e to continue.
Enter Fill Direction
for short
Source Fields:
1 Fill from Left
2 Fill from Right
3 Do not Fill
30. Press 1 to fill the field from the left.
Enter Fill
Character for
source fields: _
31. Type a dash (-).
Enter Fixed Data
Press ENTER if none
> _ _ _ _ _ _ _ _ _ _ _ _ _ _ _ _
L
32. Press e for no fixed data.
5-16 Defining Text Fields
Enter Row #
> _ _ _ 33. Type 100 for the row location. Press e.
Enter Col. #
> _ _ _ 34. Type 90 for the column location. Press
e.
- = Select Font = -
1. CG Trium 6.5 1000
2. CG Trium 8 pt 1001
3. CG Trium 10p 1002
4. CG Trium 12p 1003
5. CG Trium 18 p 1004
6. CG Trium 22p 1005
7. CG TrCon 6.5 1006
8. CG TrCon 8 pt 1007
9. CG TrCon 10p 1008
10. CG TrCon 12p 1009
11. CG TrCon 18p 1010
12. CG TrCon 22p 1011
13. LetGoth 6.5 1012
14. LetGoth 9pt 1013
35. Select CG Trium 8 pt 1001. Press e.
Enter Height Mag for
this font (1-7) > _ 36. Press 1 for the height magnification.
Enter Width Mag for
this font (1-7) > _ 37. Press 1 for the width magnification.
Set Justification
1. Left (L)
2. Right (E)
3. Center (B)
38. Press 1 for the alignment of characters in
the field.
Top of Field at:
1. Top of Supply
2. Left of Supply
3. Bottom of Supply
4. Right of Supply
39. Press 1 for the field rotation.
Select Edit #1
1. None
2. Make into Price
3. Pad Data Field
4. Extract Chars
5. Strip Chars
6. Extract from Mid
7. Insert Chars
8. Make Shoe Size
40. Press 1 for no data edits.
Defining Text Fields 5-17
Select Type:Fld#3
1. Text Field
2. Bar Code Field
3. Constant Text
4. Line
5. Finished
41. Press 5.
Save current
format? Y/N > _ 42. Press Y to save the format. You return to the
Design Menu.
Printing the Sample Combo Format
After designing your format, print it to see how it looks.
- = Design Menu = -
1. Create New Format
2. Edit Old Format
3. Copy Format
4. Delete Format
1. Press b to exit the Design Menu.
- = Main Menu = -
1. Design Formats
2. Print Labels
3. Configuration
2. Press 2 to print your format.
Select Format
to Print
- = Format Menu - =
01 COMBO
02 SIZE
3. Select COMBO and press e.
ENTER SIZE
_ _ _ _ _ _ 4. Type Small. Press e. The label prints.
Printed: 1
5. Press the trigger to print another label or
press b to return to the prompt and print a
different label.
5-18 Defining Text Fields
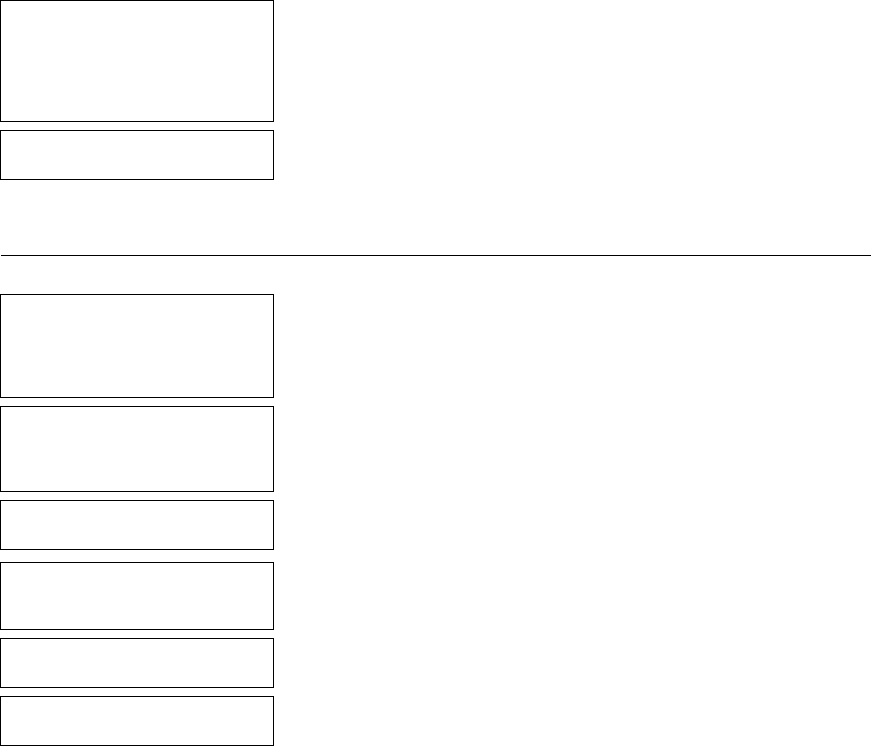
This sample prints the following label.
Combo field is filled
on the left with the -
character

Defining Bar Code Fields 6-1
DEFINING BAR CODE FIELDS
Create a separate definition for each bar code field. There are two
types of bar code fields:
Simple Contains data entered specifically for that field.
Combo
(combination)
Contains data pulled from up to 10 other fields.
See ”Bar Code Specifications” for information about each bar code that can
be used with these bar code field types.
About Bar Code Fields
Read the following information to become familiar with the prompts for bar
code fields. Ranges for the prompts are listed as well as more information
about using bar code fields.
Format Name Depending on your printer’s configuration, enter a
name for the format. For more information about
your printer’s configuration, see Chapter 3,
“Configuring the Printer.” The maximum number of
characters for the format name is 16.
Format Number Reserved for future use. (Depending on your printer’s
configuration, enter a number for the format. The format
number range is 1 – 99.)
Format Description Reserved for future use. (Depending on your printer’s
configuration, enter a description for the format.)
Supply Width The width of your loaded supply. Choices include
1.20 inches, 1.50 inches, and 2.00 inches.
Field Type Choices include: text, bar code, constant, and line.
6
6-2 Defining Bar Code Fields
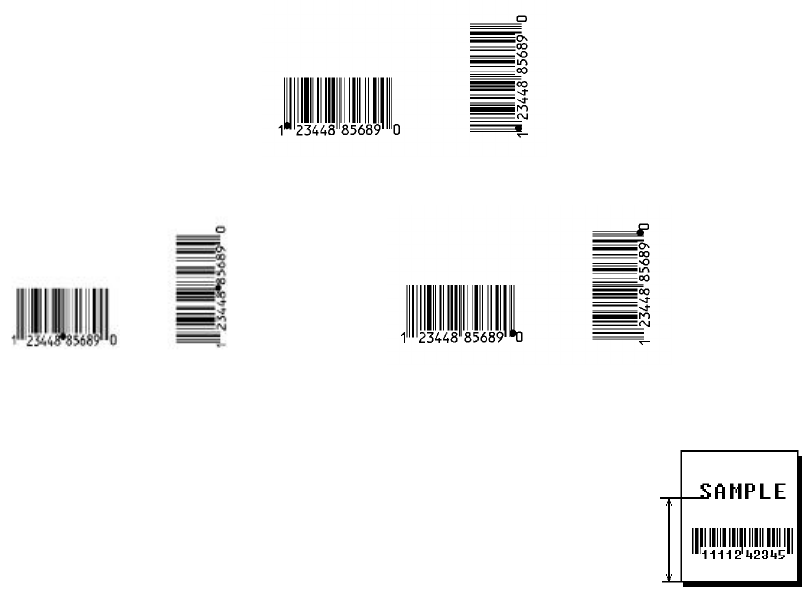
Bar Code Type Choices include: UPC-A, UPC-E, Interleaved 2 of 5,
Code 39 (with no check digit), Codabar, EAN-8,
EAN-13, Code 128, MSI, UPC-A +2, UPC-A +5,
UPC-E +2, UPC-E +5, EAN-8 +2, EAN-8 +5, EAN-
13 +2, EAN-13 +5, Code 93, Code 39-Mod 43,
UPC-A & Price CD, EAN-13 & Price CD, and I2 of 5
with Barrier Bar.
Field Class Choices include simple, price, system date/time,
and combo. For bar codes, select either simple or
combo. Combo (combination) fields are explained
later in this chapter. Simple fields are the most
commonly used.
Field Prompt Contains the prompt displayed during data entry.
The maximum number of characters is 20.
Using Fixed Data In situations where the same data appears on all
labels, you can enter the repetitive data as fixed
data. The operator does not enter the data. The
maximum number of characters is 40; however,
each field has a maximum length defined, so the
fixed data must be below that maximum.
Fixed data is stored with the format and
automatically displayed with the prompt during data
entry. Fixed data can also be added before or
after entry characters.
An example of fixed data is the manufacturer’s
code in a UPC-A bar code.
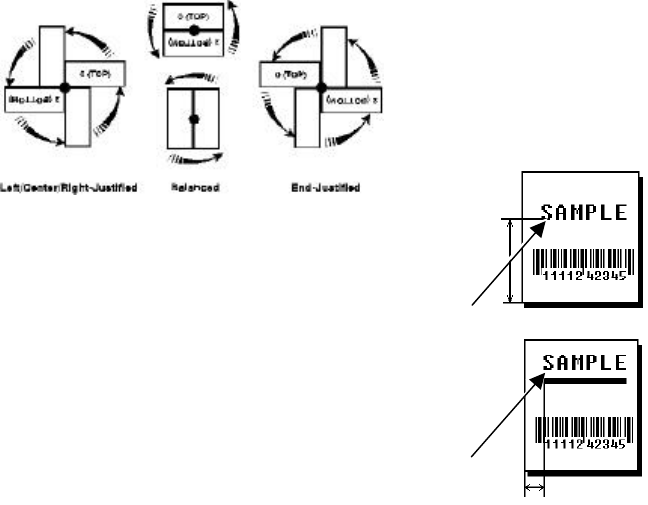
Defining Bar Code Fields 6-3
Row Distance from the bottom of print area to the pivot
point of the field. The pivot point varies, depending
on how the field is justified. Pivot points:
Left/Center/Right-Justified Fields
Balanced Fields
End-Justified Fields
Remember to include text or numbers that may
appear with the bar code for the row
measurement.
Column The vertical line where printing begins. Type the
column position for the field. The distance from the
left edge of the print area to the pivot point is the
column location. The range is 0 – 183.
Allow a minimum of 1/10 inch between the scan
edge of bar code and label edges or other data.
Density The density of the bar code. The possible values
vary by the bar code selected.
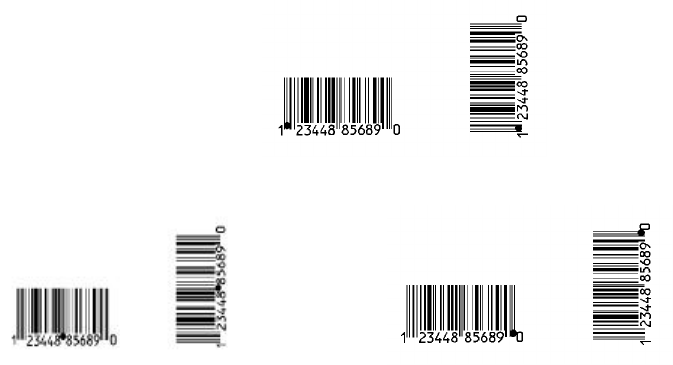
6-4 Defining Bar Code Fields
Bar Height Height of the bar code in 1/100 inches. For
example, 100 = 1 inch. The value is dependent on
the length of the label used. The minimum value is
1.
Appearance Depending on your printer’s configuration, enter
the appearance of the bar code (UPC and EAN
family only). For more information about your
printer’s configuration, see Chapter 3, “Configuring
the Printer.” See ”Setting the Appearance” for
information about the appearance choices.
Justification Depending on your printer’s configuration, enter an
alignment for the field. For more information about
your printer’s configuration, see Chapter 3,
“Configuring the Printer.” Choices include Left (L),
Right (E), and Center (B).
Field Rotation Rotation of the selected field. Choices include:
Top of Supply, Left of Supply, Bottom of Supply,
and Right of Supply.
Left/Center/Right-Justified Fields
Balanced Fields
End-Justified Fields
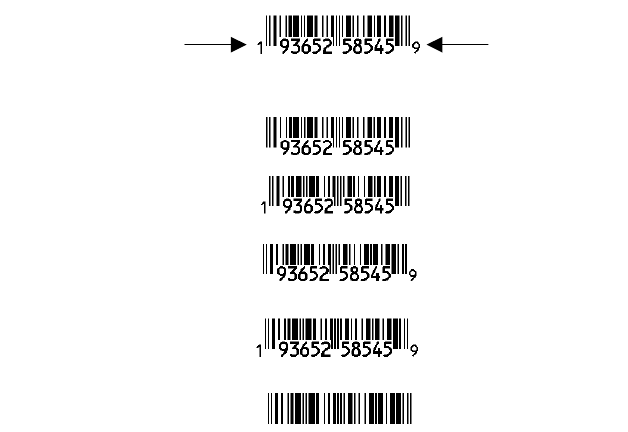
Defining Bar Code Fields 6-5
Data Edits Only two data edits are allowed per field.
Data edits are used on text and bar code (simple
and combo) fields only. For more information
about data edits, see Chapter 10, “Applying Data
Edits,” for more information. Choices include:
none, Make into Price, Pad Data Field, Extract
Characters, Extract from Middle, Insert Characters,
and Make Shoe Size.
NOTE: Make Shoe size and Make into Price are not allowed for bar code
fields.
Setting the Appearance
UPC and EAN bar codes only. The appearance of the bar code is the
combination of number system and/or check digits shown with the bar code.
You are prompted for the appearance during format creation, unless the
configuration specifies to use the default. The number system appears on
the left and the check digit appears on the right.
NOTE: The appearance that prints does not change unless you redefine the
field. You cannot change only the configuration and have the
printing change.
Following are the appearance options.
No C/D or Num Sys
Number Sys Only
Check Digit Only
Complete HR Text
(human-readable)
No Human Readable
Number System
Check Digit
6-6 Defining Bar Code Fields
Setting the Density
The density is the amount of data per unit length in a bar code. Generally,
you measure the density in characters per inch or as percentages of the
nominal size. Density values vary by bar code. The following table lists
these values.
Bar Code Density Values
UPC and EAN 80% and 120%
Interleaved 2 of 5 1.0, 2.0, 3.0, 4.0, 5.3, 6.0, 7.1, 8.3, 9.1, 10.6, 12.0, and 13.7
Code 39 – no c/d 1.3, 1.7, 2.8, 3.3, 3.7, 4.0, 6.0, 6.6, and 12.0.
Codabar 2.0, 2.9, 4.3, 4.7, 7.7, 8.4, and 9.6
Code 128 3.5/7.0, 4.4/8.7, 5.8/11.7, and 8.7/17.5
MSI 4.0, 5.3, and 6.9
Code 93 3.6, 4.3, 5.3, 7.1, and 10.7
Code 39 – Mod43 1.3, 1.7, 2.8, 3.3, 3.7, 4.0, 6.0, 6.6, and 12.0
I2of5 – Barrier Bar 1.0, 2.0, 3.0, 4.0, 5.3, 6.0, 7.1, 8.3, 9.1, 10.6, 12.0 and 13.7
Entering Simple Bar Code Fields
Follow the steps to create sample
bar code fields.
Defining Bar Code Fields 6-7
Sample 1: Simple Fixed Bar Code
The following procedure creates a UPC-A bar code on a 2.0-inch long by
2.0-inch wide supply.
NOTE: This sample uses the printer’s factory-set defaults. For more
information about your printer’s configuration, see Chapter 3,
“Configuring the Printer.”
-=Main Menu=-
1. Design Formats
2. Print Labels
3. Configuration
1. From the Main Menu, press 1.
-=Design Menu=-
1.Create New Format
2.Edit Old Format
3.Copy Format
4.Delete Format
2. Press 1 to create a new format.
Enter Format Name
>_ _ _ _ _ _ _ _ _ _ _ _ _ _
L
3. Type UPCA for the format name. Press
e.
Enter Length of
Supply (55-400)
(eg.400 = 4 inches)
>_ _ _
4. Type 200 for the length of your supply. Press
e.
Select Supply Width
1. 1.20 Inches
2. 1.50 Inches
3. 2.00 Inches
5. Press 3 for the supply width.
Select Type: Fld #1
1. Text Field
2. Bar Code Field
3. Constant Text
4. Line
5. Finished
6. Press 2 to define a bar code field.
-=Select Bar Code=-
1. UPC-A
2. UPC-E
3. Interleaved2of5
4. Code 39 –no c/d
5. Codabar
6. EAN-8
7. EAN-13
7. Press 1 for UPC-A.
6-8 Defining Bar Code Fields
Select Field Class
1. Simple Field
2. Price Field
3. System Date/Time
4. Combo (Merged)
8. Press 1 to define a simple field.
Enter Field Prompt
_ _ _ _ _ _ _ _ _ _ _
L
9. Type “SCAN UPC#.” Press e.
Enter Fixed Data
Press ENTER if none
> _ _ _ _ _ _ _ _ _ _ _ _
L
10. Press e for no fixed data.
Enter Row #
> _ _ _ 11. Type 80 for the row location. Press e.
Enter Col. #
> _ _ _ 12. Type 15 for the column location. Press
e.
Enter Density
1. 80/ 2. 120
>_
13. Press 1 for the density (80%).
Enter Bar Height
(Units = Inch/100)
> _ _ _
14. Type 40 for the bar code height (.4”). Press
e.
Top of Field at:
1. Top of Supply
2. Left of Supply
3. Bottom of Supply
4. Right of Supply
15. Type 1 for the field rotation.
Select Edit #1
1. (None)
2. Make into Price
3. Pad Data Field
4. Extract Chars
5. Strip Chars
6. Extract from Mid
7. Insert Chars
8. Make Shoe Size
16. Press e for no edits.

Defining Bar Code Fields 6-9
Select Type:Fld #2
1. Text Field
2. Bar Code Field
3. Constant Text
4. Line
5. Finished
17. Press 5.
Save current
format? Y/N > _ 18. Press Y to save the format. You return to the
Design Menu.
♦ To print the format, see ”Printing the Simple Fixed Bar Code Format”
♦ To define a combo (combination) bar code field, see “Entering a Sample
Combo Bar Code Field” for more information.
♦ To define text fields, see Chapter 5, “Defining Text Fields.”
♦ To define constant text fields, see Chapter 7, “Defining Constant Text
Fields.”
♦ To define line fields, see Chapter 8, “Defining Line Fields.”
Printing the Simple Fixed Bar Code Format
After designing your format, print it to see how it looks.
-=Design Menu=-
1.Create New Format
2,Edit Old Format
3.Copy Format
4.Delete Format
1. Press b to exit the Design Menu.
-=Main Menu=-
1. Design Formats
2. Print Labels
3. Configuration
2. Press 2 to print your format.
Select Format
to Print
-=Format Menu=-
01 UPCA
3. Select UPCA. Press e.
SCAN UPC#
_ _ _ _ _ _ _ _ _ _ _ _
4. Type 028028796302. Press e. The
label prints.
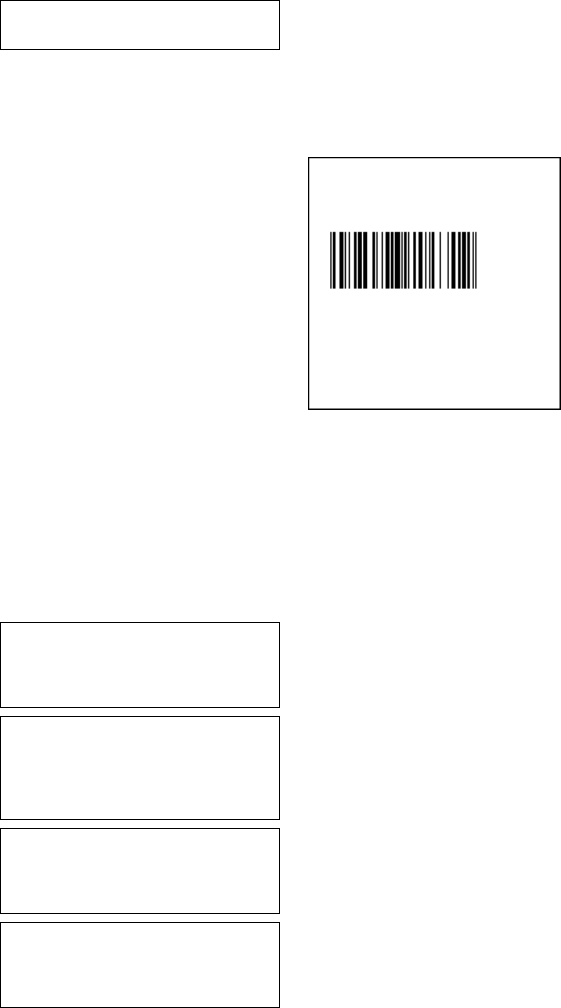
6-10 Defining Bar Code Fields
Printed : 1
5. Press the trigger to print another label or
press b to return to the prompt and print
another label.
This sample prints the following label.
Sample 2: Simple Variable Bar Code
The following procedure creates a Code 128 bar code on a 2.0-inch long by
2.0-inch wide supply.
NOTE: This sample uses the printer’s factory-set defaults. For more
information about your printer’s configuration, see Chapter 3,
“Configuring the Printer.”
-=Main Menu=-
1. Design Formats
2. Print Labels
3. Configuration
1. From the Main Menu, press 1.
-=Design Menu=-
1.Create New Format
2,Edit Old Format
3.Copy Format
4.Delete Format
2. Press 1 to create a new format.
Enter Format Name
>_ _ _ _ _ _ _ _ _ _ _ _ _ _
L
3. Type CODE128 for the format name. Press
e.
Enter Length of
Supply (55-400)
(eg.400 = 4 inches)
>_ _ _
4. Type 200 for the length of your supply. Press
e.
Defining Bar Code Fields 6-11
Select Supply Width
1. 1.20 Inches
2. 1.50 Inches
3. 2.00 Inches
5. Press 3 for the supply width.
Select Type: Fld #1
1. Text Field
2. Bar Code Field
3. Constant Text
4. Line
5. Finished
6. Press 2 to define a bar code field.
-=Select Bar Code=-
1. UPC-A
2. UPC-E
3. Interleaved2of5
4. Code 39 –no c/d
5. Codabar
6. EAN-8
7. EAN-13
7. Press 8 for Code 128.
8. Code 128
9. MSI
10. UPC-A +2
11. UPC-A +5
12. UPC-E +2
13. UPC-E +5
14. EAN-8 +2
15. EAN-8 +5
16. EAN-13 +2
17. EAN-13 +5
23. Code 93
40. Code 39 –Mod 43
41. UPCA & Price CD
44. EAN-13 & Price CD
50. I2of5 – Barr. Bar
Select Field Class
1. Simple Field
2. Price Field
3. System Date/Time
4. Combo (Merged)
8. Press 1 to define a simple field.
Numeric or
Alpha-Numeric Data?
A/N >_
L
9. Press N to specify numeric data.
Enter Max. Length
>_ _ _ 10. Type 10 as the maximum number of
characters in the field. Press e.
6-12 Defining Bar Code Fields
Enter Min. Length
>_ _ _ 11. Type 10 as the minimum number of
characters in the field. Press e.
Enter Field Prompt
_ _ _ _ _ _ _ _ _ _ _
L
12. Type “SCAN DATA.” Press e.
Enter Fixed Data
Press ENTER if none
> _ _ _ _ _ _ _ _ _ _ _ _
L
13. Press e for no fixed data.
Enter Row #
> _ _ _ 14. Type 80 for the row location. Press e.
Enter Col. #
> _ _ _ 15. Type 15 for the column location. Press
e.
-=Select Density=-
3.5/7.0 CPI 5 dots
4.4/8.7 CPI 4 dots
5.8/11.7 CPI 3 dots
8.7/17.5 CPI 2 dots
16. Select 8.7/17.5 characters per inch.
Enter Bar Height
(Units = Inch/100)
> _ _ _
17. Type 40 for the bar code height (.4”). Press
e.
Top of Field at:
1. Top of Supply
2. Left of Supply
3. Bottom of Supply
4. Right of Supply
18. Type 1 for the field rotation.
Select Edit #1
1. (None)
2. Make into Price
3. Pad Data Field
4. Extract Chars
5. Strip Chars
6. Extract from Mid
7. Insert Chars
19. Press e for no edits.
8. Make Shoe Size
Defining Bar Code Fields 6-13
Select Type:Fld #2
1. Text Field
2. Bar Code Field
3. Constant Text
4. Line
5. Finished
20. Press 5.
Save current
format? Y/N > _ 21. Press Y to save the format. You return to the
Design Menu.
♦ To print the format, see ”Printing the Simple Variable Bar Code Format.”
♦ To define a combo (combination) bar code field, see “Entering a Sample
Combo Bar Code Field” for more information.
♦ To define text fields, see Chapter 5, “Defining Text Fields.”
♦ To define constant text fields, see Chapter 7, “Defining Constant Text
Fields.”
♦ To define line fields, see Chapter 8, “Defining Line Fields.”
Printing the Simple Variable Bar Code Format
After designing your format, print it to see how it looks.
-=Design Menu=-
1.Create New Format
2,Edit Old Format
3.Copy Format
4.Delete Format
1. Press b to exit the Design Menu.
-=Main Menu=-
1. Design Formats
2. Print Labels
3. Configuration
2. Press 2 to print your format.
Select Format
to Print
-=Format Menu=-
01 CODE128
02 UPCA
3. Select CODE128. Press e.
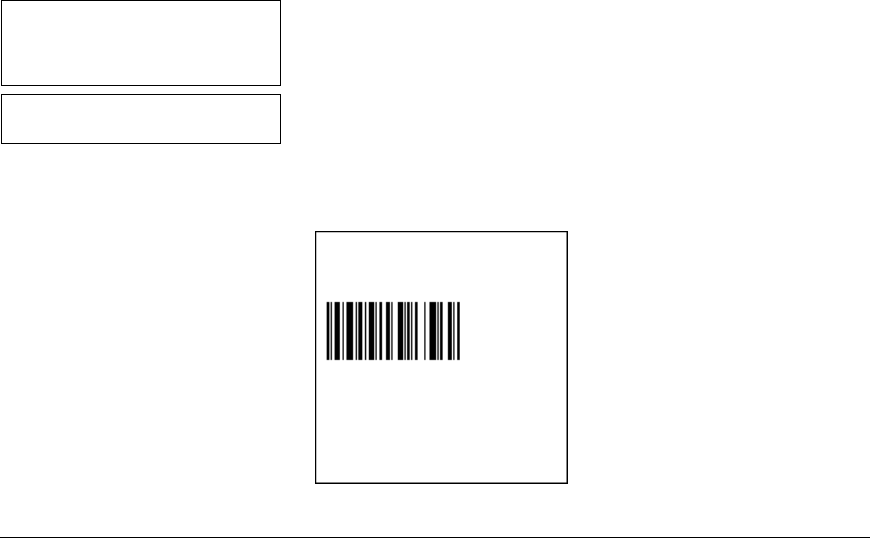
6-14 Defining Bar Code Fields
SCAN DATA
_ _ _ _ _ _ _ _ _ _ _ _
4. Type 8520147963. Press e. The label
prints.
Printed : 1
5. Press the trigger to print another label or
press b to return to the prompt and print
another label.
This sample prints the following label.
About Combo Bar Code Fields
Combo bar code fields pull data from other fields, eliminating the data from
being entered by the operator more than once. Combo fields have three
parameters:
Field Number
(two digits)
Field number from which data is copied. For example, 3 is
field #3.
Starting Position
(two digits)
Position number in the source field of the first character to
be copied. Character positions are numbered 1 to 99,
starting from the left. For example, 1 is the character in
the first position to be copied.
Number of Digits to
use (two digits)
Number of characters to copy. The range is 1 to 99. For
example, 3 copies three characters.
In cases where the source field is shorter than the combo
field, you have the option of filling (padding) data from the
left or right or none. You are also prompted for the fill
character.
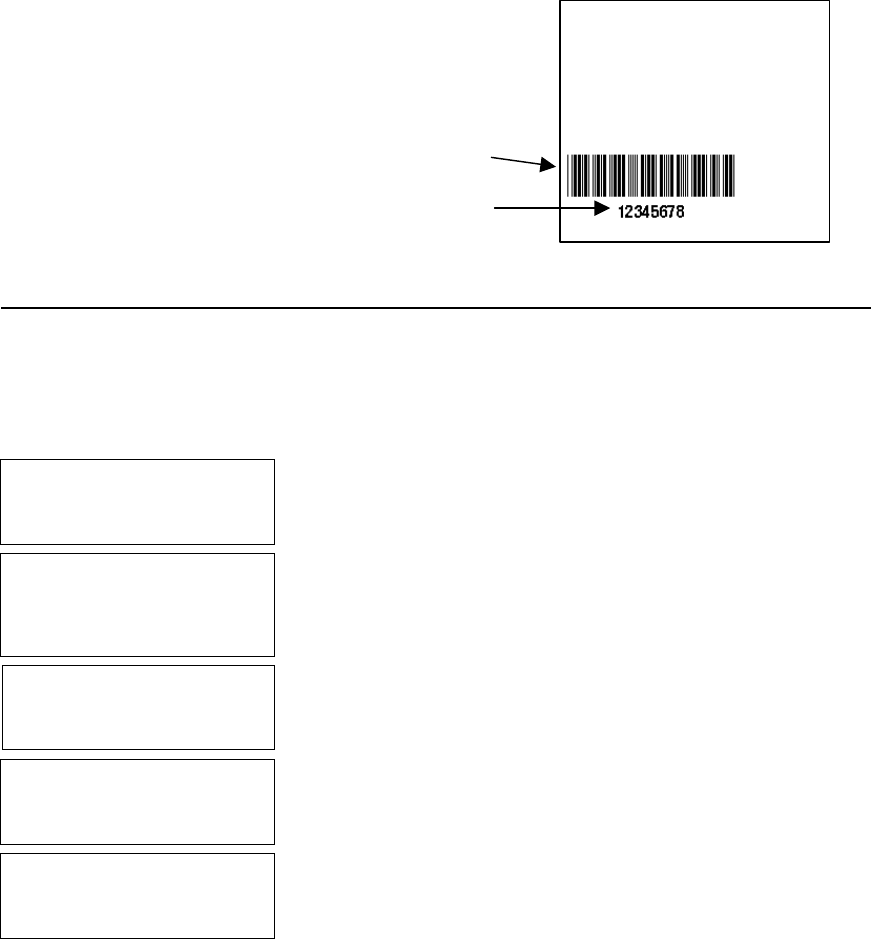
Defining Bar Code Fields 6-15
Each combo field pulls data from up to 10
different text or bar code fields. An example
of using bar code fields to create a combo
text field can be seen in the following tag.
To show human readable data with a bar code
that does not allow human readable characters,
create a combo text field from the bar
code data field.
Entering a Sample Combo Bar Code Field
Follow the steps for entering combo bar code fields on 2.0-inch long by 2.0-
inch wide supplies.
NOTE: This sample uses the printer’s factory-set defaults. For more
information about your printer’s configuration, see Chapter 3,
“Configuring the Printer.”
-=Main Menu=-
1. Design Formats
2. Print Labels
3. Configuration
1. From the Main Menu, press 1.
-=Design Menu=-
1.Create New Format
2.Edit Old Format
3.Copy Format
4.Delete Format
2. Press 1 to create a new format.
Enter Format Name
>_ _ _ _ _ _ _ _ _ _ _ _ _ _
L
3. Type COMBO for the format name. Press
e.
Enter Length of
Supply (55-400)
(eg.400 = 4 inches)
>_ _ _
4. Enter 200 for the length of your supply. Press
e.
Select Supply Width
1. 1.20 Inches
2. 1.50 Inches
3. 2.00 Inches
5. Press 3 for the supply width.
Code 39 bar code
Combo text field
(from bar code data)
for human readable
6-16 Defining Bar Code Fields
Select Type: Fld #1
1. Text Field
2. Bar Code Field
3. Constant Text
4. Line
5. Finished
6. Press 1 to define a text field.
Select Field Class
1. Simple Field
2. Price Field
3. System Date/Time
4. Combo (Merged)
7. Press 1 to define a simple field.
Numeric or
Alpha-Numeric Data?
A/N > _
L
8. Press N (alpha-numeric).
Enter Max. Length
> _ _ _ 9. Type 6 as the maximum number of characters
in the field. Press e.
Enter Min. Length
> _ _ _ 10. Type 6 as the minimum number of characters
in the field. Press e.
Enter Field Prompt
> _ _ _ _ _ _ _ _ _ _ _ _ _ _ _ _
L
11. Type ENTER DATA 1. Press e.
Enter Fixed Data
Press ENTER if none
> _ _ _ _ _ _ _ _ _ _ _ _ _ _ _ _
L
12. Press e, for no fixed data.
Enter Row #
> _ _ _ 13. Type 10 for the row location. Press e.
Enter Col. #
> _ _ _ 14. Type 10 for the column location. Press
e.

Defining Bar Code Fields 6-17
- = Select Font = -
1. CG Trium 6.5 1000
2. CG Trium 8 pt 1001
3. CG Trium 10p 1002
4. CG Trium 12p 1003
5. CG Trium 18 p 1004
6. CG Trium 22p 1005
7. CG TrCon 6.5 1006
8. CG TrCon 8 pt 1007
9. CG TrCon 10p 1008
10. CG TrCon 12p 1009
11. CG TrCon 18p 1010
12. CG TrCon 22p 1011
13. LetGoth 6.5 1012
14. LetGoth 9pt 1013
15. Select CG Trium 8 pt 1001 font.
Enter Height Mag for
this font (1-7) > _ 16. Press 1 for the height magnification.
Enter Width Mag for
this font (1-7) > _ 17. Press 1 for the width magnification.
Set Justification
1. Left (L)
2. Right (E)
3. Center (B)
18. Press 1 for the alignment of characters in
the field.
Top of Field at:
1. Top of Supply
2. Left of Supply
3. Bottom of Supply
4. Right of Supply
19. Press 1 for the field rotation.
Select Edit #1
1. None
2. Make into Price
3. Pad Data Field
4. Extract Chars
5. Strip Chars
6. Extract from Mid
7. Insert Chars
8. Make Shoe Size
20. Press 1 for no data edits.
Select Type: Fld #2
1. Text Field
2. Bar Code Field
3. Constant Text
4. Line
5. Finished
21. Press 1 to define a text field.
6-18 Defining Bar Code Fields
Select Field Class
1. Simple Field
2. Price Field
3. System Date/Time
4. Combo (Merged)
22. Press 1 to define a simple field.
Numeric or
Alpha-Numeric Data?
A/N > _
L
23. Press N (alpha-numeric).
Enter Max. Length
> _ _ _ 24. Type 6 as the maximum number of characters
in the field. Press e.
Enter Min. Length
> _ _ _ 25. Type 6 as the minimum number of characters
in the field. Press e.
Enter Field Prompt
> _ _ _ _ _ _ _ _ _ _ _ _ _ _ _ _
L
26. Type ENTER DATA 2. Press e.
Enter Fixed Data
Press ENTER if none
> _ _ _ _ _ _ _ _ _ _ _ _ _ _ _ _
L
27. Press e, for no fixed data.
Enter Row #
> _ _ _ 28. Type 50 for the row location. Press e.
Enter Col. #
> _ _ _ 29. Type 10 for the column location. Press
e.
- = Select Font = -
1. CG Trium 6.5 1000
2. CG Trium 8 pt 1001
3. CG Trium 10p 1002
4. CG Trium 12p 1003
5. CG Trium 18p 1004
6. CG Trium 22p 1005
7. CG TrCon 6.5 1006
8. CG TrCon 8 pt 1007
9. CG TrCon 10p 1008
10. CG TrCon 12p 1009
11. CG TrCon 18p 1010
12. CG TrCon 22p 1011
13. LetGoth 6.5 1012
14. LetGoth 9pt 1013
30. Select CG Trium 8 pt 1001 font.
Defining Bar Code Fields 6-19
Enter Height Mag for
this font (1-7) > _ 31. Press 1 for the height magnification.
Enter Width Mag for
this font (1-7) > _ 32. Press 1 for the width magnification.
Set Justification
1. Left (L)
2. Right (E)
3. Center (B)
33. Press 1 for the alignment of characters in
the field.
Top of Field at:
1. Top of Supply
2. Left of Supply
3. Bottom of Supply
4. Right of Supply
34. Press 1 for the field rotation.
Select Edit #1
1. None
2. Make into Price
3. Pad Data Field
4. Extract Chars
5. Strip Chars
6. Extract from Mid
7. Insert Chars
8. Make Shoe Size
35. Press 1 for no data edits.
Select Type: Fld #3
1. Text Field
2. Bar Code Field
3. Constant Text
4. Line
5. Finished
36. Press 2 to define a bar code field.
- = Select Bar Code = -
1. UPC-A
2. UPC-E
3. Interleaved2of5
4. Code 39 –no c/d
5. Codabar
6. EAN-8
7. EAN-13
37. Press e for UPC-A.
Select Field Class
1. Simple Field
2. Price Field
3. System Date/Time
4. Combo (Merged)
38. Press 4 to define a combo field.
For Combo Fields
Enter up to 10
User Field sources.
(Press key) _
39. Press any key to continue.
6-20 Defining Bar Code Fields
Enter Field #
(First is Fld One)
( ENTER when done )
> _ _
40. Type 1 and press e for source field 1.
Enter Start Position
(First is One)
> _ _
41. Type 1 and press e for copy start
position 1.
Enter # of Chars
> _ _ 42. Type 6 and press e for 6 characters to
copy.
Enter Field #
(First is Fld One)
( ENTER when done )
> _ _
43. Type 2 and press e for source field 2.
Enter Start Position
(First is One)
> _ _
44. Type 1 and press e for copy start
position 1.
Enter # of Chars
> _ _ 45. Type 6 and press e for 6 characters to
copy.
Enter Field #
(First is Fld One)
( ENTER when done )
> _ _
46. Press e to continue.
Enter Fill-Direction
for short
Source Fields:
1 Fill from Left
2 Fill from Right
3 Do not Fill
47. Press 3 to not fill the field.
Enter Fixed Data
Press ENTER if none
> _ _ _ _ _ _ _ _ _ _ _ _
L
48. Press e for no fixed data.
Enter Row #
> _ _ _ 49. Type 100 for the row location. Press e.
Enter Col. #
> _ _ _ 50. Type 10 for the column location. Press
e.
Defining Bar Code Fields 6-21
Enter Density
1. 80/ 2. 120
>_
51. Press 1 for the density (80%).
Enter Bar Height
(Units = Inch/100)
> _ _ _
52. Type 40 for the bar code height (.4”). Press
e.
Top of Field at:
1. Top of Supply
2. Left of Supply
3. Bottom of Supply
4. Right of Supply
53. Type 1 for the field rotation.
Select Edit #1
1. (None)
2. Make into Price
3. Pad Data Field
4. Extract Chars
5. Strip Chars
6. Extract from Mid
7. Insert Chars
54. Press e for no edits.
8. Make Shoe Size
Select Type:Fld #4
1. Text Field
2. Bar Code Field
3. Constant Text
4. Line
5. Finished
55. Press 5.
Save current
format? Y/N > _ 56. Press Y to save the format. You return to the
Design Menu.
♦ To print the format, see ”Printing the Sample Combo Bar Code Format.”
♦ To define text fields, see Chapter 5, “Defining Text Fields.”
♦ To define constant text fields, see Chapter 7, “Defining Constant Text
Fields.”
♦ To define line fields, see Chapter 8, “Defining Line Fields.”
6-22 Defining Bar Code Fields
Printing the Sample Combo Bar Code Format
After designing your format, print it to see how it looks.
-=Design Menu=-
1.Create New Format
2,Edit Old Format
3.Copy Format
4.Delete Format
1. Press b to exit the Design Menu.
-=Main Menu=-
1. Design Formats
2. Print Labels
3. Configuration
2. Press 2 to print your format.
Select Format
to Print
-=Format Menu=-
01 COMBO
02 CODE128
03 UPCA
3. Select COMBO. Press e.
ENTER DATA 1
_ _ _ _ _ _ _ _ _ _ _ _
4. Type 028028. Press e.
ENTER TEXT2
_ _ _ _ _ _ _ _ _ _ _ _
5. Type 885452. Press e. The label
prints.
Printed : 1
6. Press the trigger to print another label or
press b to return to the prompt and print
another label.
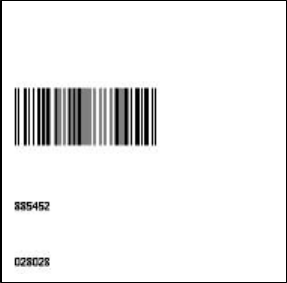
Defining Bar Code Fields 6-23
This sample prints the following label.
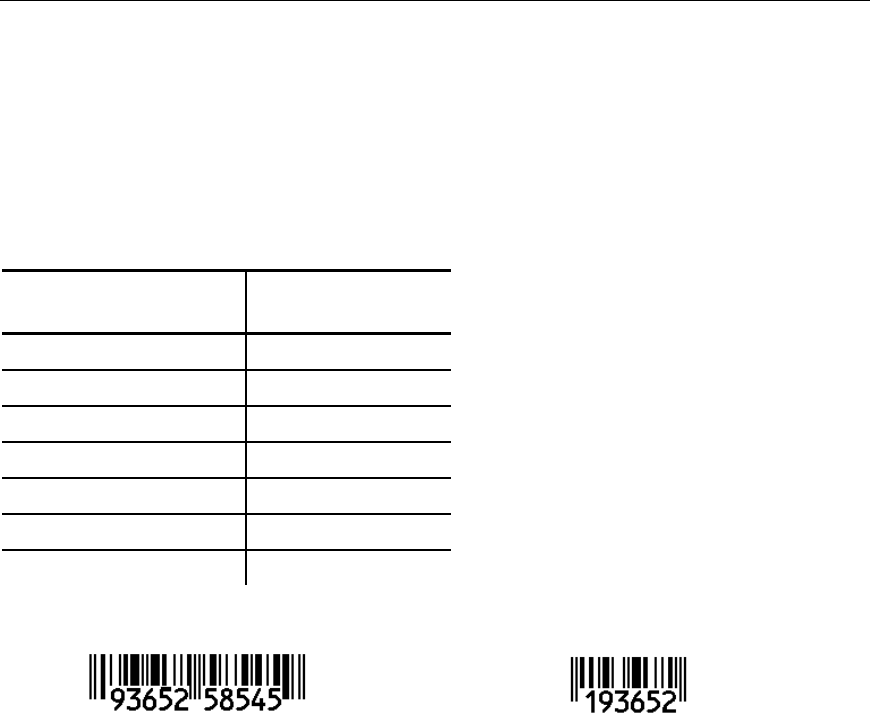
6-24 Defining Bar Code Fields
Bar Code Specifications
This section contains information specific to the various bar codes you can
select. This information helps you correctly enter the information to create a
bar code field for your format.
UPC Bar Codes
♦ Retailers use UPC (Universal Product Code) bar codes to identify
merchandise.
♦ Maximum and minimum lengths for +2 and +5 bar codes must be equal.
Bar Code
Length
(in characters)
UPC-A 12
UPC-A +2 14
UPC-A +5 17
UPC-A & Price CD 12
UPC-E 7
UPC-E +2 9
UPC-E +5 12
UPCA UPCE
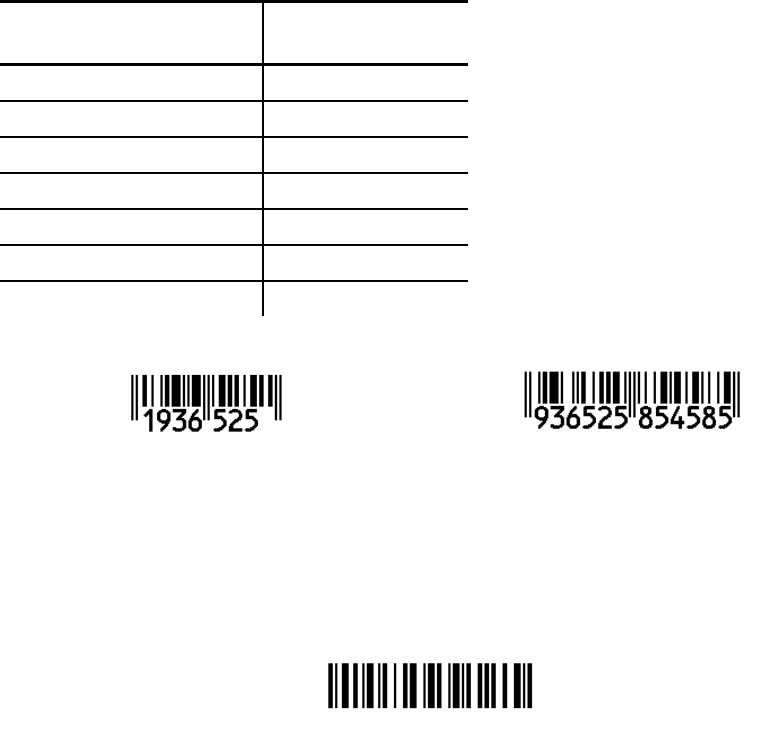
Defining Bar Code Fields 6-25
EAN Bar Codes
♦ Some retailers use EAN (European Article Number) bar codes to identify
merchandise.
♦ Maximum and minimum lengths for +2 and +5 bar codes must be equal.
Bar Code
Length
(in characters)
EAN-8 8
EAN-8 +2 10
EAN-8 +5 13
EAN-13 13
EAN-13 +2 15
EAN-13 +5 18
EAN-13 & Price CD 13
EAN-8 EAN-13
Code 128 Bar Codes
♦ Length:0 – 2710 characters
♦ Characters are alphanumeric, including any ASCII characters.
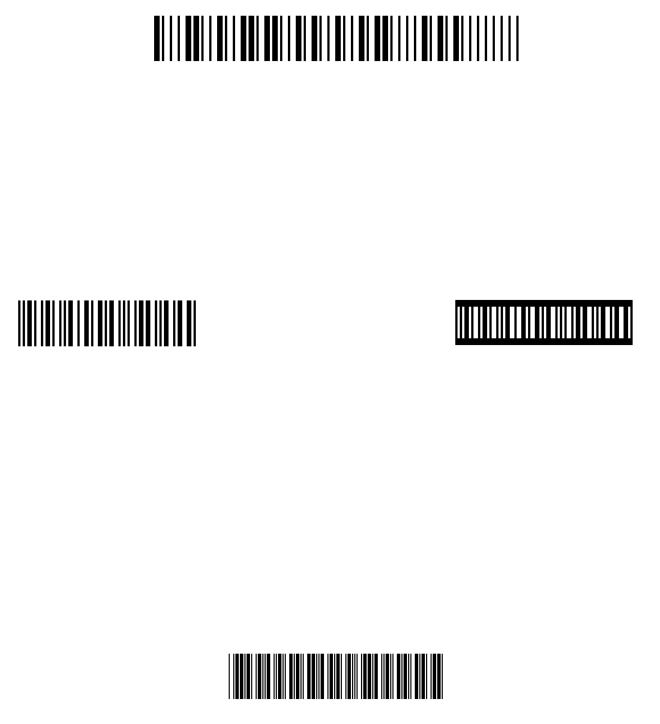
6-26 Defining Bar Code Fields
MSI
MSI is a Modified Plessey bar code.
♦ Length: 0 – 14 characters
♦ Uses only numeric data.
♦ Can use a second optional check digit.
Interleaved 2 of 5 Bar Codes
Interleaved 2 of 5 is an industrial bar code. You can use it with or without a
barrier bar.
♦ Length: 0 – 2710 characters (must be numeric)
♦ The length must be even. If not, the software adds a zero at the end.
Interleaved 2 of 5 Interleaved 2 of 5
with the Barrier Bar
Code 39 Bar Codes
Code 39 is an industrial bar code. You can use Code 39 with no check digit
and Code 39 – Mod 43.
♦ Uses alphanumeric data, certain symbols, and start/stop characters.
♦ Length: 0 – 2710 characters
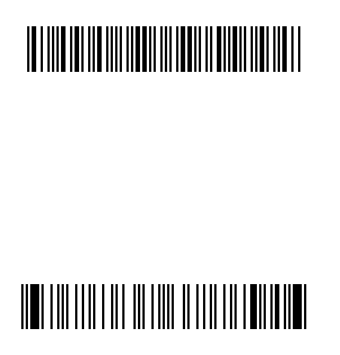
Defining Bar Code Fields 6-27
Codabar Bar Codes
Codabar is an industrial bar code with numeric printing and special start/stop
characters. You can use the start/stop characters to join multiple bar codes
when scanning.
♦ To join two bar codes, the last character of one bar code and the first
character of the other bar code must be d.
♦ Other start and stop characters can be a, b, and c.
♦ Length: 0 – 26 characters
Code 93
♦ Uses data from the 128 character ASCII set.
♦ Uses two check digits.
♦ Length: 0 - 2710 characters
6-28 Defining Bar Code Fields

Defining Constant Text Fields 7-1
DEFINING CONSTANT TEXT
FIELDS
A constant text field is a set of fixed characters that prints on all labels.
Define each constant text field separately. Use constant text fields for data
that is the same, so the operator does not have to enter the repetitive data
for each label. For example, a store number should be in a constant text
field, whereas the department number should be in a text field. The store
number is the same for each label. The department number varies per label.
NOTE: The constant text field is not assigned a field number, but is counted
as a field (keep this in mind, as the printer allows a maximum of 50
fields per format). Data edits do not apply to constant text fields.
Constant text fields are very similar to text fields.
NOTE: All samples shown in this chapter are created using 2.0-inch long by
2.0-inch wide supplies.
About Constant Text Fields
Read the following information to become familiar with the prompts for
constant text fields. Valid ranges for the prompts are listed as well as
information about using constant text fields.
Format Name Depending on your printer’s configuration, enter a name for
the format. For more information about your printer’s
configuration, see Chapter 3, “Configuring the Printer.” The
maximum number of characters for the format name is 16.
Format Number Reserved for future use. (Depending on your printer’s
configuration, enter a number for the format. The format
number range is 1 – 99.)
Format
Description
Reserved for future use. (Depending on your printer’s
configuration, enter a description for the format.)
Supply Length The length of your loaded supply. Measure from the top of
one black mark to the top of the next black mark. The
standard supply lengths are: 55, 78, 110, 150, 200, 300, or
400 inches.
7
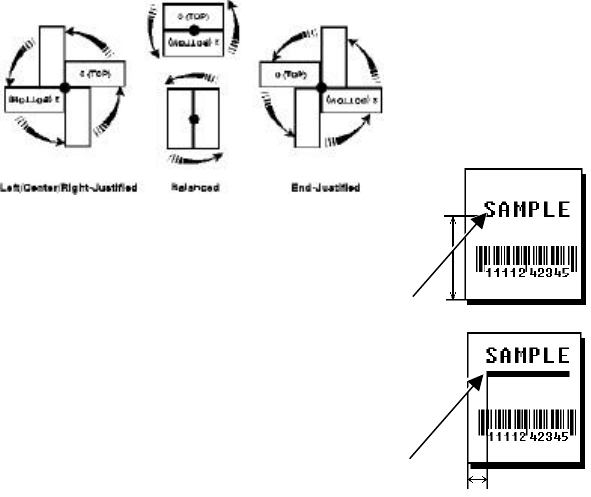
7-2 Defining Constant Text Fields
Supply Width The width of your loaded supply. Choices include 1.20, 1.50,
or 2.00 inches.
Field Type Choices include text, bar code, constant text, and line.
Fixed Data In situations where the same data appears on all labels, you
can enter the repetitive data as fixed data. The operator does
not enter the data. The maximum number of characters is 40;
however, each field has a maximum length defined, so the
fixed data must be below that maximum.
Fixed data is stored with the format and automatically
displayed with the prompt during data entry.
Row The horizontal line where printing begins. For monospaced
fonts, distance from the bottom of print area to the pivot point.
The pivot point varies depending on how text is justified.
For proportionally spaced fonts, distance
from the bottom of print area to baseline of
characters in field. The range is 0 – 365.
Column The vertical line where printing begins. Type
the column position for the field. The distance
from the left edge of the print area to the
pivot point is the column location. The
range is 0 – 183.
Baseline
Baseline
Defining Constant Text Fields 7-3
Gap Depending on your printer’s configuration, enter the number
of dots between characters. For more information about
your printer’s configuration, see Chapter 3, “Configuring the
Printer.”
The gap range is 0 – 9. For mono-spaced fonts, the
additional spacing is added to the existing inter-character
gap. This is also true for proportionally spaced fonts, but
the inter-character gap varies with character combinations.
Any number other than 0 affects your field width. Default
spacing:
Letter Gothic Bold 6pt 1 dot
Letter Gothic Bold 9pt 2 dots
All other fonts vary with each letter
Use the default unless you want to create a special effect,
such as P R I C E (additional character spacing) in a
field.
Font The style of font for your format. Choices include CG
Triumvirate Bold 6.5, 8, 10, 12, 18, or 22 point; CG
Triumvirate Bold Condensed 6.5, 8, 10, 12, 18, and 22 point;
and Letter Gothic 6.5 and 9 point.
Height
Magnification
Height magnifier for the selected font. Use a magnifier of 1
with proportionally spaced fonts, because characters lose
smoothness at higher magnifications. The range is 1 – 7.
Width
Magnification
Width magnifier for the selected font. Proportionally spaced
fonts do not have a set width. The range is 1 – 7.
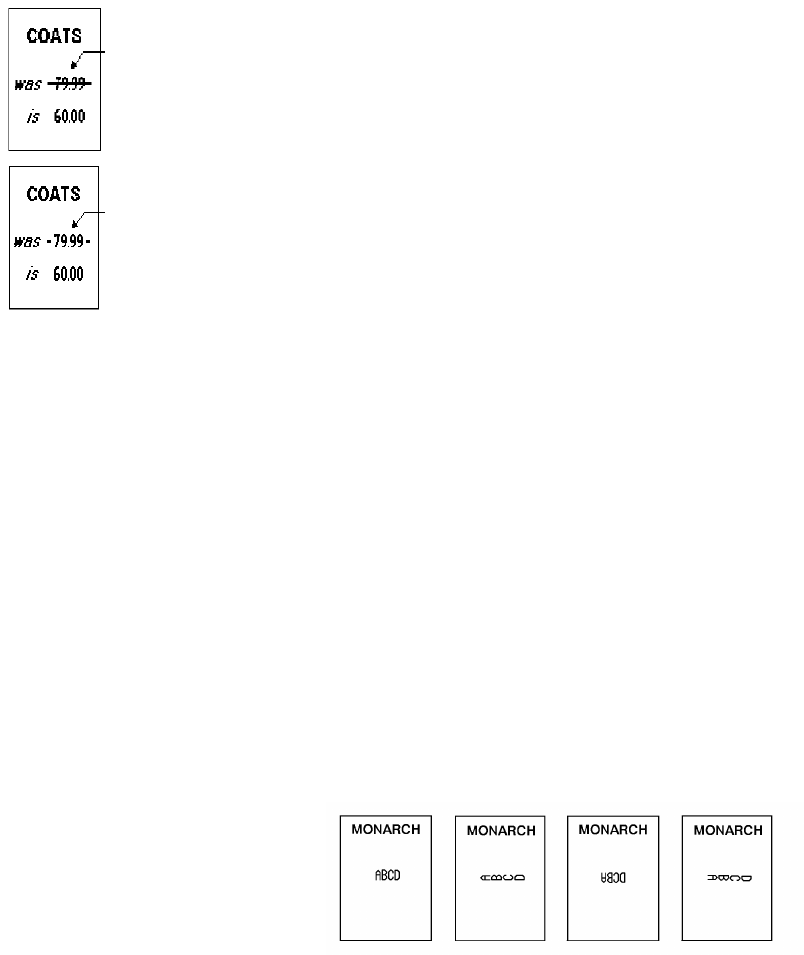
7-4 Defining Constant Text Fields
Font Color Depending on your printer’s configuration, enter the color of
the selected font. For more information about your printer’s
configuration, see Chapter 3, “Configuring the Printer.”
Solid black print should not exceed 30% on a given square
inch of the label, or printhead life may be decreased. There
are two types of field color overlay attributes:
Transparent The overlay field (text or
constant text) does not block
out or “erase” existing fields.
Opaque The overlay field blocks out or
“erases” existing fields.
Field placement is an important consideration when using
field color attributes. If a line field is defined before the
overlay (text or constant text) field, the line field is blocked
out by the overlay field, depending on the overlay field's
color attribute. If a line field is defined after the overlay
field, the line field is not blocked out by the overlay field,
regardless of the overlay field's color attribute.
Choices include Black Opaque, White Opaque, Black
Transparent and White Transparent.
Justification Alignment of the text within the field. Choices include Left
(L), Right (E), and Center (B). Fonts 1012 and 1013 (Letter
Gothic 6.5 and 9 pt) default to L (left).
Character Rotation Depending on your printer’s configuration, enter the
character rotation of the selected field. For more information
about your printer’s configuration, see Chapter 3,
“Configuring the Printer.” Choices include Top of Field, Left
of Field, Bottom of Field, and Right of Field.
The field or supply does not rotate, only the characters do.
See “ABCD” in the example below.
Line field
blocked
out by
opaque
field using
attribute B
Line field
not
blocked
out by
transparent
field using
attribute O
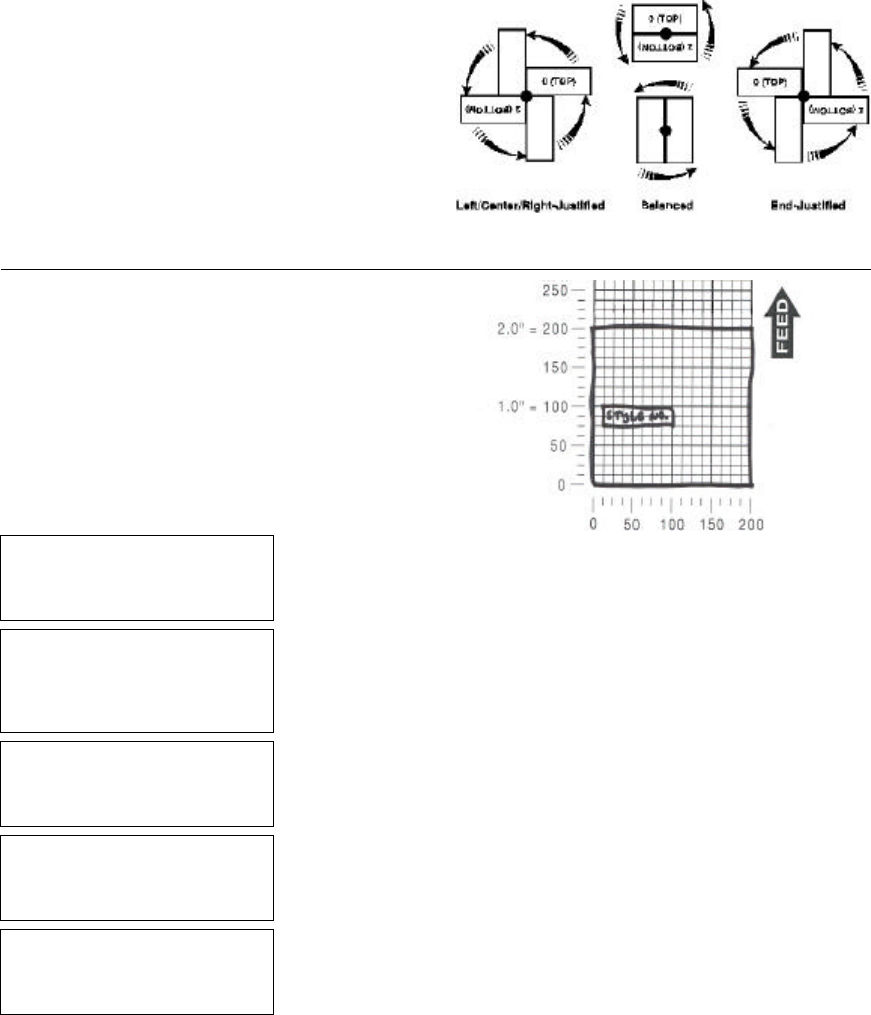
Defining Constant Text Fields 7-5
Field Rotation Rotation of the
selected field.
Choices include:
Top of Supply, Left
of Supply, Bottom
of Supply, and
Right of Supply.
Entering a Sample Constant Text Field
We will create a sample format,
CONSTANT (2.0-inch long by 2.0-inch
wide) and a sample constant text field.
- = Main Menu = -
1. Design Formats
2. Print Labels
3. Configuration
1. Press 1 to design your formats.
- = Design Menu = -
1. Create New Format
2. Edit Old Format
3. Copy Format
4. Delete Format
2. Press 1 to create a new format.
Enter Format Name
> _ _ _ _ _ _ _ _ _ _ _ _ _
L
3. Type CONSTANT. Press e.
Enter Length of
supply (55 – 400)
(eg. 400 = 4 inches)
> _ _ _
4. Type 200 for the length of your supply. Press
e.
Select Supply Width
1. 1.20 Inches
2. 1.50 Inches
3. 2.00 Inches
5. Press 3 for the supply width.
7-6 Defining Constant Text Fields
Select Type: Fld #1
1. Text Field
2. Bar Code Field
3. Constant Text
4. Line
5. Finished
6. Press 3 to define a constant text field.
Enter Fixed Data
Press ENTER if none
> _ _ _ _ _ _ _ _ _ _ _ _ _ _ _ _
L
7. Type STYLE NO. and press e.
Enter Row #
> _ _ _ 8. Type 70 for the row location. Press e.
Enter Col. #
> _ _ _ 9. Type 10 for the column location. Press
e.
- = Select Font = -
1. CG Trium 6.5 1000
2. CG Trium 8 pt 1001
3. CG Trium 10p 1002
4. CG Trium 12p 1003
5. CG Trium 18 p 1004
6. CG Trium 22p 1005
7. CG TrCon 6.5 1006
8. CG TrCon 8 pt 1007
9. CG TrCon 10p 1008
10. CG TrCon 12p 1009
11. CG TrCon 18p 1010
12. CG TrCon 22p 1011
13. LetGoth 6.5 1012
14. LetGoth 9pt 1013
10. Select CG Trium 8 pt 1001. Press e.
Enter Height Mag for
this font (1-7) > _ 11. Press 1 for the height magnification.
Enter Width Mag for
this font (1-7) > _ 12. Press 1 for the width magnification.
Set Justification
1. Left (L)
2. Right (E)
3. Center (B)
13. Press 1 for the alignment of characters in
the field.
Top of Field at:
1. Top of Supply
2. Left of Supply
3. Bottom of Supply
4. Right of Supply
14. Press 1 for the field rotation.

Defining Constant Text Fields 7-7
Select Type:Fld#2
1. Text Field
2. Bar Code Field
3. Constant Text
4. Line
5. Finished
15. Press 5.
Save current
format? Y/N > _ 16. Press Y to save the format. You return to the
Design Menu.
♦ To print the format, see “Printing the Sample Constant Text Format.”
♦ To define text fields, see Chapter 5, “Defining Text Fields.”
♦ To define bar code fields, see Chapter 6, “Defining Bar Code Fields.”
♦ To define line fields, see Chapter 8, “Defining Line Fields.”
7-8 Defining Constant Text Fields
Printing the Sample Constant Text Format
After designing your format, print it to see how it looks.
- = Design Menu = -
1. Create New Format
2. Edit Old Format
3. Copy Format
4. Delete Format
1. Press b to exit the Design Menu.
- = Main Menu = -
1. Design Formats
2. Print Labels
3. Configuration
2. Press 2 to print your format.
Select Format
to Print
- = Format Menu - =
01 CONSTANT
02 COMBO
03 SIZE
3. Select CONSTANT and press e. The
label prints.
Printed: 1
4. Press the trigger to print another label or
press b until you return to the Format
Menu.
This sample prints the following label.

Defining Line Fields 8-1
DEFINING LINE FIELDS
Use lines to form borders or mark out original prices. Define each
line separately.
NOTE: This field is not assigned a field number, but is counted as a field
(keep this in mind, as the printer allows a maximum of 50 fields per
format).
You can define any line length and a thickness up to 10 dots, as long as the
solid black print does not exceed 30% of any given square inch of the label.
Data edits do not apply to line fields.
NOTE: All samples shown in this chapter are created using 2.0-inch long by
2.0-inch wide supplies.
About Line Fields
Read the following information to become familiar with the prompts for line
fields. Valid ranges for the prompts are listed as well as information about
using line fields.
Format Name Depending on your printer’s configuration, enter a name for
the format. For more information about your printer’s
configuration, see Chapter 3, “Configuring the Printer.” The
maximum number of characters for the format name is 16.
Format Number Reserved for future use. (Depending on your printer’s
configuration, enter a number for the format. The format
number range is 1 – 99.)
Format
Description
Reserved for future use. (Depending on your printer’s
configuration, enter a description for the format.)
Supply Length The length of your loaded supply. Measure from the top of
one black mark to the top of the next black mark. The
standard supply lengths are: 55, 78, 110, 150, 200, 300, or
400 inches.
Supply Width The width of your loaded supply. Choices include 1.20, 1.50,
or 2.00 inches.
Field Type Choices include text, bar code, constant text, and line.
8
8-2 Defining Line Fields
Line Type Choices include segment or vector. With segments, you
choose the starting point and ending point. With vectors, you
choose the starting point, the angle, and the length of the line.
Start Row The horizontal line where printing begins.
The range is 0 – 365.
Start Column The vertical line where printing begins. The
range is 0 – 183.
End Row For segment lines only, the horizontal ending point for the
line. The range is 0 – 365. On horizontal lines, this value
must match the value for row.
End Column For segment lines only, the vertical ending point for the line.
The range is 0 – 183. On vertical lines, this value must
match the value for column.
Line Angle For vector lines only, choices include rotating the line 0, 90,
180, or 270 degrees to the left.
Line Length For vector lines only, specifies how long the line is. The
range depends on the length and/or width of your supply and
the non-print zone.
Thickness The thickness of the line. The range is 1 – 10. As thickness
increases, the line fills upward on horizontal lines or to the
right on vertical lines.
Defining Line Fields 8-3
Entering a Sample Line Field (Segments)
We will create a sample format, LINE
(2.0-inch long by 2.0-inch wide) and a
sample segment line field.
- = Main Menu = -
1. Design Formats
2. Print Labels
3. Configuration
1. Press 1 to design your formats.
- = Design Menu = -
1. Create New Format
2. Edit Old Format
3. Copy Format
4. Delete Format
2. Press 1 to create a new format.
Enter Format Name
> _ _ _ _ _ _ _ _ _ _ _ _ _
L
3. Type LINE for the format name. Press e.
Enter Length of
supply (55 – 400)
(eg. 400 = 4 inches)
> _ _ _
4. Type 200 for the length of your supply. Press
e.
Select Supply Width
1. 1.20 Inches
2. 1.50 Inches
3. 2.00 Inches
5. Press 3 for the supply width.
8-4 Defining Line Fields
Select Type: Fld #1
1. Text Field
2. Bar Code Field
3. Constant Text
4. Line
5. Finished
6. Press 4 to define a line field.
Is line Segment or
Vector? S/V > 7. Press S.
Enter Row #
for First Point
> _ _ _
8. Type 48 for the row location. Press e.
Enter Col. #
for First Point
> _ _ _
9. Type 10 for the column location. Press
e.
Enter Row #
for Last Point
> _ _ _
10. Type 48 for the end row location. Press
e.
Enter Col. #
for Last Point
> _ _ _
11. Type 80 for the end column location. Press
e.
Enter Thickness
(2 = 0.01 inch)
> _ _
12. Type 3 and press e.
Select Type:Fld#2
1. Text Field
2. Bar Code Field
3. Constant Text
4. Line
5. Finished
13. Press 5.
Save current
format? Y/N > _ 14. Press Y to save the format. You return to the
Design Menu.
♦ To print the format, see “Printing the Sample Line (Segment) Format.”
♦ To define a text field, see Chapter 5, “Defining a Text Field,” for more
information.
♦ To define bar code fields, see Chapter 6, “Defining Bar Code Fields.”
♦ To define constant text fields, see Chapter 7, “Defining Constant Text
Fields.”
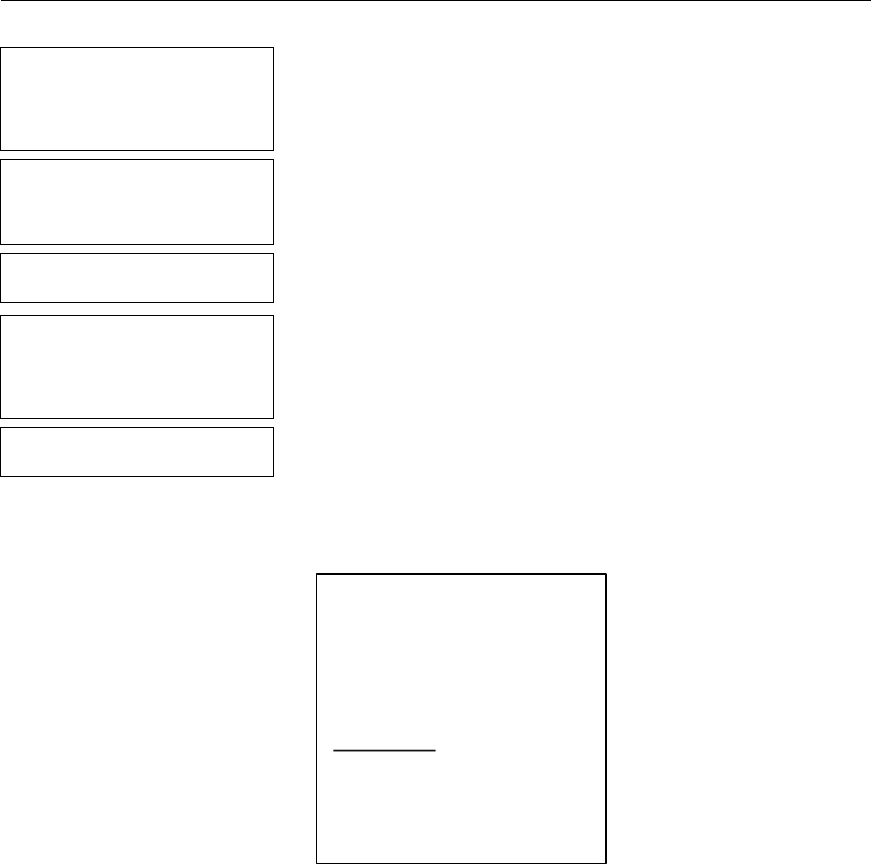
Defining Line Fields 8-5
Printing the Sample Line (Segment) Format
After designing your format, print it to see how it looks.
- = Design Menu = -
1. Create New Format
2. Edit Old Format
3. Copy Format
4. Delete Format
1. Press b to exit the Design Menu.
- = Main Menu = -
1. Design Formats
2. Print Labels
3. Configuration
2. Press 2 to print your format.
Select Format
to Print
- = Format Menu - =
01 LINE
02 CONSTANT
03 COMBO
04 SIZE
3. Select LINE and press e. The label
prints.
Printed: 1
4. Press the trigger to print another label or
press b until you return to the Format
Menu.
This sample prints the following label.

8-6 Defining Line Fields
Entering a Sample Line Field (Vectors)
We will create a sample format,
LINE (2.0-inch long by 2.0-inch
wide) and a sample vector line field.
- = Main Menu = -
1. Design Formats
2. Print Labels
3. Configuration
1. Press 1 to design your formats.
- = Design Menu = -
1. Create New Format
2. Edit Old Format
3. Copy Format
4. Delete Format
2. Press 1 to create a new format.
Enter Format Name
> _ _ _ _ _ _ _ _ _ _ _ _ _
L
3. Type LINE2 for the format name. Press
e.
Enter Length of
supply (55 – 400)
(eg. 400 = 4 inches)
> _ _ _
4. Type 200 for the length of your supply. Press
e.
Select Supply Width
1. 1.20 Inches
2. 1.50 Inches
3. 2.00 Inches
5. Press 3 for the supply width.
Select Type: Fld #1
1. Text Field
2. Bar Code Field
3. Constant Text
4. Line
5. Finished
6. Press 4 to define a line field.
Defining Line Fields 8-7
Is line Segment or
Vector? S/V > _ 7. Press V.
Enter Row #
for First Point
> _ _ _
8. Type 48 for the row position. Press e.
Enter Col. #
for First Point
> _ _ _
9. Type 50 for the column position. Press
e.
Select Line Angle:
1. 0 Degree
2. 90 Degrees Left
3. 180 Degrees Left
4. 270 Degrees Left
10. Press 2 to rotate the line 90 degrees to the
left.
Enter Line Length
> _ _ _ 11. Type 70. Press e
Enter Thickness
(2 = 0.01 inch)
> _ _
12. Type 3. Press e.
Select Type:Fld#2
1. Text Field
2. Bar Code Field
3. Constant Text
4. Line
5. Finished
13. Press 5.
Save current
format? Y/N > _ 14. Press Y to save the format. You return to the
Design Menu.
♦ To print the format, see “Printing the Sample Line (Vector) Format.”
♦ To define a text field, see Chapter 5, “Defining a Text Field,” for more
information.
♦ To define bar code fields, see Chapter 6, “Defining Bar Code Fields.”
♦ To define constant text fields, see Chapter 7, “Defining Constant Text
Fields.”
8-8 Defining Line Fields
Printing the Sample Line (Vector) Format
After designing your format, print it to see how it looks.
- = Design Menu = -
1. Create New Format
2. Edit Old Format
3. Copy Format
4. Delete Format
1. Press b to exit the Design Menu.
- = Main Menu = -
1. Design Formats
2. Print Labels
3. Configuration
2. Press 2 to print your format.
Select Format
to Print
- = Format Menu - =
01 LINE2
02 LINE
03 CONSTANT
04 COMBO
05 SIZE
3. Select LINE2 and press e. The line
prints.
Printed: 1
4. Press the trigger to print another label or
press b until you return to the Format
Menu.
This sample prints the following label.

Defining Special Fields 9-1
DEFINING SPECIAL FIELDS
This chapter includes information about creating price and
system/date time fields. Create a separate definition for each price and
date/time field.
For price fields, you define the way your price appears in the printed format,
for example £98.00. You can configure the printer to print using: US
Dollars, French Francs, Spanish Pesetas, Belgian Francs, German Marks,
British Pounds, Euro-Dollars, Swedish Krona, Danish Marka, Austrian
Schilling, and Japanese Yen. See Chapter 3, “Configuring the Printer” for
more information. For date/time fields, you define the way the system date
and time appear in the printed format, for example 10-15-01 4:00 PM.
NOTE: All samples shown in this chapter are created using 2.0-inch long by
2.0-inch wide supplies.
About Price and System Date/Time Fields
Read the following information to become familiar with the prompts for price
and date/time fields. Valid ranges for the prompts are listed as well as
information about using price and date/time fields.
Format Name Depending on your printer’s configuration, enter a name for
the format. For more information about your printer’s
configuration, see Chapter 3, “Configuring the Printer.” The
maximum number of characters for the format name is 16.
Format Number Reserved for future use. (Depending on your printer’s
configuration, enter a number for the format. The format
number range is 1 – 99.)
Format
Description
Reserved for future use. (Depending on your printer’s
configuration, enter a description for the format.)
Supply Length The length of your loaded supply. Measure from the top of
one black mark to the top of the next black mark. The
standard supply lengths are: 55, 78, 110, 150, 200, 300, or
400.
9
9-2 Defining Special Fields
Supply Width The width of your loaded supply. Choices include 1.20, 1.50,
or 2.00 inches.
Field Type Choices include text, bar code, constant text, and line.
Field Class Choices include simple, price, system date/time, and combo.
For price fields, you can specify a different monetary symbol
($ or £) by selecting a different configuration option. See
Chapter 3, “Configuring the Printer” for more information. The
price is automatically formatted in your selected currency.
For date/time fields, the operator is allowed to format the
appearance of date/time fields. However, the system date and
time are set when configuring the printer. See Chapter 3,
“Configuring the Printer” for more information.
Maximum Length The maximum number of characters in the field. The number
of characters depends on the font size, label size, whether
you are using a check digit, or if the field is printed
horizontally or vertically. For price fields, remember to
include the currency symbol (dollar sign, decimal point, etc.)
in the length of your field. For date/time fields, remember to
include any dashes, slashes, colons, etc. in the length of your
field. The range is 0 – 40.
Minimum Length The minimum number of characters in the field.
The range is 0 – 40.
Field Prompt Contains the prompt displayed during data entry. The
maximum number of characters is 40.
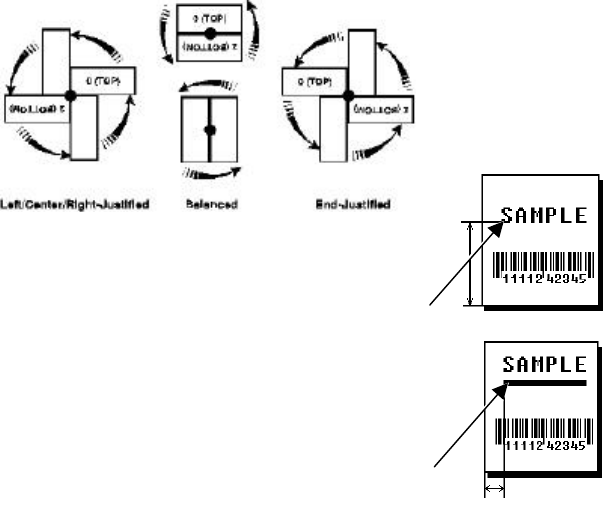
Defining Special Fields 9-3
Using Fixed Data In situations where the same data appears on all labels, you
can enter the repetitive data as fixed data. The operator does
not enter the data. The maximum number of characters is 40;
however, each field has a maximum length defined, so the
fixed data must be below that maximum.
Fixed data is stored with the format and automatically
displayed with the prompt during data entry. Fixed data can
also be added before or after entry characters.
An example of fixed data is the manufacturer’s code in a
UPCA bar code.
Row The horizontal line where printing begins. For monospaced
fonts, distance from the bottom of print area to the pivot point.
The pivot point varies depending on how text is justified.
For proportionally spaced fonts, distance
from the bottom of print area to baseline of
characters in field. The range is 0 – 365.
Column
The vertical line where printing begins. Type
the column position for the field. The distance
from the left edge of the print area to the pivot
point is the column location. The range is
0 – 183.
baseline
baseline
9-4 Defining Special Fields
Gap Depending on your printer’s configuration, enter the number of
dots between characters. For more information about your
printer’s configuration, see Chapter 3, “Configuring the
Printer.”
The gap range is 0 – 9. For mono-spaced fonts, the additional
spacing is added to the existing inter-character gap. This is
also true for proportionally spaced fonts, but the inter-
character gap varies with character combinations. Any
number other than 0 affects your field width. Default spacing:
Letter Gothic Bold 6pt 1 dot
Letter Gothic Bold 9pt 2 dots
All other fonts vary with each letter
Use the default unless you want to create a special effect,
such as P R I C E (additional character spacing) in a field.
Font The style of font for your format. Choices include CG
Triumvirate Bold 6.5, 8, 10, 12, 18, or 22 point; CG
Triumvirate Bold Condensed 6.5, 8, 10, 12, 18, and 22 point;
and Letter Gothic 6.5 and 9 point.
Height
Magnification
Height magnifier for the selected font. Use a magnifier of 1
with proportionally spaced fonts, because characters lose
smoothness at higher magnifications. The range is 1 – 7.
Width
Magnification
Width magnifier for the selected font. Proportionally spaced
fonts do not have a set width. The range is 1 – 7.
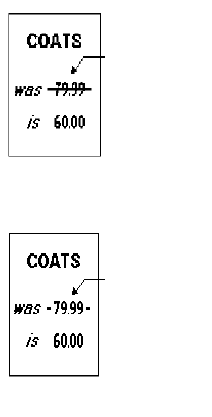
Defining Special Fields 9-5
Font Color Depending on your printer’s configuration, enter the color of
the selected font. For more information about your printer’s
configuration, see Chapter 3, “Configuring the Printer.”
Solid black print should not exceed 30% on a given square
inch of the label, or printhead life may be decreased. There
are two types of field color overlay attributes:
Transparent The overlay field (text or
constant text) does not block
out or “erase” existing fields.
Opaque The overlay field blocks out or
“erases” existing fields.
Field placement is an important consideration when using field
color attributes. If a line field is defined before the overlay
(text or constant text) field, the line field is blocked out by the
overlay field, depending on the overlay field's color attribute.
If a line field is defined after the overlay field, the line field is
not blocked out by the overlay field, regardless of the overlay
field's color attribute.
Choices include Black Opaque, White Opaque, Black
Transparent and White Transparent.
Justification Alignment of the text within the field. Choices include Left (L),
Right (E), and Center (B). Fonts 1012 and 1013 (Letter
Gothic 6.5 and 9 pt) default to L (left), regardless of selection.
Line
field
blocked
out by
opaque
field
using
attribute
B
Line field
not
blocked
out by
trans-
parent
field
using
attribute
O

9-6 Defining Special Fields
Character Rotation Depending on your printer’s configuration, enter the
character rotation of the selected field. For more
information about your printer’s configuration, see Chapter
3, “Configuring the Printer.” Choices include Top of Field,
Left of Field, Bottom of Field, and Right of Field.
The field or supply does not rotate, only the characters do.
See “ABCD” in the example below.
Field Rotation Rotation of the
selected field.
Choices include:
Top of Supply, Left
of Supply, Bottom
of Supply, and
Right of Supply.
Defining Special Fields 9-7
Entering a Sample Price Field
We will create a sample format, PRICE (2.0-inch long by 2.0-inch wide) and
a sample price field.
- = Main Menu = -
1. Design Formats
2. Print Labels
3. Configuration
1. Press 1 to design your formats.
- = Design Menu = -
1. Create New Format
2. Edit Old Format
3. Copy Format
4. Delete Format
2. Press 1 to create a new format.
Enter Format Name
> _ _ _ _ _ _ _ _ _ _ _ _ _
L
3. Type PRICE for the format name. Press
e.
Enter Length of
supply (55 – 400)
(eg. 400 = 4 inches)
> _ _ _
4. Type 200 for the length of your supply. Press
e.
Select Supply Width
1. 1.20 Inches
2. 1.50 Inches
3. 2.00 Inches
5. Press 3 for the supply width.
Select Type: Fld #1
1. Text Field
2. Bar Code Field
3. Constant Text
4. Line
5. Finished
6. Press 1 to define a text field.
Select Field Class
1. Simple Field
2. Price Field
3. System Date/Time
4. Combo (Merged)
7. Press 2 to define a price field.
Enter Max. Length
> _ _ _ 8. Type 8 as the maximum number of characters
in the field. Press e.
Enter Min. Length
> _ _ _ 9. Type 1 as the minimum number of characters
in the field. Press e.
9-8 Defining Special Fields
Enter Field Prompt
> _ _ _ _ _ _ _ _ _ _ _ _ _ _ _ _
L
10. Type KEY IN PRICE. Press e.
Enter Fixed Data
Press ENTER if none
> _ _ _ _ _ _ _ _ _ _ _ _ _ _ _ _
L
11. Press e for no fixed data.
Enter Row #
> _ _ _ 12. Type 25 for the row location. Press e.
Enter Col. #
> _ _ _ 13. Type 10 for the column location. Press
e.
- = Select Font = -
1. CG Trium 6.5 1000
2. CG Trium 8 pt 1001
3. CG Trium 10p 1002
4. CG Trium 12p 1003
5. CG Trium 18 p 1004
6. CG Trium 22p 1005
7. CG TrCon 6.5 1006
8. CG TrCon 8 pt 1007
9. CG TrCon 10p 1008
10. CG TrCon 12p 1009
11. CG TrCon 18p 1010
12. CG TrCon 22p 1011
13. LetGoth 6.5 1012
14. LetGoth 9pt 1013
14. Select CG Trium 8 pt 1001. Press e.
Enter Height Mag for
this font (1-7) > _ 15. Press 1 for the height magnification.
Enter Width Mag for
this font (1-7) > _ 16. Press 1 for the width magnification.
Set Justification
1. Left (L)
2. Right (E)
3. Center (B)
17. Press 1 for the alignment of characters in
the field.
Top of Field at:
1. Top of Supply
2. Left of Supply
3. Bottom of Supply
4. Right of Supply
18. Press 1 for the field rotation.
Defining Special Fields 9-9
Select Type:Fld#2
1. Text Field
2. Bar Code Field
3. Constant Text
4. Line
5. Finished
19. Press 5.
Save current
format? Y/N > _ 20. Press Y to save the format. You return to the
Design Menu.
♦ To print the format, see “Printing the Sample Price Format.”
♦ To define a text field, see Chapter 1, “Defining a Text Field,” for more
information.
♦ To define bar code fields, see Chapter 6, “Defining Bar Code Fields.”
♦ To define constant text fields, see Chapter 7, “Defining Constant Text
Fields.”
♦ To define line fields, see Chapter 8, “Defining Line Fields.”
Printing the Sample Price Format
After designing your format, print it to see how it looks.
- = Design Menu = -
1. Create New Format
2. Edit Old Format
3. Copy Format
4. Delete Format
1. Press b to exit the Design Menu.
- = Main Menu = -
1. Design Formats
2. Print Labels
3. Configuration
2. Press 2 to print your format.
Select Format
to Print
- = Format Menu - =
01 PRICE
02 LINE2
03 LINE
04 CONSTANT
05 COMBO
06 SIZE
3. Select PRICE and press e.
9-10 Defining Special Fields
KEY IN PRICE
$.00 4. Type 2999 and press e. The label
prints.
The price field varies depending on the
number of characters entered. For
example,
2 prints as $.02
29 prints as $.29
299 prints as $2.99
2999 prints as $29.99
Printed: 1
5. Press the trigger to print another label or
press b to return to the prompt and print a
different label.
This sample prints the following label.
Defining Special Fields 9-11
Entering a Sample Date/Time Field
We will create a sample format, DATE/TIME (2.0-inch long by 2.0-inch wide)
and a sample system date/time field.
- = Main Menu = -
1. Design Formats
2. Print Labels
3. Configuration
1. Press 1 to design your formats.
- = Design Menu = -
1. Create New Format
2. Edit Old Format
3. Copy Format
4. Delete Format
2. Press 1 to create a new format.
Enter Format Name
> _ _ _ _ _ _ _ _ _ _ _ _ _
L
3. Type DATE/TIME for the format name. Press
e.
Enter Length of
supply (55 – 400)
(eg. 400 = 4 inches)
> _ _ _
4. Type 200 for the length of your supply. Press
e.
Select Supply Width
1. 1.20 Inches
2. 1.50 Inches
3. 2.00 Inches
5. Press 3 for the supply width.
Select Type: Fld #1
1. Text Field
2. Bar Code Field
3. Constant Text
4. Line
5. Finished
6. Press 1 to define a text field.
Select Field Class
1. Simple Field
2. Price Field
3. System Date/Time
4. Combo (Merged)
7. Press 3 to define a system date/time field.
Define Time Stamp
Build Template with
Menu Selections
Press any key
8. Press e.
9-12 Defining Special Fields
- Select Component -
(Done)
Slash (/)
Dash (-)
Colon (:)
Blank Space
4 Digit Year
2 Digit Year
Numeric Month
3-Char. Alpha Month
2 Digit Day
Julian Day of Year
Hour (Base 24)
Hour (Base 12)
Minutes
Seconds
AM/PM Indicator
- > HH:MM
(Done)
Slash (/)
Dash (-)
Colon (:)
Blank Space
4 Digit Year
2 Digit Year
9. Start building your date/time stamp. Write
down the way you want your date/time stamp
to appear. For example, to create a date/time
stamp that looks like this:
HH:MM
and prints like this:
(18:21)
10. Select Hour (Base 24). Press e.
Select Colon (:). Press e.
Select Minutes. Press e.
The date/time stamp appears on the top line
while you are creating it.
If you make a mistake while entering the
date/time stamp, press f 1 to backup
one position.
Enter Fixed Data
Press ENTER if none
> _ _ _ _ _ _ _ _ _ _ _ _ _ _ _ _
L
11. Press e for no fixed data.
Enter Row #
> _ _ _ 12. Type 40 for the row location. Press e.
Enter Col. #
> _ _ _ 13. Type 10 for the column location. Press
e.
Defining Special Fields 9-13
- = Select Font = -
1. CG Trium 6.5 1000
2. CG Trium 8 pt 1001
3. CG Trium 10p 1002
4. CG Trium 12p 1003
5. CG Trium 18 p 1004
6. CG Trium 22p 1005
7. CG TrCon 6.5 1006
8. CG TrCon 8 pt 1007
9. CG TrCon 10p 1008
10. CG TrCon 12p 1009
11. CG TrCon 18p 1010
12. CG TrCon 22p 1011
13. LetGoth 6.5 1012
14. LetGoth 9pt 1013
14. Select CG Trium 6.5 1000. Press e.
Enter Height Mag for
this font (1-7) > _ 15. Press 1 for the height magnification.
Enter Width Mag for
this font (1-7) > _ 16. Press 1 for the width magnification.
Set Justification
1. Left (L)
2. Right (E)
3. Center (B)
17. Press 1 for the alignment of characters in
the field.
Top of Field at:
1. Top of Supply
2. Left of Supply
3. Bottom of Supply
4. Right of Supply
18. Press 1 for the field rotation.
Select Type:Fld#2
1. Text Field
2. Bar Code Field
3. Constant Text
4. Line
5. Finished
19. Press 5.
Save current
format? Y/N > _ 20. Press Y to save the format. You return to the
Design Menu.

9-14 Defining Special Fields
Printing the Sample Date/Time Format
After designing your format, print it to see how it looks.
- = Design Menu = -
1. Create New Format
2. Edit Old Format
3. Copy Format
4. Delete Format
1. Press b to exit the Design Menu.
- = Main Menu = -
1. Design Formats
2. Print Labels
3. Configuration
2. Press 2 to print your format.
Select Format
to Print
- = Format Menu - =
01 DATE/TIME
02 PRICE
03 LINE2
04 LINE
05 CONSTANT
06 COMBO
07 SIZE
3. Select DATE/TIME and press e. The
label prints.
This sample prints the following label.

Applying Data Edits 10-1
APPLYING DATA EDITS
Data edits are available for both text and bar code fields (simple
and combo). You can define two edits per field. For example, use the strip
characters to remove the cents from a price field ($12.50 becomes $12) and
then pad data on the right with nines ($12.99).
You can use data edits on fields where fixed data is defined.
NOTE: Fixed data can be added before or after performing the data edit.
You will be prompted, “perform data edit before or after including
fixed data?” Unexpected results may occur if you perform the data
edit before including fixed data or vice versa.
You can select from the following data edits:
Make into price Reformats the data as a price by adding the currency
symbol (selected at the Configuration menu) and decimal
point (decimal point, comma, etc.).
NOTE: Use on text fields only.
Pad data field Adds pad characters to fill in the specified field. Use this
data edit to add leading or trailing zeros in bar code or
price fields. For example, the operator enters 1 and the
price prints as .01.
Extract Characters Extracts the specified number of characters from the left
or right side of the current field. The remaining
characters are discarded.
Strip Characters Removes the specified number of characters from the left
or right side of the current field. The remaining
characters are printed.
Extract Characters
from Middle
Extracts the specified number of characters from the
specified position. The remaining characters are
discarded.
Insert Character Inserts one character at the specified position in the
current field.
10
10-2 Applying Data Edits
Make Into Shoe Size Removes the last character in the specified field and if
the character was a five (5), prints ½ at the end of the
field. If the last character was a zero (0), the last
character is removed and not printed. For example,
90 prints as 9
65 prints as 6½
NOTE: Use on text fields only.
Using Data Edits
Data edits are defined as the last step in text and bar code fields. We will
create a new format, AUTOPART (4.0 long x 2.0 wide), which contains two
♦ constant text fields.
♦ Code 39 bar code fields.
♦ combo text fields to print the human readable bar code characters.
Then, we will apply some data edits to manipulate the format. Use the
following information to create the two constant text fields. See Chapter 5,
“Defining Text Fields” or Chapter 7, “Defining Constant Text Fields” for more
information.
Prompts Constant Text Field 1 Constant Text Field 2
Fixed data PART# SERIAL#
Row 315 180
Column 15 15
Font 4. CG Trium 12p 1003 4. CG Trium 12p 1003
Height Magnification 1 1
Width Magnification 1 1
Justification 1 1
Field Rotation 1 1

Applying Data Edits 10-3
Use the following information to create the two bar code fields. See Chapter
6, “Defining Bar Code Fields” for more information.
Prompts Bar Code Field 1 Bar Code Field 2
Bar Code 4. Code 39 –no c/d 4. Code 39 –no c/d
Field Class 1. Simple 1. Simple
Data Type Alphanumeric Alphanumeric
Maximum Length 10 10
Minimum Length 1 1
Field Prompt KEY PART# SCAN SERIAL#
Fixed Data None None
Row 255 120
Column 15 15
Density 12.0cpi 1:3.0 1 dot 12.0cpi 1:3.0 1 dot
Bar Height 50 50
Field Rotation 1 1
Data Edit None None
10-4 Applying Data Edits
Use the following information to create the two combo text fields. See
Chapter 5, “Defining Text Fields” for more information about creating
combination text fields.
Prompts Combo Field 1 Combo Field 2
Field Class 4. Combo (Merged) 4. Combo (Merged)
Maximum Length 10 10
Minimum Length 1 1
Field Number 1 2
Start Position 1 1
Number of Characters 10 10
Fill Direction 3 Do not fill 3 Do not fill
Fixed Data None None
Row 240 105
Column 15 15
Font 3. CG Trium 10p 1002 3. CG Trium 10p 1002
Height Magnification 1 1
Width Magnification 1 1
Justification 1 1
Field Rotation 1 1
Data Edit None None
Applying Data Edits 10-5
Printing the Format
From the Main Menu, select Print Labels, and the AUTOPART format.
Follow the field prompts as necessary.
Depending on the data you enter for the bar code fields, this sample prints
the following label.

10-6 Applying Data Edits
Padding Data
In our AUTOPART sample, we will pad data in the PART# bar code field.
- = Main Menu = -
1. Design Formats
2. Print Labels
3. Configuration
1. Press 1 to design your formats.
- = Design Menu = -
1. Create New Format
2. Edit Old Format
3. Copy Format
4. Delete Format
2. Press 2 to edit an existing format.
Select Format
for Editing
- = Format Menu = -
01 AUTOPART
02 PRICE
03 LINE2
04 LINE
05 CONSTANT
06 COMBO
07 SIZE
3. Select AUTOPART. Press e.
- = Edit Menu = -
1. Edit Header Info
2. Edit a Field
3. Add a Field
4. Delete a Field
5. Quit Edit
4. Press 2.
Select Edit Field
Fld: 1 Constant
Fld: 2 Constant
Fld: 3 Ufld: 1 Smpl
Fld: 4 Ufld: 2 Smpl
Fld: 5 Ufld: 3 Cmbo
Fld: 6 Ufld: 4 Cmbo
5. Select Fld: 3 Ufld 1 Smpl to edit the PART#
bar code field. Press e.
Select Type:Fld #3
1. Text Field
2. Bar Code Field
3. Constant Text
4. Line
6. Press e.
Applying Data Edits 10-7
- = Select Bar Code = -
4. Code 39 –no c/d
5. Codabar
6. EAN-8
7. EAN-13
8. Code 128
9. MSI
7. Press e to keep Code 39 as the bar
code.
Select Field Class
1. Simple Field
2. Price Field
3. System Date/Time
4. Combo (Merged)
8. Press e to keep the field defined as
simple.
Numeric or
Alpha-Numeric Data?
A/N > A _
9. Press e to keep Alphanumeric as the
data type.
Enter Max. Length
> 10 _ 10. Press g. Type 2 (so the maximum length
for the field is 12). Press e.
Enter Min. Length
> 1 _ 11. Press e to keep the current minimum
length.
Enter Field Prompt
KEY PART# _ _ _ _ _ _ _ _ _ 12. Press e to keep the current field prompt.
Edit Fixed Data
Press ENTER to
retain
> _ _ _ _ _ _ _ _ _ _ _ _ _ _ _ _
13. Press e for no fixed data.
Enter Row #
> 255 _ 14. Press e to keep the current row
location.
Enter Col. #
> 15 _ 15. Press e to keep the current column
location.
- = Select Density = -
3.3 cpi 1:2.5 4 dots
4.0 cpi 1:3.0 3 dots
6.0 cpi 1:3.0 2 dots
6.6 cpi 1:2.5 2 dots
3.7 cpi 1:2.0 4 dots
12.0cpi 1:3.0 1 dot
2.8 cpi 1:2.2 5 dots
16. Press e to keep the current density.
10-8 Applying Data Edits
Enter Bar Height
(Units = Inch/100)
> 50 _
17. Press e to keep the current bar code
height.
Top of Field at:
1. Top of Supply
2. Left of Supply
3. Bottom of Supply
4. Right of Supply
18. Press e to keep the current field
rotation.
Select Edit #1
1. (None)
2. Make into Price
3. Pad Data Field
4. Extract Chars
5. Strip Chars
6. Extract from Mid
7. Insert Chars
8. Make Shoe Size
19. Select Pad Data Field. Press e.
Pad Characters on
Left or Right? L/R _
L
20. Press L to pad characters on the left.
Enter Pad
character: _ 21. Type 0 for the pad character.
Select Edit #2
1. (None)
2. Make into Price
3. Pad Data Field
4. Extract Chars
5. Strip Chars
6. Extract from Mid
7. Insert Chars
8. Make Shoe Size
22. Press e for no additional data edits.
- = Edit Menu = -
1. Edit Header Info
2. Edit a Field
3. Add a Field
4. Delete a Field
5. Quit Edit
23. Press 5.
Save changes? Y/N > _
L
24. Press Y. You return to the Format Menu.
Press b until you return to the Main Menu.
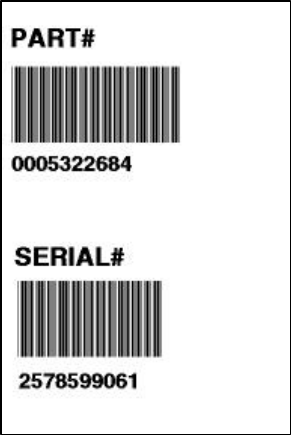
Applying Data Edits 10-9
Printing the Format
From the Main Menu, select Print Labels, and the AUTOPART format.
Follow the field prompts as necessary.
Depending on the data you enter for the bar code fields, this sample prints
the following label.
This graphic shows the padded PART# bar code field and the copied data for
the human readable combo text field.
Notice that the combo text field only contains 10 characters, not 12, because
the combo field was set up for a maximum of 10 characters. It includes the
two zero pad characters and the next eight characters of the bar code
(entered by the user).

10-10 Applying Data Edits
Extracting Characters
In our AUTOPART sample, we will extract five characters from the PART#
bar code field and only these five extracted characters will print.
- = Main Menu = -
1. Design Formats
2. Print Labels
3. Configuration
1. Press 1 to design your formats.
- = Design Menu = -
1. Create New Format
2. Edit Old Format
3. Copy Format
4. Delete Format
2. Press 2 to edit an existing format.
Select Format
for Editing
- = Format Menu = -
01 AUTOPART
02 PRICE
03 LINE2
04 LINE
05 CONSTANT
06 COMBO
07 SIZE
3. Select AUTOPART. Press e.
- = Edit Menu = -
1. Edit Header Info
2. Edit a Field
3. Add a Field
4. Delete a Field
5. Quit Edit
4. Press 2 to edit the PART# bar code field.
Select Edit Field
Fld: 1 Constant
Fld: 2 Constant
Fld: 3 Ufld: 1 Smpl
Fld: 4 Ufld: 2 Smpl
Fld: 5 Ufld: 3 Cmbo
Fld: 6 Ufld: 4 Cmbo
5. Select Fld: 3 Ufld 1 Smpl. Press e.
Select Type:Fld #3
1. Text Field
2. Bar Code Field
3. Constant Text
4. Line
6. Press e.

Applying Data Edits 10-11
- = Select Bar Code = -
4. Code 39 –no c/d
5. Codabar
6. EAN-8
7. EAN-13
8. Code 128
9. MSI
7. Press e to keep Code 39 as the bar
code.
Select Field Class
1. Simple Field
2. Price Field
3. System Date/Time
4. Combo (Merged)
8. Press e to keep the field defined as
simple.
Numeric or
Alpha-Numeric Data?
A/N > A _
9. Press e to keep Alphanumeric as the
data type.
Enter Max. Length
> 12 _ 10. Press g. Type 0 (so the maximum length
for the field is 10). Press e.
Enter Min. Length
> 1 _ 11. Press e to keep the current minimum
length.
Enter Field Prompt
KEY PART# _ _ _ _ _ _ _ _ _ 12. Press e to keep the current field prompt.
Edit Fixed Data
Press ENTER to
retain
> _ _ _ _ _ _ _ _ _ _ _ _ _ _ _ _
13. Press e for no fixed data.
Enter Row #
> 255 _ 14. Press e to keep the current row
location.
Enter Col. #
> 15 _ 15. Press e to keep the current column
location.
- = Select Density = -
3.3 cpi 1:2.5 4 dots
4.0 cpi 1:3.0 3 dots
6.0 cpi 1:3.0 2 dots
6.6 cpi 1:2.5 2 dots
3.7 cpi 1:2.0 4 dots
12.0cpi 1:3.0 1 dot
2.8 cpi 1:2.2 5 dots
16. Press e to keep the current density.
10-12 Applying Data Edits
Enter Bar Height
(Units = Inch/100)
> 50 _
17. Press e to keep the current bar code
height.
Top of Field at:
1. Top of Supply
2. Left of Supply
3. Bottom of Supply
4. Right of Supply
18. Press e to keep the current field
rotation.
Select Edit #1
1. (None)
2. Make into Price
3. Pad Data Field
4. Extract Chars
5. Strip Chars
6. Extract from Mid
7. Insert Chars
8. Make Shoe Size
19. Select Extract Chars. Press e.
Extract chars from
Left or Right? L/R _
L
20. Press R to extract characters from the right.
Enter number
of characters: _ _ 21. Type 5. Press e.
Select Edit #2
1. (None)
2. Make into Price
3. Pad Data Field
4. Extract Chars
5. Strip Chars
6. Extract from Mid
7. Insert Chars
8. Make Shoe Size
22. Press e for no additional data edits.
- = Edit Menu = -
1. Edit Header Info
2. Edit a Field
3. Add a Field
4. Delete a Field
5. Quit Edit
23. Press 5.
Save changes? Y/N > _
L
24. Press Y. You return to the Format Menu.
Press b until you return to the Main Menu.
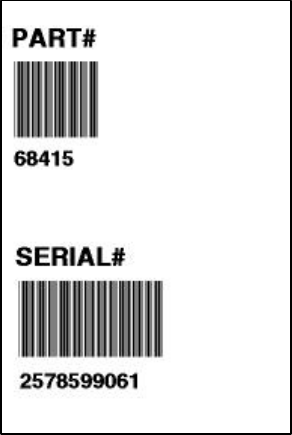
Applying Data Edits 10-13
Printing the Format
From the Main Menu, select Print Labels, and the AUTOPART format.
Follow the field prompts as necessary.
Depending on the data you enter for the bar code fields, this sample prints
the following label.
This graphic shows the five extracted characters from the PART# bar code
field and the copied data for the human readable combo text field.
Notice that the bar code field contains the last five characters entered, since
we extracted characters from the right. The combo text field also contains
those five characters.

10-14 Applying Data Edits
Stripping Characters
In our AUTOPART sample, we will strip three characters from the PART# bar
code field and only the remaining characters will print.
- = Main Menu = -
1. Design Formats
2. Print Labels
3. Configuration
1. Press 1 to design your formats.
- = Design Menu = -
1. Create New Format
2. Edit Old Format
3. Copy Format
4. Delete Format
2. Press 2 to edit an existing format.
Select Format
for Editing
- = Format Menu = -
01 AUTOPART
02 PRICE
03 LINE2
04 LINE
05 CONSTANT
06 COMBO
07 SIZE
3. Select AUTOPART. Press e.
- = Edit Menu = -
1. Edit Header Info
2. Edit a Field
3. Add a Field
4. Delete a Field
5. Quit Edit
4. Press 2 to edit the PART# bar code field.
Select Edit Field
Fld: 1 Constant
Fld: 2 Constant
Fld: 3 Ufld: 1 Smpl
Fld: 4 Ufld: 2 Smpl
Fld: 5 Ufld: 3 Cmbo
Fld: 6 Ufld: 4 Cmbo
5. Select Fld: 3 Ufld 1 Smpl. Press e.
Select Type:Fld #3
1. Text Field
2. Bar Code Field
3. Constant Text
4. Line
6. Press e.

Applying Data Edits 10-15
- = Select Bar Code = -
4. Code 39 –no c/d
5. Codabar
6. EAN-8
7. EAN-13
8. Code 128
9. MSI
7. Press e to keep Code 39 as the bar
code.
Select Field Class
1. Simple Field
2. Price Field
3. System Date/Time
4. Combo (Merged)
8. Press e to keep the field defined as
simple.
Numeric or
Alpha-Numeric Data?
A/N > A _
9. Press e to keep Alphanumeric as the
data type.
Enter Max. Length
> 10 _ 10. Press e to keep the current maximum
length.
Enter Min. Length
> 1 _ 11. Press e to keep the current minimum
length.
Enter Field Prompt
KEY PART# _ _ _ _ _ _ _ _ _ 12. Press e to keep the current field prompt.
Edit Fixed Data
Press ENTER to
retain
> _ _ _ _ _ _ _ _ _ _ _ _ _ _ _ _
13. Press e for no fixed data.
Enter Row #
> 255 _ 14. Press e to keep the current row
location.
Enter Col. #
> 15 _ 15. Press e to keep the current column
location.
- = Select Density = -
3.3 cpi 1:2.5 4 dots
4.0 cpi 1:3.0 3 dots
6.0 cpi 1:3.0 2 dots
6.6 cpi 1:2.5 2 dots
3.7 cpi 1:2.0 4 dots
12.0cpi 1:3.0 1 dot
2.8 cpi 1:2.2 5 dots
16. Press e to keep the current density.
10-16 Applying Data Edits
Enter Bar Height
(Units = Inch/100)
> 50 _
17. Press e to keep the current bar code
height.
Top of Field at:
1. Top of Supply
2. Left of Supply
3. Bottom of Supply
4. Right of Supply
18. Press e to keep the current field
rotation.
Select Edit #1
1. (None)
2. Make into Price
3. Pad Data Field
4. Extract Chars
5. Strip Chars
6. Extract from Mid
7. Insert Chars
8. Make Shoe Size
19. Select Strip Chars. Press e.
Strip chars from
Left or Right? L/R _
L
20. Press L to remove characters from the left.
Enter number
of characters: _ _ 21. Type 3. Press e.
Select Edit #2
1. (None)
2. Make into Price
3. Pad Data Field
4. Extract Chars
5. Strip Chars
6. Extract from Mid
7. Insert Chars
8. Make Shoe Size
22. Press e for no additional data edits.
- = Edit Menu = -
1. Edit Header Info
2. Edit a Field
3. Add a Field
4. Delete a Field
5. Quit Edit
23. Press 5.
Save changes? Y/N > _
L
24. Press Y. You return to the Format Menu.
Press b until you return to the Main Menu.
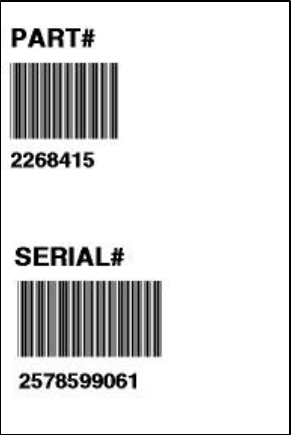
Applying Data Edits 10-17
Printing the Format
From the Main Menu, select Print Labels, and the AUTOPART format.
Follow the field prompts as necessary.
Depending on the data you enter for the bar code fields, this sample prints
the following label.
This graphic shows the seven remaining characters in the PART# bar code
field, after the first three characters were stripped.
Notice that the bar code field contains the last seven characters entered,
since we stripped the first three characters entered (from the left). The
combo text field also contains the remaining seven characters.
10-18 Applying Data Edits
Extracting Characters from the Middle
In our AUTOPART sample, we will extract four characters from the PART#
bar code field and only these four extracted characters will print.
- = Main Menu = -
1. Design Formats
2. Print Labels
3. Configuration
1. Press 1 to design your formats.
- = Design Menu = -
1. Create New Format
2. Edit Old Format
3. Copy Format
4. Delete Format
2. Press 2 to edit an existing format.
Select Format
for Editing
- = Format Menu = -
01 AUTOPART
02 PRICE
03 LINE2
04 LINE
05 CONSTANT
06 COMBO
07 SIZE
3. Select AUTOPART. Press e.
- = Edit Menu = -
1. Edit Header Info
2. Edit a Field
3. Add a Field
4. Delete a Field
5. Quit Edit
4. Press 2.
Select Edit Field
Fld: 1 Constant
Fld: 2 Constant
Fld: 3 Ufld: 1 Smpl
Fld: 4 Ufld: 2 Smpl
Fld: 5 Ufld: 3 Cmbo
Fld: 6 Ufld: 4 Cmbo
5. Select Fld: 3 Ufld 1 Smpl to edit the PART#
bar code field. Press e.
Select Type:Fld #3
1. Text Field
2. Bar Code Field
3. Constant Text
4. Line
6. Press e.

Applying Data Edits 10-19
- = Select Bar Code = -
4. Code 39 –no c/d
5. Codabar
6. EAN-8
7. EAN-13
8. Code 128
9. MSI
7. Press e to keep Code 39 as the bar
code.
Select Field Class
1. Simple Field
2. Price Field
3. System Date/Time
4. Combo (Merged)
8. Press e to keep the field defined as
simple.
Numeric or
Alpha-Numeric Data?
A/N > A _
9. Press e to keep Alphanumeric as the
data type.
Enter Max. Length
> 10 _ 10. Press e to keep the current maximum
length.
Enter Min. Length
> 1 _ 11. Press e to keep the current minimum
length.
Enter Field Prompt
KEY PART# _ _ _ _ _ _ _ _ _ 12. Press e to keep the current field prompt.
Edit Fixed Data
Press ENTER to
retain
> _ _ _ _ _ _ _ _ _ _ _ _ _ _ _ _
13. Press e for no fixed data.
Enter Row #
> 255 _ 14. Press e to keep the current row
location.
Enter Col. #
> 15 _ 15. Press e to keep the current column
location.
- = Select Density = -
3.3 cpi 1:2.5 4 dots
4.0 cpi 1:3.0 3 dots
6.0 cpi 1:3.0 2 dots
6.6 cpi 1:2.5 2 dots
3.7 cpi 1:2.0 4 dots
12.0cpi 1:3.0 1 dot
2.8 cpi 1:2.2 5 dots
16. Press e to keep the current density.
10-20 Applying Data Edits
Enter Bar Height
(Units = Inch/100)
> 50 _
17. Press e to keep the current bar code
height.
Top of Field at:
1. Top of Supply
2. Left of Supply
3. Bottom of Supply
4. Right of Supply
18. Press e to keep the current field
rotation.
Select Edit #1
1. (None)
2. Make into Price
3. Pad Data Field
4. Extract Chars
5. Strip Chars
6. Extract from Mid
7. Insert Chars
8. Make Shoe Size
19. Select Extract from Mid. Press e.
Enter character
Position: _ _ 20. Type 4. Press e.
Enter number
of characters: _ _ 21. Type 4. Press e.
Select Edit #2
1. (None)
2. Make into Price
3. Pad Data Field
4. Extract Chars
5. Strip Chars
6. Extract from Mid
7. Insert Chars
8. Make Shoe Size
22. Press e for no additional data edits.
- = Edit Menu = -
1. Edit Header Info
2. Edit a Field
3. Add a Field
4. Delete a Field
5. Quit Edit
23. Press 5.
Save changes? Y/N > _
L
24. Press Y. You return to the Format Menu.
Press b until you return to the Main Menu.

Applying Data Edits 10-21
Printing the Format
From the Main Menu, select Print Labels, and the AUTOPART format.
Follow the field prompts as necessary.
Depending on the data you enter for the bar code fields, this sample prints
the following label.
This graphic shows the four extracted characters from the PART# bar code
field. The first three and last three characters were stripped.
Notice that the bar code field contains the four middle characters entered,
since we extracted four characters starting with the fourth position. The
combo text field also contains the four extracted characters.

10-22 Applying Data Edits
Inserting Characters
In our AUTOPART sample, we will insert one character at the beginning of
the PART# bar code field, but not print that character in the combo text field.
- = Main Menu = -
1. Design Formats
2. Print Labels
3. Configuration
1. Press 1 to design your formats.
- = Design Menu = -
1. Create New Format
2. Edit Old Format
3. Copy Format
4. Delete Format
2. Press 2 to edit an existing format.
Select Format
for Editing
- = Format Menu = -
01 AUTOPART
02 PRICE
03 LINE2
04 LINE
05 CONSTANT
06 COMBO
07 SIZE
3. Select AUTOPART. Press e.
- = Edit Menu = -
1. Edit Header Info
2. Edit a Field
3. Add a Field
4. Delete a Field
5. Quit Edit
4. Press 2.
Select Edit Field
Fld: 1 Constant
Fld: 2 Constant
Fld: 3 Ufld: 1 Smpl
Fld: 4 Ufld: 2 Smpl
Fld: 5 Ufld: 3 Cmbo
Fld: 6 Ufld: 4 Cmbo
5. Select Fld: 3 Ufld 1 Smpl to edit the PART#
bar code field. Press e.
Select Type:Fld #3
1. Text Field
2. Bar Code Field
3. Constant Text
4. Line
6. Press e.

Applying Data Edits 10-23
- = Select Bar Code = -
4. Code 39 –no c/d
5. Codabar
6. EAN-8
7. EAN-13
8. Code 128
9. MSI
7. Press e to keep Code 39 –no c/d as the
bar code.
Select Field Class
1. Simple Field
2. Price Field
3. System Date/Time
4. Combo (Merged)
8. Press e to keep the field defined as
simple.
Numeric or
Alpha-Numeric Data?
A/N > A _
9. Press e to keep Alphanumeric as the
data type.
Enter Max. Length
> 10 _ 10. Press e to keep the current maximum
length.
Enter Min. Length
> 1 _ 11. Press e to keep the current minimum
length.
Enter Field Prompt
KEY PART# _ _ _ _ _ _ _ _ _ 12. Press e to keep the current field prompt.
Edit Fixed Data
Press ENTER to
retain
> _ _ _ _ _ _ _ _ _ _ _ _ _ _ _ _
13. Press e for no fixed data.
Enter Row #
> 255 _ 14. Press e to keep the current row
location.
Enter Col. #
> 15 _ 15. Press e to keep the current column
location.
- = Select Density = -
3.3 cpi 1:2.5 4 dots
4.0 cpi 1:3.0 3 dots
6.0 cpi 1:3.0 2 dots
6.6 cpi 1:2.5 2 dots
3.7 cpi 1:2.0 4 dots
12.0cpi 1:3.0 1 dot
2.8 cpi 1:2.2 5 dots
16. Press e to keep the current density.
10-24 Applying Data Edits
Enter Bar Height
(Units = Inch/100)
> 50 _
17. Press e to keep the current bar code
height.
Top of Field at:
1. Top of Supply
2. Left of Supply
3. Bottom of Supply
4. Right of Supply
18. Press e to keep the current field
rotation.
Select Edit #1
2. Make into Price
3. Pad Data Field
4. Extract Chars
5. Strip Chars
6. Extract from Mid
7. Insert Chars
8. Make Shoe Size
19. Select Insert Chars. Press e.
Enter character
to Insert: _ 20. Type P.
Enter character
Position: _ _ 21. Type 1. Press e.
Select Edit #2
1. (None)
2. Make into Price
3. Pad Data Field
4. Extract Chars
5. Strip Chars
6. Extract from Mid
7. Insert Chars
8. Make Shoe Size
22. Press e for no additional data edits.
- = Edit Menu = -
1. Edit Header Info
2. Edit a Field
3. Add a Field
4. Delete a Field
5. Quit Edit
23. Press 2 to edit the combo text field
containing the human readable characters (for
the PART# bar code) so the maximum number
of characters is 9, the start position to copy
from is 02 (does not copy the inserted “P”
character), the number of characters to copy
is 9, and do not fill the field if it is short.
Save changes? Y/N > _
L
24. Press Y. You return to the Format Menu.
Press b until you return to the Main Menu.
Applying Data Edits 10-25
Printing the Format
From the Main Menu, select Print Labels, and the AUTOPART format.
Follow the field prompts as necessary.
Depending on the data you enter for the bar code fields, this sample prints
the following label.
This graphic shows the PART# bar code field, with a “P” as the first
character.
Notice that the bar code field contains the maximum number of 10
characters, while the combo field contains a maximum of 9 characters. The
combo field does not display the “P.”
10-26 Applying Data Edits
Make Into Price
We will create a new format, SHOE-PRICE (2.0 long x 2.0 wide) that
contains three text fields and apply the “make into price” edit on the second
text field.
NOTE: Use this edit only on text fields.
Use the following information to create the text field. See Chapters 5,
“Defining Text Fields,” and Chapter 7, “Defining Constant Text Fields” for
more information.
Prompts Text Field 1 Constant Text Field Text Field 2
Field Class Simple N/A Simple
Data Type Alpha-numeric N/A Numeric
Max. Length 16 N/A 6
Min. Length 1 N/A 1
Field Prompt ENTER ITEM N/A KEY PRICE
Fixed data None PRICE None
Row 130 75 75
Column 10 30 75
Font 3. CG Trium 10p 1002 2. CG Trium 8pt 1001 2. CG Trium 8pt 1001
Height Mag. 1 1 1
Width Mag. 1 1 1
Justif. 1 1 1
Field Rot. 1 1 1
Data Edit None N/A 2 Make into Price

Applying Data Edits 10-27
Printing the Format
From the Main Menu, select Print Labels, and the SHOE-PRICE format.
Follow the field prompts as necessary.
Depending on the data you enter for the bar code fields, this sample prints
the following label.
This graphic shows the second text field
automatically formatted to include the
selected currency (set through Configuration
menu) symbols. See Chapter 3,
“Configuring the Printer,” for more
information.
Make Into Shoe Size
In our SHOE-PRICE sample, we will add one more text field, containing the
fixed data “SIZE” and apply the “make into shoe size” edit on that text field.
This example also shows how to apply a data edit to a field that includes
fixed data.
This edit transforms a size that ends in 5 into a “1/2” size when printed on a
label. For example, if you enter 65 as the size, 6 ½ appears on the label.
NOTE: Use this edit only on text fields.
- = Main Menu = -
1. Design Formats
2. Print Labels
3. Configuration
1. Press 1 to design your formats.
- = Design Menu = -
1. Create New Format
2. Edit Old Format
3. Copy Format
4. Delete Format
2. Press 2 to edit an existing format.
10-28 Applying Data Edits
Select Format
for Editing
- = Format Menu = -
01 SHOE-PRICE
02 AUTOPART
03 PRICE
04 LINE2
05 LINE
06 CONSTANT
07 COMBO
08 SIZE
3. Select SHOE-PRICE. Press e.
- = Edit Menu = -
1. Edit Header Info
2. Edit a Field
3. Add a Field
4. Delete a Field
5. Quit Edit
4. Press 3 to add a field.
New Field Location
Fld: 1 Ufld: 1 Smpl
Fld: 2 Constant
Fld: 3 Ufld: 2 Smpl
5. Select Fld: 3 Ufld: 2 Smpl. e.
Add new field
1. Before or
2. After
selected field? > _
6. Press 2 (After selected field).
Select Type: Fld #4
1. Text Field
2. Bar Code Field
3. Constant Text
4. Line
5. Finished
7. Press 1 to define a text field.
Select Field Class
1. Simple Field
2. Price Field
3. System Date/Time
4. Complex (Merged)
8. Press 1 to define a simple field.
Numeric or
Alpha-Numeric Data?
A/N > _
L
9. Press A (alpha-numeric).
Enter Max. Length
> _ _ _ 10. Type 12 as the maximum number of
characters in the field. Press e.
Applying Data Edits 10-29
Enter Min. Length
> _ _ _ 11. Type 1 as the minimum number of characters
in the field. Press e.
Enter Field Prompt
> _ _ _ _ _ _ _ _ _ _ _ _ _ _ _ _
L
12. Type ENTER SIZE. Press e.
Enter Fixed Data
Press ENTER if none
> _ _ _ _ _ _ _ _ _ _ _ _ _ _ _ _
L
13. Type SIZE, then press Space for the fixed
data. Press e.
Add fixed data
Before or After
entry chars? B/A
> _
L
14. Press B to print the fixed data before the entry
characters.
Enter Row #
> _ _ _ 15. Type 95 for the row location. Press e.
Enter Col. #
> _ _ _ 16. Type 30 for the column location. Press
e.
- = Select Font = -
1. CG Trium 6.5 1000
2. CG Trium 8 pt 1001
3. CG Trium 10p 1002
4. CG Trium 12p 1003
5. CG Trium 18 p 1004
6. CG Trium 22p 1005
7. CG TrCon 6.5 1006
8. CG TrCon 8 pt 1007
9. CG TrCon 10p 1008
10. CG TrCon 12p 1009
11. CG TrCon 18p 1010
12. CG TrCon 22p 1011
13. LetGoth 6.5 1012
14. LetGoth 9pt 1013
17. Select CG Trium 8 pt 1001. Press e.
Enter Height Mag for
this font (1-7) > _ 18. Press 1 for the height magnification.
Enter Width Mag for
this font (1-7) > _ 19. Press 1 for the width magnification.
10-30 Applying Data Edits
Set Justification
1. Left (L)
2. Right (E)
3. Center (B)
20. Press 1 for the alignment of characters in
the field.
Top of Field at:
1. Top of Supply
2. Left of Supply
3. Bottom of Supply
4. Right of Supply
21. Press 1 for the field rotation.
Select Edit #1
1. None
2. Make into Price
3. Pad Data Field
4. Extract Chars
5. Strip Chars
6. Extract from Mid
7. Insert Chars
8. Make Shoe Size
22. Select Make Shoe Size. Press e.
Select Edit #2
1. None
2. Make into Price
3. Pad Data Field
4. Extract Chars
5. Strip Chars
6. Extract from Mid
7. Insert Chars
8. Make Shoe Size
23. Press e for no additional data edits.
Perform Edits
Before or After
including Fixed
Data? (B/A) > _
24. Press A.
- = Edit Menu = -
1. Edit Header Info
2. Edit a Field
3. Add a Field
4. Delete a Field
5. Quit Edit
25. Press 5.
Save current
format? Y/N > _ 26. Press Y to save the format. You return to the
Design Menu. Press b until you return to
the Main Menu.
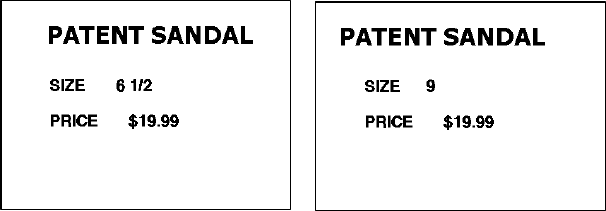
Applying Data Edits 10-31
Printing the Format
From the Main Menu, select Print Labels, and the SHOE-PRICE format.
Follow the field prompts as necessary.
Depending on the data you enter for the bar code fields, this sample prints
the following label.
These graphics show the SIZE text field automatically formatted to include
the “1/2” shoe size designation, if necessary.
10-32 Applying Data Edits
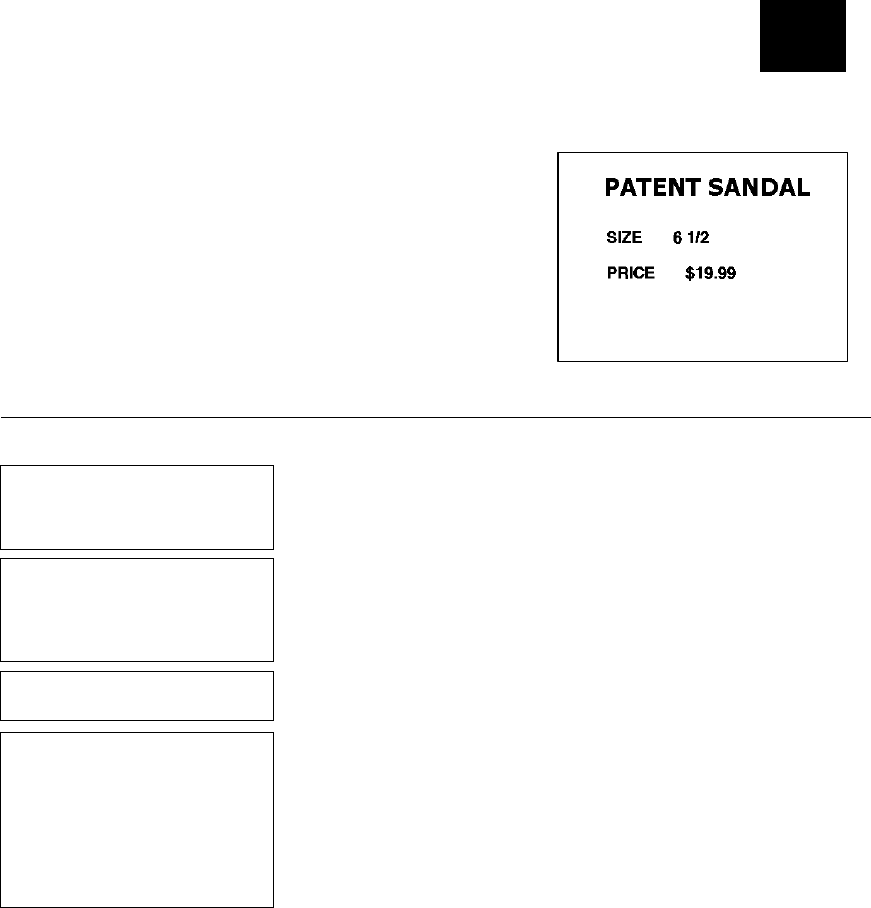
Editing a Format 11-1
EDITING A FORMAT
This chapter includes information about editing a format, copying a
format, and deleting a format. Depending on the size of your memory card,
you can store up to 80 formats in your printer.
When editing a format, you can modify the
header information (format name, supply length
and width), add a field, delete a field, or edit an
existing field.
We will copy our SHOE-PRICE format, add a
line field, and delete the text field formatted as
price field.
Copying a Format
We will copy our SHOE-PRICE format and name the new format SHOE-SIZE.
- = Main Menu = -
. Design Formats
2. Print Labels
3. Configuration
1. Press 1 to design your formats.
- = Design Menu = -
1. Create New Format
2. Edit Old Format
3. Copy Format
4. Delete Format
2. Press 3 to copy an existing format.
Select Format
to Copy _
- = Format Menu = -
01 SHOE-PRICE
02 AUTOPART
03 PRICE
04 LINE2
05 LINE
06 CONSTANT
07 COMBO
08 SIZE
3. Select SHOE-PRICE. Press e.
11
11-2 Editing a Format
Enter Format Name
> _ _ _ _ _ _ _ _ _ _ _ _ _ _ _
L
4. Type SHOE-SIZE and press e.
Format Copied!
- = Design Menu = -
1. Create New Format
2. Edit Old Format
3. Copy Format
4. Delete Format
5. The format is copied and you return to the
Design menu.
Editing a Field
When you edit a field, you can add, delete, or modify existing fields as well
as change the format name, supply length, or supply width.
Adding a Field
In our new SHOE-SIZE format, we will add a line field.
- = Main Menu = -
1. Design Formats
2. Print Labels
3. Configuration
1. Press 1 to design your formats.
- = Design Menu = -
1. Create New Format
2. Edit Old Format
3. Copy Format
4. Delete Format
2. Press 2 to edit an existing format.
Select Format
for Editing _
- = Format Menu = -
01 SHOE-SIZE
02 SHOE-PRICE
03 AUTOPART
04 PRICE
05 LINE2
06 LINE
07 CONSTANT
3. Select SHOE-SIZE. Press e.
Editing a Format 11-3
- = Edit Menu = -
1. Edit Header Info
2. Edit a Field
3. Add a Field
4. Delete a Field
5. Quit Edit
4. Press 3 to add a field.
New Field Location
Fld: 1 Ufld: 1 Smpl
Fld: 2 Constant
Fld: 3 Ufld: 2 Smpl
Fld: 4 Ufld: 3 Smpl
5. Select Fld: 4 Ufld: 3 Smpl. Press e.
Add new field
1. Before or
2. After
selected field? > _
6. Press 2 (After selected field).
Select Type: Fld #5
1. Text Field
2. Bar Code Field
3. Constant Text
4. Line
7. Press 4 for a line field.
Is line Segment or
Vector? S/V > _ 8. Press S.
Enter Row #
for First Point
> _ _ _
9. Type 122 for the row location. Press e.
Enter Col. #
for First Point
> _ _ _
10. Type 10 for the column location. Press
e.
Enter Row #
for Last Point
> _ _ _
11. Type 122 for the end row location. Press
e.
Enter Col. #
for Last Point
> _ _ _
12. Type 130 for the end column location. Press
e.
Enter Thickness
(2 = 0.01 inch)
> _ _
13. Type 3 and press e.
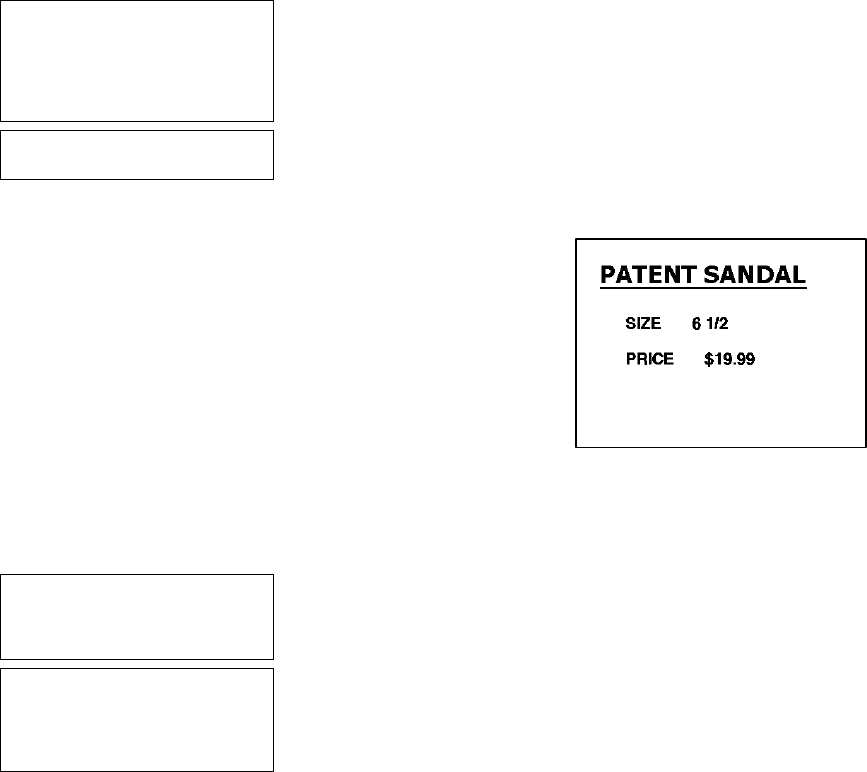
11-4 Editing a Format
- = Edit Menu = -
1. Edit Header Info
2. Edit a Field
3. Add a Field
4. Delete a Field
5. Quit Edit
14. Press 5 to exit the Edit menu.
Save changes? Y/N > _
15. Press Y. You return to the Format menu.
Printing the Format
From the Main Menu, select Print Labels, and
the SHOE-SIZE format. Follow the field prompts
as necessary.
Depending on the data you enter for the bar code
fields, this sample prints the following label.
This graphic shows the copied SHOE-SIZE
format with the line field added.
Deleting a Field
In our SHOE-SIZE format, we will delete the text field formatted as a price
field.
- = Main Menu = -
1. Design Formats
2. Print Labels
3. Configuration
1. Press 1 to design your formats.
- = Design Menu = -
1. Create New Format
2. Edit Old Format
3. Copy Format
4. Delete Format
2. Press 2 to edit an existing format.
Editing a Format 11-5
Select Format
for Editing _
- = Format Menu = -
01 SHOE-SIZE
02 SHOE-PRICE
03 AUTOPART
04 PRICE
05 LINE2
06 LINE
07 CONSTANT
3. Select SHOE-SIZE. Press e.
- = Edit Menu = -
1. Edit Header Info
2. Edit a Field
3. Add a Field
4. Delete a Field
5. Quit Edit
4. Press 4 to delete a field.
Select Fld to Erase
Fld: 1 Ufld: 1 Smpl
Fld: 2 Constant
Fld: 3 Ufld: 2 Smpl
Fld: 4 Ufld: 3 Smpl
Fld: 5 Line
5. Select Fld: 3 Ufld: 2 Smpl to erase the text
field formatted as a price field. Press e.
- = Edit Menu = -
1. Edit Header Info
2. Edit a Field
3. Add a Field
4. Delete a Field
5. Quit Edit
6. Press 4.
Select Fld to Erase
Fld: 1 Ufld: 1 Smpl
Fld: 2 Constant
Fld: 3 Ufld: 3 Smpl
Fld: 4 Line
7. Select Fld: 2 Constant to delete the constant
text field containing “PRICE.” Press e.
The constant text field is erased and you
return to the Edit menu.
- = Edit Menu = -
1. Edit Header Info
2. Edit a Field
3. Add a Field
4. Delete a Field
5. Quit Edit
8. Press 5 to exit the Edit menu.
Save changes? Y/N > _
9. Press Y. You return to the Format menu.
11-6 Editing a Format
Printing the Format
From the Main Menu, select Print Labels, and
the SHOE-SIZE format. Follow the field
prompts as necessary.
Depending on the data you enter for the bar
code fields, this sample prints the following
label.
This graphic shows the SHOE-SIZE format with
the text field formatted as a price field and the
constant text field “PRICE” deleted.
Modifying an Existing Field
In our SHOE-SIZE format, we will modify the text field.
- = Main Menu = -
1. Design Formats
2. Print Labels
3. Configuration
1. Press 1 to design your formats.
- = Design Menu = -
1. Create New Format
2. Edit Old Format
3. Copy Format
4. Delete Format
2. Press 2 to edit an existing format.
Select Format
for Editing _
- = Format Menu = -
01 SHOE-SIZE
02 SHOE-PRICE
03 AUTOPART
04 PRICE
05 LINE2
06 LINE
07 CONSTANT
3. Select SHOE-SIZE. Press e.
- = Edit Menu = -
1. Edit Header Info
2. Edit a Field
3. Add a Field
4. Delete a Field
5. Quit Edit
4. Press 2 to edit an existing field.
Editing a Format 11-7
Select Edit Field
Fld: 1 Ufld: 1 Smpl
Fld: 2 Ufld: 2 Smpl
Fld: 3 Line
5. Select Fld: 1 Ufld: 1 Smpl. Press e.
Select Type:Fld #1
1. Text Field
2. Bar Code Field
3. Constant Text
4. Line
6. Press e.
Select Field Class
1. Simple Field
2. Price Field
3. System Date/Time
4. Combo (Merged)
7. Press e to keep the field defined as
simple.
Numeric or
Alpha-Numeric Data?
A/N > A_
L
8. Press e to keep Alphanumeric as the
data type.
Enter Max. Length
> 16 _ 9. Press e to keep the current maximum
length.
Enter Min. Length
> 1 _ _ 10. Press e to keep the current minimum
length.
Enter Field Prompt
> ENTER ITEM _ _ _ _ _ _ _ _
L
11. Press e to keep the current field prompt.
Enter Fixed Data
Press ENTER if none
> _ _ _ _ _ _ _ _ _ _ _ _ _ _ _ _
L
12. Press e for no fixed data.
Enter Row #
> 130 13. Press e to keep the current row
location.
Enter Col. #
> 10 _ 14. Press g twice and type 5 to change the
column location. Press e.
11-8 Editing a Format
- = Select Font = -
2. CG Trium 8 pt 1001
3. CG Trium 10p 1002
4. CG Trium 12p 1003
5. CG Trium 18 p 1004
6. CG Trium 22p 1005
7. CG TrCon 6.5 1006
8. CG TrCon 8 pt 1007
9. CG TrCon 10p 1008
10. CG TrCon 12p 1009
11. CG TrCon 18p 1010
12. CG TrCon 22p 1011
13. LetGoth 6.5 1012
14. LetGoth 9pt 1013
15. Select CG TrCon 10p 1008. Press e.
Enter Height Mag for
this font (1-7) > 1_ 16. Press e to keep the current height
magnification.
Enter Width Mag for
this font (1-7) > 1_ 17. Press e to keep the current width
magnification.
Set Justification
1. Left (L)
2. Right (E)
3. Center (B)
18. Press e to keep the current alignment of
characters in the field.
Top of Field at:
1. Top of Supply
2. Left of Supply
3. Bottom of Supply
4. Right of Supply
19. Press e to keep the current field
rotation.
Select Edit #1
1. None
2. Make into Price
3. Pad Data Field
4. Extract Chars
5. Strip Chars
6. Extract from Mid
7. Insert Chars
8. Make Shoe Size
20. Press e for no additional data edits.
- = Edit Menu = -
1. Edit Header Info
2. Edit a Field
3. Add a Field
4. Delete a Field
5. Quit Edit
21. Press 5 to exit the Edit menu.
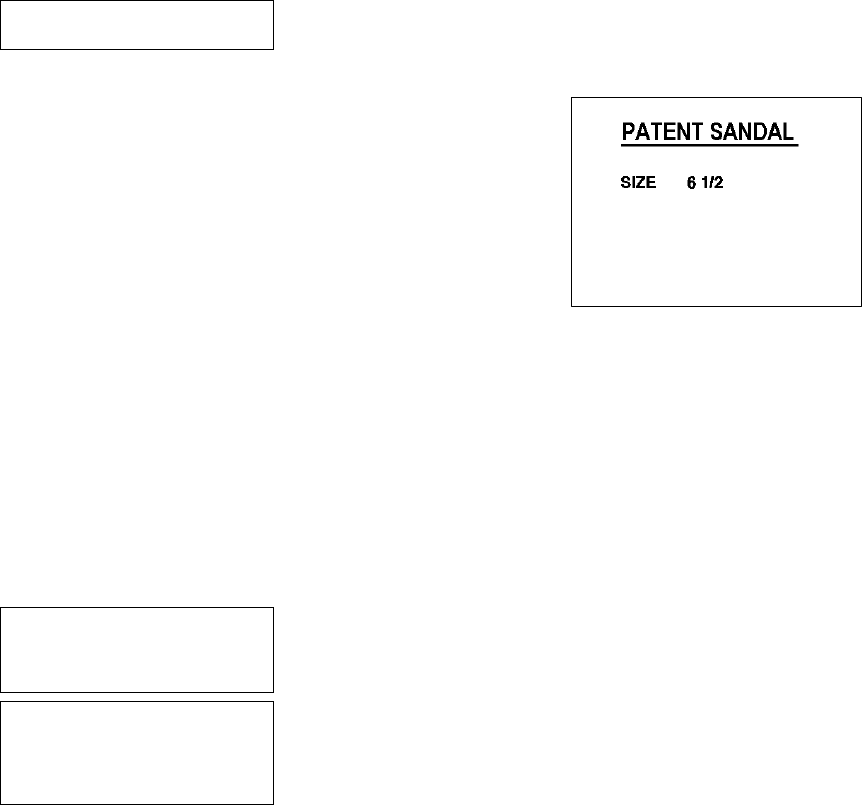
Editing a Format 11-9
Save changes? Y/N > _
22. Press Y. You return to the Format menu.
Printing the Format
From the Main Menu, select Print Labels, and
the SHOE-SIZE format. Follow the field prompts
as necessary.
Depending on the data you enter for the text
fields, this sample prints the following label.
This graphic shows the SHOE-SIZE format with
the new column location and font in the text
field.
Changing Header Information
When editing a format, you can change the header information: format
name, supply length, and supply width.
In our SHOE-SIZE format, we will change the format name, supply length,
and supply width.
NOTE: Before you change the supply length or width, make sure the supply
loaded in the printer matches the supply sizes specified in the
header information.
- = Main Menu = -
1. Design Formats
2. Print Labels
3. Configuration
1. Press 1 to design your formats.
- = Design Menu = -
1. Create New Format
2. Edit Old Format
3. Copy Format
4. Delete Format
2. Press 2 to edit an existing format.
11-10 Editing a Format
Select Format
for Editing _
- = Format Menu = -
01 SHOE-SIZE
02 SHOE-PRICE
03 AUTOPART
04 PRICE
05 LINE2
06 LINE
07 CONSTANT
3. Select SHOE-SIZE. Press e.
- = Edit Menu = -
1. Edit Header Info
2. Edit a Field
3. Add a Field
4. Delete a Field
5. Quit Edit
4. Press 1 to edit the header information.
- Edit Header Menu -
1. Change Menu Name
2. Edit MPCL Number
3. Edit Description
4. Change Length
5. Change Width
5. Select Change Menu Name. Press e.
Edit Format Name
>SHOE-SIZE _ _ _ _ _ _ _ _ _
L
6. Press g four times and type TAG. Press
e. The format name has been changed
to SHOE-TAG. You return to the Edit Header
menu.
NOTE: Duplicate names are not allowed.
- Edit Header Menu -
1. Change Menu Name
2. Edit MPCL Number
3. Edit Description
4. Change Length
5. Change Width
7. Press 4 to change the supply length.
Edit Length of
Supply (55 – 400)
>200 _
8. Press g three times and type 150. Press
e.
Editing a Format 11-11
Warning: New Length
less than old length
Press a key to
continue. Or ESC to
Abort> _
9. Press e to continue. You return to the
Edit Header menu.
NOTE: If your format has fields defined that are
close to the non-print zones (top or bottom
of the label) and you change the supply
length, those fields may print off the label
(causing this warning).
- Edit Header Menu -
1. Change Menu Name
2. Edit MPCL Number
3. Edit Description
4. Change Length
5. Change Width
10. Press 5 to change the supply width.
Select Supply Width
1. 1.20 Inches
2. 1.5 Inches
3. 2.00 Inches
11. Press 2 to change the supply width to 1.50
inches, instead of 2.0 inches.
Warning: New Width
less than old width
Press a key to
continue. Or ESC to
Abort > _
12. Press e to continue. You return to the
Edit Header menu.
NOTE: If your format has fields defined that are
close to the non-print zones (edges of the
label) and you change the supply width,
those fields may print off the label
(causing this warning).
- Edit Header Menu -
1. Change Menu Name
2. Edit MPCL Number
3. Edit Description
4. Change Length
5. Change Width
13. Press b to return to the Edit menu. Press
5 to exit the Edit menu.
Save changes? Y/N > _
14. Press Y. You return to the Format menu.
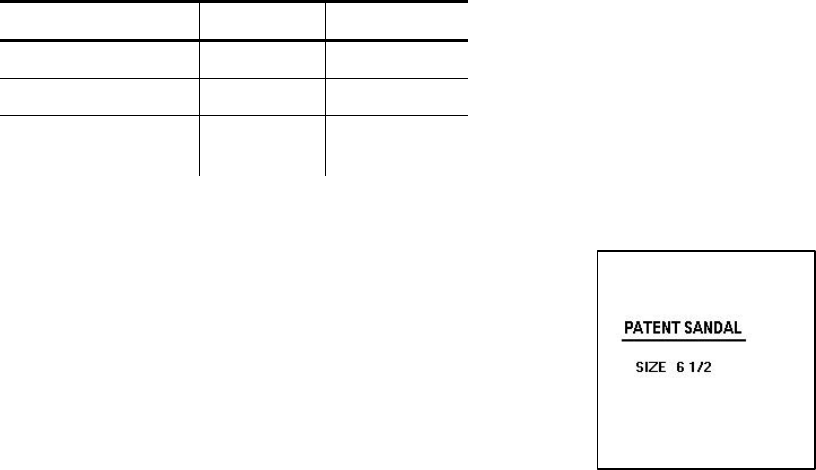
11-12 Editing a Format
NOTE: The row and column locations need to be modified for each field (to
fit on 1.5 inch by 1.5 inch supply) as follows:
Field Row Column
Text field (item) 90 10
Text field (size) 65 30
Line field 82 start
82 end
82 start
110 end
Printing the Format
From the Main Menu, select Print Labels, and the
SHOE-SIZE format. Follow the field prompts as
necessary.
Depending on the data you enter for the text fields,
this sample prints the following label. This graphic
shows the SHOE-TAG format with the new supply
length and width dimensions.
NOTE: The selections:
2. Edit MPCL Number
3. Edit Description
are reserved for future use.
Editing a Format 11-13
Deleting a Format
We will delete our SHOE-TAG format.
- = Main Menu = -
1. Design Formats
2. Print Labels
3. Configuration
1. Press 1 to design your formats.
- = Design Menu = -
1. Create New Format
2. Edit Old Format
3. Copy Format
4. Delete Format
2. Press 4 to delete an existing format.
Select Format
for Deletion _
- = Format Menu = -
01 SHOE-TAG
02 SHOE-PRICE
03 AUTOPART
04 PRICE
05 LINE2
06 LINE
07 CONSTANT
3. Select SHOE-TAG. Press e.
Delete Format:
01 SHOE-TAG
Are you sure? Y/N _
L
4. Press Y.
Format Deleted!
- = Design Menu = -
1. Create New Format
2. Edit Old Format
3. Copy Format
4. Delete Format
5. The format is deleted and you return to the
Design menu.
11-14 Editing a Format
Troubleshooting 12-1
TROUBLESHOOTING
This chapter explains how to reset the printer, call Technical
Support, and gives explanations of your printer's errors. The errors are
classified by type and are listed in order. Call Technical Support if you
receive any error message not listed in this chapter.
If you have trouble loading supplies or performing maintenance, refer to your
Equipment Manual.
Problem Solution
Error:Field off tag
MPCL Error #614
Redefine current
field
The field you are defining has run off the tag. You
must redefine it.
Warning: Possible
Field off tag error.
Do you wish to
redefine current
field?
(Y)es / (N)o > _
The field you are defining may run off the tag. You
can, but it is not necessary, to redefine the field.
Press Y to redefine or N to continue. When you print,
one or more fields may not print if they are off the
supply.
No fields in fmt You saved the format without entering any fields.
Delete the format, and recreate it.
Warning: Low Battery
Save changes and
exit to Main Menu
(Press any key)
Replace the current battery handle with a fully
charged one. See your Equipment Manual for battery
charging information.
Duplicate Name
ReEnter _
Type a new format name and press e.
You cannot have duplicate format names.
If you see the “Hot Key
List”
Press e or b to return to the Main Menu.
12
12-2 Troubleshooting
Problem Solution
If you see the DOS prompt
B:\
Type g and press e to start the application.
I2 of 5 bar codes do not
scan.
Refer to the Equipment Manual for proper scanning
techniques.
Verify that the I2 of 5 bar code scan lengths specified
in the printer configuration are even numbers of
characters.
Troubleshooting Information
If you experience problems using your printer, refer to this section.
If You Receive an Error Message
Any time you receive a message that is not described in this manual, or the
recommended action does not solve the problem, call Technical Support.
Calling Technical Support
Technical support representatives are available Monday through Friday
during regular business hours at 1-800-543-6650. Follow these steps before
you call:
1. Record any error messages that occurred.
2. Try to recreate the problem, if you can.
3. List any changes that have recently been made to the system. Try to
record what you did when the problem occurred.
If these steps do not solve the problem, call Technical Support.

Troubleshooting 12-3
Have the following information ready before you call:
♦ Monarch printer model
♦ support agreement, contract number, or invoice information
♦ customer number
♦ printer serial number
Data Errors
Errors 001 to 499 are data errors. A data error indicates that incorrect data
was received from the host, causing the printer to ignore the entire print job.
After checking the packet and correcting the problem, transmit the print job
again.
The following is a list of data errors. These errors occur because data in the
format, batch, check digit, font, or graphic packet is invalid.
Format Errors (1 - 99)
Error Code Description
001 Format ID number must be 1 to 99.
002 Name must be 1 to 8 characters inside quotes or a printer-assigned
name ("").
003 Action must be A (add) or C (clear).
004 Supply length is invalid (maximum is 4").
005 Supply width is invalid (maximum is 2").
006 Storage device must be R (volatile RAM).
007 Unit of measure must be E (English).
010 Field ID number is outside the range 0 to 999.
011 Field length exceeds 2710.
012 Row field position is greater than the maximum stock dimension.
013 Column field position is greater than the maximum stock dimension.
12-4 Troubleshooting
014 Font style is invalid. See Chapter 5, "Defining Text Fields," for more
information.
015 Character rotation must be 0 (0 degrees), 1 (90 degrees), 2 (180
degrees), or 3 (270 degrees). See Chapter 5, “Defining Text Fields,"
for information.
016 Field rotation must be 0 (0 degrees), 1 (90 degrees), 2 (180
degrees), or 3 (270 degrees). See Chapter 5, “Defining Text Fields"
for information.
017 Field restriction must be V (variable) or F (fixed).
018 Code page selection defined in the field must be 1 (ASCII).
020 Vertical magnification must be 1 to 7.
021 Horizontal magnification must be 1 to 7.
022 Color must be Black Opaque, White Opaque, Black Transparent, or
White Transparent. See Chapter 5, "Defining Text Fields," for more
information.
023 Intercharacter gap must be 0 to 9 dots.
024 Field justification must be B (balanced), L (left), or R (right). See
Chapter 5, "Defining Text Fields," for more information.
025 Data length is too long.
030 Bar code height must be at least 1 or is not within the supply
dimensions.
031 Human readable option must be
1 no CD or NS
5 NS at bottom, no CD
6 CD at bottom, no NS
7 CD and NS at bottom
8 no text
032 Bar code type is invalid. See Chapter 6, “Defining Bar Code Fields,"
for valid options.
Troubleshooting 12-5
033 Bar code density is invalid. See Chapter 6, "Defining Bar Code
Fields," for the bar code density values.
040 Line thickness must be 1 to 10.
041 Line angle must be 0, 90, 180, or 270.
042 End row is invalid. Line segment end row is defined outside of
printable area. See Chapter 8, “Defining Line Fields,” for more
information.
043 End column is invalid. Line segment end column is defined outside
of printable area. See Chapter 8, “Defining Line Fields,” for more
information.
044 Dot pattern for line or box must be "".
045 Line length is defined beyond the maximum length of 3.72". See
Chapter 8, "Defining Line Fields," for valid lengths.
046 Line type must be S (segment) or V (vector).
051 Imaging mode in the graphic header must be 0.
Batch Errors (100 - 199)
101 The format referenced by batch is not in memory.
102 Print quantity is outside the range 0 to 25.
104 Batch mode must be N (new) or U (update).
105 Batch separator in a batch control field must be 0 (Off).
106 Print multiple is not 1.
108 Multiple part supply is outside the range 1 to 5.
Option Errors (200 - 249)
200 Option number must be 1, 4, 31, or 50.
201 Copy length is outside the range 0 to 255.
12-6 Troubleshooting
202 Copy start position must be 1 to 255.
203 Destination start position must be 1 to 255.
204 Source field must be 0 to 999.
205 Copy type must be 1 (copy after rules) or 2 (copy before rules).
211 Narrow element value is less than 1 or greater than 99. Correct the
value and resend the format to the printer.
212 Wide element value is less than 1 or greater than 99. Correct the
value and resend the format to the printer.
214 Truncation code must be S (standard) or T (truncated bar code).
215 Aspect code must be C (columns) or R (rows).
216 Option definition must be S (set) or T (template).
217 Input device must be D (Default), H (Host), K (Keyboard), N (None),
or S (Scanner).
220 Check digit selection must be G to generate check digit.
221 Primary or secondary price format is outside the range 1 to 15.
222 Data type restriction is outside the range of 1 to 6.
223 Option is not valid for the field.
Online Configuration Errors (250 - 299)
251 Power up mode must be 0 (online).
252 Language selection must be 0 (English).
253 Batch separator code in a supply setup packet must be 0 (off).
254 Slash zero selection must be 0 (standard zero).
255 Supply type must be 0 (black mark) or 1 (die cut).
256 Ribbon selection must be 0 (direct) or 1 (transfer).
257 Feed mode must be 0 (continuous) or 1 (on-demand).
Troubleshooting 12-7
258 Supply position is outside the range.
259 Contrast adjustment must be -28 to 11.
260 Print adjustment must be -99 to 99.
261 Margin adjustment must be -99 to 99.
262 Speed adjustment must be 0 (1.0 IPS).
263 Primary monetary symbol is invalid.
264 Secondary symbol selection must be 0 (none) or 1 (print secondary
sign).
265 Monetary decimal places must be 0 to 3.
272 Internal code page selection must be 1 (ASCII).
273 Cut adjustment must be -99 to 99 dots.
282 RS232 Trailer string is too long. Use a maximum of 3 characters.
283 ENQ Trailer string is too long. Use a maximum of 3 characters.
284 The buffer type must be T (Transmit), R (Receive), I (Image), F
(Format), or D (Downloadable Fonts).
285 The storage device type in the memory configuration packet must be
R (volatile RAM).
286 The buffer size is invalid.
287 The printhead width must be 1.83 inches.
288 The battery voltage must be 1 (12-volt battery).
289 The printer address specified in the communication settings packet
must use exactly six characters.
Check Digit Errors (300 - 324)
310 Check digit scheme number must be 1 to 10.
311 Modulus must be 2 to 11.
12-8 Troubleshooting
314 Check digit algorithm must be D (sum of digits) or P (sum of
products).
General Packet Errors (400 - 435)
400 The character immediately following { is invalid.
401 Internal data error. Call Technical Support.
402 Field separator is not in the expected location.
403 Field separator was not found.
404 The number or string that is currently being processed is too long.
405 Too many fields exist in the format. You cannot have more than 50
fields in the format. Lines and constant text fields count as fields.
406 Packet is incomplete, attempted to delete or overwrite a format used
by the current batch, or attempted to load a graphic while the printer
was busy.
407 Parser timed out- no data. Resend packet to the printer.
408 No data. Resend packet to the printer.
409 The printer memory is full. Delete unnecessary formats from
memory.
415 The buffer size you defined exceeds the total available in your
machine.
420 Internal software error relating to list sync. Call Technical Support.
421 Internal software error relating to location name. Call Technical
Support.
422 Internal software error relating to duplicate name. Call Technical
Support.
423 Internal mailbox error. Call Technical Support.
424 Item in use. Call Technical Support.
425 Item already checked out. Call Technical Support.

Troubleshooting 12-9
426 Item not checked out. Call Technical Support.
427 Format name is invalid. Valid name is 1 - 8 characters inside quotes
or "" for a printer-assigned name. If the error reappears, call
Technical Support.
428 Batch name is invalid. If the error reappears, call Technical Support.
429 The field number appears more than once in a format.
431 The format file cannot be found.
433 The batch references a field number that does not exist in the format.
434 Internal software error caused by a downloaded task that is not
executable. Turn off the printer. Wait two seconds and turn it back
on. If the error persists, call Technical Support.
435 Internal software error caused by a downloaded task that already
exists. Turn off the printer. Wait two seconds and turn it back on. If
the error persists, call Technical Support.
Data Formatting Failures
Formatting errors indicate that a field will print incorrectly. After you have
checked the data stream and corrected the data, retransmit the format and
batch.
For errors 571-619, the batch will still print, but the field, font, bar code, or
density may be incomplete, missing or contain incorrect data.
571 UPC or EAN bar code data length is invalid. The bar code data
length in the batch does not fit the format.
573 Price field length is invalid. The price field length in the batch does
not fit the format or the field contains blanks.
574 No CD scheme or room for CD. The CD scheme in the batch does
not fit the format or the field contains blanks.
580 Out of memory. Try to reallocate memory. Resend the packet. If the
error persists, call Technical Support.

12-10 Troubleshooting
603 Internal software error caused by the batch not being held. Turn off
the printer. Wait two seconds and turn it back on. If the error
persists, call Technical Support.
611 Font, bar code or density is invalid. The font, bar code or density in
the batch does not fit the format.
612 The data in this line of the batch is either missing or does not match
the format.
613 Reference point off tag.
614 Portion of field off tag. There may be an invalid character in the
packet. Make sure you did not enter O for ∅.
615 Bar code width is greater than 16 inches or the number of keywords
for your PDF 417 bar code exceeds 928. Decrease the density or
shorten the amount of data to print the bar code.
616 Dot shifting failed. A bad dot falls on a bar code that cannot be
shifted. Call Technical Support.
618 Magnification must be 1 to 7.
Machine Faults
Errors 700 to 799 occur when there is a problem with the printer.
703 The printer sensed a calibration of different-sized black marks. Make
sure the correct supply is loaded.
704 Printer has not sensed a supply mark within the specified number of
inches or out of supplies. Check the supply tracking, supply marks,
black mark sensor position, and supply roll for binding. If the error
continues to appear, change the supply.
730 A memory allocation error occurred during initialization.
750 Printhead is overheated. Turn off the printer to let the printhead
cool. If the error persists, call Technical Support.
Troubleshooting 12-11
751 Printer did not sense a black mark when expected. The supply may
be jammed. For errors 751-753, Check the supply tracking, supply
marks, black mark sensor position, and supply roll for binding. If the
error continues to appear, change the supply.
752 Printer sensed a mark in the wrong place.
753 Printer sensed a mark that is too long.
755 Printhead is open. Close the printhead before continuing. If the
error persists, call Technical Support.
756 The printer is out of supplies. Load supplies.
757 Load supplies. The calibrated supply length differs by plus or minus
.25 inches from the format.
758 Check supply. Either the supply is not seen or the on-demand
sensor is broken. Check for a label jam. Clear the supply path or
reload supplies. This error may occur if you remove a label too
quickly in on-demand mode. The printer does not recalibrate after
this error.
762 Low battery. Recharge the battery.
763 Waiting to dispense label. Press the trigger.
765 Printhead failure. You need a new printhead. Call Technical
Support.
770 The print motor is not ready. Call Technical Support.
771 The format was not found. Recreate the format, and try again. If the
problem continues, call Technical Support.
790 The printer is busy. Turn off the printer. Wait two seconds and turn
it back on. Resend the packets. If the problem continues, call
Technical Support.
791 The printer has an error pending. Turn off the printer. Wait two
seconds and turn it back on. Resend the packets. If the problem
continues, call Technical Support.
12-12 Troubleshooting
792 The printer is not initialized. Call Technical Support.
793 The printer job queue is full. Turn off the printer. Wait two seconds
and turn it back on. Resend the packets. If the problem continues,
call Technical Support.
Errors numbered 900-999 are hard printer failures. Call Technical Support if
you receive these messages.
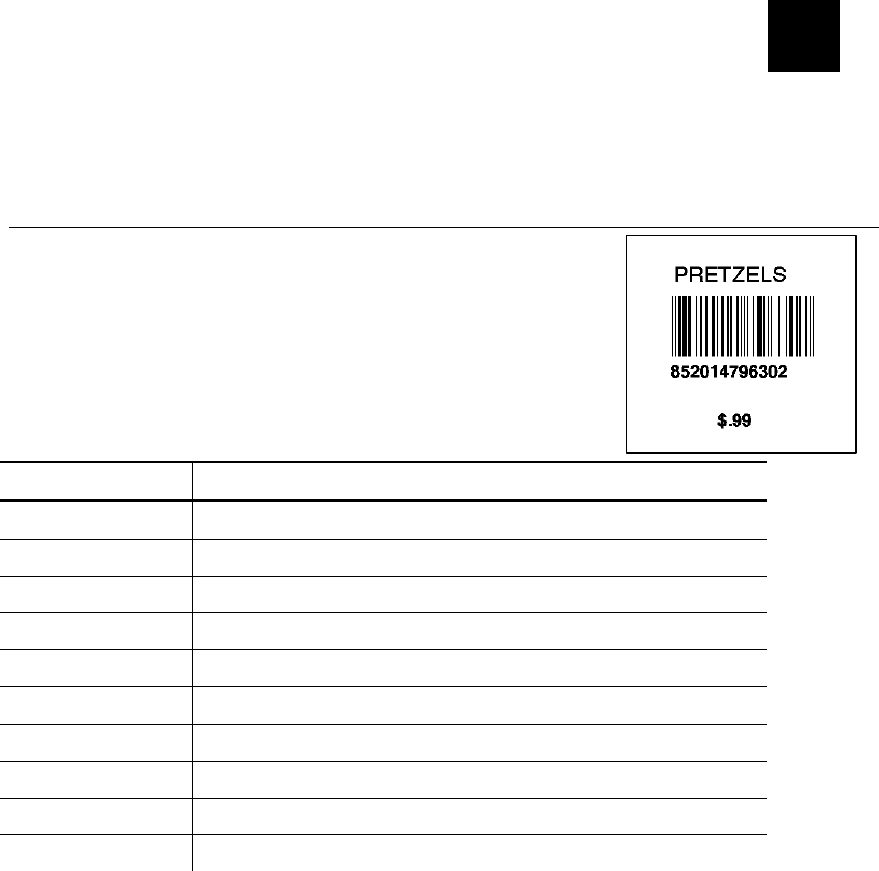
Sample Formats A-1
SAMPLE FORMATS
The following pages include several samples of different
applications, such as item pricing, item identification and receiving/inventory.
You can customize any of these formats to meet your needs.
Item Pricing
The following sample, PRETZELS
(2.0 long x 2.0 wide), contains two text fields, one
bar code field, and one price field.
The human readable characters under the bar code
are automatically generated using a combo text field
that copies the data entered from the bar code field.
Use the following information to create the bar code
field:
Prompts Bar Code Field 1
Bar Code 1. UPC-A
Field Class 1. Simple
Field Prompt SCAN UPC#
Fixed Data None
Row 80
Column 15
Density 1. 80
Bar Height 40
Field Rotation 1. Top of Supply
Edits None
A

A-2 Sample Formats
Use the following information to create the text and combo text field for
human readable characters:
Prompts Text Field 2 Combo Field 3
Field Class 1. Simple 2. Combo
Data Type Alpha-numeric N/A
Max. Length 10 12
Min. Length 1 1
Field Prompt ENTER ITEM N/A
Field Number N/A 01
Start Position N/A 01
Num. of Chars. N/A 12
Fill Direction N/A 3. Do not Fill
Fixed Data None None
Row 135 65
Column 35 15
Font 2. CG Trium 8pt 1001 2. CG Trium 8pt 1001
Height Mag. 1 1
Width Mag. 1 1
Justification 1. Left 1. Left
Field Rotation 1. Top of Supply 1. Top of Supply
Edits None None

Sample Formats A-3
Use the following information to create the price field:
Prompts Price Field 4
Field Class 2. Price Field
Max. Length 5 (including the $ and . point)
Min. Length 1
Field Prompt ENTER PRICE
Fixed Data None
Row 40
Column 35
Font 2. CG Trium 8pt 1001
Height Mag. 1
Width Mag. 1
Justification 1. Left
Field Rotation 1. Top of Supply
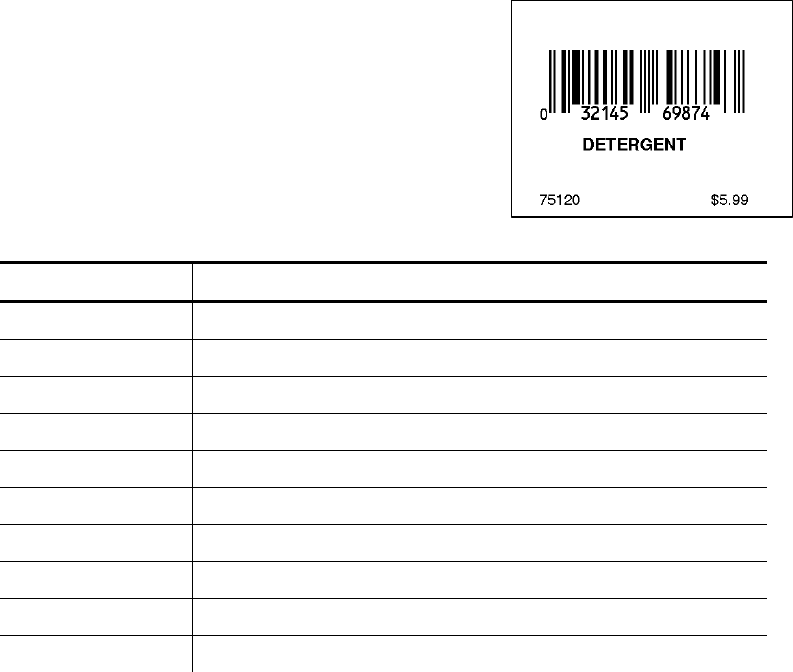
A-4 Sample Formats
The following sample, DETERGENT
(2.0 long x 2.0 wide), contains two text
fields, one bar code field, and one price
field.
To print the human readable characters,
you must set the default UPC appearance
from the configuration menu.
Use the following information to create the
bar code field:
Prompts Bar Code Field 1
Bar Code 1. UPC-A
Field Class 1. Simple
Field Prompt SCAN UPC#
Fixed Data None
Row 80
Column 25
Density 2. 120
Bar Height 45
Field Rotation 1. Top of Supply
Edits None

Sample Formats A-5
Use the following information to create the text (item) and text (dept.) fields:
Prompts Text Field 2 Text Field 3
Field Class 1. Simple Field 1. Simple Field
Data Type Alpha-numeric Alpha-numeric
Max. Length 12 5
Min. Length 1 1
Field Prompt ENTER ITEM ENTER DEPT#
Fixed Data None None
Row 55 25
Column 50 15
Font 2. CG Trium 8pt 1001 2. CG Trium 8pt 1001
Height Mag. 1 1
Width Mag. 1 1
Justification 1. Left 1. Left
Field Rotation 1. Top of Supply 1. Top of Supply
Edits None None
A-6 Sample Formats
Use the following information to create the price field:
Prompts Price Field 4
Field Class 2. Price Field
Max. Length 5 (including the $ and . point)
Min. Length 1
Field Prompt ENTER PRICE
Fixed Data None
Row 25
Column 140
Font 2. CG Trium 8pt 1001
Height Mag. 1
Width Mag. 1
Justification 1. Left
Field Rotation 1. Top of Supply
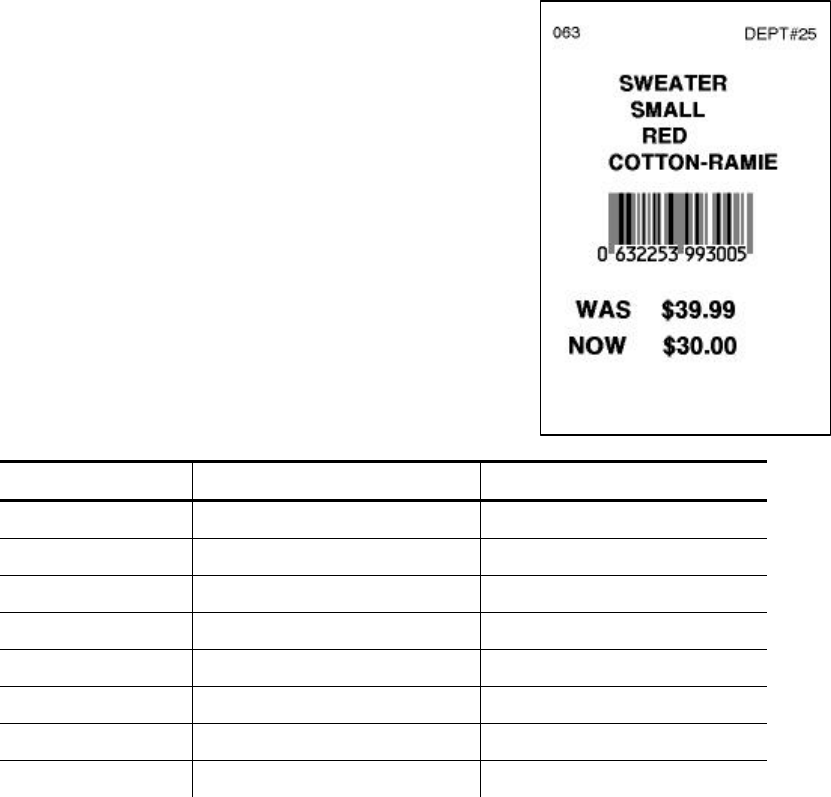
Sample Formats A-7
The following sample, SALE
(4.0 long x 2.0 wide), contains two constant
text fields, four text fields, one bar code
field, and two price fields with fixed data.
To print the human readable characters, you
must set the default UPC (and EAN)
appearance from the configuration menu.
Use the following information to create the
two constant text fields for store# and dept.#.
Prompts Constant Text Field 1 Constant Text Field 2
Fixed Data 063 DEPT#25
Row 300 300
Column 15 125
Font 1. CG Trium 6.5 1000 1. CG Trium 6.5 1000
Height Mag. 1 1
Width Mag. 1 1
Justification 1. Left 1. Left
Field Rotation 1. Top of Supply 1. Top of Supply

A-8 Sample Formats
Use the following information to create the four text fields for the item
description:
Prompts Text Field 1 Text Field 2
Field Class 1. Simple Field 1. Simple Field
Data Type Alpha-numeric Alpha-numeric
Max. Length 12 8
Min. Length 1 1
Field Prompt ENTER ITEM ENTER SIZE
Fixed Data None None
Row 265 245
Column 50 55
Font 3. CG Trium 10p 1002 3. CG Trium 10p 1002
Height Mag. 1 1
Width Mag. 1 1
Justification 1. Left 1. Left
Field Rotation 1. Top of Supply 1. Top of Supply
Edits None None
Sample Formats A-9
Prompts Text Field 3 Text Field 4
Field Class 1. Simple Field 1. Simple Field
Data Type Alpha-numeric Alpha-numeric
Max. Length 8 14
Min. Length 1 1
Field Prompt ENTER COLOR ENTER FABRIC
Fixed Data None None
Row 225 205
Column 60 30
Font 3. CG Trium 10p 1002 3. CG Trium 10p 1002
Height Mag. 1 1
Width Mag. 1 1
Justification 1. Left 1. Left
Field Rotation 1. Top of Supply 1. Top of Supply
Edits None None

A-10 Sample Formats
Use the following information to create the bar code field:
Prompts Bar Code Field 5
Bar Code 7. EAN-13
Field Class 1. Simple
Field Prompt SCAN BAR CODE
Fixed Data None
Row 150
Column 35
Density 1. 80
Bar Height 40
Field Rotation 1. Top of Supply
Edits None

Sample Formats A-11
Use the following information to create the two price fields.
Prompts Price Field 6 Price Field 7
Field Class 2. Price Field 2. Price Field
Max. Length 14 14
Min. Length 1 1
Field Prompt ENTER ORIG PRICE ENTER SALE PRICE
Fixed Data WAS NOW
Before or After B B
Row 105 80
Column 10 10
Font 4. CG Trium 12p 1003 4. CG Trium 12p 1003
Height Mag. 1 1
Width Mag. 1 1
Justification 1. Left 1. Left
Field Rotation 1. Top of Supply 1. Top of Supply
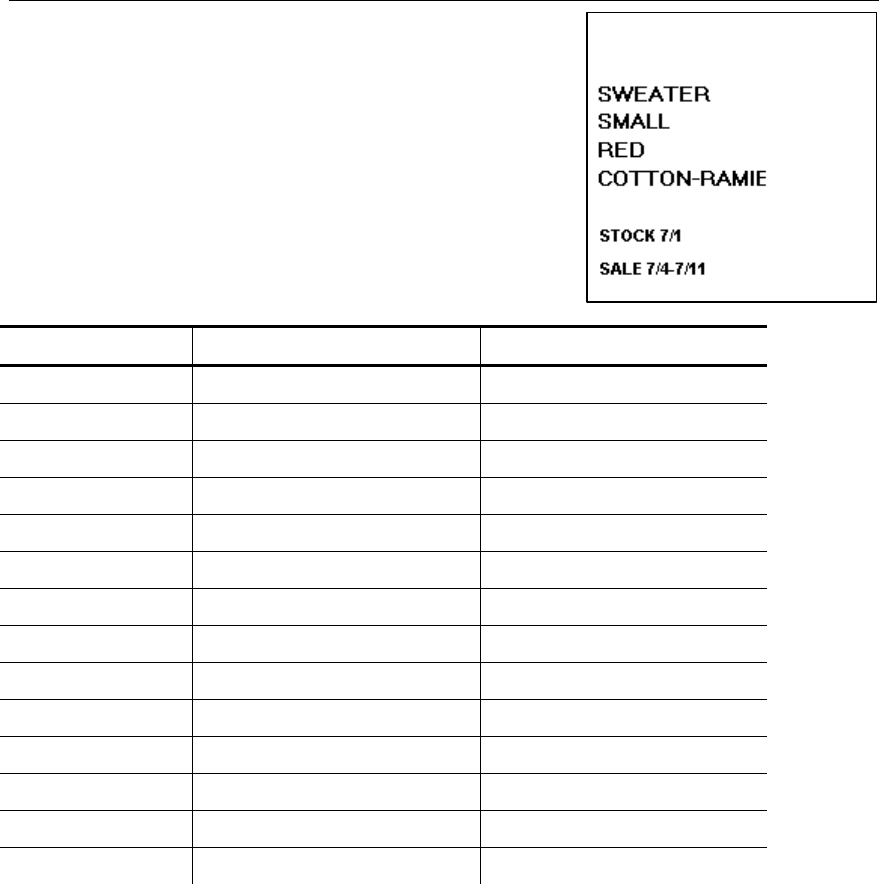
A-12 Sample Formats
Item Identification
The following sample, SWEATER
(2.0 long x 2.0 wide), contains four text fields
and two date/time fields with fixed data.
Use the following information to create the four
text fields for the item description:
Prompts Text Field 1 Text Field 2
Field Class 1. Simple Field 1. Simple Field
Data Type Alpha-numeric Alpha-numeric
Max. Length 12 8
Min. Length 1 1
Field Prompt ENTER ITEM ENTER SIZE
Fixed Data None None
Row 120 100
Column 10 10
Font 3. CG Trium 10p 1002 3. CG Trium 10p 1002
Height Mag. 1 1
Width Mag. 1 1
Justification 1. Left 1. Left
Field Rotation 1. Top of Supply 1. Top of Supply
Edits None None

Sample Formats A-13
Prompts Text Field 3 Text Field 4
Field Class 1. Simple Field 1. Simple Field
Data Type Alpha-numeric Alpha-numeric
Max. Length 8 14
Min. Length 1 1
Field Prompt ENTER COLOR ENTER FABRIC
Fixed Data None None
Row 80 60
Column 10 10
Font 3. CG Trium 10p 1002 3. CG Trium 10p 1002
Height Mag. 1 1
Width Mag. 1 1
Justification 1. Left 1. Left
Field Rotation 1. Top of Supply 1. Top of Supply
Edits None None
A-14 Sample Formats
Use the following information to create the two date/time fields with fixed
data.
Prompts Date/Time Field 5 Date/Time Field 6
Field Class 3. System Date/Time 3. System Date/Time
Template MM/DD MM/DD
Fixed Data STOCK(space) SALE 7/4-
Before or After B B
Row 30 10
Column 10 10
Font 1. CG Trium 6.5 1000 1. CG Trium 6.5 1000
Height Mag. 1 1
Width Mag. 1 1
Justification 1. Left 1. Left
Field Rotation 1. Top of Supply 1. Top of Supply
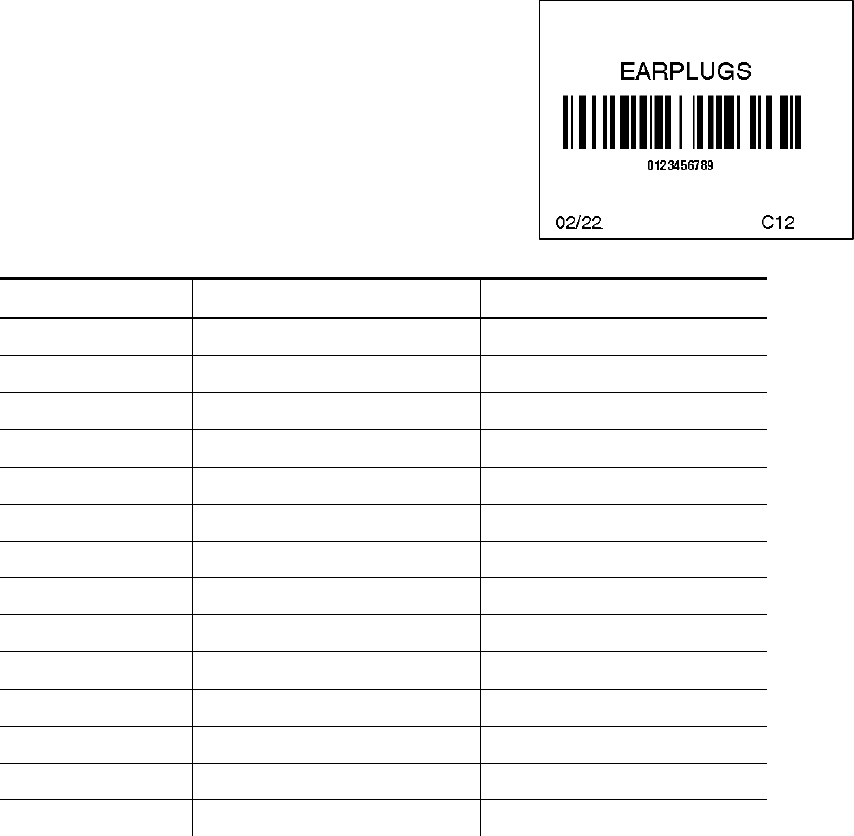
Sample Formats A-15
The following sample, MEDICAL
(2.0 long x 2.0 wide), contains two text
fields, one bar code field, one combo text
field, and one date/time field.
The human readable characters under the
bar code are automatically generated using a
combo text field that copies the data entered
from the bar code field.
Use the following information to create the
two text fields:
Prompts Text Field 1 Text Field 2
Field Class 1. Simple Field 1. Simple Field
Data Type Alpha-numeric Alpha-numeric
Max. Length 12 4
Min. Length 1 1
Field Prompt ENTER ITEM ENTER DEPT#
Fixed Data None None
Row 100 5
Column 50 130
Font 3. CG Trium 10p 1002 1. CG Trium 6.5 1000
Height Mag. 1 1
Width Mag. 1 1
Justification 1. Left 1. Left
Field Rotation 1. Top of Supply 1. Top of Supply
Edits None None

A-16 Sample Formats
Use the following information to create the bar code field:
Prompts Bar Code Field 3
Bar Code 8. Code 128
Field Class 1. Simple
Data Type Numeric
Max. Length 10
Min. Length 1
Field Prompt SCAN BAR CODE
Fixed Data None
Row 60
Column 10
Density 5.8/11.7 cpi 3 dots
Bar Height 30
Field Rotation 1. Top of Supply
Edits None
Sample Formats A-17
Use the following information to create the combo field.
Prompts Combo Field 4
Field Class 4. Combo
Max. Length 10
Min. Length 1
Field Number 03
Start Position 01
Num. of Chars. 10
Fill Direction 3. Do not Fill
Fixed Data None
Row 45
Column 50
Font 1. CG Trium 6.5 1000
Height Mag. 1
Width Mag. 1
Justification 1. Left
Field Rotation 1. Top of Supply
Edits None
A-18 Sample Formats
Use the following information to create the date/time field.
Prompts Date/Time Field 5
Field Class 3. System Date/Time
Template MM/DD
Fixed Data None
Row 5
Column 5
Font 1. CG Trium 6.5 1000
Height Mag. 1
Width Mag. 1
Justification 1. Left
Field Rotation 1. Top of Supply
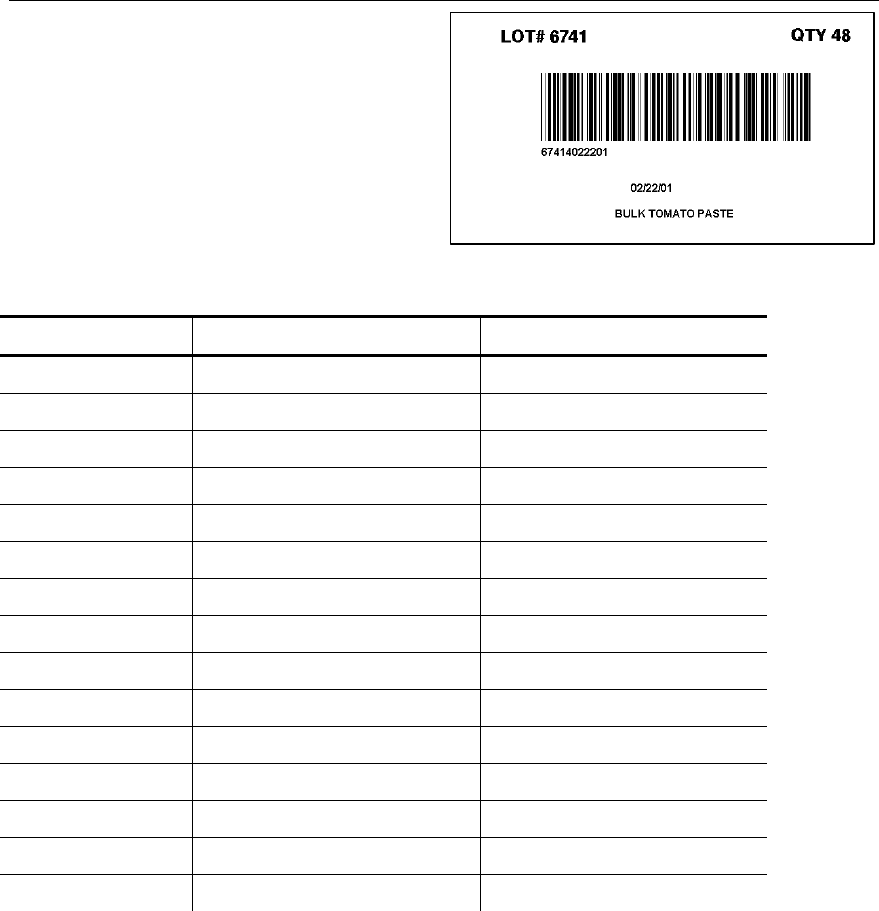
Sample Formats A-19
Receiving/Inventory
The following sample,
CODE39-LOT
(4.0 long x 2.0 wide), contains three
text fields (2 with fixed data), one bar
code field, one combo field, and one
date/time field.
The human readable characters
under the bar code are automatically
generated using a combo text field
that copies the data entered from the bar code field.
Use the following information for the three text fields:
Prompts Text Field 1 Text Field 2
Field Class 1. Simple Field 1. Simple Field
Data Type Alpha-numeric Alpha-numeric
Max. Length 10 8
Min. Length 1 1
Field Prompt ENTER LOT# ENTER QTY
Fixed Data LOT#(space) QTY(space)
Before or After B B
Row 280 65
Column 165 165
Font 2. CG Trium 8pt 1001 2. CG Trium 8pt 1001
Height Mag. 1 1
Width Mag. 1 1
Justification 1. Left 1. Left
Field Rotation 4. Right of Supply 4. Right of Supply
Edits None None
A-20 Sample Formats
Use the following information to create the third text field:
Prompts Text Field 3
Field Class 1. Simple Field
Data Type Alpha-numeric
Max. Length 20
Min. Length 1
Field Prompt ENTER ITEM
Fixed Data None
Row 215
Column 30
Font 1. CG Trium 6.5 1000
Height Mag. 1
Width Mag. 1
Justification 1. Left
Field Rotation 4. Right of Supply
Edits None

Sample Formats A-21
Use the following information to create the bar code field:
Prompts Bar Code Field 4
Bar Code 4. Code 39 – no c/d
Field Class 1. Simple
Data Type Numeric
Max. Length 12
Min. Length 1
Field Prompt SCAN BAR CODE
Fixed Data None
Row 260
Column 100
Density 6.6 cpi 1:2.5 2 dots
Bar Height 50
Field Rotation 4. Right of Supply
Edits None

A-22 Sample Formats
Use the following information to create the combo text field:
Prompts Combo Field 5
Field Class 2. Combo
Max. Length 12
Min. Length 1
Field Number 04
Start Position 01
Num. of Chars. 12
Fill Direction 3. Do not Fill
Fixed Data None
Row 260
Column 85
Font 2. CG Trium 8pt 1001
Height Mag. 1
Width Mag. 1
Justification 1. Left
Field Rotation 4. Right of Supply
Edits None

Sample Formats A-23
Use the following information to create the date/time field:
Prompts Date/Time Field 6
Field Class 3. System Date/Time
Template MM/DD/YY
Fixed Data None
Row 200
Column 50
Font 1. CG Trium 6.5 1000
Height Mag. 1
Width Mag. 1
Justification 1. Left
Field Rotation 4. Right of Supply
A-24 Sample Formats
Using Fonts B-1
USING FONTS
This appendix contains the information you need to work with fonts.
These fonts are standard in your printer.
Number Font Size and Appearance Type of Spacing # of Dots Between
Characters
1000 CG Triumvirate Bold 6.5 pt proportional varies w/each letter
1001 CG Triumvirate Bold 8 pt proportional varies w/each letter
1002 CG Triumvirate Bold 10 pt proportional varies w/each letter
1003 CG Triumvirate Bold 12 pt proportional varies w/each letter
1004 CG Triumvirate Bold 18 pt proportional varies w/each letter
1005 CG Triumvirate Bold 22 pt proportional varies w/each letter
1006 CG Triumvirate Bold
Condensed 6.5 pt
proportional varies w/each letter
1007 CG Triumvirate Bold
Condensed 8 pt
proportional varies w/each letter
1008 CG Triumvirate Bold
Condensed 10 pt
proportional varies w/each letter
1009 CG Triumvirate Bold
Condensed 12 pt
proportional varies w/each letter
1010 CG Triumvirate Bold
Condensed 18 pt
proportional varies w/each letter
1011 CG Triumvirate Bold
Condensed 22 pt
proportional varies w/each letter
1012 Letter Gothic Bold 6 pt monospaced 1
1013 Letter Gothic Bold 9 pt monospaced 2
NOTE: Point sizes greater than 12 include only the following characters:
0123456789#$%&(),./@DFKLMPS\kprö¢£¥
Refer to the following pages for illustrations of these fonts.
B
B-2 Using Fonts
Monospaced Font Magnification
Monospaced characters occupy the same amount of space within a
magnification. Use monospaced fonts for price fields and data you want to
list in a column. Decide how wide and tall you want the characters to appear
on the labels. The following two tables show the width and height of each of
the monospaced fonts after magnification.
This table includes the default gap spacing for Letter Gothic 6 pt and Letter
Gothic 9 pt.
Width Mag. Letter Gothic 6 pt Letter Gothic 9 pt
Units Character
Width Sample
Character
Width Sample
1x 1/100 in. 4.69 7.29
7x 1/100 in. 32.81 51.04
Height Magnification
Letter Gothic
1/100 in 6.9 48.28
Using Fonts B-3
Proportional Font Magnification
Each character in a proportionally spaced font is a different width. You may
be able to place more characters on a line using proportionally spaced fonts.
You may want to experiment with these fonts and adjust field measurements
in your format as needed. The following tables provide height and width
magnification of sample characters.
CG Triumvirate Bold (8 pt.)
Width Mag. Minimum Average Maximum
1x 1/100 in. 1.56 5.73 10.94
7x 1/100 in. 6.9 20.7 41.4
CG Triumvirate Bold (6.5 pt.) Font #1000
Width Mag. Minimum Average Maximum
1x 1/100 in. 1.56 4.69 9.90
7x 1/100 in. 10.94 32.81 69.27
Height Magnification
1x 7x
1/100 in 6.77 47.40
B-4 Using Fonts
CG Triumvirate Bold (8 pt.) Font #1001
Width Mag. Minimum Average Maximum
1x 1/100 in. 1.56 5.73 10.94
7x 1/100 in. 6.9 20.7 41.4
Height Magnification
1x 7x
1/100 in 8.33 58.33
CG Triumvirate Bold (10 pt.) Font #1002
Width Mag. Minimum Average Maximum
1x 1/100 in.
1/10 mm
Dots
1.56
3.97
3
6.77
17.20
13
13.02
33.07
25
7x 1/100 in.
1/10 mm
Dots
10.94
27/78
21
47.40
120.39
91
91.15
231.51
175
Height Magnification
1x 7x
1/100 in 10.42 72.92
Using Fonts B-5
CG Triumvirate Bold (12 pt.) Font #1003
Width Mag. Minimum Average Maximum
1x 1/100 in. 2.60 8.85 16.15
7x 1/100 in. 18.23 67.94 113.02
Height Magnification
1x 7x
1/100 in 12.50 87.50
CG Triumvirate Bold (18 pt.) Font #1004
Width Mag. Minimum Average Maximum
1x 1/100 in. 7.81 12.50 22.92
7x 1/100 in. 54.69 87.50 160.42
Height Magnification
1x 7x
1/100 in 19.27 134.90
B-6 Using Fonts
CG Triumvirate Bold (22 pt.) Font #1005
Width Mag. Minimum Average Maximum
1x 1/100 in. 9.38 15.63 27.08
7x 1/100 in. 65.63 109.38 189.58
Height Magnification
1x 7x
1/100 in 23.44 164.05
Using Fonts B-7
CG Triumvirate Bold Cond (6.5 pt.) Font #1006
Width Mag. Minimum Average Maximum
1x 1/100 in. 1.04 3.65 6.25
7x 1/100 in. 7.29 25.52 43.75
Height Magnification
1x 7x
1/100 in 6.77 47.40
CG Triumvirate Bold Cond (8 pt.) Font #1007
Width Mag. Minimum Average Maximum
1x 1/100 in. 1.56 4.69 8.85
7x 1/100 in. 10.94 32.81 67.94
Height Magnification
1x 7x
1/100 in 8.85 61.98
B-8 Using Fonts
CG Triumvirate Bold Cond (10 pt.) Font #1008
Width Mag. Minimum Average Maximum
1x 1/100 in. 2.08 5.73 11.98
7x 1/100 in. 14.58 40.10 83.85
Height Magnification
1x 7x
1/100 in 10.94 76.56
CG Triumvirate Bold Cond (12 pt.) Font #1009
Width Mag. Minimum Average Maximum
1x 1/100 in. 2.60 7.29 14.58
7x 1/100 in. 18.23 51.04 96.88
Height Magnification
1x 7x
1/100 in 13.02 91.15
Using Fonts B-9
CG Triumvirate Bold Cond (18 pt.) Font #1010
Width Mag. Minimum Average Maximum
1x 1/100 in. 7.81 10.94 21.88
7x 1/100 in. 54.69 76.56 153.12
Height Magnification
1x 7x
1/100 in 20.31 142.19
B-10 Using Fonts
CG Triumvirate Bold Cond (22 pt.) Font #1011
Width Mag. Minimum Average Maximum
1x 1/100 in.
9.38 13.02 26.56
7x 1/100 in. 65.63 91.15 185.94
Height Magnification
1x 7x
1/100 in 24.48 171.35

Each product and program carries a respective written warranty, the only
warranty on which the customer can rely. Monarch reserves the right to make
changes in the product and the programs and their availability at any time and
without notice. Although Monarch has made every effort to provide complete
and accurate information in this manual, Monarch shall not be liable for any
omissions or inaccuracies. Any update will be incorporated in a later edition of
this manual.
©2001 Monarch Marking Systems, Inc. All rights reserved. No part of this
publication may be reproduced, transmitted, stored in a retrieval system, or
translated into any language in any form by any means, without the written
permission of Monarch Marking Systems, Inc.
Trademarks
MONARCH®, PATHFINDER®, Ultra® and PATHFINDER Ultra® are registered trademarks of Monarch
Marking Systems, Inc.
6035 is a trademark of Monarch Marking Systems, Inc.
Paxar is a registered trademark of Paxar Corporation.
Microsoft, MS-DOS and Windows are trademarks of Microsoft Corporation.
TrueType is a trademark of Apple Computer, Inc.
Hewlett-Packard is a trademark of Hewlett-Packard Company.
CG Triumvirate and CG Triumvirate Bold are trademarks of AGFA Monotype Corporation.
Monarch Marking Systems, Inc.
170 Monarch Lane
Miamisburg, OH 45342
TC6035CMUM Rev. AA 5/01 ©2001 Monarch Marking Systems, Inc. All rights reserved.
Monarch
DOS-based
PATHFINDER
Ultra System
